
archives for 11/2011
 This year, Mark build a bunch
of chicken pastures that act as moats around a large portion of
the garden. I love the moats --- they keep the deer out, make the
edges distinct, and just make me feel relaxed. We have had a
couple of issues, though, that I'd like to remedy before boxing in the
rest of the boundary.
This year, Mark build a bunch
of chicken pastures that act as moats around a large portion of
the garden. I love the moats --- they keep the deer out, make the
edges distinct, and just make me feel relaxed. We have had a
couple of issues, though, that I'd like to remedy before boxing in the
rest of the boundary.
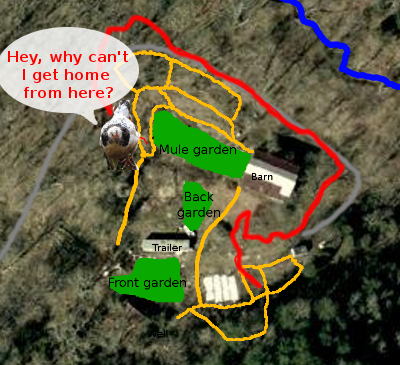
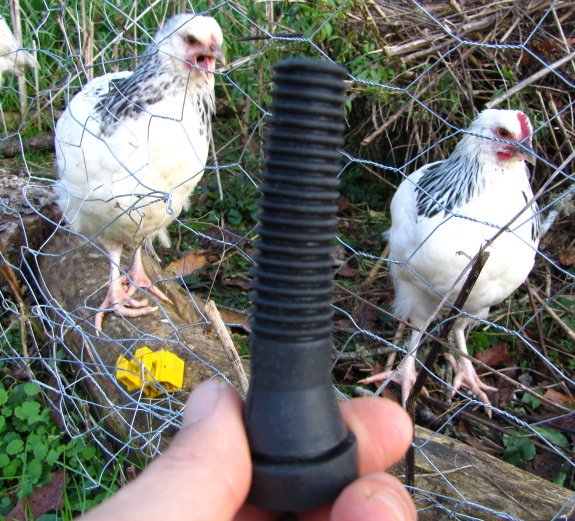
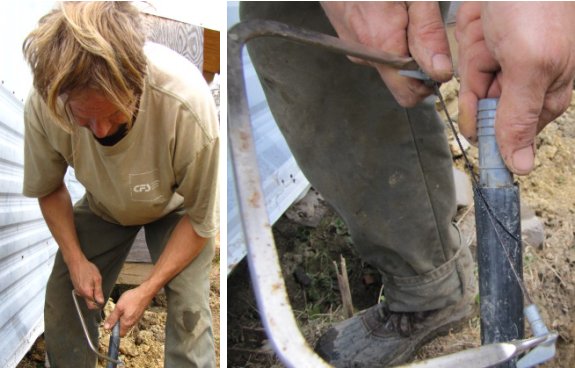
Lucy's job is to patrol
the perimeter, and that's a bit tough when she can't get there.
We started to notice gaps
gnawed in our fences,
and then realized that Lucy was making bolt-holes so she can spring off
in any direction to reach the edges of our homestead
lickety-split. The trouble is that deer and chickens come in
those holes and end up in the garden, which defeats the purpose of the
moats. Surely there's a way to give Lucy better access to the
perimeter without compromising our fences, but I'm not sure what it
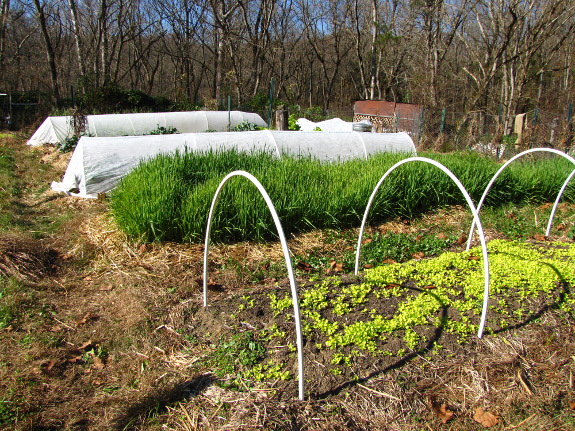
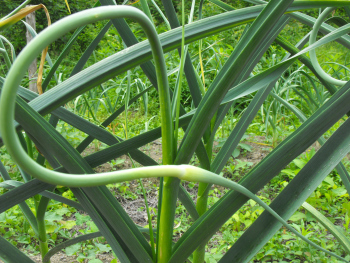
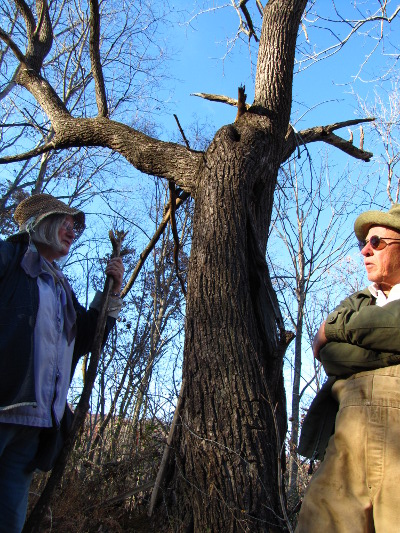
would be. I was pondering stiles (like in the photo above), but
an agile chicken or (if we go there) goat could prance over top just as
easily as a dog could. As crazy as it sounds, I'm now thinking of
installing dog doors in select locations in the pasture fences, but any
other ideas would be appreciated as well.
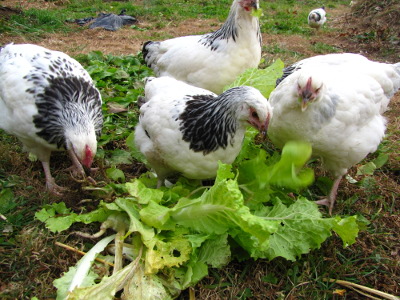
 The
chicken problem is similar to Lucy's dilemma. Since we started
letting our chickens free
range, we've had chickens stuck partway home multiple times.
As dusk falls, chickens seem to use a compass sense (maybe based on
magnetism?) to figure out how to shorten their peregrination and head
straight back to the coop. The problem is that there's often a
fence in their way, so they end up huddled in a corner, not realizing
that if they simply walked at right angles for a few feet, they could
get home. The chickens do seem to learn the terrain after a
while, so we might just have to plan on leading chickens home a few
times when they start free ranging. Maybe another solution would
be to make all exterior fences convex instead of concave?
The
chicken problem is similar to Lucy's dilemma. Since we started
letting our chickens free
range, we've had chickens stuck partway home multiple times.
As dusk falls, chickens seem to use a compass sense (maybe based on
magnetism?) to figure out how to shorten their peregrination and head
straight back to the coop. The problem is that there's often a
fence in their way, so they end up huddled in a corner, not realizing
that if they simply walked at right angles for a few feet, they could
get home. The chickens do seem to learn the terrain after a
while, so we might just have to plan on leading chickens home a few
times when they start free ranging. Maybe another solution would
be to make all exterior fences convex instead of concave?
I'm curious to hear some
creative solutions to our moat problems, so I hope you'll leave a
comment with your ideas!
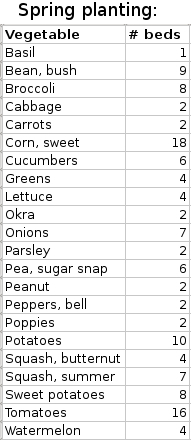
 The first step in rotating your
garden is to understand which
vegetables share the same family. The list below covers all of
the vegetables you're likely to grow, and I've italicized the more
common crops so they'll be easier to find.
The first step in rotating your
garden is to understand which
vegetables share the same family. The list below covers all of
the vegetables you're likely to grow, and I've italicized the more
common crops so they'll be easier to find.
Amaranthaceae --- Amaranth
Amaryllidaceae --- Chives, garlic, leeks, onions
Basellaceae --- Malabar spinach
Brassicaceae --- Asian greens, broccoli, broccoli raab, Brussels
sprouts, cabbage, cauliflower, collards, cress, horseradish, kale, kohlrabi, mustard, radish, rape, rocket, rutabaga, turnip, watercress
Chenopodiaceae --- Beet, beetberry, Good King Henry,
lamb's quarter, mangel, orach, quinoa, spinach, Swiss
chard
Compositae --- Artichoke, cardoon,
celtuce, chicory, endive, escarole, gobo, Jerusalem artichoke, lettuce, salsify, shungiku, sunflower, yacon
Convolvulaceae --- Water spinach, sweet
potato
Cucurbitaceae --- Balsam apple, balsam
pear, cassabanana, chayote, cucumber, gherkins, gourd, luffa, melons, pumpkins, squash
Graminae --- Corn
Labiatae --- Basil, mint, thyme
Leguminosae --- Bean, lentil, pea, peanut, pigeon pea, soybean
Liliaceae --- Asparagus
Malvaceae --- Okra
Polygonaceae --- Rhubarb, sorrel
Portulaceae --- Miner's lettuce, purslane
Solanaceae --- Cape gooseberry, eggplant, garden huckleberry, ground
cherry, naranjilla, nightshade, pepino, pepper, potato, sunberry, tomatillo, tomato
Tetragoniaceae --- New Zealand spinach
Umbelliferae --- Carrot, celery, celeriac, chervil, coriander, dill, fennel, parsley, parsnip, skirret
Valerianaceae --- Corn salad
 Although this list seems
overwhelming at first glance, a closer look
will show that the majority of your garden vegetables fit into just a
few families. Experienced gardeners have pet names for several of
them, so you'll hear folks talking about "brassicas" when they mean
broccoli, kale, and the like, "cucurbits" when they want to lump squash
and cucumbers together, and "legumes" when referring to peas and beans.
Although this list seems
overwhelming at first glance, a closer look
will show that the majority of your garden vegetables fit into just a
few families. Experienced gardeners have pet names for several of
them, so you'll hear folks talking about "brassicas" when they mean
broccoli, kale, and the like, "cucurbits" when they want to lump squash
and cucumbers together, and "legumes" when referring to peas and beans.
This
week's lunchtime series includes one of the four projects from Weekend
Homesteader: November.
Stay tuned for the rest of the series, or check out the 99 cent ebook
for more information on how to store drinking water for use during
power outages, to put an entire
chicken to use in the kitchen, and to bring in cash without going to
the office.
| This post is part of our Garden Rotation lunchtime series.
Read all of the entries: |
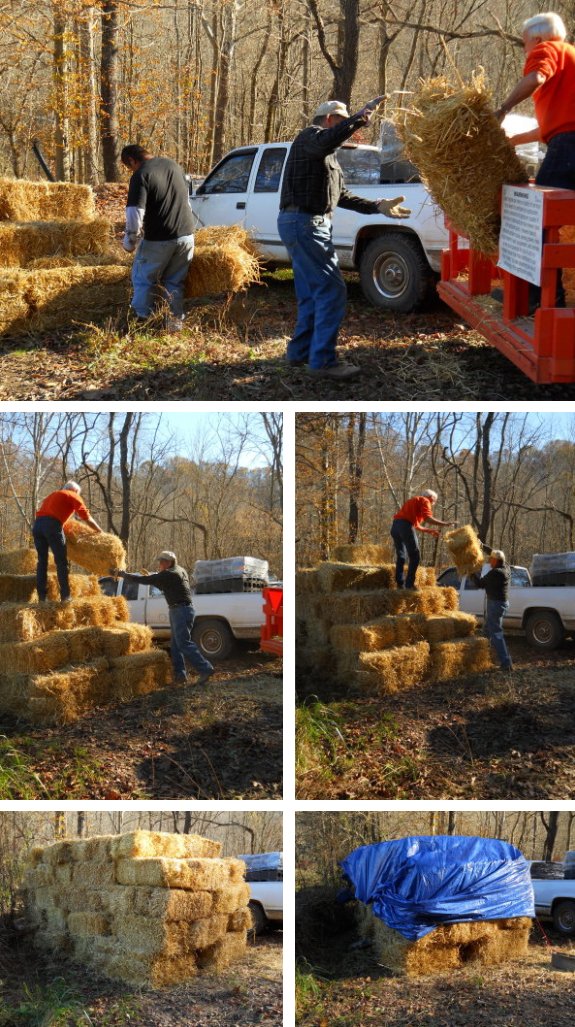
80 bales of straw at 4
dollars a piece.
20 dollars for delivery and
stacking.
This should keep Anna's
mulch habit going all winter and part of the spring.
Around here, Samhain means hard freezes are on
their way. Time to take a break from weeding and mulching the
garden and do a bit of winterization, like:
- Putting hoses away --- Unhooking all of our sprinkler hoses and laying them out on a hill lets the water drain out. I wind them from the uphill side and put the hoses away in the barn until next year. Treated this way, we have cheap hoses that have already lasted 5 years and seem to have several more to go.
- Erecting quick
hoops --- Greens
and lettuce can handle frost, but I don't want to keep my eye on the
forecast and scurry around once temperatures in the mid twenties are
coming up. Row cover fabric lets hot air vent out on beautiful
sunny
 days while protecting the
crops on cold nights, so it's okay to put my quick hoops up when
daytime temperatures rise into the 60s.
days while protecting the
crops on cold nights, so it's okay to put my quick hoops up when
daytime temperatures rise into the 60s. - Protect the fig --- The fig
held onto its leaves until this week's harder freezes, but now that the
plant is bare, I can erect its winter
protection.
And then it's back to putting
the garden to bed.
Happy Samhain/Halloween/All Soul's Day/Cross-Quarter Day!
 Congratulations to John, the winner of our seed
giveaway!
John, please drop me an email with your mailing
address and we'll put your seeds (and top bulbs) in the mail on Friday.
Congratulations to John, the winner of our seed
giveaway!
John, please drop me an email with your mailing
address and we'll put your seeds (and top bulbs) in the mail on Friday.
Meanwhile, thank you to
everyone for helping make Weekend
Homesteader: November
a success! Don't forget that I'm always happy to email a free pdf
copy to our readers --- just email
me with your
request. And don't forget to leave a review on Amazon if get a
chance.
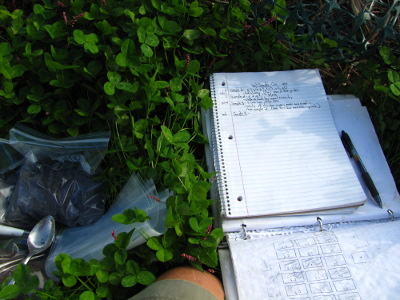
Unless you have a
stellar memory, garden rotation depends on good
notes. You may eventually decide to come up with your own method
for recording garden information, but for now I recommend you combine a
garden map with a spreadsheet.
If you haven't already
mapped your garden, the first step in this
week's exercise is to head out into the garden with pen and
paper. It's not really necessary to pace off boundaries and draw
your
garden to scale --- the idea is simply to mark down the main
features.
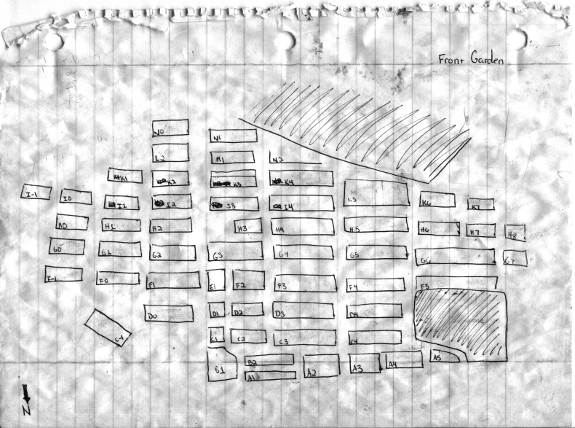
Those of you who have
permanent beds can sketch your garden once, scan
your drawing into the computer or make several photocopies, then never
have to repeat the drafting work. If that applies to you, I
recommend giving each garden bed a label so that you can quickly and
easily refer to it in your notes. I find it helpful to use a
number and letter combo to distinguish a bed, so the first row of beds
in my garden is labeled "A1", "A2", "A3", etc., the second row of beds
is labeled "B1", "B2", and so forth.
If you till up your
garden and create new rows every year, your
garden
map will be a bit fuzzier. (See the May
volume of Weekend
Homesteader for an
explanation of why permanent garden beds are better
for your soil.) But you can get the same general information
across by listing your tomatoes as grown in the southwest
quadrant. You'll probably want to draw a map each year showing
the location of each type of vegetable.
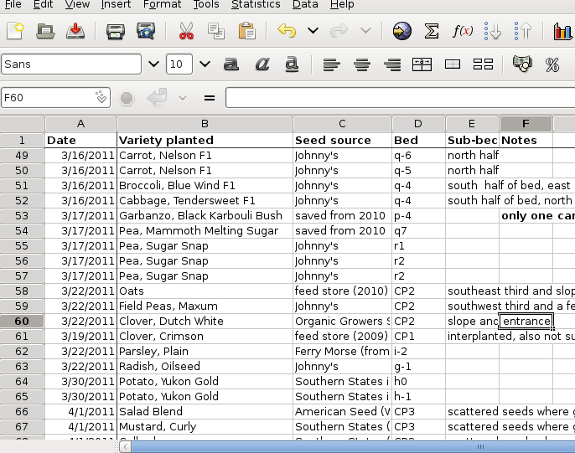
Either way, I recommend
coupling your garden map with a spreadsheet (or
at least a notebook if you're technophobic.) You can download my
garden
spreadsheet from 2011
to use as a template. Every time I plant a
bed, I note down the date, the vegetable variety, the seed source, and
the bed number. In some cases, I'll also record the portion of
the bed planted (if I'm combining more than one vegetable species or
variety in
the same bed), soil amendments I used, harvest information, and disease
and insect problems. You can put all of the same information in a
notebook, but using a spreadsheet makes it much easier to search
through your notes.
This
week's lunchtime series includes one of the four projects from Weekend
Homesteader: November.
Stay tuned for the rest of the series, or check out the 99 cent ebook
for more information on how to store drinking water for use during
power outages, to put an entire
chicken to use in the kitchen, and to bring in cash without going to
the office.
| This post is part of our Garden Rotation lunchtime series.
Read all of the entries: |

Our Chicago
Electric 5 in 1 portable power packs are just over a year old and I
thought it was time for a report.
The first one will only take
a 50% charge, while the second one is dead to the world.

The one still working came in
very handy during the 2011
power outage giving us the ability to keep the incubator going, We
only used the car
battery booster function twice.
It feels like whatever type
of battery these things have inside is underpowered. We might be able
to salvage the internal invertor if I can figure out a way to take it apart or
maybe there's a way to replace the battery with something more
substantial?
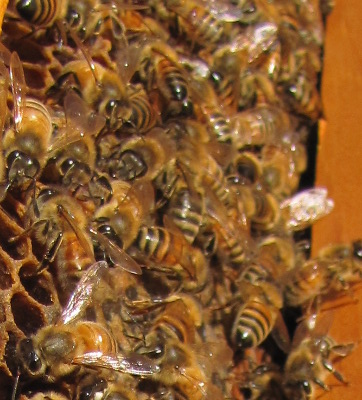 All's
well in both hives.
All's
well in both hives.
Last time I checked, I
was a bit concerned because my fall
feeding campaign had
caused
the queen in one hive to produce a lot of excess workers, but I needn't have
worried. Once the sugar water went away, I started seeing dead
bees in front of the hive, proving that the colony was just as quick
about deciding to slim their numbers back down so they didn't eat up
their winter stores prematurely.
I decided to feed the
other hive after seeing that they were 10 pounds shy of my winter goal
on October 3. It wasn't entirely purposeful, but since that hive
needed less extra honey, I let the sugar feeder run dry for a day or
two between each feeding, and the boom/bust cycle seems to have
prevented the queen from laying many extra eggs. Some queens are
simply more prone to increasing hive numbers when faced with lots of
sugar water than others, so it's possible this queen is just smarter
than the other one. Either way, though, it seems like making fall
feedings less continuous can't hurt.
With 60 pounds of capped
honey in the daughter hive, 51 pounds in the mother hive, and some
still dehydrating in each, it looks like our bees are ready for winter.
Now that you've got your
map and spreadsheet in hand, you can plan out
next year's garden. For those of you who have been gardening in
the same spot for several seasons, the goal is to make sure that plants
in the same family don't
share the same soil for at least three years. That means that you
don't want your summer beans to follow your spring peas and don't even
want those beans to be in a bed that has grown peas, beans, or peanuts
for at least three years.
Some gardeners keep
rotation extremely simple by dividing their garden into four sections
and growing different families in each
section. For example, if the northeast quarter of your garden is
home to the legume family, the southeast quarter to potatoes and
tomatoes, the southwest quarter to cucurbits, and the northwest quarter
to everything else, you can simple turn your map like a wheel to plan
next year's garden. Now your legumes go in the southeast
quadrant, the tomatoes in the southwest quadrant, and so forth.
Unfortunately, the
method outlined above has several problems.
Chances are your garden isn't entirely uniform, so the wheel rotation
method would often require you to grow vegetables in spots they don't
prefer from time to time. In my garden, a third of the
growing area has deep, loamy soil that's good for root crops and
another third is very sunny and perfect for spring and fall
crops. That means my brassicas are nearly always located in
the sunny third while carrots and potatoes dominate the loamy
third. The June
volume of Weekend Homesteader walks you through locating
each part of your vegetable
garden in the proper space.
Even if you are growing
on a completely flat area with no shade and with the
same soil type throughout, planting big blocks of the same type of
vegetable
together is asking for trouble. With the exception of corn
(which requires a large planting in one spot to allow for wind
pollination of the seeds), you'll have far less insect and disease
pressure if you scatter each type of vegetable throughout the
garden. Big blocks of similar plants mimic monoculture and often
lead to insect and disease epidemics. At the other extreme, a
diverse garden with beans beside tomatoes beside parsley will make it
tough for problematic insects to find the plants they prefer while also
tempting beneficial insects to spend time in every part of the garden.
 To add one more complication
to the mix, you should keep in mind that
you can often grow two or more different vegetables in the same bed
each year. For example, over-wintering garlic is harvested in
early
June, just in time to plant sweet potatoes. Spring leaf lettuce
takes
about a month to bulk up, can be cut for a month, and then turns
bitter, so I allot the lettuce two months out of the year. Your
notes
from last year will help you figure out how many months each crop will
take (and the May
volume of Weekend Homesteader explains when each one
should be planted), but there are always a few vegetables that are
pulled out early or don't come up. As a result, I generally plan
the
location for my vegetables in stages, first figuring out where each
variety will go for the spring planting (February to June) and only
later planning my summer and fall gardens.
To add one more complication
to the mix, you should keep in mind that
you can often grow two or more different vegetables in the same bed
each year. For example, over-wintering garlic is harvested in
early
June, just in time to plant sweet potatoes. Spring leaf lettuce
takes
about a month to bulk up, can be cut for a month, and then turns
bitter, so I allot the lettuce two months out of the year. Your
notes
from last year will help you figure out how many months each crop will
take (and the May
volume of Weekend Homesteader explains when each one
should be planted), but there are always a few vegetables that are
pulled out early or don't come up. As a result, I generally plan
the
location for my vegetables in stages, first figuring out where each
variety will go for the spring planting (February to June) and only
later planning my summer and fall gardens.
This
week's lunchtime series includes one of the four projects from Weekend
Homesteader: November.
Stay tuned for the rest of the series, or check out the 99 cent ebook
for more information on how to store drinking water for use during
power outages, to put an entire
chicken to use in the kitchen, and to bring in cash without going to
the office.
| This post is part of our Garden Rotation lunchtime series.
Read all of the entries: |
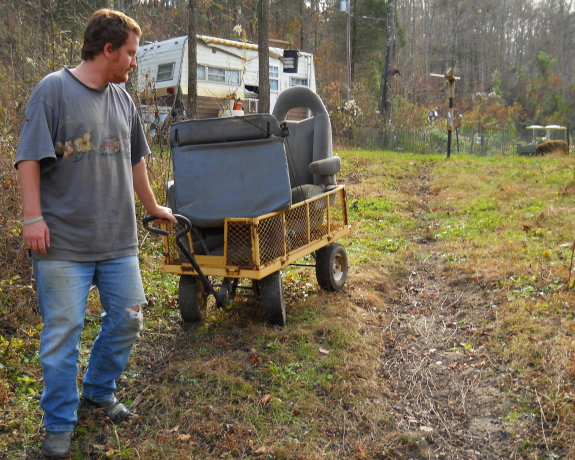
We ended up trading our old Toyota
mini-van for a 22 rifle and the few hours of labor it took to
replace the golf cart brake pads.
I've been dreading the last
part of the deal...getting the seats from our barn to the parking area
without the help of the truck.
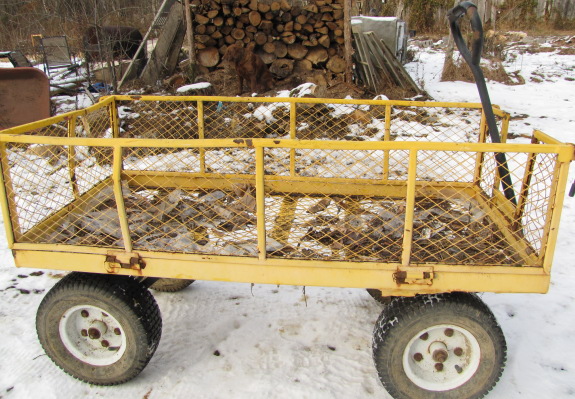
The TC1840H
garden wagon was a big
help today, but it took some major effort to make it across the creek
due to one of the wheels rubbing on the frame when our
friend pulled too fast.
Not sure if it's something I
can fix to make stronger. Maybe it's time to consider the next step up
in garden wagons?
 Step
1: Dream
Step
1: Dream
When
I was a kid, I dreamed of publishing a book. I didn't care about
the fame, but Daddy had explained the concept of royalties to me, and
the idea of doing a bunch of work and then having money trickle in for
the rest of my life sounded really awesome. Plus, I just loved
books.
Step 2: Strive
I started writing
"novels" in elementary school, but it took until
after college for me to realize that I lacked the life experience to
write good fiction. In the interim, I agonized over a bunch of
young adult fiction, pored over Writer's
Market, and even
sent some "novels" off to publishers to get those mandatory rejection
letters.
Step 3: Check in with reality
 Time passed and I got an actual
job, which I loved and then
hated. After I quit, a local businessman threw a book deal into
my lap --- I'd write about the local flora and fauna, his niece would
format it, and he'd publish it. I hunkered down over my laptop
for a month or two and spewed forth my first non-fiction
book. It
had growing pains, but the breaking point was realizing that when the
businessman said he'd publish it, he merely meant he'd print it.
There was no distribution involved, and I would need to hawk my
book on street corners to get it sold. No way! That was
going to irritate my introvert tendencies more than the job I just
quit. I published the book in ebook format instead.
Time passed and I got an actual
job, which I loved and then
hated. After I quit, a local businessman threw a book deal into
my lap --- I'd write about the local flora and fauna, his niece would
format it, and he'd publish it. I hunkered down over my laptop
for a month or two and spewed forth my first non-fiction
book. It
had growing pains, but the breaking point was realizing that when the
businessman said he'd publish it, he merely meant he'd print it.
There was no distribution involved, and I would need to hawk my
book on street corners to get it sold. No way! That was
going to irritate my introvert tendencies more than the job I just
quit. I published the book in ebook format instead.
 Step 4: Revise the dream
Hmm, ebooks. Now
that's an interesting idea. I churned
out
a few more, getting
better at the process and enjoying writing about a
topic where I really had something to say. After a while, I
realized that I could reach a much wider audience by selling my ebooks
on Amazon rather than just on my website, and with your help, my Weekend
Homesteader
series took off. This was the cat's meow! No need to hold
book signings when I could rely on the power of the internet to sell my
books.
I came to the conclusion
that paper books were good for nothing more
than stroking the author's ego. I figured that if I were a
publisher, I'd cyber-stalk Amazon's independent ebook authors and watch
who sells the most books, then approach them in hopes of publishing the
book in a paper format. I steeled myself for that day --- if a
publisher approached me, I would simply say no.
Step 5: Revisit the dream
I thought the email was spam
at first. But no, it was a small but
established publisher that had several well known books under their
belt. They wanted to publish a full color paperback version of my
Weekend
Homesteader series.
I poised my fingers over the keyboard to say no...then went to tell
Mark instead.
"You know that if you
don't at least ask them for the terms, you'll
always wonder," he told me. "Why don't you email them back and
ask what advance and royalties they'd offer?"
Well, okay. The
editor tossed off some figures on the low end of
normal (8% royalties, $1,500 advance.) I shrugged.
Interesting --- I'd write a post about it after telling the publisher
no.
Instead, I drafted a
lengthy pro-con list. The pro list was short, the con list long,
long, long.
Daddy picked up the
phone right away. "I'm shocked!" he said once
he heard who was there. (Yes, I don't call my father
enough. No, I hadn't told him the reason for my call yet.)
"A publisher wants to
make a print copy of my book," I
told him, then added: "But I think I should say no."
I didn't think I could
ever break Daddy's heart more than when I
decided to live in a trailer, but I could almost hear that essential
organ cracking into two uneven pieces. He immediately started
trying to talk me into it, so I explained my list of disadvantages
one at a time. After "deadlines, angst, stress", my perfectionist
belief that Weekend
Homesteader
isn't ready for prime time, and having to deal with criticism, I asked
him whether accepting the first publisher who comes knocking isn't a
bit like going to the prom with a boy simply because you're flattered
he asked. "No, no!" Daddy said. "It doesn't matter who
publishes your first book! Just who publishes your second.
And, by the way, about your perfectionist tendencies, you've heard of
second editions, right?"
 Finally,
I moved on to the real sticking point --- public
appearances. "You could try asking the publisher how they
distribute the book and what you'd be expected to do," Daddy said
soothingly. So I sent the publisher back an email they probably
don't get often. I told them I was a hermit. I told them
there was no way I was going to market the book in a non-internet
manner. What bookstores did they have their books in, who was
their distributer, how were they going to advertise the book, how
quickly do they remainder? The answers sucked me right in --- not
so much the part about being in mainstream bookstores throughout the
U.S. and Canada (although that was cool), but about being sold in
Tractor Supply. Tractor Supply would really reach my target
audience and help build our "empire"!
Finally,
I moved on to the real sticking point --- public
appearances. "You could try asking the publisher how they
distribute the book and what you'd be expected to do," Daddy said
soothingly. So I sent the publisher back an email they probably
don't get often. I told them I was a hermit. I told them
there was no way I was going to market the book in a non-internet
manner. What bookstores did they have their books in, who was
their distributer, how were they going to advertise the book, how
quickly do they remainder? The answers sucked me right in --- not
so much the part about being in mainstream bookstores throughout the
U.S. and Canada (although that was cool), but about being sold in
Tractor Supply. Tractor Supply would really reach my target
audience and help build our "empire"!
With the invaluable
assistance of my friend's husband (thanks,
Seth!), I poked at the contract
until it felt pretty feasible.
And then...I said yes.
(If you were hoping that
this post would actually help you get
published, you've probably realized it won't. Those of you who
noticed that the path of my publishing career looks an awful lot like
the way I got a
husband win bonus points.)
Which is all an
excessively long way of saying that a full color paperback edition of Weekend
Homesteader will
be hitting bookstores in fall of 2012. I'll be dealing with
"deadlines, angst, stress" in February and before then will be asking
all of our ebook readers for their feedback so that the paper edition
glows. For the next little while, though, I'm going to channel
the eleven year old me and tell her that getting published really is
possible and not
to give up.

The problem with a diverse
garden is that planning rotation can be a
mind-bending exercise if you grow in a large space. Luckily,
there are ways to simplify the process.
The first step toward
easy rotations is to figure out which
families
cover the most ground in your garden. These widespread families
will vary depending on what you like to eat, of course, but I always
struggle to find fresh ground for legumes, brassicas, cucurbits, the
onion family, and the tomato family. Everything else is pretty
easy since, for example, I just don't grow enough okra to make it
difficult to find the vegetable a home in next year's garden.
You could do worse than
to start off your rotation by deciding on
spots
for the members of the five prolific families mentioned above.
Make a list of all of the vegetables you grow in each family and divide
them up by planting date, then start finding homes for each crop from
earliest planted to latest planted. Don't worry if you're stumped
and can't find a good spot for the latest planted vegetables ---
openings
generally come up and let you squeeze the last few in.
The steps I use when
deciding on a spot for each vegetable in next year's garden are as
follows:
 1.
Decide how many beds to devote to the crop.
I keep notes on how much I preserve of each type of vegetable and of
the month when
I ran out of those stored foods in the winter. If I had to buy
tomatoes starting in February, that's a clue that I should plant more
beds next year. On the other hand, if I ended up with peppers
that I didn't want to eat when the time came to clean out the freezer
in the spring, I might as well grow fewer this year.
Don't get too carried away, though --- if this is your first or
second year gardening, you'll want to keep your garden small and
manageable.
1.
Decide how many beds to devote to the crop.
I keep notes on how much I preserve of each type of vegetable and of
the month when
I ran out of those stored foods in the winter. If I had to buy
tomatoes starting in February, that's a clue that I should plant more
beds next year. On the other hand, if I ended up with peppers
that I didn't want to eat when the time came to clean out the freezer
in the spring, I might as well grow fewer this year.
Don't get too carried away, though --- if this is your first or
second year gardening, you'll want to keep your garden small and
manageable.2. Consider where the crop will grow best. I like to save the sunniest spots for crops planted in the early spring or those which will survive late into the winter. The next sunniest spots go to tomatoes and cucurbits that succumb to fungal diseases during our hot, humid summers. Herbs can go anywhere, but you'll use more if they're close to your front door. Root crops require deep, well-drained soil, so keep them out of clayey or swampy spots. If you hand water, you might want to keep moisture lovers like celery close to the hose.
3. Hunt and check until you find a
spot.
Now that I know I need 10 potato beds and that the root crop needs to
be located in the loamy third of my garden, I can start hunting through
the the garden until I find the appropriate number of beds that
haven't grown tomatoes, potatoes, peppers, or eggplants for a few
years. With a spreadsheet, you can simply search for the bed
number (or sort by bed if you have all of the information on the
same sheet) and get a list of all of the vegetables grown in each bed
since you started taking notes. Although a bit time-consuming,
this hunt and check method only takes me a couple of hours when
deciding on
spots for all of the crops in our huge spring and early summer garden.
If you need an incentive
to make garden planning happen in a timely
manner, you can use mine --- once I know where each vegetable will go,
I'm allowed to pore over seed catalogs. Garden porn!
I
hope you enjoyed this excerpt from Weekend
Homesteader: November. Check out the 99 cent ebook
for more information on how to store drinking water for use during
power outages, to put an entire
chicken to use in the kitchen, and to bring in cash without going to
the office.
| This post is part of our Garden Rotation lunchtime series.
Read all of the entries: |

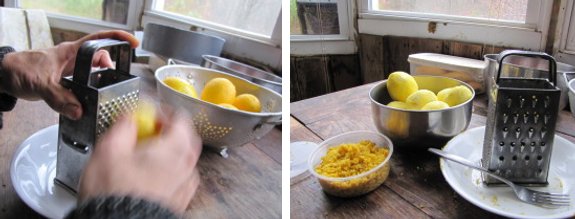
Our urine
fertilizer really
paid off, with 31 ripe or nearly ripe fruits on our dwarf
Meyer lemon tree.
The fruits were all a bit smaller than in previous years (which means
this year's lemons were roughly the size of storebought fruit.)
If we have the same bonanza of blooms this winter, I'll thin the baby
fruits so that the tree isn't overwhelmed.
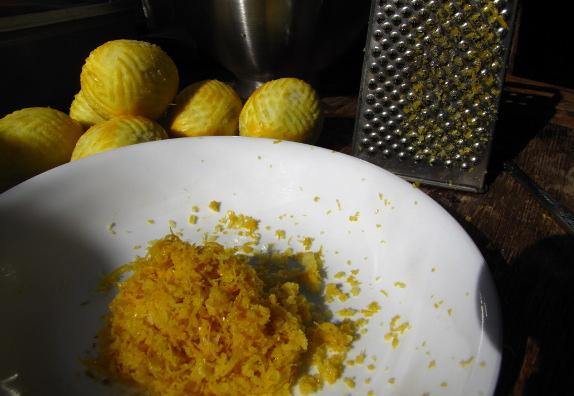
I picked the first six
lemons of the year and grated off the zest to use in baking. Our
homegrown lemon zest will go fast because Meyer lemons are a hybrid of
an orange and a lemon, so their skin is only about half strength.
I double the zest portion of any recipe when using Meyer lemon zest.
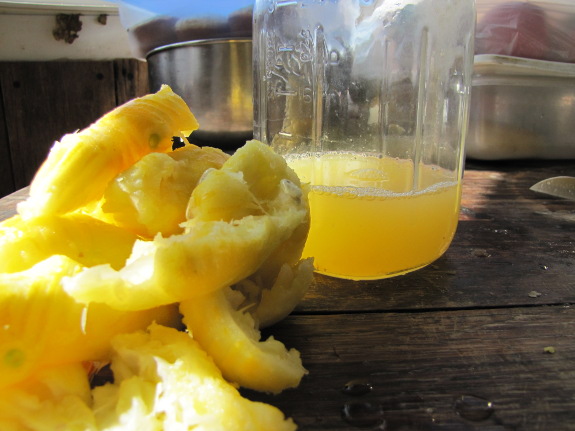
The juice is similar to
that of a storebought lemon, though a bit sweeter. One cup of
lemon juice is just enough to bake a double strength lemon meringue
pie. Too bad the dessert has to cool overnight before I can cut
and taste it.
We've already got more
flower buds on the lemon tree even as the other 80% of the fruits grow
out of their last tinge of green. Meanwhile, another dwarf citrus
has bloomed and started to set tiny fruits. In a very
un-Anna-like move, I let the labels wash off the pot, so I don't know
whether we'll be trying out homegrown navel oranges or key limes this
time next year. I guess it will be a surprise!
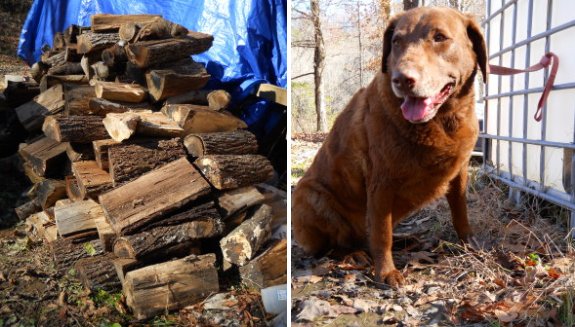
We established a new source
for firewood today that is higher quality at a lower price.
The rough estimate I did says
it's just under half a cord. A great deal at 50 dollars when you throw in
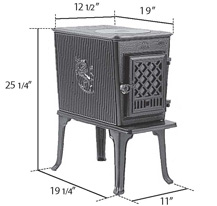
delivery and stacking. What makes it even better is the guy offered to
cut the next round to whatever size we need, which will be nice for our
tiny Jotul 602 woodstoves.
I've learned to put Lucy in a
"timeout" while I do short jobs like this during her walk,. If I don't
she sometimes gets distracted and shoots off into the woods dragging
her leash.
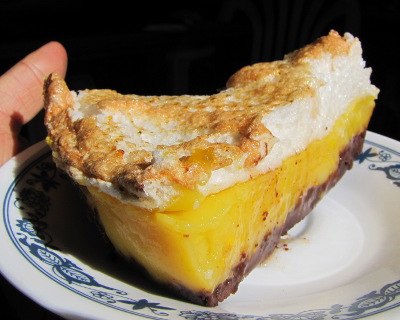 I'll be honest with you ---
this pie has very little redeeming nutritional value. On the
other hand, it is simply the best lemon meringue pie you'll ever taste
(especially if you use farm fresh eggs and homegrown
Meyer lemons.)
I'll be honest with you ---
this pie has very little redeeming nutritional value. On the
other hand, it is simply the best lemon meringue pie you'll ever taste
(especially if you use farm fresh eggs and homegrown
Meyer lemons.)
Crust:
0.5 c. flour
0.5 c. cocoa
0.25 c. sugar
0.5 tsp salt
7 tbsp butter
4 tbsp water
Put the flour, cocoa,
sugar, and salt in a food processor and blend briefly. Add the
butter in four or five pieces, and blend until the butter is broken
apart into tiny fragments. Then add the water and blend one more
time. Pat the dough into the bottom of a buttered, 9 inch round
cake pan and bake at 350 degrees for about 10 minutes, until the crust
is baked through.
Filling:
1 c. sugar (or a bit
more if you're using traditional lemons or have a sweet tooth)
6 tbsp cornstarch
0.25 tsp salt
1 cup lemon juice
6 medium egg yolks (or 5
large egg yolks)
2 tbsp butter
1.5 c. boiling water
1 tbsp grated Meyer
lemon peel (or 0.5 tbsp grated peel from a traditional lemon)
Mix the sugar,
cornstarch, and salt in a pan, then add the lemon juice, egg yolks, and
butter. (Set the egg whites aside for use in the meringue.)
Slowly pour in the boiling water, stirring constantly. Cook over
medium-high heat until the filling boils and thickens, stirring and
turning down the heat as necessary so the filling doesn't burn or
stick. Remove from the stove after 1 minute of boiling and add
the lemon peel, then pour into the baked pie crust.
Meringue:
6 medium egg whites (or
5 large egg whites)
6 tablespoons of sugar
1 tsp vanilla
 Beat egg whites until thye
are stiff but not dry, then carefully stir in the sugar and
vanilla. Spoon the meringue over the top of the hot pie
filling, making sure that the meringue comes in contact with the cake
pan all the way around. Then bake at 350 degrees for 10 to 15
minutes, until the top is brown.
Beat egg whites until thye
are stiff but not dry, then carefully stir in the sugar and
vanilla. Spoon the meringue over the top of the hot pie
filling, making sure that the meringue comes in contact with the cake
pan all the way around. Then bake at 350 degrees for 10 to 15
minutes, until the top is brown.
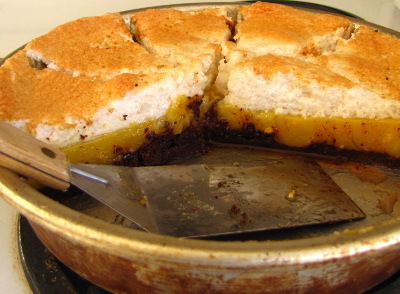
Let your completed pie
cool in the fridge overnight before eating. I
never jump through the hoops to keep my meringue from weeping and
deflating, but the pie still disappears far too quickly. Good
thing we could make four more pies just like this from 2011's
dwarf Meyer lemon harvest!
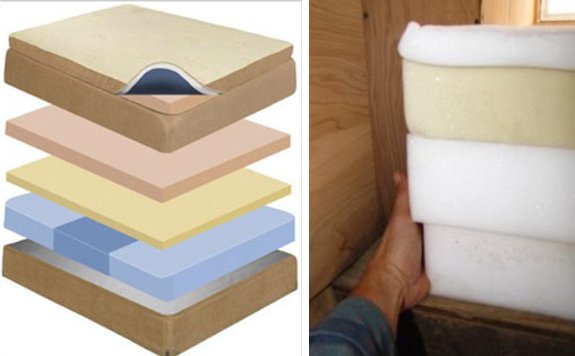
It's been a full year since I
first started sleeping on
a memory foam matress and
it's still as super comfortable as it was the first day.
The factory smell went away
within a few days. I still took it out this summer to let some mountain
fresh air soak into it, and having it in sections made the operation
much easier to handle than a regular matress.
In my opinion this foam
technology is the best invention for someone who enjoys a good night's
sleep since the arrival of the pillow.

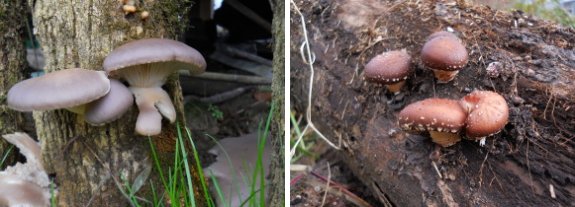
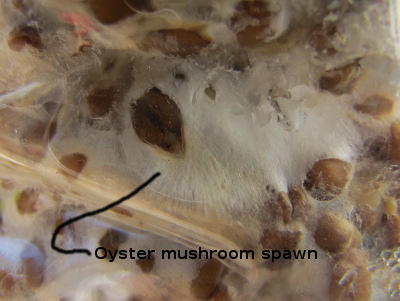
My low
tech oyster grain spawn experiment was a terrible
failure. Within a few days, the bags and jars were full of
various smelly molds, so I had to discard the grain onto the compost
pile.
I was shocked to see so
many "weed fungi" in the grain since I've had such good luck growing
oyster mushroom spawn on cardboard with similar lack of
sterility. I concluded there were two flaws in my grain
experiment:
- The oyster spawn I started with wasn't chomping at the bit. I harvested the mushrooms a few days before our pressure canner arrived in the mail, so I had to store the stem butts in the fridge. And the fridge has been running too cold, so the stem butts got a bit frosty. The ice didn't kill the spawn, but it did slow the oysters down so that wild molds had a chance to grow on the grain before the less vigorous than usual oyster spawn took over.
 Grain may simply be too rich of
a medium for unsterile conditions. Since damp newspaper
isn't very enticing, most weed fungi can't get a toehold. But
cooked grain is delicious for all and sundry, giving the oyster
mushrooms a run for their money.
Grain may simply be too rich of
a medium for unsterile conditions. Since damp newspaper
isn't very enticing, most weed fungi can't get a toehold. But
cooked grain is delicious for all and sundry, giving the oyster
mushrooms a run for their money.
We've started a bit of
newspaper spawn with the last
few oyster mushroom stem butts of the year. Assuming
the spawn runs (which it should since I've grown oyster mushroom spawn
on cardboard before), I'll have to figure out what to expand the
cardboard spawn onto. Cardboard isn't high enough in nutrients to
keep expanding spawn on indefinitely, so I may try inoculating some
straw for a bit of indoor culture for the winter. I'll keep you
posted.
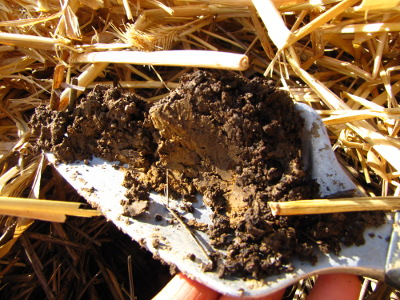
 The
report from a typical soil test will tell you to
add a certain amount of nitrogen, phosphorus, and potassium to your
soil in order to achieve a certain yield, and might also tell you to
add
lime or sulfur to change your pH. This type of soil analysis
assumes that soil is like a checking account --- you put nutrients in
and your plants take the same amount out. Large-scale farmers
will add chemical fertilizers or --- if the fields are certified
organic --- mineral supplements and compost to supply the required
amount of each primary nutrient.
The
report from a typical soil test will tell you to
add a certain amount of nitrogen, phosphorus, and potassium to your
soil in order to achieve a certain yield, and might also tell you to
add
lime or sulfur to change your pH. This type of soil analysis
assumes that soil is like a checking account --- you put nutrients in
and your plants take the same amount out. Large-scale farmers
will add chemical fertilizers or --- if the fields are certified
organic --- mineral supplements and compost to supply the required
amount of each primary nutrient.
Holistic gardeners
understand that soil is
more complex, and
that the
physical environment and microorganisms work together to make nutrients
more or less available. You can compare this view of soil to a
mutual fund, with the combination of individual stocks and bonds
determining how much money is available at any given time. If
you're a real holistic gardener, you'll take the analogy one step
further and try to create soil where you're living on the interest, not
the capital.
Which is all a long way
of saying --- this lunchtime series isn't going
to show you the traditional way of interpreting your soil test
results. I'm assuming that you'll be adding half an inch to an
inch of high quality compost to your garden before each planting as a
matter
of course, so I won't mention nitrogen at all. Instead, I'll walk
you through the less well known but even more important fields on your
soil test report so that you can create a 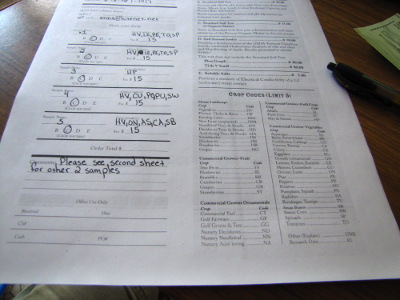 well-rounded
soil that will
require fewer inputs every year.
well-rounded
soil that will
require fewer inputs every year.
If you don't have a soil
test for your own garden handy, this week's lunchtime series will be a
lot less fun. Check out this post
about where to send your soil tests
and be aware that fall is a great time to sample since testing labs are
less busy. I got my results via email less than a week after
putting our soil samples in the mail.
| This post is part of our Holistic Soil Test Analysis lunchtime series.
Read all of the entries: |
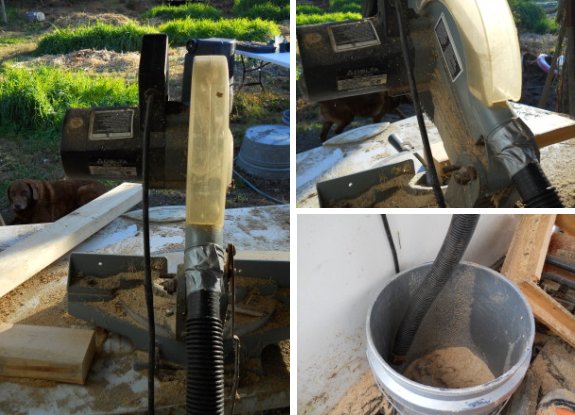

Sometime last year I realized
the miter saw had a place to attach a hose to
for catching saw dust. I looked around for the proper hose a few times
and then forgot about it.
I was walking by our junked
out washing machine by the barn today and noticed the drain hose was
about the same size as the exit point on the miter saw.
It was also the right length
for our current set up. A short piece of duct tape was all it took to
secure the hose to the saw.
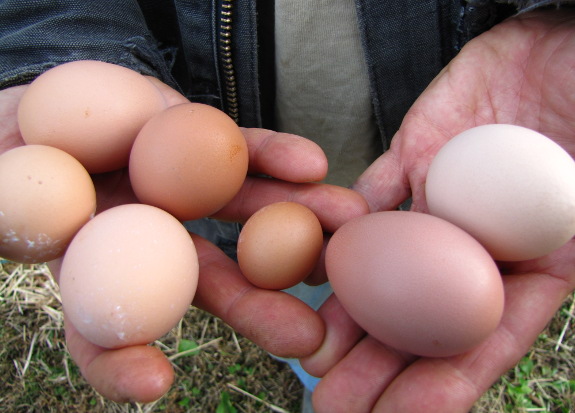
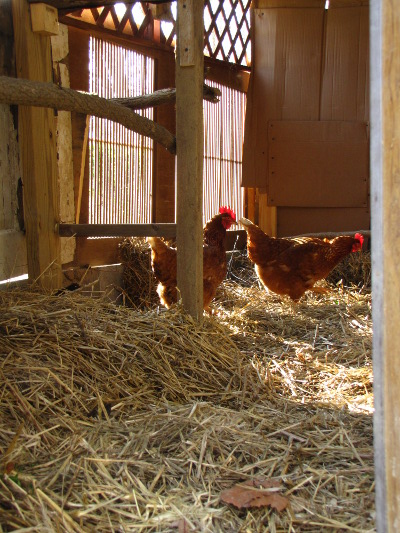
We've now got seven hens
laying! That tiny egg in the middle is a pullet
egg, the smallest one I've ever
seen. Sometimes, a hen will produce a tiny, yolkless egg when
she's first starting to lay, so I think this picture (taken November 3)
marks the date when our last Cuckoo Marans hen came into production.
The eggs are smaller,
prettier, and less numerous than we were getting from our Golden Comets, but I hope that our
heirloom Black Australorps and Cuckoo Marans will make up for their
lower yields by eating less storebought feed and raising their own
young. Right now, we're getting around 0.475 pounds of eggs per
day (4 medium eggs) and are feeding the flock roughly 1 pound of laying
pellets. That's a feed
conversion rate of
2.1:1 and a feed cost of about $1 per dozen eggs. Not too shabby,
even if you factor in having to feed the flock for six months before
they start to lay.
Keep up the good work,
girls! We like having extra eggs to sink into lemon
meringue pies.
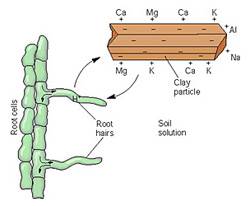 Cation exchange capacity is
the first characteristic you should consider when you get your soil
test results. Cation exchange capacity (CEC for short) is
closely tied to the amount of organic matter and clay you have in
your soil since both provide spots for positively charged ions ---
cations --- to cling to the soil. In contrast, sandy soil without
much organic matter will allow
nutrients to leach away during heavy rains.
You're throwing away your money if you add soil supplements to raise
your calcium, magnesium, or potassium levels without first increasing
your CEC so that these essential nutrients will be held in place.
Cation exchange capacity is
the first characteristic you should consider when you get your soil
test results. Cation exchange capacity (CEC for short) is
closely tied to the amount of organic matter and clay you have in
your soil since both provide spots for positively charged ions ---
cations --- to cling to the soil. In contrast, sandy soil without
much organic matter will allow
nutrients to leach away during heavy rains.
You're throwing away your money if you add soil supplements to raise
your calcium, magnesium, or potassium levels without first increasing
your CEC so that these essential nutrients will be held in place.
So what's a good
CEC? CEC can range from 0 to 100 meq/100 g, and
your goal should be to reach or exceed 20 meq/100 g. Although
clay and any kind of organic matter will help you achieve this goal,
humus is the most effective since it provides a lot more cation
binding sites per unit area. In case you're not familiar with the
distinction, humus is organic matter that has broken down to a stable
point at which it may endure for hundreds or thousands of years.
To make humus, add any kind of organic matter to your soil (compost,
mulch, or cover crops) and make sure soil
conditions are right
for earthworms, bacteria, and fungi to turn that organic matter into
high quality humus.
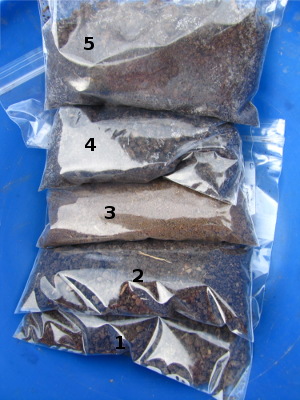
Let's take a look at my
CEC and organic matter test results:
| Mule (1) | Mule (2) | CP3 (3) | Back (4) | Front (5) | Mom front | Mom back | |
| CEC | 65.6 | 74.4 | 15.6 | 56 | 47.1 | 27.9 | 36.3 |
| % OM | 17 | 18.4 | 8.2 | 15 | 14.6 | 15.9 | 14.1 |
I've highlighted the one non-garden spot I sampled --- our chicken pasture, which was basically a lawn until we started letting chickens graze there this spring. I also sampled some of my Mom's soil, which has been intensively gardened for decades. Finally, the white columns are four different parts of my own vegetable garden. By comparing these three areas, you can see:
 Within my garden, CEC values increase as
percent organic matter increases. Mark and I were both able to
line up our soil samples from most to least organic matter by eye, so
it would be possible to keep rough track of this information without
sending off soil samples.
Within my garden, CEC values increase as
percent organic matter increases. Mark and I were both able to
line up our soil samples from most to least organic matter by eye, so
it would be possible to keep rough track of this information without
sending off soil samples.
- Mom's CEC values are lower than mine even though her soil has just about as much organic matter. That's the difference between gardening in very clayey soil (my garden) and in a silty loam (her soil.)
- My pasture --- where I've never added compost --- is the only
area with a CEC below the 20 meq/100
g level. As I use more intensive
management techniques on this
pasture, I hope to raise the CEC without adding any soil amendments.
Most organic gardeners believe you can't have too much organic matter in your soil, but soil scientists will roll their eyes at that statement and now I understand why. If your CEC is low but your organic matter levels are high, that means you're doing something wrong and your organic matter isn't being broken down into a stable humus. Maybe you've added too much high carbon material all at once (for example, tilling wood chips into the soil) or have sprayed pesticides that killed off your soil microorganisms. That's why I recommend using CEC rather than organic matter as the most important "grade" on your holistic gardening "report card." As far as I can tell, with CEC, more is always better.
| This post is part of our Holistic Soil Test Analysis lunchtime series.
Read all of the entries: |
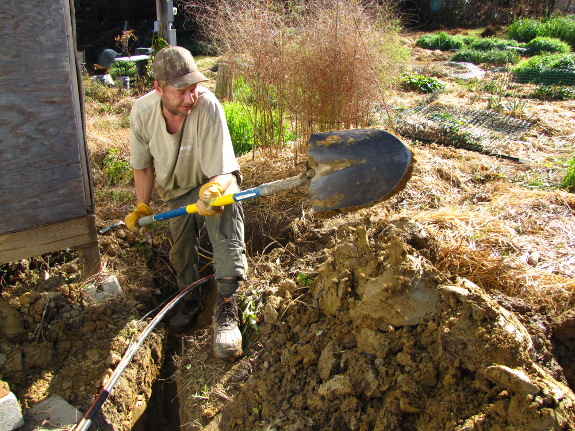
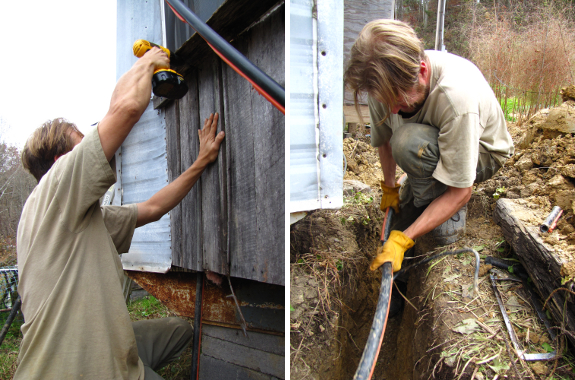
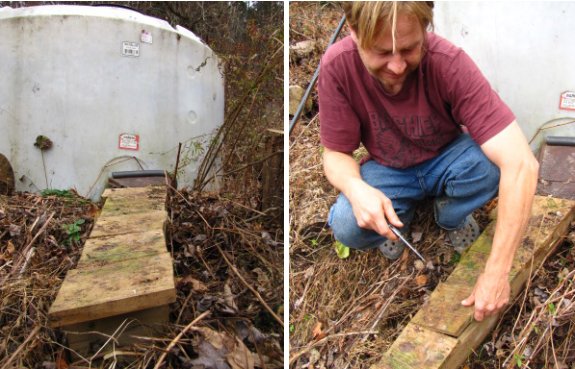
We're starting to feel like
the waterline
project is finally
nearing completion.
Yes...this is year 3 of
digging the ditch.
I'm not sure how many total
labor hours we've invested so far, but there were several days when it
was just too cold or too wet for ditch digging.
We knew it was a long term
project from the start, and with any luck we'll be rewarded with our
first winter of the water not freezing on really cold nights.
 10
acres of pasture in need of TLC.
10
acres of pasture in need of TLC.
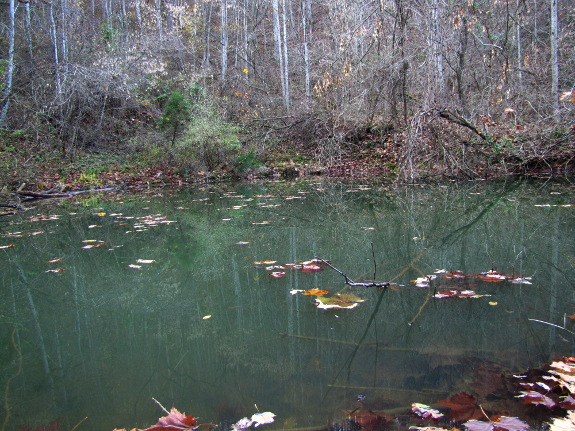
48 acres of Appalachian
forest.
Two springs and a pond.
A naturally
air-conditioned sinkhole.
A fallen down barn.
Two miles from our house.
A non-profit willing to
partner on our homesteading plan.
A well-established
intentional community that just might dip their finger in the pie.
Looks like a much more
interesting internship program than I'd
originally envisioned.
But dozens of wrinkles
still need to be ironed out before we can make an announcement.
So this is a
teaser. Maybe. Maybe not.
 Base
Cation Saturation Ratio (BCSR) is the more complex and controversial
side of CEC. To calculate the BCSR
of your soil, first determine how many cations your soil can
hold (the CEC), then measure what percentage of that whole is
filled up by hydrogen, calcium, magnesium, potassium, and sodium.
Base
Cation Saturation Ratio (BCSR) is the more complex and controversial
side of CEC. To calculate the BCSR
of your soil, first determine how many cations your soil can
hold (the CEC), then measure what percentage of that whole is
filled up by hydrogen, calcium, magnesium, potassium, and sodium.
Over the years, various
scientists have hypothesized that there's a
perfect ratio at which your soil achieves peak health and highest crop
yields. This idea may have begun with William Albrecht in
the 1930s, and in its most recent incarnation can be found in Neal
Kinsey and Charles Walters' Hands on
Agronomy.
In the latter, the authors posit that soil  cations should exist in the
following proportions: 60-70% calcium, 10-20% magnesium, 3-5%
potassium, 1% sodium, 10-15% hydrogen, and 2-4% other cations.
cations should exist in the
following proportions: 60-70% calcium, 10-20% magnesium, 3-5%
potassium, 1% sodium, 10-15% hydrogen, and 2-4% other cations.
Others argue that what
BCSR is really measuring is the far simpler
concept of pH and that the increased crop yields organic practitioners
notice after trying to correct their cation ratios are simply due to
liming the soil. I haven't read enough to decide what I think
about this controversial topic, but I'd be curious to hear pros and
cons from folks who have read about or practiced BCSR in more depth.
Meanwhile, if you're
interested to see how your soil stacks up, you'll
need to look on your soil test for the fields "% saturation K", "%
saturation Mg", "% saturation Ca", and possibly "% acidity" and "% base
saturation." In most cases, the three first three
fields can be added together to get the last field.
Subtract the saturation of potassium, magnesium, and calcium from 100%
and you get the percent acidity (which is the percent hydrogen, and
will be 0 if your soil has a pH at or above 7.) Here's the data
from my soil samples:
| Mule (1) | Mule (2) | CP3 (3) | Back (4) | Front (5) | Mom front | Mom back | |
| % Sat. K | 4.7 | 3.8 | 7.1 | 3.7 | 6.1 | 4.5 | 3 |
| % Sat. Mg | 16.7 | 17.2 | 13.8 | 17.6 | 16.4 | 13.3 | 8.5 |
| % Sat. Ca | 78.8 | 79.2 | 64.8 | 78.8 | 77.7 | 82.3 | 88.7 |
| % Base Sat. | 100.2 | 100.2 | 85.7 | 100.1 | 100.2 | 100.1 | 100.2 |
| % Sat. H |
−0.2 | −0.2 | 14.3 | −0.1 | −0.2 | −0.1 | −0.2 |
| pH | 7.5 | 7.6 | 6 | 7.3 | 7.4 | 7 | 7.3 |
I'll write about pH tomorrow, but I included the value in my chart so you could see the obvious --- the only acidic soil (my chicken pasture, highlighted in yellow) is also the only one with a percent base saturation less than 100. More relevantly, notice that all of the samples have more calcium than magnesium. This relationship, plus the very high values of all of the cations (shown below) suggests to me that I don't need to worry about my Base Cation Saturation Ratios.
| Mule (1) | Mule (2) | CP3 (3) | Back (4) | Front (5) | Mom front | Mom back | |
| K (ppm) | 825 | 724 | 351 | 615 | 875 | 415 | 351 |
| K | Very high | Very high | Very high | Very high | Very high | Very high | Very high |
| Ca (ppm) | 7206 | 7905 | 1643 | 6801 | 5772 | 3906 | 5480 |
| Ca | Very high | Very high | Very high | Very high | Very high | Very high | Very high |
| Mg (ppm) | 930 | 1048 | 213 | 926 | 743 | 385 | 320 |
| Mg | Very high | Very high | Very high | Very high | Very high | Very high | Very high |
What would I do if my BCSR seemed to be out of whack? The first step would be to correct any CEC problems, then I could add mineral sources of the cations that seemed too low. However, it's essential to be aware of how supplements will impact your soil pH before embarking on any cation improvement project.
| This post is part of our Holistic Soil Test Analysis lunchtime series.
Read all of the entries: |
Another day of amateur
plumbing has got us a bit closer to finishing this project.
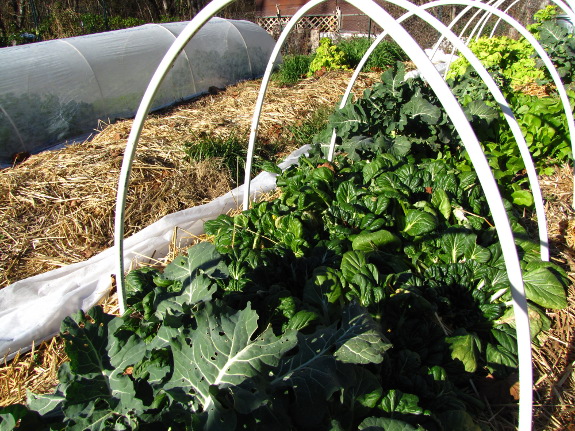
Once our nightly frosts
got down to the high 20s, quick
hoops were no longer
enough to protect our
last tomato plants.
So I ripped out the dead vines (and two gallons of green tomatoes to
pass on to the chickens) and moved the quick hoop over to our broccoli,
tatsoi, mustard, and tokyo bekana.
Thanks to my obsession
with planting greens at the end of the summer, our vegetables are still
coming almost entirely out of the garden. I've thawed out a
couple of cups of sweet corn to go in soup and a few dried squash and
mushrooms to round out our lasagna. But mostly we're eating fresh
veggies still --- mixtures of sauteed leafy greens every day, salad
with the last tommy-toes and sweet peppers still ripening inside, and
an occassional head of broccoli.
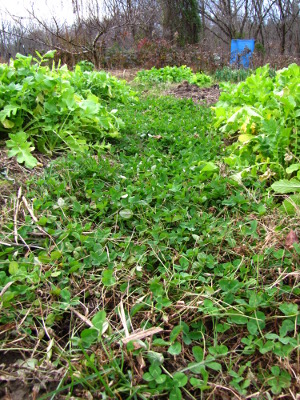
Add in the oats
and oilseed radishes
that are vibrantly growing organic matter for our soil, and the garden
still feels completely alive. I wonder how late into the winter
we can eat fresh?
 I'm not going to write about
the fundamentals of pH because I figure
most of you know:
I'm not going to write about
the fundamentals of pH because I figure
most of you know:
- 7 is neutral
- 0 to 6.9 is acidic
- 7.1 to 14 is alkaline (aka basic)
To some
extent, your pH is determined by the bedrock under your soil, but
management will also impact soil pH. For example, take a look at
my test results:
| Mule (1) | Mule (2) | CP3 (3) | Back (4) | Front (5) | Mom front | Mom back | |
| pH | 7.5 | 7.6 | 6 | 7.3 | 7.4 | 7 | 7.3 |
| CEC | 65.6 | 74.4 | 15.6 | 56 | 47.1 | 27.9 | 36.3 |
Notice that the mule garden --- just a few feet away from the chicken pasture (highlighted in yellow) has alkaline soil instead of acidic soil. Soil in both spots was identical a few years ago, and I've never added lime or large amounts of wood ashes to my soil. What I have done is topdress the mule garden with compost and manure in huge quantities, which seems to have sweetened the soil (despite various sources that report compost sours soil.)
 Depending
on which crops you're trying to grow, the perfect pH for most
garden plants ranges from 6 to 7 (although you'll want much more acidic
soil for blueberries.) pH is extremely important because it
determines the availability of many nutrients, as you can see in the
chart to the left. Each type of plant has evolved to deal with
specific micronutrient ranges, and a pH too high or too low can lead to
deficiencies
of some nutrients and toxic overabundances of others.
Depending
on which crops you're trying to grow, the perfect pH for most
garden plants ranges from 6 to 7 (although you'll want much more acidic
soil for blueberries.) pH is extremely important because it
determines the availability of many nutrients, as you can see in the
chart to the left. Each type of plant has evolved to deal with
specific micronutrient ranges, and a pH too high or too low can lead to
deficiencies
of some nutrients and toxic overabundances of others.If you're worried about the pH of your soil, the first thing you should do is to look at your CEC. Although a high CEC is generally a good thing, the value also means that the soil is very resistant to changes in pH. Raising the pH of my chicken pasture soil would be relatively easy due to its low CEC, but lowering the pH of my garden soil would be much tougher because of the high cation exchange capacity in that rich soil.
For now, I'm going to leave my soil pH alone, but I will probably opt to test the soil every year and keep an eye on this figure since a much higher pH could be problematic. Traditionally, soil pH is raised with lime and lowered with sulfur, but due to my high CEC, I would probably opt to apply acidic organic matter instead if I wanted to lower my garden pH. I suspect my chicken pasture will become more alkaline naturally as chicken manure and plant debris enrich the ground.
| This post is part of our Holistic Soil Test Analysis lunchtime series.
Read all of the entries: |

Last week I had an idea for a
chicken plucker that would pluck without a motor.
Tune in next week to see if
this new plucker contraption saves any time.
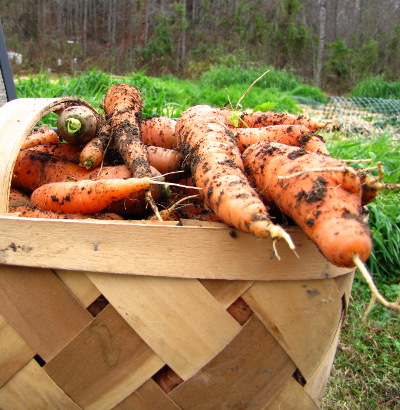 I was so scared that we
wouldn't have any fall crops when my plantings had
trouble germinating in the summer heat.
I was so scared that we
wouldn't have any fall crops when my plantings had
trouble germinating in the summer heat.
And it's true that my
carrot beds were only about half as populated as I would have wished.
But how can I complain
when I harvested a heaping half bushel from two small beds?
Looks like the lengthy
fall worked in my favor --- plenty of carrots despite late replanting.
What's your favorite
non-slaw recipe for raw carrot salads?
 Most
problems with garden soil can be remedied with judicious application
of organic matter or other supplements, but heavy metals are more
troubling. Although humans, plants, and soil microorganisms need
small amounts of many
heavy metals, high concentrations can be toxic.
To decide whether you should be concerned, look for these possible
sources of contamination near your garden:
Most
problems with garden soil can be remedied with judicious application
of organic matter or other supplements, but heavy metals are more
troubling. Although humans, plants, and soil microorganisms need
small amounts of many
heavy metals, high concentrations can be toxic.
To decide whether you should be concerned, look for these possible
sources of contamination near your garden:
- Lead paint on old buildings
- Chemical fertilizers or pesticides
- Gas stations and mechanics' shops
- Landfills
- Industrial factories
- Runoff from streets and parking lots
- Lead paint
- Treated lumber
The table below gives
information on the seven heavy metals found in soil that are regulated
by the EPA. Of these,
lead is the most likely to be found in your soil and is the one you
should be most concerned about.
| Heavy
metal |
Natural
levels (ppm) |
Unsafe
for vegetable gardening (ppm) |
Unsafe
for children to play (ppm) |
| Arsenic (As) |
3 - 12 |
more than 50 |
more than 200 |
| Cadmium (Cd) |
0.1 - 1.0 |
more than 10 |
more than 50 |
| Copper (Cu) |
1 - 50 |
more than 200 |
more than 500 |
| Lead (Pb) |
10 - 70 |
more than 500 |
more than 1,000 |
| Nickel (Ni) |
0.5 - 50 |
more than 200 |
more than 500 |
| Selenium (Se) |
0.1 - 3.9 |
more than 50 |
more than 200 |
| Zinc (Zn) |
9 - 125 |
more than 200 |
more than 500 |
You have to ingest heavy metals to get sick, which generally means eating plants that have sucked those heavy metals up out of the soil. Luckily, plants don't tend to accumulate lead the way they do some other heavy metals, so you can garden in soil with moderately elevated lead levels as long as you don't eat much dirt. At a lead concentration of 100 ppm, you'd need to eat two teaspoonsful of soil per week to create any problem; at 300 ppm, you'd need to eat 3/4 of a teaspoonful per week.
I wasn't particularly concerned about heavy metals in my garden, but the lab I sent our samples off to tested all of the problematic metals except for arsenic and selenium as a matter of course. Mom was more worried since her front yard is right beside a busy city street and her backyard (home of her vegetable garden) isn't all that far away from car exhaust and road runoff.
| Mule (1) | Mule (2) | CP3 (3) | Back (4) | Front (5) | Mom front | Mom back | |
| Zn | 8.3 | 7.8 | 12.5 | 7.5 | 8.5 | 12.5 | 28.9 |
| Pb | 1 | 1 | 1 | 1 | 1 | 3 | 7 |
| Cd | 0 | 0 | 0.1 | 0 | 0 | 0.1 | 0.3 |
| Ni | 0.1 | 0.1 | 0.1 | 0.1 | 0.1 | 0.1 | 0.1 |
| Cu | 1 | 1 | 0.9 | 1 | 1 | 1.1 | 1.2 |
| Est. total Pb | 37 | 38 | 40 | 37 | 37 | 64 | 108 |
| This post is part of our Holistic Soil Test Analysis lunchtime series.
Read all of the entries: |
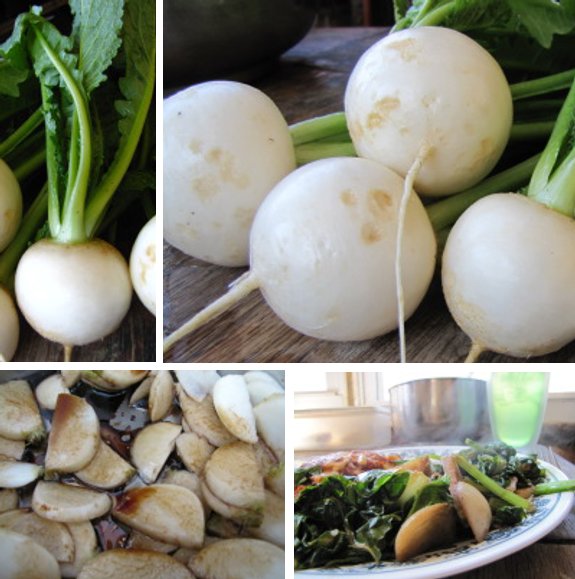
This is our first year
growing turnips.
The fresh leafy stalks are
delicious and the tubers have a unique spicy taste that reminds me of
my mom's garden when I was a kid.
I would call them a good
addition to any garden, especially when you factor in how easy they are
to store for the winter.
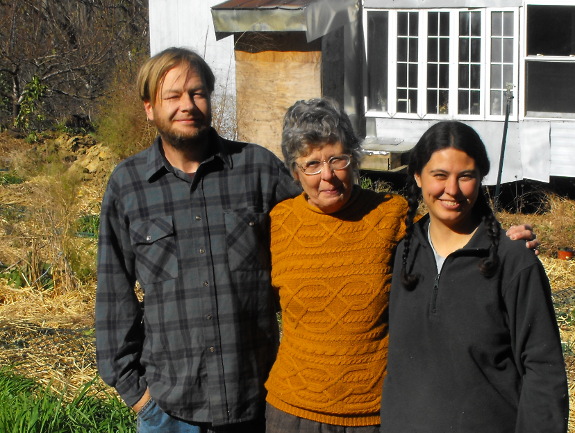
 A pair of our favorite local
friends are retiring and moving to town. We're heart-broken...but
maybe one of you would like to step into their shoes and be our new
neighbor?
A pair of our favorite local
friends are retiring and moving to town. We're heart-broken...but
maybe one of you would like to step into their shoes and be our new
neighbor?
This well established
farm is located just two miles from our house. I'll let Dick tell
you about it in his own words:
near Dungannon VA
Limited offering by
Anne Leibig and Dick Austin
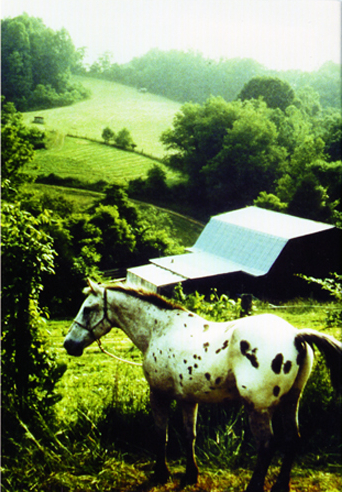
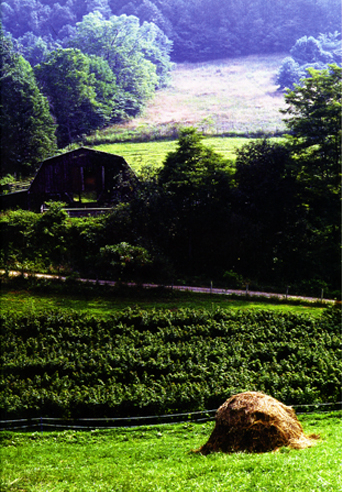
This 95 acre mountain
farm, overlooking
the Clinch
River has been managed organically, with horse power, for
more than 30 years (berries, peppers, range chickens, maple syrup),
with extensive hardwood forests including stands of sugar maples (+
syrup evaporator), 4+ acres of tillable land, 7+ acres of pasture/hay
land, large modern barn with 6 horse stalls, loft and
work-room. (All figures are approximate.)
Forest
management certified by
SmartWood.
The property is protected by a conservation easement with
The Nature Conservancy which has designated
the Clinch River
watershed one of America’s “Last Great Places” because of its
unusual biological diversity.
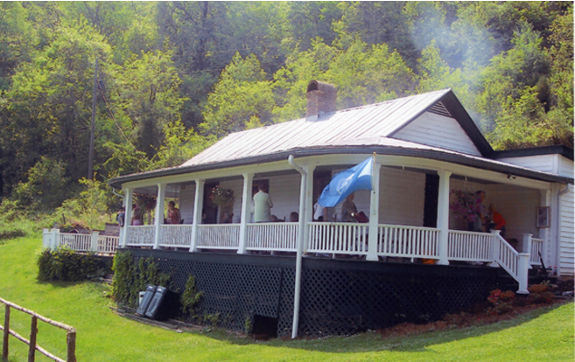
Our home comprises two
adjacent
buildings with scenic outlooks and privacy (no other homes in sight).
There are 2,100 square feet with three bedrooms, two baths, large
dining room, two living rooms, a study, a modern kitchen and pantry;
plus a distinctive curved porch (500 sq.ft.), and a deck (550 sq.ft.)
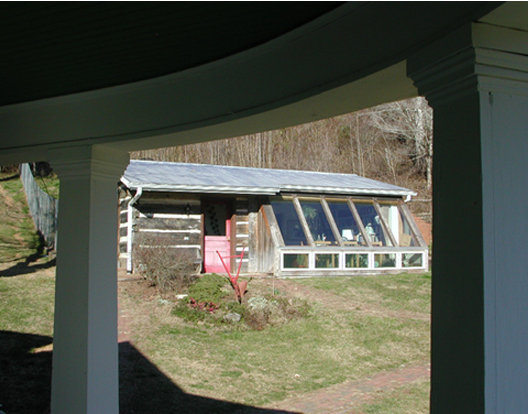
with Jacuzzi (needs plumbing repairs), and a dog run. Original house
dates from 1916 with porch from 1930, plus modern renovations and
additions. Century-old logs and hand-made bricks from the first
farmhouse are incorporated in the modern, passive-solar addition.
Both buildings have central heat and air conditioning. There is also
a wood stove in the main house.
 For forty years Anne and
Dick have
engaged with the surrounding community and natural environment. In an
effort to attract new owners who may continue this tradition, we are
making a special offer to friends and to those recommended by our
friends, at a price lower than we would ask on the commercial market.
Please contact us for details, and to arrange a visit to this home
and farm of rare beauty.
For forty years Anne and
Dick have
engaged with the surrounding community and natural environment. In an
effort to attract new owners who may continue this tradition, we are
making a special offer to friends and to those recommended by our
friends, at a price lower than we would ask on the commercial market.
Please contact us for details, and to arrange a visit to this home
and farm of rare beauty.
The farm address is
2895 Sinking Creek
Hwy., Dungannon, VA, 24245
Farm phone is
276/467-2437.
You may E-mail Anne
Leibig at
abjl@mounet.com,
or call her
cell phone, 276/690-0814.
E-mail Dick
Austin at
chestnut@mounet.com.
I've been trying to take a
picture of our curled
toe chicken's feet for months now, but she's hard to keep up with.
This plucker
finger close up is the best yet.
This image illustrates how
her corrective
tapecotomy came out.
It's hard to pick her out of
a crowd. She doesn't seem to have any trouble walking, but I think bug
and worm scratching may be impaired due to her smaller size compared to
the others.
Mark's got a talent for
tinkering. He's invented a POOP-free chicken waterer that thousands of flocks
around the world enjoy. His deer deterrents keep my garden happy.
And he's always coming up with new device to make farm life
easier. But his best invention, by far, is weekends.
Readers, don't worry ---
Mark won't be patenting weekends anytime soon, so you too can enjoy his
invention. Just pretend work doesn't exist and ignore the weeds
in the garden and the apples that need to be preserved. Then
light a cheery fire, read a book, hang out with people you care about,
and enjoy yourself. You'll be glad you did.
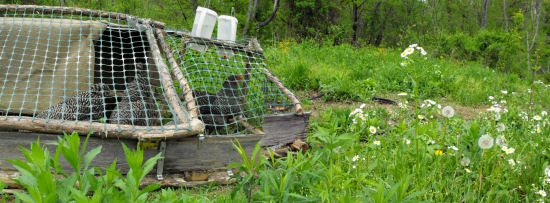
It's been a full year since
we installed
this experimental box to
prevent the portion of our non-potable water line that goes from the tank to
the ground from freezing.
The line did freeze up a few
times in that year because the end that goes into the trailer still
needs attention. The frozen time was far less than the previous year
and it seemed to thaw out much faster.
 I'm going to be writing
like crazy
over the next few weeks, so lunchtime series may be a bit sparse.
That means it's your chance to write in rather than just reading!
I'm going to be writing
like crazy
over the next few weeks, so lunchtime series may be a bit sparse.
That means it's your chance to write in rather than just reading!
To date, Weekend
Homesteader is chock full of photos of me
and Mark (and Huckleberry and Lucy), and it could use some
diversification. As you pored over my monthly ebooks, did you
say, "Hey, I have a better system than that in operation in my
garden!" Do you have some great photos of a kill mulch, a
rain barrel, a homemade worm bin, a family canning session, or anything
else in the ebook
series? Action photos with people in them (or even chickens
or dogs) get bonus points.
If so, email your photos
(one per email please) with the legalese at the end of this post to anna@kitenet.net.
A short writeup to explain your photos is great, but not
mandatory. If I choose to include your photo (and/or writeup) in
my book, I'll credit you right there in black and white and will send
you a Walden
Effect t-shirt.
Please include this text
in your email to cover my publisher's butt:
I'm looking forward to
seeing some ingenious designs!
Sometimes these barbed
connectors can be a major struggle to remove once they've been pushed
in all the way.
My new trick is to use a
coping saw to cut them free when brute force fails.
 Do you have a favorite
age? I definitely do --- 6 to 10 weeks old. Mature enough
that I can stop worrying about heat and predators and frisky enough to find a
lot of their own food.
Do you have a favorite
age? I definitely do --- 6 to 10 weeks old. Mature enough
that I can stop worrying about heat and predators and frisky enough to find a
lot of their own food.
(You know we're talking
about broiler chickens here, right?)
After 10 weeks, I start
stressing again. I've yet to plan ahead well enough that I have
sufficient pasture for these rapidly growing birds, so I start hunting
down treats to keep their diet well-rounded. The pullets and
cockerels have to be shut out of the garden at that age because they
start to scratch mulch on top of my young garlic plants, and 11 week
old broilers are so long-legged that they're willing to walk the long
way round to get to those garden beds.
 And then there's the deep
bedding. I
always seem to let the last few weeks get away from me, and the
increased volume of manure mats on the surface of the leaves or
straw. Our final batch of Light Sussex have been the worst in
that respect since they still want to roost in a huddle in
the corner, which means they concentrate their manure in one spot and
then sit in it. Yuck. I was beyond thrilled when Mom
brought me some more leaves to alleviate the manure pileup, but next
year I've got to plan ahead so I have enough high carbon bedding to top
off the coop floor every other day for the last two weeks of broiler
time.
And then there's the deep
bedding. I
always seem to let the last few weeks get away from me, and the
increased volume of manure mats on the surface of the leaves or
straw. Our final batch of Light Sussex have been the worst in
that respect since they still want to roost in a huddle in
the corner, which means they concentrate their manure in one spot and
then sit in it. Yuck. I was beyond thrilled when Mom
brought me some more leaves to alleviate the manure pileup, but next
year I've got to plan ahead so I have enough high carbon bedding to top
off the coop floor every other day for the last two weeks of broiler
time.
Which is all a long way
of saying that even though the Light Sussex have been my favorite flock
of the year, I am totally ready to slit their throats and put them in
the freezer. We processed the first four Monday --- six more to
go!
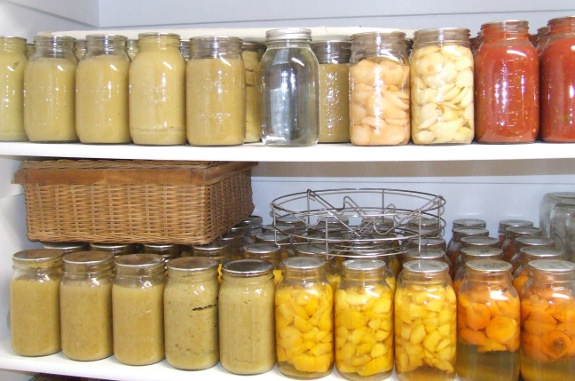
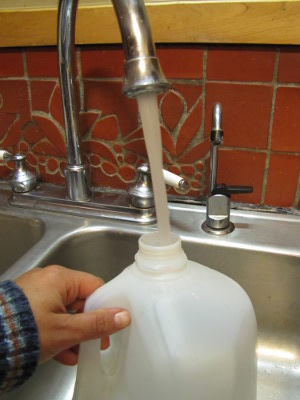
Every good homesteader
has a hundred or so quart size jars. Jars take up the same space
whether they are full of beautiful fruits and veggies or empty.
A great way to store water is in those jars once you use your precious
preserves. Water and preserves need the same storage requirements
--- dark, cool, rotated often --- so you can put those shelves to use
in the off season to store drinking water for emergency power outages.
Do
you have a great idea to share with Weekend Homesteaders? Enter
your photo and short writeup and win a t-shirt!
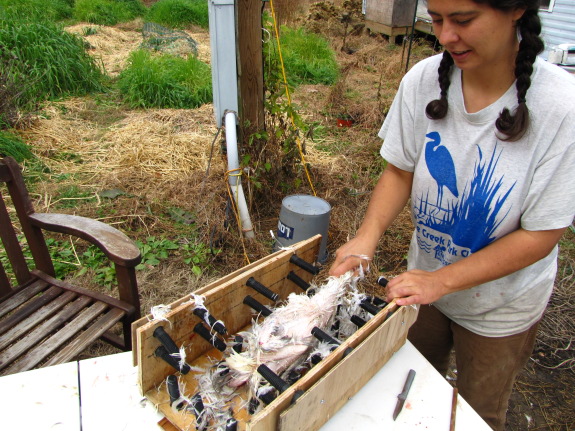
This low
tech way of plucking a chicken involves pulling the bird through
the plucker box a few times to get the majority of feathers.
It still requires some hand
plucking, but Anna seems to feel like it cuts the time needed for this
chore in half.
Maybe I can improve the
design a bit for version 2.0 by making the walls adjustable?

 I needed some good visuals
for my tree-planting chapter of Weekend Homesteader. Oh, how sad, I had to
order a few more fruit trees! (Don't throw me in that briar
patch!)
I needed some good visuals
for my tree-planting chapter of Weekend Homesteader. Oh, how sad, I had to
order a few more fruit trees! (Don't throw me in that briar
patch!)
We settled on two Asian
Persimmons (Ichi-Ki-Kei-Jeiro and Saijo) that are supposed to be
hardy enough to withstand our winters, along with a Starking Delicious
Pear. All are now installed in current or future chicken pasture
areas. The persimmons are diminutive enough that they could fit
in our smaller pastures while the pear is (hopefully) willing to deal
with somewhat waterlogged, heavy clay down in the floodplain. The
long term goal is to give
the chickens some protective cover while producing late season
fruit that they and we will share.
I love planting
experimental trees more than (almost) anything, but I do have a tough
time watching the ones that die. Last year's hardy almonds were a failed experiment ---
I thought they might have trouble fruiting because of being at the edge
of their hardiness 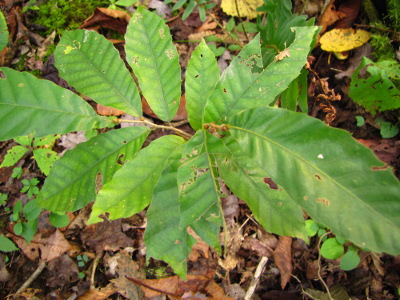 range, but what they had
trouble with was being eaten alive by Japanese beetles. I also
lost one Carpathian Walnut
because of planting it in the woods and forgetting about it (although
I'm happy to report that its sister tree and the transplanted Chinese
chestnut in the same area survived my neglect.) But all of the
rest of last year's perennials are thriving and I figure losing two
trees out of eleven isn't terrible when so few of the varieties are
tried and true.
(One of the almonds is clinging to life for another year.)
range, but what they had
trouble with was being eaten alive by Japanese beetles. I also
lost one Carpathian Walnut
because of planting it in the woods and forgetting about it (although
I'm happy to report that its sister tree and the transplanted Chinese
chestnut in the same area survived my neglect.) But all of the
rest of last year's perennials are thriving and I figure losing two
trees out of eleven isn't terrible when so few of the varieties are
tried and true.
(One of the almonds is clinging to life for another year.)
Let's hope 2015 is the
year of the persimmon and pear!
 Have you built a chicken coop or tractor so
simple that a new builder could recreate your masterpiece in a few
hours? I'm looking for some photos of easy to build chicken
housing to include in the January ebook and in the paperback edition of
Weekend Homesteader.
Have you built a chicken coop or tractor so
simple that a new builder could recreate your masterpiece in a few
hours? I'm looking for some photos of easy to build chicken
housing to include in the January ebook and in the paperback edition of
Weekend Homesteader.
As an added incentive
(beyond seeing
your name in print),
if I choose to use your photo, I'll send you a free 3 pack
DIY chicken waterer kit with drill bit. Then you can make a
spare bucket waterer for your broody hen or to make sure your flock has
plenty to drink during that holiday trip. (If you'd rather, I'll
send you a Walden
Effect t-shirt
instead.)
My book is all about
easy and fun projects that a homesteader wannabe can slip into a
weekend off, so the simpler your coop or tractor design is, the
better. On the other hand, I'm sure that some of my readers would
love to spread their building wings, so don't hold back if you've built
a chicken Taj Mahal.
If you have time, feel
free to include a brief description of how and why you built your
chicken tractor or coop. Then email your photos
(one per email please) with the legalese below to anna@kitenet.net:
I'm looking forward to
seeing some beautiful coops and tractors! (And thanks for bearing
with my begging for pictures.)
Nine of our Meyers
lemons graduated today.
Seven of them plan on going
directly into the muffin business after a brief party.
The remaining two feel a
little unsure about becoming a muffin and are considering a few pie
options.
 There
are three main choices for aisles between permanent garden beds ---
tilling up the soil, planting grass (or another low groundcover), or
mulching. Tilling got deleted from my decision-making nearly
immediately
because of the potential for erosion and mud. And since we didn't
have a
vehicle that could haul large quantities of mulch to the farm at the
beginning of our operation, grass chose itself for our aisles.
There
are three main choices for aisles between permanent garden beds ---
tilling up the soil, planting grass (or another low groundcover), or
mulching. Tilling got deleted from my decision-making nearly
immediately
because of the potential for erosion and mud. And since we didn't
have a
vehicle that could haul large quantities of mulch to the farm at the
beginning of our operation, grass chose itself for our aisles.
This year, I started
wondering if mulch would be a better option.
Mulched aisles have certain advantages over grassy aisles including:
- Mulching would save a lot of
time on weeding. Now that
we're getting our beds mulched, I spend most of my weeding time ripping
out clover and grasses that try to sneak up the bed sides from the
aisles and invade the growing zone.
- The time spent mulching can be a winter project, when we're not so pressed for spare moments.
- Mulch would build the organic matter of the soil faster than grass does, which might give the vegetables more root room. (On the other hand, I don't know if vegetable roots would want to grow into the compacted soil of permanent aisles.)
- Vining plants like sweet potatoes and cucurbits would be easier to handle since they could be allowed to roam across the aisles without being moved for mowing.
On the other hand,
grassy aisles have advantages too, like:
- We can keep our aisles in shape even if the floodplain is sodden and impassable.
- Mowing and weeding along the aisles is a bit-at-a-time project, so it doesn't feel as overwhelming as picking up eight plus truckloads of mulch.
- Our "grassy" aisles are actually a diverse blend of grasses, clover, dandelions, plantain, and other weeds, and our bees enjoy the blooms.
- I suspect grassy aisles have a more moderate summer temperature than dark mulches. Perhaps also nicer to sit on when I'm weeding?
So far, each permanent
aisle technique is neck and neck, so let's look
at some data on how much mulched and grassy aisles cost us in time and
money. I decided to consider the mule garden (since it's easiest
to measure), which is about a third of our vegetable growing
area. In the table below, I compare our current management system
with the alternative of
buying enough composted
leaf mulch to keep
the 1,440 square feet of
aisles plant-free.
| Grassy
Aisles |
Mulched
Aisles |
|
| Cost |
$15 (gas for lawn mower) |
$613 ($460 mulch, $153 gas for
truck) |
| Time |
50 hours (42 hours weeding
encroachers, 8 hours mowing) |
44.5 hours (27.7 hours picking
up mulch, 16.8 hours applying mulch) |
I was shocked to see that mulched aisles would only save us 5.5 hours of labor over the course of the year! True, we might be able to cut that time a bit by getting more serious about talking tree crews into delivering wood chips, but we'd spend even more time shoveling those chips into the pickup truck (and add a lot of back-breaking labor) in order to haul them to the garden.
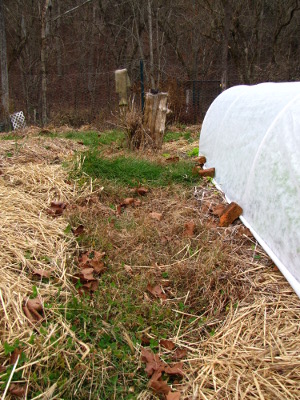 The mulch option would also
be considerably worse for the earth.
We all knee-jerk and think that mowing is bad, but our darling
lawn
mower probably uses 2.5 to 3.75 gallons of gas annually to mow the
mule
garden, which looks like a bargain compared to the 38 gallons we'd use
to
haul mulch home.
The mulch option would also
be considerably worse for the earth.
We all knee-jerk and think that mowing is bad, but our darling
lawn
mower probably uses 2.5 to 3.75 gallons of gas annually to mow the
mule
garden, which looks like a bargain compared to the 38 gallons we'd use
to
haul mulch home.I guess I need to drop the dream of mulched aisles and instead start thinking of ways to make weeds less likely to encroach on the growing area. Mark's new weed eater might be the solution since it seems to do a great job of slipping under the edges of the mulch and cutting off runners before they gain a foothold, and I could also consider some sort of permanent weed barrier. And mowing will become quicker and quicker as I merge beds into long, wide rows, removing stumps that disturb fast passes of the mower.
Do you have tips for making grassy garden aisles as easy as possible?

We've been flooded in since
Tuesday night.
You can fight the mud on a
day like this...but I prefer to work on smaller projects.
Winterizing
another chicken water bucket and protecting the new pear tree
turned out to be a nice alternative to sloshing around the waterline
ditch.
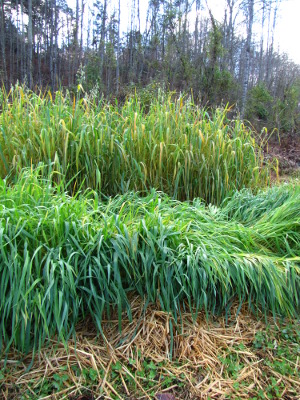 Last
year, my cover crop experiments helped me determine the best species
for our garden, so this year I'm just fine-tuning the process.
One factor I wanted to figure out was the optimal planting time for my winter
cover crops.
Last
year, my cover crop experiments helped me determine the best species
for our garden, so this year I'm just fine-tuning the process.
One factor I wanted to figure out was the optimal planting time for my winter
cover crops.
I filled up garden beds
with oats and oilseed radishes whenever they became available between
July 20 and September 15. The photo to the left shows two beds of
oats, the one in front planted August 31 and the one in back planted
August 10. This may not always be the case, but with this year's
extended autumn weather, August 10 was just too early to plant oats if
I don't want them to go to seed, while August 31 allowed for a lot of
vegetative growth without promoting flowering.
On the other hand,
planting just two weeks later, on September 15, seemed to be a bit too
late for optimal oat growth. The oats came up, but didn't get a
chance to grow big enough to completely cover the soil and do their job
of erosion and weed prevention. September 9 is the latest
planting that I felt grew sufficiently.
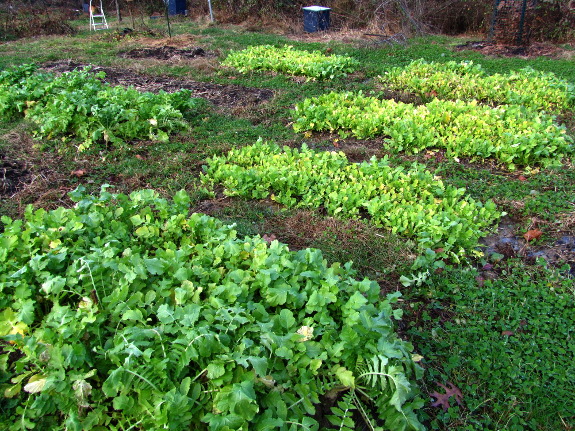
Oilseed radishes had a
simpler planting request --- the earlier the better. Beds planted
August 2 grew hefty radishes like the one shown in the foreground while
beds planted a month later (in the background on the right) look a bit
puny.
It sounds like I should
plant my cover crops in waves next year --- buckwheat from the last
frost until the beginning of August, oilseed radishes until the middle
of August, then oats from late August through early September.
Your region will probably have a slightly different planting schedule,
but chances are the same trend will apply.
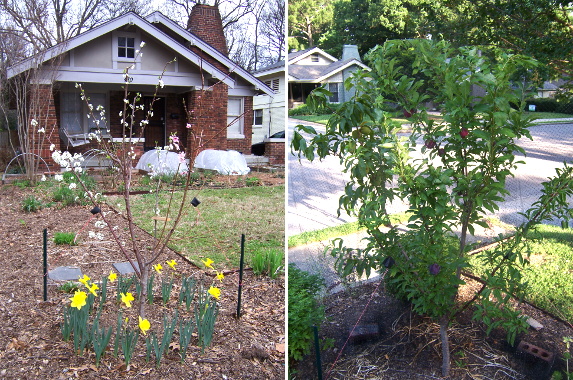
Have you ever wondered
about those "fruit cocktail trees" you see for sale in glossy
magazines? Brian Cooper tried out a dwarf tree with five
different varieties grafted on --- Elberta Peach, Belle of Georgia
Peach, Santa Rosa Plum, Redgold Nectarine, and Moorpark Apricot.

His tree was pretty big
when he brought it home and it fruited the first year. (The
photos above show the tree a year later when it had been pruned and
trained.)
Brian wrote "All of the
grafts produce fruit, but it is a challenge to keep them balanced so
they grow evenly."
His advice is timely
since I'm going to be grafting
some new varieties onto my pear trees this winter. I hadn't understood
why my orcharding books recommend adding no more than four different
varieties to one tree, but Brian's experience rang a bell. Of
course it would be tough to keep multiple varieties on an even keel so
that the most vigorous doesn't take over the tree.
Has anyone else had
experience with fruit cocktail trees? I'd be curious to hear if
your results are any different if you stick to the same species for all
varieties (for example, four types of apples on one tree.)
We had some trouble getting
the truck started last week during a very cold morning.
It turned over fine but kept
stalling out.
The problem was more than
likely some water in the fuel. I added the above bottle of HEET,
waited about an hour and it started right up. The instructions
recommend adding a bottle every time you fill up when it's cold out and
I think I might just start doing that to avoid any future cold starting
issues.
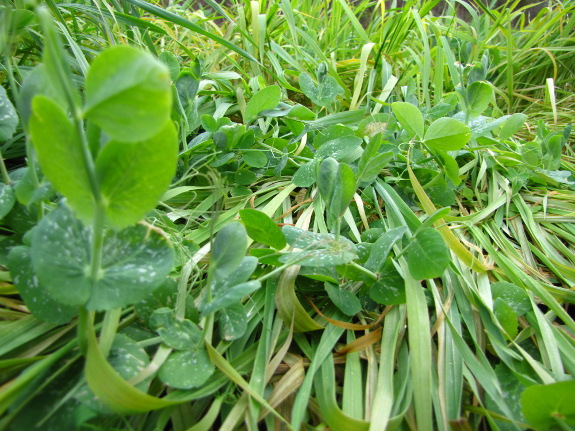
Our winter cover crop
experiments this year aren't completely limited to figuring
out the best planting time. We're also trying a
new species --- Austrian winter peas. This variety of field pea
is supposed to reliably winterkill all the way to zone 6, so we
shouldn't have to worry about weed problems in the spring.
I've mostly steered
clear of legume cover crops since they serve a different role than
grains and crucifers. The latter do grab some of the free
nitrogen that might otherwise wash away over the winter, but their
primary purpose is to make lots of organic matter to improve your soil
long term. Legume cover crops have a different role --- to fix
nitrogen out of the air and lower your fertilizer inputs. I was
most interested in soil building, so skipped the legumes at first.
I couldn't resist trying
out Austrian winter peas, though, and not just because everyone was
talking about how cool they are. My primary purpose was to plant
them in the chicken pasture to give our flock some tasty, high protein
greenery at this time of year. Strangely enough, my chickens
seemed to prefer the oat leaves, although they may change their tune as
winter progresses. But since I was buying the seeds anyway, I
figured I should try Austrian winter peas in the vegetable garden as
well.

Field peas grow best if
mixed with a small grain (like oats) so that the peas have something to
climb. I noticed that my peas tended to pull the oats down a bit,
perhaps negatively affecting how well the oats will grow. But
I've enjoyed the duo anyway because the peas started coming into their
own this month, just as the oats slowed down.
The real question will
be how well the Austrian winter peas break down in the spring, and how
much they reduce my dependence on manure. As Harvey Ussery
pointed out in his awesome book The
Small-Scale Poultry Flock, if you keep adding off-farm
compost or manure to supply your vegetable garden with nitrogen, you
may eventually end up with toxic levels of phosphorus and potassium in
your soil. My
soil is already
quite rich in both of these nutrients, so it wouldn't hurt to dial back
my manure applications and try to grow the more ephemeral nitrogen on
site.
 Next
month's volume of Weekend Homesteader is out a bit early.
Volume 8 includes in-depth information on:
Next
month's volume of Weekend Homesteader is out a bit early.
Volume 8 includes in-depth information on:
- Choosing and planting your first fruit tree
- Staying warm during winter power outages
- Figuring out which tools your homestead really needs
- Finding free and cheap supplies
For those of you who are
new to Weekend Homesteader, this series walks
you through the basics of growing your own food, cooking the bounty,
preparing for
emergency power outages, and achieving financial independence.
I hope you'll consider
splurging 99 cents to buy
a copy of my newest ebook from Amazon's
Kindle store. And many
thanks in advance if you can find the
time to write a brief review.
As usual, I'm also very
glad to email you a free pdf copy to read if you
don't have the spare cash, or just don't want to deal with downloading
an app so you can
read the ebook on your computer or phone. Just email
me with your request --- no strings attached.
Don't forget that Weekend
Homesteader: November
is still available, ready to help you roast a chicken and some delicious
root vegetables for a more manageable Thanksgiving dinner.
Finally, my offer is still open --- send me a photo with your additions
to or interpretation of the projects in any of my Weekend Homesteader
ebooks and if I use it in the print book, I'll send you a free
t-shirt. See
this post for more information.
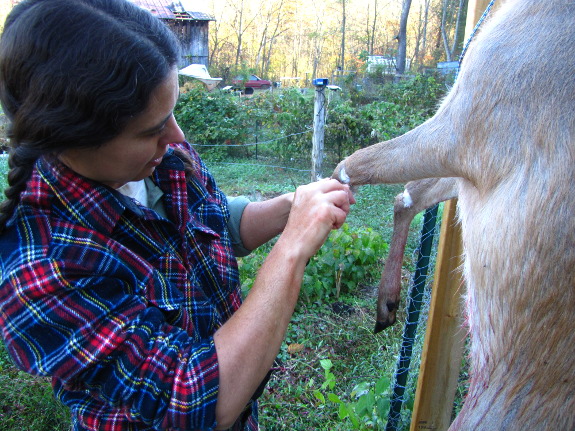
Today was the first day of
regular deer hunting season around here.
I noticed two eating our
parsley plants around lunch time and decided to get the gun.
The biggest one took off like
a flash, but the smaller one hesitated at following what may have been
his mom for just a second when he saw me. He leaped over the garden
fence and landed in the narrow chicken pasture enclosure by the coop.
He tried a few times to jump over the second fence but couldn't get
enough of a running start to clear it. I know it wasn't very sportsmanlike
of me, but I got as close as I could, braced myself on a large stump
and killed my first deer, which turned out to be a small buck with no
antlers.
We spent the rest of the
afternoon dressing it out.
One less garden predator and
some fresh pasture fed venison to go in the freezer equals a pretty
good day in my book.

Do you want to learn
about your soil without paying a lab? Jar tests are a quick
and fun way to
figure out the texture of your soil. Simply put some
of your garden soil in a Mason jar, add a bunch of water, shake it up,
and let the soil settle into layers. Sand will drop to the
bottom, followed by silt, then (eventually) clay.
In the photo at the top
of this post, my soil has been settling for about a day,
but there's still a lot of clay in suspension (dirty-looking
water.) I wanted to post about it now, but I'll take a second
round of measurements later once the water is entirely clear.
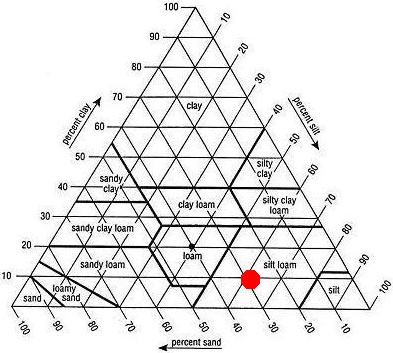 Using the data so far, I can
figure out the percentage of each type of soil particle by measuring
how high the layer is and dividing by the height of all the soil in the
jar. My soil is 29% sand, 64% silt, and 7% clay.
Using the data so far, I can
figure out the percentage of each type of soil particle by measuring
how high the layer is and dividing by the height of all the soil in the
jar. My soil is 29% sand, 64% silt, and 7% clay.
Next I use a soil
texture triangle to figure out what type of soil I have. I start
at 29% sand on the bottom of the triangle, then follow that line up and
to the left at an angle until I reach the line for 64% silt and 7%
clay. I put a red dot at the result --- a silt loam.
You can get this same
information by looking at the soil survey for your area. I have
an ancient paper copy, but you can get the
same information online nowadays. The front
garden area where I took the sample for my jar test is listed as a
Teas-Litz silt loam --- looks like I did it right!
Here's what the soil
survey says about Teas-Litz silt loam:
I'm actually pretty glad that I didn't pore over the soil survey while buying land because the USDA's analysis is wrong for no-till, homestead-style management. This soil is my front garden, which I consider high quality, and it produces great vegetables. Of course, that's because I hold all of my topsoil in place with mulch, rarely churn up the soil, and add lots of organic matter. The power of permaculture!
Our chicken waterer never spills or fills with
POOP.
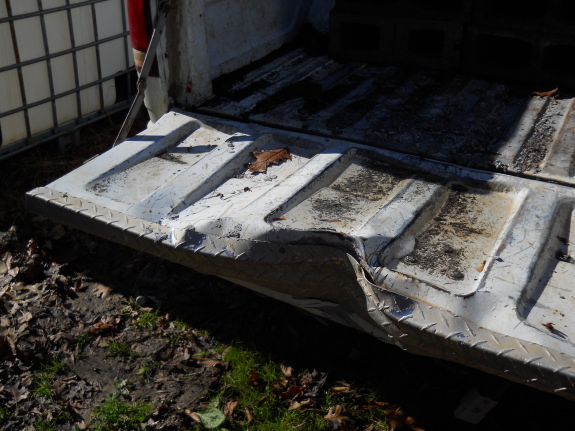
I was backing up the truck to
unload another cube
of cinder blocks the other day when this tree came out of nowhere
and slammed itself into the tailgate.
The tree barely noticed the
bump and went back to sleep when it became obvious that nobody was hurt.
I'm thinking instead of
having the dent pounded out and the locking
mechanism repaired I
should just maybe find a replacement tailgate at a junk yard like Tracy
recommended in an earlier comment and save a little time.

I've been trying to
think through why I'm so uncomfortable with the Occupy movement.
They're definitely "my" people, and I certainly agree that the way our
nation kowtows to big corporations and the ultra-rich is just plain
awful. However....
- I have trouble feeling sorry for
the middle class. A few weeks ago, gourmet chefs decided
to show their solidarity with Occupy Wall Street by cooking up free
meals for the protesters. They were annoyed to discover that
"professional homeless" people showed up to partake of the meals, so
the chefs downgraded their offerings to simple brown rice "to keep away
the people who may be freeloading." (Quotes are from this
Huffington Post article.) Now, to be fair, the article goes
on to mention ways other cities' Occupy movements have tried to help
out certain homeless people, but I think the story still illustrates a
major flaw in the Occupy movement --- they're not really the 99%, but
the middle 50%. Yes, the middle class is getting crunched, but
the lower class has been crunched for a long time and I don't believe
in trickle down economics. We should start at the bottom and work
up, not at the middle and work down.
 I think middle class
Americans are already too rich. In
at least three cities, Occupy participants are trying to prevent people
from losing their homes due to foreclosures. Now, I agree
that there have been a lot of fishy practices in the foreclosure field,
but I also think that foreclosures are simply a symptom of Americans
thinking they are entitled to live above their means. I can tell
you with certainty that the bank isn't going to come and repossess our
trailer, both because it's worth nothing and because they don't own any
part of it. By world standards, I suspect that Mark's and my
living conditions are at least in the top 5%, and I honestly feel very
rich living here. Yet, I doubt that the average Occupy participant
would dream of living in an ancient trailer, which makes their efforts to
prevent foreclosures seem like another middle class struggle to get
more stuff.
I think middle class
Americans are already too rich. In
at least three cities, Occupy participants are trying to prevent people
from losing their homes due to foreclosures. Now, I agree
that there have been a lot of fishy practices in the foreclosure field,
but I also think that foreclosures are simply a symptom of Americans
thinking they are entitled to live above their means. I can tell
you with certainty that the bank isn't going to come and repossess our
trailer, both because it's worth nothing and because they don't own any
part of it. By world standards, I suspect that Mark's and my
living conditions are at least in the top 5%, and I honestly feel very
rich living here. Yet, I doubt that the average Occupy participant
would dream of living in an ancient trailer, which makes their efforts to
prevent foreclosures seem like another middle class struggle to get
more stuff.
- Activism works a lot better if
you know exactly what you want. My last point comes from
years of working at a non-profit struggling against social
injustice. I know that it feels really good to Occupy
participants to think that they're working together to form a consensus
about what really needs to change. But I suspect if they would
simply come up with a list of five demands, most local and state
governments would give them at least some of what they're asking for
simply to make them go away. The fact that after combing through
their multiple websites, I still can't find concrete things they want
suggests that Occupy participants are merely angry and don't have an
action plan to work toward solutions.
What do you think?
Do you believe in voluntary simplicity and still want to Occupy?
Tell me how I'm wrong.

"We're going to have to
do something about the deer," I told Mark over lunch. "They're
getting in the garden again."
Fast forward ahead an
hour and I hear a gunshot that sounds awfully close. I run outside ---
"Honey, are you okay?!"
"I killed it!" my
husband crows.
It turns out he hadn't
quite killed it, though he had knocked it off
its feet. Mark had to rush inside and reload before putting the
anterless buck out of its misery. But then he was the king of the
farm for the next two days, having saved the garden and
killed his first deer. By local standards, Mark had also beaten
my record from two years ago since my
first (and only) kill had been a
doe.
I can be awfully
competitive, though. Two days later, as I talked
to Daddy on the phone, I saw a deer walking right down the garden path
as if headed for our front door. "I've got to go," I told my
father. "There's a deer in the garden." "Kill it!" he
replied.
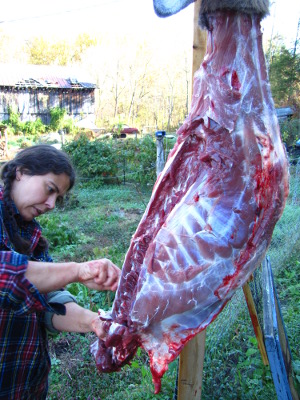 I crept down the hall and
picked up the loaded rifle. Slipping
off the safety, I eased open the front door and steadied the gun
against the door frame. As Mark likes to say, he could see the
deer fall to the ground right outside his window --- my shot had
severed its spine and the youngster died almost instantly. Once
we dressed them both out, my antlerless buck was just a hair bigger
than my long-suffering husband's. I told him he was just going to
have to get another deer to even the score.
I crept down the hall and
picked up the loaded rifle. Slipping
off the safety, I eased open the front door and steadied the gun
against the door frame. As Mark likes to say, he could see the
deer fall to the ground right outside his window --- my shot had
severed its spine and the youngster died almost instantly. Once
we dressed them both out, my antlerless buck was just a hair bigger
than my long-suffering husband's. I told him he was just going to
have to get another deer to even the score.
Which is all a long way
of saying --- this week's lunchtime series is
all about venison. Is it cost effective to hunt your own?
How do you butcher it? How do you eat it? Stay tuned for
the answers, including a special guest post on chimney top smoking.
(If you're a vegetarian,
or just disgusted by pictures of meat on the hoof, I apologize in
advance. You might want to steer clear, at least until we reach
the kitchen on Thursday.)
| This post is part of our Venison lunchtime series.
Read all of the entries: |
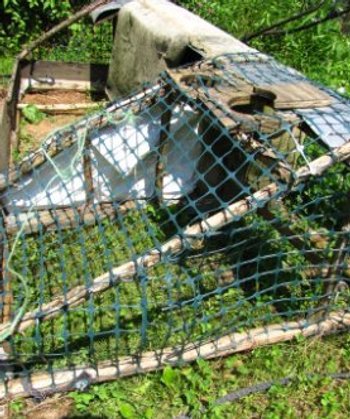
We recently learned the hard way that a generous layer of mulch
material in the isolation
coop goes a long way in
preventing your chickens from walking in their own waste the night
before processing.
The legs and feet are obvious
holding points for plucking
a chicken. Having the
feet clean and free from poultry waste makes the grip more pleasant and
fun.
 Cold weather last week
finally nipped the lettuce and greens growing
outside our quick
hoops. I'm
curious to see how long the veggies under
cover stay pristine and happy.
Cold weather last week
finally nipped the lettuce and greens growing
outside our quick
hoops. I'm
curious to see how long the veggies under
cover stay pristine and happy.
But you can't live on
lettuce and tatsoi alone. Over the last couple of weeks, we've
started to thaw out a bit of summer bounty from the freezer. And
to use more grocery store components --- flour, yeast, cheese, and
pepperoni, locally grown (but not in our backyard) old-fashioned
winesaps, and even a splurge on far flung avocados. (That's all
for yesterday's lunch.)
Storebought food makes
the first taste of our October-planted lettuce even more special.
We've been eating the September lettuce for over a month, and the
leaves had started to get a bit large and bitter. Sweet and
succulent baby lettuce from a brand new bed calls for a celebration!
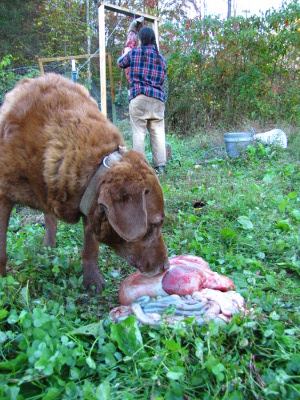 I
hate to admit it, but the biggest reason it's been two years since we
killed a deer is because of the butchering. In 2009, cutting up a
full-size deer was a daunting task and left a bit of a sour taste in my
mouth. Since then, I've become a pro at gutting and dressing
chickens and am no longer even mildly horrified by the task.
I
hate to admit it, but the biggest reason it's been two years since we
killed a deer is because of the butchering. In 2009, cutting up a
full-size deer was a daunting task and left a bit of a sour taste in my
mouth. Since then, I've become a pro at gutting and dressing
chickens and am no longer even mildly horrified by the task.
Add in an awesome meat
grinder that Rose Nell gave us (thank you!), and turning a deer into
freezer-ready packages of quality meat took only about two hours per
animal. That's two hours of me cutting and Mark fetching things
and taking pictures.
Now, I'm not saying that
I'm a master deer butcher, and I actually made most of the process up
as I went along. So I hope anyone who's cut up more than three
deer will leave a comment with some tips to make next time go even
smoother. Meanwhile, those of
you with weak stomachs should move along and I'll show everyone else
exactly what I did.
Step one was to remove
the entrails. All I needed was a good sharp knife to carefully
cut through the skin of the deer's belly without puncturing the
guts. Then I reached in the hole and yanked (and then poured)
everything out.
One of the deer had a
couple of small white spots on its liver, so I gave that to the
chickens to play it safe. I saved the other liver, and let Lucy
have the 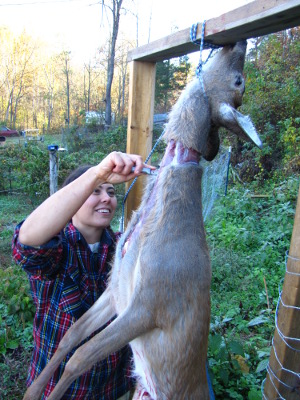 entrails.
Question one for the
pros --- How do you deal with the last bit of intestine that attaches
to the anus? With chickens, I just cut out the whole vent, but
due to the structure of the deer's pelvis, I had to cut through the
intestine, giving the possibility of a tiny amount of fecal matter
contacting the meat. I'm sure there's a better way.
Next was the hardest
part --- skinning the deer. Next time, I'll probably make Mark do
this because skinning two deer in fast succession made my carpal tunnel
act up.
Except for needing a lot
of hand strength, though, skinning is pretty simple. We hung each
deer up in a chicken pasture gate frame (boy did those come in handy)
and slit through the skin in a circle around the neck.
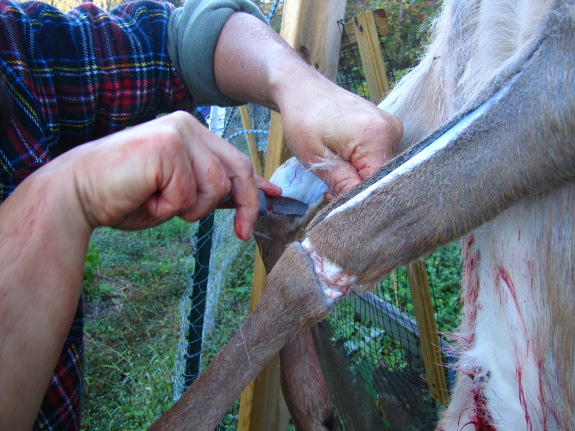
Next, I slit around and
up each foreleg. The bottom half of a deer's leg has no meat to
speak of, so I didn't skin that part.
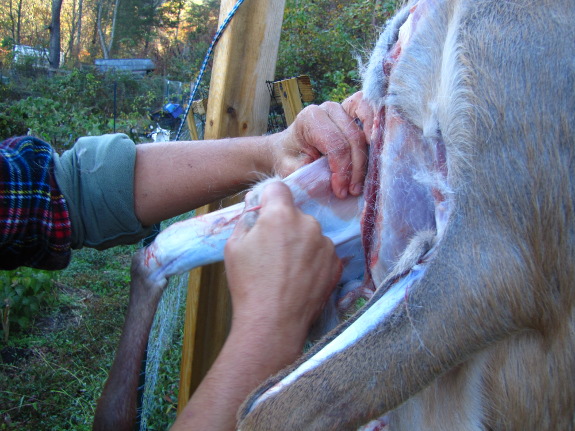
Now I pulled the skin
back off the forelegs. I used a knife now and then during the
skinning process, but mostly pulled instead of cut, since yanking does
a better job of keeping all the meat on the carcass.
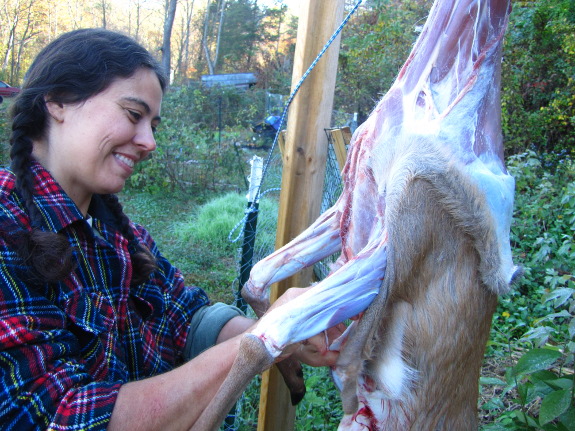
A slit from the legs up
the neck and then down to the gutting incision allowed me to start to
"undress" the deer.
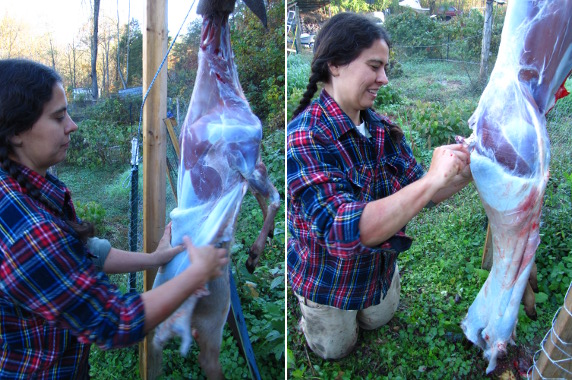
Yank, yank, yank!
Before long, it looked like my naked deer was wearing a skirt. I
cut off the tail, then pulled the skin right down to the deer's "knees"
(really, they're ankles, but they look like knees to us.)
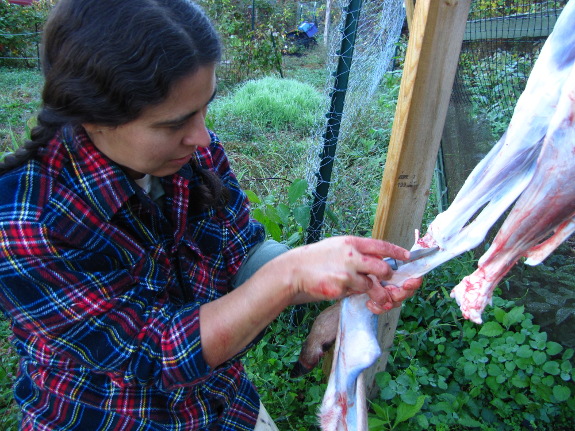
Here's where I had a bit
of trouble. My goal was to cut off the deer's lower legs (the
meatless parts), but I couldn't seem to find the right spot on the
joint to allow me to just cut lightly and bend to separate the two
bones. Is there a trick to this? I hacked at ligaments and
twisted a lot, eventually removing all four lower legs.
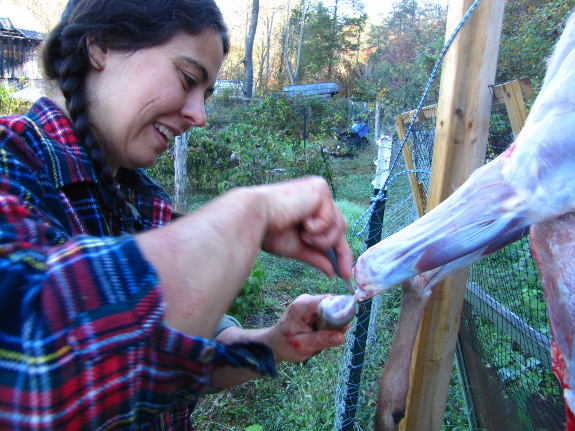
Here I am finally
getting one of the lower forelegs loose.
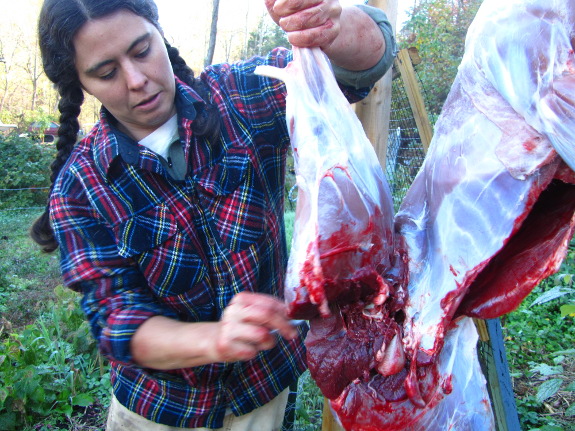
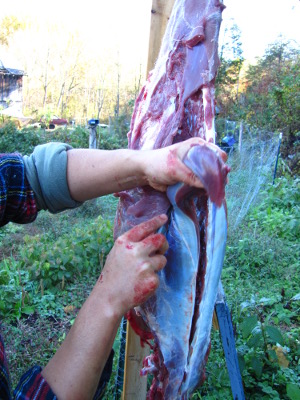 Old timers tend to let their
deer hang for a few days at this stage to age the meat, but it wasn't
really cold enough and we didn't have an animal-proof spot. So I
just cut it up and stored the meat in the fridge for a while to get the
same effect.
Old timers tend to let their
deer hang for a few days at this stage to age the meat, but it wasn't
really cold enough and we didn't have an animal-proof spot. So I
just cut it up and stored the meat in the fridge for a while to get the
same effect.
Cutting off the hams
(back legs) was easy --- just slit through the meat and twist until the
ball-and-socket joint comes loose. The front legs came off nearly
as simply.
Next came the tenderloin
(aka backstrap.) Some picky modern hunters consider this the only
part of the deer worth eating, and it's the part I save to make steaks
out of. The meat is above the ribcage, along the bony projections
above the spine.
Finally, I cut around
the neck and twisted the head off. I gave Lucy the latter and
brought the ribcage inside. After rinsing it well, I sliced off
any easy chunks of meat, then put the rest in a big pot of water to
simmer into the base of venison stew. Deer butchering complete!
| This post is part of our Venison lunchtime series.
Read all of the entries: |
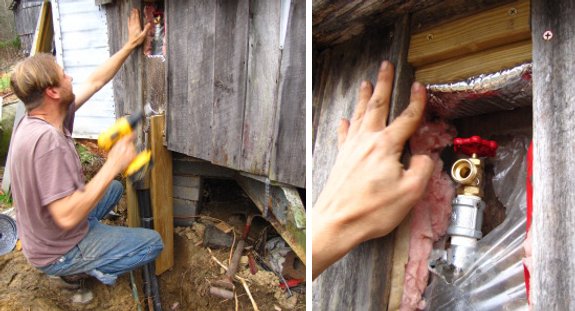
I'm just now starting to see
the light at the end of this waterline
project tunnel.
A few more steps and we'll
have indoor running water that might not freeze.
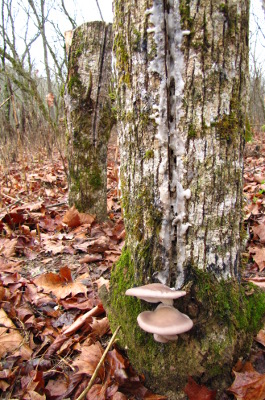 I'm probably far more excited
than this small cluster of mushroom merits. But here's the thing
--- this is our first ever batch of fruits from spawn we grew ourselves.
I'm probably far more excited
than this small cluster of mushroom merits. But here's the thing
--- this is our first ever batch of fruits from spawn we grew ourselves.
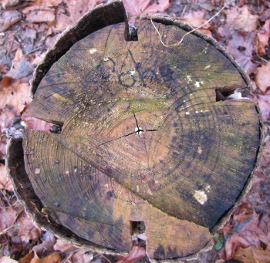
This strain of mushrooms
--- Pohu --- came to the farm in February of 2010 in the form of bought
plug spawn. We inoculated box elder logs and enjoyed
our first fruits that fall, then more this spring.
In March of this year,
we saved some stem butts from the oyster mushrooms and used them to
create cardboard
spawn. Then,
on April 13, we pushed
the mycelium-filled cardboard into gashes in the sides of box elder log
and covered the spawn up with melted beeswax. (That link shows us
inoculating the stump, but we repeated the process with logs.) We
buried the logs partway in the ground as mushroom
totems and hoped the
oyster mushrooms would do their thing.
 The brilliant part of our
plan was putting the mushroom totems where we pass every day walking
Lucy. I'd long stopped checking on the totems when the first
fruits appeared, but my eye is trained to mushrooms, so I saw the moist
clusters Tuesday morning even though I wasn't really looking.
The brilliant part of our
plan was putting the mushroom totems where we pass every day walking
Lucy. I'd long stopped checking on the totems when the first
fruits appeared, but my eye is trained to mushrooms, so I saw the moist
clusters Tuesday morning even though I wasn't really looking.
This experiment is only
a partial success because the two sister totems --- one with wild
oyster mushroom spawn we collected in Asheville this spring and one
with Blue Dolphin spawn --- haven't yet fruited, and neither have our
two experimental stumps. However, we inoculated the logs late
this spring and I think I see a bit of mycelium on each one. So
maybe we'll see fruits from all three next year?
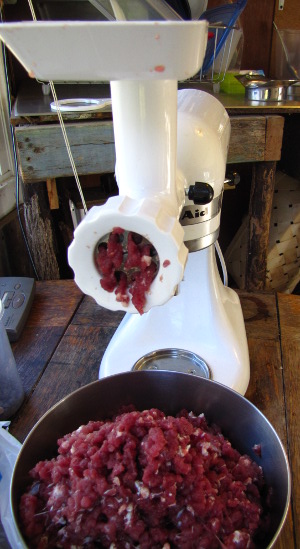 After
butchering
our deer, I ground
up all of the meat from the front legs, the neck, and the
ribcage. I left a bit of meat on the bones for Lucy, and saved
back the hams and tenderloin to be cooked whole.
After
butchering
our deer, I ground
up all of the meat from the front legs, the neck, and the
ribcage. I left a bit of meat on the bones for Lucy, and saved
back the hams and tenderloin to be cooked whole.
Both of our deer were
antlerless bucks, not quite fully grown. That means their meat is
tender, but they're a bit smaller than even a full-size doe.
Still, we got a hefty helping of meat. Here's the average from
the two deer:
- Hams --- 9 pounds
- Tenderloin --- 1.6 pounds
- Hamburger --- 5.8 pounds
- Total --- 16.4 pounds
We actually got quite a
bit more meat than that since I wasn't very careful to pick the meat
off the ribcage, but did pull off that meat to go in the stew after the
bones had cooked down for a few hours. We also got one good liver
and lots of bones for Lucy.
I figure our
gun has now paid for
itself by bringing in over 57 pounds of meat. Over the last two
years, we spent $200 on the gun, about $80 on a laser (which my 20/20 hindsight
says would have been better spent on a scope), and about $70 on bullets
for target practice. That's about $6 per pound, which isn't so
bad for high quality free range meat. Once we kill a few more
deer, the numbers will look even better, and since these deer were so
easy to process, I suspect more will head to our freezer before long.
| This post is part of our Venison lunchtime series.
Read all of the entries: |
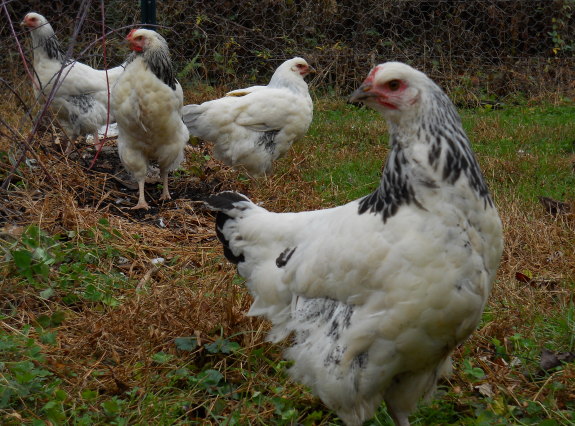
We ended up keeping a rooster
and three hens from the latest batch of Light
sussex chickens although one of the hens is most likely an unknown
Light sussex hybrid.
The smaller flock seemed a
bit lost at first, but are starting to look more like a cohesive group
the last few days.

One of the first pictures I
took of this flock was of a group of four freshly hatched chicks. I
wonder how many of the original four made it to the final team of
future foragers?
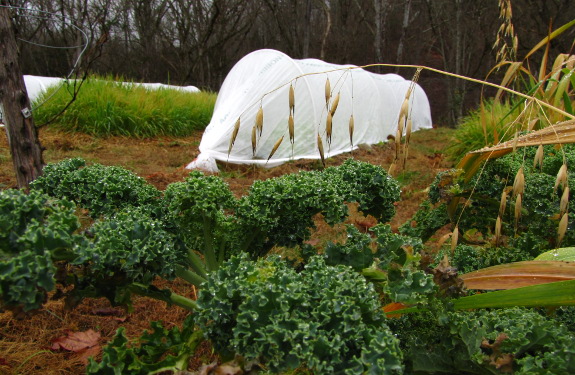
There are a lot of
perennials with leaves that can be used as greens, but I have to admit
that I prefer the flavor of our annual
greens most of the
time. So you can imagine how excited I was upon hearing of
perennial kale --- perhaps it could be my answer to the early
spring greens shortage?
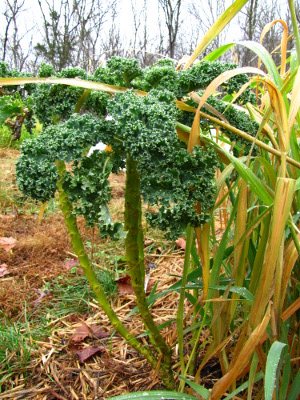 And then reality set
in. Eric
Toensmeier tried out several varieties of perennial brassicas in
his Massachusetts garden with very little luck and concluded that they
are only reliably winter hardy to zone 8 or 9. At the same time,
the perennial brassicas detest heat, so he only recommends the
currently available varieties for gardeners in the Pacific Northwest.
And then reality set
in. Eric
Toensmeier tried out several varieties of perennial brassicas in
his Massachusetts garden with very little luck and concluded that they
are only reliably winter hardy to zone 8 or 9. At the same time,
the perennial brassicas detest heat, so he only recommends the
currently available varieties for gardeners in the Pacific Northwest.
However, Toensmeier
challenged us all to develop a new perennial brassica that can
withstand hot summers and cold winters. Brassica
oleracea already
contains a heaping handful of annual and perennial species and he
suspects experimental crosses might yield the perennial holy kale...I
mean grail.
To that end, when some
kale plants overwintered last year, I left them alone. Most
bloomed and died (kale is a biennial --- that's what it does), but one
survived and kept plugging along. I can't actually remember
whether this kale bloomed and I picked off the blooms or if it just
kept growing. All I know is that I've been harvesting a few
leaves from my kale plant off and on for the last twelve months.
Will it survive the winter again unprotected? Will it skip
blooming again and prove itself a true perennial? Only time will
tell.
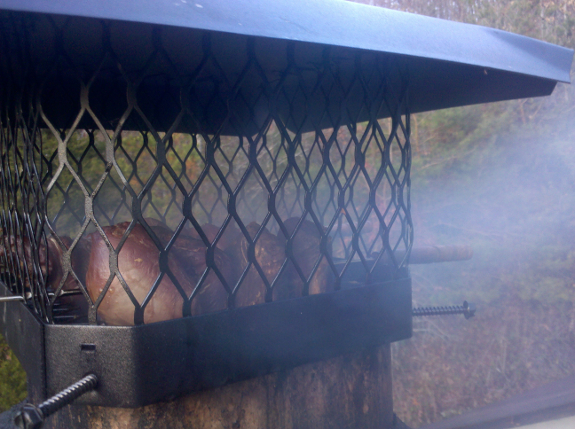
I've become interested in preserved meat since my offgrid
house's fridge is small, runs on propane, and has no freezer, which
makes storing meat difficult. Also, experiencing delicious jamón in Spain
gives a whole new appreciation for cured meat.
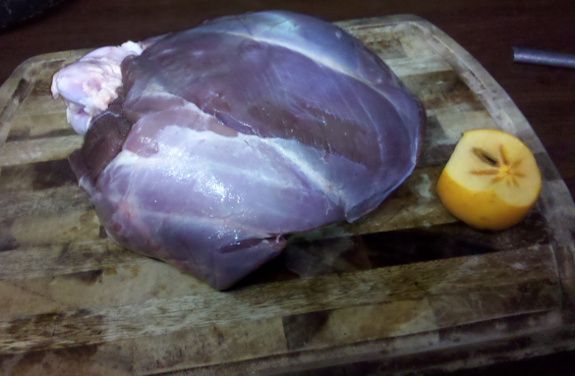
When Anna gave me a whole venison ham, this was a perfect opportunity
to experiment with smoking meat. Rather than build a smokehouse or a
smoker, I simply used my chimney. So the fire that's keeping me warm
and warming bathwater is at the same time adding delicious flavor to my
meat.
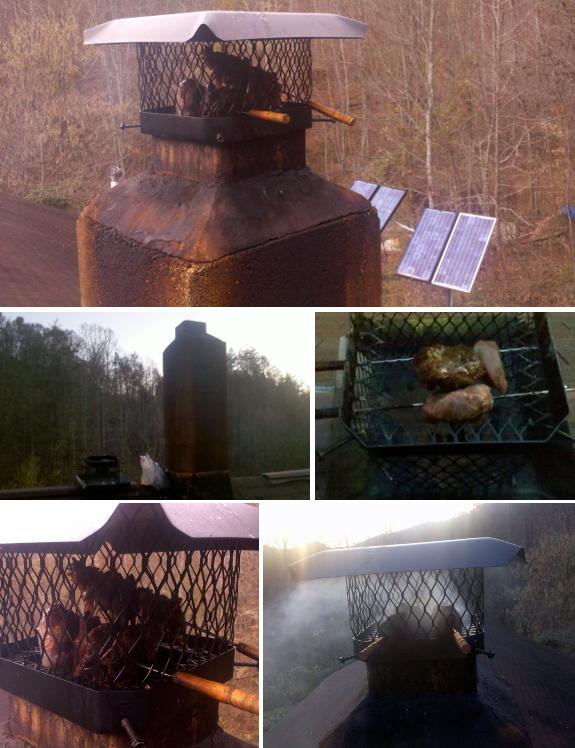
Meat has surely been smoked on chimney tops for ages, and this
page shows how that can be refined into smoke boxes attached to the
chimney, and so on. Since my house is built into a hill, it's easy to
get up on the roof, so the chimney top is good enough for me.
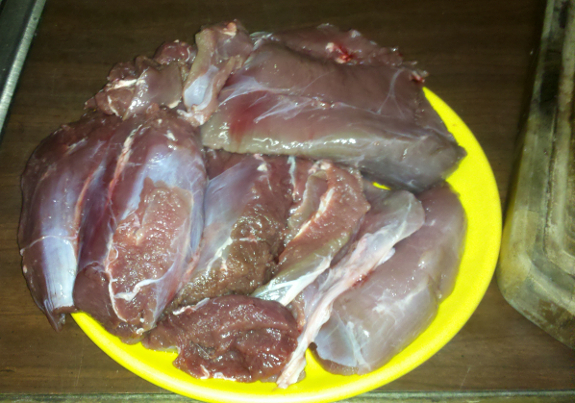
The whole ham was a bit large to fit, and I worried I could lose it
down the chimney, so I butchered it into individual steaks.
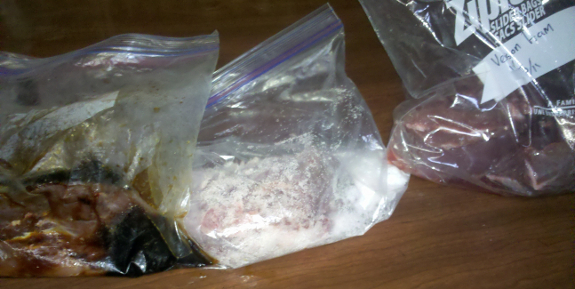
One was marinated in salt, one in soy sauce, and one "control" was left
alone.
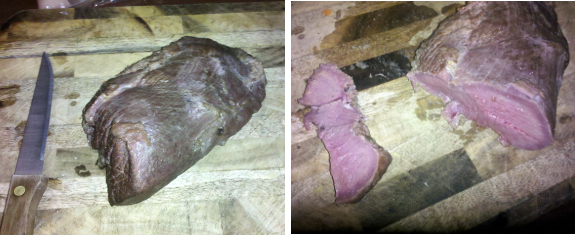
After the first smoking (4 hours), the meat was still quite rare,
springy to the touch. At the top of the chimney, the smoke is at most
warm, not hot. It only cooks the outside of the meat, and as the fire
is dampened down, it becomes a true cold smoker. Even after this first
smoke, the venison had a delightfully smokey flavor.
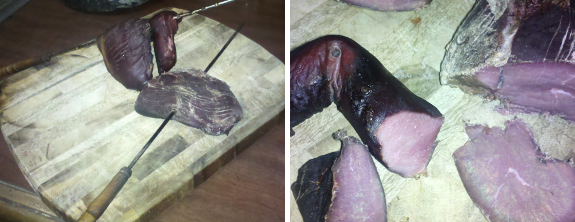
The second smoking (4 more hours) and third (12 more) firmed the meat
up, but did not cook its interior any more. Instead, it seems to be
losing moisture, and shrinking slightly. I could continue smoking the
venison indefinitely.

My favorite flavor is the salted smoked venison. It makes a terrific
antipasto and also a good sandwich. The soy sauce flavor adds perhaps
too much complexity on top of the smokiness. The unmarinated meat is my
least favorite by itself, but I liked small scraps that were smoked for
5 hours, and then cooked in a stew. They turned out to taste and feel
much like sausage.

A word on wood -- I used my regular firewood, which is probably mostly
maple, and I smelled the smoke and made sure I liked its quality before
hanging any meat. It would surely not work as well with pine or soft
woods. I'd like to try with some apple wood, and try adding some herbs
to the fire too. I'm also going to try to smoke some cheese; the trick
will be to keep the smoke consistently cool.

Joey
Hess is Anna's brother and technical advisor (paid in venison.)
He's a household name in the Linux world and is the primary person
behind Branchable,
the software that runs this blog. In his non-technical time, he
likes
to camp, hike, play board games, and fly kites. (And he probably does
lots of other things that Anna's not aware of.)
| This post is part of our Venison lunchtime series.
Read all of the entries: |
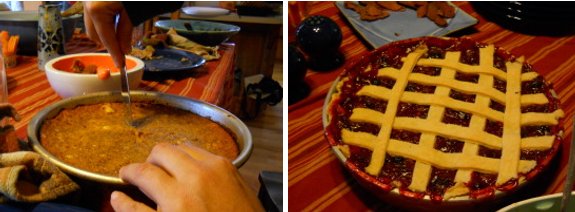
We had a great Thanksgiving
driving over a river and through some woods to share a delicious feast with family
and friends.
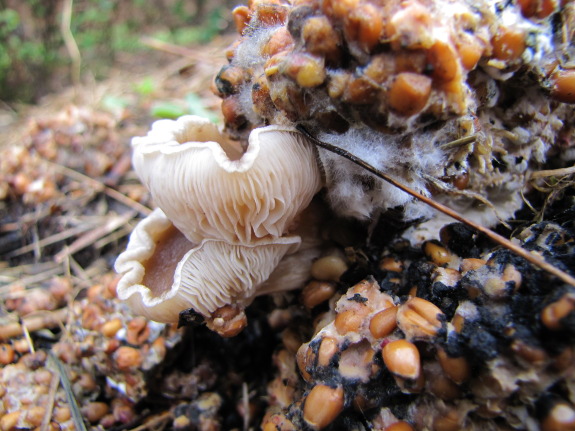
Speaking of surprise
mushrooms, here's
another one! I tossed the contaminated
grain spawn onto the
compost pile and ignored it, but it looks like the oyster mushrooms had
gotten a good toehold on at least a bit of the grain. Although
there's black mold present, the oyster still managed to produce two
little mushrooms.
This doesn't change my
analysis of the grain experiment as a failure, but it does testify to
the resiliency of oyster mushrooms. Definitely the easiest
mushroom to play with for the backyard homesteader.
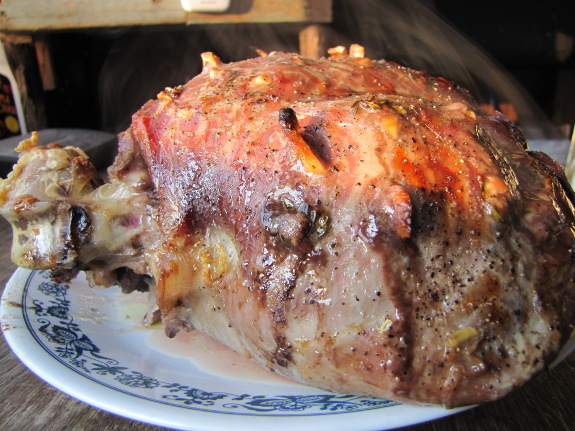
While Joey
was smoking one venison ham, I was roasting
another. I had used this same recipe on a leg of lamb with
outstanding results, and the venison was nearly as tasty, although
tasting a bit more like roast beef and just barely requiring a knife
rather than just a fork for cutting.
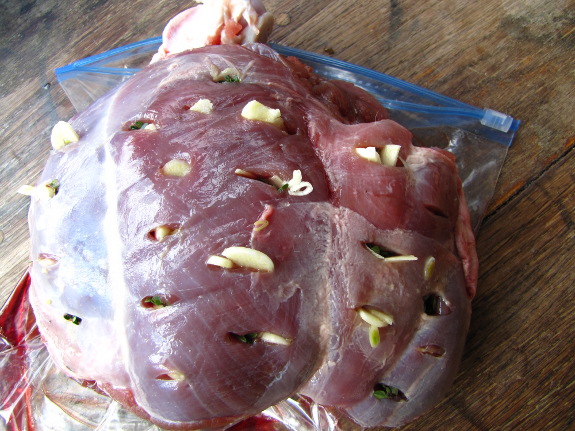
If it's been frozen,
first thaw your venison ham out thoroughly. Then slice up three
big garlic cloves into slivers and pick a couple of tablespoons of
fresh thyme sprigs out of your garden. Cut small slices into the
ham and insert a piece of garlic and thyme in each slice. For
best results, let the ham sit for a couple of hours before cooking so
the flavors of the herbs can soak into the meat.
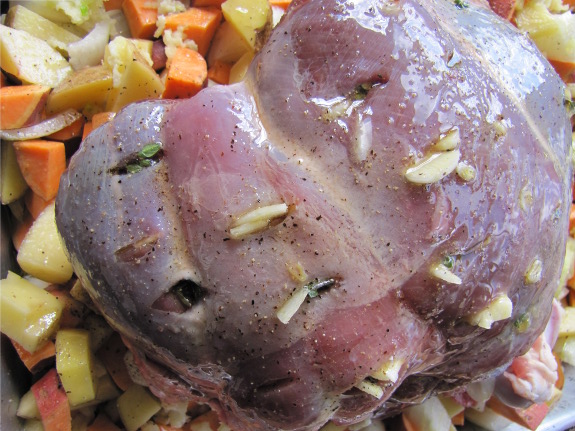
Cut up a bunch of root
vegetables to go in the pan, tossed with a bit of olive oil, salt, and
pepper. My favorite combination is two onions, one large sweet
potato, and two medium potatoes, with six cloves of garlic pressed over
them. But you can mix and match whatever root vegetables you like
best.
Put the roast on top of
the roots. Brush some olive oil on the meat and sprinkle a bit of
salt and pepper on top.
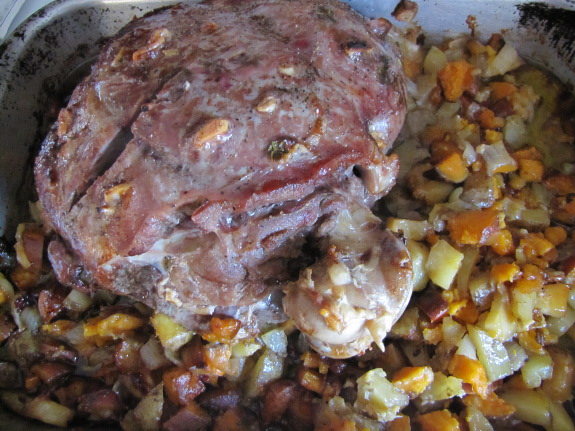
Bake at 425 degrees
Fahrenheit for about half an hour to seal the juices inside, then turn
down the heat to 325 and roast for at least two more hours. I got
hungry and pulled it out when the meat was still medium-rare, so
next time I think I'll allot at least three hours at 325 for a nearly 5
pound ham like this.
You can eat roast
venison ham plain or on sandwiches. Five pounds is a lot of meat
for two people, so I ended up cooking the second half of it up into a
pot of chili.
What's your favorite
recipe for cooking with venison? Do you make outstanding venison
jerky, awesome venison sausage, or something entirely different?
I hope you'll post with a comment --- we've got a lot more meat to
experiment with!
| This post is part of our Venison lunchtime series.
Read all of the entries: |
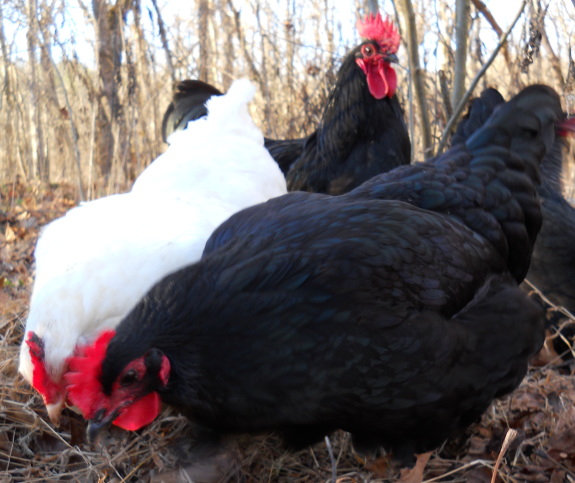
Our latest attempt to keep an
automatic chicken waterer from freezing is working.
The heat tape feels like a
more elegant solution compared to shining
a heat lamp at the nipple area or using
a stock tank heater like the Ice and Easy.
It got a pretty good test
last week when the temperature got down to 27 degrees, and I'm sure it
will get a chance to prove itself in colder conditions before long.
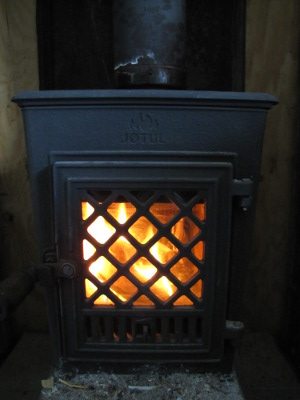 Modern marketing has
convinced us that if we just had the right possessions, we would be
happy. The concept has even spawned "retail therapy", the idea
that if you feel down, a good shopping trip will perk you right up.
Modern marketing has
convinced us that if we just had the right possessions, we would be
happy. The concept has even spawned "retail therapy", the idea
that if you feel down, a good shopping trip will perk you right up.
In stark contrast, science
suggests that buying more things makes us less able to appreciate
life's small pleasures.
I've also noticed that any emotional boost I might receive from a
purchase dulls quickly as I get used to my acquisition and the fun toy
fades into the background. (Often, the purchase glow dies even
faster as I succumb to buyer's remorse.)
But sometimes, you
really can buy happiness. A full year after installing our ultra-efficient,
tiny wood stove, I
still smile every time I glance in her direction. Basking in her
warmth is one of my favorite cold weather activities, and perhaps that
explains the longevity of my pleasure at the purchase. Even
though it seemed like we were buying a hunk of iron, we were really
paying for a lifetime of experiences, and experiences are the one type
of purchase that scientists report stand the test of time.
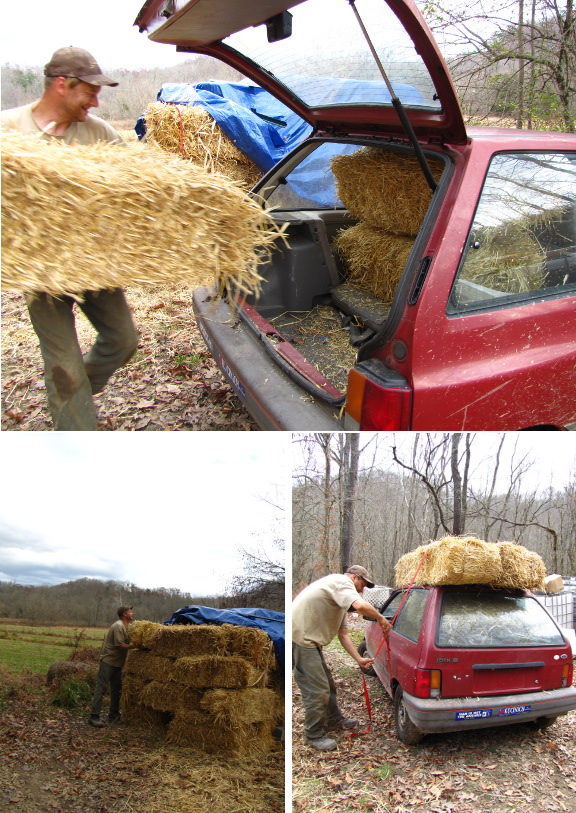
...knows how many bales of straw he can fit in his car.
The parts
Festiva can hold eight once you strap four to the roof.
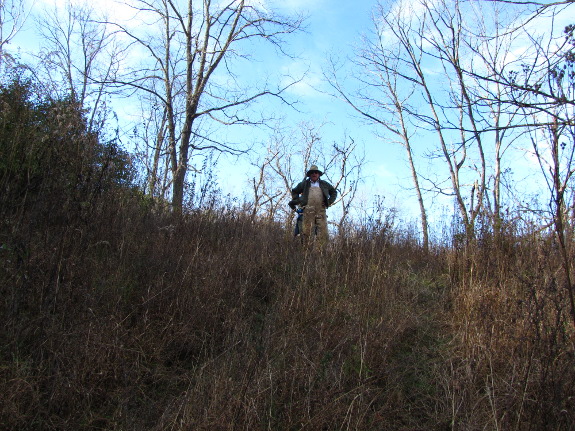
 The day before Thanksgiving,
we met with the non-profit who owns the
farm we want to share with interns. They were tentatively
enthusiastic about the idea, so I'm starting to work out the nuts and
bolts of the project.
The day before Thanksgiving,
we met with the non-profit who owns the
farm we want to share with interns. They were tentatively
enthusiastic about the idea, so I'm starting to work out the nuts and
bolts of the project.
That means making lists
of locals who can share knowledge about beekeeping, working mules, Salatin-style
pasturing,
organic farming, sustainable forestry, and more. We're figuring
out
which fun and useful projects we can fit into year one on the homestead
--- composting toilets, pasturing chickens and meat goats, improving a
spring, beginning a small garden, playing with aquaponics, maybe
building a tiny kitchen. We might even be able to team up
with a group a couple of miles down the road to give interns a window
into an established intentional community and a spot to take a hot
shower and check their email.
Meanwhile, I'm hashing
out a budget to see if we can afford to hire
someone local to cook the interns supper every day to soften the hard
ground they're camping on and to keep the community from thinking of
the
internship farm as a bunch of crazy hippies. (The intentional
community we hope to hook up with is still known locally as "the hippy
farm" over three decades after establishment.) That, in turn,
means dusting off my grant-writing skills so the
interns can afford to come learn.
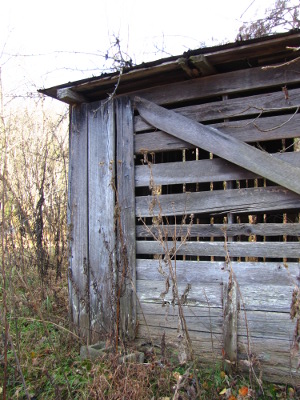 Here's where I want your feedback. I've
decided to donate my book
advance
to the project and have high hopes I can snag at least another $5,000
from foundations to get the internship project off the ground.
But if I put all of my ambitious plans into action --- paying one local
expert per week to lead a quality workshop, feeding interns all three
meals, paying for their tents, buying the supplies and animals to make
the first year's projects a reality, setting aside funds so that one
intern can come for free on a scholarship --- we're still stuck
charging interns $2,000 apiece for a 12 week stay.
Here's where I want your feedback. I've
decided to donate my book
advance
to the project and have high hopes I can snag at least another $5,000
from foundations to get the internship project off the ground.
But if I put all of my ambitious plans into action --- paying one local
expert per week to lead a quality workshop, feeding interns all three
meals, paying for their tents, buying the supplies and animals to make
the first year's projects a reality, setting aside funds so that one
intern can come for free on a scholarship --- we're still stuck
charging interns $2,000 apiece for a 12 week stay.
Is that too much?
Would it sweeten the pot if we teamed up with a
local school and gave college credit? Or would you rather see the
fee cut in half for a simplified internship --- fewer local experts
(only the ones who I wouldn't have to pay), less or no food, bring your
own tent, etc.?

Its been about a year since
we applied a coat
of DAP high temperature caulk to our first
Jotul wood stove chimney
pipe and the only thing left is just a few chips laying on the roof.
I suspect something was wrong
with the tube we got because it took an extreme amount of pressure to
get it to squeeze out and once it was out I had to keep applying
water to keep it moldable.
The 3M
high temperature caulk we
used on the second Jotul was much easier to apply and is
still holding strong.
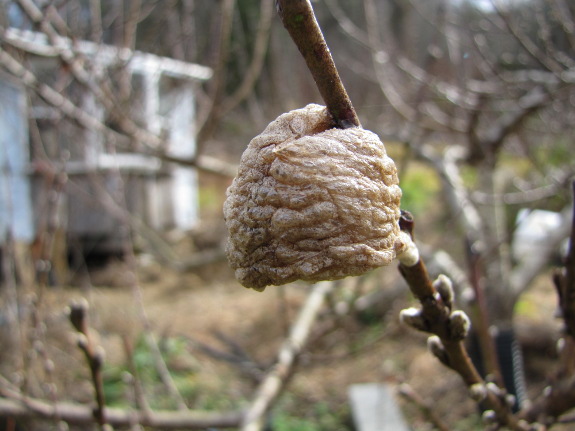
Our kitchen peach tree
is currently hosting 10 praying mantis egg sacs. That means
between one and several thousand predators are inside, itching to eat
up bad bugs in the garden next year.
I'm not quite sure why
the praying mantises love our kitchen peach so much. Maybe the
complexity of the forest
garden island or the
large size of the tree makes them feel safe there? Other peach,
pear, and apple trees just as close to the garden each host one or
fewer egg sacs apiece.
No matter what their
reasoning, I think those praying mantis mamas have good taste.
The kitchen peach is currently my favorite yard tree too!
 Do you have a strategy for
keeping warm if the electricity goes out
during a winter snowstorm? Electric heaters clearly won't work,
and gas furnaces require electricity to operate. Even wood heat
might not be reliable if you depend on an electric fan to blow warm air
where you want it.
Do you have a strategy for
keeping warm if the electricity goes out
during a winter snowstorm? Electric heaters clearly won't work,
and gas furnaces require electricity to operate. Even wood heat
might not be reliable if you depend on an electric fan to blow warm air
where you want it.
An energy efficient wood
stove in a central location within your home
is the best choice for warmth (and cooking) during power outages, but
the time and money required to install a wood stove is beyond the
Weekend Homesteader level. This week's lunchtime series helps you
find
other options to stay warm if snow knocks down the power lines.
I
hope you enjoy this excerpt from Weekend
Homesteader: December.
The 99 cent ebook walks you through the basics of planting your first
fruit trees,
staying warm without electricity, understanding the uses of essential
tools, and turning trash into treasures. If you're interested in
other aspects of basic emergency preparedness, Weekend
Homesteader: November gives tips on storing drinking water and the
upcoming Weekend Homesteader: January will cover backup lighting
options.
| This post is part of our Emergency Warmth lunchtime series.
Read all of the entries: |
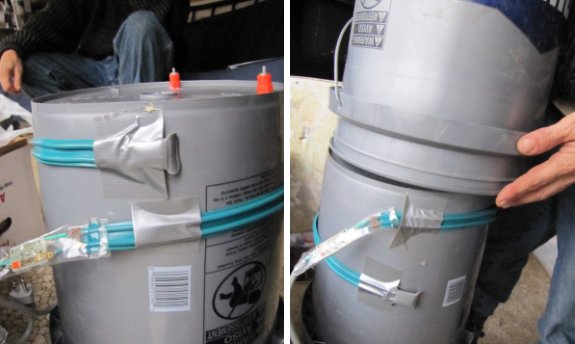
The heart of our new
heated chicken waterer is
one of those electric pipe heaters.
A few pieces of tape helps it
to stay flat against the bucket while you carefully sandwich a modified
bucket over top.
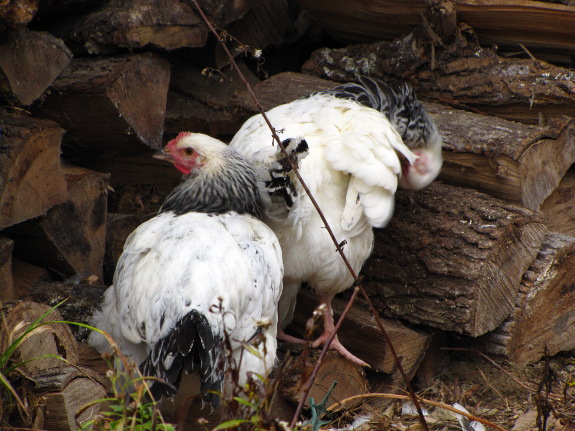
The trickiest part of
homesteading is walking the tightrope between too little, enough, and
too much. When you get all of your food at the grocery store,
it's easy to just buy what you need, but how big should your summer
garden be if it's going to provide all of your winter food too?
I've just about figured out food, but am still learning how much
firewood we need for the winter.
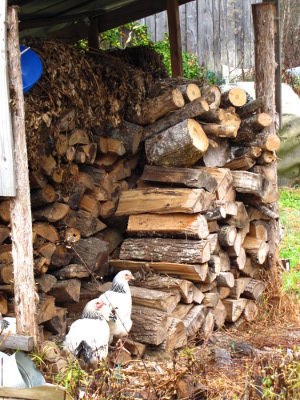 In a perfect world, you cut
your firewood a year in advance so that the wood dries and burns at
peak efficiency. We haven't quite achieved that goal yet, but we
have learned that there's little use in cutting firewood in our climate
once winter's damp sets in. So what we have in the wood shed now
needs to last until spring.
In a perfect world, you cut
your firewood a year in advance so that the wood dries and burns at
peak efficiency. We haven't quite achieved that goal yet, but we
have learned that there's little use in cutting firewood in our climate
once winter's damp sets in. So what we have in the wood shed now
needs to last until spring.
I've been burning wood
with great abandon over the last month, lighting a fire whenever I feel
like it even if we don't really need it. It's been a mostly warm
fall, but I've still had fires on about half the days this month,
usually just a fire in the morning or evening, not one that lasts all
day.
As you can see, we've
used up about two thirds of our first tier of wood, which wasn't
stacked quite as high as the other two and a half tiers. At this
rate, I suspect we might run low on wood late in the winter and have to
drive some wetter wood in from
the parking area. Hopefully next year I'll have a better idea
of how much firewood we need and can have it all under cover by the end
of the summer.
(As a side note, yes,
our young Light Sussex do think the wood shed is a much more fun spot
to hang out than the coop on a rainy November day.)
 One
strategy for keeping your family warm is to choose a small room and
heat it using a backup option that doesn't require electricity.
This is my least favorite method because it's awfully easy to spend a
lot of money on a backup heater that seldom gets used, and thus doesn't
work when you need it. However, many Americans can't wrap their
minds around heating themselves instead of the room (which I'll discuss
in the later posts), so I'm including the room-heating option.
One
strategy for keeping your family warm is to choose a small room and
heat it using a backup option that doesn't require electricity.
This is my least favorite method because it's awfully easy to spend a
lot of money on a backup heater that seldom gets used, and thus doesn't
work when you need it. However, many Americans can't wrap their
minds around heating themselves instead of the room (which I'll discuss
in the later posts), so I'm including the room-heating option.
If you choose a one-room
backup plan, your
first step is to decide which room would be easiest to keep warm
without electricity. Your whole family (and any cold-sensitive
pets, like guinea pigs and parrots) should fit inside without getting
on each others nerves, but the room should also be as small as possible
so that it's easier to heat. South-facing windows (or
north-facing windows if you live in the southern hemisphere) will let
in solar radiation that will warm the area considerably on a sunny
day. The room should have space for everyone to sleep, so a
master bedroom, den with a foldout couch, or area with lots of bare
floor is a good choice.
Once you choose your
room, think about blocking off cold air that might
want to flow in. That means having some heavy curtains (or
blankets with a way of tacking them up) to keep heat from flowing out
windows at night. The room should either close off from the rest
of the house with a solid door (and a rolled up towel to fill the space
underneath), or you should plan another large blanket or curtain to
block off the entranceway.
Your room may already
have a fireplace or wood stove, in which case you
will just need to keep it stocked with plenty of dry wood, kindling,
paper, and lighters for getting the fire going. If not, you can
install a standalone propane heater that doesn't need to be vented to
the outdoors (around $200 for the low end model.) A cheaper
alternative is a free-standing kerosene heater (around $120), but be
aware that kerosene heaters create carbon monoxide, so you'll need to
increase air flow through your room for safety. Kerosene heaters
also tend to be a bit sooty and stinky, but that problem is lessened if
you light the heaters and turn them off outdoors, carrying them inside
only
when they're already in use.
I
hope you enjoy this excerpt from Weekend
Homesteader: December.
The 99 cent ebook walks you through the basics of planting your first
fruit trees,
staying warm without electricity, understanding the uses of essential
tools, and turning trash into treasures. If you're interested in
other aspects of basic emergency preparedness, Weekend
Homesteader: November gives tips on storing drinking water and the
upcoming Weekend Homesteader: January will cover backup lighting
options.
| This post is part of our Emergency Warmth lunchtime series.
Read all of the entries: |
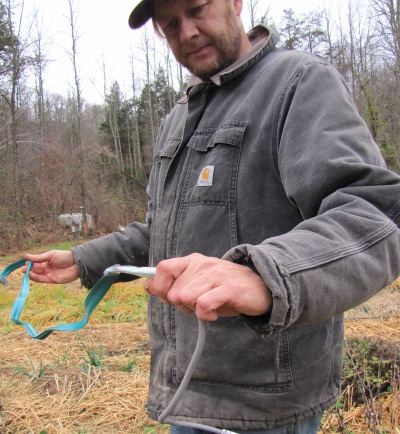
I decided to go with the smallest section of electric pipe heater for
the DIY
heated chicken waterer.
The longer lengths were just
a few dollars more, but I thought it would be best to start out at the
bottom in an effort to use the least amount of energy.
People with really cold
winters may need a longer section.
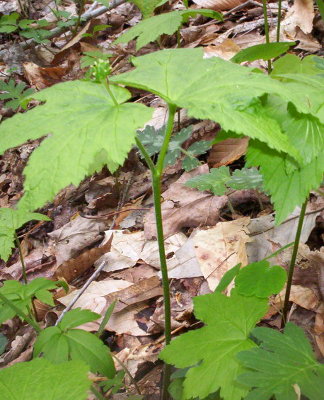 Goldenseal
and ginseng both grow wild in our woods and are harvested for their
medicinal roots. Ginseng, especially, is much sought after,
bringing hundreds of dollars per pound when dried. Years ago, I
planted some ginseng in my woods, hoping the
$100 worth of seeds would grow into $10,000 worth of plants over the
next decade.
Sadly, my neighbors came and stole the plants before they'd
matured. I don't really blame my neighbors since they probably
figure I was too much of a city slicker to know what ginseng is, and
it's hard to turn down hundred dollar bills you walk past on the forest
floor. Still, the failed experiment ensured I wasn't going to
plant any more ginseng in the back forty.
Goldenseal
and ginseng both grow wild in our woods and are harvested for their
medicinal roots. Ginseng, especially, is much sought after,
bringing hundreds of dollars per pound when dried. Years ago, I
planted some ginseng in my woods, hoping the
$100 worth of seeds would grow into $10,000 worth of plants over the
next decade.
Sadly, my neighbors came and stole the plants before they'd
matured. I don't really blame my neighbors since they probably
figure I was too much of a city slicker to know what ginseng is, and
it's hard to turn down hundred dollar bills you walk past on the forest
floor. Still, the failed experiment ensured I wasn't going to
plant any more ginseng in the back forty.
Goldenseal roots aren't
quite as highly priced, which is probably why my patch of goldenseal
(not planted by me) is still around. I'm most interested in the
medicinal  qualities of goldenseal since
the roots contain a strong antibiotic that complements the echinacea
growing in my garden. My doctor sister once explained to me that
echinacea is best above the belt and goldenseal below, and a few
minutes of research confirms that goldenseal's effectiveness is due to
increasing the secretion of mucous membranes (thus helping with
problems like urinary tract infections.) All of that said, the
few times I've wanted to chew on some goldenseal roots, I felt too sick
to climb up to the top of the hill to harvest them.
qualities of goldenseal since
the roots contain a strong antibiotic that complements the echinacea
growing in my garden. My doctor sister once explained to me that
echinacea is best above the belt and goldenseal below, and a few
minutes of research confirms that goldenseal's effectiveness is due to
increasing the secretion of mucous membranes (thus helping with
problems like urinary tract infections.) All of that said, the
few times I've wanted to chew on some goldenseal roots, I felt too sick
to climb up to the top of the hill to harvest them.
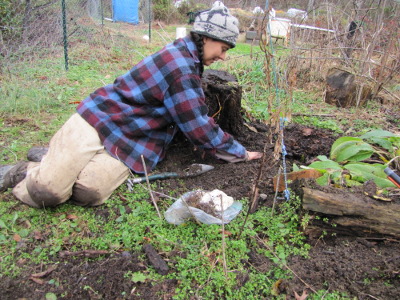 Which is all a long way of
saying that when my mother gave me some ginseng seeds and goldenseal
roots, I thought, "Why not try them out in the forest garden?"
The forest
garden island around my kitchen peach has the high organic matter
and mycelium-rich soil that woodland herbs crave and has been a good
home for Burdick's
Wild Leek. I
figured ginseng outside my kitchen window definitely won't get stolen,
and goldenseal in that location will be close enough to dig no matter
how bad I feel. I'll let you know how the herbs do in their
semi-cultivated location next year.
Which is all a long way of
saying that when my mother gave me some ginseng seeds and goldenseal
roots, I thought, "Why not try them out in the forest garden?"
The forest
garden island around my kitchen peach has the high organic matter
and mycelium-rich soil that woodland herbs crave and has been a good
home for Burdick's
Wild Leek. I
figured ginseng outside my kitchen window definitely won't get stolen,
and goldenseal in that location will be close enough to dig no matter
how bad I feel. I'll let you know how the herbs do in their
semi-cultivated location next year.
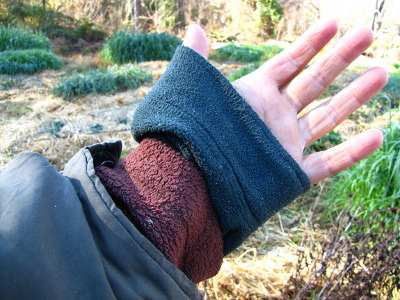 As I mentioned previously, I don't really
recommend planning to heat a whole
room with a backup heating arrangement. If you don't use your
backup equipment in your everyday life, it will take a long time for
that equipment to pay for itself and the heaters often won't work when
you
need them to. Instead, I recommend changing your habits so that
you heat your body instead of the room, both during outages and to
whatever extent you're comfortable with during your daily life.
The great thing about learning to stay warm without electricity or
fossil fuels is that you'll be prepared no matter how long the power
outage lasts, and will also enjoy a lower heating bill during normal
winters.
As I mentioned previously, I don't really
recommend planning to heat a whole
room with a backup heating arrangement. If you don't use your
backup equipment in your everyday life, it will take a long time for
that equipment to pay for itself and the heaters often won't work when
you
need them to. Instead, I recommend changing your habits so that
you heat your body instead of the room, both during outages and to
whatever extent you're comfortable with during your daily life.
The great thing about learning to stay warm without electricity or
fossil fuels is that you'll be prepared no matter how long the power
outage lasts, and will also enjoy a lower heating bill during normal
winters.
So how do you warm your
body instead of the room? The first step
is to invest in some winter clothes chosen for warmth and utility
instead of style. A good winter coat, a hat that covers your
ears, warm socks, sweaters, and long johns go a long way. On cold
winter days, I wear fleece long johns under normal pants, two pairs of
socks (if they fit in my boots), and on top am decked out in a t-shirt,
a thin fleece shirt, a thicker fleece shirt, and then a winter
coat. Throw a wool hat on my head and some good gloves on my
hands and I'm quite comfortable even sitting still at 40 or 50 degrees
Fahrenheit. If you head down to the local goodwill, you can
probably find most of these pieces of clothing for just a few bucks
apiece.
Three environmental
conditions can make the outfit above useless,
though: wind, wet, and constriction. I'll start with the last,
which is the least intuitive. When you're building a house and
adding insulation to the walls, you'll soon learn that you can't cram
two layers of insulation into the space meant for one layer and get
twice the protection from cold. Instead, that double layer of
insulation will actually work less
well than a single, properly installed layer would have.
Insulation --- and that includes your winter clothes --- works by
creating pockets that trap air in place. So if you put on two
pairs of socks and cram your feet into boots meant for one pair, your
feet will be colder than if you'd only put on one pair because the
constricted clothing will push out all the insulating air
pockets. Ditto if you try to wear long johns under close-fitting
jeans. That's why, when planning your winter layers, you'll need
to choose some clothes a bit bigger than normal to go on the outside.
You're probably more
familiar with the way wind and rain can make you
cold despite lots of insulative clothing. If you're going to be
inside during cold weather, you probably won't have to worry much
about these problems, but you should plan ahead in case you need to go
out. A waterproof wind-breaker on top of your other clothes goes
a long way toward keeping both water and chilly winds from
penetrating. This is especially important if you use synthetic
fleece clothes, which wind cuts right through.
You also need to think
about water that starts on the inside of your
clothes --- sweat. If you're outside chopping wood and notice
that you're starting to heat up, take off layers until you're
comfortable again. Otherwise, your sweat will quickly chill your
body
once you stop moving.
 Finally, keep some plastic grocery bags on hand to deal
with wet
feet. Boots eventually spring a leak during slogs through the
snow, and wet feet make even the most cheerful person cranky. If
you can put on dry socks and slip each socked feet into a grocery bag
apiece before putting on your boots, the plastic layer will keep water
in your boots from seeping into your socks and coming in contact with
your skin. You may look like a homeless person, but you'll be a warm homeless person.
Finally, keep some plastic grocery bags on hand to deal
with wet
feet. Boots eventually spring a leak during slogs through the
snow, and wet feet make even the most cheerful person cranky. If
you can put on dry socks and slip each socked feet into a grocery bag
apiece before putting on your boots, the plastic layer will keep water
in your boots from seeping into your socks and coming in contact with
your skin. You may look like a homeless person, but you'll be a warm homeless person.
I
hope you enjoy this excerpt from Weekend
Homesteader: December.
The 99 cent ebook walks you through the basics of planting your first
fruit trees,
staying warm without electricity, understanding the uses of essential
tools, and turning trash into treasures. If you're interested in
other aspects of basic emergency preparedness, Weekend
Homesteader: November gives tips on storing drinking water and the
upcoming Weekend Homesteader: January will cover backup lighting
options.
| This post is part of our Emergency Warmth lunchtime series.
Read all of the entries: |
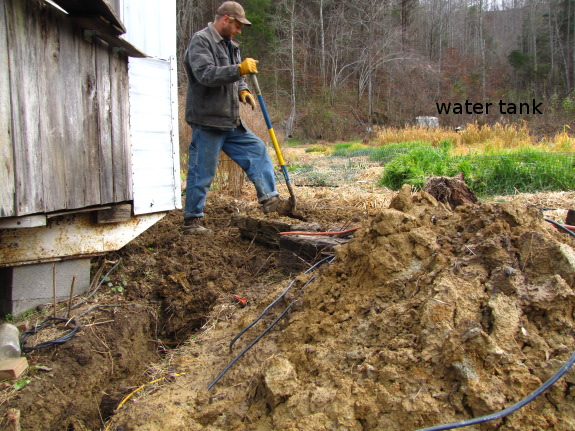
Got the waterline ditch
filled in today.
Tonight should be a good test
with temperatures predicted to be in the mid 20's.

Or explore more posts by date or by subject.
About us: Anna Hess and Mark Hamilton spent over a decade living self-sufficiently in the mountains of Virginia before moving north to start over from scratch in the foothills of Ohio. They've experimented with permaculture, no-till gardening, trailersteading, home-based microbusinesses and much more, writing about their adventures in both blogs and books.