
archives for 10/2011
 The
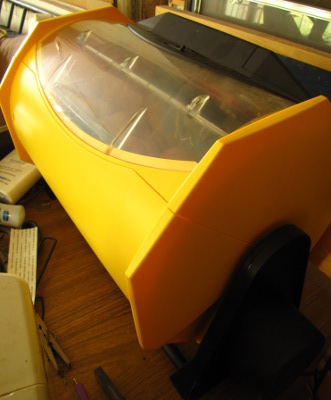
last of the bedding is clean and dry.
The
last of the bedding is clean and dry.
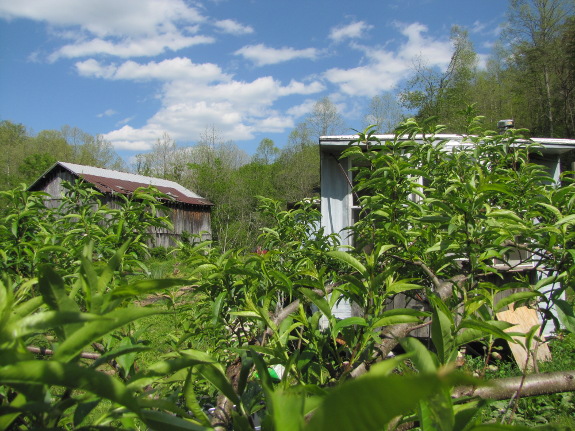
Our lunchtime
entertainment is migrating warblers stopping for a snack in the peach
tree.
Lightning bugs in the
air have been replaced by glow worms on the ground.
We ate the last
watermelons and sweet corn this week and are enjoying the last bed of
bush beans.
My planting calendar has
only one item left.
Temperatures are finally
cooling down to the normal range and there's a chance of frost tonight.
Farewell, summer!
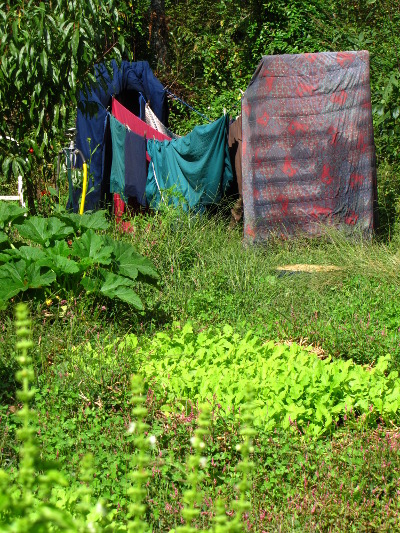
The first frost scramble was
in full swing yesterday as we were busy bringing in some of the last
few bits of harvest that will need to finish growing up inside.
Putting a quick
hoop over a few of the late tomato plants is a new experiment for
us. Stay tuned to see if it works in squeezing out yet another basket
of yumminess.
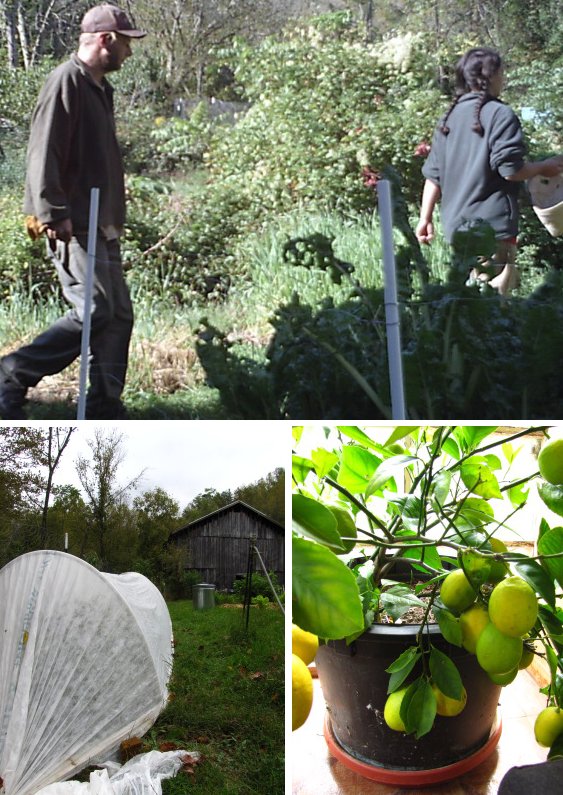
It was a good summer for our
dwarf Meyer lemon tree. Bringing her in is starting to feel like a
substantial end of summer ritual for us.
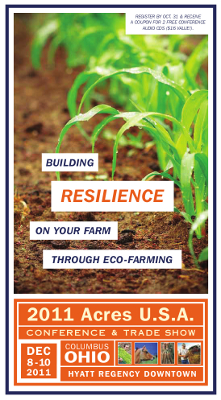 Mark and I thoroughly enjoyed
attending the Organic
Grower's School in Asheville this spring, but we hadn't
planned to seek out any similar experiences. When a flyer for the
Acres USA Conference showed up in our mailbox, I
was all set to shred it for mulch, but Mark noticed that the conference
was being held just an hour away from his Mom's house (and she is
overdue for a visit.)
Mark and I thoroughly enjoyed
attending the Organic
Grower's School in Asheville this spring, but we hadn't
planned to seek out any similar experiences. When a flyer for the
Acres USA Conference showed up in our mailbox, I
was all set to shred it for mulch, but Mark noticed that the conference
was being held just an hour away from his Mom's house (and she is
overdue for a visit.)
I was still dubious
until I noticed that Harvey Ussery would be presenting. Even
though Harvey Ussery isn't very well known, I consider him the best
homesteading author writing today. I've just about given up on
magazines, but every now and then I'll open Mother Earth News or
Backyard Poultry Magazine and flip through the table of contents.
My eye zips past repeats of the same old information and then
invariably lands on one article worth reading. Every single time
this has happened for the last two years, the author of the article has
been Harvey Ussery.
 "That's nice," said Mark
politely when I enthused about the possibility of hearing Harvey Ussery
speak. "Wait, what does that say?" I'd turned the page to
the preconferences, and Mark was suddenly riveted.
"Radionics?! That's the first time I've ever seen a course about
radionics at a mainstream conference!" Suddenly interested, Mark
reminded me that the accountant we visited this spring chastised us for
not writing as much as we should off on our taxes --- this conference
would definitely count as a tax deduction.
"That's nice," said Mark
politely when I enthused about the possibility of hearing Harvey Ussery
speak. "Wait, what does that say?" I'd turned the page to
the preconferences, and Mark was suddenly riveted.
"Radionics?! That's the first time I've ever seen a course about
radionics at a mainstream conference!" Suddenly interested, Mark
reminded me that the accountant we visited this spring chastised us for
not writing as much as we should off on our taxes --- this conference
would definitely count as a tax deduction.
So who else will be
attending? For those of you with more mainstream tastes, the
conference has Joel Salatin, Francis Thicke, and Gray Graham as keynote
speakers and a huge array of lecturers and workshop leaders.
They'll be showing the films Farmageddon, American Meat, and Queen of
the Sun, and attendees will get a chance to pick the brains of
"world-class teachers/consultants/farmers" at consulting halls.
Maybe we'll see you there?
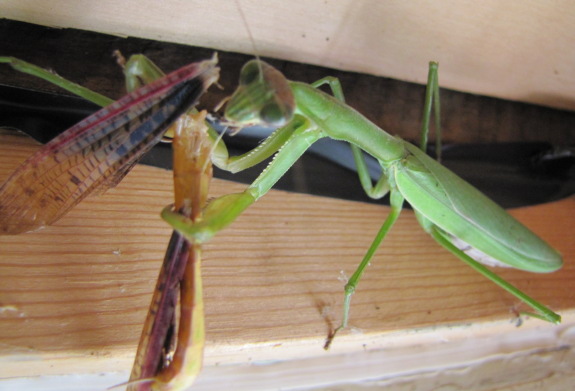
There were two hitchhikers on
our Meyer
lemon tree we brought in on Friday.
They seemed cute together on
Saturday and made me feel all warm inside.
Now there's just one. I'll
let her out tomorrow after she's had a chance to digest the weekend.
 Researchers in Beaver, West
Virginia, have been exploring forest
pastures (aka
silvopastures) for over a decade. Since I've been playing around
with reinventing the wheel for the last couple of years, I was
intrigued to see solid data from a location just two and a half hours
from our farm.
Researchers in Beaver, West
Virginia, have been exploring forest
pastures (aka
silvopastures) for over a decade. Since I've been playing around
with reinventing the wheel for the last couple of years, I was
intrigued to see solid data from a location just two and a half hours
from our farm.
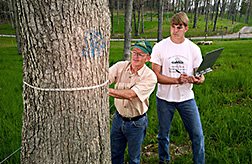
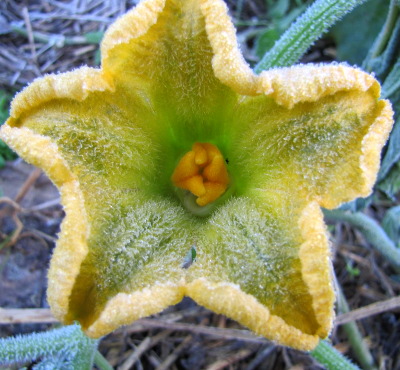
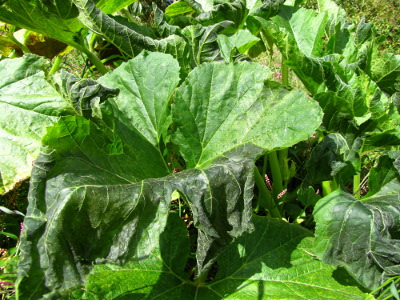
Traditionally,
large-scale experimenters planted trees in existing pastures to create
silvopastures, but Charles Feldhake, Jim Neel, and the other
researchers at the Appalachian
Farming Systems Research Center tried a different
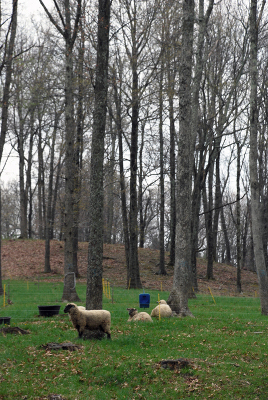
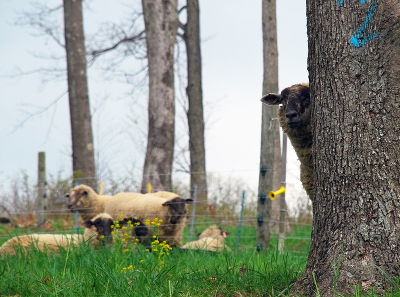
tack. They thinned out 70 year old forest dominated by white oak
until the combined diameter at breast height of the remaining trees was
about 50 to 65 feet per acre. For those of you who don't spend
your time wrapping tape measurers around tree trunks, that would
require removing up to 75% of the trees --- you can get an idea of the
final tree cover from the photos included in this post.
 The next step was pasture
establishment. After soil testing, the scientists spread the
appropriate amount of lime (to raise the pH) and chemical fertilizer on
the soil surface, along with seeds for orchardgrass, perennial
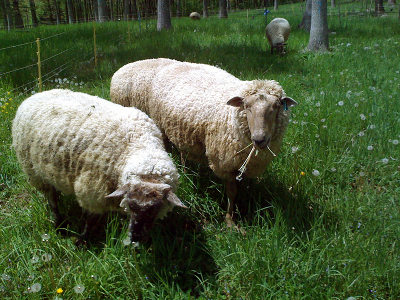
ryegrass, and white clover. Then they turned in the sheep.
The next step was pasture
establishment. After soil testing, the scientists spread the
appropriate amount of lime (to raise the pH) and chemical fertilizer on
the soil surface, along with seeds for orchardgrass, perennial
ryegrass, and white clover. Then they turned in the sheep.
Although I wrote last
week that sheep are maintainer
livestock, Feldhake
and company used their woolly grazers as colonizers, noting that the sheep not
only ate up the undergrowth but also mashed the seeds and soil
amendments into the top layer of soil. Once pasture seeds started
to sprout, the sheep were removed to let the grass and clover establish
themselves, but they were later turned back in to rotationally graze
the new pastures.
Here are some
comparisons between the silvopastures and neighboring non-treed
pastures:
 Silvopastures
produce half as much forage. So you'll need to devote
twice the area to graze the same number of sheep if you add
trees. That disadvantage is offset by the possibility of using
the trees either as timber or to produce fruit or nuts for humans
and/or livestock. (For example, if you were grazing pigs under
white oaks, the acorns might make up for the slower growth of the
pasture grasses.) Plus, forested land is more environmentally
friendly in our area than open pastures.
Silvopastures
produce half as much forage. So you'll need to devote
twice the area to graze the same number of sheep if you add
trees. That disadvantage is offset by the possibility of using
the trees either as timber or to produce fruit or nuts for humans
and/or livestock. (For example, if you were grazing pigs under
white oaks, the acorns might make up for the slower growth of the
pasture grasses.) Plus, forested land is more environmentally
friendly in our area than open pastures.- Silvopastures have a different seasonal cycle. Under the oak trees in the Beaver study area, spring regrowth was three weeks slower than in open pasture. The scientists hypothesized that rot-resistant oak leaves shaded and stunted the pasture plants in the fall and that tree species with fewer tannins in their leaves wouldn't show the same spring pasture retardation. Feldhake noted that the presence of a tree canopy seems to have a temperature mitigating effect, so fall frosts come later under the trees --- perhaps a forest pasture can extend the grazing season later into the winter?
- The pasture plants growing in the shade of trees are nutritionally different than the same plants living in the open. On the plus side, shaded plants tend to have more protein, but that goes hand in hand with excess nitrates that can potentially harm or kill ruminants.
 So what are the take-home
messages for those of us interested in creating forest pasture of our
own?
So what are the take-home
messages for those of us interested in creating forest pasture of our
own?
Several other studies
have suggested that a savannah-like environment, with scattered trees
over a grassy sward, is the most biologically productive combination of
trees and undergrowth. In other words --- space those trees out
rather than letting them shade the whole forest floor!
Since you're losing
about half of your sunlight to the tree canopy, it becomes very
important for the trees to have a purpose in a silvopasture
system. For chickens, that means planting mulberries, persimmons,
and other fruit trees rather than letting the flock graze under
whatever happens to be present. For pigs, you might focus on
chestnuts, oaks, and honey-locusts too. Time to practice what I
preach and replace those box-elders with fruit trees!
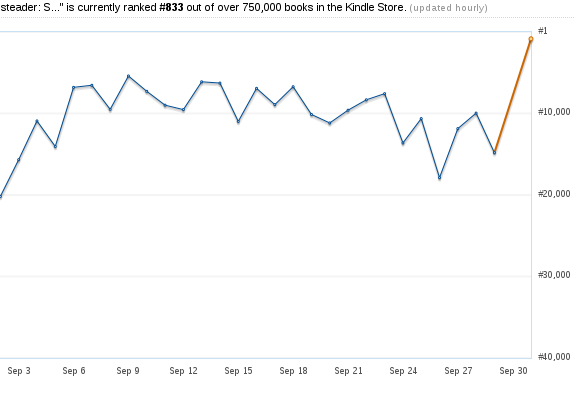
Saturday morning, I was
stunned to see that Weekend
Homesteader: September
was ranked as #833 in Amazon's kindle store. I never thought I'd
break #1,000 and I know I owe the ebook's success to our loyal readers.
I wish I could give a package of my
favorite seeds
to each of you, but unfortunately there's only enough for one.
Congratulations, April,
for being our seed winner! Drop an email to
anna@kitenet.net with your
mailing address and I'll put your seeds in
the mail tomorrow. And thank you to everyone else for helping my
ebooks see the light of day!

This is the first year
that we've wholeheartedly experimented with chickens, and I learned a
huge amount...as well as figuring out how much more we have to
learn. We began the year with four old hens and a rooster, ate
the rooster when he started attacking me, progressed through four sets
of chicks of varying breeds, and will go into winter with an entirely
new flock of ten hens and one or two roosters.
In the process, I've
started to wrap my mind about the best ways to incubate, brood, and
pasture chickens. I've consumed chicken-related books and
websites, kept lots of notes on how the chickens acted on the ground,
and generally pondered chickens at great length. Be sure to check
back at lunchtime for the next two weeks to read about my experiments!
This post is part of our 2011 Chicken Experiments lunchtime series.
Read all of the entries:
|
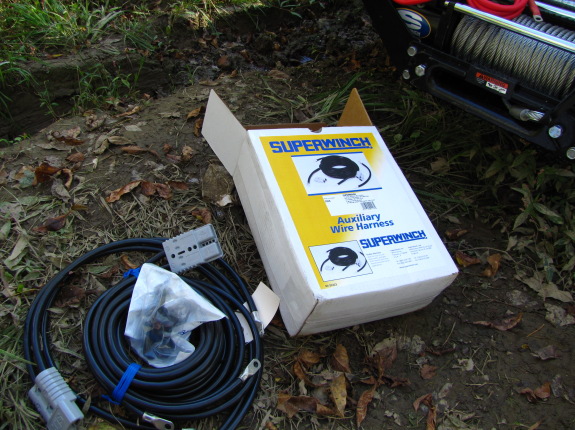
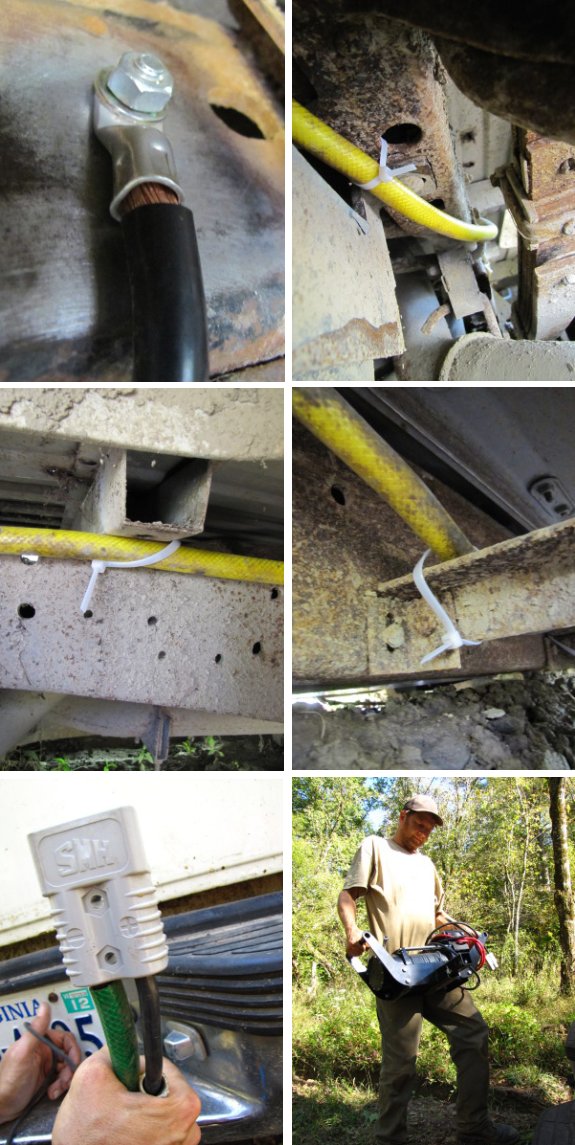
We've decided against making
a portable
Super Winch extension cord and instead went with an auxiliary
wiring harness that was custom made for portable winch applications
like this.
The positive strand is 25
feet long so it will reach the battery from the bumper. The negative
side is only 4 feet and will need to attach to the frame near the rear.
Both strands are 2 gauge with a heavy duty quck connector crimped at
the end.
I started the job of routing
the positive wire underneath the truck when I wimped out due to the
ground being cold and wet. Maybe it'll be warmer tomorrow?
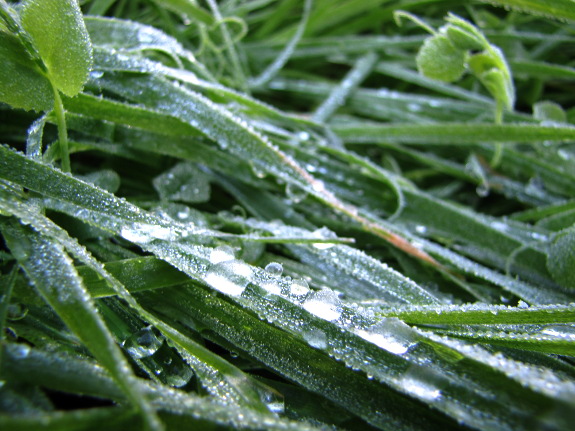
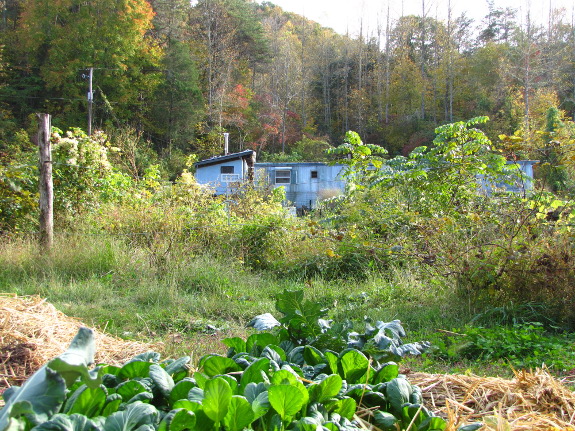
 The first frost of fall 2011
was gentle (albeit early --- October 3.) It barely nipped the
basil and summer squash and I suspect even our uncovered tomatoes might
keep right on ripening.
The first frost of fall 2011
was gentle (albeit early --- October 3.) It barely nipped the
basil and summer squash and I suspect even our uncovered tomatoes might
keep right on ripening.
The sudden cold was a
shock to our systems, though. I cleaned out the wood stove nook
and lit our first little fire. I just burnt five or six sticks of
leftover kindling, but the wood was enough to take the chill off until
the sun came in our south-facing window, and to remind me how much I
love our efficient
wood stove!
 The frost is our cue to
get ready for our first little "staycation" of the year, slated to
begin October 11. We realized after last winter's trip that the
vacation had been too long and that we started missing home pretty
fast, so we're opting to take two half weeks off at home this winter
instead. I've always loved the idea of a staycation, but didn't
trust myself not to work right through them. Let's see if Mark
can keep me honest so that I get the same deep relaxation during a
staycation as during a cruise.
The frost is our cue to
get ready for our first little "staycation" of the year, slated to
begin October 11. We realized after last winter's trip that the
vacation had been too long and that we started missing home pretty
fast, so we're opting to take two half weeks off at home this winter
instead. I've always loved the idea of a staycation, but didn't
trust myself not to work right through them. Let's see if Mark
can keep me honest so that I get the same deep relaxation during a
staycation as during a cruise.

 If you're starting from
scratch with pasturing chickens the way we were this year, you'll
probably be asking a slew of questions. Your first decision will
be between chicken
tractors and day range --- we chose the latter so I'll focus on
rotational pastures in this post. Here are some of the questions
I wish I'd known the answers to twelve months ago.
If you're starting from
scratch with pasturing chickens the way we were this year, you'll
probably be asking a slew of questions. Your first decision will
be between chicken
tractors and day range --- we chose the latter so I'll focus on
rotational pastures in this post. Here are some of the questions
I wish I'd known the answers to twelve months ago.
What
kind of fencing should I use?
Your second decision is
between permanent and temporary pastures. The
former are harder to build in the short run and are more expensive per
square foot, but are easier to use in the long run. If you're
raising 50 or fewer chickens in your backyard, I'd recommend permanent
fences.
For happy chickens who
don't live in a predator hotspot, a roll of
five foot chicken wire strung between t-posts about 15 feet apart with
a few old boards or logs tacking down the  bottom will be
sufficient. Here's
my theory on what you should do if your chickens try to escape. A well-trained
dog is our solution
to predation.
bottom will be
sufficient. Here's
my theory on what you should do if your chickens try to escape. A well-trained
dog is our solution
to predation.
If you'd prefer
temporary fencing, the traditional choice is electrified netting.
I wrote about why
electrified netting is often a poor choice for the backyard and what I
use instead here.
What
does a permanent, rotational grazing system look like for chickens?
A chicken coop sits at
the center, surrounded by several small pastures (often called
paddocks.) The chickens spend the night in the coop (and go
inside whenever they want to lay an egg), then exit through a small pophole into the pasture of your
choice. When you want to move the chickens to a new pasture, it's
as simple as closing the old  pophole while the chickens
are all sound asleep and then opening a pophole into the next pasture.
pophole while the chickens
are all sound asleep and then opening a pophole into the next pasture.
One of my favorite parts
of this system is how easy it is to move chickens to a new patch of
ground. I've seen several temporary fencing or chicken tractoring
systems where people get lazy and let the chickens sit on the same
patch of ground far too long because it's just a pain in the butt to
move them. You won't have that problem here.
How
much space do I need to devote to chicken pastures?
Mainstream pastured
poultry producers will tell you that broilers need 10 square feet of
pasture per bird per week (or a total of 40 square feet for the four
weeks the birds typically live on pasture.) You should consider
that the bare minimum required for breeds that don't forage much, with
the chickens housed in tractors that are moved daily so that the flock
can't scratch the ground bare.
In my permanent,
rotational pastures with keen foragers, I see pasture degradation when
I have fewer than 270 square feet per bird during the summer. I
suspect I'd need at least twice that much space to keep the ground from
turning into mud in the winter.
 Keep in mind that the
amount of space your chickens need will depend on a variety of factors, including climate, season,
chicken breed and age, and pasture quality. If in doubt, give
your chickens as much space as you can --- the more they can roam, the
more they will supplement storebought feed with insects caught on the
wing. You can tell that your flock doesn't have enough space when
bare spots turn up amid the grass, you can see poop on the ground, and
the pasture starts to smell and fill with flies.
Keep in mind that the
amount of space your chickens need will depend on a variety of factors, including climate, season,
chicken breed and age, and pasture quality. If in doubt, give
your chickens as much space as you can --- the more they can roam, the
more they will supplement storebought feed with insects caught on the
wing. You can tell that your flock doesn't have enough space when
bare spots turn up amid the grass, you can see poop on the ground, and
the pasture starts to smell and fill with flies.
How
many pastures do I need?
What you're really
asking here is --- how long should I leave my chickens in one paddock
and how long should I let that paddock sit fallow before I move
chickens back into it? The answer will depend on whether you're
just raising broilers when pasture plants are growing fast or are
keeping laying hens year round. Your type and quality of pasture
plants will also affect the answer.
Once again, it's helpful to
look at the bare minimum, which is four pastures for summer use or six
pastures for year round use. If you size each pasture so that
your flock eats the tender growth in about a week, you'll be able to
rotate the chickens through three other pastures  before turning them back into
the first one in a four pasture system. Three weeks off is
sufficient for plants to rebound as long as they
weren't overgrazed, the pasture got enough rain, and it's not too cold
or hot for growth. Click
here to read more about pasture rotation.
before turning them back into
the first one in a four pasture system. Three weeks off is
sufficient for plants to rebound as long as they
weren't overgrazed, the pasture got enough rain, and it's not too cold
or hot for growth. Click
here to read more about pasture rotation.
What's
the best shape for a pasture?
The perfect chicken
pasture is square, but you'll often have to work around obstructions
and use a wiggly or rectangular shape. If you can help it, don't
make your pasture more than twice as long as it is wide or chickens
will tend to hang out near the coop and not explore the far
reaches. A sharp bend in the pasture will have the same
effect. You can counteract this behavior to some extend by
locating a compost pile or chicken waterer at the far end of the
pasture.
 Does the
pasture location matter?
Does the
pasture location matter?
Yes. In the
winter, chickens will do best if their pasture is in the sunniest
possible location, beyond the shade of hills, buildings, or evergreen
trees. In the summer, the reverse is true --- chickens like some
sunny spots but will enjoy hanging out in shaded corners and under
bushes. You can either build separate pastures for winter and
summer or can create the best of both worlds by using deciduous trees
to shade certain parts of your summer pasture while letting in the
winter sun.
What's
the best type of pasture?
Chickens
enjoy succulent, young growth, which means that tall
plants like ragweed are the worst choice for your pasture. The
best types of groundcover for year-round growth tend to be perennial
grasses and legumes like bluegrass, clover, etc. You may want
to plant paddocks of annual
grains and legumes to extend the pasture season into the cold
weather. Trees and shrubs can be useful additions if they produce
fruits that chickens enjoy, but there's a tradeoff since the perennials
will also shade out the undergrowth even when the trees aren't bearing.
Is
one time of the year best for raising broilers?
 Once you get a feel for the
peak production times for your individual pasture, you'll know when it
can handle an influx of extra birds. In regions like ours where
pastures are dominated by cool season grasses, those peak periods occur
in mid spring to mid summer and again in early fall. Putting one
set of broilers on pasture in May and pasturing another in September
would use our pastures to best effect.
Once you get a feel for the
peak production times for your individual pasture, you'll know when it
can handle an influx of extra birds. In regions like ours where
pastures are dominated by cool season grasses, those peak periods occur
in mid spring to mid summer and again in early fall. Putting one
set of broilers on pasture in May and pasturing another in September
would use our pastures to best effect.
Should I
include other animals in my pastures?
Joel
Salatin's model uses
grazing animals like cows, sheep, or goats to keep the tall weeds down
 and the chicken-friendly plants growing as fast as possible. Miniature
livestock are an
option for the backyard, but an alternative is to simply mow your
pasture a few times a year.
and the chicken-friendly plants growing as fast as possible. Miniature
livestock are an
option for the backyard, but an alternative is to simply mow your
pasture a few times a year.
Can I
use chicken pastures to keep deer out of the garden?
Chicken moats are a permaculture concept
that utilize linear chicken pastures on the perimeter of a garden to
deter deer. Even though the deer can jump over a five foot fence,
they don't like to be confined and will hesitate to jump two in
succession. Our deer moats have worked very well...too bad they
don't completely encircle our tender garden plants.
I'm sure I'll have
another long list of mistakes to shun next year, but that's the fun of
pasturing!
 This post is part of our 2011 Chicken Experiments lunchtime series.
Read all of the entries: This post is part of our 2011 Chicken Experiments lunchtime series.
Read all of the entries:
|
Thanks for all the helpful
wiring comments. We especially liked the old water hose idea. That
extra layer of protection feels solid and secure.
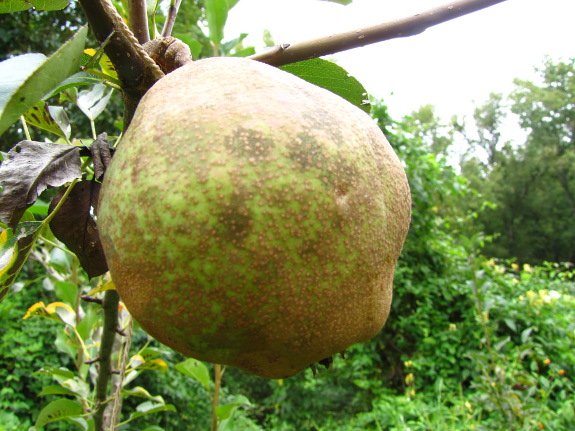
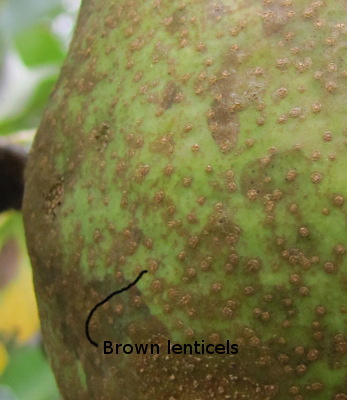
I've
been waiting with baited breath for our fruit trees to mature enough to
bear, and it seems like every one has had a surprise in store for
me. This year it was the Kieffer Pear that set two fruits a year
earlier than expected.
I watched those
beautiful green pears
swell all summer, and at last saw that their lenticels had turned
brown, meaning that the fruit was fully developed. As with all
storage pears, you have to pick the fruits and then let them ripen for
a few more weeks inside, so again I waited. Finally, the day of
the taste test came. I sliced the pear into quarters and Mark and
I each took a nibble...and just about spit it out. Unfortunately,
the pear I'd been waiting on for the last four years has gritty fruit
with very little taste --- a pear that's best canned, reports the
internet.
 Looking up the pear's sister
tree --- Orient --- turned up the fact that
these two varieties are often planted for their extreme disease
resistance,
but that their fruit is extremely unexceptional. I bought the duo
because they were cheap and I wanted a pear tree, but now I
wish I'd waited a year until I could save the cash for a tree that was
both disease resistant and flavorful. We put in an order for
Starking Delicious Pear (reported to be "Bartlett-quality" and
"virtually blight-free"), so hopefully in another four years, we'll be
tasting a more flavorful fruit.
Looking up the pear's sister
tree --- Orient --- turned up the fact that
these two varieties are often planted for their extreme disease
resistance,
but that their fruit is extremely unexceptional. I bought the duo
because they were cheap and I wanted a pear tree, but now I
wish I'd waited a year until I could save the cash for a tree that was
both disease resistant and flavorful. We put in an order for
Starking Delicious Pear (reported to be "Bartlett-quality" and
"virtually blight-free"), so hopefully in another four years, we'll be
tasting a more flavorful fruit.
Meanwhile, I plan to
graft some tastier varieties onto our existing pear trees. More
on that project in a later post.
 What
do chickens eat on pasture? Invertebrates are their favorites,
but I'm still working out methods of attracting tasty insects and worms
for the flock to consume. (Keeping a compost pile in each pasture
is a good start.) Meanwhile, I did some research and then kept
notes on the plants our chickens enjoyed.
What
do chickens eat on pasture? Invertebrates are their favorites,
but I'm still working out methods of attracting tasty insects and worms
for the flock to consume. (Keeping a compost pile in each pasture
is a good start.) Meanwhile, I did some research and then kept
notes on the plants our chickens enjoyed.
Traditional
chicken pastures
tend to be either unimproved pastures (ie whatever survives repeated
close grazing), or mixtures of legumes (white clover and subclovers),
grasses (orchardgrass, perennial
ryegrass, tall
fescue, and annual ryegrass), and weeds. Some  farmers plant annuals like
oats or rye in certain plots for winter forage.
farmers plant annuals like
oats or rye in certain plots for winter forage.
Our pastures are
currently a mix of native woodland and whatever popped up when we mowed
other reclaimed woods for a few years. That gave me a chance to
watch our chickens explore quite a range of habitats, and I
discovered that they showed seasonal preferences for plant foods.
 In the winter and early
spring, most plants are dormant, but our flock still found some tasty
wild food. Ground
cherry fruits
hung on the plants until February and were thoroughly enjoyed, even
though the chickens had to find a way through the papery husks. Chickweed leaves,
of course, were a huge hit --- whenever we turned chickens into
fresh pasture in early spring, they ran straight to the chickweed
before eating anything else. The chickens were willing to eat tender
young grass leaves,
but only after all of the tastier
In the winter and early
spring, most plants are dormant, but our flock still found some tasty
wild food. Ground
cherry fruits
hung on the plants until February and were thoroughly enjoyed, even
though the chickens had to find a way through the papery husks. Chickweed leaves,
of course, were a huge hit --- whenever we turned chickens into
fresh pasture in early spring, they ran straight to the chickweed
before eating anything else. The chickens were willing to eat tender
young grass leaves,
but only after all of the tastier  plants were gone.
As spring advanced, our
chickens started chowing down on clover and fleabane
leaves.
Although I'd read that most people plant white clover in their chicken
pastures, red clover
seemed to be
preferred by our flock. Our rooster fell in love with violet
flowers, but no
one else seemed interested.
Chickweed was past its prime
in mid April (at least according to our snobbish chickens), so they
turned to small-flowered crowfoot seeds.
 Chickweed was still their second favorite food, though, and they also
enjoyed other tender young plants for the rest of the spring period.
Chickweed was still their second favorite food, though, and they also
enjoyed other tender young plants for the rest of the spring period.
Come late May, the pastures were changing --- the "weeds" were starting
to get too woody for chicken digestion and the grasses were going to
seed. Now the flock enjoyed a smorgasbord of grass seed heads, sedge seed heads, cranesbill seeds, clover leaves, and
violet leaves.
And then we hit the summer lull. Drier weather slowed down the
tender new growth chickens crave, big weeds shaded the ground, and
suddenly grass leaves were a favorite because they were the only
non-lignified plants within reach. Our one patch of warm
season grass
was especially hard hit since it kept producing throughout the
summer. In contrast to our traditional pastures, the forested
pasture became a virtual desert from a chicken's point of view.
In late August, Mark fenced in a new forest pasture. In this
previously fallow land, there was still fresh growth on the forest
floor, and our flock enjoyed Japanese
stiltgrass leaves and various seed heads...for two days.
Then they asked to go back to the perennial grasses.

As a side note, I should mention the
foods preferred by our chicks, since they were quite different
than those consumed by adult chickens. Chicks have tiny beaks, so
they can't eat 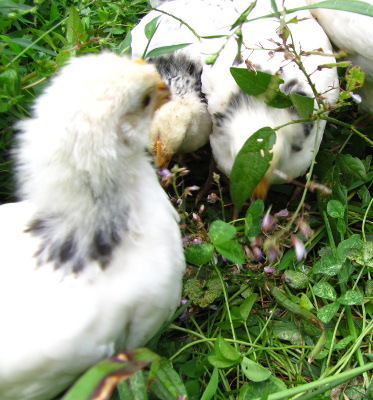 anything
large and they can't break anything tough up into bits small enough to
eat (without a hen's help.) Our spring batch ate everything in
sight since the greenery was all so succulent, but our fall chicks had
more trouble finding tasty food they could actually eat. Tick
trefoil flowers and sourgrass
flowers and young seed pods fit the bill even at the beginning
of September, and then the chicks branched out into eating sourgrass leaves and clover leaves
as they got a bit older.
anything
large and they can't break anything tough up into bits small enough to
eat (without a hen's help.) Our spring batch ate everything in
sight since the greenery was all so succulent, but our fall chicks had
more trouble finding tasty food they could actually eat. Tick
trefoil flowers and sourgrass
flowers and young seed pods fit the bill even at the beginning
of September, and then the chicks branched out into eating sourgrass leaves and clover leaves
as they got a bit older.
Finally, I should mention that I tried out planting various annuals in
the pastures throughout the year. In the long run, I've decided
that planting annuals only makes sense to give the chickens fresh food
during the summer and winter lulls --- otherwise, leaving the planted
ground chicken-free for a few weeks or months as the cultivated crops
get established just slows down rotation speeds and does the pastures
 more harm than good. And it turns out that our flock only really
enjoyed one cultivated plant I tried --- butternut squash.
The vines were able to survive moderate chicken scratching, and the
fruits were happily hollowed out by our hungry chickens.
more harm than good. And it turns out that our flock only really
enjoyed one cultivated plant I tried --- butternut squash.
The vines were able to survive moderate chicken scratching, and the
fruits were happily hollowed out by our hungry chickens.
I went into the year thinking that I'd see what our chickens' favorite
foods were and then plant pastures in just those plants. However,
as the year progressed, I started to realize that I need to think of
the pasture as an ecosystem rather than as a collection of
plants. Next year, I'll be experimenting with traditional pasture plants along with perennials that provide off-season feasts.
This post is part of our 2011 Chicken Experiments lunchtime series.
Read all of the entries:
|

A generous coating of
dielectric grease should help to prevent corrosion on this Super
Winch ground connection.
What I'm not sure about is
how to prevent dirt and mud from getting into the grease.
Maybe a plastic barrier held
on with a few layers of duct tape?
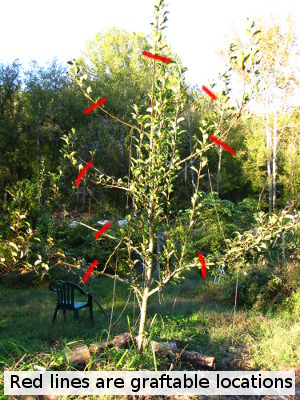 Although the flavor of our Kieffer
pear was
disappointing, I didn't want to waste four years of vigorous and
disease free growth. The solution? Graft some new varieties
onto the tree so I get tasty pears.
Although the flavor of our Kieffer
pear was
disappointing, I didn't want to waste four years of vigorous and
disease free growth. The solution? Graft some new varieties
onto the tree so I get tasty pears.
Step
one is choosing varieties. Yup --- I meant to
use that plural. As long as you stay within the same species
(meaning, grafting pears onto pears), you can graft as many varieties
onto a tree as you have branches to graft to. After four years of
growth, I've got plenty of limbs to be converted to tastier fruits.
The factors most
important to me in pear tree variety selection are taste ("dessert
quality" is the word to look for), disease resistance (focusing on fire
blight), and time
of bearing.
Checking with your local extension
service is a good
way to find varieties that work well in your neck of the woods.
Here are the varieties I selected (all of which are fire blight
resistant):
- Dabney - very early bearer, developed in Knoxville (so probably
does well here), and listed as having very good dessert quality
- Tyson - very early bearer, flavor listed as "second only to Seckel"
- Harrow Delight - moderately early bearer, flavor noted to be as good as Bartlett but different
- Seckel --- early midseason, fruits are very small, but many sources list Seckel as having the best flavor of all pears
- Honeysweet --- midseason, flavor similar to Seckel but lacking the bit of grit in the center
- Hoskins --- late bearer and fruits will keep until Christmas, good for dessert
- Luscious --- late bearer, flavor like Bartlett
Step
two is finding scionwood. Scionwood is
basically a twig cut off of another tree that I will graft onto my
existing pear tree. As long as the graft takes, all further
growth on that limb will be the variety of the scionwood, not of the
tree being grafted onto.
 The holy grail of pear tree
scionwood is the National
Clonal Germplasm Repository in Corvallis, Oregon. (There are two other
branches of this government funded program that specialize in other
types of fruit.) It's a bit tough to tell from their website, but
I'm 95% sure that they will send two cuttings of any variety selected
to just about anyone for free --- I've put in my order and will know
more about the process in the winter when the scionwood (hopefully)
arrives. Requests for pear scionwood have to be made by December
1 to be shipped this winter.
The holy grail of pear tree
scionwood is the National
Clonal Germplasm Repository in Corvallis, Oregon. (There are two other
branches of this government funded program that specialize in other
types of fruit.) It's a bit tough to tell from their website, but
I'm 95% sure that they will send two cuttings of any variety selected
to just about anyone for free --- I've put in my order and will know
more about the process in the winter when the scionwood (hopefully)
arrives. Requests for pear scionwood have to be made by December
1 to be shipped this winter.
The Clean
Plant Center of the Northwest (part of Washington State
University) has a slightly less staggering but still pretty good
selection of scionwood available as well. They charge $5 per
"budstick", each of which generally has ten or more buds on it.
For simple grafts, you need two buds apiece, and you can also graft a
bud at a time, so a single budstick goes a long way.
In the commercial
sphere, several nurseries offer small selections of pear scionwood, but
Nick Botner is the best source if you want something even moderately
unusual. Unfortunately, Mr. Botner has no internet presence
(beyond folks mentioning his amazing selection), so you have to mail
your order to 4015 Eagle Valley Road, Yoncalla, OR 97499 or call him at
(503) 849-2781. I've uploaded his 2009 variety list
for your perusal, but you should be aware that internet rumors say he
put his farm on the market this past summer, so Mr. Botner may no
longer be selling scionwood.
Step
three is grafting.
But I have to wait until early spring for that step, so I'll stop here.
 Unless you raise your own
meat birds (often called "broilers"), you
have probably only eaten one kind of chicken in your life --- Cornish
Cross. This hybrid is a wonder of modern breeding since it can
reach a
carcass size of nearly nine pounds in just eight weeks. The
Cornish Cross
also has a lower feed
conversion rate
than any other variety of chicken, which means you give the
birds less grain for every pound of weight they put on --- a boon for
your wallet and for the environment.
Unless you raise your own
meat birds (often called "broilers"), you
have probably only eaten one kind of chicken in your life --- Cornish
Cross. This hybrid is a wonder of modern breeding since it can
reach a
carcass size of nearly nine pounds in just eight weeks. The
Cornish Cross
also has a lower feed
conversion rate
than any other variety of chicken, which means you give the
birds less grain for every pound of weight they put on --- a boon for
your wallet and for the environment.
Homesteaders groan about
the Cornish Cross because of the multitude of
health problems that come along with their rapid weight gain, but what
prevented me from raising these efficient birds is their proprietary
genetics. Not only is the Cornish Cross a hybrid, the parent
lines are
owned by corporations, so the only possible way to get Cornish Cross
chickens is to buy the chicks from a hatchery. I want our flock
to be
as self-sufficient as possible, and that means raising our own chicks,
so Cornish Cross are off the table, as are other hybrid broiler
varieties like Freedom Rangers.
 On the other hand, there are two
problems with raising heirloom chickens for meat, and
both are so serious that you probably won't find heirlooom broilers for
sale even at the
farmer's market. The first problem is aesthetics. Since we
all grew up with big, plump-breasted chickens on our plates, we think
that heirloom chickens
look odd, with their big thighs sticking out and their skinny
breasts.
I crunched some numbers from one of our batches of Black Australorps
and discovered that they gave me twice as much dark meat as light meat,
which would be a problem if I was afraid of animal fats. Luckily,
I
believe that fat from pastured animals is good for me, so I cherish
both light and dark meat from our homegrown birds.
On the other hand, there are two
problems with raising heirloom chickens for meat, and
both are so serious that you probably won't find heirlooom broilers for
sale even at the
farmer's market. The first problem is aesthetics. Since we
all grew up with big, plump-breasted chickens on our plates, we think
that heirloom chickens
look odd, with their big thighs sticking out and their skinny
breasts.
I crunched some numbers from one of our batches of Black Australorps
and discovered that they gave me twice as much dark meat as light meat,
which would be a problem if I was afraid of animal fats. Luckily,
I
believe that fat from pastured animals is good for me, so I cherish
both light and dark meat from our homegrown birds.
The second problem with
heirloom chickens is the real sticking point
--- feed conversion rate. The chicken industry claims that
factory-farmed Cornish Cross chickens have a feed to meat conversion
rate of 2:1 meaning that you feed the chickens two pounds of feed and
get back one pound of meat (and bones.) Third party studies of
pastured Cornish Cross chickens report a rate of 3.5:1 at the best, so
this is what I'm aiming for. And I fell far, far short --- more
on that tomorrow.
This post is part of our 2011 Chicken Experiments lunchtime series.
Read all of the entries:
|
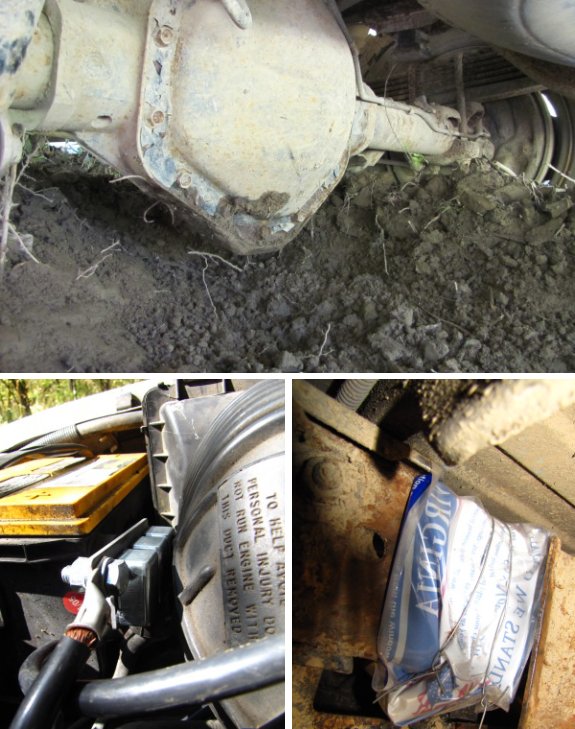
I wrapped the plastic bag our
license plate came in around the Super
Winch negative ground connection and then secured it with a couple
strands of galvanized wire. I realize now that dielectric
grease may not have been the best choice for corrosion prevention, but it should keep the air out,
and if I can remember I'll peel the plastic back a few years from now
and check up on the corrosion status.
The positive end requires a
surge protector, which was easy to install.
Digging out a small trench
where the truck had bottomed out was the hard part. It was pretty well
packed in and I didn't want to take a chance of over straining the Super Winch
motor on its first day at work.
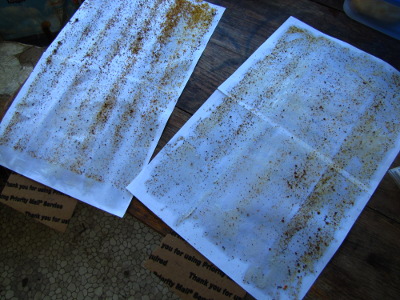 If you want to monitor the
varroa mite levels in your bee hives, it's a good idea to take counts
at multiple times rather than using one snapshot to assess the long
term health of your hive. So I repeated my three
day stickyboard counts
this week. To refresh your memories, the
mother hive dropped 44 varroa mites per day in mid September while the
daughter hive dropped 12 per day.
If you want to monitor the
varroa mite levels in your bee hives, it's a good idea to take counts
at multiple times rather than using one snapshot to assess the long
term health of your hive. So I repeated my three
day stickyboard counts
this week. To refresh your memories, the
mother hive dropped 44 varroa mites per day in mid September while the
daughter hive dropped 12 per day.
My new count showed
nearly the same mite fall for the mother hive --- 41 mites per day ---
but it seemed like the varroa mite population in the daughter have had
undergone a population explosion. This time, the daughter hive
dropped 200 total mites, or 67 per day!
An increasing varroa
mite population in the autumn is bad news, but I decided to get a bit
more scientific before I started to worry. Mite fall is a
problematic way to monitor varroa mites since a large population of
bees will naturally drop many more mites than a small population of
bees. The way to deal with this error is to estimate how many
bees are currently in your hive and calculate mite fall per thousand
bees per day.
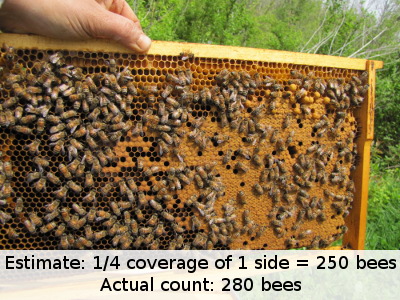 No, I didn't sit in front of
the hive and count heads all day long. Instead, I looked through
both hives, counting how many frames (or portions of frames) were
covered with bees. A deep frame completely covered with bees on
both sides holds roughly 2,000 workers, so I was able to come up with
population estimates for both hives.
No, I didn't sit in front of
the hive and count heads all day long. Instead, I looked through
both hives, counting how many frames (or portions of frames) were
covered with bees. A deep frame completely covered with bees on
both sides holds roughly 2,000 workers, so I was able to come up with
population estimates for both hives.
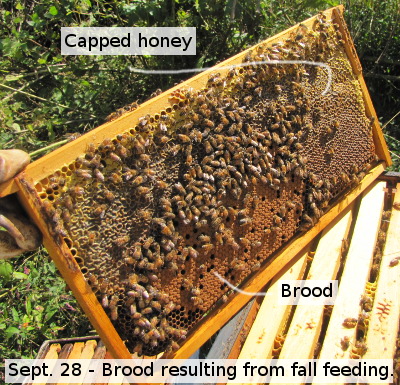
Remember how I started feeding
the daughter hive a
few weeks ago since I was concerned that she was going into winter with
too few honey stores? One of the troubles with fall feeding is
that it can prompt the queen to lay lots of eggs at a time of year when
the hive doesn't need that many workers. The mother hive --- not
fed, so changing her population based on the natural ebb of the seasons
--- had roughly 9,500 bees in the hive. On the other hand, the
daughter hive had bulked up drastically and now housed 18,250 bees!
 The good news is that when
you divide the mite fall figures by the population of each hive, it
turns out that the daughter hive is in fine shape. The mother had
roughly 4.3 varroa mites fall per thousand bees per day during my test
while the daughter had 3.7 mites per thousand bees per day. Given
all of the wiggle room in my measurements, I'd say mite populations in
each hive are roughly equal on a per bee basis.
The good news is that when
you divide the mite fall figures by the population of each hive, it
turns out that the daughter hive is in fine shape. The mother had
roughly 4.3 varroa mites fall per thousand bees per day during my test
while the daughter had 3.7 mites per thousand bees per day. Given
all of the wiggle room in my measurements, I'd say mite populations in
each hive are roughly equal on a per bee basis.
The bad news is that the
daughter hive has way too many workers in it! She has put away
the 22 pounds of sugar I gave her and now has 48 pounds of capped
honey, but I'm a little concerned that the massive population of
workers will eat right through it before winter comes. Hopefully
once the unnatural "nectar flow" disappears, the hive will kick out
those extra workers ASAP.
 As I mentioned
yesterday, the feed
conversion rate of
3.5:1 for pastured Cornish Cross is extremely tough to beat.
We've tried four different experiments with raising heirloom chickens
as broilers and yet my very best
feed to meat conversion rate was 5:1. The figure means that my
chickens required 5 pounds of storebought feed for every pound of meat
I got back, half again as much as what Cornish Cross would have
consumed.
As I mentioned
yesterday, the feed
conversion rate of
3.5:1 for pastured Cornish Cross is extremely tough to beat.
We've tried four different experiments with raising heirloom chickens
as broilers and yet my very best
feed to meat conversion rate was 5:1. The figure means that my
chickens required 5 pounds of storebought feed for every pound of meat
I got back, half again as much as what Cornish Cross would have
consumed.
My best results came
from Black Australorps who ran in
the woods in the spring (thus getting nearly maximum forage) and then
were slaughtered at 12 weeks. At the far opposite extreme, Dark
Cornish chickens raised on overgrazed summer pasture and killed at 16
weeks had an abyssmal feed conversion rate of 8.8:1.
Here are some mistakes
you should avoid if you want to feed your broilers as little as
possible.
 Slaughtering the chickens at a
more advanced age. At 12 weeks, light-weight breeds result
in carcasses of two pounds or smaller, so it seemed to make sense to
kill some a month later. Unfortunately, the growth
rate of chickens peaks around 6 to 10 weeks, so you have to feed
your flock more and more for that extra growth. To
feed the least, slaughter your chickens young.
Slaughtering the chickens at a
more advanced age. At 12 weeks, light-weight breeds result
in carcasses of two pounds or smaller, so it seemed to make sense to
kill some a month later. Unfortunately, the growth
rate of chickens peaks around 6 to 10 weeks, so you have to feed
your flock more and more for that extra growth. To
feed the least, slaughter your chickens young.
- Raising chickens during the summer lull. In our area, the succulent plants that chickens prefer are a spring and fall attraction, so I guess I shouldn't be surprised that the Cuckoo Marans we raised on summer pasture had a feed conversion rate of 5.2:1 even when killed at 12 weeks.
 Keeping broilers in with laying hens.
My third batch --- Black Australorps part two --- had a truly awful
feed conversion rate of 7.6:1 at 12 weeks. The problem here is
that I mixed the broilers in with our laying flock, assuming that the
hen we tricked into adopting them would make sure the chicks had first
dibs on the food. This worked at first, but during the last month
(when broilers consume the majority of their lifetime feed), the mother
hen cut her offspring loose, and they were stuck at the bottom of the
pecking order. I had to throw in more and more food just to make
sure they had enough to eat. In future, broilers will always get
their own coop and pastures.
Keeping broilers in with laying hens.
My third batch --- Black Australorps part two --- had a truly awful
feed conversion rate of 7.6:1 at 12 weeks. The problem here is
that I mixed the broilers in with our laying flock, assuming that the
hen we tricked into adopting them would make sure the chicks had first
dibs on the food. This worked at first, but during the last month
(when broilers consume the majority of their lifetime feed), the mother
hen cut her offspring loose, and they were stuck at the bottom of the
pecking order. I had to throw in more and more food just to make
sure they had enough to eat. In future, broilers will always get
their own coop and pastures.
 Even if I don't repeat any of
these mistakes, it's going to be tough to cut the amount of feed we
give to our broilers enough to achieve the awesome feed conversion
rates of Cornish Cross. That said, I have high hopes that the
Light Sussex we're currently experimenting with might do better than
our best batch of Black Australorps. I hatched the Sussex chicks
so late that I figured they wouldn't harm the garden if allowed to free
range, and they've been gorging on wild food ever since.
Meanwhile, I'm gauging
their feed needs by the state of their crops, which allows me to feed
them much less than the books tell me to. I'll report their feed
conversion rate on our chicken
blog around Thanksgiving, so stay tuned!
Even if I don't repeat any of
these mistakes, it's going to be tough to cut the amount of feed we
give to our broilers enough to achieve the awesome feed conversion
rates of Cornish Cross. That said, I have high hopes that the
Light Sussex we're currently experimenting with might do better than
our best batch of Black Australorps. I hatched the Sussex chicks
so late that I figured they wouldn't harm the garden if allowed to free
range, and they've been gorging on wild food ever since.
Meanwhile, I'm gauging
their feed needs by the state of their crops, which allows me to feed
them much less than the books tell me to. I'll report their feed
conversion rate on our chicken
blog around Thanksgiving, so stay tuned!
This post is part of our 2011 Chicken Experiments lunchtime series.
Read all of the entries:
|
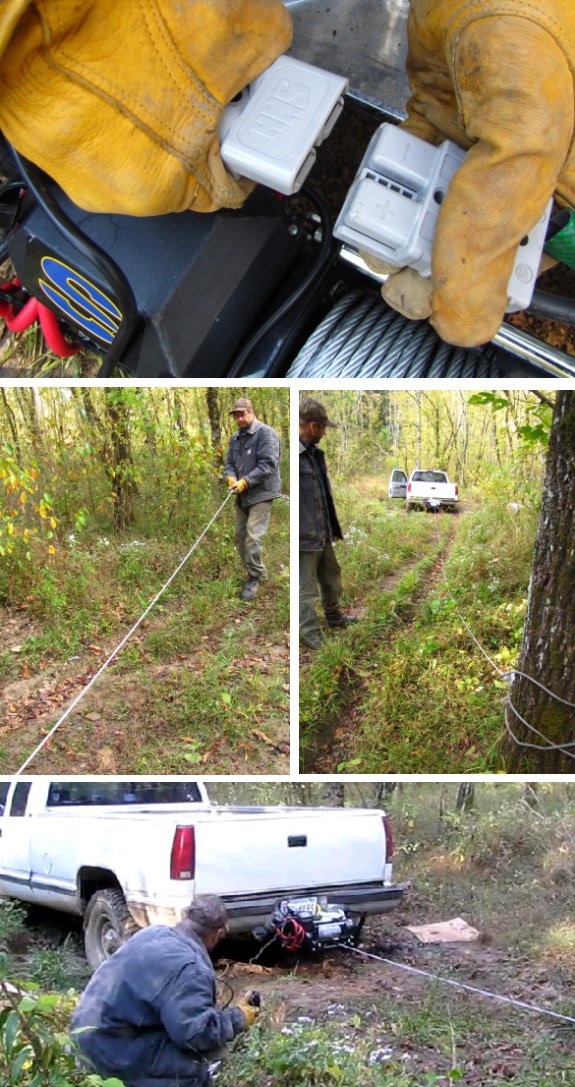
We could really feel the power of the new Super
Winch as it slowly pulled the truck out of the mud and onto solid
ground.
A couple more hours of rut
repair should have the driveway ready for a trip to the quarry.
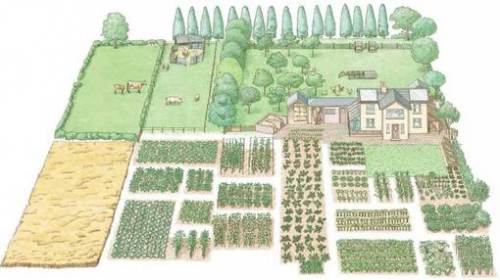
--- John Seymour, The Self-Sufficient Life and How to Live It
Despite the fact that
our property is 58 acres, I'd say our homestead is closer to one acre
in size since that's how large of an area we've carved out of the
wilderness. So I was struck by John Seymour's description of a
one acre homestead, and specifically by his conclusion that it does make sense to keep a lot of
livestock even if you have to buy hay and grain for them. He
argues that a cow produces high quality dairy for your family and for
all of the other livestock while also making huge quantities of manure
to improve the fertility of the land.
We're not going to be
getting a dairy cow anytime soon. There's not only the milking,
fencing, housing, and so forth to consider, but also the roughly $1,400
worth of grain, hay, and bedding that would go into her with only a
half acre to graze on. (And the question of how to deal with
1,500 gallons of milk per year....) However, Seymour's point is
well taken, that perhaps I shouldn't beat myself up so much about
buying all those bags of chicken feed --- after all, we do get quite a
lot of benefit from the manure we capture in the coop. And maybe
I shouldn't veto other potential livestock just because they would also
require storebought inputs of feed.
Looking at the problem
of farm fertility through Seymour's eyes, livestock are to compost as
cover crops are to mulch --- they're a way to grow your own. I
was amazed this year to see how much easier it is to plant
fallow fall beds in winter oats rather than hauling in and
then lugging around big bales of straw to mulch the bare ground.
But is there a type of livestock that would require little enough time
and feed input to make it worthwhile in comparison to Mark's trips to
the manure
motherlode?
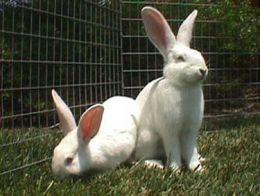 Maybe rabbits? One pair
of New Zealand Whites will produce about 8 litters per year, with 40
surviving rabbits that dress to around 3.3 pounds apiece. That's
132 pounds of meat and 2 cubic yards of manure for the price of 750
pounds of feed ($255) and perhaps $20 worth of straw for bedding.
Plus they're a whole lot less work than the goats I've been drooling
over. Maybe I should set my sights a little lower?
Maybe rabbits? One pair
of New Zealand Whites will produce about 8 litters per year, with 40
surviving rabbits that dress to around 3.3 pounds apiece. That's
132 pounds of meat and 2 cubic yards of manure for the price of 750
pounds of feed ($255) and perhaps $20 worth of straw for bedding.
Plus they're a whole lot less work than the goats I've been drooling
over. Maybe I should set my sights a little lower?

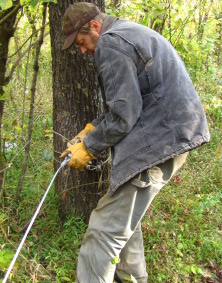
It's possible to wrap the Super
Winch cable around a tree and hook it onto itself. The instructions
clearly say to not do this.
I'm guessing it's because the
cable could get damaged.
We had a heavy chain for
wrapping around trees, but it somehow got lost it in the weeds a few
years ago. Now we use a cable with hooks on each end or a heavy duty
nylon tow strap depending on the situation.
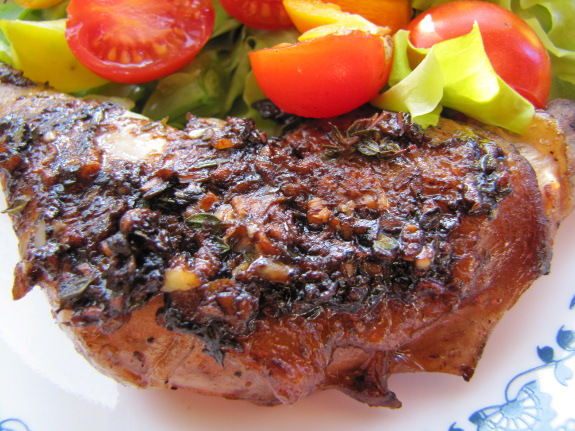
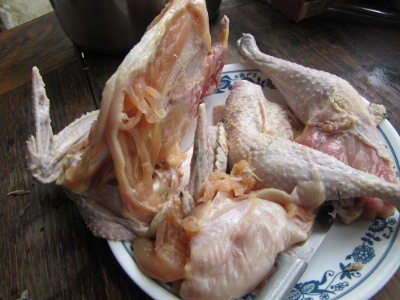
When
you start cooking with heritage
chickens, you'll
soon need to figure
out what to do with all that extra leg meat. (You might have a
similar dilemma if you're buying from the store on a budget since legs
are often much cheaper per pound than breasts.) This simple
recipe is surprisingly delicious and takes just a few minutes of
hands-on labor to prepare.
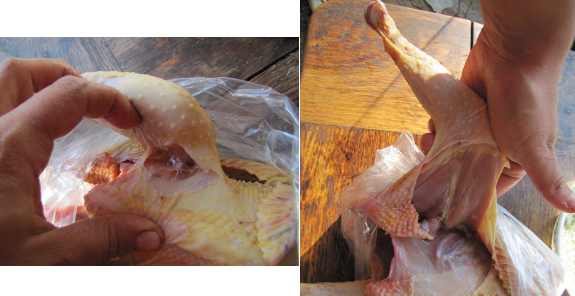
 If
you're starting with a whole chicken, first cut off the legs.
You'll be surprised how easy this is --- just slice through the skin
that connects each leg to the
breast, bend the leg sideways until the bone snaps out of its socket,
and then cut through the bit of meat holding the thigh to the rest of
the chicken carcass.
If
you're starting with a whole chicken, first cut off the legs.
You'll be surprised how easy this is --- just slice through the skin
that connects each leg to the
breast, bend the leg sideways until the bone snaps out of its socket,
and then cut through the bit of meat holding the thigh to the rest of
the chicken carcass.
Meanwhile, snip some
thyme leaves out of your garden --- about a
tablespoonful is the goal if you're cooking two chicken legs. Mix
the diced thyme, two tablespoons
of lemon juice, and some salt and 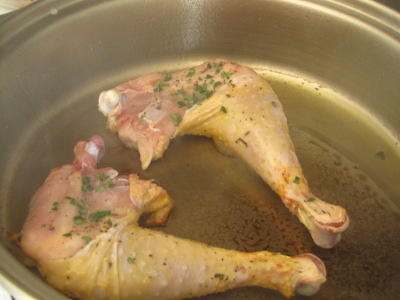 pepper in a bowl.
Heat a bit of olive oil
over medium-high heat (being careful not to
burn it), then put your chicken legs in the pan, skin side down.
Brush about half of your lemon juice and thyme mixture over top of the
legs and
cook for around five minutes until the skin is brown.
Now turn down the heat
to medium-low and flip the legs over.
Brush on the rest of the lemon juice, leaving some thyme behind in the
bowl, cover the pan, and let cook for 20 or 30 minutes (just enough
time to write a blog post and 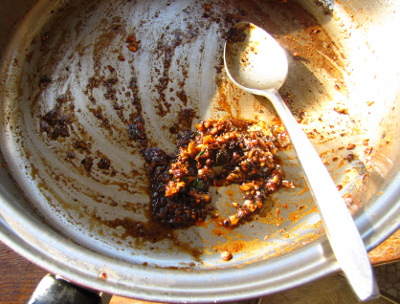 make a salad.) You can
tell the legs are getting
done when the meat starts to pull away from the end of the bone (or you
can use a meat thermometer.)
make a salad.) You can
tell the legs are getting
done when the meat starts to pull away from the end of the bone (or you
can use a meat thermometer.)
Remove the legs from the
pan once they're fully cooked and add 1 clove
of minced garlic, the remainder of the thyme, and three tablespoons of
water to the pan. Cook over medium high heat, scraping the
drippings out of the pan and into the water. After a minute or
two, the garlic should be cooked and the water should be evaporated
enough to turn the drippings into a thick sauce to spoon over the legs.
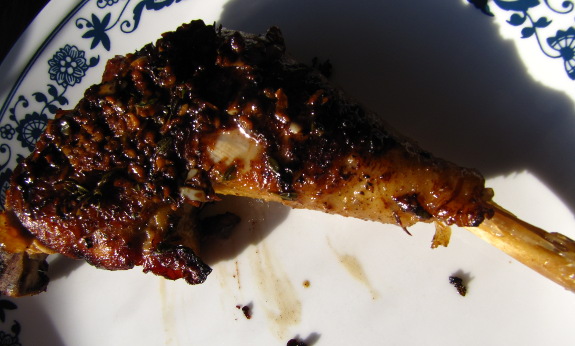
Despite having no
special spices (or MSG), these legs taste very Chinese to us.
Delicious and easy!
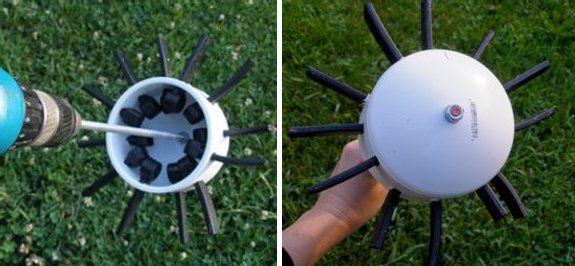
This automatic chicken
plucker is a clever and low budget alternative to the more expensive
800 dollar whiz bang option.
Kate
over at living the frugal life.blogspot.com has a nice post on her
experience building one for under 20 dollars.
I'm not sure if it's much of
a time saver, but I love the ingenuity and spirit of this poultry
project. It would be nice to see a side by side comparison of someone
trained on this method next to someone plucking by hand.
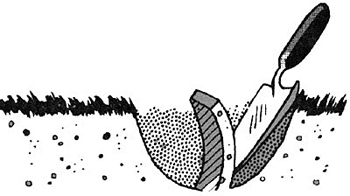
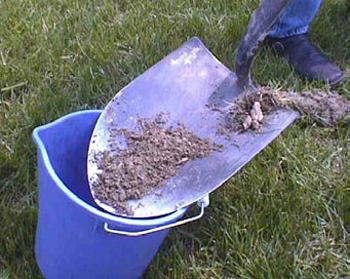
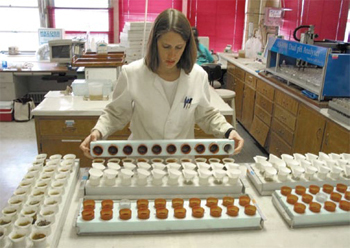 Soil
tests are very helpful for any kind of serious gardener since they give
you solid, numerical data about your soil. You can think of them
as a report card, showing you positive (or negative) changes over the
years and also pointing out areas that you need to work on.
There's plenty of information out there (like this site) to tell you how to take the
actual soil test, and I recommend this in-depth
pdf document to learn more about how your test results relate to
individual crops.
But the real question is --- which laboratory should you send your soil
sample to?
Soil
tests are very helpful for any kind of serious gardener since they give
you solid, numerical data about your soil. You can think of them
as a report card, showing you positive (or negative) changes over the
years and also pointing out areas that you need to work on.
There's plenty of information out there (like this site) to tell you how to take the
actual soil test, and I recommend this in-depth
pdf document to learn more about how your test results relate to
individual crops.
But the real question is --- which laboratory should you send your soil
sample to?
I always recommend
starting by checking with your state extension
service since most offer free or cheap soil tests. However,
extension service laboratories often skimp on testing micronutrients
and heavy metals, so it's worth spending a bit more cash at least once
during the life of your garden to get an idea of the bigger picture.
 ATTRA
provides an extensive list of soil testing laboratories, but you could
spend hours checking out each one's services! (I know because I
just did.) When it comes to a wide selection of services for a
low price, there seem to be four main contenders.
ATTRA
provides an extensive list of soil testing laboratories, but you could
spend hours checking out each one's services! (I know because I
just did.) When it comes to a wide selection of services for a
low price, there seem to be four main contenders.
The cheapest
option is A&L Eastern Laboratories,
which offers a basic soil test for only $8.50 if you skip the
interpretation. (Since most interpretation is geared toward
large-scale farmers applying chemical fertilizers, you'll need to
figure out what the numbers mean on
your own anyway.) This test will cover organic matter, nitrogen,
phosphorus, potassium, magnesium, calcium, pH, buffer index, cation
exchange capacity, and percent base saturation. For an extra $4,
you can add on sulfur, zinc, manganese, copper, and boron. For
$15, you can test your soil for molybdenum, which is primarily of
interest for those of us trying to increase clover in our pastures.
AgriEnergy Resources offers pretty much the same tests
for quite a bit more cash.
Their basic package is $14.20 and throws in sodium (which you probably
don't need) while their higher end package includes the extras from the
last lab with the addition of iron for a total of $25. A separate
test for cobalt, molybdenum, and selenium is $46. Cobalt, like
molybdenum, is of interest to clover growers, while selenium is a
micronutrient important in our immune system but seldom deficient.
Maine Soil Testing Service is a little more expensive
than the cheapest commercial labs --- $15 for their basic test --- but includes
nearly all of the extras in the same package. However, they leave
out buffer index and percent base saturation while adding lead.
Finally, testing for nitrogen is $7 extra. (Although nitrogen is
very basic to the fertility of soil, I can see why they leave it out
--- you're going to add nitrogen in the form of compost every year
regardless and values can shift a lot from day to day depending on
microbial
activity. If you're not adding chemical fertilizers or farming on
a large scale, I'm not so sure you need to have that information in
your test results.)
 Finally, UMass Amherst has perhaps
the best deal of all, especially for urban dwellers
worried about heavy metals. Their base package ($10) has
everything previously mentioned except sodium, sulfur, organic matter,
and nitrogen (and molybdenum, cobalt, and selenium which aren't
available anywhere without paying quite a bit extra.) Meanwhile,
they add in four more metals --- cadmium, nickel,
aluminum, and chromium. I'd pay $15 for the basic tests plus
organic matter, though, because I think organic matter is important
enough to keep track of long term. Nitrogen is its own test,
available for $15, which I would skip, and I can do without sodium and
sulfur.
Finally, UMass Amherst has perhaps
the best deal of all, especially for urban dwellers
worried about heavy metals. Their base package ($10) has
everything previously mentioned except sodium, sulfur, organic matter,
and nitrogen (and molybdenum, cobalt, and selenium which aren't
available anywhere without paying quite a bit extra.) Meanwhile,
they add in four more metals --- cadmium, nickel,
aluminum, and chromium. I'd pay $15 for the basic tests plus
organic matter, though, because I think organic matter is important
enough to keep track of long term. Nitrogen is its own test,
available for $15, which I would skip, and I can do without sodium and
sulfur.
You'll hear the
results of my soil tests in a week or two, so stay tuned for more than
you ever wanted to know about interpreting soil test results. Why
not dig up your own soil sample and play along?
 Incubating
my own chicks this year allowed me to experiment with smaller
batches
than I could get from a hatchery while also trying out rare varieties
of non-nursery stock. There was a steep learning curve, though,
and I soon learned that incubating is more complex than setting the
temperature and number of days in the incubator and then forgetting the
chicks until they hatched. Here are some of the questions I asked
as I went from a beginner to an intermediate incubator.
Incubating
my own chicks this year allowed me to experiment with smaller
batches
than I could get from a hatchery while also trying out rare varieties
of non-nursery stock. There was a steep learning curve, though,
and I soon learned that incubating is more complex than setting the
temperature and number of days in the incubator and then forgetting the
chicks until they hatched. Here are some of the questions I asked
as I went from a beginner to an intermediate incubator.
 What kind of incubator should I
use? We've
tried three different incubators, and the only one that worked well for
us was the Brinsea
Octagon 20 Advance.
At $300, the Octagon 20 isn't an incubator to buy on a whim, but the
lack of climate control in our trailer made the cheap Little
Giant Still Air Incubator that we bought at the local
feed store totally worthless. The Brinsea
Mini Advance Incubator
worked a little better (we got one surviving chick out of seven eggs),
but that incubator's utility is really in allowing you to see a hatch
up close and personal. It's agonizing to watch chicks who had an
improper incubation period try to struggle out of their shells and
fail, so if you're going to incubate, you should probably do it right.
What kind of incubator should I
use? We've
tried three different incubators, and the only one that worked well for
us was the Brinsea
Octagon 20 Advance.
At $300, the Octagon 20 isn't an incubator to buy on a whim, but the
lack of climate control in our trailer made the cheap Little
Giant Still Air Incubator that we bought at the local
feed store totally worthless. The Brinsea
Mini Advance Incubator
worked a little better (we got one surviving chick out of seven eggs),
but that incubator's utility is really in allowing you to see a hatch
up close and personal. It's agonizing to watch chicks who had an
improper incubation period try to struggle out of their shells and
fail, so if you're going to incubate, you should probably do it right.
Is
every egg created equal? No, and you'll have a
much better hatch rate if you put only the best eggs in your
incubator. Eggs to discard include those with even a tiny bit of
poop 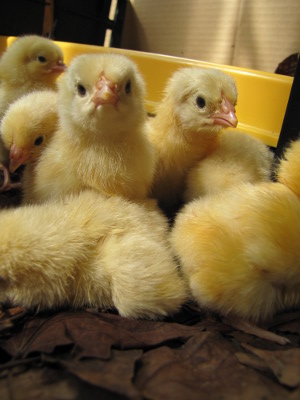 on the shell, porous eggs that
seem to be speckled when you hold them up to the light, and eggs from
hens more than two years old. Of course, cracked eggs or eggs
that have been stored
improperly shouldn't be included. In addition, more eggs tend
to be fertile in the spring and fall than in the summer and winter.
on the shell, porous eggs that
seem to be speckled when you hold them up to the light, and eggs from
hens more than two years old. Of course, cracked eggs or eggs
that have been stored
improperly shouldn't be included. In addition, more eggs tend
to be fertile in the spring and fall than in the summer and winter.
How
many chicks should I expect? If you're doing
everything just right, you should expect 75% to 80% of homegrown eggs
to hatch. Mail
ordered hatching eggs
will have been bumped around in the post office, so 50% is considered a
good hatch rate there. You can tell whether a low hatch rate is
caused by your mistakes or by bad eggs if you count how many eggs were infertile. If you're a raw
beginner, put a lot more eggs than you need in the incubator --- I
ended up with only one living chick my first time around and had to
scurry to find it friends. (A lone chick is an unhappy
chick.) By my fourth hatch, though, I got a 58% hatch rate from
mail order eggs and felt very accomplished.
 What's dry
incubation and should I do it? Mainstream hatching
literature tells you to add water to the wells in order to keep your
incubator at 40% to 50% humidity for the first 19 days. However,
many experienced hatchers report that running the incubator dry gives
them better hatch rates. Whether dry incubation works for you
will probably depend on your climate. The best way to decide
whether humidity in your incubator is in the right range is to weigh
your eggs every few
days and make sure they lose 13% of their weight by day 18.
What's dry
incubation and should I do it? Mainstream hatching
literature tells you to add water to the wells in order to keep your
incubator at 40% to 50% humidity for the first 19 days. However,
many experienced hatchers report that running the incubator dry gives
them better hatch rates. Whether dry incubation works for you
will probably depend on your climate. The best way to decide
whether humidity in your incubator is in the right range is to weigh
your eggs every few
days and make sure they lose 13% of their weight by day 18.
 How and when should I prepare for
the hatch?
No matter whether you practice conventional or dry incubation, you want
to increase the humidity in the incubator to 65% or more on day 19 so
that the chicks will slide right out of their shells. This is
also the time for you to turn off the egg turner and remove any
dividers so that the eggs lay flat on their sides. If the well of
the incubator is chick-accessible, but sure to shield it so that no
chicks can fall in and drown.
How and when should I prepare for
the hatch?
No matter whether you practice conventional or dry incubation, you want
to increase the humidity in the incubator to 65% or more on day 19 so
that the chicks will slide right out of their shells. This is
also the time for you to turn off the egg turner and remove any
dividers so that the eggs lay flat on their sides. If the well of
the incubator is chick-accessible, but sure to shield it so that no
chicks can fall in and drown.
How
often should I open the incubator? You'll read that you
can only open the incubator once or twice a day during the hatch period
or the humidity will plummet, but I found simple ways to keep
the humidity high
while poking around inside as much as I liked. Despite
conventional wisdom, I've had best results moving chicks to the brooder
an hour or less after they hatched so that they don't injure other
chicks busy struggling out of their shells.
Should
I help
chicks hatch?
It's okay to help chicks hatch as long as you understand what
constitutes an abnormal hatch. A chick pipping
at the narrow end of the egg should always be helped
because healthy chicks will either die while trying to struggle out of
this improper position or will injure
themselves.
You might choose to help chicks that have pipped but not started to
unzip for an abnormal length of time (generally 24 hours, or until the
membrane starts to turn brown and dry), but in this case you're more
likely to be aiding a weak chick which that might have to be culled.
How
and when should I cull a chick? After helping a chick,
I generally put it in a spare incubator for a few hours to regain its
strengh, then move it to the brooder to join the other chicks. If
they attack the chick, chances are it's too weak and would die on its
own. In that case, I put the chick
in an airtight container with some baking soda and vinegar and it dies
relatively painlessly within seconds.
 Is there an easier way to hatch
chicks? A broody
hen can do all of the work for you, but only certain varieties will
go broody. We added Cuckoo Marans to our flock this year in
hopes that we'll be able to raise chicks the easy way in 2012.
Is there an easier way to hatch
chicks? A broody
hen can do all of the work for you, but only certain varieties will
go broody. We added Cuckoo Marans to our flock this year in
hopes that we'll be able to raise chicks the easy way in 2012.
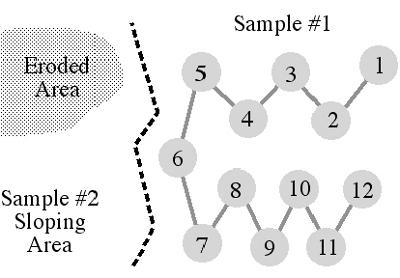
The only additional tip
I would give anyone wanting to become a journeyman hatcher is --- keep
lots of notes! I had several hypotheses on why certain eggs
didn't hatch, but only got real answers when I numbered each egg and
kept notes on everything about them. That way I was able to tell
that temperatures
in my incubator were slightly uneven. If the broody hens
don't come through for me next year, I should have even higher hatch
rates in the incubator.
This post is part of our 2011 Chicken Experiments lunchtime series.
Read all of the entries:
|

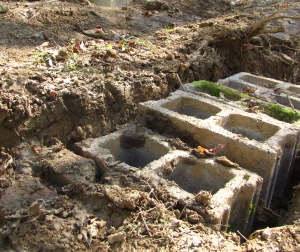
The driveway
troubled spot is now one of the more solid points thanks to several
well placed cinder blocks and some heavy tamping.
Anna says there's a 70%
chance of rain tomorrow.
That means there could be a
race between when the rain starts and how fast I can go pick up a load
of gravel, unload it into the other troubled areas, and haul in a few
supplies.
Mark and I have been
tossing around the idea of interns. On the one hand, I think we
know enough that a homesteader wannabe could learn a lot from us, we
certainly have plenty of extra work, and it would be great
to have more like-minded people around. On the other hand, we're
dyed in the wool introverts and the idea of having even a
low-maintenance, fascinating person on the property seven days of the
week gives me shivers.
There might be the possibility of housing the intern somewhere else
and/or sharing them with another farming group so that we don't
overwhelm our people-sensors --- we probably won't even give the idea a
shot if we can't find someone to fill that gap. That said, I
wonder if the idea even holds water. Time for a poll!
(Those of you reading
this on Facebook or via an RSS feed will probably have to come directly
to our website to participate.)
Our current idea is to
give the intern a place to stay and plenty of hands-on mentoring in
exchange for 20 hours of work per week. (They'd have to buy and
cook their own food, but might have a place to grow a garden.)
The work would involve learning, but would probably also involve a lot
of repetition, because that's what farms are like. If you were a
potential intern, would that sound good?
We actually have two
different potential internship ideas: the living homestead and the
microbusiness. Mark could really, really use an inventor's
apprentice, while I could really, really use someone good at weeding
and mulching. Do you think the same person would be likely to be
interested in both or are the farmer wannabes different from the people
who want to be financially independent?
How many interns do you
think we should have at one time? On the one hand, starting with
one intern sounds much less scary. On the other hand, maybe
interns are like chickens and goats --- more self-sufficient in flocks?
I dream that an intern
would take some training, but then would make work happen faster.
On the other hand, my nightmares involve interns who take more time to
teach than they give us back in labor and who are so needy that I never
get any alone time. I'm especially interested to hear from those
of you who have managed interns. Which reality is most true?
We're trying to decide
on the best time of year for an internship. Presumably,
most potential interns would be young, so the summer when they're out
of school might be a good season. But I'm not convinced that any
of our readers other than Jalen are under 25. What do you think
is a good time period for the internship?
How about length?
We'd really like to try the idea on a short term basis, maybe a month
at the most, but we learned our lesson by soliciting WWOOFers --- the
people who are interested in short-term internships are also the people
who call at the last minute and cancel. How long is the optimal
internship period to attract serious candidates?
Are you or someone you
know interested in being a Walden Effect intern?
Do you think we're crazy
to even consider this?
As usual, feel free to
add in your more in-depth response in the comments.
 Raising chicks from day one
to adulthood seems to be far less fraught with peril than getting them
out of their eggs, but my track record still improved over time.
As long as you can keep your chicks disease free (which our chicken waterer pretty much does for you),
there are only two big causes of chick mortality --- temperature and
predators.
Raising chicks from day one
to adulthood seems to be far less fraught with peril than getting them
out of their eggs, but my track record still improved over time.
As long as you can keep your chicks disease free (which our chicken waterer pretty much does for you),
there are only two big causes of chick mortality --- temperature and
predators.
Heat
Until they're fully
feathered, chicks need an external source of heat to keep them
alive. The mother hen would serve this function in the wild, but
if you're raising chicks on your own, you'll need to resort to a
powered heat source. I was thrilled when I discovered Brinsea's
EcoGlow Chick Brooder,
which mimics a mother hen by letting the chicks snuggle up under a warm
object rather than warming their entire space. I felt like the
contact brooder raised happier chicks than the traditional brood light,
although I was a nervous chick mother and hated not being able to see
the chicks for the first day as they slept off their hatch exertions.
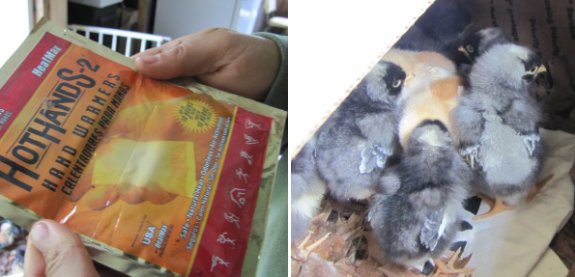
But what if the power
goes out? I learned the hard way that even an hour without heat
can kill your weakest chicks, but we also came up with a stopgap
solution for brooding during short power outages. Putting an
activated hand warmer in the bttom of a small box and closing the lid
partway kept our chicks from anxious peeping until the electricity came
back on. (Our readers also suggested some other good alternatives
here.)
Predators
 I lost a quarter of my first
two batches of chicks to rats. My mother hen did a better job,
but still lost one of her offspring. Only on hatch four did I
figure out that it's not rocket science to keep predators away from my
chicks. Just:
I lost a quarter of my first
two batches of chicks to rats. My mother hen did a better job,
but still lost one of her offspring. Only on hatch four did I
figure out that it's not rocket science to keep predators away from my
chicks. Just:
- Keep your chicks inside the house a little longer, if possible.
- Once you move the chicks outside, seal gaps in the coop so rats have a harder time getting in.
- Shut the chicks in the coop each night until they're six weeks old and too big for rats to attack.
- Keep chicken feed in a sealed container outside the coop.
I lost 25% of hatch one
to rats, 33% of hatch two to a power outage and then to rats, and 18%
of hatch three to introducing the chicks to the mother hen incorrectly
and then to rats. But our final batch of 14 chicks have all
survived their 6 week birthday and will probably make it until we pull
the plug and put them in the freezer in November. That's more
like it!
This post is part of our 2011 Chicken Experiments lunchtime series.
Read all of the entries:
|
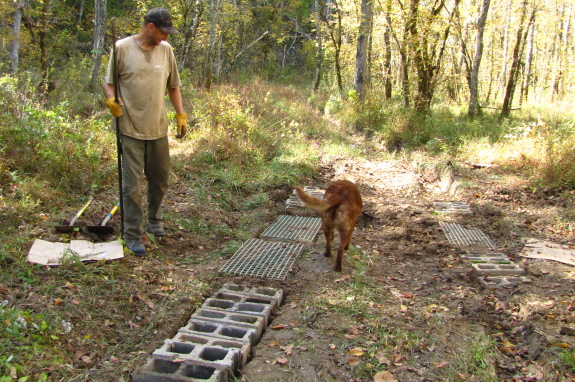
The rain showed up early this
morning which prompted us to take our first Staycation day of 2011 instead of fighting
the weather.
At least the truck is now
free and ready to go.
Hard to say how much of a
wait it might be till the next dry spell.
 A few weeks ago, I wrote that
shelling
peanuts is hard on the fingers and extremely time consuming on a large
scale. You all
came back with some great tips for easier ways to shell peanuts, and I
invited Mom over to help me try out some of the top contenders.
A few weeks ago, I wrote that
shelling
peanuts is hard on the fingers and extremely time consuming on a large
scale. You all
came back with some great tips for easier ways to shell peanuts, and I
invited Mom over to help me try out some of the top contenders.
We decided to experiment
with the simplest method first --- putting the peanuts in a cloth bag
and rolling over it with a rolling pin. This technique did a good
job of cracking the shells (deleting the painful fingers problem), but
we still had to pick the peanuts out since they didn't come all the way
loose. I figured the rolling pin method would be a good way to
shell peanuts if you're eating as you shell and aren't trying to
process enough for later.
When we got sick of
hand-picking, I hauled our wimpy chipper-shredder out of the barn and gave it
a try. Daddy had suggested lowering the rpms to process peanuts,
but since we converted the machine to electric (and since Mark was at a
friend's house), I just turned it on as-is.
First we fed in all of
last year's peanuts, collecting the debris on a cloth underneath.
The nut and shell mixture was daunting when we started to pick through
it, but then I realized that I could pour whole handfuls into a pot of
water to separate the shells and whole peanuts (which float) from the
shelled nuts (which sink.) Sending the floaters through the mill
again cracked out any nuts that had been missed the first time around,
then I repeated the float trick to pull out the rest of the nuts.
For a first attempt, the
chipper-shredder did good work, but I'll definitely tweak my technique
before trying again. First, I really should have taken the
peanuts off the stems before feeding them into the shredder --- the
bits of stem in the second batch clogged up the works and I had to
clean the shredder out by hand. Second, I should have washed all
of the dirt off the nutshells before
shredding --- it turned out that the most laborious part of the process
was picking out the few bits of soil that sank to the bottom with the
nuts and didn't rinse off with a few changes of water.

You should be aware that
the chipper-shredder will cut up your nuts to some extent --- I got
mostly halves, with some smaller pieces and a few whole nuts.
This wasn't a problem since I just roasted all of the nuts with a
little salt to create instant breakfast, but if you need whole peanuts,
you'll be happier slowing down the chipper-shredder or finding some
other way to shell your peanuts.
We've still got about a
third of this year's crop left, which I plan to use for experiments
with roasting salted peanuts in the shell and boiling peanuts.
More on that once I finish eating up my current batch.
By the way, nuts that
fell into the grass didn't go to waste. Lucy ate up as many as
she could find and then our chicks went to work. We'll be eating
those peanuts one way or another.
 Our
pasture experiments required us to build chicken coops for the first
time, which meant dealing with chicken manure. There are four
ways to handle the endless amounts of manure that build up in a chicken
coop:
Our
pasture experiments required us to build chicken coops for the first
time, which meant dealing with chicken manure. There are four
ways to handle the endless amounts of manure that build up in a chicken
coop:
- Ignore it. This works best with a dirt floor, but still ends up being an unsightly and foul-smelling mess.
- Put bedding on the floor of the
coop and change it regularly. If you really do clean out
the coop regularly, this method can work, but most people end up
putting the task off until you're pretty much using method 1.
- Make a raised mesh floor so that the manure falls through onto the ground below. This method sounds pretty cool, but in practice the manure tends to block up the holes, so you either have to clean the floor or go back to ignoring it. And then there's the manure on the ground to deal with.
- Deep bedding. Also
known as deep litter, this method involves adding
fresh bedding on top of the soiled bedding regularly. In
essence, you're building a mini compost pile on the floor of your
chicken coop, so you don't end up with bad odors. After about a
year (or whenever the bedding gets so high that you're bumping your
head on the ceiling), you shovel out the lower layers and use them on
your garden.
 I'd read that deep
bedding is good for your chickens' health, but I have to admit that my
early experience with deep bedding was less positive. This past
winter two of our old hens came down with a lingering case of diarrhea
--- the first time we've had sick chickens on the farm. The
problem could have just been caused by their advanced age, but it might
also have been due to the flock being cooped up with their own waste
all winter. On the other hand, the helpful microorganisms that
counteract pathogens accumulate in deep litter as it ages, so hopefully
we'll see disease resistance on our more mature deep bedding this
winter.
I'd read that deep
bedding is good for your chickens' health, but I have to admit that my
early experience with deep bedding was less positive. This past
winter two of our old hens came down with a lingering case of diarrhea
--- the first time we've had sick chickens on the farm. The
problem could have just been caused by their advanced age, but it might
also have been due to the flock being cooped up with their own waste
all winter. On the other hand, the helpful microorganisms that
counteract pathogens accumulate in deep litter as it ages, so hopefully
we'll see disease resistance on our more mature deep bedding this
winter.
 On the bright side, the deep
litter definitely did its job of making my life easier. As long
as I remembered to add more leaves or straw frequently as our broilers
grew up, the coops stayed clean and odor-free. And during the
winter when the outside soil temperature was a chilly 27 degrees
Fahrenheit, the composting litter on the floor of the chicken coop
nearly reached 60 degrees. Surely that free warmth was
appreciated!
On the bright side, the deep
litter definitely did its job of making my life easier. As long
as I remembered to add more leaves or straw frequently as our broilers
grew up, the coops stayed clean and odor-free. And during the
winter when the outside soil temperature was a chilly 27 degrees
Fahrenheit, the composting litter on the floor of the chicken coop
nearly reached 60 degrees. Surely that free warmth was
appreciated!
 To get best results, you're
supposed to always keep your deep bedding at least six inches
deep. As anyone who's worked with compost knows, rotting
vegetation gets smaller and smaller, so deep litter doesn't get thick
as fast as you'd think. I stole
some deep bedding prematurely this past spring because I
needed some rich mulch for a fruit tree, but I haven't harvested any of
the compost I hope is on the bottom layer of our two coops
currently. Maybe by spring, I'll have black gold to pitchfork
into my wheelbarrow.
To get best results, you're
supposed to always keep your deep bedding at least six inches
deep. As anyone who's worked with compost knows, rotting
vegetation gets smaller and smaller, so deep litter doesn't get thick
as fast as you'd think. I stole
some deep bedding prematurely this past spring because I
needed some rich mulch for a fruit tree, but I haven't harvested any of
the compost I hope is on the bottom layer of our two coops
currently. Maybe by spring, I'll have black gold to pitchfork
into my wheelbarrow.
This post is part of our 2011 Chicken Experiments lunchtime series.
Read all of the entries:
|
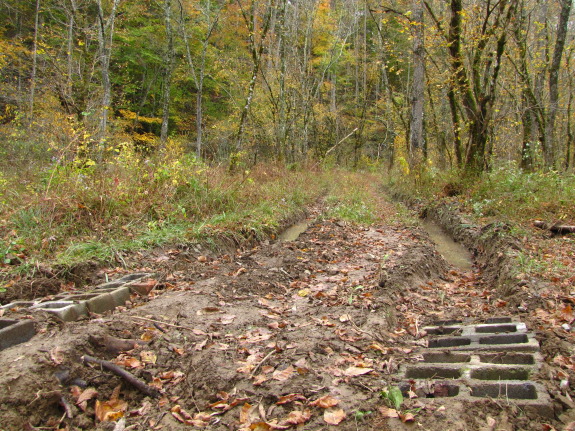
It rained enough last night
to postpone any future hauling by at least 4 or 5 days.
Our solution to that was to make today the sequel to our Staycation
Tuesday.
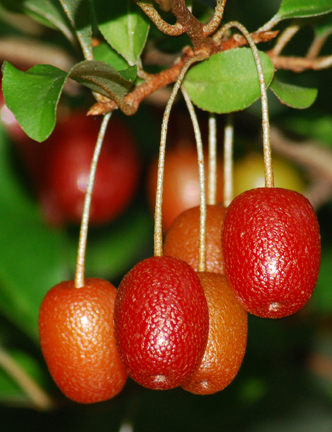 When I wrote about eating Autumn
Olive fruits,
I started to tell you that rather than planting the invasive (though
useful) shrubs, you should install their kissing cousin Goumi in your
garden. Goumi made it onto my must-have list this
spring when two Asheville
forest gardeners
both listed the fruit in their top four alongside more well known
perennials like pears and blackberries.
When I wrote about eating Autumn
Olive fruits,
I started to tell you that rather than planting the invasive (though
useful) shrubs, you should install their kissing cousin Goumi in your
garden. Goumi made it onto my must-have list this
spring when two Asheville
forest gardeners
both listed the fruit in their top four alongside more well known
perennials like pears and blackberries.
In addition to producing
delicious berries, both Autumn Olives and Goumis
are among the few non-legumes that are nitrogen-fixers, so the bushes
can
grow in very poor soil. And I had read that Goumis aren't
invasive.
However, a more
extensive search of the internet puts that last
assertion in doubt. Yes, the USDA doesn't list Goumi as invasive
at
the moment, but the species has been seen growing in the wild in twelve states
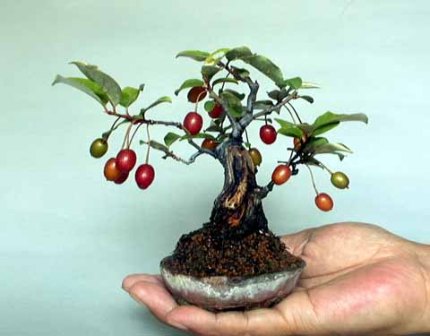 and is listed as a potential
invasive by Alabama and Tennessee. I wouldn't be at all
surprised if Goumi spreads far enough to be a federally listed invasive
species in a few years.
and is listed as a potential
invasive by Alabama and Tennessee. I wouldn't be at all
surprised if Goumi spreads far enough to be a federally listed invasive
species in a few years.
Despite the enticing
nature of Goumi bushes, I think I'm going to resist the urge to plant
them in my garden. I guess that if I was really itching to try
the fruit without putting my woods at risk, I could always make a Goumi
bonsai like this one....
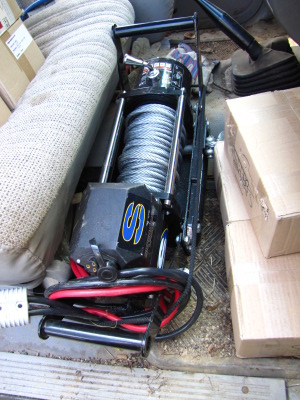 I
first thought the tiny back seat area would be a good place to stow the
Super
Winch, but decided against it when I imagined what a back breaker
it might be to lift it out and over the front seat.
I
first thought the tiny back seat area would be a good place to stow the
Super
Winch, but decided against it when I imagined what a back breaker
it might be to lift it out and over the front seat.
We settled on letting it ride
shot gun.
Most trips in the truck are
just me with no passengers, but there's still plenty of room to sit and
stretch out if someone rides along.
Makes me wish they included a
T-shirt with the package that said something like "Super Winch is my Co-Pilot".
 We outsourced our final
chicken-related experiment to our readers. Frozen water is one of
the difficulties of raising livestock in the winter, so we solicited
suggestions for turning our do it yourself
chicken waterer kits
into a homemade heated waterer.
We outsourced our final
chicken-related experiment to our readers. Frozen water is one of
the difficulties of raising livestock in the winter, so we solicited
suggestions for turning our do it yourself
chicken waterer kits
into a homemade heated waterer.
The suggestions were
inspiring and diverse. Heating elements ranged from heat lamps,
aquarium heaters, and heat tape to stock tank heaters and gutter
deicers. But we loved the heated waterer shown here the
best. For $26, Lu Ann and Christian Shank created a chicken
waterer that sandwiched heat tape between two buckets --- a very
repeatable and elegant design. You can read their description of
the project here, and we now feature it along
with some other heated waterer options on the instructions file that
comes with our DIY kits. Thanks for solving such a thorny
problem, Lu Ann and Christian!
This post is part of our 2011 Chicken Experiments lunchtime series.
Read all of the entries:
|
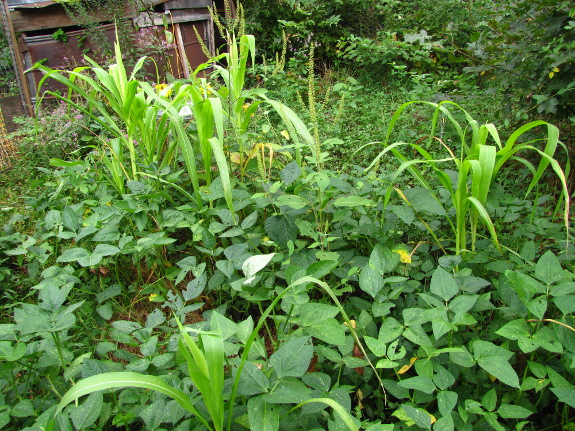
I tried out some seed
balls in one of our
pastures in June --- you can read more about my
specific experiment here. Early results were
promising, but most of the seedlings that sprouted right away later
dried up during our hot summer. The only plants that survived
were: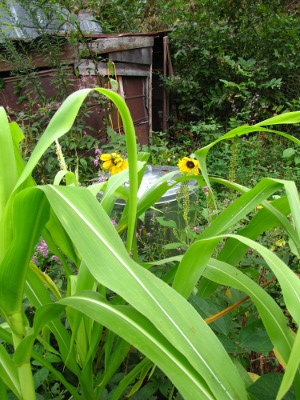
- Field corn --- The seed ball did seem to help field corn sprout better than the seeds simply scattered amid a similar amount of dirt on the surface of the soil. However, a heavy feeder like corn doesn't get enough nutrition from the seed ball to thrive, so I ended up with a few wimpy corn plants that didn't produce anything.
- Sunflowers --- I had a few come up, but the sunflowers failed to thrive. They bloomed but didn't produce seeds.
- Cowpeas --- This is the only crop that thrived in my experiment. That said, the cowpeas did just as well when scattered on the soil surface as when mixed into seed balls. Too bad the chickens weren't interested.
The conditions in my
pasture were probably similar to or slightly better than those you'd
find in a city lot (higher fertility and less shade), so I'd say that
my suspicions were correct --- seed balls aren't very helpful for
planting edible crops. Whether they are better than simply
scattering seeds for lower maintenance crops is yet to be decided.
 After
a year of chicken research, I feel like I'm ending with more questions
that I started out with. Here are some of the experiments I want
to
explore over the next year.
After
a year of chicken research, I feel like I'm ending with more questions
that I started out with. Here are some of the experiments I want
to
explore over the next year.
Pasture
optimization.
How
often do we need to cut back heavy weeds to keep the succulent new
growth coming in? Does it make sense to add another type of
animal to do this brush-clearing, or would we be better off renovating
our pastures by hand? Which traditional pasture plants will our
chickens enjoy the most? Can I figure
out the perfect ratio of tree cover to give our chickens a more
diversified food source without shading the understory too much?
How much more pasture area do we need so that I don't feel like our
ground gets overgrazed during the summer and winter lulls? Does
it work to plant annuals for those seasons of low pasture productivity?
Chicken
breed selection.
We're trying out three new breeds --- Cuckoo Marans, Black Australorps,
and Light Sussex. I'd love to narrow that down to one or two, but
want to find birds that will go broody, lay well, forage avidly, and
have a low feed conversion rate. Assuming I decide on a good
breed or breeds next year, in 2013 it will be time to learn about
poultry genetics and how many birds I need to keep a flock going
without undue inbreeding. It's also worth considering whether a
hybrid of
two of our breeds would exhibit extra vigor and bulk up faster for
broilers.
 Broiler timing. Raising
four small sets of broilers made sense on paper, but given what I now
know about pasture productivity, it seems like I might make better use
of our pasture by lumping them together into two batches. Right
now, I'm thinking that I'll start eggs incubating in March to hatch in
April and go out on pasture in late April to early May, then have a
fall batch that starts incubating in July to go out on pasture in early
September. That will probably mean learning how to make a broody
hen set on my schedule rather than hers. Or it may mean more work
with our incubator.
Broiler timing. Raising
four small sets of broilers made sense on paper, but given what I now
know about pasture productivity, it seems like I might make better use
of our pasture by lumping them together into two batches. Right
now, I'm thinking that I'll start eggs incubating in March to hatch in
April and go out on pasture in late April to early May, then have a
fall batch that starts incubating in July to go out on pasture in early
September. That will probably mean learning how to make a broody
hen set on my schedule rather than hers. Or it may mean more work
with our incubator.
It looks like I've got a
fun year of trial and error ahead of me. Stay tuned to our chicken blog for details!
This post is part of our 2011 Chicken Experiments lunchtime series.
Read all of the entries:
|

Our Rigid well pump came apart yesterday and somehow
leaked a small amount of an unknown lubricant which floated to the
surface.
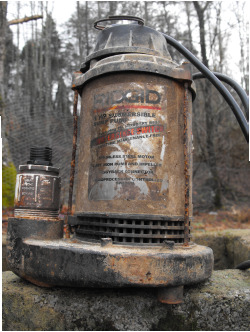
We tried soaking some of it
up with a towel tied to a rope, but what worked best was the half
gallon plastic pitcher we build Avian Aqua Misers with.
I think the failure was due
to suspending this type of pump instead of letting it rest on the
bottom. I was trying to avoid as much sediment as possible, but now can
see how the constant pressure of gravity was pulling at the case and
working against the original designer's intention.
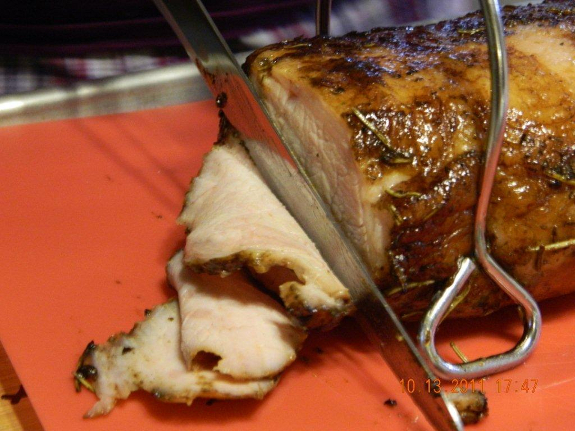
When my mother-in-law
(Rose) told me she'd started smoking, I knew right away what she
meant. I begged her to take some photos of her home-smoked meat
experiments, and her partner Jayne complied. I'll let Jayne tell
you about it in her own words.
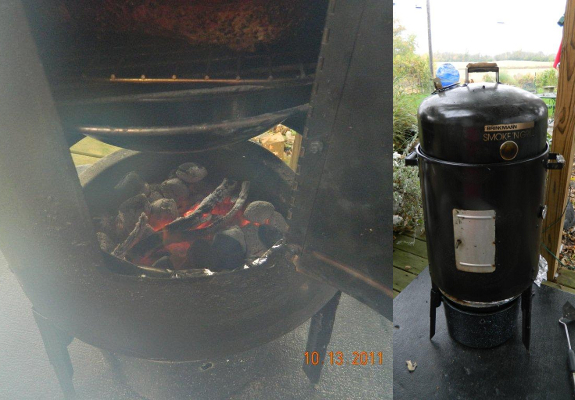
Rose did an overhaul on
an old Brinkmann Smoke N Grill that Mac and Nancy had long, long ago
tossed aside after deciding it wasn't for them. After some elbow
grease and a new paint job, Rose attacked all the other failings, not
limited to, but, including:
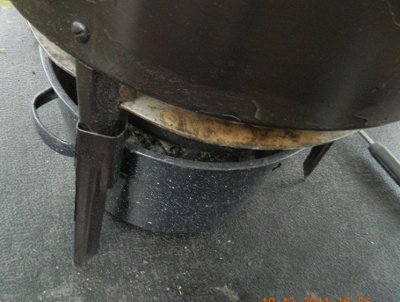 Problem: Legs on the Smoker
were so short you had to practically stand on your head to keep the
fire going with the charcoal and wood chips.
Problem: Legs on the Smoker
were so short you had to practically stand on your head to keep the
fire going with the charcoal and wood chips.Solution: Rose purchased 4 Tiki light stakes that slipped right onto the legs and elevated the whole smoker 8 inches
Smoked
Pork Loin
Serves 4-8
Ingredients:
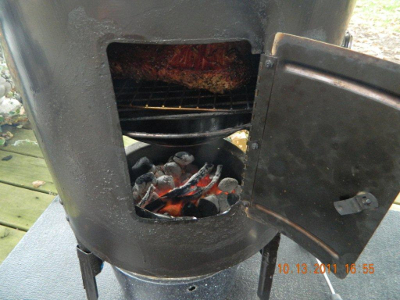 1 or 2 pork tenderloins (1.5-2
pounds each)
1 or 2 pork tenderloins (1.5-2
pounds each)- Dry rub with, garlic powder, salt & pepper, rosemary and thyme or your favorite spice mixture
- Adequate wood (hickory for a stronger flavor, pecan, cherry or apple for something milder) chunks, or 2 cups of wood chips (in foil packet, if chips) & your charcoal.
Instructions:
- Dry rub pork loin
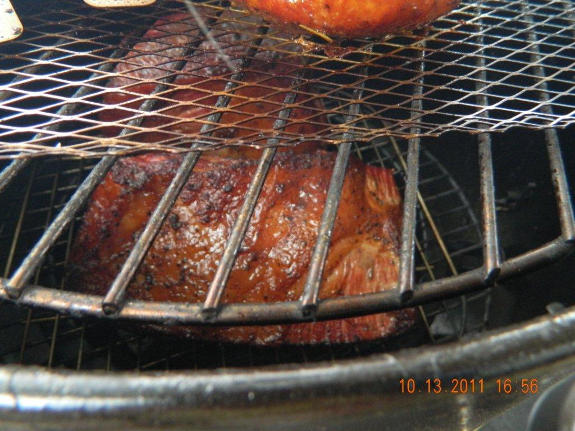
- Smoke approximately 3 hours at 225, replacing charcoal (and adding new wood chips) once, or as needed, to maintain temperature.
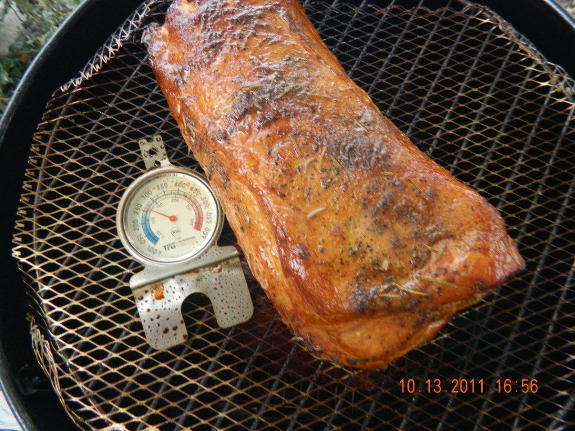
- When the meat reaches 150-160 degrees, take off smoker and wrap in foil for 5-10 minutes.
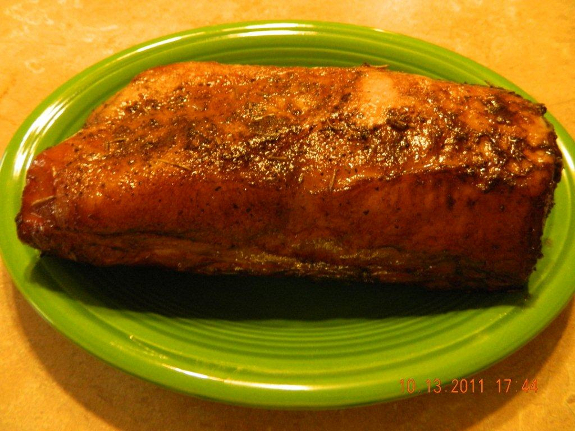
- Slice thinly and serve with favorite sauce on the side or with a chutney.
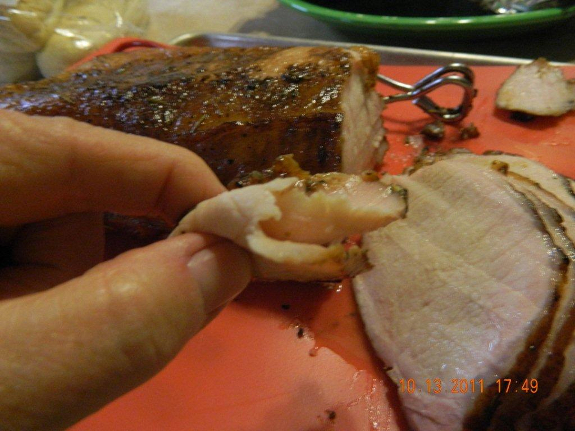
It doesn't get any easier
than smoking your favorite cut of meat and certainly the taste is well
worth the effort.
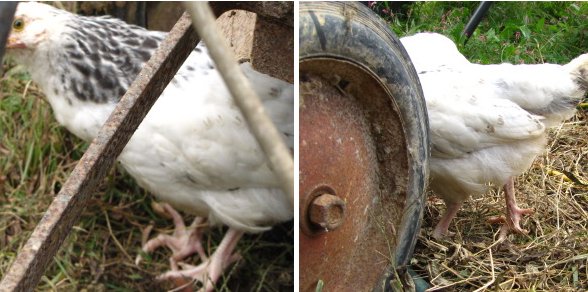
Our curled
toe chicken seems to walk
and scratch just as well as the rest of her
flock.
She seems a little smaller
than some of the other hens, but we think that would be more connected
to her early struggle as a chick.
It's tough not to start
calling her "Curly". I've done it a few times and caught myself.
Knowing a bird by her first name seems a little too close to the
"friend zone" for my comfort level and it would no doubt complicate things
on retirement day.

I was relaxing on the
futon with two snuggly cats and a good book when the hawk swooped down
out of nowhere. "Aaaah!" I shrieked and our more skittish cat
fled the house just as fast as our tweens scattered in terror.
 I couldn't tell at first
whether anyone had been taken. The tweens had gone to ground
under the trailer or in the weeds and wouldn't come out no matter how
much grain I rattled.
I couldn't tell at first
whether anyone had been taken. The tweens had gone to ground
under the trailer or in the weeds and wouldn't come out no matter how
much grain I rattled.
Slowly, they crept
forth. Eight chickens, nine chickens, twelve chickens.
Finally, all fourteen tweens were accounted for --- thank goodness!
I've been reading that
even in optimal pastured situations, less than a quarter of the
chickens are willing to brave the great outdoors at any given
time. I can just imagine farmers prodding Cornish Cross out the
door of the coop --- "When I was your age, chickens played
outside! No TV-watching, couch potatoes on my farm!"
Repeated studies have
shown that adding trees or bushes to a pasture entices more chickens
outside. Now I know why. Could our forest pastures be the reason we've never
had a hawk attack until now?
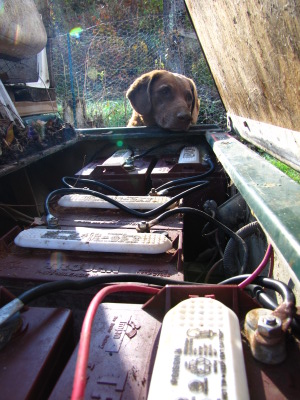 Last
year I posted on how we repaired
a battery cable on the golf cart with a 2 dollar copper connector
and saved a little money.
Last
year I posted on how we repaired
a battery cable on the golf cart with a 2 dollar copper connector
and saved a little money.
I don't think I got the
connector crimped good enough and it may have contributed to the battery
terminal melting.
The pre-made cables are just
a few dollars more than the replacement connector, but at the time it
seemed like a good short cut that would save a trip to the store.
I'd say our crimping tool
wasn't made for those large connectors. If I had it to do over again I
might have used a table vice to squeeze the connector better, but any
future cable problems will wait till we can get the proper pre-made
cable.
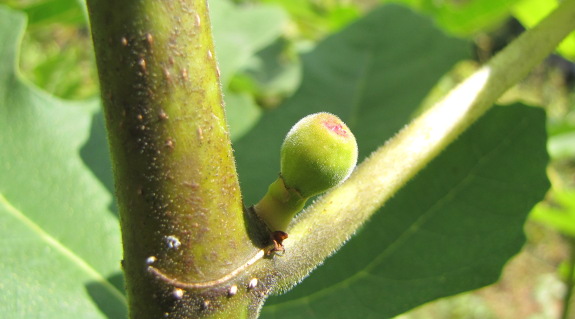
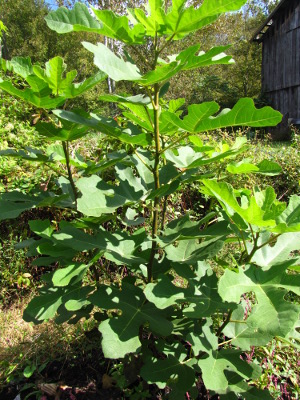 Our Chicago
Hardy Fig grew
beautifully in its first year and would have given us some ripe fruits
if our growing season had been just a month or two longer.
Our Chicago
Hardy Fig grew
beautifully in its first year and would have given us some ripe fruits
if our growing season had been just a month or two longer.
My winter-protection of
autumn leaves enclosed in some of that green plastic trellis material I
love so much worked great, but I unwrapped the tree prematurely in the
spring. The tender buds were nipped by a late frost and the fig
had to regrow from the ground, which is probably why it got such a late
start on fruiting.
The jury's still out
until I taste a homegrown fig here in zone 6, but I have high hopes
that the tiny tree will come through for us next year!
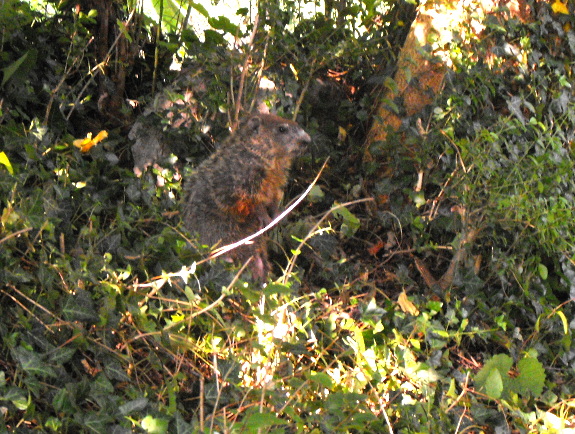

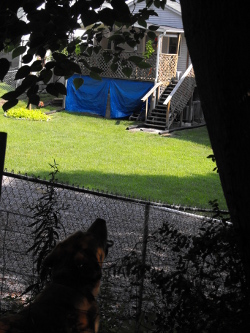
Last year at this time,
I got my urban
homesteading correspondent (aka Mom) to write up a
lunchtime series walking you through her garden. This year, I
simply stole her camera, which was full of stunning photos, like this
series showing her dog chasing the resident groundhog up a tree.
(Clearly, the lesson to be learned here is --- keep your camera out of
my hands or face the consequences.) I hope you enjoy the urban
homesteading tips that will show up here at lunchtime for the rest of
the week!
| This post is part of our Tips from the Urban Homestead lunchtime
series.
Read all of the entries: |
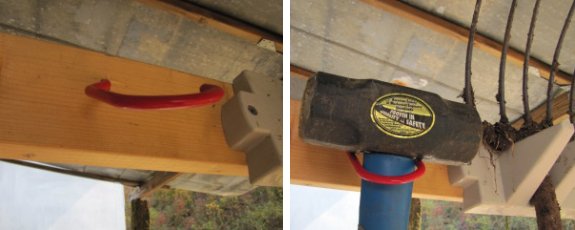
A rubber
coated storage hook feels like it was born to hold a sledge hammer.
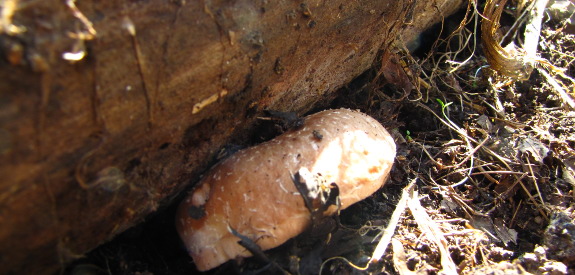
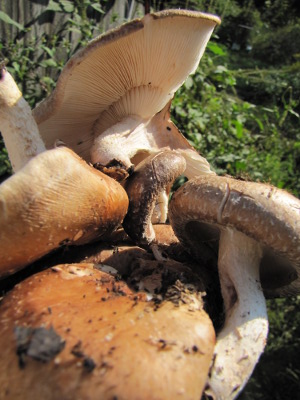 The good news is that our mushroom
rafts started
producing like crazy once we got a few rains and temperatures dropped
to more autumnal levels. I was surprised to discover mushrooms
even on the logs that didn't fruit last year --- being close to the
earth seems to rejuvenate mushroom logs with even a hint of life left
in them.
The good news is that our mushroom
rafts started
producing like crazy once we got a few rains and temperatures dropped
to more autumnal levels. I was surprised to discover mushrooms
even on the logs that didn't fruit last year --- being close to the
earth seems to rejuvenate mushroom logs with even a hint of life left
in them.
The bad news is that the
mushrooms we harvested were pretty filthy. Mushrooms are one of
the few foods that you really can't wash since they'll soak up the wash
water and go soggy. I wiped the shiitakes harvested from our
rafts vigorously with a damp cloth, but there was still quite a bit of
debris left on the caps. Good thing we're not very picky eaters.
Our mushroom totems had
a bit of the same problem since mushrooms tend to pop out in the
dampest portion of the log, which is also the region closest to the
ground, but careful 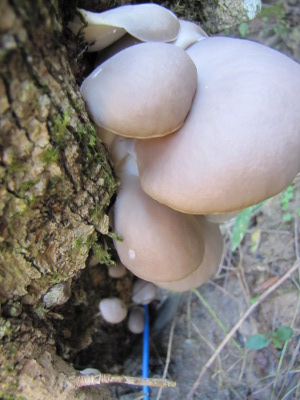 plucking seemed to minimize
the dirt. Now that weather is a bit cooler, the oyster mushroom
totems have started fruiting all up and down their length, resulting in
a much cleaner product.
plucking seemed to minimize
the dirt. Now that weather is a bit cooler, the oyster mushroom
totems have started fruiting all up and down their length, resulting in
a much cleaner product.
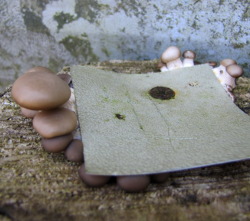
I'm still weighing the
pros and cons of mushroom rafts and totems vs. the more intensive log-soaking
methods we'd used
previously. I don't think I'll repeat our mushroom rafts, but the
totems have a lot of selling points if you can put them in a damp,
shady location.
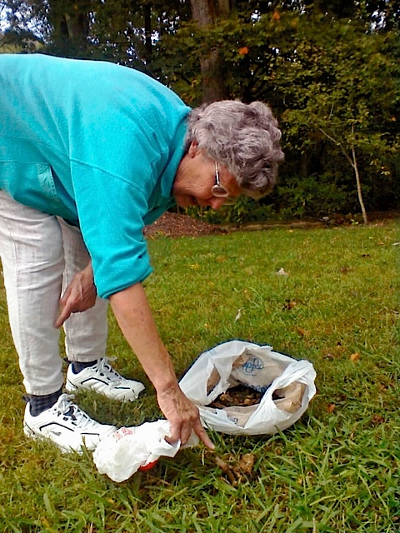 Looking
for fertility for your small urban garden? Search no further than
your local golf course or park.
Looking
for fertility for your small urban garden? Search no further than
your local golf course or park.
Canada Geese love these
"lawns" and they camp out on the grass spreading their manure.
Park managers will nearly always be more than thrilled if you scoop
some up (just like bagging your dog's poop during an urban walk) and
bring it home to mix with a high
carbon material like
leaves.
Goose manure is about
77% water and has a fertilizing value of about 2-4-2 when dried.
That means a lot of high quality phosphate, which is hard to find in
plant-based compost. Of course, goose poop is a bit too strong to
apply directly to your plants, but you can either add it to your
compost pile for a dose of nitrogen or mix with mulch for a spring
boost around perennials. Another alternative would be to water
down the goose poop to make a manure tea for feeding house plants,
especially greedy eaters like dwarf
citrus.
While you're fertilizing
your garden, you'll even be helping the local watershed.
Phosphates from concentrated masses of goose poop can cause algae
blooms in nearby waters and end up killing fish and other life.
Scooping poop can keep the water clean and your garden green.
| This post is part of our Tips from the Urban Homestead lunchtime
series.
Read all of the entries: |
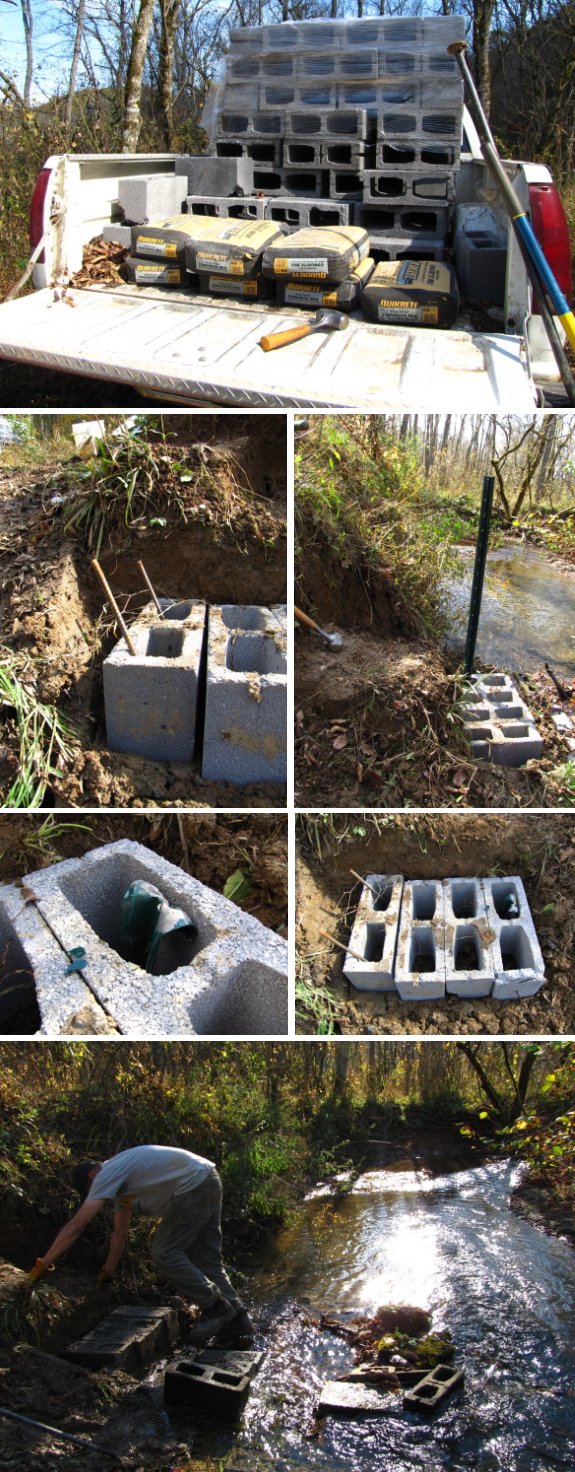
Anchoring down these cinder
blocks has our creek crossing feeling twice as stable as before.
It's a project we've
been putting off for years.
I still doubt if we get any
trick or treaters this year brave enough to hike across the creek,
through the woods, and back to our trailer for a piece of candy.
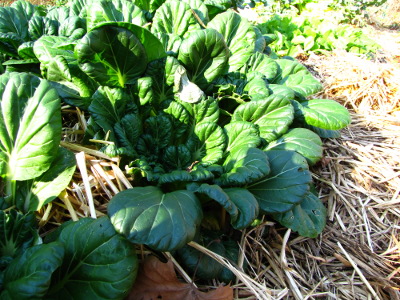 I
think of October as "putting the garden to bed month." It's a bit
of a misnomer because my garden never sleeps. Even though the
summer crops are nearly done, the mule garden is vibrant with half a
dozen varieties of leafy greens, lettuce, and the few broccoli and
cabbage plants that germinated in the summer heat. There are
carrots bulking up, garlic and potato
onions already
poking out of the ground, and beds and beds of oat
and radish cover crops.
Strawberry leaves will stay green all year if I can protect
them from the deer
and parsley and Egyptian onions will feed us fresh herbs
through the winter.
I
think of October as "putting the garden to bed month." It's a bit
of a misnomer because my garden never sleeps. Even though the
summer crops are nearly done, the mule garden is vibrant with half a
dozen varieties of leafy greens, lettuce, and the few broccoli and
cabbage plants that germinated in the summer heat. There are
carrots bulking up, garlic and potato
onions already
poking out of the ground, and beds and beds of oat
and radish cover crops.
Strawberry leaves will stay green all year if I can protect
them from the deer
and parsley and Egyptian onions will feed us fresh herbs
through the winter.
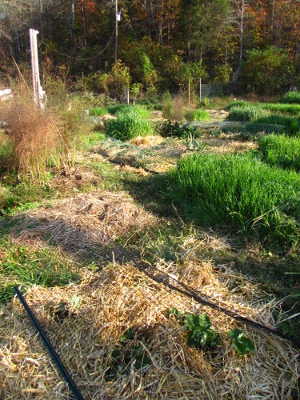 So I guess I should call it
"weeding and mulching month." The goal is to get every weed out
of the garden before it goes to seed and then to cover any patches of
bare ground with mulch. I never quite achieve that dream before
cold weather makes weeding an act of cold finger stoicism, so near the
end I tend to cut corners and just toss mulch on top of small weeds
without rooting them out.
So I guess I should call it
"weeding and mulching month." The goal is to get every weed out
of the garden before it goes to seed and then to cover any patches of
bare ground with mulch. I never quite achieve that dream before
cold weather makes weeding an act of cold finger stoicism, so near the
end I tend to cut corners and just toss mulch on top of small weeds
without rooting them out.
In the spring, I can
tell the difference. Beds in which I took the time to dig out
dandelion roots rather than just snapping off the leaves are much less
work for the rest of the year. On the other hand, if I toss a
heavy coat of straw down on top of tiny chickweed and dead nettle
seedlings, I always regret it since the weeds manage to make their way
up through the mulch and have to be removed...along with half the straw.
Our two month old chicks
are helping speed the process along, picking out any chickweed and
sourgrass that come up in my garden beds. (They've also been
eating a 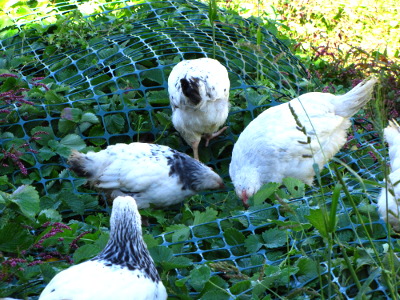 few of the last tomatoes, but
are otherwise well-behaved on threat of losing their garden
privileges.) The abnormally warm fall weather is also a
bonus. But I've still got nearly two-thirds of the garden to
manicure, so I'm not making any bets on this being the one year I treat
the whole garden properly.
few of the last tomatoes, but
are otherwise well-behaved on threat of losing their garden
privileges.) The abnormally warm fall weather is also a
bonus. But I've still got nearly two-thirds of the garden to
manicure, so I'm not making any bets on this being the one year I treat
the whole garden properly.
In a way, I'm chomping
at the bit to start working on our long term, winter projects. On
the other hand, I know I would give just about anything to enjoy a
sunny day of warm-fingered weeding in February, so I'm enjoying the
garden while I can.
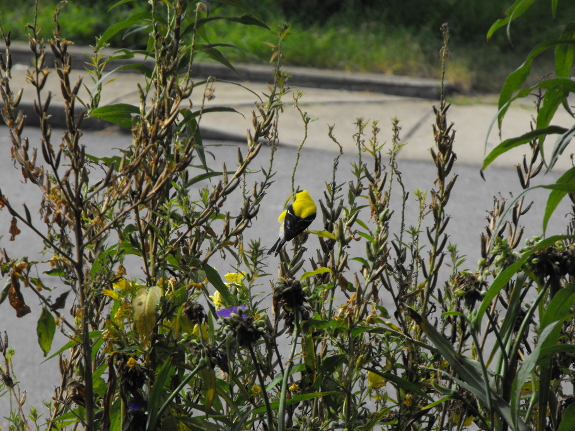
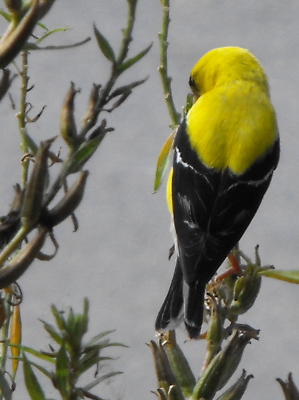 On our farm, it doesn't take
any work at all to attract wildlife, but city gardens are very
different. Without acres of woodland and hayfields to make them
feel at home, you need to leave some weedy patches to give wild animals
hiding places and food.
On our farm, it doesn't take
any work at all to attract wildlife, but city gardens are very
different. Without acres of woodland and hayfields to make them
feel at home, you need to leave some weedy patches to give wild animals
hiding places and food.
Mom is a master of the
art of blending in well enough with the neighborhood aesthetic while
still attracting birds, butterflies, and more to her small urban
lot. She likes to let wild goldenrod and asters bloom here and
there to feed all kinds of beneficial pollinators and will often allow
flowers to go to seed rather than deadheading. I think the
goldfinch who showed up on these evening primrose pods is even prettier
than the flowers that once graced the plants.
Other ideas for
attracting wildlife to an urban yard include:
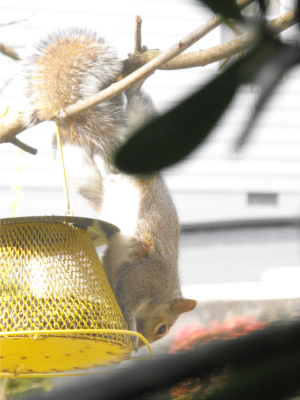 Water
--- a bird bath or small pond will be a gathering spot for everything
from insects to birds. Just make sure you keep mosquitoes at bay
by either adding fish to the water or allowing it to dry up regularly.
Water
--- a bird bath or small pond will be a gathering spot for everything
from insects to birds. Just make sure you keep mosquitoes at bay
by either adding fish to the water or allowing it to dry up regularly.- Cover --- Bushes or
clumps of tall grasses (like pampas grass) make animals feel
safer. To attract a wider range of animals, add brush and rock
piles (but only if you're willing to work around snakes.)
Of course, there's
always some wildlife you might prefer not to attract --- like this
squirrel that eats up all the bird feed --- but, overall, your garden
will be more resilient if it's more diverse. So leave some weedy
edges and give the earth room to breath!
| This post is part of our Tips from the Urban Homestead lunchtime
series.
Read all of the entries: |
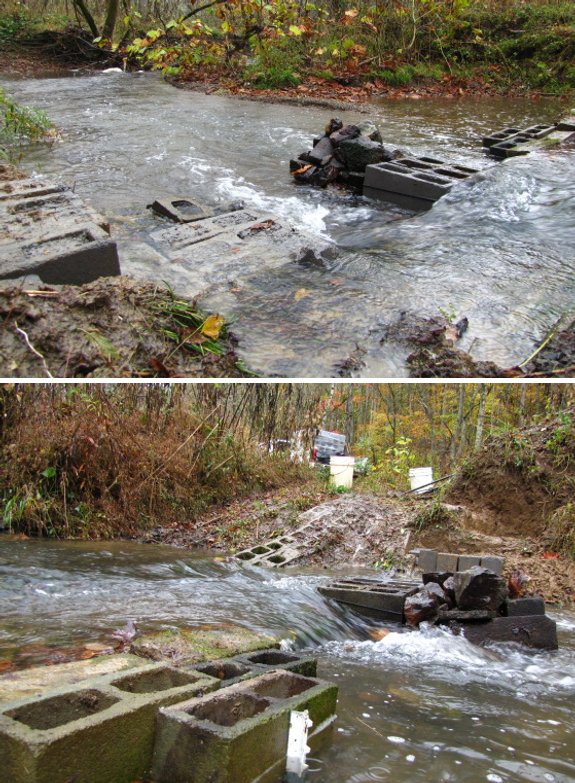
It started raining during our
cinder
block stepping stone project today.
Looks like the creek is now
up a good 2 or 3 inches.
I would have preferred the
cement I mixed yesterday to have another day of drying, but it seems to
be holding up pretty well.
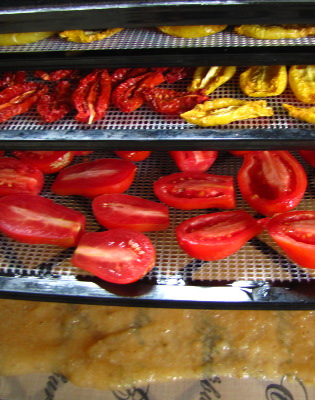 Has
our dehydrator paid for itself?
Probably not yet, but we've only had it around four months.
Has
our dehydrator paid for itself?
Probably not yet, but we've only had it around four months.
I've made about 6 cups
of dried mushrooms, 12 cups of dried summer squash, and 11 cups of
dried tomatoes. That doesn't sound like much, until you figure
that dried foods take up perhaps a quarter of the space of fresh foods,
so the dehydrator has processed around 7 gallons of vegetables already!
During peak tomato
drying season, I realized that I could slide in some fruit leather for Mark after the dryer had
been running for a couple of hours and kill two birds with one
stone. Tomato halves are a bit too tall to allow me to put a tray
on each shelf of the dehydrator, but they soon shrink down to more
moderate dimensions. Then I can add four trays of applesauce to
perk up my hard-working husband.
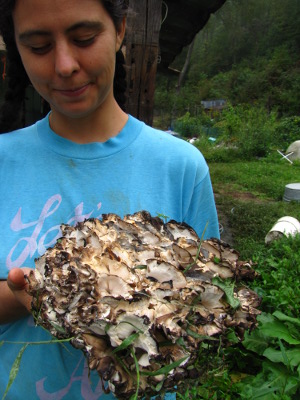 We also learned that the
delicious (but extremely chewy) black-staining polypore mushroom can be
easily broken into tiny pieces after dehydrating. The result is
small enough chunks that you don't spend all afternoon chewing,
especially if you simmer the dried and powdered polypore for a few
hours in a pot of vegetable soup.
We also learned that the
delicious (but extremely chewy) black-staining polypore mushroom can be
easily broken into tiny pieces after dehydrating. The result is
small enough chunks that you don't spend all afternoon chewing,
especially if you simmer the dried and powdered polypore for a few
hours in a pot of vegetable soup.
Of course, the real
reason we got the dehydrator was to preserve homegrown fruit.
Strawberry season had just ended when we took the plunge, and if we'd
had the tool previously, I wouldn't have given away a couple of gallons
of berries and lost perhaps another half gallon to improper conditions
during one of my rounds of drying
in a sunny car.
(We still ended up putting away 23 cups of strawberry leather using the
car method, so it's hard to complain.) And then our peach tree
failed us, so we didn't have any summer fruit to dry. If our
strawberries and peaches bear well next year, then the dehydator will pay for
itself.
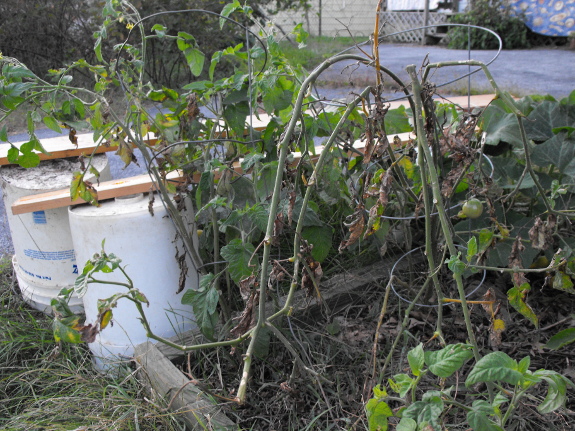
Fall weather is so
variable that if you dodge the first frost, you can sometimes enjoy
summer garden bounty all the way until Thanksgiving or later. In my
most recent 99 cent ebook, I explain how to make quick
hoops for under $50, but in many cases, something quicker and cheaper
is called for. That's why I loved Mom's frost protection method,
shown here.

The idea is to drape a
blanket over your plants without crushing them. She set up some
five gallon buckets and boards to make a frame over her summer squash,
tomato cages did the job on the other end of the garden bed, and the
porch railing made a support elsewhere. Add a blanket and get
instant protection from light frosts.

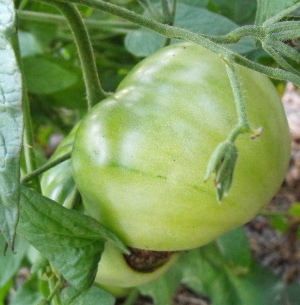 Of
course, with a system like this, you'll need to wait to put the blanket
in place until dusk and then take it off the next morning since light
won't pass through. I think Mom didn't mind the extra work,
though, to keep enjoying tasty squash and tomatoes.
Of
course, with a system like this, you'll need to wait to put the blanket
in place until dusk and then take it off the next morning since light
won't pass through. I think Mom didn't mind the extra work,
though, to keep enjoying tasty squash and tomatoes.
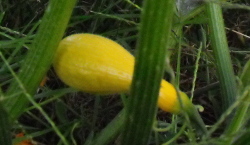
Thanks for the photos
and idea, Mom!
| This post is part of our Tips from the Urban Homestead lunchtime
series.
Read all of the entries: |
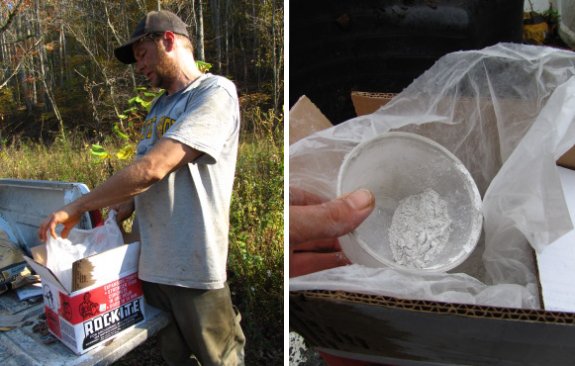
Once upon a time I worked for
an industrial fence company, and sometimes we had to set a fence post
in sub-freezing conditions. The trick to making this work is to mix in
just the right amount of Rockite with the Ready-Mix concrete. The Rockite helped to
speed the process along, preventing the mixture from freezing.
I decided to apply this
technique to the creek
stepping stones where I
filled in the holes of each cinder block with 1 part Rockite to 8 parts Ready-Mix. A few of the holes had a fence
post driven through them to act as an anchor.
It seems like it worked, but
I won't know for sure until I see how well they stand up to the
constant pressure of our creek.
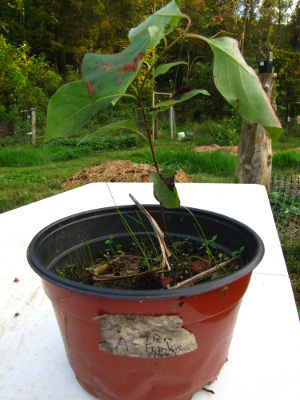 The good news is that I now
have one beautiful little American persimmon growing in our chicken
pasture. The bad news is that I
started with 40 seeds last fall. What happened?
The good news is that I now
have one beautiful little American persimmon growing in our chicken
pasture. The bad news is that I
started with 40 seeds last fall. What happened?
The seeds came from a
variety of sources (thanks, Lisa, Frankie, and Mom!) and I think I
should have been more careful about how the seeds were handled.
The one seed that sprouted came to me inside a freshly picked
persimmon, while many of the unsprouted seeds arrived flesh-free.
Persimmon seeds can die easily if they don't stay moist, so I think
it's quite possible that some of the seeds I planted weren't even
viable when I put them in the ground. In future, I'll be sure to only plant
seeds that have been inside a fruit, in the
gut of an animal, or
inside a damp baggie.
Since I had so many
persimmon fruits from Frankie, I put about a dozen seeds in some 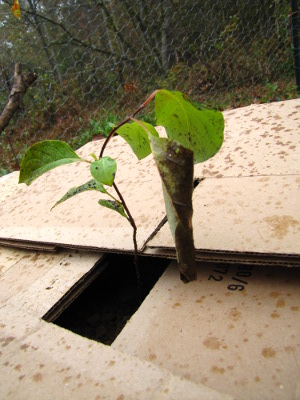 water to ferment off the
flesh the way you do with tomatoes or cucumbers. I was hoping that the
fermenting process would make the seeds more likely to sprout, but none
of that batch made it. Fermenting
persimmon seeds doesn't seem to be helpful.
water to ferment off the
flesh the way you do with tomatoes or cucumbers. I was hoping that the
fermenting process would make the seeds more likely to sprout, but none
of that batch made it. Fermenting
persimmon seeds doesn't seem to be helpful.
Finally, I think the
biggest problem was my planting method. Persimmons hate being
transplanted and are supposed to be very dependent on native forest
mycelium, so I dug up some soil out of the nearby woods, put it in
pots, and planted the seeds inside. Over the winter, these pots
were sitting outside to stratify the seeds, and the frost
heaved the soil until many of the seeds ended up sitting on the surface
and drying out. Since persimmon seeds don't sprout until far into
the summer, I forgot about the pots and the seeds had another chance to
dehydrate. If that combination of mismanagement didn't kill all
of the seeds, it surely must have knocked back the soil fungi, so my
low germination percentage is no big surprise.
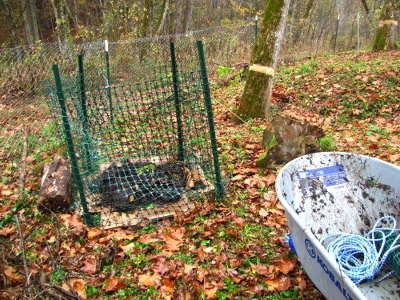 This year, I plan to remove
persimmon seeds from the fruit, wrap them in a damp cloth inside a
ziploc bag, and let them stratify in the more controlled refrigerator
environment.
Only
in the spring will I take them out and put them in pots (in a more noticeable
location!) Alternatively, if I didn't think I'd lose track of
them, I could just plant several seeds in each place where I want
persimmons to grow, then thin back to one plant per patch next summer.
This year, I plan to remove
persimmon seeds from the fruit, wrap them in a damp cloth inside a
ziploc bag, and let them stratify in the more controlled refrigerator
environment.
Only
in the spring will I take them out and put them in pots (in a more noticeable
location!) Alternatively, if I didn't think I'd lose track of
them, I could just plant several seeds in each place where I want
persimmons to grow, then thin back to one plant per patch next summer.
All of these should'ves
aside, I think the one persimmon seedling I set out this week will do
quite well. Of course, I have to wait 4 to 8 years until I know
whether it's a useless boy or a useful girl....
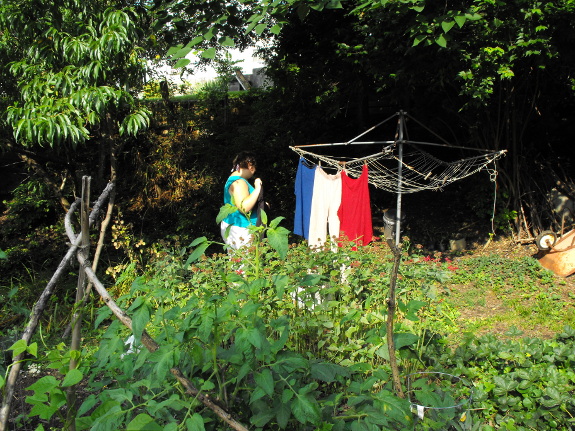
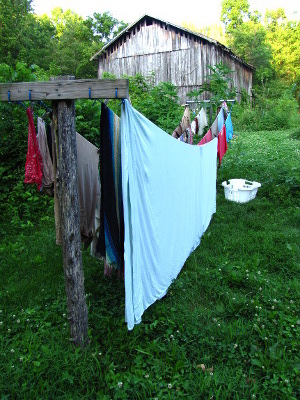 Before Errol made my first T-structure
clothesline, at the Farm (like yours), I had strung heavy wire going up
the ditch behind the house, some of it tied to branches, I guess, that
hung over the electric fence on the other side of the ditch. When
I had heavy things, like Errol's jeans, or maybe big towels or even
quilts or blankets, the line would sag --- as it does in your first
photo.
Before Errol made my first T-structure
clothesline, at the Farm (like yours), I had strung heavy wire going up
the ditch behind the house, some of it tied to branches, I guess, that
hung over the electric fence on the other side of the ditch. When
I had heavy things, like Errol's jeans, or maybe big towels or even
quilts or blankets, the line would sag --- as it does in your first
photo.
I had already learned, from Mrs. Vespa and Onie, to use tall
props, which is
one reason I still keep my eye out for fairly straight branches over 8'
long! My props were sometimes 10' long, and the best had a fork
at the end, for the line to rest in. These were essential, for raising
up the heavy load (the worst part of hanging out is if any drops in the
mud!!) Clothes dry so much faster if higher off the ground!
(Which is why I drape the socks and underwear on the high bars of my
reel.)
When Errol made the
T-frame, I went down to Onie and said, "He is trying to domesticate
me!" I loved my rambling line!!
In
winter,
especially, it is easier to dry sheets if you do NOT hang
over the line (for
they can freeze to the line)! And if you fold the wet sheet in
half, then in 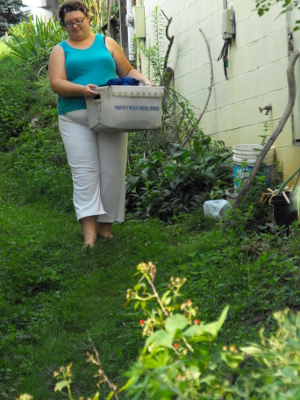 quarters, it is easier to unfold
and hang, out in the cold. One of the ways I was taught to hang
out was to organize
the clothes before going out, as one takes them out of the
washing machine (or,
in your case, as you rinse and wring) --- so you have a pile of
underwear that you already know where you will hang, and have the
better clothes sort of shaken out and folded conveniently ready to hang.
quarters, it is easier to unfold
and hang, out in the cold. One of the ways I was taught to hang
out was to organize
the clothes before going out, as one takes them out of the
washing machine (or,
in your case, as you rinse and wring) --- so you have a pile of
underwear that you already know where you will hang, and have the
better clothes sort of shaken out and folded conveniently ready to hang.
You really need to be
particular, on damp days, or if you have alot to hang out and hope to
be re-using your line the same day! Not bothering to make sure
the clothes are completely right-side out, even, for example if you
wash them wrong-side out; and not shaking
them out so they don't clump, but are flat. Those
two rules, plus the awareness of drying high, if possible, and not
draping over the line, in the winter, unless you plan to turn the
article for the underside to be dried. These are my life-tested
rules!
| This post is part of our Tips from the Urban Homestead lunchtime
series.
Read all of the entries: |
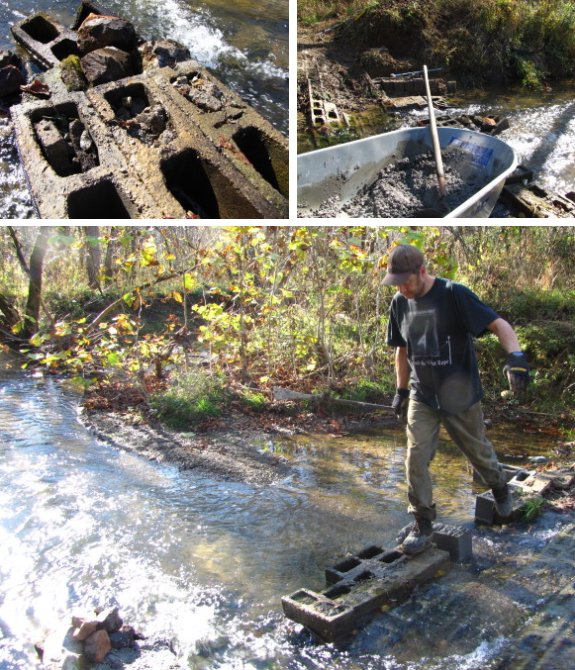
The final phase of our creek
stepping stone project is
now complete.
It was just under 50 dollars
when you total up all the supplies.
I would say the labor was 80
percent hard work mixed in with 20 percent of playing in the creek.
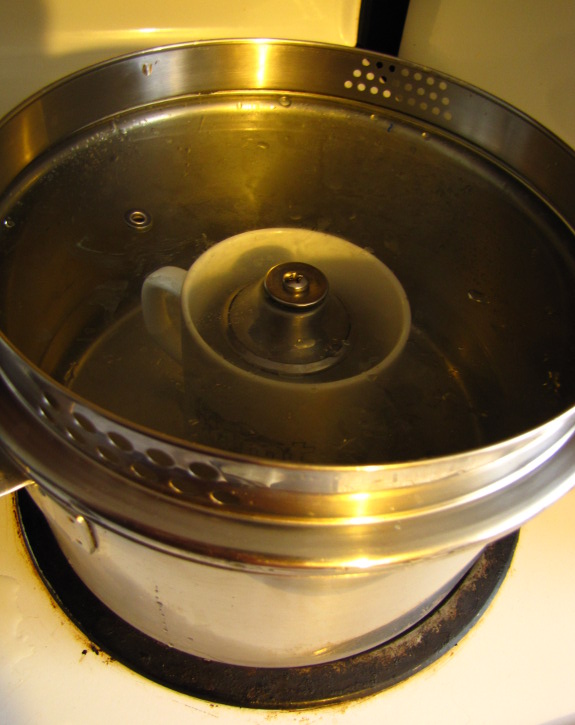
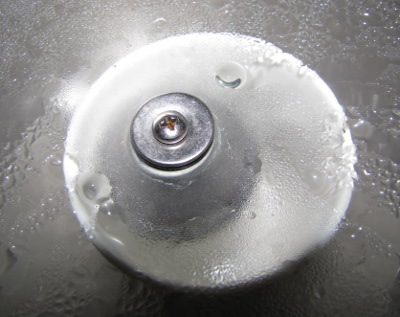 The
November volume of Weekend
Homesteader is going to have a section about stocking up on
drinking water for short term emergencies. As I wrote, I started
thinking about how people could deal with unsafe water if their stores
ran low and they had to pull water out of a creek or lake. One
government website suggested distilling as the safest solution, and
provided a relatively painless method of distilling small amounts of
drinking water for home use.
The
November volume of Weekend
Homesteader is going to have a section about stocking up on
drinking water for short term emergencies. As I wrote, I started
thinking about how people could deal with unsafe water if their stores
ran low and they had to pull water out of a creek or lake. One
government website suggested distilling as the safest solution, and
provided a relatively painless method of distilling small amounts of
drinking water for home use.
 Find a pot with a domed lid
that ends in a knob handle. Fill the pot partway full of water,
place a mug in the middle, then put the lid on upside down. When
you bring the water to a boil, condensation gathers on the bottom of
the lid, then drips down the handle and into the mug. I tested
the method on our electric stove, but the same theory would work on the
wood stove if the power was out.
Find a pot with a domed lid
that ends in a knob handle. Fill the pot partway full of water,
place a mug in the middle, then put the lid on upside down. When
you bring the water to a boil, condensation gathers on the bottom of
the lid, then drips down the handle and into the mug. I tested
the method on our electric stove, but the same theory would work on the
wood stove if the power was out.
What do you think ---
would you try distilling water in an emergency situation if the only
liquid available seemed too gunky to simply boil or add bleach
to? I had fun experimenting, but have to admit that the mug and
lid jiggled around like crazy and I only ended up with a couple of
tablespoons of water in the five minutes I allotted to the
project. I'd be curious to hear what your long term backup water
plans entail (assuming you don't already drink out of a spring or well.)
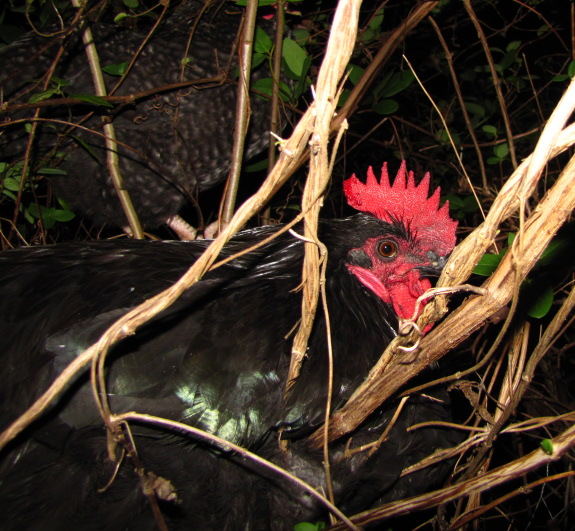
We've been letting our new
flock free range in the forest behind their pasture lately and last
night was the first night they didn't come home to roost.
Free ranging gives them more
variety while letting the pastures recover, but now I'm going to be
inclined to herd them towards their coop when it starts to get dark.
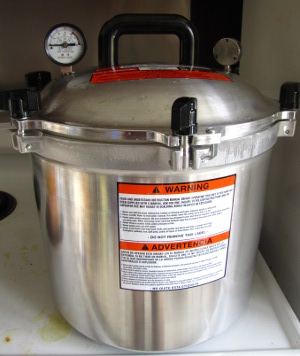 Here's the right way to start
oyster mushrooms from scratch:
Here's the right way to start
oyster mushrooms from scratch:
- Make a "clean room" into which spores of other mushrooms can't
invade.
- Mix up some agar and make sterile petri dishes.
- Add a tiny section of oyster mushroom to each dish.
- Once the spawn runs across the petri dish, make sure nothing else
is growing on the dish. If you haven't created a clean culture,
throw it away and start again.
- Fill clean canning jars about halfway with roughly equal
quantities of grain and water. (0.45 pounds of wheat or rye and
0.9 cups of water is about right.)
- Put sterilized filters on top of each jar so that air can come
and go but fungi spores can't.
- Let the grain soak overnight, then cook the jars at 15 PSI in a pressure canner for an hour.
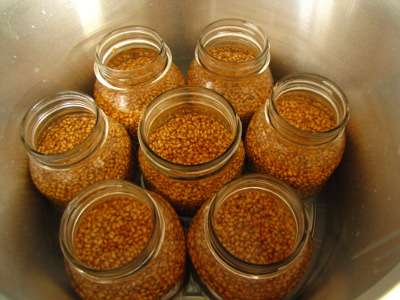 Move the pressure canner to the
clean room before opening.
Move the pressure canner to the
clean room before opening.- Let the grain cool.
- Cut the petri dish (with spawn) into sections and add some to
each jar. You can get away with adding 3% spawn by weight, but if
you've got it, 10% to 20% is much better.
- Shake the jars to mix the spawn into the cooked grain.
- Incubate at 75 degrees Fahrenheit for two or three weeks until the oyster mushroom spawn has fully colonize the grain.
 Maybe it's just me, but that
procedure sounds pretty intense and far beyond the average backyard
mushroom-grower's reach --- and I didn't even mention the part where
you use the grain spawn to inoculate the fruiting
medium!
Extreme measures are needed to keep one strain of mushroom pure for a
big mushroom company, but what if you just want to expand your existing
mushroom log collection slightly?
Maybe it's just me, but that
procedure sounds pretty intense and far beyond the average backyard
mushroom-grower's reach --- and I didn't even mention the part where
you use the grain spawn to inoculate the fruiting
medium!
Extreme measures are needed to keep one strain of mushroom pure for a
big mushroom company, but what if you just want to expand your existing
mushroom log collection slightly?
Last year, I
experimented with growing
oyster mushroom spawn on cardboard. The jury's still out
on whether that worked --- the trouble with mushroom experiments is
that you often have to wait years before you find out if you were
successful. So I decided to experiment with a medium-tech way of
growing oyster mushroom spawn in case the low-tech cardboard method
doesn't pan out.
The vigor of oyster
mushrooms (and the fact that I'm not planning on expanding my spawn
more than once) allows me to ignore some of the sterility
precautions. Rather than jumping through all of the hoops
outlined above, I simply soaked some leftover wheat 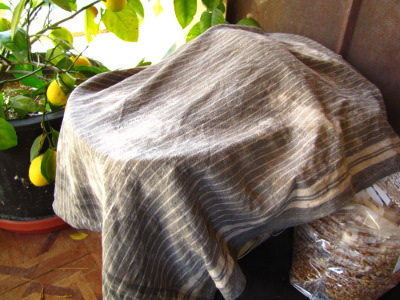 overnight in open quart
jars. Next, I cooked the jars in the pressure canner at 15 PSI
for an hour. Once the grain had cooled, I spooned some into a
couple of ziploc bags, leaving the jars halfway full. Then I
mixed in a bunch of oyster mushroom stem butts I'd collected off our
bountifully fruiting mushroom
totems this
week. I left the tops of the bags and jars open, but draped a
damp cloth over them in hopes of keeping the contents moist.
overnight in open quart
jars. Next, I cooked the jars in the pressure canner at 15 PSI
for an hour. Once the grain had cooled, I spooned some into a
couple of ziploc bags, leaving the jars halfway full. Then I
mixed in a bunch of oyster mushroom stem butts I'd collected off our
bountifully fruiting mushroom
totems this
week. I left the tops of the bags and jars open, but draped a
damp cloth over them in hopes of keeping the contents moist.
I'm sure plenty of "weed
fungi" got into the grain in my completely unsterile work area, but I
suspect the oysters will outcompete those weeds pretty quickly.
As long as the spawn that appears is white, doesn't look greasy, and
smells right, I'll assume my technique worked. Then I'll be faced
with an even bigger dilemma --- what to do with two gallons of oyster
mushroom spawn when it's too late in the year for outside inoculation!
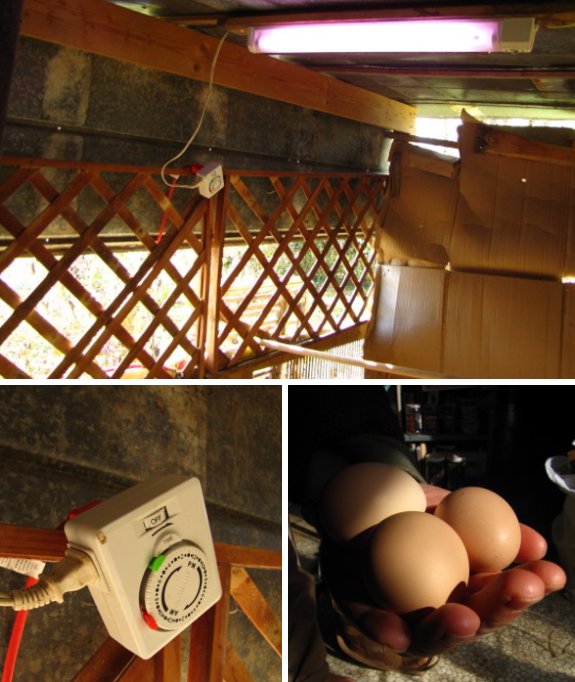
We installed a light in the
main chicken coop to extend daylight hours which in turn should
stimulate egg production.
A timer turns it on around
5pm and off at 10.
It took about a week to start
seeing an increase from one egg per day to an average of three.
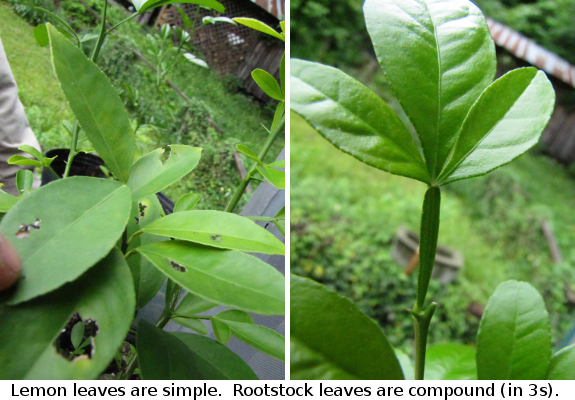
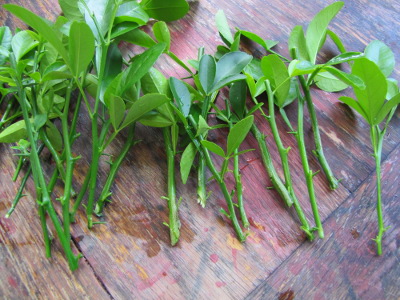 This summer, our movie star
neighbor proudly displayed dozens of dwarf
lemons he had bought for a song. The trouble was, every
single one had sprouted from the rootstock, and the bushy growth of
trifoliate orange was overshadowing the lemon scionwood. I was
itching to prune, so my neighbor kindly handed me the clippers and let
me play.
This summer, our movie star
neighbor proudly displayed dozens of dwarf
lemons he had bought for a song. The trouble was, every
single one had sprouted from the rootstock, and the bushy growth of
trifoliate orange was overshadowing the lemon scionwood. I was
itching to prune, so my neighbor kindly handed me the clippers and let
me play.
Soon, the little lemon
trees were revealed, and the ground was littered with dozens of 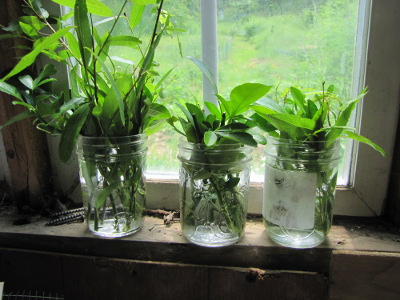 trifoliate orange
branches. The opportunity to root this dwarf citrus species and
use it to create more dwarf lemons was too tempting to resist, even
though Mark reminded me that neither we nor our movie star neighbor
have room for any more dwarf citrus plants.
trifoliate orange
branches. The opportunity to root this dwarf citrus species and
use it to create more dwarf lemons was too tempting to resist, even
though Mark reminded me that neither we nor our movie star neighbor
have room for any more dwarf citrus plants.
There's the right way to
root semi-difficult species like trifoliate orange, and then there's the
homesteading way.
I tend to go for the quick and dirty methods that require no
storebought supplies, even though these techiques give fewer successful
results. If I've only spent half an hour of my time and
absolutely no money, who cares if only 10% of my cuttings make
it? With that in mind, I simply snipped the trifoliate orange
cuttings down to four inch lengths and plopped them in glasses of water
along with a few willow cuttings collected on the walk home.
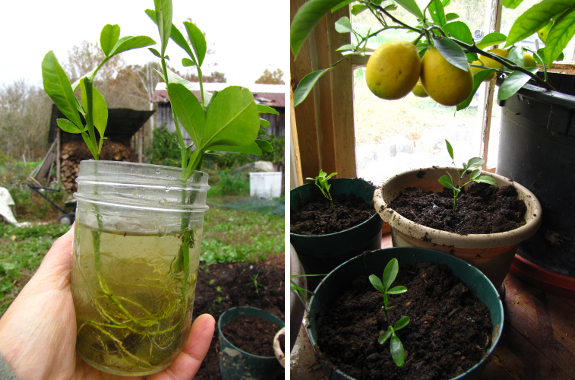
Next, I forgot about
them. The glasses of water dried up repeatedly, but I tended to
remember to add fresh liquid before the cuttings really gave up the
ghost. Months later, I was shocked to see that three of my
trifoliate oranges had grown hefty roots! I potted them up in
some composted manure and will graft on Meyer lemon twigs in a month or
two, once our parent tree has ripened its lemons all the way and starts
putting out new growth.
And then I'll give the
baby lemon trees away because Mark was right --- we really don't have
room for any more potted plants. But it sure is fun to make
something out of nothing!
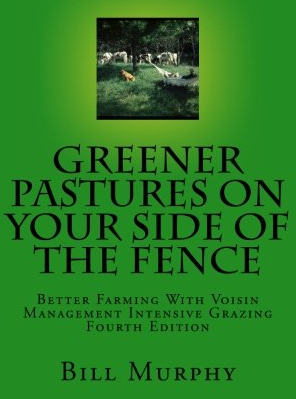 When I started experimenting
with chicken pastures,
I figured that since chickens weren't ruminants and don't graze the
same way as cows and sheep, I didn't need to read up on pasture
management. As a result, I managed to make every beginner mistake
possible.
When I started experimenting
with chicken pastures,
I figured that since chickens weren't ruminants and don't graze the
same way as cows and sheep, I didn't need to read up on pasture
management. As a result, I managed to make every beginner mistake
possible.
Reading Greener
Pastures on Your Side of the Fence: Better Farming With Voisin
Management Intensive Grazing by Bill Murphy spurred numerous
epiphanies. I realized that even if I was just providing prime
pasture to grow grasshoppers that in turn would feed my chickens, I
needed to use all the tricks possible to get the greatest amount of
high quality forage out of my limited pasture area. The nearly
complete lack of growth in my pastures in July and August was
preventable, and my chickens could have eaten more if the grass hadn't
been allowed to go to seed and turn woody.
In fact, using Bill
Murphy's guidelines of creating a pasture that contains 30 to 50%
legumes, I might have been able to cut most of the expensive protein
supplements out of our chickens' summer feed and simply provided free
choice minerals and corn. On a properly managed, intensively
grazed pasture, protein content of the forage averages 22%, which is
enough for all grazing animals. Sure, our chickens couldn't break
down the structural carbohydrates in the grasses, but corn (for energy)
is much cheaper than soybeans (for protein.)
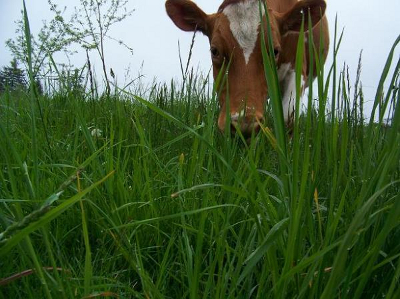 If you're grazing ruminants,
Bill Murphy's book is even more of a must-read. He uses careful
rotation to create a self-maintaining pasture that gets its nitrogen
from animal manure and legumes. Some of the benefits of his
system include:
If you're grazing ruminants,
Bill Murphy's book is even more of a must-read. He uses careful
rotation to create a self-maintaining pasture that gets its nitrogen
from animal manure and legumes. Some of the benefits of his
system include:
- Costs as low as 1/6 that of feeding animals in confinement.
- Higher yields of more nutritious forage than in continuous grazing situations.
- Organic matter constantly being added to the soil and more soil
bacteria and fungi than in any other type of agricultural land.
- Lack of erosion since pasture is never allowed to degrade and create bare spots.
- Three or four times as many earthworms as is in tilled
soil. In fact, if you keep legumes populous in your pasture, the
weight of the earthworms under the surface may reach twice the weight
of the livestock grazing on top!
This week's lunchtime
series will cover the highlights of American management intensive
grazing, but I highly recommend that you pick up Bill Murphy's book if
you have any pasture at all. This is one of the few books that
will have a permanent place on my bookshelf as I peruse the data-rich
graphs and tables over and over.
(By the way, the grazing
photos in this series are from Throwback at Trapper
Creek, whose
beautiful and knowledgeable blog turned me onto the notion of high tech
grazing. As usual, click on the image to see the source website.)
| This post is part of our Greener Pastures on Your Side of the Fence
lunchtime series.
Read all of the entries: |
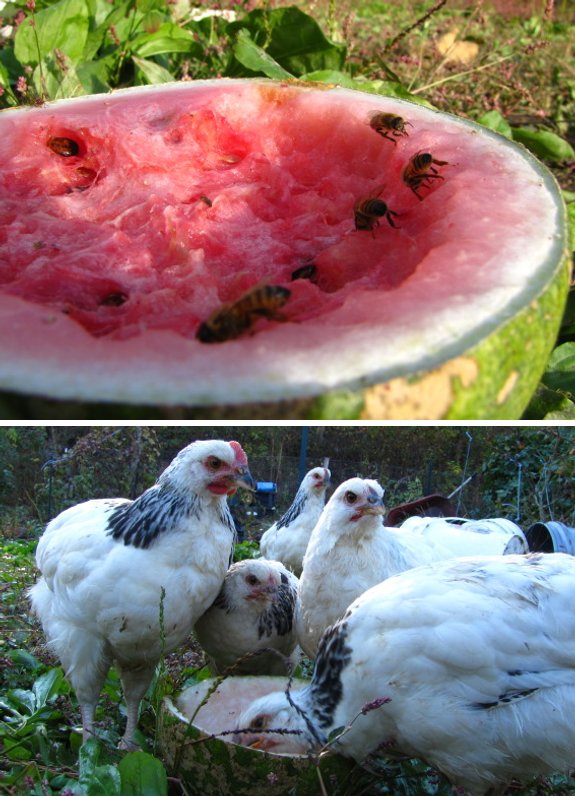
A bad melon is a bummer for
us humans, but a big bonus for our birds and bees.
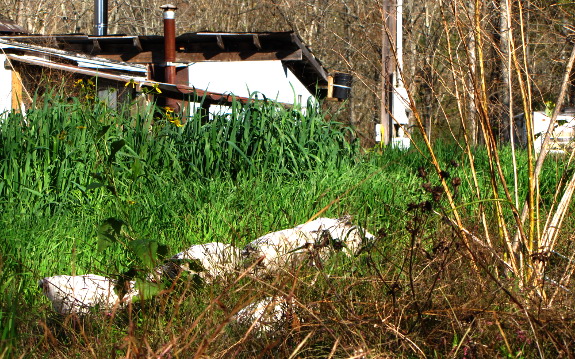
My garden soil feels
very different this year than it has in the past. I've never seen
so many worms, especially the huge nightcrawlers that love a steady
supply of mulch. And I've never had soil so rich, dark, and
alive. After four years of maintaining soil, I feel like in 2011 I
finally built soil.
I made three big changes
in the garden over the last year. I kept a constant straw mulch
whenever possible, I doubled my application rate of horse manure
compost to a full inch before every crop, and I slipped in cover crops whenever possible.
The plants responded
with astonishing bounty, with one notable exception. We had a
terrible time with Mexican bean
beetles this year,
which I suspect is due to the high application rate of compost.
I've read that if you feed beans too much, the nitrogen in their leaves
is in a slightly different form that's tastier to bean beetles than if
they'd made the 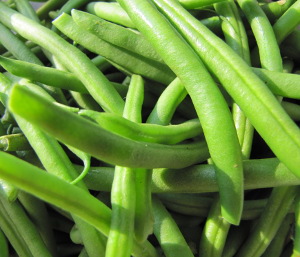 proteins
by fixing nitrogen out of the air. I tested this hypothesis by
planting my last bed of beans with no compost at all, and that was the
one bed where the bean beetles barely made any headway --- the insects
were present, but were darker in color and seemed to be growing much
more slowly. The beans, on the other hand, grew vigorously and
churned out dozens of dinners. The experiment was far from
definitive because the lower bean beetle vigor could have just been due
to the decline of the gardening year, but I think I'll cut back on the
compost going to my beans next year. For the rest of the garden,
though, I wouldn't change a thing.
proteins
by fixing nitrogen out of the air. I tested this hypothesis by
planting my last bed of beans with no compost at all, and that was the
one bed where the bean beetles barely made any headway --- the insects
were present, but were darker in color and seemed to be growing much
more slowly. The beans, on the other hand, grew vigorously and
churned out dozens of dinners. The experiment was far from
definitive because the lower bean beetle vigor could have just been due
to the decline of the gardening year, but I think I'll cut back on the
compost going to my beans next year. For the rest of the garden,
though, I wouldn't change a thing.
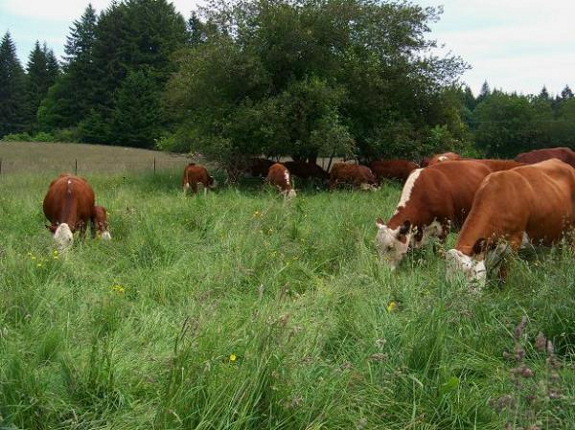
At its best, management
intensive grazing mimics the ecology of a native prairie. Quick
bursts of heavy grazing result in pastures that are extremely diverse,
often hosting up to 30 plant species. Trees and shrubs don't have
a chance to get a foothold the way they do in pastures that are
continuously grazing with low numbers of animals, and the grasses and
legumes produce a lot more leaves than they do when you're grazing
continuously with lots of animals. From an animal's point of
view, the result is much higher quality forage and a lot more of it.
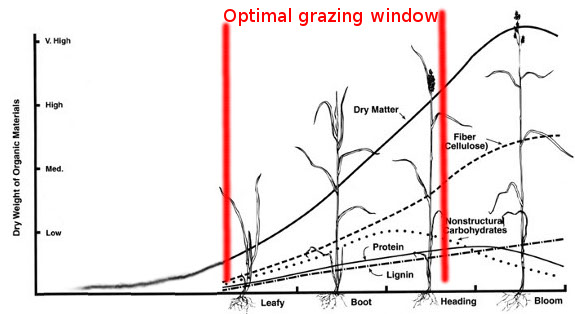
The image above shows
how putting animals on your pasture only during the optimal grazing
window produces the maximum amount of forage of the highest nutritional
value. The far left side of the graph shows what happens if grass
is grazed nearly down to the ground --- at first, the plant grows
very slowly because it has to use up stored energy in its roots to
create new leaves. As the leaf area becomes large
enough to grab energy straight from the sun, the plant grows faster and
faster. But then the plant decides to flower, so it slows down
leafy
growth in order to push some energy toward blooming. After a
certain
point, the plant isn't making any extra leaves at all because it has
gone to seed.
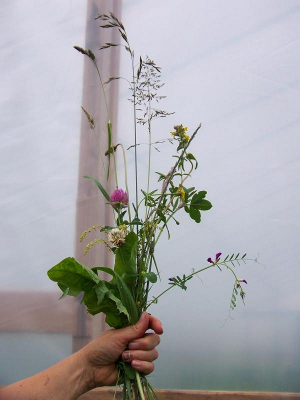 To get the most from your
pasture, you must keep your plants between the two stages marked with
red lines in the
diagram. You never graze the pasture so low that the grasses have
to pull too much
energy from their roots and you never let them get so tall that they
start to bloom. For poultry, sheep, goats, and pigs, you should
let
the grass grow until it's 3 to 4 inches tall, then graze it down to 1
to 2 inches tall before repeating the cycle.
To get the most from your
pasture, you must keep your plants between the two stages marked with
red lines in the
diagram. You never graze the pasture so low that the grasses have
to pull too much
energy from their roots and you never let them get so tall that they
start to bloom. For poultry, sheep, goats, and pigs, you should
let
the grass grow until it's 3 to 4 inches tall, then graze it down to 1
to 2 inches tall before repeating the cycle.
Bill Murphy has
experimented with various methods of renovating poor pastures, and has
discovered that well-timed bouts of grazing of the sort outlined above
are just as effective as costly campaigns of killing the existing sod
and seeding new pastures, overseeding with clover, or alternating
pastures with row crops. Keeping the nitrogen content of the soil
down and the grass grazed low enough favors clovers, and they seem to
spring up on their own to fill in more and more of the pasture sward
every year. That means richer and richer forage for your grazing
animals to eat.
| This post is part of our Greener Pastures on Your Side of the Fence
lunchtime series.
Read all of the entries: |
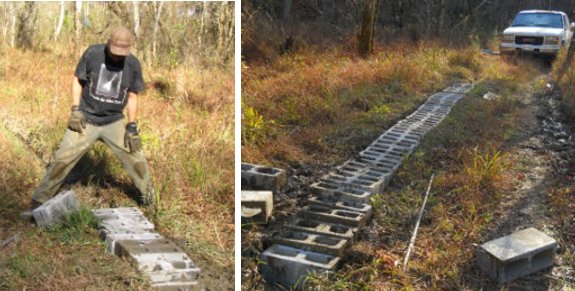
Day 2 of our new driveway
repair project went smoother than day 1.
I think I'm getting the hang
of it.
 One of the rallying points of
conventional agriculture is that organic farming can't feed the
world. They argue that we have to use chemicals and genetically
modified crops if we want to feed folks who can't afford expensive
organic produce.
One of the rallying points of
conventional agriculture is that organic farming can't feed the
world. They argue that we have to use chemicals and genetically
modified crops if we want to feed folks who can't afford expensive
organic produce.
The Rodale Institute
begs to differ, and they carried out thirty years of side by side
trials of conventional versus organic corn and soybean crops to prove
their point. According to Rodale's recent report, yields were similar for
both organic and conventional crops, but organic crops had the benefits
shown in the graph --- more profit for the farmer combined with less
energy input and lower greenhouse gas emissions.

The result I found most
intriguing is the Rodale Institute's claim that corn yields were higher
in the organic field during drought years than in the conventional
field, even though the farmers had planted GMO "drought tolerant" seeds
for the latter.
Rodale's website
mentioned that they had also run tests on the difference between
organic crops fed by manure and organic crops fed by legumes, as well
as comparing both organic and conventional no-till techniques to tilled
soil. I was intrigued to see the results of these trials, so I
dug deeper, looking for numbers. And was surprised to find no
data except for a few pretty graphs on the whole website.
The lack of data felt a
bit fishy to me, even though Rodale listed 46 peer-reviewed articles
about their trials. The Rodale Institute is one of the oldest
supporters of organic farming, and I have to wonder if they chose not
to go public with their data because there were some bad results they
didn't want to share with the public. Are there negative aspects
of their organic trials that they simply chose to sweep under the
rug? I hope not, but a more fact-filled website would go a long
way toward setting my mind at ease.
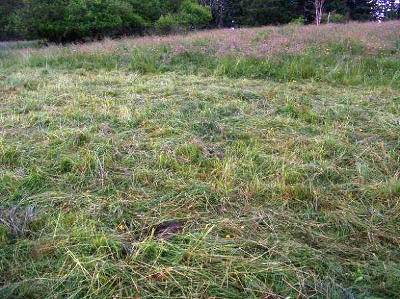 One of the tricky parts of
rotational grazing is figuring out how long to let your livestock stay
in a paddock (the occupation period) and how long they need to be
somewhere else before they can come back (the recovery period.)
If you get the recovery period wrong, you may end up with only a third
as much forage from your pasture, and if you get the occupation period
wrong, your pasture will be dominated by unpalatable plants.
One of the tricky parts of
rotational grazing is figuring out how long to let your livestock stay
in a paddock (the occupation period) and how long they need to be
somewhere else before they can come back (the recovery period.)
If you get the recovery period wrong, you may end up with only a third
as much forage from your pasture, and if you get the occupation period
wrong, your pasture will be dominated by unpalatable plants.
The occupation period
will depend on how many animals you have in the paddock --- fifty
chickens will eat the grass down to 2 inches faster than five chickens
will. In a perfect world, you should graze small enough areas
that the occupation period is only a day or two long, but up to six
days is okay. Occupation periods over six days are problematic
since your animals will start to be selective about what they eat and
will graze new growth, which eventually makes the plants your animals
don't like take over the pasture.
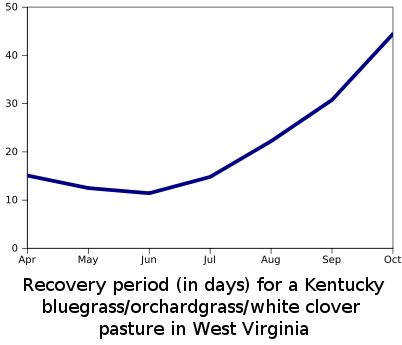 The recovery period depends
on the season. Lush spring pasture may grow fast enough that it's
ready to be grazed again in two weeks, but the cool season grasses in
most of our pastures slow down as summer sets in. This graph
shows the recovery period for an intensively grazed pasture in West
Virginia, with recovery periods ranging from a low of 11 days in June
to a high of 44 days in October.
The recovery period depends
on the season. Lush spring pasture may grow fast enough that it's
ready to be grazed again in two weeks, but the cool season grasses in
most of our pastures slow down as summer sets in. This graph
shows the recovery period for an intensively grazed pasture in West
Virginia, with recovery periods ranging from a low of 11 days in June
to a high of 44 days in October.
Bill Murphy stresses the
point that you have to learn your own pastures and not depend on his
facts and figures. The best way to determine the proper
occupation and recovery period is to keep an eye on pasture growth
every day. When the grass has grown up to three or four inches
tall, move your chickens in. When they've eaten it down to one or
two inches, move them out. That way you won't end up with the
pasture problems I'll discuss in tomorrow's post.
| This post is part of our Greener Pastures on Your Side of the Fence
lunchtime series.
Read all of the entries: |
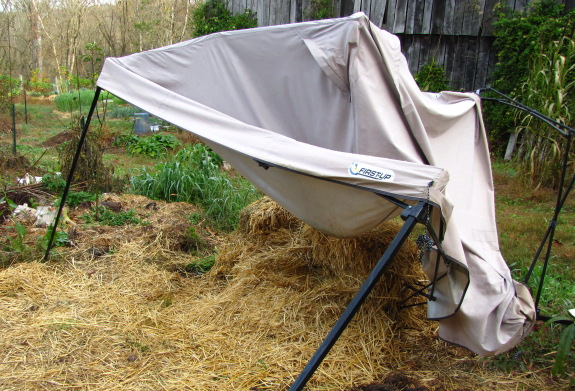
We thought this First-Up
temp tent would be good enough to protect our straw.
It did great most of the
summer, but high winds got the better of it back in late August and
we've been ignoring it ever since.
I doubt if I could fix it
good enough to be folded back in travelling mode, but it might be
possible to make repairs in a way that beefs up the weak points. Maybe
it will make it through a medium wind storm if it's tied down and
tucked up next to the barn.

I warned our Light
Sussex chicks that the first time they started scratching up my mulch,
they were going to be grounded. Too bad they don't speak
English. At nine weeks old, the birds finally got hefty enough
that they were able to work their toes under my straw and confuse my
sprouting garlic plants. Time for the temporary
fencing to go back
up, this time splitting the forest garden and woods off from the more
delicate garden areas.
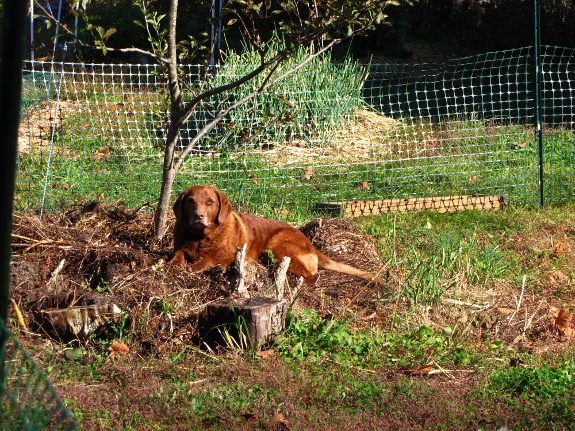
Lucy was a bit confused
to have her stomping grounds split in half, but I'm sure she'll figure
it out. Walking a quarter of a mile around the pastures and barn
to sit in the sun doesn't sound too tough if you're a stout farm dog.

This spring, the grass
in our chicken pastures was growing faster than the flock could eat
it. As a result, I left the chickens in each paddock a long time
to eat all that lush greenery, and by the time the girls got done with
all three paddocks, the earliest grazed paddock had gone to seed.
That depressed our summer growth extraordinarily, resulting in
over-grazed pastures all through the summer and fall, despite the fact
that (on paper) our pasture sizes seemed more than adequate to handle
the chickens living there.
This problem is very
common in improperly managed, rotational grazing settings. Bill
Murphy suggests three ways to deal with lush spring grazing:
Graze more animals in the spring. We got a late start with our broilers this year, but if we'd had a bunch of hungry young beaks to fill when the pasture was growing like gang-busters, we could have used up the excess pasture that way.
Mow behind animals. If you simply let your animals graze the lushest part of the pasture and rotate them at six days despite lots of plant matter being left, you can come in behind the animals and mow. This is the most wasteful and labor intensive, but with a bagging mower you could be collecting those high nitrogen clippings for the garden.
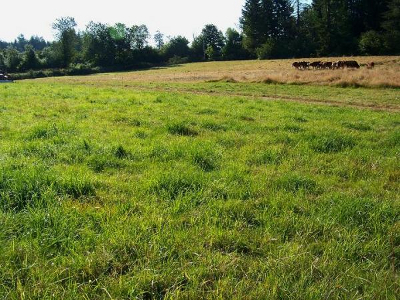 Assuming we get the spring
overflow figured out, what do we do about the summer and fall
slowdown? The solution is to have more paddocks. With our
recovery period estimated to be 44 days in October and the maximum
occupation period being 6 days, we'd need 9 paddocks to keep from
grazing each area too soon. Although that sounds tricky, I
suspect that we could subdivide our existing pastures into much smaller
sections using temporary fencing, perhaps using pathways created by a
hoop of remesh to lead the chickens to each area at the proper time.
Assuming we get the spring
overflow figured out, what do we do about the summer and fall
slowdown? The solution is to have more paddocks. With our
recovery period estimated to be 44 days in October and the maximum
occupation period being 6 days, we'd need 9 paddocks to keep from
grazing each area too soon. Although that sounds tricky, I
suspect that we could subdivide our existing pastures into much smaller
sections using temporary fencing, perhaps using pathways created by a
hoop of remesh to lead the chickens to each area at the proper time.
Of course winter is
another matter entirely. Bill Murphy recommends stockpiling
summer growth to feed your livestock in winter, but non-ruminants won't
get much out of dried grass. We'll continue to experiment with annual
grains, and will
have to get creative if the pastures look bare in midwinter.
| This post is part of our Greener Pastures on Your Side of the Fence
lunchtime series.
Read all of the entries: |
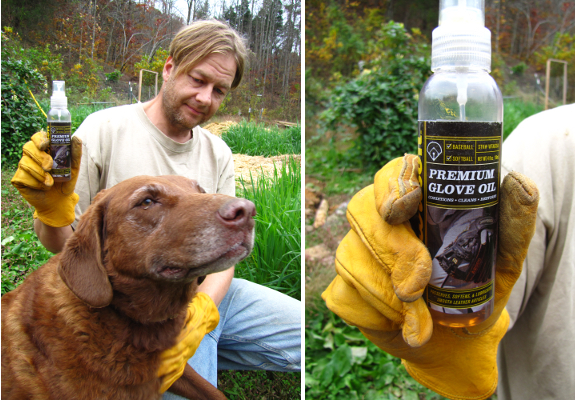
The last time I used a
special glove oil was a bit over 30 years ago in little league.
It takes just a small squirt
to bring a stiff pair of work gloves back to life.
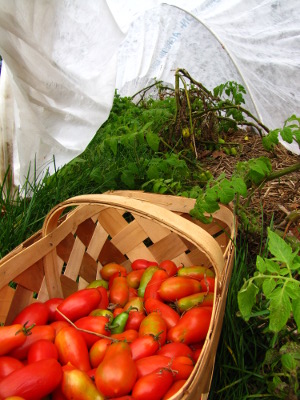 When I set out my tomatoes in
May, I wished I'd started a few more romas. So I took cuttings from our biggest plants,
rooted them in some water, and planted five extras on June 10.
When I set out my tomatoes in
May, I wished I'd started a few more romas. So I took cuttings from our biggest plants,
rooted them in some water, and planted five extras on June 10.
The June plants grew
great, but they had barely ripened a single tomato by the first frost
warning at the beginning of October. I hated the idea of losing
all of those green tomatoes, so I cut the tomatoes off their stakes,
spread them across the ground, and topped them off with a quick
hoop. Since I'd made several quick hoops in the spring and wasn't
using them yet for the fall garden, it only took half an hour for the
whole protection experiment.
I have to admit that I
forgot about those tomatoes. We had two small frosts and then two
more serious frosts that nipped back all of the other tomatoes, and I
figured the baskets of ripening fruits in the kitchen were the last of
the year.
At least, that's what I
thought until Mark came in with armloads of red beauties one
evening. He ended up picking about a quarter of a bushel of ripe
or nearly ripe tomatoes off my protected plants, and there are still
plenty more finishing up outside. I guess quick
hoops win one more battle over cold frames!
For step by step
instructions about building quick hoops, check out my
99 cent ebook.
 Chilly
November weather drives even the most hardy homesteaders inside.
But the onset of the cold season doesn't mean the end of fun
homesteading projects. In Weekend
Homesteader: November,
you'll learn to rotate garden
beds to keep diseases at bay, to store drinking water for use during
power
outages, to put an entire chicken to use in the kitchen, and to bring
in cash without going to the office.
Chilly
November weather drives even the most hardy homesteaders inside.
But the onset of the cold season doesn't mean the end of fun
homesteading projects. In Weekend
Homesteader: November,
you'll learn to rotate garden
beds to keep diseases at bay, to store drinking water for use during
power
outages, to put an entire chicken to use in the kitchen, and to bring
in cash without going to the office.
For those of you who are
new to Weekend Homesteader, this series walks
you through the basics of growing your own food, cooking the bounty,
preparing for
emergency power outages, and achieving financial independence.
I hope you'll consider
splurging 99 cents to buy
a copy of my newest ebook from Amazon's
Kindle store. And many
thanks in advance if you can find the
time to write a brief review.
 As usual, I'm also very
glad to email you a free pdf copy to read if you
don't have the spare cash, or just don't want to deal with downloading
an app so you can
read the ebook on your computer or phone. Just email
me with your request --- no strings attached. Thanks for
reading!
As usual, I'm also very
glad to email you a free pdf copy to read if you
don't have the spare cash, or just don't want to deal with downloading
an app so you can
read the ebook on your computer or phone. Just email
me with your request --- no strings attached. Thanks for
reading!
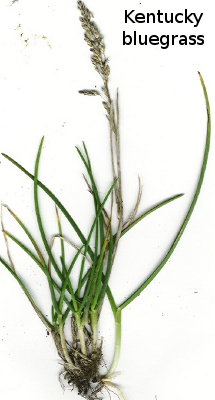 When I started my adventures
with chicken pasturing, I tried to micromanage the pasture, adding in
plants that I knew chickens
liked to eat.
In stark contrast, Joel Salatin believes that the most important
characteristic of chicken pastures is a very short sward and that the
individual species aren't as important. The list below introduces
a few of the common pasture grasses and legumes that seem to combine
both characteristics --- easy digestibility and the ability to survive
close grazing or mowing.
When I started my adventures
with chicken pasturing, I tried to micromanage the pasture, adding in
plants that I knew chickens
liked to eat.
In stark contrast, Joel Salatin believes that the most important
characteristic of chicken pastures is a very short sward and that the
individual species aren't as important. The list below introduces
a few of the common pasture grasses and legumes that seem to combine
both characteristics --- easy digestibility and the ability to survive
close grazing or mowing.
Kentucky
bluegrass is
ideal for intensive rotational grazing because it
can handle close grazing and some mismanagement. The species
wants to produce most of its growth in the spring and then slow down in
midsummer, but with good management, Bill Murphy attests that you can
get much more uniform
yields. Kentucky bluegrass shouldn't be confused with Canada
bluegrass, which provides less and lower quality forage for livestock,
but which does better in poor soil.
Perennial
ryegrass is an
ideal pasture grass if you live in zone 5 or
warmer and can provide high nitrogen and moist growing
conditions. The leaves contain a lot of  nonstructural
carbohydrates, which means they're very digestible and might be a good
choice for chickens.
nonstructural
carbohydrates, which means they're very digestible and might be a good
choice for chickens.
Orchardgrass can handle moderate soil
fertility and low moisture, but
it tends to get tall and inedible quickly if not grazed
carefully. If you have orchardgrass, you'll need to graze early
and often since chickens can't digest tough leaves.
Timothy has a lot of advantages,
being very palatable, persistent, easy
to establish, and tolerant of poor drainage. However, the grass
can't
handle drought and has a low yield. Timothy is a taller grass
than the others mentioned here, but can tolerate close grazing.
White
clover is the
primary legume in management intensive pastures
since it survives close grazing and grows quickly. When mixing
grasses with white clover, you need to graze or mow the grasses closely
in the spring so that they don't shade out the legumes.
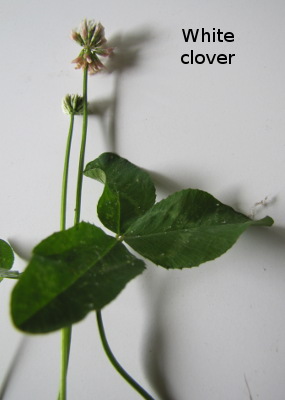 Red clover is
more deep-rooted and can withstand drought, but is also more upright,
so
can't deal with close grazing. Alfalfa is even more deep-rooted,
but can't handle frequent grazing, requiring a 25 to 30 day recovery
period even in the spring.
Red clover is
more deep-rooted and can withstand drought, but is also more upright,
so
can't deal with close grazing. Alfalfa is even more deep-rooted,
but can't handle frequent grazing, requiring a 25 to 30 day recovery
period even in the spring.
Gene Logsdon's All Flesh
is Grass is
sitting on my shelf waiting to provide my continued pasture
education. A quick flip through the book suggests that it will
give additional information on good pasture species, so I'll write more
on that topic later this fall. In the meantime, I'm
inclined to believe that Joel Salatin and Bill Murphy know what they're
talking about --- even young, tender fescue leaves are probably
more tasty to chickens than old bluegrass leaves from plants gone to
seed.
| This post is part of our Greener Pastures on Your Side of the Fence
lunchtime series.
Read all of the entries: |
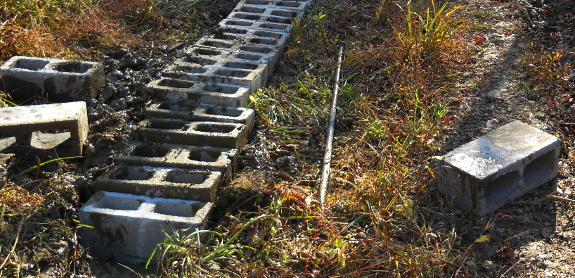
You can't tell from this
picture, but these cinder blocks are rejected seconds from the factory.
I wouldn't want to use them
for building a basement wall, but time has proven with our cinder
block creek ford that
slightly imperfect blocks are fine for driveway applications like this.
The perfect blocks are 80
cents compared to the seconds at 55. A savings that adds up when you do
a few truck loads.
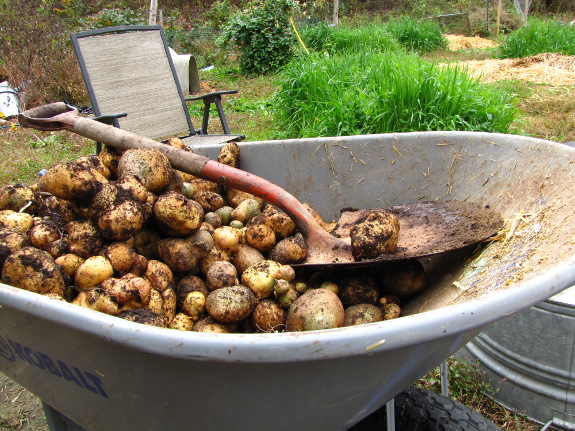
We had an odd potato
harvest this year. Although I planted a few pounds at the normal
March date, I saved most of my seed potatoes to go in the ground at the
beginning of May. A friend had told me that he waits to plant his
potatoes until after the frost free date, which gives him full size
tubers late enough in the year that he can dig them in cool
weather. We rarely want potatoes in the summer, so I figured a
fall crop of potatoes sounded good and followed his lead.
At first, the experiment
seemed to be paying off in spades. A third or more of our early
planted potatoes often rot in the cold soil before they start growing,
but my May-planted beds were chock full of potatoes. The plants
grew like crazy...but they wouldn't die. For those of you who
haven't grown potatoes, you want to wait to harvest your main crop
until the plants die back, which means they've hardened up the skins of
the tubers and given the spuds longevity to last through the winter in
your root cellar. So, potatoes that don't die are a problem ---
you can dig new
potatoes, but not
storage potatoes.
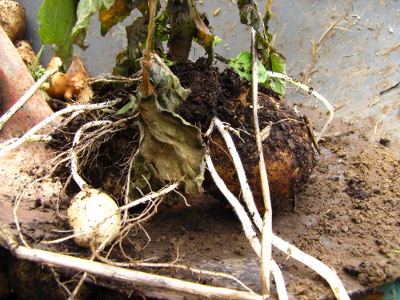 When our first hard frost
came, the last plants started to wither, so I went ahead and dug our
potatoes. My underground adventure confirmed my hypothesis ---
the potatoes produced in May and June had sprouted up new plants in
July and August and started putting out a second round of tubers in
September and October. This sounds good --- double potatoes ---
but is actually problematic. Some of the older tubers had rotted
after giving their strength to the new growth, and I hadn't thought to
hill up the second round of potatoes (who hills their potatoes in
August?!), so most of them were green on one side.
When our first hard frost
came, the last plants started to wither, so I went ahead and dug our
potatoes. My underground adventure confirmed my hypothesis ---
the potatoes produced in May and June had sprouted up new plants in
July and August and started putting out a second round of tubers in
September and October. This sounds good --- double potatoes ---
but is actually problematic. Some of the older tubers had rotted
after giving their strength to the new growth, and I hadn't thought to
hill up the second round of potatoes (who hills their potatoes in
August?!), so most of them were green on one side.
Here is the yield from
the 6 pounds of potatoes I planted late:
- 10 pounds of wounded potatoes (some injured by the spade, others just troubled)
- 30 pounds of partly green potatoes
- 49 pounds of good potatoes
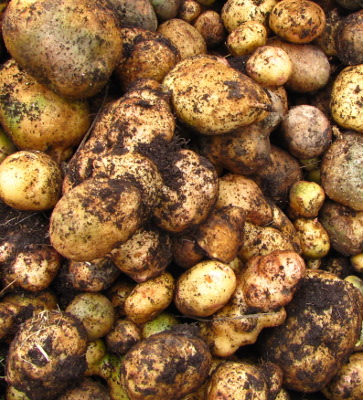 Now, to be fair, this is an
awesome yield --- 15 times as many pounds of potatoes as I put in the
ground! Even if you just look at the good potatoes, the
experiment paid off since one pound of seed potatoes turned into 8
pounds of good potatoes (versus the 6.5 pounds of good potatoes I got
in previous years.)
Now, to be fair, this is an
awesome yield --- 15 times as many pounds of potatoes as I put in the
ground! Even if you just look at the good potatoes, the
experiment paid off since one pound of seed potatoes turned into 8
pounds of good potatoes (versus the 6.5 pounds of good potatoes I got
in previous years.)
What I'm not sure about
is how long the good potatoes will last. Several of the biggest
ones have hollow heart (which is a disorder characterized by exactly
what the name suggests), perhaps because I hilled them up the first
time with manure. And the second round of potatoes might not have
enjoyed enough growing time to harden off for storage. And, of
course, there's the problem that I'll have to cut all that green off
the problematic potatoes.
So, interesting
experiment, but I'm not sure if I'll repeat it. Has anyone else
had experience with planting potatoes late?
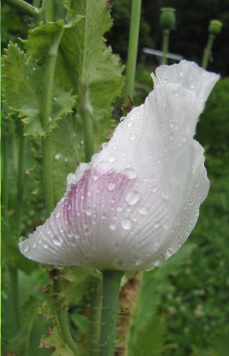 I finally got around to
packaging up the seeds I've had drying on a shelf for the last few
months, and realized I had enough interesting varieties for a second
giveaway! This month's selection includes:
I finally got around to
packaging up the seeds I've had drying on a shelf for the last few
months, and realized I had enough interesting varieties for a second
giveaway! This month's selection includes:
- Hungarian Breadseed Poppy --- Perfect for the stealth garden since these poppies are just as pretty as any flowers in your garden. But then the pods swell to produce plenty of tasty poppyseeds for baking.
- Clemson Spineless Okra --- Our favorite variety for flavor. Okra flowers are so huge and showy that I could envision using them in your flower garden as an edible border --- a bit like Rose of Sharon.
- Mung Beans --- Grow your own sprouting beans! These are phenomenally easy to grow since bean beetles don't like them and you only have to pick the ripe pods a few times over the course of the summer. We got about a cup of sprouting beans from one small bed, which will turn into quite a lot of meals.
- Jersey Knight Asparagus --- One of our readers mentioned that his Jersey Knight "all-male" asparagus included one female plant, which prompted me to go outside and realize that one of my plants was female as well! From what I've read on the internet, if you plant seeds from these females, you'll get nearly all male plants (with the associated higher yields), so I quickly gathered all the seeds I could.
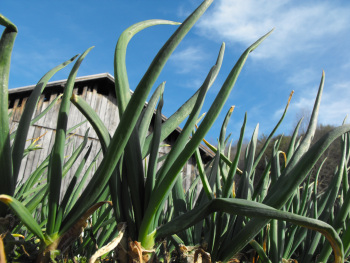 Egyptian Onions
--- Yes, I do still have a heaping handful of top bulbs left, saved
just for you! One of my favorite (and most prolific) perennial
vegetables.
Egyptian Onions
--- Yes, I do still have a heaping handful of top bulbs left, saved
just for you! One of my favorite (and most prolific) perennial
vegetables.
To be entered in the
giveway, just promote one of my ebooks in any way you choose. I'm
most in need of a review for the November
volume of Weekend Homesteader, but you can post a link on
Facebook or your blog, email your friends, tell your Mom, or do
whatever suits your fancy. No need to buy the ebooks to enter ---
just email me and I'll gladly send you a
free pdf copy of whichever ebook(s) you choose.
Leave a comment on this
post by midnight on Tuesday, November 1, to let me know you've entered,
and I'll pick one of you at random on Wednesday morning to win the seed
package. Thanks in advance for helping spread the word about my
newest ebook!
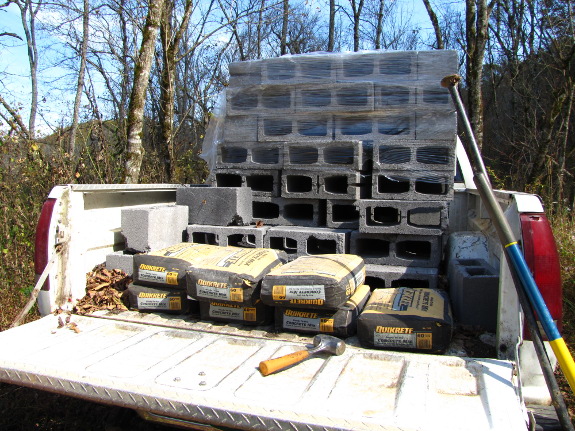
Our local cinder block
factory is only 8 miles away, which is an important detail I left out
of yesterday's
post on saving money when buying rejected cinder blocks.
Another big advantage to
getting blocks directly from the source is the ability to have them
forklifted into the back of your truck. It just takes a few seconds to
slide off the tailgate, which allows the forklift guy to push the cube
back towards the wheel base.
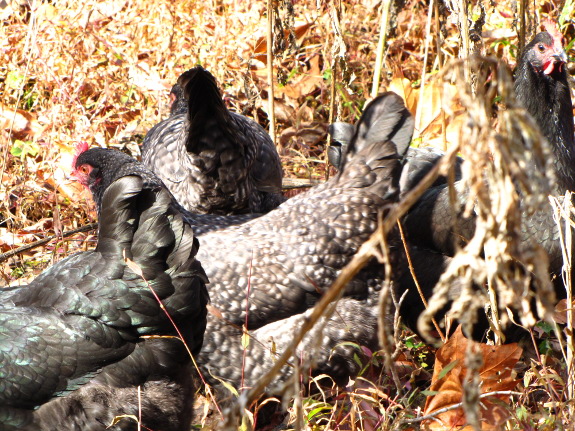
I hear that normal
Americans don't spend their Saturdays stalking chickens in the paw paw
patch...

...reading the future in
egg yolks...
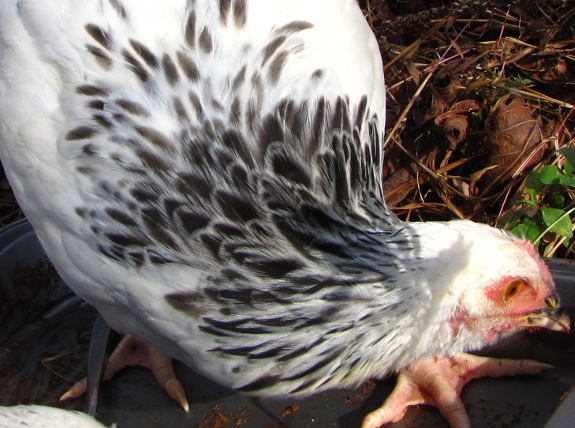
...and letting their
chickens peck out the pan.
But who wants to be
normal?

As long as I can remember
Ready-Mix concrete has come in paper bags.
I'm thinking they could use
something more sturdy... like the material our cat, dog, and chicken
feed bags are made of, but that would mean less waste, which would
equal less profits.
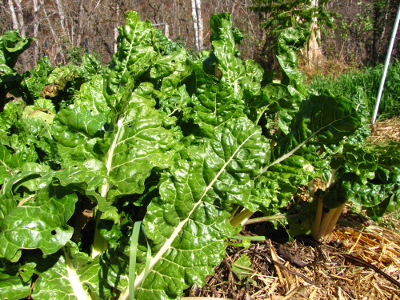 Although
leafy greens aren't as sexy as tomatoes, they make up the majority of
our fresh diet for about six months of the year, so I figured it was
worth trying to find the best varieties for our garden. Here are
the greens we're experimenting with this year.
Although
leafy greens aren't as sexy as tomatoes, they make up the majority of
our fresh diet for about six months of the year, so I figured it was
worth trying to find the best varieties for our garden. Here are
the greens we're experimenting with this year.
Swiss
Chard: Fordhook Giant --- I've never thought of
Swiss chard as being very cold hardy, but I recently read that Fordhook
Giant is more tolerant of cold weather than the colored stalk varieties
I've grown in previous years. Unlike the other greens detailed
below, which were planted in August or September just for winter
eating, this Swiss Chard was planted in the spring and eaten all
through the summer.
 Kale: Winterbor, Improved Dwarf Siberian, and
Red Russian ---
Kale is our favorite winter green since it tends to last the longest
and taste the sweetest, so I'm trying out three varieties reputed to be
especially cold hardy. I have one data point so far --- the
Improved Dwarf Siberian barely came up in the earliest planted bed, so
perhaps it can't germinate in hot soil.
Kale: Winterbor, Improved Dwarf Siberian, and
Red Russian ---
Kale is our favorite winter green since it tends to last the longest
and taste the sweetest, so I'm trying out three varieties reputed to be
especially cold hardy. I have one data point so far --- the
Improved Dwarf Siberian barely came up in the earliest planted bed, so
perhaps it can't germinate in hot soil.
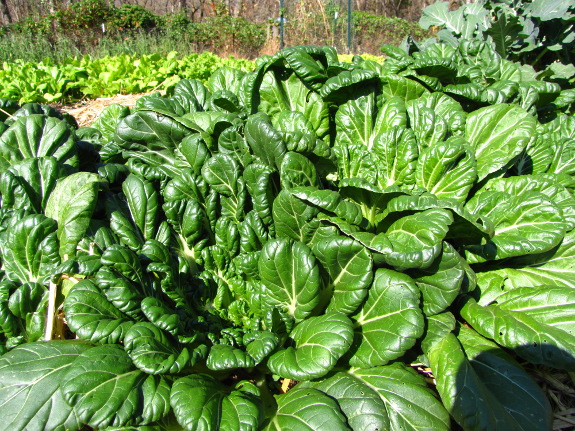
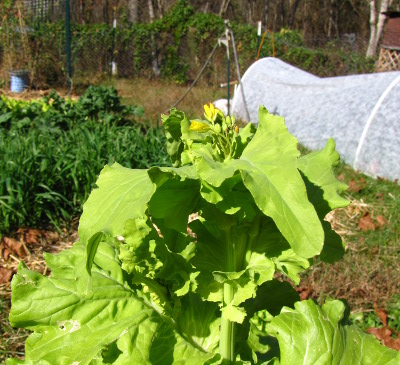 Tatsoi --- Germination seemed to be
a bit spotty during the summer heat, but the plants that came up spread
out quickly to cover all of the soil. I really enjoy the almost
cabbage-like shape of this Asian green, and the way it doesn't give any
space for weeds to grow.
Tatsoi --- Germination seemed to be
a bit spotty during the summer heat, but the plants that came up spread
out quickly to cover all of the soil. I really enjoy the almost
cabbage-like shape of this Asian green, and the way it doesn't give any
space for weeds to grow.
Tokyo bekana ---
The earliest planting (August 2) of this Asian green is starting to
bolt, which doesn't bode well, but Mark and I enjoy the taste.
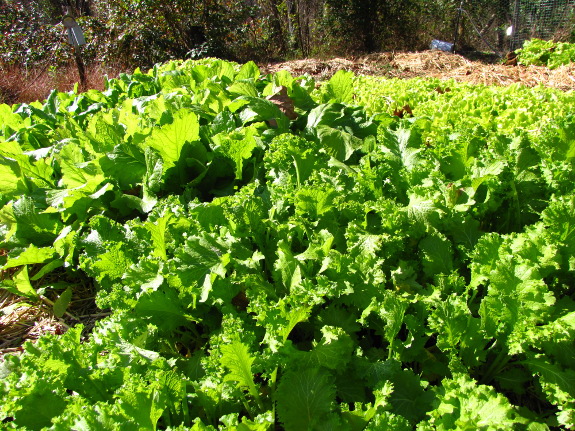
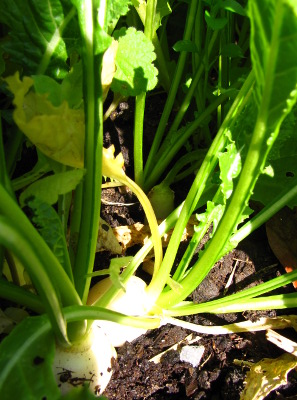 Mustard: Giant, Broadleaf, and
Tendergreen ---
Neither Mark nor I are big fans of spice, so mustard is our least
favorite green for flavor. However, I have to admit that mustard
grows better in our fall garden than any other species (although in the
past, it has died back much sooner than kale.) I didn't research
mustard as thoroughly as some of the other types of greens, just
planting the varieties offered at our local feed store.
Mustard: Giant, Broadleaf, and
Tendergreen ---
Neither Mark nor I are big fans of spice, so mustard is our least
favorite green for flavor. However, I have to admit that mustard
grows better in our fall garden than any other species (although in the
past, it has died back much sooner than kale.) I didn't research
mustard as thoroughly as some of the other types of greens, just
planting the varieties offered at our local feed store.
Turnip,
Hakurei --- This
small turnip is meant to be plucked at about the stage you see in the
photo, then eaten with the tender tubers chopped up and mixed with the
greens. We haven't tried any yet, but will soon.
We'll decide on the best
greens using two different metrics --- cold hardiness and flavor.
The best way to select for extreme cold hardiness is to leave your
plants uncovered until temperatures drop down around 25, but we'll be
erecting quick
hoops this
week. Despite the protection, I think we'll see differences in
how long plants grow through the winter and whether they last until
spring.
A taste test is called
for to decide on the most flavorful greens. So far, I've just
been mixing up pots of a bit of this and that, which is very tasty, but
doesn't tell me which varieties fit our palates best. Now that
we've had several frosts to sweeten the greens, I'll pick a day to cook
up a little bit of each one and have a greens tasting. The
question is, should I cook them up the way I usually do --- sauteed
with a bit of oil and balsamic vinegar --- or just steam them lightly
so that the distinctive flavor of each variety is most evident?
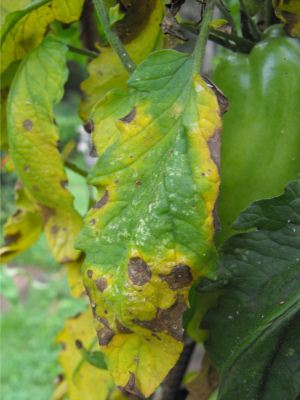 You've
probably heard the term "garden rotation" before, but what does
it mean and why do we do it?
You've
probably heard the term "garden rotation" before, but what does
it mean and why do we do it?
Let's start with the
example of early blight, a fungal
disease that hits
tomatoes in warm, damp weather. Mainstream
tomato growers spray anti-fungal chemicals on their plants to
keep early blight at bay, but those of us gardening organically have to
come up with another solution. I won't go into the specifics of
combating
tomato fungal diseases organically here. The
relevant point is that once your tomatoes come down with early blight,
the fungal spores can survive in the soil for years. So if you
plant tomatoes in the same ground next year, they're going to be
infected with early blight nearly immediately and you may get no crop
at all.
Okay, you say, that's
not too tough. I'll just move my tomatoes
every year. But here's the thing --- tomatoes and potatoes are in
the same family, and they tend to share a lot of diseases.
Late blight is a fungal
disease that's much more devastating than early
blight, but, luckily for us, late blight can only survive in
living plant tissue. Since tomatoes shrivel up and die at the
first sign of frost, you don't need to worry about late blight being
carried over from one year to the next...unless you grow
potatoes. Have you ever noticed that it's nearly impossible to
harvest every tiny spud out of the soil, and that "volunteer" potatoes
tend to pop up in the spot where you grew potatoes last year? If
you had late blight in last year's garden, those volunteer potatoes
will spread the disastrous fungus to any tomatoes you plant nearby this
year. So when you choose the spot for your tomatoes this year,
you want to make sure neither tomatoes nor potatoes have been grown
there recently.
I could tell you dozens
of interactions like this that you want to
avoid, but garden rotation is really pretty simple. If you grow a
vegetable in a spot that hasn't been home to any plants in the same
family for at least three years, then you'll cut down on insects and
diseases drastically. Wouldn't you rather spend an hour
planning out your garden than battle sick plants all summer?
This
week's lunchtime series includes one of the four projects from Weekend
Homesteader: November. Stay tuned for the rest of the series,
or check out the 99 cent ebook for more information on how to store
drinking water for use during power outages, to put an entire
chicken to use in the kitchen, and to bring in cash without going to
the office.
| This post is part of our Garden Rotation lunchtime series.
Read all of the entries: |
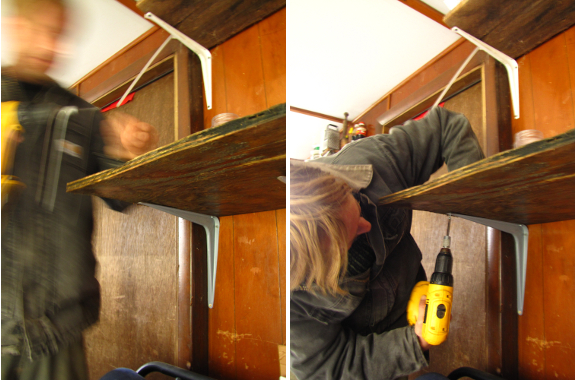
It's funny how a new shelf can improve the mood and flow of a room.

Or explore more posts by date or by subject.
About us: Anna Hess and Mark Hamilton spent over a decade living self-sufficiently in the mountains of Virginia before moving north to start over from scratch in the foothills of Ohio. They've experimented with permaculture, no-till gardening, trailersteading, home-based microbusinesses and much more, writing about their adventures in both blogs and books.