
archives for 12/2011

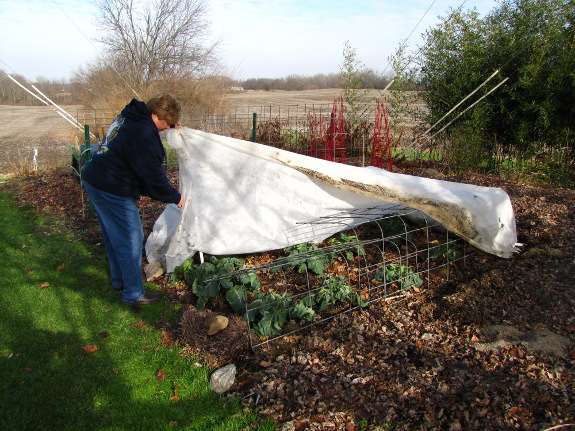
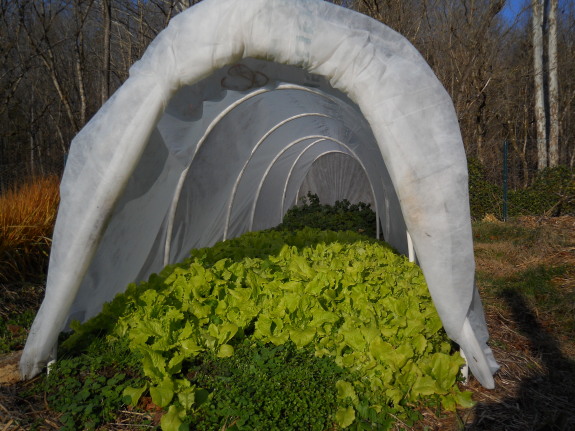
I'm monitoring my quick
hoops carefully this
fall to see their limitations. So far, lettuce with no protection
has turned into a slimy mess and tokyo bekana that's not under cover 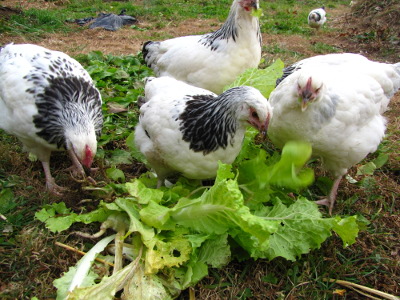 has been moderately
nipped. (Not so much that the chickens
don't think it's a treat, though.)
has been moderately
nipped. (Not so much that the chickens
don't think it's a treat, though.)
Meanwhile, under the
hoops, lettuce and all types of leafy greens are still going
strong. The Persephone
Days are here, so my
winter crops aren't actively growing, but I planted so many that I'll
still have plenty to harvest for weeks yet as long as the quick hoops
mitigate the cold.
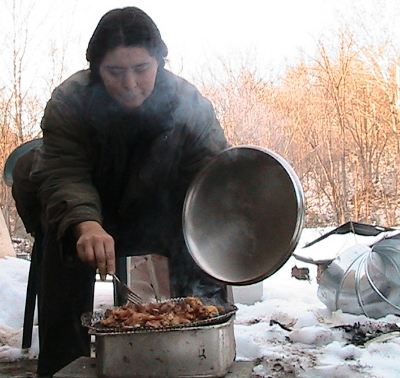
Broccoli, however, is a
goner even under the row cover fabric. I picked the last head
yesterday and had to cut off about half the florets due to freeze
damage. My guess is that broccoli needs more protection than a
quick hoop when the outside temperatures get down into the
twenties. Still, it's hard to complain when I can make a whole
stir fry (minus the spices and rice) straight out of the garden on the
last day of November.
It got well below freezing
last night without affecting either water line.
That's big news for us and
might indicate an end to breaking a
hole in the top layer of ice on the storage tank when we need water on cold days.
The insulated box that goes
from the ground to the trailer has a small door so we can access the
water hose spigot when needed.
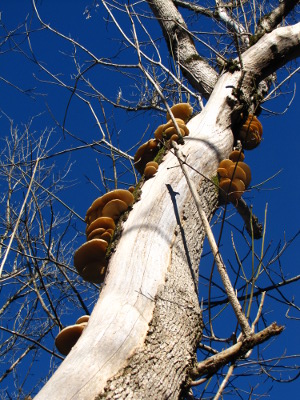 I'm sometimes surprised by
how bountiful the uncultivated portions of our farm are. Thursday
morning, I startled thirty wild turkeys who were hunting for bugs in
our woods. Then, while helping Mark split firewood, I looked up
and saw this box-elder chock full of wild oyster mushrooms. Taken
together, the turkeys and mushrooms would have made a bountiful
meal...if I'd had a gun with me on my walk and if the mushrooms weren't
fifteen feet up in the air.
I'm sometimes surprised by
how bountiful the uncultivated portions of our farm are. Thursday
morning, I startled thirty wild turkeys who were hunting for bugs in
our woods. Then, while helping Mark split firewood, I looked up
and saw this box-elder chock full of wild oyster mushrooms. Taken
together, the turkeys and mushrooms would have made a bountiful
meal...if I'd had a gun with me on my walk and if the mushrooms weren't
fifteen feet up in the air.
Luckily, we can recreate
that bounty in a more easily harvestable fashion. I thawed a
homegrown chicken out of the freezer and plucked yet another flush of
shiitakes off our mushrom
raft.
Permaculture gives us the best of both worlds --- high quality meat fed
partially from wild insects plus micronutrient-rich mushrooms grown on
woods-harvested logs, all right at my fingertips.
 Once you've chosen your
emergency winter wardrobe, I recommend you
spend the majority of the cash you've set aside for this project
on a good sleeping bag. If you snuggle down inside a sleeping bag
rated at 0 degrees Fahrenheit in all of the clothes mentioned above
(minus the boots), you'll be warm as toast no matter what happens.
Once you've chosen your
emergency winter wardrobe, I recommend you
spend the majority of the cash you've set aside for this project
on a good sleeping bag. If you snuggle down inside a sleeping bag
rated at 0 degrees Fahrenheit in all of the clothes mentioned above
(minus the boots), you'll be warm as toast no matter what happens.
When choosing sleeping
bags for power outages, you don't need to buy
the expensive, light-weight versions meant for backpacking. And
as long as you keep your bag dry, the insulating material doesn't
matter. Instead, make your choice based on two characteristics
--- temperature rating and style.
Sleeping bag temperature
ratings should be taken with a grain of salt since a 0
degree bag probably won't make you very happy in a tent on a windy
mountaintop at 0 Fahrenheit. That said, lower ratings do mean
warmer
bags, so go as low as your wallet will allow.
There are two main types
of sleeping bag styles --- mummy bags and
rectangular bags. Mummy bags are the warmest for one person
sleeping alone since they follow the contour of your body when zipped
up (and usually even include a hood to keep your head warm.) But
don't buy a mummy bag if you can't sleep in a confined situation ---- a
zipped up rectangular bag will be warmer than an unzipped mummy
bag. In addition, make sure you choose a bag that's big enough if
you're especially tall or wide.
 If you regularly sleep
with someone, you might want to choose a right
and left handed pair of sleeping bags. These bags can be used
separately or can be zipped together to make a family-sized warm spot.
If you regularly sleep
with someone, you might want to choose a right
and left handed pair of sleeping bags. These bags can be used
separately or can be zipped together to make a family-sized warm spot.
Don't just toss your
sleeping bags into the closet while waiting for a
power outage. Rectangular bags can often be unzipped so they lie
all the way flat and work as an extra comforter on your bed, allowing
you to turn down the heat at night. I enjoy slipping my mummy bag
inside the sheets to give me something to snuggle into when I first get
into my cold bed at night --- a sleeping bag heats up much faster than
a traditional bed.
I
hope you enjoy this excerpt from Weekend
Homesteader: December.
The 99 cent ebook walks you through the basics of planting your first
fruit trees,
staying warm without electricity, understanding the uses of essential
tools, and turning trash into treasures. If you're interested in
other aspects of basic emergency preparedness, Weekend
Homesteader: November gives tips on storing drinking water and the
upcoming Weekend Homesteader: January will cover backup lighting
options.
| This post is part of our Emergency Warmth lunchtime series.
Read all of the entries: |
 One
of the best things you can do to stay warm is to move around.
This will also raise your spirits during an extended power
outage. I've found that if I get up the courage to jump out of my
toasty sleeping bag and into the cold air long enough to get fully
dressed and give the dog a walk first thing in the morning, my blood
has started pumping enough to keep me warm for an hour or more.
Of course, if you have a wood stove, splitting wood is a time-proven
method of warming you twice.
One
of the best things you can do to stay warm is to move around.
This will also raise your spirits during an extended power
outage. I've found that if I get up the courage to jump out of my
toasty sleeping bag and into the cold air long enough to get fully
dressed and give the dog a walk first thing in the morning, my blood
has started pumping enough to keep me warm for an hour or more.
Of course, if you have a wood stove, splitting wood is a time-proven
method of warming you twice.
If you're a little less
hard-core, warm foods and drinks will also wake
your body and improve your mood. It's easy to heat a pot of
water on top of a wood stove to make tea or cocoa, and then you can
make a pot of
soup for lunch. You can even pull coals out of the stove to cook
on top of, as I did during a ten day power outage in 2009 when we had
only an exterior wood furnace to keep us warm. A propane camp
stove will do the job even better. No matter how you heat up your
food and drinks, be very careful since synthetic fabrics are extremely
flammable.
Finally, know the
symptoms of hypothermia and keep an eye on young
children or elderly family members who might not be self-aware enough
to realize they're too cold. Early symptoms include constant
shivering; pale or blue lips, ears, fingers, and toes; clumsiness;
slurred speech; stumbling; trouble thinking; and poor
decision-making. You should be very concerned if you or someone
in your family experiences blue and puffy skin; inability to walk;
incoherent behavior; stupor; a weak pulse; and slow, shallow
breathing. Don't risk it if you're experiencing even mild
hypothermia --- find a way to get warm and dry immediately.
Beyond the basics
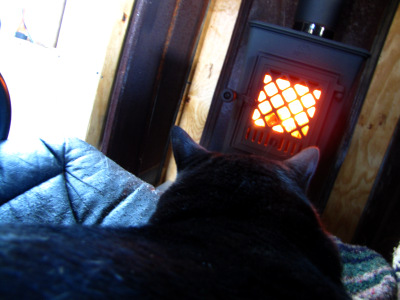 After dealing with one too many winter power
outages, we saved our
pennies to buy and install an efficient wood stove. I estimate
the stove will pay for itself in lower heating costs within three or
four years, we cook soup and beans on the stove even when the power's
on, and the cats and I love basking in the radiant heat and watching
the flames flicker inside. You can read more about our choices by
following these links:
After dealing with one too many winter power
outages, we saved our
pennies to buy and install an efficient wood stove. I estimate
the stove will pay for itself in lower heating costs within three or
four years, we cook soup and beans on the stove even when the power's
on, and the cats and I love basking in the radiant heat and watching
the flames flicker inside. You can read more about our choices by
following these links:
I
hope you enjoyed this excerpt from Weekend
Homesteader: December.
The 99 cent ebook walks you through the basics of planting your first
fruit trees,
staying warm without electricity, understanding the uses of essential
tools, and turning trash into treasures. If you're interested in
other aspects of basic emergency preparedness, Weekend
Homesteader: November gives tips on storing drinking water and the
upcoming Weekend Homesteader: January will cover backup lighting
options.
| This post is part of our Emergency Warmth lunchtime series.
Read all of the entries: |

It finally dried up enough
yesterday for me to put a new coat of high
temperature caulking on the first Jotul
woodstove chimney.
I checked it today and it
seems like a solid seal.
The real test will be the
next time it rains.
The journalists
who fell in the alligator swamp a year and a half ago
recently posted a video of our farm on youtube. It makes me a
cringe a bit, partly because they got Mark's last name wrong, partly
because of all the messy bits I didn't clean up (I didn't think they
were coming in the house...), but mostly because it's just painful to
listen to myself talk. What I do find interesting, though, is to
see how much the garden has changed in just a few months. I keep
meaning to post a video tour of the farm and not getting around to it,
so maybe this will suffice for now.
Edited to add: Mark's name is now right --- thanks, Mimi!

Racoons are cute, but they're
also one of the top predators to worry about if you have chickens.
Dragonflypower.com
has a system where he traps and cooks them. His suggestion for those
who are not enthusiastic about raccoon stew is to trap the biggest one
and take him to the vet to be fixed. Once he realizes your coop is
secure he'll stop trying and keep other racoons out of his territory.
Otherwise you end up with a fresh new crop of racoons each year who
will want to have a try at your delicious chickens.
We've never had a problem
with racoons thanks to Lucy's vigilante patrols.
Image credit goes to
Alaska-in-pictures.com.
 Our first foray into buying in bulk was only approximately 50%
successful. We saved a bundle on bulk cocoa and had no trouble
using it up in good time, but the flours were more problematic.
Whole wheat flour (and other processed whole grains, like brown rice)
are only good for six months, or considerably less if you live in a
hot, humid climate like ours. If you save 10% on the flour but
have to give 25% of it to the chickens, that's a net loss.
Our first foray into buying in bulk was only approximately 50%
successful. We saved a bundle on bulk cocoa and had no trouble
using it up in good time, but the flours were more problematic.
Whole wheat flour (and other processed whole grains, like brown rice)
are only good for six months, or considerably less if you live in a
hot, humid climate like ours. If you save 10% on the flour but
have to give 25% of it to the chickens, that's a net loss.
I'm currently
considering going a bit higher tech, buying wheat in its unprocessed
form and a grain grinder. (We do have a hand grinder, but I know
that I wouldn't grind much wheat if it was my only option. It's
terrible on my wrists.) The good thing about this option is that
you end up with much higher quality flour since grains start to degrade
as soon as they're ground. In addition, untouched hard grains
(like wheat and corn) can easily last a decade, and I'm pretty sure we
could manage to go through 45 pounds in that time period. (Soft
grains, such as barley and oats will last at least six years.)
I suspect that many of
you have already tried this out, and I'd love to hear your
experiences. Here are my primary questions, but feel free to
ramble on about other things that are moderately relevant:
- What kind of grain grinder do you use? The Nutrimill and Whispermill have very good ratings, but both are micronizers, which means they basically explode the grain rather than grind it. That has implications for bread-baking, and would also mean that all of our flour would be whole grain. I want to be able to sift out the bran --- I know that whole wheat is better for you, but we've cut back our grain usage so drastically that it's more of a dessert, and I follow the French guidelines of eating the tastiest food in extreme moderation. Which is a long way of saying that I'm considering the more expensive mills that grind grains on stones, such as the Komo Fidibus. What do you think?
- Where do you get your bulk grains? Once you add on shipping, all of the online options are exorbitant. I was shocked to see that Sam's Club sells wheat in plastic bucket for about 45 cents per pound, which is the best price I've seen short of the feed store. Speaking of the feed store --- I know that Dolly Freed in Possum Living got her family's grain from the feed store, but I'm just not sure. I'd like to know whether I'm getting hard wheat or soft wheat, and if I do end up buying one of the micronizers, I've read that a single stone can tear up your machine. Ideas?
- Where and how do you store your
grains?

Chicken keeping doesn't get
much easier than free
range chickens with an automatic
heated chicken waterer.
Toss four cups of food to the seven hens and a rooster in the morning,
collect four eggs that night. The flock does all the work.
 Some
of my experiments fade away while others stand the test of time and
become part of our daily routine. Biochar falls into the latter
category.
Some
of my experiments fade away while others stand the test of time and
become part of our daily routine. Biochar falls into the latter
category.
We haven't gotten around
to making large amounts of biochar, but it's simple to sift
charcoal out of the ashes from our wood stove whenever the ash bucket
fills up (once or twice a month.) Come spring, I'll soak
the charcoal in urine to give it a dose of nitrogen, then add it to my soil.
This past growing
season, I discovered that biochar
gave early spring onion seedlings a leg up, probably due to absorbing
sunlight and heating the soil. The real benefits of biochar,
though, will show up later when microorganisms move into their "condos."
For more information on
biochar, check out some of my previous posts. First, videos from
the experts:
Next, my research and
experiments with bringing biochar to the backyard:
- Backyard biochar resources
- Biochar chemistry and biology
- Do I need to crush biochar?
- How to activate biochar
- How to apply biochar to your garden
I'm always looking for
the permaculture low hanging fruit, and I'd put my biochar system on
that list. If you heat with wood, don't toss those hunks of
charcoal! Put them to work in your garden.
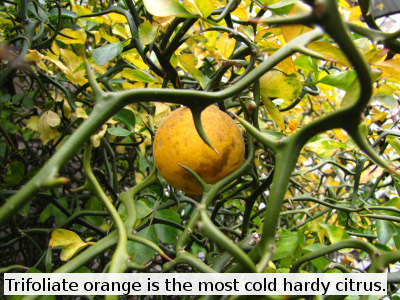 What
do you do if you want to grow as much of your own food as possible but
you love oranges? If you live in the Deep South, of course, you
can plant oranges, lemons, and grapefruits in your yard and laugh at us
northerners. Even in zone 8, citrus grafted onto particularly
cold hardy rootstocks (usually trifoliate orange) can survive outdoors
with a little care. Here in zone 6, though, our only outdoors
choice is to plant trifoliate orange with nothing grafted onto it, and the
fruits just aren't worth it.
What
do you do if you want to grow as much of your own food as possible but
you love oranges? If you live in the Deep South, of course, you
can plant oranges, lemons, and grapefruits in your yard and laugh at us
northerners. Even in zone 8, citrus grafted onto particularly
cold hardy rootstocks (usually trifoliate orange) can survive outdoors
with a little care. Here in zone 6, though, our only outdoors
choice is to plant trifoliate orange with nothing grafted onto it, and the
fruits just aren't worth it.
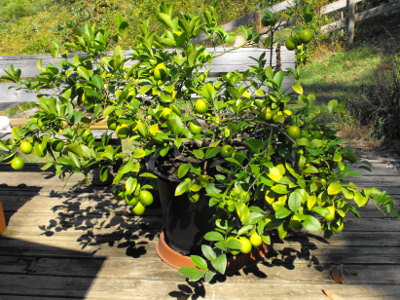
Luckily, there is
another way to grow your own citrus even in cold
climates --- dwarf trees in pots that live inside over the
winter. Dwarf citrus trees stay just small enough that you can
manhandle them inside for the winter, then you enjoy their color,
scent, and fruits in a sunny window until spring. The trees
are naturally somewhat cold hardy, so you don't end up losing
your plants when you leave the door open for an hour on a winter day
the way we did with our dwarf
bananas.
The rest of this week's
lunchtime series will explain the biology and
care of dwarf citrus trees. Be careful, though --- once you read
about them, you'll want your own. And it's hard to stop with just
one.
| This post is part of our Dwarf Citrus lunchtime series.
Read all of the entries: |
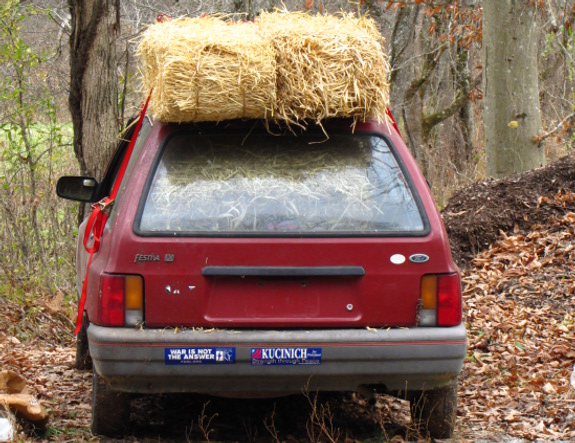
The downside to ratchet
strapping bales of straw to a car roof is the access issue.
Securing the straps with the
door frame holds both doors closed and requires climbing in and out
through the window.
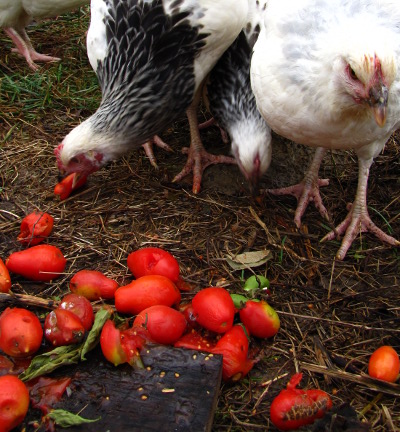 Last year, I was so excited
to have homegrown
tomatoes left at Thanksgiving. This year, I gave the
last of the house-ripened tomatoes to the chickens.
Last year, I was so excited
to have homegrown
tomatoes left at Thanksgiving. This year, I gave the
last of the house-ripened tomatoes to the chickens.
The truth is that even
the best heirloom tomatoes taste an awful lot like storebought if
they're picked green in October before the first frost and ripened
inside. It may sound crazy, but we'd rather eat delicious
lettuce, leafy greens, and carrots at this time of year than a less
than perfect tomato.
In fact, we're hardly
even eating out of the freezer yet. Even summer soup, frozen at
its peak of perfection, doesn't hold a candle to the sweetness of
November kale. Maybe I'll replace my dream of a Thanksgiving
tomato with a New Year's salad?
 Nearly all dwarf trees get
their size from the rootstock. For citrus trees, that's usually a
flying dragon trifoliate
orange, which stunts
the resulting tree down to around 10 to 12 feet tall.
Nearly all dwarf trees get
their size from the rootstock. For citrus trees, that's usually a
flying dragon trifoliate
orange, which stunts
the resulting tree down to around 10 to 12 feet tall.
You can use the bonsai
effect --- a small pot and occasional pruning --- to miniaturize your
tree further, down to about
4 to 5 feet.
Generally, if you want your dwarf tree to grow larger, you'll pot it up
into a 25% larger container annually. If you're happy with the
size of your dwarf tree, wait until the tree has finished ripening up
all of its fruits, then tip it out of the pot, cut off about an inch or
two around the outside of the rootball, add some fresh soil to the pot,
and put your tree back in. At the same time, cut back about a
third of the tree's branches so the top growth roughly matches the
root growth.
 The
scionwood (what you graft onto the rootstock) decides what kind
of
fruit you get. That's why you get huge lemons from a dwarf Meyer
lemon tree that's only two feet tall --- it's the variety, not the size
of the tree, that determines fruit size. Since some citrus
varieties
do better grafted on dwarfing rootstock than others, there's not the
same
range of fruit types available as dwarfs, but you can often find dwarf
lemons, limes, oranges, tangerines, and grapefruits. In some
cases, the fruits are the same size as the ones you'd find in the
grocery store, in come cases they're larger, and in some cases they're
smaller --- it all depends on the variety.
The
scionwood (what you graft onto the rootstock) decides what kind
of
fruit you get. That's why you get huge lemons from a dwarf Meyer
lemon tree that's only two feet tall --- it's the variety, not the size
of the tree, that determines fruit size. Since some citrus
varieties
do better grafted on dwarfing rootstock than others, there's not the
same
range of fruit types available as dwarfs, but you can often find dwarf
lemons, limes, oranges, tangerines, and grapefruits. In some
cases, the fruits are the same size as the ones you'd find in the
grocery store, in come cases they're larger, and in some cases they're
smaller --- it all depends on the variety.
Which brings me to the
final question I often get about dwarf citrus
--- can you grow one from seed? You can probably answer that
question yourself from the data I've already given you. Remember,
the rootstock determines how big the tree is and the scionwood is
responsible for the fruits. So, if I plant a seed from my dwarf
Meyer lemon tree, the offspring is only going to get its DNA from the
scionwood and will turn into a full-size Meyer lemon tree.
| This post is part of our Dwarf Citrus lunchtime series.
Read all of the entries: |

It took a few years of
tightening and loosening these hose clamps with a flat head screwdriver
before I realized a socket attached to a ratchet driver is the easy way
to get the job done.
The flat head, sometimes
called slotted, often gets distracted and wants to slip off at the
worst possible moment.

Remember how I wrote
about sampling some Autumn
Olive fruits a
couple of months ago? I liked the flavor initially, but not the
aftertaste. So I wasn't too keen on trying my movie star
neighbor's Autumn Olive fruit leather. Boy was I wrong! The
beautiful leather was sweet, tart, and delicious, with no strange
aftertaste at all.
My neighbor's recipe is
almost too simple to post about. He just sent the fruits through
a foley mill to remove the seeds and mash them up, then dried them in
his dehydrator. No added lemon juice or sweetener of any
sort. I'm only guessing, but I suspect the aftertaste I 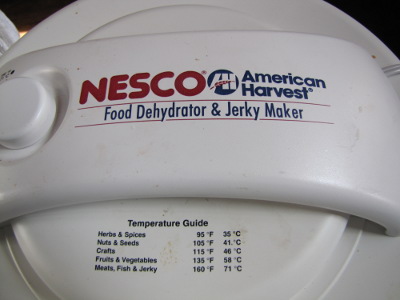 didn't like was in the seeds,
which is why the leather was pure ambrosia.
didn't like was in the seeds,
which is why the leather was pure ambrosia.
As a side note, our
neighbor loves his American Harvest dehydrator. It's round like
those cheap ones that do nothing, but has heating elements at the top
and a fan to force air through the trays. If you don't want to
spring for the top of the line Excalibur
dehydrator we chose,
this might be a good second best.
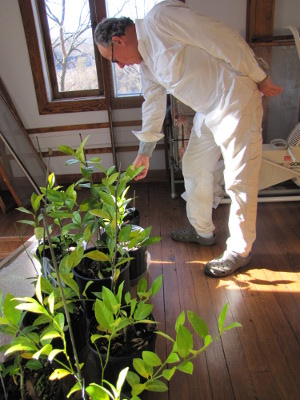 If
you kill your spiderplants, you probably won't want to buy a dwarf
citrus tree. Potted citrus plants are going to produce quite a
bit of food for you, so they require a proportionate amount of care.
If
you kill your spiderplants, you probably won't want to buy a dwarf
citrus tree. Potted citrus plants are going to produce quite a
bit of food for you, so they require a proportionate amount of care.
Light
In a perfect world, your
citrus tree would like to have full sun.
Most growers move their plants outside into a sunny spot for the
summer, but in the winter you'll need either a south-facing window or a
grow light to keep your tree happy. Although I've read that Meyer
lemons
want 8 to 14 hours of direct sun per day, our tree fruits quite
well for us even though it probably only gets about 6 hours of real sun
in the dead of winter. But don't think you're going to be able to
grow a dwarf citrus tree in a shady living room --- allot sixteen
square feet in your sunniest window.
Pots and soil
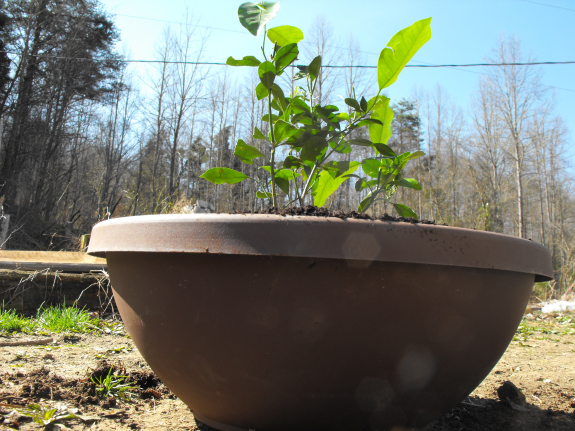 I
like to start young dwarf citrus trees in pots like the one shown
here. The wide, bowl-shape is perfect since dwarf citrus produce
very
shallow roots and just ignore the soil in the bottom of deeper
pots. Once the tree needs more space, I'll pot it up into
a 10 gallon pot, which is about as big as Mark and I like to go.
You'll get a beautiful tree and scads of fruits if you pot your
tree up yet again into a 15 gallon pot, but it's dicey maneuvering such
a huge plant inside for the winter.
I
like to start young dwarf citrus trees in pots like the one shown
here. The wide, bowl-shape is perfect since dwarf citrus produce
very
shallow roots and just ignore the soil in the bottom of deeper
pots. Once the tree needs more space, I'll pot it up into
a 10 gallon pot, which is about as big as Mark and I like to go.
You'll get a beautiful tree and scads of fruits if you pot your
tree up yet again into a 15 gallon pot, but it's dicey maneuvering such
a huge plant inside for the winter.
If you're going to buy
soil, there are special citrus blends
available. I like to make my own potting soil from a mixture of
stump
dirt, worm
castings, and
composted horse manure. No matter what
you do, don't dig up dirt out of your yard, put it in a pot, and expect
your citrus tree to thrive. In such a confined space, you need
light, fluffy soil with a great cation
exchange capacity,
which
generally means lots of organic matter (or vermiculite.)
Feeding and watering
 Once
your dwarf citrus trees get old enough to fruit (often in the
first or second year), they are hungry eaters. My neighbor gets
awesome results with storebought chemical liquid citrus
fertilizer. I don't like to buy things, so I get nearly as good
results by feeding my tree with watered
down urine, compost
tea, or
worm tea (depending on what I have on hand at the time.)
For best results, feed your tree once a week in lieu of watering it.
Once
your dwarf citrus trees get old enough to fruit (often in the
first or second year), they are hungry eaters. My neighbor gets
awesome results with storebought chemical liquid citrus
fertilizer. I don't like to buy things, so I get nearly as good
results by feeding my tree with watered
down urine, compost
tea, or
worm tea (depending on what I have on hand at the time.)
For best results, feed your tree once a week in lieu of watering it.
Speaking of watering,
citrus trees are like most house plants --- they
hate getting too much water. For best results, water your tree
whenever the soil feels dry an inch or two below the surface.
(Just stick your finger into the dirt.) Only water enough that
you'll need to give the tree another drink in a week or less.
Another frequent mistake
is to let your plant sit in a saucer of water
so that the bottom third of the soil in the pot is saturated with water
and unusable by the tree. One way to get around this is to drill
a few holes in the side of
your pot an inch or so from the bottom. Now your saucer will
overflow if you water too much (oops), but you won't fill the plant's
growing area up with water.
Indoors and outdoors
 Dwarf citrus trees fall prey
to the usual banes of houseplants ---
scale, aphids, whiteflies, etc. You can go to great lengths to
delete these pest insects, but I prefer a simpler approach. As
soon as the last frost has passed in the spring, I move my houseplants
outside and let my garden's army of beneficial insects eat all the bad
bugs up.
Dwarf citrus trees fall prey
to the usual banes of houseplants ---
scale, aphids, whiteflies, etc. You can go to great lengths to
delete these pest insects, but I prefer a simpler approach. As
soon as the last frost has passed in the spring, I move my houseplants
outside and let my garden's army of beneficial insects eat all the bad
bugs up.
Growing your dwarf
citrus trees indoors in the winter and outdoors in the summer has other
benefits as well as insect control.
The extra sunlight gives your trees lots of energy to put out fruits,
and rains naturally cleanse the leaves. (Since citrus trees are
evergreens, their leaves can become dusty if raised solely indoors.)
Don't move your citrus
plants outside prematurely, though. They
can tolerate temperatures just above freezing for short periods, but
prefer 55 to 85 degrees Fahrenheit.
Pruning
 How (or whether) you prune
your Meyer lemon depends on the size
you wish it to attain. In addition to the
tips here, you'll
want to prune away branches that cross or shade
other ones, just like you would with a fruit tree outdoors. You
can also decide whether to prune your Meyer lemon into an erect tree
shape or to let it grow as more of a bush with lots of branches that
arch up and then droop down with the weight of their fruits. If
you choose the latter route, most auhorities suggest training to the
three strongest trunks.
How (or whether) you prune
your Meyer lemon depends on the size
you wish it to attain. In addition to the
tips here, you'll
want to prune away branches that cross or shade
other ones, just like you would with a fruit tree outdoors. You
can also decide whether to prune your Meyer lemon into an erect tree
shape or to let it grow as more of a bush with lots of branches that
arch up and then droop down with the weight of their fruits. If
you choose the latter route, most auhorities suggest training to the
three strongest trunks.
The only reason your
tree would definitely need pruning is if it
sprouts below the graft union. Even if you can't pick out the
scar on the tree's trunk where the scionwood was grafted onto the
rootstock, you'll know the rootstock has sprouted if you see three-part
leaves instead of
simple leaves on your tree. Prune back all of
the rootstock sprouts and keep an eye on the tree since they may
come back.
| This post is part of our Dwarf Citrus lunchtime series.
Read all of the entries: |
2011 was a very wet year for
our driveway.
One of the lessons learned
was to be flexible. Being able to drop everything and shift into
hauling mode when the ground dried up helped us to bring in several
truck loads of organic inputs in spite of the rain.
We usually get a few windows
of opportunity when the driveway freezes, but shoveling horse manure on
days like that is a bit beyond my skill level.
Yes, I admit it --- one
of my incentives for making the homesteading
internship property
a reality is to find a place to plant all of the persimmon seeds I've
been accumulating this fall. They seem to be jumping out of the
woodwork, and I'm itching to put them all in the ground.
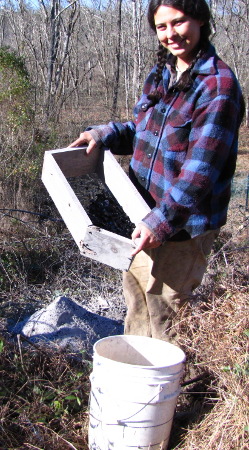
 First
came an intriguing package from down south. Pulling out the
ziploc baggies, I thought perhaps someone had sent me an early batch of
Christmas candy. But, not, it was one bag of very smelly coyote
scat and another of whole persimmons. I'll be excited to see
which does better --- the seeds that went through the animal, or those
that came straight out of the fruit.
First
came an intriguing package from down south. Pulling out the
ziploc baggies, I thought perhaps someone had sent me an early batch of
Christmas candy. But, not, it was one bag of very smelly coyote
scat and another of whole persimmons. I'll be excited to see
which does better --- the seeds that went through the animal, or those
that came straight out of the fruit.
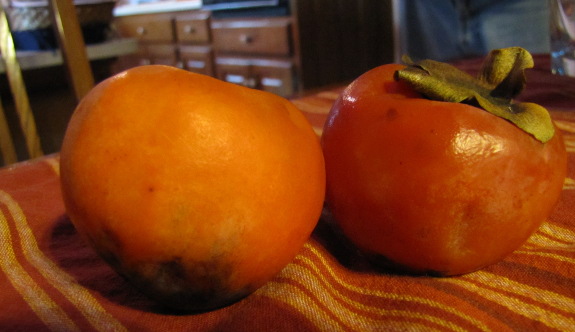
Next, Mom brought me a
batch of local persimmons. Both of these first sets of seeds are
from trees that fruit early in the year, which would make great pasture
plants to fatten up fall broilers.
 On the internship property
itself, I got sidetracked from inventorying all of the land's features
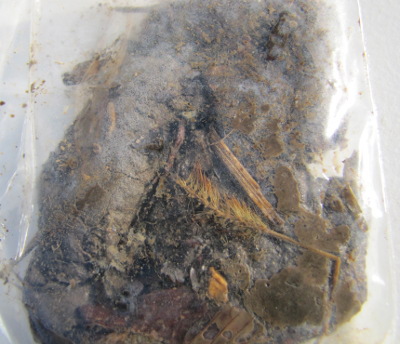
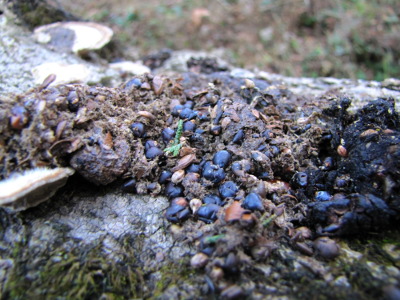
when I found this great fox scat on a log. The scat had dried up
and fallen apart, so I'm not sure whether the persimmon seeds I picked
out will sprout --- time will tell. (Most of the seeds in the
photo are Red Cedar seeds, just in case you're wondering.)
On the internship property
itself, I got sidetracked from inventorying all of the land's features
when I found this great fox scat on a log. The scat had dried up
and fallen apart, so I'm not sure whether the persimmon seeds I picked
out will sprout --- time will tell. (Most of the seeds in the
photo are Red Cedar seeds, just in case you're wondering.)
Then came the piece de
resistance --- my brother brought two ripe Asian
persimmons to
Thanksgiving. The fruits yielded only one seed apiece, but I'm
excited to give them a try for a handful of reasons. First, Joey
reports that the fruits are the non-astringent type of persimmon even
when unripe, and I didn't think that type survived this far
north. Second, I've read that Asian persimmons grafted onto
American rootstocks (like the ones I planted this fall) sometimes die
suddenly, so I'm excited to try an ungrafted Asian persimmon.
And, finally, these are a later-ripening variety, perfect for
stretching winter pasture.
I wrapped each seed in a
damp rag inside a ziploc bag and stored them all in the fridge.
Hopefully that will work to stratify the seeds and they'll sprout well
in the spring. Thank you
so much to each of my persimmon seed gatherers!
 Now
for the fun part --- blooming! I suspect that some people get
dwarf Meyer lemons for the beauty and fragrance of the blooms alone,
not even caring about the fruits. Other dwarf citrus plants have
similar, but less showy, flowers, and the information below applies to
all of the common species.
Now
for the fun part --- blooming! I suspect that some people get
dwarf Meyer lemons for the beauty and fragrance of the blooms alone,
not even caring about the fruits. Other dwarf citrus plants have
similar, but less showy, flowers, and the information below applies to
all of the common species.
Meyer lemons can bloom
throughout the year, but they tend to bloom the
most in the winter, as do most other dwarf citrus trees. That
presents a problem since there are no bees flying around your living
room to pollinate the flowers. I've found that some flowers will
self-pollinate (especially if you shake the tree a bit), but you'll get
more fruits if you take a few minutes to hand-pollinate each new batch
of blooms.
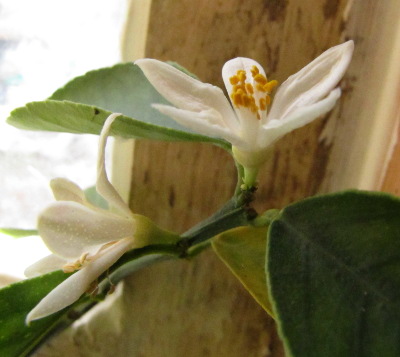
 The flowers are ready to be
pollinated when the pistil (green part in
the middle of the flower) is shiny and the petals are lush and
white. Simply take a small paintbrush (or your fingertip) and
gently tap the stamens of one flower to gather pollen, then tap the
pistil of another flower to fertilize that fruit. You'll have to
repeat this procedure a few times over the course of the bloom since
flowers open in stages, and some have already lost their petals (too
late to pollinate) by the time the last ones have opened.
The flowers are ready to be
pollinated when the pistil (green part in
the middle of the flower) is shiny and the petals are lush and
white. Simply take a small paintbrush (or your fingertip) and
gently tap the stamens of one flower to gather pollen, then tap the
pistil of another flower to fertilize that fruit. You'll have to
repeat this procedure a few times over the course of the bloom since
flowers open in stages, and some have already lost their petals (too
late to pollinate) by the time the last ones have opened.
Another option --- but
one I can't recommend --- is to open your window
during a sunny winter day and let your honeybees in. We did this
last year because our worker bees could smell the flowers' aroma
through the
screen and wanted in for such a luscious winter treat. The bees
pollinated our tree beautifully, but couldn't figure out how to get
back outside, and several perished.
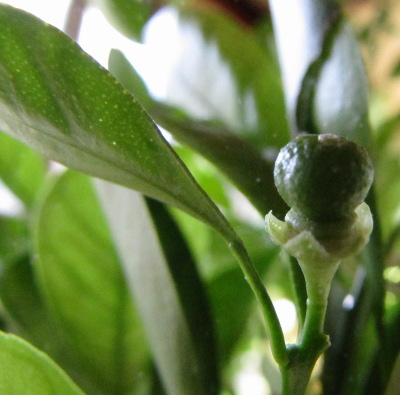
 No matter how you pollinate
the
flowers,
you'll know you've been
successful if the flowers drop their petals but maintain the green
ovary in the center. The tree will naturally thin itself,
dropping perhaps 75% of its flowers within a few days of full
bloom. Citrus trees generally go through a second round of
thinning a few weeks later when the fruits are pea- to
marble-sized. After this second thinning, you may choose to thin
a bit further so that there's no more than one fruit in each cluster.
No matter how you pollinate
the
flowers,
you'll know you've been
successful if the flowers drop their petals but maintain the green
ovary in the center. The tree will naturally thin itself,
dropping perhaps 75% of its flowers within a few days of full
bloom. Citrus trees generally go through a second round of
thinning a few weeks later when the fruits are pea- to
marble-sized. After this second thinning, you may choose to thin
a bit further so that there's no more than one fruit in each cluster.
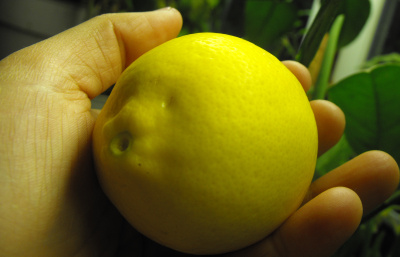
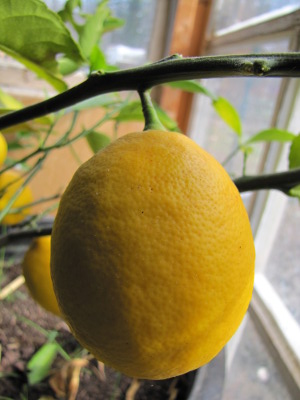
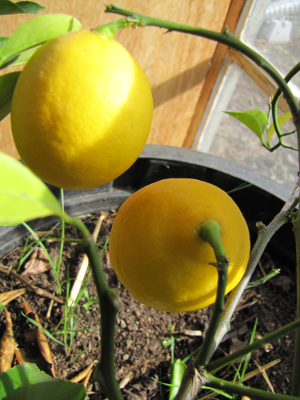
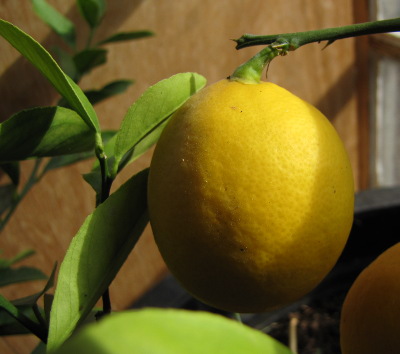
Then you wait, and wait,
and wait. Our dwarf Meyer lemon
generally takes about eight months to ripen its fruits, which gives us
lemons in November or December. You can tell the fruits are ripe
by color (Meyer lemons should actually turn slightly orange) and by the
lift test --- gently lift a fruit upwards, and if the fruit is ripe it
will snap off the branch without any force on your part. Give one
fruit a taste and then pick the others if that one was juicy and sweet.
I won't bother to tell
you what
to do with the fruits.
They go
far too fast because they're so delicious. That's when you have
to be careful not to buy five more dwarf citrus trees, requiring you to
kick your kids out to take over their sunny room.
| This post is part of our Dwarf Citrus lunchtime series.
Read all of the entries: |
 We found this battery charger at a
thrift store for 5 dollars back when we first started collecting tools.
We found this battery charger at a
thrift store for 5 dollars back when we first started collecting tools.
It usually takes all night
for a full charge compared to just a few minutes with the unreliable 5
in 1 portable power packs.
Makes me wonder if it's
easier on the battery to do the slow trickle charge?
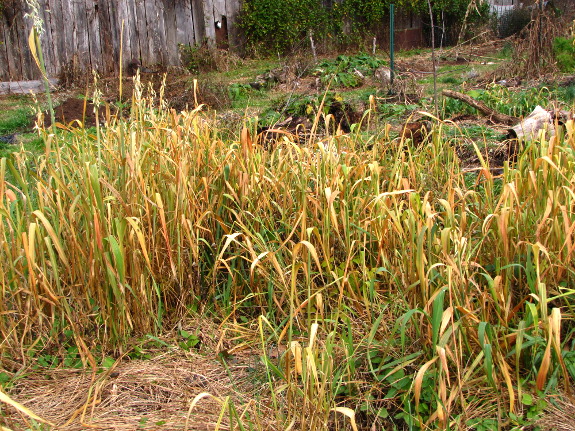
How easy can it be to
build your soil? This patch of oats proves that two minutes of
planting in August can produce quite a bit of biomass.
 You may recall that our
forest garden had grown up in a truly distressing fashion this
summer. After Mark whacked
all of the weeds down with his weed eater, there was a lot of soil
that had been shaded bare by the huge wingstem and other weeds. I
tossed handfuls of oats on the ground and ignored
them, figuring they'd either come up or get eaten by birds.
You may recall that our
forest garden had grown up in a truly distressing fashion this
summer. After Mark whacked
all of the weeds down with his weed eater, there was a lot of soil
that had been shaded bare by the huge wingstem and other weeds. I
tossed handfuls of oats on the ground and ignored
them, figuring they'd either come up or get eaten by birds.
I forgot to tell Mark
about my experiment, so he mowed through some of the cover crops, but
the patches he missed grew up quite nicely. They kept down any
late summer weeds and will probably provide semi-bare patches with a
light coating of mulch come spring. The soil won't be weed-free
and rich enough to plant vegetables directly into but will probably be
bare enough to plant a summer round of cover crops in the same quick
and dirty fashion. Those two minutes of gardening really paid off!
 By
far, the most common dwarf citrus variety is the dwarf
Meyer lemon.
This variety was grown in containers in China before being
"discovered" by Frank Nicholas Meyer and brought to the United States,
and it is probably the best-suited variety for indoors
cultivation. Meyer lemons can handle lower temperatures during
fruit ripening, which is a factor that makes some dwarf citrus drop
fruits during indoor winters. We and our friends have had great
luck with Meyer lemons and only spotty luck with other varieties, so if
you want a sure bet, go for a dwarf Meyer lemon.
By
far, the most common dwarf citrus variety is the dwarf
Meyer lemon.
This variety was grown in containers in China before being
"discovered" by Frank Nicholas Meyer and brought to the United States,
and it is probably the best-suited variety for indoors
cultivation. Meyer lemons can handle lower temperatures during
fruit ripening, which is a factor that makes some dwarf citrus drop
fruits during indoor winters. We and our friends have had great
luck with Meyer lemons and only spotty luck with other varieties, so if
you want a sure bet, go for a dwarf Meyer lemon.
Variegated
Pink lemon is
another citrus well-suited to indoor growth. Like Meyer 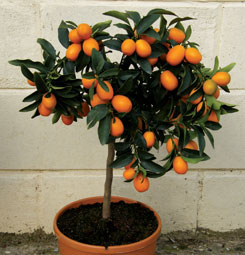 lemons,
Variegated Pink lemons handle indoor conditions well, but the tree is
slightly larger, making it hard to fit in your living room.
lemons,
Variegated Pink lemons handle indoor conditions well, but the tree is
slightly larger, making it hard to fit in your living room.
Trovita
and Calamondin
oranges
are the easiest oranges to raise indoors according to some
websites. The Calmondin isn't actually a true orange, but a cross
between a kumquat and a tangerine, so don't expect big fruits.
We've only tried Washington
Navel orange,
which has set its first fruits this year. I'll keep you posted
about whether the Washington Navel keeps those tiny fruits and turns
into our second successful dwarf citrus variety.
Limes are interesting
because you can grow them either for leaves or for fruits (or
both.) Kaffir lime is the variety most often
grown for leaves used to season food. We're 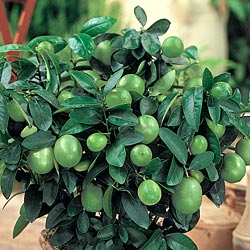 currently growing a Dwarf Key
lime
--- no fruits yet, and it's about the same age as the Washington Navel
orange, but it's going to get another year of grace before we give up
on it.
currently growing a Dwarf Key
lime
--- no fruits yet, and it's about the same age as the Washington Navel
orange, but it's going to get another year of grace before we give up
on it.
Grapefruit often need
high heat to ripen fruit, so it's a bit tricky to grow them
indoors. Oro Blanco
grapefruit is
reputed to be delicious and also tolerant of indoor conditions.
Which dwarf citrus
varieties have you tried and loved or hated?
| This post is part of our Dwarf Citrus lunchtime series.
Read all of the entries: |
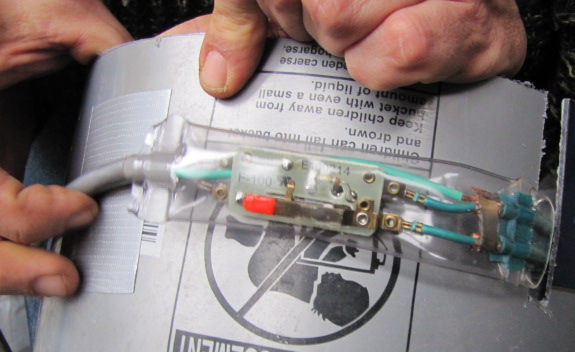
Our pipe
heating cable has a
thermostat pod encased in clear plastic.
The pilot light will come on
when the temperature reaches 38 degrees or you can push down on the
switch to activate it for testing purposes.
It's important to position
the pod so that the switch doesn't get pushed in by any type of
pressure, otherwise the unit will not shut off when it warms up.
 I
thought you all might be amused to see my ten year plan, written right
after purchasing the property in October 2003. Many of my goals
were later mitigated by Mark's realism, but it's still fun to see how
far we've gotten.
I
thought you all might be amused to see my ten year plan, written right
after purchasing the property in October 2003. Many of my goals
were later mitigated by Mark's realism, but it's still fun to see how
far we've gotten.
Generally:
1. To have repaid the
totality of the cost of the land. (Need to hurry up and pay off
the other $5,000 I owe my friend. I seem to have forgotten about
that debt in the excitement of living on the land.)
 2. To be relatively self-sufficient, growing
the majority of the food I eat. To live simply, cut off as much as
possible from the consumer economy. (We do grow nearly all of our
vegetables and an increasing amount of our fruit and meat. I know
we don't live as simply as I had planned when I wrote my list in 2003,
but I think we've reached a good compromise.)
2. To be relatively self-sufficient, growing
the majority of the food I eat. To live simply, cut off as much as
possible from the consumer economy. (We do grow nearly all of our
vegetables and an increasing amount of our fruit and meat. I know
we don't live as simply as I had planned when I wrote my list in 2003,
but I think we've reached a good compromise.)
3. To have a small cash
crop, probably ginseng, possibly art or writing, to pay for cash
expenses. (Well, the ginseng got stolen by hunters and the art
and writing don't really pay the bills, but the chicken waterers do.)
4. To make no more money
than I need to pay for immediate needs and to put a small amount away
for retirement. (I guess this would be a failure --- we're making
more money than I planned to. On the other hand, we're doing our
best to give a lot of the excess back to the local community with
projects like our internship.)
 5. To have half of my time free to draw and
write and take care of the woods. (This would be a total
win. If the week is divided into 14 work periods, we take four of
those off and I write for three of them.)
5. To have half of my time free to draw and
write and take care of the woods. (This would be a total
win. If the week is divided into 14 work periods, we take four of
those off and I write for three of them.)
6. Once my immediate
needs are met, to give surplus food to family and neighbors.
(Yes, we're giving away some surplus, although we could do more.)
Specifically:
 7. Buildings - A house for me to
live in. Barn roof replaced so that barn can be used for tools, food
storage, and animals. A loft in the barn built for guest housing in
summer. A root cellar. A composting toilet. A greenhouse to grow food
in winter. Electricity to run a computer and lights. A phone line. A
mail box. (We're partway there. The trailer made the house
easy and we've saved the cash for the barn roof, even though we're
still talking to potential roofers. Joey's yurt has taken the
place of a loft in the barn and I decided that quick
hoops are better than a greenhouse for my uses. We've got the
composting toilet (or a semblence thereof), electricity, a phone line,
and a mail box. All we're really lacking is a root cellar.)
7. Buildings - A house for me to
live in. Barn roof replaced so that barn can be used for tools, food
storage, and animals. A loft in the barn built for guest housing in
summer. A root cellar. A composting toilet. A greenhouse to grow food
in winter. Electricity to run a computer and lights. A phone line. A
mail box. (We're partway there. The trailer made the house
easy and we've saved the cash for the barn roof, even though we're
still talking to potential roofers. Joey's yurt has taken the
place of a loft in the barn and I decided that quick
hoops are better than a greenhouse for my uses. We've got the
composting toilet (or a semblence thereof), electricity, a phone line,
and a mail box. All we're really lacking is a root cellar.)
 8. Garden - an acre of garden
and orchard. The garden will begin by growing vegetables, and will work
up to supplying all berry fruits, vegetables, grains, and beans used by
me and my animals with enough to store for the winter and for guests.
The orchard will provide tree fruit. (We've got about two acres
of garden and orchard which feed us well, although we're still in the
early stages of growing food for our animals and haven't really got our
grains figured out.)
8. Garden - an acre of garden
and orchard. The garden will begin by growing vegetables, and will work
up to supplying all berry fruits, vegetables, grains, and beans used by
me and my animals with enough to store for the winter and for guests.
The orchard will provide tree fruit. (We've got about two acres
of garden and orchard which feed us well, although we're still in the
early stages of growing food for our animals and haven't really got our
grains figured out.)
 9. Animals - Chickens, probably about three,
to feed me eggs and to live primarily on scraps from me with some
grains grown for them. A goat (possibly 2) to provide me dairy
products. To set up arrangements with neighbors to give away/sell the
kids and mate my nanny once a year. (We've got a lot more
chickens than that and don't have the goats. On the other hand,
we have figured out meat animals a lot better than I thought we would
have, so it evens out.)
9. Animals - Chickens, probably about three,
to feed me eggs and to live primarily on scraps from me with some
grains grown for them. A goat (possibly 2) to provide me dairy
products. To set up arrangements with neighbors to give away/sell the
kids and mate my nanny once a year. (We've got a lot more
chickens than that and don't have the goats. On the other hand,
we have figured out meat animals a lot better than I thought we would
have, so it evens out.)
 10. To heat the house and cook with deadwood
from the property. (We've got the wood stove, but we do buy
firewood. This is one goal I'm happy with letting slide ---
buying firewood puts money into a local entrepreneur's pocket and gives
me time to write and Mark time to invent.)
10. To heat the house and cook with deadwood
from the property. (We've got the wood stove, but we do buy
firewood. This is one goal I'm happy with letting slide ---
buying firewood puts money into a local entrepreneur's pocket and gives
me time to write and Mark time to invent.)
11. To provide a means
of entry to the property for those who require a road or other
un-walking method. (So-so. If it's dry enough, we've got
the truck, and we also have the golf cart if we can figure out what
that noise is....)
It's also interesting to
see what I completely left out. Husband? Naw, not on my ten
year plan. Community? What's that? I guess I know
what will be on my next ten year plan --- making our sustainable
homestead reach beyond the boundaries of our property.
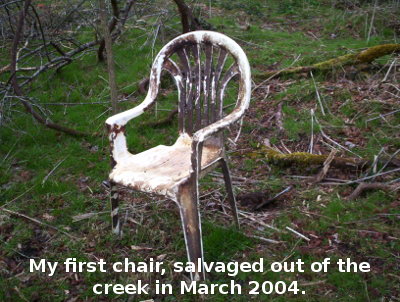
Replacing
the brake pads didn't make that rubbing sound go away.
It might be a bearing or the
motor. We've stopped using it for now.
At least it provides a nice
dry spot for Lucy to take a nap on.
Ben emailed to ask if I could recommend some books about "starting
up...going from the "normal" way of life...and ESCAPING and getting
into a permaculture lifestyle." Here are my top picks:
There are a lot of good homesteading
overview books,
but my favorite is John Seymour's The
Self-Sufficient Life and How to Live It. (Well, also my Weekend Homesteader
series, of
course.) This type of book will grab your
attention about a lot of different projects, but you'll need to look in
other directions once you choose a certain area you're interested in.
In my opinion, vegetable
gardening
is at the heart of homesteading, so you might start your more in depth
reading there. Lee Reich's Weedless
Gardening and Steve
Solomon's Gardening
When it Counts are two of the best books for helping you start in a
permaculture fashion. A lot of beginners prefer Mel Bartholemew's
Square
Foot Gardening, but
I find the technique expensive and not as
focused on soil health. Speaking of which, Teaming
With Microbes by
Jeff Lowenfels is a beautiful and easy to read
primer on what's going on in your dirt.
Chickens should also be
considered low-hanging fruit in the homesteading world. By far
the best book on incorporating chickens into a permaculture homestead
is Harvey Ussery's The
Small-Scale Poultry Flock. I'm still in the
middle of that
book since it came out not long ago, so no lunchtime series on it
yet. (Speaking of which, most of the links in this post point you
toward my summaries of the top points in each book, although a few just
send you to Amazon if I haven't written a post about that book yet.)
In terms of general
permaculture
information, a
lot of people love Toby Hemenway's Gaia's
Garden. For
some reason, I didn't get into the book when I
flipped through it, but I

Edible
mushrooms are
easy and
fun and are one of the hidden sides of the permaculture garden. I
recommend reading Paul Stamets' Mycelium
Running for
inspiration, but starting with something simple like
oyster mushrooms in logs. (I don't have a more basic edible
mushroom book to recommend, but there are lots of resources on the
internet.)
There are also a range of inspirational,
memoir-type books
you might be interested in. The most
well known is The
Good Life by Helen
and Scott Nearing. Possum Living
by Dolly Freed is a fun book written by an 18 year old about "how to
live well without a job and with (almost) no money." More
recently, Barbara Kingsolver's Animal,
Vegetable, Miracle
covers one family's experience eating locally
and in season.
If you're interested in
the traditional
cultures that
spawned many modern permaculture techniques, you
might want to check out Farmers
of Forty Centuries by FH King.
And, finally, I have to
plug our own book, Microbusiness
Independence, which
helps you fund
your homesteading adventure.
So, what am I
missing? What are the best introductory books for
off-grid living, sustainable building, aquaculture and other
homesteading topics I'm not as up to date on? I hope you'll
comment with your own beginners' reading list.


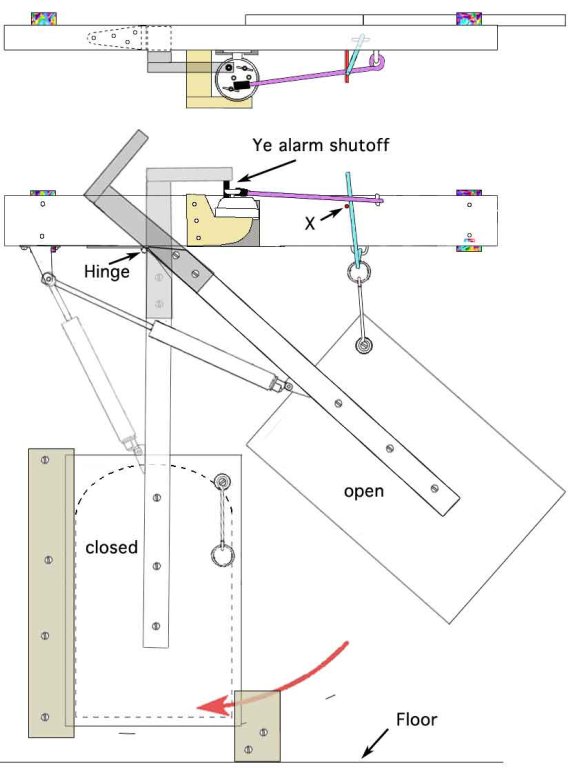
Dragonflypower.com has details on a new automatic
chicken coop door closer.
It's quite an advanced
version of the alarm
clock coop closer and in
my opinion deserves some attention for those thinking of making their
own similar contraption.
 We try to report our failures
here as well as our successes. So I feel obliged to admit that we
only managed to attend a quarter of the Acres USA
conference.
We try to report our failures
here as well as our successes. So I feel obliged to admit that we
only managed to attend a quarter of the Acres USA
conference.
We drove up to Ohio
Monday so Mark could attend the first part of his pre-conference course
Tuesday. The pre-conference classes were amazing, but by the time
they ended on Wednesday night, Mark and I knew we couldn't survive
another day getting up before dark, coming home after dark, and staying
inside a huge conference center for the time in between.
Yes, there were a dozen
Amish people at the pre-conference. No, they didn't seem to be as
badly affected by the concrete jungle as we were.
I was dying to see
Harvey Ussery (oh, and Joel Salatin), both of whom spoke Friday.
I was itching to listen to in-depth lectures on plant secondary
metabolites, cover crops, and more. I wanted to peruse the
bookstore and trade show, and to hear more about Fertrell's
Nutri-Balancer (which pastured poultry keepers seem to swear by.)
But we couldn't do it.
 I like to pretend that the
reason we stay home so much is because the farm needs us, but the truth
is we need the farm much more. I don't think we relaxed until we
stepped out of the car on the edge of the hay field, waded through the
flood waters, and fired up the wood stove.
I like to pretend that the
reason we stay home so much is because the farm needs us, but the truth
is we need the farm much more. I don't think we relaxed until we
stepped out of the car on the edge of the hay field, waded through the
flood waters, and fired up the wood stove.
Note to self: Two days
of conference is about our max. No way can we combine a
conference with a family visit --- preferably, we'd plan it so that
half of each conference day was silent contemplation time. Live
and learn....
Note to readers: All is
not lost! Once I digest the experience a bit more, I'll have a
really awesome lunchtime series on Mob Grazing for you. And I
think I can get a partial refund and use it to get MP3s of most of the
conference. Stay tuned.
We had one of the plastic
nubs to break off from our small Whirlpool
refrigerator.
I didn't think super glue
or epoxy would be strong enough, so I found a dull drill bit that was
the right diameter and installed it far enough in so it sticks out like
the old nub did.
The middle section of the
door is no doubt filled with some kind of styrofoam, which is why I
drilled a smaller pilot hole first to help get the bit positioned as
straight as possible.
It works fine and feels like
a long lasting solution.
 Mark's
step-mom, Jayne, decided to convert her garden to no-till.
Previously, she had used her mulching mower to shred tree leaves and
grass clippings from her lawn, then applied the organic matter to the
vegetable garden as a generous coating of mulch. However, she
also tilled the soil every spring and fall.
Mark's
step-mom, Jayne, decided to convert her garden to no-till.
Previously, she had used her mulching mower to shred tree leaves and
grass clippings from her lawn, then applied the organic matter to the
vegetable garden as a generous coating of mulch. However, she
also tilled the soil every spring and fall.
In fall 2010, Jayne
stopped tilling, but kept adding mulch. Come
spring, she simply pulled the mulch back from directly over top of her
seeds (or seedlings), then scooped the mulch back into place around the
plants once they were up and running. Despite using the same
amount of mulch as in previous years, Jayne reported that this
year's garden had far fewer weeds than earlier gardens had.
 In
addition to deleting weeds, Jayne's heavy mulching campaign seems to
have created a warmer microclimate that has allowed her garden plants
to thrive deep into the winter. She lives in zone 5, at the edge
of a huge cornfield which lets the Midwestern wind whip through her
garden --- this is a much colder spot than my zone 6, windless
garden. And yet, Jayne had unprotected arugula and other salad
greens thriving on December 8. (In contrast, the salad greens I
didn't place under quick
hoops are already
two thirds dead.)
In
addition to deleting weeds, Jayne's heavy mulching campaign seems to
have created a warmer microclimate that has allowed her garden plants
to thrive deep into the winter. She lives in zone 5, at the edge
of a huge cornfield which lets the Midwestern wind whip through her
garden --- this is a much colder spot than my zone 6, windless
garden. And yet, Jayne had unprotected arugula and other salad
greens thriving on December 8. (In contrast, the salad greens I
didn't place under quick
hoops are already
two thirds dead.)
Under her row cover
fabric, Jayne's broccoli and cabbage were
thriving. We looked under the covers when outside temperatures
were in the low 20s, and there did seem to be some frost on the stems
of the broccoli, but the heads looked fine. Could the heavy
organic matter be helping these broccoli hang on?
Are you inspired to
change over to no-till next year? A good place to start is with
my Weedless
Gardening lunchtime
series.
We finally found someone to
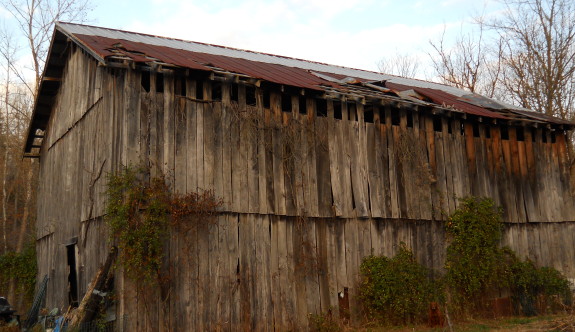
fix the barn roof that has experience and helpers.
It's going to take 52 pieces
of 14 foot long 26 gauge tin to get the job done.
Our new guy thinks it will
take him and a co-worker 3 or 4 full days. We agreed on 1800 dollars,
and he offered to have him and his guys carry back the tin through our
flood plain if we can't figure out a mechanized way of doing it. I
asked him how much he needed up front and I was relieved when he said
25 percent the first day. I once paid a guy to build a cinder block
fence in Las Cruces, New Mexico and learned the hard way that
motivation levels can vary when it comes to finishing a job.
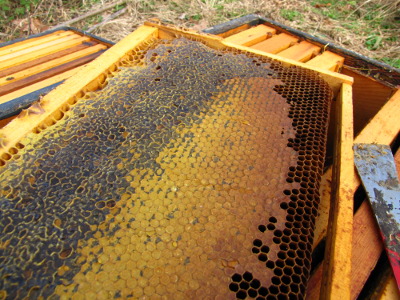 Our two bee hives have been
awfully quiet for the last few weeks. No one out flying on warm
sunny days. No perceptible buzz when I leaned down to press my
ear against the hive body. But I didn't think anything could be
wrong. In November, the hives were well-stocked
with honey and low
enough on varroa mites
that I didn't need to worry. We haven't had any terribly cold
spells yet. I just figured I wasn't paying enough attention.
Our two bee hives have been
awfully quiet for the last few weeks. No one out flying on warm
sunny days. No perceptible buzz when I leaned down to press my
ear against the hive body. But I didn't think anything could be
wrong. In November, the hives were well-stocked
with honey and low
enough on varroa mites
that I didn't need to worry. We haven't had any terribly cold
spells yet. I just figured I wasn't paying enough attention.
Unfortunately, my gut
was right and my head was wrong. I opened up the hives and found
them...empty. Chock full of honey, but no bees live or dead.
I usually poo-poo
backyard beekeepers who swear their bees died of Colony Collapse
Disorder. I believed (and still do) that we tend to jump to that
conclusion without checking the data. Our two hives that died
last winter, for
example, showed clear signs of starvation --- bees dead on the comb
with their heads stuck in empty cells. It's easy to just write
off anything as "Colony Collapse Disorder --- not my fault", but the
truth is that a dead hive often is the beekeeper's fault.
 Which
is not to say that Colony Collapse Disorder never comes to the
backyard. If your bees are simply gone and the honey is untouched
(even by robber bees), you might be the unfortunate recipient of this
difficult to diagnose disorder. This week, I did start to see a
few robber bees visiting my empty hives, but I suspect the honey-rich
hives had been untouched for a few weeks before that. All of the
data points toward Colony Collapse Disorder being the culprit in this
case.
Which
is not to say that Colony Collapse Disorder never comes to the
backyard. If your bees are simply gone and the honey is untouched
(even by robber bees), you might be the unfortunate recipient of this
difficult to diagnose disorder. This week, I did start to see a
few robber bees visiting my empty hives, but I suspect the honey-rich
hives had been untouched for a few weeks before that. All of the
data points toward Colony Collapse Disorder being the culprit in this
case.
I'm going to extract the
honey and then put on my thinking cap. When we started with bees,
we got free
Langstroth equipment,
but I'd like to research whether top bar hives or Warre hives are more
likely to keep our bees healthy. We also bought package
bees from afar, and I'd like to see if we can find a local person
breeding bees well adapted to our area. Alternatively, perhaps we
should look into strains other than Italian if we have to buy in more
bees from far-flung sources. But whatever we change, we will be bringing bees back to the
farm, and hopefully our next experiment with bees will do better than
our last.
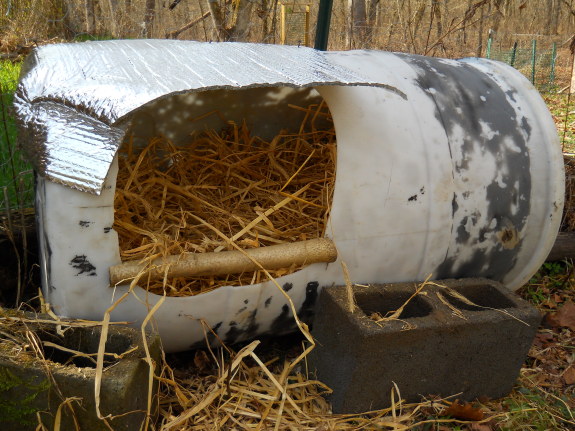
We've been trying to merge
our two chicken flocks into one happy group.
It's not going as planned.
The Light
susex breed is still
warming up to our Black
Australorp rooster and his girls. I think he's been chasing them
out of the coop. They've been huddling in a corner of the pasture the
past couple of nights so I decided to build them the above chicken coop
anex.
You can find used
50 gallon plastic barrels
at some feed stores for under 10 dollars. It only took a few minutes to
cut out the entrance with a jig saw.
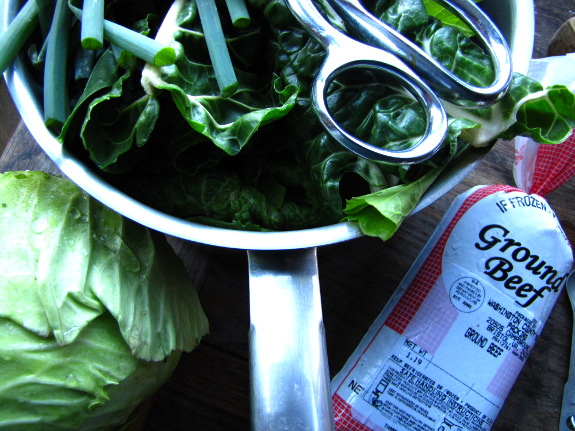
When I went out to pick
these potsticker fixings, the cabbage head
was frozen clear through, but it thawed out and made a pretty tasty
dinner. This last cabbage plus parsley and Egyptian onions are
the only edibles currently growing uncovered in the garden, but we've
still got plenty of greens and lettuce under the quick
hoops.
We've also been eating a
bit out of the freezer this month --- two gallons down. Very
similar to our larder situation last
year, and plenty
more in the garden, freezer, and kitchen shelf so that we can keep
eating our own produce until spring.
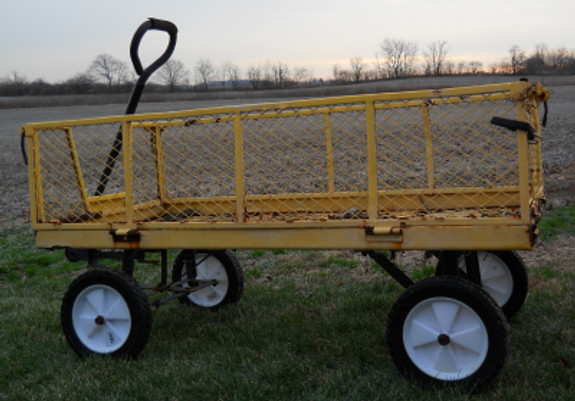
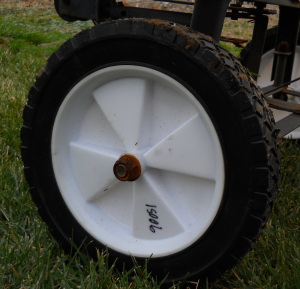 One
of our favorite readers shared with us recently how she upgraded the
pneumatic wheels on her yellow wagon to solid wheels from Harbor Freight.
(Thanks Jayne)
One
of our favorite readers shared with us recently how she upgraded the
pneumatic wheels on her yellow wagon to solid wheels from Harbor Freight.
(Thanks Jayne)
It's an advanced upgrade that
required four metal sleeves to make them fit.
If we didn't have so much mud
to deal with I might do a similar operation on our TC1840H
garden wagon.
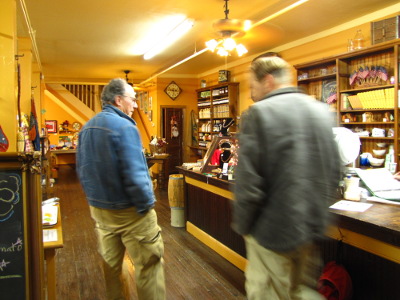
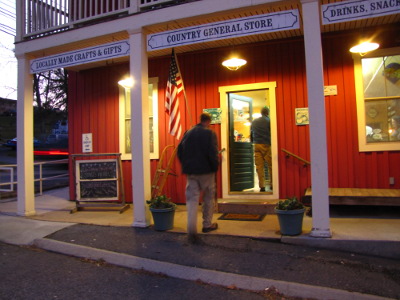 Steve Hopp started the Harvest
Table Restaurant in
Meadowview, Virginia, based on the concepts outlined in his wife's
book, Animal,
Vegetable, Miracle.
The restaurant "work[s] with seasonal produce and meats from local and
regional sources, offering the best of each season."
Steve Hopp started the Harvest
Table Restaurant in
Meadowview, Virginia, based on the concepts outlined in his wife's
book, Animal,
Vegetable, Miracle.
The restaurant "work[s] with seasonal produce and meats from local and
regional sources, offering the best of each season."
In theory, the idea is
very sound, but in practice, this
article from July
2011 reports that the restaurant has yet to turn a profit. The
problem is pretty simple and is one of the first 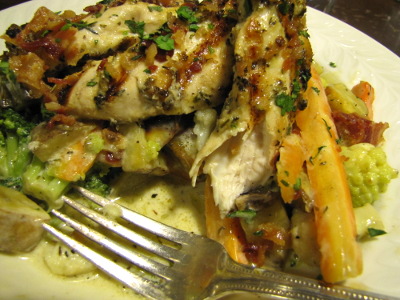 things I noticed during our
recent visit --- price. Mark and I took our movie star neighbor
out on Saturday night and were a bit shocked that dinner for three (all
of us drinking water, but we did get two desserts and two starter
soups) came to $70, plus tip. In an area where the average annual
income is barely above the poverty line, a $28 meal is a hard
sell. (Yes, we always tip more than 15%. Mark has done his
time as a waiter and knows servers deserve it.)
things I noticed during our
recent visit --- price. Mark and I took our movie star neighbor
out on Saturday night and were a bit shocked that dinner for three (all
of us drinking water, but we did get two desserts and two starter
soups) came to $70, plus tip. In an area where the average annual
income is barely above the poverty line, a $28 meal is a hard
sell. (Yes, we always tip more than 15%. Mark has done his
time as a waiter and knows servers deserve it.)
 Our trip to the Harvest Table
was a thought-provoking lesson in practicing what we preach. I've
long said that if we bought our food from ethical sources --- pastured
meat and in-season produce raised by small farmers --- we'd be paying
twice as much for groceries. Realistically, that means eating out
half as often and cutting back on the pricey items (or growing them
ourselves.)
Our trip to the Harvest Table
was a thought-provoking lesson in practicing what we preach. I've
long said that if we bought our food from ethical sources --- pastured
meat and in-season produce raised by small farmers --- we'd be paying
twice as much for groceries. Realistically, that means eating out
half as often and cutting back on the pricey items (or growing them
ourselves.)
Unfortunately, that also
means leaving the poor out of the equation. I suspect that very
few locals eat at the Harvest Table and that the restaurant instead
gets most of its business from 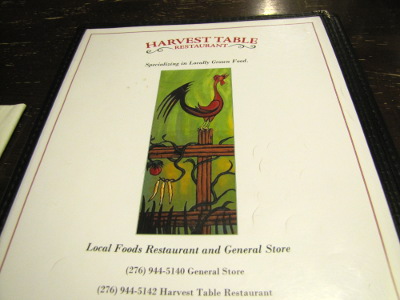 tourists passing through on
the nearby I-81. I'm not sure what the solution is to that thorny
problem (except that gourmet food is one of the items we can all grow
with a little time and space.)
tourists passing through on
the nearby I-81. I'm not sure what the solution is to that thorny
problem (except that gourmet food is one of the items we can all grow
with a little time and space.)
For those of you who
live far away (or can't afford the high prices), the Harvest Table
could provide a simpler lesson. Keep an eye on their specials on facebook for ideas about cooking
totally in-season meals of your own. Or drop by the restaurant to
check out their selection of permaculture books and local crafts.
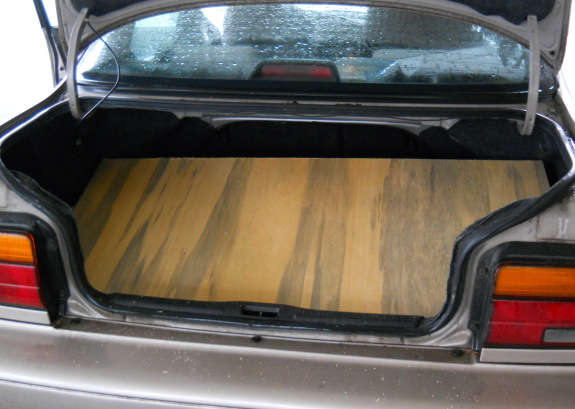
Went to the big city today
for an eye check up and some plywood.
Figured out that if you have
the guy at Lowes cut a sheet of plywood in 2 foot sections it will
perfectly fit in the trunk of our Toyota.
 Next
month's volume of Weekend Homesteader includes in-depth information
on:
Next
month's volume of Weekend Homesteader includes in-depth information
on:
- Backup lighting for power outages
- Rotational chicken pastures, coops, and tractors
- Soil testing basics
- The science of baking bread (and pizza)
For those of you who
are
new to Weekend Homesteader, this series walks
you through the basics of growing your own food, cooking the bounty,
preparing for
emergency power outages, and achieving financial independence.
I hope you'll consider
splurging 99 cents to buy
a copy of my newest ebook from Amazon's
Kindle store. And many
thanks in advance if you can find the
time to write a brief review.
As usual, I'm also very
glad to email you a free pdf copy to read if you
don't have the spare cash, or just don't want to deal with downloading
an app so you can
read the ebook on your computer or phone. Just email
me with your request --- no strings attached. (Plus,
I'm trying out a new system on Amazon, so the book will be free there
next Monday through Friday.)
Don't forget that Weekend
Homesteader: December
is still available, full of tips on fruit trees, emergency
preparedness, and more. Thanks for reading!
 Want
to make some fun and easy gifts for the backyard chicken keeper on your
list? It's too late to start the plants this year, but a couple
of hills of egg gourds might fit the bill in 2012.
Want
to make some fun and easy gifts for the backyard chicken keeper on your
list? It's too late to start the plants this year, but a couple
of hills of egg gourds might fit the bill in 2012.
The egg gourd is a type
of decorative gourd that looks astonishingly similar to chicken
eggs. Maggie gave me three, which will soon be replacing golf balls
as nest eggs in the
chicken coop. If you do a google image search for "gourd eggs",
you'll see dozens of crafty alternatives to make use of these
non-edible squash.
Thanks, Maggie!
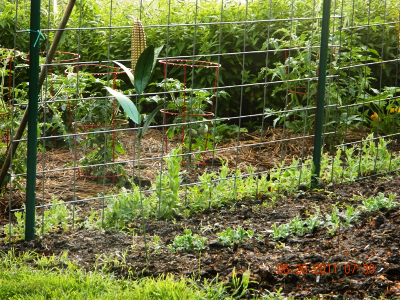
I'm still in awe each time I
pass by Anna's quick
hoop experiments.
The pay off is pretty huge
when you consider how many fresh garden salads we continue to have on a
daily basis thanks to a mixture of cut pieces of rebar, PVC, and some Agribon
material.
I remember this time last
year dreaming of fresh leafy greens in a gastronomical sense of the
word.
 I've
been enjoying the thought-provoking discussion in the comments section
of my Harvest
Table review.
Specifically, Lisa's question got me thinking about how much time and
money we put into our vegetable garden.
I've
been enjoying the thought-provoking discussion in the comments section
of my Harvest
Table review.
Specifically, Lisa's question got me thinking about how much time and
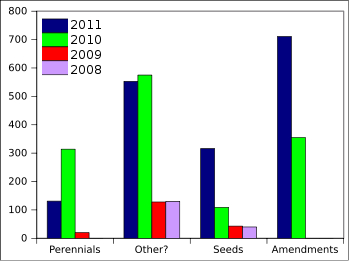
money we put into our vegetable garden.The chart to the left shows our garden expenditures for the last four years. The reason I went so far back in time is because I tend to spend a lot more money on the garden when I have the cash since I think of items like straw, cover crop seeds, and fruit trees as an investment in our farm's future health. But I don't want anyone to think you have to set aside $1,000 per year to grow your own vegetables. When we were pinching pennies in 2008 and 2009, we spent less than $200 annually and still managed to grow a lot of food, even if we didn't build our soil and increase our long term capacity with perennials.
 How about time? I
estimate we put in about 540 hours over the
course of the year working in the garden. That's where the real
"money" comes in, depending on whether we want to give ourselves
minimum wage ($3,915) or the amount I make on ebooks (about $25/hour,
which would make our garden time worth $13,500.) To be honest,
though, most farmers don't even make minimum wage, so they probably
would consider my time worth more like $2,000. That lowball
figure would put our total
time and money expenditures at $2,200 to
grow all of our own vegetables (and some of our fruit), while a more
realistic figure is $14,500.
How about time? I
estimate we put in about 540 hours over the
course of the year working in the garden. That's where the real
"money" comes in, depending on whether we want to give ourselves
minimum wage ($3,915) or the amount I make on ebooks (about $25/hour,
which would make our garden time worth $13,500.) To be honest,
though, most farmers don't even make minimum wage, so they probably
would consider my time worth more like $2,000. That lowball
figure would put our total
time and money expenditures at $2,200 to
grow all of our own vegetables (and some of our fruit), while a more
realistic figure is $14,500.And what do we get for all that time and money? The mainstream estimate would be about $1,500 worth of food, which is what the average CSA would cost if it extended all year. On the other hand, I asked Mark at lunch what dollar figure he'd put on the food I bring in from our garden, and he glowed about the taste for a while before settling on $18,250 (or $50 per day.)
Now, I'm a fan of numbers, so I'd use the following analysis to figure out the value our homegrown food holds for me:
- Taste. I've eaten
mainstream grocery store produce, farmer's market produce, the contents
of CSA baskets, and vegetables grown in peoples' backyards with
chemicals and/or compost. And there's no comparison between our
own
food and any of those other products. It's very easy for me to
say that our food is ten times as tasty as grocery store produce ---
that seems like an underestimate. If taste is about half of the
"cost" of our food, that would put the value of our food in this
category at $7,500.
- Nutrition. I'm
confident in the assumption that our homegrown fruits and vegetables
have two to five times as much nutritional
quality as grocery store
produce. We eat or preserve our bounty within minutes of its peak
ripeness, which means very little loss of vitamins and minerals.
And our food is naturally much higher in micronutrients because we
focus on soil health first, which allows fungal communities to hunt
down and hold minerals that usually wash out of soil in mainstream
agricultural systems. So, if nutrition is another half of the
"cost" of our food, that comes to $2,625.
- Ecology. Industrial
agriculture systems send their fields into biological debt each year by
depleting organic matter, eroding away mineral soil, and killing what
little life is left behind. Mainstream organic market gardens
generally end
each year with a zero balance --- they manage to hold onto their
topsoil (hopefully), provide habitat for a few beneficial insects, and
don't leach toxins, but that's about it. Our garden is the only
type of vegetable gardening system I've seen that ends every year in
the
 black. We fix carbon out of the
atmosphere by increasing the
soil humus levels and we provide habitat for wild species like
salamanders
and bees that are generally displaced by mainstream agriculture.
The table below is a geeky estimate of how much our garden ecosystem
services are worth per acre (based loosely on this
document), which would put our quarter acre vegetable garden value
at about $367/yr. I figure we'd be going at least that far into
ecological debt by using mainstream agricultural methods, so the total
value in this category is about $734 if we're comparing ourselves to
grocery store food producers.
black. We fix carbon out of the
atmosphere by increasing the
soil humus levels and we provide habitat for wild species like
salamanders
and bees that are generally displaced by mainstream agriculture.
The table below is a geeky estimate of how much our garden ecosystem
services are worth per acre (based loosely on this
document), which would put our quarter acre vegetable garden value
at about $367/yr. I figure we'd be going at least that far into
ecological debt by using mainstream agricultural methods, so the total
value in this category is about $734 if we're comparing ourselves to
grocery store food producers.
| Wild habitat $/acre/yr |
Garden multiplier |
Garden $/acre/yr |
|
| Genetic resources | 22.82 | 0.2 | 4.56 |
| Pollination | 36.69 | 1.5 | 55.04 |
| Water services | 43.78 | 0.9 | 39.40 |
| Air quality | 73.72 | 0.6 | 44.23 |
| Carbon sequestering | 62.64 | 2 | 125.28 |
| Erosion control | 88.52 | 1 | 88.52 |
| Soil formation | 3.80 | 2 | 7.60 |
| Nutrient cycling | 1027.3 | 1 | 1027.30 |
| Habitat | 105.09 | 0.5 | 52.55 |
| Biodiversity | 6.57 | 0.3 | 1.97 |
| Healthy ecosystem | 7.32 | 1 | 7.32 |
| Habitat refugia | 76.73 | 0.2 | 15.35 |
| Total |
1469.12 |
In case you don't feel like pulling out your calculator, that all adds up to an estimated value of $10,859 for our annual garden produce (not counting the enjoyment of running my hands through the dirt.) I guess I'm a cheapskate compared to Mark, but at least we're on the same wavelength.
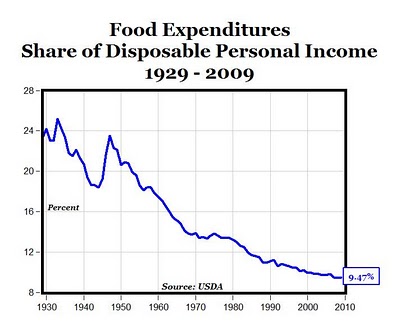 As one final way of looking
at food value, let's delve into history. My reasoning here is
that the Green Revolution has hidden the true cost of food --- we pay
very little at the grocery store, but then spend money (now or later)
cleaning up the environmental repercussions of our factory farming
system. In 1900, when we paid for all of our food up front,
Americans spent approximately 43% of their annual income on food.
The 2010 U.S. census reports that married couples like me and Mark made
an average of $58,036 last year, which would put our real
food value at $24,955. Of course, that
figure includes meat, dairy, and grains, none of which are included in
the other estimates above, but even if fruits and vegetables only make
up half of our dietary cost, the historical analysis suggests that
Mark's and my estimates are on track.
As one final way of looking
at food value, let's delve into history. My reasoning here is
that the Green Revolution has hidden the true cost of food --- we pay
very little at the grocery store, but then spend money (now or later)
cleaning up the environmental repercussions of our factory farming
system. In 1900, when we paid for all of our food up front,
Americans spent approximately 43% of their annual income on food.
The 2010 U.S. census reports that married couples like me and Mark made
an average of $58,036 last year, which would put our real
food value at $24,955. Of course, that
figure includes meat, dairy, and grains, none of which are included in
the other estimates above, but even if fruits and vegetables only make
up half of our dietary cost, the historical analysis suggests that
Mark's and my estimates are on track.Which figure do you think is the most realistic estimate of the value of our food? Perhaps you have yet another way of looking at food value?
One interview hearing Dr
William Davis talking about his new book "Wheat Belly" is all it took to convince me
food with wheat in it is not worth the adverse health effects.
The guy makes his point in an
easy to understand fashion and comes from years of experience as a
cardiologist.
 Mark's take on shoes: It's
worth spending more to protect one of the most important parts of your
body.
Mark's take on shoes: It's
worth spending more to protect one of the most important parts of your
body.Anna's take on shoes: I work them so hard, the Wal-mart ones only wear out a few months faster than the expensive ones, so it's better to just get the cheapest kind.
Mark's
threat (offer?) to take me shoe-shopping came at a weak time.
We'd bought matching pairs of waterproof work boots at Wal-mart just a
month before since this same style lasted nearly two years for Mark
last time around. But my new boots came with a slow leak that
 quickly got bigger. I'd suffered through wet feet for three weeks
and was so sick of plastic
bags in my shoes that I was ready to grasp at any straw, even if it
was fancy, expensive, and stylish.
quickly got bigger. I'd suffered through wet feet for three weeks
and was so sick of plastic
bags in my shoes that I was ready to grasp at any straw, even if it
was fancy, expensive, and stylish.
We were in Ohio visiting
Mark's mom at the time, so she and Mark cooked up a plan to take me a
real shoe store. There, Mark shod me in two high priced pairs of
shoes --- calf-high Bogs ($95.95) for really wet weather and ankle-high
Red Wing work boots ($169.95) for drier periods. A little
research at home suggests that I could have reduced the price by about
15% by buying online (or by 35% if we'd selected an off-brand), but I
suspect Mark considers that extra price worth it because it allowed him
to strike while the iron was hot. (Or, rather, while cold, wet
feet were on the front of my mind.)
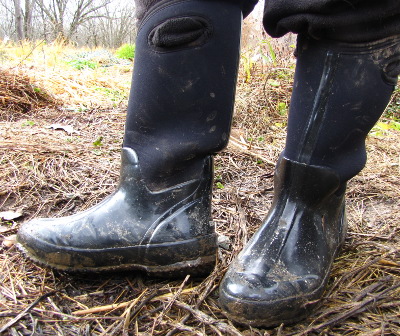 So far, I can tell you that
both pairs of shoes are quite comfortable. The Bogs, especially,
are much superior to other types of muck boots I've worn since they
feel like real shoes (not flippers), they're warm, and they hug my calf
so that even when I wade through water too deep for the boots, my feet
don't get as wet.
So far, I can tell you that
both pairs of shoes are quite comfortable. The Bogs, especially,
are much superior to other types of muck boots I've worn since they
feel like real shoes (not flippers), they're warm, and they hug my calf
so that even when I wade through water too deep for the boots, my feet
don't get as wet.
The real question,
though, is how fast my expensive boots will wear out. I've pretty
much given up on wearing muck boots because I walk them into the ground
so quickly --- six months is a good lifetime for the cheap versions
under heavy farm use. Since my Bogs cost five times as much as
the cheapest boots, they'll need to survive until May 2014 to make it
worth our while. Think they'll make it?
 If
you eat bread, you should know how to bake it. Once you
understand the technique, making your own bread turns into a
therapeutic ritual
that fills your house with a delightful scent while putting
preservative-free bread on the table. You can easily tweak bread
recipes to suit your fancy, creating whole grain bread that would cost
a bundle in the grocery store, or splitting your dough down the middle
to make a loaf for sandwiches along with half a dozen hamburger
buns. The smart home chef doubles the recipe and freezes some
for a quick and easy meal in the middle of the week, perhaps pizza or
dinner rolls. And, all of that flexibility aside, everyone knows
that nothing you buy in the store can compete with the flavor of fresh
baked bread.
If
you eat bread, you should know how to bake it. Once you
understand the technique, making your own bread turns into a
therapeutic ritual
that fills your house with a delightful scent while putting
preservative-free bread on the table. You can easily tweak bread
recipes to suit your fancy, creating whole grain bread that would cost
a bundle in the grocery store, or splitting your dough down the middle
to make a loaf for sandwiches along with half a dozen hamburger
buns. The smart home chef doubles the recipe and freezes some
for a quick and easy meal in the middle of the week, perhaps pizza or
dinner rolls. And, all of that flexibility aside, everyone knows
that nothing you buy in the store can compete with the flavor of fresh
baked bread.
This
week's lunchtime series walks you through the science and practice of
bread-baking. Don't want to wait for future installments?
The information is excerpted from Weekend
Homesteader: January, which is available for free on
Amazon from today until December 23! I hope you'll give the
entire book a try (and leave me a review!)
| This post is part of our Bread lunchtime series.
Read all of the entries: |
We had several projects this
year that's made life easier, but the one I get reminded of on a daily
basis is the cinder
block stepping stone upgrade.
The creek is longer to cross
now, but less deep and is often just below ankle high. A major treat
compared to our previous winter creek crossing adventures.
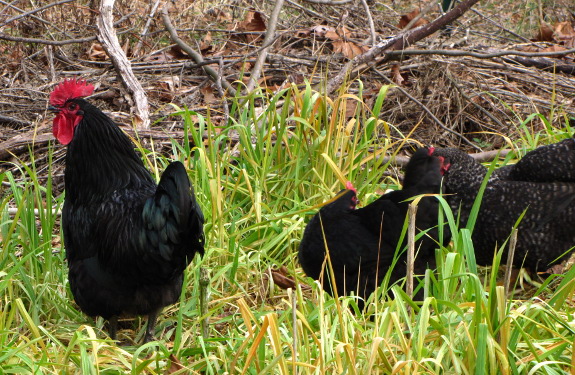
The theory behind our flock
merger was pretty
simple --- Harvey
Ussery wrote that
you can sometimes get multiple roosters to play nicely together in one
flock if a younger rooster is raised with an older rooster. The
youngster will grow up knowing he's the underdog and won't annoy the
head rooster unduly.
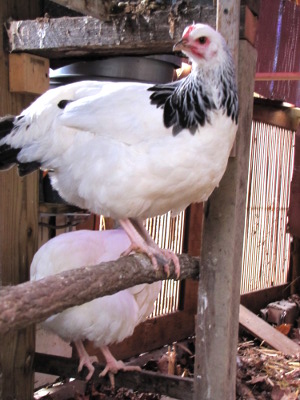 I figured we had a limited
time to give this hypothesis a try before our Light Sussex rooster was
full grown and ready to take on the world (and I also wanted to get the
Sussex out of the shade without putting in all of the effort of
building a third chicken coop.) So we moved our half-grown Light
Sussex (three pullets and a cockerel) into the main coop and shut the
pasture door so they wouldn't go running home.
I figured we had a limited
time to give this hypothesis a try before our Light Sussex rooster was
full grown and ready to take on the world (and I also wanted to get the
Sussex out of the shade without putting in all of the effort of
building a third chicken coop.) So we moved our half-grown Light
Sussex (three pullets and a cockerel) into the main coop and shut the
pasture door so they wouldn't go running home.
At first, the experiment
seemed to be headed for failure. The Australorp rooster chased
the younger birds away from the food and the Sussex were too scared to
even go in the coop at night. But every day, the chickens
mellowed out a bit more. Saturday, I felt comfortable enough to
open the pasture door and let them all back out into the floodplain,
where the two flocks foraged separately but in the same vicinity.
Mark tells me the Sussex are even roosting up on the perches in the
coop now. Maybe a second week will see the chickens actually
hanging out together?
 I'll be honest with you ---
your first bread baking effort might not be perfect.
You need to get the hang of rising and kneading if you want perfect,
fluffy rolls. And you have to understand the chemistry behind
each ingredient before you can start mixing and matching to create your
own recipes. I'll walk you through making a
fluffy, white bread from scratch so you'll understand the basics.
I'll be honest with you ---
your first bread baking effort might not be perfect.
You need to get the hang of rising and kneading if you want perfect,
fluffy rolls. And you have to understand the chemistry behind
each ingredient before you can start mixing and matching to create your
own recipes. I'll walk you through making a
fluffy, white bread from scratch so you'll understand the basics.
First, find your
ingredients:
1 1/3 c. water
2 tbsp. sugar
1 tbsp. yeast
2 tbsp. olive oil
2 tsp. salt
3 c. bread flour
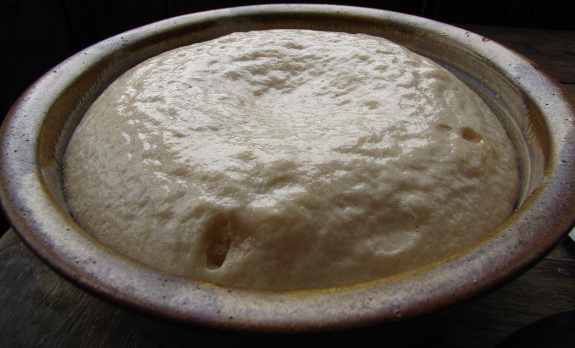
I usually skip the next
step --- proofing --- but I do recommend you
try it once just to understand the yeast organism. Heat your
water to "baby bottle temperature" (just warm enough so that it feels
neither hot nor cold when you put a drop on the inside of your wrist),
then mix in the sugar and yeast. Wander away for about ten
minutes, then see whether your yeast has woken up and created a
foamy mass on top of the water.
Whether you give your
yeast time to proof or not, the next step is to
make your dough. To the warm water, yeast, and sugar, add the
rest of your ingredients, which in the case of this recipe are oil,
salt, and bread flour. You'll want to mix all of the ingredients
other than the flour first because the last cup of flour is going to
take some heavy stirring to incorporate it into the dough.
Stay
tuned for more on the science and practice of
bread-baking at lunchtime for the rest of the week. Don't want to
wait for future installments? The
information is excerpted from Weekend
Homesteader: January, which is available for free on
Amazon from today until December 23! I hope you'll give the
entire book a try (and leave me a review!)
| This post is part of our Bread lunchtime series.
Read all of the entries: |
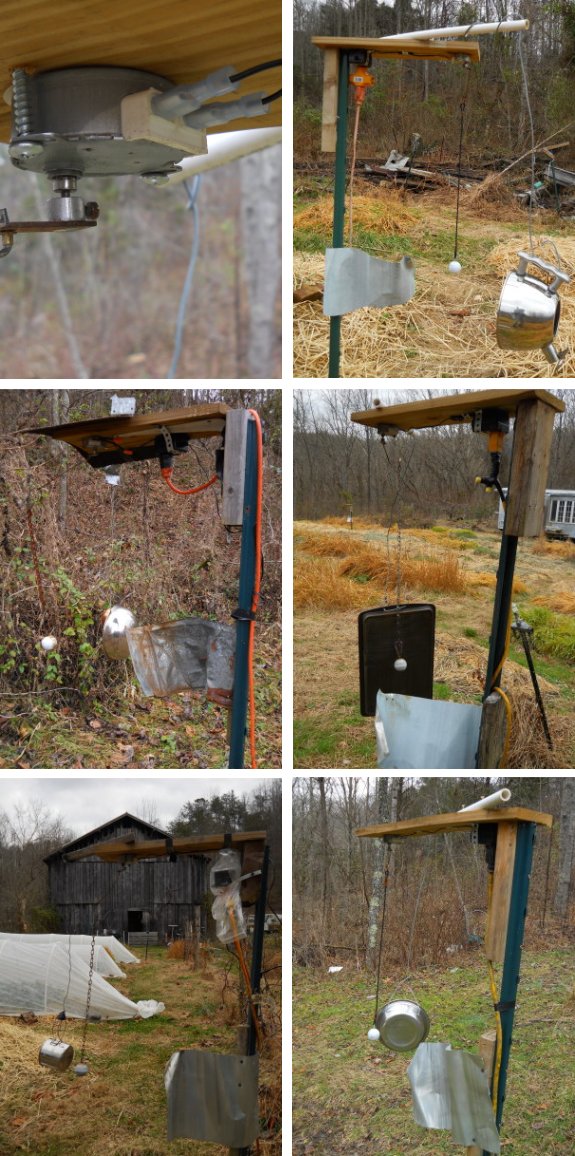
There's been no deer damage
to the garden since we retired
those two young bucks
last month. I'm pretty sure it was them that figured out the mechanical
deer deterrents were all bark and no bite during a power
outage this past summer.
We now run a total of five
deterrents 24 hours a day at key locations around the garden's
perimeter.
I've got technical details on
the new type of motor over at backyard
deer.com.

Remember my list of ambitious
winter goals?
We were barreling right through them when I signed my book
contract.
Suddenly, turning my halfway completed, rough draft into a product I'd
be proud of felt a lot more important than a bathtub in the house.
You know how authors
often write in the acknowledgement section of the book about how their
spouse did the dishes, took care of the kids, and walked the dog so
that the author would have time to write? Mark did one better ---
he reminded me that the whole point of our homesteading lifestyle is to
allow us to seize the day and do what feels right at any given
moment. Then he split a whole bunch of wood and parked me in
front of the fire with the cats and a laptop.
So I'm writing myself
out until I either finish the book or get thoroughly sick of it and
need a break. Since I feel guilty if Mark is working too hard
while I'm playing on the computer, he's gone into tinkering mode
too. Even Huckleberry is doing his best to further the cause ---
our spoiled cat accepted sitting in the side car (where my feet are)
rather than sleeping on top of the keyboard. Aren't I lucky to
have such an awesome team?
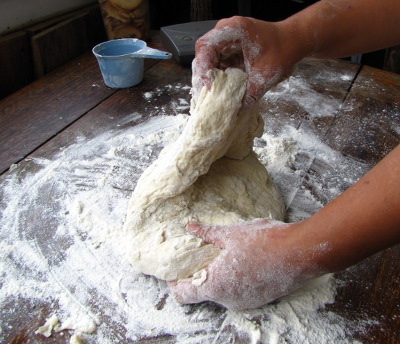 When all of the ingredients
are in the bowl and the dough is getting
hard to stir, clean off a table or countertop, toss down a handful of
flour to keep the dough from sticking, and pour the contents of your
bowl onto the counter. Knead the bread by stretching it out, then
folding it in half, turning ninety degrees after each stretch and
fold. You may have to add a bit more flour to keep the dough from
sticking to your hands and the counter, but try not to add too much ---
a slightly sticky dough will produce fluffier bread.
When all of the ingredients
are in the bowl and the dough is getting
hard to stir, clean off a table or countertop, toss down a handful of
flour to keep the dough from sticking, and pour the contents of your
bowl onto the counter. Knead the bread by stretching it out, then
folding it in half, turning ninety degrees after each stretch and
fold. You may have to add a bit more flour to keep the dough from
sticking to your hands and the counter, but try not to add too much ---
a slightly sticky dough will produce fluffier bread.
Gluten isn't only important for the texture of the bread --- it helps dough rise as well. When yeast excretes carbon dioxide, strands of gluten trap that gas within the dough. Without gluten, your bread would rise a bit, then fall.
The amount of gluten in your bread will depend on two factors. First is the length of your kneading time. Bread products that don't need much gluten (like pizza crusts) don't have to be kneaded very long, but if you want fluffy whole wheat bread, you might have to knead for as much as half an hour.
Type of flour is just as important as length of kneading. If you use a low protein flour like all-purpose wheat flour, there simply won't be enough protein present to create as many gluten fibers. Flours made from grains other than wheat can be high in protein but lack the specific proteins used to create gluten. Finally, whole wheat flour has another problem --- the tough bran particles cut through the gluten, fragmenting the fibers even as you knead. That's why it's often helpful to add some gluten to your recipe if you want fluffy bread made with flours other than wheat bread flour.
For a white bread like
this one, ten minutes of kneading is
sufficient. It's not mandatory, but you'll find it easier to
knead your dough if you stop after the first five minutes and give your
dough five or ten minutes to relax before finishing the kneading
process.
Stay
tuned for more on the science and practice of
bread-baking at lunchtime for the rest of the week. Don't want to
wait for future installments? The
information is excerpted from Weekend
Homesteader: January, which is available for free on
Amazon from today until December 23! I hope you'll give the
entire book a try (and leave me a review!)
| This post is part of our Bread lunchtime series.
Read all of the entries: |
 We've
been thinking animal traps would be a good starting point for the possible
homesteading intern project we might be doing in the summer of 2012.
We've
been thinking animal traps would be a good starting point for the possible
homesteading intern project we might be doing in the summer of 2012.
Once the traps are in place
it will only take a matter of minutes to check on them.
I'm guessing there may be
enough rabbits to feed a small army while the first group begins to
carve out a homestead.

 By
the Winter Solstice, I've often forgotten what the world looked like
when it was green.
By
the Winter Solstice, I've often forgotten what the world looked like
when it was green.

Even though this year's
warm fall means we've barely experienced winter yet, I thought you
might enjoy a reminder of summer in all its glory.
 These
photos are all from 2009, which I like to call "the year without a
summer." Looks pretty summery from a December perspective.
These
photos are all from 2009, which I like to call "the year without a
summer." Looks pretty summery from a December perspective.
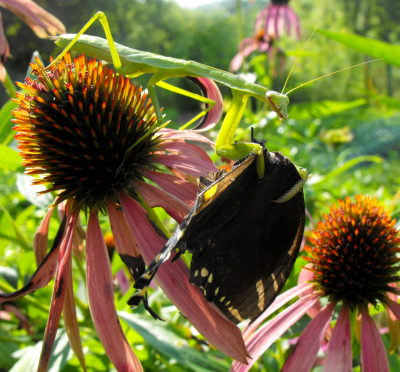
(Yes, I am a big fan of
toads.)

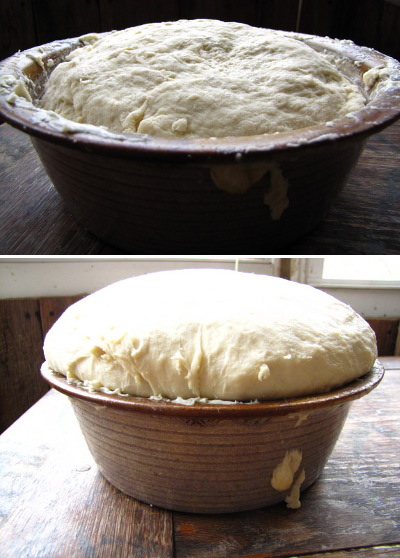 One you're done kneading your
dough, return the dough to the bowl
and
cover it with a damp dish towel to rise. In a modern home, you
can just let the bread sit on the counter, but if you're a more serious
homesteader who heats with wood and doesn't maintain an even
temperature inside during the winter, you'll want to find a warm spot
for your dough to rise. Many wood cook stoves have a warming oven
just high enough above the fire to keep the dough warm without cooking
it. In a pinch, you can turn your electric or gas oven to "warm"
and put your bread inside --- depending on the model, you may also need
to crack the door open to keep the dough from getting too hot. No
matter how you do it, your bread should have risen to the point where
it has achieved twice its original size ("doubled in bulk") after about
an hour.
One you're done kneading your
dough, return the dough to the bowl
and
cover it with a damp dish towel to rise. In a modern home, you
can just let the bread sit on the counter, but if you're a more serious
homesteader who heats with wood and doesn't maintain an even
temperature inside during the winter, you'll want to find a warm spot
for your dough to rise. Many wood cook stoves have a warming oven
just high enough above the fire to keep the dough warm without cooking
it. In a pinch, you can turn your electric or gas oven to "warm"
and put your bread inside --- depending on the model, you may also need
to crack the door open to keep the dough from getting too hot. No
matter how you do it, your bread should have risen to the point where
it has achieved twice its original size ("doubled in bulk") after about
an hour.
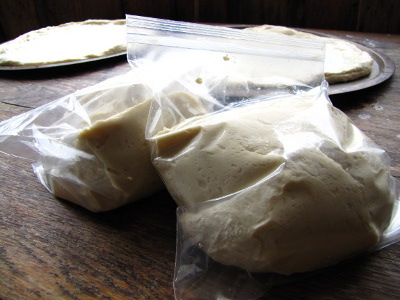 After it has risen, punch down your dough, shape it, and let it rise
again. If you want to save some of the dough for later, put it in
a plastic bag after the first rise and stick it in the freezer.
Otherwise, shape the dough however you want --- into rolls, buns, or
loaves. You can even form long strands of dough to make braided
loaves, or can add cheese or herbs to make spiced buns.
After it has risen, punch down your dough, shape it, and let it rise
again. If you want to save some of the dough for later, put it in
a plastic bag after the first rise and stick it in the freezer.
Otherwise, shape the dough however you want --- into rolls, buns, or
loaves. You can even form long strands of dough to make braided
loaves, or can add cheese or herbs to make spiced buns.
If you're a raw
beginner, I recommend keeping it simple and making
buns. It can be difficult to know when your bread is fully baked
in a loaf pan, but dough in the shape of a hamburger bun cooks
perfectly in very little time. Simple tear off a hunk of dough
about half the size of your fist and flatten it, placing each bun on a
greased cookie sheet. If you want to get fancy, you can sprinkle
poppy or sesame seeds on top, then paint on an egg yolk to make the
seeds stick and to give the bread a beautiful shine.
Now it's time to let the
dough rise until it doubles in bulk
again. Pay more attention this time to ensure you don't ignore
the
dough too long and let it over-rise --- after a certain point, the
gluten can't hold the carbon dioxide any longer and your buns will
flatten out. But don't try to rush this rise either --- you want
your dough to be as high as possible so you get fluffy bread.
Preheat your oven to 350
degrees Fahrenheit, then bake your bread on
the top rack until the top and bottom of each bun is very lightly
brown, about fifteen minutes. Don't worry, the living yeast will
be killed by heat, so all you're left with is a delightful texture and
flavor.
Stay
tuned for more on the science and practice of
bread-baking at lunchtime for the rest of the week. Don't want to
wait for future installments? The
information is excerpted from Weekend
Homesteader: January, which is available for free on
Amazon from today until December 23! I hope you'll give the
entire book a try (and leave me a review!)
| This post is part of our Bread lunchtime series.
Read all of the entries: |

Drilling 4 holes in the base
of this 10 dollar desk lamp was all it took to make it mountable on our ceiling
above Anna's writing
station.
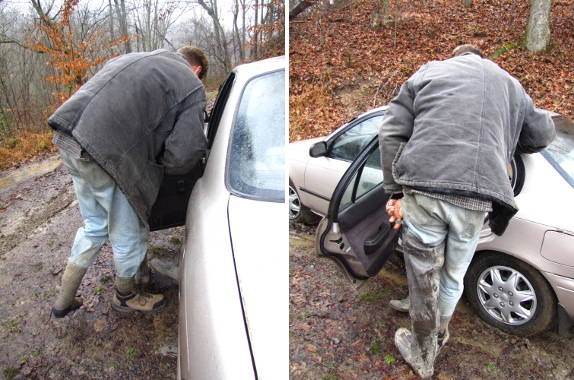
Home from the outside
world. First step --- change from going to town shoes to farm
boots. I wonder if all that standing on one leg is the reason
Mark's balance is improving?
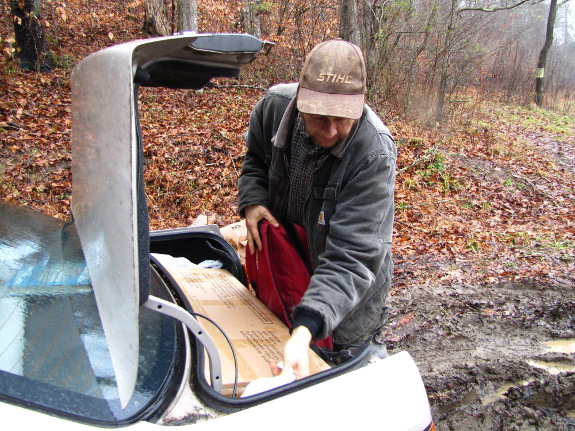
Next step --- pick out
any perishables to be carried in ASAP. In the winter, even
oranges are perishables because they might freeze before morning.
Quite an incentive not to buy too much.
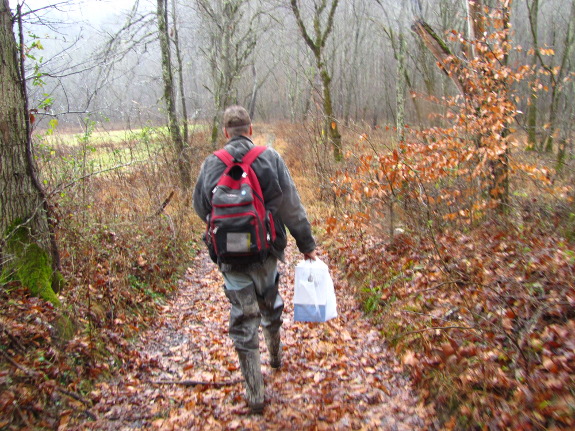
Finally --- walk a third
of a mile home. The walk is just as blissful as it looks. I
wouldn't trade our moat for anything.
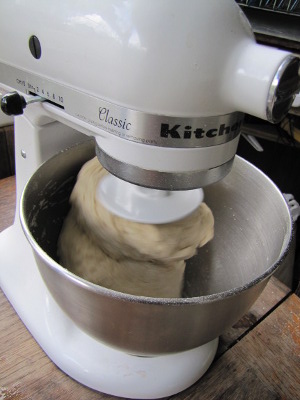 If you find yourself picking
up loaves from the store because you just
don't have time to make your own bread, you might consider some
bread-making shortcuts. There are kneadless bread recipes that
replace fifteen minutes of kneading with a day sitting in the fridge,
or you can get a machine to do the work for you. I've found that
bread machines do a pretty good job of kneading but aren't so great at
baking. Instead, my favorite labor-saver is the bread hook on my
KitchenAid mixer. I let the mixer do the kneading and I monitor
the rising and baking myself.
If you find yourself picking
up loaves from the store because you just
don't have time to make your own bread, you might consider some
bread-making shortcuts. There are kneadless bread recipes that
replace fifteen minutes of kneading with a day sitting in the fridge,
or you can get a machine to do the work for you. I've found that
bread machines do a pretty good job of kneading but aren't so great at
baking. Instead, my favorite labor-saver is the bread hook on my
KitchenAid mixer. I let the mixer do the kneading and I monitor
the rising and baking myself.
Others of you might have
the opposite reaction to this week's project
--- you may love bread-making so much that you want to try out
whole grain breads or your own pizza dough. The latter is the
easiest next step since the recipe I've included in this week's
lunchtime series works perfectly
as a pizza dough. You'll just have to learn how to stretch the
dough into a round shape. Even if you don't want to toss the
dough over your head,
I recommend doing this step in the air with your hands rather than on
the counter with a rolling pin.
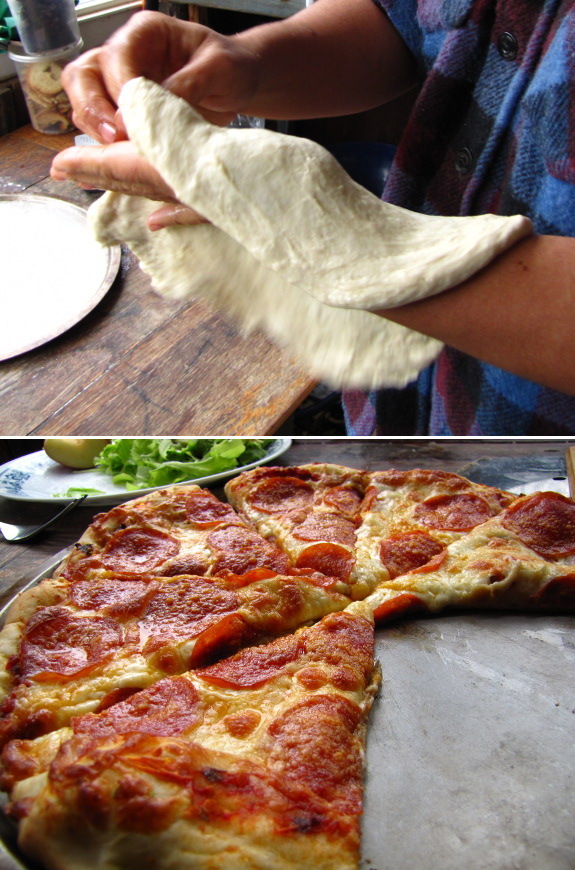
Whole grain breads will
require a bit more experimentation on your
part. This is my favorite
whole wheat bread recipe, which uses added gluten and
a long kneading
time to create a bread nearly as fluffy as the white version.
What's your favorite recipe?
The
information in this lunchtime series was excerpted from Weekend
Homesteader: January, which is available for free on
Amazon today! I hope you'll give the entire book a try (and leave
me a review!)
| This post is part of our Bread lunchtime series.
Read all of the entries: |

Packing 50 bags of
leaf material so they won't bounce out takes a special touch.
Smash....smash...........smash
those bags down.
That's how an expert leaf bag
smasher does it in a clutch.
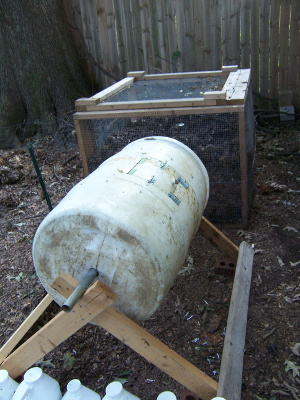 Brian Cooper emailed this
great photo of his rodent-proof, inexpensive compost tumbler,
constructed from a 55 gallon barrel, a metal pipe, and some
lumber. He added a door, 3/8 inch holes for drainage, and some
screws inside to break up the compost as it tumbled.
Brian Cooper emailed this
great photo of his rodent-proof, inexpensive compost tumbler,
constructed from a 55 gallon barrel, a metal pipe, and some
lumber. He added a door, 3/8 inch holes for drainage, and some
screws inside to break up the compost as it tumbled.
Brian wrote that if he
had to do it all over, he would have made the door and ventilation
holes larger. On the other hand, the benefits far outweighed any
slight growing pains. Brian reports quicker, more broken up
compost with less work and no pest problems. He can easily
collect compost tea draining out the bottom and can even snag black
soldier fly larvae for the chickens!
Thanks for sharing your
compost tumbler, Brian! I plan to include it in Weekend
Homesteader: March as well as in the paper book. It beats my trellis
compost bin by a
long shot.
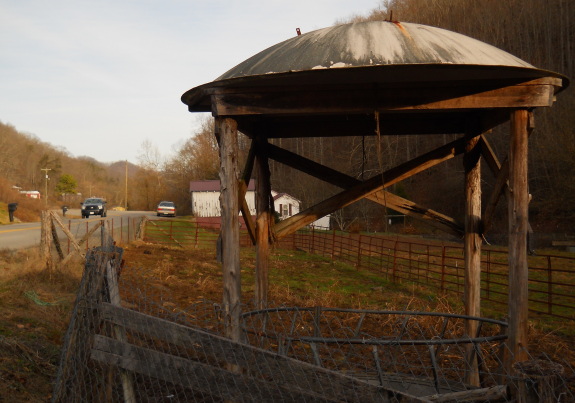
It's how I'd want to live out my old age if I was a retired satellite dish.
 We've been making the family
Christmas rounds, which means I've been off the farm more this month
than in the previous six months combined.
We've been making the family
Christmas rounds, which means I've been off the farm more this month
than in the previous six months combined.
All of our visits have
been wonderful, but they make me aware how much we've drifted outside
mainstream society in recent years.
Everyone's been very
forgiving, but only my mother seems to understand why I think her dog
run looks like the beginning of a great rotational
chicken pasture system.
Only she can at least
pretend to be excited when I find a little collection of stump
dirt drifting out of
a diseased tree in her backyard.

And only she would think
to give me a whole truckload of
biomass for
Christmas. Thanks, Mom! Merry Christmas, everybody!
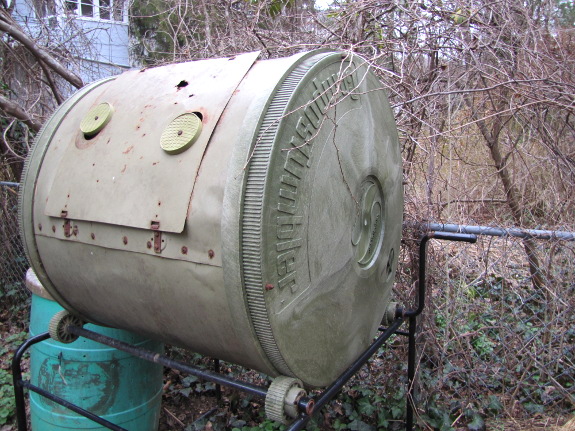
After posting about
Brian Cooper's DIY
compost tumbler, I
started pondering whether compost tumblers might be the easiest low-key
way to raise black
soldier fly larvae.
When we went to visit some
forest gardening buddies this past spring, they had a
compost tumbler, which also happened to be chock full of black soldier
fly larvae. I'd be curious to hear whether others of you with
compost tumblers also see lots of black soldier fly larvae in your bin.
I'm always looking for
the best ways to simplify permaculture systems so they work with as
little human input as possible. I can imagine throwing some food
scraps in a tumbler in the pasture with chickens patrolling the ground
underneath to catch larvae that drop through the holes. It would
have to be a pretty efficient system, though, to make it more
worthwhile than giving the food scraps straight to the flock.
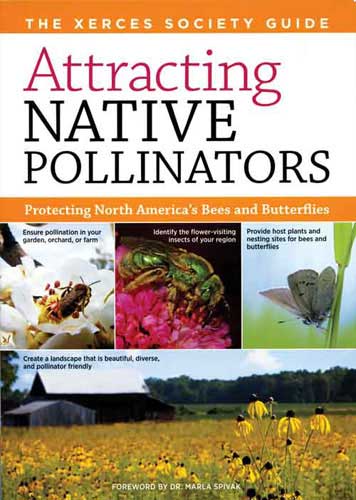 Attracting
Native Pollinators
by the Xerces Society is the prettiest homesteading-related book I've
read this year. Stunning images dot nearly every page, zooming in
on the tiny bees pollinating an apple tree or diagramming the
underground nest site of a bumblebee queen.
Attracting
Native Pollinators
by the Xerces Society is the prettiest homesteading-related book I've
read this year. Stunning images dot nearly every page, zooming in
on the tiny bees pollinating an apple tree or diagramming the
underground nest site of a bumblebee queen.
Unfortunately, the
book's writing isn't quite as stellar as the illustrations. Attracting
Native Pollinators
was clearly written by a committee who couldn't quite decide if they
were working on a textbook or an inspirational DIY guide. Now and
then, I could sense the authors' passion to protect the bees, wasps,
and flies pollinating our wild and cultivated landscapes, but elsewhere
they got bogged down in excessive vocabulary. All the more reason
to sum up the most intriguing points in a lunchtime series and save you
some slogging.
Despite the annoying
features of certain parts of the text, I heartily recommend that you
pick up a copy of the book, if only to use as reference guide.
The main genera of pollinator bees plus the most important families of
other types of pollinators are covered in a field-guide-like fashion,
another section lists the host plants for many common butterflies, and
yet a third chapter discusses the best native plants to add to your
pollinator garden. And, of course, the book is the gardener
equivalent of porn --- perfect to set on your coffee table to
suck in new converts to ecological gardening.
| This post is part of our Attracting Native Pollinators lunchtime
series.
Read all of the entries: |
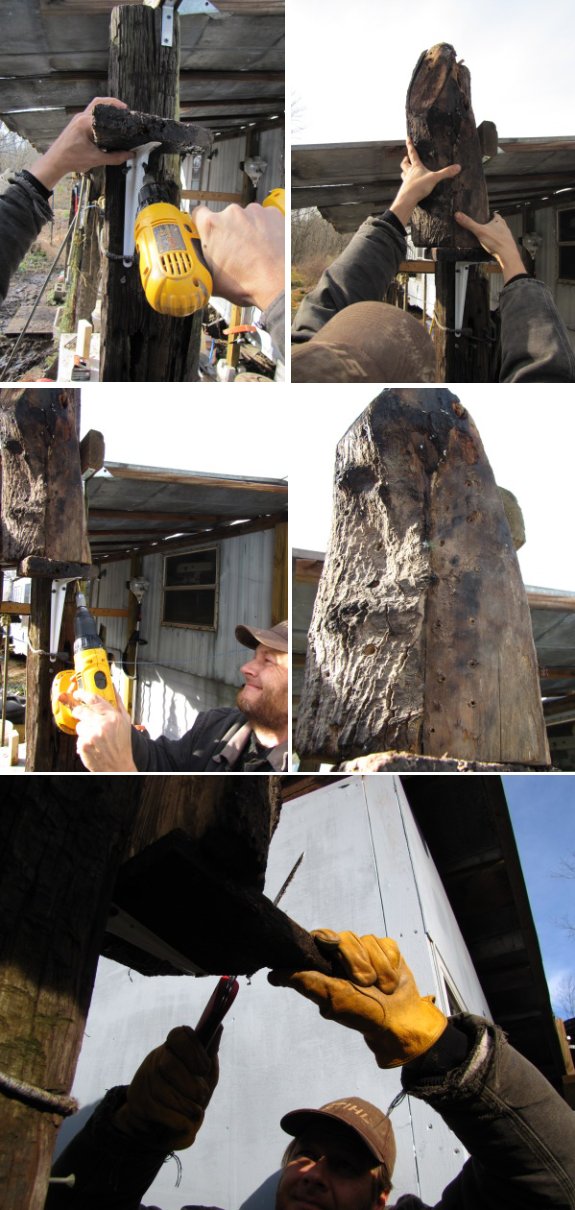
Can you guess what Anna was
thinking when she asked me to mount this charred piece of firewood on
an east facing surface today?
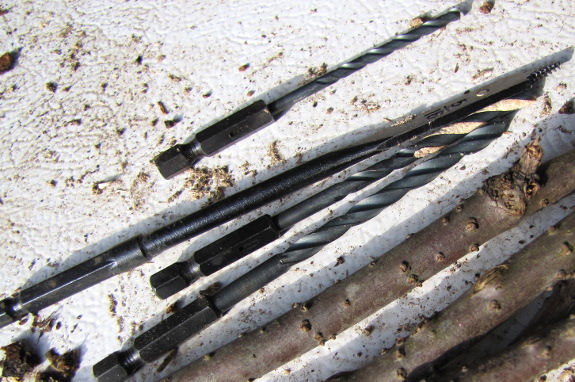
 If you guessed that Mark's
mystery object was a native bee nest, you were right! You'll
read more about the theory behind creating nests for native
pollinators on
Thursday, but I can't wait to post about my experiments.
If you guessed that Mark's
mystery object was a native bee nest, you were right! You'll
read more about the theory behind creating nests for native
pollinators on
Thursday, but I can't wait to post about my experiments.
Version 1.0 uses a piece
of firewood that was too gnarly for Mark to split. I drilled one
face with holes sized 1/8, 5/32, 3/16, and 5/16 inches in diameter ---
the goal is to use a variety of sizes between 3/32 and 5/8 inches so
that we'll attract several different bee species.
Next, I wanted to
blacken the surface of the wooden nest block since a dark color is
supposed to attract bees. You can use spray paint, but I didn't
have any on hand, so I tried various methods to char the surface.
Sticking the block of firewood in the stove didn't work --- not only  didn't the log fit, the
flames didn't want to burn the side I was focusing on.
didn't the log fit, the
flames didn't want to burn the side I was focusing on.
It was much more
effective to scoop some of the hot coals out into a galvanized tub and
light a bit of junk mail so that the flames licked the face of the
log. Those of you who like gadgets will probably have even better
luck using a propane torch.
The end result was
lightly blackened wood surrounding the holes.
 Finally,
I got Mark to mount my bee nest on the east side of one of our porch
posts. In a perfect
world, nests get early morning sun to help the bees warm up enough to
fly right after dawn, then the burrows are shaded from the full summer
heat later in the day. I also wanted to make sure that my bee
nest was somewhere we'll walk by regularly so that I'll notice if it's
being used. Hopefully this spot will do the job.
Finally,
I got Mark to mount my bee nest on the east side of one of our porch
posts. In a perfect
world, nests get early morning sun to help the bees warm up enough to
fly right after dawn, then the burrows are shaded from the full summer
heat later in the day. I also wanted to make sure that my bee
nest was somewhere we'll walk by regularly so that I'll notice if it's
being used. Hopefully this spot will do the job.
After reading further,
though, I discovered one flaw in my design. Nest blocks with lots
of holes like this one can turn into breeding grounds for bee diseases
and pests, so you need to go through a complex management scheme to
clean the nests and/or phase them out of production after a year or
two. Stay tuned for versions 2.0 and 3.0, which deal with the
pest problem in a simpler manner.
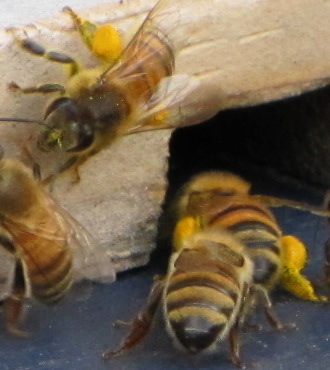 Although
Attracting
Native Pollinators
discusses many other types of
pollinators, they recommend that you focus your efforts on making bees
happy. The Xerces Society argues that bees are the most important
group of pollinators because:
Although
Attracting
Native Pollinators
discusses many other types of
pollinators, they recommend that you focus your efforts on making bees
happy. The Xerces Society argues that bees are the most important
group of pollinators because:
- Bees are hairy, which means pollen sticks to their bodies and is carried in large quantities from flower to flower.
- Bees actively gather pollen. Most other types of pollinators focus on nectar, which means they might never even come in contact with the flower's pollen. For example, the long tongue of a butterfly allows the insect to feed without brushing up against the stamens of many flowers. In contrast, since bees use pollen as a source of protein and other nutrients, the insects often end up coated in the grains.
- Bees exhibit flower constancy.
Many bees fixate on a single species of flower at a time, visiting up
to 100 individual flowers of the same type on a single trip. In
contrast, other pollinators usually hop around, starting on an
aster, dropping by some goldenrod, and ending up on a dandelion.
This generalist
strategy works well for the insects but means the flowers are wasting
lots of pollen that will end up on another type of plant and won't do
its job.
 It's
worth noting that when I say "bees" this week, I'm not really talking
about honeybees. Although large agricultural operations tend to
put all their eggs in one basket and focus on the introduced honeybee,
some farmers have found that providing habitat for native bees (more on
that in later posts) results in better pollination efficiency than
trucking in migratory honeybee hives. In addition, scientists
have discovered that adding honeybees to the mix actually decreases the
populations of native pollinators, which results in problems down the
line when the honeybee
hives collapse or
when picky plants have to do without the only pollinator species
they're equiped to deal with.
It's
worth noting that when I say "bees" this week, I'm not really talking
about honeybees. Although large agricultural operations tend to
put all their eggs in one basket and focus on the introduced honeybee,
some farmers have found that providing habitat for native bees (more on
that in later posts) results in better pollination efficiency than
trucking in migratory honeybee hives. In addition, scientists
have discovered that adding honeybees to the mix actually decreases the
populations of native pollinators, which results in problems down the
line when the honeybee
hives collapse or
when picky plants have to do without the only pollinator species
they're equiped to deal with.
In general, our gardens
and natural ecosystems fare much better when we attract as wide a
variety of native pollinator species as possible. The Xerces
society posits that if we focus on helping native bees, we'll also
protect the other pollinator groups --- wasps, flies, butterflies,
moths, and
beetles. The result is not only pollinated plants but also
control of pest insects and the production of nest sites for
bees. Stay tuned for more information on how to make this
diverse pollinator population a reality in your neck of the woods.
| This post is part of our Attracting Native Pollinators lunchtime
series.
Read all of the entries: |

It's been about a year since the last repair
to the Chopper 1 axe and it's holding up very well....so well that
I plan on doing the same glue job on the other side.
Now when the spring fails it
won't let the thingamajig that holds it in place fall out and get lost
in the mud.
The main advantage the
Chopper 1 has over the SuperSplitter is what I call the bounce. When
you don't apply enough power the Chopper 1 tends to just bounce off
while at the same time splitting the piece a little. The SuperSplitter
would often get stuck when I misjudged the power needed and lodge in
the log with a stubborn vengeance. Sometimes I would spend more energy
getting the SuperSplitter dislodged than actually splitting wood.
 My
firewood
nest block will
require some upkeep to prevent it from turning into a breeding ground
for bee pests and diseases. An alternative to this type of
maintenance is to make lots of small nest blocks with only four to six
tunnels apiece and space the blocks of wood 25 or more feet apart
around your property. Smaller nest blocks will naturally
decompose faster and will also spread the bees out --- think of them as
comfortable small town environments for bees.
My
firewood
nest block will
require some upkeep to prevent it from turning into a breeding ground
for bee pests and diseases. An alternative to this type of
maintenance is to make lots of small nest blocks with only four to six
tunnels apiece and space the blocks of wood 25 or more feet apart
around your property. Smaller nest blocks will naturally
decompose faster and will also spread the bees out --- think of them as
comfortable small town environments for bees.
To make one of these
"small bee towns", cut some scrap 2X4s into eight inch lengths.
Then drill holes in one end using the same criteria I used for my
firewood nest block.
Smaller wooden blocks
are much easier to char by placing them in the wood stove until they
catch fire, then running them under water until all sizzling stops.
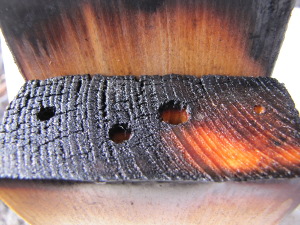
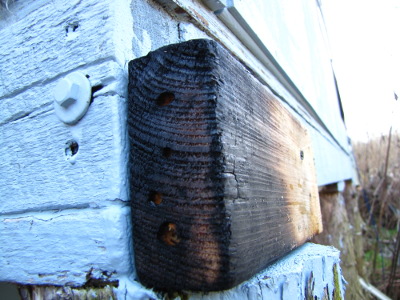
The last step is to
mount the blocks on easy-to-find landmarks that get morning sun.
I put one small town bee nest on the side of the East Wing and another
on a post in the mule garden. Hopefully, spreading the nests out
will tempt the bees to visit several parts of the garden rather than
sticking to one area.
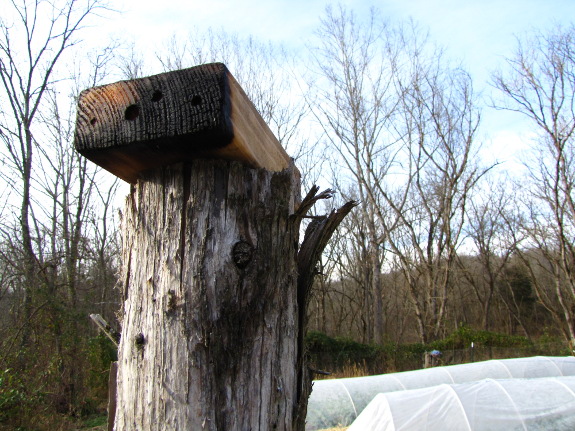
Stay tuned for yet more
bee suburbs tomorrow!
Native pollinators have
three main requirements --- flowers, nesting sites, and overwintering
habitat. We'll cover the other two in later posts, but for now I
want to talk about flowers for wild bees.
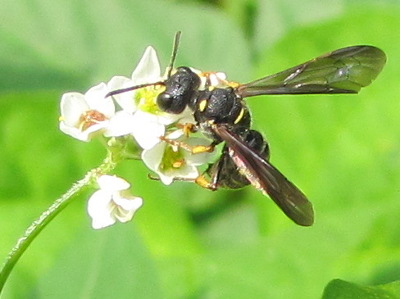
Attracting
Native Pollinators
takes a holistic approach to providing forage for wild
pollinators. Rather than listing a few key plants, they recommend
that you create open, sunny patches of flowers that bloom throughout
the entire growing season. The best patches are big and round ---
at least three feet in diameter of the same flower species --- but
linear corridors along fences or roads can also be effective.
When planning pollinator patches, try to think like a tiny bee,
remembering that the smallest pollinators may only fly 600 feet or less
each day in search of food. If you have flowerbeds already
scattered around your homestead, can you join them together with
corridors or stepping stones (small patches of flowers) to make it
easier for the bees to move from point A to point B?
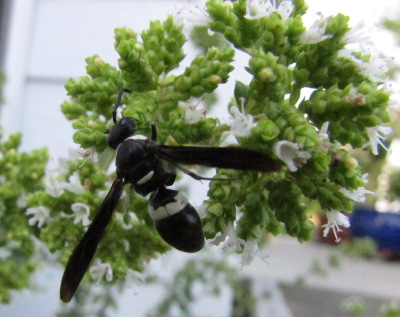 Next, consider the types of
plants in your forage areas. Head out into your garden in the
summer and take note of which plants are already drawing in pollinators
--- for us, some of the wild bees' favorite attractions are our
overgrown oregano bed, our peach trees, and our buckwheat
cover crops.
Are there times of the year when very few or no flowers are in
bloom? If so, you'll want to hunt down pollinator-friendly
flowers to fill in those gaps.
Next, consider the types of
plants in your forage areas. Head out into your garden in the
summer and take note of which plants are already drawing in pollinators
--- for us, some of the wild bees' favorite attractions are our
overgrown oregano bed, our peach trees, and our buckwheat
cover crops.
Are there times of the year when very few or no flowers are in
bloom? If so, you'll want to hunt down pollinator-friendly
flowers to fill in those gaps.
When choosing plants,
consider native plants, or at least cultivated varieties that haven't
been bred to be excessively showy --- the most ornamental flowers have
usually developed double petals and other fancy features at the expense
of the pollen and nectar 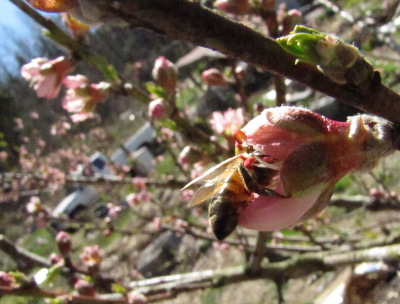 that bees depend on.
Aim for at least nine plant species in your forage areas --- three each
for spring, summer, and fall --- and try to include at least one plant
that blooms very early in spring and one that blooms very late in the
fall.
that bees depend on.
Aim for at least nine plant species in your forage areas --- three each
for spring, summer, and fall --- and try to include at least one plant
that blooms very early in spring and one that blooms very late in the
fall.
Finally, the Xerces
Society recommends that you include at least one native warm-season
bunch grass or sedge in wildflower meadows, planning for the grass to
cover 30% or less of the ground area. Native bunch grasses host
butterflies, provide nest sites for bumblebees and overwintering sites
for other insects, and make the landscape more weed-resistant.
 How do you maintain a
pollinator meadow? Depending on the scale of your project, you
may choose grazing, mowing, or fire, but be sure to do so patchily and
at low intensity. For example, if you're going to mow your meadow
to keep tree seedlings and weeds at bay, cut the plants at 12 to 16
inches and mow slowly in daylight, using a flushing bar to encourage
animals to move out of the way. Mow or burn no more than a third
or a quarter of the area at a time so that animals can escape to nearby
untouched areas. If you graze, do so at low intensity and rotate
animals out quickly; if you burn, leave areas fire-free for 5 to 10
years.
How do you maintain a
pollinator meadow? Depending on the scale of your project, you
may choose grazing, mowing, or fire, but be sure to do so patchily and
at low intensity. For example, if you're going to mow your meadow
to keep tree seedlings and weeds at bay, cut the plants at 12 to 16
inches and mow slowly in daylight, using a flushing bar to encourage
animals to move out of the way. Mow or burn no more than a third
or a quarter of the area at a time so that animals can escape to nearby
untouched areas. If you graze, do so at low intensity and rotate
animals out quickly; if you burn, leave areas fire-free for 5 to 10
years.
Sounds pretty daunting,
huh? I've gotten bogged down in creating pollinator habitat in
the past because I simply can't talk myself into managing flowers in
the summer when the vegetable garden demands so much of my time.
As a result, I'm pondering a few different options:
- Focusing on perennial flowers --- Annual flower beds clearly aren't my cup of tea, but my perennial flowers survive neglect as long as they get weeded and mulched once a year. Clearly I need to think further in that direction.
- Combining flowers with pastures --- I'm tempted to turn one of our chicken pastures into a pollinator meadow. The management techniques used to attract pollinators are just the opposite of what I'd do to promote maximum food for chickens, but surely there's a way to meet in the middle?
- Flowers in the forest garden
--- The flowers in my forest gardens tend to fall by the wayside since
they're annuals and I ignore them. But if I grew perennials
around each of my fruit trees, I'd have good pollinator habitat close
to most of my garden areas.
Do you have low-work
pollinator forage areas? What are your key management techniques
to keep them going?
| This post is part of our Attracting Native Pollinators lunchtime
series.
Read all of the entries: |
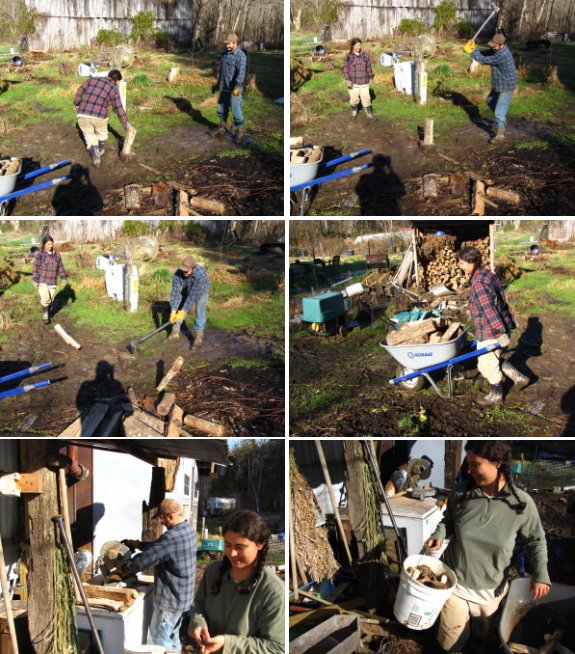
We had my cousin Ben visiting today and talked him
into taking a few pictures of our new system of splitting firewood.
1. Anna selects a log and
places it on the chopping stump.
2. Then she steps back so the
split log won't hit her.
3. That's when I hit it with
the Chopper
1.
4. Load up pieces and push
them over to the cutting station.
5. Cut pieces in half with
miter saw so they fit in our small stove.
6. Put pieces in 5 gallon
bucket to be carried in and stacked by Anna.
 I hate to say this, but I
miss our modern hybrid chickens. When we went to Ohio a few weeks
ago, I did what I used to do with our Golden Comets --- make sure they have an automatic chicken waterer and then toss down enough
feed on the ground to last them several days. Sure, I knew the
chickens would gorge during days one and two and then fast a bit, but
we'd never had a problem using this method with our Golden Comets in
tractors, and our current flock has over two acres of woods to scratch
for worms in.
I hate to say this, but I
miss our modern hybrid chickens. When we went to Ohio a few weeks
ago, I did what I used to do with our Golden Comets --- make sure they have an automatic chicken waterer and then toss down enough
feed on the ground to last them several days. Sure, I knew the
chickens would gorge during days one and two and then fast a bit, but
we'd never had a problem using this method with our Golden Comets in
tractors, and our current flock has over two acres of woods to scratch
for worms in.
When we came home, the
flock looked happy and healthy...but they'd stopped laying. In
fact, even before we left, our six near-adult hens were only averaging
about 3.25 eggs per day, or an egg 54% of the time. Meanwhile,
the eggs they did lay were so much smaller than our Golden Comet eggs
that I often doubled the eggs in a recipe.
I've heard Mark mutter
"freeloaders" under his breath a time or two already --- lack of real
eggs will make a man cranky. On the other hand, I did get the
chicks off to a late start last spring, so I'm giving them the benefit
of the doubt. We'll see how well our Black
Australorps and Cuckoo Marans lay come spring and put on
our thinking caps if they're still not worth their salt. I really
want to keep a chicken that we can reproduce on the farm, but I also
want lots of eggs without having to pay for too much feed. If I
have to keep hunting until I find a better breed, I will.
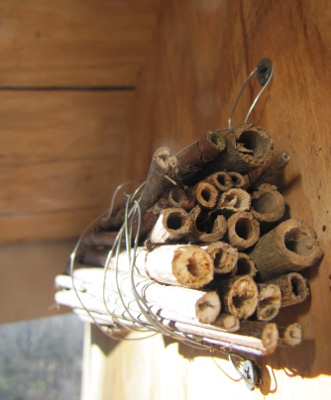 The second requirement of
native bees is nest sites --- spots for the insects to raise their
young. About 70% of American native bees are ground nesters,
which dig (or take over) holes in the soil, while the other 30% are
tunnel nesters that primarily nest in abandoned beetle burrows in
stumps and snags. Keep your eyes open and protect any nest sites
you see, then you can choose whether to make additional habitat for
bees to move into.
The second requirement of
native bees is nest sites --- spots for the insects to raise their
young. About 70% of American native bees are ground nesters,
which dig (or take over) holes in the soil, while the other 30% are
tunnel nesters that primarily nest in abandoned beetle burrows in
stumps and snags. Keep your eyes open and protect any nest sites
you see, then you can choose whether to make additional habitat for
bees to move into.
Ground nesting bees
require undisturbed, bare soil, preferably sandy or loamy and always
unmulched. If they had their druthers, most would choose a
south-facing slope in full sun (or with afternoon shade) so that they
can warm up quickly first thing in the morning. Constructing
ground nesting habitat can be as simple as laying down a kill mulch on
a small patch of ground, then raking back the organic matter in the
spring to leave bare soil for the bees.
 Tunnel nesting bees are the
ones gardeners often build habitat for. If you have a dead tree
somewhere that's not going to crush your house, leave it in place (and
maybe drill some extra holes in the trunk) and bees will naturally move
in. You can plant elderberries, raspberries, blackberries, or
sumac since some bee species hollow out the pith in the center of these
plants' dead branches to create nest tunnels. Or you can make
designated nest boxes out of a block of wood, bundles of weeds or
bamboo stems, or adobe blocks --- I'll give specifics in Weekend
Homesteader: March (and will probably post about some of my experiments
sooner), or you can download
this fact sheet from the Xerces Society.
Tunnel nesting bees are the
ones gardeners often build habitat for. If you have a dead tree
somewhere that's not going to crush your house, leave it in place (and
maybe drill some extra holes in the trunk) and bees will naturally move
in. You can plant elderberries, raspberries, blackberries, or
sumac since some bee species hollow out the pith in the center of these
plants' dead branches to create nest tunnels. Or you can make
designated nest boxes out of a block of wood, bundles of weeds or
bamboo stems, or adobe blocks --- I'll give specifics in Weekend
Homesteader: March (and will probably post about some of my experiments
sooner), or you can download
this fact sheet from the Xerces Society.
 Finally, bumblebees require a
special set of nesting conditions --- a warm, dry place near or under
the ground about the size of a shoe box. You
can build (or buy) nest boxes, but the authors of Attracting
Native Pollinators report that only about a quarter of these boxes
get lived in. A simpler approach is to let grass grow up in an
out-of-the-way spot; when it falls over in the winter, mice will move
in and build nests, then bumblebees will take over in the spring.
Alternatively, you can make piles of brush or stone that create similar
cavities.
Finally, bumblebees require a
special set of nesting conditions --- a warm, dry place near or under
the ground about the size of a shoe box. You
can build (or buy) nest boxes, but the authors of Attracting
Native Pollinators report that only about a quarter of these boxes
get lived in. A simpler approach is to let grass grow up in an
out-of-the-way spot; when it falls over in the winter, mice will move
in and build nests, then bumblebees will take over in the spring.
Alternatively, you can make piles of brush or stone that create similar
cavities.
With the exception of
bumblebees, most native bees won't bother you even if you walk close to
their nests, so feel free to create habitat right outside your kitchen
window. Isn't a bee nest box more fun to watch than a bird feeder?
| This post is part of our Attracting Native Pollinators lunchtime
series.
Read all of the entries: |
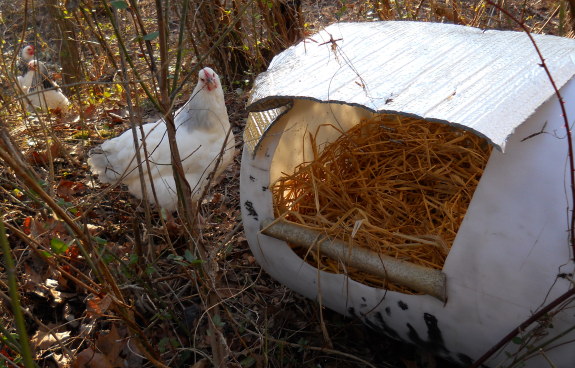
I don't think the new
chicken enclosure is working out.
It's been about 2 weeks and
there's no sign of any chicken lounging.
We changed the location a few
different times and still no takers.
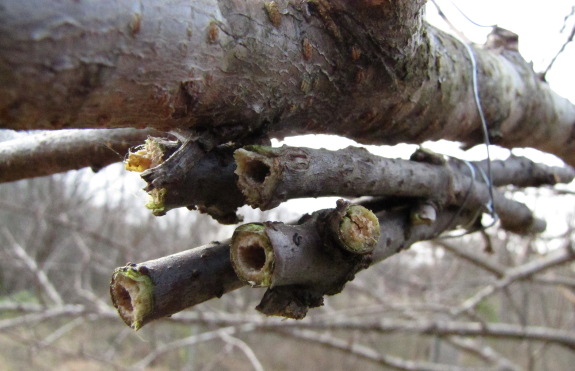
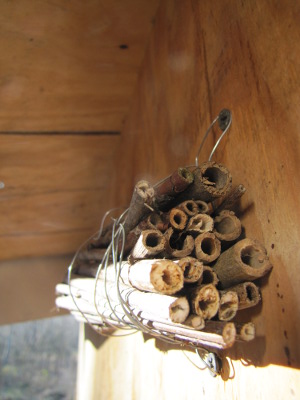 Although you may be heartily
sick of reading about bee nests after my firewood
bee nest post and my post
about "small bee towns", I was still gungho and
wanted to try another technique. Stem bundles are probably the
easiest type of bee nest you can build, and they may be more effective
than my wood block nests since the insides of hollow stems are
naturally smooth and conducive to bees.
Although you may be heartily
sick of reading about bee nests after my firewood
bee nest post and my post
about "small bee towns", I was still gungho and
wanted to try another technique. Stem bundles are probably the
easiest type of bee nest you can build, and they may be more effective
than my wood block nests since the insides of hollow stems are
naturally smooth and conducive to bees.
To make a bamboo stem
bundle, cut bamboo into sections just below the node so that each piece
has one long tube that's naturally blocked off at the bottom. If
you don't have bamboo, you can use hollow-stemed weeds as long as you
find a way to plug the far end --- I'm trying a bit of mud and ashes,
as you can see in the photo below.
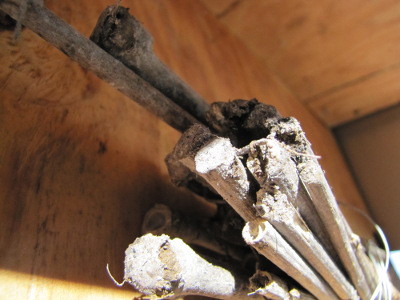 As
with wooden blocks, you'll need to decide whether you want to combine
just a few stems together for a no-maintenance stem bundle or make
larger nests that will need some care. If you choose the latter,
you can make a very pretty stem bundle by stuffing cut stems into
coffee cans, plastic buckets, or short pieces of PVC pipe. With
just a few stems, though, it's simpler to tie the twigs together with a
piece of wire or string.
As
with wooden blocks, you'll need to decide whether you want to combine
just a few stems together for a no-maintenance stem bundle or make
larger nests that will need some care. If you choose the latter,
you can make a very pretty stem bundle by stuffing cut stems into
coffee cans, plastic buckets, or short pieces of PVC pipe. With
just a few stems, though, it's simpler to tie the twigs together with a
piece of wire or string.
If you don't have any
bamboo or hollow weeds on hand, you can drill out the centers of 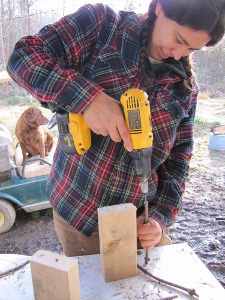 pithy twigs to get the same
effect. Elderberry, sumac, and chinaberry twigs are supposed to
work well --- I'm trying elderberry.
pithy twigs to get the same
effect. Elderberry, sumac, and chinaberry twigs are supposed to
work well --- I'm trying elderberry.
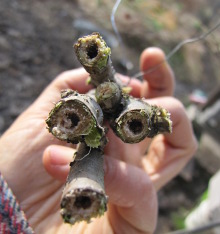
I hung one stem bundle
on the side of our wood stove addition on the south face of the trailer
and another under a limb in the kitchen peach tree. Now I just
need to wait and see which, if any, of my artificial nests catch the
fancy of our wild bees this spring and summer.
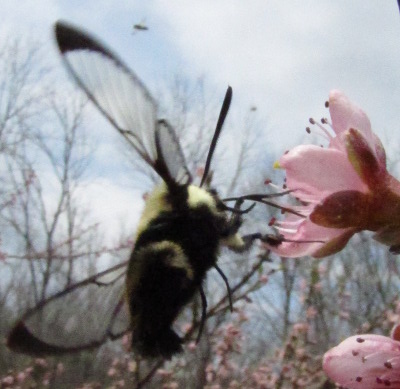 The final habitat requirement
of native pollinators is a spot to spend the winter. Most native
bees winter in their summer nest tunnels or burrows, but bumblebees
need a sheltered spot with plenty of leaf litter in which to
hibernate. Some non-bee pollinators spend the winter in tall
grass, bushes, trees, piles of leaves or sticks, or on man-made objects.
The final habitat requirement
of native pollinators is a spot to spend the winter. Most native
bees winter in their summer nest tunnels or burrows, but bumblebees
need a sheltered spot with plenty of leaf litter in which to
hibernate. Some non-bee pollinators spend the winter in tall
grass, bushes, trees, piles of leaves or sticks, or on man-made objects.
In general, the best way
to protect pollinators in the winter is to leave them alone. If
you need to manage your pollinator meadows by mowing or burning, try to
do so in the late summer or fall while the insects are still active and
can get away. Even if you don't have a designated pollinator
area, it's worth leaving some overgrown, weedy spots along the edges of
your garden to give these important insects a winter home.
Want to know more about
native pollinators? Here are some extra sources:
- Attracting Wild Pollinators --- This beautifully illustrated book was the source for this week's lunchtime series. It delves much further into all of the topics mentioned here.
- Native pollinators --- This lunchtime series covers four of the most common types of pollinators in our garden --- sweat bees, small carpenter bees, miner bees, and the greater bee fly.
- Bumblebees
--- Learn about buzz pollination, bumblebee identification, and more in
this lunchtime series.
| This post is part of our Attracting Native Pollinators lunchtime
series.
Read all of the entries: |
We've carried in 50 pound bags of chicken feed before, but it's a
struggle during the muddy season and hard on the back.
The new method is to transfer 15 to 20 pounds in a smaller cat food bag
so it can fit in a medium sized back pack.
Having both hands free is an
advantage when trying to balance on the stepping stones while crossing
the creek.
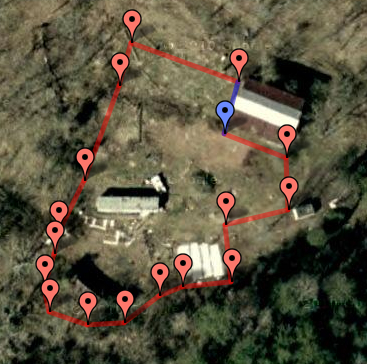 Have
you ever wondered how large a certain pasture area was so that you'd
know how many pounds of clover to seed? Or perhaps you'd like to
estimate how many cubic yards of compost it would take to smother your
vegetable garden in a layer one inch thick?
Have
you ever wondered how large a certain pasture area was so that you'd
know how many pounds of clover to seed? Or perhaps you'd like to
estimate how many cubic yards of compost it would take to smother your
vegetable garden in a layer one inch thick?
Pacing off the
boundaries of these areas can get complicated, especially if they're
irregularly shaped or have trees or buildings in the way. Enter Google Planimeter.
This fun tool layers on
top of Google Maps. You mark the boundaries of your area using as
many points as you feel are necessary, and the website spits out the
size of the plot in square meters, hectares, square kilometers, square
feet, acres, and square miles.
I quickly learned that
I'd been estimating our homestead area incorrectly. Instead of
encompassing two acres, our current garden and orchard are more
like...0.57 acres. Add on another quarter acre currently fenced
in as pasture, and our entire cultivated land comes to less than an
acre. Who knew you could spend so much time (and grow so much) in
so little space?
Of course, the tool
doesn't take hills into account, so if you are farming on uneven
terrain, it will underestimate areas slightly. Yet another reason
to move to the mountains --- you get more acres of growing area per
square mile of earth. I wonder if we get taxed on real acres or
horizontal acres?
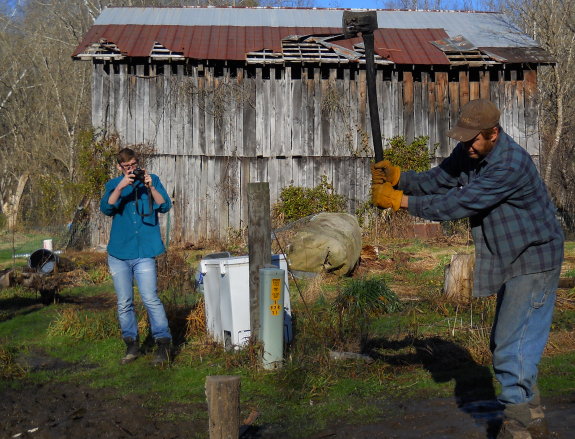
From my perspective 2011 was
a great year filled with fun and excitement.
Anna and I are planning to
have a quiet New Year's Eve celebration with Lucy,
Strider,
and Huckleberry.
I hope everybody reading this
has a safe evening and an awesome 2012.

Or explore more posts by date or by subject.
About us: Anna Hess and Mark Hamilton spent over a decade living self-sufficiently in the mountains of Virginia before moving north to start over from scratch in the foothills of Ohio. They've experimented with permaculture, no-till gardening, trailersteading, home-based microbusinesses and much more, writing about their adventures in both blogs and books.