
archives for 01/2012
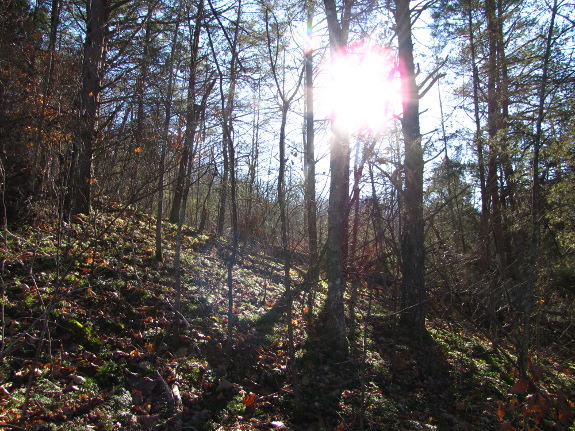
Saturday afternoon, I
was itching for a walk, so I put on my hiking shoes and followed their
lead. They told me that it was too muddy to go down into the
floodplain without my muck boots, and wouldn't it be fun to chase the
sun up over the hill?
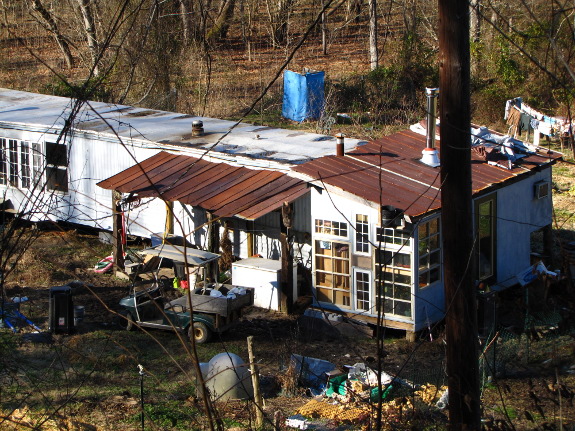
Eventually, the sun
angled me around onto the other hill, which overlooks our
homestead. As trashy as it may appear to most folks, this view of
our trailer and addition are pure beauty in my eyes
--- freedom for a grand total of $3,000. People keep asking me
when we're going to build a house and I look at them like they're
nuts. Why would I want to spend masses of money and/or time
building a larger space to keep clean (and use up prime growing
area?) Now, porches, a summer kitchen, a better roof, and perhaps
strawbale walls for additional insulation might make the cut...someday
when my gardening and writing projects get boring. (Ha!)
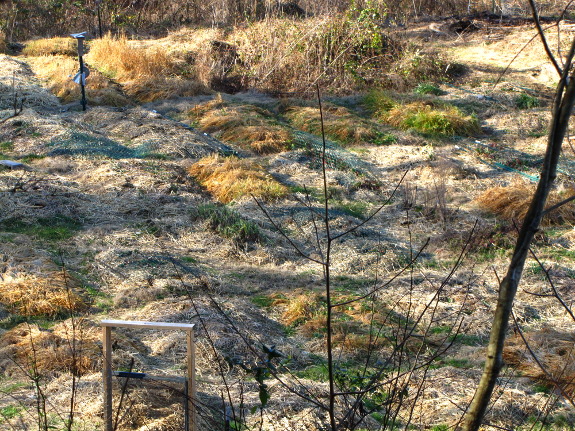
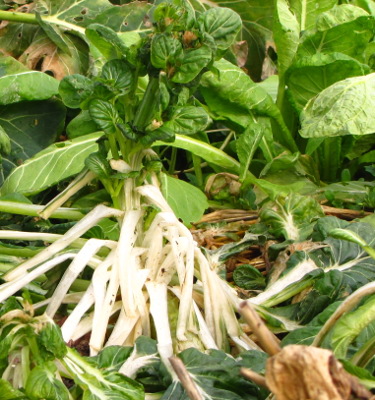
I got tired looking at
our trailer after a while and zoomed in on the garden. Here's the
shady front garden, half of it mulched with straw and the other half
with nearly dead oat
cover crops.
Perhaps you don't get the same pure joy I do out of watching things rot?
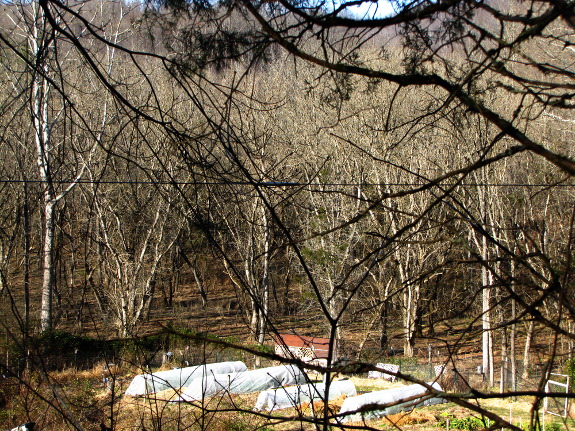
The mule garden was
still in nearly full sun, making the quick
hoops shine.
Our whole homestead is encircled by the protective arms of trees ---
young but beautiful. I'm looking forward to watching them grow up.
No New Year's
resolutions here. Just more of the same --- beauty, nourishment,
and most of all fun!
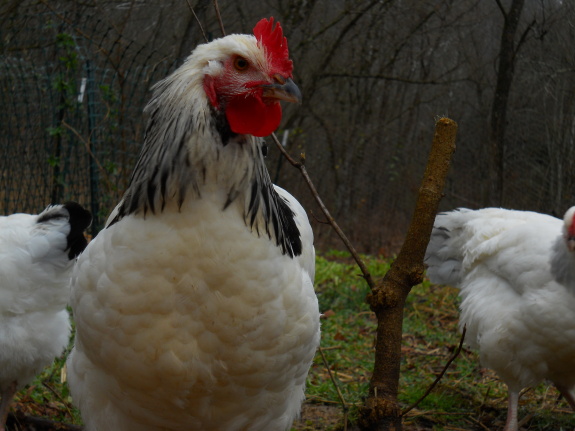
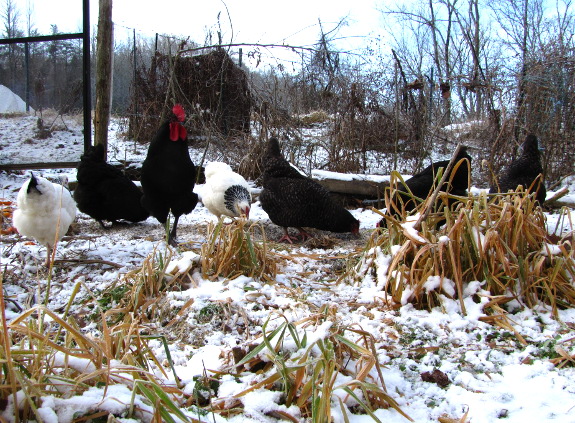
 I
can't quite make up my mind whether I like our Light Sussex or
not. They're very different chickens from any we've had
before.
I
can't quite make up my mind whether I like our Light Sussex or
not. They're very different chickens from any we've had
before.
Although they do roost
on the perches sometimes, it took them months to even consider getting
up off the ground. And they still seem to think it's just fine to
bed down out in the woods if it's a clear night.
They're friendly as can
be --- almost too friendly. When the other flock, led by the
Australorp rooster, came up into the garden, I chased them away with
much hollering and Lucy action, and after a repeat performance they
didn't come back. Trying to chase the Sussex out of the garden
didn't go nearly as well --- they weren't really afraid of me even when
I ran straight at them.
The Sussex do seem to be
pretty good foragers, though. As with our
problematic winter-layers, I'm taking a wait and see
approach --- this time next year, I should be better able to report on
how well Light Sussex, Black Australorps, and Cuckoo Marans match my
homesteading criteria. I'm also interested to see whether hybrids
that we raise in the spring will show hybrid vigor --- lots of fun
breeding experiments ahead!
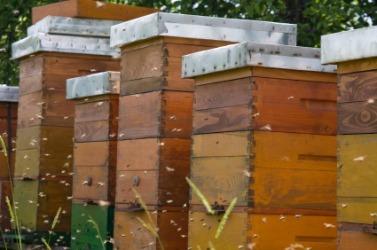
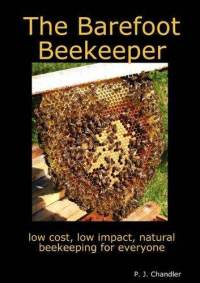 The demise
of both of our hives
this autumn pushed me to look deeper into sustainable beekeeping.
I've got a couple more books to read before I settle on a new method,
but The
Barefoot Beekeeper
by PJ Chandler was definitely a thought-provoking step in the right
direction. This week's lunchtime series will highlight the most
intriguing tips I learned about natural beekeeping (and, specifically,
top bar hives.)
The demise
of both of our hives
this autumn pushed me to look deeper into sustainable beekeeping.
I've got a couple more books to read before I settle on a new method,
but The
Barefoot Beekeeper
by PJ Chandler was definitely a thought-provoking step in the right
direction. This week's lunchtime series will highlight the most
intriguing tips I learned about natural beekeeping (and, specifically,
top bar hives.)
Before you rush out and
buy the book on Amazon, though, I should warn you that you might not
want to pay $21.61 for the paperback version. As reviewers there
rightly mentioned, the book is short and sweet --- so why not download
the ebook version from the author's website for $10 instead? And if you're
new to bees, you might want to wait on reading The
Barefoot Beekeeper
until you've pored over another beginner book and understand the basics
of bee biology and behavior.
Those caveats aside,
this book is the best natural beekeeping book I've read so far.
It delved much deeper into the issue than Natural
Beekeeping and gave
me much more food for thought. If you're an intermediate level
beekeeper, I think The
Barefoot Beekeeper
is a must-read.
| This post is part of our The Barefoot Beekeeper lunchtime series.
Read all of the entries: |
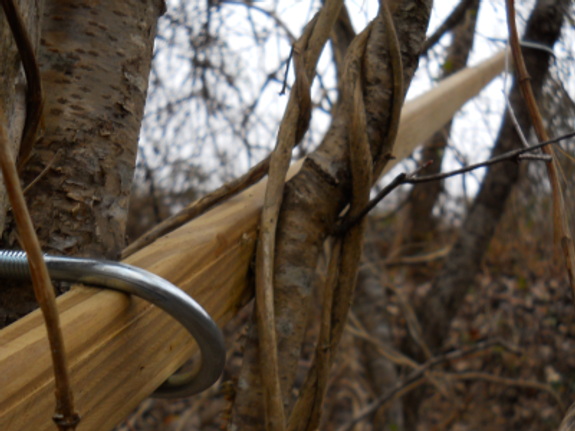

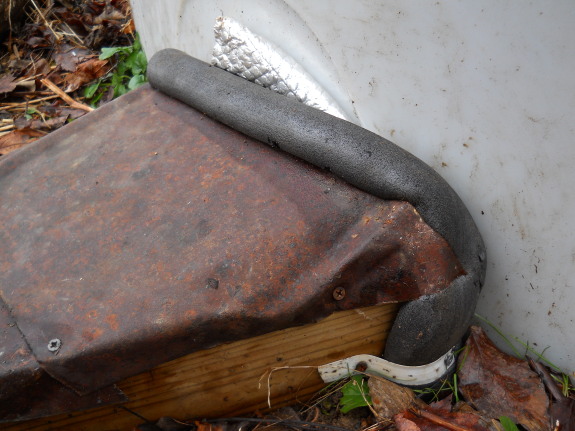
We've been taking this short cut to our trailer that saves about 3
minutes, but gets a little slippery on wet days.
I've had the idea for months
now to connect two small trees with a treated furring strip to make a
do it yourself hand rail, but kept forgetting to pick up the proper
hardware.
The total price with both U
bolts and the furring strip was around 7 dollars. Not a bad deal for
such a huge increase in safety.
 I'd
love to tell you that converting from cold
frames to quick hoops
is the reason we're still enjoying fresh lettuce and greens at the
beginning of January.
I'd
love to tell you that converting from cold
frames to quick hoops
is the reason we're still enjoying fresh lettuce and greens at the
beginning of January.
But the truth is that
this winter has been strangely warm. Last year, our farm was
under a coat of snow for nearly the entire month of December and
the ground froze solid, but in December 2011 there were days when I
didn't even need to light the wood stove.
I hear we're in for an
arctic blast this week, and the snow is already falling. I'll let
you know whether the vegetables under the quick hoops survive once the
leaves thaw out and either liquify or keep growing.
Even though cold weather
is more work, I'm happy to see snow on the ground. (And maybe the
ground will freeze solid enough to drive the truck in?)
 We've all heard that modern
beekeeping is in trouble, but The
Barefoot Beekeeper opened my eyes to problems that I hadn't
considered. Yes, large-scale beekeepers are mean to their bees,
stressing them out by stealing all of their honey and then feeding them
nutrient-free corn
syrup to get them
through the winter. The bees are often given access to only one
type of pollen, which leaves them perpetually malnourished, and they
have to put up with pesticides in their foraging grounds and even in
their hives. We truck bees across the nation, letting pests and
diseases piggy-back with the traveling bees and spread to other
areas. But there's a lot more to the decline of honeybees than
that.
We've all heard that modern
beekeeping is in trouble, but The
Barefoot Beekeeper opened my eyes to problems that I hadn't
considered. Yes, large-scale beekeepers are mean to their bees,
stressing them out by stealing all of their honey and then feeding them
nutrient-free corn
syrup to get them
through the winter. The bees are often given access to only one
type of pollen, which leaves them perpetually malnourished, and they
have to put up with pesticides in their foraging grounds and even in
their hives. We truck bees across the nation, letting pests and
diseases piggy-back with the traveling bees and spread to other
areas. But there's a lot more to the decline of honeybees than
that.
According to PJ
Chandler, the honeybee decline began nearly as soon as the Langstroth
hive was invented. For those of you who don't keep bees,
Langstroth hives are the wooden boxes you're likely to see in modern
apiaries. These hives are built out of wooden boxes with moveable
frames inside, the combination of which allows us to easily look
through a whole hive like paging through a book.
 The Langstroth hive replaced
a much more lethal method, in which bees were kept in skeps that had to
be destroyed to harvest honey, so it was lauded as a great invention at
the time. However, Chandler argues that the Langstroth hive harms
bees in several ways:
The Langstroth hive replaced
a much more lethal method, in which bees were kept in skeps that had to
be destroyed to harvest honey, so it was lauded as a great invention at
the time. However, Chandler argues that the Langstroth hive harms
bees in several ways:
- Drastic temperature changes
--- In a natural hive, bees maintain a temperature of 94 degrees
Fahrenheit year round. When we open a Langstroth hive to page
through those frames, the temperature in the hive drops dramatically
even on a warm summer day. Did you know that varroa mites can
only reproduce at temperatures below 92 degrees? Chandler doesn't
have data to back this up, but his thesis feels sound --- the
temperature spikes in the Langstroth hive make it easier for mites to
gain a toehold, and the loss of heat also stresses out the bees who
have to work hard to bring the hive back up to optimal levels.
- Premade foundation --- As
I've written
previously, the cells in the foundation most beekeepers buy are
larger than the natural cell size. These large cells promote the
spread of varroa mites.
 In addition, we have to
consider other aspects of modern beekeeping, such as the tendency to
concentrate our hives in large apiaries. As I mentioned about my native
bee nests, if you
house a lot of bees together, pests and diseases are much more apt to
spread through the populations. This makes me wonder if we
wouldn't be better off keeping our hives on opposite sides of the
property rather than close together.
In addition, we have to
consider other aspects of modern beekeeping, such as the tendency to
concentrate our hives in large apiaries. As I mentioned about my native
bee nests, if you
house a lot of bees together, pests and diseases are much more apt to
spread through the populations. This makes me wonder if we
wouldn't be better off keeping our hives on opposite sides of the
property rather than close together.
All of that said, most
of us aren't ready to go back to tearing skeps apart and killing
colonies just to get at the honey. Stay tuned for a modern
solution that still keeps the bees healthy.
| This post is part of our The Barefoot Beekeeper lunchtime series.
Read all of the entries: |
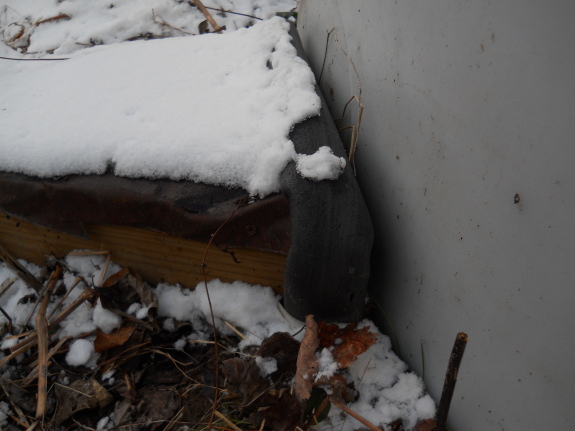
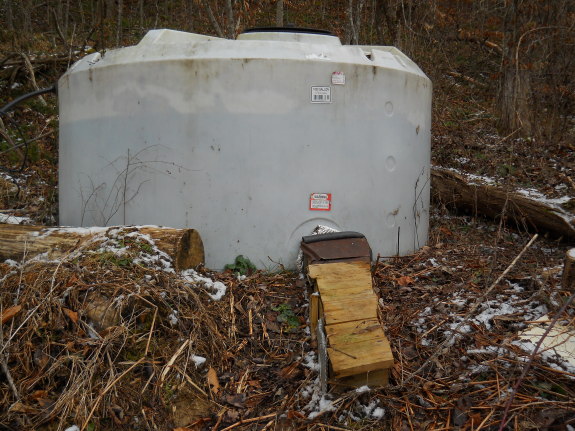
The non potable water line
froze up last night...the first time this winter.
Like Anna said, "the good
news is the drinking water didn't freeze".
It might be this gap that
formed where the tank meets the insulation box as the line arcs down
into a trench. I think I'll let this problem marinate for a few days
while I think of a solution. Maybe it'll be warmer then.
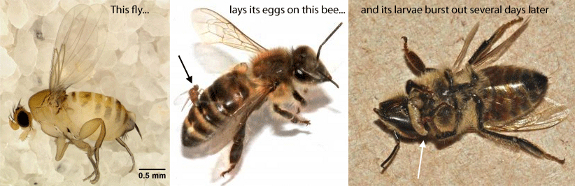
I've read at least half
a dozen different possible explanations for colony
collapse disorder,
but the Apocephalus borealis fly is a new one. This
tiny parasitic fly lays its eggs on honeybees, then the larvae nibble
their way into the bees' brains and eat them alive.
Unsurprisingly, bees
that fall prey to the Apocephalus
borealis flies
don't do so well. The bees get disoriented, abandon their hives,
and become stranded near bright lights.
Although lots of other
problems have been correlated with hives that succumb to colony
collapse disorder, the parasitic fly is unique in that it seems like it
might actually cause the symptoms we see. In addition, the timing
seems right --- in the San Francisco Bay area where the scientists
work, the fly visits honeybees from October to January and again in
late summer, right before the majority of hives come down with colony
collapse disorder.
So far, scientists are
simply adding Apocephalus
borealis to the
suite of problems that colony collapse disorder hives seem to share,
but I wouldn't be surprised if it turns out to be the primary culprit.
For
those of you who didn't take statistics, if two things always happen
together, that's a correlation. For example, Huckleberry likes to
sit in my chair whenever I want to sit there. Just because the
events are correlated, though, doesn't prove anything about causation
--- sometimes, two correlated events are simply caused by the a third
event we didn't think to measure. In my example, the third event
is a warm fire on a cold night --- the warmth attracts both me and
Huckleberry like moths to a flame. Returning to the serious case
of colony collapse disorder, just because we often see Nosema apis and Varroa destructor in the
sick hives doesn't mean these illnesses cause the disorder.
 Before
I write about modern beekeeping methods that promote healthier bee
populations, let's take a step back and look at the way honeybees live
in the wild. Although some of them will move into the walls of
our houses (oops), most feral honeybees prefer to nest in hollow
trees. That means they are quite well insulated from the
elements, with thick wooden walls on the sides and an even thicker
"roof" above their heads.
Before
I write about modern beekeeping methods that promote healthier bee
populations, let's take a step back and look at the way honeybees live
in the wild. Although some of them will move into the walls of
our houses (oops), most feral honeybees prefer to nest in hollow
trees. That means they are quite well insulated from the
elements, with thick wooden walls on the sides and an even thicker
"roof" above their heads.
Nest chambers of
wild bees are vertically elongated cylinders with a
capacity of about 8 to 16 gallons. To give you a frame of
reference, the deep brood box that most Langstroth hives begin with has
a capacity of about 11 gallons, and beekeepers generally add on at
least one more deep brood box or two shallow supers. That makes
the wild bee hives sound small, but keep in mind that wild bees don't
sock away as much honey as we ask our bees to. Instead, they
swarm as soon as conditions in the hive start to get cramped, sending
out a daughter colony to make a new hollow her own.
 Wild bee hives are usually at
or near the base of a tree and the
entrances are generally at the bottom of the hollow. Entrances
vary in size depending on the capacity of the tree, but range from
about 4 to 16 inches in diameter.
Wild bee hives are usually at
or near the base of a tree and the
entrances are generally at the bottom of the hollow. Entrances
vary in size depending on the capacity of the tree, but range from
about 4 to 16 inches in diameter.
The bees chew away rough
bark at the entrance to make a smooth landing
area, then they coat the inside walls with propolis. Combs are
fastened to the top and sides of the chamber, but the bees leave small
passageways along the edges to allow them to move around inside
easily. They put honey in the top of the combs, then pollen, and
care for their brood below.
Can we develop a hive
that allows for human management while keeping as
many of these wild bee characteristics as possible? Tomorrow's
post will suggest one possible compromise.
| This post is part of our The Barefoot Beekeeper lunchtime series.
Read all of the entries: |
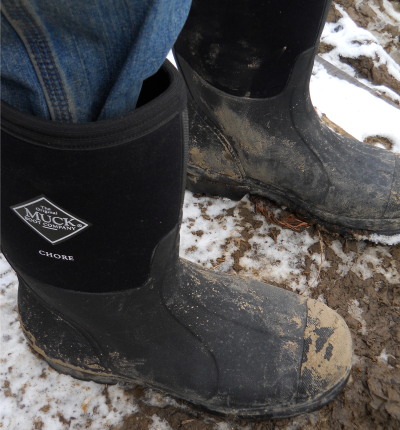
I decided to upgrade my winter foot wear with some new Muck
boots.
These boots fit my feet like
no other boot I've ever encountered.
The stretchy material hugs
the upper ankle area in just the right spots while at the same time
having enough give to allow for a superior freedom of movement.
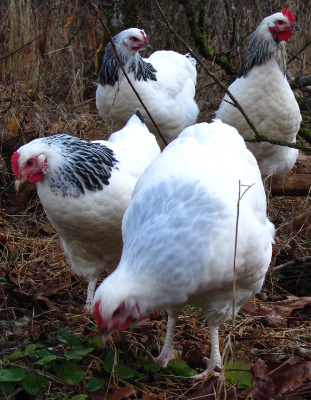
 Remember two weeks ago when I
wrote that I was trying to combine
two roosters into one flock? I'm ready to
tentatively call the experiment a success.
Remember two weeks ago when I
wrote that I was trying to combine
two roosters into one flock? I'm ready to
tentatively call the experiment a success.
The Light
Sussex are still at
the bottom of the pecking order, but they're now allowed to eat side by
side with the grownups, as long as they mind their manners. As
usual, it was the head rooster who made the decision --- once he
started guarding the Sussex as well as his previous harem, they were in.
The only trouble with
the merger occurred last week when the Light Sussex cockerel led his
ladies up over the hill into the garden...and the Australorps and
Marans started following behind! Luckily, I saw the first white
heads peek up over the hill as I was cooking supper and ran out to
scare them out of their wits. There have been no repeat
performances.
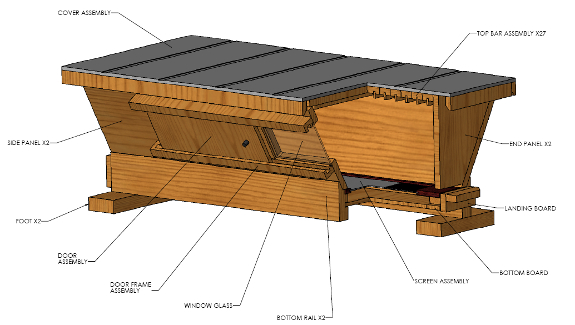
PJ
Chandler's solution
to the ills
of modern beekeeping
is the top bar hive. The hive is simply a long box with sides
that slant inwards and a lid that fits over top. Removable frames
are placed in the box a bit like the frames in a Langstroth hive, but
top bar frames are just what they sound like --- simply a top
bar. The bees create their own wax just like they do in foundationless frames, which allows them to build
at a more natural cell size.
 One of the major selling
points of the top bar hive is that you can manage the hive in a very
unobtrusive fashion. The frames entirely enclose the space at the
top of the bees' nest area, so taking off the lid doesn't lower the
temperature inside much, nor does it bother the bees. The bee
colony is enclosed on the sides by two follower boards to keep them
from sprawling into the entire hive before they're ready, and
inspections can be as simple as sliding one follower board away from
the bees and peeking inside.
One of the major selling
points of the top bar hive is that you can manage the hive in a very
unobtrusive fashion. The frames entirely enclose the space at the
top of the bees' nest area, so taking off the lid doesn't lower the
temperature inside much, nor does it bother the bees. The bee
colony is enclosed on the sides by two follower boards to keep them
from sprawling into the entire hive before they're ready, and
inspections can be as simple as sliding one follower board away from
the bees and peeking inside.
Honey is usually
harvested one frame at a time, by cutting the entire comb off the
wooden frame. Although bees then have to redraw the wax on that
frame, cutting off the comb probably helps sanitize the hive, slowing
the buildup of diseases and pests. In general, you should
probably expect a bit less honey from a top bar hive than from a
Langstroth hive, but if that means your bees are healthier, I'd say the
trade is worth it.
Stay tuned for
tomorrow's post in which I'll discuss more of the pros and cons of top
bar hives, or check out our friend Everett's description of his top bar hive.
| This post is part of our The Barefoot Beekeeper lunchtime series.
Read all of the entries: |
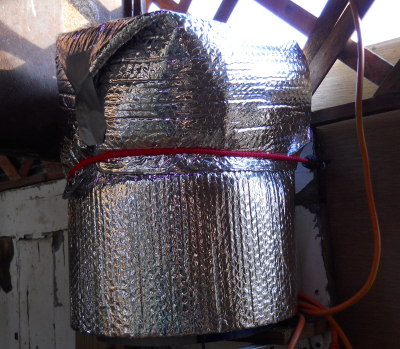
Our
do it yourself heated chicken waterer froze up the other night.
It did fine earlier in the
month when it got down to 16 degrees, but it would seem like somewhere
around 10 is the "too cold" point.
Instead of increasing the length of the electric pipe heater we decided
to wrap it with Reflectix.
Maybe we'll get lucky and
have to wait till next winter to fully test out this new generation of
diy heated chicken waterers.
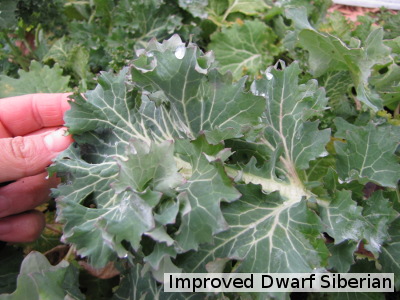 We're currently trying out
three varieties of kale that are supposed to be particularly cold hardy
--- Winterbor (from Johnny's and Territorial), Improved Dwarf Siberian
(from Territorial), and Red Russian (from Sweet Garden Organics.)
I planted three beds (each with all varieties) between August 6 and
August 26, then covered them with quick
hoops once cold
weather came along.
We're currently trying out
three varieties of kale that are supposed to be particularly cold hardy
--- Winterbor (from Johnny's and Territorial), Improved Dwarf Siberian
(from Territorial), and Red Russian (from Sweet Garden Organics.)
I planted three beds (each with all varieties) between August 6 and
August 26, then covered them with quick
hoops once cold
weather came along.
Germination
The first test was how
well the seeds germinated in summer heat. Red Russian barely came
up in two of the beds while Winterbor and Improved Dwarf Siberian each
didn't feel like growing in one bed. Given such a range of data
points, I'm going to say they're all potential trouble and might need a
bit of help if you're planting your fall garden during hot weather (as
you should be.)
Growth
Despite its name,
Improved Dwarf Siberian was the largest kale variety, growing a thick
stem and long leaves that sprawled out over the bed. Red Russian
turned out to be the diminutive cousin, keeping its growing tip near
the ground and politely adding a new leaf to its topknot now and then.
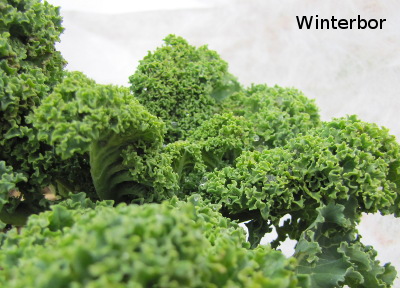 Winterbor looked a lot like
Dwarf Siberian at first, but once the weather got cold, Winterbor
started growing very ruffled leaves on short stems. My gut
feeling is that Winterbor is still growing (perhaps because the
condensed leaves are better able to handle cold?) while the other two
varieties are biding their time until spring. I don't have any
real data to back that up, though --- I only peek under the quick hoops
now and then.
Winterbor looked a lot like
Dwarf Siberian at first, but once the weather got cold, Winterbor
started growing very ruffled leaves on short stems. My gut
feeling is that Winterbor is still growing (perhaps because the
condensed leaves are better able to handle cold?) while the other two
varieties are biding their time until spring. I don't have any
real data to back that up, though --- I only peek under the quick hoops
now and then.
Beauty
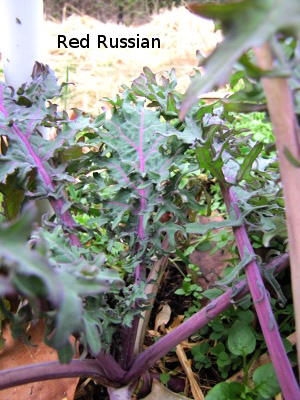 If I lived in the city, I'd
plant all three of these kale varieties in my flower garden for winter
color. Red Russian might be the prettiest, but the beautiful
white veins on the Siberian and the ruffled Winterbor leaves are both
quite striking.
If I lived in the city, I'd
plant all three of these kale varieties in my flower garden for winter
color. Red Russian might be the prettiest, but the beautiful
white veins on the Siberian and the ruffled Winterbor leaves are both
quite striking.
Flavor
All three varieties of
kale taste so good right now that when I go out and snip leaves for
dinner, I eat a bunch before I get back inside. I've had to cut
way back on the balsamic vinegar I saute them in --- the leaves are
already so sweet that the sugary vinegar almost turns them into
dessert. If I had to choose the least tasty variety, it would
probably be Red Russian, but not by much.
Winter
hardiness
Only time will tell
which variety lasts longest into the winter. This factor will
probably be the most important in determining what we grow next year.
For those of you who
aren't kale fans, I'll post a roundup of our other winter
greens in another
post.
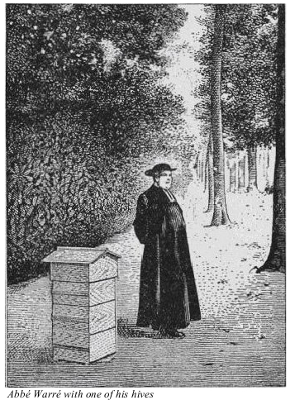 Less well known than the top
bar hive is another alternative beekeeping box --- the Warre hive,
sometimes called a "vertical top bar hive." I have to admit that
I haven't read Abbe Warre's Beekeeping for All yet (although you can
download it for free by following the link.) The information
below is drawn from The
Barefoot Beekeeper,
and is clearly biased toward the author's method.
Less well known than the top
bar hive is another alternative beekeeping box --- the Warre hive,
sometimes called a "vertical top bar hive." I have to admit that
I haven't read Abbe Warre's Beekeeping for All yet (although you can
download it for free by following the link.) The information
below is drawn from The
Barefoot Beekeeper,
and is clearly biased toward the author's method.
Although Warre used
smaller boxes, his technique is very similar to the modified Langstroth
method I've used in the past (although less intrusive.) Warre
stacked small boxes (12 inches square and a bit over 8 inches deep)
just like in a Langstroth hive, with the major difference being that
his frames were merely top bars with wax strips. When the first
box was full of bees and honey, Warre slipped an empty box underneath
(similar to my swarm prevention in years past, but without the extra checkerboarding.)
 Where Warre's method differs
most from mine is that he didn't believe in delving into the hive at
intervals to page through the frames. In fact, he actually fixed
his frames in place with nails and didn't mess with the bees at
all. When they had moved down into the lower box, he would slip
another empty box underneath and then take away the top box, harvesting
all of the honey out of it at once.
Where Warre's method differs
most from mine is that he didn't believe in delving into the hive at
intervals to page through the frames. In fact, he actually fixed
his frames in place with nails and didn't mess with the bees at
all. When they had moved down into the lower box, he would slip
another empty box underneath and then take away the top box, harvesting
all of the honey out of it at once.
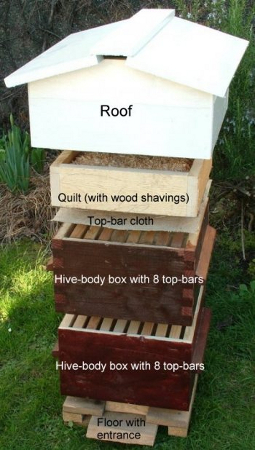
Warre's hive also
differs from Langstroth hives by containing a special, insulated
roof. Chandler argues that one of the problems with the
Langstroth hive is that the thin walls and roof cause condensation
within the hive in the winter, which makes the bees sick. Both
the Warre hive and the top bar hive deal with this problem by using
thicker wood and adding a sawdust layer to the inner lid.
PJ Chandler presented a
chart of pros and cons of the Warre hive versus his top bar hive, which you have to take with
a grain of salt since he clearly prefers the latter. Some
disadvantages he saw to the Warre method were:
- You have to store some boxes when not in use. The top bar hive is all one piece, so you block off empty areas but don't have to find space in the barn to store anything.
- More physical strength is
required for the Warre hive. Each time you add a new box
underneath, you have to hoist up the heavy box of bees and honey.
On the other hand, the
Warre hive did win in one respect:
- Very low maintence.
The top bar hive requires much more regular maintenance, with the
beekeeper often checking in and adding another frame twice a week
during heavy nectar flows. On the other hand, when you do work
with the Warre hive, you need to allot more time and physical strength
to the project.
I have to admit that I
think I'd drive myself nuts not being allowed to look into the hive
using Warre's method. On the other hand, there's always the
potential of creating viewing windows in the sides of the boxes, and if
the Warre method was better for the bees, I'd be tempted to try it.
Has anyone had
experience with Warre and/or top bar hives? Do you know of other
reasons to choose one over the other?
| This post is part of our The Barefoot Beekeeper lunchtime series.
Read all of the entries: |
I've tested out
a wide variety of work gloves over the last 8 years, but none of
them have come close to the quality these new John Deere gloves exude.

At 20 dollars they're a bit
over twice what I usually
like to pay, but I can already tell it's going to be worth it in
just the way the green stretchy material hugs the back of my hand.
The leather is thicker than
most work gloves without being too thick. Some gloves are plenty thick,
but next to impossible to grip anything with full confidence.
 If Attracting
Native Pollinators
is the prettiest homesteading-related book of 2011, The
Small-Scale Poultry Flock
is the most thought-provoking. You can read my gushing review on
our chicken blog, along with my summary of Ussery's most interesting
points:
If Attracting
Native Pollinators
is the prettiest homesteading-related book of 2011, The
Small-Scale Poultry Flock
is the most thought-provoking. You can read my gushing review on
our chicken blog, along with my summary of Ussery's most interesting
points:
Breeding
small flocks of chickens --- Homestead-scale tips on
growing better birds.
Choosing
mother hens ---
Breeds and traits that make good broody hens.
Chicken
feed: Beyond the basics --- Chicken food groups,
mangels, and more.
Keeping chickens happy in the winter --- Ussery has a variety of
tips for dealing with this tough time of year.
Eating
the whole chicken
--- Parts of the bird you never knew were a delicacy. (Mountain
oysters, anyone?)
Diversifying
your poultry flock
--- Did you know you can train geese to weed your garden?
I would have made the
book a lunchtime series over here, but as you can see, I couldn't
summarize it in five posts. In fact, there are dozens of
fascinating tidbits in his book that I didn't manage to fit into a post
--- go read it!
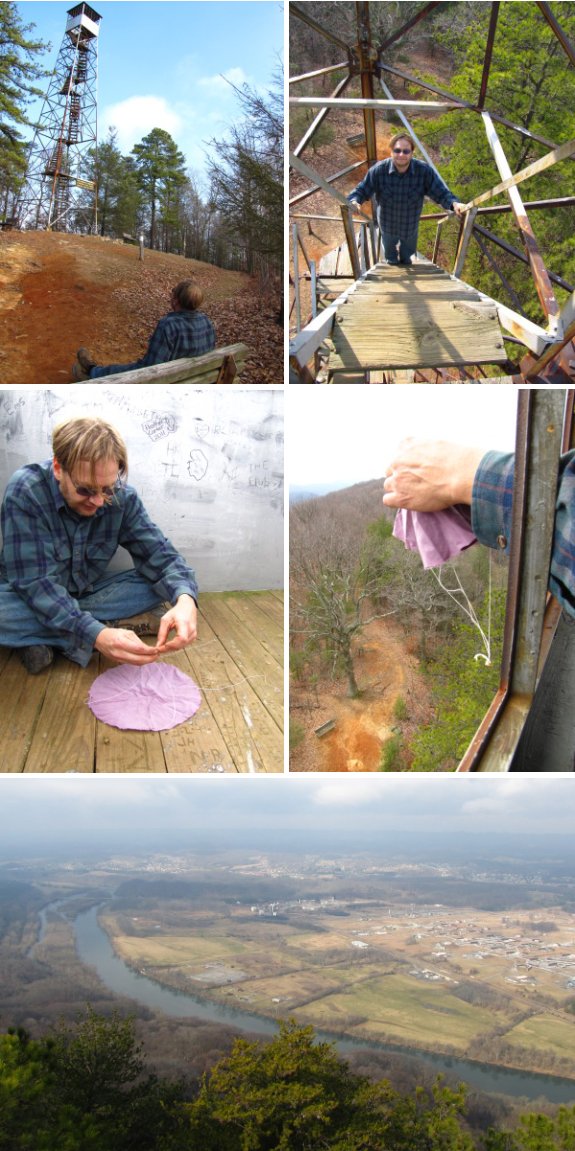
Bays Mountain Park and
Planetarium is a 3500 acre nature preserve in Northeast Tennessee.
We hiked all the way up to
the fire tower today, and the view was well worth it.
 I'm obsessed with my book
project. I
wake up with sidebars in mind and try to go to sleep with editing
decisions still rolling around in my head.
I'm obsessed with my book
project. I
wake up with sidebars in mind and try to go to sleep with editing
decisions still rolling around in my head.
The choice to put the
farm on hold and bulldoze my way through finishing the book has been a
good one for the manuscript, which is suddenly starting to look like
something I won't cringe to see in Tractor Supply. (I might even
go so far as to say I'm proud of it.) Unfortunately, just a few
weeks of sedentism is enough to remind me that my body craves motion.
 So
I begged Mark to take me to Bays Mountain, where I could wear myself
out walking up to the fire tower. I had forgotten the tower was
so high (60 feet) and scarily open, and that the platform at the top
was so tiny. We didn't stay aloft long, but did try out the
homemade parachute some kid had left behind.
So
I begged Mark to take me to Bays Mountain, where I could wear myself
out walking up to the fire tower. I had forgotten the tower was
so high (60 feet) and scarily open, and that the platform at the top
was so tiny. We didn't stay aloft long, but did try out the
homemade parachute some kid had left behind.
After an engrossing
planetarium presentation, I realized I hadn't thought about the book
all day. Success! If editing takes much longer, we'll have
to go back for another round of nature meditation.

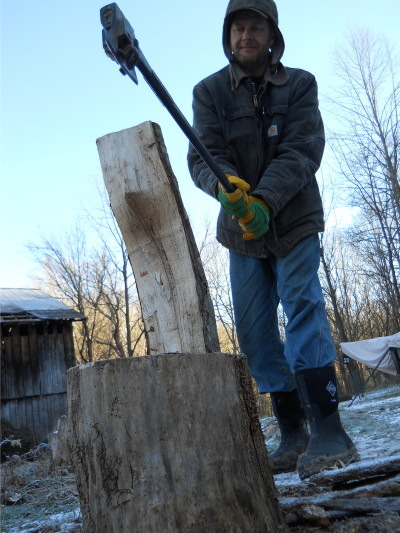
Increasing the height of our firewood chopping block by several inches
really helped the process.
I guess the optimal height
might vary depending on how tall one is and what size logs are being
cut, but for me the sweet spot is easier to hit with the chopping block
as high as the middle spot between the ground and your knee.
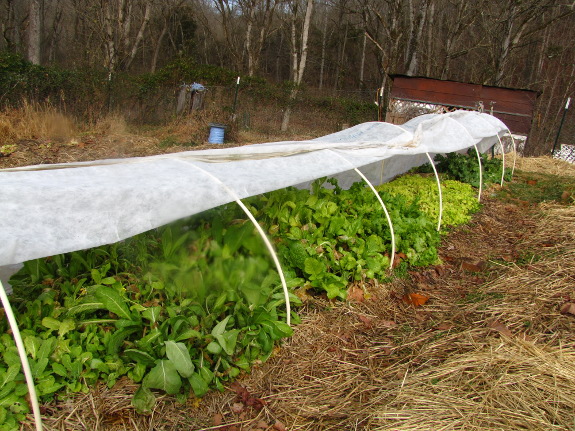
 I promised you a peek under
the quick
hoops, but it took a
few days for the snow to thaw enough that the edges of the fabric
weren't frozen down. Winter lows have so far dropped to 10
degrees Fahrenheit, and we've had a few days where even the highs
remained below freezing --- a pretty good test.
I promised you a peek under
the quick
hoops, but it took a
few days for the snow to thaw enough that the edges of the fabric
weren't frozen down. Winter lows have so far dropped to 10
degrees Fahrenheit, and we've had a few days where even the highs
remained below freezing --- a pretty good test.
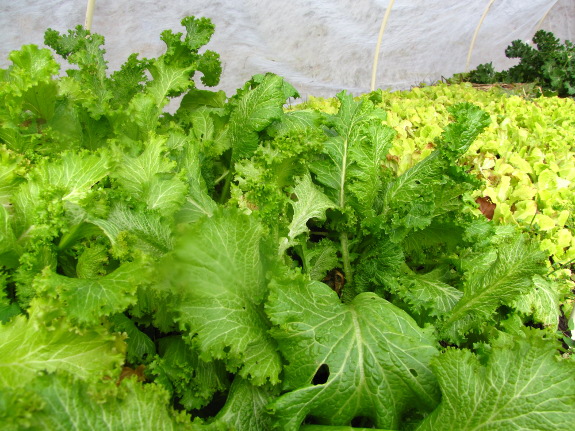
(You might want to read
about the
winter greens I'm growing first. Also, sorry
about the smudge on the camera lens.)
The bad news is that our
two varieties of Asian greens are pretty much kaput. They were
vigorous and productive in the fall, but I probably should have
harvested them harder and planned to completely eat 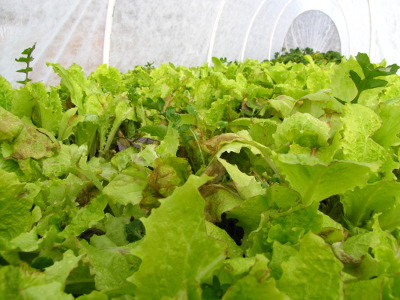 them up before cold weather
hit. Instead, I left a lot behind, hoping they'd be strong enough
to keep going into the winter, and most of those stored leaves turned
to inedible mush. Live and learn!
them up before cold weather
hit. Instead, I left a lot behind, hoping they'd be strong enough
to keep going into the winter, and most of those stored leaves turned
to inedible mush. Live and learn!
On the other hand, our
Black-seeded Simpson lettuce fared much better than I expected.
Although several leaves did get nipped, the majority of the plants look
healthy and ready to eat.
I didn't expect much from our
mustard since two varieties (Tendergreen and Broadleaf) had started to
bolt in the sunny December weather. I was wrong! The
 mustard looked nearly untouched by the cold weather and Giant mustard
(the one variety that didn't bolt) has plenty of leaves to get us
through another couple of weeks until growth starts back up.
mustard looked nearly untouched by the cold weather and Giant mustard
(the one variety that didn't bolt) has plenty of leaves to get us
through another couple of weeks until growth starts back up.
Of course, the kale is still just as delicious
looking as it was last week, and our Hakurei turnips might actually be
putting out new leaves (although small and slowly.)
But here's a surprise ---
Fordhook Giant Swiss chard, out in the open with no quick hoop covering,
is still alive and doing pretty well! I didn't think the Swiss
chard even deserved protection because the colorful stalked varieties
I've grown previously have wimped out over the winter. But
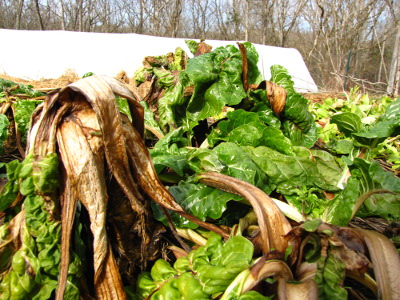 reports that Fordhook Giant is a much more winter hardy variety seem to
be founded in fact. I guess we'll stick to the "ugly" variety and
turn Swiss chard into a winter standby!
reports that Fordhook Giant is a much more winter hardy variety seem to
be founded in fact. I guess we'll stick to the "ugly" variety and
turn Swiss chard into a winter standby!
All told, our greens and
lettuce beds have given us at least sixty meals so far --- pretty good
for the minimal effort of tossing down seeds, weeding and mulching
once, then erecting quick hoops. I thought I'd planted too many
beds, but there's really no such thing as too much fresh food in the
winter.
I took the cover off the tank box and
stuffed in some Reflectix to
fill in the gap.
Will be crossing my fingers
the next time it gets really cold.
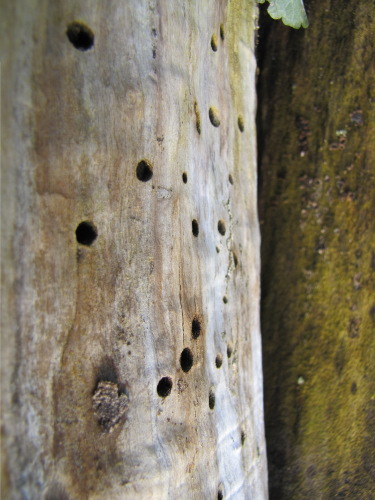 Remember how I wrote that many
of our native bees nest in old beetle burrows in dead trees, stumps,
and branches?
I'd never noticed these holes before, but now that I've read about
them, I see them everywhere.
Remember how I wrote that many
of our native bees nest in old beetle burrows in dead trees, stumps,
and branches?
I'd never noticed these holes before, but now that I've read about
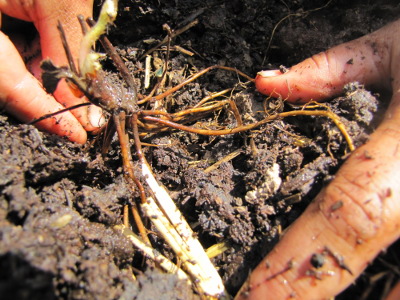
them, I see them everywhere.
The stumps we lazily
left strewn throughout the yard and garden are clearly one of the
sources of our huge native bee population. This is a
representative sample of just a few inches of one of our stumps.
Come to think of it, a
couple of years ago, I saw a strange-looking wasp visit this stump for
an unknown reason --- I guess I know what she was doing now!
Since our stumps are
slowly being ripped
out of the ground
and turned into hugelkultur
mounds, I guess it's
a good thing I'm making the bees replacement
homes.

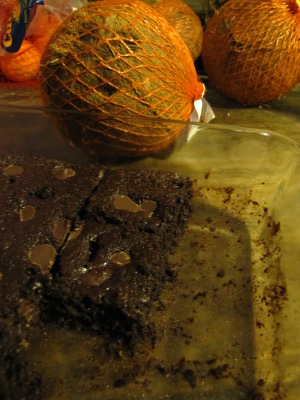
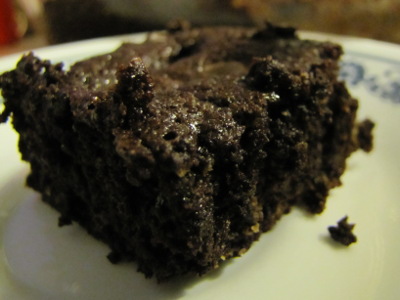
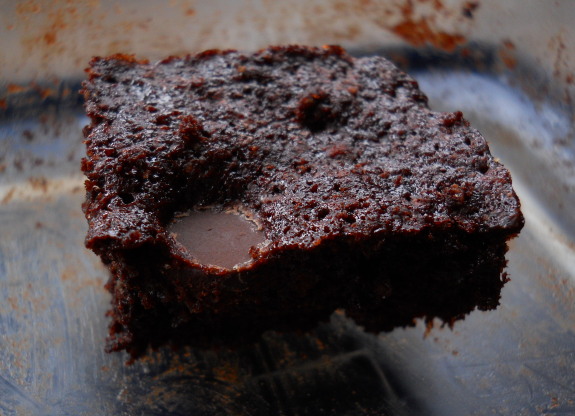
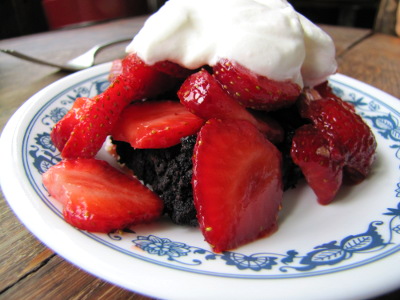
As of today I'm 43 years old.
Anna made me some awesome
birthday brownies, while at the same time indulging my
recent experiment with deleting wheat. How did she do it? Coconut
flour. More on that later.
Best birthday brownies ever.
 Many folks turn to coconut
flour when they decide to ditch
wheat.
Compared to white flour, coconut flour has about the same amount of
protein, but replaces nearly a third of the carbohydrates with good
fats. Coconut flour makes decadent desserts, too, if you like the
taste of coconut and don't mind a bit of denseness in the final product.
Many folks turn to coconut
flour when they decide to ditch
wheat.
Compared to white flour, coconut flour has about the same amount of
protein, but replaces nearly a third of the carbohydrates with good
fats. Coconut flour makes decadent desserts, too, if you like the
taste of coconut and don't mind a bit of denseness in the final product.
Of course, if you live
in the boondocks like we do, you're not going to find coconut flour in
the grocery store. You might find whole coconuts, though, in
which case you can try to make your own. Here's the method we
used to make our coconut flour (and why
you shouldn't follow our lead):
To
make coconut flour the right way, you'll need to first send
the flesh through an oil expeller. I've hit a bit of a wall with
our expeller, but Mark thinks he can
convert it to heating with electricity so that smoke doesn't ruin the
product. If he gets that going, I think we could make real
coconut flour by first expelling the oil, then sending the coconut cake
through the Magic Mill.
No matter how you get
it, here's a delicious recipe for coconut
flour brownies:
 0.5 cups cocoa
- 0.5 cups coconut flour
- 0.5 cups sugar
- 1 teaspoon baking powder
- 0.5 teaspoons salt
- 2 eggs
- 4 tablespoons butter (or 8 tablespoons if you get the oil out of your flour or use storebought coconut flour)
- 1 teaspoon vanilla
- a small handful of dark chocolate chips
Mix the first seven ingredients together, sprinkle
the chocolate chips on top, and bake at 350 degrees Fahrenheit until a
knife comes out clean. Serves 4 (or 8 if you have self restraint.)
Have you experimented
with coconut flour? I'd be very curious to hear about your
technique if you've made the flour at home.
Not much left of the delicious no-wheat brownies.

Look at this ---
mushrooms in the middle of January! Not only is the
totem that fruited in November pushing out new mushrooms,
so is the totem that I inoculated with wild oyster mushroom spawn.
The oyster mushrooms in
our yard aren't currently fruiting, which makes me wonder if the woods
might be a slightly more sheltered microclimate. I've read that
even leafless limbs hold in a bit of warmth on cold winter nights, a
bit like quick
hoops do. Of
course, this area is also one of the sunniest parts of our farm, so
that might be the real reason mushrooms are able to grow there in the
dead of winter.
As a side note, the
chickens are only interested because they thought they were going to
get breakfast. Otherwise, they leave oyster mushrooms alone,
meaning that those of you with limited space can "stack" chickens and
mushrooms to your heart's content. Two harvests from one space
--- gotta love permaculture.

Yet another day when my Pro Line hip waders are worth their weight in gold.
 If you keep bees, you end up
with lots of wax. Folks who like comb honey or who manage top bar hives will have much more, but
even those of you who use an extractor will collect a lot of
cappings.
If you keep bees, you end up
with lots of wax. Folks who like comb honey or who manage top bar hives will have much more, but
even those of you who use an extractor will collect a lot of
cappings.
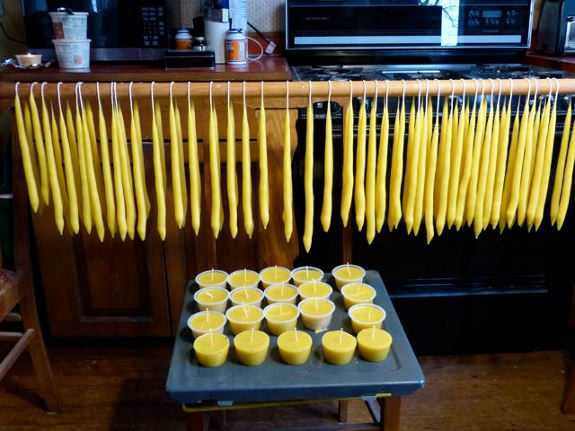
Our movie star neighbor
solved the excess beeswax problem by making 110 candles. (He
hasn't quite figure out how to solve the excess candles problem....)
The first step was to
clean the beeswax. He melts his wax in an olive oil can partially
full of water atop a pot of boiling water, then uses a seive to dip out
any gunk that floats to the surface. (This waxy debris makes
great firestarters, our neighbor points out.) After the wax is
mostly clean, pour it into a five gallon bucket to cool, then pour off
the water once the wax has solidified. You should be able to pop
the solid wax right out of your bucket, but then will need to scrape
more gunk off the bottom until you're left with beautiful, clean wax.
Knock the wax into
chunks with a hammer and melt it again in a fresh olive oil can, still
atop a pot of boiling water. If you don't want to mess your
kitchen up, lay down some newspapers, and also set up a broom or other
pole between two chairs. Cut wick material (about $2 for more
than you'll ever use) into lengths twice as long as you want your
finished candles to be. Then start dipping.
If your wax is the
perfect temperature, it will coat the wick thickly but won't drip off
excessively. A little cooler is generally better than a little
hotter since cooler wax stays on much better --- you'll know if you've
gone too cold because the wax will be a bit chunky.
Our neighbor found it
useful to keep three cans of wax melting at all times, pouring melted
wax into the foremost can so that it was always full enough to dip a
candle.
After dunking the wick
the first time, wait until the wax is partly cool, then stretch the
candle out with your fingers so that the candle straightens. You
may need to repeat this procedure after the second dipping as well, but
after that, you can just dip, cool, and dip again.
You'll notice in the
pictures that our neighbor makes two candles out of each wick.
This method makes it easy for him to drape the candles over his rod and
let them cool between dippings. Later, he'll cut the wick and end
up with a pair of candles.
 Our neighbor dipped each
candle about 25 to 30 times, which means it took him six to seven hours
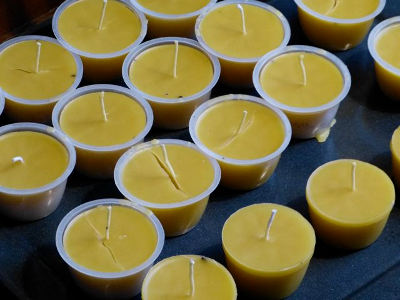
(and about two gallons of clean wax) to make 80 candles plus 30 tea
lights. The tea lights were to use up excess wax at the end of
the project and are made from a small piece of wick inside a cleaned
out applesauce container.
Our neighbor dipped each
candle about 25 to 30 times, which means it took him six to seven hours
(and about two gallons of clean wax) to make 80 candles plus 30 tea
lights. The tea lights were to use up excess wax at the end of
the project and are made from a small piece of wick inside a cleaned
out applesauce container.
Previous batches of
handmade candles have gone to the Harvest
Table Restaurant,
where they were priced at $5 per pair. However, our neighbor
notes that they didn't sell nearly as well as honey (which went like
hotcakes.) On the other hand, the yellow, honey-scented candles
hanging on his wall always attract the attention of guests, so he's had
no problem giving them away to loving homes.
 Cold
winter days give us an incentive to catch up on our reading, so I've
launched the February
ebook a bit early. Topics include:
Cold
winter days give us an incentive to catch up on our reading, so I've
launched the February
ebook a bit early. Topics include:
- Easy berries
- Backyard chickens
- Buying in bulk
- Informal apprenticeships
For those of you who are
new to Weekend Homesteader, this series walks you through the basics of
growing your own food, cooking the bounty, preparing for emergency
power outages, and achieving financial independence.
I hope you'll consider
splurging 99
cents to buy
a copy of my newest ebook from Amazon's
Kindle store. And many
thanks in advance if you can find the
time to write a brief review.
 As usual, I'm also very
glad to email you a free pdf copy to read if you
don't have the spare cash, or just don't want to deal with downloading
an app so you can
read the ebook on your computer or phone. Just email
me with your request --- no strings attached.
As usual, I'm also very
glad to email you a free pdf copy to read if you
don't have the spare cash, or just don't want to deal with downloading
an app so you can
read the ebook on your computer or phone. Just email
me with your request --- no strings attached.
Don't forget that Weekend
Homesteader: January is
still available, with the first half of the backyard chickens primer
and with information on backup lighting, soil testing, and bread
baking. Thanks for reading!
Our 2nd Jotul wood stove can sometimes heat my small room
to the point where I need to open a window. I've been experimenting
with different ways of controlling the size of the fire with mixed
results.
The first lesson learned is
to not worry about letting the fire go out. The super draft on the
Jotul makes it really easy to start. I usually stop feeding it if my
inside temperature goes above 68.
Another trick I like to use
is putting a log in the corner so one of its sides is up against a
wall. I think it burns slower when less surface area is exposed.
I don't want you to
think that life under the quick
hoops is entirely
worry-free. The winter protection does make one garden problem
much worse --- bugs.
 Some
people use row cover fabric to keep insects out. For example, you
can cover up your eggplants in the summer and prevent flea beetle
damage. Or, if you're running breeding experiments, you can
uncover different varieties of the same species on alternate days to
allow for wild pollination but not cross-pollination.
Some
people use row cover fabric to keep insects out. For example, you
can cover up your eggplants in the summer and prevent flea beetle
damage. Or, if you're running breeding experiments, you can
uncover different varieties of the same species on alternate days to
allow for wild pollination but not cross-pollination.
Unfortunately, row
covers keep out all of the beneficial insects too --- like ladybugs to
eat up the aphids that seem to grow like crazy on my winter
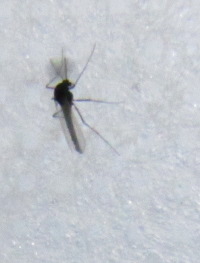
greens. I'm not sure what these tiny flies are or what eats them,
but I'd like some of those predators inside my quick hoops too.
 I've ranted at length
about the downside
of greenhouses --- most relevantly, the fact that you have to
supply most ecosystem functions yourself rather than relying on the
earth to do the work for you. It looks like quick hoops share at
least a one of these flaws.
I've ranted at length
about the downside
of greenhouses --- most relevantly, the fact that you have to
supply most ecosystem functions yourself rather than relying on the
earth to do the work for you. It looks like quick hoops share at
least a one of these flaws.
On the upside, I'll be
moving the quick hoops in just a couple of months, so these insect
infestations will soon be a thing of the past. I can just hear
the hibernating ladybugs planning their entrance strategy.
19 degrees last night was
cold enough to freeze the non-potable water line for the 2nd time this
season.
I'm not complaining though.
Today was a perfect winter
day for being still.
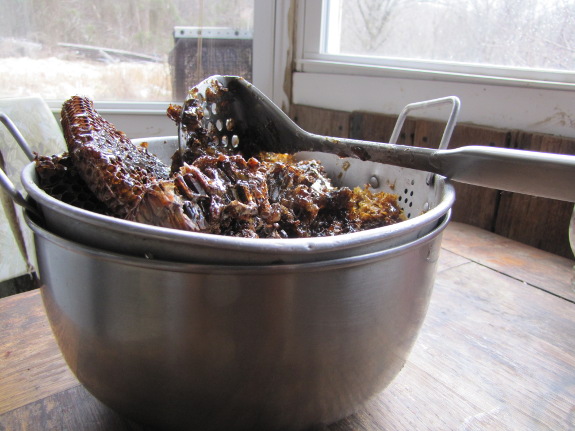
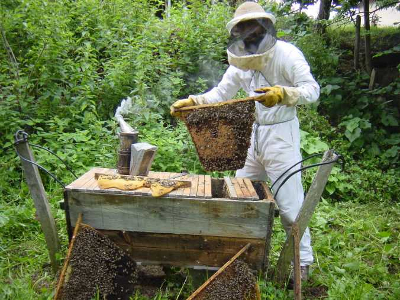
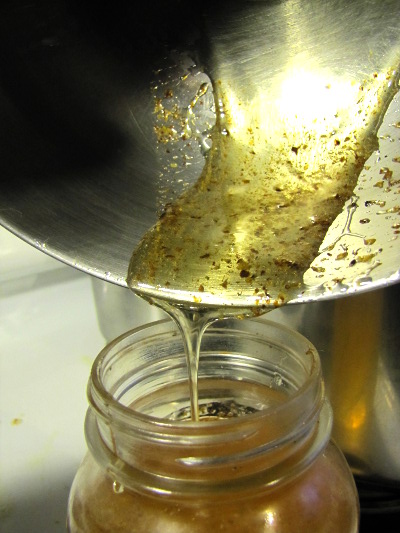
 Can
you get honey out of the comb without an extractor. Well, sure.
Can
you get honey out of the comb without an extractor. Well, sure.
Just cut the comb off
the frame, put it in a colander atop a bowl, and mash everything up a
bit with a potato masher (or spoon.)
Honey will slowly
trickle down into the bowl...slow being the operative word if
you start out with frozen honey from a dead
hive in January.
On the scale of our two
person family, the truth is that extracting honey using a bowl and
colander is probably the best option --- faster than cleaning the
extractor, really. Yet another reason to set my sights on top bar hives.


This small electric heater is
another element in the formula for keeping
my Jotul wood stove burning at its lowest temperature.
Knowing it will kick in when
the fire dies down lets me sleep a little easier.
It also functions as a main
heat source when the outside temperature is above freezing.
 Despite
what the calendar says, I consider this the halfway point of winter.
Despite
what the calendar says, I consider this the halfway point of winter.
From a heating
perspective, January is the coldest month. That means we should
be midway through our wood supply, but we've actually used more than we
should have. It's been a warm, but sedentary, winter, and I've
burnt excess wood so I wouldn't irritate my carpal tunnel while
pounding away on the keyboard. We have plenty more out at the
parking area if the driveway ever cooperates, but for now we've only
got about 40% of the farmside wood left. Time to be a little more
sparing.
 From
a food storage perspective, I'd say we're only a third of the way
through winter. Even though our Persephone
Days
will soon be over and the winter greens will start growing again, we
won't pick anything non-leafy until oyster mushrooms pop up in March,
asparagus in April, and then finally strawberries, broccoli, and more
in May. Here, we've done a much better job than with our wood
stores, in large part due to the seemingly endless supplies of lettuce
and greens from the quick hoops. Of the 28.75 gallons of winter
vegetables we stored away, we've consumed a mere 4.5 gallons.
We'd better pick up the pace!
From
a food storage perspective, I'd say we're only a third of the way
through winter. Even though our Persephone
Days
will soon be over and the winter greens will start growing again, we
won't pick anything non-leafy until oyster mushrooms pop up in March,
asparagus in April, and then finally strawberries, broccoli, and more
in May. Here, we've done a much better job than with our wood
stores, in large part due to the seemingly endless supplies of lettuce
and greens from the quick hoops. Of the 28.75 gallons of winter
vegetables we stored away, we've consumed a mere 4.5 gallons.
We'd better pick up the pace!
 In the long run, an orchard
provides the most fruit per hour of
maintenance, but berries fill in the gap while you're waiting for
your apple trees to produce. Luckily, easy berry plants like
strawberries and raspberries will start producing in a year or
less. Better yet, they're so easy to propagate that you'll soon
have filled up every nook and cranny of your yard with edibles and will
be begging neighbors to take extra plants off your hands.
In the long run, an orchard
provides the most fruit per hour of
maintenance, but berries fill in the gap while you're waiting for
your apple trees to produce. Luckily, easy berry plants like
strawberries and raspberries will start producing in a year or
less. Better yet, they're so easy to propagate that you'll soon
have filled up every nook and cranny of your yard with edibles and will
be begging neighbors to take extra plants off your hands.
Choosing your berries
The
primary purpose of this week's exercise is to be harvesting your own
fruit in
a year or less. As a result, I'm going to focus on the quickest
bearing berries --- blackberries, raspberries, and strawberries.
Each of these plants require only minimal to moderate care, with their
differences detailed in the chart below.
| USDA
hardiness zones |
pH |
Spacing (feet) |
Notes |
|
| Blackberry |
5-10 |
5.5-7.0 |
3-10 |
Best in southern climates and
for people with lots of space |
| Raspberry, red |
3-8 |
6.0-6.8 |
1-2 |
Best in northern climates; can
fit into smaller spaces than other brambles |
| Raspberry, black |
5-8 |
6.0-6.8 | 2-3 |
A good southern berry for those
with less space, but not as productive as other brambles |
| Strawberry |
3-8 |
6.5-6.8 |
1-2 |
You can tuck a few strawberry
plants into even the smallest garden, but they take more care than the
brambles |
If you're feeling patient, you might want to select additional small fruits from the second chart below. Although you may get a grape or blueberry the first or second year, these "advanced" species all require four or five years to reach their full potential. I consider a blueberry patch a long term investment --- on par with planting a fruit tree --- while strawberries and raspberries can be snuck into the yard of a rental property.
| USDA
hardiness zones |
pH |
Spacing (feet) |
Notes |
|
| Blueberry, highbush |
3-8 |
4.5-5.5 |
6-8 |
Best in northern climates; must
have acidic soil; needs more than one variety for pollination |
| Blueberry,
rabbiteye |
7-9 | 4.5-5.5 |
6-8 |
Best in southern climates; must
have acidic soil; needs more than one variety for pollination |
| Currant |
3-6 |
6.2-6.5 |
4 |
Best in northern climates; some
states don't allow you to plant certain varieties because of the white
pine blister rust |
| Gooseberry |
3-7 |
6.2-6.5 |
4 |
Best in northern climates but
can be planted a bit further south than currants; if you live in the
south, try to find a cool microclimate |
| Grape |
3-8 |
6.0-7.5 |
8-10 |
Bunch grapes hate hot, humid
summers, so consider muscadines in the deep south |
| Kiwi |
5-8 |
5.0-6.5 |
10 |
Kiwis come in male and female
varieties --- be sure to plant at least one male for every eight
females; only hardy
kiwis can survive below zone 7 |
For the rest of this
lunchtime series, I'll be focusing on care of the
simplest berry varieties. If you decide to plant any of the more
"advanced" small fruits from the second chart, you'll need to do a bit
of extra research on pruning and trellising. But don't let that
discourage you --- all of these small fruits are well within the reach
of the backyard homesteader.This week's lunchtime series is exerpted from Weekend Homesteader: February, which is available for 99 cents from Amazon's kindle store. The ebook also includes a primer on choosing and caring for a backyard flock of chickens, information on buying in bulk, and tips for creating your own apprenticeship. If you enjoy the book, please consider leaving me a review.
| This post is part of our Easy Berries lunchtime series.
Read all of the entries: |

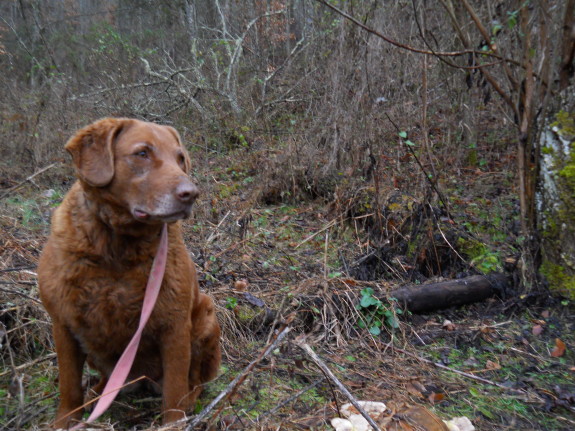
Our dog Lucy works overtime
to keep predators away from the perimeter.
Sometimes she gets a little
too aggressive when it comes to small critters and runs them all the
way into the ground.
We briefly considered
building some sort of barrier around each bed, but the damage is rare
and usually easy to fix.
You wouldn't know it for
the huge amount of garlic
I grow every year,
but I used to hate garlic. What won me over to the anti-vampire
side of the cooking fence was roasted garlic. When you cook whole
cloves without breaking them apart, the result is sweet and mildly
garlicky, without the bite of minced garlic.
In recent years, I've
learned to love the bite, but I'm working on a roasted garlic hummus
recipe, so I figured I'd learn to roast garlic the right way.
It's surprisingly easy. Clean a dozen or so heads of garlic
(assuming your skins are still a bit dirty from the garden, like  mine),
then chop off the tops so that the tips of most cloves are barely
exposed. Drizzle a bit of olive oil on the exposed skin and bake
in a 350 degree oven for about an hour. Once you can handle the
heads again, squeeze out the roasted cloves.
mine),
then chop off the tops so that the tips of most cloves are barely
exposed. Drizzle a bit of olive oil on the exposed skin and bake
in a 350 degree oven for about an hour. Once you can handle the
heads again, squeeze out the roasted cloves.
You'll have much better
luck roasting softneck garlic than hardneck for the simple reason that
it's tough to cut the top off the latter. And why waste those
easy to skin, huge cloves on this recipe when trouble heads with two
dozen tiny cloves are so easy to roast? You can squeeze the guts
out of a head of garlic in seconds, no matter how many cloves are
present.
Use your roasted garlic
in any recipe that calls for regular garlic, but add a lot more of
it. (About a head of roasted garlic will replace a clove of raw
garlic.) Enjoy!
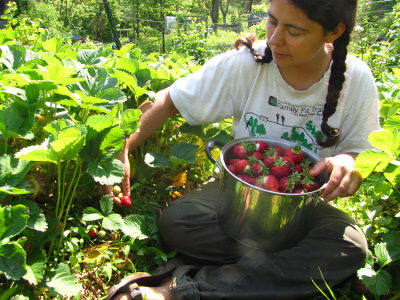
Be forewarned --- once
you taste a homegrown strawberry, you'll never
be able to eat another berry from the grocery store. Even ripe
fruits plucked fresh from a you-pick operation don't hold a candle to
the explosion of flavor inside a strawberry grown in the humus-rich,
no-till garden. Luckily, strawberries are pretty simple to grow
in your backyard, so you'll be able to feed your new addiction.
Your first step when planting
strawberries is variety selection.
Although everbearing strawberries look good on paper, I find
June bearers to be less work with higher returns, so I recommend the
beginning homesteader start there. Even if you stick with
June bearers, you can count on a full month of strawberries if you
plant early, midseason, and late varieties (and be aware that
"June bearers" actually fruit in April and May in the south and middle
of the country --- the name simply refers to the single annual
crop.) Your extension
service is the best source for
recommendations of varieties that do well in your area.
Strawberries can be planted in the early spring or in the fall. I
tend to plant in the fall when expanding my own strawberry patch but in
the spring when buying in fresh plants --- that way, I don't lose my
expensive new stock to drought.
 You'll get the most value for
your money if you buy bare-rooted strawberries in sets of 25 from an
online nursery. The strawberries will come with few or no leaves
and will look
quite dead, but when planted with the roots spread out just below the
soil surface and the growing crown peeking up slightly above the
ground,
new leaves will soon appear.
You'll get the most value for
your money if you buy bare-rooted strawberries in sets of 25 from an
online nursery. The strawberries will come with few or no leaves
and will look
quite dead, but when planted with the roots spread out just below the
soil surface and the growing crown peeking up slightly above the
ground,
new leaves will soon appear.
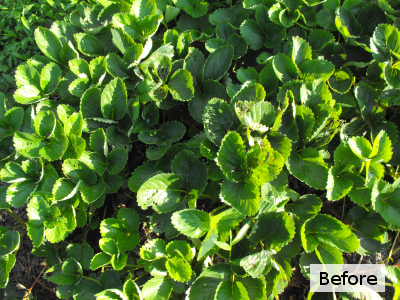
There are several different methods of growing strawberries, and your
initial plant spacing will depend on which technique you plan to
follow. I put in a bit more work to get tastier fruits, spacing
my plants 12 inches apart and removing all of the runners --- this is
called the hill system. If you're more of a laissez faire
gardener, you might prefer the matted row system, in which plants are
spaced much further apart and allowed to fill up the gaps with
runners. The benefit of the matted row system is that it's less
work in year one and you don't have to buy as many plants; the downside
is that you'll spend more time next year picking lots of small fruits
that often aren't quite as tasty as the fewer big fruits you get from
the hill system.
No matter which spacing method you choose, be aware that strawberries
can handle a little bit more shade then most vegetables but will give
you the sweetest fruits in full sun. Strawberries can also become
quickly overwhelmed by weeds, so mulch them
carefully and repeatedly and hand weed as necessary. If you're
planting into weedy ground, you might choose to lay down a kill mulch
(see Weekend
Homesteader: May) and plant your strawberries into small
holes cut in the cardboard.
This
week's lunchtime series is exerpted from Weekend
Homesteader: February,
which is available for 99 cents from Amazon's kindle store. The
ebook
also includes a primer on choosing and caring for a backyard flock of
chickens, information on buying in bulk, and tips for creating your own
apprenticeship. If you enjoy the book, please consider leaving me
a
review.
| This post is part of our Easy Berries lunchtime series.
Read all of the entries: |
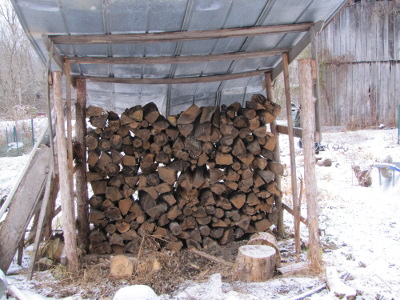
One question that's been on
the back of our minds lately is if we have
enough fire wood to get us through the rest of the cold season.
This walnut tree we cut down
not far from the trailer a couple of years ago seemed to be calling out
to me today saying "ahem......you're forgetting about me!"
I guess it's a case of not
seeing the tree for the forest. I've walked past it almost everyday
without giving it a second thought.
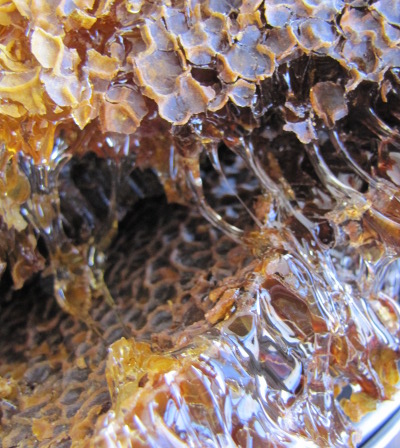
 There
are two small difficulties with extracting
your honey by hand.
The first occurred to me as I left the honey dripping into a bowl
overnight --- in the summer, that bowl would attract ants like
crazy. (Of course, in the summer, it probably wouldn't take all
night for the honey to settle out of the wax.)
There
are two small difficulties with extracting
your honey by hand.
The first occurred to me as I left the honey dripping into a bowl
overnight --- in the summer, that bowl would attract ants like
crazy. (Of course, in the summer, it probably wouldn't take all
night for the honey to settle out of the wax.)
The other slight problem
is that you get a few wax particles in your honey. There are
several ways to deal with this --- you can strain the honey through a
finer sieve or cloth, or you can wait until the wax floats to the top
of the jar and just skim it off. Or you can do what I do and just
savor the honey, wax and all --- the tiny specks aren't really
noticeable.
Care of your first year plants
 Your new plants will try to
bloom their first spring. For
best
results, carefully pick every flower off the plants so they'll put
their energy into growing healthy roots and leaves instead. Yes,
that means you won't get to taste your first berry until next year
--- it will be worth the wait. Using my growing system, this
first year is the only time you'll have to pick off flower buds since
you'll plant new strawberries in the fall from here on out. (Fall
planted berries have generally established themselves enough that you
can let them fruit their first spring.)
Your new plants will try to
bloom their first spring. For
best
results, carefully pick every flower off the plants so they'll put
their energy into growing healthy roots and leaves instead. Yes,
that means you won't get to taste your first berry until next year
--- it will be worth the wait. Using my growing system, this
first year is the only time you'll have to pick off flower buds since
you'll plant new strawberries in the fall from here on out. (Fall
planted berries have generally established themselves enough that you
can let them fruit their first spring.)
After trying to bloom,
the strawberry plants will send out lots of
runners. Those of you following the hill system will want to snip
back runners during your usual weeding sessions. You don't need
any fancy equipment as long as you catch the runners when they're young
and tender --- just pinch them off between your thumb and forefinger.
Strawberry plants often
keep green leaves through most or all of the
winter, but you'll want to put some mulch over top of the plants once
the rest of your garden has died back. Freezing and thawing can
otherwise push your berries' shallow roots up out of the ground and
kill the plants. Be sure to rake the mulch back from the tender
new
leaves in early spring and topdress the bed with a healthy coating of
compost, topped off with the old mulch plus a new layer of straw.
Flowering and fruiting
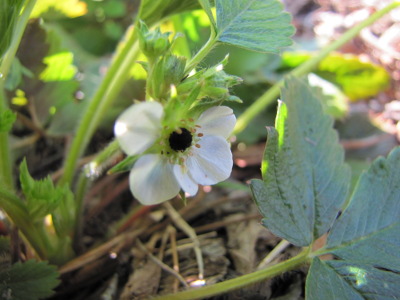 After patiently waiting 12
months, you're ready for your strawberry
harvest. This time, leave all of the blooms and keep an eye on
the weather. Late spring freezes can damage strawberry flowers,
so I toss row cover fabric over top of the plants if lows are expected
to drop below 30 degrees once flower buds have opened. You'll
know your flowers were damaged if the centers change from yellow to
black. All is not lost, though --- strawberry flowers tend to
open
a few at a time over the course of a week or two, so losing the
earliest flowers will just allow the plant to put more energy into
later fruits.
After patiently waiting 12
months, you're ready for your strawberry
harvest. This time, leave all of the blooms and keep an eye on
the weather. Late spring freezes can damage strawberry flowers,
so I toss row cover fabric over top of the plants if lows are expected
to drop below 30 degrees once flower buds have opened. You'll
know your flowers were damaged if the centers change from yellow to
black. All is not lost, though --- strawberry flowers tend to
open
a few at a time over the course of a week or two, so losing the
earliest flowers will just allow the plant to put more energy into
later fruits.
 While watering is important
throughout the growing season, the time
between fruiting and harvest is a critical period. Strawberries
need an inch of water per week, and if the weather isn't cooperating,
you have to irrigate. Otherwise, just watch and wait, picking
your strawberries when they are bright red on the outside and at least
slightly red clear through. You'll need to set aside time to
harvest strawberries at least every other day, but daily harvesting is
better. Berries are sweetest in the afternoon and are least tasty
if picked right after a rain (or watering session.)
While watering is important
throughout the growing season, the time
between fruiting and harvest is a critical period. Strawberries
need an inch of water per week, and if the weather isn't cooperating,
you have to irrigate. Otherwise, just watch and wait, picking
your strawberries when they are bright red on the outside and at least
slightly red clear through. You'll need to set aside time to
harvest strawberries at least every other day, but daily harvesting is
better. Berries are sweetest in the afternoon and are least tasty
if picked right after a rain (or watering session.)
If you ever get sick of
grazing on fresh strawberries, Weekend
Homesteader: August tells how to make peach leather, a recipe that
can
be easily tweaked to produce the most delicious strawberry leather
you've
ever tasted. Or check out recipes for strawberry
freezer jam and chocolate
strawberry shortcake.
Renovating and expanding the strawberries
 After gorging on
strawberries in May or June, it's time to start
plucking runners again. This year, you don't need to be quite as
careful about removing every single runner because you'll want to
expand your patch. By the middle of summer, missed runners will
have rooted and turned into new strawberry plants. When the
weather forecast promises three or more rainy days in a row, head out
into the garden with your trowel and carefully dig up all of these baby
strawberry plants, then start a second patch in a new garden bed.
This is another time when irrigation is critical since summer-planted
strawberries can easily wither up and die before they get their feet
under them.
After gorging on
strawberries in May or June, it's time to start
plucking runners again. This year, you don't need to be quite as
careful about removing every single runner because you'll want to
expand your patch. By the middle of summer, missed runners will
have rooted and turned into new strawberry plants. When the
weather forecast promises three or more rainy days in a row, head out
into the garden with your trowel and carefully dig up all of these baby
strawberry plants, then start a second patch in a new garden bed.
This is another time when irrigation is critical since summer-planted
strawberries can easily wither up and die before they get their feet
under them.
If you use my method of
expanding the patch in the late summer, you can
skip this step, but otherwise you'll need to renovate your bed in the
fall. Many sources recommend mowing off the strawberry leaves,
but I find that step unnecessary. Instead, I simply rip out
plants that have gotten too close together, leaving at least one foot
of mulched soil between each plant.
I've found that flavor
and vigor begin to diminish after a strawberry
patch has fruited once, twice, or three times. (How many seasons
you can eke out of the plants depends on the quality of your
soil.) I
generally eat two years' worth of strawberries from a bed, then rip the
plants out and rotate the bed back into the general vegetable
garden. As long as I transplanted runners the previous year, I'll
have a fresh bed ready to produce more berries the following
spring.
This
week's lunchtime series is exerpted from Weekend
Homesteader: February,
which is available for 99 cents from Amazon's kindle store. The
ebook
also includes a primer on choosing and caring for a backyard flock of
chickens, information on buying in bulk, and tips for creating your own
apprenticeship. If you enjoy the book, please consider leaving me
a
review.
| This post is part of our Easy Berries lunchtime series.
Read all of the entries: |
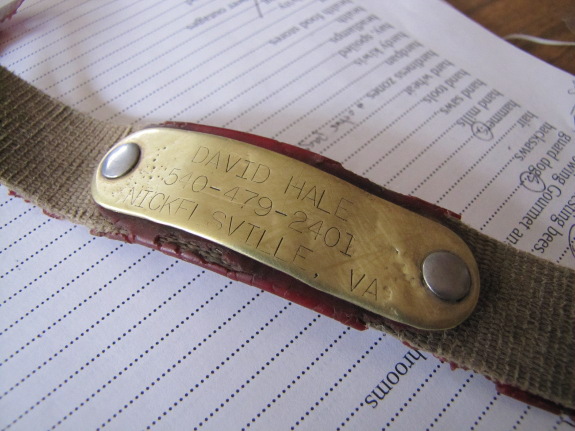
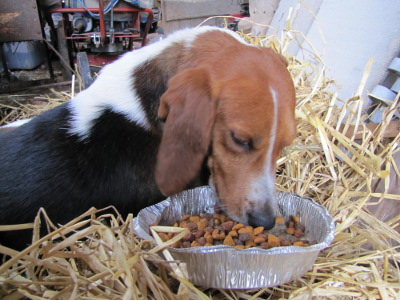
We had a lost dog show up in
our barn this morning...again.
The last time this happened
was with a nice pit bull back before we had a phone. We posted a
picture in the post office with our not so easy to find address. A guy
showed up a few days later looking for his Dixie. She was a cutie.
I'm guessing this dog is
someone's hunting helper. He had a collar with what I assume is his
owner's name and phone number, but the number was disconnected.
Lucy seems to be taking it in
stride. We sometimes worry about her social skills around other dogs.
She works hard at keeping a small pack of wild dogs that roam our woods
from getting too close, but clearly this guy is different. If I didn't
know any better I'd think Lucy might be a little sweet on him.
Despite playing hookie
part of the day yesterday to nurse the stray dog back to health, I still
managed to finish the second draft of Weekend
Homesteader. A
red letter day!
 There's still plenty of work
to be done before I can wash my hands of the project. But I sent
the draft off to two dutiful readers. While they babysit...ahem,
edit...the manuscript, I can take a few days "off" to reenter the real
world.
There's still plenty of work
to be done before I can wash my hands of the project. But I sent
the draft off to two dutiful readers. While they babysit...ahem,
edit...the manuscript, I can take a few days "off" to reenter the real
world.
I don't want to get too
excited about the farm since I'll be back in book mode for at least
another week once I get the editorial suggestions. But maybe we
can play with firewood? Weed a few fruit trees? I can't
wait!
 There
are only two potentially complicated parts of growing blackberries and
raspberries --- variety selection and pruning. Otherwise, care is
simply a matter of annual fertilizing, mulching, and (most important)
eating all those fruits.
There
are only two potentially complicated parts of growing blackberries and
raspberries --- variety selection and pruning. Otherwise, care is
simply a matter of annual fertilizing, mulching, and (most important)
eating all those fruits.
Choosing your brambles
As I mentioned
previously, blackberries and black raspberries do better
in the south while red raspberries like areas with cooler
summers. Over large parts of the United States, you can easily
grow all three types of brambles, but your life will be a bit easier if
you begin your experiment with ones that are well suited to your
climate.
Once you decide which
type of brambles you want to grow, your next step
is to settle on which additional characteristics you're looking
for.
Thornless blackberries are easier to work with, but I've noticed
they don't seem to be as cold hardy as the thorny varieties, so
northerners should bear with thorns.
Among raspberries, you'll need to decide whether you're interested in a
spring or everbearing variety --- unlike with strawberries, I have had
very good luck with everbearing raspberries and recommend them highly.
Bramble plants tend to
be more expensive than strawberries, often
costing several dollars apiece, but you don't need to start with
many. In my garden, one everbearing raspberry plant became a
clump large enough to provide lots of fruit that fall, and by the next
spring I was able to transplant yet more new raspberries to fill up a
whole row. The third spring, I gave away gobs of raspberry
starts,
and by the fourth year after planting all of my friends stopped
answering the phone when raspberry-planting season came around.
So --- choose your variety wisely, but don't be concerned about
starting small.
Planting and training brambles
Blackberries and
raspberries have a tendency to try to take over the
world, so plan ahead when selecting their location. I find it
helpful to plant brambles in mulched rows about eighteen inches wide,
then mow anything that tries to grow beyond the mulch boundary.
Unlike most other garden plants, brambles can handle tough clay soil
and even some degree of waterlogging, so feel free to put them in that
spot where nothing else will grow.
 If
you're turning lawn or weeds into a berry patch, lay down a thick
kill mulch and plant your brambles into holes in the cardboard.
The best time to plant is in early spring, which means you'll probably
be putting in dormant, bare-rooted stock. The young brambles will
have a dead-looking cane poking up out of the roots --- the cane is
indeed dead, but the plant will send up a new cane once warm weather
rolls around. Mulch the patch well, preferably with something a
bit more carbon-rich than you used for your strawberries. (See
Weekend
Homesteader: July for more information on types of mulch, or
just use well-rotted wood chips.)
If
you're turning lawn or weeds into a berry patch, lay down a thick
kill mulch and plant your brambles into holes in the cardboard.
The best time to plant is in early spring, which means you'll probably
be putting in dormant, bare-rooted stock. The young brambles will
have a dead-looking cane poking up out of the roots --- the cane is
indeed dead, but the plant will send up a new cane once warm weather
rolls around. Mulch the patch well, preferably with something a
bit more carbon-rich than you used for your strawberries. (See
Weekend
Homesteader: July for more information on types of mulch, or
just use well-rotted wood chips.)
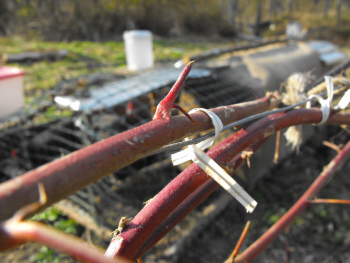 Brambles don't need an extremely sturdy trellis, but it is helpful to
find a way to tie the plants so they don't bend down over the
path. I use light-weight metal fence posts about five feet apart
with two strands of thin wire running between them. Twist ties
are a simple way of attaching canes to the wire temporarily --- you'll
need to be able to unhook them when you prune out dead canes next
winter.
Brambles don't need an extremely sturdy trellis, but it is helpful to
find a way to tie the plants so they don't bend down over the
path. I use light-weight metal fence posts about five feet apart
with two strands of thin wire running between them. Twist ties
are a simple way of attaching canes to the wire temporarily --- you'll
need to be able to unhook them when you prune out dead canes next
winter.
This
week's lunchtime series is exerpted from Weekend
Homesteader: February,
which is available for 99 cents from Amazon's kindle store. The
ebook
also includes a primer on choosing and caring for a backyard flock of
chickens, information on buying in bulk, and tips for creating your own
apprenticeship. If you enjoy the book, please consider leaving me
a
review.
| This post is part of our Easy Berries lunchtime series.
Read all of the entries: |
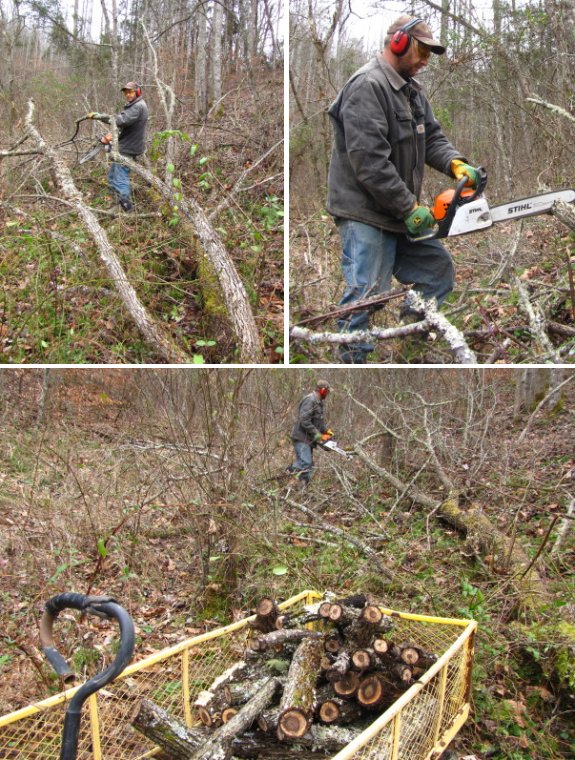
It only took us about 40
minutes to cut up half of that
walnut tree.
We stacked the small stuff in the trailer
so it might dry out a little faster.
I think it's still good
and hard due to the amount of struggle in the chainsaw.
Another year or two and it
might be too rotten.
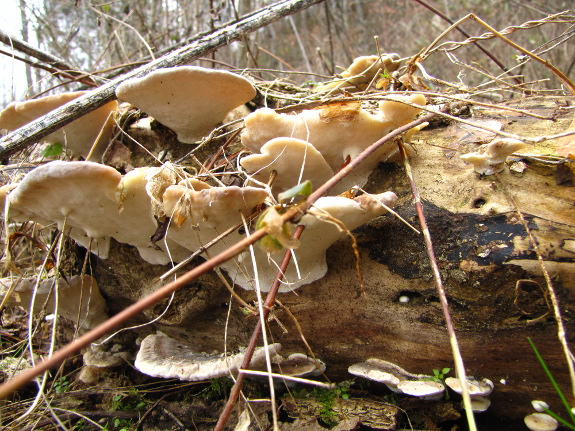
We've never cut down a
tree on our property specifically for firewood, but we do end up
cutting down a lot of trees as we make mushroom
logs and clear land
for cultivated crops. In a perfect world, we'd saw the excess
into stove-lengths immediately and haul it up to the wood shed, but in
the real world, something more pressing is usually on the agenda.
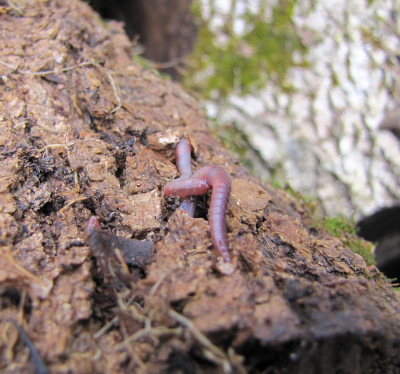 Slowly
but surely, we're learning how long we can ignore the downed trees
before they're no longer firewood and have become fodder for the hugelkultur mounds. Type of wood is the
first factor --- softwoods like our ubiquitous box-elder may start to
rot within a few months of being cut while hardwoods last much longer.
Slowly
but surely, we're learning how long we can ignore the downed trees
before they're no longer firewood and have become fodder for the hugelkultur mounds. Type of wood is the
first factor --- softwoods like our ubiquitous box-elder may start to
rot within a few months of being cut while hardwoods last much longer.
Three years ago, Mark
cut down a bunch of trees to clear ground for a blueberry patch.
The photo at the top of this post shows what the box-elder logs look
like --- once your "firewood" is sprouting mushrooms, there's no point
in throwing it in the stove. (Worms in the bark aren't a good
sign, but aren't a deal breaker either.) On the other hand, a walnut tree with approximately the same
dimensions, cut at the same time, shows no signs of rot three years
later.
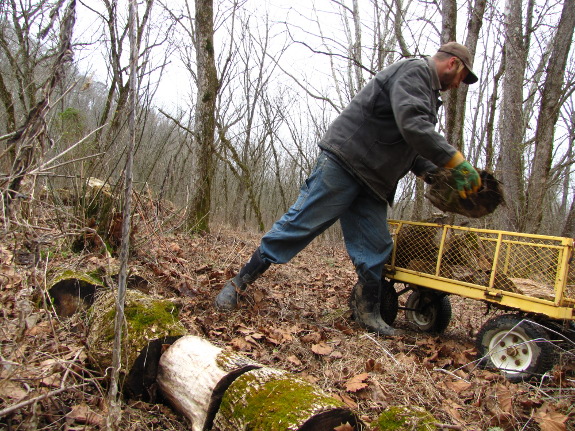
The second factor is
whether the cut trees are lying on the ground. In our damp
climate, the earth never really gets dry, so a log that touches the
soil for its whole length never gets dry either. The box-elder
logs Mark's handling in the photo above were already starting to rot
even though they'd been cut from a living tree just nine months ago.
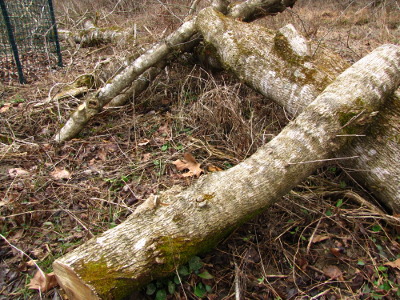 We
got smart with the box-elder we cut recently, leaning log sections up
against the fallen trunk --- those should stay relatively rot-free
until the driveway is passable by truck. Similarly, the limbs of
the walnut we cut yesterday are much drier than the main trunk since
they were raised off the ground.
We
got smart with the box-elder we cut recently, leaning log sections up
against the fallen trunk --- those should stay relatively rot-free
until the driveway is passable by truck. Similarly, the limbs of
the walnut we cut yesterday are much drier than the main trunk since
they were raised off the ground.
Of course, this whole
discussion assumes you put off care of your firewood until later.
If you cut fresh wood right away and store it in a dry, airy wood shed,
the wood will last indefinitely. In fact, like wine and hard
cheese, firewood under cover only gets better with age.
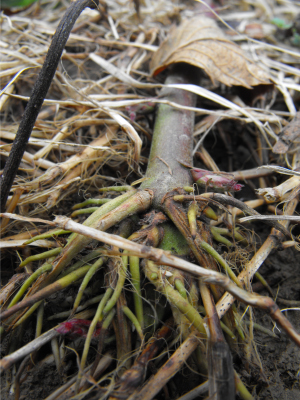 Bramble growth
Unless you planted
ever-bearing raspberries, you'll spend your first
year watching your berries grow and learning to prune them. That
gives you a chance to get a handle on the unique aspects of bramble
biology
so that you'll understand which canes to cut and which to leave in
place.
The first factor to
consider is how each type of bramble spreads
vegetatively. Blackberries and black raspberries grow long,
arching canes that bend down and then root at the tip. If you cut
the tip loose and dig it up, you can transplant that youngster into a
new part of the garden and expand your patch. Red raspberries, on
the other hand, send out horizontal roots just beneath the soil
surface, then new plants pop up along those roots. If you want to
prevent your berry patch from turning into an impenetrable thicket,
you'll need to understand which type of reproductive strategy your
berries favor and prune accordingly.
The next thing you'll
notice is that most blackberries and raspberries
fruit only on second year wood. The first shoots that come up are
known as primocanes and will only be vegetative, making leaves but no
blossoms. Next year, those primocanes have matured into
floricanes
and will flower and make berries; at the same time, the canes are
sending up new
primocanes to prepare for the third year's berries. After
fruiting, floricanes die and must be removed if you don't want your
berry patch to turn into a thicket. But don't remove the
primocanes or you won't get any fruits next year!
Bramble pruning
Now that you understand
how brambles grow, pruning them should seem less complex.
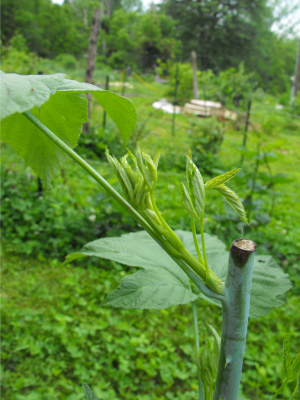
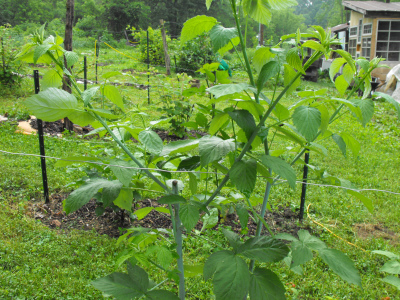
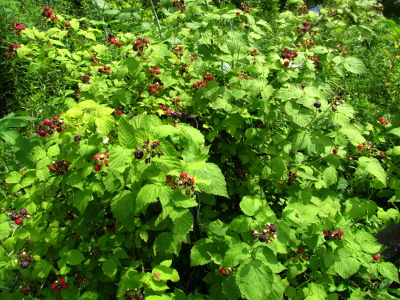
The three photos above show a black raspberry being tip pruned --- first the top is pinched off, then side shoots form, then the next year the bushy plant is loaded with
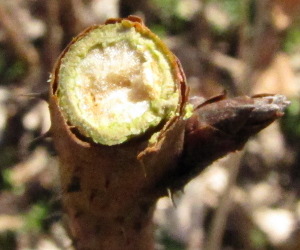
fruits.
The second type of pruning is winter pruning. In early spring, go
into your patch and cut out any dead canes --- you'll be able to tell
which ones are dead because they'll be brown on the outside, often with
peeling bark. If in doubt, cut the top off the cane and take a
peek inside. Living canes will have a ring of green just under
the bark. They'll also tend to have plumper buds.
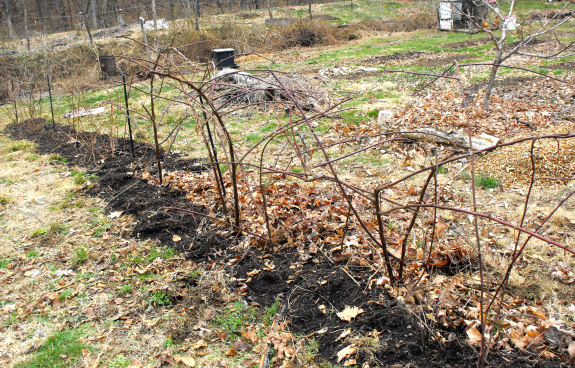
After taking out all of
the dead canes, winter pruning is different for
each type of bramble. If you didn't summer prune carefully or
often enough, blackberries and black raspberries will have reached out
beyond the edges of the row. Prune each plant until the side
branches are one to two feet long. While you're at it, use your
twist ties to attach these new canes to the trellis wires.
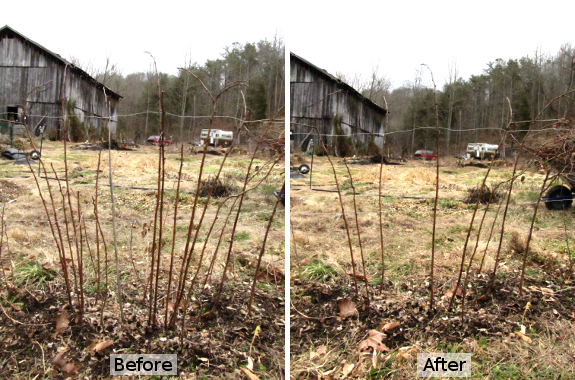
You'll recall that red
raspberries grow differently, sending up new
shoots from their roots rather than making long, trailing canes.
As a result, you only need to prune them once a year, in the
winter. First, cut out any dead canes, then thin until canes are
about six inches apart.
Ever-bearing raspberries
are a bit different because they have two
fruiting periods each year --- one in the spring and one in the
fall. If you only want a fall harvest, pruning is absurdly simple
--- just mow down the whole row of raspberries in the winter.
However, if you want to enjoy raspberries both in the spring and in the
fall, you'll need to follow the advice above for normal red raspberries
and also cut the tops off the canes that fruited the previous
summer. Most people
admonish you to remove the top third of these canes, but the truth is
that you're
cutting off the dead part. After snipping off a few tops, you'll
start getting an eye for the point at which the plump, live
cane turns into the more 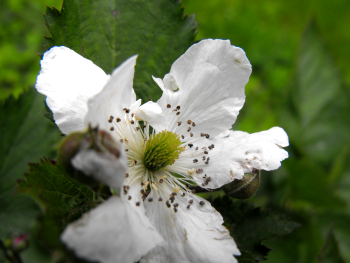 shriveled,
dead cane.
shriveled,
dead cane.
Annual care
Except for the
complexities of pruning, your bramble patch will mostly
take care of itself. Each spring, you'll want to topdress your
plants with compost then smother any potential weeds with mulch.
The brambles will flower and then fruit, generally bearing between late
June and August.
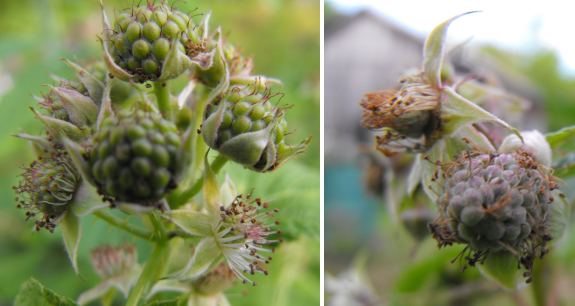
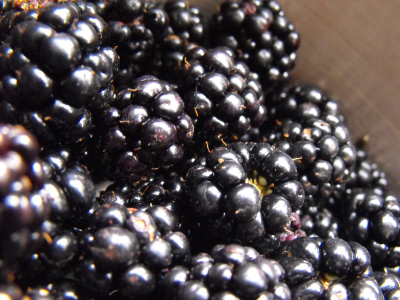 Bramble
fruits tend to be more resilient than strawberries, so you can
probably get away with picking the berries only twice a week. Red
raspberries, though, have a tendency to mold in hot, humid climates, so
harvest more often.
Bramble
fruits tend to be more resilient than strawberries, so you can
probably get away with picking the berries only twice a week. Red
raspberries, though, have a tendency to mold in hot, humid climates, so
harvest more often.
A well-tended patch of blackberries or raspberries can last a very long
time. Keep pruning and mulching and you'll be eating from your
plants a decade or more after planting. Now that's a good return
on your investment!
This
week's lunchtime series is exerpted from Weekend
Homesteader: February,
which is available for 99 cents from Amazon's kindle store. The
ebook
also includes a primer on choosing and caring for a backyard flock of
chickens, information on buying in bulk, and tips for creating your own
apprenticeship. If you enjoy the book, please consider leaving me
a
review.
| This post is part of our Easy Berries lunchtime series.
Read all of the entries: |
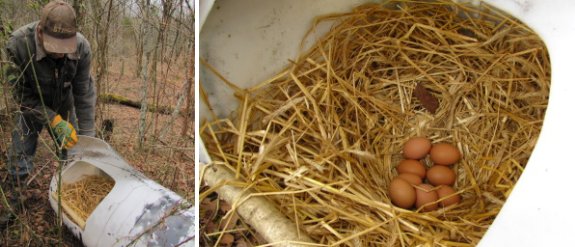
Finally got around to
checking on our 50
gallon nest barrel.
At some point earlier this
week our chickens decided it's time to start laying again.
Not a day too soon as we both
are getting tired of hum drum store bought eggs.
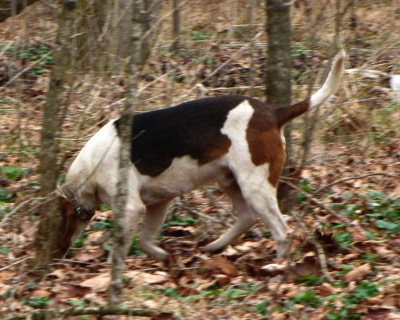 The
stray hunting
dog bounced right back after about six cups of dog food and a long
nap. By his second day on the farm, he was pacing the woods,
following scent trails.
The
stray hunting
dog bounced right back after about six cups of dog food and a long
nap. By his second day on the farm, he was pacing the woods,
following scent trails.
We called every vet and
Hale in a 30 mile radius, the pound, and a hunter one vet
recommended. No luck on finding the stray's previous owner, so we
looked for a new one.
He'll be heading home
with an experienced hunter this morning, who explained to us that dogs
like this are Treeing Walker Coonhounds (or, as he said,
"Walkers"). Wikipedia adds, "Treeing Walker Coonhounds are
extremely fast, agile, and tireless in
the pursuit of 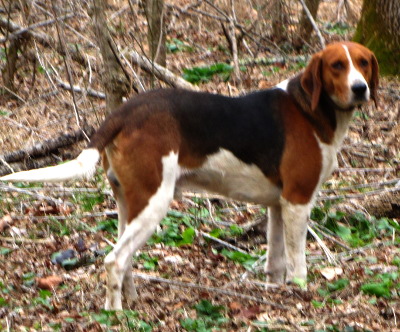 game.
They are extremely vocal with a distinctive bay
that allows their owners to easily identify their dogs from great
distances." All very true.
game.
They are extremely vocal with a distinctive bay
that allows their owners to easily identify their dogs from great
distances." All very true.
I don't know about Mark,
but I considered keeping our Walker at first. However, he wreaked
havoc on our tranquility by his presence alone (despite being very well
behaved) and we're very glad to see him go to a new home.
Huckleberry and Strider went on strike Friday and didn't come to
breakfast until 10 am, and I just couldn't stand another day facing
that picket line.
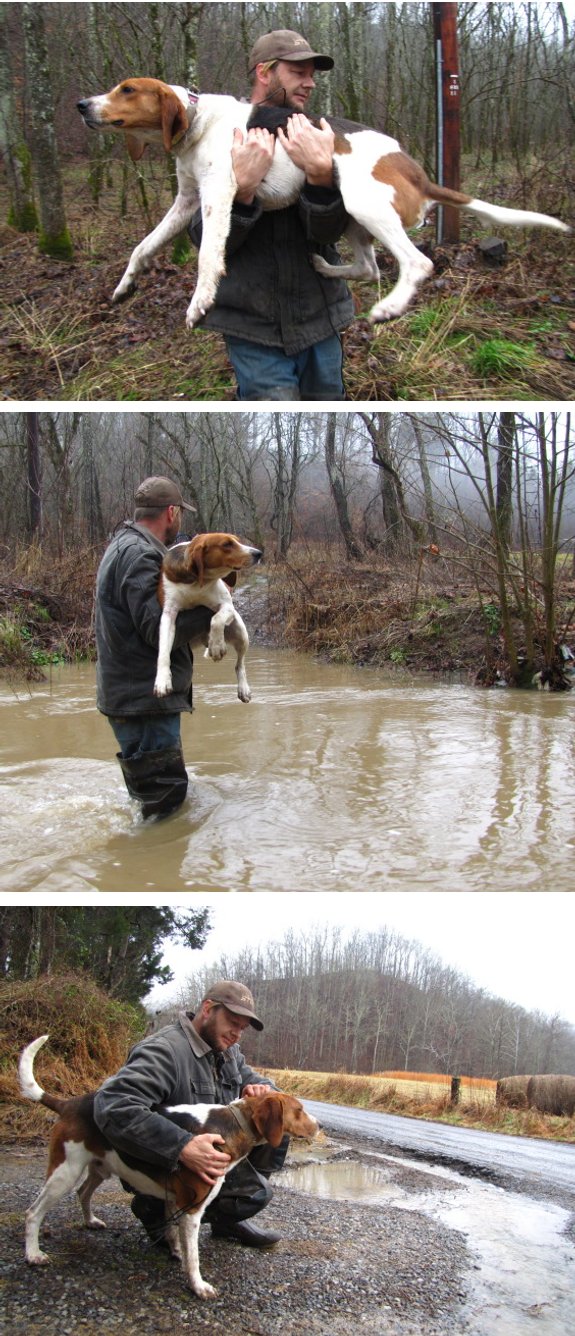
Yeah...I was highly motivated
to meet the
dog's potential new owner today.
A nice couple showed up with
a little boy who promptly announced the dog's new name is now officially
Corndog! He said his
other dog is called Cookie Monster.
The guy said he hunts with
other people in the area and if he figures out who the mysterious David
Hale is, he would contact him at that point and get his dog back to him.
We are very relieved to be
back to a one dog/two cat farm.

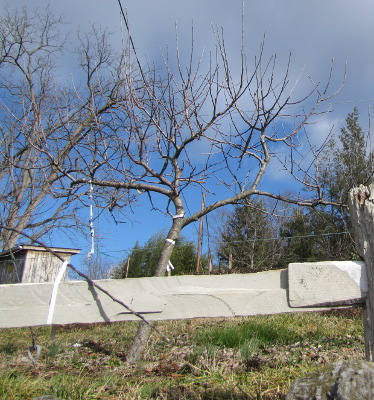 I'm always interested to see
people trying out espaliered
fruit trees, even
though I've never quite been intrigued enough to experiment
myself. So I was thrilled to notice espaliered apples at Bristol's
Urban Homestead when
Mark and I swung by last week.
I'm always interested to see
people trying out espaliered
fruit trees, even
though I've never quite been intrigued enough to experiment
myself. So I was thrilled to notice espaliered apples at Bristol's
Urban Homestead when
Mark and I swung by last week.
The photo at the top of
this post is clearly a young apple tree who is just entering the
training program, but the tree to the left might be ready to
graduate. I wonder if it's bearing yet? Next time, I'll
have to call ahead and see if the owners can tell me more about their
espalier experiments.
One way to protect your
chickens is to elevate the coop on a pole so that racoons can't climb
up and help themselves to a snack.
Cheap-easy-living.weebly.com
used an old truck camper and a satellite pole to keep their flock safe.
The idea is that predators would have problems climbing the pole while
the chickens could fly up when they needed some coop time.
Some chickens have trouble
with flight, so this might not work for all breeds, but I think it's an
outside the box solution that is worth considering if you have these
items laying around and a group of chickens who know how to flap their
wings enough to get home. It might also be good for folks
with back trouble who don't want to bend down to pick up eggs.
 When we got started with
beekeeping in 2009, learning the basics of conventional beekeeping was
all I could handle. So I did what my neighbors did and bought
random package bees, figuring they were all about the same.
When we got started with
beekeeping in 2009, learning the basics of conventional beekeeping was
all I could handle. So I did what my neighbors did and bought
random package bees, figuring they were all about the same.
Then we started losing
hives and I realized that what I was aiming for --- natural,
chemical-free beekeeping --- isn't really possible with run-of-the-mill
honeybees. We're starting from ground zero again, which gives me
the opportunity to use a better bee.
Survivor
bees are one
intriguing option. BeeWeaver has been raising honeybees
entirely without chemicals for ten years. They actually started
weaning their bees off the drugs years before, but couldn't quit cold
turkey or they would have gone bankrupt. The price tag is steep
--- $130 plus shipping for a package --- but the real reason I haven't
clicked the "buy" button yet is because the company is located in
Texas. I'm just not sure whether southern bees would do well in
our climate.
VSH bees are the U.S. government's
solution to chemical-free varroa mite control. The Baton Rouge
Bee Lab discovered a strain of honeybee in which the workers
industriously remove any brood infected with varroa mites. The
Lab has sold VSH  queens to commercial apiaries
--- see this map for locations of facilities
selling VSH (and other types of resistant bees.) I'm intrigued by
this option (especially since there are local sources), but I'm not
sure whether being resistant to varroa mites is enough. Will
these VSH bees die of colony collapse disorder or any of the dozen
other bee plagues?
queens to commercial apiaries
--- see this map for locations of facilities
selling VSH (and other types of resistant bees.) I'm intrigued by
this option (especially since there are local sources), but I'm not
sure whether being resistant to varroa mites is enough. Will
these VSH bees die of colony collapse disorder or any of the dozen
other bee plagues?
Russian
bees came from an
earlier government program that imported mite-resistant bees from
Russia. The main problem with Russian bees appears when they
hybridize with other bees and the offspring turn mean. I'm not
sure whether I'm willing to focus my efforts entirely on Russian bees,
and I don't think it's a good idea to have a Russian hive and a
different type of honeybee in the same area.
Feral
bees would be the
very best option since honeybees that have survived without beekeepers
for generations are likely to continue to do so in our apiaries.
However, it's tough to find feral bees at the moment, and when you do
find them, you can't be sure they're not a first year swarm from some
neighbor's chemical-treated hive.
I'd be very curious to
hear anyone's thoughts on these bee options. At the moment, I'm
tempted to order one package of survivor bees from BeeWeaver and one
package of VSH bees from somewhere more local. Thoughts?
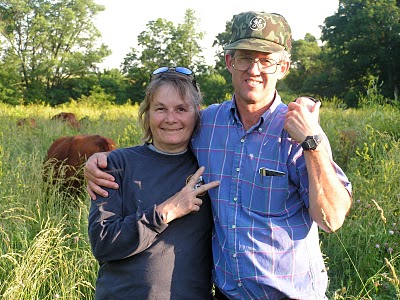 A
couple of months ago, I attended an all day workshop about mob grazing
led by Greg Judy. He was a riveting, entertaining, and down to
earth speaker, but the information he covered was even better than the
presenting style.
A
couple of months ago, I attended an all day workshop about mob grazing
led by Greg Judy. He was a riveting, entertaining, and down to
earth speaker, but the information he covered was even better than the
presenting style.
Greg and his wife
started farming in the late 1980s on poor "grazing land" in
Missouri. "All I knew was: cows
eat grass," Greg explained. Initially, he ran his cattle using
conventional methods --- letting them eat the same pasture continuously
--- but eventually he switched over to management
intensive grazing.
Under the management
intensive system, Greg focused on keeping seed
heads from forming on his grass. The mandatory fast
spring rotations to prevent the grass from going to seed seemed to work
at first, but the pasture suffered in July. During the summer
slump, grass didn't grow at all, and he had to feed hay or sell animals.
 Enter Ian Mitchell-Innes, a
South African farmer practicing mob grazing. Over the last
decade, Ian had increased the fertility of his farm so much that he was
able to quadruple his stocking rate, and Greg became his willing
pupil. Greg learned to let grass grow taller in the spring, then
noticed that the unstressed plants no longer obsessed over reproducing,
instead growing more green leaves and longer roots. Three years
later, Greg was able to quit his job and become a full time rancher.
Enter Ian Mitchell-Innes, a
South African farmer practicing mob grazing. Over the last
decade, Ian had increased the fertility of his farm so much that he was
able to quadruple his stocking rate, and Greg became his willing
pupil. Greg learned to let grass grow taller in the spring, then
noticed that the unstressed plants no longer obsessed over reproducing,
instead growing more green leaves and longer roots. Three years
later, Greg was able to quit his job and become a full time rancher.
Today, he pastures his
animals on twelve farms, focusing on grazing livestock and building
topsoil. "We like to think of ourselves as microbe farmers," Greg
explained, going on to note that they are marketers of solar energy ---
the only free resource on the farm. Greg adds no lime or chemical
fertilizers to his soil, has no machinery, and uses minimal labor.
This week (and next),
I'll cover Greg's system in depth, but for now, I'll leave you with
some outside the box ways he suggests making your farm pay for
itself. He highly recommends leasing for young farmers who don't
have the cash to buy the land outright, noting that he has free
lifetime leases on several plots of hunting land, having proven to the
owners that they'll harvest more deer due to his management. And
although he makes a lot of his livelihood from the beef he raises, Greg
notes that the parasite resistant sheep he sells as breeding stock are
the highest profit item on his farm. Finally, he tosses out other
ideas that are compatible with the ranching lifestyle --- attracting
ecotourists interested in birding or wildlife watching, adding nature
trails, or leasing out the pasture to hunters. His message is
clear --- if you get creative and nurture the land, you can make a
living on the farm.
 This post is part of our Mob Grazing lunchtime series.
Read all of the entries: This post is part of our Mob Grazing lunchtime series.
Read all of the entries:
|

We cut up another 2 wagon
loads worth of that walnut
tree today.
The Stihl
MS-211 continues to
impress me. One thing I've noticed is the exhaust is a lot less smelly,
which is a nice change when you've got your nose within a few feet of
the action. It also feels like the improved engine goes a bit further
on a tank of fuel.
It's easier to start than the
older 039, but not super easy, especially
when you forget to clean out the air filter.
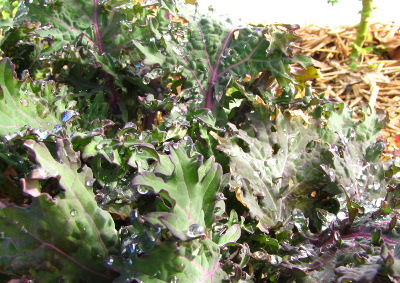 We're making drastic changes in our garden for next year. A
winter with delicious fresh food from the quick hoops and larder has
made us neglect our frozen food. In fact, if I had as much fresh
kale, lettuce, cabbage, and carrots as I wanted, I suspect the only
vegetables we'd actually take from the freezer would be vegetable soups
and sun-dried tomatoes.
We're making drastic changes in our garden for next year. A
winter with delicious fresh food from the quick hoops and larder has
made us neglect our frozen food. In fact, if I had as much fresh
kale, lettuce, cabbage, and carrots as I wanted, I suspect the only
vegetables we'd actually take from the freezer would be vegetable soups
and sun-dried tomatoes.
So we're changing our
summer gardening strategies to:
- Start onions inside this winter so we'll (hopefully) finally be eating homegrown onions all year. (This is the one vegetable we still buy for part of the year.)
- Start some broccoli and cabbage
inside for earlier harvest than we can get when starting them in
the quick hoops. (We'll still start most of them with the low
work quick hoop method.)
- Double the tomatoes.
I might also try starting a few inside, although this is chancy since I
don't keep the trailer warm in the spring --- quick hoops will still be
our primary starting method.
- Halve green beans and summer squash (since we'll mostly be eating them fresh rather than freezing them.)
- Halve sweet potatoes, white
potatoes, and winter squash since we've cut back on carbs and
don't eat as many.
- Double the parsley to
plan ahead for winter harvests.
 Meanwhile, we'll be boosting fall production
as we:
Meanwhile, we'll be boosting fall production
as we:
- Double fall carrots and winter greens.
- Start fall broccoli and cabbage inside or in the shade in the summer so we have more for the winter.
- Experiment with beets and spinach a bit more, starting the seeds in the fridge to aid summer germination.
- Experiment with Brussels sprouts.
If you're curious, here are the number of beds I plan for each
crop. Keep in mind this includes spring, summer, and fall
plantings, so the five bean beds will be spaced throughout the summer
for a succession of bush beans, and the spring lettuce beds will be
long gone by the time I plant fall beds.
| Basil | 1 |
| Beans | 5 |
| Beets | 1 |
| Broccoli | 16 |
| Brussels sprouts | 2 |
| Buckwheat |
cover crop |
| Cabbage | 6 |
| Carrots | 8 |
| Corn | 17 |
| Cucumbers | 6 |
| Garlic | 12 |
| Kale | 14 |
| Lettuce | 15 |
| Mung beans | 2 |
| Mustard | 4 |
| Oats | cover
crop |
| Okra | 2 |
| Onions | 7 |
| Onions, potato | 1 |
| Parsley | 3 |
| Pea, sugar snap | 8 |
| Peanut | 1 |
| Peppers | 2 |
| Poppies | 2 |
| Potatoes | 4 |
| Pumpkin, naked-seed | 1 |
| Radish, oilseed | cover
crop |
| Rye | forest pasture |
| Spinach | 2 |
| Squash, butternut | 4 |
| Squash, summer | 7 |
| Strawberries | 9 |
| Sweet potatoes | 4 |
| Swiss chard | 1 |
| Tatsoi | 1 |
| Tokyo bekana | 4 |
| Tomatoes | 25 |
| Watermelons | 4 |
It's a bit scary to
change gears so drastically, but I strive to make our garden plan
follow our stomachs. And our winter stomachs say fresh kale
trumps frozen green beans!
 So how does mob grazing
differ from management
intensive grazing?
The biggest differences are how long you let the plants grow back after
being grazed (the recovery
period) and the
intentional trampling of some grass.
So how does mob grazing
differ from management
intensive grazing?
The biggest differences are how long you let the plants grow back after
being grazed (the recovery
period) and the
intentional trampling of some grass.
When he was following
the management intensive system, Greg Judy used to rotate his animals
so quickly that they nibbled on the same plots of land eight times per
year, but now he's cut back to five annual rotations. Rather than
striving to keep the grass short, he lets the plants grow up to what he
calls the boot stage, in which each plant has three to four leaves and
is developing a seed head (although the head is not yet visible.)
He notes that waiting to graze until the boot stage helps the pasture
grow 40% more biomass compared to faster rotations.
In order to achieve
these long recovery periods without cutting back the number of animals
on his farm, Greg combines his herds together and manages all twelve of
his farms as one unit. Even though that means he sometimes has to
drive cattle a couple of miles down the road to a new farm, the system
pays off by giving his pastures more time to recover between grazing
episodes.
 The second factor that
differentiates mob grazing from management intensive grazing is
trampling. Every time Greg turns his cows into a new plot of
land, he aims for them to eat only 60% of the grass. Another 30%
is trampled into the ground, with the final 10% left standing to
provide a wind break and preserve moisture and wildlife habitat.
The second factor that
differentiates mob grazing from management intensive grazing is
trampling. Every time Greg turns his cows into a new plot of
land, he aims for them to eat only 60% of the grass. Another 30%
is trampled into the ground, with the final 10% left standing to
provide a wind break and preserve moisture and wildlife habitat.
Again, Greg's method of
ensuring that a lot of the grass gets trampled involves bunching
animals up --- a high stocking density (lots of cows in the same small
paddock) inevitably mash down a lot of grass. Waiting to turn the
cows onto pasture until plants are mature also helps since the older
grass will break rather than springing back once trampled.
Trampled grass in a
pasture may seem wasteful, but is actually similar to adding compost
and mulch to your garden. Dead grass left behind on the soil
surface feeds microorganisms (which in turn feed the pasture plants),
and the organic matter added to the soil holds moisture and maintains a
healthy soil food web. "For every grass blade you trample," Greg
Judy says, "You'll get two back."
This post is part of our Mob Grazing lunchtime series.
Read all of the entries:
|
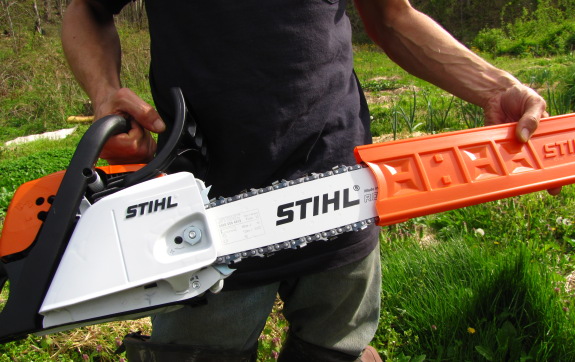
Have you thought about
doing a series on maintaining chainsaws? Sharpening, cleaning, and
adjusting?
I would be really interested in that!
Eric in Japan
Thanks for the question Eric.
I've been learning as I go,
so I'm not sure if I've got enough experience to do a series on the
subject, but I might have enough information to form a short trilogy of
tips.
Chain adjustment: I learned
the hard way to never over tighten the nuts that secure down the chain
tension. The old 039 had a problem vibrating loose,
which would make me stop every so often and adjust the chain slack. My
amateur mistake was to tighten it too much, which stripped out the bolt
and required a trip to the shop to fix.
Stay tuned tomorrow for my
two cents on sharpening the chain with a file.
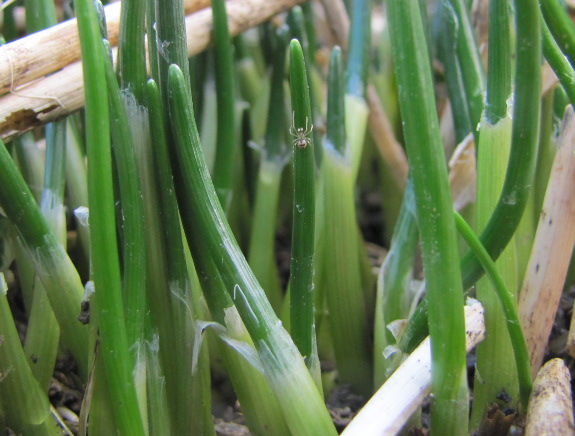
The Persephone
Days are over, and
this mild winter seems to be turning into spring already. Chives
are sprouting up (and a tiny spider decided he wanted to try his hand
at modelling.)
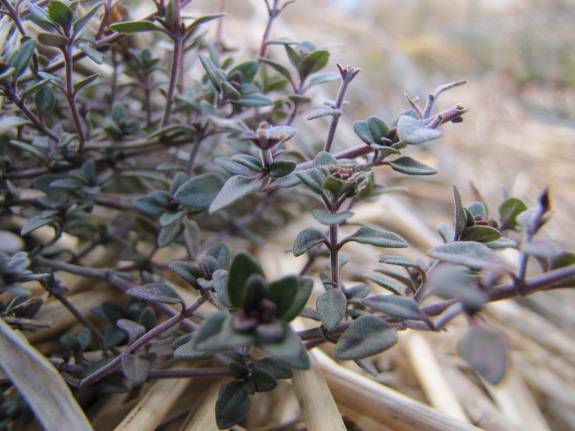
Thyme stays green all
winter, but I feel like the perennial is starting to push out new
leaves --- a good thing since I've been harvesting some every couple of
weeks to season our dinners.
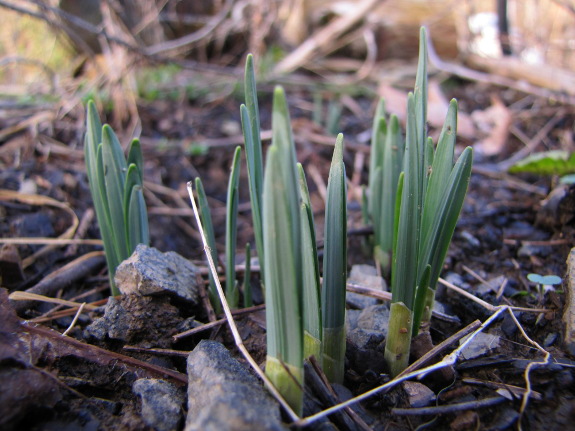
And the daffodil leaves
have been pushing up out of the soil for a week or two, promising that
spring will be as beautiful as it is bountiful.
If you count your
seasons by the cross-quarter
days, spring will be
here next week, and the birds and I are both feeling it! Forgive
me if I seem a little high on spring....
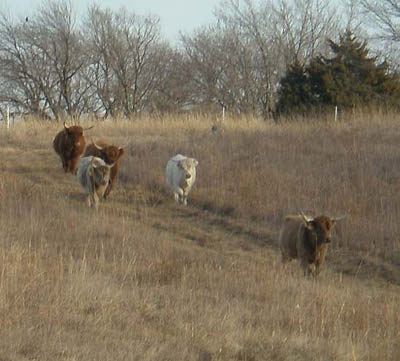 In addition to long
recovery periods and trampling a third of the grass, mob grazing's third unique
feature is stockpiling winter forage.
In addition to long
recovery periods and trampling a third of the grass, mob grazing's third unique
feature is stockpiling winter forage.
Greg Judy notes that 80%
of the expenses for a typical cattle farm come during the winter when
farmers feed hay. You can either make it yourself (which requires
lots of expensive equipment and turns your hayfields into ecological
monocultures), or you can buy hay from your neighbor and at least add
nutrients to your farm (while spending an arm and a leg).
Or you can simply
stockpile your summer grass. Allowing grass to grow tall and
remain standing in the field during late summer means you can keep
grazing your cattle right through the winter without buying much (or
any) hay. Cows also tend to be healthier on stockpiled grass than
on hay --- probably a lot like we feel healthier eating greens out of
our quick hoops all winter rather than subsisting entirely on frozen
produce.
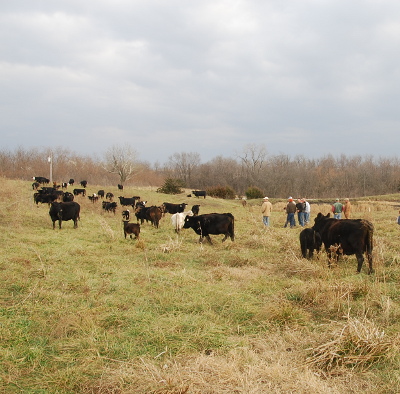 Although the idea seems best
suited to areas with mild winters, Greg Judy notes that he feeds hay
only about eight days a year on his Missouri farm, and I've read
similar reports from farmers in Ohio and Washington state. Even
when the ground is covered with snow, cows are able to dig up
stockpiled grass (and the grass helps the snow melt faster too.)
Although the idea seems best
suited to areas with mild winters, Greg Judy notes that he feeds hay
only about eight days a year on his Missouri farm, and I've read
similar reports from farmers in Ohio and Washington state. Even
when the ground is covered with snow, cows are able to dig up
stockpiled grass (and the grass helps the snow melt faster too.)
Tomorrow, I'll write
about the nuts and bolts of stockpiling, but I want to back up for a
minute and make sure nobody's getting too carried away. Greg
Judy's operation focuses primarily on beef cattle, with some sheep,
goats, and pigs. Ruminants are going to get a lot more winter
nutrition from stockpile than monogastric animals (like chickens) will
--- don't plan to feed your livestock on stockpiled grass if they
couldn't survive the winter eating hay.
This post is part of our Mob Grazing lunchtime series.
Read all of the entries:
|
 I like to use a round file without
the guide piece attached.
I like to use a round file without
the guide piece attached.
There are several different size
files you can get, and it's important to have the right diameter.
My method involves pushing
the file with pressure from the short side of the angle towards the
long end. When pulling back reduce the pressure and repeat until the
resistance feels smooth.
It should only take a few
strokes to do each tooth. Some people will say to twist a little while
you're pushing. Easier said than done. I've found that rotating the
file after each tooth helps spread the wear more evenly. Replace the
file once the grooves get worn down. I think one will usually last me
somewhere around 10 to 15 sharpenings.
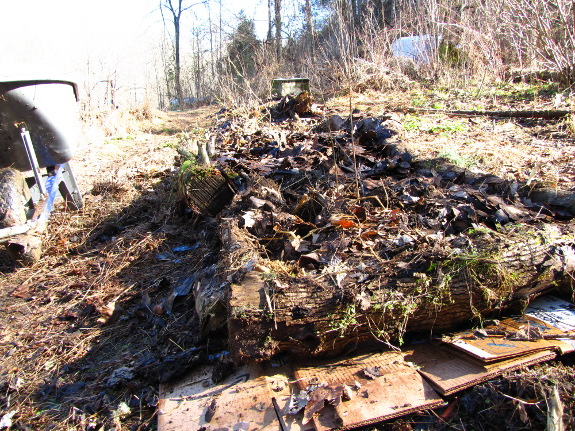
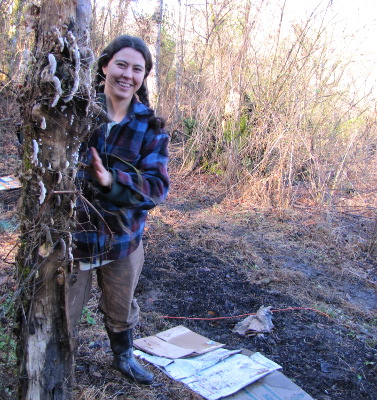 Are
logs along the sides of permanent garden beds good, bad, or indifferent?
Are
logs along the sides of permanent garden beds good, bad, or indifferent?
On the positive side,
edging your beds with logs increases the quality of your soil.
Not only do they catch topsoil that might try to erode away, they also
serve as breeding grounds for beneficial soil microorganisms, and
slowly rot down into top notch humus.
Log-lined beds are
pretty too, especially as mosses and mushrooms start to grow in the
rotting wood. And they'll ensure that you don't accidentally walk
on or mow the plants you care about.
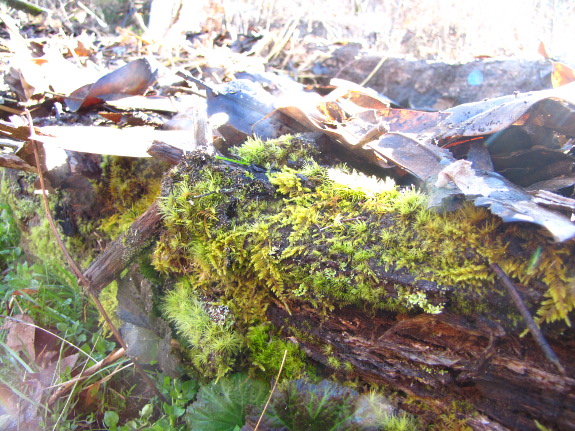
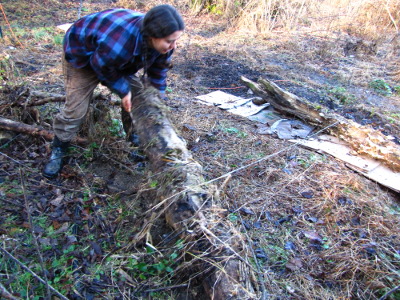 You
don't really need to be concerned about the high carbon wood sucking
nitrogen out of your soil since the log is all one piece. (You
have even less to worry about if you're edging a bed of woody
perennials since they can handle a bit of nitrogen loss and will enjoy
the fungi that come along for the ride.)
You
don't really need to be concerned about the high carbon wood sucking
nitrogen out of your soil since the log is all one piece. (You
have even less to worry about if you're edging a bed of woody
perennials since they can handle a bit of nitrogen loss and will enjoy
the fungi that come along for the ride.)
On the other hand,
log-edged beds don't play well with grassy aisles maintained with a
lawnmower. You can't mow right up to the edge of the bed, so
weeds tend to grow up amid the logs and take over. Yes, I am
writing 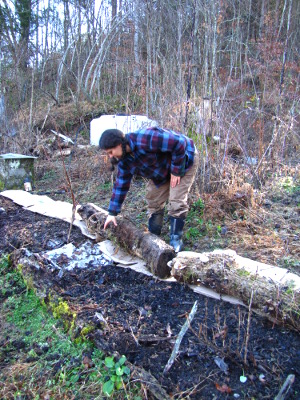 from experience --- our poor blueberry
patch got so weedy
last year I was afraid to let Mark mow it for fear he'd run over a
beloved plant.
from experience --- our poor blueberry
patch got so weedy
last year I was afraid to let Mark mow it for fear he'd run over a
beloved plant.
I'm trying out a new
method of dealing with weeds this year, in hopes we can keep that
downside of log-lined beds under control. First, I laid down a kill
mulch along the edge
of the bed I planned to line, then I rolled the logs into place and
added leaf mulch on both sides.
Of course, the real
reason I'm willing to give logs another try is the ninja
blade on Mark's new weedeater. I suspect one pass of
the weedeater will make short work of any nefarious honeysuckle and
wingstem trying to wiggle up in the unmown space beside the logs.
I'll be sure to let you know if I'm wrong as summer progresses.
 Yesterday, I wrote about the benefits
of stockpiling winter forage. But how do you manage
pastures so that you'll have extra grass to tide your animals over
through the winter?
Yesterday, I wrote about the benefits
of stockpiling winter forage. But how do you manage
pastures so that you'll have extra grass to tide your animals over
through the winter?
Greg Judy tries to
stockpile his whole farm every year. By extending his recovery
period and always grazing paddocks in the same order, pastures last
grazed in July are ready to be eaten in fall and early winter, while
the areas grazed in October and November will have grown back enough to
be grazed again in January.
Greg makes two passes
over each stockpiled paddock over the course of the winter.
First, he rotates the animals through quickly, ensuring that they only
eat the upper third of each plant. These growing tips are the
part of the plant highest in sugars, which means Greg's cows are
getting lots of energy right when they need it --- during the coldest
part of the winter.
Starting in February, he
rotates the cows through the same paddocks again, this time letting
them eat half of what remains. This second helping of stockpiled
grass isn't as high quality as the grass tips, but the cows don't need
as much energy since winter is beginning to mellow into spring.
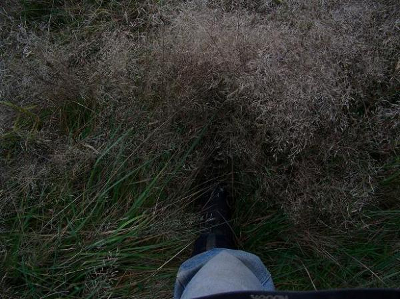 Come April, the pastures
should have fully recovered, with new grass stalks once again reaching
the boot stage. However, Greg aims to still have a bit of
stockpiled, brown grass left in each field even as the new grass is
growing up. (He notes that if your cows have eaten up every last
bit and you don't have stockpile left in April, you've got too many
animals on the farm.) The combination of lush spring growth and
leftover winter growth keep the cows from coming down with bloat since
they tend to consume both types of plant matter at once.
Come April, the pastures
should have fully recovered, with new grass stalks once again reaching
the boot stage. However, Greg aims to still have a bit of
stockpiled, brown grass left in each field even as the new grass is
growing up. (He notes that if your cows have eaten up every last
bit and you don't have stockpile left in April, you've got too many
animals on the farm.) The combination of lush spring growth and
leftover winter growth keep the cows from coming down with bloat since
they tend to consume both types of plant matter at once.
The final factor Greg
Judy mentions about winter grazing is soil management. Many
farmers don't allow their animals on pasture at all during the winter
because of the tendency of their hooves to churn the ground up into mud
("pugging"). Greg is able to keep his animals on pasture since
he's bred for a lighter cow (more on this later) and since he moves his
cattle twice a day during wet periods in the winter. Make sure
you pay attention to the soil as well as the grass!
This post is part of our Mob Grazing lunchtime series.
Read all of the entries:
|

Bob reminded me in the
comment section yesterday about the angle marks on the cutters of a
Stihl chain. It really helped to teach me the proper angle when I first
started sharpening.
I went through a phase with
the old 039
where I used a generic chain that our local hardware store would cut to
whatever size you needed. I think they were maybe 5 dollars cheaper,
but at the time I was trying to avoid a trip to the big city. I've
since decided to pay a little extra and get the Stihl brand chains
after talking to a few old timers about the difference.
Image credit goes to
PlanoPower.com.
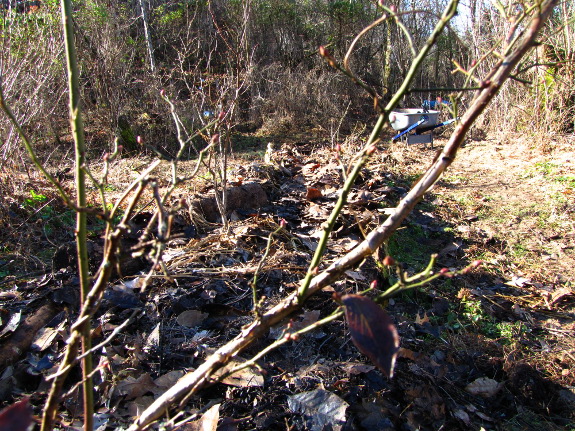
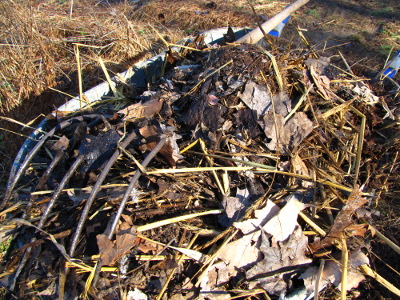 Someday,
I'll let the deep
bedding in our
chicken coops rot all the way down into high quality compost. But
it won't be this year.
Someday,
I'll let the deep
bedding in our
chicken coops rot all the way down into high quality compost. But
it won't be this year.
As usual, I need more
biomass than I have on hand, so I'm mining the chicken coops
early. I figure the half-composted mixture of manure, leaves, and
straw will work as both compost and mulch for our blueberries.
(It certainly did a good job underneath our peach tree last year.)
In the coop, I used the
pitchfork to pull back the top six inches or so of bedding, then
scooped out the partly broken down material underneath. I caught
the faintest hint of 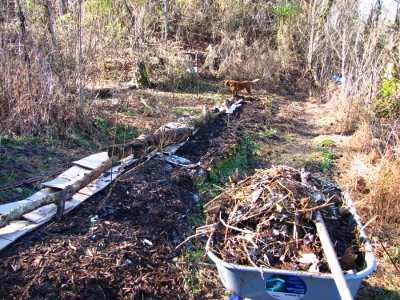 ammonia (a sign that I let a
pocket of manure get too thick before adding more bedding), but
otherwise felt like I was working with good quality leaf mold.
ammonia (a sign that I let a
pocket of manure get too thick before adding more bedding), but
otherwise felt like I was working with good quality leaf mold.
My blueberries are in
mulched wide rows, but I don't think their roots have colonized all of
the intervening space between plants yet. So I made circles of
deep bedding material around each bush, then filled in the gaps with
magnolia leaves my mom had picked up on her city curb.
I wonder if I'll have
enough deep bedding to finish the whole blueberry patch?
 The reason I'm so interested
in mob grazing (even though we're unlikely to have large livestock any
time soon) is the potential for renovating poor soil. Next week,
I'll cover a few other ways that mob grazing can improve pastures, but
today I want to focus on trampling.
The reason I'm so interested
in mob grazing (even though we're unlikely to have large livestock any
time soon) is the potential for renovating poor soil. Next week,
I'll cover a few other ways that mob grazing can improve pastures, but
today I want to focus on trampling.
Remember how I mentioned
that Greg
Judy plans for about a third of the grass to be trampled into the soil
during each grazing session? If you're renovating
poor soil, you may need to trample a lot more.
Greg notes that degraded
pastures will generally produce very seedy, poor quality grass the
first year they are managed by mob grazing. He recommends using a
very low stocking density so that your livestock can subsist on the bit
of high quality grass present, then make sure they trample the
rest. Next year, the grass will be more palatable.
The same theory applies
if your pasture has grown up in poor quality weeds. Greg regaled
us with the tale of how he tried to manage a field of cockleburs by
grazing hard every spring in hopes of eradicating the problem.
The result? The cockleburs did better and better each year.
However, once he started ignoring the weeds and managing for grass,
cockleburs were trampled down into the litter and eventually wiped out.
 You might be tempted to let some paddocks
lie fallow if they're very problematic, but Greg recommends against
this. Remember, your livestock are the ones improving the soil,
both with their manure and by trampling down weeds and grass to enrich
the ground. If you have to, give your livestock supplementary
feed that they can eat on pasture, but keep them on the problematic
ground if you want it to improve. (And, whatever you do, don't
mine out the few nutrients you have by haying!)
You might be tempted to let some paddocks
lie fallow if they're very problematic, but Greg recommends against
this. Remember, your livestock are the ones improving the soil,
both with their manure and by trampling down weeds and grass to enrich
the ground. If you have to, give your livestock supplementary
feed that they can eat on pasture, but keep them on the problematic
ground if you want it to improve. (And, whatever you do, don't
mine out the few nutrients you have by haying!)
Finally, plan your
paddock's shape based on the quality of your pasture. Livestock
trample more in rectangular paddocks since they have to mill around to
find the food, so make your paddocks long and skinny while you're in
the soil improvement phase. Once you've build up organic matter
and your pastures are thriving, you can switch over to square paddocks
so your livestock can utilize as much grass as possible.
This post is part of our Mob Grazing lunchtime series.
Read all of the entries:
|
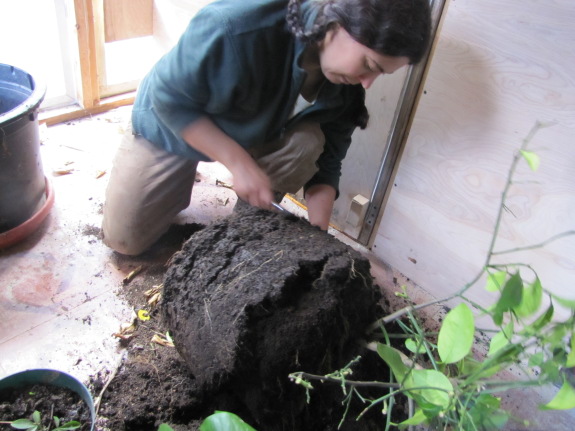
Today was the day for
operation dwarf
Meyer lemon re-potting.
I was nervous we'd hurt our
precious fruit tree during the procedure.
No branches were harmed. I
mainly assisted with the heavy pulling while Anna held the pot and did
the actual surgery.
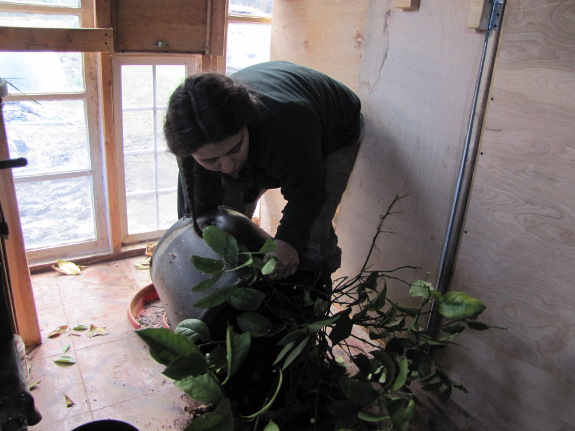
If you keep potting your
dwarf Meyer lemon up into the next size pot each year, it will grow
into a beast too heavy to maneuver out the door. Putting our
house plants outside in the summer is the sum-total of my pest
management plan, so I chose to instead use some bonsai techniques to
keep the dwarf citrus at a manageable size.
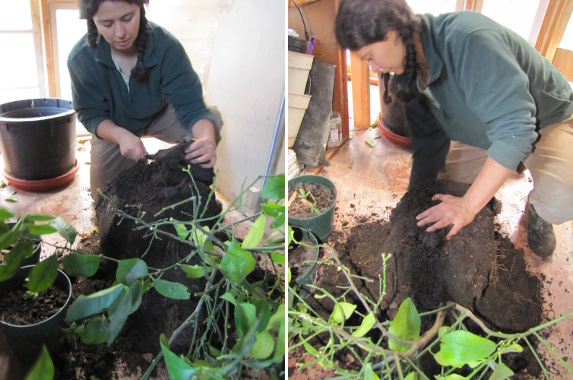
I waited until I'd harvested
all of the fruits,
but made sure to time my pruning to come before the lemon tree opened
its first blooms. With Mark's help, I
yanked the tree out of its pot and used a bread knife to shave off
about a third of its root ball.
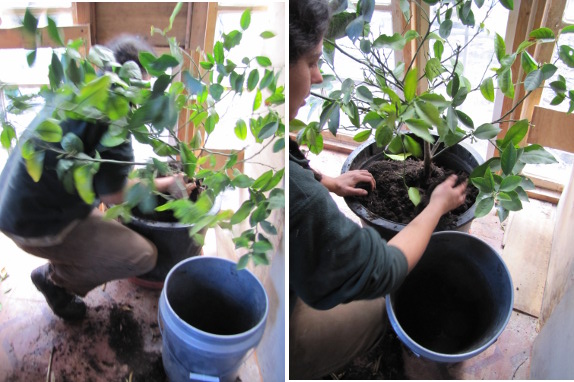
Cutting back roots helps
miniaturize the tree, and also ensures that the lemon won't get
rootbound and strangle itself when roots circle the inside of the
pot. Meanwhile, the technique allows me to replace a third of the
potting soil with well composted manure, which will make sure our
darling lemon gets plenty of micronutrients to round out its weekly
meals of diluted
urine.
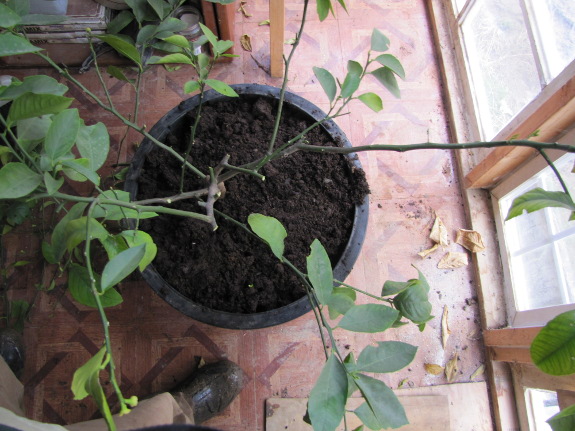
To counteract the stress
of suddenly cutting off part of the tree's feeding apparatus, I also
trimmed away about a third of its branches. I'd never actually
pruned the lemon before, so I focused on shaping it to an open center system, removing twigs that were
shaded under other branches. I tried to leave as many of the
branches with tiny bloom buds as possible, but figured the long term
shape of the tree trumped the current year's fruit. (If I was
pruning a young tree, I'd try to focus on three main limbs, but I
didn't want to make my changes to drastic on this long-unpruned tree.)
My root pruning is
relatively major surgery, so I'll keep a close eye on our lemon for the
next week or so. Hopefully it'll bounce right back and start
opening those flower buds that dot its branches.
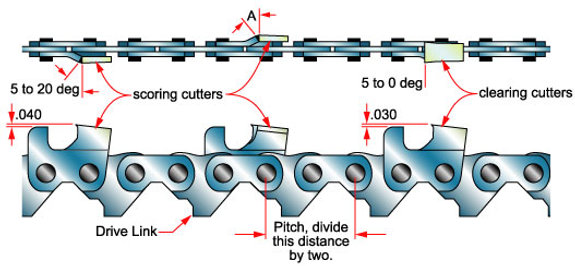
When we first got our 039
Stihl chainsaw
we also got a ripping chain with a special adjustable guide that
connects to the chainsaw body. The guide helps to make even cuts when
you want to make planks from a tree.
I think we cut a total of 15
planks from a pine tree that were each about 2 feet long. They worked
good for our foot bridge, but the process was not easy.
We decided making our own
planks was a bit too complex for our skill level, but if you've got the
time and a remote location that makes delivery a challenge then maybe a
chainsaw mill is an option worth considering.
 This easy and delicious
hummus recipe makes enough to eat now and freeze several cups for later.
This easy and delicious
hummus recipe makes enough to eat now and freeze several cups for later.
- 1 pound of dried chickpeas, cooked up into about 6.5 cups of cooked chickpeas
- 6.5 tablespoons of tahini
- 13 tablespoons of olive oil
- 6.5 heads of roasted garlic
- 2 cloves of raw garlic, minced
- juice of 3 Meyer lemons
- 1.25 teaspoons salt
- 0.25 teaspoons of pepper
- water
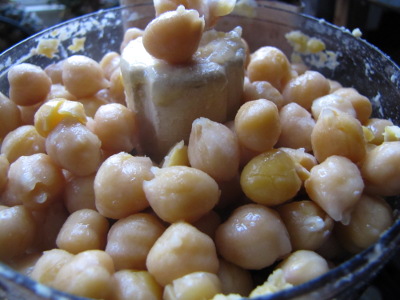 Mark
loves hummus, and I've been wanting to make him some for years.
The trouble is that it's impossible to find most of the ingredients
locally. We found a can of tahini five years ago (and I assumed
it was still good --- it was), but our grocery store doesn't carry
chickpeas. When Mark saw some in the big city Sunday, he stocked
up and I made a huge pot of hummus.
Mark
loves hummus, and I've been wanting to make him some for years.
The trouble is that it's impossible to find most of the ingredients
locally. We found a can of tahini five years ago (and I assumed
it was still good --- it was), but our grocery store doesn't carry
chickpeas. When Mark saw some in the big city Sunday, he stocked
up and I made a huge pot of hummus.
First,
I soaked the chickpeas overnight and then cooked them for a few hours
on the wood stove. Meanwhile, I roasted a
lot of garlic and
then
started passing the rest of the ingredients through the food processor
to grind them up.
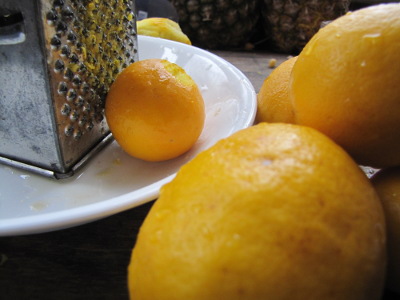 (I'm
zesting the lemons here simply because I never throw away the rind of a
homegrown lemon. I only used the juice, though.)
(I'm
zesting the lemons here simply because I never throw away the rind of a
homegrown lemon. I only used the juice, though.)
Once all of the
ingredients are mixed together, add water until the hummus has the
right consistency. (I added some more water after taking the
photo at the top of the page.)
Here's the important
part --- wait a
day before eating!
We tried some of the hummus right away and it was good, but the flavors
really blend if you let your hummus sit in the fridge overnight.
We like to eat hummus on
carrot sticks, but you'll probably have your preferred serving
method. Since this recipe makes about six cups, feel free to
freeze some of it for later. Enjoy!
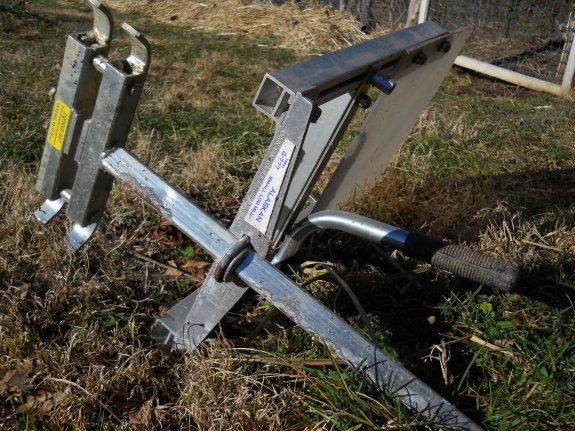
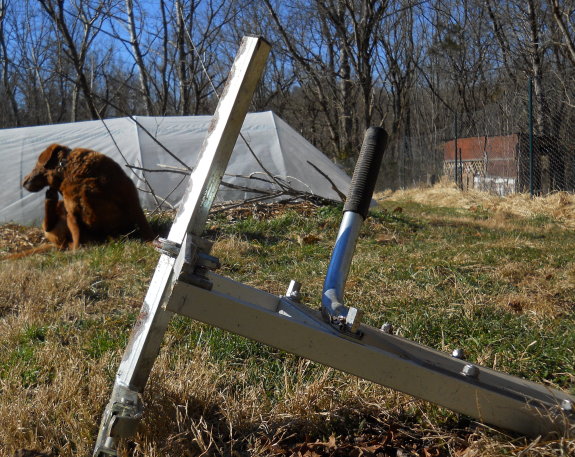
The Alaskan small log mill
only takes a few minutes to attach to a chainsaw.
It's been years since we've
used it. The main thing I remember is needing someway to clamp the log
down so it wouldn't move while I operated the chainsaw. The plan at the
time was to either build a small structure or fix up a corner of the
barn. We got lucky and found someone giving away an old trailer and
decided a recycled home would get us on the land a year or two sooner
and a lot cheaper.
There's no doubt it would
feel groovy to sit back and look at a structure knowing you built it
from a downed tree, but I'm not sure the longevity would compare to
store bought and kiln dried wood? I guess it would depend on the tree
you start with and the level of craftsmanship.
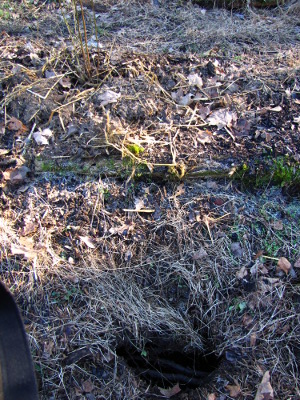 Are you the kind of person
who sees a strange hole in the woods and has to poke your hand
in? I am. That's why when the pathway between the
blueberries seemed to have more give than I expected, I stamped...and fell into a hole up to
my knee.
Are you the kind of person
who sees a strange hole in the woods and has to poke your hand
in? I am. That's why when the pathway between the
blueberries seemed to have more give than I expected, I stamped...and fell into a hole up to
my knee.
I usually think of water
as dropping from the sky, slowly percolating through the soil, and
ending up in creeks and rivers. But our neck of the woods is full
of caves that allow groundwater to flow more freely. In fact, our creek goes
underneath a ridge and river before popping back up on the other side.
Could my tiny sinkhole be the entrance to a large cavern?
Mark rolled his eyes at
my "cave", and rightly so. Although the hole itself was big
enough to stick your head in, it quickly narrowed on either side to
allow a mere trickle of water to flow through. I guess now I know
where the water comes from for the wet weather spring that spurts out
of the ground near the goat path during really rainy spells.
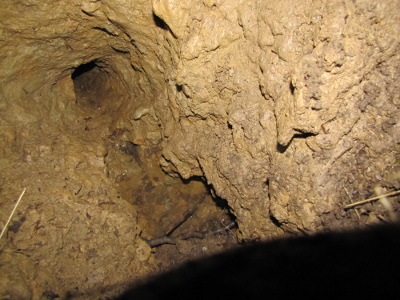
Too small to tap for
geothermal, I wonder what the best use of my hole might be? I
could fill it with wood chips to act as a sponge, soaking up water
during wet weather and then releasing it back into the soil during
droughts. Ideas?
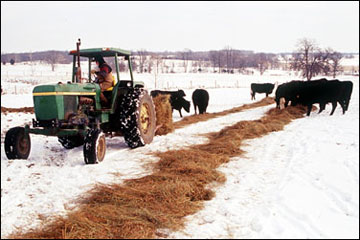 So how do you start a mob
grazing operation
from scratch? Say you've got an old potato field that keeps
eroding into the creek every year, and you've decided to turn it into
pasture to preserve (and build) topsoil. How do you make that
pasture happen, and what do you want it to look like?
So how do you start a mob
grazing operation
from scratch? Say you've got an old potato field that keeps
eroding into the creek every year, and you've decided to turn it into
pasture to preserve (and build) topsoil. How do you make that
pasture happen, and what do you want it to look like?
Instead of spreading a
lot of grass seed, Greg Judy recommends starting with hay. If you
unroll a lot of hay bales into the proto-pasture in the winter and
graze your livestock there (even though there's really nothing to graze
on), the hay will naturally seed the pasture, and will also add a bit
of starter biomass when livestock trample some into the soil.
You'll need to keep feeding your animals for the first year --- this is
worth it because you're building your soil every time the livestock
pass through.
In the second year, you
can finally plant some clover seeds, focusing on fall planting when the
baby clover won't be competing much with weeds. Unlike Voisin
grazing (which
believes more clover is always better), Greg Judy recommends
aiming for only 30% legumes since too much high nitrogen clover is bad
for beef cows.
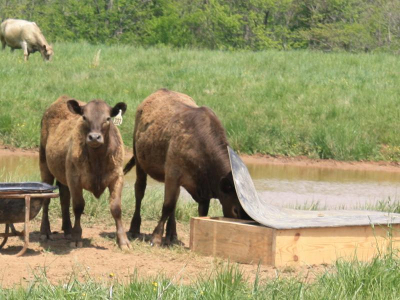 Meanwhile, start feeding your
animals free choice minerals in the summer, with each type of nutrient
in its own compartment. The livestock will only eat what's
deficient in the soil, and since about 70% of the minerals will pass
right through them, you'll be correcting soil nutrient imbalances at
the same time you're making your livestock healthier. Greg Judy
noticed that, after three years of mob grazing, his animals are now
eating only a quarter as much mineral as they used to, and they don't
touch any of the minerals at all when grazing on his highest quality
soil.
Meanwhile, start feeding your
animals free choice minerals in the summer, with each type of nutrient
in its own compartment. The livestock will only eat what's
deficient in the soil, and since about 70% of the minerals will pass
right through them, you'll be correcting soil nutrient imbalances at
the same time you're making your livestock healthier. Greg Judy
noticed that, after three years of mob grazing, his animals are now
eating only a quarter as much mineral as they used to, and they don't
touch any of the minerals at all when grazing on his highest quality
soil.
As your pasture grows,
don't worry if you start to see plants you're not familiar with.
If your recovery period is long enough, warm season perennials like
indian grass, big bluestem, and gama grass will spring up --- these are
great for summer grazing as long as you make sure to give them a long
rest period. Meanwhile, don't worry about a few "weeds" --- Greg
Judy believes that giant ragweed pumps minerals from deep in the soil,
which is why his cows love it. (They like tree leaves for the
same reason.) A well-managed pasture will become more diverse and
more like a native prairie every year.
This post is part of our Mob Grazing lunchtime series.
Read all of the entries:
|
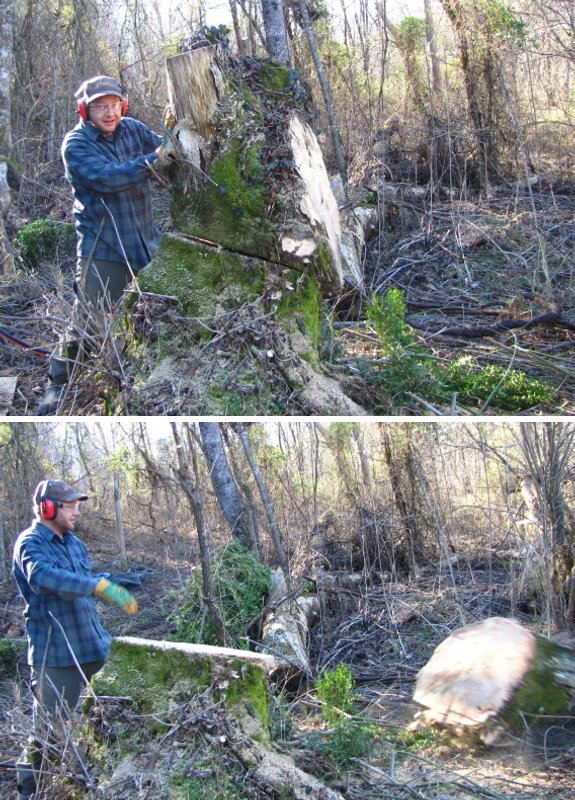
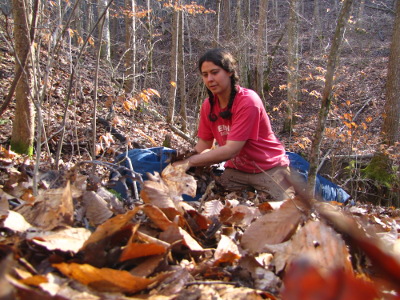 With the driveway still
impassable and the blueberries in need of mulch, I decided to
rake some leaves out of the woods. I'd been eying a spot
on the southwest corner of our property for years since beech and oak
leaves accumulate there in deep drifts. I figured the most
time-consuming portion of leaf gathering was the gathering part, so I
headed to my remembered spot with our two huge chicken waterer mailing bags.
With the driveway still
impassable and the blueberries in need of mulch, I decided to
rake some leaves out of the woods. I'd been eying a spot
on the southwest corner of our property for years since beech and oak
leaves accumulate there in deep drifts. I figured the most
time-consuming portion of leaf gathering was the gathering part, so I
headed to my remembered spot with our two huge chicken waterer mailing bags.
The leaf drifts didn't
disappoint. In fact, I scared a flock of turkeys who had gathered
on 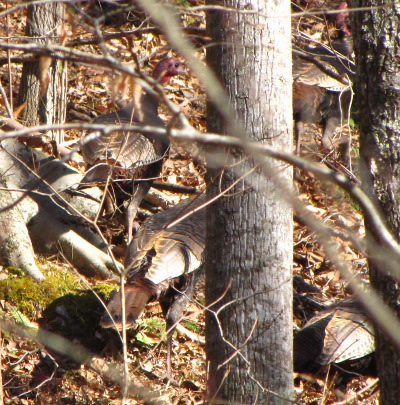 the hillside for a similar
reason (although they were scratching through the leaves for
invertebrates rather than snagging the leaves themselves.) In a
matter of minutes, I had stuffed both bags so full they were bulging
against the seams. Then I picked one up...
the hillside for a similar
reason (although they were scratching through the leaves for
invertebrates rather than snagging the leaves themselves.) In a
matter of minutes, I had stuffed both bags so full they were bulging
against the seams. Then I picked one up...
...Or rather, tried to pick one up. Who
knew that a bag full of compacted leaves would be so heavy? With
a bag on each shoulder, I struggled up to the top of the hill, and then
ended up dragging the leaves back down the other side. (Not good
for the bags --- I won't be repeating that part, but no way was I going
to leave my organic matter behind.)
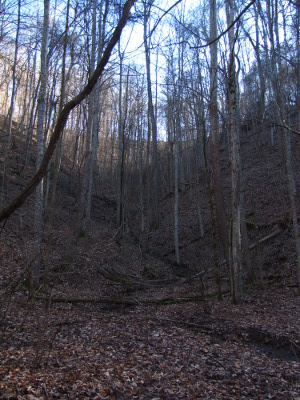 The
last third of the way was on level ground with lots of logs to cross,
so I had to leave one bag behind and come back for it later. As I
walked through the woods closer to home, I noticed smaller drifts, and
resolved that my next leaf gathering expedition would be here ---
clearly I was wrong about raking being the most time-consuming part of
the project.
The
last third of the way was on level ground with lots of logs to cross,
so I had to leave one bag behind and come back for it later. As I
walked through the woods closer to home, I noticed smaller drifts, and
resolved that my next leaf gathering expedition would be here ---
clearly I was wrong about raking being the most time-consuming part of
the project.
But I forgot all the
pain and agony as I spilled leaves out onto my blueberry patch.
Each big bag held the equivalent of at least four of the trashbags full
of leaves Mom gathered for me on the curb. Since I've lined
each blueberry bed in logs, I have high hopes the
leaves will stay put (rather than blowing away), and I'm sure my
blueberries will enjoy the the dose of micronutrients.
 Even though mob grazing's
primary focus is on the soil and plants, you don't want to ignore your
livestock. If you're building up poor soil, it won't be able to
support as many animals per acre, so pay attention to the oldest and
youngest animals to make sure they're healthy. Cattle shouldn't
have a dent on their left side --- that means they're not getting
enough to eat. Healthy cattle, on the other hand, will have a
shiny line down the neck that denotes good gland function (and keeps
flies away), and will lose their winter coats quickly. If your
cattle don't look healthy, give them more space (or feed them hay if
you must.)
Even though mob grazing's
primary focus is on the soil and plants, you don't want to ignore your
livestock. If you're building up poor soil, it won't be able to
support as many animals per acre, so pay attention to the oldest and
youngest animals to make sure they're healthy. Cattle shouldn't
have a dent on their left side --- that means they're not getting
enough to eat. Healthy cattle, on the other hand, will have a
shiny line down the neck that denotes good gland function (and keeps
flies away), and will lose their winter coats quickly. If your
cattle don't look healthy, give them more space (or feed them hay if
you must.)
Meanwhile, choose your
livestock wisely. Most modern cattle have been bred for size, but
you want to select for the ability to thrive on pasture 365 days a
year. Greg Judy had to go back to older varieties of cattle with
short legs, big bellies, and an oily streak down the back. His
full-grown bulls clock in at 1050 to 1100 pounds and his cows at 850 to
900 pounds, in contrast to some breeds that mature at 2000 to 2500
pounds. He culls relentlessly, removing cattle from his herd if
they're getting too thin, so his livestock become hardier every year.
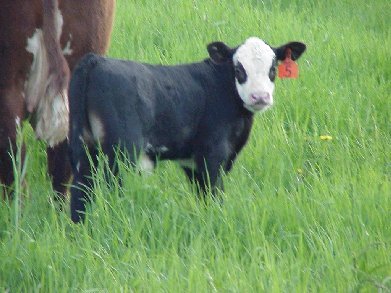 Greg also shifted management
patterns to make year-round grazing feasible. Rather than weaning
calves the way most cattle-farmers do, he selects for cows that are
smaller, then he gives them lots of forage so that the mothers are able
to stay healthy while raising their calves. He makes sure his
cows give birth around the first of April, when the pastures are just
starting to pick up speed, which means peak milk production arrives in
May when calves are big enough to handle it.
Greg also shifted management
patterns to make year-round grazing feasible. Rather than weaning
calves the way most cattle-farmers do, he selects for cows that are
smaller, then he gives them lots of forage so that the mothers are able
to stay healthy while raising their calves. He makes sure his
cows give birth around the first of April, when the pastures are just
starting to pick up speed, which means peak milk production arrives in
May when calves are big enough to handle it.
Finally, Greg doesn't
worry about parasites. One of the major benefits of rotational
grazing is that you move the animals quickly enough that cattle aren't
eating around their own feces, and by the time they come back through,
parasites have perished. That means Greg doesn't even give his
herd dewormer --- if the cows get sick, he figures they have bad genes
and he culls them.
This post is part of our Mob Grazing lunchtime series.
Read all of the entries:
|
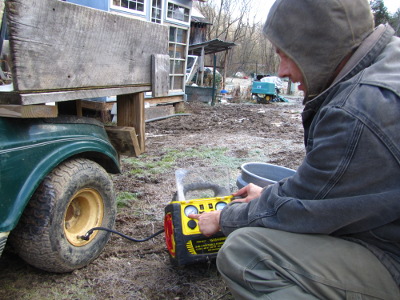 The
driveway was frozen enough this morning to risk getting the golf cart
through the mud.
The
driveway was frozen enough this morning to risk getting the golf cart
through the mud.
We recently found out that
our local mechanic has the same golf cart and is willing to take a look
at ours.
It did great through the
frozen mud. The mechanic is just down the road, which meant maybe a
fourth of a mile on our local country road and another fourth on the
main highway. I was a bit stressed at the prospect of breaking down
half way, or getting a ticket, but traffic is pretty light around here,
especially at 9:30 in the morning when most folks are already tucked
into their job for the day.
A guy at the garage suggested
that a Farm Use tag mounted on the back might be
enough to reduce the risk of trouble with the police for occasions like
this. Not sure if that's good enough for the law, but I'm guessing it
would help.

Or explore more posts by date or by subject.
About us: Anna Hess and Mark Hamilton spent over a decade living self-sufficiently in the mountains of Virginia before moving north to start over from scratch in the foothills of Ohio. They've experimented with permaculture, no-till gardening, trailersteading, home-based microbusinesses and much more, writing about their adventures in both blogs and books.