
archives for 02/2012
 I hope that when I reported
that the
Persephone Days were over, you didn't rush out to
plant your spring vegetables. Once daylength is longer than ten
hours, surviving crops like kale will start growing again, but that
doesn't mean the
ground is warm enough for seeds to sprout.
I hope that when I reported
that the
Persephone Days were over, you didn't rush out to
plant your spring vegetables. Once daylength is longer than ten
hours, surviving crops like kale will start growing again, but that
doesn't mean the
ground is warm enough for seeds to sprout.
Lettuce, onions, and
spinach can all handle soil temperatures as low as 35 while most other
spring crops like the earth to have warmed to at least 40 degrees
Fahrenheit. I tested the soil
temperature in the
sunniest part of our garden last week, and the ground underneath our
quick hoops was just barely 35 degrees, while unprotected soil was
hovering right around freezing.
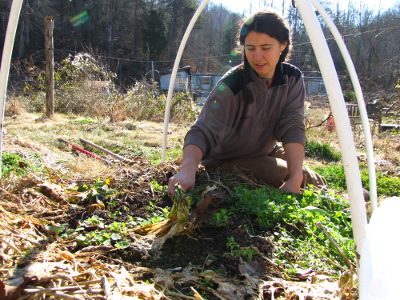
Most of the plants under
my quick hoops are starting to grow again, but the tatsoi totally
perished in the winter cold. That means I had a spot just waiting
to plant spring lettuce! Rip out a few weeds, toss down a bucket
of composted manure, then sprinkle on lettuce seeds, and the first
garden bed of 2012 is seeded for March harvests.
 Many of us get so excited
when we learn about multi-species
grazing and about rotational
pastures that we want to create a vibrant ecosystem
overnight. But Greg Judy cautions us to slow down.
Many of us get so excited
when we learn about multi-species
grazing and about rotational
pastures that we want to create a vibrant ecosystem
overnight. But Greg Judy cautions us to slow down.
If you already manage a
pasture, he recommends not increasing your stocking rate or expanding
into multiple species for at least two years. It will take you
that long to improve the quality of your soil so that it can handle
more feet.
Meanwhile, Greg
recommends that you figure out what your centerpiece animal is and
learn the intricacies of its care before bringing new animals in.
Yes, adding more species can make the patsuring system work more
efficiently, but so will focusing on what's most important rather than
scattering your attention in five different directions.
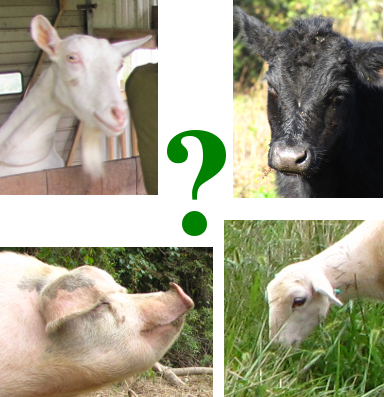
Meat animals make much
better starter livestock than dairy animals do. Making milk
requires a lot of energy, and it's tough (although possible) to keep
dairy animals healthy on pasture alone. In addition, a quality
milk cow is worth a lot more than a meat cow, so there's less financial
risk as you muddle your way up the learning curve.
Finally, Greg recommends
that you pay as close attention to yourself as you do to the
pasture. If you work a full time job and plan to pasture
livestock in your spare time, don't start with a complex dairy cow
rotation where you need to move animals seven times a day. On the
other hand, if you're unemployed and are willing to put in the time,
you can feed many more animals on the same acreage if you're willing to
rotate often so that high quality food is always available. Maybe
in a few years, you'll be able to run half a dozen different kinds of
livestock on that same pasture.
 This post is part of our Mob Grazing lunchtime series.
Read all of the entries: This post is part of our Mob Grazing lunchtime series.
Read all of the entries:
|
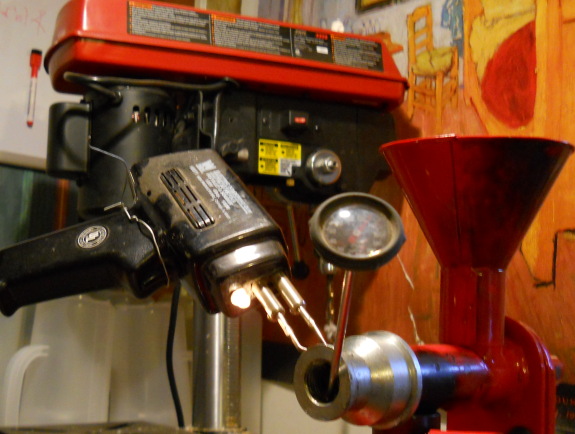
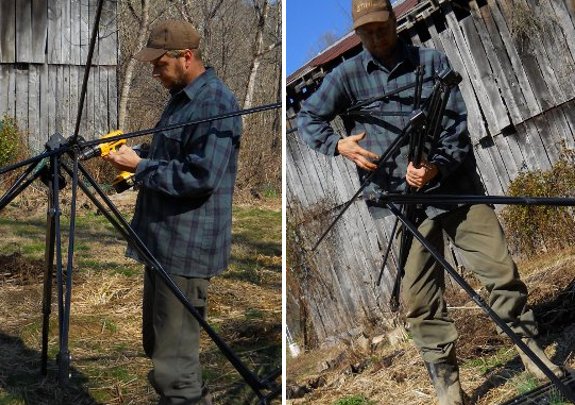
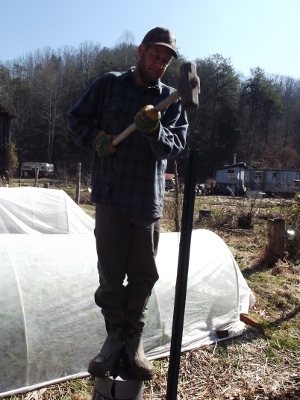
I've been experimenting with
alternative heating methods for the new Rajkumar
oil expeller.
The soldering iron pictured
above failed miserably.
It did a good job of heating
the metal, but those things were never designed to be left on for more
than a minute, which is why it has a push button trigger instead of a
toggle switch. I knew this, but thought it could handle just a few
minutes more. That's when the plastic case around the heating element
melted. Now I need to find a new soldering iron.
The next round of experiments
will involve an electric
pipe heater.
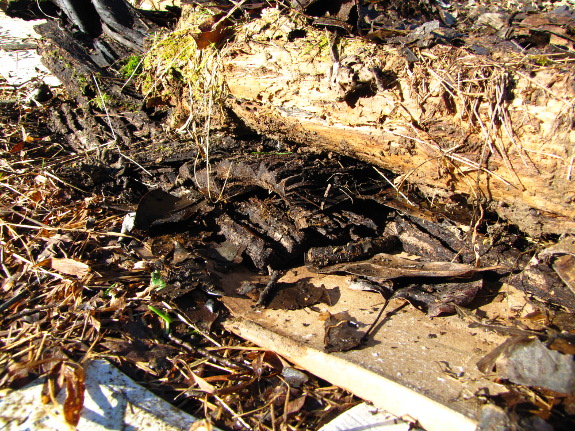
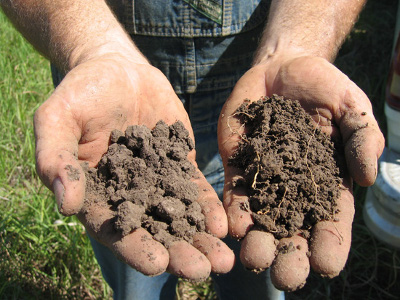
I saw Mark peeling the
bark off the walnut logs we were stacking into the
woodshed and realized that he was right --- barkless logs will probably
dry faster. Even dry bark doesn't make good firewood, so I
decided to snag the biomass for my garden.
My first impulse is to
see how the bark fares as the kill layer of a kill
mulch. I never
have enough corrugated cardboard to go around --- maybe a couple of
thicknesses of bark will do just as well?
 Well planned pasturing systems can heal the
earth --- and can take advantage of natural systems to keep the
livestock healthier. Greg Judy puts up tree swallow boxes since
one adult can eat 8,000 flies per day, leading to happy cows.
Meanwhile, he pays close attention to the critters in and on the soil,
watching dung beetles roll manure down tunnels into the earth and
counting 462 worms in a single cow pat. He considers spiders to a
prime indicator of pasture health since these predators need to eat
lots of insects to stay alive, and insects thrive in rich, organic
matter-filled soil.
Well planned pasturing systems can heal the
earth --- and can take advantage of natural systems to keep the
livestock healthier. Greg Judy puts up tree swallow boxes since
one adult can eat 8,000 flies per day, leading to happy cows.
Meanwhile, he pays close attention to the critters in and on the soil,
watching dung beetles roll manure down tunnels into the earth and
counting 462 worms in a single cow pat. He considers spiders to a
prime indicator of pasture health since these predators need to eat
lots of insects to stay alive, and insects thrive in rich, organic
matter-filled soil.
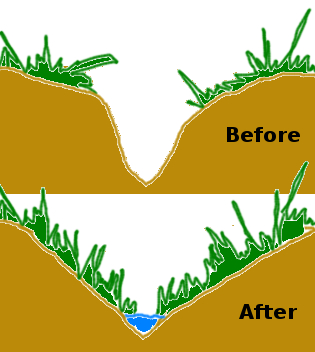
Other parts of Greg's
pasturing ecology seem less intuitive. He believes that careful
mob grazing can heal gullies and riparian
areas. He mob grazes steep sided gullies three or four times per
year, knocking the banks down so that vegetation can gain a
foothold. While I'm not sure his system would work in very wet
climates (his waterways tend to dry up in the summer), Greg's system
has created vegetated waterways that capture his neighbor's eroding
topsoil (and precious water) each time it rains. "It doesn't
matter how much rain you get," said Greg. "It matters how much
you keep."
This post is part of our Mob Grazing lunchtime series.
Read all of the entries:
|
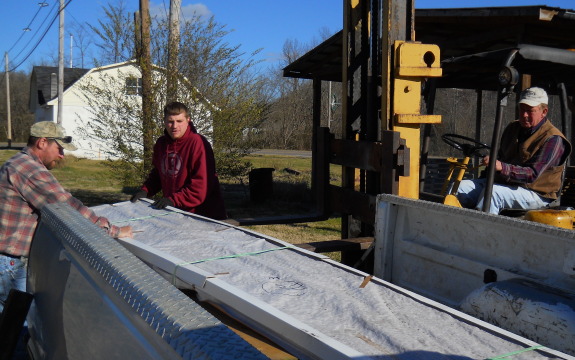
Our 14 foot long metal
roofing panels came in today.
The
guy we hired said he won't have much trouble walking the material
across the creek and back to the barn.
Yes...he actually has seen
the creek and driveway first-hand when he came out to give us the
estimate. I'm guessing he has plans to make some sort of stretcher so a
guy on each end can lift maybe 4 or 5 at a time?
I started my most
successful forest garden island very simply. I planted
the tree in a raised bed, then dumped weeds around the bed's edges for
three years.
The mounds of weeds rotted down to expand the original raised bed,
creating rich dirt that extended beyond the tree's canopy. I highly
recommend this method since it requires you to maintain your focus on
the centerpiece tree, giving it a few years to get established before
the tree has to compete with anyone else.
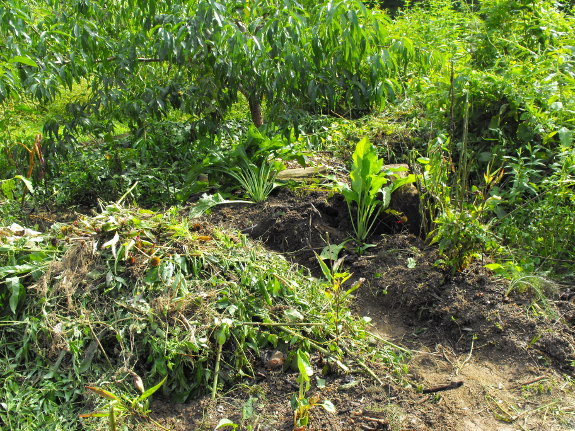
The photo above shows the
three year old peach tree in August 2009. At this point, my
well established peach was ready to handle understory plants, so I
transplanted comfrey and bee balm into the partial shade beneath the
peach's canopy, and fennel, echinacea, rhubarb, and Egyptian onions in
the sun.
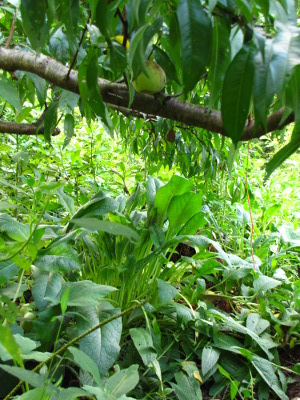
 May
of the next year, the forest garden island was in full swing. In less successful
forest garden islands, I had planted comfrey under younger peach trees
in poor soil, and the comfrey
stole nitrogen from the tree. But this more
established peach had no problem shading the comfrey enough that the
understory plant behaved.
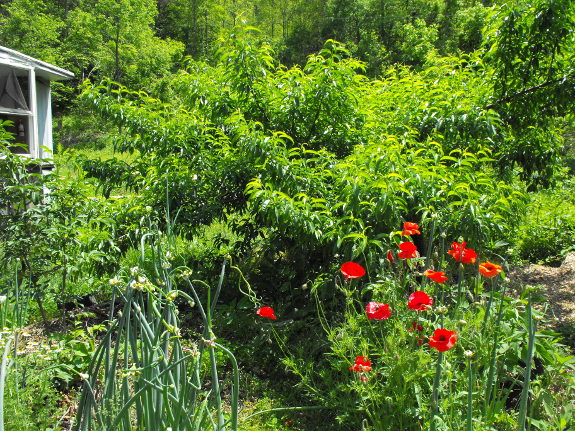
May
of the next year, the forest garden island was in full swing. In less successful
forest garden islands, I had planted comfrey under younger peach trees
in poor soil, and the comfrey
stole nitrogen from the tree. But this more
established peach had no problem shading the comfrey enough that the
understory plant behaved.
You'll notice that
fennel, echinacea, and rhubarb have disappeared --- these plants didn't
like being transplanted in the summer heat. However, the Egyptian
onions were thrilled with their new home and thrived even during my
summer neglect.
That spring, I seeded
poppies amid the Egyptian onions, which added a lot of beauty, but
won't be repeated. I love puttering in my forest garden islands
in the winter, but in the 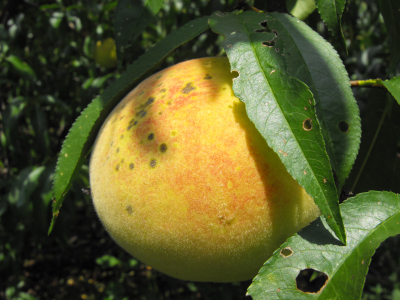 summer I'm too busy in the
vegetable garden to give them any care. Since
annuals tend to require bare ground, which has to be weeded, they're
out of the running as forest garden plants.
summer I'm too busy in the
vegetable garden to give them any care. Since
annuals tend to require bare ground, which has to be weeded, they're
out of the running as forest garden plants.
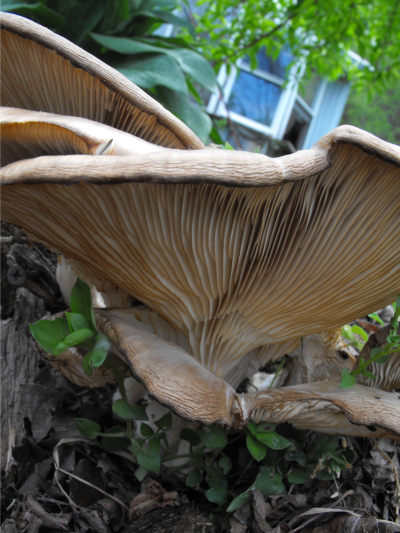
This second year of the
forest garden island was when our peach started producing --- over half
a bushel that summer. Meanwhile the
ecology of the island seemed to come into its own, attracting birds,
insects, and wild mushrooms.
Last year was the third
year of forest garden experimentation. The peach
had achieved its mature size and was starting to shade out the comfrey
and bee balm closest to the trunk. That allowed me to add another
type of understory plant --- shade lovers. I transplanted ramps right around the tree's
trunk and daffodils helter skelter throughout
the island. Both of these plants are early spring ephemerals,
which are active in the spring before the tree canopy shades them out,
then die back when summer arrives.
Where will the island go
from here? I'm experimenting with more shade-loving species this
spring --- goldenseal
and ginseng.
Meanwhile, if I get around to it, I plan to transplant some flowering
perennials into the sunny zone --- probably bee balm, echinacea, and
fennel, since I have them around in excess.
A wild elderberry sprang
up at the edge of the forest garden island a few years ago, and I left
it alone since it seemed to be far enough away that it doesn't compete
with the peach.  Pollinators seem to love the
flowers, and the birds enjoy the fruits. (I know elderberries are
edible for humans too, but I'm not enough in love with the taste that I
feel the need to fight off the birds, who really love the taste.)
Pollinators seem to love the
flowers, and the birds enjoy the fruits. (I know elderberries are
edible for humans too, but I'm not enough in love with the taste that I
feel the need to fight off the birds, who really love the taste.)
The island has stopped
expanding since the peach has achieved its final size, and I can feel
the ecosystem starting to reach a steady state. Annual
maintenance is now about the same as it would be for any other fruit
tree, but I
suspect the tree is healthier for the diverse ecosystem under and
around its canopy. Plus, we get to enjoy a bit of beauty right
outside the kitchen window. This is one of our most successful
permaculture experiments, and I highly recommend you try it out around
your own fruit trees.
 If you've read my lunchtime
series on Voisin
grazing as well as
this one on mob
grazing,
you might be wondering which method is better. I suspect the
answer depends on what kind of animal you're trying to feed, and on how
healthy your pasture is to start with.
If you've read my lunchtime
series on Voisin
grazing as well as
this one on mob
grazing,
you might be wondering which method is better. I suspect the
answer depends on what kind of animal you're trying to feed, and on how
healthy your pasture is to start with.
Mob grazing has two
major benefits --- it heals the soil quickly, and
it also allows you to keep ruminants on pasture all winter without
feeding hay. On the other hand, Voisin grazing's tender grasses
and copious clover make this method more appropriate to non-ruminants
(like pigs and chickens), and to dairy animals that require high
quality feed.
Can you mix and match
the two systems to suit your own needs? I'm
not positive, but I suspect you could treat different paddocks in
different ways, stockpiling winter forage in one while grazing another
one close and often to promote the growth of clovers.
I'd be very curious to
hear from those of you who have tried either
system. What did you like about it? What problems did you
run into?
This post is part of our Mob Grazing lunchtime series.
Read all of the entries:
|

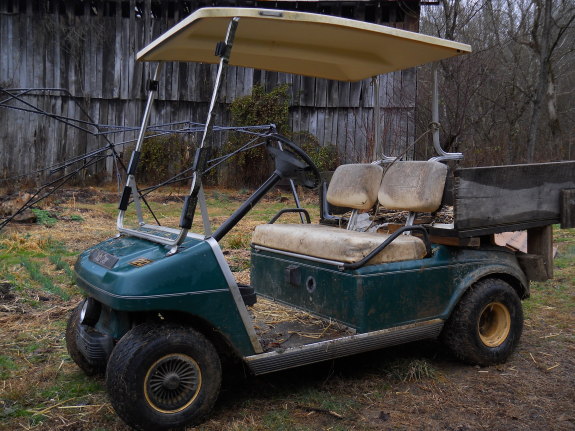
We got the golf
cart home without any trouble from the local sheriff.
Our mechanic found the
problem. It was a worn bearing. I was highly impressed with the way he
was able to replace it with a bearing that normally fits in a car. You
can't get Club Car parts online, only from a local
dealer.
I think he talked us into
upgrading the back springs, which will help with the heavy loads we
tend to haul.
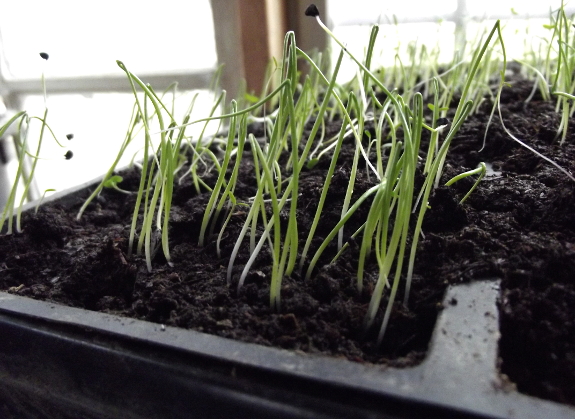
 Based on last year's onion
experiments, I've
decided to start my storage onions inside this winter. The other
option that worked well was to grow the onions under quick hoops in
soil doctored with biochar, but I only have one bucket
of the precious amendment and am not sure I want to "waste" it on
onions. (My quick hoops are all full of overwintering greens
anyway.)
Based on last year's onion
experiments, I've
decided to start my storage onions inside this winter. The other
option that worked well was to grow the onions under quick hoops in
soil doctored with biochar, but I only have one bucket
of the precious amendment and am not sure I want to "waste" it on
onions. (My quick hoops are all full of overwintering greens
anyway.)
So I headed out to the
old apple tree for some stump
dirt to use as
potting soil. I put the stump dirt directly into my seed starting
flats, wet it down, then lightly compressed the organic matter with my
fingers. After sprinkling seeds on top, I added a thin layer of
composted horse manure --- sometimes I use stump dirt alone as
potting soil, but the apple tree's rotted center didn't seem quite as
dark and rich as the organic matter I mine out of the beech tree
further away.
Assuming they come up
and grow, I'll transplant tiny onion sets at the beginning of
March. Although it seems rough to throw them into unprotected
ground so early, last year's transplants did find even without a quick
hoop. Maybe 2012 will be the year we finally delete the last
storebought vegetable from our diet?
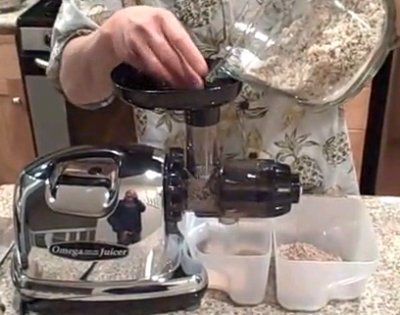 I was trying to find some
information on cold pressing coconuts when I stumbled upon Youtube user
rawfoods and his unique
approach.
I was trying to find some
information on cold pressing coconuts when I stumbled upon Youtube user
rawfoods and his unique
approach.
1. Shred up the coconut.
2. Bake chunks in a dehydrator
at 118 degrees for 12 to 24 hours depending on humidity.
3. Slowly feed the dried
coconut pieces into a juicer where the fiber will get extracted from
the oil, which is very creamy and can be used as butter if you have the
proper coconut.
4. You may need to feed the
fiber back through to get additional oil out. This guy uses an Omega
8006 juicer.
5. Feed extracted fiber into a grain mill to make coconut flour.
More on this later when we
actually juice up some dried coconuts.
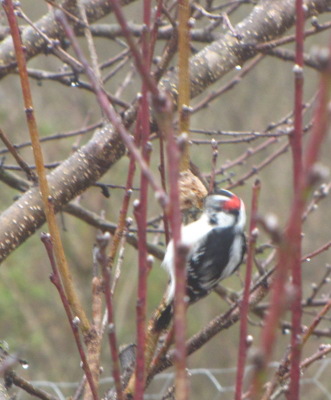 This photo is less than
stellar, but the behavior is too interesting not to share.
This photo is less than
stellar, but the behavior is too interesting not to share.
Mark called me over to
the window a few days ago to tell me that a bird was eating my praying
mantis egg cases.
Sure enough, this little Downy Woodpecker was pecking away at the
spongy blobs coating my peach tree twigs.
Generally, I like
praying mantises (even though the ones I have are invasive
species). But my rule of thumb is that even if an animal is
eating a beneficial insect, that's a good sign because it means I've
created a quality ecosystem that can support top level predators.
I wonder how many of my
other egg cases have been mined out? And I also wonder if the
mantis eggs have hatched into tiny mantises, spurring this attack.
I guess only the woodpeckers know for sure.
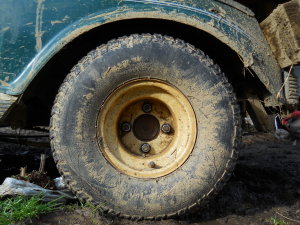
Back in December of 2009 I posted about having some
trouble with one of the golf cart lug nuts.
The hardware store didn't
have counter sunk nuts, so I got some regular nuts and added a set of
washers.
Turns out it was a mistake to take this short cut. Our mechanic fixed
the problem with proper
lug nuts on our last visit and kindly advised me to not do such a
thing again.
It's hard to be sure, but the
lug nut situation may have contributed to the bearing going bad.

The first crocuses
opened on February 3 this year, and the Wood Frogs hit full chorus on
February 5. Meanwhile, the human chorus of "this is a crazy
winter" just gets louder and louder.
 However, take a look at the
graph at the top of this page, showing average February temperatures at
our closest major weather station for the last 64 years. (We're
actually a zone colder than them, but the trends are mostly the same
here.) Isn't it interesting to see that January 2012 is only the
13th warmest year during that time period?
However, take a look at the
graph at the top of this page, showing average February temperatures at
our closest major weather station for the last 64 years. (We're
actually a zone colder than them, but the trends are mostly the same
here.) Isn't it interesting to see that January 2012 is only the
13th warmest year during that time period?
This post is in no way
related to global climate change, in case you're curious. No
single data point (and no comparison to the past 64 years) proves
anything in that respect. My thesis is --- our weather is always
erratic, so enjoy the crocuses when they come! I transplanted
some of our little beauties into our forest
garden island so I
can watch them out the kitchen window. I suspect no one else gets
so much mileage from a few little bulbs.
 The
Practical Beekeeper: Beekeeping Naturally
by Michael Bush is the epitome of a self-published book. (Yes, I
do include my 99 cent ebooks in this category.) The text is chock
full of very good information that you can't find anywhere else, but is
definitely a bit rough around the edges.
The
Practical Beekeeper: Beekeeping Naturally
by Michael Bush is the epitome of a self-published book. (Yes, I
do include my 99 cent ebooks in this category.) The text is chock
full of very good information that you can't find anywhere else, but is
definitely a bit rough around the edges.
First of all, the author
is up front about the fact that the majority of the information can be
found for free on his website.
I've spent years dipping into his informative website and was quite
willing to pay a bit of money to have that information distilled into a
more linear format.
Unfortunately, I felt
like he didn't distill all that much.
There's no index, and the book is divided into beginner, intermediate,
and advanced sections, each of which covers most of the same topics in
different degrees of depth. So, to find out what Bush thinks
about strains of bees, I had to read the entire table of contents and
then flip through three different sections of the book. I even
noticed a few paragraphs that were included, verbatim, in multiple
sections.
Meanwhile, the book is
hardcover and large print, which means it's
hefty and sells for the scary price of $49. In retrospect, I
might have been better off with the ebook ($29 on his website) since
the photos are black and white and only moderate quality (meaning they
wouldn't lose anything by being viewed in eink.)
Whichever format you
choose, though, I highly recommend The Practical
Beekeeper to any intermediate beekeeper who's struggling to navigate
the maze of creating a chemical-free apiary. The book appears
daunting, but is actually an easy read and will definitely open your
eyes to
concepts you'd never considered.
| This post is part of our The Practical Beekeeper lunchtime series.
Read all of the entries: |
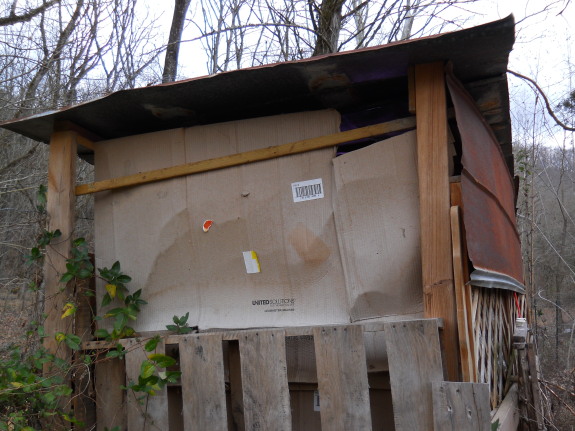
It's been almost a year since
I used some scrap cardboard to block the wind in the used
pallet chicken coop.
There's no direct sun, and
the roof keeps it dry.
I'd say it's holding up
pretty good. I can notice some slight fading, but it seems to have
years left in it as an effective barrier.
 My kitchen
forest garden island
gets all the love while the peach tree just one year younger is out of
sight and out of mind. No wonder my favorite peach's younger
sister has a canopy spread barely half the width of my darling kitchen
peach.
My kitchen
forest garden island
gets all the love while the peach tree just one year younger is out of
sight and out of mind. No wonder my favorite peach's younger
sister has a canopy spread barely half the width of my darling kitchen
peach.
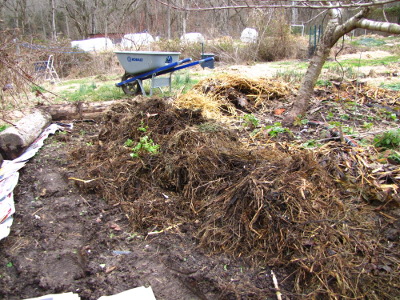
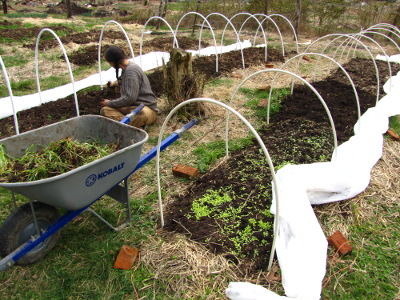
I decided to begin to
remedy matters by expanding the little sister's raised bed. I
wheelbarrowed some partially decomposed weeds from the compost pile in
the chicken pasture to line one of the bed's edges, then added another
wheelbarrow load
of deep bedding,
lightly sprinkled atop the soil all around.
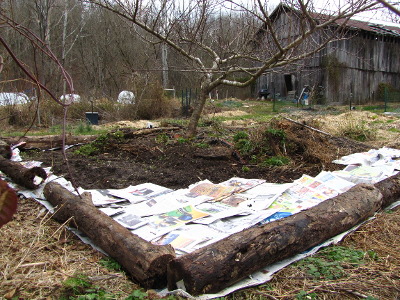 Meanwhile, I ripped up the mushroom
rafts (which I wasn't very pleased with) and rearranged the aging
logs in a big square around the peach. A friend and I weeded the
areas that were mulched last year, then I laid down a newspaper kill
mulch atop the parts of the square that were lawn. (I would have
preferred corrugated cardboard to newspaper, but you have to use what
you've got. Mom kindly saved all of these newspapers to be
firestarters, and I never ended up burning them since I had too much
junk mail.)
Meanwhile, I ripped up the mushroom
rafts (which I wasn't very pleased with) and rearranged the aging
logs in a big square around the peach. A friend and I weeded the
areas that were mulched last year, then I laid down a newspaper kill
mulch atop the parts of the square that were lawn. (I would have
preferred corrugated cardboard to newspaper, but you have to use what
you've got. Mom kindly saved all of these newspapers to be
firestarters, and I never ended up burning them since I had too much
junk mail.)
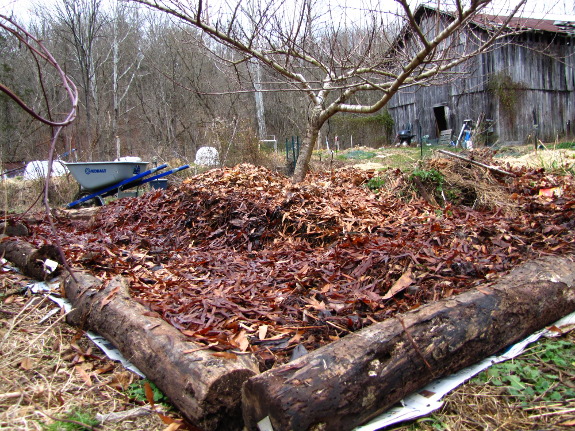
Finally, I topped it all
off with leaves and promised little sister peach to pay more attention
to her needs. With fruit trees, you don't really see the full
results of your actions until two seasons later, so I'll be waiting for
baskets of peaches in the summer of 2013.
 PJ Chandler argued that the
Langstroth hive is the root of many of the problems currently facing
beekeepers.
Michael Bush agrees that honeybees are in trouble, but instead traces
the ills to:
PJ Chandler argued that the
Langstroth hive is the root of many of the problems currently facing
beekeepers.
Michael Bush agrees that honeybees are in trouble, but instead traces
the ills to:
- Raising sickly bees.
Bush argues that the modern methods of pouring chemicals into the hive
to keep pests at bay ends up selecting for resistant super-pests...and
for wimpy bees that wouldn't be able to survive without
chemicals. In addition, since most honeybees now come from only a
few beekeeping companies, we've restricted the gene pool so much that
we're raising only a few inbred strains of bees, none or few of which
have the ability to live in a chemical-free hive. These bees have
also been bred to use less propolis, which might make it easier for the
beekeeper to pry the hive apart, but also makes allows viruses
to thrive among the bees.
 Using foundation that makes
bees sick.
I've written before that using foundation in
your hive makes your bees
create larger celled comb than they naturally would, which helps out
varroa mites. But did you know that the foundation you put in
your hive is processed beeswax from someone else's hive...who almost
certainly treated with lots of chemicals? The wax is impregnated
with pesticides, which causes drones raised on that foundation to be
less fertile and queens who mate with those drones to fail nine times
faster than a healthy queen would.
Using foundation that makes
bees sick.
I've written before that using foundation in
your hive makes your bees
create larger celled comb than they naturally would, which helps out
varroa mites. But did you know that the foundation you put in
your hive is processed beeswax from someone else's hive...who almost
certainly treated with lots of chemicals? The wax is impregnated
with pesticides, which causes drones raised on that foundation to be
less fertile and queens who mate with those drones to fail nine times
faster than a healthy queen would.- Upsetting the natural ecology of
the hive.
A healthy hive isn't just a couple of thousand bees; it also
includes beneficial fungi, bacteria, yeasts, mites, and insects.
It's helpful to think of a bee hive as a bit like our stomachs --- the
beneficial critters help "digest" (ferment) pollen while keeping the
hive from getting sick by crowding out pathogens. Using chemicals
in the hive is like taking antibiotics every day --- you kill the good
microorganisms along with the bad, so the system doesn't work as
well. In addition, feeding sugar water (pH 6.0) instead of
leaving bees enough honey (pH 3.2 to 4.5) creates an enironment that
helps the pathogens thrive.
Michael Bush's solutions --- while they can be hard to implement ---
are very simple. He says we have to stop using chemicals in our
hives, even if that means many of our colonies die and only the strong
remain. Deleting foundation allows bees to build clean wax at a
natural cell size. And we must make sure that our bees always
have enough honey rather than stealing too much and then feeding sugar
water. More on the specifics of his beekeeping method in
tomorrow's post.
| This post is part of our The Practical Beekeeper lunchtime series.
Read all of the entries: |
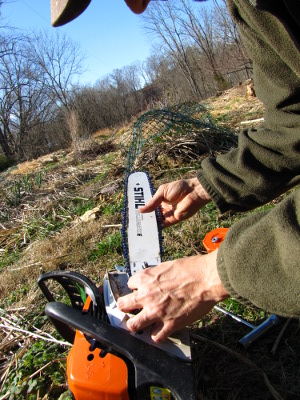
I forget where I read about running a chainsaw with the bar upside down.
The logic is that the bar
will wear more evenly if you flip it every so often.
My system is to make the swap
each time I install a new or machine sharpened chain.

One of the best things
about leaves as mulch is that they're totally free. If you live
in town and pay attention, you can probably snag bags of leaves off the
curb on trash day during the fall. But if you're a rural dweller
like me, you'll want to head into the woods to find your mulch.
 One of the primary
purposes of mulch in the garden is to prevent weeds from growing, so
it's essential that you rake leaves from weed-free areas. Mature
forests (or yard trees over manicured lawns) are your best bet --- our
younger forest areas are home to the invasive Japanese stilt grass, which I
don't want to introduce into my garden.
One of the primary
purposes of mulch in the garden is to prevent weeds from growing, so
it's essential that you rake leaves from weed-free areas. Mature
forests (or yard trees over manicured lawns) are your best bet --- our
younger forest areas are home to the invasive Japanese stilt grass, which I
don't want to introduce into my garden.
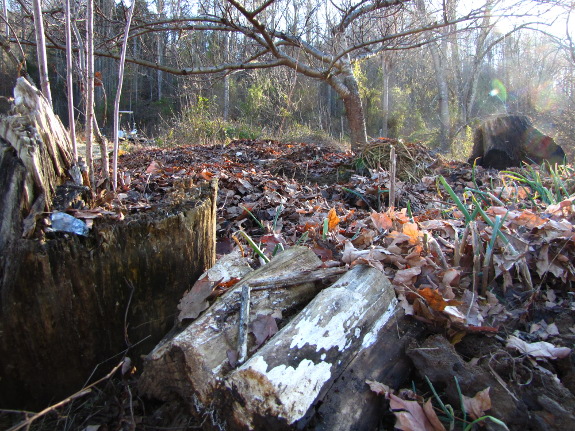
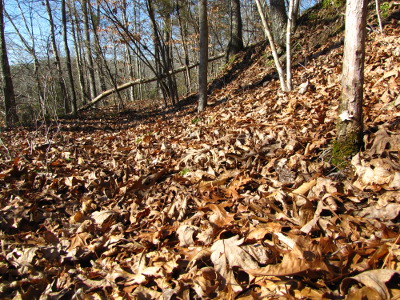
Look for dips in the
landscape and areas without a lot of understory growth for easiest leaf
harvests. The old logging road shown here tends to accumulate
leaves drifting down the hill, making it easy for me to scoop them up.
If you're able to drive
right to your leaf-gathering location, you'll probably choose to use a 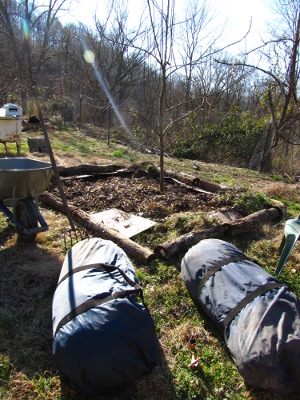 leaf rake and some sort of
bin to gather leaves. But if you're walking off the beaten path,
I've found it easiest to simply scoop leaves with my hands into large
duffel bags, compacting the leaves frequently so you get the most
leaves per trip. To save your back, gather leaves during dry
weather. (Wet
leaves are heavy.)
leaf rake and some sort of
bin to gather leaves. But if you're walking off the beaten path,
I've found it easiest to simply scoop leaves with my hands into large
duffel bags, compacting the leaves frequently so you get the most
leaves per trip. To save your back, gather leaves during dry
weather. (Wet
leaves are heavy.)
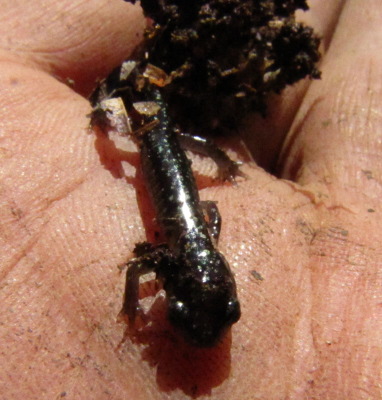
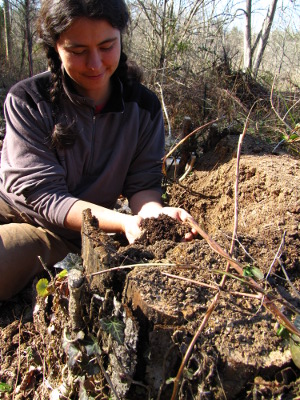
The partially decomposed
duff beneath this year's leaves might be worth harvesting too, as long
as you don't mind creating a slight erosion potential in the spot where
you stole the leaves. Duff is heavier than undecomposed leaves,
which means it's less likely to blow away in the garden, and it is
often full of beneficial mycorrhizae which will boost the growth of
your garden plants. However, if you delve into the duff, try to
pay attention and don't harm the critters living there --- I moved this
tiny salamander to the side with a handful of humus and covered him
back over so he wouldn't dry out.
More in a later post
about the best ways to use leaf mulch in the garden. Meanwhile,
what tips would you add about leaf harvest?
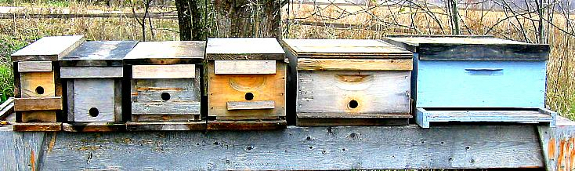
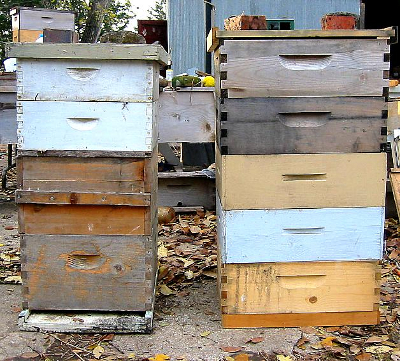 So what does Michael Bush's
apiary look like? In some ways it's quite traditional --- he
mostly uses Langstroth hives and equipment from mainstream beekeeping
companies. However, he has made a few changes:
So what does Michael Bush's
apiary look like? In some ways it's quite traditional --- he
mostly uses Langstroth hives and equipment from mainstream beekeeping
companies. However, he has made a few changes:
- His boxes are all 8 frame mediums. Since the frames are all the same size, he can move honey and brood around if necessary and can allow an unlimited brood nest. In addition, the smaller boxes are about half the weight of a 10 frame deep, which makes his life much easier. The only downside is cost --- getting started requires nearly twice as much capital with Bush's method.
- He uses foundationless frames. As I've said over and over, foundationless frames help reduce varroa mite problems. In addition, you don't have the cost of buying foundation, the time drain of installing it, and the problematic chemicals that get carried into your hive from someone else's. Although we had a collapse after extracting honey from deep foundationless frames, you won't have problems if you stick to mediums or if you cut and crush.
 He uses top entrances only.
Bush has plugged up his bottom entrances so that his bees go in and out
entrances in the top of the hive. Top entrances means he doesn't
need to worry about mowing around hives or about snow covering the
entrance in the winter. Mice are much less prone to sneak in a
top entrance, and he sees fewer problems from skunks and other pests
too. Finally, top entrances provide good ventilation and, when
combined with a layer of styrofoam on top of the hive, lead to little
winter condensation.
He uses top entrances only.
Bush has plugged up his bottom entrances so that his bees go in and out
entrances in the top of the hive. Top entrances means he doesn't
need to worry about mowing around hives or about snow covering the
entrance in the winter. Mice are much less prone to sneak in a
top entrance, and he sees fewer problems from skunks and other pests
too. Finally, top entrances provide good ventilation and, when
combined with a layer of styrofoam on top of the hive, lead to little
winter condensation.
- He doesn't treat hives.
Except in rare cases, Bush doesn't add any chemicals to the hive.
Even "organic" treatments like thymol
aren't generally on his agenda since these chemicals will kill
beneficial microorganisms in the hive.
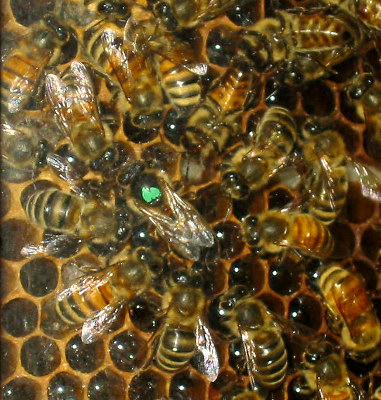
- He breeds locally adapted queens.
Rather than buying new queens, Bush raises his own. But even with
these queens on hand, he doesn't requeen a hive unless absolutely
necessary --- for example, if the hive is failing while others are
thriving, or if the bees turn mean. Generally, his queens live to
be about three years old and then are naturally replaced by supersedure.
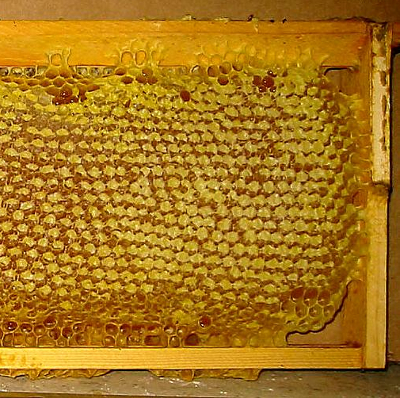 He feeds only honey
(usually.) In general, Bush tries to ensure that his bees have
enough of their own honey to make it through the winter. If he
has to feed, he usually feeds honey, but will sometimes feed dry sugar
in a pinch.
He feeds only honey
(usually.) In general, Bush tries to ensure that his bees have
enough of their own honey to make it through the winter. If he
has to feed, he usually feeds honey, but will sometimes feed dry sugar
in a pinch.
- He doesn't scrape anything out of the hive. Bush believes that the burr comb that is sometimes built between boxes is good because it lets you check for mites on drone pupae as you pull it apart, and the intact burr comb gives bees a ladder to climb from box to box. He doesn't cut out swarm cells, instead doing his best to prevent swarms naturally, then splitting hives to raise new queens if he misses the boat and swarm cells do materialize. He also doesn't scrape off propolis, since he believes this processed bee sap kills pathogenic bacteria and viruses in the hive.
Michael Bush's goal is
two-pronged --- he wants to raise bees that don't need chemicals to
stay alive, and he wants his apiary to be as little work as
possible. Those sound like laudable permaculture ambitions to me.
| This post is part of our The Practical Beekeeper lunchtime series.
Read all of the entries: |
Our neighbor's bees have been
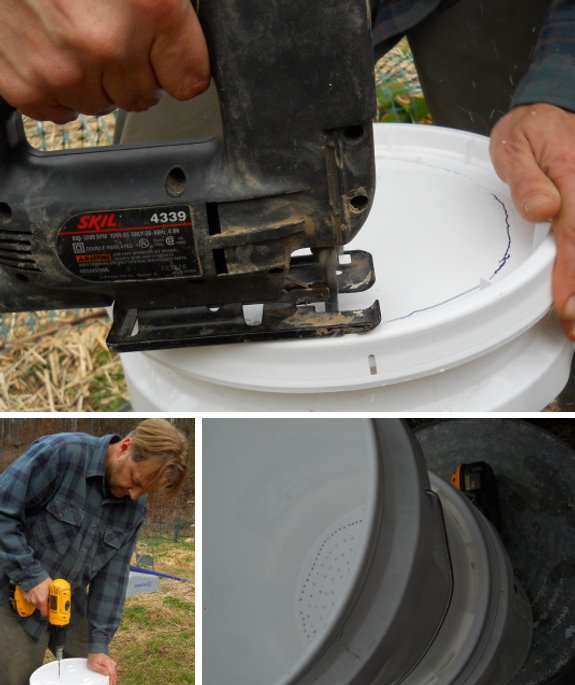
busy stealing honey from our two hive boxes, so we decided it's time to
build a 5 gallon bucket honey strainer.
The food grade buckets are
more expensive, but worth it for a project like this.
Stay tuned for a full report
on how this method works for straining out the wax.
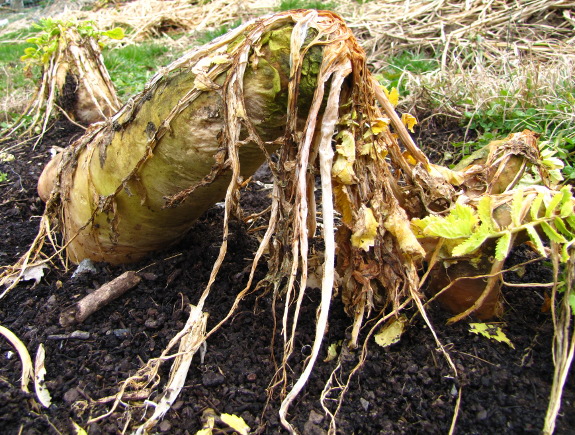
When I first read about oilseed
radishes, the only
negative report claimed that the cover crop stinks to high heaven when
rotting in the spring. I haven't noticed any odor at all from my
decaying oilseed radishes, but their dead bodies do catch the eye with
their striking poses.
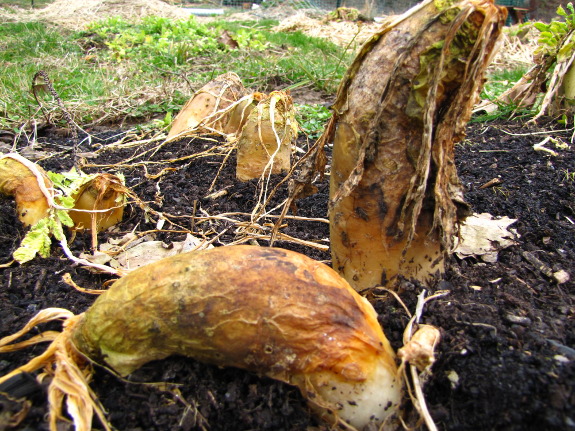
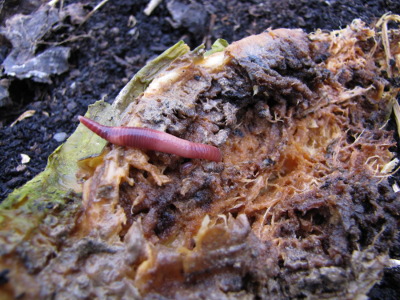 Once
they rot just a bit more than is shown in the two photos above, the
radishes also catch the attention of the local worms. I broke one
radish in half and was surprised to see this earthworm tunneling
through the decaying center.
Once
they rot just a bit more than is shown in the two photos above, the
radishes also catch the attention of the local worms. I broke one
radish in half and was surprised to see this earthworm tunneling
through the decaying center.
Worm action is probably
the reason these huge roots disappear into the soil so quickly.
I'll be able to plant into these beds without raking much of anything
to the side in just a few weeks, and the soil will be improved by up to
a quarter of a pound of dry organic matter per square foot --- not a
bad yield for tossing down a couple of cents' worth of seeds last fall.
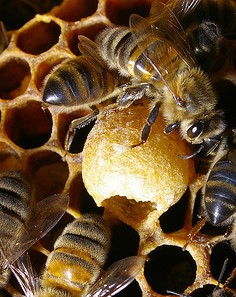
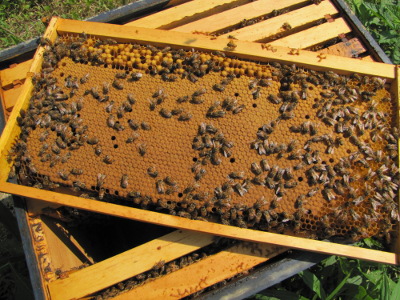
 In nature, a healthy, mature
hive tries to swarm at least once every year. As soon as the
first flowers open, the bees scurry to gather nectar and pollen, which
tempts the queen to lay a lot of eggs and to hatch out plenty more
workers. At a certain point, the hive is getting crowded, and the
bees start filling up the brood nest (where eggs are usually laid) with
honey and pollen. These two conditions --- lots of bees in a
small space and a brood nest full of food --- change something in the
hive mentality, and they decide it's time to make some new queens.
In nature, a healthy, mature
hive tries to swarm at least once every year. As soon as the
first flowers open, the bees scurry to gather nectar and pollen, which
tempts the queen to lay a lot of eggs and to hatch out plenty more
workers. At a certain point, the hive is getting crowded, and the
bees start filling up the brood nest (where eggs are usually laid) with
honey and pollen. These two conditions --- lots of bees in a
small space and a brood nest full of food --- change something in the
hive mentality, and they decide it's time to make some new queens.
Once queen larvae are
developing in the hive, the old queen knows it's time to move on.
She gathers up about 60% of her workers and flies away to another nest
site, leaving the rest of the workers behind to care for the developing
queens. Eventually, the new queens hatch, and one usually kills
off the others before settling in as a new matriarch of the old hive.
From the perspective of
a bee, swarming is an effective method of reproduction. In
addition, the gap in brood rearing between when the old queen leaves
and when the new queen starts to lay tends to break many disease cycles
in the old hive. However, beekeepers generally want to prevent
swarming since a hive that swarms rarely produces much honey.
 Swarm prevention begins with
keeping the brood nest from becoming congested during the first nectar
flow. Michael Bush adds supers as necessary so the bees have
plenty of room to dehydrate nectar. However, supering alone is
not enough, so he also opens up the brood chamber by putting one empty
frame after every two frames of brood. A different beekeeper,
Walt Wright, uses a less invasive method called checkerboarding, which
consists of alternating frames of capped honey with drawn (but empty)
frames in the box above the brood nest.
Swarm prevention begins with
keeping the brood nest from becoming congested during the first nectar
flow. Michael Bush adds supers as necessary so the bees have
plenty of room to dehydrate nectar. However, supering alone is
not enough, so he also opens up the brood chamber by putting one empty
frame after every two frames of brood. A different beekeeper,
Walt Wright, uses a less invasive method called checkerboarding, which
consists of alternating frames of capped honey with drawn (but empty)
frames in the box above the brood nest.
If you didn't get around
to managing the hive and you see queen cups already built, you'll have
to move on to the second phase of swarm prevention. No, don't cut
out those queen cups --- once the bees have decided to swarm, they'll
just build them again. Instead, take each frame with a queen cup
on it and start a "nuc" --- a small, new hive --- with an extra frame
of honey to tide the bees over. More tomorrow on how to handle
nucs, but for now just understand that each of these little hives can
be raised into a new hive to expand your apiary. As long as you
open up the brood  nest at the same time you
create the nucs, the bees should think they've already swarmed and will
get back to work making honey for your larder.
nest at the same time you
create the nucs, the bees should think they've already swarmed and will
get back to work making honey for your larder.
The flip side of the
swarming coin is that the behavior creates an opportunity for
beekeepers to get started with no outlay of cash. This spring, I
may follow Bush's advice and ask police and rescue dispatchers and the
local extension agent to contact me when they hear about swarms.
More on how to catch a swarm when I've put some of my readings into
practice.
| This post is part of our The Practical Beekeeper lunchtime series.
Read all of the entries: |
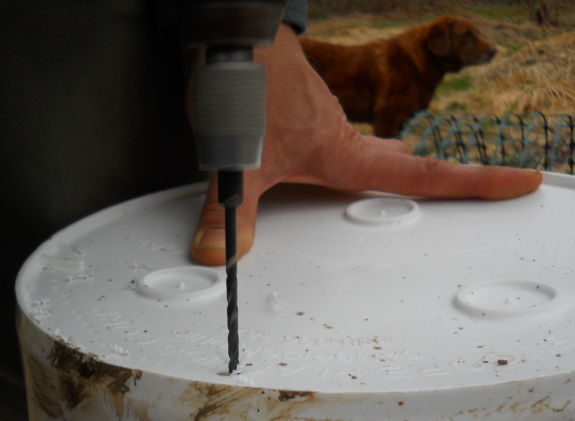
Drilling holes in a bucket
from the outside presented a problem.
Plastic hanging chads.
Sanding them off while
reaching into the 5
gallon bucket honey strainer is awkward. I wished I had tried to
drill the holes from the inside now, it may have made the clean up
process easier.
 My friend Heather has been
giving me great editing feedback on my
book, and she
brought up an interesting point in response to my chapter about scavenging
biomass.
Heather asked:
My friend Heather has been
giving me great editing feedback on my
book, and she
brought up an interesting point in response to my chapter about scavenging
biomass.
Heather asked:
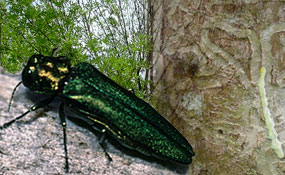
When we go camping on the eastern shore there are all these signs about not bringing in firewood from certain counties because the wood might carry in different bugs.
I'm sure it's OK because you do it, but why is it OK? Are there things that people shouldn't do in terms of moving around biomass so they don't spread / introduce pests?
Despite Heather's belief that I can do no wrong, she's got an excellent point, and one I hadn't even considered in the context of the garden. Many states prohibit you from moving firewood far (often limiting transport to 50 miles or less) since invasive diseases and insects can come along for the ride and infect areas that used to be safe from their depradations. I can see how moving tree leaves from place to place might present a lower but still real risk.
 In general, I've read that
you shouldn't worry much if you're moving biomass ten miles or less
since an insect might fly that far on its own on a gusty day.
And, of course, processed biomass like cardboard or coffee grounds are
unlikely to host pests.
In general, I've read that
you shouldn't worry much if you're moving biomass ten miles or less
since an insect might fly that far on its own on a gusty day.
And, of course, processed biomass like cardboard or coffee grounds are
unlikely to host pests.I'm also careful, when gathering leaves, to steer clear of areas with invasive herbaceous species, since I don't want seeds of garlic mustard or Japanese stilt grass to germinate in my garden. This problem is probably less thorny, though, since even the most lackadaisical gardener is likely to notice invasive plants before they can make their way into adjacent woodland.
What would you add to those warnings?
Our chicken waterer provides clean water for day
old chicks, broody hens, and your main flock.
One of the main thrusts
of Michael Bush's book is --- backyard beekeepers of every experience
level need to be breeding homegrown bees. With diseases and pests
wiping out colonies left and right, we can't risk narrowing the gene
pool by letting a few big companies breed all of our queens, and we
shouldn't even use our single favorite queen as the mother of every new
hive in our apiary. Meanwhile, we should try to include the
survivor genetics of feral bees, letting our queens mate with wild
drones and allowing queens of captured swarms to maintain control of
their colonies.
 But the reproduction of bee
hives is quite complex, as my swarming post probably made
clear. Do we need fancy equipment and a PhD to raise our own
queens? Although Michael Bush does go into some production
methods that felt beyond me, he also mentioned very simple breeding
techniques for those of us who aren't obsessed with maximum
productivity.
But the reproduction of bee
hives is quite complex, as my swarming post probably made
clear. Do we need fancy equipment and a PhD to raise our own
queens? Although Michael Bush does go into some production
methods that felt beyond me, he also mentioned very simple breeding
techniques for those of us who aren't obsessed with maximum
productivity.
Remember how I split my
hive this past spring?
Splitting by the box (one full box of brood in each daughter hive) is
indeed the easiest way to double your number of hives with very little
work. If you put ten deep frames or sixteen medium frames of
brood and honey in each daughter hive, both hives will take off so
quickly that you might be able to split the hives again before the year
is out. Those of you with several hives can take a single frame
of brood and a frame of honey from each of your strong hives and create
a new hive in this manner without setting the parent hives back much at
all.
 Smaller
splits are handy for raising queens --- a useful technique for the more
advanced apiarist who wants to replace ornery or failing queens with
daughter queens from a stronger and nicer hive. For these splits,
Bush recommends having some nucs on hand. Nucs are smaller boxes
--- often just big enough to hold two, three, four, or five frames ---
that keep the workload down for small colonies of bees. You might
put one frame of brood and one frame of honey in a two frame nuc, then
add the tiny colony to a queenless hive once the nuc has raised a
queen. Alternatively, you could put three frames of brood and two
frames of honey in a five frame nuc, then transfer the new colony to a
normal sized brood box to create a new hive once the queen is laying.
Smaller
splits are handy for raising queens --- a useful technique for the more
advanced apiarist who wants to replace ornery or failing queens with
daughter queens from a stronger and nicer hive. For these splits,
Bush recommends having some nucs on hand. Nucs are smaller boxes
--- often just big enough to hold two, three, four, or five frames ---
that keep the workload down for small colonies of bees. You might
put one frame of brood and one frame of honey in a two frame nuc, then
add the tiny colony to a queenless hive once the nuc has raised a
queen. Alternatively, you could put three frames of brood and two
frames of honey in a five frame nuc, then transfer the new colony to a
normal sized brood box to create a new hive once the queen is laying.
When's the best time to
split? Beekeepers have a saying that you can either produce lots
of new hives, or make lots of honey, but not both. If you split
hives before the main nectar flow, the bees can use all those blooms to
create a strong colony that will make it through the winter with no
help from you...but you probably won't be able to harvest any
honey. On the other hand, if you let the parent hive collect lots
of honey during the main nectar flow, then split them, you might end up
having to feed the daughter hives to make sure they have enough winter
stores. As with any other part of beekeeping, you have to decide
how much to focus on the health of the bees, and how much to focus on
your own stomach.
| This post is part of our The Practical Beekeeper lunchtime series.
Read all of the entries: |
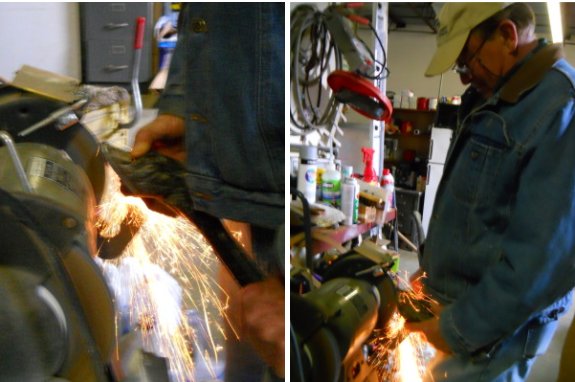
Our friendly, neighborhood
hardware store sharpens dull tools free of charge.
I've never asked the people
at Home Depot or Lowes for this kind of extra service,
but something tells me their store policy would frown on any activity
that produced such a high volume of sparks.
Buying a grinder would cost
somewhere between 50 and 200 dollars, but beware of the steep learning
curve. If you don't do it right you could ruin a good axe or sword.
 Last year, I stumbled through
learning
to incubate eggs to
produce homegrown chicks, so this year I'm ready to put my newfound
knowledge into practice. And to experiment some more, of course.
Last year, I stumbled through
learning
to incubate eggs to
produce homegrown chicks, so this year I'm ready to put my newfound
knowledge into practice. And to experiment some more, of course.
One thing we learned is
to go ahead and start chicks at the right time of year rather than
waiting and hoping that a broody hen will decide to sit on some
eggs. I have high hopes that our Cuckoo Marans will feel
motherly...eventually...but since the pasture will be at its peak in
April, May, and June, I want to have our first chicks struggling out of
their shells at the beginning of March.
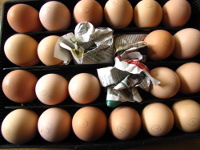
I put 21 eggs in the
incubator, which is as many as will fit laying down on their sides for
hatch. Since that left a bit of room when the eggs sit upright
for the first 19 days, I added newspaper spacers in the center of the
incubator, where hatch
rates have historically been lower.
Mark your calendars for
fluffy cuteness around March 3!

 A month ago, I wrote, "If
editing takes much longer, we'll have
to go back [to Bays
Mountain] for another round of nature meditation."
A month ago, I wrote, "If
editing takes much longer, we'll have
to go back [to Bays
Mountain] for another round of nature meditation."
Editing did take much longer. In fact, I've still got two thirds
of my fourth (and final) polishing round to go before I can give the
manuscript to my publisher.
(Yes, I know it is a little overly obsessive to go through four drafts
before I even give the manuscript to the official editor. There's
something about the permanency of a print book that makes me leery of
letting the least tiny problem slide. On the plus side, the final
product should be something I'm actively proud of.)
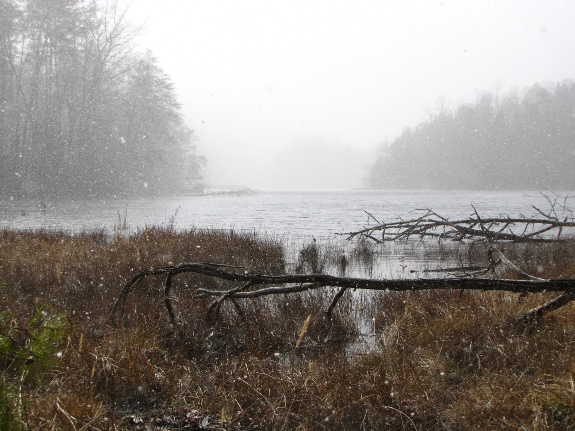
 Meanwhile, Bays Mountain gave
me a very interesting thought problem to take my mind off the
book.
Meanwhile, Bays Mountain gave
me a very interesting thought problem to take my mind off the
book.
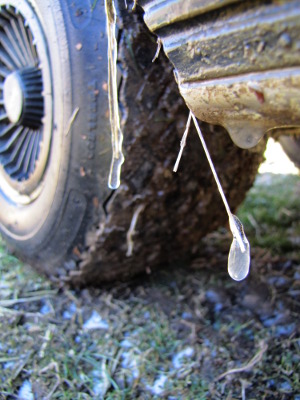
See the dangling tree on
the right side of the photo above? Clearly a beaver had gnawed it
off its feet, but the stump is nowhere to be found. We could see
down to the bottom of the little pond, and there's no pointy stump
beneath its waters, nor is there one anywhere within a ten foot radius.
Any ideas on how a
beaver-gnawed log came to be suspended in the air?
You know you're pushing the golf cart's limits when icicles grow on the
underside between trips.
With lows around 10 last night, the hauling opportunity seemed too good
to pass up.
A frozen driveway allowed us to bring in a week's worth of firewood, 15
bags of leaves for mulch, some chicken
waterer supplies, and a month's worth of chicken feed.
Maybe tomorrow the driveway will stay frozen long enough that we can
haul some straw?
 I read a lot of blogs and
books that talk about water management. The problem is, they're
all tailored toward arid climates, where you need to work hard to
capture any rain that falls and store it in your soil for later dearths.
I read a lot of blogs and
books that talk about water management. The problem is, they're
all tailored toward arid climates, where you need to work hard to
capture any rain that falls and store it in your soil for later dearths.
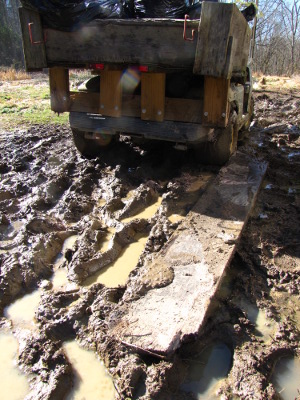
Our water management
issues are very different. The badly eroded soil of the forest
garden becomes so waterlogged that algae grows in puddles even during
the winter. Our gutterless trailer pours so much water off the
sides that the soil is sodden, and simple foot traffic is enough to
turn the ground into a morass.
Meanwhile, our two
creeks are clearly eroding more than they should. The big creek
was straightened by some foolish farmer a few decades ago, and even
though I know channeling it back into its original meander would slow
the flow, I'm afraid to undertake such a huge project.
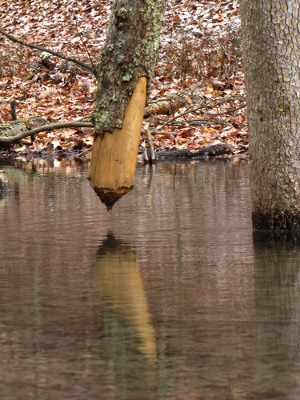
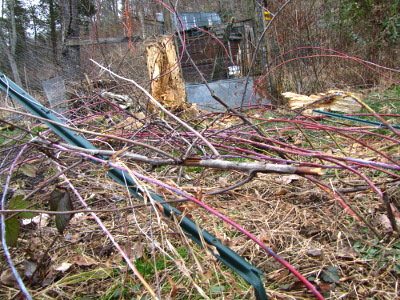
 The
smaller creek has dug itself so deep that that the lower portion has
vegetationless banks four feet tall. As I was gathering leaves in
the woods, I noticed that the tree that had been holding back the
advance of the headcut was losing the battle.
The
smaller creek has dug itself so deep that that the lower portion has
vegetationless banks four feet tall. As I was gathering leaves in
the woods, I noticed that the tree that had been holding back the
advance of the headcut was losing the battle.
I suspect all of these
problems are really opportunities if considered from a permaculture
standpoint. I've been raising up the forest garden with
hugelkultur mounds, and the rotting wood releases enough water a bit at
a time that I was
able to grow tomatoes there without irrigating last summer. Gutters on the East
Wing would clear up the worst path morass, channeling the water into
one of our IBC tanks to allow us to experiment
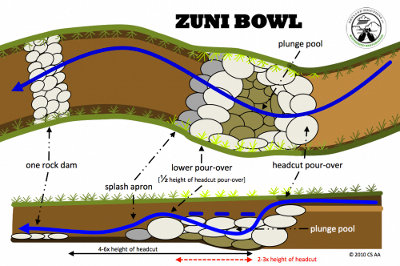
with aquaponics. Maybe the small creek could be mended with a Zuni
bowl and some homemade
meanders. And
one of these days I'd like to create a little pond.
 But I don't want to dive into
any water management project without a bit more information. Do
you have any books you would recommend for permaculture style water
management in wet landscapes? I'm looking for an inspiring print
source that shows how to work with water on a small scale with no heavy
machinery. (You can recommend websites too, but I'm unlikely to
read them deeply --- I have a mental block against getting in depth
information off the internet.)
But I don't want to dive into
any water management project without a bit more information. Do
you have any books you would recommend for permaculture style water
management in wet landscapes? I'm looking for an inspiring print
source that shows how to work with water on a small scale with no heavy
machinery. (You can recommend websites too, but I'm unlikely to
read them deeply --- I have a mental block against getting in depth
information off the internet.)
 I'm
pushing to finish
editing the paper version of Weekend Homesteader, so there's no lunchtime
series this week. However, I don't want you to go into
withdrawal, so I'm giving away Weekend
Homesteader: October
today and tomorrow over on Amazon. Just follow the link and
you'll be able to download it completely free.
I'm
pushing to finish
editing the paper version of Weekend Homesteader, so there's no lunchtime
series this week. However, I don't want you to go into
withdrawal, so I'm giving away Weekend
Homesteader: October
today and tomorrow over on Amazon. Just follow the link and
you'll be able to download it completely free.
Despite the fact that
the four exercises in Weekend Homesteader: October are geared toward
the fall, they're actually quite timely in February. I walk you
through making quick hoops, which are perfect for preheating late
winter soil so you can plant sooner. And I also write about
free biomass, storage vegetables, and living simply.
As always, if you don't
want to mess with Kindle format, you can email
me and I'll reply
with a free pdf copy. And please do tell any friends who might be
interested! I gave away 8,875 free copies of Weekend Homesteader:
August a few weeks ago and would love to beat that record.
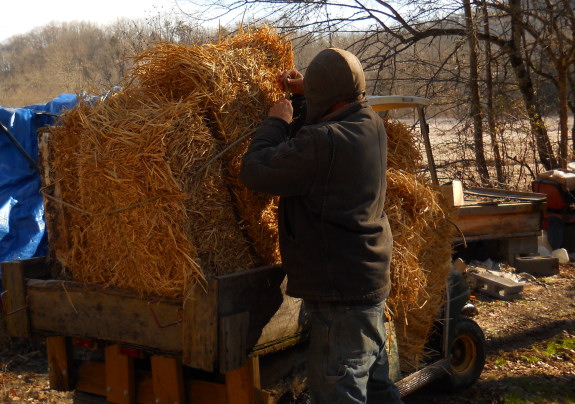
We figured out today that
stacking straw in a vertical fashion on the golf cart allows us
to haul six bales compared to horizontal stacking that only gave us
four.
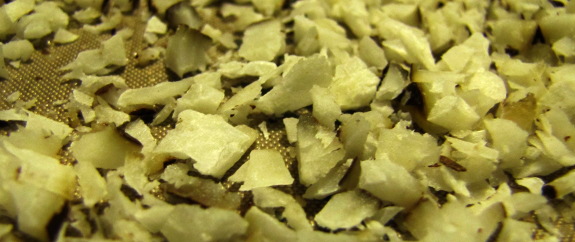
 We made some progress with
our second coconut flour experiment, but we haven't figured it all the
way out yet. Mark had watched a
youtube video that showed how to extract coconut butter by drying
the meat and passing it through a juicer, so we started our experiment
by whirring the coconut meat up in the food processor, then letting it
dry out in the food dehydrator for about eight hours.
We made some progress with
our second coconut flour experiment, but we haven't figured it all the
way out yet. Mark had watched a
youtube video that showed how to extract coconut butter by drying
the meat and passing it through a juicer, so we started our experiment
by whirring the coconut meat up in the food processor, then letting it
dry out in the food dehydrator for about eight hours.
I suspect we made a
mistake when we turned off the dehydrator before supper and didn't get
to the juicing stage until a couple of hours later. In
retrospect, I think the dehydrating step wasn't meant to dry out the
coconut so much as warm it so the oils would flow better. Perhaps
that's why the juicer was only able to extract a moderate amount of oil
from the coconut meat.
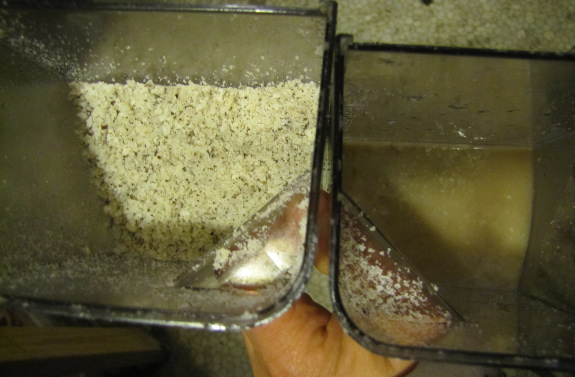
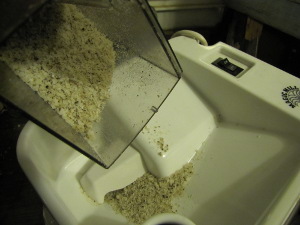
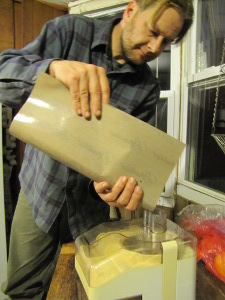
I didn't think the
de-juiced coconut meat was fine enough to bake with, so I passed the
fragments through the MagicMill on its most coarse setting.
Unfortunately, there were still enough oils left in the meat that the
coconut flour gunked up the machine, just
like last time.
Clearly, we need to figure out the extracting step better before we put
the remains through the mill.
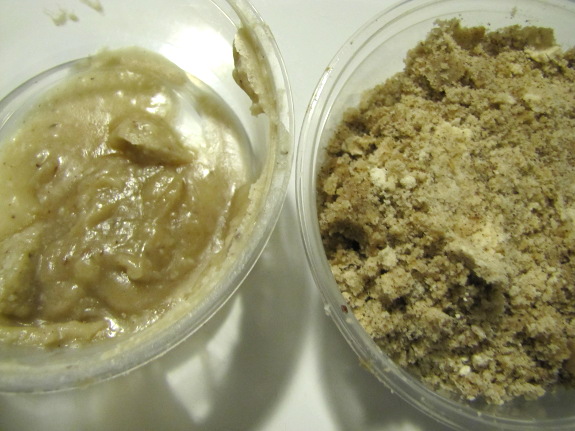
I can tell we're making
progress, though. Look --- coconut butter separated from
something vaguely resembling coconut flour!
Anna and I came to a
Valentine's Day agreement when we started dating.
That first year I asked
"Which would you prefer, a heart shaped box of chocolate, a dozen
roses, or a nice dinner somewhere semi-fancy?"
She thought about it a bit
and said "A heart shaped box implies chocolate should only be for
special occasions, and I need chocolate almost every day. I cringe at
cut flowers and prefer to enjoy them in the ground, and dinner out on a
holiday sounds too crowded for my comfort level."
I was more than relieved to
hear such a practical answer. We decided to start skipping the holiday
and agreed that every day felt like Valentine's Day when you live in
paradise with someone you love.
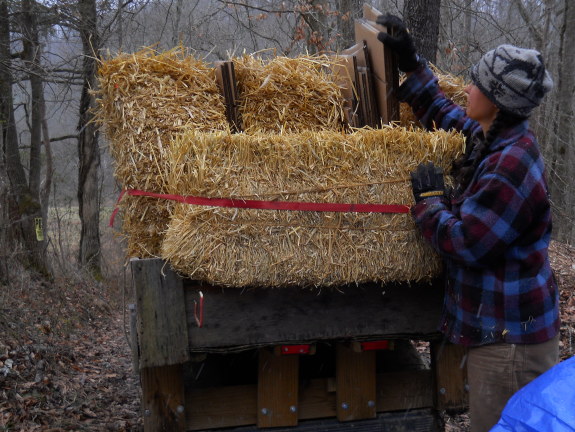
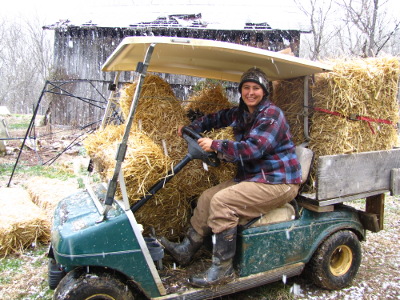
We managed to haul in another
golf cart load of straw this morning before the ground thawed out.
Turns out you can squeeze on 7 bales if you ratchet strap one to the
back like in the photo above.
 Mark is the type of
considerate husband who doesn't post details on the internet when his
wife wrecks the golf cart. So I have to tell you myself.
Mark is the type of
considerate husband who doesn't post details on the internet when his
wife wrecks the golf cart. So I have to tell you myself.
Remember how icicles
were forming on the underside of the golf cart as we hauled in supplies
Sunday? They also started affecting the "gas" pedal. I
didn't realize that was the case until I went to turn the golf cart
around and reversed right through my berry patch, shrieking in terror
the whole way.
It turns out that when
the "gas" pedal sticks in the on position, slamming your foot on the
brakes does absolutely nothing. Yes, I did manage to halfway tear
down one of our 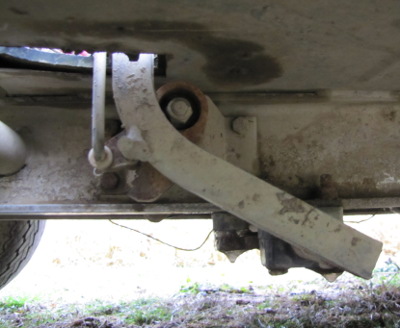 chicken pasture gates at the
same time. Mark considers it an unusual day when I don't break
something and ask him to fix it --- this wasn't an unusual day.
chicken pasture gates at the
same time. Mark considers it an unusual day when I don't break
something and ask him to fix it --- this wasn't an unusual day.
For future reference, if
you drive your golf cart through a creek repeatedly when the
temperature is in the teens, a big lump of ice will form around the
"gas" pedal mechanism. This makes the pedal stick in the on
position, but you can work around it by getting in the habit of pushing
the pedal, then slipping your foot underneath and pulling the pedal
back to "off." If you get really good, you can also push the
"gas" pedal very lightly and have it freeze halfway down, setting the
golf cart on cruise control at a moderate pace.
 I drove like that for three
trips on Sunday and one on Monday, but then my fun came to an abrupt
end. After unloading the golf cart, I headed inside to get a
drink of water, and when I came back out, pressing the "gas" pedal did
nothing. I thought I'd really broken the golf cart that time, and
I could see Mark's dreams of an ATV coming to fruition. Luckily,
when the afternoon sun melted the lump of ice around the pedal
mechanism, the golf cart sprang back to life and she was able to haul
one more load of straw Tuesday morning before the floodplain thawed so
much as to become impassable. I love our alternative farm truck!
I drove like that for three
trips on Sunday and one on Monday, but then my fun came to an abrupt
end. After unloading the golf cart, I headed inside to get a
drink of water, and when I came back out, pressing the "gas" pedal did
nothing. I thought I'd really broken the golf cart that time, and
I could see Mark's dreams of an ATV coming to fruition. Luckily,
when the afternoon sun melted the lump of ice around the pedal
mechanism, the golf cart sprang back to life and she was able to haul
one more load of straw Tuesday morning before the floodplain thawed so
much as to become impassable. I love our alternative farm truck!
(As a final note, will
someone please tell me what the "gas" pedal is called in an electric
vehicle?")
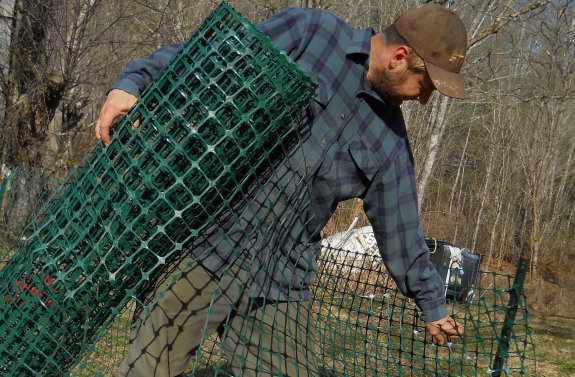
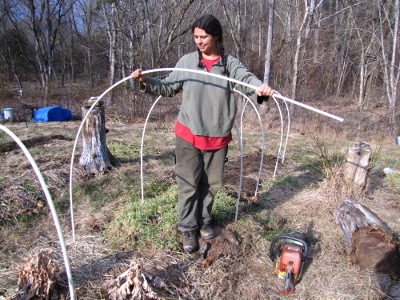
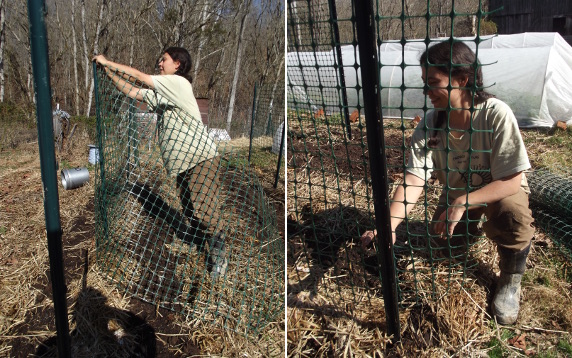
I'm ready to pronounce this plastic,
temporary fence experiment a success.
The put up and take down
procedure is easy and quick.
We've been using this type
of material for a few years now. I remember first getting it during
the 2008 election. There's no sign of U.V. damage yet. I'd guess it
might be another 10 years before we start seeing signs of drying and
cracking. I'll let you know in 2022 if it's still the cat's meow of the
temporary fence world.
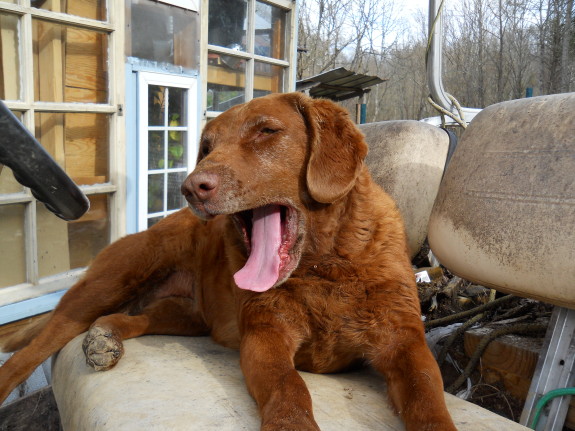
One downside to this material
is the chewability factor. It takes Lucy about a minute to bite her way
through if she really wants to, and thinks nobody is looking. She's
usually a good dog, but has a serious bad girl streak to her when it
comes to kitchen scraps meant for the flock.
Despite the relative
mildness of this winter, the soil
temperature (and
thus the spring garden) is actually a smidge behind last year's
conditions. I suspect that last winter's heavy coat of snow
insulated the soil surface, and that this year's clouds worked in the
opposite direction to make the soil colder than it normally would have
been.
No matter what the
cause, I only planted my first unprotected garden seeds yesterday ---
breadseed poppies. I would normally have planted some early peas
too, but the earth hasn't warmed to 40 degrees yet, so there's no
reason to let my seeds rot in the ground.
Despite the cold spell
this past weekend, lettuce is up and running under the quick
hoops --- I hope to
be able to pick some in two or three weeks. Meanwhile, the onions
I seeded inside came up thickly. About the same time I'm picking
the first spring lettuce, I'll be teasing the seedlings apart and
setting them out in their final garden home.
Why did we choose an electric
golf cart over a gas powered ATV?
We had an old Isuzu 4 wheel
drive truck that may have been in the saddest shape any truck has ever
been in. It was only 400 dollars, and we were short on cash at
the time and thought we could nurse it back to being a decent farm
truck. The problem was our location. Being new in town made it
difficult to coax a mechanic to make a house call, which is what was
needed when the truck broke down in the middle of the driveway.
The country was still
recovering from Hurricane Katrina and fuel prices were reaching record
levels. It felt like we had to get ready for a future where gas would
cost as much or more than what folks in Europe were paying. Maybe I was
reading too much information on Peak Oil speculation. I'm not sure what
to believe when it comes to that subject amymore, and in retrospect the
decision may have been partially based on a fear of running out of
petrol.
I realize if gas prices go
through the roof then electric rates would more than likely follow, but
the plan was to do what several people on the internet were doing which
was to use solar cells to charge the golf cart.
 Another deciding factor was Anna's
comfort level. I was pretty sure the golf cart would be less
intimidating than driving a truck through troubled waters mixed with a
bit of dirt.
Another deciding factor was Anna's
comfort level. I was pretty sure the golf cart would be less
intimidating than driving a truck through troubled waters mixed with a
bit of dirt.
It may have been more
practical to choose an ATV, but sometimes the path less traveled
yields the greatest rewards.
 The manuscript of Weekend
Homesteader is officially done. (Well, until my editor sends
me revisions to look at.) Depending on my technical prowess, the
files will either be winding their way to New York via the internet
today, or taking the slower mail approach on a CD.
The manuscript of Weekend
Homesteader is officially done. (Well, until my editor sends
me revisions to look at.) Depending on my technical prowess, the
files will either be winding their way to New York via the internet
today, or taking the slower mail approach on a CD.
Here are the highlights
of the finished product:
- Days before the actual deadline: 13
- Days after my virtual deadline: 17
- Sleepless nights due to excitement: 5
- Meltdowns due to terror: 2
- Suggested word count from my editor: 60,000 to 150,000
- Final word count: 105,745
- Number of times I read each of those words: 4
- How many times too may was that: 1
- Maximum number of images my editor said I could have: 200
- Number of images I'm sending her: 229
- Most boring part: editing the index the second time
- Most exciting part: adding lots of cool sidebars while imagining proto-Annas propagating their own mushroom spawn on cardboard or using urine to fertilize the garden
- How bored my blog readers are with hearing me natter on about it: I don't know --- you tell me.
Phew! If you asked
me today if I wanted to write another book, I'd say no. But I
suspect by next month I'll already be dreaming about the other ten
projects in my idea notebook.
If you're just tuning
in, you can download the second
drafts of the first ten months on Amazon. Weekend Homesteader:
March is coming out next week, and there will be no Weekend
Homesteader: April since the last few projects are intangibles I
scattered through other months in the print book. The print book will be a full color paperback due out in the fall.
Thanks for bearing with
me!
We decided today was the day to stop ignoring the tangled mess of bent
metal that was once our workshop.
The job called for a hex key
bit, but the closest thing I could find today was a star bit that
seemed to do the job until I stripped out the teeth of the bit.
Taking the main legs apart
along with a few sections of the roof was all it took to make it more
manageable. The metal pieces have a nice powder coating to them, which
might come in handy for a yet unknown future project.

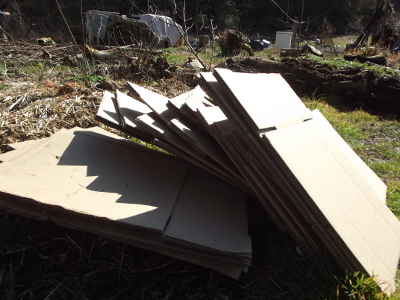 My favorite material for
blocking sunlight and weeds at the bottom of a kill
mulch is cardboard, so I was thrilled when a friend told me he was
getting rid of a lot of cardboard boxes. I've been carrying in
about ten from the parking area each morning when I walk Lucy, but I
used up a whole weeks' worth in about half an hour Friday. That
sent me hunting for other kill mulch bases.
My favorite material for
blocking sunlight and weeds at the bottom of a kill
mulch is cardboard, so I was thrilled when a friend told me he was
getting rid of a lot of cardboard boxes. I've been carrying in
about ten from the parking area each morning when I walk Lucy, but I
used up a whole weeks' worth in about half an hour Friday. That
sent me hunting for other kill mulch bases.
Egg cartons seem to have
a lot of potential in a certain niche. If you open them out, the
bottom half of one carton overlaps the top half of another carton quite
well, although the 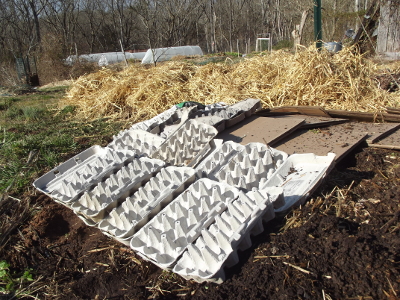 seam between rows is less
secure. I wouldn't want to use egg cartons as a kill mulch if
there were really ornery weeds underneath since the plants would
certainly find that gap.
seam between rows is less
secure. I wouldn't want to use egg cartons as a kill mulch if
there were really ornery weeds underneath since the plants would
certainly find that gap.
That said, I have a
feeling that the cups of the egg carton might capture and hold water,
helping it infiltrate the soil rather than running off. My gut
says that fungi will also like the extra air space left behind when I
top the egg cartons off with mulch. As with my bark kill
mulch, I'll be
waiting to see how the experimental weed blocker works as the growing
season progresses.
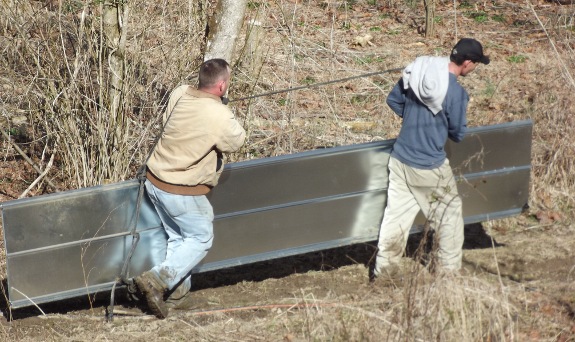
A piece of heavy nylon rope
tied in just the right configuration is how our roofers carried the 14
foot sections of tin for the barn roof today.
 Soon after posting that our
soil was too cold for peas, I stuck the thermometer in
the ground again and got a reading of 39 degrees. Yes, that's
still one degree shy of their minimum germination temperature, but the
ten day forecast (with the exception of today) promises highs in the
fifties to sixties and lows above freezing, so I figured I could risk
it.
Soon after posting that our
soil was too cold for peas, I stuck the thermometer in
the ground again and got a reading of 39 degrees. Yes, that's
still one degree shy of their minimum germination temperature, but the
ten day forecast (with the exception of today) promises highs in the
fifties to sixties and lows above freezing, so I figured I could risk
it.
I've posted before about
how I make my pea
trellises.
These light-weight fence posts combined with the green
plastic trellis material are easy to put up and take
down and look quite elegant in the garden. I do most of the work
myself, but always need to ask Mark to pound in the fence posts.
I've only had two
problems with my pea plantings in recent years. I've learned not
to plant peas in the waterlogged soil of the back garden since they
tend to get root rot. And this year I'm also working harder to
keep all of the soil except for the row where the peas will come up
completely mulched. Last year, weeds grew amid the pea plants
before I pulled the mulch back into place, and when I tried to rip the
weeds out, I removed a few pea vines as well. Luckily, the
partially decomposed straw that mulched the beds over the winter is in
just the right state to sit politely in the middle of the bed without
blowing around and covering up emerging seedlings.
As a final note, if
you're a raw beginner, you might want to check out my posts about soaking
peas, giving extra
soaked peas to the chickens, why
we no longer grow shelling peas, and growing
peas for tendrils.
I'm looking forward to sugar snap peas in May!
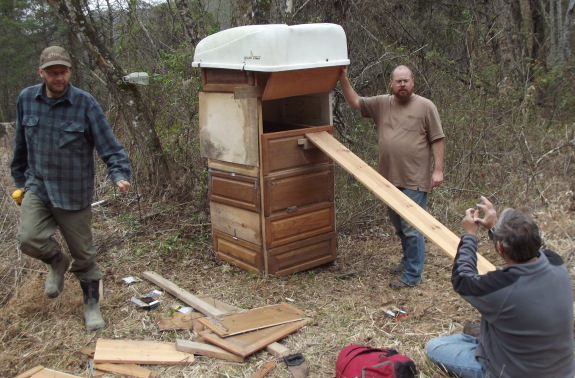
Yesterday we helped Joey
build this mini chicken coop.
It went together pretty fast.
That's an old plastic cargo carrier for the roof.
I think the scrap cabinet
panels give it a nice touch of class.
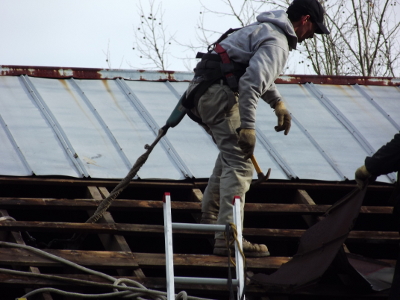
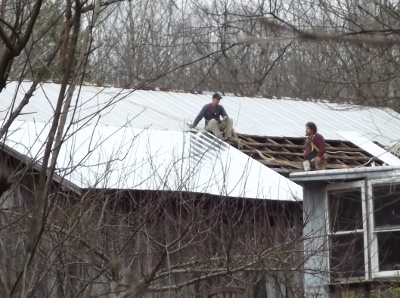
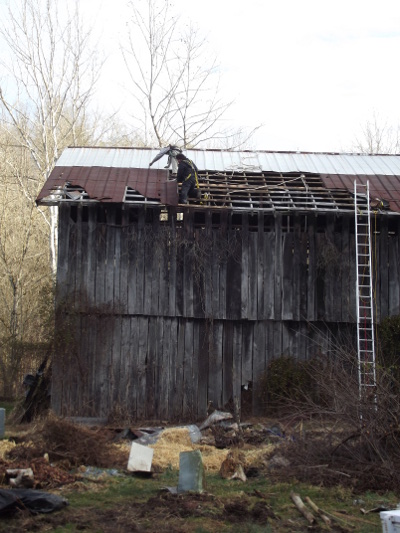 I'll admit that I've wondered
whether hiring someone to
replace the barn roof was a shortcut we shouldn't take, but after
watching the crew of three work from dawn to dusk Saturday, I'm ready
to admit that hiring pros made sense.
I'll admit that I've wondered
whether hiring someone to
replace the barn roof was a shortcut we shouldn't take, but after
watching the crew of three work from dawn to dusk Saturday, I'm ready
to admit that hiring pros made sense.
Within half an hour of
reaching the farm, they'd torn about half the tin off the south side of
the barn and were getting ready to haul
in the first round of roofing panels. I'm pretty sure this
half hour of labor would have taken me and Mark all day if we'd done it
ourselves.
The boss --- Tony --- is
not only a pro, he also has a gentle way of talking to both his crew
and the barn owners that set us all at ease. If you're local and
need a major job done, let me know and I'll give you Tony's phone
number --- we highly recommend him.
 We also really appreciated
the roofers' safety conscious attitude. Mark explained to Tony
right off the bat that we don't have homeowners' insurance. (We
don't have anything valuable enough to insure.) As I brought Tony
a check for the first quarter of his
fee, I overheard him
reminding the crew about safety and telling them to wear their
harnesses at all times.
We also really appreciated
the roofers' safety conscious attitude. Mark explained to Tony
right off the bat that we don't have homeowners' insurance. (We
don't have anything valuable enough to insure.) As I brought Tony
a check for the first quarter of his
fee, I overheard him
reminding the crew about safety and telling them to wear their
harnesses at all times.
We felt so confident in
their abilities that we left after a few hours to spend the day building
my brother's chicken coop. When we came home, it
looked like no one had even sustained a scratch. Then Tony called
down from the roof to ask me to check inside Lucy's mouth. "I
think she might have something stuck there," he explained.
 Sure enough, Lucy's
relentless chewing had lodged a stick across the bridge of her mouth
where she couldn't paw it out, and Tony had been able to spare enough
attention from the roof to notice. He'd actually tried to pry it
out too, but Lucy didn't trust him quite enough to let him do the
deed. Mark and I teamed up on her and made short work of the
offending stick. What other roofer adds "dog baby-sitter" to
their job title?
Sure enough, Lucy's
relentless chewing had lodged a stick across the bridge of her mouth
where she couldn't paw it out, and Tony had been able to spare enough
attention from the roof to notice. He'd actually tried to pry it
out too, but Lucy didn't trust him quite enough to let him do the
deed. Mark and I teamed up on her and made short work of the
offending stick. What other roofer adds "dog baby-sitter" to
their job title?
Before:
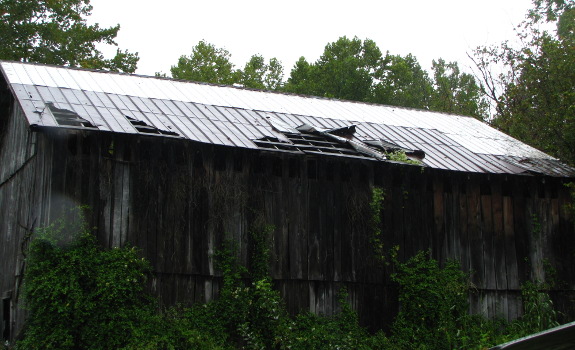
And after:

They've still got about
two days of work ahead of them to hit the more problematic back side of
the barn and the corner of this side. Meanwhile, we need to
decide whether we want to spend another $400 to $500 to get them to put
gutters on the barn while they're at it.
Nothing else will happen
until at least next weekend, though, because it set in to rain
Sunday. The first thing I did after I woke up was to go out into
the barn and look up. On the south side, under the new tin, I was
amazed to hear one of my favorite noises --- rain drops on a tin roof
--- and to be completely dry.
I'm already starting to
ponder how to take advantage of all this new space. Chick
brooder? Straw storage? Work room? Picnic zone?
Right now, I'm having so much fun dreaming, I don't even want to put
pen to paper and draw potential diagrams.
 Embark on a spring
homesteading adventure with this
final volume of
Weekend Homesteader.
You'll plant a garden of cool season crops to feed
you as early as April, and will also inoculate logs with edible
mushrooms for years' worth of feasts. Meanwhile, find out how to
enhance the long term health of your homestead by building a compost
pile and attracting native pollinators.
Embark on a spring
homesteading adventure with this
final volume of
Weekend Homesteader.
You'll plant a garden of cool season crops to feed
you as early as April, and will also inoculate logs with edible
mushrooms for years' worth of feasts. Meanwhile, find out how to
enhance the long term health of your homestead by building a compost
pile and attracting native pollinators.
For those of you who are
new to Weekend Homesteader, this series walks you through the basics of
growing your own food, cooking the bounty, preparing for emergency
power outages, and achieving financial independence.
I hope you'll consider
splurging 99
cents to buy
a copy of my newest ebook from Amazon's
Kindle store. And many
thanks in advance if you can find the
time to write a brief review.
< As usual, I'm also very
glad to email you a free pdf copy to read if you
don't have the spare cash, or just don't want to deal with downloading
an app so you can
read the ebook on your computer or phone. Just email
me with your request --- no strings attached.
As usual, I'm also very
glad to email you a free pdf copy to read if you
don't have the spare cash, or just don't want to deal with downloading
an app so you can
read the ebook on your computer or phone. Just email
me with your request --- no strings attached.
Don't forget that Weekend
Homesteader: February
is
still available, full of information about easy berries, backyard
chickens, buying in bulk, and informal apprenticeships. Thanks
for reading!
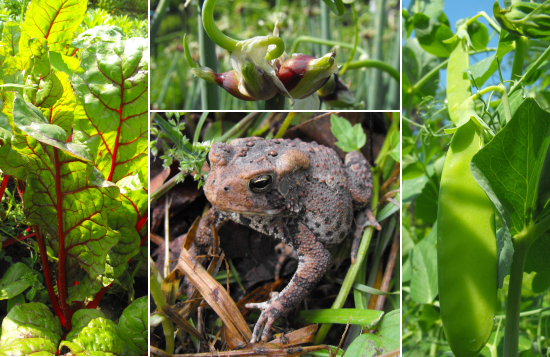
Those of you who have
worked your way through the Weekend Homesteader
projects since May will notice that you've come nearly full
circle. You planted a simple summer garden and learned how
season extension can make the fall
garden produce deep
into the winter
months. Now it's time to begin round two, starting the garden
year a bit sooner so that you can taste homegrown produce as early as
April.
Before diving into this week's project, you may want to refresh your
memory by perusing Weekend
Homesteader: May
(the basics of no-till
gardening), Weekend
Homesteader: October
(simple season extension), and
Weekend
Homesteader: November
(garden rotation). But don't get
bogged down if you're just tuning into the series. Your spring
garden could be as simple as a lettuce bed, thrown together in a
few minutes and enjoyed just as thoroughly.
This
week's lunchtime series is excerpted from Weekend
Homesteader:
March. I saved some of my favorite projects for last, so I
hope
you'll splurge 99 cents to read about growing edible mushrooms,
composting, and attracting native pollinators. And, of course,
the ebook has the full spring planting chapter in case you just can't
wait to read each installment at noon this week.
| This post is part of our Spring Planting lunchtime series.
Read all of the entries: |
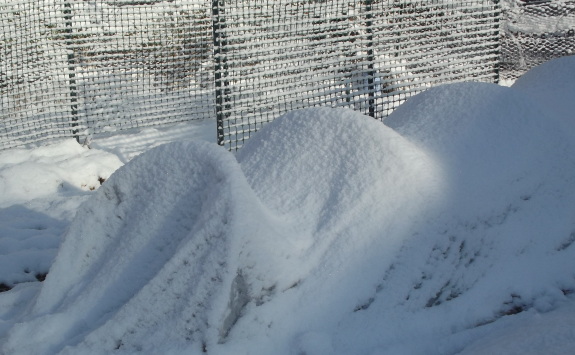
Our quick
hoops took some small
damage last night when a moderate snow load started weighing down the
fabric and pulling up one of the stakes.
It might be necessary to
decrease the gap between supports so it can handle the snow.
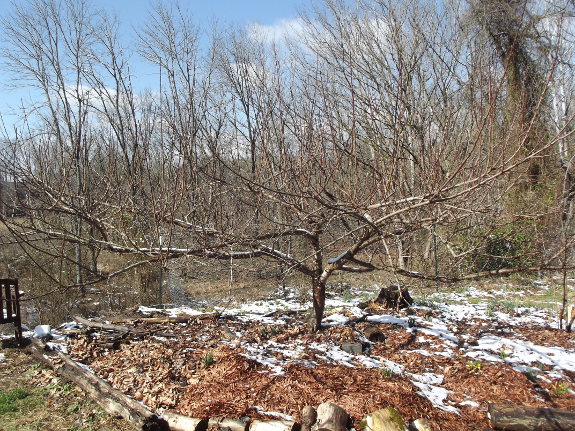
I plan to write an ebook
about pruning...in 5 to 10 years. So far, I feel like I've gotten
the hang of training and pruning
young peaches to the open center system, and this year I'm
experimenting with maintenance pruning a mature peach.
That's right, after five
years of selecting scaffolds and weighing down limbs to get optimal
branching angles, our kitchen peach is fully grown. I didn't
train her at all this year, just pruned out crossing branches, snipped
the tops off watersprouts, and cut back a few branches that had
overgrown the path.
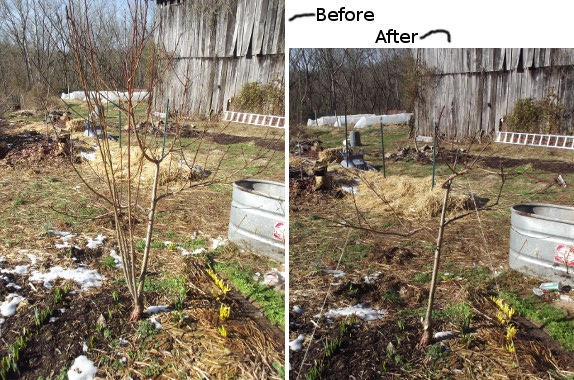
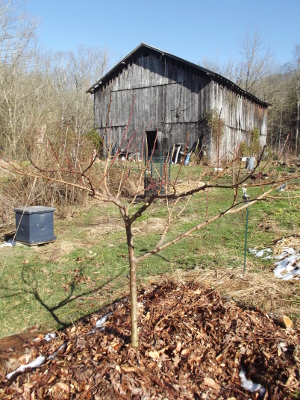 Our younger peaches needed
more TLC. The one above should have gotten a bit more love over
the summer since the watersprouts coming up from the rootstock made the
main trunk lean. Except for removing the watersprouts, I barely
did any cutting, focusing on training my scaffold branches
instead. Remember --- the more you can train instead of prune,
the fewer watersprouts you'll have next year and the faster your tree
will achieve maturity.
Our younger peaches needed
more TLC. The one above should have gotten a bit more love over
the summer since the watersprouts coming up from the rootstock made the
main trunk lean. Except for removing the watersprouts, I barely
did any cutting, focusing on training my scaffold branches
instead. Remember --- the more you can train instead of prune,
the fewer watersprouts you'll have next year and the faster your tree
will achieve maturity.
I'll be pruning and
training our apples, pears, and plums tomorrow. Meanwhile, I need
to decide what to do with all of the pruned off peach branches.
Official sources tell you to burn them to cut back on diseases and
pests, but I'm itching to use the organic matter. What do you do
with your pruned off branches?
The
main difference between planting in early spring as opposed to
after the frost-free date is soil temperature --- cold ground makes
seeds rot before they sprout. Luckily, there are several methods
of heating up the soil, ranging from the simple to the complex.
Add dark organic matter. You've probably noticed how wearing a black shirt in the sun heats your body up quickly. You can put the same science to work in the garden by topdressing your beds with a layer of dark-colored organic matter. Good compost, well-rotted manure, or even biochar can work. For more extreme soil preheating, you can lay down a dark sheet of plastic on the soil, but be aware that this technique can kill soil microorganisms.
Erect a quick hoop. The
quick hoops you built in October are easy to move to a fresh plot
of
land to create mini-greenhouses on top of your spring beds.
Putting up a quick hoop a week or two before planting can warm the soil
by several degrees.
You probably noticed that each of these techniques shares two factors
--- sun and time. Your soil will naturally warm up as spring
advances; you're just trying to expedite the process so you can
jumpstart the garden year. To eat from your garden as soon as
possible, combine
all three methods and plant seeds as much as three months before your
frost-free date.
This
week's lunchtime series is
excerpted from Weekend
Homesteader: March. I saved some of my favorite
projects for last, so I hope you'll splurge 99 cents to read about
growing edible mushrooms, composting, and attracting native
pollinators. And, of course, the ebook has the full spring
planting
chapter in case you just can't wait to read each installment at noon
this week.
| This post is part of our Spring Planting lunchtime series.
Read all of the entries: |

This wild plum tree was here
before we moved in.
Year after year we kept
checking for yummy plums and found none.
2012 is the year we decided
to give up and make room for something new.
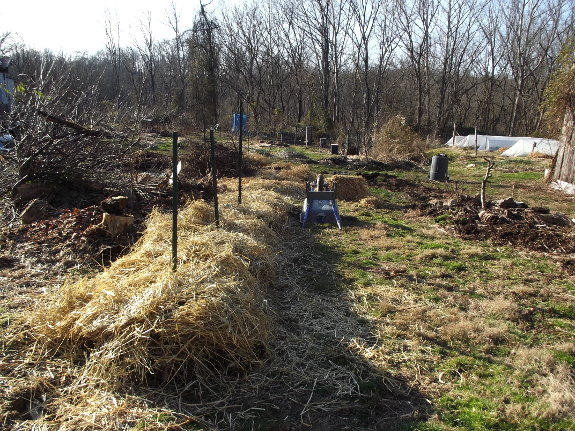
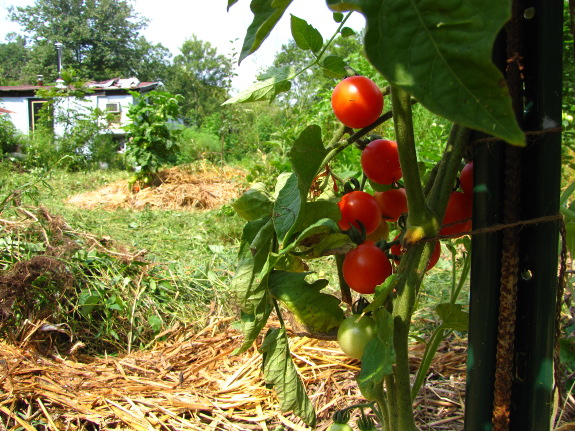 In an effort to prevent
myself from ignoring
the forest garden again this year and letting it turn into a weed jungle, I'm making a lot of changes.
In an effort to prevent
myself from ignoring
the forest garden again this year and letting it turn into a weed jungle, I'm making a lot of changes.
The first step is to
incentivize working in the forest garden during the growing
season. To that end (and because our tomatoes did so well there
last year), I'm making lots of new beds to plant tomatoes and butternut
squash into. You can see part of this year's tomato alley at the
top of the page.
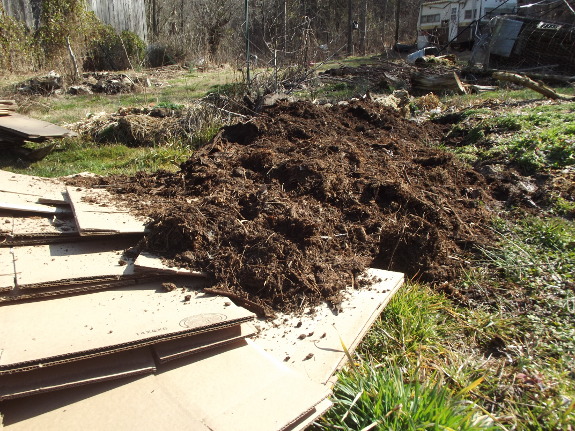
I built the new beds by
simply wheelbarrowing partially rotted compost out of the chicken
pasture and topping it off with straw. There are very few
perennial weeds in the areas I chose because the waterlogged soil is so
terrible nothing can survive unless I raise the plants' roots up out of
the wet. I figure that making these extremely simple kill
mulches now will ensure that most weeds have died by May, but I can
always come back through and add cardboard beneath the straw if
anything starts to poke up through. (As you can see, I did add
cardboard in select areas where perennial weeds were evident.)
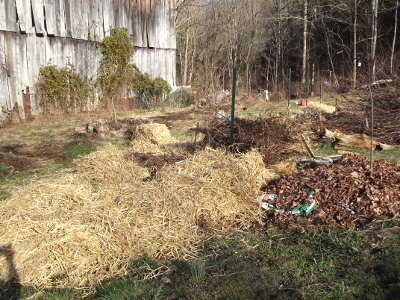 Since
they're in the forest garden, the new beds serve double duty.
This year, they'll be part of the vegetable garden, but each one is
attached to a tree mound, and as the tree grows, more and more of the
bed's growing area will be mulched with leaves instead of straw and
given over to tree roots. A modified version of this expanding
tree mound technique has served me well in the forest
garden island.
Since
they're in the forest garden, the new beds serve double duty.
This year, they'll be part of the vegetable garden, but each one is
attached to a tree mound, and as the tree grows, more and more of the
bed's growing area will be mulched with leaves instead of straw and
given over to tree roots. A modified version of this expanding
tree mound technique has served me well in the forest
garden island.
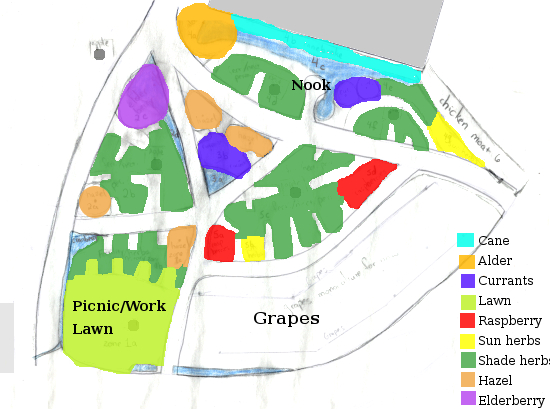 My original plan involved building keyhole beds surrounding the fruit trees,
but I've ditched that goal as I learned more about my own gardening
style. Yes, keyhole beds seem to make a lot of sense as a way of
expanding a circular tree mound, but they're tough to maintain if you
have to mow the aisles. Instead, I'm making all of my new beds
linear and leaving plenty of room for the mower to fit in
between. I'll probably fill in aisles as the trees overshadow
them, ending up with solid raised beds in the seldom-trampled areas
under trees.
My original plan involved building keyhole beds surrounding the fruit trees,
but I've ditched that goal as I learned more about my own gardening
style. Yes, keyhole beds seem to make a lot of sense as a way of
expanding a circular tree mound, but they're tough to maintain if you
have to mow the aisles. Instead, I'm making all of my new beds
linear and leaving plenty of room for the mower to fit in
between. I'll probably fill in aisles as the trees overshadow
them, ending up with solid raised beds in the seldom-trampled areas
under trees.
In case this post makes
the forest garden project sound well thought out, let me hasten to add
that I was really just playing around in the sun Friday, making it up
as I went along. By the end of the summer, I'll know if my
seat-of-my-pants changes made sense or not.
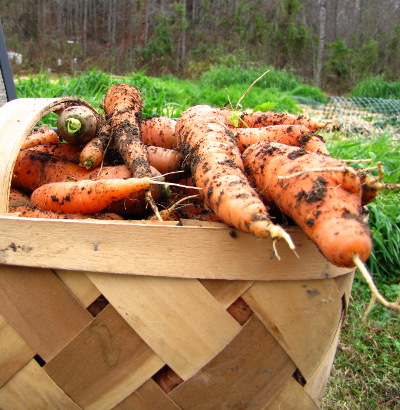
Even under quick hoops,
you won't want to plant frost-sensitive
vegetables like tomatoes and cucumbers anytime soon. However,
there is still a wide selection of crops to choose from for your spring
garden. I've highlighted the easiest ones in the chart below.
| Vegetable |
Start from: |
Notes |
| Beets |
Seeds |
Beet seeds can sometimes be
difficult to germinate. As with other root crops, beets need
loose, loamy soil. |
| Broccoli |
Transplants |
The more advanced gardener can
start her own seedlings either inside or in a quick hoop.
Otherwise, buy sets from the local feed store when night temperatures
have risen into the high 20s to low 30s Fahrenheit. |
| Brussels sprouts |
Transplants | The more advanced gardener can start her own seedlings either inside or in a quick hoop. Otherwise, buy sets from the local feed store when night temperatures have risen into the high 20s to low 30s Fahrenheit. |
| Cabbage |
Transplants | The more advanced gardener can start her own seedlings either inside or in a quick hoop. Otherwise, buy sets from the local feed store when night temperatures have risen into the high 20s to low 30s Fahrenheit. |
| Carrots |
Seeds |
Well-drained, loamy soil is
mandatory. Carrots are slow-growers, so weed carefully to give
the seedlings breathing room. |
| Cauliflower |
Transplants | The more advanced gardener can start her own seedlings either inside or in a quick hoop. Otherwise, buy sets from the local feed store when night temperatures have risen into the high 20s to low 30s Fahrenheit. |
| Collards |
Seeds |
Spring
greens are some of the easiest vegetables to grow. In addition to
collards, spinach, and Swiss chard, consider trying some Asian greens
for variety. |
| Leeks |
Seeds |
Leeks take a long time to grow, so I generally prefer the perennial Egyptian onions instead. As with other root crops, leeks need loose, loamy soil. |
| Lettuce |
Seeds |
Leaf
lettuce is my earliest harvest of the year because I always plant it
under quick hoops. You can cut leaves within a month of
planting, but be sure to seed a second bed as soon as you start eating
the first --- lettuce becomes bitter within a few weeks of first
harvest. |
| Onions |
Seeds, sets, or transplants. |
Getting your onions to germinate
out in the cold can be a bit tricky, so you may choose to start them
inside or under quick hoops to ensure they have time to grow before
summer heat stunts them. Select a variety
appropriate for your day length (short day in the south and long day in
the north.) Many gardeners simplify planting by buying sets (tiny
bulbs) from the local feed store, but onions grown from sets usually
don't store well. |
| Parsley |
Seeds |
Parsley is grown very similarly
to carrots, but you pick the leaves a few at a time for the next year
rather than digging up the root. |
| Peas |
Seeds |
Soak
your seeds overnight before planting to ensure they sprout
quickly. Erect a trellis for them to grow on. |
| Potatoes |
Cut
up pieces of potato, each with two eyes |
Hill
up your potatoes by adding soil or dirt extending a few inches up the
growing
stem once the plant is about eight inches tall. This prevents the
new tubers from being exposed to sunlight and turning green. If
you're planting early into cold soil, consider cutting your seed
potatoes a few weeks in advance and laying them out in a bright spot so
they'll presprout. |
| Radish |
Seeds |
Some
gardeners plant radish seeds in their carrot rows. The radishes
come up quickly and mature before they compete with the
slower-growing carrots. |
| Spinach |
Seeds |
I find that spinach plants
usually bolt in the spring, so I generally focus on other varieties of
leafy greens. |
| Swiss
chard |
Seeds |
Swiss
chard seeds can sometimes
be difficult to germinate, but otherwise Swiss chard is perhaps the
easiest green to grow and will keep producing all summer. |
| Turnips |
Seeds |
Like other root crops, turnips
prefer loamy, well-drained soil. |
The raw beginner should start out with collards, lettuce, peas,
potatoes, radishes, and Swiss chard. Second year gardeners might
add broccoli, carrots, and parsley. But ignore my advice if you
love beets and hate lettuce --- plant what you like to eat!This week's lunchtime series is excerpted from Weekend Homesteader: March. I saved some of my favorite projects for last, so I hope you'll splurge 99 cents to read about growing edible mushrooms, composting, and attracting native pollinators. And, of course, the ebook has the full spring planting chapter in case you just can't wait to read each installment at noon this week.
| This post is part of our Spring Planting lunchtime series.
Read all of the entries: |
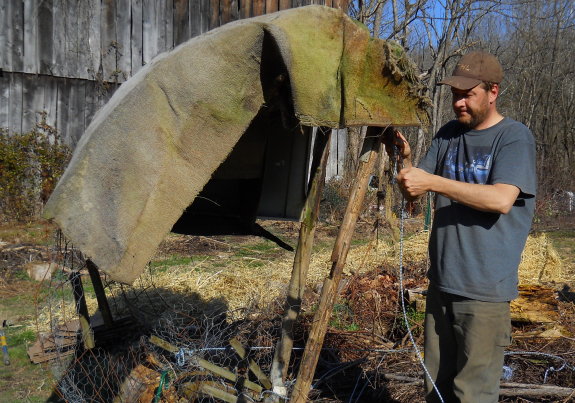
I finally got around to
taking apart another one of our chicken
tractors that we stopped using in favor of small
pastures we can rotate the flock through.
The old carpet we used for
the roof and walls is still holding strong after 6 years of exposure to
the elements.
Makes me wonder if salvaged
carpet could work for other projects like this?
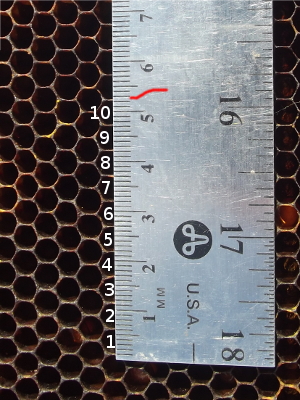 Letting bees build
their comb with a natural cell size is one of the tenets of Michael
Bush's organic beekeeping method. I thought I was
following his lead, but I think I skipped a step and didn't actually
manage to downgrade my bees to natural cells. Maybe that's part
of why my hives kept dying.
Letting bees build
their comb with a natural cell size is one of the tenets of Michael
Bush's organic beekeeping method. I thought I was
following his lead, but I think I skipped a step and didn't actually
manage to downgrade my bees to natural cells. Maybe that's part
of why my hives kept dying.
Here's the technical
information:
- Most foundation that beekeepers put in their hives has cells 5.4 mm in diameter.
- Michael Bush (and others) believe that bees naturally build cells ranging in size from 4.6 mm to 5.1 mm for worker brood.
Putting package bees in
a hive with foundationless frames is a good start, but your bees won't
build naturally sized cells right away. Instead, you need to go
through a process called regression where you allow the bees to draw
out the comb and raise bees in it, then cut that wax out and make the
bees draw it again. Workers that have been raised on modern
foundation will generally build 5.1 mm brood cells the first time
they're exposed to foundationless frames, then the smaller bees that
hatch out of that frame will draw 4.9 mm comb.
For easy regression,
keep feeding empty frames into the center of the
brood nest and your bees will eventually turn the outer frames into
honey storage. Then you can just cut out that larger celled wax
as you
harvest honey. (I wonder if it's a coincidence that this is how top bar hives
are often managed?) Making the brood chamber top bars 1.25 inches
wide instead of 1.5
inches wide will also prompt the bees to build smaller
cells.
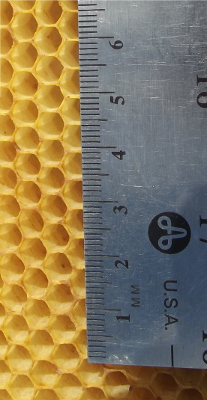 I was such a newbie when we
got our first package of bees that I didn't realize I needed to regress
them. As I've been cutting out honey from our dead hives, I
decided to measure the cell size in the brood nest to see what my bees
were actually doing. To measure cell size, lay the centimeter
side of your ruler down on the comb so that 0 lines up with the edge of
one cell, then count ten cells. The number of centimeters that
encompass those ten cells equals the size of one cell in millimeters.
I was such a newbie when we
got our first package of bees that I didn't realize I needed to regress
them. As I've been cutting out honey from our dead hives, I
decided to measure the cell size in the brood nest to see what my bees
were actually doing. To measure cell size, lay the centimeter
side of your ruler down on the comb so that 0 lines up with the edge of
one cell, then count ten cells. The number of centimeters that
encompass those ten cells equals the size of one cell in millimeters.
The photo at the top of
this post shows some old brood comb that probably dates back to the
original package workers. It looks to me like my bees drew 5.2 mm
foundation (once I factor in the way the camera angle offsets the ruler
slightly).
The second photo shows
younger comb that probably got drawn after the meltdown of 2010. It actually looks to
me like this comb is a hair bigger, with cell size of 5.3 mm.
Perhaps that's because the bees were rebuilding during a nectar flow
and were making comb for honey (which is traditionally bigger than comb
for worker brood).
The moral of the story
is --- don't just assume because you're using foundationless frames
that your bees are building at a natural cell size. Bring your
ruler out to the hive and do some quick measurements to see where
you're at, then regress until you achieve 4.9 mm cells.
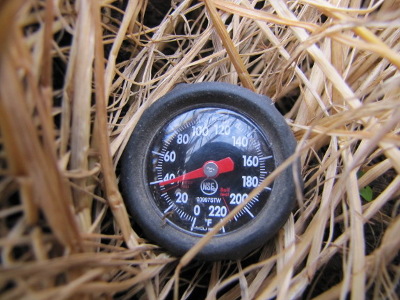 Every
winter is a little different, so I use a soil thermometer to keep an
eye on the temperature of the soil and plant accordingly. The
thermometer pictured here is actually a meat thermometer, bought for
less than $10, but it works just as well as the more expensive soil
thermometers you'll find in gardening stores.
Every
winter is a little different, so I use a soil thermometer to keep an
eye on the temperature of the soil and plant accordingly. The
thermometer pictured here is actually a meat thermometer, bought for
less than $10, but it works just as well as the more expensive soil
thermometers you'll find in gardening stores.
To check the
soil temperature, get up early before the sun has hit the ground and
insert the thermometer into the ground. Wait a few minutes,
then take a reading. If you have garden areas that are more
sunny than others, you'll want to test the soil temperature at
several places–I usually find that our soil is two to five degrees
colder in the shade of our hillside compared to in the sunnier parts
of the garden.
The table below lists the germination temperatures for common spring crops.
| Vegetable |
Minimum
temp. (degrees F) |
Optimum
temp. (degrees F) |
| Beets |
40 |
50-85 |
| Broccoli |
40 |
45-85 |
| Brussels sprouts |
40 |
45-85 |
| Cabbage |
40 |
45-95 |
| Carrots |
40 |
45-85 |
| Cauliflower |
40 |
45-85 |
| Collards |
45 |
70-75 |
| Leeks |
40 |
70-75 |
| Lettuce |
35 |
40-80 |
| Onions |
35 |
50-95 |
| Parsley |
40 |
50-85 |
| Peas |
40 |
40-75 |
| Potatoes |
45 |
60-70 |
| Radishes |
40 |
45-90 |
| Spinach |
35 |
45-75 |
| Swiss chard |
40 |
50-85 |
| Turnips |
40 |
60-105 |
In most cases, you can get away with planting once the soil has reached the minimum germination temperature, but don't plant your seeds if a cold spell is going to set in within a couple of days. You should also be aware that some vegetables will give you spotty germination until the ground was warmed up closer to the optimum temperature --- you might want to double your seeding rate to ensure a good stand if planting near the minimum. Once a seed has sprouted, it's less sensitive to cold soil, so expediting germination by soaking your seeds overnight before planting can also help.
To plant earlier than
cold soil will allow, many gardeners are tempted
to start seedlings indoors. However, unless you have grow lights
or a heated greenhouse, I recommend that beginners stick to growing
their plants entirely in the earth for the first year. A quick
hoop might be enough to let you plant a couple of weeks earlier than
you otherwise could have, then you can transfer the same protection to
a new bed in April to jumpstart your summer garden.This week's lunchtime series is excerpted from Weekend Homesteader: March. I saved some of my favorite projects for last, so I hope you'll splurge 99 cents to read about growing edible mushrooms, composting, and attracting native pollinators. And, of course, the ebook has the full spring planting chapter in case you just can't wait to read each installment at noon this week.
| This post is part of our Spring Planting lunchtime series.
Read all of the entries: |
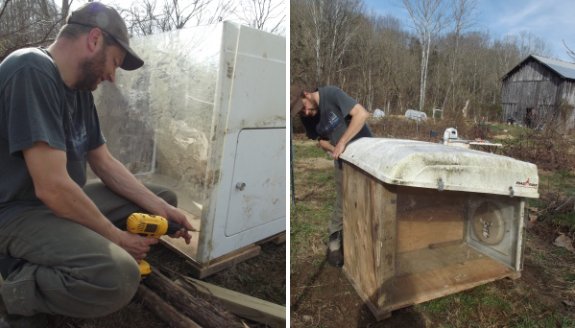
We felt like our DIY
table top brood coop needed an upgrade, and today was a perfect day
for it.
The main entrance is a
salvaged dryer door. An old piece of plexiglass came together as one of
the walls and will allow us to check on the chicks from the kitchen
window.
I remembered we had an old
plastic cargo carrier in the barn and decided to take a page from
Joey's mini
chicken coop and make it fit for our new chick roof.
The plan is to use 4 bungee
cords to secure the roof so we can easily take it off for easy access.
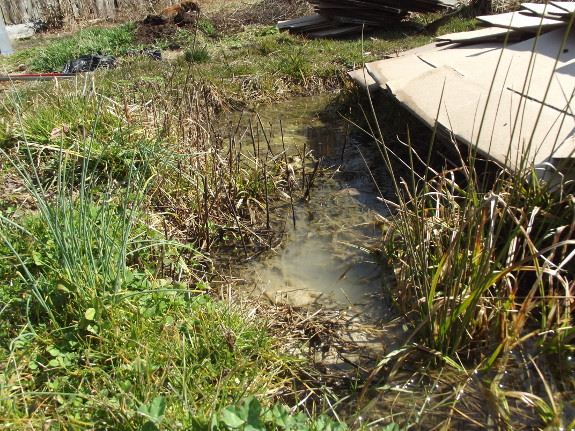
One of my early projects
in the forest
garden was to build mounds
and swales in an
attempt to deal with waterlogged soil. The mounds did their job
well --- they raised plants up high enough out of the water that they
survived. The swales were more problematic.
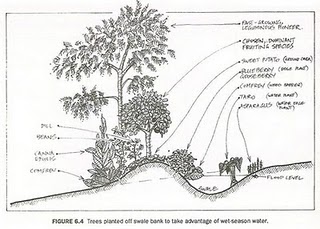 The permaculture literature
discusses swales as used in dry climates. There, swales capture
runoff so the precious liquid doesn't disappear onto the neighbor's
property. A dry climate swale is basically a linear, wet-weather
pond that runs along a contour line, filling up during rains, then
releasing the water into the surrounding area over the days and weeks
that follow. Bill Mollison and other permaculture practitioners
plant moisture-loving trees and shrubs on the downhill side of these
swales for free irrigation.
The permaculture literature
discusses swales as used in dry climates. There, swales capture
runoff so the precious liquid doesn't disappear onto the neighbor's
property. A dry climate swale is basically a linear, wet-weather
pond that runs along a contour line, filling up during rains, then
releasing the water into the surrounding area over the days and weeks
that follow. Bill Mollison and other permaculture practitioners
plant moisture-loving trees and shrubs on the downhill side of these
swales for free irrigation.
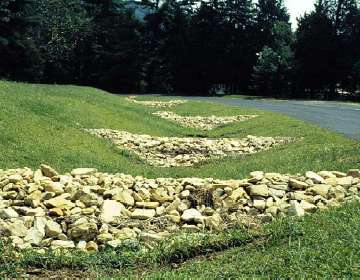 In wet climates, a different
kind of swale is used to channel runoff across flood-tolerant
vegetation, cleaning the water and preventing erosion. In this
case, swales are built perpendicular to a slope to keep water moving,
then check-dams are added at intervals to slow the water down and help
silt drop out. Wet climate swales are often located next to roads
or parking lots, as is shown in this photo, and they allow runoff to
sink into non-waterlogged soil.
In wet climates, a different
kind of swale is used to channel runoff across flood-tolerant
vegetation, cleaning the water and preventing erosion. In this
case, swales are built perpendicular to a slope to keep water moving,
then check-dams are added at intervals to slow the water down and help
silt drop out. Wet climate swales are often located next to roads
or parking lots, as is shown in this photo, and they allow runoff to
sink into non-waterlogged soil.
You'll notice that both
types of swales capture water and let it sink into the ground.
The big difference in function is that dry climate swales can be built
in ground that doesn't "perk" since the goal is to make the water stick
around as long as possible. Wet climate swales are built on
well-drained soil with the goal of getting that runoff into the
groundwater as quickly as possible.
I wish I'd realized the
difference between dry climate and wet
climate water management when I installed my swales, because I
learned the hard way that creating a dry climate swale in our neck of
the woods can turn wet ground into a marsh. Marshes have their
place, but a marshy ditch in the middle of a "lawn" becomes a mowing
hazard quickly. Rather than ruin the lawn mower, Mark skipped
mowing these spots, with predictable
results.
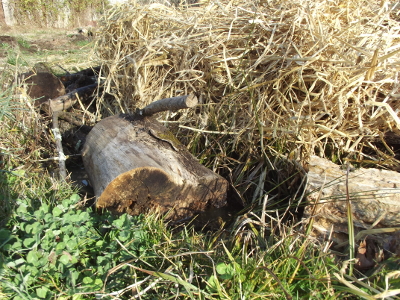 As part of my campaign to
streamline maintenance of the forest garden, I'm starting to build the
swales back up to ground level. I figure rotten logs in the holes
will capture and hold water, releasing it to the nearby plants during
dry spells. Once I hunt down enough logs to fill the swales up,
I'll mulch over top so that that area won't need to be mowed at all
this year.
As part of my campaign to
streamline maintenance of the forest garden, I'm starting to build the
swales back up to ground level. I figure rotten logs in the holes
will capture and hold water, releasing it to the nearby plants during
dry spells. Once I hunt down enough logs to fill the swales up,
I'll mulch over top so that that area won't need to be mowed at all
this year.
Of course, even my
improved swales hold onto water rather than draining it out of the
waterlogged area. I might eventually turn to ditching to deal
with that issue, but for now, I think I can take advantage of the extra
water. I'll just keep building up so that roots don't drown.
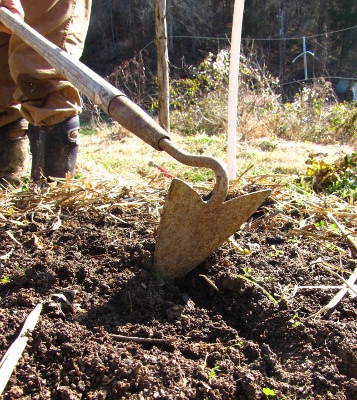 Planting spring crops is
extremely easy in a no-till garden. If
you haven't already done so, rake back the mulch and add half an inch
to an inch of high quality compost to feed your vegetables. For
best results, you'll want to work the compost into the top inch or two
of your soil with a bow rake, but don't disturb the soil profile
further down.
Planting spring crops is
extremely easy in a no-till garden. If
you haven't already done so, rake back the mulch and add half an inch
to an inch of high quality compost to feed your vegetables. For
best results, you'll want to work the compost into the top inch or two
of your soil with a bow rake, but don't disturb the soil profile
further down.
Small seeds can be
scattered directly on the soil surface in damp
spring weather. Larger seeds (like peas) and seed potatoes should
be planted in a trench made by dragging your hoe in a line down the
length of the bed. Add your seeds then fill the trench back in,
lightly tamping the soil with the flat part of your hoe to remove air
pockets. Your seed packet will tell you how deep to plant your
seeds, but a good rule of thumb is that depth should be proportional to
size of the seed --- miniscule seeds can go on the soil surface,
medium-sized seeds might sit a quarter of an inch below, while large
seeds can be planted an inch or more deep.
As long as you pay
attention to soil temperature, germination shouldn't
be a problem in the spring. Once your seedlings are up and
running, weed carefully then mulch to prevent further weeds from
growing. Now all you have to do is watch and wait for April, May,
and June vegetables.
This
week's lunchtime series is
excerpted from Weekend
Homesteader: March. I saved some of my favorite
projects for last, so I hope you'll splurge 99 cents to read about
growing edible mushrooms, composting, and attracting native
pollinators. And, of course, the ebook has the full spring
planting
chapter.
| This post is part of our Spring Planting lunchtime series.
Read all of the entries: |
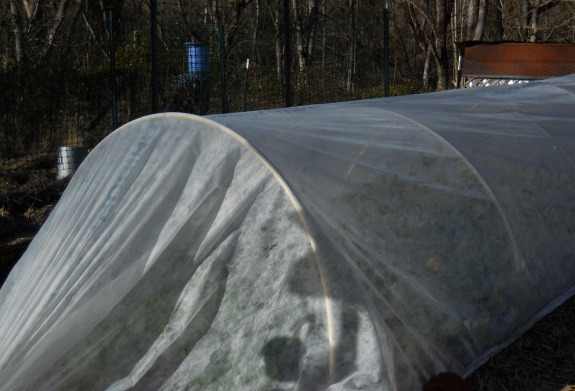
The
quick
hoops are showing very little damage from the snow load earlier in
the week.
It will be interesting to see
how many seasons we can stretch this Agribon material under these
conditions.

I'm the world's worst
housekeeper, but I do like to go through my shelves from time to time
to root out books I no longer use (and to give me room to slip a few
new classics in). I think of this process as composting old
dreams --- after all, why else do I keep 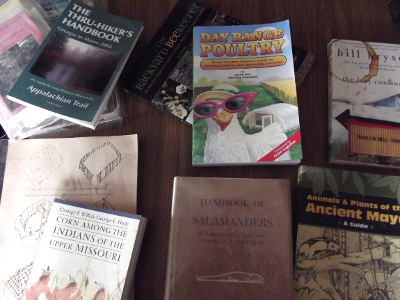 books
that I haven't opened in a decade unless they represent a dream I never
fulfilled (or achieved and moved beyond)?
books
that I haven't opened in a decade unless they represent a dream I never
fulfilled (or achieved and moved beyond)?
Many of the books I
discarded during the most recent rainy day purge are going to my
mother, who's taken up the study of Appalachian ecology and can use the
books I now know by heart. Others, though, are looking for a
home. Are any of you itching to read:
- The Backyard Beekeeper (a very basic guide that's good for a raw beginner)
- Day Range Poultry (pretty disappointing from the backyard permaculture perspective, but would be useful if you want to start a pastured poultry operation)
- Corn Among the Indians of the Upper Missouri (very interesting if you want to learn about Native American agriculture)
- A History of 17 Years of
Excavation and Reconstruction: A Chronicle of 12th Century Human Values
and the Built Environment (about research at Sunwatch in Ohio,
but interesting for any student of that era of Native American history;
semi-scientific, but I think relatively accessible to a layman)
- The Thru-Hiker's Handbook: Georgia to Maine 2002
- Appalachian Trail Gudie to Tennessee-North Carolina (Eleventh Edition, with maps)
- Appalachian Trail Guide: Southwest Virginia (Third Edition, with maps)
- Lost Continent: Travels in Small-Town America
- Animals and Plants of Ancient Maya (not as much of a reference as I thought it would be, but interesting if you're into Mayan culture)
- Handbook
of Salamanders
(not the best salamander field guide, but with lots of measurements if
you want to take ID to the next level)
 If
you'd like to give any of these books a shot, just email
anna@kitenet.net
with your mailing address and I'll send them off. We'll swallow
the shipping expenses unless you live outside the U.S.
If
you'd like to give any of these books a shot, just email
anna@kitenet.net
with your mailing address and I'll send them off. We'll swallow
the shipping expenses unless you live outside the U.S.
I'm looking forward to
the new seedlings that will root in the fertile soil of this dream
compost!
Edited to add: The books have all found good homes. Thanks for adopting a dream!
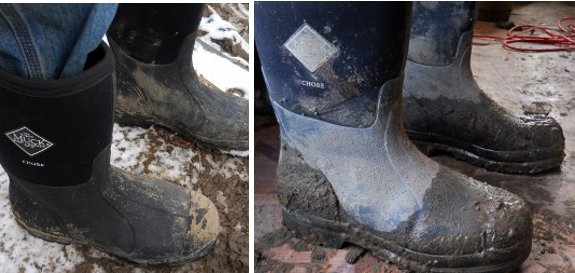
It's been two months since I
first started test driving these new Muck
boots and I'm happy to report they are by far the best work boot
I've ever owned!
Last year I started wearing
wool socks to keep my feet from getting too cold, but the Muck
boots seem to provide a bit more thermal protection to the point where
the wool socks have not been needed.
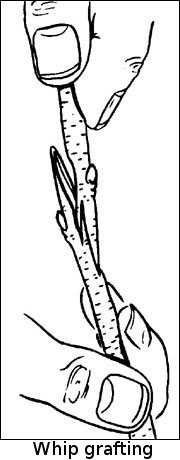 Sometimes, I'm amazed how knowing
the right word
opens research doors that have been slamming in your face. I've
been
tossing around the idea of grafting
new varieties onto my four year old
pear trees, but
before I undertook such a major surgery, I wanted to hear from
people who had tried the same experiment successfully.
Unfortunately,
my internet searches turned up very little information...until I
stumbled across the term "topwork".
Sometimes, I'm amazed how knowing
the right word
opens research doors that have been slamming in your face. I've
been
tossing around the idea of grafting
new varieties onto my four year old
pear trees, but
before I undertook such a major surgery, I wanted to hear from
people who had tried the same experiment successfully.
Unfortunately,
my internet searches turned up very little information...until I
stumbled across the term "topwork".
Topworking is the method
that orchardists use to change one tree variety to another. If
your trees (like mine) are pretty small (less than three inches trunk
diameter), you can simply take a deep breath and cut the whole top off
the tree below the first tier of branches and graft your new variety
there. Otherwise, you'll need to graft six to ten limbs that will
be the tree's main scaffolds. If your tree is more than eight
years old, it's probably so big that you should spread your topworking
out across two or more years, but otherwise you can do the deed all at
once.
How do you perform this
high stakes grafting? I'm most familiar with whip grafts that you
use to graft scionwood onto rootstock, but whip grafts are only
appropriate if both pieces of tree being grafted are roughly the same
diameter. In topworking, you generally have a pencil-thin piece
of scionwood being grafted onto a  much larger branch or trunk,
so you'll want to choose between budding, cleft grafting, and bark
grafting.
much larger branch or trunk,
so you'll want to choose between budding, cleft grafting, and bark
grafting.
Budding is most
appropriate for cherries, plums and peaches, while apples and pears
respond well to other types of grafts. The choice between cleft
and bark grafts depends upon time of year, with cleft grafting working
best just as buds begin to swell while bark grafting comes later in the
year when bark begins to slip. (The photos in this post are from
the Missouri Extension
Service website,
which also gives more in depth information about each kind of graft.)
I've decided to perform
one cleft graft on each of my pear trees, lopping off the tree top and
then inserting two pieces of scionwood in each. The double
scionwood is a way of hedging my bets --- I'll cut one off next year if
both take hold. Stay tuned for photos once I have scionwood in
hand and am ready to take the plunge!
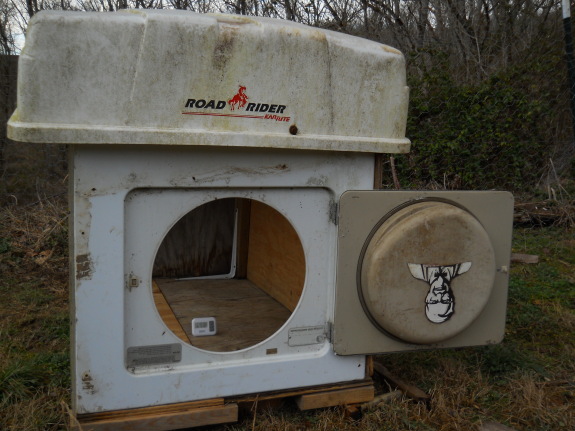
How does one mount a dryer
door so that it stays put?
Neil Johnson, Memphis, TN
I started by securing pieces
of 2x4 to the bottom, and then drilled holes in the metal above which
allowed for a medium sized dry wall screw to bite all the way down.
The sides had a groove that
was just big enough to shove a 1x1 into. Same deal with drilling holes
in the metal and then using dry wall screws to attach while going
through the side plywood and plexiglass.
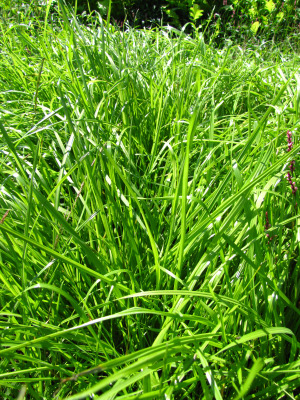 I'm
convinced that many different cover crops have a place in our
garden...I just haven't found them all yet. Currently, my old
standbys are fall-planted
oats and oilseed radishes for winter cover, then buckwheat
for short fallow periods in the summer garden. But I've found
another niche I want to fill, and I'm hopeful annual ryegrass will
slide right in.
I'm
convinced that many different cover crops have a place in our
garden...I just haven't found them all yet. Currently, my old
standbys are fall-planted
oats and oilseed radishes for winter cover, then buckwheat
for short fallow periods in the summer garden. But I've found
another niche I want to fill, and I'm hopeful annual ryegrass will
slide right in.
My back garden is nearly
as eroded
and waterlogged as the forest garden, which means that many
vegetables do poorly there. I've raised some of the beds up with
trucked in manure and topsoil, but there's never enough organic matter
to go around, so most of the beds are still sitting in water.
Since I'm moving my
tomatoes to the forest garden's raised beds this year, I have about
twenty beds that can sit fallow until this time next year. That
just happens to be how many waterlogged beds there are in the back
garden, so it seemed like a perfect opportunity to see how much a long
term cover crop could build up such a troubled spot.
Annual ryegrass won the
lottery for several reasons, but the real selling point of this
brilliant green grass is that it can handle floods. The cover
crop bible (Managing
Cover Crops Profitably)
notes that annual ryegrass produces more biomass than small grains in
wet soil, growing as much as 9,000 pounds of organic matter per acre if
you mow the ryegrass down to four inches several times through the
course of the year. In addition, ryegrass is a succulent forage
that's very tasty for animals, making me hope I can put a temporary
fence around the back garden and run some of our broilers there.
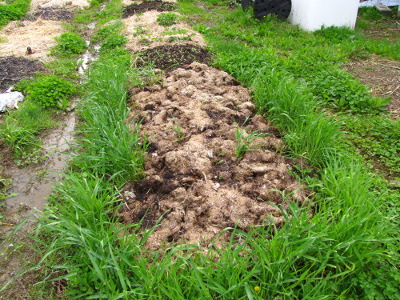 Before you get too excited,
annual ryegrass has some major pitfalls for the no-till gardener.
Traditional farmers plow ryegrass into the soil just as it starts to
bloom, but I'll have to get more creative. When I tried out
annual ryegrass last year, it
was very tough to kill,
and I decided that if I ever used it again, I would have to commit to
laying down a kill mulch to get rid of the vibrant greenery. The
photo here shows a bed of ryegrass approximately 75% killed by mowing
the ryegrass close to the earth, adding an inch of manure, and then
laying down grass clippings for mulch.
Before you get too excited,
annual ryegrass has some major pitfalls for the no-till gardener.
Traditional farmers plow ryegrass into the soil just as it starts to
bloom, but I'll have to get more creative. When I tried out
annual ryegrass last year, it
was very tough to kill,
and I decided that if I ever used it again, I would have to commit to
laying down a kill mulch to get rid of the vibrant greenery. The
photo here shows a bed of ryegrass approximately 75% killed by mowing
the ryegrass close to the earth, adding an inch of manure, and then
laying down grass clippings for mulch.
The other potential
problem with annual ryegrass is its tendency to self-seed and turn into
a weed problem. I'm going to need to be vigilant and mow the beds
whenever seed heads begin to form, which shouldn't be a problem in our
small back garden. Maybe this is my incentive to finally buy a
scythe that fits my stature, then learn to use it?
 Sepp
Holzer's Permaculture is a book that I recommend
checking out of the library, but probably not buying unless you happen
to live in high elevation Europe or have an obsession with heavy
machinery.
Sepp
Holzer's Permaculture is a book that I recommend
checking out of the library, but probably not buying unless you happen
to live in high elevation Europe or have an obsession with heavy
machinery.
Sepp Holzer writes about
techniques he uses on his 111 acre farm (the Krameterhof), which sits
around 5,000 feet above sea level on the southern slope of the
Schwarzenberg Mountain in Austria. Throughout the book, Holzer
brags about what he can grow at such a high elevation, but from a U.S.
perspective, it's not so unique --- I'm pretty sure he lives in the
equivalent of zone 5 (one zone colder than us).
What I enjoyed most
about the book is the way Holzer developed his own type of permaculture
based on youthful experiments imitating natural cycles. He
started farming in 1962 at the age of 19, and only learned about the
permaculture movement in 1995, but he was practicing permaculture long
before that. As a result, Holzer's book is full of permaculture 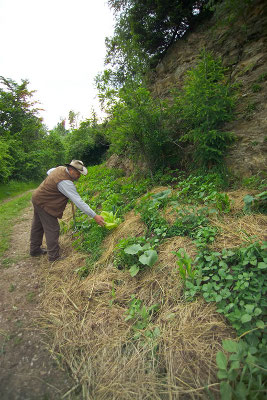 techniques you won't find
anywhere else --- he's not simply regurgitating Mollison's ideas (or
anyone else's). On the down side, some of the illustrations in
the book seem to represent flights of fancy that Holzer hasn't yet put
into practice, so be sure to take the non-photographic ramblings with a
grain of salt.
techniques you won't find
anywhere else --- he's not simply regurgitating Mollison's ideas (or
anyone else's). On the down side, some of the illustrations in
the book seem to represent flights of fancy that Holzer hasn't yet put
into practice, so be sure to take the non-photographic ramblings with a
grain of salt.
The other problem I had
with Holzer's book is his obsession with moving lots of earth
around. Yes, his terraces, ponds, hugelkultur mounds (simply called "raised beds"
in the book), humus storage ditches (aka dry
weather swales), and
underground shelters are useful and pretty, but they aren't very
appropriate to small scale permaculturalists who don't happen to have
an excavator at their beck and call. That said, it was easy to
find four topics in his book applicable to the backyard (or at least
the small scale farm), which I'll regale you with this week at
lunchtime.
| This post is part of our Sepp Holzer's Permaculture lunchtime series.
Read all of the entries: |
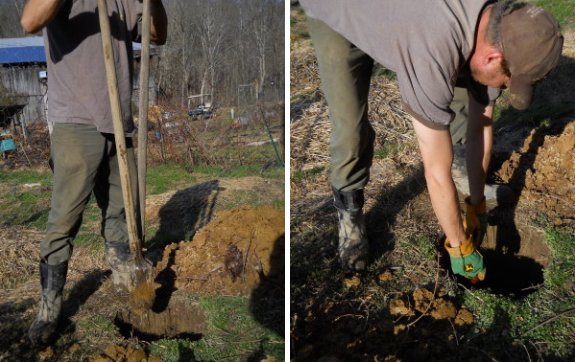
Most humanure systems use a 5 gallon bucket to collect the product, and
for the longest time Anna kept trying to talk me into one of these
fancy, composting toilets. I kept visualizing a less than happy picture
of such a system and wondered if the juice was worth the squeeze when
it comes to trading yuckiness for usable organic matter.
Regular readers to the blog
will know how serious Anna takes her compost, and I knew she would
eventually wear me down if I didn't come up with a better solution.
"How about locating the latrine
near fruit trees?....once their roots mature enough they can find the
organic bounty and turn it into delicious snacks. We can add leaf
matter and bio-char to make it more balanced."
It only took her a few
minutes to see how a more simple approach would save us time and
decrease the yuck factor. It's been a few years since then, and I'm
ready to call the experiment a success.
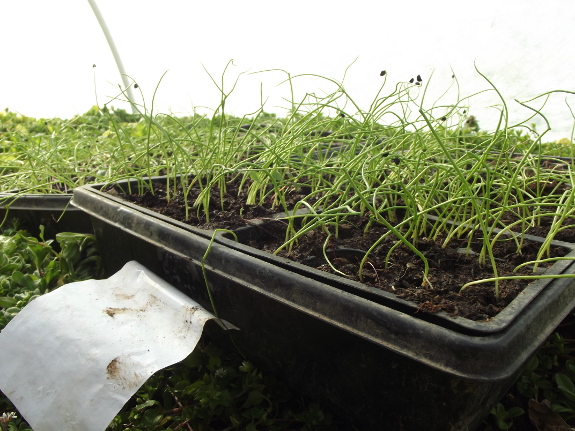
I think I started far too many onions.
Two flats seeded thickly looks like it would have been enough seedlings
to fill fifteen beds, not seven.
Of course, it's good to
have extras because my onions are still a bit experimental. I transplanted them
into the garden at this time last year with success, but they seem so
tiny that I'm glad to have spares waiting in the wings (or rather, in
the quick hoops where I hardened them off last week).
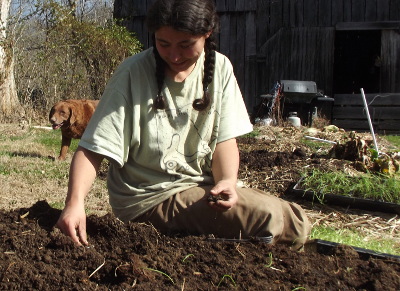 Plus there's the issue of
variety. Here at 36 degrees latitude, we're smack dab on the
dividing line between short day and long day onions. In the past,
I've planted Copra, which is a long day variety, but this year I opted
to try out Pontiac (another long day onion) and Pumba (a short day
onion). I'll let you know which variety does better come harvest
time in June.
Plus there's the issue of
variety. Here at 36 degrees latitude, we're smack dab on the
dividing line between short day and long day onions. In the past,
I've planted Copra, which is a long day variety, but this year I opted
to try out Pontiac (another long day onion) and Pumba (a short day
onion). I'll let you know which variety does better come harvest
time in June.
If all's well in the
onion beds next week, I'll give some of the seedlings away (Mom,
Joey?). And I think I'll also sneak a few into the new
beds I made in the forest garden for tomatoes. Although the tomatoes
go in a month before the onions come out, I suspect the two can coexist
for a few weeks, and the 280 onions I currently have in the ground
don't feel like so many when I consider that they have to last a solid
year.
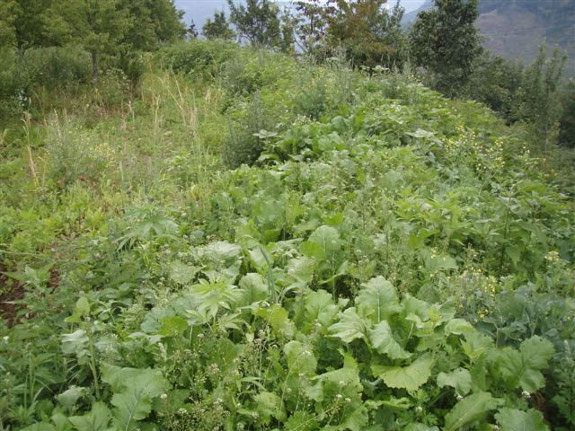
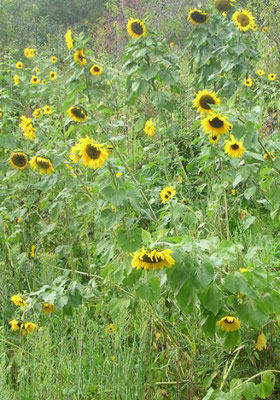 The most inspiring part of Sepp
Holzer's Permaculture
is the way Holzer takes poor soil that his neighbors think is only good
for tree plantations and turns it into a nearly self-sufficient, low
work farm that churns out food of all sorts. Although it's not
the most photogenic part of his homestead, green manure is the real
root of Holzer's success.
The most inspiring part of Sepp
Holzer's Permaculture
is the way Holzer takes poor soil that his neighbors think is only good
for tree plantations and turns it into a nearly self-sufficient, low
work farm that churns out food of all sorts. Although it's not
the most photogenic part of his homestead, green manure is the real
root of Holzer's success.
As Holzer brings new
areas into production, he seeds a wide variety of plants and then
leaves the plot alone for two or three years. The mixture of
plants serves a variety of purposes ecologically, and also builds soil
as the green manure plants die back each fall, reseed, and grow again
the next spring. (I'd actually call his plants cover crops, not green manure, since he
doesn't till them into the ground, but I'm sticking to the terminology
in his book.)
Holzer plants sunflowers
and hemp to feed the birds and mixes in a wide variety of flowers for
pollinators: cornflowers,
yarrow, calendula, golden marguerites, scented mayweed, spreading
bellflowers, and comfrey. Next, he adds soil builders: peas,
beans, clover, lupin, 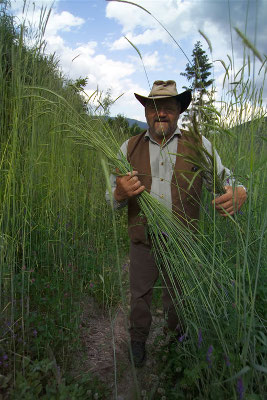 cabbages, oilseed rape,
turnips, sunflowers, buckwheat, and sweet clover to improve the soil
(and hold it in place after his excavator moves the earth
around). The diverse polyculture that results is what Holzer
calls green manure.
cabbages, oilseed rape,
turnips, sunflowers, buckwheat, and sweet clover to improve the soil
(and hold it in place after his excavator moves the earth
around). The diverse polyculture that results is what Holzer
calls green manure.
Later, once the soil is
in production in ways I'll explain in later posts, other plants join
the mix. Holzer grows a variety of grains (rye, wild rye,
sorghum, millet, and perennial Siberian grain), legumes (a long list of
which can be found in his book), and root crops (turnips, radishes,
salisify, black salsify, and Jerusalem artichokes) to feed his cattle
and pigs over the winter with no work on his part.
The takeaway message for
the average homesteader is --- soil building takes time, so start
now. Several of you have recently bought acreages with pasture in
various states of disrepair, and many of you won't even be moving onto
the land within the next year. Seeding a diverse array of cover
crops is a perfect way to improve your farm during that one afternoon
you'll be visiting, giving you a multiple year jumpstart when you're
actually on the land.
| This post is part of our Sepp Holzer's Permaculture lunchtime series.
Read all of the entries: |
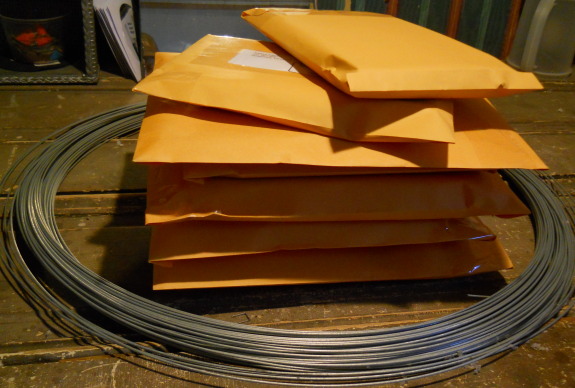
A happy stack of used, hand-me-down
books from Anna's shelf
are now on their way to new homes across the country.
I'd guess they're in route to
the new processing station in Johnson City this evening.
Sort of feels like playing
match maker in a literary sense of the word.
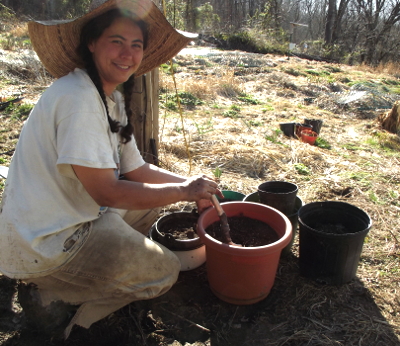 Those of you who love plants
have probably jumped over a similar hurdle. Maybe you tried to
overwinter a tomato plant and it eventually gave up the ghost, or you
have a house plant that was potted up into a larger containetr, leaving some
soil behind. Either way, you're left with dirt from which the
nutrients are mostly gone, but with plenty of yummy organic matter left.
Those of you who love plants
have probably jumped over a similar hurdle. Maybe you tried to
overwinter a tomato plant and it eventually gave up the ghost, or you
have a house plant that was potted up into a larger containetr, leaving some
soil behind. Either way, you're left with dirt from which the
nutrients are mostly gone, but with plenty of yummy organic matter left.
The best use of old
potting soil depends in part on your house plant style, and on what
kind of mixture you started with. In the most typical scenario,
you bought potting soil from the big box store and you use chemical
fertilizers to feed your plants. In this case, you might as well
reuse the potting soil since you're basically growing your plant
hydroponically, using the potting soil as a structural element
only. You might want to mix the old potting soil half and half
with high quality compost or new potting soil, though, to add a few
nutrients to the earth.
(As a side note, if your
plant died from something soil related, you won't want to reuse the
troubled dirt as is. Some gardeners report good results with
sterilizing the soil by pouring boiling water over it, or by baking the
soil in the oven. Finally, you could simply add the potting soil
to the outdoors garden, where beneficial microorganisms will make short
work of the bad guys.)
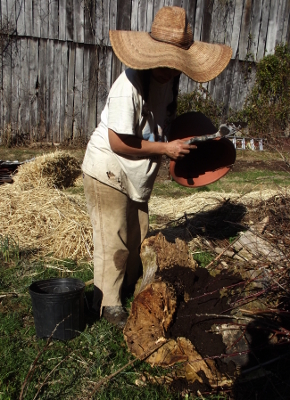 At the other extreme, you
might make your potting soil out of a mixture of compost, stump
dirt, or other
organic materials like I do. In this case, your potting soil is
providing the nutrients as well as the structural components, which is
why you'll need to topdress your potted plants at least once a year and
to cut away part of the roots of long-lived plants to replace some soil lower
down.
At the other extreme, you
might make your potting soil out of a mixture of compost, stump
dirt, or other
organic materials like I do. In this case, your potting soil is
providing the nutrients as well as the structural components, which is
why you'll need to topdress your potted plants at least once a year and
to cut away part of the roots of long-lived plants to replace some soil lower
down.
In this homegrown
scenario, depleted potting soil should head out to the garden, where it
will act as a soil amendment. I dumped mine between logs in a hugelkultur bed, but you could also
apply the old potting soil to the top of a bed in the vegetable garden
or alongside a tree mound that needs to be expanded. The soil is
probably low in nitrogen, but is unlikely to be low enough that it will
grab nitrogen out of nearby earth. Instead, it will help fluff up
your garden soil, increase its water retention capacity, and make
microorganisms happy.
(By the way, thanks for
cleaning up the office, honey!)
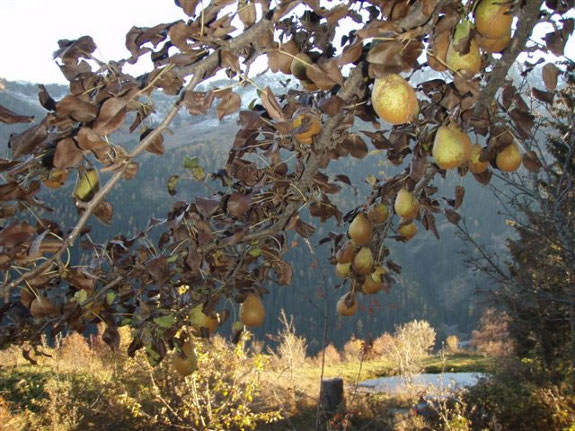
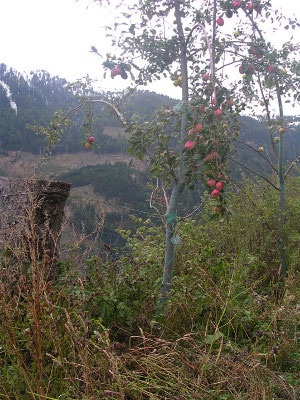 After two or three years of soil
improvement, Sepp
Holzer is ready to start his (nearly) do-nothing orchards. With
over a hundred acres of farmland holding around 14,000 individual fruit
trees, Holzer clearly can't feed, prune, and manicure every inch of his
fruit plantation. Instead, he goes to the opposite extreme,
selecting for extremely hardy plants that can survive when planted into
plain soil and never pruned.
After two or three years of soil
improvement, Sepp
Holzer is ready to start his (nearly) do-nothing orchards. With
over a hundred acres of farmland holding around 14,000 individual fruit
trees, Holzer clearly can't feed, prune, and manicure every inch of his
fruit plantation. Instead, he goes to the opposite extreme,
selecting for extremely hardy plants that can survive when planted into
plain soil and never pruned.
In fact, Holzer doesn't even harvest most of his fruits. He sells
many of his heirloom pears to distillery owners who come and harvest
the fruits themselves, and most of the rest of the bounty falls to the
ground and feeds his livestock over the winter.
Holzer's first step when
expanding his orchard is to send pigs through to loosen the soil and
trample down the green manure plants. Next, he spreads pomace
that has fermented for about a month across the ground. (Pomace
is the skins and seeds left after making wine, oil, or --- in this case
--- cider.) The apple and pear seeds sprout and either grow or
die, with the seedlings best suited to the particular spot they've been
placed outcompeting the others. These seedlings will become
vigorous rootstocks, producing trees that grow taller and fruit later
than those on commercial rootstock, but also tend to live longer.
 A year or two after spreading
the pomace, Holzer comes through to transplant out trees that are too
close together --- these are grafted in his nursery and sold as one of
his sources of income. The best seedlings are left in place and
have heirloom apple and pear scionwood grafted on.
A year or two after spreading
the pomace, Holzer comes through to transplant out trees that are too
close together --- these are grafted in his nursery and sold as one of
his sources of income. The best seedlings are left in place and
have heirloom apple and pear scionwood grafted on.
Holzer doesn't prune at
all, not even to remove the watersprouts that pop up from the rootstock
(and which he believes protect the main trunk from nibbling
wildlife.) Rather than fertilizing the trees, he simply sends his
livestock through the area at intervals, meanwhile allowing the green
manure plants to continue to improve the soil around the trees' roots.
While I don't recommend
Holzer's do-nothing fruit production for the backyard hobbyist with
only a small growing area, his methods work very well for large
expanses of pasture. As you'll see in tomorrow's post, the fruit
trees provide so much food for his livestock that he barely has to feed
them at all.
| This post is part of our Sepp Holzer's Permaculture lunchtime series.
Read all of the entries: |
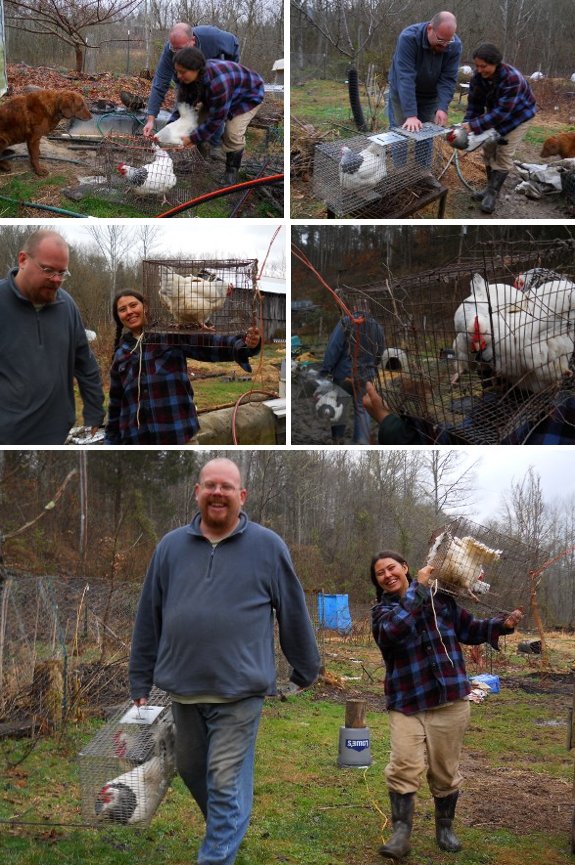
Joey reports all 3 hens and 1 rooster are safely in their new home.
It sure is easy when all you have to do is take pictures.

Or explore more posts by date or by subject.
About us: Anna Hess and Mark Hamilton spent over a decade living self-sufficiently in the mountains of Virginia before moving north to start over from scratch in the foothills of Ohio. They've experimented with permaculture, no-till gardening, trailersteading, home-based microbusinesses and much more, writing about their adventures in both blogs and books.