
Bread ingredients and proofing yeast
 I'll be honest with you ---
your first bread baking effort might not be perfect.
You need to get the hang of rising and kneading if you want perfect,
fluffy rolls. And you have to understand the chemistry behind
each ingredient before you can start mixing and matching to create your
own recipes. I'll walk you through making a
fluffy, white bread from scratch so you'll understand the basics.
I'll be honest with you ---
your first bread baking effort might not be perfect.
You need to get the hang of rising and kneading if you want perfect,
fluffy rolls. And you have to understand the chemistry behind
each ingredient before you can start mixing and matching to create your
own recipes. I'll walk you through making a
fluffy, white bread from scratch so you'll understand the basics.
First, find your
ingredients:
1 1/3 c. water
2 tbsp. sugar
1 tbsp. yeast
2 tbsp. olive oil
2 tsp. salt
3 c. bread flour
I usually skip the next
step --- proofing --- but I do recommend you
try it once just to understand the yeast organism. Heat your
water to "baby bottle temperature" (just warm enough so that it feels
neither hot nor cold when you put a drop on the inside of your wrist),
then mix in the sugar and yeast. Wander away for about ten
minutes, then see whether your yeast has woken up and created a
foamy mass on top of the water.
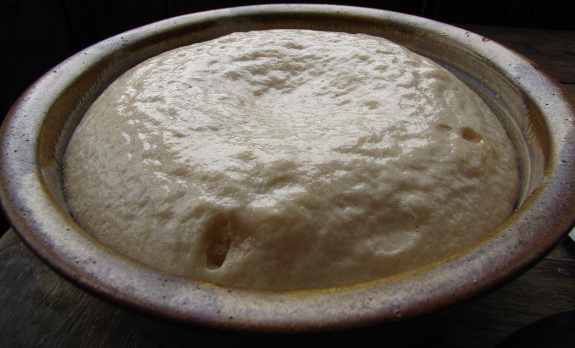
 Whether you give your
yeast time to proof or not, the next step is to
make your dough. To the warm water, yeast, and sugar, add the
rest of your ingredients, which in the case of this recipe are oil,
salt, and bread flour. You'll want to mix all of the ingredients
other than the flour first because the last cup of flour is going to
take some heavy stirring to incorporate it into the dough.
Whether you give your
yeast time to proof or not, the next step is to
make your dough. To the warm water, yeast, and sugar, add the
rest of your ingredients, which in the case of this recipe are oil,
salt, and bread flour. You'll want to mix all of the ingredients
other than the flour first because the last cup of flour is going to
take some heavy stirring to incorporate it into the dough.
Stay
tuned for more on the science and practice of
bread-baking at lunchtime for the rest of the week. Don't want to
wait for future installments? The
information is excerpted from Weekend
Homesteader: January, which is available for free on
Amazon from today until December 23! I hope you'll give the
entire book a try (and leave me a review!)
| This post is part of our Bread lunchtime series.
Read all of the entries: |

Or explore more posts by date or by subject.
About us: Anna Hess and Mark Hamilton spent over a decade living self-sufficiently in the mountains of Virginia before moving north to start over from scratch in the foothills of Ohio. They've experimented with permaculture, no-till gardening, trailersteading, home-based microbusinesses and much more, writing about their adventures in both blogs and books.
Want to be notified when new comments are posted on this page? Click on the RSS button after you add a comment to subscribe to the comment feed, or simply check the box beside "email replies to me" while writing your comment.
Mark likes his bread very fluffy, and this recipe definitely does the trick. Less yeast = less fluff.
I prefer to measure flour too, for the same fluffiness reason. If you add flour until it doesn't stick to your fingers, it's a bit too dry for optimal rising.
Of course, everyone develops the bread recipe that suits their fancy....
Cameron --- It does take some practice to make a bread you like. Hopefully reading the science behind each step this week will make it seem a bit less daunting.
Fritz --- I don't think I've ever had trouble with yeast getting too old. I think that modern yeasts are a lot more resilient.... But, then, I don't have a source for whole pounds of yeast --- the best I can do is those little jars in the grocery store.