
archives for 07/2012
 This
has been a deer-filled week, but not a single nibble in the
garden...yet. First, it became abundantly clear that the
last week of June was when fawns were being born in 2012. Bradley
saw a deer in labor down by the creek early in the week, and when I
walked that way the next day, I found hoofprints the size of a
thumbprint in the little bit of mud that has survived the drought.
This
has been a deer-filled week, but not a single nibble in the
garden...yet. First, it became abundantly clear that the
last week of June was when fawns were being born in 2012. Bradley
saw a deer in labor down by the creek early in the week, and when I
walked that way the next day, I found hoofprints the size of a
thumbprint in the little bit of mud that has survived the drought.
Thursday, we were all
working outside when a bleat like the cry of a goat made us drop our
tools in puzzlement. We don't have neighbors with goats, but the
more avid hunter in our midst (that's Bradley, in case you haven't
guessed) knew immediately that the sound was the call of a frightened
fawn. Sure enough, two does were down past the barn and a fawn
was fleeing in the opposite direction, startled by Lucy. The
mother deer started to come at Lucy with her hooves, but our smart dog
had too much sense to engage and just raced around in excitement.
 I'm
pretty sure that fawn eventually made it back to its mother after Lucy
lost interest, but Friday Lucy showed up with a fawn hindquarter
between her jaws. From reading too many mystery novels, I knew to
look at the size of the maggots on the flesh, which told me that the
fawn had probably died before the barn bleater was sighted.
Again, our hunting advisor had the best analysis of the situation ---
the fawn had probably been caught in the machine when our neighbor
hayed his field a few days before.
I'm
pretty sure that fawn eventually made it back to its mother after Lucy
lost interest, but Friday Lucy showed up with a fawn hindquarter
between her jaws. From reading too many mystery novels, I knew to
look at the size of the maggots on the flesh, which told me that the
fawn had probably died before the barn bleater was sighted.
Again, our hunting advisor had the best analysis of the situation ---
the fawn had probably been caught in the machine when our neighbor
hayed his field a few days before.
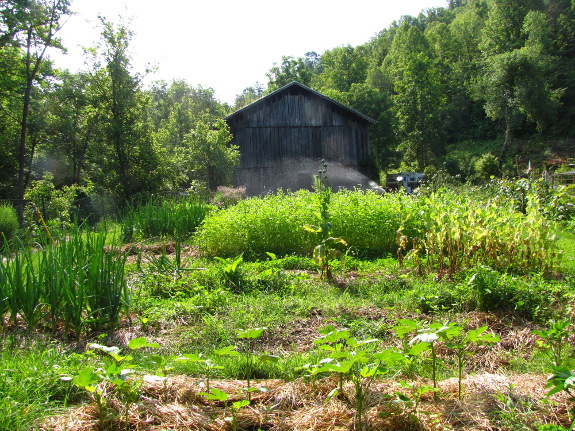
All of this was minor
compared to the excitement Saturday morning. I rolled out of bed
and settled into my usual spot on the couch with a view of the entire
front garden and blueberry patch...and a deer! The first invader of
the garden in 2012!
On closer inspection, it
turned out that the doe had injured herself jumping over the fence in
the night. She was limping around our inner perimeter looking for
a way out, but was unable to jump the fence with her broken or sprained
leg.
 I spent too long thinking
through my options, so disaster struck. First, it ran through my
head that if the deer had gotten into the garden once, she'd be
back. Plus, how long would she last in the wild with an injured
leg? Might as well put her out of her misery (and eat her).
I spent too long thinking
through my options, so disaster struck. First, it ran through my
head that if the deer had gotten into the garden once, she'd be
back. Plus, how long would she last in the wild with an injured
leg? Might as well put her out of her misery (and eat her).
On the other hand, what
if she had a fawn like all of the other does I'd seen recently?
Did I want the poor baby to starve? (Well, maybe I did --- after
all, we're badly overpopulated with deer in our region.) And, of
course, it's not hunting season, so shooting the deer in my garden
would be illegal. Finally, we're in for record heat this weekend,
so processing would have to be fast.
Before I could make up
my mind, Lucy made up hers. The deer had seen me and gotten
alarmed, battering herself against the fence behind our water tank, and
our usually even-tempered dog ran up there and actually went straight
for the deer's throat! It was like a scene out of Call
of the Wild, and
I was terrified the deer would slice Lucy open with her hooves.
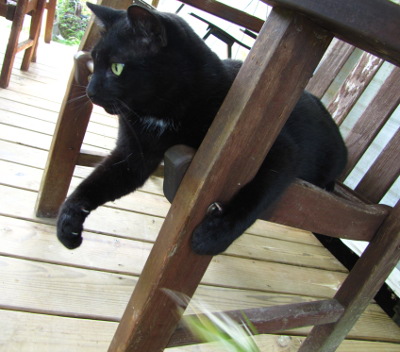
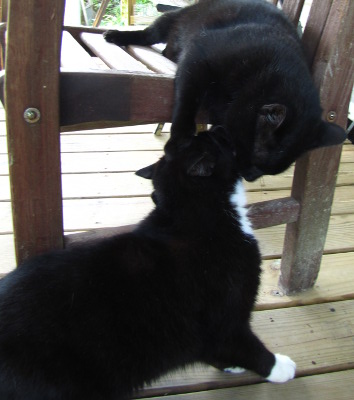
(I don't have any relevant photos, so Huckleberry is recreating the
Battle of the Deer for your viewing pleasure, using his brother as a
prop.)
To protect our beloved
dog, I would have shot the deer in a heartbeat, but I'm simply not a
good enough marksman to fire into a tangle of dog and deer and think
I'd only hit the latter. Plus, there was our precious water
tank inches away
from the melee. While I hollered ("Lucy! No!"), the deer
burst through the fence and got away.
 The moral of the story is: I
need to work on my target practicing and decision making. Or
rather, I need to think through issues like this before they show up in
my garden at 6 am on a Saturday. Am I willing to shoot a deer in
the garden out of hunting season? What if she probably has a
fawn? For the hunters among you, what would you do?
The moral of the story is: I
need to work on my target practicing and decision making. Or
rather, I need to think through issues like this before they show up in
my garden at 6 am on a Saturday. Am I willing to shoot a deer in
the garden out of hunting season? What if she probably has a
fawn? For the hunters among you, what would you do?
(Huckleberry says he'd
take the deer down and gnaw on its bones!)

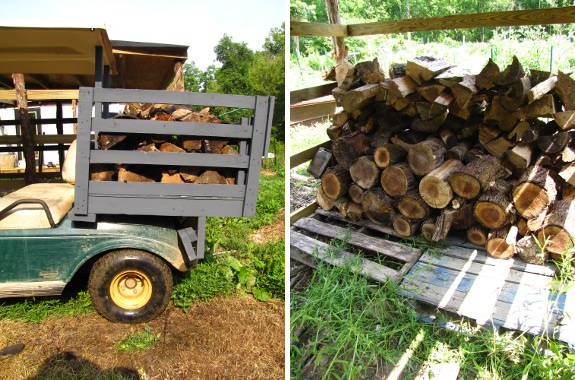
 The woodshed
expansion project got
wrapped up this week.
The woodshed
expansion project got
wrapped up this week.
It kind of hurts to think of
a winter fire on a day like today, but it's a warm feeling knowing
we've got a solid, long term solution to keeping our firewood dry.
I'd guess once we get it full
it might last 2 or 3 winters depending on the temperature.
 Are you looking for the
world's tastiest tomato? (Who isn't?) If so, a
new study suggests
you should choose the uglier varieties that don't turn evenly red.
Are you looking for the
world's tastiest tomato? (Who isn't?) If so, a
new study suggests
you should choose the uglier varieties that don't turn evenly red.
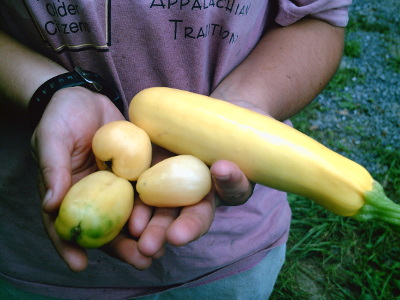
If your full-grown but
green tomatoes look like the ones pictured in this post, you're in
luck. The darker green top means that portion of the tomato is
full of chloroplasts, busy spinning straw into gold....er, I mean,
sunlight into sugars.
Supermarket tomatoes, in
contrast, have been bred to ditch the dark green top.
Agrobusinesses have found that consumers are more prone to select a
tomato that's a solid red color rather than having a tinge of green
around the stem.
Unfortunately, the same
gene that makes the tomatoes turn red uniformly means they don't get
that extra flavor boost. So, pretty tomatoes = insipid
flavor. Of course, there
are other factors that lead supermarket tomatoes to "taste like crap" (in the words of one of our
readers), but it's interesting to find out that variety selection does
matter.
(Yes, we have eaten two
remarkably early tommy-toe tomatoes. No, there's still no hint of
color on our larger plants.)
 I figured we all deserved a
break from hard-to-parse books during the dog days of summer. So
our second selection will be a light and fun memoir.
I figured we all deserved a
break from hard-to-parse books during the dog days of summer. So
our second selection will be a light and fun memoir.
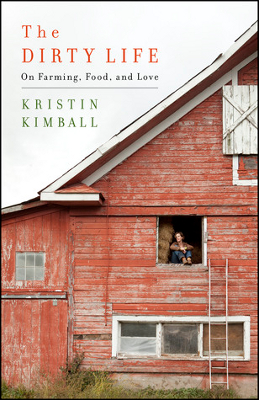
The
Dirty Life: A Memoir of Farming, Food, and Love follows a back-to-the-land
couple who eventually developed perhaps the most interesting CSA currently in
existence. Here's a description of Essex farm (from the author's website):
We currently farm 600 acres and feed 222 members. We are powered by fifteen solar panels, nine draft horses, ten full-time farmers, and three tractors. We do not use synthetic fertilizer, herbicide, or pesticide. Our animals eat feed we’ve grown ourselves or local hay and local, certified organic grain.
The all-you-can-eat membership price for 2012 is $3300 per year for the first adult in a household, and $2900 for the second adult, with a $400 discount for each additional adult. Children over 3 are $100 per year of age (e.g., a five-year-old is $500 for the year, a seven-year-old is $700, etc.).
It's an intriguing
model, and my understanding is that Kristin Kimball writes about the  path to building their farm
in an easy-to-read and entertaining manner. So, head to your
library or book store and pick up a copy! We'll begin discussions
on July 25 (with more information about how much of the book we'll
discuss in the first chunk once I have a copy in my hands). I
hope that even those of you who've been driven away by Thoreau's
excessively long sentences will return to the fold!
path to building their farm
in an easy-to-read and entertaining manner. So, head to your
library or book store and pick up a copy! We'll begin discussions
on July 25 (with more information about how much of the book we'll
discuss in the first chunk once I have a copy in my hands). I
hope that even those of you who've been driven away by Thoreau's
excessively long sentences will return to the fold!
My
paperback is
currently at the printer, so those of you who have preordered will have
a copy before too long! Thanks to everyone who has bought it
sight unseen.

We had a power outage last
night. It started around midnight and lasted till about 9 am.
The last time we used our back
up generator was over 2 years ago, and I forgot to run all the fuel
out of it when we were finished which created a situation where the
engine would begin to start and then quit.
It just so happens we were
asking our helper Bradley about this problem last week and his advice
was to drain the fuel and replace the spark plug which most likely got
fouled up due to my neglect.
I almost got up in the middle
of the night to see if I could extract the old plug and maybe swap it
with one from the lawn mower due to the high temperature, but felt like
it would go better in the light of day. Funny how the power came back
on just as I got the old plug removed this morning. With any luck we'll
remember to pick up a fresh spark plug tomorrow so we can be ready if
the power goes out again.
 I adore keeping track of the
weather, but I've been on strike for the last two years. You see,
the little digital max/min thermometers I'd been buying kept keeling
over after six months or a year, and I'm just not keen on throwaway
products.
I adore keeping track of the
weather, but I've been on strike for the last two years. You see,
the little digital max/min thermometers I'd been buying kept keeling
over after six months or a year, and I'm just not keen on throwaway
products.
I think I've finally
found the solution --- an
analog thermometer that still records maximum and minimum temperatures, for the same price as those
disposable digitals. Unless I drop it or hit it with a brick, I
can't think what might go wrong.
The Sper Scientific
thermometer is so simple it's ingenious. The column of mercury is
bent into a U-shape so that you can read the temperature both on the
right and on the left. Each side of the column also has a
colored, magnetized something-or-other inside the tube, so when the
temperature increases (on the max side) or decreases (on the min side),
the mercury pushes the colored marker in front of it. The marker
doesn't retreat to follow the mercury when the latter shrinks back
down, so you're left with a reminder of what the maximum or minimum
temperature was. Then you use a little magnet (attached to a
string so you don't lose it) to pull the markers back down onto the top
of the mercury column, resetting the maximum and minimum recordings.
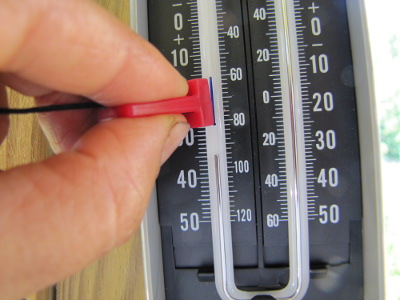 Reading the thermometer does
take a bit of getting used to. First, if you're accustomed to
Fahrenheit, you have to remember to read the small numbers. And
you also have to realize that the numbers on the minimum (left) side go
from low numbers at the top to high numbers at the bottom rather than
vice versa. Finally, the markers only delineate two degree
intervals, so you won't get the same precision you see in a digital
thermometer.
Reading the thermometer does
take a bit of getting used to. First, if you're accustomed to
Fahrenheit, you have to remember to read the small numbers. And
you also have to realize that the numbers on the minimum (left) side go
from low numbers at the top to high numbers at the bottom rather than
vice versa. Finally, the markers only delineate two degree
intervals, so you won't get the same precision you see in a digital
thermometer.
But I don't mind a
slight learning curve if I've finally found a thermometer that will go
the distance. We got our new thermometer up and running just in
time to record last week's crazy temperatures --- a low of 42 one
night, followed soon thereafter by three days that hit 102. Maybe
it would have been less painful if I didn't know how hot it was?
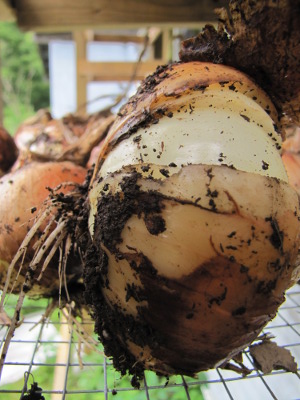
 I never heard back from four
of our Egyptian
onion winners.
So this is the last call for Barb, Monica, JT, and Stan --- please drop
me an email with your mailing address ASAP if you'd like your onions!
I never heard back from four
of our Egyptian
onion winners.
So this is the last call for Barb, Monica, JT, and Stan --- please drop
me an email with your mailing address ASAP if you'd like your onions!
Since I suspect some or
all of those winners may have wandered away and won't check back, I'm
also selecting four runnersup. Kerry, Sharon, Brian, and Carmen
--- if I get your email before I hear from the original winners, I'll
send the box of onions to your garden instead.
Finally, if you're still
itching to win something, our 2012
chicken photo contest
is up and running. We're giving away $300 worth of waterers this
year as a thank you to all of our customers. Stay tuned to our chicken blog to see some of the best
entries as they come pouring in.

We got a really nice summer
shower this afternoon at exactly the half way point when our helper
Bradley was replacing the other
front wheel bearing on
the golf cart.
He didn't want to leave with
it half way done, which is why he's doing a turtle impersonation in the
picture above.
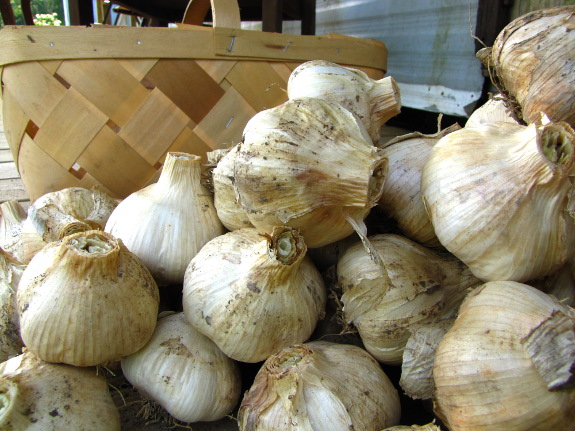
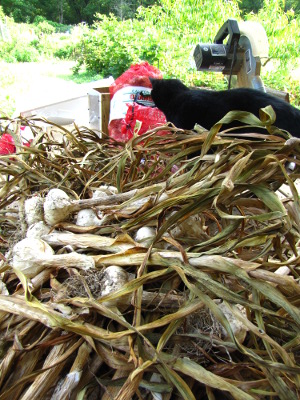 I
think we've finally got our garlic planting amount figured out. We used
20 pounds of garlic in 2010, so when our 2011 crop came
in over quota, I gave the excess away. Sure enough, when the time
came to clean
and bag this year's garlic, we were down to the last
handful of the previous year's bulbs in the kitchen --- perfect!
I
think we've finally got our garlic planting amount figured out. We used
20 pounds of garlic in 2010, so when our 2011 crop came
in over quota, I gave the excess away. Sure enough, when the time
came to clean
and bag this year's garlic, we were down to the last
handful of the previous year's bulbs in the kitchen --- perfect!
Of course, our garlic
continues to adapt to our climate, so despite cutting back the number
of beds planted last fall (to twelve), I still ended up with 29.5
pounds of garlic. About half of that amount has sprouted and won't last too long, but
since I use a lot of our annual garlic supply during the summer months
(in soups, Hollywood
sun-dried tomatoes,
pizza sauces, etc.), I suspect the sprouted garlic will get eaten up
before it goes bad.
Even though I really
should cut back our planting this fall to take into account the extra
productivity from our acclimatized bulbs, I think I'm going to stick to
the same number of garden beds as last year. It's nice to have a
bit extra to give away, and Huckleberry seems to have developed a taste
for the crop....
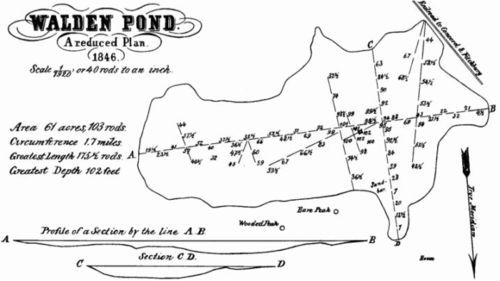
"While men believe in
the infinite some ponds will be thought to be bottomless," wrote
Thoreau. Then he spent the remainder of chapter 16 telling how he
surveyed the bottom of Walden pond.
Not only did Thoreau
determine that the body of water did indeed have a bottom (and no "vast
holes 'into which a load of hay might be driven'"), the chapter also
walked us through an excellent example of the scientific method.
Thoreau started by using keen observation to develop a hypothesis:
Step two of the
scientific method was using this observation to come up with a
hypothesis --- in this case, that the deepest spot in any pond can be
pinpointed using the method above. Next, Thoreau set up an
experiment to test his hypothesis. He used a map to estimate
where he thought the deepest point in another pond should lie, then
surveyed that pond and found his estimate close to the mark.
Of course, Thoreau would
have needed to survey quite a few more ponds to thoroughly test his
hypothesis. But it's handy to be reminded that deductive
reasoning is a very important skill to have, especially if you're a
homesteader trying to partner
with the natural world. Why are the bean beetles so much
worse than they've been in previous years? Is your neighbors'
advice spot on or is it an old wives' tale? If I were building a
curriculum for homesteaders to be, deductive reasoning would be
presented in week one.
If you're new to the book
club, you might want
to check out the thought-provoking comments on
chapter
1, chapter
2, chapters
3 and 4, chapters
5 and 6, chapters
7 and 8, chapters
9 and 10, chapters
11 and 12, and chapters 13 and
14. We'll
be discussing the last two chapters of Walden next week, and will then
be taking a week off before diving into The
Dirty Life. Don't forget to start hunting down a copy of the
next book (which is a much lighter read, I promise) ASAP.

Our recent golf
cart modifications helped to make tank moving day a smooth and enjoyable
process.
Thanks to the new
barn roof we plan to begin capturing rain water with most of the
tanks.
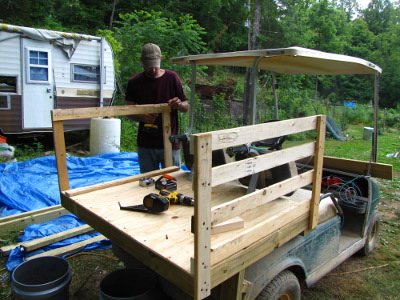
 You'd think that a golf cart
pickup bed built by committee would be terrible, but you'd be wrong.
You'd think that a golf cart
pickup bed built by committee would be terrible, but you'd be wrong.
When the time came to
replace the decaying, two
year old structure,
we turned the project over to Bradley...with caveats. Usually, we
let him do whatever he wants (with results better than either of us
could have imagined), but Mark and I had spent a lot of time with the
old pickup bed and we each wanted some changes made.
Mark asked for the bed
to be light and durable --- he didn't want the weight of the bed to
reduce how much we could haul, and he did want the structure to last
more than two years. Meanwhile, I wanted the golf cart pickup bed
to be larger and to have higher sides. A tall order, but Bradley
came through with flying colors.
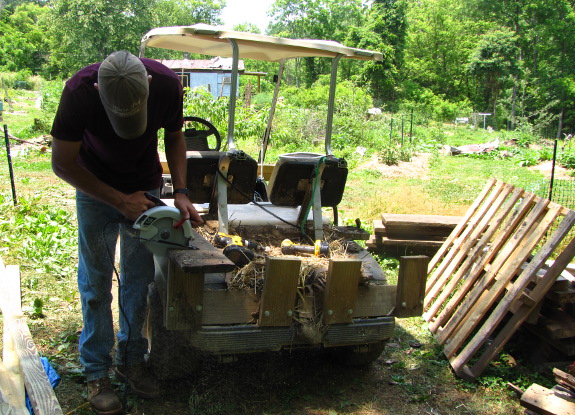
The first step was to
take apart what remained of the old bed. We love using screws
because they make it easy to change your mind about a project without
buying new  materials, but these screws
had been banged around so much, they weren't removable with the
drill. Enter Bradley's favorite tool --- the circular saw.
(Yes, we went out and bought him a second copy to live on our farm so
he didn't have to lug his through the alligator swamp repeatedly.)
materials, but these screws
had been banged around so much, they weren't removable with the
drill. Enter Bradley's favorite tool --- the circular saw.
(Yes, we went out and bought him a second copy to live on our farm so
he didn't have to lug his through the alligator swamp repeatedly.)
Mark's method of
attaching the previous bed to the frame of the golf cart passed muster,
so Bradley left it as is and simply built on top. He framed up
the base of the bed with treated two by fours similar to the way you'd frame the
floor of a house --- this method will ensure the bed is very durable,
while also allowing it to extend further beyond the body of the golf
cart.
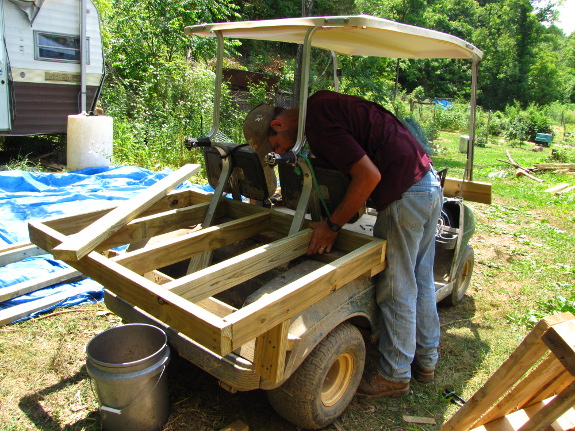
 A sheet of plywood on top
formed the floor of the bed, then Bradley went to work on the
walls. He modeled these after the slatted sides on fancy versions
of a kid's red wagon, which allowed him to extend the walls higher
without adding much additional weight. Since we haul biomass in
five gallon buckets, there's no problem with manure or wood chips
slipping out the sides, but Bradley did add a slat right against the
bed of the golf cart so nothing small will roll out.
A sheet of plywood on top
formed the floor of the bed, then Bradley went to work on the
walls. He modeled these after the slatted sides on fancy versions
of a kid's red wagon, which allowed him to extend the walls higher
without adding much additional weight. Since we haul biomass in
five gallon buckets, there's no problem with manure or wood chips
slipping out the sides, but Bradley did add a slat right against the
bed of the golf cart so nothing small will roll out.
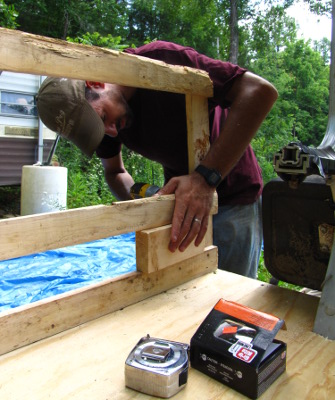 For even spacing, Bradley
used a scrap piece of two by four to support the slats while screwing
them in place. (I could have helped, but I was busy with the
camera, and Mark was in town mailing chicken waterers.)
For even spacing, Bradley
used a scrap piece of two by four to support the slats while screwing
them in place. (I could have helped, but I was busy with the
camera, and Mark was in town mailing chicken waterers.)
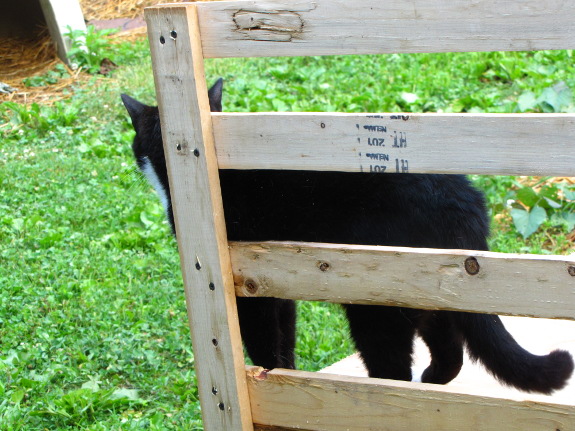
Bradley went home and
Strider checked out the work in progress. "Perfect!" he told
me. "I can watch the dog house but Lucy can't get me!"
The next day, Bradley
came back and didn't get annoyed when we said, "We love what 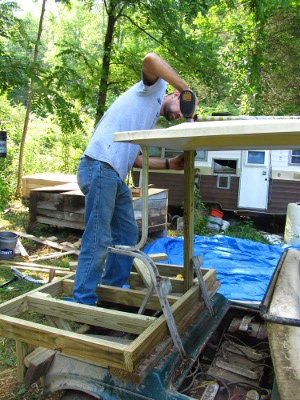 you've done, but...."
The canopy for the golf cart has weird spurs sticking back into the
pickup bed area, which were originally used to attach straps to hold
golf club bags in place. But these spurs were likely to get in
the way of our serious hauling.
you've done, but...."
The canopy for the golf cart has weird spurs sticking back into the
pickup bed area, which were originally used to attach straps to hold
golf club bags in place. But these spurs were likely to get in
the way of our serious hauling.
"Not a problem," replied
Bradley. He took back off the bed and sides (ah, the glory of
screws!), removed the canopy supports, and replaced them with two by
fours. Then he put it all back together and added the tailgate,
made on the same principle as the sides but with some two by twos for
additional structural support.
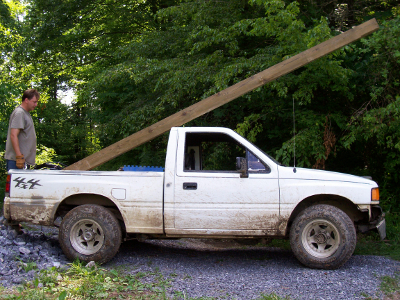
Speaking of structural
support, the photo below shows the diagonal braces Bradley added
underneath the bed to allow him to cantilever the floor out beyond the
golf cart frame. (In case you're confused about the jack ---
Bradley was upgrading the springs, which Mark will 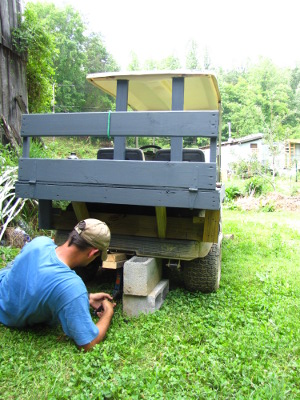 post about later. I
just stole the photo for this post.)
post about later. I
just stole the photo for this post.)
Meanwhile, Bradley and
Mark teamed up on a smaller
front box to add yet
more hauling capacity, and Mark ensured the longevity of the untreated
plywood by giving
both boxes a coat of paint.
Mark and I are blown
away by the increased capacity of our new and improved golf cart
bed. With the walls removed, we easily hauled in all
six tanks, and then
I zipped back out for two heavy loads of firewood.
I felt like I was able
to haul three or four times as much wood as previously and I probably
could have stacked it even higher. The trick now will be holding
ourselves back so we don't strain the motor.
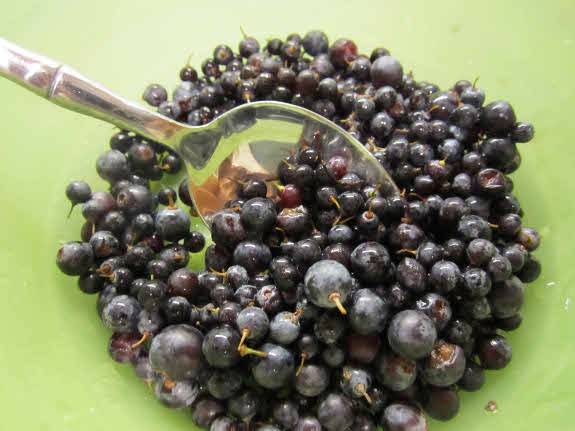
 Wild grapes grow along the
roadsides in Capay Valley, California. Here's my favorite way of
using them: squishing them into juice.
Wild grapes grow along the
roadsides in Capay Valley, California. Here's my favorite way of
using them: squishing them into juice.
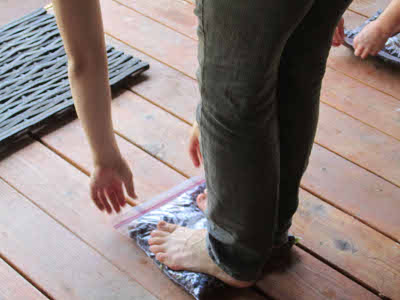
1. Wash and put the grapes
into a large ziplock bag. Seal the bag, removing as much air as
possible.
2. Squeeze the grapes with
your feet or fingers. Pop all the grapes. This is a very pleasant
sensual experience!
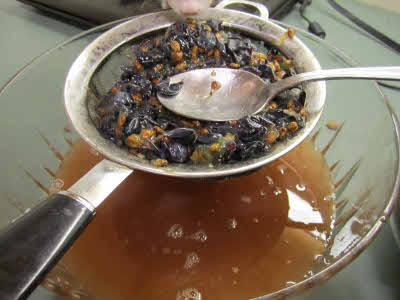 3. Pour the grapes pulp into a
strainer and press with the back of a spoon, catching the juice into a
bowl.
3. Pour the grapes pulp into a
strainer and press with the back of a spoon, catching the juice into a
bowl.
4. Do not heat the juice!
Heating it removes much of the delicious flavor. You can strain it
further, but I don't.
5. Refrigerate or freeze the
juice. If you allow the juice to stand at room temperature for a day or
so before refrigerating it, you will get some natural carbonation from
the yeast on the grape skins. I like this.
I get rave reviews from friends
about the freshness of this juice and I serve it at my B&B, Cache Creek Inn.
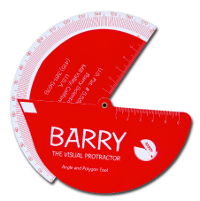 In
addition to running Cache Creek Inn, Camilla Barry and her husband
invented the visual protractor shown here, which they describe as
"the world's easiest protractor --- anyone can use it!"
In
addition to running Cache Creek Inn, Camilla Barry and her husband
invented the visual protractor shown here, which they describe as
"the world's easiest protractor --- anyone can use it!"
If you'd like to share a guest
post with our readers, check out our submission
policy. We love
learning about what other homesteaders are doing across the country and
around the world!

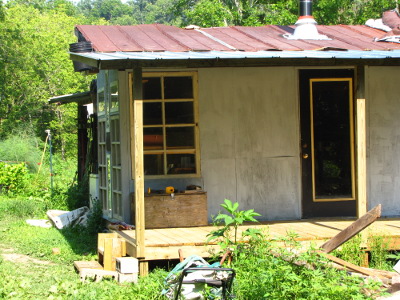
We got the new east porch
started last week. Our helper Bradley got about half way done with the
roof today before it got too hot.
It might be hard to see in
the picture above, but the side he's not working on is secured with a
rope so it can pivot. This allows him to get the other end screwed in
without needing an extra hand.
We've learned several
building tips like this just by observing his style and technique. It's
a nice bonus on top of the high quality craftsmanship we get to
appreciate after he goes home.
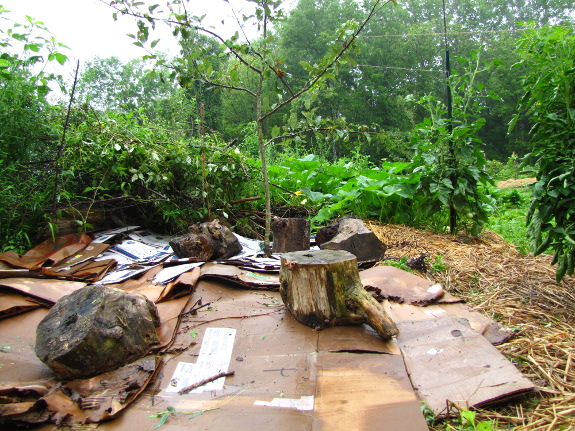
After a bit of debate,
we decided to use pallets as the floor of our new
woodshed. The 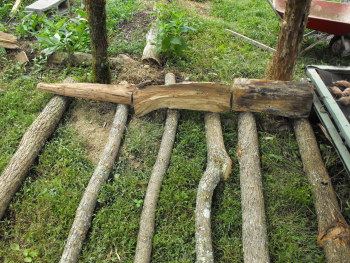 woodshed
(and half of our core homestead) is in an area with very high
groundwater, so you really can't just stack wood directly on the
ground. (Well, you can, but then the firewood is not only
unburnable, but is also impossible to pry loose from the frozen muck.)
woodshed
(and half of our core homestead) is in an area with very high
groundwater, so you really can't just stack wood directly on the
ground. (Well, you can, but then the firewood is not only
unburnable, but is also impossible to pry loose from the frozen muck.)
In our previous
incarnation, Mark cut
sassafras saplings and lay them on the ground to stack on top of, but those quickly sunk into
the mud from the weight of the firewood. My pallets may too ---
we'll just have to wait and see.
 The other innovation (in
addition to size) for wood shed 2.0 is adding some two by fours to
partially close in the walls. Our efficient
wood stoves have
very small fire boxes, and short firewood has a bad tendency to fall
back on top of me when I stack it over my head. Now I can layer
the wood so that it leans against the back of the shed, which will give
the stack better stability.
The other innovation (in
addition to size) for wood shed 2.0 is adding some two by fours to
partially close in the walls. Our efficient
wood stoves have
very small fire boxes, and short firewood has a bad tendency to fall
back on top of me when I stack it over my head. Now I can layer
the wood so that it leans against the back of the shed, which will give
the stack better stability.
I'm still plugging away
at hauling in the firewood that's been sitting out in the parking area
for months, some of which was bought and some of which was cut from a
big tree that fell on the driveway. Since the parking area wood
is wetter, those logs are going in the back of the shed, then I'll
stack the leftover firewood that was in the old shed in front for early
winter burning. We've also got a few box-elders and red maples
that Bradley cut away from the back side of the barn and left to lie
until the sap dries up a bit --- those will be added to one side of the
shed once I rustle up a few more pallets.
As you can see, we've
still got a ways to go before our winter's wood will be under roof, but
it's great to make progress (and to think of cold weather on a
sweltering summer day).

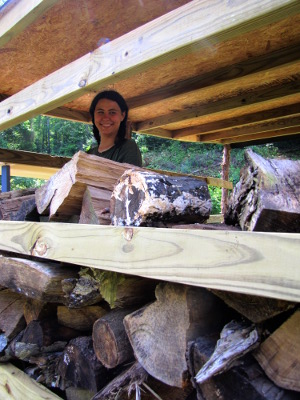
Our helper Bradley brought
along someone to help him today and they both finished up the new tin
roof.
This wall gets direct morning
sun. According to the inside gauge the temperature is already 5 degrees
cooler than yesterday at the same time of day.
 My experiments with
persimmons are slow, but I'm making forward progress. Two years
ago, I
planted some seeds using a method I've explained in depth in a previous
post. The soil
was poor (despite potentially having the right mychorrizae in it) and
the winter's freeze and thaw pushed many of the seeds to the surface,
where they died. I
ended up with only one seedling, and it sat there for most
of last year, then didn't leaf back out after I transplanted it into
the pasture this winter.
My experiments with
persimmons are slow, but I'm making forward progress. Two years
ago, I
planted some seeds using a method I've explained in depth in a previous
post. The soil
was poor (despite potentially having the right mychorrizae in it) and
the winter's freeze and thaw pushed many of the seeds to the surface,
where they died. I
ended up with only one seedling, and it sat there for most
of last year, then didn't leaf back out after I transplanted it into
the pasture this winter.
Last year, I gathered
a lot more seeds and tweaked my technique. Rather than
letting the seeds naturally stratify outside, I wrapped them in damp
rags and then sealed them inside a ziploc bag, with the result that
several sets of persimmon seeds spent the winter molding in our
fridge. When I pulled the bags out in late May, the contents were
disgusting, but the seeds were in much better shape than my previous
batch.
After rinsing off the
seeds, I had to choose a potting soil. Despite books' admonition
to use only forest soil, I decided that potting soil characteristics
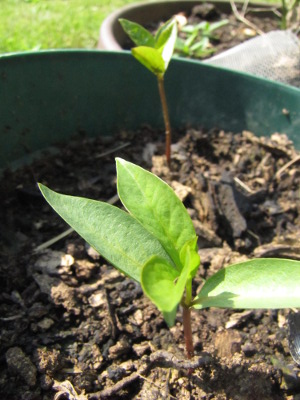
trumped soil mychorrizae. So I potted up this year's persimmon
seeds in stump
dirt. Less
than a month after planting, seedlings started popping up.
 The
first seeds to germinate were gathered from a scat last November.
I didn't think the seeds were in terribly good shape since they seemed
a bit dried out, but as many of our readers suggested, passing through
the gut of an animal definitely aids in persimmon germination.
For a week, I thought the scat seeds were the only ones that were going
to sprout, but then plants in other pots started unfurling their leaves
--- looks like I'll have a lot of persimmons to play with this year!
The
first seeds to germinate were gathered from a scat last November.
I didn't think the seeds were in terribly good shape since they seemed
a bit dried out, but as many of our readers suggested, passing through
the gut of an animal definitely aids in persimmon germination.
For a week, I thought the scat seeds were the only ones that were going
to sprout, but then plants in other pots started unfurling their leaves
--- looks like I'll have a lot of persimmons to play with this year!
Since our core homestead
is really too small for many (any?) American persimmons, my plan is to
repot these seedlings into individualized pots before they get too
big. After a year of growth, they'll be ready to have Asian
persimmon scionwood
grafted onto them, and the year after that they'll go into our chicken
pastures.
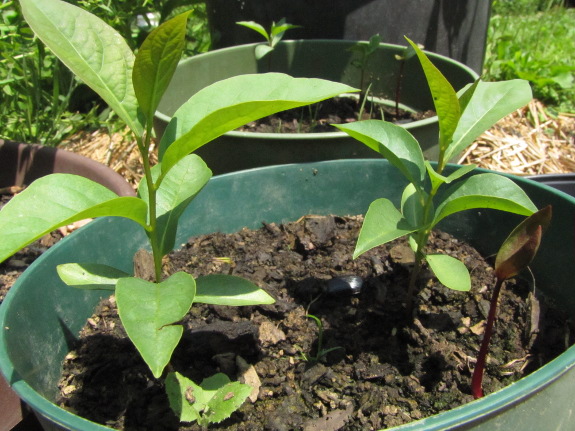
That is, if our internship
property doesn't
materialize in the next year. The spot we'd been salivating over
fell through, but we haven't let the dream die. Maybe we'll have
a big forest pasture just waiting for persimmons next spring?

The new diy
golf cart pick up bed
increased our rear load capacity from 7 buckets to 9.
We've got a few ideas on
squeezing room for more.
1. Haul buckets with sides
removed. Maybe a ratchet strap would hold them in place. Extending the
sides out just a few inches would allow an additional 3. It might
require a post at each end of the back for the ratchet strap to wrap
around.
2. Modify the sides so they
angle outward and maybe go higher up so another layer of buckets can
fit on top of the bottom layer increasing the rear load limit to 24.
That might be too much weight when hauling moist manure or gravel, but
wood chips should be light enough for that much volume.
While I've been playing
in the garden and Bradley's been building things, Mark has faced the
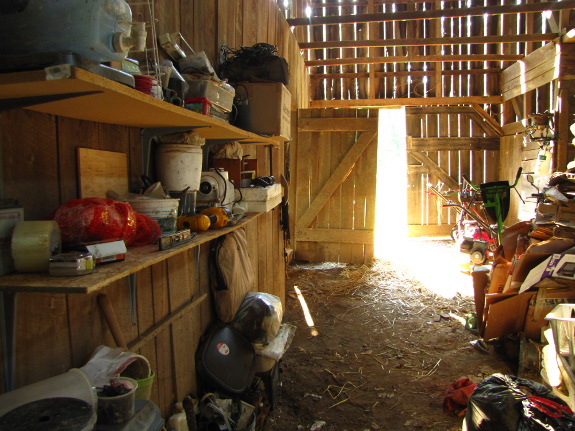
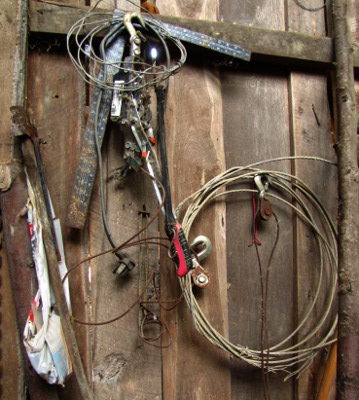
most difficult job on the farm --- organizing the barn.
I believe in being
honest on our blog, but sometimes you just don't need to see the worst case
scenario. So there are no before photos that go with this
post. Suffice it to say that for five years, only a small portion
of the barn was waterproof, and that area had no solid walls 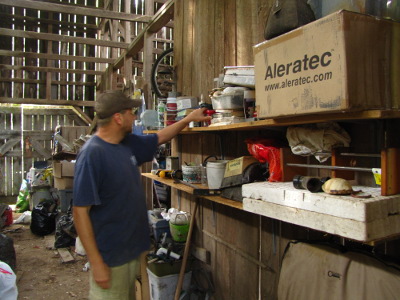 on which to hang shelves and
tools. As a result, everything in the barn was piled in a mass
right in front of the doors.
on which to hang shelves and
tools. As a result, everything in the barn was piled in a mass
right in front of the doors.
A new
roof opened up
exciting barn area, but didn't do anything about the jumble of
machinery, tools, and so forth that had built up in the aisle.
For the last few weeks, Mark has been dealing with years of neglect,
which mostly consists of putting things on shelves and nails. I'd say
he's about halfway done (or maybe even more), with the result that we
can walk into the barn again!
 The long term goal is to have
room to stable the golf cart and lawn mower in a nearly clear central
aisle, with the sides being split up into work and storage areas.
We may eventually build lofts too, either just for fun, for guest
quarters, or for biomass stockpiling (aka hay lofts). There's
certainly plenty of vertical area to take advantage of in this old
tobacco-drying barn.
The long term goal is to have
room to stable the golf cart and lawn mower in a nearly clear central
aisle, with the sides being split up into work and storage areas.
We may eventually build lofts too, either just for fun, for guest
quarters, or for biomass stockpiling (aka hay lofts). There's
certainly plenty of vertical area to take advantage of in this old
tobacco-drying barn.
I just thought you
should know why Mark's been quiet about his projects lately --- he's
been slaving away on an unphotogenic task that no one else wants to
tackle. Thanks, honey, for perservering!

The DeWalt impact driver is
an awesome innovation in drill technology.
We've been using ours for a
few months now. I could tell you how the torque feature lets the drill
decide when to add more power or back off by making a loud clicking
sound, but the best way to appreciate what a great tool this is would
be to look at the reviews on Amazon. 111 five star reviews with only 1
one star review from a guy who had issues with how his driver smelled.
A good example is shelf
brackets. I was putting up a new shelf in the barn recently trying to
use the old Dewalt regular drill. The wood was hard enough to cause
problems. Either it would break off the head or stop gripping and begin
to strip the screw. When I finally walked over to get the impact drill
the difference was obvious.
I was going to write a
long post about why Mark and I decided to sink this year's retirement
money into farm infrastructure (aka paying Bradley to build us things)
rather than putting cash in the bank. About how it's just another
example of the homesteading motto: keep your eyes open for
opportunities and then seize the day. We figure Bradley's obvious
skills and expanding confidence will soon put him out of our league, so
we're accepting every possible minute he can spare to make our farm
more self-sufficient until that inevitable day comes.
 But I suspect you don't
really care why so much new infrastucture is coming to the farm
this summer, and would rather read about how it all happens. So
here are lessons learned from porch 2.0.
But I suspect you don't
really care why so much new infrastucture is coming to the farm
this summer, and would rather read about how it all happens. So
here are lessons learned from porch 2.0.
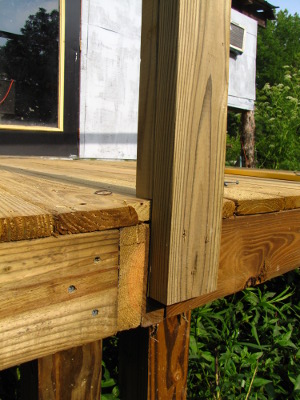
With porch 1.0, we had already bought four
by fours to support the roof, but Bradley was involved in the supply
run this time around and had other ideas. He explained that using
a pair of two by fours for each support post is just as sturdy as using
a four by four, and also allows you to attach the post more securely to
the floor (as you can see here), all while costing significantly
less. The only downside of this method is that you end up with a
support that's 3 inches by 3.5 inches rather than one that's 3.5 inches
by 3.5 inches, but that won't be an issue if you're not trying to put
heavy things on top.
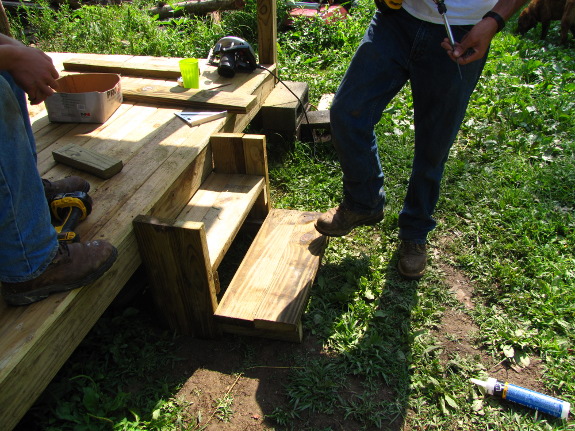
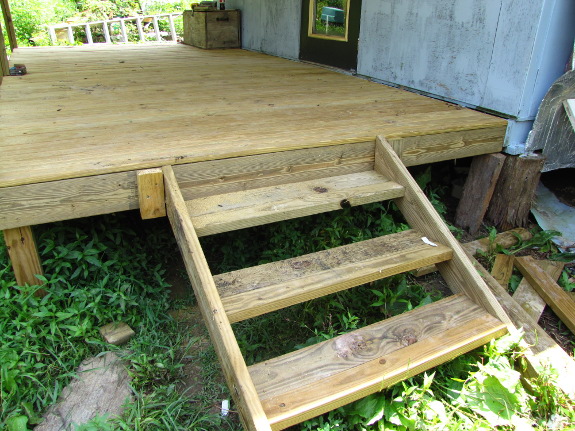
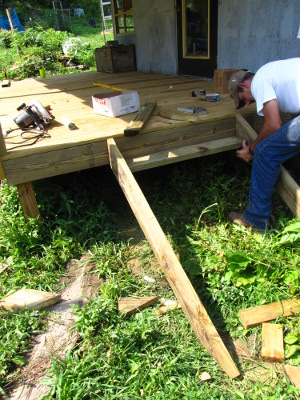 Next, Bradley asked why we'd
buy inexpertly-cut stair risers when he could make a more stable set of
steps out of dimensional lumber. He built the simple stairs above
for the uphill side and the enticing steps to the right and below for
the downhill side.
Next, Bradley asked why we'd
buy inexpertly-cut stair risers when he could make a more stable set of
steps out of dimensional lumber. He built the simple stairs above
for the uphill side and the enticing steps to the right and below for
the downhill side.
In both cases, Bradley
cobbled the staircases together out of odds and ends we had leftover
from other projects. You can see that each step is made from
multiple boards so that we didn't have to rush to the store for wider
planks, and that the stair steps on the downhill side rest on little
pieces of lumber attached to the inside of pairs of slanted
boards. This is all treated lumber since the area gets extremely
wet in the winter.
Speaking of wet, muddy
ground, I'm starting to realize that Mark's right to put porches so
high up on our priority list. It's amazing how much effort (and
mental energy) has been drained over the years by slogging through the
mud pit that develops over the winter in the area that's now under roof
outside the East Wing. In addition to looking forward to the
winter luxury of dry feet, we've enjoyed the summer luxury of cooler
living conditions without the need for electricity during this current
heat wave.
But the most important
benefit of the porches is harder to quantify and is due to the fact
that porches make us spend a lot more leisure time outside. Stay
tuned for the startling discovery that resulted from that outdoors time, coming up in tomorrow's post.
Anna noticed some deer damage
over the weekend. The first of the year.
It was a minor incursion, but
we know from past
experience that each visit gets longer as the offending deer feels
more comfortable.
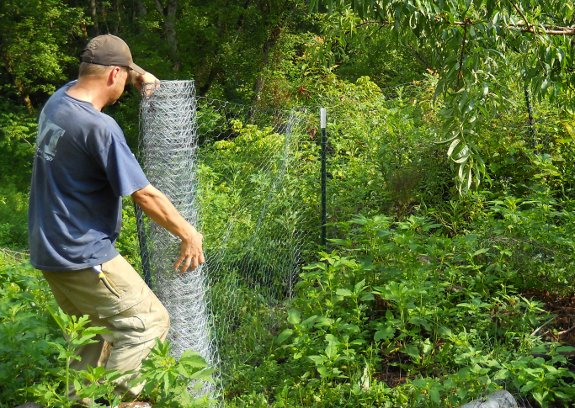
We decided to make today the
day we finish fencing in the side where we think he or she entered. 80
more feet of 5
foot high chicken wire closes up this end of the perimeter leaving
about another 70 feet towards the east end before we have the entire
garden surrounded.
 Yesterday I wrote that our
new porches tempt me and Mark to spend more time relaxing outdoors than we used to. As a
result, we've been paying more attention to the natural world, and,
after a couple of weeks, I made a shocking dicovery. The summer
sun rises in a totally different
spot than the winter sun does!
Yesterday I wrote that our
new porches tempt me and Mark to spend more time relaxing outdoors than we used to. As a
result, we've been paying more attention to the natural world, and,
after a couple of weeks, I made a shocking dicovery. The summer
sun rises in a totally different
spot than the winter sun does!
Yes, we technically
already took advantage of this fact when we planned
our south-facing trailer windows to capture winter sun without roasting
us in the summer. And if you'd asked me a year ago, I could have
told
you that the sun is lower in the sky in the winter than in the summer.
But I didn't realize
that the sun being higher in the summer sky means that it rises over
the barn instead of over the hill like it does in the winter!
This tidbit of data makes our budding passive solar heating and cooling
systems a bit more complex.
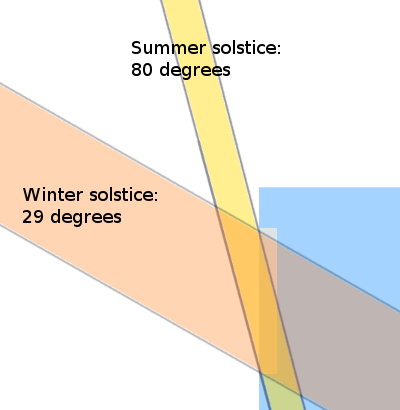
 Notice how our new porch shades the East Wing from
the morning sun. I was a bit concerned that we'd be losing some
much-needed winter solar gain, but overlaying the sunpath diagram with
a map of our property shows that the sun has moved so far south in the
sky by late fall that it barely hits the side of the east wing at all.
Notice how our new porch shades the East Wing from
the morning sun. I was a bit concerned that we'd be losing some
much-needed winter solar gain, but overlaying the sunpath diagram with
a map of our property shows that the sun has moved so far south in the
sky by late fall that it barely hits the side of the east wing at all.
By the same reckoning,
we could probably block some of the scorching late afternoon sun on the
west side of our trailer without impacting winter solar heat gain as
well. I'm still 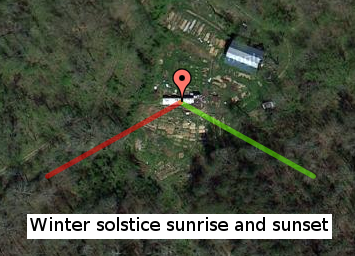 wrapping my head around the
fact that the sun doesn't rise in the east and set in the west, though,
so I think I'm going to observe a little longer before I make any
drastic decisions for that area.
wrapping my head around the
fact that the sun doesn't rise in the east and set in the west, though,
so I think I'm going to observe a little longer before I make any
drastic decisions for that area.
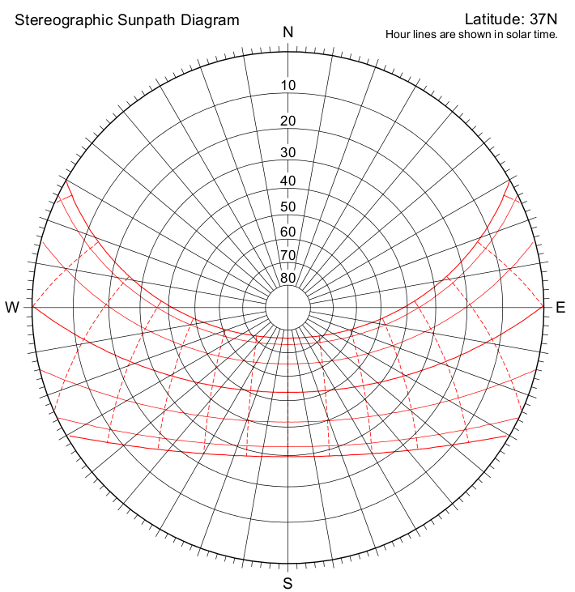
If you want to play with
sun patterns in your own neck of the woods, there are lots of good
resources on the web. This website allows you to
calculate the sun angle at your latitude (but you'll have to draw the
elevation mockup yourself) and this
website has downloadable sunpath diagrams, like the second image in
this post. Finally, this website allows
you to plot sunrise and sunset locations overlaying an aerial photo of
your property for any day of the year.
Or you can just build a
porch and watch the world unfold around you.
Edited to add:
Read more about passive
solar design in Trailersteading, which is now available for
$1.99 on Amazon. I hope you enjoy reading it as much as I enjoyed
writing it!
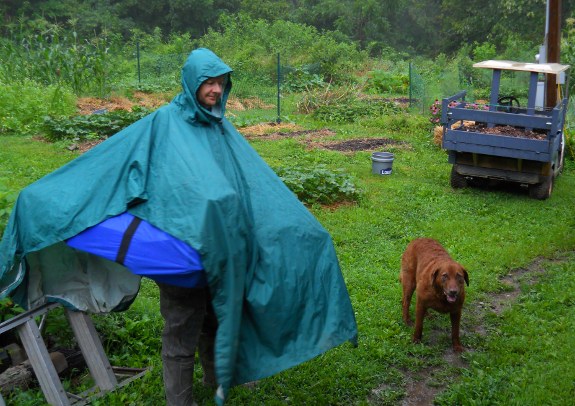
We got some much needed rain
last night and this morning.
The creek was too high for
the golf cart, which meant the poncho express if I wanted to mail
chicken waterers today.
I tried telling Lucy to take
the morning off, but she was hearing none of it and insisted on blazing
the trail to our parking area in the pouring rain.
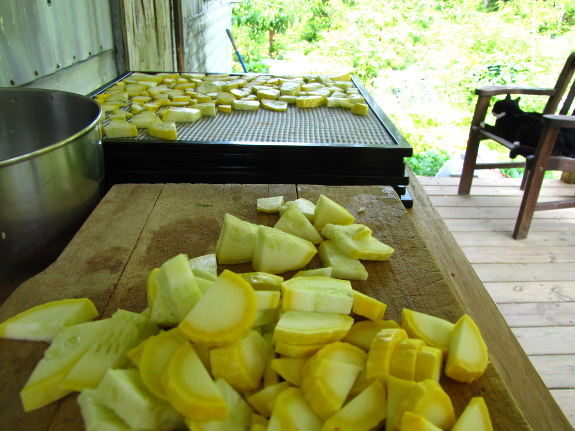
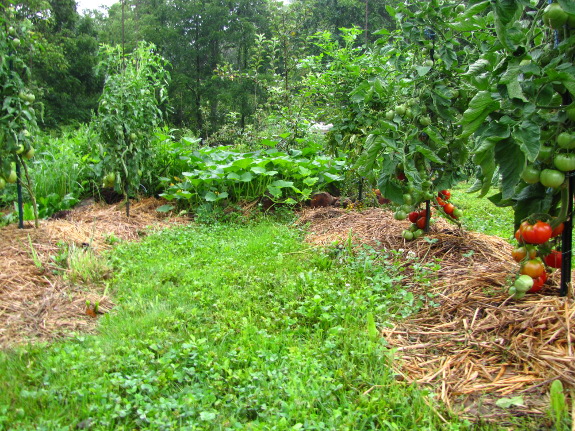
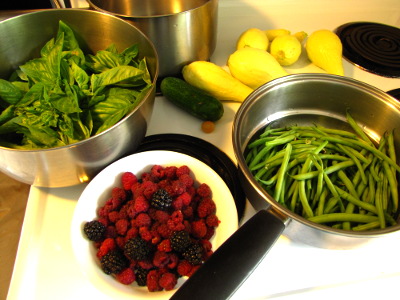 The
mountains of produce started piling up around the first of this
month, and momentum is still building. The photos in this post
show just a few of the big harvests that have gone into our bellies
and/or freezer during the first week of July.
The
mountains of produce started piling up around the first of this
month, and momentum is still building. The photos in this post
show just a few of the big harvests that have gone into our bellies
and/or freezer during the first week of July.
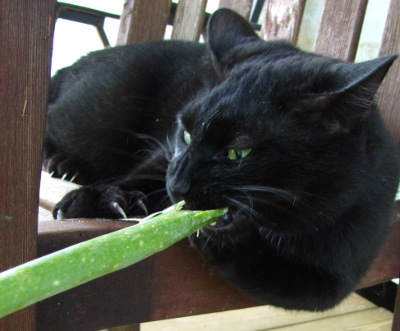
(No, we didn't eat the
bug or the cats.)

 Since
outdoor temperatures were in the high nineties to low hundreds for the
last two weeks, the trailer got so hot inside that Mark couldn't stand
to
spend more than about thirty seconds there. I could handle a few
more minutes, but was very glad to be able to do most of our food
processing on the porch.
Since
outdoor temperatures were in the high nineties to low hundreds for the
last two weeks, the trailer got so hot inside that Mark couldn't stand
to
spend more than about thirty seconds there. I could handle a few
more minutes, but was very glad to be able to do most of our food
processing on the porch.
In addition to cooler
temperatures, when you work outside, you get
visited by fascinating insects like the wheel bug above. These
predatory insects like to eat caterpillars and Japanese beetles, so I
was thrilled to see one carried in on the produce. (Be careful
--- I hear they have a painful bite.)
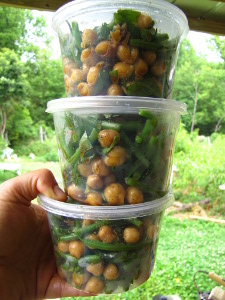
After figuring out where to process the produce, the
next decision was what to do with it. First
step --- eat as much as possible right away! At this time of
year, I try to put a cucurbit on our plate for each lunch and dinner,
along with another vegetable or two. I've also been
trying out various vegetable salad mixtures, all of which have been
very heavy on the cucumbers to use up that bountiful crop.
 Despite
the joy of working on the porch, I've been giving away more food than
usual. Due to the wonders of quick
hoops, we only ate
about
twenty gallons of frozen summer produce between us during the off
season, which means I lowered my quotas on everything except vegetable
soup. (It
seems like we can eat an unlimited amount of vegetable
soup.) Although summer vegetables sound more interesting than
kale and lettuce, when the former is frozen and the latter is fresh, we
subsist nearly entirely on the latter.
Despite
the joy of working on the porch, I've been giving away more food than
usual. Due to the wonders of quick
hoops, we only ate
about
twenty gallons of frozen summer produce between us during the off
season, which means I lowered my quotas on everything except vegetable
soup. (It
seems like we can eat an unlimited amount of vegetable
soup.) Although summer vegetables sound more interesting than
kale and lettuce, when the former is frozen and the latter is fresh, we
subsist nearly entirely on the latter.
I did plant less of
certain crops in 2012 and used less manure to fertilize, but the garden
seems bound
and determined to churn out just as much food as last year despite
having a smaller area planted. As the person we see the most,
poor Bradley has been burdened with the excess. Maybe that huge
bag of summer squash and cucumbers we pawned off on him Friday is the
reason he had
other plans and couldn't come back to work on Monday?
 "I left the woods for as
good a reason as I went there. Perhaps it seemed to me that I had
several more lives to live, and could not spare any more time for that
one. It is remarkable how easily and insensibly we fall into a
particular route, and make a beaten track for ourselves. I had
not lived there a week before my feet wore a path from my door to the
pondside; and though it is five or six years since I trod it, it is
still quite distinct."
"I left the woods for as
good a reason as I went there. Perhaps it seemed to me that I had
several more lives to live, and could not spare any more time for that
one. It is remarkable how easily and insensibly we fall into a
particular route, and make a beaten track for ourselves. I had
not lived there a week before my feet wore a path from my door to the
pondside; and though it is five or six years since I trod it, it is
still quite distinct."
 Thoreau ends Walden by admonishing us to live
our lives fully, not to fall into ruts or societal traps. He
tells us to explore our inner world, to live fully in the moment, and
to "love your life, poor as it is."
Thoreau ends Walden by admonishing us to live
our lives fully, not to fall into ruts or societal traps. He
tells us to explore our inner world, to live fully in the moment, and
to "love your life, poor as it is."
How's that for an upbeat
ending to a quotable but laborious book?
I'd love to hear from
everyone who read part or all of Walden, now that the first book
club read is at its end. What were your overall thoughts?
Did you think Thoreau was a long-winded poser, or a mystic
visionary? Did the book inspire you; if so, to do what?
Personally, I'm ready to move
on from Thoreau and crack open The
Dirty Life, which we'll begin discussing on July 25. For my
college buddies: the husband in The Dirty Life's team is a
graduate of our alma mater, if that's an inducement to join the next
discussion.
As we wait for everyone's
copies of the next book to arrive on interlibrary loan, feel free to
read back over my posts (and reader comments) on Walden's
chapter
1, chapter
2, chapters
3 and 4, chapters
5 and 6, chapters
7 and 8, chapters
9 and 10, chapters
11 and 12, chapters
13 and
14, and chapters
15 and 16. Several of us are subscribed to the comments and
will see contributions you post there, even if they're out of sync.

This ultra cute Gray Treefrog showed up today for a
visit.
I looked around the sink area
and found a gap I forgot about when we brought our gray water line into
the trailer after burying
it last year.
Is there a connection between
Gray Treefrogs and gray water?
I don't think so.
 Good afternoon, sweet Anna!
I've recently been mulling over the costs of homesteading (or whatever else people choose to call it) and thought it would be wise to ask you what you think.
Purchasing land and home aside, what are the the bank account costs of establishing a garden that can feed two people with the methods that you use? Even if you buy the land outright and the home is free, or also bought outright, there are still repairs that will have to be made over time, is there a way to guess a general amount per year for that? How much to maintain soil, gardening equipment? Seed preservation, food storage, and livestock if one keeps the smaller, more cost-effective animals?
You guys have been making great strides on the farm improvements by utilizing your helpful assistant lately, what do those sorts of costs look like? Obviously much of what you can explain are only guesses or your own costs, but what are some good methods for keeping track of costs once we begin on our own journey on the land?
 I suppose what I'm asking is:
how much does it cost to maintain and how much does it cost to improve
over time? I think that some of us who are hoping to go back to
the land would like to know how much to plan for. We need to
know, generally of course, how to determine the money we would need to
tuck away, invest, or what level of income to maintain so that our
lives can function while we find our balance, then how much it will
take to cruise right along.
I suppose what I'm asking is:
how much does it cost to maintain and how much does it cost to improve
over time? I think that some of us who are hoping to go back to
the land would like to know how much to plan for. We need to
know, generally of course, how to determine the money we would need to
tuck away, invest, or what level of income to maintain so that our
lives can function while we find our balance, then how much it will
take to cruise right along.Most people --- okay, maybe just me --- don't have any idea how to plan for food. I don't know how much salad I eat, if I'll need potatoes, if I can really stomach that much zucchini, etc. And worse, I'm worried that even if I calculate enough, that what I grow won't make it. Every year is an experiment, surely, but how can you figure in the cost of having to go to the store anyway because of crop failure, etc?
Is this all just too BIG a question? Is it simply too much to answer? I don't know who else I can ask.
Thank you so much for all you do,
Brandy
 I've been receiving a lot of
thought-provoking reader questions like this via email lately, but
there are always so many other things to post about that I never seem
to get around to answering them. There's no time like the present
to start, though, and I thought Brandy's question might be something
that other readers would like to chime in on. (Plus, with a
salutation like that, how could I not make this the first reader
question post of the summer?)
I've been receiving a lot of
thought-provoking reader questions like this via email lately, but
there are always so many other things to post about that I never seem
to get around to answering them. There's no time like the present
to start, though, and I thought Brandy's question might be something
that other readers would like to chime in on. (Plus, with a
salutation like that, how could I not make this the first reader
question post of the summer?)
While I think we should
all talk about money more, this is a tough question to answer because
everyone will spend a different amount of cash on their
homestead. Mark and I believe strongly in paying as we go, which
means that in the early years on the homestead, we spent next to
nothing on the garden and improvements. Our combined annual
income was $12,000 at the time, so we simply couldn't afford any excess.
 That said, I had been saving
ever since high school, so I had enough of a nest egg to pay some hefty
startup fees. It cost $1,266 for our electric hookup and we paid
another $2,000 to move our free
trailer onto the land. Mark and I were just barely dating at
the time, so I paid off his debts in exchange for labor before we
pooled our incomes and started going steady. As a result, we went
into the endeavor debt-free, except for a no-interest,
pay-when-you-feel-like-it loan from a very good friend to buy the land.
That said, I had been saving
ever since high school, so I had enough of a nest egg to pay some hefty
startup fees. It cost $1,266 for our electric hookup and we paid
another $2,000 to move our free
trailer onto the land. Mark and I were just barely dating at
the time, so I paid off his debts in exchange for labor before we
pooled our incomes and started going steady. As a result, we went
into the endeavor debt-free, except for a no-interest,
pay-when-you-feel-like-it loan from a very good friend to buy the land.
During our first two
years on the farm, I budgeted $100 for seeds each year, and if I could
drum up the cash, spent another $50 or so on perennials, but we didn't
add any other storebought inputs. Many of our first perennials
were gifts from friends --- our family's heirloom Egyptian onions have
now spread across the U.S., and a friend's gift of two varieties of
strawberry plants have fed us bushels of berries while also allowing me
to give away starts to my family and friends. We started
our grapes by taking hardwood cuttings from a friend's orchard, and
our huge ever-bearing raspberry patch started as a single plant that
came as a freebie with our order of fruit trees. The theme here
is that if you understand how to propagate plants and save seeds (and
are patient), you can get the plant side of your farm going with very
little cash.
 Our first chickens were a
partnership with a neighbor who wanted fresh eggs but didn't want to
put the time into building chicken tractors and taking care of the
livestock. He paid for the birds and we only had to buy chicken
feed, giving him some eggs in the early years. That said, chicken
feed isn't cheap, so poultry care made up a large proportion of our
early farm costs ($262 in 2008, before we gave away some of the 20
birds we started with).
Our first chickens were a
partnership with a neighbor who wanted fresh eggs but didn't want to
put the time into building chicken tractors and taking care of the
livestock. He paid for the birds and we only had to buy chicken
feed, giving him some eggs in the early years. That said, chicken
feed isn't cheap, so poultry care made up a large proportion of our
early farm costs ($262 in 2008, before we gave away some of the 20
birds we started with).
Meanwhile, we turned the
trailer from a windowless, throwaway item into a living space using
free building materials my mother found on the curb on trash day and
that we picked up at a giveaway of a service organization that builds
houses. We did splurge a hundred dollars or so to get new
double-glazed windows, which had been custom-made but not picked up, so
were vastly reduced in price. Tools were the 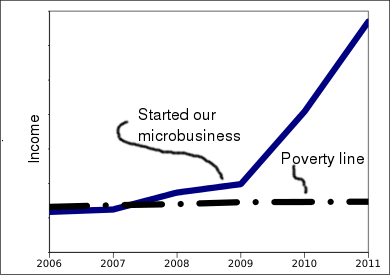 expensive
part, but my father found a lot of hand tools for me at an auction and
Mark's mother gifted us with many power tools. (The December
volume of Weekend Homesteader covers the tools that I consider the
bare essentials for homesteading.)
expensive
part, but my father found a lot of hand tools for me at an auction and
Mark's mother gifted us with many power tools. (The December
volume of Weekend Homesteader covers the tools that I consider the
bare essentials for homesteading.)
While this sounds like
hard-scrabble living (and it was in certain ways), we also had the
freedom to invest our time in breaking free of the rat race and
figuring out where our passions lay. Since we weren't saddled
with debt, we were able to tighten our belts and start our microbusiness, finally rising above the
poverty line. More recently, income from my writing has added to
the coffers, which means we suddenly have plenty of extra cash to throw
at homesteading projects.
 As
our income has increased, we've put more and more money into the
farm. We spent nearly $900 on each of our efficient
wood stoves (getting
some of that back in taxes), which lowered our heating bill and finally
allowed me to stop wearing a winter coat inside. The
East Wing cost us another $1,100, and more recently we spent
$4,000 on the barn roof and have paid Bradley around $3,000 this summer
for lots of projects (only some of which you've seen on the blog) along
with perhaps that much again for his building supplies.
As
our income has increased, we've put more and more money into the
farm. We spent nearly $900 on each of our efficient
wood stoves (getting
some of that back in taxes), which lowered our heating bill and finally
allowed me to stop wearing a winter coat inside. The
East Wing cost us another $1,100, and more recently we spent
$4,000 on the barn roof and have paid Bradley around $3,000 this summer
for lots of projects (only some of which you've seen on the blog) along
with perhaps that much again for his building supplies.
Lately, we've been
investing lots of cash in straw and cover crop seeds --- Mark talked me
into splurging $80 this summer on 20 pounds of oilseed radishes to
really boost the farm's fertility and we've also spent $650 in the last
year on straw. And, as you've probably noticed, we've been
devoting more cash to perennials that are experimental, half of which
fail to thrive in our climate, but others of which have found a niche
on our farm.
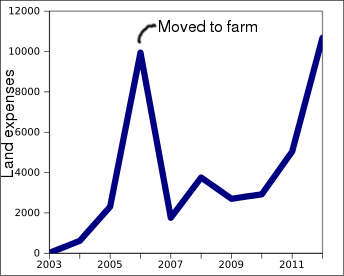 I keep track whenever money
goes in or out of our pockets using the free program GnuCash. It
reports that we've spent just shy of $40,000 on the farm since 2003,
which you should take with a grain of salt --- I'm not as careful to
make sure that everything is categorized correctly in our non-business
accounting. But you can get an idea for annual costs, ranging
from that expensive startup year, through the years when we were barely
getting by, and finally to our push in the last year to invest in our
homestead.
I keep track whenever money
goes in or out of our pockets using the free program GnuCash. It
reports that we've spent just shy of $40,000 on the farm since 2003,
which you should take with a grain of salt --- I'm not as careful to
make sure that everything is categorized correctly in our non-business
accounting. But you can get an idea for annual costs, ranging
from that expensive startup year, through the years when we were barely
getting by, and finally to our push in the last year to invest in our
homestead.
So, the take-home
message is --- assuming you don't go into debt to get started, your
annual costs could be as low as $2,000 to $3,000 per year to run a two
person homestead. However, that assumes you're willing to do
without and pinch pennies (much easier if you start with nothing and
slowly build up your infrastructure than if you move from a fancy place
in the city and are shocked to live without running water for the first
few years).
 The
one ongoing expense you can't get away from is property taxes, which
is why I highly recommend buying cheap land and living below your
means. We purchased subpar swamp and hillside in a
poverty-stricken region of Appalachia for $600 per acre, and even
though property taxes have risen considerably in the last eight years,
we only paid $321 in county taxes in 2011.
The
one ongoing expense you can't get away from is property taxes, which
is why I highly recommend buying cheap land and living below your
means. We purchased subpar swamp and hillside in a
poverty-stricken region of Appalachia for $600 per acre, and even
though property taxes have risen considerably in the last eight years,
we only paid $321 in county taxes in 2011.
I hope that helps you
get a handle on the financial side of homesteading. I didn't
cover all of your questions in depth since it's hard to put
a cash price on the value of the produce we grow (although I did mean to add
that I think any reasonably interested person can grow all of their own
vegetables as long as they diversify enough that if one crop fails,
they can eat something else). Maybe others will chime in with
their answers to Brandy's question?
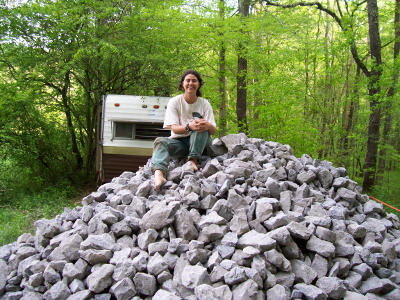
(By the way, all of
these photos are from when Mark and I were courting, before we moved to
the farm. And, as a postscript to the many people who have
emailed questions I haven't yet answered --- don't worry, you're still
on my list!)

I've been having second
thoughts on the tri-bladed
metal brush knife also known as the "Ninja Blade".
It cuts heavy grass and light
scrub, but every now and then I would hit a small tree or the ground of
a hillside that would stop it cold.
The FS90-R
recovers nicely, but can only handle a limited number of cold stops
like that before the flywheel shaft key sheers.
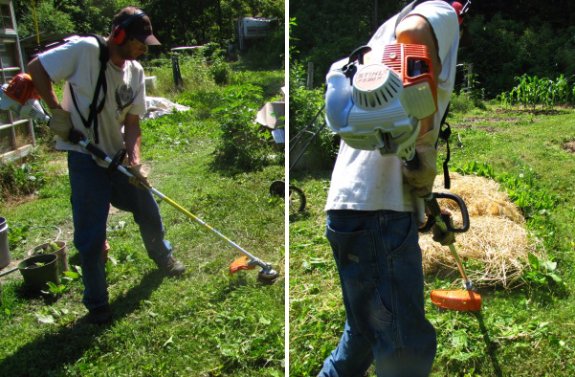
About an hour of research on
a weedeater forum revealed some bad news. Turns out you can't just
replace the flywheel shaft key. The key is built into the flywheel,
which would cost 65 dollars if you could order one, which you cannot
unless you're an official Stihl
dealer.
Ours is still under
warranty, but it's been in the shop for a month, and when I called them last week I got
the impression from the guy I talked to that their technician is either
slow or buried or both.
 Even though winter feels very
far away, the dog days are the right time to start
your fall garden.
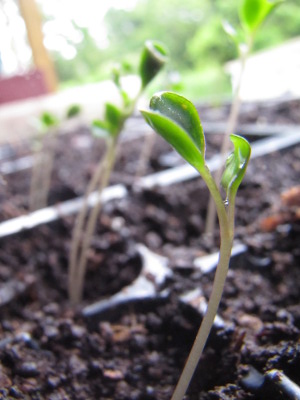
Last year, I
had a lot of trouble getting seeds to germinate in the hot, dry weather, so this year I opted to
start broccoli, cabbage, and (a new experiment this year) brussels
sprouts inside.
Even though winter feels very
far away, the dog days are the right time to start
your fall garden.
Last year, I
had a lot of trouble getting seeds to germinate in the hot, dry weather, so this year I opted to
start broccoli, cabbage, and (a new experiment this year) brussels
sprouts inside.
Sure enough, it was so
hot that I couldn't even get the first set of seeds to germinate inside
the trailer. So I moved the flats to the porch and refilled them
with stump
dirt from my favorite tree (the output of which I save for special
occasions). The result was cute little seedlings popping up
within a few days.
If I'd only known that
our weather was going to have a mood swing, I could have
direct-seeded. Recently, I've learned that summer weather (at
least in our neck of the woods) tends to get stuck in feedback loops,
which explains why some summers are distressingly cool and wet while
others are just as distressingly hot and dry.
A couple of weeks ago, I
noticed a several degree difference in temperature (as measured by my
bare feet) between the lush clover growing where our sink graywater
spills out and the parched clover just fifteen feet away. My feet
were picking up on the same factor that influences our summer weather
--- dry soil makes the air hotter while wet soil makes the air
cooler. Maybe that's why once the rains finally came, they kept
on coming all week long?
 I don't mind a few more days
of rain if it means the fall garden will get off to a good start.
Carrot seedlings (planted at the beginning of July) are already up and
I can just feel the snap pea seeds I set out Thursday plumping up in
the wet earth. Once those sprout, I've put in an order for more
hot, dry weather to keep the tomatoes and cucurbits happy.
I don't mind a few more days
of rain if it means the fall garden will get off to a good start.
Carrot seedlings (planted at the beginning of July) are already up and
I can just feel the snap pea seeds I set out Thursday plumping up in
the wet earth. Once those sprout, I've put in an order for more
hot, dry weather to keep the tomatoes and cucurbits happy.
In the meantime, the
photo above shows what I look like when I squelch in from the
garden. Can you tell I'm soaked from mid-thigh down and filthy
from head to toe? Pure bliss....
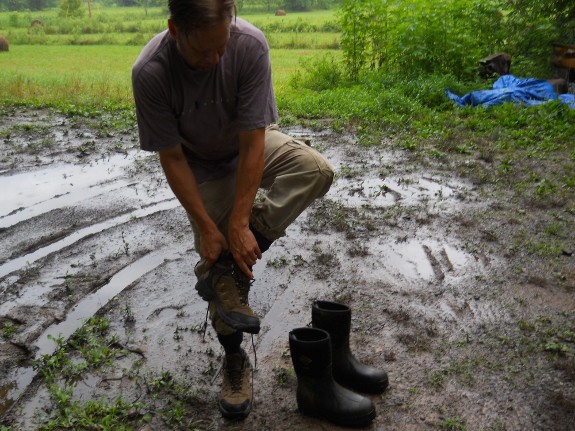
This is me switching from
boots to "going to town" shoes.
Its been raining for over a
week, but today was the first day it felt wet enough to pull out the Mucks.
 Many people believe that if
you break a mirror you get seven years of bad luck. The only
mirror I own is at the entrance to the chicken coop (a reused closet
door), so I can't speak to the truth of the mirror legend. But I
can tell you that if you let weeds go to seed in your garden, you're in
for seven years of extra work.
Many people believe that if
you break a mirror you get seven years of bad luck. The only
mirror I own is at the entrance to the chicken coop (a reused closet
door), so I can't speak to the truth of the mirror legend. But I
can tell you that if you let weeds go to seed in your garden, you're in
for seven years of extra work.
Even though we
reclaimed the forest garden from the weeds last summer, we'll be putting in extra
effort for the next few years to ensure that the offspring of those
weeds don't regain a foothold. I've got three weapons in my
anti-weed arsenal at the moment --- kill mulches, tomatoes, and
butternuts.
Kill mulches are the
obvious solution. I rip out as many of the weeds as I can, then
top what's left off with a heavy layer of cardboard and then wood chips
(around the trees) or straw (around the vegetables). I've found
that in areas with vigorous vines, like Japanese honeysuckle, it may
take multiple kill mulches a few months apart to really wipe out the
invaders.
Next, I plant tomatoes
next-door to the trouble zones. Mark and I love tomatoes more
than any other plant in the summer garden, and they're a bit of a
struggle in our humid climate. So I commit to pruning off
diseased leaves and new suckers every week, then tying the tomatoes up
to their stakes. The result is that I pay attention to that part
of the garden on a regular basis, and no weed goes to seed without me
noticing.

The final solution in my
anti-weed campaign this year is butternut squash. Although we
love butternuts, I consider them plant-it-and-forget-it crops.
But as long as the weed pressure is relatively low, they do a pretty
good job of acting as a living mulch, shading the ground so seeds don't
germinate.
So far, I'm very pleased
with the results --- for the first time since we moved to the property,
the forest garden is starting to look like a productive and happy
place. Maybe it won't take a full seven years to outrun our bad
luck after all.

When I first started
homesteading I was using one pair of decent work boots as an all season
solution.
It wasn't working all that
well in our Rainforest like climate. My last all purpose boot was an
expensive pair of Timberlands, which only lasted 10 months before they got worn to the point of no
repair.
My new strategy is to split
the work into three chunks.
1. Dry to moist- Ariat hiking boots
2. Soaked in the ground wet- Muck Chore boots
3. Flooded over the calf- Pro Line hip waders
None of these options are
steel toed. Something I was forced to wear in the Navy where dropping
something heavy was an everyday possibility. I guess if I was doing more
industrial farming or working with a tractor I might consider going
back to wearing a steel toe.
Soon after nadiring
the Warre hive the
second time, I saw a
huge mass of bees in the air above their home. This was during
the sweltering weather we faced at the end of June, and I thought for a
few minutes that the hive might be overheating and the bees
absconding. However, it turned out that all the fuss was merely a
huge brood of new workers taking their bearings before getting to work.
 Despite all of the extra
hands to make light work, two weeks later, the colony still hasn't
moved down into the fourth box. I suspect the slowdown is mostly
due to a week of rain --- bees don't do well flying between raindrops,
so they're stuck at home eating through their winter stores.
Despite all of the extra
hands to make light work, two weeks later, the colony still hasn't
moved down into the fourth box. I suspect the slowdown is mostly
due to a week of rain --- bees don't do well flying between raindrops,
so they're stuck at home eating through their winter stores.
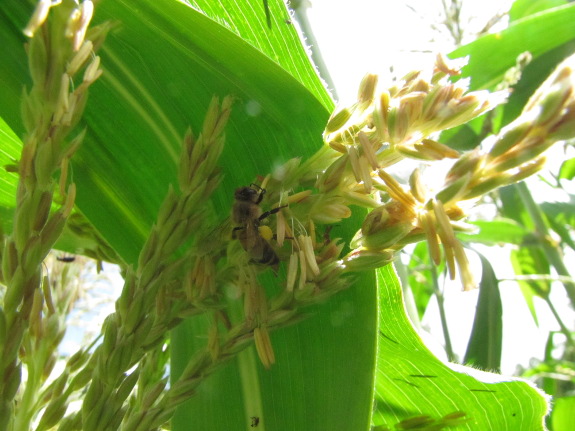
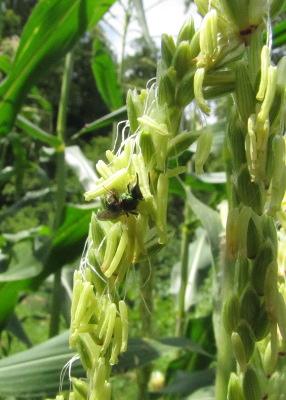
When the clouds cleared
Saturday, I saw bees all over, but was surprised to notice that the
busiest spot seemed to be our patch of blooming sweet corn. Corn
is supposed to be wind-pollinated, but from the bumblebees, sweatbees,
and honeybees buzzing around the flowers, I have to conclude that
insects do a bit of work there as well.
Hopefully we'll get
enough of a break from the rain that the bees can visit the buckwheat
and clover, too, and fill up on nectar to help them drawn out the
foundationless frames. They've still got a lot of work to do so
that I don't have to embark on fall feeding to top up their winter
honey.

I was tinkering around with a
new type of deer
deterrent today.
The motion detector Sensor Plug in the bottom right
hand corner should turn the oscillating fan on if a deer tries to come in through
our main entrance. The movement from the flagging tape and the noise
from the banging golf balls should make a deer run back into the woods.
There's an adjustment on how
long the fan will go before resetting, and a red light on the front
indicates when there's movement. Stay tuned to see how this contraption
stands up through my series of tests.
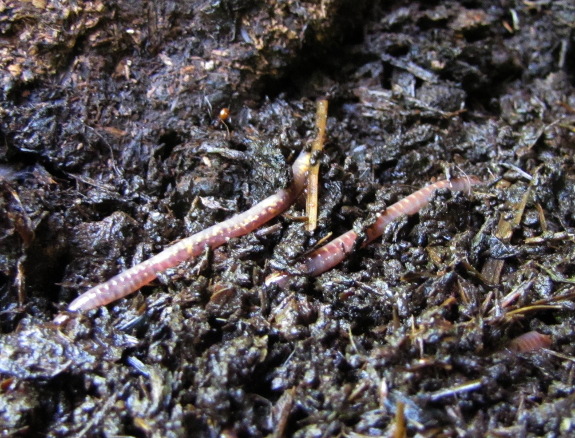
Although the title of
this post may seem like an odd question to ask, it makes sense once you
start thinking about worm bins. After all, your goal when adding
biomass to a compost bin is similar to your efforts when making a
compost pile, and a well-made compost pile quickly heats up from
microbial action. So, can worms stand hot composting?
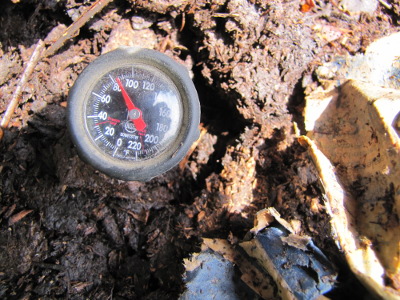
 The reason I started
researching this question is because the manure we used to fill our second
worm bin was fresher than I thought and soon heated up. I
didn't think to stick in the compost
thermometer until this weekend, but suspect the manure got hotter
than the 90 degrees at which compost worms perish.
The reason I started
researching this question is because the manure we used to fill our second
worm bin was fresher than I thought and soon heated up. I
didn't think to stick in the compost
thermometer until this weekend, but suspect the manure got hotter
than the 90 degrees at which compost worms perish.
In heartening news, I
tossed similarly fresh manure on top of the worms in the first worm bin
a week earlier, and I just noticed that those worms have moved to the
surface and started to work. I suspect the worms were able to
hide at the extremities of the bin, where temperatures were lower, then
slither back into the center once the first burst of heat subsided.
 I hope that the soaked
newspaper I added to the second bin gave those worms a similar escape
hatch. (Adding carbon slows down a compost pile, which lowers the
heat.) Only time will tell whether we have to seed the second bin
again, but I know that after this, I'll be careful to let manure cool
down before adding compost worms.
I hope that the soaked
newspaper I added to the second bin gave those worms a similar escape
hatch. (Adding carbon slows down a compost pile, which lowers the
heat.) Only time will tell whether we have to seed the second bin
again, but I know that after this, I'll be careful to let manure cool
down before adding compost worms.

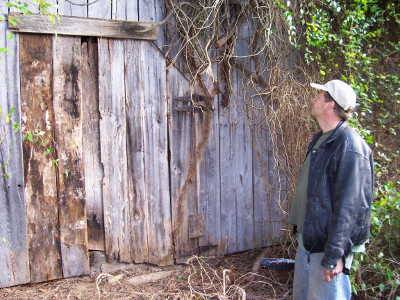
Our barn has these stable
doors that don't close all the way due to warping.
Instead of trimming a few
spots to make them close properly we chose the other option. Deletion.
The original builders used
large nails to secure each door hinge to a support beam. It would have
been nice to salvage the old rusty hinges, but cutting them out with a reciprocating
saw seemed like the
smarter choice.
 I
usually wait to harvest my storage onions until the tops have died back
on all of the bulbs, but this year it seemed more prudent to take in
half early, then plan on a second harvest to round up the stragglers
who are still green.
I
usually wait to harvest my storage onions until the tops have died back
on all of the bulbs, but this year it seemed more prudent to take in
half early, then plan on a second harvest to round up the stragglers
who are still green.
Wet weather just before
harvest is bad for root crops, and the forecast says we're in for
another week of rain. Already, a few of the onions had started to
rot and several others had split their outer layers, which means they
won't keep quite as long.
I can't complain,
though, since we've now got 46 pounds of onions on our curing
racks, with at least
that many yet to come out of the ground.

My extended onion
harvest means the racks will be full for the rest of
July and probably part of August, then I'll press them into service
again in late September for sweet potatoes, followed closely by winter
squash. After the porch and straw door, I think our vegetable
curing tower may be the infrastructure improvement that has seen the
most use this year.
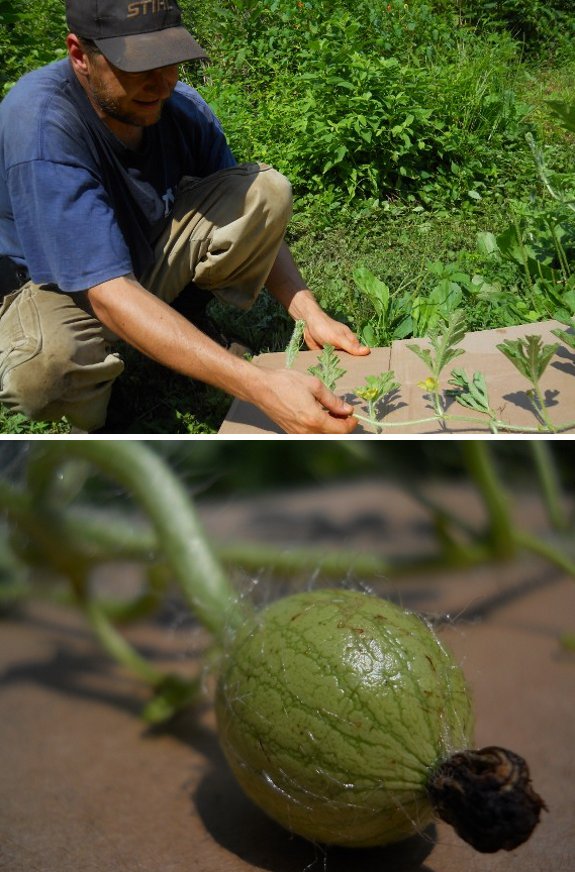
It's that time of year when
watermelon and butternut squash plants explode with growth and reach
past their raised bed areas.
A cardboard buffer might
sacrifice part of our "lawn", but hopefully will provide some
additional protection for these yummy treats.
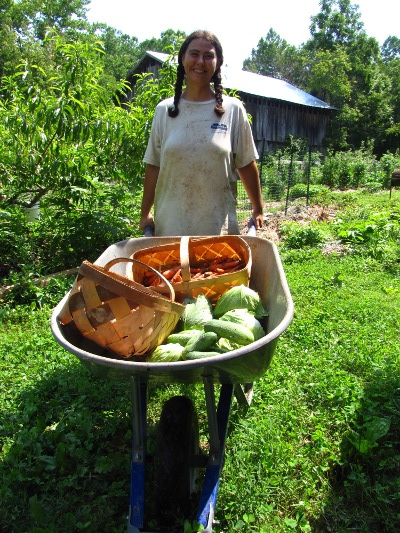 When you have to push the
day's harvest home in the wheelbarrow, you know the homestead is
exceeding expectations.
When you have to push the
day's harvest home in the wheelbarrow, you know the homestead is
exceeding expectations.
Now, what to do with all
that bounty? With the exception of the extra cucumbers (which
even Bradley and the chickens have stopped accepting), the rest of the
bounty is bound for harvest
catch-all soup.
Of course, we can't make
a big pot of the soup right now because other important ingredients
aren't quite ready. For example, we'll be slaughtering our second
round of broilers next week, who will provide the stock. Our
green beans are ready, but the sweet corn isn't quite fleshed out, and
the roma tomatoes are just now starting to change color.
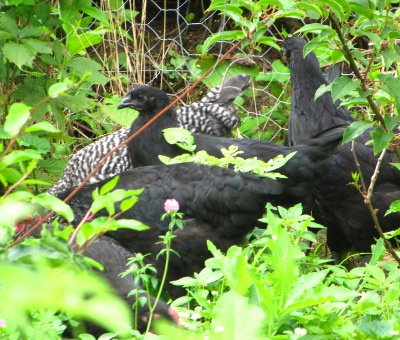 While we're waiting for the
tomatoes to ripen up, cabbages and carrots would keep well sitting in a
cool root cellar. Too bad I never put it on the list to dig
the refrigerator root cellar back out of the dirt....
While we're waiting for the
tomatoes to ripen up, cabbages and carrots would keep well sitting in a
cool root cellar. Too bad I never put it on the list to dig
the refrigerator root cellar back out of the dirt....
Instead, I'll be
cramming storage vegetables into every nook and cranny of our small fridge. Half the carrots
filled up the crisper drawer, which is all I usually devote to storage
vegetables, and I cleaned off the bottom shelf for the cabbages.
Now, what about those other 15 pounds of roots?
 "This book is the story of
two love affairs that interrupted the trajectory of my life: one with
farming --- that dirty, concupiscent art --- and the other with a
complicated and exasperating farmer I found in State College,
Pennsylvania."
"This book is the story of
two love affairs that interrupted the trajectory of my life: one with
farming --- that dirty, concupiscent art --- and the other with a
complicated and exasperating farmer I found in State College,
Pennsylvania."
This is my opportunity
to admit that I read chick lit from time to time, but find 99% of it so
unsatisfying I swear off ever trying another book in the genre.
The trouble isn't even that the women are totally outside my frame of
reference, talking about name brand handbags the way I glow about
cucurbits and pollinators. The real issue is that these novels
are supposed to be love stories that trump my own, but the authors'
idea of wish fulfillment doesn't hold a candle to my real life. I
always compare the storied love interest to my own husband and find the
fictional heroes sadly lacking.
My Mark still trumps the
Mark in The Dirty Life, but at least I can see the
latter's appeal. When visiting our heroine in New York, he chafes
at her city life, but finally finds a facet he enjoys:
 Which is all a long way of
saying --- if you're a romantically-inclined homesteader, you'll love The
Dirty Life.
Which is all a long way of
saying --- if you're a romantically-inclined homesteader, you'll love The
Dirty Life.But what if you want something more solid? Don't worry, there are thought-provoking themes threaded through the humor and nail-biting plot. For example, take Kristin's analysis of Mark's theory on economics:
"[Mark would] like to imagine a farm where
no money traded hands, only goodwill and favors. He had a theory
that you had to start out by giving stuff away --- preferably big
stuff, worth, he figured, about a thousand dollars. At first, he
said, people are discomfited by such a big gift. They try to make
it up to you, by giving you something big in return. And then you
give them something else, and they give you something else, and pretty
soon nobody is keeping score. There is simply a flow of things
from the place of excess to the place of need. It's personal, and
it's satisfying, and everyone feels good about it. This guy is
completely nuts, I thought. But what if he's right?"
Hopefully you've hunted down
your copy of The
Dirty Life and
are trying to decide if it's worth cracking open. This post is
your incentive to go for it! We'll be discussing the prologue and
part one next Wednesday, but I suspect that, like me, you will have
gulped down the whole book without being able to take a break. I
hope you enjoy it as much as I did.While you're hunting down books, don't forget to check out my paperback, with fun and easy projects to make self-sufficiency less daunting.
We spent a fun afternoon
today looking at tax maps and deed books.
There are a few properties in
the area that might work as an organic orchard annex and we wanted to
do some detective work on how big they are and what the county thinks
the value is.
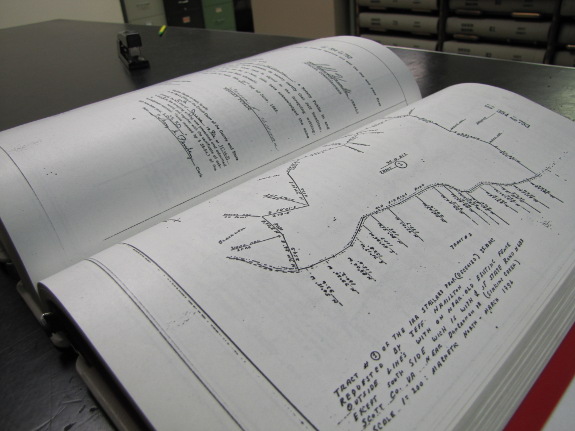
 As Mark
mentioned, we spent
Wednesday afternoon at the county courthouse, finding information about
nearby properties. I learned how to do this when I was buying our
own farm, since a title search is essential to make sure you know what
you're getting into. You can either pay a lawyer to look for
liens (debts), sold mineral rights, pesky right-of-ways, etc. attached
to your potential property, or you can buckle down and do the research
yourself. Even after you own a piece of property, these skills
come in handy since you can use the same technique to figure out who
your neighbors are, or to find the assessed value and size of any
property in the county.
As Mark
mentioned, we spent
Wednesday afternoon at the county courthouse, finding information about
nearby properties. I learned how to do this when I was buying our
own farm, since a title search is essential to make sure you know what
you're getting into. You can either pay a lawyer to look for
liens (debts), sold mineral rights, pesky right-of-ways, etc. attached
to your potential property, or you can buckle down and do the research
yourself. Even after you own a piece of property, these skills
come in handy since you can use the same technique to figure out who
your neighbors are, or to find the assessed value and size of any
property in the county.
 If your county has entered
the digital age, you might not have to jump through all of these hoops,
but here's what we did. In case you're curious, the photos are in
order (except for the first one), but don't match the written steps
they're beside --- a little artistic license.
If your county has entered
the digital age, you might not have to jump through all of these hoops,
but here's what we did. In case you're curious, the photos are in
order (except for the first one), but don't match the written steps
they're beside --- a little artistic license.
Step
1: Orient yourself. If you're looking up
information on a property in a rural area, it can be handy to pinpoint
the location by flipping back and forth between google maps' aerial
photo and plain map features. Once you zoom in far enough (at
least in our region), google maps shows the parcel boundaries on the
non-photographic map. Do this at home before you head to the
courthouse, and print out an annotated map to refresh your
memory. (While you're at it, pack your bag with a notebook, pen,
camera, and money for copies if you want to make any. Except for
using the copying machine, this project is cost-free.)
 Step 2:
Find your tax map number. At the courthouse,
your first stop will be the tax assessor's office, where you'll
probably find a big map of the county on the wall. The lines mark
off the boundaries of smaller maps, which (in our courthouse at least)
are filed in a hanging cabinet. Pull out the proper map and
orient yourself using your prior research. (In our county, only
roads and creeks are shown on these maps, so it can be tough to find a
property if you haven't done some homework.) The tax map number
is the number of the map you used followed by the number of the parcel
--- for example: 47-90 for the property labeled 90 on the map labeled
47.
Step 2:
Find your tax map number. At the courthouse,
your first stop will be the tax assessor's office, where you'll
probably find a big map of the county on the wall. The lines mark
off the boundaries of smaller maps, which (in our courthouse at least)
are filed in a hanging cabinet. Pull out the proper map and
orient yourself using your prior research. (In our county, only
roads and creeks are shown on these maps, so it can be tough to find a
property if you haven't done some homework.) The tax map number
is the number of the map you used followed by the number of the parcel
--- for example: 47-90 for the property labeled 90 on the map labeled
47.
 Step 3:
Find the assessment information for your property. Filing cabinets beside
the maps are divided up by map number, so you can just flip through
until you find the sheet that corresponds to the property you're
interested in. In our county, this sheet of paper gives all kinds
of fascinating information, including the name and address of the
owner(s), the acreage, the assessed value of the property, and
information on improvements. You should also write down the deed
information, which will be another two number series (this time a deed
book number followed by a page number).
Step 3:
Find the assessment information for your property. Filing cabinets beside
the maps are divided up by map number, so you can just flip through
until you find the sheet that corresponds to the property you're
interested in. In our county, this sheet of paper gives all kinds
of fascinating information, including the name and address of the
owner(s), the acreage, the assessed value of the property, and
information on improvements. You should also write down the deed
information, which will be another two number series (this time a deed
book number followed by a page number).
 Step 4:
Find the most recent deed for the property. In our courthouse, you
have to go downstairs to the records department to look at deeds.
(The folks who work throughout the courthouse are often very friendly
and will help you out if you get confused or lost.) The deed
books are in numerical order, so pull out the correct one and flip to
the page listed on the tax assessment. In the deed book, you'll
learn when the current owners bought the property, from whom, and for
how much. In some cases, there will be a description (or map) of
the boundaries; in others, you will be referred to the previous sale of
the property for that information. The information in the deed
trumps the boundaries delineated on the tax map, so if your property is
a completely different shape in the two places (like ours is), the deed
is more likely to be correct.
Step 4:
Find the most recent deed for the property. In our courthouse, you
have to go downstairs to the records department to look at deeds.
(The folks who work throughout the courthouse are often very friendly
and will help you out if you get confused or lost.) The deed
books are in numerical order, so pull out the correct one and flip to
the page listed on the tax assessment. In the deed book, you'll
learn when the current owners bought the property, from whom, and for
how much. In some cases, there will be a description (or map) of
the boundaries; in others, you will be referred to the previous sale of
the property for that information. The information in the deed
trumps the boundaries delineated on the tax map, so if your property is
a completely different shape in the two places (like ours is), the deed
is more likely to be correct.
 Step 5:
Read back through the deeds for the last hundred years or so. A complete title
search is only necessary if you're interested in buying a piece of
land, or if you're a history buff. It's pretty easy to follow the
land backwards --- each deed will refer to a previous deed book and
page --- but can get trickly if land has been split apart or lumped
together. I didn't go into depth with any of the properties we
were looking at this week since we're just putting out feelers, but
when I bought our farm, I went all the way back and even read the deeds
of neighboring properties to get more information about our
right-of-way.
Step 5:
Read back through the deeds for the last hundred years or so. A complete title
search is only necessary if you're interested in buying a piece of
land, or if you're a history buff. It's pretty easy to follow the
land backwards --- each deed will refer to a previous deed book and
page --- but can get trickly if land has been split apart or lumped
together. I didn't go into depth with any of the properties we
were looking at this week since we're just putting out feelers, but
when I bought our farm, I went all the way back and even read the deeds
of neighboring properties to get more information about our
right-of-way.
Extra
credit: While
you're there, you might want to flip through the earliest deed books
your courthouse has available. Ours date back to the late 1800s,
and the earliest ones are handwritten!
The return spring broke on
our new Skil
drill press.
Its been almost a year since
we got it, and today was the first problem in all that time.
I tried making what was left
of the spring work by attempting to bend back the new bitter end so it
could slide into the slot on the shaft, but the metal only bent a small
amount.
A quick call into Skil
headquarters put me in touch with a nice tech by the name of Sandy. He
offered to send us out a new return spring for free. I'm guesing the
spring comes wound in the above metal holder, otherwise it's going to
be a bear to wind by hand.
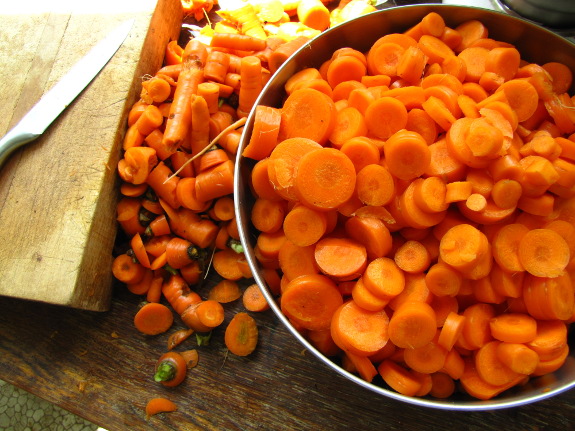
Part of Brandy's
question that I
didn't entirely answer alluded to her concern that she'd have to budget
for buying vegetables at the grocery store if the crops in her
hypothetical homestead failed. The trick to feeding yourself off
your own farm only (in one food group or in all of them) is to
diversify and grow more of each type of food than you think you can
eat. That way, if your eggplant gets decimated by flea beetles,
you'll still be wallowing in cucumbers and tomatoes.
Another facet, though,
is to learn to eat produce that isn't as pretty
as the stuff in the grocery store. For example, I made a mistake
and
left the spring carrots in the ground a month too long. In past
years,
this hasn't been much of a problem, but 100 plus degree heat followed
by weeks of rain meant that a third of the harvest had bits of rot here
and there.
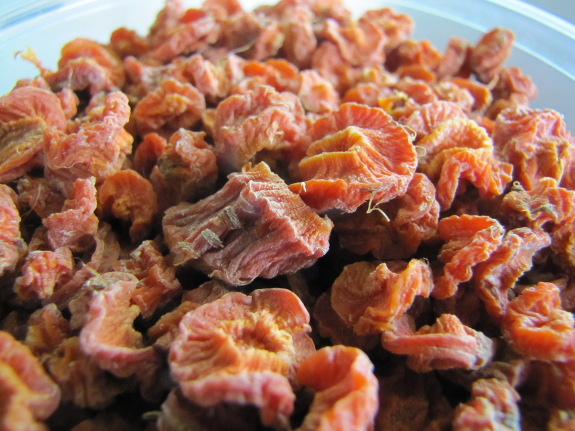
The average American
would toss those subprime carrots in the compost pile (or the trash
can), but I instead cut them up, blanched them, and spread the root
rounds on our food
dehydrator
trays. It's simple to do a spot test of problematic veggies ---
cut off the part that's obviously bad and then taste what's left.
If your tongue says "yum!", the produce is good to eat or preserve, as
long as you do it right away.
Of course, if our farm
was more diversified, we could have given carrots to horses, cows,
goats, or pigs. Or, if I'd wanted to cook them up, we could have
fed them to our chickens. But my goal is generally to keep people
food for people as much as possible since we're still working the kinks
out of our own food production system. Hopefully these dried
carrots will come in handy for winter soups when the rest of the
harvest is long gone. Plus, eight pounds turned into two cups,
which definitely helped with the storage
issue!
I saw this interesting
gadget the other day and
have been wondering how it works and if it could be scaled up for use
with a wood stove.
It uses something called
thermoelectric technology to convert heat from the fire into
electricity which powers a small fan to make the fire more efficient.
Extra energy gets used to charge small gadgets.
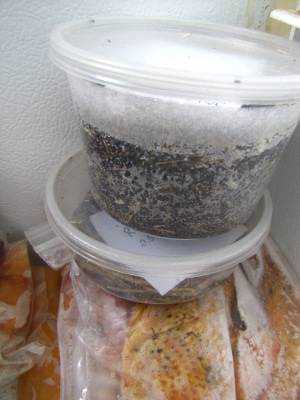 If you have room in your
freezer, you can store all of your seeds there to extend their
longevity, but I froze my kale seeds for a different
reason. While harvesting, I saw lots of insects
wriggling around, and I've noticed in general that bigger seeds
(especially corn and beans) are prone to insect damage if you take them
directly from the garden to a seed storage box. Even though the
insects I noticed at first glance in my kale harvest were benign, I
decided to head off the problem in my big stash of seeds.
If you have room in your
freezer, you can store all of your seeds there to extend their
longevity, but I froze my kale seeds for a different
reason. While harvesting, I saw lots of insects
wriggling around, and I've noticed in general that bigger seeds
(especially corn and beans) are prone to insect damage if you take them
directly from the garden to a seed storage box. Even though the
insects I noticed at first glance in my kale harvest were benign, I
decided to head off the problem in my big stash of seeds.
Freezing seeds is
extremely simple, but you can do it wrong. The potential problem
is getting your seeds wet, either by putting them in the freezer in a
paper package, or by defrosting them incorrectly. As you can see
in this post's second photo, cold seeds coming out of the freezer pull
moisture out of the air, but that isn't an issue as long as you wait to
open plastic containers until they're thoroughly thawed.  (The
air inside the container should be low in moisture, so you won't see
condensation on the inside as long as it stays sealed.)
(The
air inside the container should be low in moisture, so you won't see
condensation on the inside as long as it stays sealed.)
For basic seed-saving
tips to make your homestead more self-sufficient (and cheaper) without
much work, check out the September
volume of Weekend Homesteader. We don't save all of
our own seeds, but enjoy saving the easiest ones like tomatoes and
beans.
 We
tried a new heirloom variety of tomato this year called Gold
Rush Currant.
We
tried a new heirloom variety of tomato this year called Gold
Rush Currant.
It was one of the first
plants to show color, and provided the first taste of the year.
They tasted like store bought
tomatoes. No flavor whatsoever and was the first to show signs of a septoria
leaf spot infection.
We discussed our options and
decided Gold Rush Currant had to go. Normally we'd just cut it out at
ground level and leave the stem and roots to rot back in the ground,
but the septoria leaf spots pushed us to be cautious and pull the whole
thing up. We're not sure if that particular fungus can live in the
soil, but we figured why take the chance of spreading it to plants that
actually bring something to the table worth eating.
 Cucumbers are very good for
me.
Cucumbers are very good for
me.
You see, our favorite
neighborhood intentional community was having a fortieth anniversary
party Saturday. Even though I like all of the members
individually, parties just aren't my thing, and I wasn't planning on
going.
But I had all these
cucumbers....
Bradley finally accepted
another bagful Wednesday. But even with me and Mark eating their
fruits every day, the plants had accumulated another couple of dozen
cucumbers by Saturday and we don't plan to see Bradley again until at
least Monday.
The easiest solution
seemed to be to simply cut those cucumbers up and bring them to the
potluck. I couldn't fit all of them in the biggest bowl we own,
so I also snuck a bagful of whole cucumbers in and left them on the
potluck table when we went home. Hopefully it'll be like a boxful
of cute kittens --- they'll all find new homes.
So, the upshot is, our
copious cucumbers dragged me to that party, which is why I think
they're good for my health. Oh, and eating them's good too.
Farm Show magazine interviewed me
recently over the phone about our mechanical
deer deterrent contraption.
They sent a free copy so I
could check out the article. It's my first exposure to this publication
and I was impressed with the quality, but what really floated my boat
was their lack of advertising. Zero.
I can have them send the
current issue out to about a dozen friends, so if you think you might
like to try a free trial copy then leave a comment and we'll have you
email us your information.
 Last
week, I mentioned that the
shape of your property on the tax assessor's map could be wrong. So how do you figure
out where the real boundaries are? The geekily inclined will
enjoy pulling out their deed and mapping the property boundaries
themselves.
Last
week, I mentioned that the
shape of your property on the tax assessor's map could be wrong. So how do you figure
out where the real boundaries are? The geekily inclined will
enjoy pulling out their deed and mapping the property boundaries
themselves.
Your deed will probably
have a section a bit like the first image in this post which lists a
series of directions and distances. A rectangular property would
only have four corners, but most properties in our neck of the woods
are oddly shaped and contain ten or twenty points, which complicates
matters. I like to sum up all of the points in a spreadsheet like
the one shown below to keep myself on track.
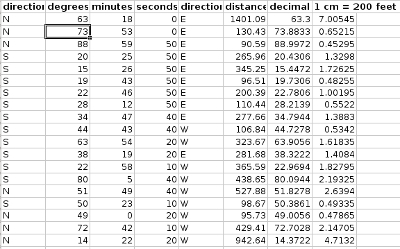 You'll notice that the first
six columns are copied directly from the deed, but where did the other
two columns come from? To calculate decimal degrees, divide the
seconds by 360, the minutes by 60, and leave the degrees alone, then add
all three numbers together for each point. I like to use a
spreadsheet rather than jotting down the numbers in a notebook since I
can set up a formula to do all the math for me.
You'll notice that the first
six columns are copied directly from the deed, but where did the other
two columns come from? To calculate decimal degrees, divide the
seconds by 360, the minutes by 60, and leave the degrees alone, then add
all three numbers together for each point. I like to use a
spreadsheet rather than jotting down the numbers in a notebook since I
can set up a formula to do all the math for me.
The last column in my
spreadsheet shows how many centimeters I'll measure on my map for each
distance, which requires me to choose a scale. After playing
around with my sheet of graph paper, I settled on 1 centimeter for 200
feet --- you might want to set 1 centimeter equal to 100 feet on a
larger property or to 50 feet on a smaller property. You can also
measure in inches, but my rulers tend to divide inches up into eighths
and centimeters into tenths, which makes it easier to deal with
decimals on the centimeber side. Again, I set up a formula in the
spreadsheet and let it do all the math for me.
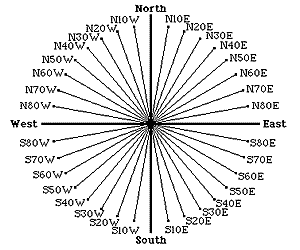 As
a side note, older deeds often list distances in poles and links.
A pole (also known as a perch or a rod) is equal to 16.5 feet and a
link is equal to 0.66 feet. Again, setting up your spreadsheet
carefully makes it easy to convert from these older measurements to
something you're more familiar with.
As
a side note, older deeds often list distances in poles and links.
A pole (also known as a perch or a rod) is equal to 16.5 feet and a
link is equal to 0.66 feet. Again, setting up your spreadsheet
carefully makes it easy to convert from these older measurements to
something you're more familiar with.
Now you're ready to
map! You'll need a sheet of paper (graph paper is better, for
reasons I'll explain tomorrow), a ruler, and a protractor. Since
I lost my tenth grade protractor somewhere or other and didn't want to
remember how to orient the protractor to deal with all the directions anyway,
I just printed out the image to the left, cut out a circle of paper
containing the protractor, and coated it with clear tape that extended
past the edges of the paper. I used my ruler to make the lines on
the protractor extend onto the transparent tape, then cut out a hole in
the center of the protractor to allow me to line the tool up
properly. Fifteen minutes later, I had the homemade protractor
shown below.
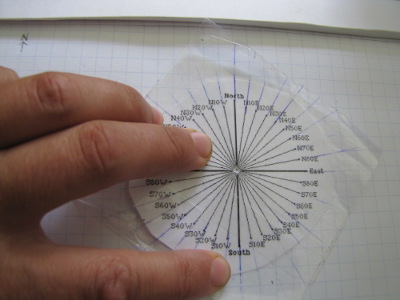 Before you start, remember to
label north and the scale on your paper. Since the deed I was
working with mentioned that the boundaries listed start at the
northwest corner of the property, I set my first dot in a random
location in the upper left side of the paper. I set my protractor
on top of the dot (making sure north was lined up correctly), and made
a mark at what I estimate to be 63.3 degrees in the northeast quadrant.
Before you start, remember to
label north and the scale on your paper. Since the deed I was
working with mentioned that the boundaries listed start at the
northwest corner of the property, I set my first dot in a random
location in the upper left side of the paper. I set my protractor
on top of the dot (making sure north was lined up correctly), and made
a mark at what I estimate to be 63.3 degrees in the northeast quadrant.
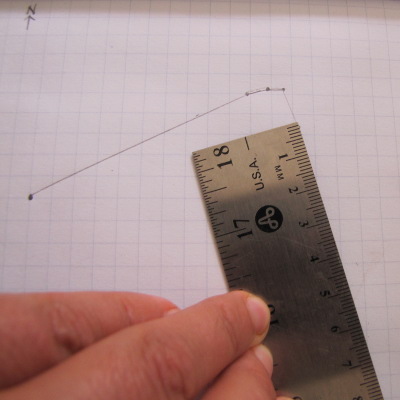 Next, line your ruler up so
that zero is at the first dot, with the ruler making a straight line
through the second dot. Plot the first distance listed in your
spreadsheet. Now, go back and mark the distance and direction for
the rest of the points in turn. (I recommend plotting your
boundaries in pencil and erasing your direction dots as you go along so
you don't get confused.)
Next, line your ruler up so
that zero is at the first dot, with the ruler making a straight line
through the second dot. Plot the first distance listed in your
spreadsheet. Now, go back and mark the distance and direction for
the rest of the points in turn. (I recommend plotting your
boundaries in pencil and erasing your direction dots as you go along so
you don't get confused.)
If you're really good,
your final line will end up hitting your first dot, but don't be too
concerned if it's a short distance off. Especially if you're
using a homemade protractor like mine, chances are you'll have to fudge
a bit at the end to make your property close up.
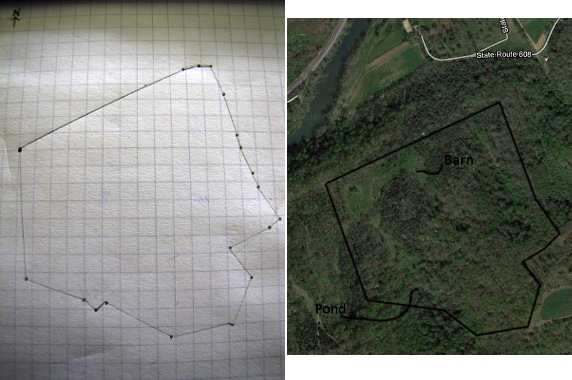
It turns out that this
time around, the county got it right --- the map I drew matches up
quite well with Google Maps' description of the property
boundaries. I guess I didn't need to make my map after all, but
it sure was fun. Stay tuned for tomorrow's post on estimating
acreages using your newly drawn map.
Edited
to add: Roland
created an awesome spreadsheet that makes plotting your property
boundaries and estimating the acreage inside extremely easy. Just
download
his spreadsheet,
replace the letters and numbers in blue with your own, and the
spreadsheet does the calculating for you!
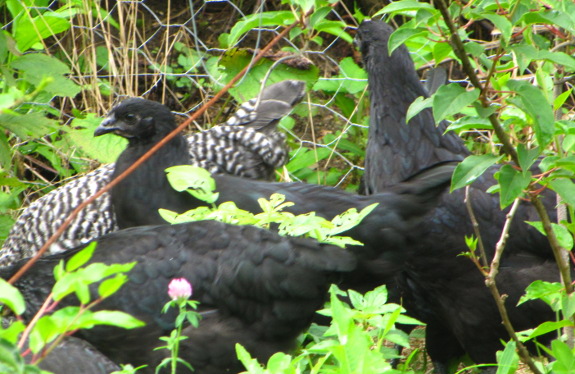
Our second set of australorp
and marans
broilers will go in the freezer this week.
After that, we'll be down to
eight hens and a rooster until our last set of chicks hatch out at the
end of August.
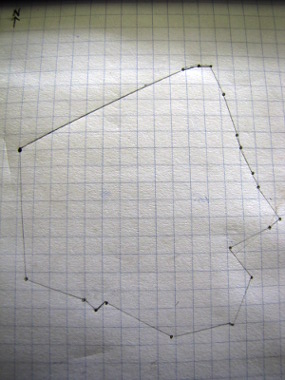 Yesterday, I explained how
to map your property boundaries from a deed. I told you to use a
sheet of graph paper for your mapping, but didn't mention that the
purpose of the graph paper is to make it easy to measure the acreage of
your property.
Yesterday, I explained how
to map your property boundaries from a deed. I told you to use a
sheet of graph paper for your mapping, but didn't mention that the
purpose of the graph paper is to make it easy to measure the acreage of
your property.
Your first step is to
figure out how much land area one square equates to. My graph
paper has four squares per inch and the scale of my map is one
centimeter for every 200 feet, which means (using the math shown in the
second image) that each square is equal to 127 feet on each side.
The area of the square
is 127 feet times 127 feet, or 16,129 square feet. Since one acre
contains 43,560 square feet, one of my graph paper squares bounds 0.37
acres.
Now
for the fun part --- counting squares! First, count how many
squares are entirely contained in your property boundary, making a mark
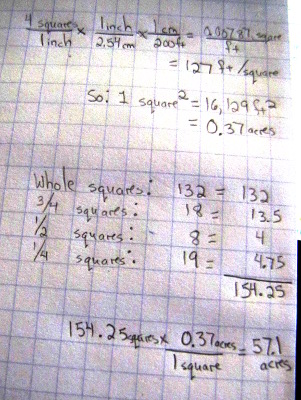 inside each one so you don't double count it. If you want to get
a very accurate estimate (and spend all day at this project), you can
then estimate the percent of each boundary square that's within your
property, but I simply divide partial squares up into three categories
--- those approximately 75% contained in the property, those half
contained in the property, and those 25% contained in the
property. I count how many squares fit in each of these
categories, putting a dot in each square once again as I count
it.
inside each one so you don't double count it. If you want to get
a very accurate estimate (and spend all day at this project), you can
then estimate the percent of each boundary square that's within your
property, but I simply divide partial squares up into three categories
--- those approximately 75% contained in the property, those half
contained in the property, and those 25% contained in the
property. I count how many squares fit in each of these
categories, putting a dot in each square once again as I count
it.
A little math shows that
my property consists of approximately 154.25 squares, or 57.1
acres. The deed listed the property as 57.72 acres, so it looks
like my mapping and math were pretty good!
You can use this same
technique to estimate the acreage of parts of your property from a topo map or aerial
photo. For example, do you want to know how big that cleared area
is? Just figure out the scale, trace the boundaries onto a sheet
of graph paper, and go to town. Or you could use Google
Planimeter....
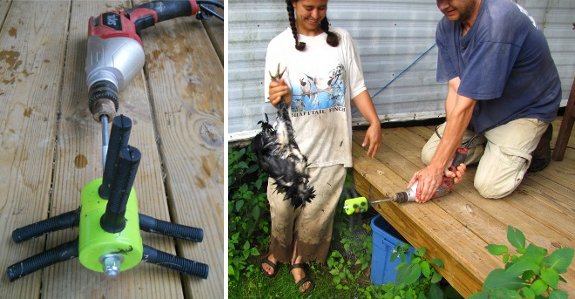
We tested a new drill
powered plucking device today.
Anna and I retired 5 chickens
this morning, and the Power Plucker made that process go faster than
our DIY
plucking board. Once we
got the hang of using the right speed and angle it went even faster.
Safety glasses and leather gloves are recommended.
It seems to be built to last
and the price is only 30 dollars. Big thanks to Bradley for taking a
break from building to be our photographer.
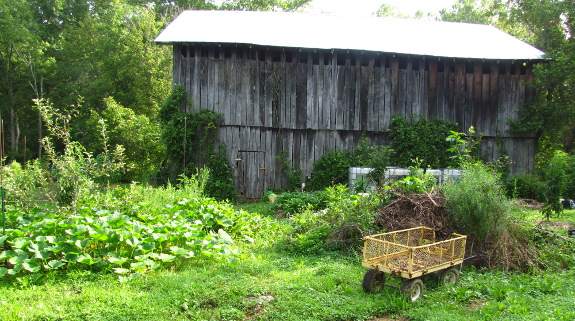
If you're building a
homestead from scratch, you'll end up with plenty of brush. So,
what do you do with it?
The tradition in our
neck of the woods is to pile it up, let it dry out, and then burn
it. But during our early years on the farm, one of our readers
asked me why I'd burn good biomass, and I couldn't think of any good
reason.
In the forest garden
where every bit of topsoil eroded away before we bought the farm, I've
been adding woody debris in the form of hugelkultur mounds to boost organic
matter as quickly as possible. I figured if I let a brush pile
rot down over there, I'd get a similar effect.
The trouble with brush
piles in the garden is that tall weeds and vines are protected from the
lawnmower and tend to take over. Our previous in-garden brush
pile turned into an impenetrable mass of Japanese honeysuckle pretty
quickly, and I could tell Mark thought this one would follow suite.

But the area has been
mowed for a couple of years now, so the honeysuckle is mostly absent,
and the remaining weeds just aren't that ornery. I spent about
half an hour yanking a few of the tallest ones last week, and the pile
looks almost presentable now. It doesn't hurt that the butternuts
are quickly taking over the area, and that a New England aster popped
up in one corner.
What I really need is
some sort of low tech roller to crush the branches down a couple of
times a year. Many of these branches are from the wild
plum and are covered
with thorns, so I have a hard time talking myself into crushing them
with my body. If I keep piling more compact biomass on top,
though, I suspect the pile will naturally turn into high quality garden
area in four or five years.
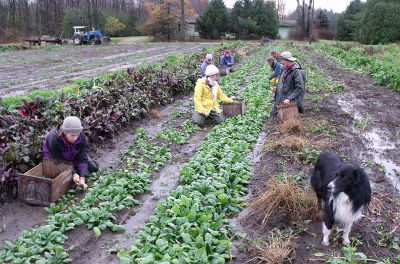 The first section of The Dirty Life tells how a New York City
girl and a farmer fell in love. Kristin heads down to
Pennsylvania to research a story about Mark, but the farmer is too busy
to talk with her right then. After hoeing broccoli with his
assistant and helping slaughter a pig, she finally makes Mark sit down
for an interview.
The first section of The Dirty Life tells how a New York City
girl and a farmer fell in love. Kristin heads down to
Pennsylvania to research a story about Mark, but the farmer is too busy
to talk with her right then. After hoeing broccoli with his
assistant and helping slaughter a pig, she finally makes Mark sit down
for an interview.
"He did his best to ignore it. He wasn't looking for a girlfriend. He'd recently ended a long-term relationship. Moreover, it was high summer. He had a farm to run. He had to focus. The last thing he needed was the voice saying he'd been found by a wife. 'You're going to marry this woman,' the voice insisted, ' and if you were brave enough, you'd ask her right now.'"
While the personal parts of the culture clash make for riveting reading, the more thought-provoking side is the contrast between Mark's hippy upbringing and Kristin's urban Republican family. Kristin brings her boyfriend home to meet the parents for Thanksgiving dinner, and of course Mark provides the food and cooks it too. Unfortunately, the first impression doesn't go well.
"I'd forgotten how very clean my mother's
world is until we walked in with those boxes, which were smudged with
field dirt, a few limp leaves clinging to their  bottoms. It appeared we would
contaminate any surface we put them on, so Dad directed Mark to the
garage, and my mother asked me quietly if I was sure it was safe to eat
the turkey, which was wrapped in a drippy white shopping bag, its
headless neck sticking out obscenely. I'd also forgotten that my
mother prefers her food
highly packaged, associations with its origins as obscured as
possible. When we were kids, she would never buy brown eggs,
because they seemed too 'farmy.'"
bottoms. It appeared we would
contaminate any surface we put them on, so Dad directed Mark to the
garage, and my mother asked me quietly if I was sure it was safe to eat
the turkey, which was wrapped in a drippy white shopping bag, its
headless neck sticking out obscenely. I'd also forgotten that my
mother prefers her food
highly packaged, associations with its origins as obscured as
possible. When we were kids, she would never buy brown eggs,
because they seemed too 'farmy.'"
So here's your discussion question for this week: Have you had to overcome the perceived uncleanliness of real food in yourself or your family? Was it hard to learn that tomatoes with green tops taste better than uniformly-colored grocery store offerings? Are you forced into hiding the bug-bitten cabbage leaves from your spouse and to trickery to tempt your family into eating garden produce? If so, what techniques did you use to get your family to embrace the dirty life?
Unless I hear that I'm making
you read too large (or too small) chunks, we'll discuss part two next
Wednesday. And, as usual, feel free to chime in with your
observations about the first section of the book even if they seem off
topic. I'm looking forward to your take on this fun read!The Weekend Homesteader provides projects for those who want to get their hands dirty...and those who want to become self-sufficient but stay clean.
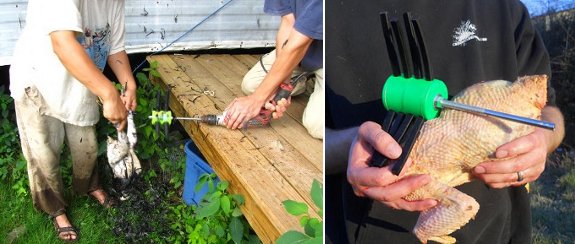
We processed 5 more chickens
today.
The average time saved per
bird is 3 to 5 minutes.
Some rough math predicts our
total saved time this week at a precious hour thanks to the new Power Plucker.
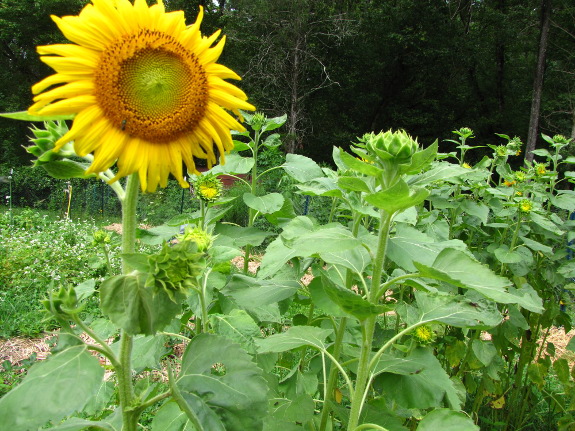
 For a couple of years now, Managing
Cover Crops Profitably has been my cover crop
bible. But although the publication has great depth, it only
covers 19 species, and I'm starting to get a handle on which of those
will work on our farm and which won't. Being who I am, I'm not
content to rest on my laurels and stick to buckwheat in the summer and oilseed
radishes and oats in the winter --- I want to keep trying
new things!
For a couple of years now, Managing
Cover Crops Profitably has been my cover crop
bible. But although the publication has great depth, it only
covers 19 species, and I'm starting to get a handle on which of those
will work on our farm and which won't. Being who I am, I'm not
content to rest on my laurels and stick to buckwheat in the summer and oilseed
radishes and oats in the winter --- I want to keep trying
new things!
Enter the Northern
Great Plains Research Laboratory's Cover Crop Chart. This publication
replaces depth with breadth, presenting the highlights of 46 cover crop
species both pictorially and in the form of a bulleted list.
That's the source I headed toward when I started hearing about
sunflowers used as a cover crop.
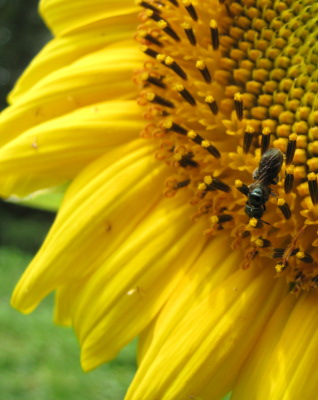 As I already know well,
sunflowers are great for attracting pollinators (and for feeding
chickens), but how
do the plants operate as a cover crop? The Cover
Crop Chart mentions that sunflowers pull up nutrients from deep
in the soil, perhaps because they're good at teaming up with arbuscular
mycorrhizae. Sunflowers' C:N
ratio is listed as
11 to 14 for the leaves, 41 to 46 for the stems, 50 to 68 for the
roots, and 14 to 19 for the flowers. What that data says to me is
that sunflowers are good to plant in troubled soil that's going to be
taking the whole summer off, or in the chickens' winter yard, scratched
bare from last year and needing some high carbon materials (and
playthings) to keep your flock happy this winter.
As I already know well,
sunflowers are great for attracting pollinators (and for feeding
chickens), but how
do the plants operate as a cover crop? The Cover
Crop Chart mentions that sunflowers pull up nutrients from deep
in the soil, perhaps because they're good at teaming up with arbuscular
mycorrhizae. Sunflowers' C:N
ratio is listed as
11 to 14 for the leaves, 41 to 46 for the stems, 50 to 68 for the
roots, and 14 to 19 for the flowers. What that data says to me is
that sunflowers are good to plant in troubled soil that's going to be
taking the whole summer off, or in the chickens' winter yard, scratched
bare from last year and needing some high carbon materials (and
playthings) to keep your flock happy this winter.
I'd be curious to hear
what unusual cover crops our readers have been trying in their
gardens. Be sure to mention your garden conditions and how well
the plants grew in your comment so someone else can learn from your
experience!
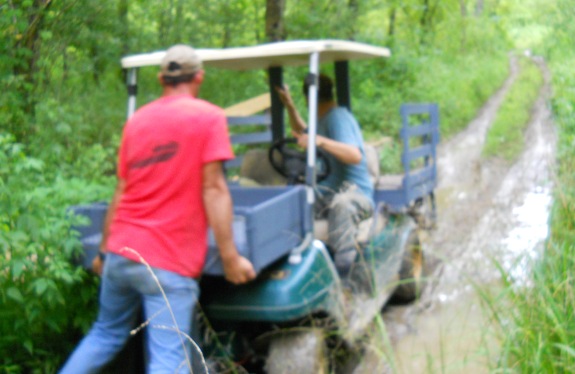
An added bonus to the golf
cart front storage box is the new ability to easily lift up and
scoot the front end over a bit.
This comes in handy when you
need to get back on the road after getting stuck in the mud while
trying to avoid a box turtle.
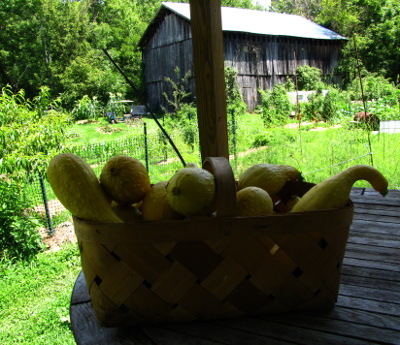 We may have to rename this
the year of the cucurbits. After giving my brother about forty
cucumbers on Monday, we nibbled all week, and still had this basket
(cucumbers on the bottom, crookneck squash on the top) to pawn off on
Bradley Friday.
We may have to rename this
the year of the cucurbits. After giving my brother about forty
cucumbers on Monday, we nibbled all week, and still had this basket
(cucumbers on the bottom, crookneck squash on the top) to pawn off on
Bradley Friday.
Meanwhile, the
butternuts are growing like crazy. I turn their stems inward once
a week so they don't take over the aisles, and the last seven days'
growth amounted to about three feet.
At this time of year, we
spend more time picking and processing produce than anything else
garden-related. I gave away the leftover freezer contents over
the last month, and am already filling the freezer back up, adding a
few pints of green beans, six cups of corn, and seven pints of
vegetable soup this week. Since we're eating more seasonally even
in the winter, quotas are lower and I suspect we'll be giving away a
lot more excess produce as the summer progresses.
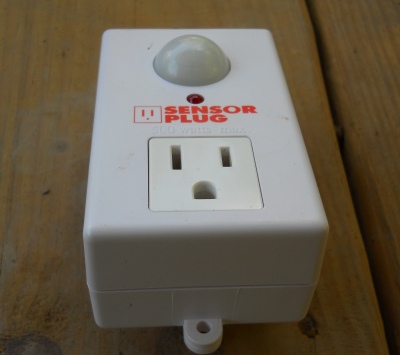
The good news is we haven't had any deer damage lately. The bad news is
my motion
activated deer deterrent has a fatal flaw.
I tried switching modes, adjusting the sensitivity, and checking the
fuse. Nothing could get the Sensor
Plug to work right.
The red light indicated movement, but whatever is plugged in to it stays
on all the time.
My conclusion is we got a
dud, or the product is just junk.
 We live right on the line
between good growing conditions for long day and short day onions,
which I figured might be part of the problem we've had with the
crop. (In case you're curious, intermediate day onions seem to be
all sweet varieties, not storage onions). So this year I tried
two new varieties.
We live right on the line
between good growing conditions for long day and short day onions,
which I figured might be part of the problem we've had with the
crop. (In case you're curious, intermediate day onions seem to be
all sweet varieties, not storage onions). So this year I tried
two new varieties.
Pumba is a short day
onion, appropriate for people living in the southern U.S., while
Pontiac is a long day onion for northerners. I got the seeds from
the same place 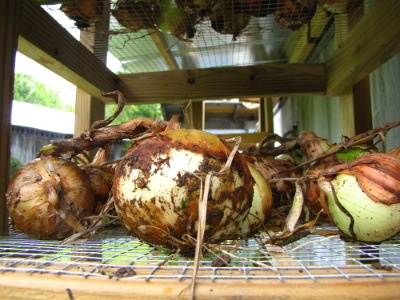 (Johnny's),
started them inside at the same time, and transplanted
them into
alternating beds so location in the garden would influence each
variety's growth similarly.
(Johnny's),
started them inside at the same time, and transplanted
them into
alternating beds so location in the garden would influence each
variety's growth similarly.
The
onions I pulled out a couple of weeks ago were all Pumba onions ---
this variety is supposed to be ready to harvest eight days before
Pontiac, so the earliness was no surprise. Pumba averaged
13.6 pounds per bed, and several of the onions had started to rot
before I pulled them up.
 The leaves on Pontiac were
still green in the middle of July, so I let them go a couple more
weeks. These long day onions beat the pants of Pumba in the
weight department, coming in at 22.3 pounds per bed when I finally
harvested them Friday. A few Pontiac onions started trying to
bloom, though, which might influence their storage potential.
The leaves on Pontiac were
still green in the middle of July, so I let them go a couple more
weeks. These long day onions beat the pants of Pumba in the
weight department, coming in at 22.3 pounds per bed when I finally
harvested them Friday. A few Pontiac onions started trying to
bloom, though, which might influence their storage potential.
The conclusion?
Despite straddling the dividing line, we're clearly northerners and
should grow long day onions. Total weight of our storage onion
crop this year was 92.9 pounds, maybe enough to get us through until
next spring? Only time will tell.
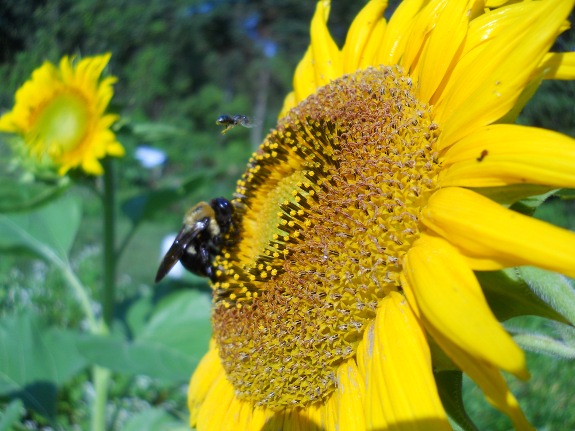
Let the pollinators do all the work while I take pictures.
 If
I were recommending books for beginning beekeepers, I'd put Sue
Hubbell's A
Book of Bees in the
optional-but-highly-recommended section. The author is a
commercial-scale beekeeper in Missouri, and she writes about her
average yearly tasks with the weight of experience, having kept three hundred hives at a time for fifteen years.
If
I were recommending books for beginning beekeepers, I'd put Sue
Hubbell's A
Book of Bees in the
optional-but-highly-recommended section. The author is a
commercial-scale beekeeper in Missouri, and she writes about her
average yearly tasks with the weight of experience, having kept three hundred hives at a time for fifteen years.
Of course, the reader
has to keep in mind that Hubbell's choices with her bees won't always
match those of the backyard beekeeper, who might choose to be more
hands-on and to delete chemicals from his repertoire. But the
author explains each of her actions so well, I think that even a new
beekeeper could understand why she requeens, lets the bees swarm, and
so forth. And her words about minimizing your intrusions on the
hive seem to mirror modern
natural beekeeping methods.
Meanwhile, A
Book of Bees acts
as an antidote to the factual but dry beginner texts like The
Backyard Beekeeper.
Hubbell slips in explanations of beekeeper terminology, the bee life
cycle, diseases, and much more, so you end up understanding most of the
basics without ever having to memorize a glossary of terms.
But the real reason to
read this book is the same reason many of you picked up The
Dirty Life --- pure
fun. Hubbell lets you into her life, from sipping coffee with her
before heading out to the hives, to asking her chickens to pick wax
moths off ruined comb. It's a fast and fun read for beginning,
intermediate, or advanced beekeepers, but is more of a library
check-out than a purchase. Read it and return it. And, yes,
Ikwig, this is a bathtub book.
The new drill
press return spring
showed up in the mail yesterday.
It took less than a minute to
install and choose between the possible return speeds.
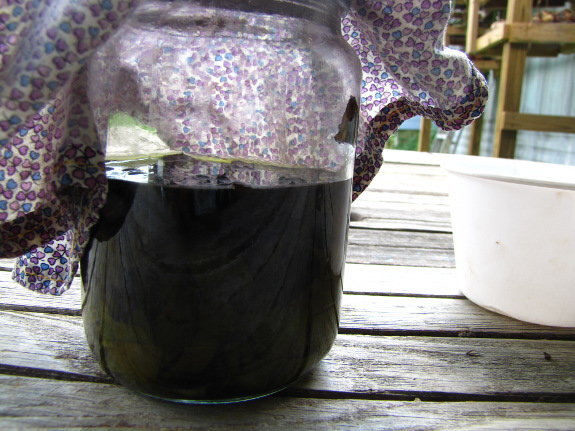
About a month ago, I
started some plantain and comfrey leaves steeping in olive oil for salve. At first, I
remembered to swirl the jar now and then to mix the contents, but after
a while the activity faded out of my daily routine and the jar simply
sat. Despite my neglect, the active ingredients seeped out of the
leaves and into the oil, creating an infusion.
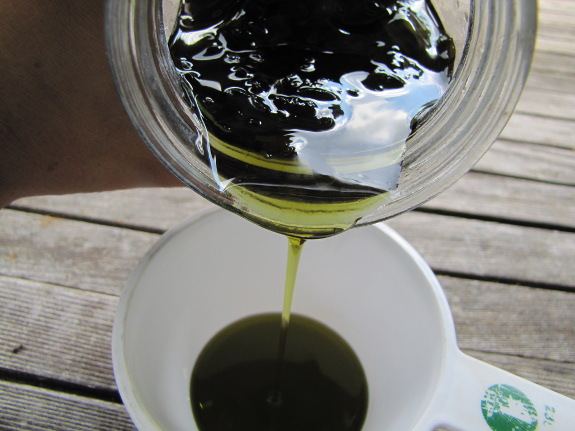
Sunday, I decided to
process my infusion and turn it into a salve. The first step was
to separate the herbal-infused oil from the leaves. I could have
sent the jar contents through a strainer, but was feeling lazy (and not
wanting to dirty extra dishes), so I just carefully poured the oil off,
using a spoon to push the leaves back into the jar. I ended up
with about three quarters of a cup of dark green oil.
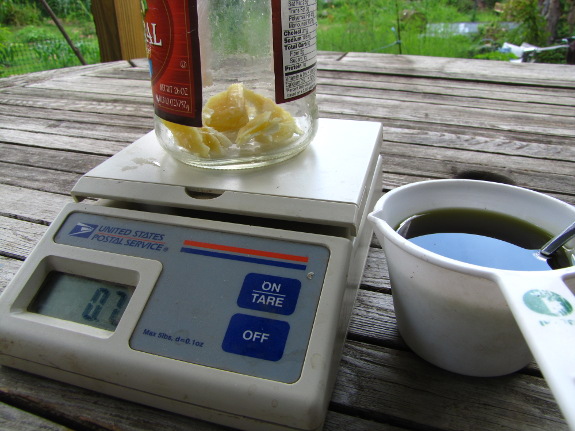
To turn an infusion into
a salve, you simply add a bit of melted beeswax to solidify the
concoction and make it stick to your skin when applied rather than
running off. A quick search of the internet suggests that one
ounce of beeswax is about right for a cup and an eighth of infusion, so
I chopped some wax off my
movie star neighbor's
gifted block and weighed it.
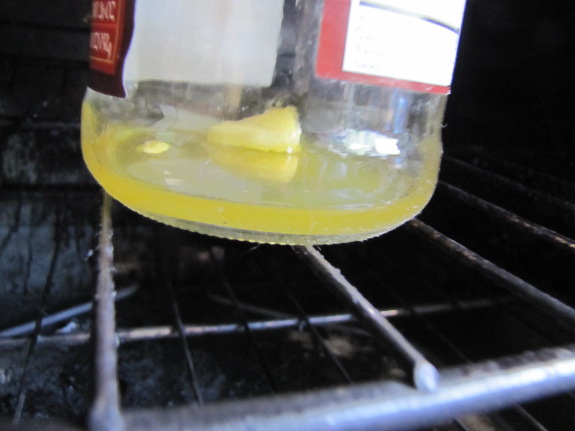
I'd just made a pie, so
put the wax in a washed-out peanut butter jar (glass) and placed the
container in the oven to take advantage of residual heat while I cooked
lunch. Twenty minutes later, the wax was liquid.
I'd read that you need
to preheat your infusion so you won't solidify the wax when you join
the two ingredients together, but I'd also read you don't want to get
your infusion very hot or you'll denature some of the active
chemicals. I opted to simply let my measuring cup of green oil
sit on top of the stove while melting the wax, but that turned out to
be not enough preheating --- little bits of wax came out of solution
when I poured in the warm oil. No problem --- I just put the jar
back in the warm oven while we ate our first homegrown watermelon of
the year, by which point everything was nicely dissolved.
Most folks pour their
salve into small glass jars for storage, but what I had on hand was one
cup food storage containers, so that's what I used. The warm
salve poured in like a liquid, but set up within half an hour into a
soft but solid salve. At the rate I go through anti-sting
ointments, this should last me the rest of my life.
Rather than cleaning out
my wax-melting jar, I simply set it aside with my beeswax for
later. As easy and fun as salve-making turned out to be, I think
I might try my hand at a pure comfrey salve this year too.
Today was a big day filled
with our first bulk plastic pitcher delivery.
We had been getting half
gallon plastic pitchers at our local Dollar General store, but that
medium volume was stressing their system to the point where some weeks
they just couldn't fill the order.
It took a little over an hour
to unload all 7 pallets and shuttle them down our driveway to the
parking area. A nice bonus was meeting a new neighbor who didn't mind
waiting to get by. He told us about his flock of chickens and seemed
happy when we gave him a free waterer for being such a nice guy about
us blocking the road.
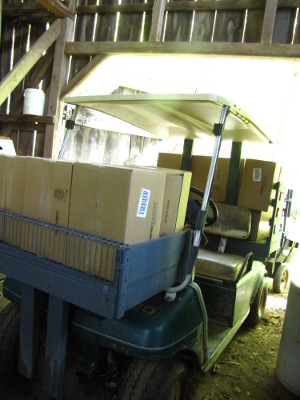 We ordered the bare minimum
number of pitchers from the factory in Massachusetts, but that still
turns out to be an
awfully big order.
We estimate those seven pallets will keep our chicken waterer business going for two or
three years.
We ordered the bare minimum
number of pitchers from the factory in Massachusetts, but that still
turns out to be an
awfully big order.
We estimate those seven pallets will keep our chicken waterer business going for two or
three years.
Of course, getting the
pallets off the tractor trailer was just the first part of the delivery
expedition. Bradley brought his wife, trailer, and stepson, and
the stepson brought his truck, so we were able to ferry the pallets of
pitchers back to our parking area from the main road. The only
tricky part was keeping Lucy out of harm's way --- it's a good thing
Mark wears a belt, since that turned into an emergency leash.
Next step was moving the
boxes into our barn. Bradley's barn
floor and Mark's
hard work organizing
made it possible to drive 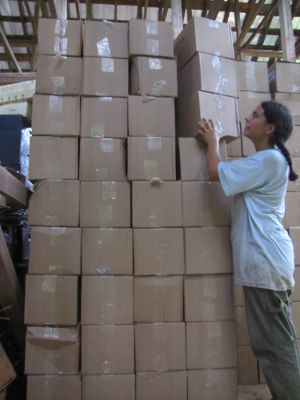 the golf cart through the
doors, which sped things up considerably. Add in the front and rear
carrying boxes on
the golf cart, the heavy
hauler pulled
behind, and the passenger seat area, and I could haul about fifty boxes per trip.
the golf cart through the
doors, which sped things up considerably. Add in the front and rear
carrying boxes on
the golf cart, the heavy
hauler pulled
behind, and the passenger seat area, and I could haul about fifty boxes per trip.
(We don't usually use
the heavy hauler because it tends to bog down in the mud, but it's dry
enough, and the pitchers are light enough, that the trailer made a good
addition to this project.)
Despite these time
savings, though, we only got about a third of the chicken waterer parts
under roof before we called it quits yesterday. Let's hope the
other four pallets make it in before the 50% chance of rain for today
saturates the floodplain.
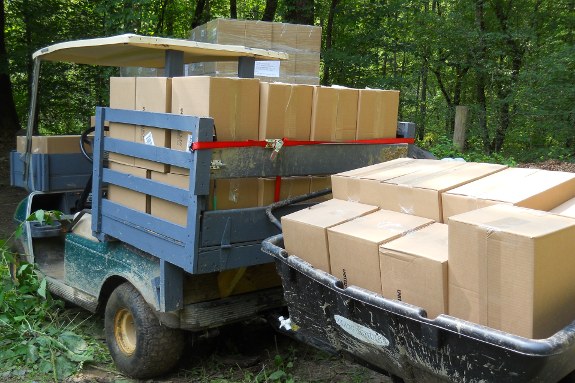
Finished hauling in the bulk
pitcher delivery today.
Whew!
It only took two trips per
pallet with the golf cart and mini-trailer.

Or explore more posts by date or by subject.
About us: Anna Hess and Mark Hamilton spent over a decade living self-sufficiently in the mountains of Virginia before moving north to start over from scratch in the foothills of Ohio. They've experimented with permaculture, no-till gardening, trailersteading, home-based microbusinesses and much more, writing about their adventures in both blogs and books.