
archives for 11/2012
 With
lots of help from Sarah, the monthly ebook versions
of Weekend Homesteader are now available in their
revised format on Amazon!
With
lots of help from Sarah, the monthly ebook versions
of Weekend Homesteader are now available in their
revised format on Amazon!
(As a side note, Sarah
is the Bradley
of the digital world, and she works long distance.
Having just quit her job, she's available if you've got photography,
editting, or formatting work you'd like done. I'm a bit afraid to
tell you how awesome she is since she might get too busy for us
just like Bradley did. Sarah cleaned up my ebooks in ways I
didn't even know to ask for, and she might even work for Silver Fox rabbits
and Chocolate Turkeys....)
 If you've been waiting
to get the revised ebooks, now's your chance to snap up all
twelve. Meanwhile,
if you've bought some or all of the ebooks in the past, you should be
getting an email from Amazon within the next month or so asking if you
want a free update to the revised editions --- say yes. We moved
things around and revised each chapter to match the paperback, plus I couldn't help adding
in more photos that didn't fit into the print version. I've also
created the twelfth month --- Weekend
Homesteader: April
--- so you have access to every project that's in the print book.
If you've been waiting
to get the revised ebooks, now's your chance to snap up all
twelve. Meanwhile,
if you've bought some or all of the ebooks in the past, you should be
getting an email from Amazon within the next month or so asking if you
want a free update to the revised editions --- say yes. We moved
things around and revised each chapter to match the paperback, plus I couldn't help adding
in more photos that didn't fit into the print version. I've also
created the twelfth month --- Weekend
Homesteader: April
--- so you have access to every project that's in the print book.
And as a final side
note, my publicist has been having me churn out guest posts right and
left to increase the buzz during the upcoming paperback launch.
You can read two of my favorites here:
Links to the monthly
ebooks are below. Thanks for reading!

This post is to remind me
next year at this time to check our mushroom logs.
These Shitake
mushrooms would've been yummy last week.
Maybe a daily chart of soil
temperatures would provide some insight into predicting when a Shitake
log might be ready to pop some fruit out?
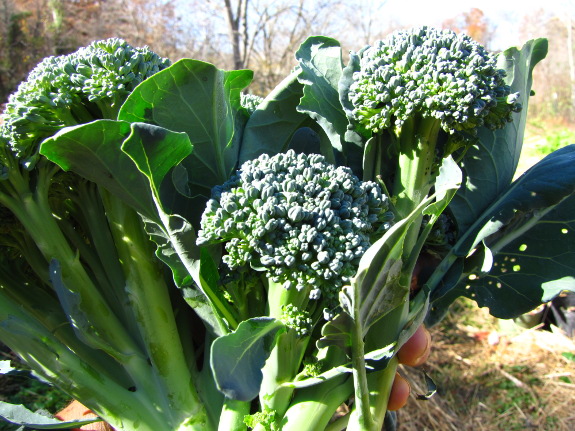
October did turn out to
be the
month of the broccoli.
Every day or so, we'd have a huge helping and eat every sprig and chunk
--- nothing tastes better than homegrown broccoli in season.
In the spring, I cut my
broccoli heads low, peel off the woody skin near the stalk base, and
cook up the whole kit and caboodle. In the winter, though, I
don't have anything else 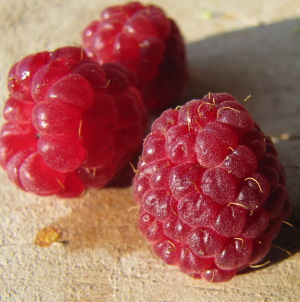 begging to fill the broccoli
space, so I cut the heads high, leaving most of the stem behind.
Within a week or two, side shoots come popping up, which I cut and eat
just like the original head.
begging to fill the broccoli
space, so I cut the heads high, leaving most of the stem behind.
Within a week or two, side shoots come popping up, which I cut and eat
just like the original head.
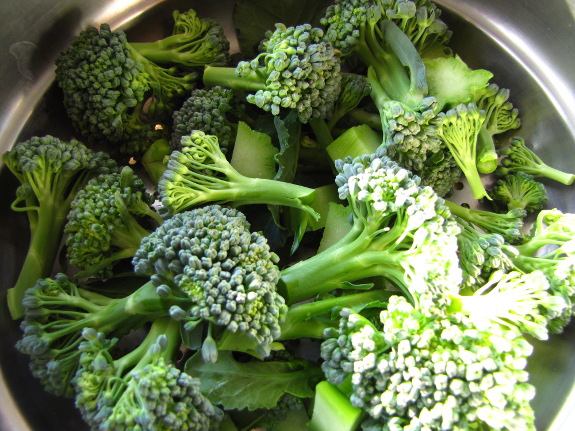
This endless broccoli
crop continues until the first killing frost --- and since we've dodged
even a light frost so far this fall, that might be a while! The
lack of frost means we're still eating raspberries too, and they're
even better in cool weather. Dare I suggest we may still be
enjoying fresh berries at Thanksgiving?
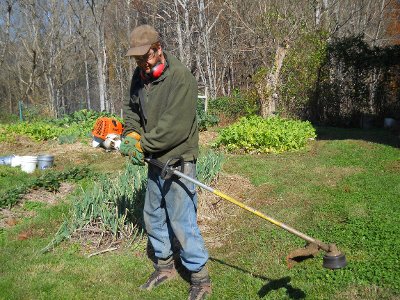
Forgetting about mushroom
logs yesterday helped me to remember that the weed eater and mower
will like me better in the Spring if I don't let fuel sit in the tank
all winter.
With any luck this post will
help me to not forget next year.
 I
don't know if the distinction is variety or age, but Celeste went dormant over a week
ago, while Chicago
Hardy is still in
the act of losing his leaves. I figured I'd go ahead and protect
our fig youngster just in case cold weather comes calling before our
elder fig is ready.
I
don't know if the distinction is variety or age, but Celeste went dormant over a week
ago, while Chicago
Hardy is still in
the act of losing his leaves. I figured I'd go ahead and protect
our fig youngster just in case cold weather comes calling before our
elder fig is ready.
Since I read up a bit on
fig
cold protection,
I've decided to tweak my technique a bit. I started out by tying
the stems on the young fig tree together so they'll stay in the center
of my insulation, then I stuffed a cat food bag with freshly raked
autumn leaves.
Mashing the leaves a bit
opened up a hole in the center, which let me drop the leaf-filled bag
on top of the little fig tree.
I tied the bag at the
base to hold it in place and used the rest of my leaves to mulch the
bed heavily.
I'll keep my eye on
Celeste to see if the bag starts to come loose --- I was tempted to
push in a metal fence post to tie the bag to, but figured I might not
need it. I'm hopeful this method will work better than my previous
one since the cat
food bag should keep the leaves dry and in place. We won't know
for sure until May!
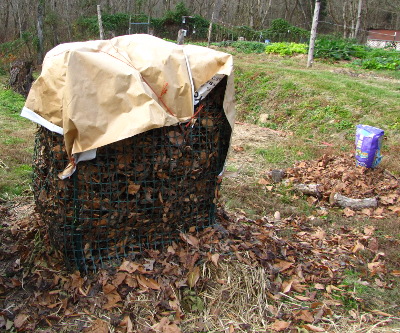
Our neighbors made this
hardware wire corn crib to keep raccoons and other critters out.
Last year was the first test
and it yielded not one kernel.
After it dries a bit more
they usually take it somewhere that grinds it into corn meal.
 I've been curious about Brett Markham's Mini
Farming: Self-Sufficiency on 1/4 Acre mostly because it's been
topping the charts in Amazon's Sustainable Living category for about a
year (or more). Mini
Farming is
another one of those beginner gardening books (with the bonus of a
section on chickens and one on preserving), and I'd probably recommend
it to new gardeners before I'd send them to Square
Foot Gardening.
I've been curious about Brett Markham's Mini
Farming: Self-Sufficiency on 1/4 Acre mostly because it's been
topping the charts in Amazon's Sustainable Living category for about a
year (or more). Mini
Farming is
another one of those beginner gardening books (with the bonus of a
section on chickens and one on preserving), and I'd probably recommend
it to new gardeners before I'd send them to Square
Foot Gardening.
I appreciated Markham's
focus on economics and the inclusion of information on composting and
cover crops. On the other hand, I wasn't so keen on his Solomon-like
seed meal fertilizers
and had to stop reading for two weeks when I butted up against his
nutrition chapter. (Chapter summary: Potatoes are a vegetable, so
look how little space it takes to grow your own!)
In general, I think
Markham is one of those farmers who toes the organic line but doesn't
spend enough time promoting holistic health of his crops (although I
admit that if we were growing enough to sell, chances are we'd lower
our standards too). For someone just starting out, they could do
worse than to begin with a relatively mainstream book like this and
then slowly branch out into more permaculture techniques once they've
gotten their feet wet. Plus, Markham's cost-benefit analysis may
tempt some folks who otherwise wouldn't even consider gardening to try
their hand, so this might be the book to give to your in-laws if they
think your homesteading bug is crazy.
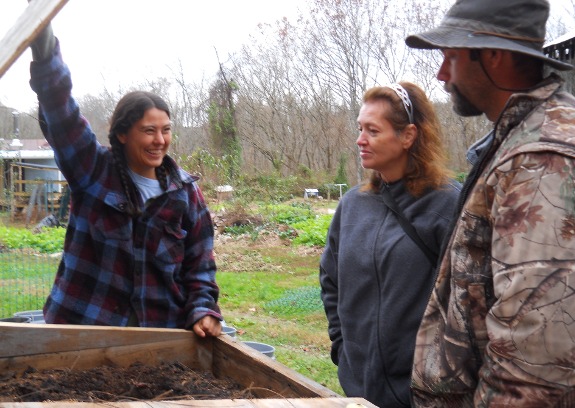
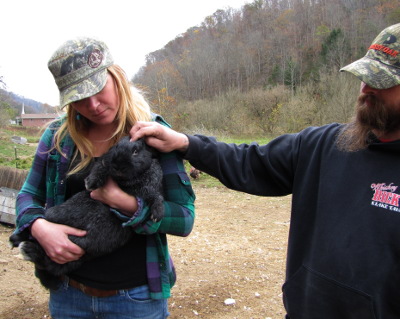
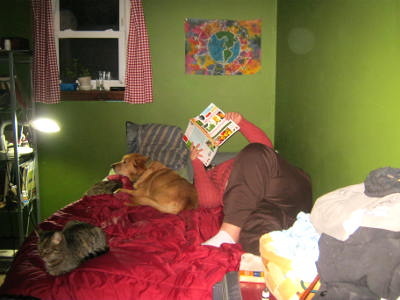
Some friends who were hiking
the Appalachian Trail dropped by today for a visit and a tour of the
garden.
Shannon and Dawn are the
folks who have been sharing their meat
rabbit adventures in the form of Tuesday guest posts.
Yes...horse manure with worms
really makes Anna that happy.
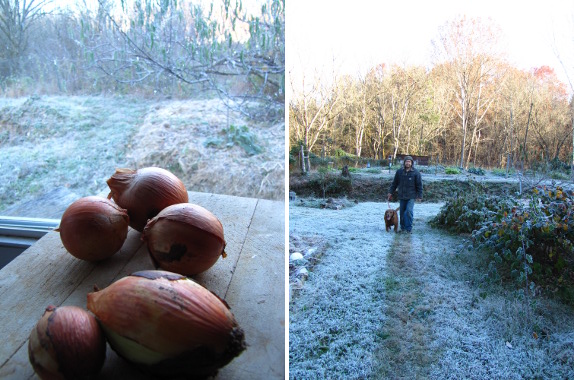
 This past weekend was a time
of endings and beginnings. A heavy frost (nearly a killing
freeze) marked the last of the summer produce Saturday morning, and I
chopped up some of our final homegrown onions to enjoy in a chicken
soup with friends.
This past weekend was a time
of endings and beginnings. A heavy frost (nearly a killing
freeze) marked the last of the summer produce Saturday morning, and I
chopped up some of our final homegrown onions to enjoy in a chicken
soup with friends.
It was great to welcome Shannon back to the farm, and to
meet Dawn (and their well-travelled dog Downey). We sent them on
their way with oilseed radish seeds to try in their clay soil, and they
left us some Malabar spinach seeds, since the plant has thrived in
their Louisiana heat.
Now that they're safely
home with their rabbits, we can expect to hear more
from our southern correspondents soon. (Yes, Shannon, that was a
hint.)
Last year, I
summed up all of the chicken experiments I'd been posting about
throughout the year on our Avian Aqua Miser site, and I thought you might
enjoy seeing the highlights again this year.
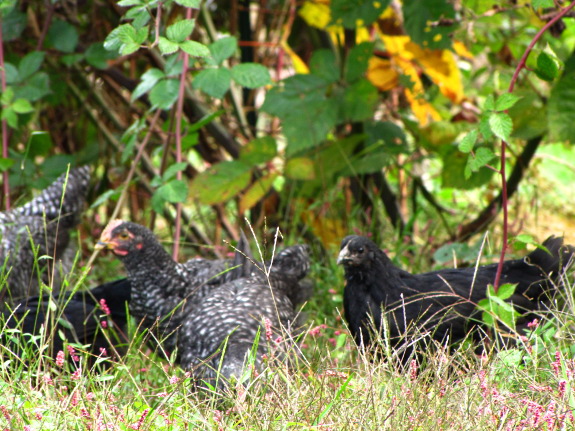
 One of the most timely
experiments I wanted to mention involved letting
our chickens free range in the woods over the winter. I was fascinated to
see that the flock concentrated most of their attention around the
bases of big trees, where they scratched through the mulch in search of
invertebrates. They only foraged over about three quarters of an
acre, probably because the flock had to stay close enough to the hen
house so that ladies could drop by at intervals to lay their eggs.
One of the most timely
experiments I wanted to mention involved letting
our chickens free range in the woods over the winter. I was fascinated to
see that the flock concentrated most of their attention around the
bases of big trees, where they scratched through the mulch in search of
invertebrates. They only foraged over about three quarters of an
acre, probably because the flock had to stay close enough to the hen
house so that ladies could drop by at intervals to lay their eggs.
The
forest worked as a good escape valve in the summer too, when the grasses stopped
growing and the ground began to look bare in their rotational
pastures. I think this system really depends on a quality
rooster, though, since when I tried the same trick with some  half-grown broilers, they
just sat on the other side of the pasture fence and begged to be let back
into their home turf.
half-grown broilers, they
just sat on the other side of the pasture fence and begged to be let back
into their home turf.
If you start
young chicks free ranging from week one and keep them close to the
house, they're the very best chickens to let run semi-wild. Having
trees or bushes available to hide in makes chicks (and
adult hens, for that matter) feel safer, so they spend more time
hunting wild food.
 There
are reasons we don't let our main flock free range all the time, though. The book Free-Range
Chicken Gardens
gives some tips for helping chickens coexist with a garden during the
growing season, but we like to keep the garden extremely productive, so
the chickens get relegated to pastures after they reach two months
old. We were forced to clip
a couple of chickens' wings (and then eat one of them)
when they didn't toe the line and thought the garden was still fair
game during the summer months.
There
are reasons we don't let our main flock free range all the time, though. The book Free-Range
Chicken Gardens
gives some tips for helping chickens coexist with a garden during the
growing season, but we like to keep the garden extremely productive, so
the chickens get relegated to pastures after they reach two months
old. We were forced to clip
a couple of chickens' wings (and then eat one of them)
when they didn't toe the line and thought the garden was still fair
game during the summer months.
I don't feel like we
have much more experimenting to do with free range chickens. Our
system just works!
| This post is part of our 2012 Chicken Experiments lunchtime series.
Read all of the entries: |
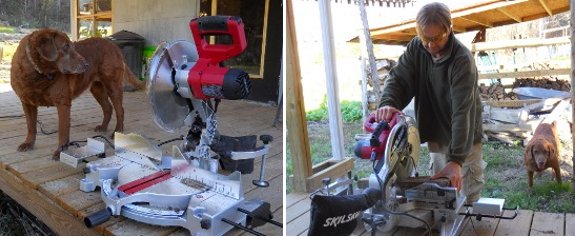
Day 1 of the new Skil 15 amp
circular saw started today.
Cutting logs of purchased
firewood in half will be the main application.
It cuts like a hot knife
through butter and highlights the cutting area with a laser.
 I promised myself that I
wasn't going to start a political debate about the election, but I did
want to remind our readers to do their civic duty and go vote.
And in the process I realized I had a lot of nonpartisan (but still
very controversial) voting advice I wanted to share.
I promised myself that I
wasn't going to start a political debate about the election, but I did
want to remind our readers to do their civic duty and go vote.
And in the process I realized I had a lot of nonpartisan (but still
very controversial) voting advice I wanted to share.
Vote. Yes, even if you're
disappointed in all the candidates, it is worth going out and
voting. Do your research first, though, so you'll know who
all the little guys are because...
Your
vote makes more of an impact locally. Even though it seems
like who wins the presidency is the most important aspect of today,
your state and local elections will actually have more of an influence
on your day-to-day life. Plus, your vote has more likelihood of
swaying the results of elections closer to home (and the issues are
easier to understand fully too). (Speaking of which, I am going to plug one candidate
--- if you live in Virginia's ninth congressional district like we do, I
have been on Anthony Flaccovento's farm and can personally vouch for
his farming techniques, along with his stances on other key
issues. Vote for Anthony!)
Don't
choose your political leaders based on charisma. This is my pet peeve,
so I'll try to be brief. U.S. elections have turned into a cult
of personality, which is why the only candidates who get elected
anymore are those with deep pockets who can make themselves look like
movie stars and turn their families into storybook characters.
Unfortunately, to get that much capital, nearly all of them have to
toady up to the big industry lobbyists, so none of them are ever going
to vote in such a way as to help the little guy. If you don't
approve of the cult of personality, make it a habit not to look at
photos or videos of your candidate or to listen to them speak --- you
may think this won't sway you, but it will. Figure out which
issues are important to you, then look up your candidates' voting
history (many websites provide this information on various issues) or
do some other primary research to figure out who is going to represent
the values you espouse, then vote accordingly.
Don't
vote selfishly.
There are so many people (and plants and salamanders) who have no say
in the election but whose lives will change drastically based on the
outcome, so I try to vote for what will make these disenfranchised
populations happier and healthier. Your personal bottom line
should not be the deciding factor in who you vote for.
 Before voting for a third
party candidate for president, please understand
the electoral college system. I hear so many people
saying they're going to vote for a third party candidate for president,
and it always makes me sad. Yes, I think anyone who runs for
president with the full support of the Democrat or Republican party is
crooked (see point number three), but you're literally throwing away
your vote if you select anyone else. A candidate has to receive
the majority of the popular votes in a state to get a single electoral
college vote, so unless you think 50% of the people in your state are
going to select the same third party candidate, your vote is
worthless. If you care about this issue, there are many people
working to reform our system --- for example www.nationalpopularvote.com --- but simply voting for a
third party candidate is putting the cart before the horse. Your
vote for a third party candidate makes a lot more sense at the local
level, though, especially if you talk your neighbors into doing the
same.
Before voting for a third
party candidate for president, please understand
the electoral college system. I hear so many people
saying they're going to vote for a third party candidate for president,
and it always makes me sad. Yes, I think anyone who runs for
president with the full support of the Democrat or Republican party is
crooked (see point number three), but you're literally throwing away
your vote if you select anyone else. A candidate has to receive
the majority of the popular votes in a state to get a single electoral
college vote, so unless you think 50% of the people in your state are
going to select the same third party candidate, your vote is
worthless. If you care about this issue, there are many people
working to reform our system --- for example www.nationalpopularvote.com --- but simply voting for a
third party candidate is putting the cart before the horse. Your
vote for a third party candidate makes a lot more sense at the local
level, though, especially if you talk your neighbors into doing the
same.
So how's that for a
political rant that 99% of our readers are bound to disagree with at
least partially? (And I didn't even have room to complain about all these glossy fliers showing up in my mailbox that aren't appropriate for kill mulches, worm bins, or even the wood stove!)

 This year's experiments with
chicken pastures were mostly a streamlining of the process that we
started to hammer into shape in 2011. In general, our trials this
year had to do with improving wild pastures vegetated with whatever
sprung up after we cut the plants too tall for chicken beaks.
This year's experiments with
chicken pastures were mostly a streamlining of the process that we
started to hammer into shape in 2011. In general, our trials this
year had to do with improving wild pastures vegetated with whatever
sprung up after we cut the plants too tall for chicken beaks.
I found that mowing
the pastures as high
as possible (which isn't very high with our mower) after the chickens
are rotated to the next pasture cuts back the weeds that the flock
ignored. That gives chicken-friendly plants more space to
grow. It seems to be necessary to come back through with clippers
once in the summer, too, to
hit weeds along the fenceline that outgrew the mower. I can tell that this
simple maintenance duo is going to have our sunnier pastures
grass-filled in just a couple of years.
 The three pastures under
heavy tree canopies are going slower at the grassing up process, so I
decided to take the opportunity to improve what's currently pretty poor
soil. I planted
buckwheat in one this summer, then replaced it with oilseed
radishes this
fall. The cover crops aren't thriving in this shade, but they are
producing some biomass. Hopefully we'll find time to take the
problematic trees down this winter and start replacing them with more
chicken-friendly bushes that are spaced far enough apart that they let
the grasses grow.
The three pastures under
heavy tree canopies are going slower at the grassing up process, so I
decided to take the opportunity to improve what's currently pretty poor
soil. I planted
buckwheat in one this summer, then replaced it with oilseed
radishes this
fall. The cover crops aren't thriving in this shade, but they are
producing some biomass. Hopefully we'll find time to take the
problematic trees down this winter and start replacing them with more
chicken-friendly bushes that are spaced far enough apart that they let
the grasses grow.
 Meanwhile, I tried to convert
two other relatively barren pastures (also in the shade) over to
pasture plants that chickens enjoy. The trouble is that I
planted cover crops along with the grasses and clovers as a nurse crop,
and the former outcompeted the latter. I
did get some perennials to come up in one spot, but it was impossible to
keep the chickens off the tender growth this summer, and I think I
wiped my hard-won grass and clover out. I'm hopeful that the bare
ground left behind by the oilseed radishes will give me a good spot to
try again, but I'll have to commit to keeping the flock completely out
of that pasture until 2014.
Meanwhile, I tried to convert
two other relatively barren pastures (also in the shade) over to
pasture plants that chickens enjoy. The trouble is that I
planted cover crops along with the grasses and clovers as a nurse crop,
and the former outcompeted the latter. I
did get some perennials to come up in one spot, but it was impossible to
keep the chickens off the tender growth this summer, and I think I
wiped my hard-won grass and clover out. I'm hopeful that the bare
ground left behind by the oilseed radishes will give me a good spot to
try again, but I'll have to commit to keeping the flock completely out
of that pasture until 2014.

The one thing we did
right was to (mostly) prevent
overgrazing of the pastures this year. It really
helped to figure out temporary
fencing (and the free
range escape hatches
I posted about yesterday) so that we weren't forced to keep chickens on
over-used ground simply because we had nowhere else to put them.
As usual, I also spent a
lot of time peering at our poultry to see what they were actually
eating on pasture. I learned that (despite what the books say) winter
cover crops of oats and field peas  were ignored by our picky
flock, as were sweet
potatoes I tried to feed them whole and raw. On the other hand, winter
rye and mustards were pecked right up.
were ignored by our picky
flock, as were sweet
potatoes I tried to feed them whole and raw. On the other hand, winter
rye and mustards were pecked right up.

In a surprise
about-face, our chicks this year enjoyed both comfrey and oilseed
radishes (both of
which were on the no-good list for previous flocks). Cicadas and jewelweed
seeds were other new
hits.
I've got plenty of
experimentation ahead for improving our pastures, and an ebook in the
works to help others follow our lead without muddling through all of
our mistakes. Stay tuned to our chicken blog for a blow-by-blow, or wait
until next year's sum-up over here for more details.
| This post is part of our 2012 Chicken Experiments lunchtime series.
Read all of the entries: |
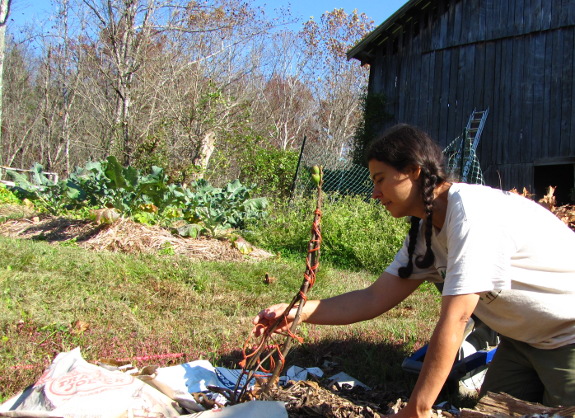
We trimmed it back to 3 feet and tied the branches together.
I'm already looking forward to the 2013 fig harvest.
As Mark
mentioned last night,
our larger fig was ready to be swaddled just like his
younger sister.
The idea is that figs aren't really winter hardy here in zone 6, but
with some careful variety
selection and a
little love, you can
see get lots of fruits without babying a house plant.
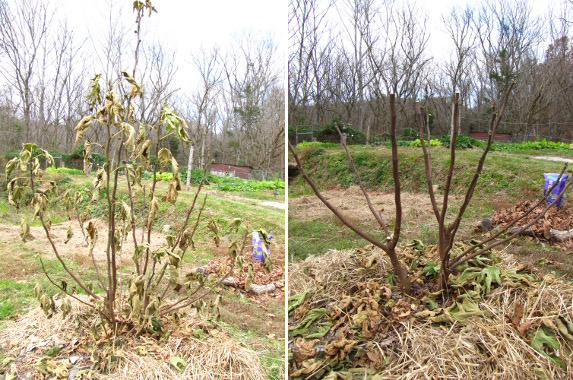
 I'd
read that Chicago Hardy figs do best if cut back drastically to three
main trunks each winter, but when I pulled out the clippers, I suddenly
couldn't decide if that meant three main trunks with all of their side
branches or just three sticks coming out of the ground. So I went
for a moderate approach where I removed any tiny branches and ones that
would be shaded, but left multiple branches on each trunk.
I'd
read that Chicago Hardy figs do best if cut back drastically to three
main trunks each winter, but when I pulled out the clippers, I suddenly
couldn't decide if that meant three main trunks with all of their side
branches or just three sticks coming out of the ground. So I went
for a moderate approach where I removed any tiny branches and ones that
would be shaded, but left multiple branches on each trunk.
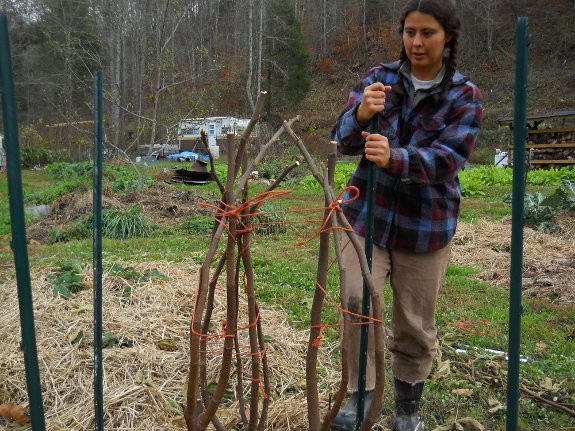
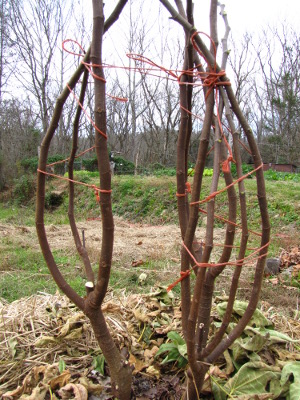
Next, I cut the tree
down to about three feet high. Some people keep their figs tall
and wrap the whole thing up, but it was awfully nice having fruits I
could pick without a ladder, and I can protect what's left better if I
shorten this year's growth. By carefully bending and then tying
the branches together, they formed a compact bundle, giving me plenty
of room to stuff leaves around them within an enclosure I made out of
lightweight fence posts and trellis material.

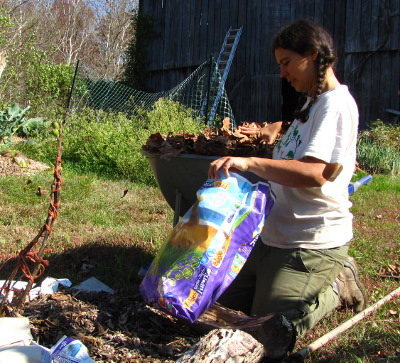
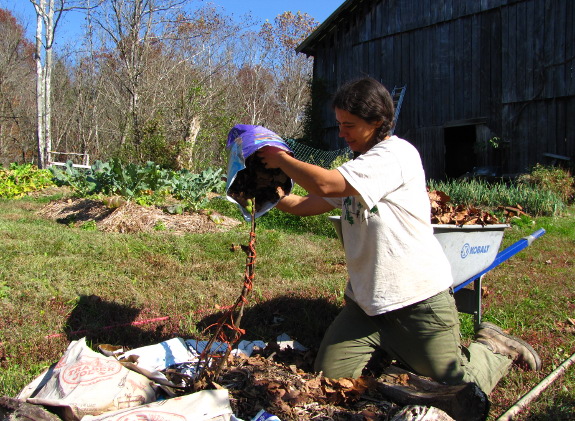
 I topped it all off with a
cheap tarp that came on our roofing
tin. I felt
like last year's
frost protection
lost some efficiency when rain pounded down the insulating leaves and
exposed the tips of the fig branches. Hopefully this year's tarp
will prevent moisture entering my fig enclosure from above.
I topped it all off with a
cheap tarp that came on our roofing
tin. I felt
like last year's
frost protection
lost some efficiency when rain pounded down the insulating leaves and
exposed the tips of the fig branches. Hopefully this year's tarp
will prevent moisture entering my fig enclosure from above.
I saved nearly all of
the small branches to try rooting next year, and three of them already
had little roots forming (since I cut those 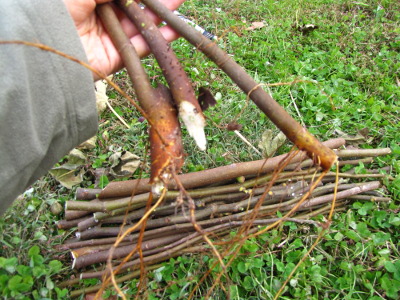 branches
off below the mulch line). Usually you gather
scionwood in the late winter, but it was necessary to chop our fig
down before wrapping it, so now I'm stuck trying to decide how to store
these cuttings in a cool, damp, but not freezing spot all winter.
We're really going to have to try to excavate our fridge root cellar
soon....
branches
off below the mulch line). Usually you gather
scionwood in the late winter, but it was necessary to chop our fig
down before wrapping it, so now I'm stuck trying to decide how to store
these cuttings in a cool, damp, but not freezing spot all winter.
We're really going to have to try to excavate our fridge root cellar
soon....
 At least in our area, stone
fruits can be very problematic because they succumb to the fungal
disease brown rot.
In addition, many of them tend to lose flowers during frosts that come
behind spring thaws, so you may spend several years watching a
beautifully trained peach tree bloom without harvesting any
fruits. Assuming you don't have just the right microclimate to
keep them happy (early morning sun to dry the dew, low humidity in the
summer, and a full-sun site that's shaded during the winter),
you're once again stuck choosing varieties that will handle your
conditions without the necessity of chemical intervention.
At least in our area, stone
fruits can be very problematic because they succumb to the fungal
disease brown rot.
In addition, many of them tend to lose flowers during frosts that come
behind spring thaws, so you may spend several years watching a
beautifully trained peach tree bloom without harvesting any
fruits. Assuming you don't have just the right microclimate to
keep them happy (early morning sun to dry the dew, low humidity in the
summer, and a full-sun site that's shaded during the winter),
you're once again stuck choosing varieties that will handle your
conditions without the necessity of chemical intervention.
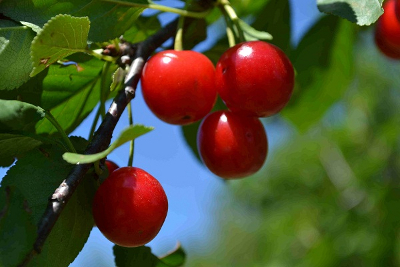 Sour cherries
are perhaps the most disease-resistant of the stone fruits, especially
if you select a variety like English Morello or Meteor. I've also
read about Mongolian-cross bush cherries (Valentine, Carmine Jewel,
Romeo, Juliette, Rose, and Crimson Passion), which are reputed to have
big fruits with lots of sugar, to be tolerant of clay soil, and to
fruit by the fifth year. Unfortunately, the sweet
cherries
I adore are very prone to getting frost-bitten, to
losing their fruits to brown rot, and to perishing in clay. (We
ripped out our dwarf sweet cherry after the Japanese beetles ate all
the leaves multiple years in a row and the few fruits rotted
away.) If you live in a damp climate like ours and have had good
luck with a sweet cherry, I'd love to hear about it.
Sour cherries
are perhaps the most disease-resistant of the stone fruits, especially
if you select a variety like English Morello or Meteor. I've also
read about Mongolian-cross bush cherries (Valentine, Carmine Jewel,
Romeo, Juliette, Rose, and Crimson Passion), which are reputed to have
big fruits with lots of sugar, to be tolerant of clay soil, and to
fruit by the fifth year. Unfortunately, the sweet
cherries
I adore are very prone to getting frost-bitten, to
losing their fruits to brown rot, and to perishing in clay. (We
ripped out our dwarf sweet cherry after the Japanese beetles ate all
the leaves multiple years in a row and the few fruits rotted
away.) If you live in a damp climate like ours and have had good
luck with a sweet cherry, I'd love to hear about it.
Peaches are more tolerant of
wet feet than cherries, but are very prone to lose fruit to bacterial
spot and brown rot. Disease-resistant varieties include:
- Early Redhaven
- Ernie's choice --- reputed to taste like a nectarine
- Garnet Beauty
- Harbrite
- Harcrest
- Harrow Beauty
- Harrow Diamond
- Glohaven
- Elberta
- Madison
- New Haven
- Raritan Rose
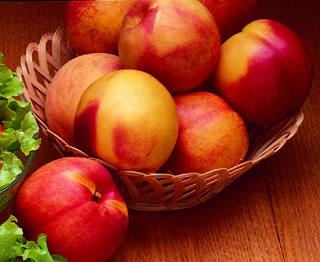 Nectarines
are simply a hairless peach, but most are especially prone to insect
and disease damage (as we found in our own garden). However
Hardired, Mericrest, Midglo, and RedGold have at least some disease
resistance.
Nectarines
are simply a hairless peach, but most are especially prone to insect
and disease damage (as we found in our own garden). However
Hardired, Mericrest, Midglo, and RedGold have at least some disease
resistance.
Although the beautiful
golden fruits of apricots
always tempt me in nursery catalogs, it sounds like I'd be better off
keeping my distance if I don't want to baby trees with little
reward. Of all the stone fruits, apricots are most likely to lose
their ultra-early flowers to frosts, they have no tolerance for wet
feet, and they get all the usual stone fruit diseases. Selecting
late bloomers like Alfred, Goldcot, Harcot, Harglow, Hargrand,
Harlayne, Harogen, Jerseycot, Precious, and Sugar Pearls will at least
weigh the odds in your favor.
(By the way, in case
you're wondering why so many frost- and
disease-resistant stone fruits have names starting with "Har", these
were developed at the Harrow Research Station in Ontario.)
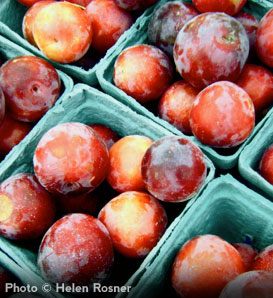 Finally, we come to the plums, which are really two
species --- European plums (Prunus
domestica) and
Asian plums (Prunus
salicina).
The latter are less hardy, with zone 6 being their most northern
limit, require light soil, and need warm, dry summers. European
plums are better for most low-key gardeners since they can handle clay
and bloom later, so they skip some spring frosts, but they're less
likely to be disease resistant (with Seneca and Imperial Epineuse being
the only resistant varieties I saw listed). Disease-resistant
Asian plums include:
Finally, we come to the plums, which are really two
species --- European plums (Prunus
domestica) and
Asian plums (Prunus
salicina).
The latter are less hardy, with zone 6 being their most northern
limit, require light soil, and need warm, dry summers. European
plums are better for most low-key gardeners since they can handle clay
and bloom later, so they skip some spring frosts, but they're less
likely to be disease resistant (with Seneca and Imperial Epineuse being
the only resistant varieties I saw listed). Disease-resistant
Asian plums include:
- AU Roadside
- AU Rosa
- Methley (which is what we have, but it's not thriving in our clay)
- Satsuma
You can also check out
the more cold hardy Asian-American crosses, as
long as you're willing to work harder to get them pollinated.
Disease-resistant and hardy varieties include Alderman and Superior.
As usual, I'd love to
hear about the stone fruits you've grown without
chemical intervention. Be sure to mention your growing zone and
general region since many varieties do much better in certain areas
than others. I have a couple of spots that I might be able to
cram another tree into, and your tips will help me decide who makes the
cut.
Next week, we'll finish
up The
Holistic Orchard
by talking about
berries, but in the meantime you might enjoy previous posts about beginning
a holistic orchard, techniques
for designing a holistic orchard, orchard
soil health, managing
fungi in the orchard, and disease-resistant
pears. After that, we'll take a week off, then will start
reading Joel Salatin's Folks
This Ain't Normal,
which won the vote by a landslide!
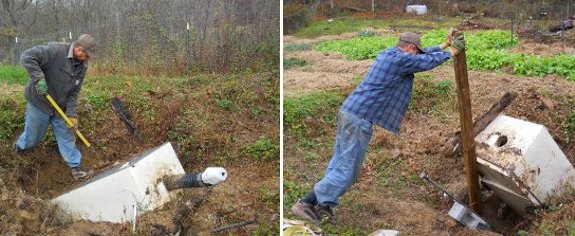
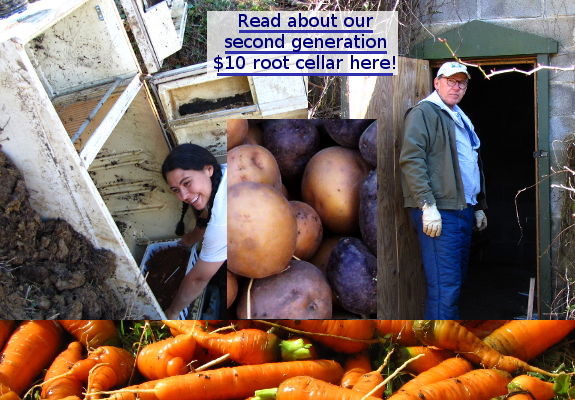
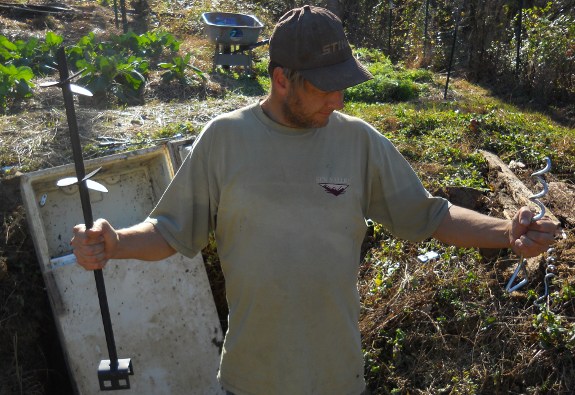
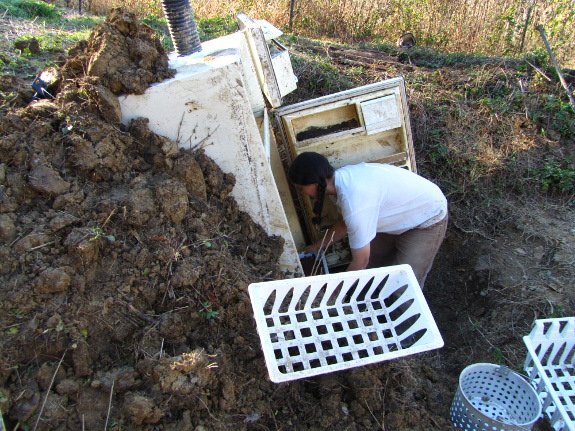
An upcoming carrot harvest
pushed us into fixing the refrigerator
root cellar today.
It took some digging and
prying, but it's now sitting up straight.
Next we need to figure out a
way to anchor it in place and then build a roof that will divert the
water. The parsnips from 2009 were nowhere to be found.
 Long-time readers will be
aware that I'm always trying to sneak new livestock onto the farm and
Mark's always reining me in. "Whoa, there!" he says. "Are
you ready for such a big commitment? Remember how much time the
garden and fruit trees and berry bushes and laying flock and broilers
take up, not to mention all this writing you're always poking away
at. Do you really think we have time to milk
a goat or fence
in an acre for sheep?"
Long-time readers will be
aware that I'm always trying to sneak new livestock onto the farm and
Mark's always reining me in. "Whoa, there!" he says. "Are
you ready for such a big commitment? Remember how much time the
garden and fruit trees and berry bushes and laying flock and broilers
take up, not to mention all this writing you're always poking away
at. Do you really think we have time to milk
a goat or fence
in an acre for sheep?"
I think I may have found
the perfect middle ground, though --- fattening a pair of hogs. This
fascinating page
suggests that you can raise a pair of pigs from 40 pounds (when they're
weaned) to 200 pounds for $500 ($1.39 per pound) if you do the
butchering yourself. The great part is that the whole process
only takes four months, so if we decide we hate swine, we only have to
live with them for 120 days.
 (Even if we weren't pinching
pennies, we'd have to do the butchering on-farm. The idea of
walking a pig half a mile down our floodplain to the parking area and
then loading it up in our car to get to the slaughter-house sounds
tougher than skinning, gutting, and cleaning the hogs ourselves.
Bradley remembers killing hogs with his family as a kid, so I'll bet we
could get him to help us, and how much harder could it be than a deer?)
(Even if we weren't pinching
pennies, we'd have to do the butchering on-farm. The idea of
walking a pig half a mile down our floodplain to the parking area and
then loading it up in our car to get to the slaughter-house sounds
tougher than skinning, gutting, and cleaning the hogs ourselves.
Bradley remembers killing hogs with his family as a kid, so I'll bet we
could get him to help us, and how much harder could it be than a deer?)
In addition to providing
top-notch meat for $1.39 per pound, spending the summer with a pair of
pigs could be the first step toward reclaiming more quality pasture for
chickens (or other animals). As colonizing
livestock, pigs can
be living bush hogs if you leave the rings out of their noses, and all
of the areas we've considered expanding into would need a year or two
of this work before anything else could happen there.
As an added bonus,
there's always the
manure to
consider. Plus, increased diversity on a homestead usually seems
to lead to increased efficiency, in this case resulting from the pigs
eating some garden waste the chickens aren't interested in. And I
just love experimenting with new things.
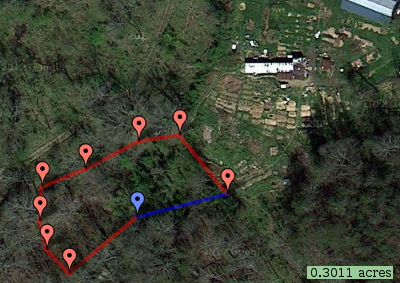 My
reading suggests that a third of an acre divided into four paddocks
would be sufficient pasture for a pair of growing swine. I've got
the perfect spot in mind too --- a little plateau just southwest of our
core homestead with lots of scrubby growth that can come out and two
big oak trees that would stay put and drop mast (acorns) into the
pasture. The question is, how crazy am I to want to spend $1,550
on a livestock panel fence that will last the rest of our lives and
allow us to graze anything we want in there forever, versus a small
fraction of that sum on electric fencing?
My
reading suggests that a third of an acre divided into four paddocks
would be sufficient pasture for a pair of growing swine. I've got
the perfect spot in mind too --- a little plateau just southwest of our
core homestead with lots of scrubby growth that can come out and two
big oak trees that would stay put and drop mast (acorns) into the
pasture. The question is, how crazy am I to want to spend $1,550
on a livestock panel fence that will last the rest of our lives and
allow us to graze anything we want in there forever, versus a small
fraction of that sum on electric fencing?
And, of course, is
raising a pair of weanling pigs much more work than I imagine?
I'd be curious to hear from others who have tried a similar small-scale
operation. If we figured out the fencing and housing over the
winter, would day-to-day pig care drive me nuts during the busy garden
season?
(What do you think,
Mark? Are you sold?)
 When we moved our chickens
from tractors to a coop and rotational pasture system, we had to deal
with manure for the first time. Deep
bedding was the
perfect solution, but we did run into a few minor problems this year.
When we moved our chickens
from tractors to a coop and rotational pasture system, we had to deal
with manure for the first time. Deep
bedding was the
perfect solution, but we did run into a few minor problems this year.
The real cause of the
trouble is that it's tough to find enough high carbon biomass to fill
the coops (and to keep filling them as manure builds up). Autumn
leaves are may favorite, and I've tried a bit of the sawdust we
bought for the composting toilet, with good results.
But when I ran low on optimal bedding, I decided to try treating
the coop floor as a compost pile.
The positive side is
that I was no longer creating bare patches in the pastures where I
threw our food scraps. Unfortunately, the scent of sweet corn
cobs was irresistable to the neighborhood raccoon, who came for the scraps and
 stayed for a chicken
dinner. The hen he was hunting got away, but it took us weeks of
effort to make our flock feel comfortable in the coop again. Now
corn cobs go in the worm bin, and the raccoon seems willing to stay in
the woods.
stayed for a chicken
dinner. The hen he was hunting got away, but it took us weeks of
effort to make our flock feel comfortable in the coop again. Now
corn cobs go in the worm bin, and the raccoon seems willing to stay in
the woods.
The issue of never
having enough high carbon materials is one we run into in the garden as
well, and I've got all kinds of ideas for solving the conundrum.
Maybe we'll commit some open areas along the sides of our homestead to
growing rye for straw, or we'll plant a high quality leaf tree (sugar
maple is my favorite) in a pasture that stays mowed so raking leaves
will be easy. We're also pondering chop 'n
drop plants,
although that will probably be less helpful for the chicken coop than
for the garden.
But these issues aside,
deep bedding has been a boon to our farm. Having that high
quality mulch/compost to topdress the berries with this spring was
worth every minute of coop maintenance!
| This post is part of our 2012 Chicken Experiments lunchtime series.
Read all of the entries: |
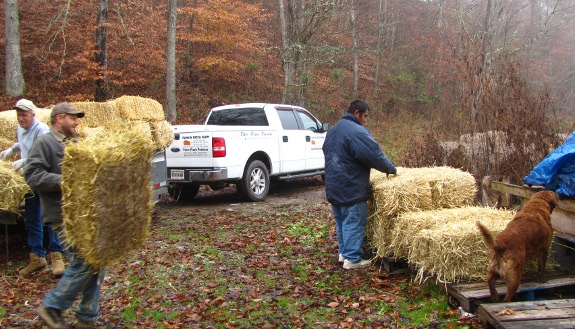
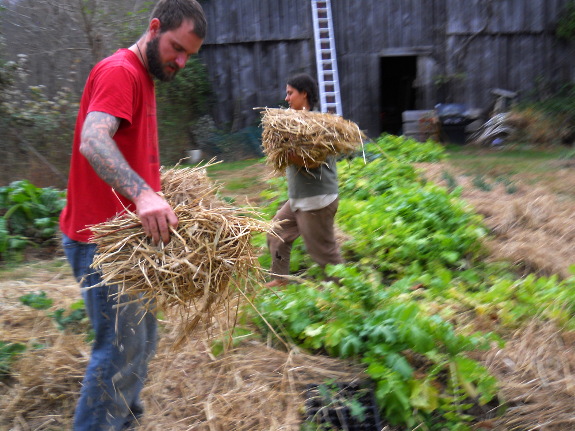
29 bales delivered and stacked for 145 dollars.
It might be enough to get us through the Autumn mulching frenzy.
 One
of the most exciting things for me about having a book in print is the
idea of my loyal blog readers stumbling across it in their library,
bookstore, or Tractor Supply. The
Weekend Homesteader is already available in some bricks and mortar
sales locations and should be hitting most of them this coming week, so it's
time for a scavenger hunt!
One
of the most exciting things for me about having a book in print is the
idea of my loyal blog readers stumbling across it in their library,
bookstore, or Tractor Supply. The
Weekend Homesteader is already available in some bricks and mortar
sales locations and should be hitting most of them this coming week, so it's
time for a scavenger hunt!
It's easy to play (and
you may even win a prize). Just snap a photo of yourself with my
book, whether in your bedroom or out in the world, and email
it to anna@kitenet.net,
post it somewhere else and link to it in a comment below, or put it on our
facebook page by
Sunday (November 18) at midnight. I'll pick one photographer at
random and mail you a signed copy --- there aren't many of these
floating around because I'm not selling them, only giving them to my
favorite people.
Meanwhile, if you'd like
a bit more substance, check out my
Destiny Survival Radio Interview. (I'm actually afraid
to listen to it since I'm not a very good public speaker, but at least
you'll hear my Appalachian accent before I get confused halfway through
the phrase "your eyes are bigger than your stomach.") Readers
might instead like this guest post about when
emergencies are a fact of life better. Or check out two of my favorite book reviews so far, one by my sister, and one on About.com.
Thanks for reading (and
scavenging!)

Last year, I faced a lot
of growing pains when it came to hatching our own chicks and keeping
them alive, but now I feel like an expert. Hatch rates this year
ranged from 80% to  95%, and survival rates (how
many chicks lasted through their first month of life) were always right
at 95%.
95%, and survival rates (how
many chicks lasted through their first month of life) were always right
at 95%.
To get there, I perfected my choice
of eggs to go in the incubator, tweaked my dry
incubation
technique, and learned
how to leverage my specific incubator. I also prevented a
lot of second-guessing by figuring out how
to tell if eggs left in the incubator on day 22 were late-hatchers or
duds. More
basically, I started taping
my incubator and turner plugs to the wall socket to prevent accidental
unplugging.


Once the chicks made it
out of the egg, we continued to have good results with an Ecoglow
Brooder instead of a
heat lamp. Mark built me an outdoor
brooder that did a
great job to keep
the chickens happy outside as early as week 1, which saved my sanity and
also let them enjoy
free ranging much
earlier in life. Turning the plexiglass toward the sun helped
heat up the brooder in the early spring, then flipping the window side
to face north (and  putting the brooder in the
shade) prevented overheating for our summer flocks.
putting the brooder in the
shade) prevented overheating for our summer flocks.
I feel like I've finally
got chick care figured out, which is why I wrote Permaculture
Chicken: Incubation Handbook to jumpstart others'
journeys. If you want to see more cute chick photos without
spending 99 cents, you might also want to check out this
post.
| This post is part of our 2012 Chicken Experiments lunchtime series.
Read all of the entries: |
I bought the small stainless
steel anchor at Walmart in the RV section.
When we got it home it
started to look too weak for the refrigerator
root cellar.
The bigger black anchor is
what people use to secure a mobile home to the ground. I found ours
today at a mobile home supply store in Coeburn for 8 dollars a piece.
It was a struggle to sink it all the way in to our clay ground, which
is a good sign that it's stuck in place and won't budge.
The real reason I moved
our refrigerator
root cellar resurrection to the top of the list is
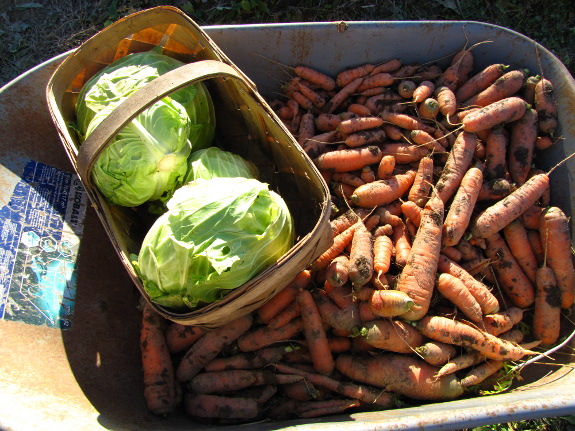
that lows have hit 22 and there's no more room in our real fridge for
the rest of the cabbages and carrots. If I didn't want them to
freeze and ruin in the garden, these crops needed to find some cool,
damp storage immediately.
It's a bit risky to fill
the refrigerator root cellar up with valuable crops when we don't know
for sure if it'll hold
above-freezing temperatures (and refrain from falling
over again).
On the other hand, you can look at this a bit like putting tomato
plants in the forest garden --- a wheelbarrow load of
carrots is going to ensure I pay attention to our new experiment.
If there's a problem, we won't be waiting three years to fix it this
time.
Usually, I sort my
carrots, putting the few that are broken, nibbled, starting to rot, or
excessively small on top for immediate consumption. But I don't
really know the intricacies of our fridge root cellar yet, so I opted
to leave the carrots all mixed together. That way I'm hedging my
bets --- if one area doesn't work right, all of my best carrots won't
happen to be there.
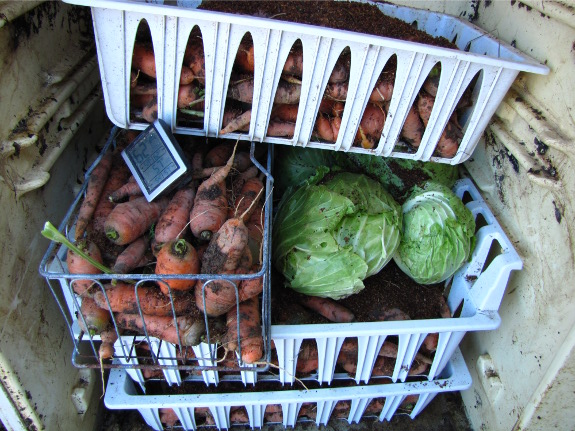
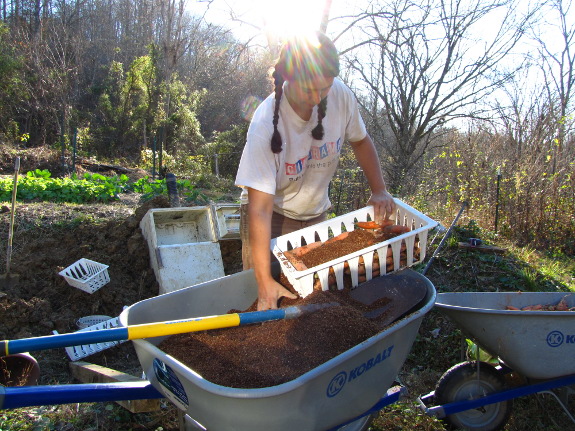
I packed some of the
carrots in sawdust and left some plain as an extra experiment.
While the keeping quality of the crops will be the real indicator of
root cellar function, Mark also tossed in a max./min.
thermometer. I'm ordering another analog
version since I have
a feeling the digital one won't last long in the damp conditions.
If the fridge works as
planned, I can see another one in our future. An afternoon's work
filled our current unit halfway up, and I haven't even moved our white
potatoes and fig scionwood out there yet. And once we start
having apples, we'll want to keep them in their own unit so the
ethylene given off by the fruits doesn't spoil the vegetables. So
many exciting experiments ahead!
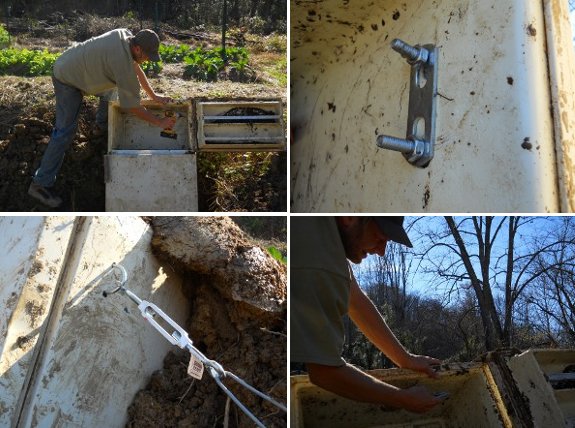
The refrigerator
root cellar has 2 anchor
points. One on the right side and the other in the back.
I chose to use a medium sized
U-bolt, but it's possible two holes big enough to loop some 12 gauge
wire through might be enough.
Each point in the ground is
lower than the refrigerator anchor, giving it a downward tug along with
the side ways tension.
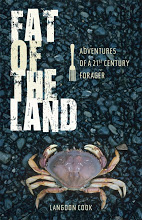 Fat
of the Land was a
fun read, but I'm afraid it only provided one tidbit of wildcrafting
information I might use (baking with dandelion petals). Instead,
the series of essays follows the hunt for one wild delicacy after
another, most of which are seafood and require extreme feats to
harvest. (Those of you who live closer to the shore are more
likely to get useful factual information from the book.)
Fat
of the Land was a
fun read, but I'm afraid it only provided one tidbit of wildcrafting
information I might use (baking with dandelion petals). Instead,
the series of essays follows the hunt for one wild delicacy after
another, most of which are seafood and require extreme feats to
harvest. (Those of you who live closer to the shore are more
likely to get useful factual information from the book.)
Even though it's only
moderately educational, the book is beautifully written and
inspirational. I found it fascinating to follow the culinary
journey of a mainstream American who admits that his cooking prowess
mostly consisted of opening cans before he started hunting down wild
food. I'd definitely add Fat
of the Land to
the homesteading-beach-read genre.
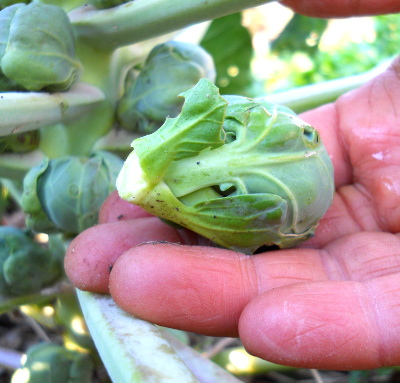
 I'm not sure how many
Brussels sprouts we'll get before extreme cold wipes the plants out,
but our first harvest netted rave reviews from Mark. I tossed
them with olive oil, salt, and pepper and roasted them in the oven
until they turned bright green. "These are even better than roast figs!" proclaimed my kind husband.
I'm not sure how many
Brussels sprouts we'll get before extreme cold wipes the plants out,
but our first harvest netted rave reviews from Mark. I tossed
them with olive oil, salt, and pepper and roasted them in the oven
until they turned bright green. "These are even better than roast figs!" proclaimed my kind husband.
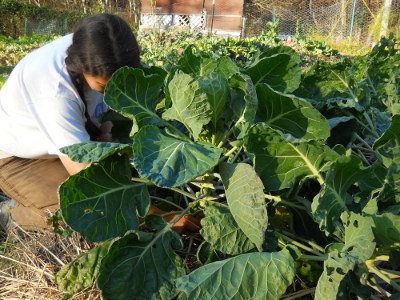
Of the bulkier crucifers
(exempting the leafy greens), broccoli is the most frost tender.
Even though ours are still churning
out side shoots,
these are less crisp and I can tell the harvest is coming to an
end. Our cabbages survived hard freezes in the garden, but I
opted to move
them to the root cellar to ensure they don't die
before winter feasts use them up. Meanwhile, the Brussels sprouts
seem largely unaffected by lows that have nearly hit 20.
 The extra cold hardiness is a
boon because Brussels sprouts take forever to ripen up. We
planted ours at the same time as the cabbage and broccoli, and have
only had a small handful to eat. I'm hopeful that we'll get more
sprouts all the way through to December, and if not, I'll just plant
earlier next year --- I'm starting to get the impression Mark could eat
Brussels sprouts every day in November just like we enjoyed broccoli in
October.
The extra cold hardiness is a
boon because Brussels sprouts take forever to ripen up. We
planted ours at the same time as the cabbage and broccoli, and have
only had a small handful to eat. I'm hopeful that we'll get more
sprouts all the way through to December, and if not, I'll just plant
earlier next year --- I'm starting to get the impression Mark could eat
Brussels sprouts every day in November just like we enjoyed broccoli in
October.

 Our customers have turned DIY kits into an astonishing number
of efficient and beautiful waterers over the last year. Some of
them won prizes for their efforts (and if you're a chicken keeper, you
should be aware that our automatic
chicken feeder contest
is still in effect until November 16). Others simply shared their
designs for the joy of it.
Our customers have turned DIY kits into an astonishing number
of efficient and beautiful waterers over the last year. Some of
them won prizes for their efforts (and if you're a chicken keeper, you
should be aware that our automatic
chicken feeder contest
is still in effect until November 16). Others simply shared their
designs for the joy of it.
The photo to the right
shows Robert's
no-perch chicken waterer and the image at the top of
the page is a chicken
waterer that fills automatically from rainfall on the coop roof. (The inventor of the
latter tweaked
his design to work in tractors too.) Meanwhile, Michael
performed an awesome experiment to determine the exact angle at which
our nipples begin to leak.
Other favorite customer
experiments include a
waterer made out
of a five gallon bottle, a funnel
and hose technique
to make our premade
waterers easy to fill from outside the
coop, and a drip
tray so the coop
floor always stays dry even if you  have
a messy drinker.
have
a messy drinker.
Closer to home, Shannon
tentatively determined that our waterers might work for rabbits too, and Mark streamlined our heat
tape bucket waterer to stay thawed down into the teens.
We're looking forward to
seeing more beautiful designs (and chickens) over the next year.
Be sure to stay tuned to our chicken blog or facebook
page if you want to
know about upcoming contests in a timely manner.
| This post is part of our 2012 Chicken Experiments lunchtime series.
Read all of the entries: |

I discovered today that the
golf cart can haul 10 bales of straw.
While going up the ford I
noticed the LED indicator dimmed and the motor felt like it was
struggling.
Maybe it could've handled
another load with 10 if it had a full charge, but I decided to play it
safe and reduce the amount of bales to 7 per trip.
We barely got them all in the
barn before a storm started pouring down on us. My guess is this is the
start of our winter raining season which might last till early summer.
The last weed and mulch
episode in the garden is never at the top of my priority list, but I
know from experience that every hour's work now saves two hours during
the next growing season. So we took advantage of a handy visitor and some barefoot weather to
finish slipping straw around the greens in the mule garden.
All that's left to mulch
is about half the perennials, then we'll be going into winter more
ship-shape than ever before. I generally run out of warm weather
before I run out of weeds, but not this year!
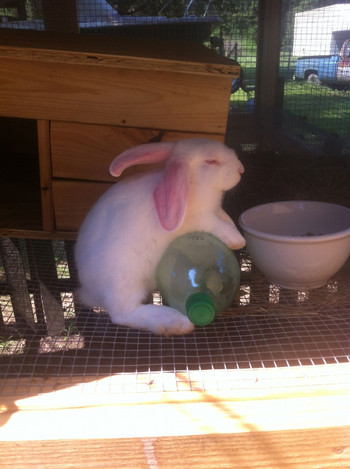 We started with our first
rabbit, a New
Zealand White, sometime during the late spring. (He's the one
in the picture to the right relaxing on a bottle of ice water during
our summer heat.) He was a young male that was purchased from a
local feed store and was the only meat rabbit they had left.
We started with our first
rabbit, a New
Zealand White, sometime during the late spring. (He's the one
in the picture to the right relaxing on a bottle of ice water during
our summer heat.) He was a young male that was purchased from a
local feed store and was the only meat rabbit they had left.
While we were searching out other available rabbits in the local area,
our new neighbors who had just moved in offered us a pair of New
Zealand Whites. The rabbits were apparently a gift for their son
but they weren't too keen on keeping them around. The rabbits
were both a bit older than our first rabbit, and I'd estimate they had
a full 6-8 weeks in age on our young buck. This turn of events is
how we ended up with two males and one female. Obviously not the
ideal mix of male-to-female ratio, but hey... two of them were
free.
When we discussed breeding,
we considered the possibility that the free pair from our neighbors
were likely closely related and possibly siblings. Some
literature Dawn read from the library actually encourages inbreeding of
rabbits, but that seems so counter to everything we have learned in the
past that we will likely shy away from that. So, we decided we'd
breed the storebought male with the donated female. Later we'll
find another female (possibly a Californian) to breed with our other
male. That will give us a 50/50 mix and two breeding pairs.
 Sometime in the last month or two our
purchased male finally reached maturity, so the question became when
did we want to breed them and have our first litter arrive?
Ideally, we'd have the arrival timed when we are both around. I
travel a bit for work, and we didn't want to time it for when I'd be
gone. Also, we wouldn't want to time it during potential holidays
or vacation time (like our recent NC & VA trip when we visited
Anna & Mark). So, this past weekend ended up
being the "big date" for our rabbit pair, constrained by our schedules.
Sometime in the last month or two our
purchased male finally reached maturity, so the question became when
did we want to breed them and have our first litter arrive?
Ideally, we'd have the arrival timed when we are both around. I
travel a bit for work, and we didn't want to time it for when I'd be
gone. Also, we wouldn't want to time it during potential holidays
or vacation time (like our recent NC & VA trip when we visited
Anna & Mark). So, this past weekend ended up
being the "big date" for our rabbit pair, constrained by our schedules.
If all goes well, our doe will have a litter sometime around December
10th. I'm hoping that the entire process will be uneventful and
require little from us other than providing some bedding and cleaning
of the hutch. Cold weather might be a concern, but we'll see how
it goes. Winters are typically pretty mild around here and if we
have to we can insulate or heat the hutch. If we're lucky, the
weather will be fine and temperature will not be a concern.
 The process of breeding was
fairly uneventful. We rounded up the female, removed the box from
the male's hutch so that there'd be more room, and then placed the
female on his side. Generally, the female should always be
brought to the male. The other way around apparently can turn
violent as the female will often defend her turf.
The process of breeding was
fairly uneventful. We rounded up the female, removed the box from
the male's hutch so that there'd be more room, and then placed the
female on his side. Generally, the female should always be
brought to the male. The other way around apparently can turn
violent as the female will often defend her turf.
Female rabbits are reflexive ovulators and some of the reading that
Dawn has done suggests that they should be bred multiple times in the
course of a day or two. We tried this, but "date #2" didn't go as
well as the first time around. She wasn't having any of it the
second day, so we will see if this was a successful pairing or
not. When we first placed the female in the male's hutch, there
was a bit of chasing, but there was no fighting. We were a bit
concerned about whether or not there would be a battle but they seemed
to be pretty well behaved as they did what comes naturally.
One thing we will have to do
to prepare over the next couple of weeks is to modify the nesting box
so that it has a hinged top allowing access to the litter. Dawn
is the expert here as she's done all the reading on the topic.
She's also the one who built the boxes for our rabbits and probably
will be the one to modify the female's nesting box.
 We'll need to decide quickly what
kind of nesting material we will place in the hutch. There are
several options; some are readily available materials (hay, grass,
leaves), while others are available commercially (bagged cellulose,
etc.) The literature claims that when she is preparing to have a
litter, the doe will use available nesting material and combine that
with fur which she pulls out of her coat. When cleaning the
netsting box they say to change the hay (or other material) and put the
fur back with new nesting material.
We'll need to decide quickly what
kind of nesting material we will place in the hutch. There are
several options; some are readily available materials (hay, grass,
leaves), while others are available commercially (bagged cellulose,
etc.) The literature claims that when she is preparing to have a
litter, the doe will use available nesting material and combine that
with fur which she pulls out of her coat. When cleaning the
netsting box they say to change the hay (or other material) and put the
fur back with new nesting material.
 I'm sure we'll make some
discoveries along the way and will learn in the process. With any
luck, we'll have some cute bunny pictures to share soon. We've
just got to stay unattached to the cute fuzzballs so that we cannot
feel bad when it comes time to put them in the oven!
I'm sure we'll make some
discoveries along the way and will learn in the process. With any
luck, we'll have some cute bunny pictures to share soon. We've
just got to stay unattached to the cute fuzzballs so that we cannot
feel bad when it comes time to put them in the oven!
Shannon and Dawn
will be sharing their experiences with raising meat rabbits on Tuesday
afternoons. They homestead on three acres in Louisiana when time
off from life and working as a sys admin permits.