
archives for 10/2012
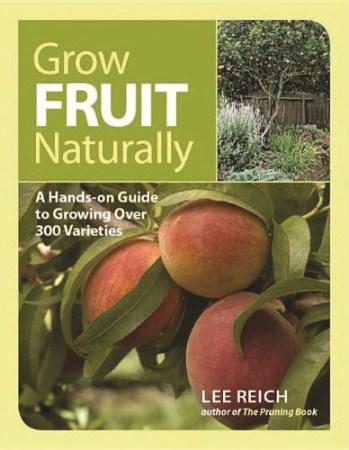 Grow
Fruit Naturally
by Lee Reich is a good starter book for those interested in growing
organic fruit, and will definitely be a handy reference to keep on my
bookshelf for the next few years. It's actually quite similar to
the same author's The Pruning
Book, both in pros
and cons.
Grow
Fruit Naturally
by Lee Reich is a good starter book for those interested in growing
organic fruit, and will definitely be a handy reference to keep on my
bookshelf for the next few years. It's actually quite similar to
the same author's The Pruning
Book, both in pros
and cons.
On the positive side, Growing
Fruit Naturally
is linear and hits all of the salient points concisely. On the
negative side, despite the title, the book really covers only
mainstream organic methods, not the cutting edge permaculture
techniques of nurturing full-ecosystem health that you'll find in The
Holistic Orchard.
In the end, I recommend
the book for beginners, and for intermediate fruit-growers like myself
who still need a reminder every year before they prune their
grapes. On the other hand, if you've been orcharding for a
decade, you might want to give this book a pass.
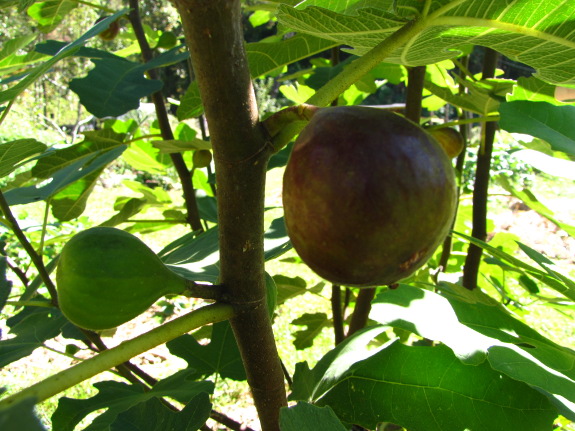
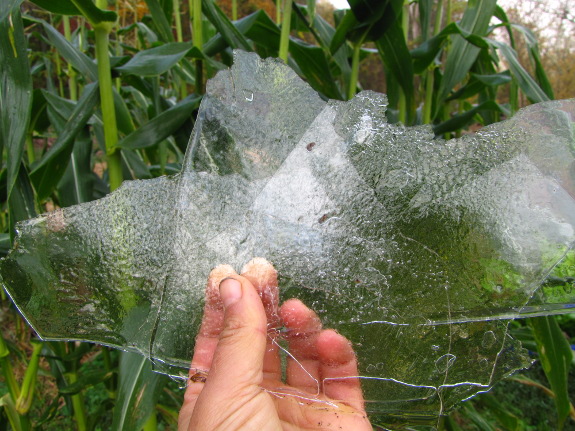
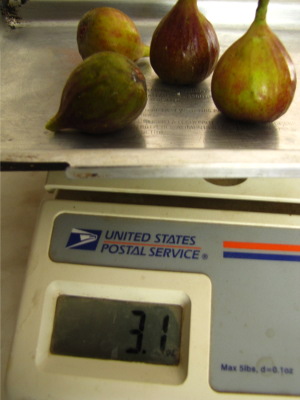 Once
a week, all through September, I've dreamed about figs. Black
ones, brown ones, plump and enticing, and always just out of reach.
Once
a week, all through September, I've dreamed about figs. Black
ones, brown ones, plump and enticing, and always just out of reach.
The source of my
obsession: our Chicago
Hardy fig has been
ripening up about a fig a day. I wait until we have three to
five, then cut them in half and roast them the easiest way possible ---
in the toaster oven under the highest heat until the juices puddle on
the tray and hit hard ball candy stage.
I've read that a mature
fig tree will bear thirty pounds of fruit per year, but I find that
hard to believe. At twenty figs to a pound, we'd have to multiply
our yields by 15 to become average. Even though older trees bear
more, here at the cold hardiness limit of the fig range, I can't expect
my tree to grow to true fig size.
While I yearn for figs
in my sleep, Mark gets practical. Having cleared the gully of
brambles this summer, he envisions that prime planting ground turning
into a fig paradise. One day, he brings Celeste home to begin Figlandia.
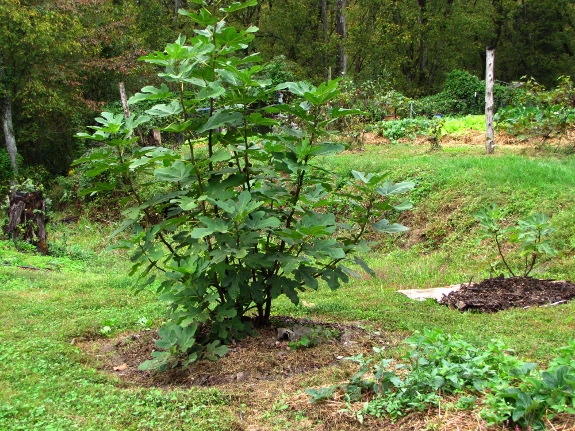
Meanwhile, I've started
a kill mulch at the shady end of the front garden to create a perennial
propagation bed. Brian has offered to trade scionwood with me, so
I'll be trying to root hardwood cuttings this winter and soon we'll be
trying some more varieties.
This post is your
warning --- you'll probably be hearing far more than you'd want about
figs for the next little while (especially this week at lunchtime). I can't help it. Figs
appear to be the fruits of my dreams.
| This post is part of our Fig lunchtime series.
Read all of the entries: |
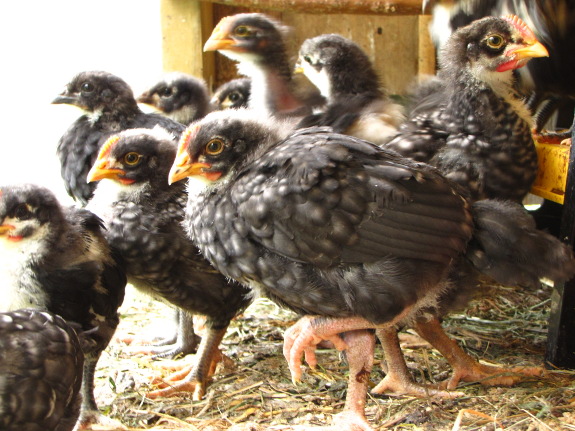
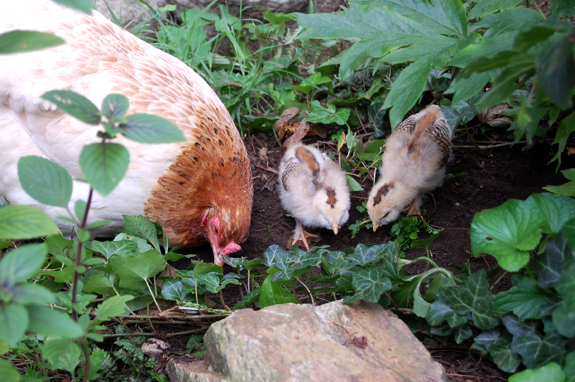
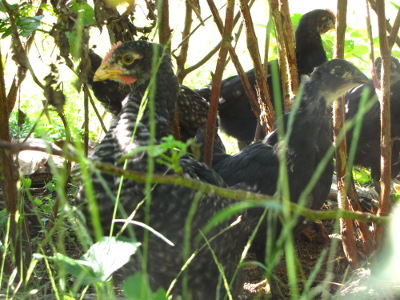
It seems like our chicks get
more aggressive with their foraging right after it rains.
Maybe bugs are easier to find
or they feel extra hungry after waiting for the rain to stop. Either
way adds up to some quality entertainment on a rainy Monday.
A cold, rainy day
enticed me to break through one of my mental blocks and go visit with
our fans on facebook.
I'd been meaning to run
a no-holds-barred chicken photo contest, and this seemed like the way
to do it. A cool app makes it possible for anyone to
upload images and vote on the results --- you just have to become
a fan of Avian Aqua Miser first.
The photo deadline is
next Monday and voting ends a week from Friday. The winner gets a
free chicken waterer. (More details on the
contest page.)
Even if you don't have
chickens, you'll probably enjoy perusing the entries and voting on your
favorite. And if you need another rainy day activity, I've set Weekend
Homesteader: January (which includes an introduction to chickens,
along with bread baking, soil testing, and emergency lighting) free on
Amazon today. Happy October!
 There seem to be a couple of
different lines of thought on how to best feed pets and
livestock. For many years I have not followed what seems to
be the popular wisdom and have had good results as far as I can
tell. The competing schools of thought seem to be:
There seem to be a couple of
different lines of thought on how to best feed pets and
livestock. For many years I have not followed what seems to
be the popular wisdom and have had good results as far as I can
tell. The competing schools of thought seem to be:
- Measure/meter the amount of food and dispense it at regular feeding times
- Keep food available at all times, and let the animal feed when hungry
We have been following the
second school of thought with the rabbits, and as far as we can tell,
it's working just fine. I have 4 and 10 year old Labradors who
have been on that method all their life and they haven't had any
problems with overeating or weight. My opinion (and it's just an
opinion based on my own observations) is that if ample food is always
available, the animals get used to that and then don't try to gorge
themselves when food is made available. I generally make an
entire 50 lb sack available to my labs in a plastic bin. When it
gets low, I buy another sack.
Dawn found that the other
school of thought is discussed a bit in the literature she read.
They also suggested feeding at evening time. The idea behind this
seems to be that most wild rabbits feed nocturnally, perhaps mostly due
to predation. I'm not sure how relevant a wild rabbit's behavior
is to a completely domesticated rabbit, but that seems to be the
conventional wisdom from some sources.
Dawn recently started
measuring how much feed our rabbits are consuming. As we were
getting started, we didn't keep track very well. We just filled
the feeders
and let them go. Our results for the first measured week with
feeders constantly full (by volume, we'll get some weights later):
- Doe: 11 cups of feed consumption per week
- Bucks: 8 cups of feed consumption per week
The doe does seem to be
packing on more weight than the bucks, but the does seem to be heavier
for most breeds according to the reference material we've looked
at. Our purchased buck is just reaching maturity, while our
donated buck and doe have several weeks head start and have been mature
for a couple of weeks now. We don't have numbers on how much feed
the rabbits consume while young and growing, but plan to get that once
we have a litter. As we go along, we'll start keeping better
track of how much feed they consume from "birth to oven".
Along with our initial
experience with our first buck using his food dish as a litter box,
Dawn has observed that it helps to keep the feeder suspended off the
cage bottom. If it is kept raised a few inches from the cage
floor, it helps prevent them from soiling the feed. I'm not sure
why rabbits seem to defecate in their food source, but they seem to do
it quite readily. At first I thought maybe they were just
depositing cecal pellets there, but it doesn't
seem to be so. Dawn has also suggested that keeping the feeder on
the inner walls of the cage keeps rain and dew from dampening the food,
thereby preventing waste.
As for supplementing store
bought feed, we have been feeding them some purchased timothy hay as it
is recemmended for proper nutrition in most of the references we have
found (and my local vet made just this one recommendation when
asked). We have also been feeding them regular doses of fresh
grass from the yard (mostly bahia grass) which they really seem to
enjoy. When allowed to graze in the yard, they seem to really go
for the clover. They also absolutely love eating fresh oak
leaves. I'm not sure it's too healthy for them (I haven't seen it
come up on any toxic plant lists) but they will instantly devour any
fresh oak leaves or twigs we give them.
We plan to experiment with
different amounts of grass and forage as feed and try to keep track of
how much it reduces their dependence on traditional rabbit
pellets. We also would like to try a portable "rabbit tractor"
where they can forage within a pen. I'm not sure how well this
will work out, but it is something we intend to try. It will be
interesting trying to build a rabbit proof portable pen that can be
wheeled around to the most tasty forage in the yard.
Along with regular feeding,
it's also important to provide sticks, twigs, etc. for them to chew
on. It's important for proper dental maintenance, but it also
gives the rabbit something to play with; they can be surprisingly
playful and inquisitive. They seem to eat greener twigs pretty
quickly, but dried twigs and branches are better for them to maintain
their teeth. Just be careful not to provide a branch that could
be toxic. Walnut and a few fruit tree branches can be toxic,
along with others.
All in all, we've just been
having fun learning as we go and completely understand that we are
amateurs at this so far. As time goes on, we'll get a better feel
for what works and what doesn't. We're looking forward to
learning all about breeding them since we believe our doe has reached
maturity. Most of all, this has been an enjoyable learning
experience that we hope will provide some meat for the table and
perhaps a measure of self sufficiency.
Shannon and Dawn
will be sharing their experiences with raising meat rabbits on Tuesday
afternoons. They homestead on three acres in Louisiana when time off
from life and working as a sys admin permits.

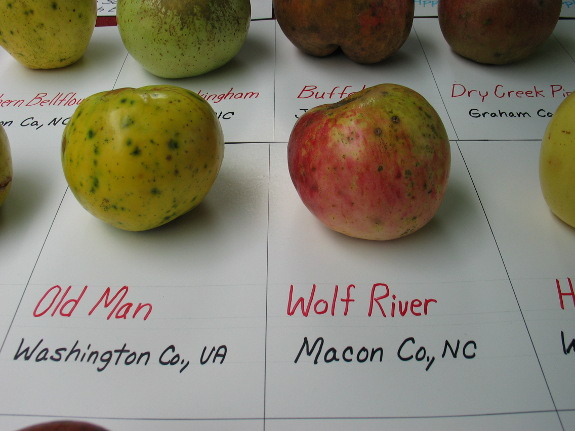
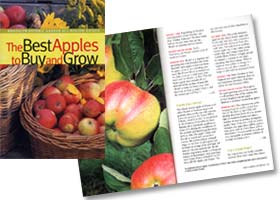 The
Best Apples to Buy and Grow is one of those small,
beautifully illustrated books that clearly can't find room within its
pages to tell the reader everything. But, in this case at least,
it does a great job providing depth in its niche --- helping readers
choose from among the 1,513 apple varieties currently available
commercially in the U.S.
The
Best Apples to Buy and Grow is one of those small,
beautifully illustrated books that clearly can't find room within its
pages to tell the reader everything. But, in this case at least,
it does a great job providing depth in its niche --- helping readers
choose from among the 1,513 apple varieties currently available
commercially in the U.S.
Half of the book
introduces the top variety choices of four apple experts, summarized by
the Brooklyn Botanic Garden. By picking the brains of well-known
pomologists from around the U.S. (Virginia, New York, Arkansas, and
Oregon), the book's "60 Great Apples" are likely to steer most readers
toward locally adapted varieties. (I'll make a later post with
the types of apples that piqued my fancy from this and the other
orchard books I've been perusing lately.)
The other half of the
book consists of basic information you could find in many other
sources, but some tidbits did stand out. Several apple varieties
tend to lose points among modern growers for a tendency toward biennial
bearing (having a huge crop one year then taking the second year off),
but the authors point out that this can be a good pest resistance
strategy. The grafting section also included some simple good
advice --- cut scionwood in January or February, graft in February or
March, and set out the new trees after the last freeze. (I'll be
marking my calendar for this winter's experiments.)
All told, The
Best Apples to Buy and Grow is a fun read, and I highly
recommend hunting it down in your local library. I'll be
returning my copy to its original owner, though --- a few pages of
notes summed up all of the useful information I'll need to remember.
The first chapter of
Phillips' The Holistic Orchard introduces the author's
philosophy of creating a healthy ecosystem holistically rather than
fighting to mask the symptoms with allopathic treatments (such as using
organic, but still harmful, sprays). His goal, he writes is "not
so much to destroy problems as to create health."
So, how do you start an
orchard so healthy it can be maintained with simple mulching and foliar
sprays of fish oil? First, you need to realize that fruit trees
and berry bushes thrive in a forest edge habitat, where the soil is
dominated by fungi
over bacteria at a ratio of roughly 10:1.
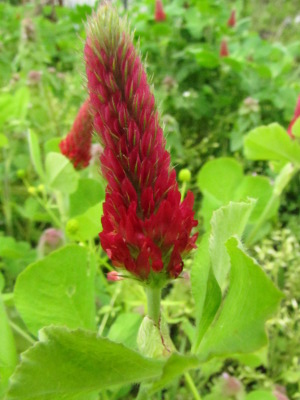 To get there, Phillips first
tills, then plants a cover crop of red or crimson clover. These two species
have an affinity for mycorrhizal fungi, which will stand the trees in
good stead a year later when they finally grace the soil.
To get there, Phillips first
tills, then plants a cover crop of red or crimson clover. These two species
have an affinity for mycorrhizal fungi, which will stand the trees in
good stead a year later when they finally grace the soil.
Phillips' cover crops go
into the ground in the fall, and they grow for a solid year before
being scythed and allowed to rot on the soil surface over the second
winter. Organic matter added to the earth from the top down is a
great way to promote beneficial soil fungi, so you definitely don't
want to till the clovers in.
Since clover is
perennial, you'll either need to fork out the roots come spring number
two, or lay down a kill mulch (cardboard topped by wood chips) the
autumn before. Either way, Phillips recommends preparing a circle
of vegetatation-free soil about four to six feet in diameter for each
future fruit tree.
Once the trees are in
place, mulch is key. Phillips swears by ramial wood chips, which
come from deciduous twigs and branches less than 2.5 inches in
diameter, meaning that the C:N ratio is quite low (30:1). For
those of us who can't be as discerning, I think it's nearly as good to
just let any kind of deciduous wood chips rot for a couple of years
before using.
 Haphazard
mulching is handy to
keeping the diversity of soil life high, so Phillips lays down heavy
mulches on only one side of the tree each year, using spoiled hay and
straw in spots around producing trees for even more diversity.
Right up against the trunk, a three to four inch deep layer of pea
stone extending a foot or so out from the tree in all directions keeps
the young trees dry.
Haphazard
mulching is handy to
keeping the diversity of soil life high, so Phillips lays down heavy
mulches on only one side of the tree each year, using spoiled hay and
straw in spots around producing trees for even more diversity.
Right up against the trunk, a three to four inch deep layer of pea
stone extending a foot or so out from the tree in all directions keeps
the young trees dry.
I'm ashamed to say that
I've never been able to think a year or two in advance to fully prepare
the soil for perennials using cover crops, but this first chapter of The
Holistic Orchard
has inspired me to try prepping areas I want to house perennials in
2014. I think I'll tweak Phillips' technique a bit, though, since
I'm working on a backyard scale rather than running a commercial
orchard --- kill mulches always trump tilling in my book. But
since I'm starting in the fall, that means I won't be able to plant
until the spring, so I'll probably run back
to back buckwheat cover crops, then either put in my perennials in
fall of 2013 or plant clover then to give the soil another year of
fertility building.
 I'm curious to hear from
others. How have you prepped the soil for fruit trees, and did
your technique bear fruit? Are you a believer in simply replacing
chemical sprays with organic alternatives that do the same thing, or do
you try to garden holistically?
I'm curious to hear from
others. How have you prepped the soil for fruit trees, and did
your technique bear fruit? Are you a believer in simply replacing
chemical sprays with organic alternatives that do the same thing, or do
you try to garden holistically?
We'll be discussing
chapter two next Wednesday, and I have to admit I've read ahead and
find that section equally inspiring. I hope you'll join the book
club and read along!
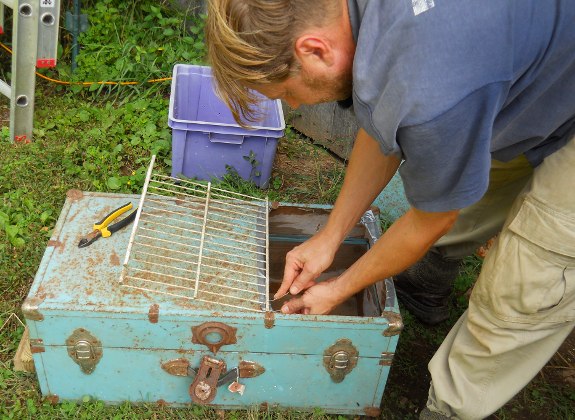
Anna heard about an upcoming
animal swap and we realized our chicken carrier cage is nowhere to be
found.
It only took a few minutes to
cut an opening in this metal foot locker.
We don't have any livestock
to trade, but we have high hopes of bringing home one or two laying
hens so we can get more eggs this winter.
One of the reasons I'm
excited to experiment with a high
density apple planting
is because it will allow me to try out more varieties. When
grafted onto standard or semistandard  rootstocks, apples require a
lot of space, and I only have room for four in our forest garden.
Being able to test several more varieties to see how they handle our
microclimate and disease pressure will be very valuable (and tasty).
rootstocks, apples require a
lot of space, and I only have room for four in our forest garden.
Being able to test several more varieties to see how they handle our
microclimate and disease pressure will be very valuable (and tasty).
On the other hand, I've
learned the hard way that it's not even worth trying apple varieties on
our homestead if they aren't resistant to cedar
apple rust.
Your neck of the woods may have its own apple Achilles heel, but the
following varieties went onto my short list due to their disease
resistance for my area:
| Variety |
Scab |
Cedar apple
rust |
Mildew |
Fire blight |
Ripens |
Notes |
| Akane |
Dessert, cooking, or drying;
precocious; broad disease resistance |
|||||
| Arkansas Black |
Resistant (or susceptible) |
Resistant |
Resistant |
Resistant |
Late fall |
Storage apple; best
cooked; blooms avoids frost |
| Arlet |
August to September |
Disease tolerant in humid
climates |
||||
| Ashmead's Kernel |
October |
Dessert; stores until March;
relatively disease tolerant |
||||
| Baldwin |
Susceptible |
Very resistant |
September to October |
Good for dessert, cooking, or
cider; stores well; needs pollinator; biennial |
||
| Belle de Boskoop |
Resistant |
Resistant |
Resistant |
Resistant |
September |
Dessert or cooking; needs
pollinator |
| Black Limbertwig |
Resistant |
Resistant |
Resistant |
Resistant |
October |
Dessert, cider, and cooking |
| Bramley Seedling |
Immune |
Resistant |
Resistant |
Susceptible |
October to November |
Cooking or cider; blooms avoid
frost; needs pollinator; stores well |
| Chestnut Crabapple |
Small but sweet; disease
resistant |
|||||
| Duchess of Oldenburg |
Resistant |
Resistant |
Somewhat resistant |
Somewhat resistant |
Precocious; best for cooking |
|
| Empire |
Susceptible |
More resistant |
More resistant |
More resistant |
October |
Good for dessert or cider; keeps
3 to 5 months |
| Enterprise |
Immune |
More resistant |
More resistant |
Most resistant |
September to October |
Dessert; stores up to 6 months;
blooms avoid frost |
| Fireside |
Susceptible |
Resistant |
? |
Susceptible |
September |
Dessert |
| Florina |
Most resistant |
More resistant |
Somewhat resistant |
Somewhat resistant |
October |
|
| Freedom |
Immune |
Immune |
Resistant |
Resistant |
October |
Stores until January; all-purpose |
| Grime's Golden |
? |
Resistant |
? |
Resistant |
September to October |
All-purpose; stores until January;
best flavor in Mid-Atlantic |
| Hardy Cumberland |
Resistant |
October |
Good in southern Appalachians;
stores well |
|||
| Hudson's Golden Gem |
Resistant |
Resistant |
Resistant |
Resistant |
September |
Tastes like Bosc pears; good for
dessert, cooking, or cider |
| Jonathan |
Resistant |
Resistant |
Susceptible |
October |
Dessert, cooking, and cider;
poor keeper |
|
| Keepsake |
? |
Resistant |
? |
Resistant |
October |
Dessert; good keeper; slow to
bear |
| Kidd's Orange Red |
Resistant |
Resistant |
Resistant |
September to October |
Good flavor of Cox's Orange
Pippin, but less temperamental; precocious |
|
| King David |
Resistant |
Resistant |
Resistant |
Moderately susceptible or
resistant |
October to November |
Dessert, cooking, or cider;
stores well; tolerant of abuse; blooms miss frosts; precocious |
| Liberty |
Immune |
Most resistant |
Somewhat resistant |
Somewhat resistant |
September to October |
Dessert and cooking; doesn't
store well; precocious |
| Lodi |
Resistant |
Resistant |
Resistant |
Moderately susceptible |
June to July |
Better keeper than Yellow
Transparent but not quite as tasty; cooking; needs pollinator |
| Mammoth Black Twig |
Resistant or susceptible |
Resistant |
Resistant |
Resistant |
October |
Dessert, cooking, drying, or
cider; stores until April; blooms miss frosts |
| Myers Royal Limbertwig |
Resistant |
Resistant |
Resistant |
Resistant |
Dessert or cider |
|
| Nova Easygro |
Most resistant |
? |
Susceptible |
Somewhat resistant |
September |
|
| Novamac |
Most resistant |
More resistant |
Somewhat resistant |
Somewhat resistant |
September |
|
| Pixie Crunch |
Most resistant |
? |
Somewhat resistant |
Somewhat resistant |
August |
Stores for 2 months |
| Priscilla |
Immune |
Resistant |
Resistant |
Resistant |
September |
Stores 2 to 3 months; easy to
grow |
| Pristine |
Immune |
Somewhat resistant or somewhat
susceptible |
More resistant |
Somewhat resistant or susceptible |
July to August |
Dessert or cooking |
| Ralls Genet |
Resistant |
Resistant |
Resistant |
Resistant |
Late |
Blooms miss frosts |
| Redfree |
Immune |
Immune |
More resistant |
More resistant |
July to August |
Stores up to two months |
| Red Limbertwig |
Resistant |
Resistant |
Resistant |
Resistant |
All-purpose; good keeper |
|
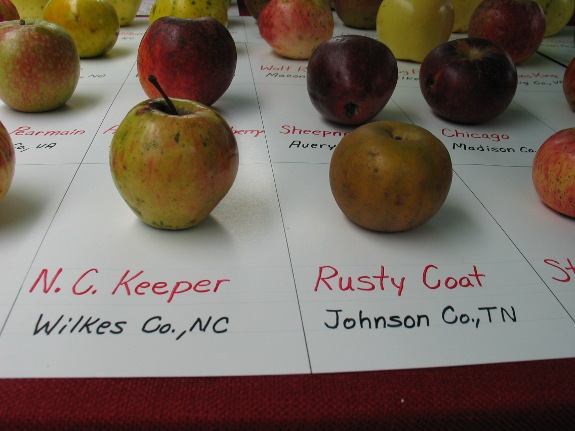
| Rustycoat |
Resistant |
Resistant |
Resistant |
Resistant |
Fall |
Tastes like Asian pear |
| Sansa |
Immune |
? |
Resistant |
Resistant |
August |
Dessert, cooking, or cider |
| Summer Rambo |
Somewhat resistant |
Somewhat resistant |
Somewhat resistant |
Somewhat resistant |
July to August |
Dessert or cooking; dependable;
needs pollinator |
| Sundance |
Most resistant |
More resistant |
Somewhat resistant |
Somewhat resistant |
September |
Stores up to 6 months |
| Sweet Sixteen |
Resistant |
Resistant |
Somewhat resistant |
Resistant |
September to October |
Not as tasty in hot summer
areas; blooms avoid frosts; biennial if not thinned; dessert and cooking |
| William's Pride |
Immune |
Immune |
More resistant |
More resistant |
July to August |
Dessert or cooking; keeps 1
month; best in northern gardens |
| Winesap |
Susceptible |
Resistant |
Susceptible |
Resistant |
October |
Stores up to 6 months; needs
pollinator; dessert or cooking |
| Yates |
Resistant |
Resistant |
Somewhat resistant |
Resistant |
Late |
Good keeper; cider |
| Yellow Transparent |
Resistant |
Resistant |
Susceptible |
Susceptible |
June to July |
Earliest apple; dessert or
cooking; doesn't store; bears young; susceptible to late frosts |
The data for my table came from The Holistic Orchard, Grow Fruit Naturally, The Best Apples to Buy and Grow, and our favorite local apple nursery's website. The astute reader will notice that heirloom varieties (like Yellow Transparent, an old Russian apple) are mixed together with modern inventions (like Sweet Sixteen, barely older than I am). The heirloom varieties developed the hard way, standing out amid seedling apples that perished
 when not cared for, while the
more recent apples have been bred with scientific knowlege of
disease-resistant genes. In the end, it doesn't really matter
where the resistance comes from, and I decided to try some out of each
category.
when not cared for, while the
more recent apples have been bred with scientific knowlege of
disease-resistant genes. In the end, it doesn't really matter
where the resistance comes from, and I decided to try some out of each
category.Of course, I also wanted to spread my harvest out throughout the year, so I ended up choosing Yellow Transparent and Pristine as early apples, Zestar (not resistant, but we wanted to try it anyway), Summer Rambo, and Sweet Sixteen for early fall, and Enterprise, Empire, Grimes Golden, and Mammoth Black Twig as late apples/keepers. In a few years, I'll probably learn that some of those apples thrive in our climate while others are losers. Then it'll be time to cut out the bad trees and go back to the drawing board to experiment with some other disease-resistant apples.
When we started thinking
about expanding our
fig planting, I
decided to do some research on figs that can grow here in zone 6 (and
even for those of you in zone 5). I'll write a later post about
frost protection; for now, I want to talk about selecting varieties
that can handle the cold best.
Before you start
thinking about frost hardy figs, though, you need to understand that
young figs of any variety are more sensitive to cold winters than
larger figs are. Depending on who you talk to, figs less than two
to five years old are likely to die back to the ground regardless of
your efforts. In addition, wet feet over the winter make a fig
more likely to 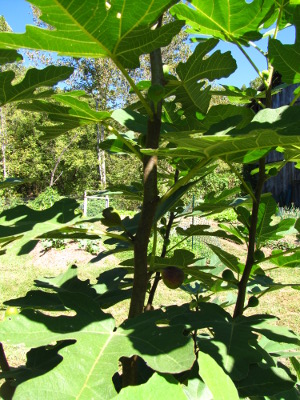 perish.
So, don't lose heart if you've planted a supposedly hardy variety and
it spends its first few years dying back and producing little fruit ---
the tree might grow out of it, especially if you provide better soil
drainage.
perish.
So, don't lose heart if you've planted a supposedly hardy variety and
it spends its first few years dying back and producing little fruit ---
the tree might grow out of it, especially if you provide better soil
drainage.
Okay, so which figs are
likely to achieve hardiness? As I searched the internet, I
discovered that fig aficionados talk about varieties you're unlikely to
find in most nurseries. In fact, you might have to join one of
the fig forums and beg for cuttings if you want to try these heirlooms.
The good news is that
fig lovers have also put a lot of effort into testing the cold
hardiness of their varieties, in one case setting out over a hundred
types of figs and letting the plants deal with a cold winter to see
which few survived. Sal (Gene strain), Marseilles vs Black, Blue
Celeste, and Hardy
Chicago were the
winners in that experiment, which had a winter low of 0 F.
Another fig grower reports that Hardy Hartford is his most cold hardy
variety, surviving -4 Fahrenheit with no winter protection.
During a winter that only got down to 10 F, the following varieties
were added to the cold hardy list:
- Florea
- Gino
- English Brown Turkey (aka Eastern Brown Turkey)
- Sweet Georg
- Adriana
- Tiny Celeste
- UCD Celeste
- 143-36
- Paradiso White (Gene Hosey strain)
- Archipel
- Lindhurst Wht
- Jurupa
Yet other sources add
the following figs to the cold hardy list:
- Brooklyn White
- Violetta
- Hanc Mathies English Brown Turkey
- LaRadek's English Brown Turkey
- Sal's EL
- Dark Portuguese
- Paradiso
- Alma
- LSU Gold
Another factor to
consider in addition to sheer cold hardiness is the fruiting nature of
the variety in question. Figs produce two crops: the breba crop
early in the season on last year's wood, and the main crop later on new
growth. We chose Chicago Hardy (aka Hardy Chicago) because it
will produce a large main crop even if it freezes to the ground during
the winter, but I'm starting to realize that a main crop that ripens in
September is never going to produce as much fruit as a fig that can
give us an especially early breba crop as well. Some sources say
that Celeste (aka Malta, Celestial, Conant, Sugar Fig, and Tennessee
Mountain Fig) can produce a heavy crop as early as June, as long as
prune sparingly and use frost protection. Stay tuned for
tomorrow's post about protecting figs over cold winters.
| This post is part of our Fig lunchtime series.
Read all of the entries: |
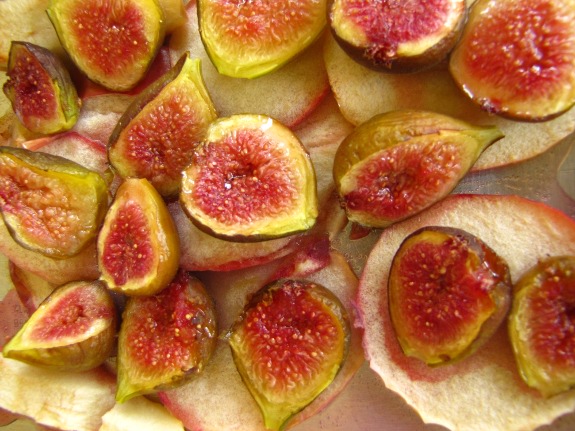
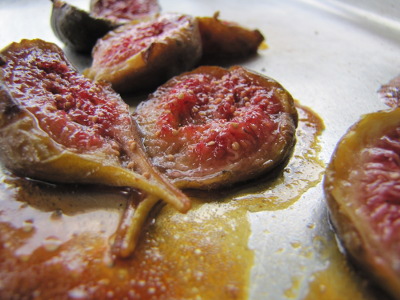
There's a problem with eating
roasted figs.
Some of the precious juice
drips down onto the toaster oven tray and gets caramelized.
Apple slices underneath can
be a delicious soaking platform while making the clean up 10 times
easier.
I've been making a lot
of posts about what's in my head rather than what's on the farm because
my outside chores for October consist of weeding
and mulching the vegetable garden to prepare it for winter. A blow by blow would
be pretty boring.
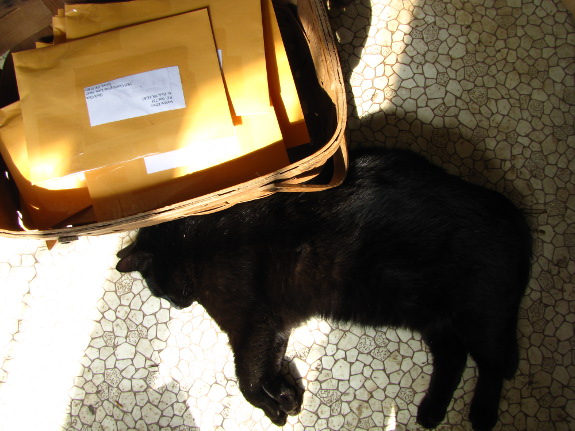
But I didn't want you to
think I spent all week napping in the sun. Huckleberry does that
for us.
In addition to giving me
lots of meditation time to dream up new ideas, I enjoy autumn hours
spent weeding because they let me watch the fall colors change from day
to day on the trees...
...and on my plate.
I had a great shot of my
clothesline fall colors too, but I decided it was just too risque for
public consumption --- my underwear took up about 500 square
pixels. You'll just have to imagine the blue-gray trailer, the
peach leaves beginning to drop, my rainbow-striped towel fluttering on
the line, and a stray walnut leaf spinning through the air.
I think this is shaping
up to be my favorite autumn ever.
 The
best way to push your hardiness boundaries is to provide tender
perennials like figs with a warm and dry microclimate. One grower
I know planted
his fig right under the dryer exhaust vent, with very good results, and
others recommend locating your fig on the southern side of a
house. Stone patios can grab the heat from the winter sun and
radiate it back out at night, and presumably locating a fig near a
large body of water would serve the same purpose.
The
best way to push your hardiness boundaries is to provide tender
perennials like figs with a warm and dry microclimate. One grower
I know planted
his fig right under the dryer exhaust vent, with very good results, and
others recommend locating your fig on the southern side of a
house. Stone patios can grab the heat from the winter sun and
radiate it back out at night, and presumably locating a fig near a
large body of water would serve the same purpose.
If you dry your clothes
on the line and don't have a patio, you can still get figs through zone
6 winters with a little extra effort. One option consists of
cutting the roots on one side of the tree with a shovel to allow you to
bend the whole tree down flush with the earth. You can either dig
a trench and bury the branches underground, or simply top them with
bales of straw.
 The alternative we've used
involves autumn
leaves insulating the aboveground growth of the fig. My method worked
okay, but the leaves got beaten down by rain and snow, and any branches
that ended up exposed died back. This winter, I'll probably take
the advice of more experienced fig growers and tie the limbs together,
pack in leaves, then wrap the leafy insulation with a tarp or other
waterproof layer.
The alternative we've used
involves autumn
leaves insulating the aboveground growth of the fig. My method worked
okay, but the leaves got beaten down by rain and snow, and any branches
that ended up exposed died back. This winter, I'll probably take
the advice of more experienced fig growers and tie the limbs together,
pack in leaves, then wrap the leafy insulation with a tarp or other
waterproof layer.
A final option,
especially handy for those in the extreme north, is to treat your fig
as a potted plant. The fig can spend the summer outdoors, then
once it drops its leaves (usually after a light frost), you take the
plant inside to a cool basement or root cellar. Alternatively, if
you've got a warm, sunny window that's not already full of dwarf citrus, you can keep a potted fig
growing all winter by bringing it in before cold weather hits.
I'd be curious to hear
from those of you north of zone 7 who have had good luck growing
figs. Which varieties did you choose and how do
you get them through the winter? What kind of yields have you
seen?
| This post is part of our Fig lunchtime series.
Read all of the entries: |

We finally decided to give up
on these grapes today.
The fruit was okay, but
without spraying the yields are very low.
Spraying would be smelly,
expensive, and leak into the surrounding soil, an option we never
considered because we love our dirt. We instead ordered a Mars Seedless
that's been growing nicely for about a year now and should be disease
resistant enough for this area.
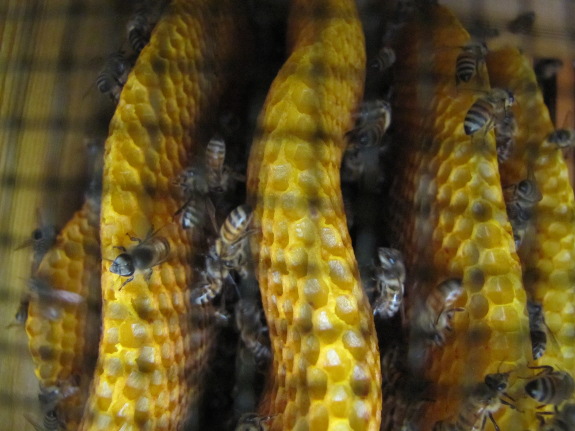
When I peeked up under
the hive this week, I was hoping to see the third box full of capped
honey. Instead, it looked like the bees hadn't drawn any extra
comb, and the comb that existed was pretty much empty.
 With
the wingstem
nectar flow over,
the bees are reduced to scrounging through the asters and everbearing
raspberry flowers, so I decided to try again and see if they would take
sugar water now.
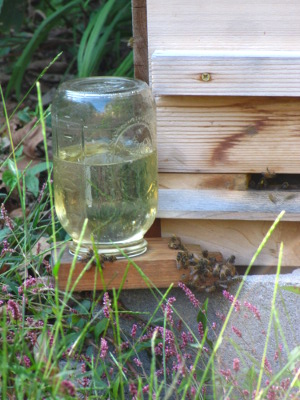
With
the wingstem
nectar flow over,
the bees are reduced to scrounging through the asters and everbearing
raspberry flowers, so I decided to try again and see if they would take
sugar water now.
"I don't mind if I do,"
said the bees, gulping down a pint in seven hours.
What I'm not sure about
is how much honey is in the hive at the moment. I estimated the
bees had packed away 26 pounds (one hive body full) when I did a thorough
inspection in early
September, and the third hive body looks exactly the same now as it did
then.
If the hive only has 26
pounds of honey in it, I'd need to pour 10 quarts of sugar water down
the bees' gullets before weather gets too cold for them to dehydrate
the nectar into sugar --- a tall order.
On the other hand, it's
quite possible that the bees have simply been moving honey into the
upper boxes as they slow down brood production, in which case I don't
need to feed as much. Since I can't tell the difference without
opening the hive, I'll just keep feeding as long as the bees keep
eating.
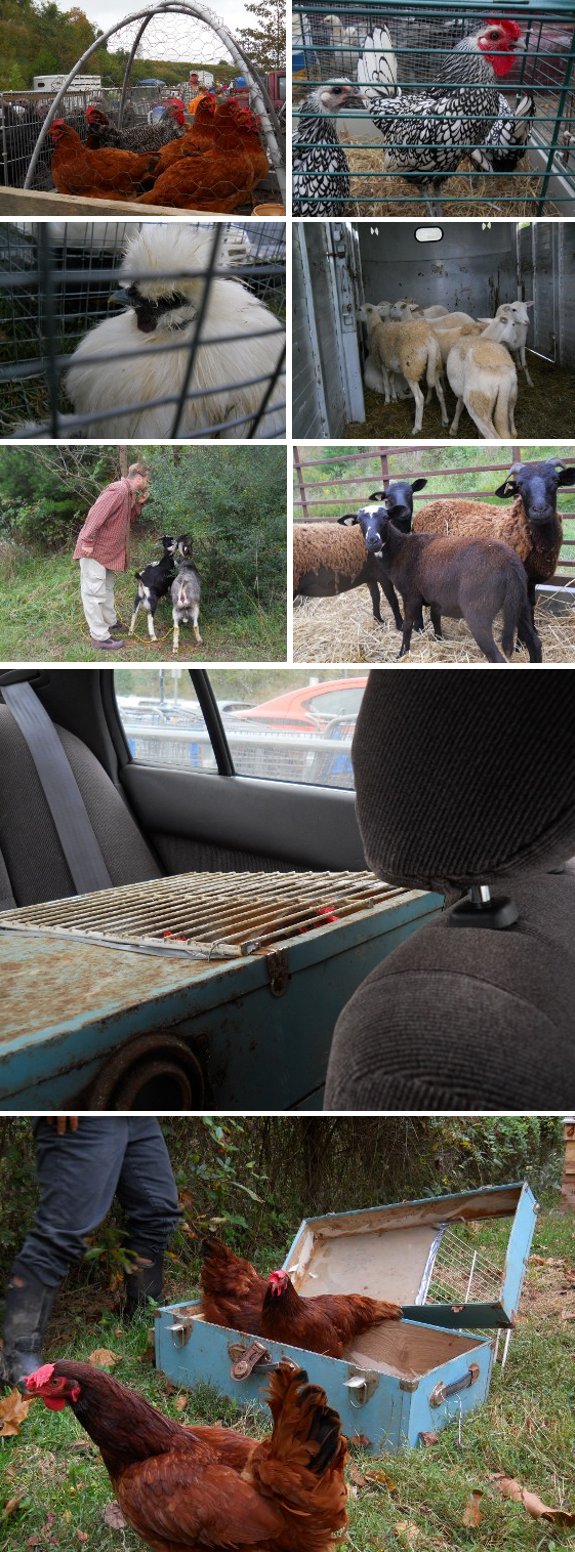
The Tractor Supply animal
swap had an impressive selection of livestock.
We ended up trading an Avian Aqua Miser plus 25
dollars for the above trio of Rhode Island Red hens.
Two full sized turkeys were
going for 50 dollars and someone had 3 dollar hens.
I'd say it was 10 times more fun than if we would've gone to the County
Fair.
 I
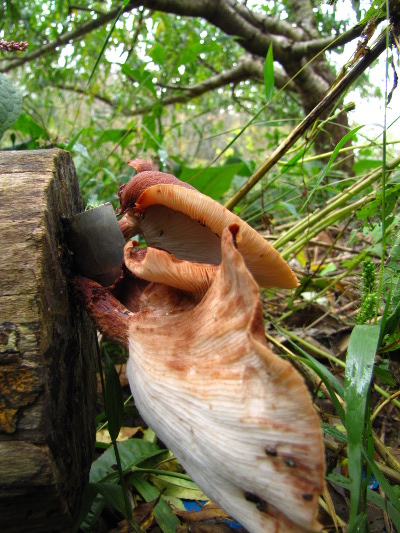
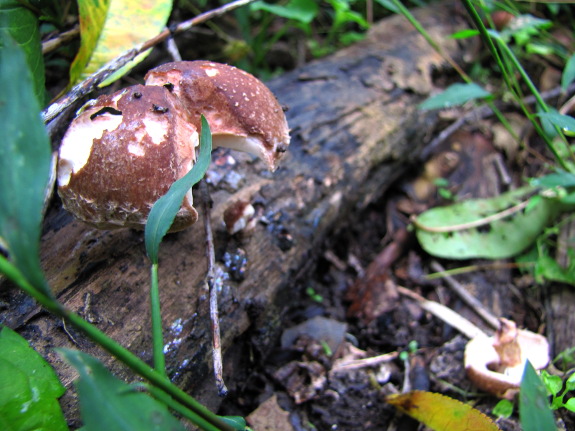
have to admit that I've been a bit lackadaisical about managing our edible mushrooms for the last couple of years.
I
have to admit that I've been a bit lackadaisical about managing our edible mushrooms for the last couple of years.
Converting over to rafts
and totems means
that we don't get mushrooms in the summer. Our logs just bear in
the spring and fall when cool, damp weather creates natural fruiting
conditions for oysters and shiitakes.
I don't actually mind
taking an item off our summer list, though. We have plenty to eat
during the hot months, and so much to do that soaking mushroom logs
feels like a chore.
The main downside of my
new methodology is that I tend to miss about half the mushrooms when
they do appear. If you soak
a mushroom log, you
know it's going to fruit (or not) within a week, so you can schedule
the 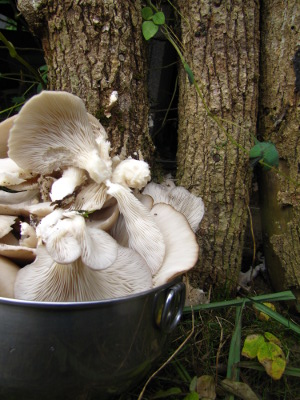 day to check back.
However, rafts and totems fruit when they feel like it, and there's
really only a window of one day when the mushrooms are at their peak,
so it's easy to miss.
day to check back.
However, rafts and totems fruit when they feel like it, and there's
really only a window of one day when the mushrooms are at their peak,
so it's easy to miss.
That's how I came to
overlook the first fruiting of our magnolia
stump. It's
along a seldom-visited edge of our core homestead, and I didn't see the
oysters until they'd shriveled up and gone by.
The
mushroom totems along the driveway, though, caught my eye on
Friday when they bore their second flush of fruit, and that reminded me
to check the totems behind the trailer yesterday. Quite a
haul! We stir-fried Friday's mushrooms, but I'm open to
suggestions for how we'll eat up the weekend's bounty. What are
your favorite oyster mushroom recipes?
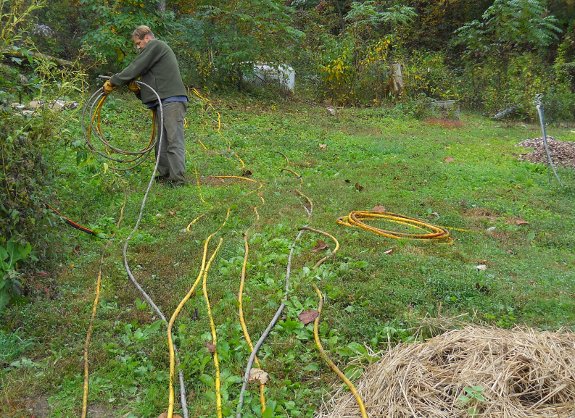
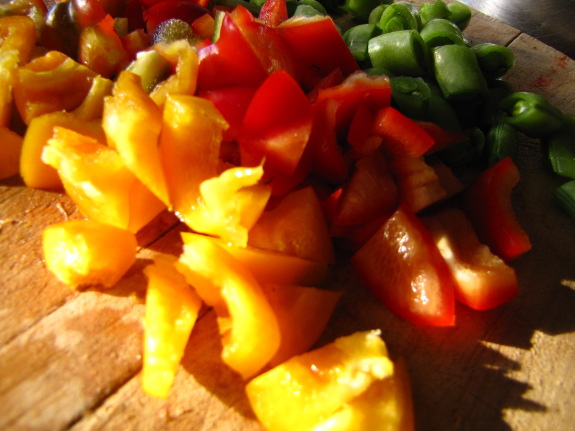
Hoses are drained. Green peppers picked.
We're mostly ready and looking forward to another peaceful winter.
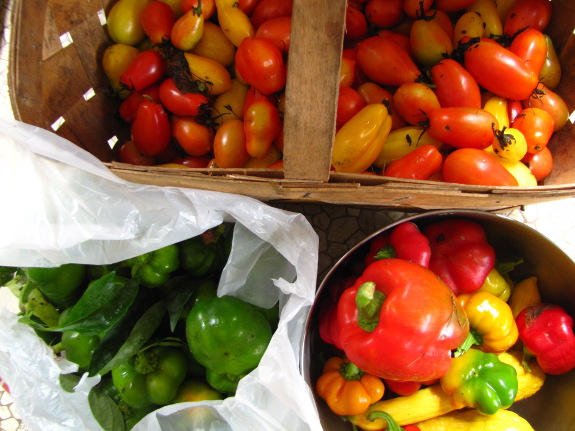
It's likely to frost at
some point this week, so I went ahead and picked everything
sensitive. Green peppers are a giveaway item, while yellow and
red peppers will sit in the fridge and go in the next couple of weeks'
salads. I cooked up a huge basket of sweet corn and socked away a
gallon of decobbed kernels in the freezer. And the tomatoes I
roasted with carrots, onions, and garlic, then whizzed up in the food
processor to create a cream of tomato and basil soup.
What's left? Lots
of lettuce and leafy
greens, all of which
can be eaten at our leisure. Potatoes and carrots need to be dug
this week, and I'll probably freeze some broccoli since the heads are
expanding faster than we can eat them. Soon after that, the first
cabbage will be ready, right about the time we'll likely eat the last
of our sugar snap peas. These fall crops can all handle
temperatures down into the low twenties, so I'm hopeful we'll be eating
them for weeks to come.
What are you eating out
of your garden at the moment?
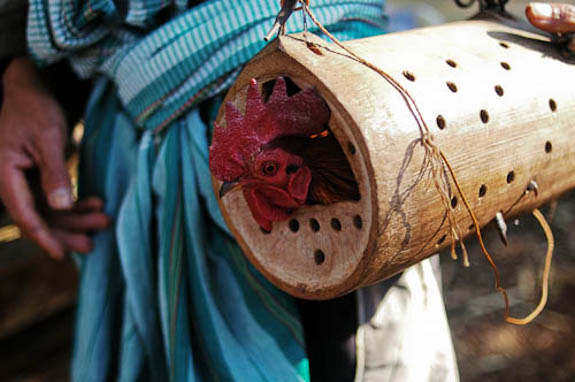
A sharp knife and some bamboo
is all it takes to make the above chicken carrier.
The picture is from AustinBushPhotography.com.
He took this a few years ago
in Northern Thailand where they take a rooster and tie him to a tree in
the forest and then try to encourage crowing. This attracts wild
chickens which make a tasty meal.
I'm officially a heating
wimp this year. I like to play fire chicken, seeing how long in
the fall I can go without any source of heat. The idea is that my
body acclimates to the cold, so if I can bear with chilly weather in
October, the same temperatures will feel warm in January.
 But a cold, rainy day that
never broke 50 broke me. Monday was a very unusual day since we
had to wake up in the dark, pounding rain to get to the big city for
our dental checkups at 9 am. (No cavities for either of
us!) Honestly, I think I needed the mental boost of the fire even
more than the warmth when we straggled home that afternoon.
But a cold, rainy day that
never broke 50 broke me. Monday was a very unusual day since we
had to wake up in the dark, pounding rain to get to the big city for
our dental checkups at 9 am. (No cavities for either of
us!) Honestly, I think I needed the mental boost of the fire even
more than the warmth when we straggled home that afternoon.
I did get the fire
started with a couple of pieces of boxelder and half of a walnut round,
but then I just burned scrap lumber. Do you burn odds and ends of
two by fours that are too small to use otherwise even though they're
pine?

We decided to start Staycation
2012 this afternoon.
The above picture is for
Anna's upcoming Mother Earth News magazine article for the
February/March issue.
No...Huckleberry
didn't take this picture, it was a timer on a bale of straw thing.
Our greywater
swamp
became a much more pressing problem last week as the grasses and
clovers began to go dormant. In the summer, actively growing
vegetation pushes an astonishing amount of water from the soil up into
the
air via transpiration, but once the weather cools and plants slow down,
the ground is on a trend toward increasing wetness. While our
chicks love hunting for bugs in the greywater effluent, we stopped
going out the back door because it was just too swampy. I guess
it's time to put greywater management on the list!
After some
brainstorming, Mark and I agreed that a constructed
wetland
was the way to go. But what would it look like? I thought
you might enjoy seeing what goes through my head when I'm
thinking about a design like this:

In case you can't read
my scrawl, the big questions pertained to
lining. Should we line the wetland at all, and if so with what?
As we know from
experience, our clay soil will create a boggy spot
where the greywater comes out even without a liner. Assuming
you're not cleaning up something really toxic (in which case, a liner
is recommended to keep the toxins from leaching into the groundwater),
the only real reason to line a constructed wetland is to keep the soil
from
drying up during the summer. However, a liner does have benefits
--- it allows real wetland plants to take hold over a large area, and
can even be used to create a pool of clean water at the end of the
wetland for irrigation or frog habitat.
If we do decide to line
the wetland, there are three options:
- Purchase a pond liner. If we went for the high quality version, that would be pricey --- $266.
- Compact clay soil. Mainstream folks tend to rent mechanized compacters to mash wet clay around under pressure and create a nearly impenetrable liner.
- Gley the pond. You
can read my post about gleying
here. (Using pigs to seal a pond is a method of gleying.)
Of course you know which
option appeals to me, but our little wetland
is nowhere near big enough to make it worthwhile to raise pigs just to
seal it, and the area is at the same time too big to haul in enough
manure to gley without animals. I'm wondering how much stomping
around in boots would be required to compact the soil, and whether
chickens can be used to gley ponds. Ideas?
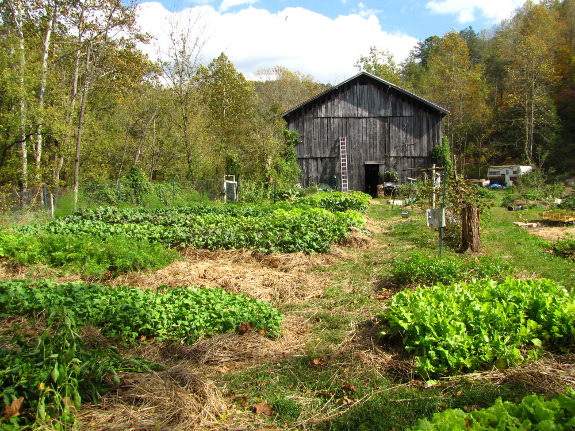
 The
second chapter of The
Holistic Orchard was
all about planning an innovative orchard that suits your site. I
wish I'd read this before I drowned some trees in our soggy soil, then
reinvented the wheel to create
raised planting beds
incorporating hugelkultur just like Phillips
suggests. His notes on sun and wind are probably just what some
other beginning orchardist needs as well.
The
second chapter of The
Holistic Orchard was
all about planning an innovative orchard that suits your site. I
wish I'd read this before I drowned some trees in our soggy soil, then
reinvented the wheel to create
raised planting beds
incorporating hugelkultur just like Phillips
suggests. His notes on sun and wind are probably just what some
other beginning orchardist needs as well.
A method Phillips calls
"biological terracing" looks like it would be just right for our steep
and dry powerline cut pasture. Soil is shoveled
downhill to create a terrace with a bowl  behind it, and the bowl is
filled with wood chips to soak up moisture. I've pondered
terracing our powerline hillside (or at least building small cepas for trees), but have gotten
bogged down in deciding what will hold the steep downhill side of the
terrace from being scratched apart by chickens. Phillips'
suggestion of planting comfrey to hold the slope sounds like it might
withstand moderate abuse. (The two photos I've included are other
ideas for terracing --- click each to see the source.)
behind it, and the bowl is
filled with wood chips to soak up moisture. I've pondered
terracing our powerline hillside (or at least building small cepas for trees), but have gotten
bogged down in deciding what will hold the steep downhill side of the
terrace from being scratched apart by chickens. Phillips'
suggestion of planting comfrey to hold the slope sounds like it might
withstand moderate abuse. (The two photos I've included are other
ideas for terracing --- click each to see the source.)
Next, Phillips
introduces forest gardening, dynamic
accumulators, and nectary
plants
that attract beneficial insects. I won't write more
about that here since I've posted about each topic in depth in the
past. I was a bit disappointed that the author seemed to be
regurgitating a lot of forest gardening information from the literature
rather than telling us which techniques actually work in his orchard,
but that's my pet peeve about permaculture books in general.
Did any techniques pop out
at you from this week's reading? Or do you have a site-specific
problem Phillips didn't cover that you're wondering how to work around?
We'll read chapter three
for next Wednesday. I know it's a lot of pages, but the first and
last parts cover information you probably already know if you've delved
into orcharding at all, so feel free to skip or skim that and just
focus on the "soil fertility" and "tree doings" sections on pages 59
through 82. I hope you'll keep reading along (and that newcomers
will feel free to join the club! We'll probably focus on this
book all through October and November, so you've got plenty of time to
hunt down a copy.)

This post is to document the
beginning date of my new Georgia Boot
phase.
The above Ariat shoes only lasted 9 months
before one started to leak.
I think the breaking point is
where the toe bends. I know I put those boots through some hard
conditions, but in my opinion they should've lasted longer for being in
the 100 dollar category.
It's a good thing my
father's alive, because otherwise he'd be rolling over in his
grave. The first Christmas after we pulled
a trailer onto our farm, he gave me and Mark
matching "Redneck Trailer Service" hats. Later, he begged me,
"Just don't built onto your trailer!" And now...I'm writing a
book about it.
My next ebook is a
response to the tiny house and build your own house movements, combined
with the voluntary simplicity movement. The
Simple Trailer Life
(or maybe The
Trailer Homestead
--- what do you think?) will suggest an even cheaper and more
environmentally friendly
method of lowering housing costs --- living in a used mobile home.

And I need your
help! First of all, any title suggestions would be much
appreciated. Second, I'm looking for some homesteaders whom I
could quote about why they wouldn't
dream of living in a trailer. I've got several great case studies
of happy trailer-dwellers already, but if you have a good story, I
wouldn't mind hearing from you about that too. (The photo above
is from Holy Scrap Hot Springs, one of our featured
trailer-dwelling couples, and you'll be hearing more from one
of our long-time readers as well.) If you're interested in
participating, just email anna@kitenet.net for more information.
This ebook is flowing
out of my fingertips like water, so hopefully I'll be able to let you
read it by the end of the year. Stay tuned!
Edited to add:
Trailersteading is now available for $1.99
on Amazon. I hope you enjoy reading it as much as I enjoyed
writing it!

Soil expert Dan Kittredge from
the Bionutrient Food Association was on the always fresh C-Realm
podcast yesterday.
Mr Kittredge has some
interesting things to say on nutrionally dense food crops and the
conditions and interactions that can improve soil health and vitality.
I liked his metaphor
explaining how soil acts as an external digestive system for plants not
unlike our stomachs. I learned about fungal inoculants and after a
little research we've decided to try out a product sold by Paul
Stamets that should
increase mycelium networks in our raised beds which will in turn help
to promote beneficial bacteria growth and aeration.
I thought for sure it
was going to frost Wednesday night, but my max/min
thermometer noted a low of 33 degrees. This is a bit like
what happens if the groundhog sees its shadow, but in reverse.
There's no chance of frost now for at least another week and a half, so
we get bonus days of summer.
That means I gambled
wrong on cutting
all those green peppers and baby squashes off the plants. On the other hand,
even the red raspberry plants Mom and I picked within an inch of their
lives Wednesday still ripened yet more delectable berries Thursday, and
I'm hoping sunnier days may tempt a few more figs to ripen up.
Each one of our farm years so far has had a frost right around our
average frost date of October 10, so it will be interesting to see what
else changes with an elongated fall.
Turns out I got a little
ahead of myself with yesterday's
experiment.
Spring will be a better time
to experiment with a fungal inoculant. Spores might survive over the
winter, but they'll have a better chance of thriving with higher soil
temperatures.
Image credit goes to
Wikipedia.
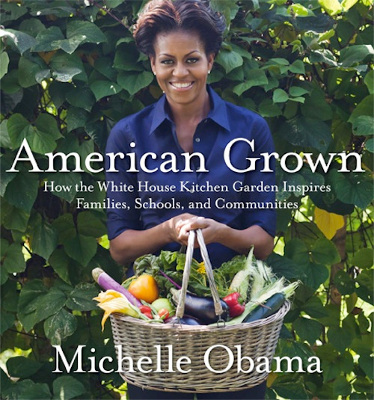 American
Grown is a
beautifully illustrated book that's worth checking out of the
library. Michelle Obama chronicles her experiences gardening for
the first time, then expands out from the White House lawn to write
about her campaign to combat childhood obesity. She also profiles
community and school gardens across the United States, and White House
chefs include some gourmet recipes at the end of the book.
American
Grown is a
beautifully illustrated book that's worth checking out of the
library. Michelle Obama chronicles her experiences gardening for
the first time, then expands out from the White House lawn to write
about her campaign to combat childhood obesity. She also profiles
community and school gardens across the United States, and White House
chefs include some gourmet recipes at the end of the book.
The positive side of American
Grown is that
it's very enthusiastic and inspirational, but the flip side of the coin
is that there's very little dirt in evidence. I wonder how many
folks who start growing vegetables because of this book will be shocked
when they don't have a huge staff to keep their garden impeccable and
when the kale comes into the kitchen with insect-nibbled holes in its
leaves. I would have felt much more comfortable recommending this
book to a gardening audience if there weren't quite so many gloved
hands and if a single picture had shown the author as anything less
than impeccably coiffed.
My second complaint is
that the book presented very few details. On the other hand, I'm
actually a bit glad Michelle Obama only gave us select tidbits since
she's clearly a raw beginner and factual errors are relatively
common. For example, the author thinks it's good she can fence
out foxes who might otherwise eat her garden, and her picture
illustrating the point that "the pawpaw is one of the few fruits native
to the United States" is actually a papaya. Luckily, since I'm
not a historian and didn't know if she got anything wrong, I thoroughly
enjoyed the section detailing the history of the White House gardens.
My conclusion is that
this book would be fun to flip through on a cold winter day along with
the seed catalogs, but it's not very nutritionally dense.
(In the interest of full
disclosure, I should say that I voted for her husband and probably will
again. On the other hand, I really detest the window-dressing
role of First Ladies, so I'm actually more negative than positive
toward this book politically.)
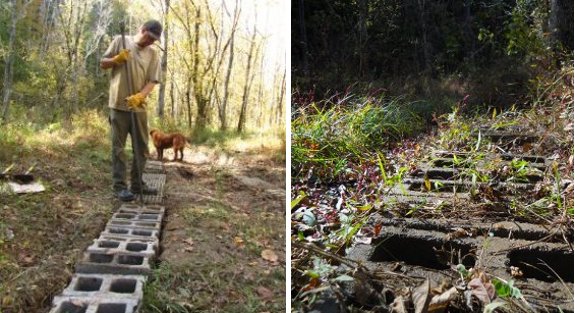
It's been a year since I
tried to repair
the driveway ruts with
cinder blocks.
The blocks are still in
place, but they didn't receive any truck traffic.
We've been using the golf
cart to haul stuff which doesn't seem to push the bricks any deeper,
but we've also been trying to avoid using it during really wet times.
 I've written about succession
planting previously, which involves keeping the garden active by
growing more than one crop per year in the same spot. But I
realized I'd never written here about a related permaculture principle
which is one of my favorites --- stacking.
I've written about succession
planting previously, which involves keeping the garden active by
growing more than one crop per year in the same spot. But I
realized I'd never written here about a related permaculture principle
which is one of my favorites --- stacking.
When permies use the
term "stacking", they are growing more than one crop in the same space
at the same time. For example, silvopastures
can allow you to raise timber (or nuts and fruits) right on top of
livestock while forest
gardens may stack
shade-tolerant herbs and leafy greens under fruit trees.
The best way to keep competition down when stacking is to
involve multiple kingdoms. For example, mushroom
rafts under a peach
tree don't compete at all --- if anything, the fungi slowly break down
the wood into high quality humus that the peach will enjoy while the
peach maintains a damp, shady environment for the mushrooms.
Even though they're in the same kingdom, putting
my bee hive in the chicken pasture this year has been a win-win.
 My favorite stacking success
has been letting our chicks free range throughout the raspberries (and
back garden) during their first month or two of life. The only
slight downside is that the chicks scratch the mulch to pieces, but
they find lots of invertebrates (and clean up any dropped berries) in
the process, all while laying down a thin coating of fertilizer.
The chicks feel safe because they're nestled amid thorny branches, and
that patch of raspberries seems to bear berries twice as large and
juicy as those on the other end of the homestead.
My favorite stacking success
has been letting our chicks free range throughout the raspberries (and
back garden) during their first month or two of life. The only
slight downside is that the chicks scratch the mulch to pieces, but
they find lots of invertebrates (and clean up any dropped berries) in
the process, all while laying down a thin coating of fertilizer.
The chicks feel safe because they're nestled amid thorny branches, and
that patch of raspberries seems to bear berries twice as large and
juicy as those on the other end of the homestead.
What's your favorite
example of stacking on your own farm?
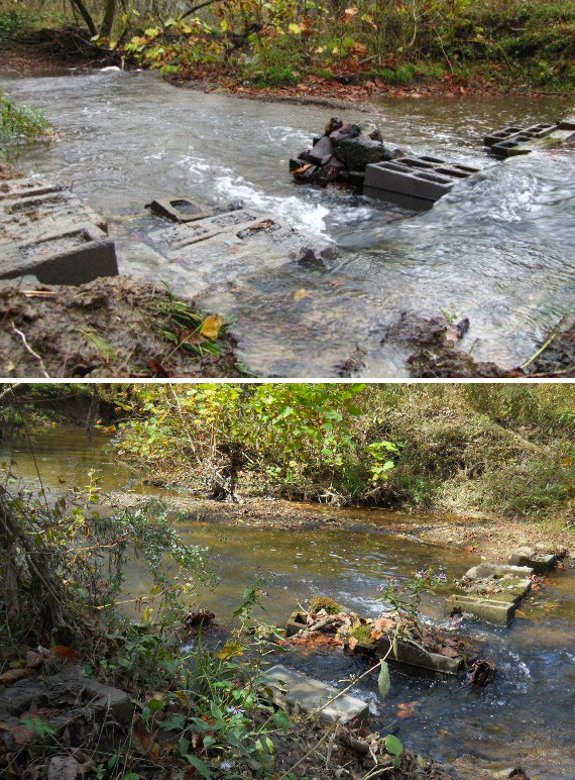
The cinder
block stepping stones
have held up nicely over the last year.
It turned out to be a huge
improvement allowing us to step over the deep section 90 percent of the
time.
A more stable solution would
involve a large drainage pipe to let the bulk of the creek flow
through. We heard of a neighbor trying such a trick only to have it
wash out after the first big storm.
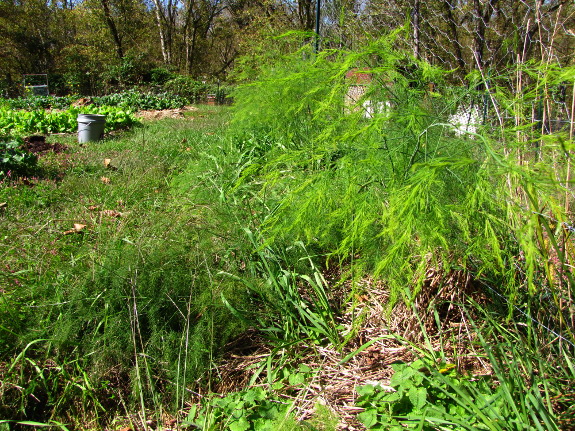
Half a year after
planting, asparagus
alley already has a
major success and a major failure under its belt.
What worked? The
seeds I saved from the one female in my "all-male"
asparagus planting
do seem to be producing nearly all male plants. Only about half
the asparagus seedlings got big enough to bloom this year, but every
flower I picked apart is full of stamens with no pistils.
On the downside, I think
locating a row of asparagus against the pasture fence wasn't the best
idea. Yes, the plants will probably provide some much-needed
summer shade for our chickens, and the chickens will likely eat up any asparagus
beetles that come to
call. But it's hard to weed the side of the bed against the
fence, so grasses seem to be taking over.
I've dug out roots and
kill-mulched once already this year and think I might have to do
something more drastic, like put some kind of root barrier between the
asparagus and the fence. Ideas?
 I've been looking for a book
on grafting for years, and for years I thought one didn't exist.
Most books about tree fruits have a short chapter on the topic, but I
really wanted something I could sink my teeth into. Finally, I've
found it!
I've been looking for a book
on grafting for years, and for years I thought one didn't exist.
Most books about tree fruits have a short chapter on the topic, but I
really wanted something I could sink my teeth into. Finally, I've
found it!
The Grafter's
Handbook is by R.J.
Garner, who worked as a scientist at the East Malling Research Station
for twenty years. In case "Malling" sounds vaguely familiar, it
should --- the research station gave its name to many of the apple
rootstocks developed there. Garner's book is a treasure trove of
hands-on experience, all summed up in easy-to-read and
scientifically-designed chapters. Garner even hand-drew over a
hundred excellent diagrams to illustrate his points (and included a few
more dozen photos to prove his grafting techniques aren't a pipe dream).
The only downside of The
Grafter's Handbook
is that it was published in England and is now out of print, which
makes it rather hard to find. I lucked out and bought a gently
used copy on Amazon for $10, but if you can hold your horses, there's a
revised
edition coming out
next year, updated by British gardener Steve Bradley. (When I
started this review, I was actually going to say that the only thing
that would make this book better is if it was lightly updated to
include modern tools, so now I almost wish I'd known about the revised
edition before I bought and read this one.)
This week (and next),
I'll be regaling you with highlights from The
Grafter's Handbook
at lunchtime. I hope it will inspire you to try your had at
grafting this winter just like it did me.
| This post is part of our Grafting lunchtime series.
Read all of the entries: |
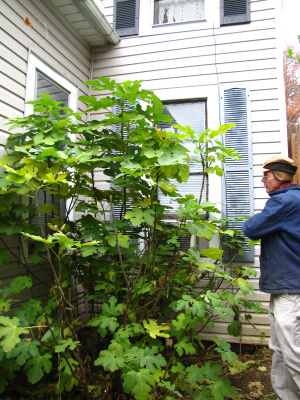
We put a healthy layer of
aged wood chips on the Hardy
Kiwis today.
All three plants produced
plenty of new vines this year but no fruit.
The wood chips should
increase their ground protection, which might be enough to give them a
boost in the Spring growth spurt of 2013.
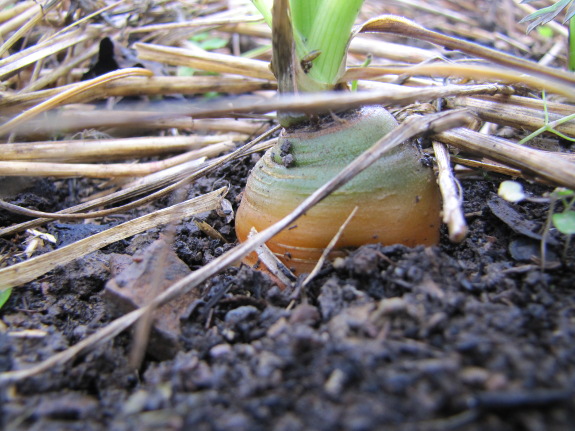
Last
week, I mentioned carrots on my soon-to-harvest list, and a couple of you rightly
pointed out that you don't have to harvest carrots before the
frost. In fact, carrots get sweeter if you wait to dig them until
cold weather has moved in, and some people even leave their carrots in
the ground over the winter. However, there are some reasons you
might choose to harvest your carrots early.
If you get a heavy layer
of snow that stays put all winter long, you're in the perfect spot for
overwintering carrots. Counterintuitively, the snow protects the
ground so it doesn't freeze and the garden row acts just like a good
root cellar. Those of us who garden further south, though,
experience ground freezes and thaws throughout the winter months, and
each freeze-thaw cycle pushes the carrots a bit further out of the
ground. The tops quickly freeze and then rot, so you can't count
on carrots overwintering in our area.
You can get around this
issue by mulching
the carrots heavily in the fall. However, if your
ground doesn't freeze, varmints are very likely to move into that soft,
warm bed and nibble on your roots all winter long. Which brings
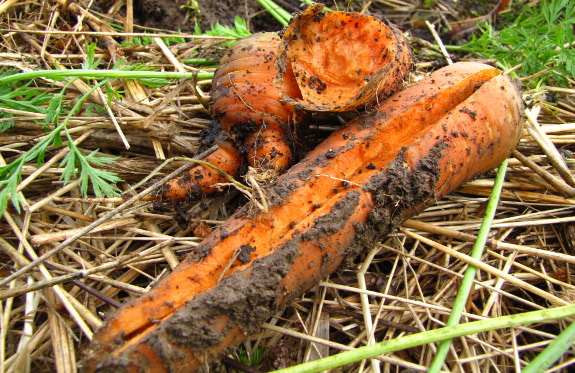
me to one of the reasons I'm harvesting my carrots early this year: a
vole found the tasty carrots in one bed and started gnawing off the
bottoms, so I decided to get those roots before they're all eaten up.
The other reason I'm
harvesting now has to do with maturity of the carrots. In order
to overwinter carrots in the garden, you need to plant them at just the
right time so they're fully mature just as the ground gets too cold for
them to grow any further. This is very tricky since you never
know if autumn will be cold and dark or warm and sunny, so I tend to
just plant early (at the beginning of July) to ensure I get in a good
crop.
The downside of early
planting, though, is that good weather may mean your carrots head past
mature and into overmature before cold weather halts the plants'
growth. You can't really count on the days to harvest listed on
the seed packet to get this maturity data since 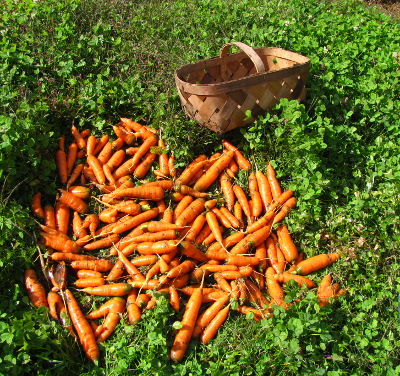 shorter days slow carrots
down, but if you pull
out small carrots throughout their time in the ground to eat and thin
the bed, you'll
clearly see when the roots stop bulking up and start heading over the
hill by splitting or rotting.
shorter days slow carrots
down, but if you pull
out small carrots throughout their time in the ground to eat and thin
the bed, you'll
clearly see when the roots stop bulking up and start heading over the
hill by splitting or rotting.
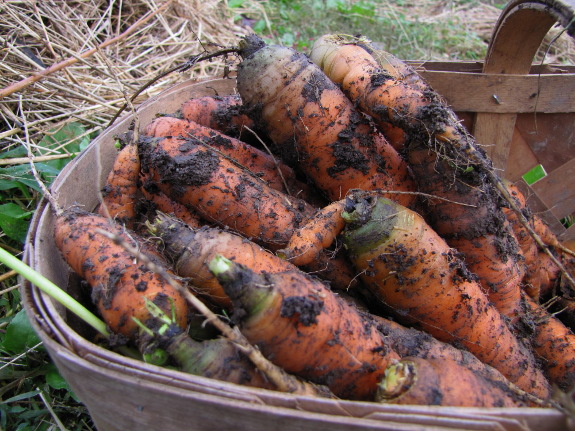
And that's why I
harvested a third of our carrots Monday. We got 23 pounds from
two beds (and I've probably already harvested another 10 or 20 pounds
from those beds over the last couple of months), which filled up my
crisper drawer. Yikes! Now I have to figure out where to
store the other three beds of carrots.
 One benefit to keeping rabbits is
the wonderful and rich manure they produce. While rabbits may not
produce manure in quantities that some other livestock will produce,
the manure is all produced in a localized area, assuming they are kept
in pens/hutches. This makes it trivially easy to gather and
use. We plan to improve upon our collection area soon so that
there will be a plastic or sheet metal catchment that will direct the
manure into a basin or barrel. We have a few ideas on how to
accomplish this and it will be an interesting project we can report on
later.
One benefit to keeping rabbits is
the wonderful and rich manure they produce. While rabbits may not
produce manure in quantities that some other livestock will produce,
the manure is all produced in a localized area, assuming they are kept
in pens/hutches. This makes it trivially easy to gather and
use. We plan to improve upon our collection area soon so that
there will be a plastic or sheet metal catchment that will direct the
manure into a basin or barrel. We have a few ideas on how to
accomplish this and it will be an interesting project we can report on
later.
Many different sources claim that rabbit manure does
not need to be aged. I have heard this common wisdom for many
years, but am only just now ready to start putting it to the
test. The gardening here has been slowing down due to the
oppressive heat of mid-late summer, and most recently due to lack of
time. However, Dawn and I will soon be transplanting some citrus
trees (Satsumas, Mandarin Orange, Kumquats, Kaffir Lime) once fall is
here in full force and we will be using much of the accumulated manure
to enrich the soil around the newly transplanted trees. By the
time spring rolls around we also plan to really put the manure to the
test when the vegetable garden will be at full throttle again.
Rabbit manure is claimed to
have an excellent nutrient content. I'm no manure expert, but
I've seen several sources which list it at an average N2.4
P1.4 K0.6. We'll have to research which types of plants that
ratio is best for but I'd guess it's suitable for most.
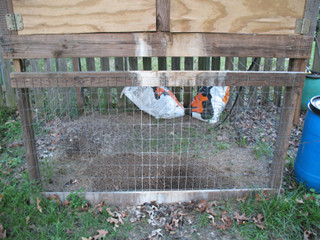 We learned early on that we
needed to build a fence around the bottom of the cage to keep the dogs
out. They were enjoying digging in and sometimes snacking on the
manure. The barrier also keeps them from nipping and sniffing at
the fuzzy bunny feet at the bottom of the cage. When the rabbits
first showed up here the dogs were intensely curious and would stand on
hind legs to sniff at the new creatures invading their territory.
Dawn built a handy removable frame which allows easy access to the
underside of the cage while still keeping the dogs out. It may
not be obvious from the photo, but the front of the cage pulls out in
mere seconds to allow full and easy access making it easy to shovel the
manure.
We learned early on that we
needed to build a fence around the bottom of the cage to keep the dogs
out. They were enjoying digging in and sometimes snacking on the
manure. The barrier also keeps them from nipping and sniffing at
the fuzzy bunny feet at the bottom of the cage. When the rabbits
first showed up here the dogs were intensely curious and would stand on
hind legs to sniff at the new creatures invading their territory.
Dawn built a handy removable frame which allows easy access to the
underside of the cage while still keeping the dogs out. It may
not be obvious from the photo, but the front of the cage pulls out in
mere seconds to allow full and easy access making it easy to shovel the
manure.
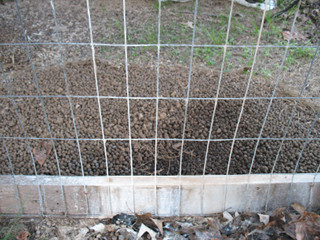
Lately, things have been
quite busy here and we haven't been able to keep up with things as much
as would be ideal. Therefore, the manure has been accumulating
and there is some grub or maggot that has started invading our precious
store of manure on the ground. It's time for us to get busy with
the shovel and make use of the brown gold! Also in that vein, we
started contributing our rabbit posts weekly but quickly had to fall
back to every other week. Things have been quite busy for the
last couple of months on the verge of overwhelming due to unfortunate
termite discoveries, mechanical breakdowns, and a number of other
things including a needed trip out of town all piling up at once.
I certainly have more admiration of the commitment it takes for folks
to keep up with a regular blog schedule despite the busy pace that life
sometimes presents (I'm looking at Anna and Mark here...  ).
).
Shannon and Dawn
will be sharing their experiences with raising meat rabbits on Tuesday
afternoons. They homestead on three acres in Louisiana when time off
from life and working as a sys admin permits.
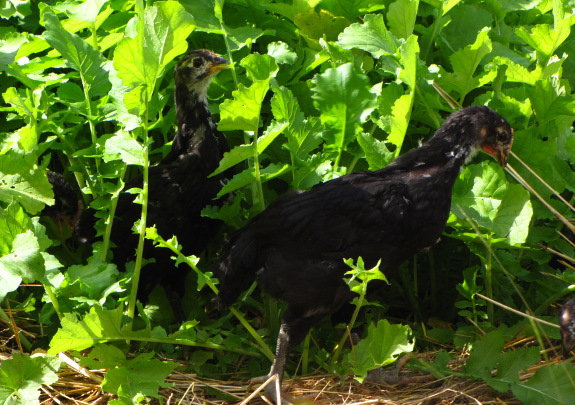
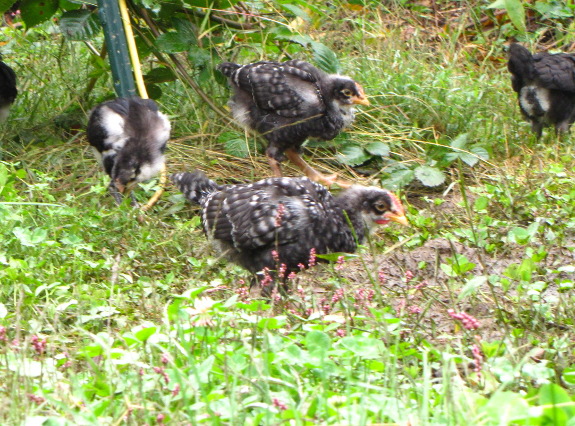
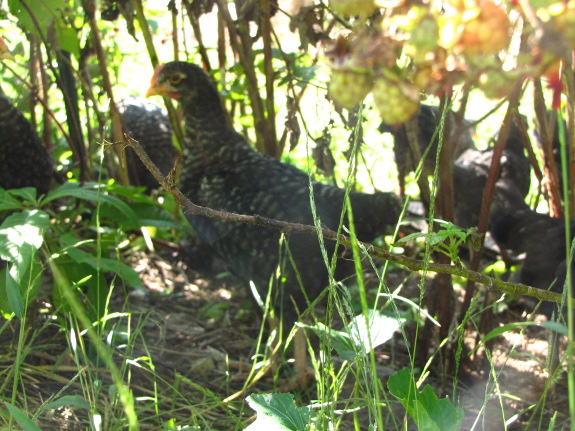
Our new flock of chicks like
to nibble on the leaf of an oilseed
radish plant.
The last group didn't seem
interested.
I'm guessing it's more of a
palette cleanser than a full blown snack.
Even though we haven't
had a frost yet, weird microclimate effects resulted in homegrown ice
Tuesday morning. I'd let a little rainwater accumulate in the
wheelbarrow, and the metal dissipated heat in such a way that a low of
34 resulted in a skim of ice. Strange, huh?
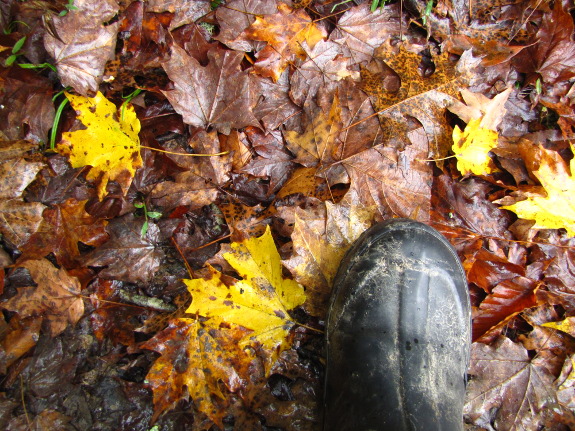
Meanwhile, the sun has
drifted low
enough in the sky that we don't see light in our core homestead
until mid-morning. Although the north-facing exposure of our
plateau makes me envious of our neighbor's sun, it does provide some
dramatic lighting.
Do you think we'll make
it to Halloween without a frost?
 Those
of you who read chapter three of The
Holistic Orchard
with me this week
will probably feel like you were drinking from a fire hose. The
section
took me days to digest and I suspect I'll be trying out Phillips'
techniques for the next several years. Feel free to comment about
other parts of the chapter (of which there were many), but I want to
focus my post on soil health this week.
Those
of you who read chapter three of The
Holistic Orchard
with me this week
will probably feel like you were drinking from a fire hose. The
section
took me days to digest and I suspect I'll be trying out Phillips'
techniques for the next several years. Feel free to comment about
other parts of the chapter (of which there were many), but I want to
focus my post on soil health this week.
It's very handy to read
this chapter with soil test results in hand. I
didn't actually test my orchard soil last winter, but I have test
results from the back garden, which started with the same
type of soil,
even if it has been treated slightly differently over the years.
Here are the relevant portions of the test results:
| pH | 7.3 |
| % OM | 15 |
| P (ppm) | 556 |
| K (ppm) | 615 |
| Ca (ppm) | 6801 |
| Mg (ppm) | 926 |
| CEC | 56 |
| % Sat. K | 3.7 |
| % Sat. Mg | 17.6 |
| % Sat. Ca | 78.8 |
Phillips follows an
Albrecht-like ratio approach to soil health, focusing on the relative
(rather than absolute) amounts of nutrients. When I got my
results back for the garden, all of the cations were listed as "very
high", so I figured I was fine. But Phillips notes that if
there's too much magnesium (Mg) in relation to the calcium (Ca) in the
soil (for example), plants will accidentally take up magnesium while
looking for calcium and may end up deficient in the latter. In
addition, he points out that calcium tends to spread soil apart, which
can be handy for drainage and aeration in clay
soil, while magnesium pulls soil particles together (useful in
sand, but not elsewhere).
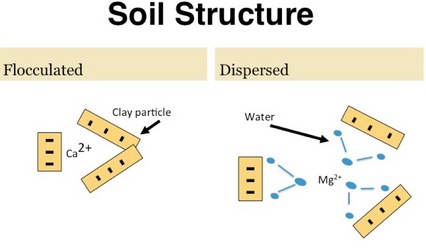 The optimal Ca:Mg ratio
(compared using the percent of base saturation figures, not the
absolute ppm figures) is 5:1 for sandy soil and 7:1 for clay. As
you can see, my ratio is 4.5:1, meaning that some of my drainage issues
might be improved by boosting calcium. However, since my pH is
already too high, I don't want to just add lime, so I'll need to look
into gypsum, which increases calcium content in soil without sweetening
the ground.
The optimal Ca:Mg ratio
(compared using the percent of base saturation figures, not the
absolute ppm figures) is 5:1 for sandy soil and 7:1 for clay. As
you can see, my ratio is 4.5:1, meaning that some of my drainage issues
might be improved by boosting calcium. However, since my pH is
already too high, I don't want to just add lime, so I'll need to look
into gypsum, which increases calcium content in soil without sweetening
the ground.
Similarly, you want to
consider the ratio of phosphorus (P) to potassium (K). Phillips
recommends P:K values of 2:1 to produce the most nutrient-dense fruits,
although 1:1 is okay in young orchards. My P:K value of 0.9:1 is
typical and signifies a need to boost phosphorus levels without
increasing the soil's supply of poassium. I'm going to have to do
some research into phosphate amendments to see which ones won't raise
our pH, but Phillips lists black rock phosphate, colloidal phosphate,
Tennessee brown phosphate, bonemeal, and bone char as possibilities.
If your head's awhirl
with numbers, here are some non-numeric soil factors to consider.
As I've mentioned previously, the goal in orchard soils is to boost
fungi at the expense of bacteria, which Phillips explains results in
more nitrogen being available in the form of ammonia.
Bacterially-dominated soils tend to have nitrogen in the form of
nitrates, which  results in happy-looking trees and big fruits,
but low nutrient density and flavor, along with more susceptability to
disease. Phillips recommends keeping your soil fungally-dominated
by making special compost for the orchard out of deciduous wood chips
slow-composted with animal manures.
results in happy-looking trees and big fruits,
but low nutrient density and flavor, along with more susceptability to
disease. Phillips recommends keeping your soil fungally-dominated
by making special compost for the orchard out of deciduous wood chips
slow-composted with animal manures.
When should you apply
that compost? I've always thought that early spring was the best
time, but Phillips gets more scientific. He explains that the
white feeder roots that suck up nutrients are even more ephemeral than
leaves --- they generally only live 14 to 60 days before dying
back. Trees produce multiple flushes of feeder roots throughout
the year, generally during periods when growth on top of the tree has
slowed, and if you time your compost applications to match root growth
periods, you'll get more nutrients to the tree. Trees focus on
blooms in early spring, roots in mid spring, leaves in early summer,
and roots in late summer and fall. Cutting herbaceous plants
under the tree canopy (like grass or comfrey) during peak root growth
can help feed your tree at just the right time, and so can spreading
compost in autumn when half of the leaves have fallen. Meanwhile,
a heavy mulch in the fall can keep the roots growing later into the
winter, and can also muffle spring warmth so trees bloom up to ten days
later and miss fruit-killing freezes.
If you can handle
another eye-opening chapter, we'll read chapter 4 "Orchard dynamics"
for next Wednesday. Those new to the club might want to check out
previous chapters on beginning
a holistic orchard
and techniques
for designing a holistic orchard. And, as always, I'm
looking forward to hearing your thoughts on this fascinating subject.
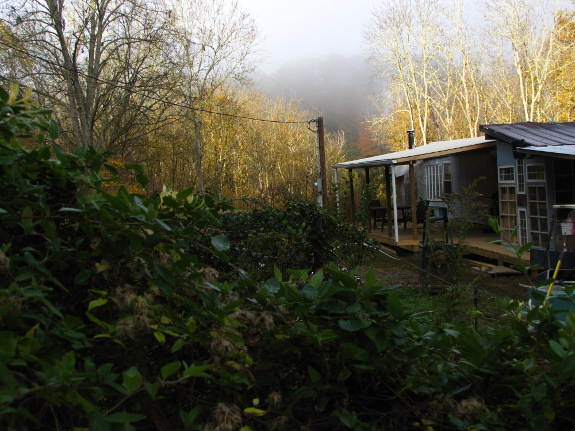
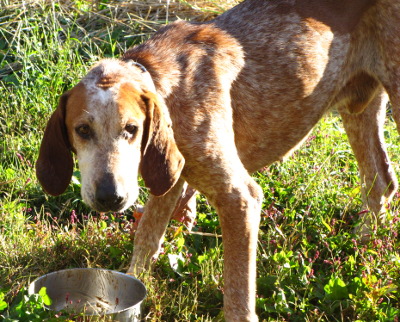 This
German short haired pointer showed up yesterday lost and hungry.
This
German short haired pointer showed up yesterday lost and hungry.
It took a few phone calls to
track down a local hunter we thought might be looking.
He graciously agreed to take
the dog who might belong to his friend, and if not he said he'd find him
a home.
 I'm starting to get more
sophisticated about my biomass uses. While autumn leaves make a
good mulch for perennials, they tend to blow around, so when I have my
druthers, I've been using seedless
weeds and composted
wood chips there.
I'm starting to get more
sophisticated about my biomass uses. While autumn leaves make a
good mulch for perennials, they tend to blow around, so when I have my
druthers, I've been using seedless
weeds and composted
wood chips there.
Meanwhile, I'd like to
channel the autumn leaves into the chicken coops, where they make the
best possible addition to the deep
bedding. The
leaves are high enough in carbon that they counteract quite a lot of
manure, and they're also fluffy enough that chickens can scratch
through easily, mixing the coop-floor compost heap.
The snag I'm hitting in
my grand plan is storage. While I
can rake leaves out of the woods at any time of the year, right now is when they're
easy pickings. Before they've been run over and rained on too
many times, it's child's play to rake the leaves off the bare parts of
the driveway, then scoop them into the golf cart. In half an
hour, I can come home with three heaping wheelbarrowsful.
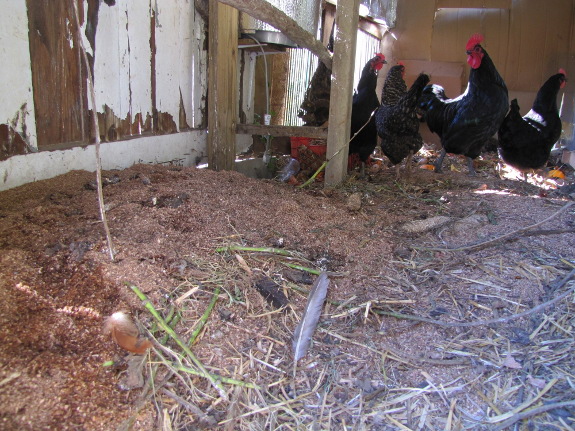
But where to put
them? For deep bedding, it's best to store leaves somewhere dry,
and they're so fluffy that they take up a lot of space. I'm
starting out the easy way by filling both coops to the brim --- I may
have to fork through the leaves if the tops get matted down, but
otherwise I'll have happy chickens for at least a month or two with
little work. I'd like to store enough to last me all year,
though, since deep bedding starts to smell and breed flies in the
summer if not refreshed frequently, and I'm slow to add more bedding if
all I have on hand is subpar materials. I'm pondering closing in
a little corncrib-like room in the barn and stuffing it full of leaves,
but I feel like there's a simpler solution out there. Ideas?

The
Grafter's Handbook
began its explanation of grafting by noting what grafting won't
do. Although we often think of grafting as a way of getting more
fruit trees, the techniques outlined in Garner's book won't actually
create more plants; instead, grafting changes rootstocks (what you
graft onto) from one variety to another, often impacting the tree's
size, disease-resistance, and other features in the process.
Another factor to consider is that grafting is easier with dicots (most
of the plants you're familiar with) and conifers than with monocots
(like grasses and garlic), and you shouldn't expect two different
species to survive if grafted together (although they sometimes will if
the species are related).
With those caveats
aside, grafting has much more potential than most of us have probably
imagined. A skilled grafter can:
- Make hundreds of baby trees of the same variety using whip-and-tongue or bud grafts.
- Change the variety of an older tree or create a fruit cocktail tree using topworking and frameworking.
- Save sick trees by bridging gaps in the bark, buttressing up weak limbs, or adding on more extensive roots.
- Study how various parts of a plant work.
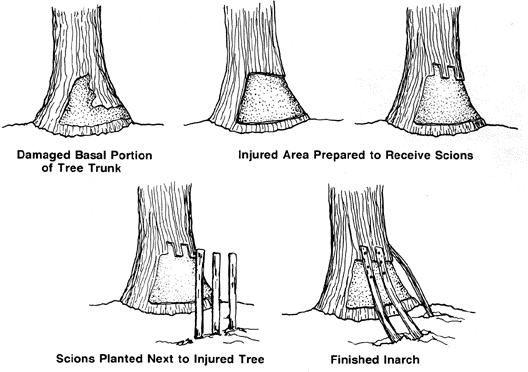
As you might expect from
this extensive list of grafting results, there are scores of methods to
choose from, and Garner walks you through most of them. Luckily
for the beginner, most of these techniques have niche purposes, such as
changing the variety of rubber trees or connecting tomato tops to
potato roots, so only a handful of the grafting methods are really
necessary for the backyard plant propagator to learn. Later posts
in this lunchtime series will present the most common grafting
techniques that a homesteader might use, as well as information on how
to grow your own rootstocks, collect scionwood, and more.
| This post is part of our Grafting lunchtime series.
Read all of the entries: |
 I
pulled a muscle in my lower back on Monday while shoveling mulch and
have had to take it easy these past few days.
I
pulled a muscle in my lower back on Monday while shoveling mulch and
have had to take it easy these past few days.
One thing that's helped is a
tube of Bengay menthol pain relieving gel. I was dubious at first, but
pleasantly surprised when I felt an immediate decrease in pain.
The menthol smell really does
"vanish" by at least 50 percent.
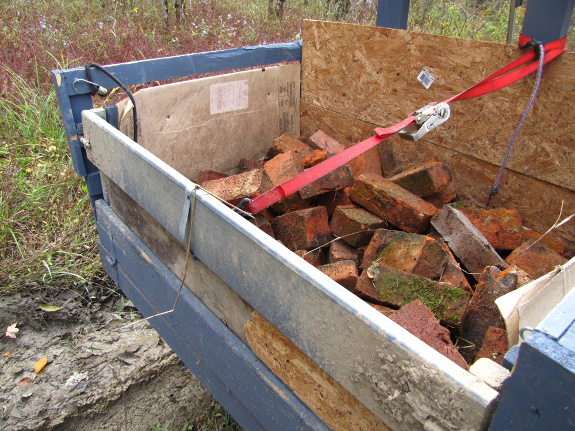
100 bricks....
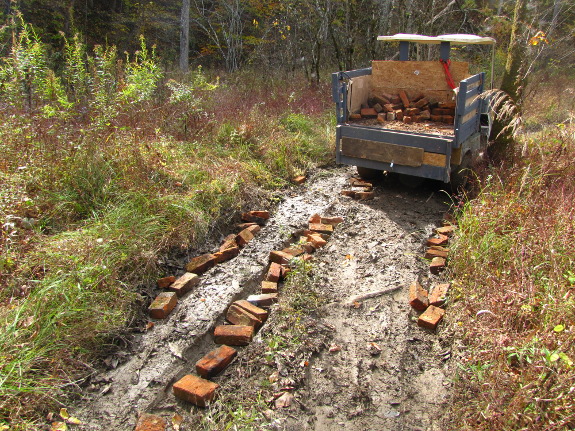
...in the worst driveway
swamp.
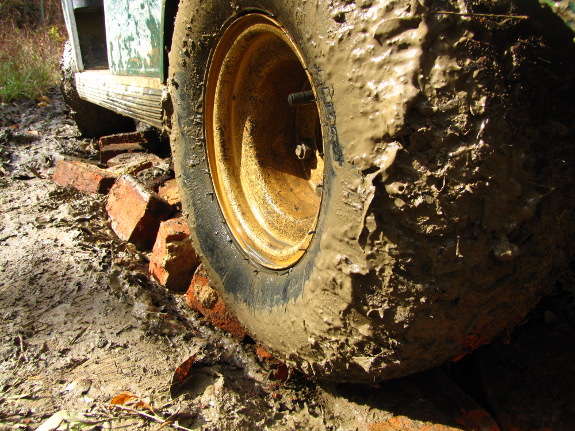
Do you think that'll
keep us above the mud for 100 trips?
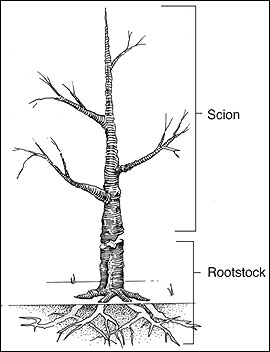 When I summed up the purposes
of grafting, I
warned you that grafting won't create more plants, just change a
rootstock from one variety to another. So where do all those
rootstocks come from?
When I summed up the purposes
of grafting, I
warned you that grafting won't create more plants, just change a
rootstock from one variety to another. So where do all those
rootstocks come from?
If you want to grow your
own fruit tree rootstocks, you have two choices --- seeds or
cuttings. Seedling rootstocks are easy to grow --- just collect
pits from the fruit you eat and plant the seeds --- and seedlings have
the benefit that they're usually vigorous and healthy. With some
types of fruits, like peaches, a seedling roostock can be a good
choice, but most homesteaders with a small backyard won't want to grow
their apple rootstocks from seed since a standard apple tree can take
over their entire growing space. Instead, nurseries count on
carefully selected and vegetatively propagated rootstock varieties to
change the size of their trees and to confer resistance to disease.
 Vegetatively propagated
rootstocks are much more uniform than those
grown from seed, although you have to make an investment of space and
time to grow your own. You can either root cuttings (softwood or hardwood) or use layering (a method
of making one plant produce lots of shoots, which root and can be
severed to create new plants). Garner notes that cuttings can
usually be rooted for apples, pears, plums, and cherries, although my
own experience has shown that softwood cuttings need a lot of babying
and might not be worthwhile if you don't have the right
equipment.
Vegetatively propagated
rootstocks are much more uniform than those
grown from seed, although you have to make an investment of space and
time to grow your own. You can either root cuttings (softwood or hardwood) or use layering (a method
of making one plant produce lots of shoots, which root and can be
severed to create new plants). Garner notes that cuttings can
usually be rooted for apples, pears, plums, and cherries, although my
own experience has shown that softwood cuttings need a lot of babying
and might not be worthwhile if you don't have the right
equipment.

Stooling is a type of
layering that seems very easy for the beginner. You simply plant
a purchased rootstock, let it grow for a year, cut the tree to the
ground, then mound up dirt around the shoots to create new rootstocks
that can be removed later. The downside of stooling is that it
takes two years before you get your first harvest, but the stool can
produce for twenty or more years after that. If we like the
rootstock we use for our high
density apple experiment, I think it would be worth
starting a stool so that I could create our own dwarf apples in the
future.
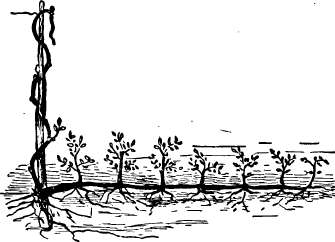 Some more complex types of
layering are used for various reasons. Etiolation (in which the
shoots arising from the rootstock are pegged down in a trench) is used
for shy rooters, like apples, pears, quince, plum, cherries, peaches,
walnuts, and mulberries. Etiolation is more work than stooling,
so should be considered only if you can't get your stock to root
otherwise. Similarly, air layering (in which a shoot is injured
and then surrounded with moist material to root above the soil line) is
a very sure technique, but doesn't produce as many offspring. At
the other extreme, tip layering is an easy way to get blackberries,
some raspberries, currants, and gooseberries to root.
Some more complex types of
layering are used for various reasons. Etiolation (in which the
shoots arising from the rootstock are pegged down in a trench) is used
for shy rooters, like apples, pears, quince, plum, cherries, peaches,
walnuts, and mulberries. Etiolation is more work than stooling,
so should be considered only if you can't get your stock to root
otherwise. Similarly, air layering (in which a shoot is injured
and then surrounded with moist material to root above the soil line) is
a very sure technique, but doesn't produce as many offspring. At
the other extreme, tip layering is an easy way to get blackberries,
some raspberries, currants, and gooseberries to root.
No matter how you start
our rootstocks, you need to grow the young plants until they're well
rooted before grafting onto them. Budding is often done the first
summer, but dormant grafting such as whip-and-tongue grafts have to
wait another year. So, if you planted a rootstock from the
nursery now, you could cut it to the ground to start a stool in fall
2013, mound up earth around the new shoots in 2014, cut loose your
rootstocks that winter, and graft onto them in early spring of 2016.
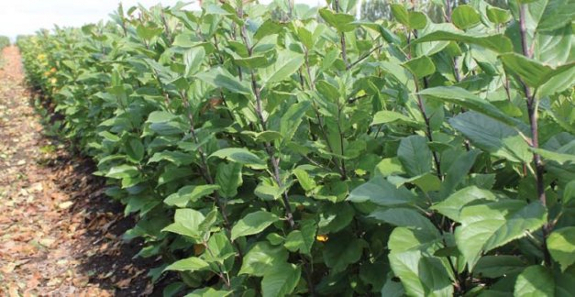
In case that seems
daunting, I should tell you that you can often order rootstocks
of named varieties from various nurseries. In addition, you
should check
with your local extension office since many run grafting workshops in
the spring which provide all of the rootstocks, scionwood, and
paraphernalia, allowing you to come home with several newly grafted
trees for a very small fee. A final option is to skip the rootstock entirely and graft a new branch onto an existing fruit tree in your yard.
I'd be very curious to
hear from anyone who has grown his or her own rootstock. Which
method did you use? Do you recommend it to others?
| This post is part of our Grafting lunchtime series.
Read all of the entries: |

This small wire brush is
prefect for cleaning gunked up battery acid.
We had a problem earlier in
the week that I'm pretty sure was due to an intermittent connection at
this point which seemed to correct itself the next day when it got
warmer.
At least that's my best guess.
 I consider our blog to be
like our front porch, which means it feels rude not to respond to
comments folks leave on our posts. After all, if you slogged
through the mud to get here, the least I can do is to tell you how much
I appreciate your feedback.
I consider our blog to be
like our front porch, which means it feels rude not to respond to
comments folks leave on our posts. After all, if you slogged
through the mud to get here, the least I can do is to tell you how much
I appreciate your feedback.
Unfortunately, I'm
afraid I'm going to have to change my worldview slightly. While I
love the new ideas bouncing around as a result of our increased
traffic, lately I've been spending more time answering comments than
writing my daily post. I'm afraid it's starting to feel more like
a mob of strangers shouting questions while trampling my asparagus than
like a neighbor dropping by.
So I'm going to preserve
my sanity by metaphorically moving the comments section to a sidewalk
cafe just across a white picket fence from my front porch. I'll
enjoy listening to the community discussions drifting in my open
window, but probably will only drop by occasionally to put in my two
cents' worth.
 That means I probably won't
be responding to intriguing ideas folks toss out, although they will
definitely be percolating through my mind and perhaps coming forth in
the garden and in later blog posts. Questions that are easily
answered by typing your keywords in the search box on the sidebar will
also get skipped, which will hopefully leave me time to respond to
questions that aren't answered in previous posts.
That means I probably won't
be responding to intriguing ideas folks toss out, although they will
definitely be percolating through my mind and perhaps coming forth in
the garden and in later blog posts. Questions that are easily
answered by typing your keywords in the search box on the sidebar will
also get skipped, which will hopefully leave me time to respond to
questions that aren't answered in previous posts.
I hope my new policy of
answering fewer comments won't keep you from sharing your views, and I
apologize in advance if you feel slighted by my lack of response.
It's not that we're getting too big for our britches; it's that the
Walden Effect is out-growing our farm and turning into a community all
its own. Hopefully the new feature in which later comments get
emailed to previous commenters will allow you all to churn up a
vigorous discussion even if I'm hiding behind my metaphorical white
picket fence.

It's been hard to find a good
Stayman Winesap apple this year.
The one on the right is the
type we've been seeing most. The missing red color indicates a lack of
ripening. We found the one on the left today and it tastes more mature,
but it's the only source so far.
A fruit stand guy told me
yesterday that all the rain we got back in the summer caused the trees
to produce too many leaves which blocked part of the sun and prevented
full ripening.
 In the interest of full
disclosure, the author emailed me a review copy of Get
Your Pitchfork On!
That's always a dicey situation since it's
hard to write a bad review while the author is right there chewing on
her fingernails, but in this case, I would have given the book five
stars even if I'd bought it myself.
In the interest of full
disclosure, the author emailed me a review copy of Get
Your Pitchfork On!
That's always a dicey situation since it's
hard to write a bad review while the author is right there chewing on
her fingernails, but in this case, I would have given the book five
stars even if I'd bought it myself.
Get
Your Pitchfork On!
is the antidote to The
Bucolic Plague ---
just as engagingly written, but with more down to earth information
that a normal homesteader can relate to. Kristy Athens and her
husband were happily growing vegetables and fruit in the city, but they
wanted more, so they snapped up a 7 acre farm beside the Columbia River
Gorge. Kirsty's book tells their story, interspersed with lots of
fascinating information that will prepare city-dwellers for the country
life.
Although I don't agree
with everything the author says (when do I ever?), I wanted to
recommend this book to several folks I know who have recently moved
from the city to the country. It's a bit like an immersion course
to ensure you speak the right language when in a foreign land.
For example:
“Who does he think he is?!” she sputtered to me on the phone.
Don’t let this be you. I know it’s not “safe” to have one’s dog in the back of a pickup. That isn’t the issue. You don’t have to transport your dog that way, but don’t tell other people what to do.
If you're considering buying land in the country and want to learn to fit in, this book should definitely find a place on your permanent bookshelf. And it's worth checking out of the library even if you're an armchair homesteader or already have your perfect piece of paradise. Since it was put out by a small press, Get Your Pitchfork On! isn't very well known, but it deserves better recognition --- go tell your friends!
Our chicken waterer is the clean solution to
fowled water.
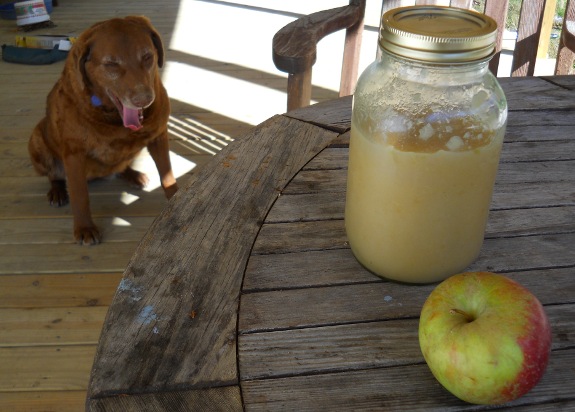
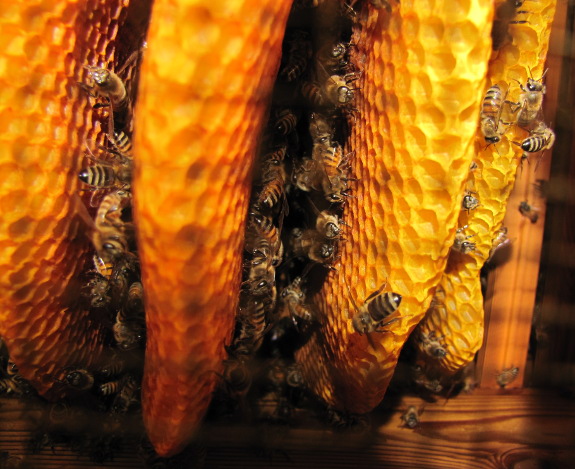
The bees have drunk a
bit more than a gallon of sugar water in
the last couple of weeks. By my estimate, that
should have filled about a third of a Warre hive box up with honey, but
the view from below is exactly the same as it was when I started my
force-feeding campaign.
Chances are the bees are
simply filling in the upper boxes, which is why I don't see any capped
honey below. I wish I could be sure, which brings me to a
physics/math question for my geekier readers.
Some people weigh a hive
by tipping up one side and putting a bathroom scale underneath, then
tipping up the opposite side and repeating. I believe they
usually just add those two figures to come up with a total weight for
the hive. But I'm not sure that makes sense, and I feel like the
angle would also be important. If you don't know if the honey is
evenly distributed throughout the hive, can you gauge the weight of a
hive piecemeal?
 After
figuring out your rootstock, you'll still need to hunt
down some
scionwood before starting to graft. Scionwood (sometimes simply
called "scion") consists of small twigs of the variety you want your
final fruit tree to become. By grafting a piece of Arkansas Black
scionwood onto a rootstock, for example, all aboveground growth of the
tree will produce Arkansas Black apples.
After
figuring out your rootstock, you'll still need to hunt
down some
scionwood before starting to graft. Scionwood (sometimes simply
called "scion") consists of small twigs of the variety you want your
final fruit tree to become. By grafting a piece of Arkansas Black
scionwood onto a rootstock, for example, all aboveground growth of the
tree will produce Arkansas Black apples.
How and when you collect
your scionwood depends on the type of graft
you plan to perform. Budding is done in the summer, so you want
to clip off scionwood during the growing season and graft right
away. The scionwood is often called a "budstick" in this case,
and the number of buds on it is not relevant since you'll be using one
at a time.
Most of us (especially
if we live in more northern states
and are grafting apples and pears) will be grafting during the winter,
in which case we collect scionwood during the dormant season and store
it in a cellar, underground, or in the fridge until late winter. Michael
Phillips recommends
gathering dormant scionwood in January or February, wrapping it in
moist newspaper and then in a ziplock bag, and storing the cuttings in
the fridge. No matter how you store it, you should be careful not
to let your scionwood, freeze, dehydrate, or mildew.
Scionwood for dormant
grafting should be carefully selected. The best scionwood comes
from the previous season's growth (meaning the twigs aren't quite a
year old) and doesn't contain any flower buds. The tip of the
previous year's growth isn't as good, so if you have the choice, you'll
want to cut your scionwood from the lower two-thirds of the young
branch. Select a piece about 12 to 18 inches long to give you
wiggle room if you can, but if scionwood is in short supply you can get
away with shorter pieces as long as each one contains three or four
buds. The twigs you select should be about the thickness of a
pencil, roughly a quarter to half an inch in diameter.
But how do you find a
tree to cut scionwood from? If you're lucky, you'll have a
helpful neighbor with a tasty variety you want to try out in your own
yard. (I hope to get some Seckel pear scionwood that way from my
movie star neighbor.) Alternatively, you can buy scionwood from
online nurseries, or check out this site to swap
scionwood with fellow enthusiasts. Finally, I'd be glad
to swap scionwood with any of you if you have varieties I'm looking for
and want one of my cuttings in exchange.
| I can give: |
I'm looking
for: |
|
|
Drop me an email if you're interested, or leave a comment below to swap with other readers.
| This post is part of our Grafting lunchtime series.
Read all of the entries: |
Our new way of dealing
with Asparagus Beetles is to cut down the asparagus plants in the
Fall and use them as deep bedding in one of the chicken coops. The
chickens get to snack on the larvae when they wake up in the Spring.
We only found one Asparagus
Beetle last year and zero for 2012.
Maybe 2013 will be our first
year of serious asparagus?
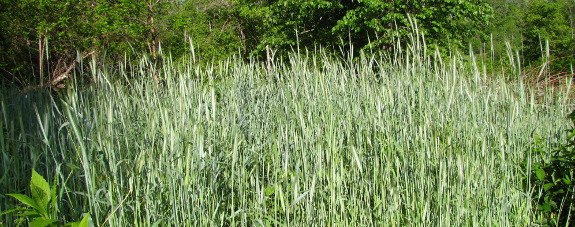
Another year, another
experimental cover crop. This time around, I'm trying rye
(different from the ryegrass I tested out this spring) in
hopes that it'll fill an empty niche in our system. Starting at
our frost free date in the spring (May 15), I use buckwheat to fill garden gaps, then
transfer over to oats
and oilseed radish
in midsummer. In past years, I've simply kill mulched beds that
come open in the fall, but this seems like a waste of growing time (and
expensive straw), especially when balmy spring days make me itch to
fill those beds with cover crops.
 Rye didn't make it onto my
radar previously because the cereal is usually killed by tilling in,
and I'm stubbornly steering clear of cover crops that won't die
easily. However, I recently read that rye is readily mow-killed
if you wait until the flowers have fully opened, an event that happens
when day length reaches 14 hours (May 14 here, according to this
handy calculator and
last year's
rye experiment).
My new scythe will make cutting what
amounts to ultra-tall grass easy.
Rye didn't make it onto my
radar previously because the cereal is usually killed by tilling in,
and I'm stubbornly steering clear of cover crops that won't die
easily. However, I recently read that rye is readily mow-killed
if you wait until the flowers have fully opened, an event that happens
when day length reaches 14 hours (May 14 here, according to this
handy calculator and
last year's
rye experiment).
My new scythe will make cutting what
amounts to ultra-tall grass easy.
Granted, you need to
wait three to four weeks after killing rye before spreading small
vegetable seeds because of rye's allelopathic properties, and even
larger seeds and transplants can suffer from lack of nitrogen if you
plant too soon after killing the cover crop and without adding extra
compost. However, I often don't plant some beds in the front
garden until late May to mid June since I like to succession-plant
summer crops, so I'm confident I can work around rye's issues.
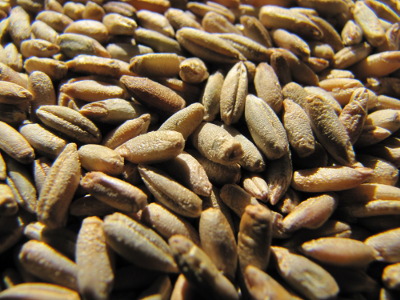 Potential problems with
killing the cover crop aside, rye is beloved by many farmers and is
probably the most-used cover crop in the U.S. Rye is supposed to
produce up to 10,000 pounds of dry matter per acre while outcompeting
weeds and growing in colder weather than any other cereal. I was
very happy with the amount of growth of my first rye experiment last
year, so I'm looking forward to seeing how this cover crop does in the
garden.
Potential problems with
killing the cover crop aside, rye is beloved by many farmers and is
probably the most-used cover crop in the U.S. Rye is supposed to
produce up to 10,000 pounds of dry matter per acre while outcompeting
weeds and growing in colder weather than any other cereal. I was
very happy with the amount of growth of my first rye experiment last
year, so I'm looking forward to seeing how this cover crop does in the
garden.
 My
topworking this past spring failed miserably. I think part of that
was user error and environmental factors beyond my control, but another
big part of the problem was lack of proper tools. So I decided to
weigh the odds in my favor this winter by buying proper equipment and
supplies.
My
topworking this past spring failed miserably. I think part of that
was user error and environmental factors beyond my control, but another
big part of the problem was lack of proper tools. So I decided to
weigh the odds in my favor this winter by buying proper equipment and
supplies.
The most essential tool
for grafting is a quality knife. It should be edged on one side
and flat on the other, and should be of high enough quality metal that
you can sharpen it on a stone. If you get into more complicated
types of grafting, you may also want to get a budding knife (curved on
the tip), surgical knives (for herbaceous plants), and cleaving tools,
mallets, and wedges for topworking, but most of us can skip
those. However, you will probably want to have normal pruning
tools and a lower quality knife on hand so you don't ruin your grafting
knife by cutting bindings or preparing branches.
The next item you'll
need is some kind of sealant (along with a brush --- half an inch wide
by three quarters of an inch long). In The
Grafter's Handbook,
Garner mentions all kinds of old fashioned recipes made out of some
subset of clay, fresh horse manure, hay, hair, wax, resin, and more,
but I suspect it's worth spending a few dollars to take advantage of
modern technology. Phillips recommends Trowbridge's
grafting wax
(although it needs heat to liquify), Doc Farwell's latex grafting
compound, or Treekote.
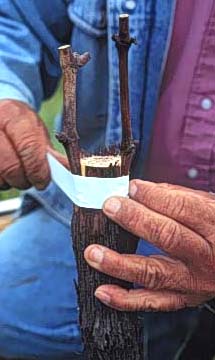 Finally, you will want some
kind of binding material. During Garner's era, grafters tied the
scionwood to the rootstock with raffia, pieces cut from inner tubes,
rubber bands, plastic strips, sheets of rubber covered in tinfoil (for
herbaceous plants), or cotton twine dipped in wax. They sealed
larger areas with cotton sheets dipped in grafting wax or beeswax,
counting on the weak cloth to tear as the tree grew. Phillips
recommends electrical tape or parafilm (both of which have to be
removed in one or two months, as did many of Garner's materials), or rubber
grafting strips (which grow with the twig).
Finally, you will want some
kind of binding material. During Garner's era, grafters tied the
scionwood to the rootstock with raffia, pieces cut from inner tubes,
rubber bands, plastic strips, sheets of rubber covered in tinfoil (for
herbaceous plants), or cotton twine dipped in wax. They sealed
larger areas with cotton sheets dipped in grafting wax or beeswax,
counting on the weak cloth to tear as the tree grew. Phillips
recommends electrical tape or parafilm (both of which have to be
removed in one or two months, as did many of Garner's materials), or rubber
grafting strips (which grow with the twig).
I went ahead and bought
a Victorinox
Florist's Grafting Knife, which has a cheap plastic
casing but good reviews for the low price. But I haven't decided
what to do about sealant and binding material, so I'd be very curious
to hear from other grafters out there. What do you use?
| This post is part of our Grafting lunchtime series.
Read all of the entries: |
We decided to replace the
battery cable I was wire brushing last week
My new system will include a
generous dab of Permatex dielectric grease to prevent
future rust and corrosion.
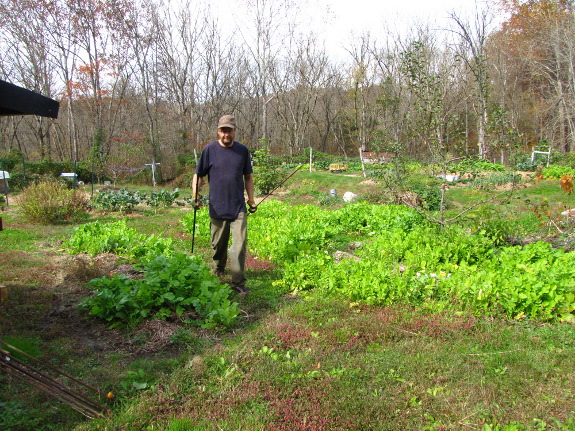
The oilseed
radishes I slipped into gaps in the forest garden in early September have formed a sea of
yellow-green, but it's time to give that area a little more TLC.
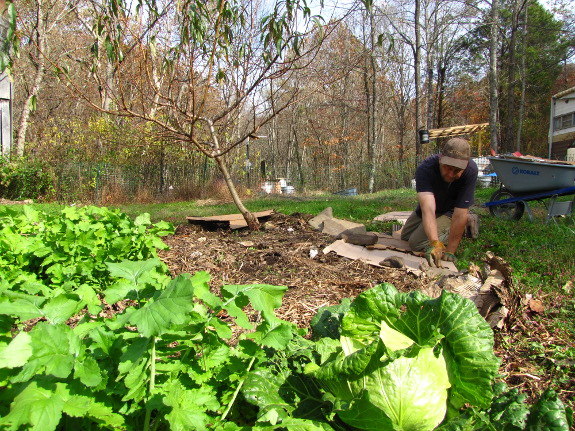
Mark pulled out the dead
tomato vines, put away stakes, and
laid down kill mulches to expand each tree's mulched area to the
dripline.
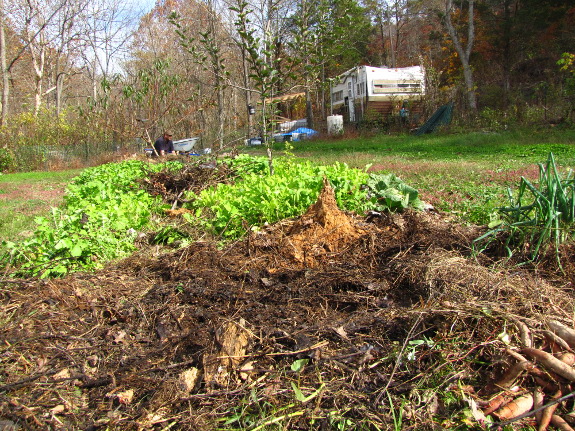
Meanwhile, I ripped out
weeds and pushed back mulch to open up bare ground beyond the trees'
likely root zone. Tossing down rye
seeds there will
result in homegrown mulch in the spring.
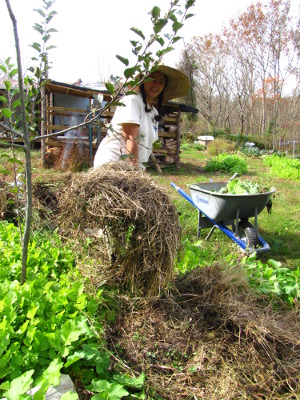 All
summer, I'd dumped wheelbarrows full of weeds at the edges of the
forest garden beds, then fertilized the high carbon biomass with urine. I could have done
this right in place around the trees, but I didn't want excess nitrogen
to send the woody plants off in vegetative sprints, and I also wanted
an easy place for wheelbarrow dumping. A final reason to keep my
weed piles outside the tree zone is that sometimes weeds reroot in our
wet climate, and mounding up the pulled out plants smothers the ones
underneath so they all perish.
All
summer, I'd dumped wheelbarrows full of weeds at the edges of the
forest garden beds, then fertilized the high carbon biomass with urine. I could have done
this right in place around the trees, but I didn't want excess nitrogen
to send the woody plants off in vegetative sprints, and I also wanted
an easy place for wheelbarrow dumping. A final reason to keep my
weed piles outside the tree zone is that sometimes weeds reroot in our
wet climate, and mounding up the pulled out plants smothers the ones
underneath so they all perish.
The result of my summer
weed piles was a lot of partially decomposed biomass ready to fertilize
and mulch my fruit trees. I forked the brown matter around the
base of each fruit tree to give them a boost just as their
roots hit peak fall growth.
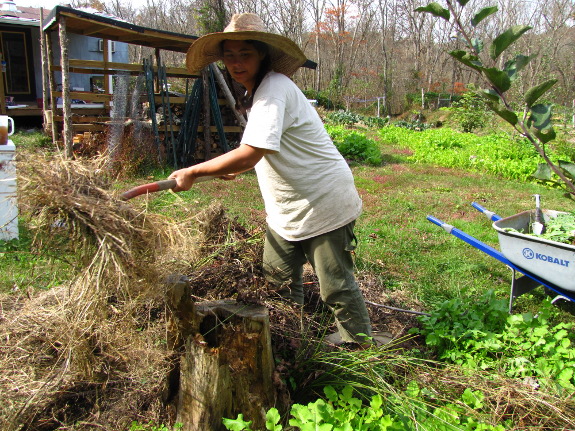
While I was at it, I
broke apart a stump that had been slowly decaying beside one of my
apple trees. Other forest garden beds are full of the fluffiest,
darkest soil imaginable from my hugelkultur donuts, and this bed could use a
woody boost too. I laid the stump pieces rotted-side-down close
to the tree so the organic matter will work its way into the soil
faster.
One beautiful fall
afternoon and half the forest garden is in shape. I hope the
extra care will help our baby trees grow faster and bear sooner.
 The fourth chapter of The
Holistic Orchard was
mostly about what can go wrong in the orchard and how to prevent bugs
and diseases from ruining your crop. I'm going to skip over the
insect information since it was pretty mainstream, and instead give you
a rundown on Phillips' more unique recommendations for managing fungal
disease.
The fourth chapter of The
Holistic Orchard was
mostly about what can go wrong in the orchard and how to prevent bugs
and diseases from ruining your crop. I'm going to skip over the
insect information since it was pretty mainstream, and instead give you
a rundown on Phillips' more unique recommendations for managing fungal
disease.
Once the fungus has a
real foothold on your tree, holistic prevention
techniques have failed and you're stuck either throwing up your hands
and calling the year a loss (like I did with our peach brown
rot two years ago),
or using harmful chemicals. But it's also possible to plan ahead
and block pathogenic fungi from successfully overwintering and/or
infecting the tree in the first place. Techniques we can all get
behind include boosting the health of the tree with proper nutrition so
its immune system is able to fight off that initial infection, and
helping leaves decompose as quickly as possible in the fall so the
fungi can't survive until spring.
 Phillips' sprays are a little
more controversial. He blasts his trees with storebought
beneficial microbe mixes and compost tea (to colonize leaf surfaces and
prevent pathogenic fungi from getting a foothold), molasses (to feed
the good fungi and bacteria), whey (to fight bad fungi), herbal teas
(to boost leaf silicon and calcium levels), liquid fish and seaweed
(for micronutrients), and neem
oil (to smother
insects and feed good microorganisms).
Phillips' sprays are a little
more controversial. He blasts his trees with storebought
beneficial microbe mixes and compost tea (to colonize leaf surfaces and
prevent pathogenic fungi from getting a foothold), molasses (to feed
the good fungi and bacteria), whey (to fight bad fungi), herbal teas
(to boost leaf silicon and calcium levels), liquid fish and seaweed
(for micronutrients), and neem
oil (to smother
insects and feed good microorganisms).
The last item on the
list --- neem oil --- is the one Phillips swears by the most, and the
one that I think is closest to an allopathic medicine. (In other
words, I think it's a bit harsh on the ecosystem to be used
preventatively.) Like other oils used to kill and deter pests,
neem oil is likely to harm untargeted insects, and can even damage the
tree itself if sprayed on too thickly at the wrong time of year.
I'd put neem oil at about the same level as Bt --- if you're
comfortable with using one, you probably won't mind using the other.
 I'd be curious to hear how
you felt about this spray-based approach to tree health. There
was a lot of other fascinating information in this chapter too, like
how to mix fruit trees with grass without starving the tree roots, so
feel free to leave your comments on those tidbits as well.
I'd be curious to hear how
you felt about this spray-based approach to tree health. There
was a lot of other fascinating information in this chapter too, like
how to mix fruit trees with grass without starving the tree roots, so
feel free to leave your comments on those tidbits as well.
Next Wednesday, we'll be
moving into the second half of the book, which profiles each type of
fruit tree in a mouth-watering but still educational way. Chapter
five covers apples and pears, and since I've written about disease-resistant
apple varieties (and a lot of other apple-related information)
lately, I'll be focusing in on the pears. I hope you'll read
along and chime in with your own pear experiences.
Finally, those new to
the club might want to check out
previous posts on beginning
a holistic orchard, techniques
for designing a holistic orchard, and orchard
soil health. Even though these summaries are long and
intense, I'm only barely skimming the highlights of this fascinating
book, so I highly recommend you hunt down a copy and join the club.

That lower
back pain is slowly decreasing with each day.
I think I've finally learned
my lesson on how important it can be to stretch and warm up before
doing any heavy shoveling.
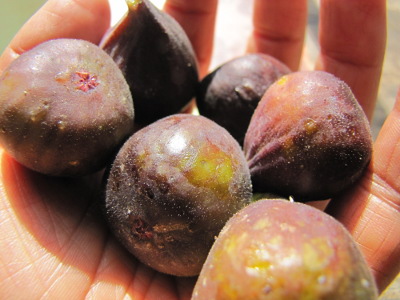 Our
fig tree has changed a lot in the last month. We missed a couple
of frosts by a hair, and the tree could clearly tell that its growing
time was limited. So it began ripening up figs right and left,
holding back some water and turning the skins more purple in the
process.
Our
fig tree has changed a lot in the last month. We missed a couple
of frosts by a hair, and the tree could clearly tell that its growing
time was limited. So it began ripening up figs right and left,
holding back some water and turning the skins more purple in the
process.
I actually prefer the
taste of these late fall figs --- they're less watery, so the flavors
are already concentrated even before I cut them in half and roast them in the toaster
oven. But I had to tweak my roasting technique. Waiting
until I hear juices sizzle in the pan will now result in burnt figs, so
I instead roast until the tops begin to look dry.
Yes, we're still obsessed. No, I still can't
imagine ever having enough homegrown figs. Our weekly quarts of
fall raspberries are nearly as good, though.
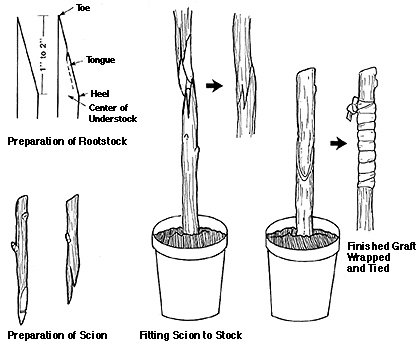 When it comes right down to
it, you really only need to know two methods to graft most young fruit
trees. The whip and tongue graft is the simplest, appropriate for
young apple and pear trees grafted onto rootstock the same
pencil-thickness as the scionwood. Budding is used if you have
very little scionwood to go arond or if you need to graft a cherry,
plum, apricot, or peach, none of which are reputed to respond well to
whip and tongue grafting. Budding is also less sensitive to the
scionwood and rootstock having different diameters.
When it comes right down to
it, you really only need to know two methods to graft most young fruit
trees. The whip and tongue graft is the simplest, appropriate for
young apple and pear trees grafted onto rootstock the same
pencil-thickness as the scionwood. Budding is used if you have
very little scionwood to go arond or if you need to graft a cherry,
plum, apricot, or peach, none of which are reputed to respond well to
whip and tongue grafting. Budding is also less sensitive to the
scionwood and rootstock having different diameters.
A whip and tongue graft
joins the scionwood to the top of the rootstock using a slanting cut to
increase surface area and a notch (the tongue) to help the two pieces
stay in place as you tie them. Select a point about four to eight
inches above the ground on the rootstock, where the diameters of the
two pieces of wood match, then make a cut six times the diameter of the
wood (says Garner), or roughly an inch and a
half long (says Phillips). You'll want to
practice until you can make a cut with no bulges or raggedness, then
focus on lining up the tips and the cambium all around so that there's
an 80% visual match. Add the tongue (a 1/8 inch cut into each
piece of wood), then trim the scion to two buds before slipping the
joints together.
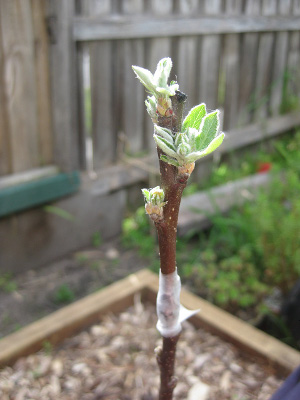 After making the cuts for a
whip and tongue graft, you'll want to wrap the new tree with some kind
of binding
material to hold the junction firmly in place. Start at the
bottom and leave space between loops as you circle up to ensure you
haven't gotten the pieces out of alignment, then cover everything up by
taping back down over the junction. Add some sealant on the tip
and over the tape and then plant your new tree out in a garden bed for
the first year. In early June, the buds on the scionwood should
have sprouted and the longest should be at least two to four inches
long; that's your cue to pinch the tips of all but the best shoot and
to remove any rootstock growth.
After making the cuts for a
whip and tongue graft, you'll want to wrap the new tree with some kind
of binding
material to hold the junction firmly in place. Start at the
bottom and leave space between loops as you circle up to ensure you
haven't gotten the pieces out of alignment, then cover everything up by
taping back down over the junction. Add some sealant on the tip
and over the tape and then plant your new tree out in a garden bed for
the first year. In early June, the buds on the scionwood should
have sprouted and the longest should be at least two to four inches
long; that's your cue to pinch the tips of all but the best shoot and
to remove any rootstock growth.
These instructions
assume you're followed the American trend of bench grafting (which
simply means you dug up rootstocks and took them inside to graft), in
which case you probably joined your rootstock and scionwood between
December and March. If grafting onto a rootstock in the field,
you'll want to wait until the week before the first green shows on the
buds so that winter's cold won't damage the new union.
In contrast, bud
grafting is generally completed in the summer, between June and early
August. There are many types of bud grafts, but shield budding is
most common. First, prepare the rootstock by making a T-shaped
series of slits in its bark, then slide in a carefully  prepared bud shield.
The bud comes from the leaf axil of the current season's growth and
consists of the bud and the leaf stem. After slipping the piece
of scionwood under the rootstock's bark (with the bud itself sticking
out), you tie the two together and seal the wound, but don't cut off
the top of the rootstock yet. Instead, you let the bud heal into
the young tree, sometimes waiting until the next year to tempt the
scionwood to grow. Once it's time to force the bud, slowly remove
leafy shoots of the rootsock a few at a time, or bend down the top of
the stock so the scion bud is the highest one on a curved stem.
After the bud begins to grow well, you can cut off the top of the
rootstock so the scionwood takes its place.
prepared bud shield.
The bud comes from the leaf axil of the current season's growth and
consists of the bud and the leaf stem. After slipping the piece
of scionwood under the rootstock's bark (with the bud itself sticking
out), you tie the two together and seal the wound, but don't cut off
the top of the rootstock yet. Instead, you let the bud heal into
the young tree, sometimes waiting until the next year to tempt the
scionwood to grow. Once it's time to force the bud, slowly remove
leafy shoots of the rootsock a few at a time, or bend down the top of
the stock so the scion bud is the highest one on a curved stem.
After the bud begins to grow well, you can cut off the top of the
rootstock so the scionwood takes its place.
I've used whip and
tongue grafting before and found it relatively simple, but haven't
tried budding yet. How about you? Are there other grafting
techniques you recommend for the beginner?
| This post is part of our Grafting lunchtime series.
Read all of the entries: |
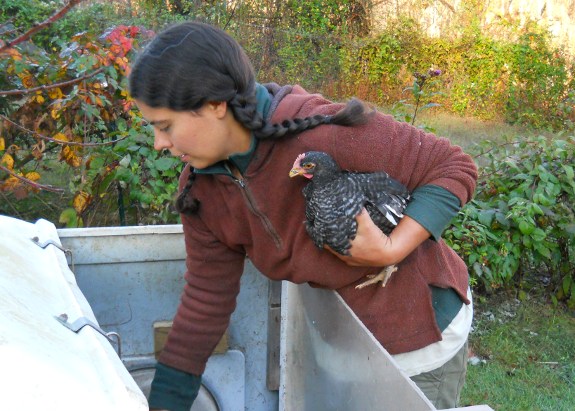
We moved them two at a time to a nearby pasture today.
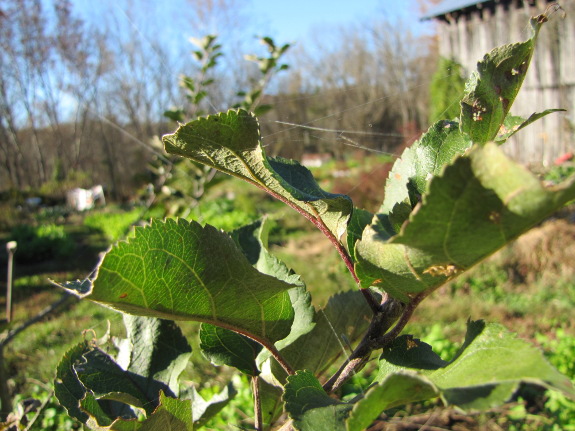
Like most amateur
fruit-growers, I've had a tendency to ignore the rootstock when
selecting new trees. Reading The
Holistic Orchard and
The
Grafter's Handbook,
though, helped me realize that rootstocks are responsible for a lot
more than the size of the tree, so I dropped an email to my
favorite orchard
(the source of a lot of my apples) to see what rootstock I currently
have in my garden.
MM111 is one of the
older apple rootstocks, and it's still around for a reason --- it's
clearly a workhorse. The roots do just what they should,
anchoring the apple trees firmly and helping them survive in poorly
drained, heavy clay soil (like mine). While some other fruit
trees have perished in our garden, my apples on MM111 keep plugging
along.
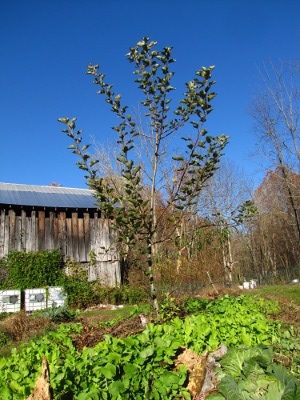 On the negative side, trees
grafted onto MM111 seem to be inclined toward burr knotting, and (as
with all dwarfing rootstocks) the trees don't live quite as long as
seedlings --- 40 years instead of 75, in this case. If you're
concerned about the disadvantages of MM111 (or of any other rootstock),
you can plant the tree deep enough to bury the graft union and the
scionwood will root, creating what's essentially a seedling tree (which
may have its own disadvantages).
On the negative side, trees
grafted onto MM111 seem to be inclined toward burr knotting, and (as
with all dwarfing rootstocks) the trees don't live quite as long as
seedlings --- 40 years instead of 75, in this case. If you're
concerned about the disadvantages of MM111 (or of any other rootstock),
you can plant the tree deep enough to bury the graft union and the
scionwood will root, creating what's essentially a seedling tree (which
may have its own disadvantages).
Of course, size does
matter, not only because you might not fit a full-size apple tree into
your homestead, but also because smaller trees bear much faster (4 to 6
years in this case compared to 8 to 12 years for a seedling
tree). MM111 produces a tree that's 70% to 85% the size of a
seedling (aka standard) apple tree, with the lower figure referring to
less vigorous, spur apples and the larger size referring to more
vigorous varieties. (This site
gives information on the vigor of many common apple varieties.)
That means your tree is likely to get 14 to 20 feet tall (depending,
again, on vigor of the scionwood variety), and trees should be spaced
that distance apart.
Yellow Transparent is
listed as very vigorous, but my other varieties are supposed to have
medium vigor, so I think I've actually given my apple trees more room
than they need (25 feet between each one). That's good news since
it gives me space in between for extra forest garden experimentation
--- more on that in a later post.
 In addition to the simple
grafts used to make new sapling fruit trees, it's worth learning about
techniques you can use to change the variety of more mature trees --- topworking and frameworking.
These related techniques can both be used to completely alter the
variety of a mature tree, or to add on a limb of a new variety when
creating a fruit
cocktail tree.
In addition to the simple
grafts used to make new sapling fruit trees, it's worth learning about
techniques you can use to change the variety of more mature trees --- topworking and frameworking.
These related techniques can both be used to completely alter the
variety of a mature tree, or to add on a limb of a new variety when
creating a fruit
cocktail tree.
So what's the difference
between topworking and frameworking? Topworking is more drastic,
removing more of the current tree (so it takes longer to recover), but
also costing less time and money. Frameworking keeps the main
branches and adds on new fruiting laterals, using scions with six to
eight buds and joining the two with stub grafting, side grafting, or
inverted L rind grafting. In contrast, topworking cuts limbs back
further and generally uses cleft grafts, oblique cleft grafts (which
Garner considers better than the former), rind grafts (if you can wait
until April when the bark slips), or strap grafts (a very good graft if
you are skilled enough to handle the complexity).
 I won't go into each kind of
grafting technique here --- I recommend you check out The
Grafter's Handbook
or peruse some extension service websites if you want to give any of
them a try. But I'll be writing about this more next spring when
I try again to change the varieties of my pear trees (this time
probably using the more appropriate frameworking).
I won't go into each kind of
grafting technique here --- I recommend you check out The
Grafter's Handbook
or peruse some extension service websites if you want to give any of
them a try. But I'll be writing about this more next spring when
I try again to change the varieties of my pear trees (this time
probably using the more appropriate frameworking).
I hope you haven't
gotten bored with all this talk of grafting, and that it's inspired you
to consider making some changes in your own orchard. We've got
several experiments on the horizon in addition to our pear
frameworking, including adding a pollinator branch to our plum tree,
trying out more apple varieties by grafting a few limbs onto our
existing trees, and grafting Asian persimmon tops onto our American
persimmon seedlings.
Do you have any grafting experiments in the pipeline?
| This post is part of our Grafting lunchtime series.
Read all of the entries: |
 Oilseed
radishs have been an extremely effective cover crop for us this
year.
Oilseed
radishs have been an extremely effective cover crop for us this
year.
We normally leave them in the ground to rot and feed the soil, but
today we got to talking about other uses.
"Do you think the chickens
might eat one?" I asked Anna.
"Sounds like a fun
experiment," she said with a touch of excitement.
We sliced it up and boiled
half. The young chickens took a few sample bites from the boiled
radish, but didn't seem to touch the raw slices. Maybe we need to boil
it longer or try feeding some to the older hens?
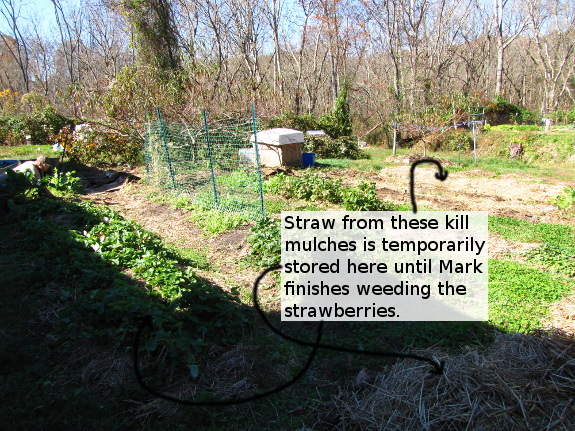
I get a lot of questions
from folks asking when to take apart a kill
mulch and how to plant into it. In general, I like to lay down
kill mulches that will rot in place and never be messed with again, but
now and then I make more temporary
kill mulches.
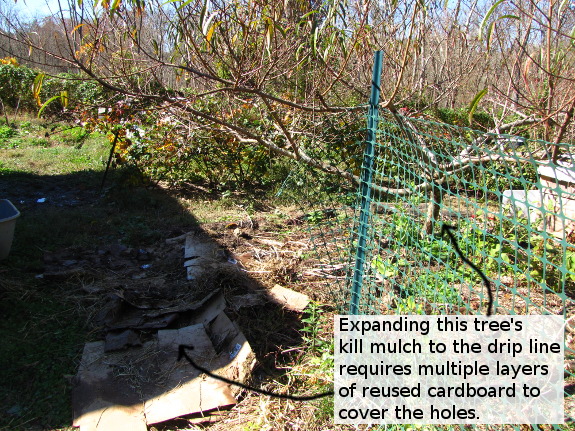
As an example of a
temporary kill mulch, I laid down sheets of cardboard covered by straw
to kill the last of the ryegrass about six weeks ago, and now
I want to plant rye
there to keep growing biomass over the winter. So I simply
scooped up the straw and moved it to another part of the vegetable
garden, then peeled back the partially rotted cardboard, which I piled
up to make a more permanent kill mulch expanding a peach bed. The
grass underneath was all dead but only partially decomposed, so I raked
it to the edge of the bed to keep rotting before scattering rye seeds
on top of the damp soil.
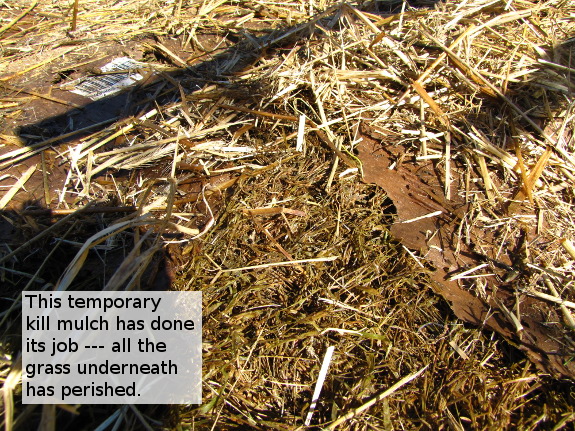
If you don't have a
reason to direct-seed into a young kill mulch,
though, you'll get more biomass into the soil by leaving the cardboard
in place. During a damp, warm summer, cardboard completely
disappears in a few months, and a cold, wet winter will do the same
job, if more slowly. (Counterintuitively, newspaper rots less
quickly, but even it will dissipate in a few summer months.) Then
you can simply rake the straw to the edge of the bed for later if
you're going to be scattering seeds, or open up a small hole for
transplanting tomatoes or garlic bulbs. Instant no-till garden!
We had fun this afternoon
taking a tour of the Copper
Creek Ranch just outside of Gate City.
They breed rare heritage
livestock.
Give them a hollar if you
need a Chocolate Turkey to add to your flock.
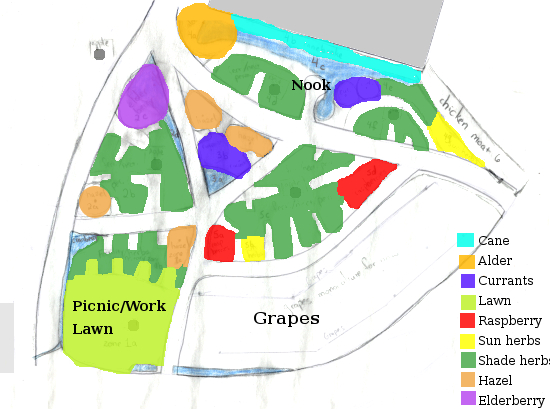 A
little less than four years ago, I read Edible
Forest Gardens and
got all fired up. You can read my
ambitious plan from that winter. Now here's what didn't work:
A
little less than four years ago, I read Edible
Forest Gardens and
got all fired up. You can read my
ambitious plan from that winter. Now here's what didn't work:
- The kind of swales I made concentrate rather than drain away water. Luckily, raised hugelkultur planting mounds saved my fruit trees (and created awesome, fungally dominated soil in the process).
- At least while young, the
trees weren't able to compete with dynamic accumulators like comfrey
due to the poor soil on the site. So I changed over to
mulching around the base of each tree, keeping other plantings beyond
the dripline.
- Keyhole beds increase the edge area between beds and paths, which means a lot more weeding if you have grassy aisles. I'm slowly changing over to more linear beds for easier weeding.
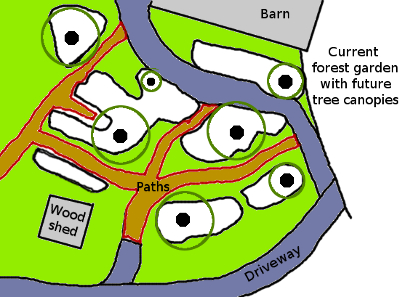 Four years later, the area is
really more of an orchard than a forest garden, but a couple of years
of adding high
value vegetables beyond the trees' root zone has won the troubled
area from the weeds, and I feel ready to start expanding back out into
more diversified plantings. Now I realize that my goals with
non-fruit plantings should be much simpler, focused around building
quality soil as quickly as possible so the trees will have something
other than waterlogged clay to expand their roots into as they grow.
Four years later, the area is
really more of an orchard than a forest garden, but a couple of years
of adding high
value vegetables beyond the trees' root zone has won the troubled
area from the weeds, and I feel ready to start expanding back out into
more diversified plantings. Now I realize that my goals with
non-fruit plantings should be much simpler, focused around building
quality soil as quickly as possible so the trees will have something
other than waterlogged clay to expand their roots into as they grow.
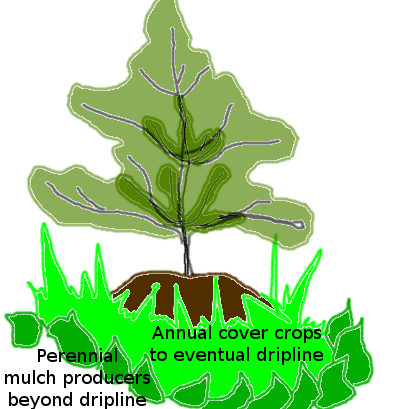 My new plan is to keep the
soil directly under the current trees' branches completely mulched, at
least until the trees are large enough to handle competition.
Meanwhile, a ring of annual cover crops (buckwheat in the summer, oats,
oilseed radishes, or rye in the winter) will be building soil in the
zone where tree roots will soon be growing. I'll concentrate
perennial mulch producers (like comfrey) beyond the eventual spread of
the tree.
My new plan is to keep the
soil directly under the current trees' branches completely mulched, at
least until the trees are large enough to handle competition.
Meanwhile, a ring of annual cover crops (buckwheat in the summer, oats,
oilseed radishes, or rye in the winter) will be building soil in the
zone where tree roots will soon be growing. I'll concentrate
perennial mulch producers (like comfrey) beyond the eventual spread of
the tree.
Stay tuned for more
specifics on the mulch producers I'm thinking of branching out into in
a later post. Meanwhile, I'd love to hear from others who have
started young forest gardens. Which parts of your book learning
worked and didn't work for you?
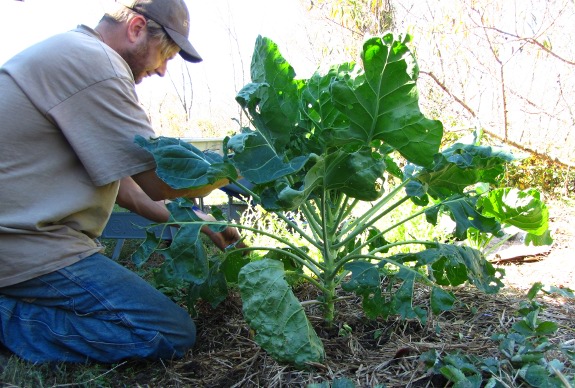
We might be finally growing
enough broccoli to satisfy our demand.
Our 2010 broccoli
expansion efforts worked
so well we repeated it for 2011 and 2012 with impressive results.
Now it's hard to imagine a
Fall without fresh, yummy broccoli.
 "Speak
the right language? Fit in? Sounds like bs to me. Of course you don't,
like the tourist, go about lecturing people on the "right way" to do
things. But if a subject is at hand, you don't hide your point of view
for the sake of conforming or being kewel, either."
"Speak
the right language? Fit in? Sounds like bs to me. Of course you don't,
like the tourist, go about lecturing people on the "right way" to do
things. But if a subject is at hand, you don't hide your point of view
for the sake of conforming or being kewel, either."--- Jackie (in response to my post about Get Your Pitchfork On!)
Should a homesteader try to
fit in when moving to a rural area? My gut reaction is to agree
with Jackie, but reality has proven that it's actually worth the effort
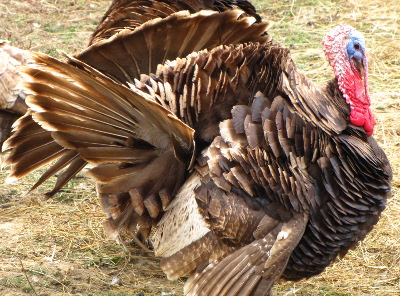 to keep an open mind and resist alienating our neighbors.
On average, the guy down
the street from your new homestead is more religious, less liberal
politically, and less inclined to treat a dog or a cat like a
pet. Chances are he makes a living running a piece of heavy
machinery at a strip mine while his wife may be a nurse at the nearest
city's hospital.
On the other hand, he
may agree with you that hunting is an all-American pursuit, and can
probably give you some pointers to make your first animal-processing
endeavor much less fraught. If you're a home canner, his wife may
have a recipe to share for her grandmother's award-winning pickles, and
either one can probably tell you more about vegetable varieties that
suit your region than any book.

Yes, they probably think
nothing of fertilizing with 10-10-10 and drenching their crops with
herbicides, pesticides, and fungicides. But most country people
are also willing to let quite a bit of zany originality slide, so while
they may roll their eyes at your forest garden, they'll still offer you
a stool at the hardware store...once you've put in your four or five
years of local shopping to earn the opportunity.
I've noticed that
longer-lived back-to-the-land dreams seem to be built around a small
enclave of like-minded people, but that these homesteaders also tend to
meet their more mainstream neighbors in the middle and find common
ground. And it seems like if you bend a little bit to fit in, you
have more of a chance of winning your neighbors over to your point of
view as well. For example, sharing nutrient-dense strawberries
fertilized with horse manure is a sure way to get questions about how
to grow such flavorful food.
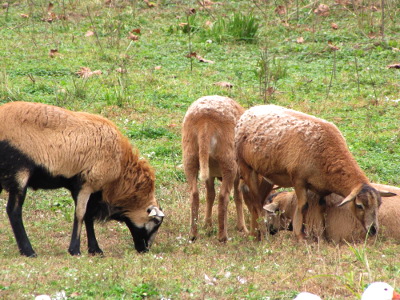 Over the years we've spent on
the farm, I've realized that fitting in isn't all bs --- sometimes it's
just opening that door of communication so you don't turn into an expat
who only socializes at the American embassy. After all, we moved
to the country because we love country skills. Why not learn from
the experts?
Over the years we've spent on
the farm, I've realized that fitting in isn't all bs --- sometimes it's
just opening that door of communication so you don't turn into an expat
who only socializes at the American embassy. After all, we moved
to the country because we love country skills. Why not learn from
the experts?
(By the way, the photos
are completely unrelated to the post --- I thought Mark didn't share
enough visuals from our very photogenic visit to Copper
Creek Ranch this
Saturday. But if you want, you can imagine your own subtitles,
telling you not to follow blindly like a sheep, but also not to be
stubborn as a mule.)
 One
thing Mike and I learned quickly on our land was that when you’re
building or repairing something, it doesn’t have to look pretty; it
just has to work. We took this philosophy to heart when
installing bridges in our woods.
One
thing Mike and I learned quickly on our land was that when you’re
building or repairing something, it doesn’t have to look pretty; it
just has to work. We took this philosophy to heart when
installing bridges in our woods.
Of our seven acres,
approximately one was a woodlot that hadn’t been messed with since the
first cut, probably in the 1930s when the house was built. Our
entire property sloped from the highway (our east border) westward,
toward the White Salmon River, and this woodlot was at the
bottom. Since our parcel was basically in the middle of a
half-mile slope from the top of the 1,000-foot ridge to the east and
the river, water moved through at a pretty good clip during the winter
rains and spring thaw.
The result: “water events,”
a euphemism that we grew to dread. As I mention in Get Your
Pitchfork On: The Real Dirt on Country Living:
Our woodlot was on its way
to becoming a ravine, but that didn’t stop us from enjoying it in the
interim. Bushwhacking was difficult and hard on the understory,
so Mike took on the project of establishing a few trails through the
woods.
If you combine the idea of
installing paths and the reality of water picking and choosing its
courses through the woods, you see the issue: we had to cross
swales. We didn’t want to build actual, arched bridges for a
couple of reasons: we wanted to maintain a natural feel in this little
forest, and with every “water event” changing the width and course of
each swale, we might build a great bridge only to have it fall into the
swale the following spring.
So, we decided to work with
the materials at hand: boards from the woodpile and downed trees.
These extra boards that were
lying around the barn worked for a while …
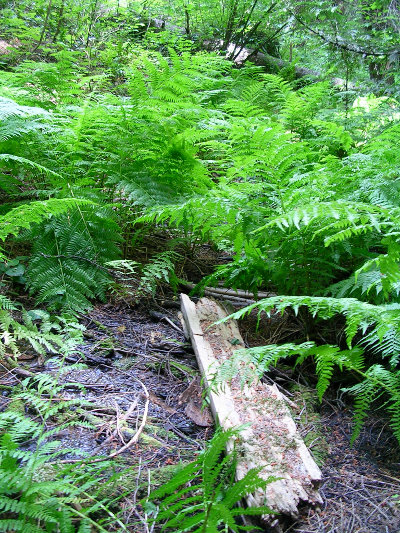
We repositioned this broken
piece of Douglas fir to traverse a particularly boggy spot, stabilizing
it on the ends with rocks so it didn’t roll back and forth
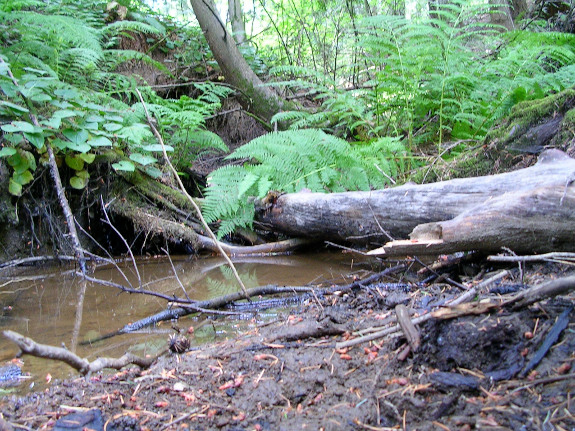
Very considerate of this
cedar to fall and help us cross this section!
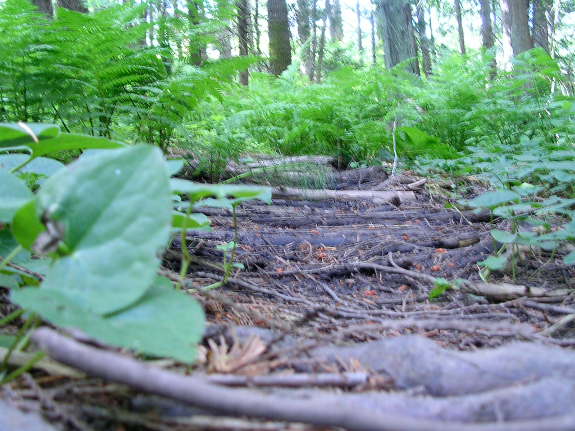
Where the ground was mucky,
we laid dozens of 2- to 4-inch-thick sticks across the trail to give us
purchase
Kristy
Athens’ nonfiction and short fiction have been published in a number of
magazines, newspapers and literary journals, most recently Culinate,
Jackson Hole Review, High Desert Journal, and Barely South
Review. She is the author of Get Your Pitchfork On!: The Real
Dirt on Country Living (Process Media, 2012), which was reviewed on The
Walden Effect in October.
We have a small problem where Lucy will sometimes chew a hole through a
section of chicken fence so she doesn't have to walk around the long way.
I tried fixing this back in
March with a door
made from a piece of scrap carpet. Lucy used it a few times but
soon forgot it was there and went back to her old ways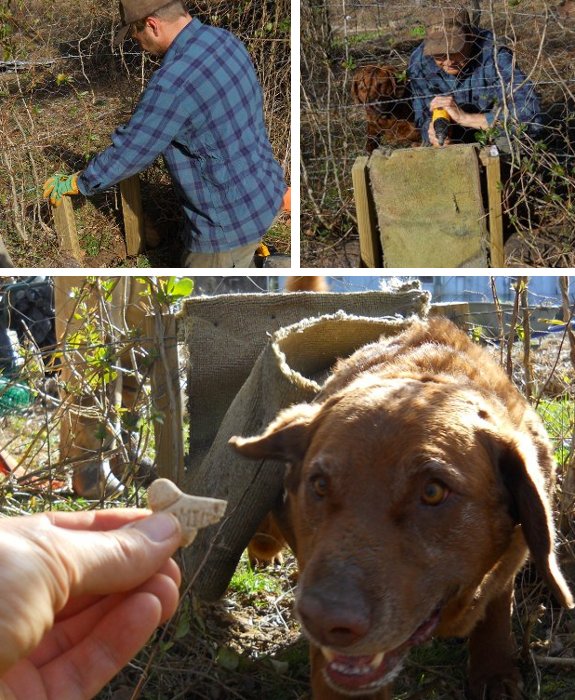 .
.
The failure here is directly
connected to the design. It's plenty big enough, but not being able to
see through to the other side is too much to ask of at least our dog.
The next version will use a piece of Plexiglass or maybe we'll break
down and buy a commercial dog door.
Chop 'n drop is a catchy
permaculture term for cutting plants and
letting them lie on the soil surface around fruit trees as a homegrown,
fungus-promoting mulch. When choosing mulch-producing plants, you
want to be sure to select species that can regrow multiple times in a
year (among woody plants, look for trees that can be coppiced), and
you'll also want to look at the quality of the biomass produced.
Any organic matter is
good, but if you want to replace compost with
chop 'n drop plants, head for the nitrogen-fixing legumes. On the
other hand, if you want to build soil as fast as possible, look instead
for less succulent plants like grains and trees. Another factor
to consider is dynamic
accumulation --- if
your soil is deficient in a particular
nutrient, these plants can often pull lost nutrients up from below the
root zone and make it available again.
Finally, don't forget
that your chop 'n drop plants will be competing
with any useful plants they intermingle roots with. In poor soil
like ours, it's best to keep the mulch producers outside the dripline
of fruit trees, which means your chop 'n drop technique will probably
look more like chop 'n toss-a-few-feet-to-the-side. Some plants
(like comfrey) are notorious for being impossible to eradicate once
they're in place, so if you don't want them to compete with your adult
trees, plant them beyond th eventual dripline.
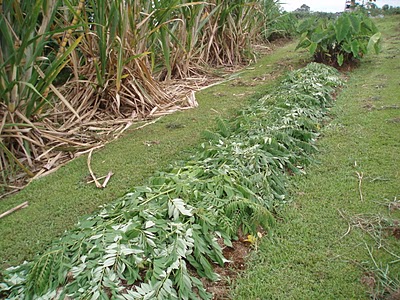 I'm thinking of adding some
chop 'n drop shrubs in the gaps between the
eventual canopy spread of my fruit trees in the forest
garden, with comfrey
lining the paths. Elderberry, mulberry,
hazel, and willow are all trees that coppice well (and which I can
propagate from existing plants in my garden or surrounding
areas). Pampas grass might be worth a try too --- the plants look
like they produce masses of quality organic matter every year, although
I'm not sure whether you can cut them in such a way that you don't end
up with seeds in your mulch. Finally, I haven't decided if I want
to mess with nitrogen-fixers yet since soil rebuilding is currently my
top priority, but if I do branch out, top choices there include
Siberian pea shrub and alder.
I'm thinking of adding some
chop 'n drop shrubs in the gaps between the
eventual canopy spread of my fruit trees in the forest
garden, with comfrey
lining the paths. Elderberry, mulberry,
hazel, and willow are all trees that coppice well (and which I can
propagate from existing plants in my garden or surrounding
areas). Pampas grass might be worth a try too --- the plants look
like they produce masses of quality organic matter every year, although
I'm not sure whether you can cut them in such a way that you don't end
up with seeds in your mulch. Finally, I haven't decided if I want
to mess with nitrogen-fixers yet since soil rebuilding is currently my
top priority, but if I do branch out, top choices there include
Siberian pea shrub and alder.
I'd love to hear which
chop 'n drop plants you've used and why they
were successful (or problematic) in your garden. Don't forget to
mention your general location in your comment so that folks will know
whether your recommendations are likely to suit their garden.
 Since I don't have a
lunchtime series this week, and Shannon is quite literally on vacation
(hiking the AT), I thought I'd pick your brains about our book club. We'll be coming to
the end of The Holistic Orchard
soon, and I'm curious to hear whether folks want to continue the
reading club now that weather is cooling down and inside chores are
demanding your attention. I've thoroughly enjoyed reading along
with you, but know that attention may be waning.
Since I don't have a
lunchtime series this week, and Shannon is quite literally on vacation
(hiking the AT), I thought I'd pick your brains about our book club. We'll be coming to
the end of The Holistic Orchard
soon, and I'm curious to hear whether folks want to continue the
reading club now that weather is cooling down and inside chores are
demanding your attention. I've thoroughly enjoyed reading along
with you, but know that attention may be waning.
If the book club is
still up your alley, some books that are itching for attention my
shelf include:
- Folks This Ain't Normal --- Joel Salatin's first mainstream-published book looks like a relatively easy read.
- The Resilient Gardener --- I've heard great things about this book, but it's dense (like The Holistic Orchard), so I need a bit of a nudge to get into it.
- Edible
Forest Gardens
--- I read this two volume set four years ago, and am starting to feel
like I need to go back over it with a fine tooth comb.
Alternatively,
it might be more interesting to round out my reading with Martin
Crawford's Creating
a Forest Garden.
Feel free to mention
other book club books in the comments section, or chime in with your
two cents' worth on my top choices.
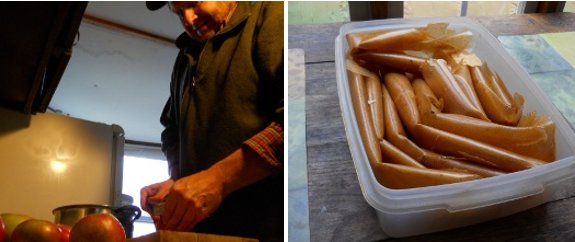
The big bad storm didn't
quite make it to our little corner in the mountains.
Nearby places got as much as
12 inches of snow while it just drizzled all night here.
It was still wet and cold,
which made for a good day to finish cutting up the last of the lackluster Winesaps. The apple
sauce is good, but adding a little honey and then drying it with
the Excalibur made some very tasty
apple leather.
 I figured out what those ends
of 2X4s were good for --- kindling!
I figured out what those ends
of 2X4s were good for --- kindling!
They split apart into
small pieces with a touch of the hatchet, and light like gasoline.
Now I'm wishing I hadn't
wasted so many chunks of lumber during my first fire of the year.
It just goes to show
that everything has a niche on the homestead, if you only know what it
is.
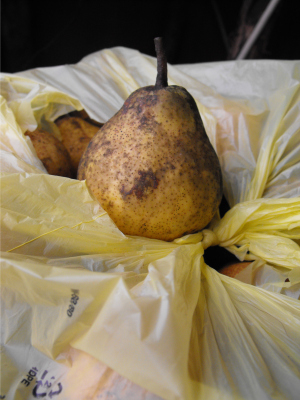 The
fifth chapter of The
Holistic Orchard is
about pome fruits --- apples, pears, and quinces. Of these,
quinces seem to be very prone to fire blight damage, and I've posted
about disease-resistant
apple varieties
previously, so I thought I'd sum up Phillips' (and Lee Reich's) tips on choosing
resistant pears.
The
fifth chapter of The
Holistic Orchard is
about pome fruits --- apples, pears, and quinces. Of these,
quinces seem to be very prone to fire blight damage, and I've posted
about disease-resistant
apple varieties
previously, so I thought I'd sum up Phillips' (and Lee Reich's) tips on choosing
resistant pears.
Although they're both
called pears, European pears (Pyrus
communis) and
Asian pears (Pyrus
pyrifolia, Pyrus
ussuriensis, plus
other crosses) are different beasts. Asian pears can fruit in
year 3 (versus year 8 to 10 for most European pears), but European
pears come into their own as prime keeping fruits, some of which can
last all winter in your root cellar. Most relevantly, though,
Asian pears are much less resistant to fire blight (the worst disease
to affect pears in the U.S.), with the only semi-resistant varieties
I've heard about being:
- Korean Giant (aka Olympic) --- ripens in late October and keeps four months
- Shinko --- the most blight-resistant Asian pear, ripening in
September to October
- Yoinashi --- an early (August-ripening), somewhat
blight-resistant pear
 Among European pears, you
have a much greater selection of blight-resistant varieties. In
the table below, I've summed up the ones that look most promising here
in zone 6, with a focus on flavor. As you can see, if you focus
on harvest and storage times, you could be eating homegrown pears from
August through December (or later).
Among European pears, you
have a much greater selection of blight-resistant varieties. In
the table below, I've summed up the ones that look most promising here
in zone 6, with a focus on flavor. As you can see, if you focus
on harvest and storage times, you could be eating homegrown pears from
August through December (or later).
| Variety |
Zone |
Ripening
time |
Notes |
| Atlantic Queen |
5 to 8 |
September |
deals well with adverse
conditions |
| Ayers |
6 to 8 |
early August |
partially self-pollinating |
| Blake's Pride |
4 to 8 |
September |
bears young; good pollinator;
stores 4 months |
| Burford |
6 to 8 |
September |
semi-dwarf |
| Harrow Delight |
4 to 8 |
mid August |
|
| Harvest Queen |
September |
||
| Luscious |
4 to 8 |
mid September |
|
| Magness |
5 to 9 |
early September |
flavor is reputed to be
excellent; althogh leaves and flowers are resistant, trunk is
susceptible to fire blight; slow to bear; needs pollinizer; keeps 4
months |
| Maxine |
4 to 8 |
mid September |
aka Starking Delicious |
| Moonglow |
5 to 8 |
early August |
bears early; keeps 4 months |
| Potomac |
5 to 9 |
late September |
slow to bear; Anjou-type pear |
| Seckel |
5 to 8 |
September |
flavor is reputed to be
excellent; semi-dwarf (8 to 10 feet tall); keeps 3 months; can get
blight, although somewhat resistant |
| Shenandoah |
mid to late September |
more acidic than an average
pear; stores 4 months |
|
| Tyson |
5 to 8 |
late August |
tastes like Seckel |
| Warren |
5 to 8 |
late August |
low yields and needs pollinator;
stores 4 months |
I'd love to hear some firsthand data from our readers. Which pear varieties have you planted? Have they lived up to your expectations?
Next Wednesday, we'll be discussing chapter 6, which sums up all of the luscious stone fruit (peaches, apricots, etc.) If you're new to the book club, you might also want to check out previous posts on beginning a holistic orchard, techniques for designing a holistic orchard, orchard soil health, and managing fungi in the orchard. And be sure to chime in on yesterday's post about the future of the book club.
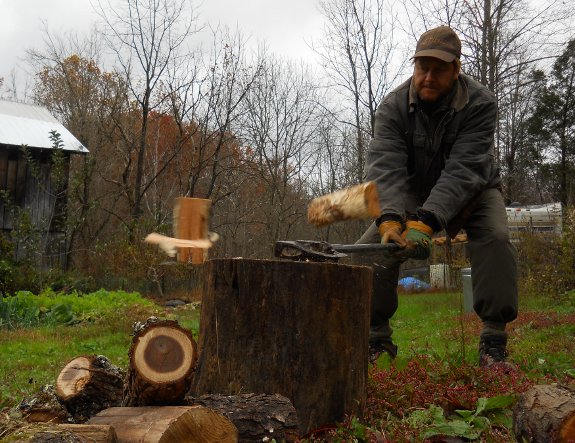
I've heard of people using an
old tire to hold a log in place while they chop on it, and the
demonstration video looks impressive.
It seems to be a nifty trick
for the person who chops alone, but Anna and I always chop together,
and our system we've developed where I chop with the Chopper 1 axe while she does the setting up and
stowing is a very smooth operation.
The start of wood chopping
season warms me on multiple levels.

Or explore more posts by date or by subject.
About us: Anna Hess and Mark Hamilton spent over a decade living self-sufficiently in the mountains of Virginia before moving north to start over from scratch in the foothills of Ohio. They've experimented with permaculture, no-till gardening, trailersteading, home-based microbusinesses and much more, writing about their adventures in both blogs and books.