
archives for 01/2010
 (I know Mark has already told you some of
this, but it's so momentous I wanted to post about it too!)
(I know Mark has already told you some of
this, but it's so momentous I wanted to post about it too!)
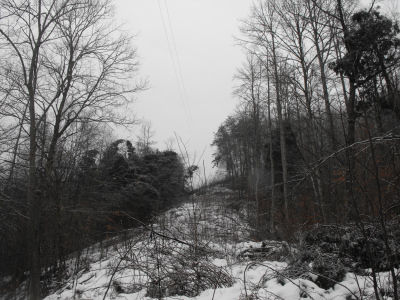
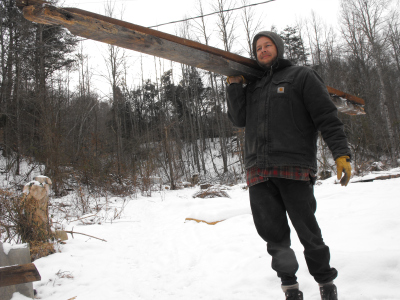
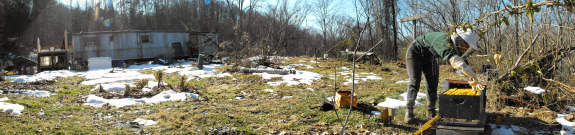
Mark and I finally got away from the farm Wednesday to visit my family
in Bristol. When we got home, we were thrilled to see the
powerline back in place atop its poles! We scurried into the
trailer...only to discover that the juice was still off.
Remember how I
lost faith on day 1 of the outage? Now it was Mark's
turn. When the electricity was still off on Thursday morning, I
could see his spirits plummeting into his (cold, wet) boots. It
was too rainy outside to heat anything up on the wood stove for lunch,
so we shivered in the kitchen, eating cold chicken sandwiches and
bemoaning our fate.
Then I gasped.
"Oh, no!" Mark responded. "What's wrong now?"
Speechless, I pointed down the hall to where our CFL had flickered into
light. "Look, Mark! Electricity!!!!!!"
We stared in rapture at the glowing bulb for a couple of minutes, then
jumped into action. Mark plugged in the stove fan and freezer
while I started up the fridge and internet. I turned on the
drinking water pump and filled
up our emergency milk jugs of water, then we headed out to pump
water from the creek to fill the thousand
gallon washing-water tank. (We'd been caught, very
unfortunately, with it nearly completely empty, which really made the
outage more difficult than it should have been.)
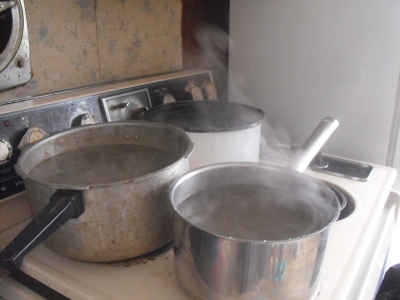 Next, Mark plugged in the
golf cart while I filled pots of water to heat on the stove.
Near instant hot water, and plenty of it! After skimping for
nearly two weeks, washing each day's dishes in a scant gallon of melted
snow, I was so
excited that I filled our sink with gallons and gallons worth, even
though there weren't really that many dishes.
Next, Mark plugged in the
golf cart while I filled pots of water to heat on the stove.
Near instant hot water, and plenty of it! After skimping for
nearly two weeks, washing each day's dishes in a scant gallon of melted
snow, I was so
excited that I filled our sink with gallons and gallons worth, even
though there weren't really that many dishes.
Before I was able to calm down enough to check my email, I had to twirl
around outside in the snow, singing at the top of my lungs,
"Elec-tri-ci-ty! Light! Heat! Water!"
My weather-forecaster buddy warns that bitter cold weather is on its
way tonight, with all next week slated to stay below freezing.
Right at this instant, though, I can't muster any doom and gloom at all.
This post is part of our Two Weeks Without Electricity series.
Read all of the entries:
|
 To
hear Michael Phillips write about it, you would think that apple trees
are fortunate to make it through the year, let alone set fruit.
He
fights a slew of insect pests along with fungal, bacterial, and viral
diseases, struggling to end up with a harvest of fruits pretty enough
to sell to his customers.
To
hear Michael Phillips write about it, you would think that apple trees
are fortunate to make it through the year, let alone set fruit.
He
fights a slew of insect pests along with fungal, bacterial, and viral
diseases, struggling to end up with a harvest of fruits pretty enough
to sell to his customers.
I feel lucky to be a
homesteader who cares mostly about taste. Still, I plan to take
some of his preventative advice to heart. We're slowly cutting
down nearby cedar trees and would do the same if we had nearby
crabapples or hawthorns since all three serve as alternate hosts for
apple diseases.
Once our trees are
bearing, we'll rake up their leaves in the fall and compost them since
fallen apple trees can innoculate the tree with diseases the next year
if left in place. While thinning our hypothetical fruits, we'll
be careful to remove insect-damaged apples and will also rake up
June-dropped fruits to feed to our chickens. Old timey apple
farmers used to run poultry and swine under their trees during that
period --- maybe we'll have pigs
by then and can work something out.
For now, though, we're
in that golden period before the apple trees mature when we can
fantasize that our fruits won't fall prey to any diseases or
pests. I'll dream while I can, and remember The
Apple Grower for
organic tips when the time comes.
| This post is part of our Growing Organic Apples lunchtime series.
Read all of the entries: |
Happy New Year!
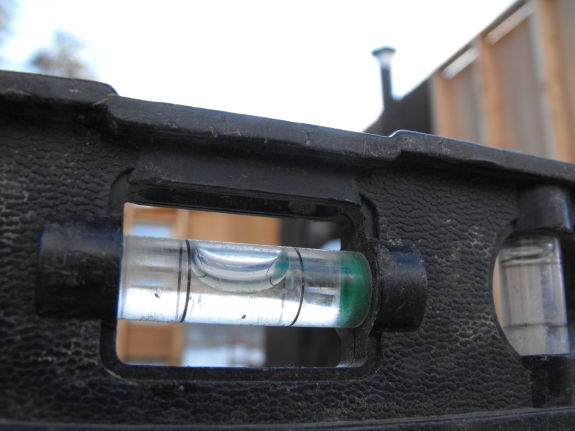
We started 2010 on a level footing by plugging away at our latest storage
building project today.
| This post is part of our Building a Storage Building from Scratch
series.
Read all of the entries: Part 1: Foundation
Part 3: Walls and scavenging lumber
Part 5: The roof
|
 A
few quick book-keeping notes for the new year....
A
few quick book-keeping notes for the new year....
First
of all, thank you
to everyone who posted comments this month to enter our daffodil
giveaway! I've
really enjoyed hearing all of your feedback and getting to know you
better. The grand prize winner is my father --- I swear it was
random! :-) We had a really good month selling automatic chicken waterers, so there were only about 20
daffodil bulbs left to give away. I'm tossing in some poppy seeds
to round his
flower bed out. Stay tuned for another giveaway soon!
On
another vaguely
chicken-related topic, I'm posting a long series about chicken tractors
on our chicken blog this month. Some of
the posts you've already seen over here while others are totally
new. My goal is to really think through all of the chicken
tractor designs we've used in the past so that our next tractor will be
awesome. I hope my musings will also help other folks design a
cheap and effective tractor and get those hens out of the mud.
You can subscribe to the RSS feed of that blog just like this one --- I
look forward to seeing some of you over there!
Finally,
I was going to post a review of the best non-fiction books I'd
read in 2009 over here, but instead decided to finally set myself up a
Goodreads account.
If I stick to it, I plan to post all of my fiction and non-fiction book
ratings over there (although I'll keep posting lunchtime series over
here.) Feel free to friend me and share your own books!
And have a great 2010!
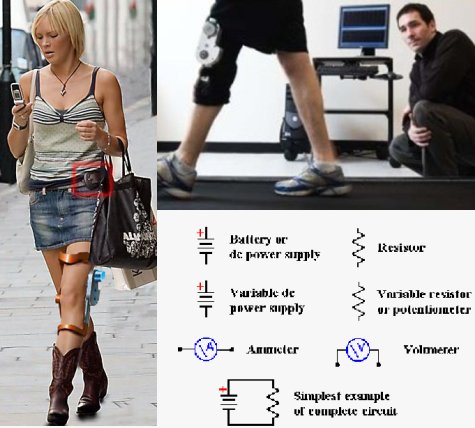 The
University of
Michigan has made some impressive strides in the area of human
generated electricity.
The
University of
Michigan has made some impressive strides in the area of human
generated electricity.
Their latest prototype is a knee brace that
harnesses the energy normally lost when the knee is bent. It can
produce up to 5 watts of power, which would be enough juice to run 10
mobile phones.
It would be interesting to see how much electricity the average person generates
over the course of a day?
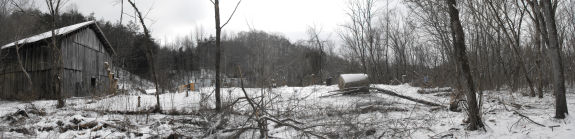
 Last
week, I was paging through old blog entries from this summer and
literally couldn't remember the earth looking so green. On the
south side of the trailer, the ground is still covered by snow where
it's shaded by the hill, and the rest of the world is mostly
brown. I watch deer pulling honeysuckle out of trees and dream of
a big, black bull calf doing the same in search of green leaves.
Last
week, I was paging through old blog entries from this summer and
literally couldn't remember the earth looking so green. On the
south side of the trailer, the ground is still covered by snow where
it's shaded by the hill, and the rest of the world is mostly
brown. I watch deer pulling honeysuckle out of trees and dream of
a big, black bull calf doing the same in search of green leaves.
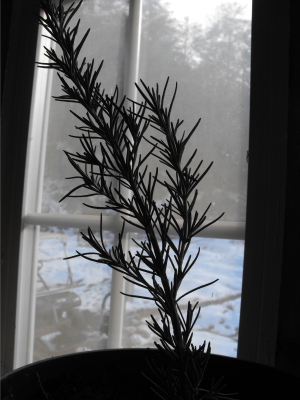 How
do I relieve winter gardener's blues? Luckily, I've got some
house plants in need of attention. My citrus trees (dwarf
Meyer lemon and
dwarf tangerine) have sunken down in their pots over the long growing
season and need a new infusion of stump dirt. I also have a
rosemary in need of potting --- one of the six sprigs I got from my
father finally sprouted roots.
How
do I relieve winter gardener's blues? Luckily, I've got some
house plants in need of attention. My citrus trees (dwarf
Meyer lemon and
dwarf tangerine) have sunken down in their pots over the long growing
season and need a new infusion of stump dirt. I also have a
rosemary in need of potting --- one of the six sprigs I got from my
father finally sprouted roots.
So I climb the hill
halfway to the cars, heading straight to my
favorite, hollow beech.
This old beauty churns out around seven or eight gallons of stump dirt
every year, which I scoop out with our yellow-handled shovel, savoring
every teaspoonful. I chose a warm day so that the stump dirt
would be shovelable, but that means the driveway is too wet to drive
on. So I lug the dirt home in five gallon buckets. It's all
worthwhile, though, when I get to sink my fingers into rich soil, the
combined scent of actinomycetes and rosemary smelling as good as baking
bread.
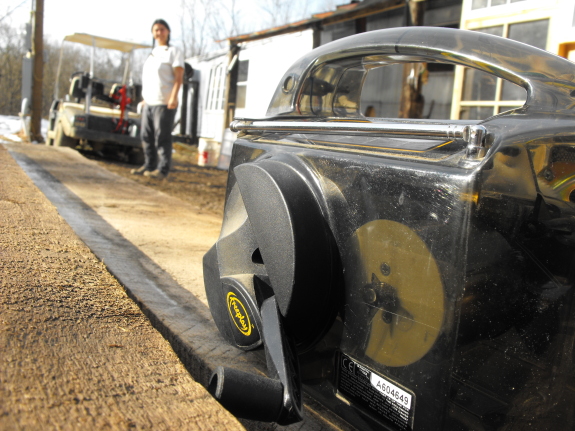
10 years ago I found this hand cranked radio in the discount bin of a
Radio Shack just after the Y2K hype was settling down. Most hand
powered devices use a small dynamo that charges an even smaller battery
that will eventually stop holding a charge over time. This unit uses a
medium sized spring that slowly releases its mechanical power after the
energy is stored in the form of hand cranks. It will hold up to 40
cranks, which equals about 20 minutes of power.
The radio is very basic and also works on a little solar cell that is embedded in the top, but only if you place it directly in the sun. I like to have it on hand as a back up power source and someday dream of building a larger version that might be more capable of powering something like our modem and router and maybe a laptop or two. It only produces enough electricity for a small flashlight, which can be considered night time entertainment during a power outage.

In response to my post
on easy to grow
grains, two of you
asked whether I was concerned about amaranth being a weed. I
decided to do a bit of research and disentangle fact from fiction.
The
word "amaranth" can be used to refer to any plant in the genus Amaranthus --- 70 species total.
Some species are weeds and some are useful foods dating back thousands
of years.
The
weed species are generally known as pigweed and include Amaranthus
albus, A.
blitoides, A.
hybridus, A. palmeri, A.
powellii, A.
retroflexus, A.
spinosus (the one
that wreaks havoc on my bare feet in the summer), A.
tuberculatus, and
A. viridis. I wonder whether any
of these plants were also grown by Native Americans for food,
accounting for their widespread growth across the U.S.?
Unfortunately, I couldn't find any data on this.
On
the other hand, A.
caudatus, A.
cruentus, and A.
hypochondriacus are grown
as food plants,
with the latter being the species most often grown in the U.S.
Amaranth was grown by the Incas, the Aztecs, and various Native
Americans in what is now Mexico until the conquistadores came and
nearly wiped amaranth out of existence. Nowadays, you can find
the seeds of the edible varieties for sale from some of the more
heirloom-inclined seed companies.
We
opted to buy some Manna de Montana Amaranth from Seeds of Change --- I'll let you know how it
goes as the growing season progresses. Meanwhile, I splurged on a
few more experimental crops --- Hungarian Blue Breadseed Poppy, Temuco
Quinoa, Urd Sprouting Bean, Black Kabouli Garbanzo Bean (since we have
to drive an hour to get these in the store), Hullless Oats (thanks for
the tip, Sena!), and Afghani Sesame. I figure at least one or two
should work out and make it onto our list of regulars!
 My
brother posted about the last decade of his life so vibrantly (and
succinctly) that I decided to give it a go. The last decade fills
up pretty much a full third of my life to date and my entire
post-college adulthood --- yikes!
My
brother posted about the last decade of his life so vibrantly (and
succinctly) that I decided to give it a go. The last decade fills
up pretty much a full third of my life to date and my entire
post-college adulthood --- yikes!
2000 started with the
last few months of my senior year at college. Although my
freshman, sophomore, and junior years had been life-changing and fun,
my senior year was stressful and angsty. By the beginning of
July, I was glad to see campus disappear and to instead be hopping on a
plane to England (then Australia, then Costa Rica) for a solid year of
camping and drawing plants.
 Although
I'd dreamed of living on a homestead in the woods ever since I was
ripped from our family farm in elementary school, I think my world
travel year cemented the deal. I backpacked the whole time, and
was shocked to return home to the U.S. and discover the size of stores
and supermarkets, and to see the many boxes of possessions I had
waiting for me in my mom's basement. Why would I need all of this
stuff when I'd happily lived with just fifty pounds of camping and
drawing equipment for the last year?
Although
I'd dreamed of living on a homestead in the woods ever since I was
ripped from our family farm in elementary school, I think my world
travel year cemented the deal. I backpacked the whole time, and
was shocked to return home to the U.S. and discover the size of stores
and supermarkets, and to see the many boxes of possessions I had
waiting for me in my mom's basement. Why would I need all of this
stuff when I'd happily lived with just fifty pounds of camping and
drawing equipment for the last year?
| This post is part of our Decade in Review series.
Read all of the entries: |
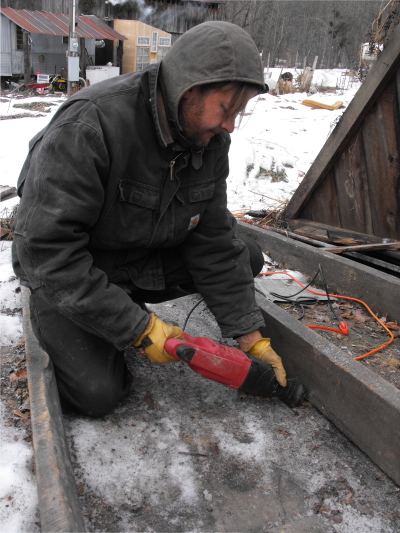
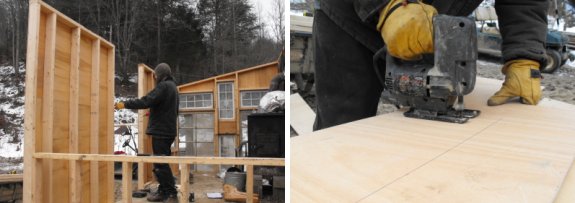
Cutting through difficult nails within a tight space like this is where
these reciprocating
saws really shine. The medium sized metal blade allows you to bend
it at an angle, just don't bend it too much or it will kick like a mule.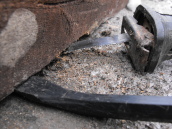
| This post is part of our Building a Storage Building from Scratch
series.
Read all of the entries: Part 1: Foundation
Part 3: Walls and scavenging lumber
Part 5: The roof
|
Daddy told me that it
looks fishy for him to win the giveaway, and one of our regular readers
agreed. :-) So the daffodils will go
to whoever of the following top five randomly selected commenters emails me their mailing address
first:
Shannon (who got two votes from the random number generator!)
Vester
Heather
Everett
Among
the folks whose blogs I read, several people have made a New
Year's resolution to post at least three sentences every day on their
blogs. I, on the other hand, have a hard time limiting myself to
two
posts a day. :-) I didn't want to "waste" an entry on this, so
here's
a quick note that's not an entry, really! (See, no picture!!)
 I'd
be the first one to tell you that our homemade
storage building has growing pains.
Although I've read a lot of books and websites, this is the first time
I've ever put screw to 2x4, and it shows.
I'd
be the first one to tell you that our homemade
storage building has growing pains.
Although I've read a lot of books and websites, this is the first time
I've ever put screw to 2x4, and it shows.
We probably could have
the whole thing done by now if we knew what we were doing, but we've
still got two walls to raise and the roof to put on before we even
start on the interior. Still, I can feel the building process
picking up momentum as we repeat steps we've figured out in the past.
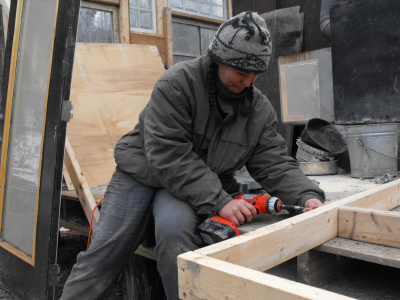
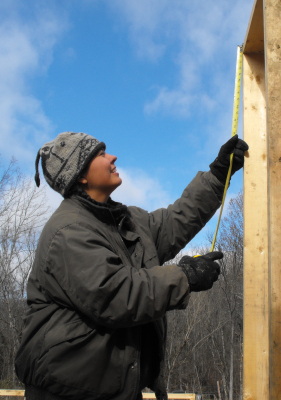
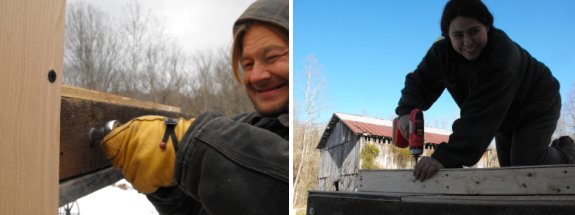
Monday, Mark let me try
my hand at framing a wall. Those square bits that come in the
screw boxes make it much easier for a novice like me to drive screws
without stripping the heads.
I nearly finished the
half wall section I was working on before I ran out of lumber.
Unfortunately, we had to call it quits for the day since we got a flat
driving the golf cart through ice to the cars where
the rest of the 2x4s are stored. Mark's teaching me that things
happen on a farm --- you just have to roll with it and allow plenty of
extra time to get projects done!
Read our ebook about quitting your job and becoming financially independent.
| This post is part of our Building a Storage Building from Scratch
series.
Read all of the entries: Part 1: Foundation
Part 3: Walls and scavenging lumber
Part 5: The roof
|
 Although
backpacking gave me a glimpse of simplicity, I didn't have any
money to buy a farm, so I instead spent the next few years wandering
around in other peoples' woods. Every year, I moved to a new
property
where I identified the plants and animals and told the owners what they
were doing right or wrong. Some of my hosts turned out to be my
best
friends, and I got all of my maternal urges out of my system by helping
with one set of kids who I still adore (even though they're all
grown up now!)
Although
backpacking gave me a glimpse of simplicity, I didn't have any
money to buy a farm, so I instead spent the next few years wandering
around in other peoples' woods. Every year, I moved to a new
property
where I identified the plants and animals and told the owners what they
were doing right or wrong. Some of my hosts turned out to be my
best
friends, and I got all of my maternal urges out of my system by helping
with one set of kids who I still adore (even though they're all
grown up now!)
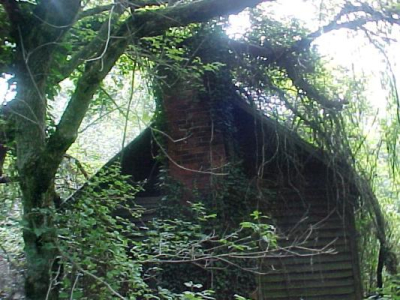 In 2003, I finally
achieved the goal I'd been saving for and dreaming of for so long --- I
bought 58 acres of swamp and hillside about an hour from the farm I
grew up on. With no experience under my belt, I took my father's
advice and decided to build a little house by hand, first tearing down
the old house on the property to get some supplies.
Crowbarring on
winter days, I came down with carpal tunnel and ended up dropping that
dream for the time being.
In 2003, I finally
achieved the goal I'd been saving for and dreaming of for so long --- I
bought 58 acres of swamp and hillside about an hour from the farm I
grew up on. With no experience under my belt, I took my father's
advice and decided to build a little house by hand, first tearing down
the old house on the property to get some supplies.
Crowbarring on
winter days, I came down with carpal tunnel and ended up dropping that
dream for the time being.
| This post is part of our Decade in Review series.
Read all of the entries: |
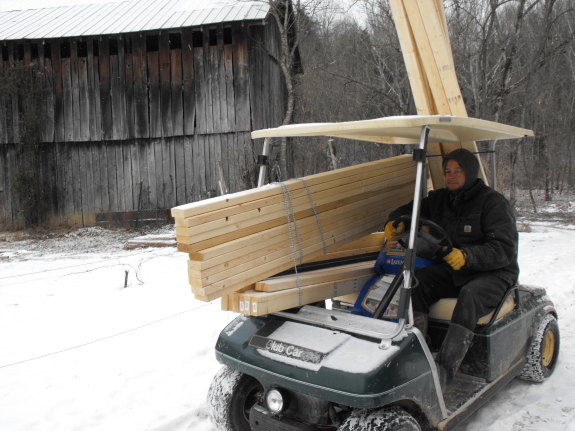
I had my 2nd flat tire of the week just as I got yesterday's fixed.
The first one was due to a sharp tree root jutting out of the frozen
ground and jabbing itself into the side wall, but today's deflation could
have been avoided if I'd had an inner tube in the tire, which it now
has.
At least we got all the 2x4s shuttled back to our storage
building project before this next storm sets in.
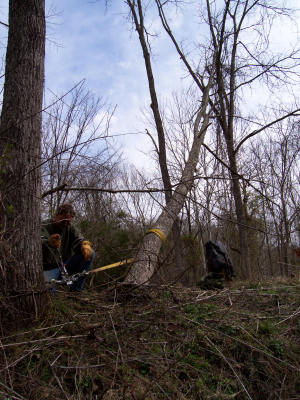
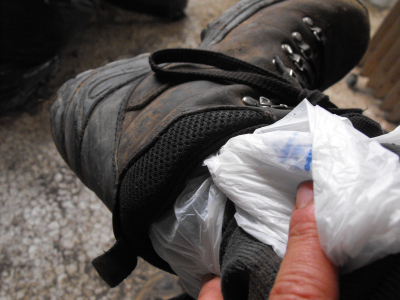 Today's
homesteading tip originated with my mother, I swear, not with a
homeless person. On a farm, it's awfully easy to get your boots
wet even if they're waterproof. Maybe the world is full of deep,
damp snow (like last week) and clods drop down the back of your
heel. Maybe you slip off the creek bank while sawing through a
grapevine (like this week) and your foot submerges in frigid
water. Either way, the worst thing you can do is keep working
with wet feet. But if you don't have a good pair of spare boots,
what do you do?
Today's
homesteading tip originated with my mother, I swear, not with a
homeless person. On a farm, it's awfully easy to get your boots
wet even if they're waterproof. Maybe the world is full of deep,
damp snow (like last week) and clods drop down the back of your
heel. Maybe you slip off the creek bank while sawing through a
grapevine (like this week) and your foot submerges in frigid
water. Either way, the worst thing you can do is keep working
with wet feet. But if you don't have a good pair of spare boots,
what do you do?
Take a plastic grocery
store bag and wrap it around your dryly socked foot. Then slide the whole
shebang into your boot --- this has the added bonus of making boots
slide on even easier! The grocery store bag separates your foot
from the damp boot wall until the evening, when you can set your
footware by the stove to dry. Dry feet!
 When
I had to put my farm dream on hold, I ended up
moving back in with one of my inventory families, to help with those
same kids. The family matriarch had plans for me, though I didn't
know
it. She (Sue Ella) and her sister (Rose Nell) were playing
matchmaker and believed that Rose Nell's son and I were perfect for
each other. Sue Ella tried every trick in the book
to get us to meet, but I scurried the other way just as quickly as
possible. He'd be coming down for Thanksgiving? Sorry --- I
have to
go visit my father! You want me to help him drive your son's
possessions across country? Are you nuts?! Even though I'd
traveled
the world, I'd never kissed a boy --- women in my mother's family tend
to be late bloomers --- and I didn't particularly see why I should
start now.
When
I had to put my farm dream on hold, I ended up
moving back in with one of my inventory families, to help with those
same kids. The family matriarch had plans for me, though I didn't
know
it. She (Sue Ella) and her sister (Rose Nell) were playing
matchmaker and believed that Rose Nell's son and I were perfect for
each other. Sue Ella tried every trick in the book
to get us to meet, but I scurried the other way just as quickly as
possible. He'd be coming down for Thanksgiving? Sorry --- I
have to
go visit my father! You want me to help him drive your son's
possessions across country? Are you nuts?! Even though I'd
traveled
the world, I'd never kissed a boy --- women in my mother's family tend
to be late bloomers --- and I didn't particularly see why I should
start now.
When Sue Ella finally
pinned me down in 2005, she and Rose Nell didn't trust us to go on this
first,
blind date on our own. Intead, Sue Ella put me in her car, Rose
Nell
put Mark in her car, and all four of us met at a restaurant in the
middle. After our date, we browsed for a while in the Dollar
Store,
and went our separate ways. In fact, Mark fled all the way to New
Mexico, but he emailed me and slowly wiggled his way through my
defenses and into my heart. Four months later, we kissed for the
first
time while listening to a chorus of spring peepers. When we
kissed again
in a cave, my knees went weak, and 17 months later we moved onto the
land. Mark had been the missing link in my farm dream, even
though I
hadn't known it at the time.
| This post is part of our Decade in Review series.
Read all of the entries: |

Using this utility pump to fill a proper water container feels like a
huge improvement over last
year's 5 gallon bucket method. The biggest downside was lifting the
bucket back out once you filled it as full as you dared.
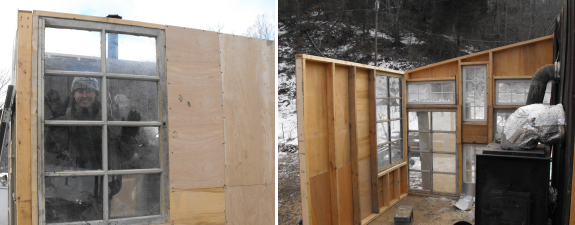
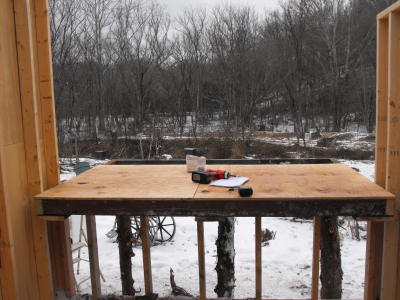
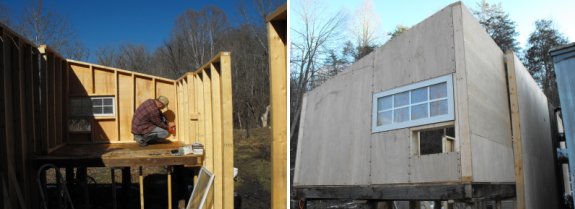
 This
is my new wall --- I'm so proud of making it (nearly) all by
myself. That said, I should have measured a little better to make
it "square" (a perfect rectangle) so that we didn't have to take it
back apart to get the window to fit....
This
is my new wall --- I'm so proud of making it (nearly) all by
myself. That said, I should have measured a little better to make
it "square" (a perfect rectangle) so that we didn't have to take it
back apart to get the window to fit....Next time, I'm not going to assume that the diagonals being off by a quarter of an inch is okay. Unsurprisingly, Mark decided he would be in charge of putting in the door, which is the next step.
| This post is part of our Building a Storage Building from Scratch
series.
Read all of the entries: Part 1: Foundation
Part 3: Walls and scavenging lumber
Part 5: The roof
|
 The last three years of
the decade, we got the farm running and I learned to garden. I've
always been torn in several directions --- between art and writing on
one hand and biology on the other. The farm --- and this blog ---
turned out to be the junction of the two fields, letting me create
beauty and play with plants all at once.
The last three years of
the decade, we got the farm running and I learned to garden. I've
always been torn in several directions --- between art and writing on
one hand and biology on the other. The farm --- and this blog ---
turned out to be the junction of the two fields, letting me create
beauty and play with plants all at once.
After moving to the farm, I first worked
as a part-time professor at a local college, then as an employee at a
non-profit organization. Both of these jobs were fun in parts but
also
stressful. Only last year did we reach what had been Mark's dream
all
decade --- such a simplicity of needs and diversification of income
sources that we could both quit our jobs and work for
ourselves.

Meanwhile, Mark and I
grew together in delightful ways. Every day seemed (and still
seems)
to be better than the last, and his kisses still make me weak at the
knees. In December 2008, we finally decided to get legal, so we went
to the courthouse and got hitched. Last year, we celebrated
with our family and friends with a
picnic at the park.
| This post is part of our Decade in Review series.
Read all of the entries: |
The 6th wall section is now up and looking like a storage
building.
| This post is part of our Building a Storage Building from Scratch
series.
Read all of the entries: Part 1: Foundation
Part 3: Walls and scavenging lumber
Part 5: The roof
|
 We
kicked off Mark appreciation week on Thursday with a trip to the big
city to see Avatar in 3D. Even though the story had some flaws,
the world building and visuals were so stunning that by the time we
stepped back out the door, we were shocked to see snow falling on a
dark, cold night.
We
kicked off Mark appreciation week on Thursday with a trip to the big
city to see Avatar in 3D. Even though the story had some flaws,
the world building and visuals were so stunning that by the time we
stepped back out the door, we were shocked to see snow falling on a
dark, cold night.
The roads get dicey fast
in the mountains, and it took us about two hours to drive what usually
takes 45 minutes. On the north side of the hills, the snow that
knocked out our power three weeks ago is still hanging on, but is
now invisible under another layer of white. Luckily, Mark's an
experienced driver and we made it home with no mishaps.
The world has been white and frozen for so long that I feel like I've
moved to New England for the winter!
 What do I foresee in the
twenty-teens? Honestly, if you'd asked me what my life would be
like a
decade later in 2000, the only part I could have imagined would have
been the farm, so I don't think my predictions should hold much
weight. But I can tell you what I'd like to see.
What do I foresee in the
twenty-teens? Honestly, if you'd asked me what my life would be
like a
decade later in 2000, the only part I could have imagined would have
been the farm, so I don't think my predictions should hold much
weight. But I can tell you what I'd like to see.
In ten years, I hope
that Mark and I will still be living on this same farm, but hopefully a
slightly more
advanced farm with a pasture or two,
a growing forest
garden, and maybe
even an indoors bathtub and outdoors greenhouse. By then, I want
to have streamlined the garden process to cut back a bit on the time we
spend on repetitive chores like weeding and increase the time we spend
on the more fun part. Maybe by then we'll
truly be food independent, having figured out grains, oil, and a few
more meats.
I hope to have built my
social network a little more by then. My college years were
blissful
in that regard, and ever since I've been looking for a similar
community where I can feel accepted and at ease. We're slowly
making
friends in the area now that we're settled, so hopefully this community
will grow organically with time.
 Last decade, I found
Mark --- he and the farm were really the highlights of the 2000s.
This
decade, I hope that we'll find someone to back us up on the farm when
we go on our explorations. Whether that will be a live-in
apprentice,
a nearby farmer who we can trade caretaking with, or something else
entirely, I'll leave
up to the toss of the dice.
Last decade, I found
Mark --- he and the farm were really the highlights of the 2000s.
This
decade, I hope that we'll find someone to back us up on the farm when
we go on our explorations. Whether that will be a live-in
apprentice,
a nearby farmer who we can trade caretaking with, or something else
entirely, I'll leave
up to the toss of the dice.
Lately, I've started to
find a good balance of computer work, physical work, and relaxation
--- hopefully by the end of the decade I'll have it as well figured out
as Mark does. Maybe this decade will be all about balance.
| This post is part of our Decade in Review series.
Read all of the entries: |
![]()
A new layer of snow and some frigid temperatures kept us working inside
today. Brrrrr.
The movie Avatar
was a fantastic initiation into the new realm of 3D cinema. Science
fiction is the perfect genre for this new technology and Avatar was a
non stop ride that remains with you long after the house lights come on. A great way to celebrate the beginning of my 41st year.
 Last
year, I posted about the most
delightful, fluffy, completely whole wheat bread recipe that counts on wheat gluten to increase the fluff
factor. Ever since then, folks have been asking me, "Isn't gluten
bad for you?"
Last
year, I posted about the most
delightful, fluffy, completely whole wheat bread recipe that counts on wheat gluten to increase the fluff
factor. Ever since then, folks have been asking me, "Isn't gluten
bad for you?"
Some people are gluten
intolerant, which means that their bodies can't break down
gluten. If these folks eat foods containing gluten, they end up
with all kinds of health problems. On the other hand, gluten
isn't like trans-fat or any of the other components of food that cause
problems in everyone. If you don't have a gluten sensitivity, you
can dive right in with no problems!
Gluten is found
naturally in most grains, and is currently added to a long list of
other foods (including things like chocolate, soup, and potato
chips.) Basically, if you're not making an effort to be
gluten-free, you're almost certainly eating gluten on a regular
basis. As long as you aren't showing any gluten intolerance
symptoms, you might as well get in the habit of adding gluten to your
whole wheat bread for a tastier texture (and extra protein.)
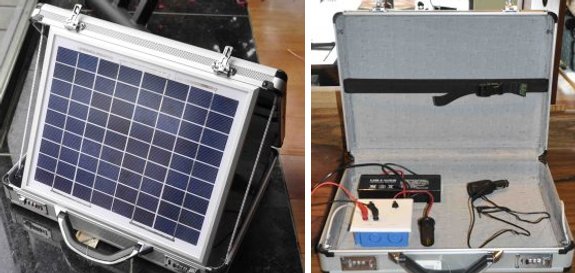
The team at KMS
woodworks has made some interesting progress in bringing together a compact solar charger that can be used for several low
end power needs like a lap top. They are still in the testing stage,
but it looks like they might make them available for sale in the 300 to
350 dollar range in the not too distant future.
It would be worth that much to me if it could power our modem and both
lap tops for a few hours per day, especially during a power outage.
I really like the idea of having a portable off the grid option,
especially one that can be taken on a back pack to provide the power
for blog posts in some random ancient megalith site or more Mayan ruins.
I felt like such a wimp complaining, but it turns out that this weather really is out of the ordinary. There's a high pressure zone sitting on Greenland that's deflecting cold air into the U.S., a situation that hasn't been this extreme since 1950. But all's not lost --- Dr. Walter Meier of the National Snow and Ice Data Center wants us to know that “pretty much all of the Arctic is above normal." There, don't you feel better now?
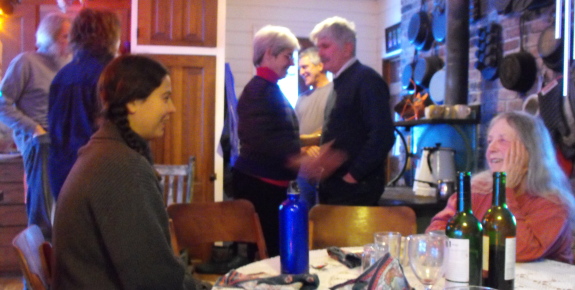
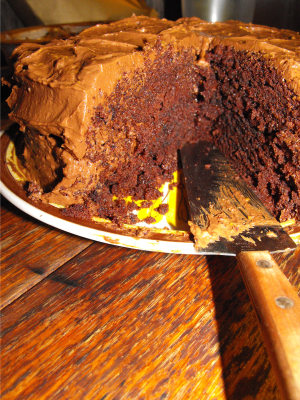
We made it out this afternoon for a wonderful Christmas party that had
been rescheduled due to the Blizzard of 09.
A big thanks to Steve and Maxine for making such a fantastic chocolate cake and
helping to ring in my 41st year with a delicious bang.
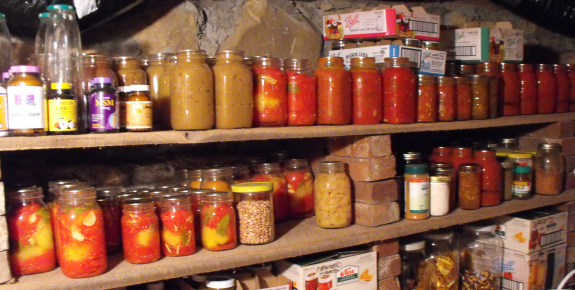
You know when you're a
homesteading geek when...
- you go to a party and one of the big attractions is heading down into the basement to check out your host's stored produce...
- ...and all of your friends want to go too so you have to wait your turn.
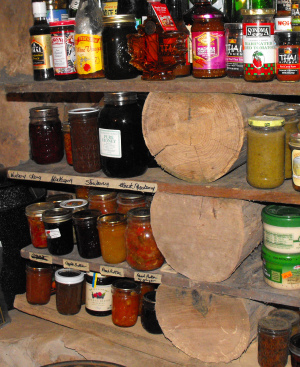
Check out these homemade
shelves spaced apart with log sections. Very classy!
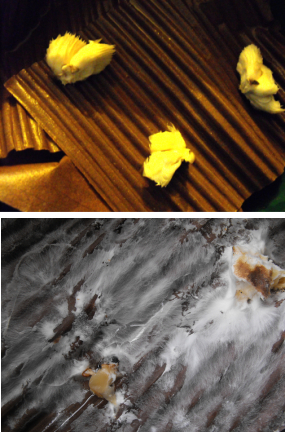
 Regular
readers will remember how Mycelium
Running
sent me on a quest to propagate our edible mushrooms cheaply.
Paul Stamets' enthusiasm was so contagious that I've spent the last
nine months experimenting (with semi-success, which I'll discuss
later.) I reached a point where I needed to know more, so I
requested another one of his books on interlibrary loan.
Regular
readers will remember how Mycelium
Running
sent me on a quest to propagate our edible mushrooms cheaply.
Paul Stamets' enthusiasm was so contagious that I've spent the last
nine months experimenting (with semi-success, which I'll discuss
later.) I reached a point where I needed to know more, so I
requested another one of his books on interlibrary loan.
The 574 page Growing
Gourmet and Medicinal Mushrooms arrived at my library a few
weeks ago, and I've been reading it ever since. This book
is more technical than Mycelium
Running,
since the purpose is to provide the information new commerical growers
need to start their operation. The result is a book that is
slightly more tedious than Mycelium
Running, so I
can't recommend it to the general reader quite as whole-heartedly.
Nevertheless, Stamets'
enthusiasm shines through...along with so much
information that I'm struggling to pare it down to fit into two
lunchtime series! After reading the book from cover to cover, I
seem to have come up with twice as many questions as I started with,
but at least my original questions got answered.
This post is part of our Growing Gourmet Mushrooms lunchtime series.
Read all of the entries:
|
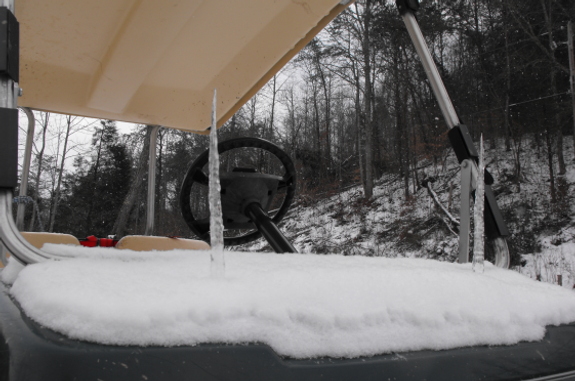
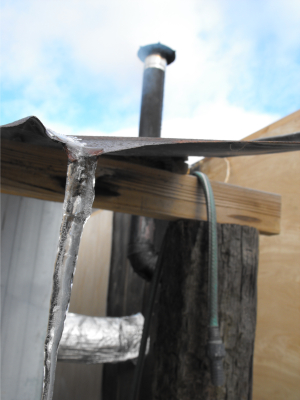
I puzzled over these strange ice formations for several minutes this
morning wondering how such a thing could have occured and where the
source of water was coming from.
I got my answer when I noticed Anna trying to hold back a serious case
of the giggles when I went back in. Turns out she thought it would be
nice to break off a couple sticks of ice and implant them as "dragon
horns" for the golf cart.
 Baking
a cake on the farm is always an adventure. As the culmination of
Mark appreciation week, I decided on a rich chocolate cake that called
for seven eggs...only to look in the fridge and see a mere four
eggs! So I put on my boots and coat and headed outside in search
of three more.
Baking
a cake on the farm is always an adventure. As the culmination of
Mark appreciation week, I decided on a rich chocolate cake that called
for seven eggs...only to look in the fridge and see a mere four
eggs! So I put on my boots and coat and headed outside in search
of three more.
Usually, our nine hens
give us more eggs than we can eat, but this abnormal cold spell has
frozen the chicken
tractors in place and put our hens in a bad mood. Some days
this month, we've only gotten one egg between them. Would we get
lucky today?
I opened the nest box
door in the Plymouth Rock's tractor --- one egg. The young Golden
Comets are always good for at least an egg, so I wasn't concerned there
--- sure enough, one egg. But the last tractor has Golden Comets
who are finishing up their fourth year of life and are starting to slow
down in their laying. I opened the dryer
door and peeked in the last nest box...and breathed a sigh of
relief. One last egg!
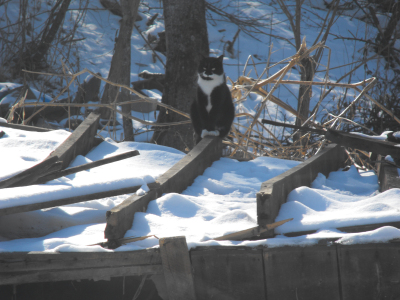
 Back
inside, I melted and beat and mixed. It was the first day this
year that had reached above freezing (even if only by a degree) and the
cats were feeling their oats. Every time the sun came out from
behind a cloud, both cats begged to be let out. Five minutes
later, the clouds closed and two chilly cats wanted in. My
routine was a bit like this --- turn on the microwave, let in a cat,
stir in the butter, let out a cat, measure the flour, let in a
cat. I think I didn't miss any ingredients (or cats.)
Back
inside, I melted and beat and mixed. It was the first day this
year that had reached above freezing (even if only by a degree) and the
cats were feeling their oats. Every time the sun came out from
behind a cloud, both cats begged to be let out. Five minutes
later, the clouds closed and two chilly cats wanted in. My
routine was a bit like this --- turn on the microwave, let in a cat,
stir in the butter, let out a cat, measure the flour, let in a
cat. I think I didn't miss any ingredients (or cats.)
Finally, the cake was
ready to hit the oven...except that I couldn't find the second round
cake pan. After a few minutes of looking around the kitchen with
a furrowed brow, I realized that I hadn't baked a double layer cake
since we stopped watering
the bees in a marble-filled cake pan. Out came the marbles,
in went the batter. Finally, the cake was in the oven and I could
relax. Happy birthday week, Mark!
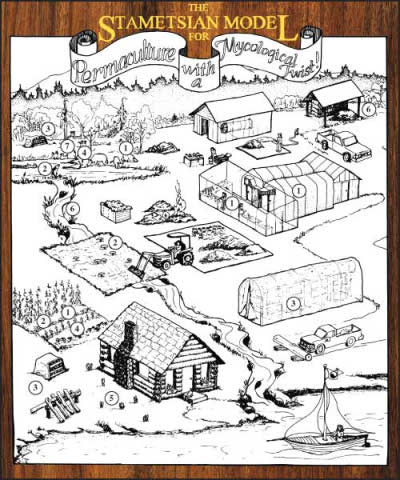 I checked out Growing Gourmet and Medicinal
Mushrooms
to learn a bit more about just what the title says, but I ended up
getting sucked in by the chapter on permaculture. (I know, what a
shock.) In the multi-use world of a working farm ecosystem, one
species stands out --- the King Stropharia (Stropharia rugosoannulata).
I checked out Growing Gourmet and Medicinal
Mushrooms
to learn a bit more about just what the title says, but I ended up
getting sucked in by the chapter on permaculture. (I know, what a
shock.) In the multi-use world of a working farm ecosystem, one
species stands out --- the King Stropharia (Stropharia rugosoannulata).
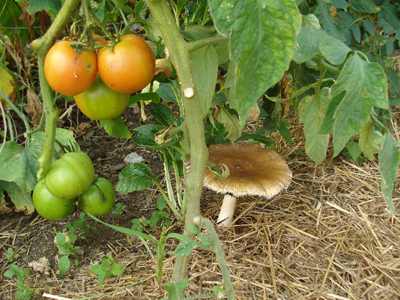
King Stropharia mushrooms are supposed to be both edible and tasty, but
their utility doesn't stop there. Paul Stamets reports food webs
that I wouldn't have believed coming from anyone else. I wasn't
so surprised to read that vegetables growing near the King Stropharia
grow better since I've read about how many
fungi team up with plant roots.
But I was shocked to hear that honey bees feed on the mushroom's
mycelium! Is this a possible method of providing our bees with
supplemental food other than sugar water?
Do bees feed on other species of fungi? I've personally seen our
workers harvesting something out of urine-soaked soil, and ever since
have been dubious of the the popular wisdom that bees just need
nectar/sugar and pollen.
As if that isn't enough of a reason to grow King Stropharia mushrooms,
Paul Stamets notes that the species is a potent bioremediator. He
sends runoff from his cow pasture through beds of wood chips full of
King Stropharia mycelium and sees clean water flowing out the other
end. Since Stamets has shown than the mushrooms can filter
bacteria and nitrogen out of contaminated water, I think that a King
Stropharia bed might be a perfect fit for our graywater leach field to
clean the water running out of our kitchen sink.
 If you're as sold on the idea of King
Stropharia mushrooms as I am,
you'll probably want to know how to grow them. Once you get a
start from one of the mushroom companies (such as Paul Stamets'
Fungi
Perfecti), this species is reported to be extremely easy to grow
outside. Just rake fresh wood chips to a depth of one foot, add
five to twenty pounds of sawdust spawn per hundred square feet, water
for four days with a sprinkler, and keep the bed moist thereafter by
watering for half an hour in the morning and evening. If you
start your King Stropharia bed in the early spring, as is recommended,
you should see fruits by late July and continue to eat this
permaculture king until autumn weather cools the ground. Be sure
to pick the mushrooms young and expand your bed once it's in full swing
using the stem
butt method!
If you're as sold on the idea of King
Stropharia mushrooms as I am,
you'll probably want to know how to grow them. Once you get a
start from one of the mushroom companies (such as Paul Stamets'
Fungi
Perfecti), this species is reported to be extremely easy to grow
outside. Just rake fresh wood chips to a depth of one foot, add
five to twenty pounds of sawdust spawn per hundred square feet, water
for four days with a sprinkler, and keep the bed moist thereafter by
watering for half an hour in the morning and evening. If you
start your King Stropharia bed in the early spring, as is recommended,
you should see fruits by late July and continue to eat this
permaculture king until autumn weather cools the ground. Be sure
to pick the mushrooms young and expand your bed once it's in full swing
using the stem
butt method!
This post is part of our Growing Gourmet Mushrooms lunchtime series.
Read all of the entries:
|
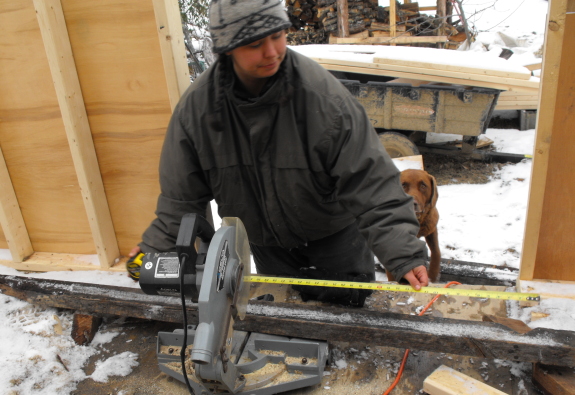
Anna and Lucy are the miter saw experts on this
job. I'm just backing them up with some heavy lifting and the
occasional two cents.
| This post is part of our Building a Storage Building from Scratch
series.
Read all of the entries: Part 1: Foundation
Part 3: Walls and scavenging lumber
Part 5: The roof
|
 Halfway
through our homemade
storage building project, we opted to make a few changes. It
was originally envisioned as a workshop where Mark could build our chicken waterers, but once we decided to put
the exterior wood stove
inside, it made sense to repurpose it as Mark's bedroom/office
instead. In its new incarnation, though, the bed would have been
too close to the stove, and Mark wanted to raise his mattress up a bit,
so we decided to add another four feet to the length of the
structure.
Halfway
through our homemade
storage building project, we opted to make a few changes. It
was originally envisioned as a workshop where Mark could build our chicken waterers, but once we decided to put
the exterior wood stove
inside, it made sense to repurpose it as Mark's bedroom/office
instead. In its new incarnation, though, the bed would have been
too close to the stove, and Mark wanted to raise his mattress up a bit,
so we decided to add another four feet to the length of the
structure.
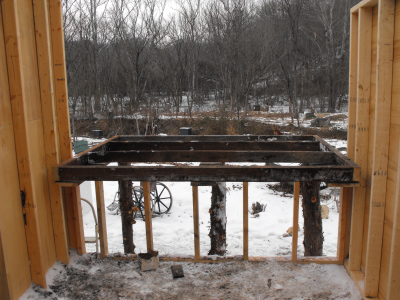 Tuesday,
we installed the floor for the bed addition, which felt a bit like
doing homework math problems --- you get a chance to correct the
misunderstandings you made the first time around and to cement the
proper method into your motor memory. This time, I
took Shannon's advice and put the rim joists on right away, which had the added benefit
of meaning that we didn't need to use expensive brackets.
Tuesday,
we installed the floor for the bed addition, which felt a bit like
doing homework math problems --- you get a chance to correct the
misunderstandings you made the first time around and to cement the
proper method into your motor memory. This time, I
took Shannon's advice and put the rim joists on right away, which had the added benefit
of meaning that we didn't need to use expensive brackets.
 We
used salvaged three by fours for the floor joists. The sawmill
lumber wasn't exactly straight, but I suspect it'll be just as strong
as store bought two by sixes. After all, the three by fours
really are three inches by four inches, so they have nearly half again
as much cross-sectional area as the two by sixes.
We
used salvaged three by fours for the floor joists. The sawmill
lumber wasn't exactly straight, but I suspect it'll be just as strong
as store bought two by sixes. After all, the three by fours
really are three inches by four inches, so they have nearly half again
as much cross-sectional area as the two by sixes.
| This post is part of our Building a Storage Building from Scratch
series.
Read all of the entries: Part 1: Foundation
Part 3: Walls and scavenging lumber
Part 5: The roof
|
 Of
course, the meat of Growing
Gourmet and Medicinal Mushrooms
is information about how to take an existing mushroom and turn it into
thousands of new mushrooms. My previous lunchtime series about how
to cultivate edible mushrooms for free
explains most of the first step for turning an existing mushroom into a
mass of mycelium (the vegetative growth form of the fungus.)
Basically, you can either choose to start with spores
(like growing your mushroom from seed) or clone a mushroom you really like (like taking
cuttings of a grape vine.)
Of
course, the meat of Growing
Gourmet and Medicinal Mushrooms
is information about how to take an existing mushroom and turn it into
thousands of new mushrooms. My previous lunchtime series about how
to cultivate edible mushrooms for free
explains most of the first step for turning an existing mushroom into a
mass of mycelium (the vegetative growth form of the fungus.)
Basically, you can either choose to start with spores
(like growing your mushroom from seed) or clone a mushroom you really like (like taking
cuttings of a grape vine.)
The stem butt method of
cloning was the one mentioned in Mycelium
Running, and I
have to admit that this method is a winner. I managed to create
a mass of mycelium this fall using oyster mushroom stem butts with nearly no effort.
Still, I've always interested in learning new techniques, and Growing
Gourmet and Medicinal Mushrooms had a few in depth mushroom
cloning tips.
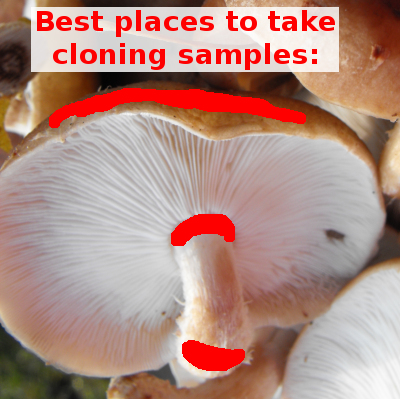
First of all, it's best
to start with a young mushroom in the button
stage when cloning. Also, I probably should have used only the
inside of the stem butt since the outer portion is likely to be
contaminated with competitor species, especially when cloning
ground-fruiting mushrooms. Other locations on the mushroom are
just as useful for cloning, including the area just above the gills on
the cap and the area on the stem right below the disk of the cap.
This post is part of our Growing Gourmet Mushrooms lunchtime series.
Read all of the entries:
|
Blue skies and above freezing temperatures helped us to breeze through
two and a half more wall sections of our home
made storage building project today.
| This post is part of our Building a Storage Building from Scratch
series.
Read all of the entries: Part 1: Foundation
Part 3: Walls and scavenging lumber
Part 5: The roof
|
 As
we pull together our first semi-serious structure on the farm, we've
received a
lot of feedback from really helpful folks who want us to build
something more sturdy.
Some of the feedback is right on track --- we are new to this after all
and we just miss some steps. For example, we'll be adding a
header to both load-bearing walls to fix the window/door problem and
will add rim joists on the ends of the floor joists.
As
we pull together our first semi-serious structure on the farm, we've
received a
lot of feedback from really helpful folks who want us to build
something more sturdy.
Some of the feedback is right on track --- we are new to this after all
and we just miss some steps. For example, we'll be adding a
header to both load-bearing walls to fix the window/door problem and
will add rim joists on the ends of the floor joists.
On the other hand, we've
intentionally underbuilt some areas rather than following the
conventional wisdom to build a house that'll last two hundred
years. Americans seem to be obsessed with building things to last
centuries --- odd since Europeans have only been on this continent for
a few hundred years. As a nation, we build out of steel and
concrete, then opt to tear it all down twenty years later to build
something bigger and better. The rubble is unusable --- pure
waste. It's almost as if we're struggling to overcome our own
mortality, or to prove ourselves immune to the natural cycle of decay.
When
we visited Mexico,
our tour guide told us that traditional Mayan families tore down their
houses and rebuilt them every few years. The structures were made
of plant matter that could end up back in the garden, so this wasn't
really waste. They also built modularly, making several small
structures instead of one huge house so that when one hut had to be
taken down it didn't turn their lives inside out. Similarly, the
folks who lived on our farm before us believed that a dozen rocks
sitting on the ground were a fine foundation for their house --- and
the structure stood for three quarters of a century. I think all
of these people had a good point --- why not build something simpler
and cheaper that won't last forever and instead plan to repair or
replace in a decade or two?
 Granted,
if you live in the city or are paying off a mortgage, you probably have
to build for the long haul and abide by nitpicky building codes,
spending ten times as much money on your house as is actually
necessary. The freedom to do our own thing is one of the many
reasons we love our farm. Sure, some of our experiments will
probably fail, and our building piers may start to rot out in ten or
twenty years. But we've barely put any cash into it, so we can
just rebuild.
Granted,
if you live in the city or are paying off a mortgage, you probably have
to build for the long haul and abide by nitpicky building codes,
spending ten times as much money on your house as is actually
necessary. The freedom to do our own thing is one of the many
reasons we love our farm. Sure, some of our experiments will
probably fail, and our building piers may start to rot out in ten or
twenty years. But we've barely put any cash into it, so we can
just rebuild.
Or maybe we're just
young and stupid. :-) Time will tell....
| This post is part of our Building a Storage Building from Scratch
series.
Read all of the entries: Part 1: Foundation
Part 3: Walls and scavenging lumber
Part 5: The roof
|
 So you've cloned
your mushroom ---
now what? Paul Stamet's Growing
Gourmet and Medicinal Mushrooms
comes at this from a commercial point of view, so he recommends working
in an
ultra-sterile laboratory and growing cloned mushrooms on agar in
petri dishes. Once the mycelium has nearly colonized the entire
petri dish, he cuts the agar into sections and uses it to inoculate
jars of grain.
So you've cloned
your mushroom ---
now what? Paul Stamet's Growing
Gourmet and Medicinal Mushrooms
comes at this from a commercial point of view, so he recommends working
in an
ultra-sterile laboratory and growing cloned mushrooms on agar in
petri dishes. Once the mycelium has nearly colonized the entire
petri dish, he cuts the agar into sections and uses it to inoculate
jars of grain.
Although Stamets' lab
technique isn't really applicable on our farm, I
still teased out a lot of information that will probably be equally
true for our cardboard
mushroom cultivation.
The purpose of this stage in the procedure --- known as the spawn run
--- is to take a little bit of fungal growth and turn it into a lot of
growth. Stamets repeatedly urges you to keep the spawn running at
all times by providing the perfect growing conditions --- moderate
humidity of around 60 to 75%, a warm temperature
around 75 degrees Fahrenheit, and darkness to moderate light.
If you play your cards
right, the mycelium will run very quickly at this point and it must
always have more room to grow into. Never let the spawn cover all
of its petri
dish/ cardboard/ whatever or it will use up its food, build up wastes
to
toxic levels, and lose vitality. Once the mycelium comes near the
edge of its container, expand it by mixing the spawn into five to ten
times as much fresh substrate. Feel free to expand your spawn
twice (which means it can become 100 times bigger than it was to start
with!), but use caution when expanding beyond that or your mycelium may
show loss of vigor.
This post is part of our Growing Gourmet Mushrooms lunchtime series.
Read all of the entries:
|

Today was a great day for laughing and celebrating Anna's mom's
birthday.
 One
of the least important casualties in the blizzard of '09 was our clothesline.
The wet snow clung to our old cotton line so heavily that three of the
four strings snapped! They were pretty rotten anyway, so rather
than tie yet another knot in them, I opted to replace all four.
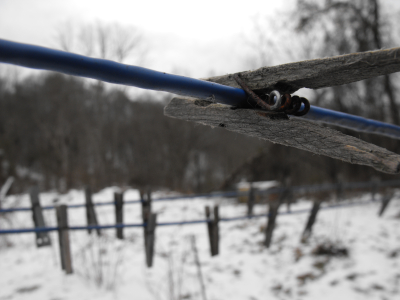
One
of the least important casualties in the blizzard of '09 was our clothesline.
The wet snow clung to our old cotton line so heavily that three of the
four strings snapped! They were pretty rotten anyway, so rather
than tie yet another knot in them, I opted to replace all four.
Our barn is a royal
mess, but it has its uses. A few minutes of
poking around turned up a spool of some kind of cable --- plastic over
wire. Perfect clothesline replacement at an unbeatable price!
Once I cut the new line
pieces to the right length and tied them in
place, I started wondering whether that cable should have been saved
for something more important. I hope it wasn't leftover ethernet
cable from Joey's yurt....
 Next
week, I'll continue my summary of the techniques Paul Stamets uses to
cultivate mushrooms in a commercial setting. But I wanted to take
a break and talk about my own experiment. If you haven't already,
you can read how I
sandwiched oyster mushroom stem butts
between layers of wet cardboard in a flower pot --- this is the cloning
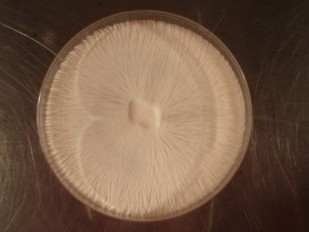
stage of the operation. After a week, I saw mycelium
running across the cardboard, so I expanded
it by putting the mycelium between more layers of wet cardboard in a
bigger container.
Next
week, I'll continue my summary of the techniques Paul Stamets uses to
cultivate mushrooms in a commercial setting. But I wanted to take
a break and talk about my own experiment. If you haven't already,
you can read how I
sandwiched oyster mushroom stem butts
between layers of wet cardboard in a flower pot --- this is the cloning
stage of the operation. After a week, I saw mycelium
running across the cardboard, so I expanded
it by putting the mycelium between more layers of wet cardboard in a
bigger container.
And then I messed
up. The electricity went out and the trailer's interior
temperature dropped pretty low --- nearly to freezing on the floor
furthest from the wood stove where I happened to have my spawn.
When I checked on it, my mycelium was just sitting there and some of it
had died back. Drat! I'm hoping that the cold temperatures
just put my fungi into temporary hibernation, so I've moved them to a
warmer location and will report back in a few weeks. If I don't
see growth by then, I'll go back to the beginning with new mushrooms in
the spring.
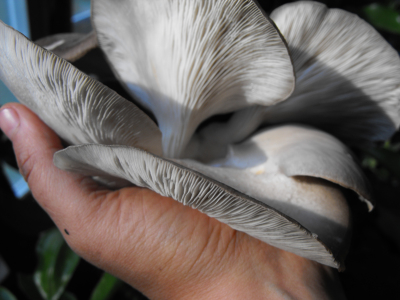
 My dream is to develop a
relatively simple method of propagating oyster mushrooms on the home
scale, without petri dishes, autoclaves, or even storebought
grain. Wouldn't it be great if mushroom-keeping was as easy as
building a worm bin and if those mushrooms could be fed with your junk
mail and cardboard, turning waste into food and garden soil? In
case you think I'm living in an ivory tower, check
out this website where the author turned cardboard and junk mail into
mushrooms --- it is
possible! I just need to work a few kinks out of my system.
My dream is to develop a
relatively simple method of propagating oyster mushrooms on the home
scale, without petri dishes, autoclaves, or even storebought
grain. Wouldn't it be great if mushroom-keeping was as easy as
building a worm bin and if those mushrooms could be fed with your junk
mail and cardboard, turning waste into food and garden soil? In
case you think I'm living in an ivory tower, check
out this website where the author turned cardboard and junk mail into
mushrooms --- it is
possible! I just need to work a few kinks out of my system.
This post is part of our Growing Gourmet Mushrooms lunchtime series.
Read all of the entries:
|
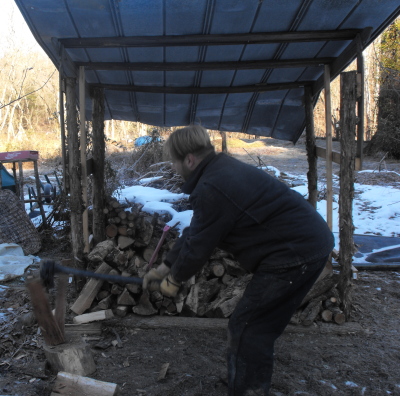 We got the Chopper
1 axe up and running thanks to a couple of replacement springs
and clips from the Chopper 1 website.
We got the Chopper
1 axe up and running thanks to a couple of replacement springs
and clips from the Chopper 1 website.
I've only just started using it, but I can already say I like it a lot.
It feels like I'm getting more splitting action for less energy input,
which is a very good thing. What I like most so far is the feeling of
increased safety. When there's not enough power to split the log
the Chopper 1 just sort of bounces as opposed to grazing off out of
control like the Super
Splitter has been known to do if your aim is a little off.
Credit goes to Anna for capturing the exact moment when the Chopper 1 is
completing a split.
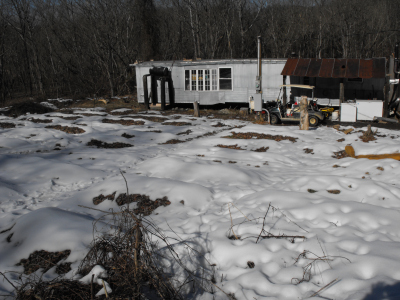 The temperatures rose above
freezing at last, and the month-old snow began to creep back toward the
hill. The first daffodil leaves peeked through the soil in the
sunniest spot, and an amorous cardinal started to sing.
The temperatures rose above
freezing at last, and the month-old snow began to creep back toward the
hill. The first daffodil leaves peeked through the soil in the
sunniest spot, and an amorous cardinal started to sing.
I celebrated by washing
our laundry, pumping water down the hill from the thousand
gallon tank since our water line is still frozen. Then I
turned off the pump...and water kept right on flowing. Gotta love
capillary action! Now I know that I only need to use electricity
to get the suction started --- after that, water will flow four feet up
out of the tank all by itself!

The frozen water
shuffle got a bit easier after I installed a plastic faucet onto
the pour spout of our 6 gallon jug.
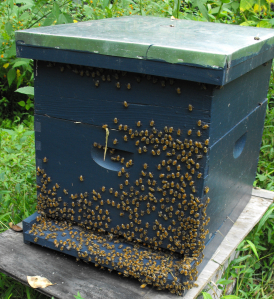
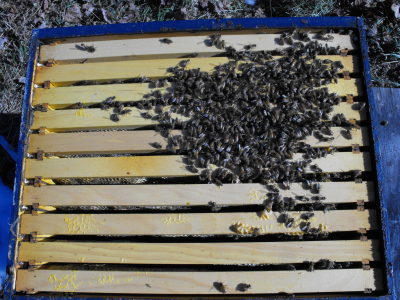 Winter
is the season that makes or breaks bee hives. Our goal is to be
such good bee stewards that our fuzzy little friends have no problem
with the cold weather.
Winter
is the season that makes or breaks bee hives. Our goal is to be
such good bee stewards that our fuzzy little friends have no problem
with the cold weather.
Although the hives look
abandoned during most of the winter, during warm spells we can see the
bees fly out on "cleansing flights" --- this is a euphemism for the
fact that honey bees won't use the bathroom in the hive. Luckily,
bees are able to hold it and only need one warm day a month for their
cleansing flights. While they're out, I've also seen them poking
around on the ground, seeming to lap up water from melting snow.
During the rest of the
winter, the bees huddle together around the queen (and the
honey.) They slowly rotate from the outside to the center so that
no one gets too cold. At the core of this cluster of bees,
workers shiver their bodies and raise the temperature of the cluster as
high as 95 Fahrenheit, but just outside the cluster, the unheated
portion of the hive may drop below freezing.
Our job as winter
beekeepers is quite simple --- make sure that
the bees have enough honey to keep shivering. We took
advantage of a day above 50 on Friday to quickly open up the hives and
count the frames of honey. All three still have good stores,
though one has significantly less than the others. If that hive
is still low on honey during the February check, I'll give them a few
frames of sweet stuff from our strongest hive, which has plenty to
spare.
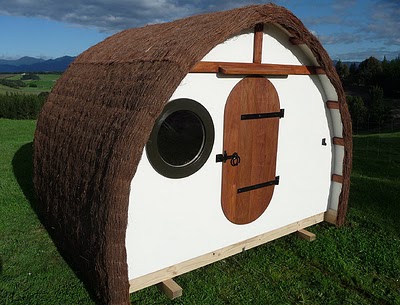 In doing some research for the home
made storage building I discovered the term garden office which is
how they describe some sheds in parts of Europe.
In doing some research for the home
made storage building I discovered the term garden office which is
how they describe some sheds in parts of Europe.
Shedworking.co
is a great place to browse pictures of other garden offices to spark
your imagination and learn new techniques.
I'm partial to this thatch roof design, but don't think it would work
for us here.
My
sister has been doing a lot of thinking and writing about the impact of
routine in her life, and that got me thinking about my own
routines. The first half hour of my "work day" is always the same
--- walking
Lucy and then taking care of the chickens.
Although I rarely write
about it here, the morning chores are a very important part of the
Walden Effect. They clear my head and give me time to think
through any thorny issues that need my attention.
Saturday, I brought the
new camcorder along to document my journey. I hope you enjoy
seeing a glimpse of my daily life rather than finding it boring --- if
the latter, take heart that the video is less than two minutes long.
 Last
week, I posted how to
clone mushrooms then
expand
your spawn as the
first steps toward growing your own mushrooms. Of course, if you
have extra cash and little time, you can always buy spawn from one of
the many companies that cater to the home mushroom grower.
Regardless of how you get it, what do you do with that spawn?
Last
week, I posted how to
clone mushrooms then
expand
your spawn as the
first steps toward growing your own mushrooms. Of course, if you
have extra cash and little time, you can always buy spawn from one of
the many companies that cater to the home mushroom grower.
Regardless of how you get it, what do you do with that spawn?
The pros grow their
mushrooms indoors in bags, trays, or jars. These methods are
definitely the most cost-effective for large-scale growers since the
growing conditions can be tweaked easily to speed up mushroom
production. However, I'm leery of indoors growing since it
requires sterile conditons and lots of up front equipment costs.
Basically, by providing the perfect conditions for your mushrooms,
you're also providing the perfect conditions for lots of molds and
bacteria, so you need to fight contaminants constantly.
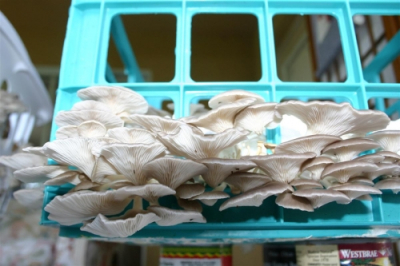
On the homestead scale,
I think that outdoor growing is usually the best way to go. We've
had good luck growing both
oyster mushrooms and shiitakes on logs, and a similar method can be
used to inoculate fresh stumps.
A new method I want to
check out is growing mushrooms in beds of wood chips, straw, or other
materials. If you inoculate your chips in early spring or fall,
the mycelium will naturally expand through the substrate and you may
get mushrooms within the same year. Just be sure to give the
fungus at least four weeks to grow before cold weather kicks in and put
your mushroom bed in a damp, shady, north-facing area.
This post is part of our Growing Gourmet Mushrooms lunchtime series.
Read all of the entries:
|
We closed in on finishing up the walls for the do it
yourself storage bulding today. It was such a treat to have the sun
on our backs during the afternoon portion of the project.
| This post is part of our Building a Storage Building from Scratch
series.
Read all of the entries: Part 1: Foundation
Part 3: Walls and scavenging lumber
Part 5: The roof
|
This video started out as a
serious summary of Monday morning's work on the homemade
storage building.
Then I sped it up so you wouldn't be sitting around waiting for
something to happen. And suddenly the chipmunk noises made me
laugh.
Mark watched it and said
something along the lines of, "That's nice, dear." I think I may just have an
odd sense of humor.... Hope at least a few of you
get a kick out of it. 
| This post is part of our Building a Storage Building from Scratch
series.
Read all of the entries: Part 1: Foundation
Part 3: Walls and scavenging lumber
Part 5: The roof
|
 The material which mushrooms are grown on
is known as the substrate. Although some species are very picky,
others (like the oyster mushroom) can be grown on almost anything that
started life as a plant. We'll provide sterilization instructions
for all of these substrates tomorrow. For now, here are recipes
for turning your plant matter into growing media.
The material which mushrooms are grown on
is known as the substrate. Although some species are very picky,
others (like the oyster mushroom) can be grown on almost anything that
started life as a plant. We'll provide sterilization instructions
for all of these substrates tomorrow. For now, here are recipes
for turning your plant matter into growing media.
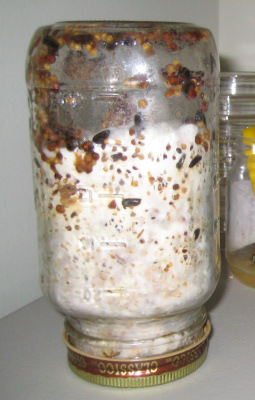
When commercial growers start their mycelium in a petri dish, they
often expand it into jars of sterilized grain. Millet, rye, and
wheat are most often used, but Paul Stamets reports that any grain will
do. To fill a one quart jar, mix 200 grams of grain, 220 mL of
water, and 1 gram of gypsum (to keep the kernels separated and provide
calcium and sulfur.)
Later, mycelia can be expanded onto a mixed wood substrate made up of
different sizes of chips and sawdust. The fungus will quickly
colonize the smallest sawdust grains, while the larger chips provide
for air flow and allow the fungus to form rhizomorphs that lead to big
mushroms. Paul Stamets recommends using only one species of tree
at a time, if possible, and sticking to fast-growing and -decomposing
species like alder. These trees have more sapwood, which is easy
for your mycelium to colonize quickly. His recipe for sawdust
spawn is very simple --- moisten the sawdust to 60 to 70% water,
sterilize, and innoculate.
 Sawdust and wood chips are a bit hard for
your mushrooms to digest quickly, so if you want to boost your yields
you may choose to supplement them with some source of protein.
Lots of homestead and farm waste products fit the bill, including rice,
wheat, or oat bran; ground corn; grape pumice from wineries; spent
barley from breweries; vegetable oil; and stale bread. Enriching
your substrate, though, is a double-edged sword --- the extra nutrients
also help contaminants grow quickly, so you'll need to double your
sterilization time. Paul Stamets' recipe for enriched sawdust is
as follows: 100 pounds of sawdust, 50 pounds of one half to four inch
wood chips, 40 pounds of bran, and 5 to 7 pounds of gypsum, moistened
to 60 to 65% water and then sterilized.
Sawdust and wood chips are a bit hard for
your mushrooms to digest quickly, so if you want to boost your yields
you may choose to supplement them with some source of protein.
Lots of homestead and farm waste products fit the bill, including rice,
wheat, or oat bran; ground corn; grape pumice from wineries; spent
barley from breweries; vegetable oil; and stale bread. Enriching
your substrate, though, is a double-edged sword --- the extra nutrients
also help contaminants grow quickly, so you'll need to double your
sterilization time. Paul Stamets' recipe for enriched sawdust is
as follows: 100 pounds of sawdust, 50 pounds of one half to four inch
wood chips, 40 pounds of bran, and 5 to 7 pounds of gypsum, moistened
to 60 to 65% water and then sterilized.
The last widely used mushroom substrate is straw --- this is Paul
Stamets' favorite for economical oyster mushroom production. He
chops wheat, rye, oat, or rice straw into 1 to 4 inch lengths, then
pasteurizes it and inoculates.
Although grain, wood chips, and straw are the main substrates used in
commercial mushroom production, you shouldn't stop there! Growing Gourmet and Medicinal
Mushrooms teased me with notes that mushrooms can be grown on
newspaper, cardboard, books, corncobs, corntalks, peanut shells, tea
leaves, coffee grounds, and much more. I hope that by this time
next year I'll have information on the best ways to turn these waste
products into mushrooms!
This post is part of our Growing Gourmet Mushrooms lunchtime series.
Read all of the entries:
|
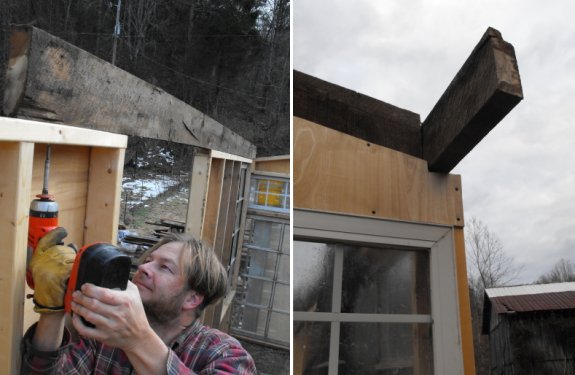
Today we installed some hard wood beams from the old house on the top
of our walls to form a solid box for the storage
buiding. We decided to extend each side out by a foot to provide
some additional cover for the outer walls.
| This post is part of our Building a Storage Building from Scratch
series.
Read all of the entries: Part 1: Foundation
Part 3: Walls and scavenging lumber
Part 5: The roof
|
 Just keeping the farm going uses most
of our energy, but we like to end each year a little better off than
the last. I get easily frustrated, though, when the big projects
have to get pushed to the back burner to accomodate planting, weeding,
and the usual cycle of farm chores. The solution? Take the
dozens of big projects we'd like to complete and narrow them down to
the top ten to be completed each year.
Just keeping the farm going uses most
of our energy, but we like to end each year a little better off than
the last. I get easily frustrated, though, when the big projects
have to get pushed to the back burner to accomodate planting, weeding,
and the usual cycle of farm chores. The solution? Take the
dozens of big projects we'd like to complete and narrow them down to
the top ten to be completed each year.
I thought you might
enjoy seeing last year's top ten goals (and our status on each
project). This is my version of New Year's resolutions
--- why make a resolution when you can instead make a plan?
 Better
steps to the house. We shored up the existing steps and
they work fine.
Better
steps to the house. We shored up the existing steps and
they work fine.- Fence deer out of the full perimeter. After some fencing, Mark invented our deer deterrent, which solved the same problem for vastly smaller amounts of time and money.
- Start saving for retirement (again.) This goal fell by the wayside for a few years as we poured our finances into the farm's startup costs. Luckily, this year we got back on track and started putting money away again. (Check out our ebook for information about becoming fiscally solvent on the farm.)
- Running water in the trailer. We came close to reaching this goal, burying about 75% of the water line from the thousand gallon tank to the trailer. We've still got a bit more to go, though, which is why our lines froze up and we went back to carrying water.
 Bees.
We started our bees!
Bees.
We started our bees!- Irrigation to all plants. Due to an extremely wet summer, we didn't water much at all. But we did put in most of the irrigation infrastructure we'll need. We'll test it out during the next drought.
- Expand the shiitakes. We not only added a few more shiitake logs, we even started oyster mushrooms (which fruited already!)
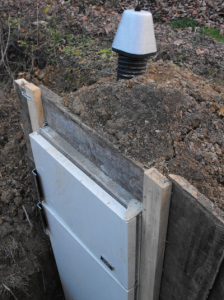 Root
cellar. After embarking on a huge root cellar project, we
changed directions and decided
to work on making
a root cellar out of a fridge. We completed it, but the dirt
slumped in a rain and pushed the fridge over. We need to dig it
out and add a roof.
Root
cellar. After embarking on a huge root cellar project, we
changed directions and decided
to work on making
a root cellar out of a fridge. We completed it, but the dirt
slumped in a rain and pushed the fridge over. We need to dig it
out and add a roof.- Fix the barn roof. We didn't get to this....
- Build a wider, higher footbridge. We shored up the existing bridge instead, but it gave out in early winter.
- Build a woodshed. Done!
- Build Mark a loft/office space. We built him a loft inside the trailer, then made a good start on our new building.
As you can see, we didn't manage to narrow our goals down to ten, but
we did complete seven and make good progress on another four. Not
too bad for working around all of the little things that inevitably
come up on a farm! Stay tuned for this year's overly ambitious
goals in a later post.
 When
growing mushrooms, your goal is to get your mycelium to colonize a new
substrate as quickly as possible --- definitely within two weeks.
As every gardener knows, nature abhors a vaccuum. Just as your
garden beds will quickly become coated with weeds if you don't plant
your veggies thickly or mulch them, your mushroom substrate will be
full of harmful contaminants if you don't make sure your mushrooms get
a head start.
When
growing mushrooms, your goal is to get your mycelium to colonize a new
substrate as quickly as possible --- definitely within two weeks.
As every gardener knows, nature abhors a vaccuum. Just as your
garden beds will quickly become coated with weeds if you don't plant
your veggies thickly or mulch them, your mushroom substrate will be
full of harmful contaminants if you don't make sure your mushrooms get
a head start.
The best way to
jump-start your mycelium in a new substrate is to
sterilize or pasteurize the material to kill off the harmful
competitors. Heat is the primary method used, but you have to be
sure not to raise the temperature of your substrate over 200 F or
you'll do more harm than good by waking up bad molds.
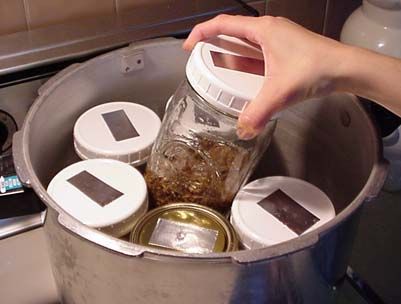
Sterilization sounded
very difficult to me until I realized that the methods
used at the home scale are basically the same as canning. Want to
sterilize jars of grain? Just boil the grain in water for an
hour, put it in clean quart jars, and then cook the whole thing in a
pressure cooker for another hour at 15 psi. I soaked my
cardboard substrate in hot water before inoculating, which I assume
did a bit of sterilization at least.
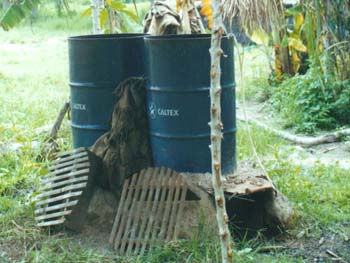 Of course, if you want to
inoculate masses of wood chips or straw, they
probably won't fit in your pressure cooker. Paul Stamets offers
an alternative method for pasteurizing bulk substrates at home --- fill
a big pot or metal drum with water, put your substrate in a wire basket
inside, and place over a propane burner or a fire. Straw needs to
cook at 150 to 180 degrees Fahrenheit for an hour while wood chips
should be cooked for twice as long. If you've enriched your wood
chips, you may need to cook for as long as 5 hours.
Of course, if you want to
inoculate masses of wood chips or straw, they
probably won't fit in your pressure cooker. Paul Stamets offers
an alternative method for pasteurizing bulk substrates at home --- fill
a big pot or metal drum with water, put your substrate in a wire basket
inside, and place over a propane burner or a fire. Straw needs to
cook at 150 to 180 degrees Fahrenheit for an hour while wood chips
should be cooked for twice as long. If you've enriched your wood
chips, you may need to cook for as long as 5 hours.
No matter how you
sterilize your substrate, let it cool, then inoculate
it with that
mycelium you carefully grew according to last week's
instructions.
The fungus will do most of the rest for you!
This post is part of our Growing Gourmet Mushrooms lunchtime series.
Read all of the entries:
|
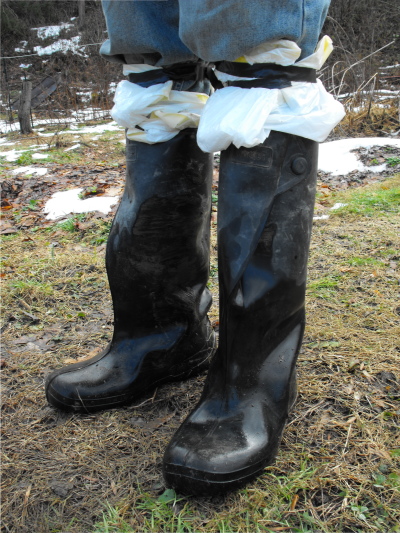
This was my solution yesterday to the problem of the creek still being
a few inches too high.
You still get some water creeping in, but your pants and socks stay dry
for a quick trip into town to visit the post office and hardware store.
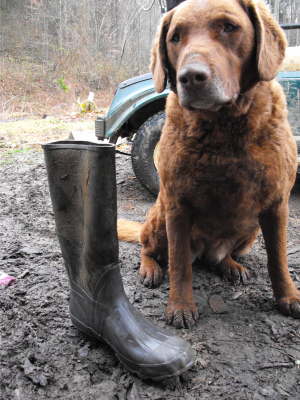 Last
weekend, Mark had a two day board meeting out of town, which culminated
in being towed home since his car wouldn't start. He descended
from the tow truck with his backpack of overnight gear, his laptop, and
his wading boots in hand.
Last
weekend, Mark had a two day board meeting out of town, which culminated
in being towed home since his car wouldn't start. He descended
from the tow truck with his backpack of overnight gear, his laptop, and
his wading boots in hand.
But while Mark was gone,
warm rains melted a lot of our snow and gushed into the creek in
frigid, muddy rivulets. The creek had risen far past the point
where wading boots would do any good. Luckily, Mark had a backup
plan --- scoot across the creek on a handy log.
For future reference,
when scooting across a raging creek on a log, it's best to carry as
little as possible. Mark knew the drill, so he paused before
embarking to toss his wading boots to the other shore. Boot
number one whizzed through the air and landed on the creekbank.
Boot number two swung aloft and --- thunk! --- hit an arching limb,
then --- splash! --- landed in the flood waters. With a last gulp
of air, the boot sank.
Now, you have to
understand that those boots are Mark's babies. He bought them
less than a month ago in an attempt to keep his feet dry through the
freeze/mud cycle. So when his boot landed in the flood, Mark went
in after it...waist deep in cold, cold water. But the boot got
away, and Mark came home dripping wet and worn out.
Ever since, Lucy and I
have been patrolling the creek on our daily
walks.
Finally, Wednesday morning, the waters cleared up enough that we could
see all the way to the bottom. And, just fifteen feet downstream,
there was our quarry! We pulled it out and brought it home,
triumphant. Lucy won three dog bones and I won a kiss. Sure
is nice to be the hero.
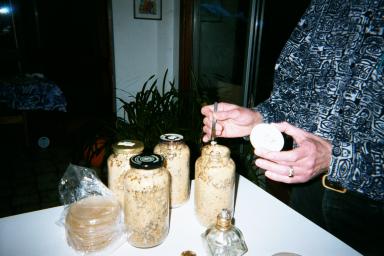 Growing Gourmet and Medicinal
Mushrooms
presents so many options for substrates that I got a little lost.
Luckily, the last half of the book gives specific inoculation paths
that Paul Stamets has used to successfully grow various species of
mushrooms.
Growing Gourmet and Medicinal
Mushrooms
presents so many options for substrates that I got a little lost.
Luckily, the last half of the book gives specific inoculation paths
that Paul Stamets has used to successfully grow various species of
mushrooms.
I started out on this
journey wanting to propagate shiitake mushrooms, but have since
determined that oyster mushrooms are the easiest and least
expensive to grow and thus my top choice. Paul Stamets' tried and
true method for growing oysters begins with mycelium on agar in petri
dishes, then expands onto grain, and again onto straw (or enriched
sawdust.) At each step, the mycelium are expanded onto substrates
that are 5 to 10 times bigger and are given a week or two to colonize
the new substrate. Stamets warns that it is possible to skip
steps, but that doing so can result in slower colonization which in
turn leads to contamination. In either case, the inoculated
substrates should be incubated at 75 to 85 degrees Fahrenheit and 85 to
100% humidity.
Want to grow King
Stropharia mushrooms
too? Their spawn prefers 70 to 80 degrees Fahrenheit and 95 to
100% humidity. Stamets goes from petri dish to grain to wood
chips/sawdust. Check out Growing
Gourmet and Medicinal Mushrooms for instructions on growing
all kinds of other species.
This post is part of our Growing Gourmet Mushrooms lunchtime series.
Read all of the entries:
|
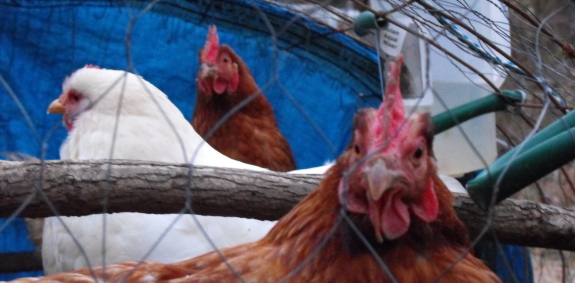
These hens seem to be getting along better since I installed the additional
2 roosting posts.
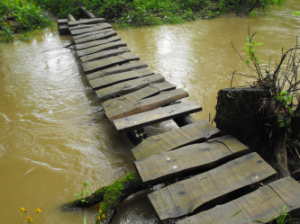 If
you read our
rundown on 2009's top ten goals, you may be asking --- what
are our major projects for 2010?
If
you read our
rundown on 2009's top ten goals, you may be asking --- what
are our major projects for 2010?
- Revisit the creek crossing.
Maybe build solid, higher stepping stones. Or a zip line.
Or a better bridge. Still pondering this one. The goal is
to get us across the creek during moderate to high water.
- Finish our homemade
storage building. Number two on our list, but number
one on our agenda.
- Experiment with ways to get
humanure to our fruit trees.
We're considering building a movable "outhouse" that will let us fill
pits with human waste interspersed with leaves and bones. My
goal
is to safely dispose of all of the wastes, but in such a way that
they'll rot down into fertilizer that the trees can grow their roots
into. We hope to develop a method which will ensure that we don't
have to handle the waste. Again, still pondering --- more on this
once I read the Humanure book that I skimmed last year.
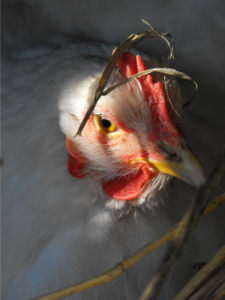 Running water
in the trailer. Finishing up last year's waterline
burying expedition.
Running water
in the trailer. Finishing up last year's waterline
burying expedition.
- Figure out chicken reproduction.
Yeah, yeah, I know all about the birds and the bees. But our
broody hen is a terrible mother, so we'd like to give our electric
incubator another try. But our house has too much temperature
variation for the incubator to work as is (we've tried), so Mark's
going to build an insulated brood box to keep the incubator at more of
a steady temperature. Hopefully we can raise enough chickens this
year to eat some. Whether we'll break down and take on a
free-loader rooster is still up in the air.
- Figure out a way to keep a
constant mulch cover over the entire garden.
This may mean buying a chipper or hunting down those utility line
trucks to get a mass of wood chips for longer term mulching (once they
rot down.) Or raking
more leaves. Or getting more serious
about grass
clippings (maybe with a riding mower so we can cover more
territory?) Probably some combination of the above. No
matter how we do it, I want to spend less time weeding so that we can
expand the garden in 2011 to grow some of our own grain. Right
now, we can't expand anything or I'll go nuts during weeding season!
- Figure out mushroom reproduction. As you've read in our mushroom lunchtime series, we're well on our way.
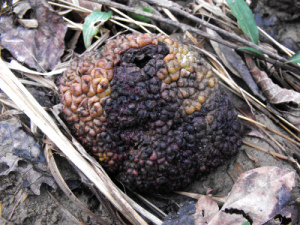 Find a
temporary caretaker to check on the farm when we're away. This
isn't essential right now but is a prerequisite for any potential dairy
animals.
Find a
temporary caretaker to check on the farm when we're away. This
isn't essential right now but is a prerequisite for any potential dairy
animals.
- Start fencing or hedging
pasture areas for potential sheep/goats/pigs. Big
livestock are on our ten year plan, so we'd better get ready for them!
- Bathing room. Once
the storage building is in place, there'll be room in the trailer to
make a really nice bathtub with a view of the garden. Maybe I
could even have a supplemental bathing area outdoors for the summer
months too?
- Solidify the driveway with more
rocks. This mostly just means money to hire someone to
haul rip-rap for us. And tracking him down to do the
hauling. Then some rock spreading.
- Fix the fridge
root cellar.
Once again, my ability
to count to 10 is in serious doubt. But listing twelve top goals
gives me some wiggle room so that if we complete ten we'll still have
succeeded. It's clearly going to be another exciting year on the
farm!
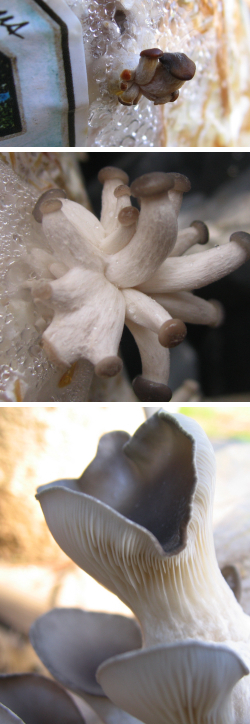 No matter whether you've gone
the cheap, at-home route of growing
mushroom spawn on cardboard or carefully followed the
optimal growing instructions using petri dishes, jars of grain, and
sawdust, mycelium is
just mycelium. I've been talking about this stuff for two weeks,
and I know you're anxious to get to the mushrooms themselves.
No matter whether you've gone
the cheap, at-home route of growing
mushroom spawn on cardboard or carefully followed the
optimal growing instructions using petri dishes, jars of grain, and
sawdust, mycelium is
just mycelium. I've been talking about this stuff for two weeks,
and I know you're anxious to get to the mushrooms themselves.
Mushrooms aren't like
plants which pay attention to day length and then bloom and fruit on
cue. Instead, you need to give your mycelium a hint when it's
time to get some mushrooms. First of all, the mycelium has to
have completely colonized the substrate --- reaching the end of its
habitat is one natural cue that prompts mushroom formation.
When growing mycelium in
an unnatural habitat, like plastic bags, you will also want to lower
the carbon dioxide levels, which simulates the fungus reaching the
outside world. Many growers punch small holes in the bags where
they want the mushrooms to emerge. Increasing the light levels at
least slightly also tells the mycelium that it has reached the surface
and should send up a fruitbody.
Meanwhile, your mushroom
is probably waiting for a specific season (though which one depends on
the species you are growing.) Increase the humidity to nearly
100% and either increase or decrease the temperature to signal a
seasonal shift. Oyster mushrooms are split into warm weather
varieties which should be prompted to fruit at temperatures between 50
and 75 degrees Fahrenheit and cold weather varieties that need a few
days at 50 to 60 degrees Fahrenheit.
If you give your
mycelium the right cues, they should form what are called primordia ---
little buttons on the surface that can grow into mushrooms. To
prompt the mushrooms to develop properly, lower the humidity a bit and
retain lower carbon dioxide levels and moderate light. If you
want mushrooms fast, raise the temperature, or just leave the
temperature where it's at and wait a few more days. Soon, you'll
be feasting on gourmet mushrooms!
This post is part of our Growing Gourmet Mushrooms lunchtime series.
Read all of the entries:
|

We managed to get all the roof rafters installed today along with most
of the cross sections on the home-made
storage building.
| This post is part of our Building a Storage Building from Scratch
series.
Read all of the entries: Part 1: Foundation
Part 3: Walls and scavenging lumber
Part 5: The roof
|
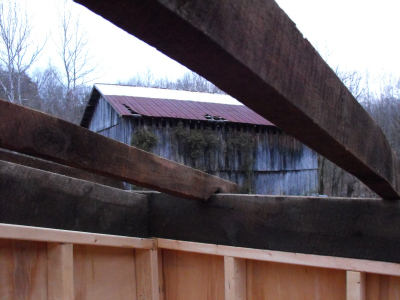 As
we reach the rafters of the homemade
storage building,
we're using primarily scavenged lumber and are discovering that it has
its pros and cons.
As
we reach the rafters of the homemade
storage building,
we're using primarily scavenged lumber and are discovering that it has
its pros and cons.
On the pro side, that
old wood is hard --- Mark screws straight
into storebought lumber as if it's balsa wood, but our scavenged boards
require pilot holes. The scavenged lumber also comes in much
thicker sections --- no 1.5 inch lumber here. From a very
project-specific standpoint, the scavenged wood makes awesome rafters
because it's already cut to the length of the tin (that we plan to
reuse) and has a handy notch in just the right place.
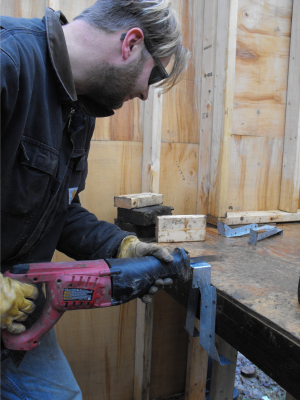 On
the other hand, scavenged lumber isn't quite so modular as those
regular 2X4s. We've had to add a spacer here and there since some
rafters are thicker than others. Furthermore, the brackets that
Mark found in the barn to secure the non-notched ends of the rafters to
the header would have fit 2X4s but not our old rafters. Luckily,
Mark was able to cut the brackets in half and they worked just fine.
On
the other hand, scavenged lumber isn't quite so modular as those
regular 2X4s. We've had to add a spacer here and there since some
rafters are thicker than others. Furthermore, the brackets that
Mark found in the barn to secure the non-notched ends of the rafters to
the header would have fit 2X4s but not our old rafters. Luckily,
Mark was able to cut the brackets in half and they worked just fine.
Of course, you all know
my main motivation in using scavenged lumber --- price. It's hard
to beat free, especially since it doesn't take any longer to tear the
boards out of the old building than it would take to drive to the
nearest big box store. You sure do buy less when you live in the
middle of nowhere.
| This post is part of our Building a Storage Building from Scratch
series.
Read all of the entries: Part 1: Foundation
Part 3: Walls and scavenging lumber
Part 5: The roof
|
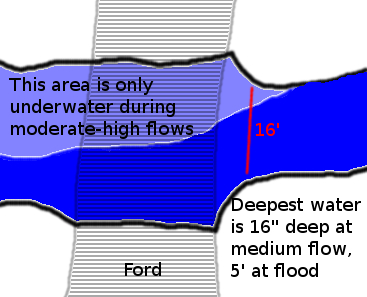 Several of you have expressed an interest in Farm Goal
'10's "Revisit the creek crossing." I'm always interested to
see what clever ideas people come up with, especially while we're in
the planning stages. (We'll be in the planning stages for another
couple of months until the water warms up.) So here's some extra
info to get those creative juices flowing.
Several of you have expressed an interest in Farm Goal
'10's "Revisit the creek crossing." I'm always interested to
see what clever ideas people come up with, especially while we're in
the planning stages. (We'll be in the planning stages for another
couple of months until the water warms up.) So here's some extra
info to get those creative juices flowing.
The drawing here is a top view of the creek crossing area. As you
can see, the creek is relatively shallow a lot of the time, but
regularly rises to 16 to 20 inches after normal rains. About once
a month, it rises to the top of (and over) its approximately five foot
high banks, at which point it washes away anything that isn't securely
bolted down.
 Creek crossing 1.0 is a cinderblock
ford that still works perfectly for its purpose --- getting
vehicles across the creek when the water is no more than two feet
high. However, we really only drive across the creek a few times
a month. This year's priority refers to the much more frequent
times that we walk across. Just so you know, we don't want a big,
fancy bridge to drive across --- we like our moat.
Creek crossing 1.0 is a cinderblock
ford that still works perfectly for its purpose --- getting
vehicles across the creek when the water is no more than two feet
high. However, we really only drive across the creek a few times
a month. This year's priority refers to the much more frequent
times that we walk across. Just so you know, we don't want a big,
fancy bridge to drive across --- we like our moat.
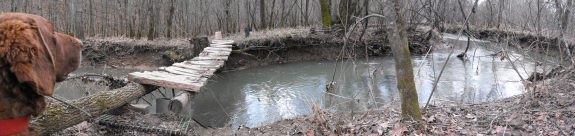
Creek crossing 2.0 was a
footbridge that we built from trees felled on the property. It
lasted for about two years, and was nearly perfect. The only flaw
was that everyone except me, Mark, and my mom refused to walk across it
because the five foot drop below it terrified them. Wimps.
:-) One option would be to rebuild a similar footbridge, but
actually spend a little bit of money for treated lumber and add a
handrail. To deal with high water, it would probably need to be
about twenty feet long.
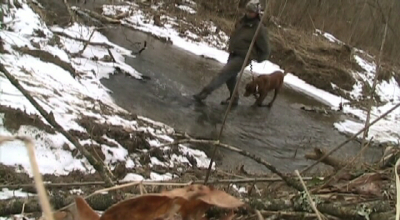 Creek crossing 3.0 consists of three
cinderblocks placed along the edge of the ford. When the water is
only a foot deep (80% of the time), these are actually one of the best
crossing options. You hop from block to block and keep your feet
dry. They can be a bit wobbly, but folks seem to be less scared
of them than of the footbridge. They do wash away during floods,
though.
Creek crossing 3.0 consists of three
cinderblocks placed along the edge of the ford. When the water is
only a foot deep (80% of the time), these are actually one of the best
crossing options. You hop from block to block and keep your feet
dry. They can be a bit wobbly, but folks seem to be less scared
of them than of the footbridge. They do wash away during floods,
though.
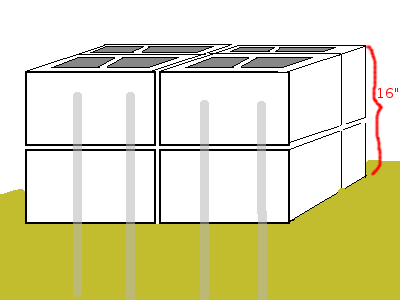 One option we're considering is building a
more high tech version of creek crossing 3.0 --- cementing stepping
stones to the bottom of the creek using rebar and making them two
blocks high to accommodate higher water. Or perhaps three blocks
high with half of the bottom block sunk into the creek bottom.
Not sure if we'd need to make the stepping stone four blocks in
diameter like this drawing to make people feel comfortable or just two.
One option we're considering is building a
more high tech version of creek crossing 3.0 --- cementing stepping
stones to the bottom of the creek using rebar and making them two
blocks high to accommodate higher water. Or perhaps three blocks
high with half of the bottom block sunk into the creek bottom.
Not sure if we'd need to make the stepping stone four blocks in
diameter like this drawing to make people feel comfortable or just two.
There's also a log spanning the creek that we shimmy across when
desperate to get in or out during extremely high water. This is
vastly suboptimal, and we've considering replacing it with two ziplines
--- one to take you across the creek and the other to take you
back. When I started researching ziplines, though, they looked to
be out of our price range for our current creek crossing plans.
I'm not interested in spending more than $100 on the creek right
now. Plus, clearly the folks who wouldn't walk across the
footbridge are unlikely to brave a zipline, so we'd have to create an
alternative option anyway.
So, what do you think? Bridge, stepping stones, zipline, or
another option entirely? I'd love to see links to other websites
where people have installed low cost creek crossings. Just keep
in mind that anything less than five or six feet off the creek bottom
will be washed away unless extremely securely attached.
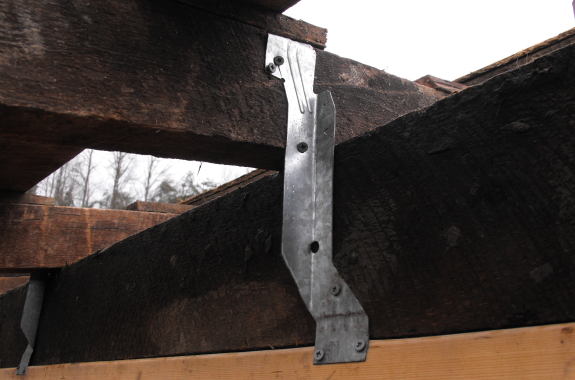
These modified
brackets help to illustrate the "use what you've got" building
philosophy we've been trying to adopt for this home
made storage building project.
| This post is part of our Building a Storage Building from Scratch
series.
Read all of the entries: Part 1: Foundation
Part 3: Walls and scavenging lumber
Part 5: The roof
|
 It's
been a beautiful week of spring, with temperatures above freezing and
highs in the low fifties, but winter is returning this week.
It's
been a beautiful week of spring, with temperatures above freezing and
highs in the low fifties, but winter is returning this week.
Until finishing our
water line moves its way to the top of our list, we've instated a new rule
--- fill the thousand
gallon tank
as soon as it empties halfway. This is harder than it sounds
since there are usually only a few days a winter month when the ground
is thawed enough to pump water and the creek is clean instead of
flooded brown. We got lucky and stocked up on Sunday.
Meanwhile, I've doubled
the number of milk
jugs of drinking water we keep on hand
--- now we've got twenty eight gallons. We should be okay on both
drinking and washing water for at least two or three weeks regardless
of flood, freeze, or lack of electricity.
 As the next step in my pursuit of easy to grow
grains, I decided to
take everyone's advice and read Small-Scale
Grain Raising by
Gene Logsdon. I thoroughly enjoyed the book, although (as usual)
I felt it glossed over some very important aspects of bringing grain
growing to the backyard. Still, the book made me feel that
growing grain was within my reach.
As the next step in my pursuit of easy to grow
grains, I decided to
take everyone's advice and read Small-Scale
Grain Raising by
Gene Logsdon. I thoroughly enjoyed the book, although (as usual)
I felt it glossed over some very important aspects of bringing grain
growing to the backyard. Still, the book made me feel that
growing grain was within my reach.
I have to admit that
before reading Small-Scale
Grain Raising, I
fell into the category of folks who don't really think about where
their grain comes from. The only grain commonly grown in my area
is corn, and I grew up thinking that flour came from the store. I
assumed that grain-growing was an esoteric undertaking requiring vast
amounts of land, equipment, and know-how. And could you really
grow it around here?
But some rough and dirty
math suggests that I could create the three cups of flour I use in my favorite pizza
crust recipe from 22
square feet of soil --- about the size of one of my raised beds.
As I'll explain later, Logsdon has had success threshing and winnowing
grain on the backyard scale.
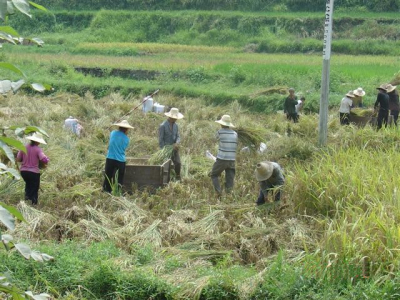 Many of you are probably
thinking --- why grow grain when you can buy flour so cheaply in the
store? My primary motivation is a bit geeky --- I just like
knowing how to do things myself. But growing your own grain has
other perks. When I read Farmers
of 40 Centuries, I
was a bit jealous of the endless rice straw these farmers seemed to
have on hand for mulching. Straw is a major byproduct of all
kinds of grain-growing, and I am always on the lookout for more sources
of mulch.
Many of you are probably
thinking --- why grow grain when you can buy flour so cheaply in the
store? My primary motivation is a bit geeky --- I just like
knowing how to do things myself. But growing your own grain has
other perks. When I read Farmers
of 40 Centuries, I
was a bit jealous of the endless rice straw these farmers seemed to
have on hand for mulching. Straw is a major byproduct of all
kinds of grain-growing, and I am always on the lookout for more sources
of mulch.
Growing your own grain
is also the key to independence from store-bought chicken feed.
And if you grow your own grains, you can make true whole grain flours,
without the healthy germ removed. All in all, it looks like an
endeavor worth experimenting with.
| This post is part of our Backyard Grain Growing lunchtime series.
Read all of the entries: |
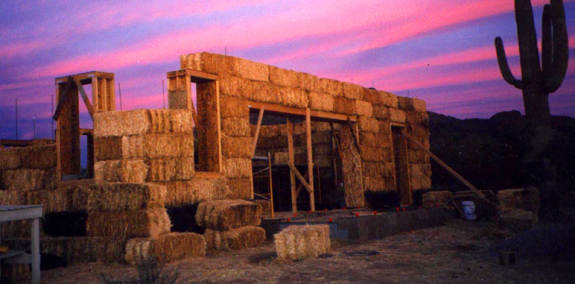
Carolyn Roberts from house of
straw.com has made a fun and informative 8 minute video
that takes you through all the hoops she had to jump through to make
her straw bale dream a reality. What sets this collection of
information apart from others I've come across is the level of detail
she shares when it comes to building codes and materials.
We considered the straw bale approach briefly, but decided against it
for multiple reasons, mainly the fact that we get a lot of moisture
around here, and it's not really as cheap as you might think.
Carolyn spent 50 thousand dollars and a good chunk of her precious time
to finish the above home, which was way out of our price range and
would have delayed our garden infrastructure building considerably. Her
Walden castle is hands down more beautiful and efficient than our
recycled trailer, but we would have had to go in debt to attain that
level of comfort, an option that shouldn't even be on the table for
anyone who prefers time over money, which goes to the very core essence of what the Walden Effect is all about.
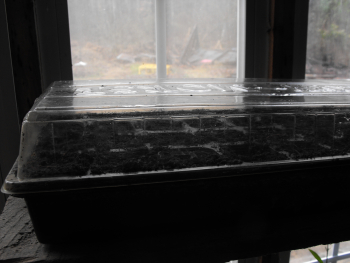 Despite
swearing up and down that I wasn't going to start any seeds indoors
this year, I filled a flat with stump
dirt Monday and
sprinkled in tiny alpine strawberry seeds. I tossed a few in the
ground outdoors, too, as a control since I believe that plants people
baby indoors often do just as well when planted straight in the garden.
Despite
swearing up and down that I wasn't going to start any seeds indoors
this year, I filled a flat with stump
dirt Monday and
sprinkled in tiny alpine strawberry seeds. I tossed a few in the
ground outdoors, too, as a control since I believe that plants people
baby indoors often do just as well when planted straight in the garden.
I'm excited to add
alpine strawberries to our current repertoire of June-bearing and
everbearing strawberries. I've read that alpine strawberries can
cope with partial shade and make a good addition to the herb layer of forest
gardens. Plus,
the fruits are reputed to have the best flavor of all strawberries,
even though they're so tiny that you probably don't want to pick too
many. Best of all, alpine strawberries can be started from seed
as long as you do so indoors, which eliminates the high startup costs
of traditional strawberries.

This is our second shot
at starting strawberries from seed. We grew some our first year
on the farm, planting the seeds in the middle of January and eating
fruits by summer. Yields were good but, unfortunately, the
variety we grew (fresca) was some sort of odd hybrid with full-sized
berries that were quite tasteless.
In case you're a botany
geek like me, you might be interested to know that the various types of
strawberries are in different species. The big June-bearing
strawberries are Fragaria x ananassa, which is a hybrid between
the eastern North American native Fragaria
virginiana (which
grows wild in our woods) and the large-fruited, South American Fragaria
chiloensis.
Alpine strawberries were bred from Fragaria
vesca, a native
strawberry to parts of North America, Europe, and Asia. Although
we don't hear much about Alpine strawberries, they have been eaten
since the Stone Age and literal tons are still picked commercially each
year in Turkey. I look forward to picking our own this summer!
One
of the biggest stumbling blocks for me in growing my own grain was that
I just didn't know where to start. There are at least a dozen
grains available in the grocery store, but since none of my neighbors
grow any of them, I didn't know which ones are suited to my climate and
to my uses.
Here's a quick rundown
on the pluses and minuses of various types of
grain, from the backyard perspective. I've put the most promising
varieties near the top so that you can stop reading if you get bored.
 Corn
is the king of high output per unit area, but low protein. This
is the only grain commonly grow in the backyard, for a good
reason. You can easily harvest corn on a small scale, picking the
corn and shelling it by hand or in a hand-cranked sheller. Corn
makes up the bulk of many animal feeds and is, indeed, a cheap and easy
way to start breaking your dependence on storebought feed.
Corn
is the king of high output per unit area, but low protein. This
is the only grain commonly grow in the backyard, for a good
reason. You can easily harvest corn on a small scale, picking the
corn and shelling it by hand or in a hand-cranked sheller. Corn
makes up the bulk of many animal feeds and is, indeed, a cheap and easy
way to start breaking your dependence on storebought feed.
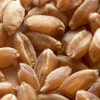
Wheat
is the other primary grain that Americans eat, and you can't beat the
taste. As a backyard grain, it's harder than corn but easier than
many others. It can be used as animal feed and can also be grazed
by livestock in the spring without unduly affecting your grain harvest.
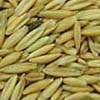 Oats
are one of the best grains, health-wise, due to their high protein
content. They are a bit more difficult than wheat since the seeds
are coated in a tough hull that is difficult to remove at home, but I
plan to try a hull-less oat variety that lacks that problem. In
addition to being used as human and animal food, oats were
traditionally grown as a cover crop for strawberries in England.
The oats were planted in late summer to early fall between the
strawberry plants, grew for a while, then were naturally killed by
frost before setting seed. The grass-like plants fell and mulched
the berries --- how can you beat a mulch that spreads itself?
Oats
are one of the best grains, health-wise, due to their high protein
content. They are a bit more difficult than wheat since the seeds
are coated in a tough hull that is difficult to remove at home, but I
plan to try a hull-less oat variety that lacks that problem. In
addition to being used as human and animal food, oats were
traditionally grown as a cover crop for strawberries in England.
The oats were planted in late summer to early fall between the
strawberry plants, grew for a while, then were naturally killed by
frost before setting seed. The grass-like plants fell and mulched
the berries --- how can you beat a mulch that spreads itself?
 Soybeans
clearly aren't grains, but Gene Logsdon includes them in his book
because they make up the other major portion of commercial animal feeds
and are a great source of protein. They are grown like garden
beans,
and can be eaten at the green stage (aka the delicious edamame you
might have
tried as an appetizer in a Japanese restaurant) or dried and used like
soup beans. Soybeans also make a good hay and green manure.
When
feeding to animals, though, you shouldn't feed soybeans raw because the
beans contain a substance that interferes with digestion and protein
absorption. As long as you roast the beans first, they are a
cheap and
easy way to add protein to your chickens' diets.
Soybeans
clearly aren't grains, but Gene Logsdon includes them in his book
because they make up the other major portion of commercial animal feeds
and are a great source of protein. They are grown like garden
beans,
and can be eaten at the green stage (aka the delicious edamame you
might have
tried as an appetizer in a Japanese restaurant) or dried and used like
soup beans. Soybeans also make a good hay and green manure.
When
feeding to animals, though, you shouldn't feed soybeans raw because the
beans contain a substance that interferes with digestion and protein
absorption. As long as you roast the beans first, they are a
cheap and
easy way to add protein to your chickens' diets.
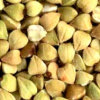 Buckwheat
is only kinda-sorta a grain as well. (It's in the smartweed
family
instead of the grass family.) One of our readers suggested that
we
give this a shot, and I have to admit that it looks like a homestead
winner. Buckwheat is high in lysine, an amino acid that other
grains
lack, and is a dynamic accumulator
of phosphate. It can be planted in early summer when gaps start
opening in the garden from spring crops, and the fall flowers are an
excellent source of nectar for honeybees. You can go the normal
route
of threshing and winnowing, or just pick a cup or two by hand in the
garden. Logsdon reports that his chickens love buckwheat.
Buckwheat
is only kinda-sorta a grain as well. (It's in the smartweed
family
instead of the grass family.) One of our readers suggested that
we
give this a shot, and I have to admit that it looks like a homestead
winner. Buckwheat is high in lysine, an amino acid that other
grains
lack, and is a dynamic accumulator
of phosphate. It can be planted in early summer when gaps start
opening in the garden from spring crops, and the fall flowers are an
excellent source of nectar for honeybees. You can go the normal
route
of threshing and winnowing, or just pick a cup or two by hand in the
garden. Logsdon reports that his chickens love buckwheat.
 Sorghum
is a grain I've never eaten but one that my neighbors actually
grow. You can grow grain sorghum (aka "milo") specifically for
the edible seeds or grow sweet sorghum and use the stalks for molasses
and the grain for food. Sorghum has yields as high as corn, and
is very easy to harvest for animal feed since you can just cut the
entire seed head and toss it to your chickens. Threshing is also
easier than other grains --- just rub the sorghum heads between your
hands and the seeds will drop right out.
Sorghum
is a grain I've never eaten but one that my neighbors actually
grow. You can grow grain sorghum (aka "milo") specifically for
the edible seeds or grow sweet sorghum and use the stalks for molasses
and the grain for food. Sorghum has yields as high as corn, and
is very easy to harvest for animal feed since you can just cut the
entire seed head and toss it to your chickens. Threshing is also
easier than other grains --- just rub the sorghum heads between your
hands and the seeds will drop right out.
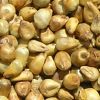
Millet isn't often used for human
food in the U.S., but is a primary grain in northern China. Pearl
millet (Pennisetum
glaucum)
seems to have potential for the backyard since it threshes free from
the hulls naturally, and chickens can be fed a whole seed head, as with
sorghum.
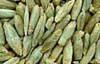
Rye has the most potential as a
pasture plant since it is very tolerant of cold weather and will stay
green all winter. Unless you love the flavor of the grain (which
I don't), there's no real reason to grow it for grain the backyard.
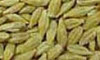
Barley makes good livestock feed
and beer, but is also not one of the top backyard grains.
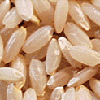
Rice
is, unfortunately, a backyard loser. The grain requires at least
forty days with minimum temperatures greater than 70 degrees
Fahrenheit, conditions that can be found in Arkansas, Louisiana, Texas,
and California, but not Virginia.
Wild
Rice is a
delicious,
native North American alternative to cultivated rice.
Unfortunately, we are again outside its range. You might try
growing wild rice if you live in New England or the Midwest.
| This post is part of our Backyard Grain Growing lunchtime series.
Read all of the entries: |
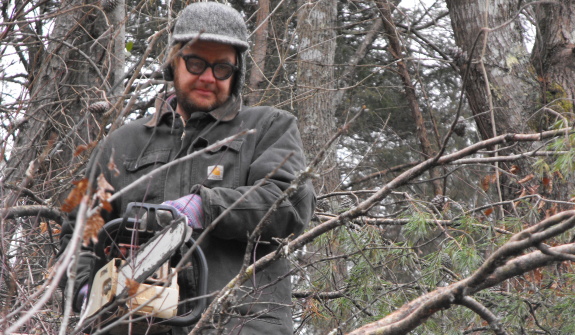
We finally got around to trimming a few of the downed pine trees this
afternoon left over from the blizzard of 2009.
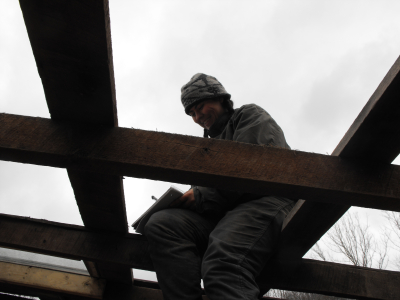 Why,
you ask, are we out cutting wood when we're trying to hurry up and
finish our homemade
storage building? Well, Monday it poured all day and the
creek went up, so when we headed out to work on Tuesday, we were
chagrined to discover that the screws we'd bought last weekend were on
the other side of a raging flood. Then we started pondering how
to seal in the skylight over Mark's loft in the new roof, and realized
that none of the roof sealants are going to dry properly at
temperatures hovering around freezing.
Why,
you ask, are we out cutting wood when we're trying to hurry up and
finish our homemade
storage building? Well, Monday it poured all day and the
creek went up, so when we headed out to work on Tuesday, we were
chagrined to discover that the screws we'd bought last weekend were on
the other side of a raging flood. Then we started pondering how
to seal in the skylight over Mark's loft in the new roof, and realized
that none of the roof sealants are going to dry properly at
temperatures hovering around freezing.
And, of course, there's
the siren song of mulch. We got in touch with one of our
neighbors this weekend and have decided to go in on renting an
industrial chipper one weekend soon. (At a lot of the rental
places, you can take a piece of equipment home on Saturday morning and
not have to return it until Monday morning for the price of a single
day since they're closed on Sunday.) We want to get the most bang
for our buck, so that means consolidating all of the brush into a few
big piles for easy access.
My mouth starts watering
every time I think of the chipper, and I keep having to remind myself
not to count my chickens before they hatch. But every brush pile
is already earmarked for a project. We've got two big piles of
pine limbs that I figure will make an awesome, acidifying mulch on our blueberries,
and a pile of freshly cut and fallen branches that will make a great
substrate for the King
Stropharia spawn we
plan to order in a few weeks. Then there are the three year old
brush piles that we originally planned to burn like our neighbors do,
but instead decided to let rot down --- I figure that these will turn
into instant, semi-composted mulch to go straight on perennials.
Hopefully, we'll have a few more afternoons to build our brush piles
before the chipper comes through.
We certainly aren't
going to jump to the level of growing all of our own grains
immediately, but I wanted to crunch the numbers and see if that would
even be feasible. The first step is to figure out how much of
each type of grain we eat. That part was pretty simple since we started buying our
flour in bulk last
year, and thus know that we go through about 100 pounds of wheat flour,
5 pounds of cornmeal, and 25 pounds of oats in a year. Here's my
estimate of how many pecks of whole grain those pounds of flour and
rolled oats are equivalent to:
| Logsdon's
suggestions for a typical family (pecks) |
How much we
currently eat per year (pecks) |
Square
feet needed to grow 1 peck |
|
| Wheat |
4 |
10 |
272 |
| Corn (for
meal) |
2 |
0.5 |
74 |
| Popcorn |
2 |
0 |
? |
| Soybeans |
4 |
0 |
183 |
| Grain sorghum |
2 |
0 |
78 |
| Buckwheat |
1 |
0 |
348 |
| Oats |
1 |
2.5 |
166 |
| Triticale or
rye or barley |
1 |
0 |
348 (rye), 122 (barley) |
| Soup beans |
2 |
less than we should... |
? |
| Alfalfa for
sprouting |
1 to 2 quarts |
less than we should... |
? |
As you build your own estimate of how many pecks of grain you eat per year, you might find the following conversions useful:
- 1 cup of
wheat converts into just a little more than a cup of whole wheat flour,
and that weighs about a quarter of a pound --- this might help you
convert from the five or fifty pound bags of flour you buy to
cups.
- A peck is equivalent to about 37 cups (and is also a quarter of a bushel.) So if you go through one five pound bag of cornmeal each year, like we do, you're probably eating 0.5 pecks of corn, very roughly.
| This post is part of our Backyard Grain Growing lunchtime series.
Read all of the entries: |
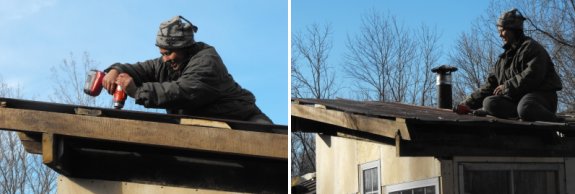
Note to any future
homesteading men out there. If you find a woman that
will do your roofing without too much complaining then you've found a
mate. Treat her well and don't work her too hard.
| This post is part of our Building a Storage Building from Scratch
series.
Read all of the entries: Part 1: Foundation
Part 3: Walls and scavenging lumber
Part 5: The roof
|
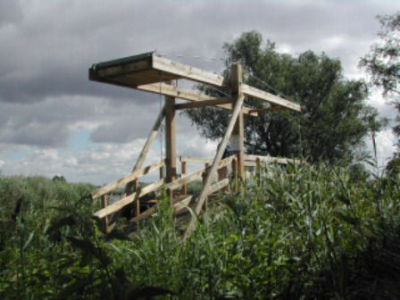 For those of you who aren't
following the cheap
creek-crossing options discussion, I thought I'd showcase some
of
the interesting ideas our readers have suggested to get us across the
creek. Mom posted a cool video of a road-sized drawbridge in
action, to which Roland responded with this image of a pedestrian-scale
drawbridge. Roland
commented to let us know that these are quite common in the Netherlands
--- who knew?!
For those of you who aren't
following the cheap
creek-crossing options discussion, I thought I'd showcase some
of
the interesting ideas our readers have suggested to get us across the
creek. Mom posted a cool video of a road-sized drawbridge in
action, to which Roland responded with this image of a pedestrian-scale
drawbridge. Roland
commented to let us know that these are quite common in the Netherlands
--- who knew?!
This video of a really cheaply constructed rope swinging bridge also
tickled my fancy. Swinging bridges are quite common in our area,
which suggests they might be one of the best options. I'd thought
they were beyond our price-range, but they might be feasible using rope
and two by fours.
 Roland,
again, peaked my curiosity with his note that the Incas have been
making grass rope bridges for centuries. Isn't the one shown here
awesome? (No, we won't be weaving straw ropes --- I just
think it's cool.)
Roland,
again, peaked my curiosity with his note that the Incas have been
making grass rope bridges for centuries. Isn't the one shown here
awesome? (No, we won't be weaving straw ropes --- I just
think it's cool.)
Meanwhile, Dudley
suggested two quick and dirty (and cheap) options --- using a junked
flatbed tractor trailer, or using a ladder as the supports for wooden
planks. The former reminded me of the idea Mark had floated a
while ago about using the frame of a burned down mobile home.
Daddy and Erich
suggested using telephone poles as the supports for a footbridge ---
this may indeed be our cheapest and easiest option, if we found used
telephone poles and were able to haul them.
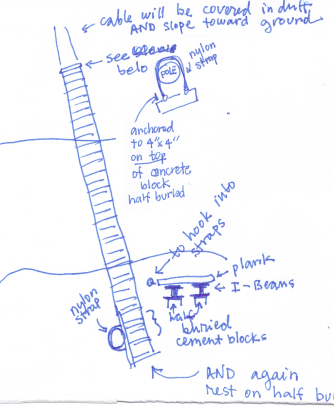 A
couple of you have suggested pontoon bridges, but these don't seem very
feasible for our creek --- the water goes up and down too fast, I
think, and floating trees would be a problem.
A
couple of you have suggested pontoon bridges, but these don't seem very
feasible for our creek --- the water goes up and down too fast, I
think, and floating trees would be a problem.
Daddy let me know that
my stepping stone option isn't nuts since he'd been to a park that used
three foot high piers as stepping stones along a trail.
Finally, two of you drew
up bridge plans for us! The drawing on the left is Titus's plan,
using the existing telephone poles on each side of the
creek as anchors. It depends on I-beams for support.
The drawing below is Roland's tensegrity bridge. (I'd never heard
of it either! Check out his
comment for more info.)
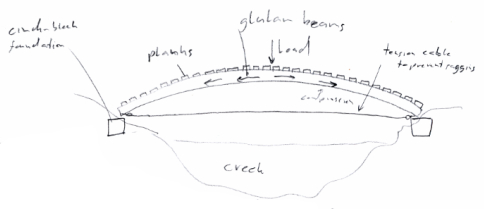
I don't think we're any
closer to making a design decision, but we sure have enjoyed seeing all
of these ideas. Keep them coming!
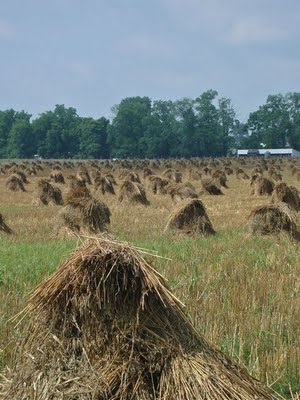 Now
that you've got an idea of which
grains to try growing in your backyard
and how
much space you need to grow the grains, let's talk about the
actual growing process. Most of grain-growing is pretty similar
to growing anything else. Some grains are planted in the spring
and others in the fall, then you weed them and hope that bugs and
diseases don't do much damage.
Now
that you've got an idea of which
grains to try growing in your backyard
and how
much space you need to grow the grains, let's talk about the
actual growing process. Most of grain-growing is pretty similar
to growing anything else. Some grains are planted in the spring
and others in the fall, then you weed them and hope that bugs and
diseases don't do much damage.
One major difference
between grains and vegetables is that grains are traditionally planted
in solid blocks in America rather than rows. Commercial farmers
depend on heavy applications of herbicides to keep these fields of
grain weed-free, but Logsdon suggests that the American farmer might be
better off using the Chinese method of planting in rows so that your
grains can be hand-weeded. Alternatively, you might rotate your
grains after a crop that's cultivated intensely for weeds like
strawberries or potatoes.
The main differences
between growing grains and vegetables, of course, come during the
harvest. On the backyard scale, most grains are harvested by
cutting the whole plant down with a scythe when the seeds are mostly or
fully mature. You can tie plants into bundles and then into
shocks to dry in the field, or bring them under cover and let them dry
inside. Either way, in a couple of weeks once the plants are
fully dry, it's time to separate the seeds from the head.

The first step is
threshing --- lay the plants down on a big bedsheet on a flat surface
and whack the daylights of out them with a bat or stick.
Alternatively, beans can be threshed by putting the whole plants in a
bag and beating the bag around. When you're done threshing, the
seeds should have fallen out and you can take away the bulk of the
plants for the chickens to peck through and then to be used as mulch.
 Of course, a lot of bits of
chaff (excess plant matter) end up in with the seeds after threshing,
so the next step is winnowing --- removing the grain from the
chaff. Logsdon advocates pouring the grain and chaff mixture from
one bucket to another, either outside where a breeze can pull away the
chaff or in front of a big fan. In either case, you will need to
pour each bucket of grain six to ten times to end up with clean seeds.
Of course, a lot of bits of
chaff (excess plant matter) end up in with the seeds after threshing,
so the next step is winnowing --- removing the grain from the
chaff. Logsdon advocates pouring the grain and chaff mixture from
one bucket to another, either outside where a breeze can pull away the
chaff or in front of a big fan. In either case, you will need to
pour each bucket of grain six to ten times to end up with clean seeds.
If you're working with
wheat or some other grains, you are now done with the grain separation
steps, but oats, barley, buckwheat, and rice all need to be
dehulled. These seeds are coated in a tough substance that won't
be very tasty, and which is, unfortunately, hard to remove effectively
at the home scale. Logsdon suggests heating the grains at 180
degrees Fahrenheit for an hour and a half, putting them through a
blender, then sifting out the hulls, but he admits his method is only
moderately effective. Southern
Exposure Seed Exchange has instructions for turning your grain mill
into a dehuller,
which might be worth a shot. Or just grow hull-less oats and feed
hull-covered grains to your livestock.
| This post is part of our Backyard Grain Growing lunchtime series.
Read all of the entries: |
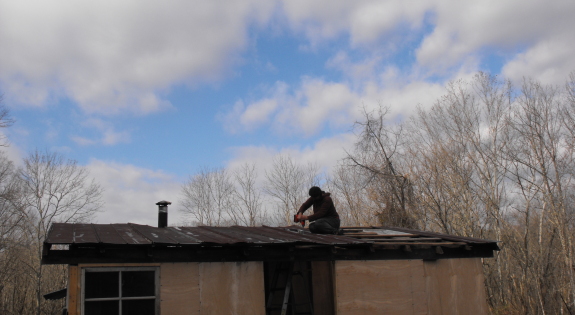
Blue skies, sun shine, and
finishing most of the roof. Another great day of progress for the do it
yourself storage building.
| This post is part of our Building a Storage Building from Scratch
series.
Read all of the entries: Part 1: Foundation
Part 3: Walls and scavenging lumber
Part 5: The roof
|
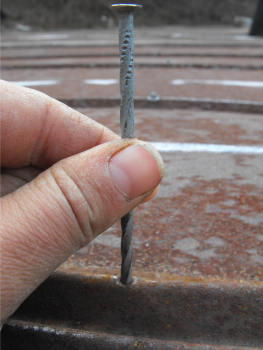 Like
every part of our homemade
storage building
project, the roof was a learning experience. We chose to reuse
salvaged tin from the old house we tore
down, and I wish I'd
taken the time during demolition to mark the order in which the sheets
of tin came off the roof. Instead, we ended up with a mixture of
pieces of tin from different parts of the roof, and when we put them up
on the new roof, the holes in the overlapping ridges didn't line up
from one piece to the other. It wasn't too hard to make a pilot
hole in the bottom piece of tin with a nail then fit in the roofing
screw, but extra holes in your roof are never a good thing.
Like
every part of our homemade
storage building
project, the roof was a learning experience. We chose to reuse
salvaged tin from the old house we tore
down, and I wish I'd
taken the time during demolition to mark the order in which the sheets
of tin came off the roof. Instead, we ended up with a mixture of
pieces of tin from different parts of the roof, and when we put them up
on the new roof, the holes in the overlapping ridges didn't line up
from one piece to the other. It wasn't too hard to make a pilot
hole in the bottom piece of tin with a nail then fit in the roofing
screw, but extra holes in your roof are never a good thing.
Learning experience two
was all about lining up the tin. Our building isn't quite square,
and I decided to line up the long side of the tin with
the short edge of the building and let the short side of the tin be not
quite parallel with the long edge of the building. Mistake!
By piece of tin number three, it was clear that my tin was no longer
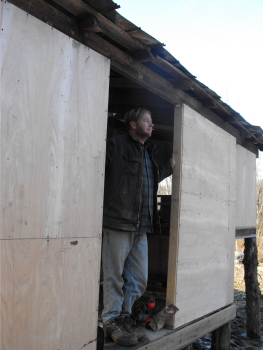 going to cover the top wooden cross-piece unless I gave in and tugged
it up a bit. I ended up with a roof with slightly jaggedy top and
bottom edges rather than straight lines across. Hopefully when we
add the gutter, the jaggediness will be less visible.
going to cover the top wooden cross-piece unless I gave in and tugged
it up a bit. I ended up with a roof with slightly jaggedy top and
bottom edges rather than straight lines across. Hopefully when we
add the gutter, the jaggediness will be less visible.
Mark kindly didn't
comment on my roofing inadequacies.... Thanks, honey!
| This post is part of our Building a Storage Building from Scratch
series.
Read all of the entries: Part 1: Foundation
Part 3: Walls and scavenging lumber
Part 5: The roof
|
 If
the process of threshing,
winnowing, and dehulling your grains for
human consumption seems a bit daunting, you might choose to start
growing grains for your livestock instead. Your animals are
likely to be less picky than you are, so you won't have to go to quite
so much trouble when adding homegrown grains to the menu. I'm hopeful that as we
start growing our own chicken feed, we'll begin saving money and end up
with healthier chickens due to a more well-rounded diet.
If
the process of threshing,
winnowing, and dehulling your grains for
human consumption seems a bit daunting, you might choose to start
growing grains for your livestock instead. Your animals are
likely to be less picky than you are, so you won't have to go to quite
so much trouble when adding homegrown grains to the menu. I'm hopeful that as we
start growing our own chicken feed, we'll begin saving money and end up
with healthier chickens due to a more well-rounded diet.
Currently, we're
starting a new series over on our chicken blog with all of the nitty
gritty info on formulating your own chicken feeds. If you're interested,
you might want to subscribe to that blog to read all about recipes,
protein content of grains, and non-grain alternatives over the next few
weeks. Meanwhile, here's a brief summary of the tips in Gene
Logsdon's book about growing grains specifically for livestock.
Tips
for the lazy farmer
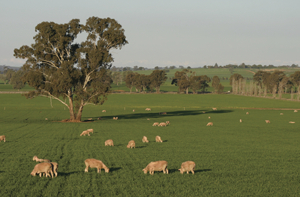 If you're a lazy farmer, like
me, you're probably interested in ways that you can feed your animals
with the least work possible. One option is to plant winter wheat
(or barley or rye) at the end of the summer, around September 15.
About a month after the grains go in the ground, they will be
established enough that you can graze your animals on them during the
winter and spring. With careful rotation so that the plants
aren't overgrazed, you will be able to harvest nearly as much grain
from these plants as you would have without grazing them.
If you're a lazy farmer, like
me, you're probably interested in ways that you can feed your animals
with the least work possible. One option is to plant winter wheat
(or barley or rye) at the end of the summer, around September 15.
About a month after the grains go in the ground, they will be
established enough that you can graze your animals on them during the
winter and spring. With careful rotation so that the plants
aren't overgrazed, you will be able to harvest nearly as much grain
from these plants as you would have without grazing them.
Pigs are a great tool for the
lazy farmer. Logsdon notes that you can turn pigs into a
cornfield in the fall and they'll harvest the grain themselves,
fattening up just when they should. I envision planting a small
corn paddock as part of my forest garden grazing rotation and moving
the pigs in at just the right time of year.
What
grains should I grow for my animals?
 If
you're going to go the traditional route of harvesting grain for your
livestock, you will probably want to grow some combination of corn,
oats, barley, grain, sorghum, and soybeans. The bulk of
commerical feeds are made up of two components --- corn and soybeans
--- but your animals will probably be healthier if you give them a bit
more variety.
If
you're going to go the traditional route of harvesting grain for your
livestock, you will probably want to grow some combination of corn,
oats, barley, grain, sorghum, and soybeans. The bulk of
commerical feeds are made up of two components --- corn and soybeans
--- but your animals will probably be healthier if you give them a bit
more variety.
Although we tend to
think of grain as being aseasonal, you can in fact plan your garden so
that your animals (and you) eat nearly fresh grains throughout the
year. Rye and barley are the first grains to ripen in early
summer, then wheat, oats, buckwheat, and sorghum are ripe in the
fall. In the winter and spring, you can feed the easily stored
corn and soybeans.
How
much grain should I grow for my animals?
Logdson estimates that a
single chicken needs about a bushel of grain per year. A hog
needs 12 bushels of corn to be fattened to butchering weight and a cow
needs five to six bushels. A ewe and lamb need just one bushel of
grain per year between them if they are on pasture, and goats may not
need much at all except when they're being milked.
How
do I prepare grain for my livestock?
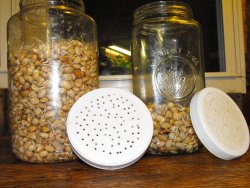 Some
grains can be fed whole, but nearly all grains are more digestible if
they are ground. If you're grinding grain into flour for
yourself, you can use the same hand-cranked mill to grind a bit of
grain for your chickens. On the other hand, if we really get into
growing our own feed we'll probably find a way to make or buy a better
mill.
Some
grains can be fed whole, but nearly all grains are more digestible if
they are ground. If you're grinding grain into flour for
yourself, you can use the same hand-cranked mill to grind a bit of
grain for your chickens. On the other hand, if we really get into
growing our own feed we'll probably find a way to make or buy a better
mill.
Old timey farmers knew
that sprouting was even better than
grinding. If you're willing to put in a little extra time, you
can sprout all of the grains you feed your animals, a process that
makes them even more nutritious.
We're in the very early
stages of our homegrown grain experimentation, but we'll be sure to
update you as we test all of these methods of growing grain for both
ourselves and our animals. Stay tuned!
| This post is part of our Backyard Grain Growing lunchtime series.
Read all of the entries: |
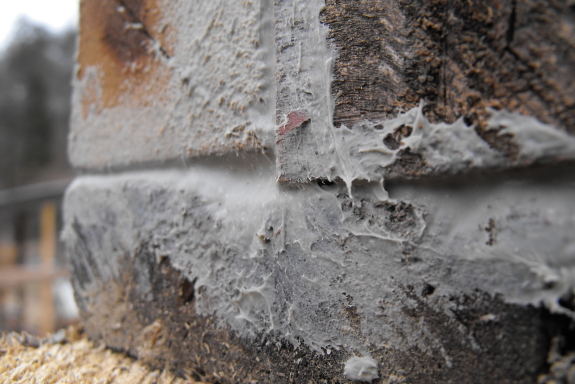
We ended up with several small gaps
once everything went together with the salvaged wood for the storage
building project. I was a
little apprehensive about using liquid
nails yesterday because I
knew it was predicted to get colder today, but it looks to be setting
up just fine.
One of my favorite
bloggers posted about the new plants she'll be trying out in her garden
this year, and I thought it was an interesting meme. So, without
further ado, 2010's experiments and additions:
- New mushrooms: Winecap
(aka King
Stropharia), White Morel (reported to be a crapshoot, but I feel
lucky), and a summer fruiting Oyster
Mushroom --- just ordered the spawn from Field and Forest Products!
- New woodies in the forest garden: Osage-orange (for hedges), honey locust (for forest pasturing), and Korean stone pine (for pine nuts). I'm starting them all from seed, the first two from seeds collected in the wild and the last from seeds I bought on ebay. All are experiments!
- New fruits and veggies: Alpine strawberries, hulless oats, soybeans (labeled as edamame for fresh eating), garbanzo and urd beans (the latter for sprouting), Afghan sesame, Hungarian breadseed poppy, manna de montana amaranth, and temuco quinoa. All are from Seeds of Change except the strawberries, soybeans, and poppies from Renee's Garden.
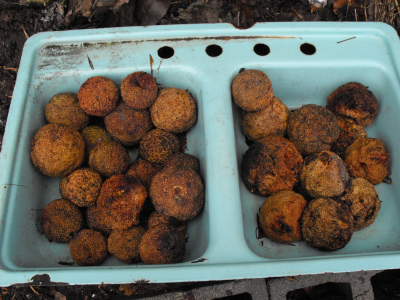 And, of course, there's the usual trial of new
varieties of common fruits and vegetables (most of which I buy from
Jung.) What's new in your garden this year?
And, of course, there's the usual trial of new
varieties of common fruits and vegetables (most of which I buy from
Jung.) What's new in your garden this year?
(This image, by the way,
shows the
osage-oranges I collected slowly rotting down to seed
pulp for the spring. They're already quite mushy and stinky.)

Cosmic Cookout is a project that's been in the
back of my head for years now, and thanks to Anna's help as webmaster it's finally
ready to see the light of day.
It's a place to help me
distill down some of the more interesting and fantastic information
that has been gushing out of the physics of consciousness field the
past few years with some attention paid to the disclosure movement.
The intention is to stimulate
debate and conversation through a process of observation and questions
and hopefully increase awareness and understanding and perhaps move to
a higher level of consciousness.
Credit goes to Neuronarrative for the fine images above.
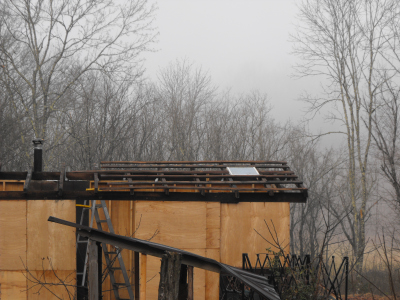 We've
decided to wait on putting the tin around the skylight until we're
forecast to have some sustained warm weather, but otherwise the
homemade
storage building is under roof and enclosed to the same level
as the pre-made buildings you can buy at Lowes. Of course, we've
still got a lot of work to do --- painting the exterior, adding
gutters, sealing cracks, adding insulation, throwing some linoleum on
the floor, and finishing the interior walls. But I thought now
would be a good time to crunch the numbers and see whether it was smart
to build the structure ourselves rather than buying one pre-made.
We've
decided to wait on putting the tin around the skylight until we're
forecast to have some sustained warm weather, but otherwise the
homemade
storage building is under roof and enclosed to the same level
as the pre-made buildings you can buy at Lowes. Of course, we've
still got a lot of work to do --- painting the exterior, adding
gutters, sealing cracks, adding insulation, throwing some linoleum on
the floor, and finishing the interior walls. But I thought now
would be a good time to crunch the numbers and see whether it was smart
to build the structure ourselves rather than buying one pre-made.
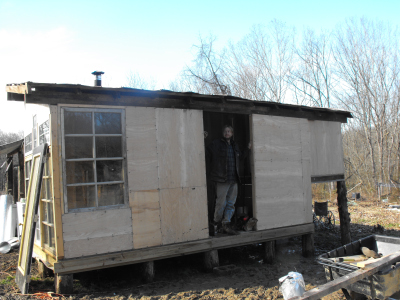 Our
building is 8 feet by 20 feet (with the last four feet on the long side
being a raised loft.) The total cost in supplies has been
$1,063.39, or $6.65 per square foot. We could have gotten a metal shed
from Home Depot for a similar price per square foot, but it would have
only been six feet tall (which would have bumped Mark's head!) A
similar sized wooden shed on the lot at Lowes (with more adequate head
room) costs three times as much, is constructed out of two by twos
instead of two by fours, and only has one small window. I think
we got a good deal --- plus we learned an awful lot about building in
the process!
Our
building is 8 feet by 20 feet (with the last four feet on the long side
being a raised loft.) The total cost in supplies has been
$1,063.39, or $6.65 per square foot. We could have gotten a metal shed
from Home Depot for a similar price per square foot, but it would have
only been six feet tall (which would have bumped Mark's head!) A
similar sized wooden shed on the lot at Lowes (with more adequate head
room) costs three times as much, is constructed out of two by twos
instead of two by fours, and only has one small window. I think
we got a good deal --- plus we learned an awful lot about building in
the process!
| This post is part of our Building a Storage Building from Scratch
series.
Read all of the entries: Part 1: Foundation
Part 3: Walls and scavenging lumber
Part 5: The roof
|
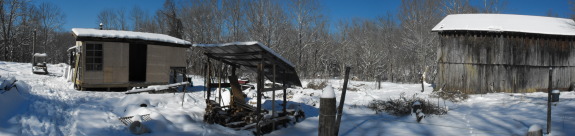
The home
made storage building
passed its first heavy snow test...yes, I know, 6 inches doesn't count
as heavy for some of you out there, but it was heavy enough to dominate
the small talk in both the Dollar store and the Post Office around here
during the days leading up to this latest visit by Jack Frost.

Or explore more posts by date or by subject.
About us: Anna Hess and Mark Hamilton spent over a decade living self-sufficiently in the mountains of Virginia before moving north to start over from scratch in the foothills of Ohio. They've experimented with permaculture, no-till gardening, trailersteading, home-based microbusinesses and much more, writing about their adventures in both blogs and books.