
archives for 06/2011
 Our
easy hive split
was a buzzing success! Both the mother and the daughter hive have
had workers flying in and out extremely busily all month, but that
doesn't really mean anything. If my hive split had failed
(meaning the queenless hive didn't manage to requeen), workers would
still go out and harvest nectar and pollen until they eventually got
picked off by predators and weren't refreshed by new bees.
Instead, I had to wait (very impatiently) for a full month and then
delve into each brood box to see what was going on down there.
Our
easy hive split
was a buzzing success! Both the mother and the daughter hive have
had workers flying in and out extremely busily all month, but that
doesn't really mean anything. If my hive split had failed
(meaning the queenless hive didn't manage to requeen), workers would
still go out and harvest nectar and pollen until they eventually got
picked off by predators and weren't refreshed by new bees.
Instead, I had to wait (very impatiently) for a full month and then
delve into each brood box to see what was going on down there.
In order to understand
the story, you have to know that each type of bee in the hive develops
along a slightly different timeline:
| Egg
(days) |
Larva
(days) |
Pupa
(days) |
Total
days |
|
| Worker |
3 |
5.5 |
12.5 |
21 |
| Queen |
3 |
5 |
8 |
16 |
| Drone |
3 |
6.5 |
14.5 |
24 |
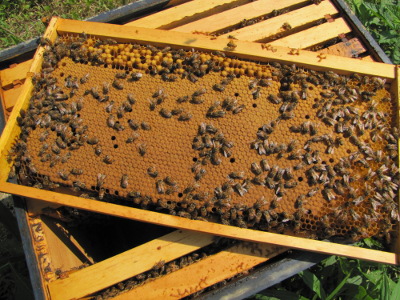
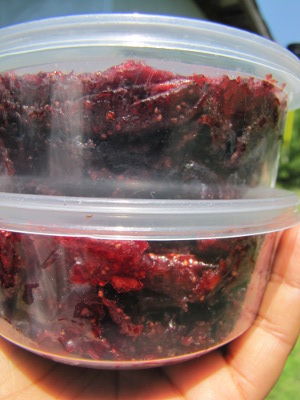
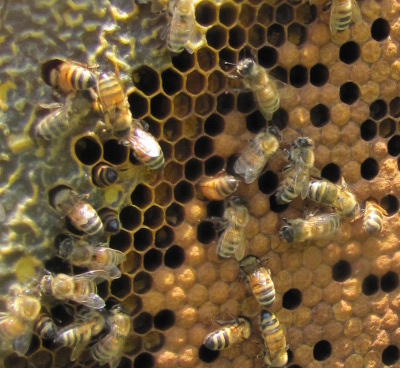
Queens rush through their childhood and chew out of their capping within 16 days, but workers take three full weeks to mature. I checked on the bees exactly 28 days after the split and this is what I saw:
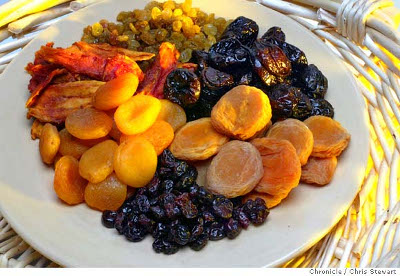
- East hive --- Small
larvae (probably no more than two or three days in the larval stage)
and eggs. (No photo because the bees got pissy.)
- Middle hive --- Lots of
capped brood, larvae, and eggs. (One frame shown above.)
 Clearly, during my hive
split, I transferred the queen to the middle
hive, and she just kept plugging away at her duties (laying eggs),
which resulted in the current state with brood of all ages. In
contrast, the east hive had lost their queen, so they didn't do any
child-rearing until less than a week ago. That lines up very well
with the amount of time it would take for a queen to hatch (16 days),
mate (another few days, potentially more because of the constant rain),
and then lay the eggs that turned into the largest larvae present
(about 6 days old) --- 22 days plus whatever time her mating flight
took.
Clearly, during my hive
split, I transferred the queen to the middle
hive, and she just kept plugging away at her duties (laying eggs),
which resulted in the current state with brood of all ages. In
contrast, the east hive had lost their queen, so they didn't do any
child-rearing until less than a week ago. That lines up very well
with the amount of time it would take for a queen to hatch (16 days),
mate (another few days, potentially more because of the constant rain),
and then lay the eggs that turned into the largest larvae present
(about 6 days old) --- 22 days plus whatever time her mating flight
took.There's still a very slight chance that the new queen could have mated badly and is laying drones --- I'll know for sure next week when I see capped brood. And an even slighter chance that the eggs are being laid by workers --- unlikely since the brood pattern is so even and the eggs are in the bottom of the cells rather than on the sides. But I'm pretty confident the hive split was a success.
Since I was down so deep in the hives, I went ahead and checkerboarded both brood boxes so that the excess honey wouldn't tenpt the bees to swarm. The bees were not pleased with this intrusion, and I had to don my gloves after one stung my hand. After I know for sure that the east hive has a happy queen, I'll leave the brood box alone and focus on honey for the rest of the summer....
There's something rather glorious about a simple outdoor shower. Mark built one, here's my take.
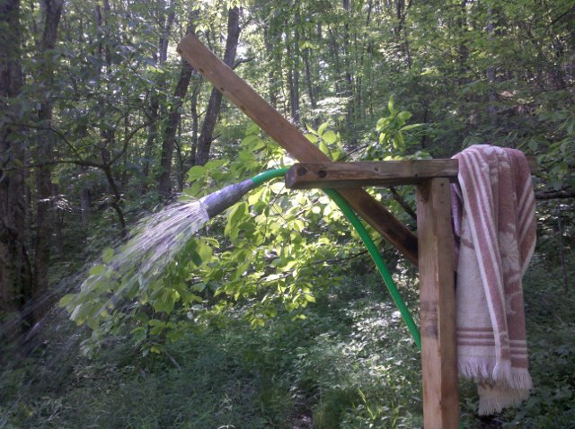
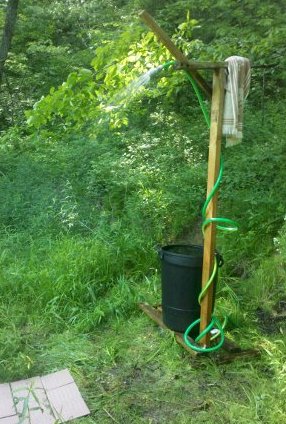
Not as perfect as a waterfall, but more convenient. I put it together in lego mode, just snapping bits together until it seemed right. The water barrel collects the flow when the shower is not in use and also serves as ballast. I have replaced the duct taped shower head with a garden watering wand since taking the picture, as well as adding things like a soap dish.
My shower is fed down from a small spring house, using 150-some feet of hose, that drops at least 12 feet. That provides enough pressure for a good shower. Earlier this spring, there was enough water flowing to leave the hose running all the time. Now that the spring has slowed to a trickle, I turn the shower off when not in use, so it can build up a head of water in the spring house, and be ready for a nice long shower next time.
I've also found that from 10 am on, the hose heats the water enough so it's a hot shower for a few minutes, then a warm shower, before it becomes a cold springfed shower. That's perfect, it's just how I like my showers! By using a black hose this would probably even work in colder parts of the year, as a simple solar shower.
Not that the alternative isn't nice too..

Joey is an occasional guest poster and resident at the Walden Effect. 
 The weather has been
unusually hot this week, with highs in the 90s and record highs for our
area at the closest weather station. Monday afternoon, the
temperature inside our trailer got up over 100, setting off the high
alarm on the incubator --- now I've taken to training a fan on brood
3 during the hottest period in the late afternoon.
The weather has been
unusually hot this week, with highs in the 90s and record highs for our
area at the closest weather station. Monday afternoon, the
temperature inside our trailer got up over 100, setting off the high
alarm on the incubator --- now I've taken to training a fan on brood
3 during the hottest period in the late afternoon.
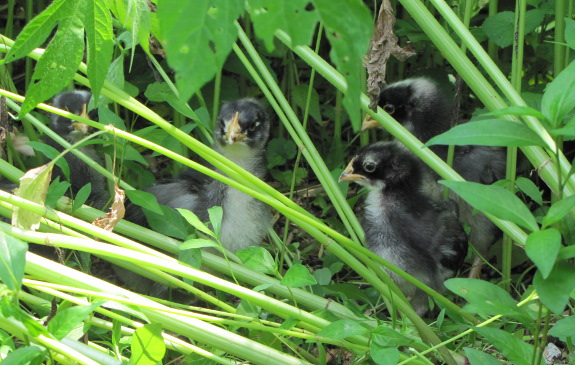
The adult hens are
spending their time resting in the shade, but the tweens have been out
and about...and so have the chicks! When we moved the
fluffballs from the house to the second coop on Sunday, I leaned a
piece of plywood against their pophole, figuring they weren't ready to
explore yet, but the youngsters knocked that down by Monday
afternoon. I figured they knew what they wanted, so I instead
used the plywood as a little ramp, and soon our youngest flock was
exploring the ragweed forest.
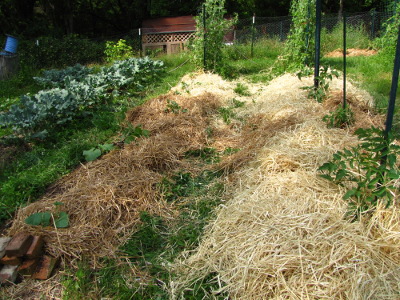
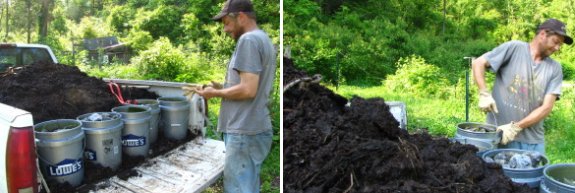
 Other than trying to keep
ourselves cool, though, this unusually hot weather has been a
boon. After two solid months of adding items to our "must be
hauled onto the farm ASAP!" list, the driveway finally dried up enough
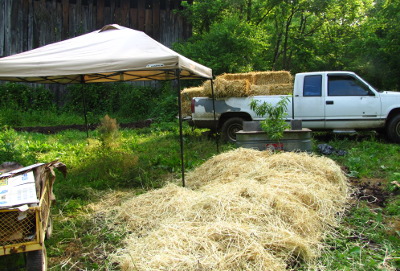
to allow passage. Sticking to the most important first, Mark treated me to two
truckloads of manure and a
load of straw. Meanwhile, we were able to
drive in supplies that had been building up in the parking area,
including masses of cardboard for kill mulches, bags of lawn clippings
for garden mulch,
Other than trying to keep
ourselves cool, though, this unusually hot weather has been a
boon. After two solid months of adding items to our "must be
hauled onto the farm ASAP!" list, the driveway finally dried up enough
to allow passage. Sticking to the most important first, Mark treated me to two
truckloads of manure and a
load of straw. Meanwhile, we were able to
drive in supplies that had been building up in the parking area,
including masses of cardboard for kill mulches, bags of lawn clippings
for garden mulch, 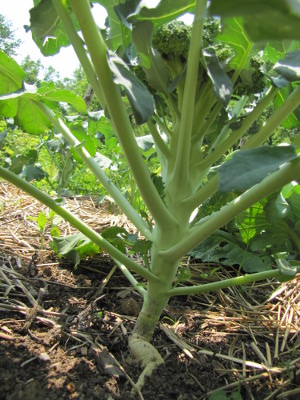 and some lumber.
Weeding has been taking up more and more of my time as last fall's
mulch melted into the soil, so I'm even more grateful than usual for my
big piles of biomass.
and some lumber.
Weeding has been taking up more and more of my time as last fall's
mulch melted into the soil, so I'm even more grateful than usual for my
big piles of biomass.
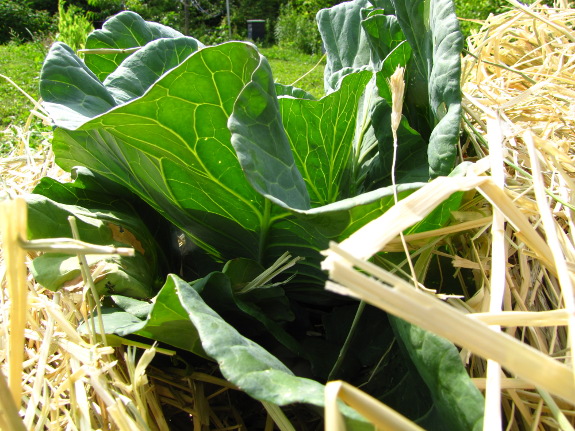
On the whole, the garden
has also been happy to see the sun. Sure, a few strawberries got
cooked on the vine and a cabbage leaf showed signs of sunscald, but I
can almost see the rest of the garden growing. We finally hooked
up the rest of the sprinklers
and are now watering in earnest to keep that momentum going.
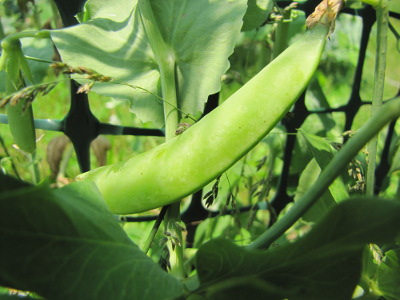
Homegrown produce currently on the menu includes strawberries (far more
than we can eat), greens, lettuce, parsley, broccoli, snow peas, and
sugar snap peas.
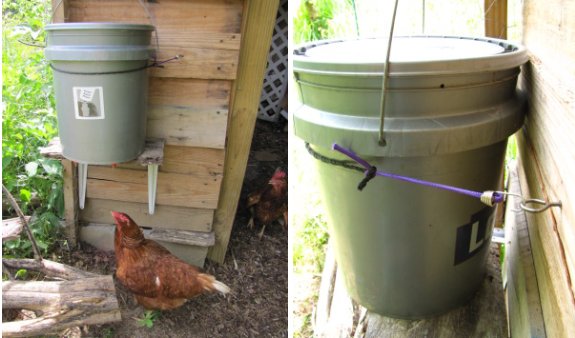
I decided my previous
5 gallon automatic waterer bucket holder needed to be simplified.
2 shelf brackets, a piece of
scrap lumber, and some rope with a bungee cord tied on the end seems to
do the job quite nicely.
 I've posted twice
about how
to cook an old chicken,
but in the two and a half years since then, my recipes have gained
sophistication. When it came time to cook our
mean rooster, I
earmarked most of his flesh for pizza sausage (aka Italian
sausage.) I used to think that making my own sausage sounded
scary, but lately I've decided that it's actually one of the easiest
ways of dressing up tough meat. If you plan to use the sausage in
pizza, spaghetti sauce, or gravy, there's not even any need to mess
with casings or to worry about fat to protein content. You can't
really go wrong.
I've posted twice
about how
to cook an old chicken,
but in the two and a half years since then, my recipes have gained
sophistication. When it came time to cook our
mean rooster, I
earmarked most of his flesh for pizza sausage (aka Italian
sausage.) I used to think that making my own sausage sounded
scary, but lately I've decided that it's actually one of the easiest
ways of dressing up tough meat. If you plan to use the sausage in
pizza, spaghetti sauce, or gravy, there's not even any need to mess
with casings or to worry about fat to protein content. You can't
really go wrong.
For this ultra simple
recipe, you need:
- 0.75 pounds of tough chicken meat (or any other kind of tough or not so tough meat. I've used venison, lamb, and beef hamburger, all with good results.)
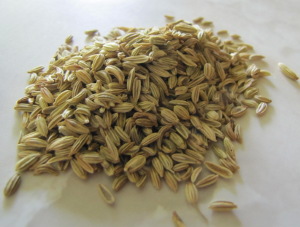
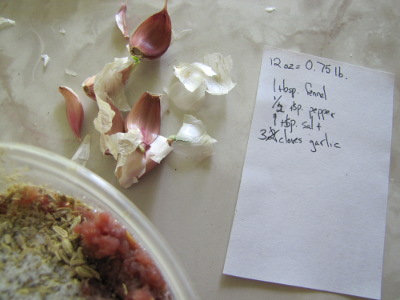 1 tbsp of whole fennel seeds
- 0.5 tsp pepper
- 0.75 tsp salt. (As you can see, we actually made the recipe
with a full teaspoon, but it felt a bit on the salty side.)
- 3 big cloves of garlic (or several smaller cloves)
If it's not already
ground, cut the meat off the bone and put it in the food
processor. Whir the meat up until it looks a lot like ground
meat, and if you're really using an old chicken, pick out the
connective tissue. (This will look like white, shiny lines of
dental floss. The connective tissue won't hurt you, but is
awfully tough and will be hard to chew. We give it to Lucy.)
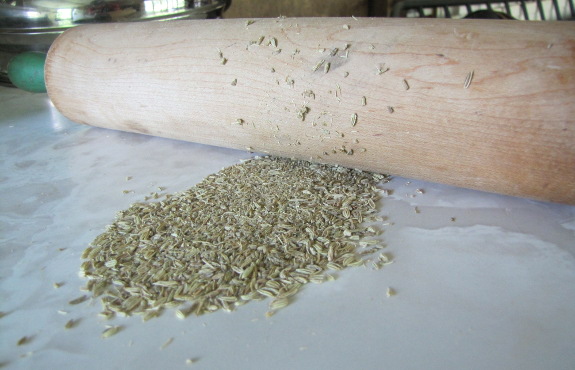
 Next,
crush the fennel seeds. If you own a mortar and pestle, I'm sure
this is a breeze, but it's not that tough even without one. I
pour out the seeds onto a large cookie sheet or a clean counter and
roll over them repeatedly with the rolling pin. You'll need to
keep pushing the uncrushed seeds into the center of the pile with your
hand until they're all crushed, so this might take two or three
minutes. Some folks put the seeds in a ziploc bag before crushing
to make the process even simpler, but then you have to throw the bag
away.
Next,
crush the fennel seeds. If you own a mortar and pestle, I'm sure
this is a breeze, but it's not that tough even without one. I
pour out the seeds onto a large cookie sheet or a clean counter and
roll over them repeatedly with the rolling pin. You'll need to
keep pushing the uncrushed seeds into the center of the pile with your
hand until they're all crushed, so this might take two or three
minutes. Some folks put the seeds in a ziploc bag before crushing
to make the process even simpler, but then you have to throw the bag
away.
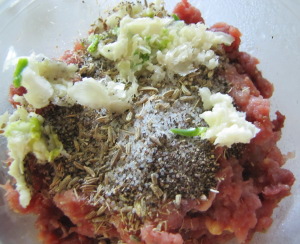 Pour the crushed fennel seeds
into the ground meat along with the pepper, salt, and pressed garlic
cloves, mix well, and refrigerate for at least four hours. This
time is necessary to allow the flavors to work their way into the meat.
Pour the crushed fennel seeds
into the ground meat along with the pepper, salt, and pressed garlic
cloves, mix well, and refrigerate for at least four hours. This
time is necessary to allow the flavors to work their way into the meat.
When you're ready to use
your sausage, fry it up in a skillet on medium to high heat, stirring
often and crushing the clusters with a fork so the sausage doesn't
clump up. You might find a few more threads of connective tissue
that you missed --- pick them out. Then spread the pre-cooked
meat onto a homemade pizza and bake.
 We
stewed up the bones (and residual flesh) into a simple chicken soup and
then used the rest of the flesh in the recipe above. The sausage
is a bit too much for two pizzas, so I have enough left over to add
into some homegrown omelets. All told, I figure our old rooster
served as the main course for a full fourteen people-meals.
That's not bad!
We
stewed up the bones (and residual flesh) into a simple chicken soup and
then used the rest of the flesh in the recipe above. The sausage
is a bit too much for two pizzas, so I have enough left over to add
into some homegrown omelets. All told, I figure our old rooster
served as the main course for a full fourteen people-meals.
That's not bad!
We're trying a new product
from the city of Bristol.
It's made from decomposed
leaves and it looks and feels like a quality product.
We paid a little over 50
dollars for just under 2 tons, which might end up being cheaper than bales
of straw depending on how
it socializes with the garden.
"Are you going to be mad
if I'm profligate with the
straw?" I asked Mark
tentatively on Thursday afternoon. He looked at me as if I was a
bit slow --- after all, he's the one who pushes me to buy mulch when I
say it's too expensive --- and replied: "No, if anything, you'll get
bonus kisses."
I didn't ask about the manure and cardboard because I didn't want to
give him a chance to say "No, those require a lot more work!"
Instead, once he
and the big white truck had headed into the city Friday morning, I went to
town (figuratively.) Why not hill up 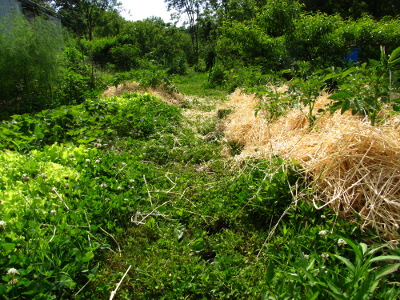 potatoes with composted
manure then mulch them with straw? Those back garden beds need
some serious soil remediation anyway because the topsoil is so thin
there. Big weeds threatening to overcome some tomato plants that
haven't been weeded in two months? No problem --- lay
down a quick kill mulch of damp cardboard and then top it all off with
straw. When
quitting time came at 4 pm, I had to tear myself away from my biomass
piles.
potatoes with composted
manure then mulch them with straw? Those back garden beds need
some serious soil remediation anyway because the topsoil is so thin
there. Big weeds threatening to overcome some tomato plants that
haven't been weeded in two months? No problem --- lay
down a quick kill mulch of damp cardboard and then top it all off with
straw. When
quitting time came at 4 pm, I had to tear myself away from my biomass
piles.
When we had less cash on
hand, I frowned upon storebought mulch. But now that we can
afford it, I figure this is the kind of time-saver I can get behind
buying (at least until I come 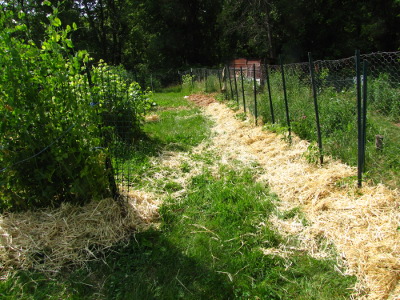 up with a homegrown
alternative.) Not only does mulch cut down on weeding, the
biomass also breaks down into organic matter that's like money in the
bank --- mulched beds are full
of worms, and every
year the soil gets fluffier and darker. Since I can't foresee any
reason we'd ever move off the farm, building our soil is a long term
investment in our future, making gardening easier every year while the
food grown there becomes tastier and better for us. As usual,
Mark was right. (Don't let it go to your head, honey. And I
plan to collect on that bonus.)
up with a homegrown
alternative.) Not only does mulch cut down on weeding, the
biomass also breaks down into organic matter that's like money in the
bank --- mulched beds are full
of worms, and every
year the soil gets fluffier and darker. Since I can't foresee any
reason we'd ever move off the farm, building our soil is a long term
investment in our future, making gardening easier every year while the
food grown there becomes tastier and better for us. As usual,
Mark was right. (Don't let it go to your head, honey. And I
plan to collect on that bonus.)
I've finally found a motor
that is sustainable and will last longer than the previous
incarnations of this type of mechanical deer deterrent.
The above video demonstrates
the range of noise signatures that can be achieved with some adjusting
of the primary stopping point.
We've only had one minor deer
incursion this year, and we're still not sure if it was due to our recent power
failure or a particularly brave and determined deer. The system is
working quite well as you can see a very healthy and un-nibbled garden
in the background of the video.
 The
USDA rolled out a new visualization of their
dietary recommendations last week. After the
previous diagram (which was so painfully
difficult to get information from that I gave up on it), I was thrilled
to see that the USDA now uses the same method I do when planning dinner
--- divide the plate up into quadrants and show how much space you
should devote to each food group. (This plan is much easier to
follow at home if you plate everybody's food rather than putting bowls
on the table buffet style.)
The
USDA rolled out a new visualization of their
dietary recommendations last week. After the
previous diagram (which was so painfully
difficult to get information from that I gave up on it), I was thrilled
to see that the USDA now uses the same method I do when planning dinner
--- divide the plate up into quadrants and show how much space you
should devote to each food group. (This plan is much easier to
follow at home if you plate everybody's food rather than putting bowls
on the table buffet style.)
I'm also pleased to see
fruits and vegetables taking up a full half of the plate. I try
to make fruits and vegetables fill more like two thirds or three
quarters of our plates once you factor in dessert (strawberries and a
bit of chocolate on the side for the lunch pictured here), but I can
see how the government might 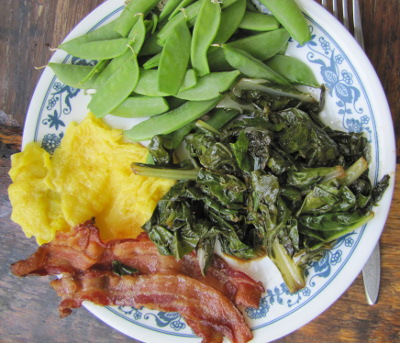 be scared to increase the
proportions so drastically from their 1980s era recommendation of 34%
of your servings being fruits and vegetables. Granted, since
serving sizes varied for each type of food in the old pyramid, the USDA
might have meant us to fill half of our plates with fruits and
vegetables all along, but I don't think that's the gist folks got from
the old diagram.
be scared to increase the
proportions so drastically from their 1980s era recommendation of 34%
of your servings being fruits and vegetables. Granted, since
serving sizes varied for each type of food in the old pyramid, the USDA
might have meant us to fill half of our plates with fruits and
vegetables all along, but I don't think that's the gist folks got from
the old diagram.
However, I have several
gripes with even this improved government recommendation:
- Why "grains" instead of "carbs"?
I know that it would take a bit more education to help people
understand what a carbohydrate-rich food is, but I think the MyPlate
chart is going to confuse a lot of people who might throw potatoes and
winter squash into the vegetable category. (I'll bet the corn
industry has a lot more lobbying power than the potato industry.)
And these confused eaters will just pretend their dessert didn't happen
since they won't know where to fit it on the plate, when they should
really be counting it into the carb category in most cases.
- Where are the fats and oils?
Most people aren't going to categorize nuts, homemade chicken broth,
and olive oil as "protein", so where will they put these fatty foods on
their virtual plate? The government website says an almond fits
in their protein group, but the percent of total calories made up by
protein in an almond is only 15%, while fat provides a whopping 70% of
the nut's energy.
- Why is dairy so special?
The more I delve into nutrition, the more I think that it's a bit odd
to make dairy its own category. (Or perhaps the milk industry is
just so powerful that they can tell Americans to drink our milk with
every meal regardless?) In fact, it makes me wonder if this isn't
the government's "fat" category, but even that is confusing since many
people drink skim milk or eat low-fat yogurt. (No, dairy is not
the only way to get calcium --- a cup of cooked greens will provide a
quarter to a half of your daily allowance, depending on variety, and
most vegetables have an appreciable amount of calcium.)
 Although
it's easy to argue that government nutritional guidelines mean
nothing, I know that I learned the old food pyramd in school and strove
to incorporate the recommendations into my life. I think that
many people, like me, blindly follow the advice given by authority
figures, so it's important for those authority figures to get it right.
Although
it's easy to argue that government nutritional guidelines mean
nothing, I know that I learned the old food pyramd in school and strove
to incorporate the recommendations into my life. I think that
many people, like me, blindly follow the advice given by authority
figures, so it's important for those authority figures to get it right.
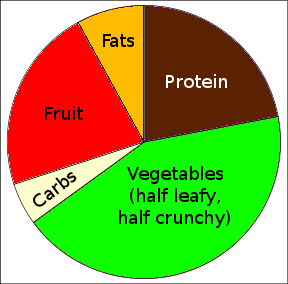
If I was in charge of
the USDA, I think my food plate would look more like the hastily thrown
together pie chart shown here. What would your ideal plate look
like?
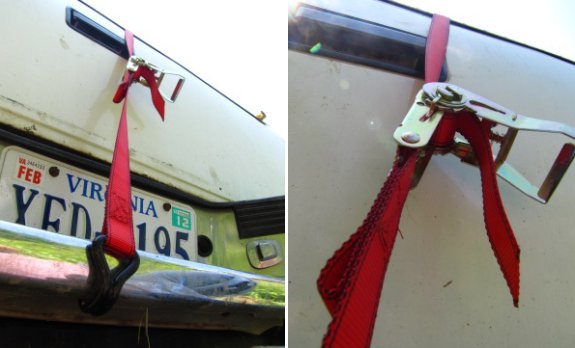
I made another adjustment
to the tailgate latch mechanism, but it still has a tendency to
fly open if I hit a hard bump in the road.
A medium
sized ratchet strap
proved to be an easy and effective way of keeping it shut for my
trip home with the mulch.
 One of the joys of working
with plants is how easy they are to propagate, even without waiting for
the plants to go to seed. I've posted previously about propagating
grapes from hardwood cuttings, but during the summer, the
techniques are a little different. Now the cuttings are known as
"softwood cuttings" because they consist of this year's new, flexible
growth along with the leaves, and the technique is subtly different too.
One of the joys of working
with plants is how easy they are to propagate, even without waiting for
the plants to go to seed. I've posted previously about propagating
grapes from hardwood cuttings, but during the summer, the
techniques are a little different. Now the cuttings are known as
"softwood cuttings" because they consist of this year's new, flexible
growth along with the leaves, and the technique is subtly different too.
Choose
an easy plant to propagate. I've got a windowsill
of softwood cuttings in action right now, but some are highly
experimental. The sweet
potato slips I began in a bed of gravel are one of the easiest types
of softwood cuttings --- they root in just a few days. Similarly,
I snipped off some suckers from my tomatoes when I was pruning last
week because I want a few more plants, and I expect to see roots on all
the new tomato plants shortly. I've had 17% rooting success with softwood
cuttings of rosemary
and 50% success with hardy
kiwis (although the
latter died when I didn't baby them enough in the garden.)
Currently, I'm also trying out thyme (which is supposed to be
relatively easy) and trifoliate orange (the dwarfing rootstock for
Meyer lemons.) I recommend starting with any vigorous perennial
you're in love with, as long as the original plant didn't come grafted
onto a different rootstock (a sure sign that softwood cuttings will be
difficult.)
 Take a cutting with four or five
nodes. Both
softwood and hardwood cuttings need at least four nodes per cutting
(five is better) since these are the points that can grow leaves and
roots. Nodes are easily visible on dormant grapevines as bumpy
spots, and on softwood cuttings as the location where leaves are
attached to the stem. Since you can't expect every cutting to
root, you might as well increase your chances of success by taking
several.
Take a cutting with four or five
nodes. Both
softwood and hardwood cuttings need at least four nodes per cutting
(five is better) since these are the points that can grow leaves and
roots. Nodes are easily visible on dormant grapevines as bumpy
spots, and on softwood cuttings as the location where leaves are
attached to the stem. Since you can't expect every cutting to
root, you might as well increase your chances of success by taking
several.
Keep
the plants moist. Softwood cuttings are much
more sensitive than hardwood cuttings are to lack of moisture.
After all, the plants have leaves actively releasing water into the
atmosphere, so they need new water to take the lost liquid's
place. The best way to keep softwood cuttings moist is to install
misters that wet the plants (either from above or below) every minute
or two, but in the homesteading world, you can often get away with just
putting your cuttings in a glass of water. Make sure that at
least two of the nodes are below the water level at all times, and
change the water if it starts to get gunky. An alternative is to
fill a pot with moist potting soil, stick the cuttings into the dirt
two nodes deep, and then attach a transparent plastic bag over the top
of the pot. (I've had less luck with the second method because
it's tougher to harden off the plants to low moisture conditions after
they root.)
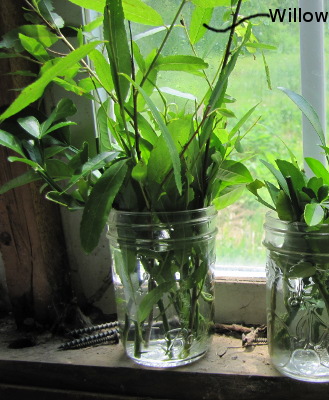 Rooting hormone increases your
chances.
You can buy rooting hormone in the store, but I like to just snip a few
twigs off the creek willow (Black Willow, Salix
nigra, but any
willow will work) and stick them in the glass with my cuttings.
Willows release a natural rooting hormone as they grow their own roots,
which will speed your more important cuttings along.
Rooting hormone increases your
chances.
You can buy rooting hormone in the store, but I like to just snip a few
twigs off the creek willow (Black Willow, Salix
nigra, but any
willow will work) and stick them in the glass with my cuttings.
Willows release a natural rooting hormone as they grow their own roots,
which will speed your more important cuttings along.
Harden
off your new plants. Once your cuttings
grow roots, you'll be tempted to toss them into the garden.
That's fine with the very vigorous rooters like tomatoes and sweet
potatoes, but I've learned the hard way that more tender perennials
need some time expanding their root network before being set out in the
hot sun. (As a rule of thumb, figure that if you had less than
90% success with rooting your cuttings, they need a hardening off
period.) Transplant your rooted cuttings into pots and put them
in a sunny windowsill (but not in a hot greenhouse), watering them
regularly. Once the plant's roots fill the pot, your cutting is
ready to go into the ground.
If you haven't already
jumped on the softwood cutting bandwagon, I strongly encourage you to
give it a try. The only downside is finding a spot in the garden
for all those vigorous plants you materialized out of thin air.
 How to Dry Foods by Deanna DeLong is part
cookbook and part explanation of the whys and hows behind drying
food. The author has spent over twenty years practicing, writing,
and teaching about food dehydration, so she's able to answer all of the
questions I've been storing up as I start to consider drying more of
our winter stores. More on those answers in later posts, but
first, I feel obliged to tell you the few flaws in the book:
How to Dry Foods by Deanna DeLong is part
cookbook and part explanation of the whys and hows behind drying
food. The author has spent over twenty years practicing, writing,
and teaching about food dehydration, so she's able to answer all of the
questions I've been storing up as I start to consider drying more of
our winter stores. More on those answers in later posts, but
first, I feel obliged to tell you the few flaws in the book:
- There are ads for a single brand of dehydrator scattered throughout. I actually wouldn't have minded seeing her reviews of several different brands, but this felt more like product placement.
- She's a big fan of using sulfur to treat your fruit before dehydrating it and barely touches on alternative methods of pretreating. Some folks recommend Making & Using Dried Foods by Phyllis Hobson as a more well-rounded alternative in that department, although I haven't read it yet.
That said, I'm a big fan
of charts that sum up lots of information in a small space, and
DeLong's charts are probably worth the entire price of the book.
I actually bought an e-copy to have on hand as I experiment with drying
this summer, and I tend to only buy a few books per year, so, yes, I
recommend it.
| This post is part of our How to Dry Foods lunchtime series.
Read all of the entries: |
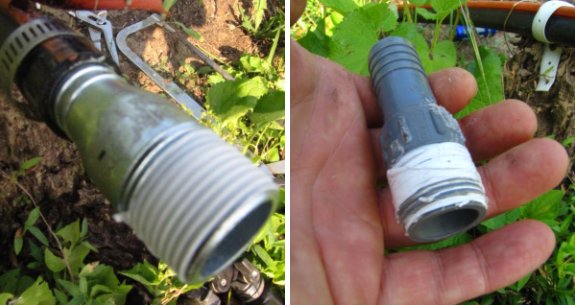
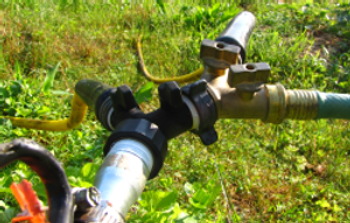
The pressure on our creek
pumping irrigation system turns out to be too high for the threads
on these plastic connectors. It kept popping off until I wrapped a
generous layer of plumber's tape around the threads. That fix lasted a
full year before it started popping off again.
Fast forward to the end of
this story where a metal connector seems to have no problem handling
the high pressure.
The full metal solution was
only 2 dollars compared to 49 cents on the plastic version. One new
discovery I made during this trip to the store is that Lowe's
will now give a military discount to all active duty, retired, and
veterans all year long.
10 percent is nothing to sneeze at. The only proof they need is some
sort of government issued card.
 I used to dream of owning a
greenhouse. In my imagination, I would be raising tropical fruits
like pineapples, mangos, and avocados and eating fresh vegetables all
winter. I also remember the pure joy I got from walking into the
biology greenhouse when I was in college and inhaling the warm
greenness while snow coated the walk outside. At first, I figured
I'd build a greenhouse as soon as I could afford it, but now I'm not so
sure, because...
I used to dream of owning a
greenhouse. In my imagination, I would be raising tropical fruits
like pineapples, mangos, and avocados and eating fresh vegetables all
winter. I also remember the pure joy I got from walking into the
biology greenhouse when I was in college and inhaling the warm
greenness while snow coated the walk outside. At first, I figured
I'd build a greenhouse as soon as I could afford it, but now I'm not so
sure, because...
 Greenhouses breed pests.
I love our dwarf
citrus, but I've noticed that once a year, the inside trees come
down with whitefly infestations. Luckily, I can just move the
trees into the garden in the spring and let natural predators deal with
the problem, but I've heard about hobbyists who completely gave up on
their greenhouses as a result of pest infestations. If you follow
natural gardening techniques, there are tons of critters, both in the
soil and in the air, working to make your garden a success, but you
have to fill all of those environmental niches yourself if you cut your
plants off inside a greenhouse. In the end, you usually have to
spray noxious chemicals or lose the growing space for good.
Greenhouses breed pests.
I love our dwarf
citrus, but I've noticed that once a year, the inside trees come
down with whitefly infestations. Luckily, I can just move the
trees into the garden in the spring and let natural predators deal with
the problem, but I've heard about hobbyists who completely gave up on
their greenhouses as a result of pest infestations. If you follow
natural gardening techniques, there are tons of critters, both in the
soil and in the air, working to make your garden a success, but you
have to fill all of those environmental niches yourself if you cut your
plants off inside a greenhouse. In the end, you usually have to
spray noxious chemicals or lose the growing space for good.- Potted plants are a lot of work.
While we're on the topic of "nature does it better", I should admit
that I consider potted plants a pain in the butt. You've probably
noticed that I start fewer plants inside than nearly any serious
gardener, and there's a reason for that --- I'd rather not mess with
reinventing the wheel when I can get nature to do chores for me.
It is possible to plan greenhouses so they're open to the earth
underneath, but then you tend to get a buildup of buildup of
salts and other problems in the soil.
- Greenhouses have to be heated. No matter how much you plan your greenhouse with passive solar techniques in mind, you're going to have to add supplemental heat in the winter if you're growing anything truly tender. Electric heat is expensive (and getting more so), and I don't think I'm willing to commit to stoking a wood stove in a greenhouse in the middle of the night. That means I'd be limited to growing spring and fall crops like broccoli and lettuce, which can be raised nearly as efficiently in a quick hoop.
 Quick hoops are simpler. When I
learned that I could grow
tomato sets just as well in a quick hoop as under grow lights
inside, I was overjoyed. The more I use cold frames and similar
methods of protecting plants outdoors to give them an early jump on the
growing season, the more I think these techniques are my style.
Nature takes care of watering and I can easily move the quick hoops to
new patches of ground every season, so pests and diseases don't build
up in the soil.
Quick hoops are simpler. When I
learned that I could grow
tomato sets just as well in a quick hoop as under grow lights
inside, I was overjoyed. The more I use cold frames and similar
methods of protecting plants outdoors to give them an early jump on the
growing season, the more I think these techniques are my style.
Nature takes care of watering and I can easily move the quick hoops to
new patches of ground every season, so pests and diseases don't build
up in the soil.
- I love seasons. I
dream of the summer garden all winter, but I also love spending at
least a couple of months with no garden chores. Greenhouses
promise out of season bounty, but the truth is that I wouldn't want to
lose the building anticipation as I wait for the first strawberry or
tomato.
 Which is not to say that
I might not succumb to the greenhouse bug someday, but I hope I can
stand firm!
Which is not to say that
I might not succumb to the greenhouse bug someday, but I hope I can
stand firm!
 As our regular readers have
probably discovered, I'm a big fan of freezing. About 95% of our
vegetables for the year come from the garden, and the ones that aren't
fresh plucked or stored
on the shelf mostly
go in the freezer. Yes, freezers use electricity, but they also
preserve the flavor and nutrients in vegetables better than any other
method of storing food, and I put taste first. So why am I
interested in drying?
As our regular readers have
probably discovered, I'm a big fan of freezing. About 95% of our
vegetables for the year come from the garden, and the ones that aren't
fresh plucked or stored
on the shelf mostly
go in the freezer. Yes, freezers use electricity, but they also
preserve the flavor and nutrients in vegetables better than any other
method of storing food, and I put taste first. So why am I
interested in drying?
Although vegetables
taste better frozen, I've started to realize that most fruits taste
better dried. In addition, nutritional values of dried foods tend
to be on a par with frozen foods since the produce loses only some of
its vitamin A and C in the process, but maintains all other
nutrients. Drying has other advantages too, providing backup food
that doesn't depend on electricity and that takes up only a very small
amount of space.
You can dry food with
only a bare minimum of equipment, but the author of How to
Dry Foods makes it
clear that you'll end up with more nutritious, flavorful food if you
buy a dehydrator. That said, once you've bought the basic
equipment, even electric dehydrating costs very little cash compared to
the price of buying canning jar lids every year, boiling your hot water
bath canner for an hour, or running another freezer.
Food safety is the last
point in favor of drying over canning. Although dried food can go
bad, there's no hidden killer like botulism --- you'll be able to smell
or see mold growing on your food and can just toss it.
 As long as you choose the foods that taste
best dried (more on that in a later post), the only real disadvantage
with drying is preparation time. There's a lot of work involved
in slicing up foods to an even thickness and laying them carefully on
the tray, and if you don't buy a top of the line dehydrator, you'll end
up spending yet more time turning trays around to dry the food evenly
and removing pieces that dried faster. That said, I'm a huge fan
of fruit leathers, which take only barely more time to prepare than
applesauce. If you like the taste of fresh fruit, it's worth
trying out drying.
As long as you choose the foods that taste
best dried (more on that in a later post), the only real disadvantage
with drying is preparation time. There's a lot of work involved
in slicing up foods to an even thickness and laying them carefully on
the tray, and if you don't buy a top of the line dehydrator, you'll end
up spending yet more time turning trays around to dry the food evenly
and removing pieces that dried faster. That said, I'm a huge fan
of fruit leathers, which take only barely more time to prepare than
applesauce. If you like the taste of fresh fruit, it's worth
trying out drying.
| This post is part of our How to Dry Foods lunchtime series.
Read all of the entries: |
 Due to a very cold winter and
soil that warmed extra-slow this spring, the garden is running about a
week behind last year. That means our garlic isn't quite ready to
dig yet, but we still have four pounds left from last
year, so I'm not
terribly concerned.
Due to a very cold winter and
soil that warmed extra-slow this spring, the garden is running about a
week behind last year. That means our garlic isn't quite ready to
dig yet, but we still have four pounds left from last
year, so I'm not
terribly concerned.
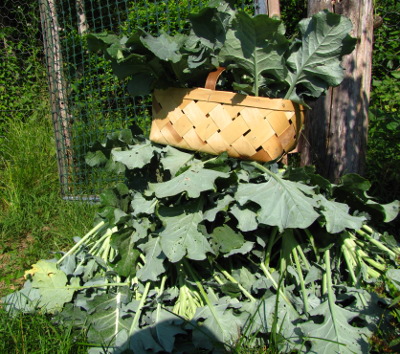
I harvested
broccoli a week late
too. We'd been eating broccoli nearly every day since last
Tuesday, but the majority of the heads were suddenly in need of picking
early this week. Since I
decided to ditch the shelling peas this spring and plant broccoli in
their place, I ended
up with so many heads that they barely fit in my basket. 2.75
gallons of broccoli now in the freezer!
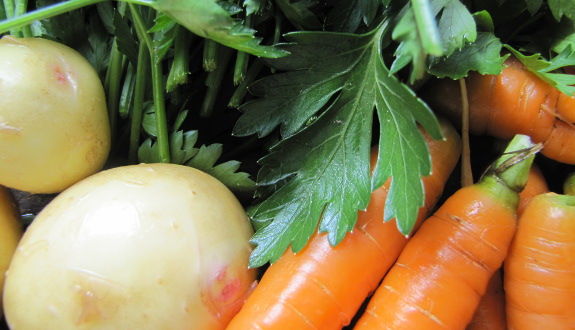
This week also heralded
the beginning of the year's roots. I pulled some new
potatoes from early beds planted just for that purpose and also
thinned out part of a carrot bed, saving the fingerling carrots to go
in chicken soup. I plant my carrots thick on purpose since the
seeds sometimes don't germinate evenly, and since I like being able to
harvest 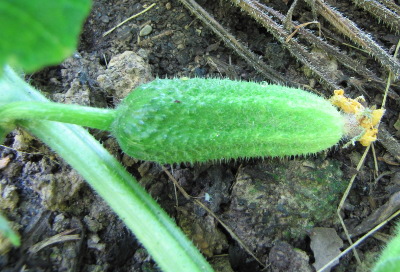 little
carrots early without using up my main crop. The carrots left
behind will now have room to grow big and sweet.
little
carrots early without using up my main crop. The carrots left
behind will now have room to grow big and sweet.
Despite the slow spring
crops, it looks like our summer vegetables might be ahead of schedule
thanks to judicious quick
hoop use. I think this cucumber is going to be ready within
the week!
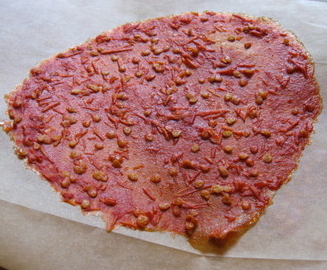
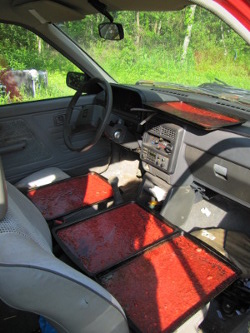 I've been having a lot of fun
drying
strawberry leather in an old car (22 cups of strawberry
leather preserved for winter feasts!), but there are clear downsides to
the method. Deanna DeLong summarized the pros and cons of several
different methods of drying as follows.
I've been having a lot of fun
drying
strawberry leather in an old car (22 cups of strawberry
leather preserved for winter feasts!), but there are clear downsides to
the method. Deanna DeLong summarized the pros and cons of several
different methods of drying as follows.
Oven
drying. You
can simply put your food on cookie sheets (or on cheese-cloth-covered
oven racks), turn the oven on very low, crack the door, and dry food
that way. But oven drying takes two to three times as long as
dehydrator drying (which means fewer nutrients and less flavor survives
the process) and you use a lot more electricity. You need to move
the food around often since the air flow isn't very regular, and you
often end up with areas that overheat and turn brittle. I think
that oven drying's primary use is as a backup to solar drying --- if
you have food nearly dry and suddenly the weather turns rainy, you can
finish it off in the oven.
 Sun-drying. The simplest
dehydration method is to put your food on cookie sheets or screens in a
sunny spot, covering them with netting to keep off bugs. Although
easy, sun-drying is really only appropriate for climates with high heat
(highs in the 90s or above for extended periods), low humidity, and low
air pollution. If you can get away with it (mostly in the
southwest if you live in the U.S.), sun-drying is the cheapest method
and the UV light kills some microorganisms in your food. On the
other hand, sun-drying can take ten times as long as dehydrator drying
(which means fewer nutrients left at the end), and cloudy or rainy days
can ruin your food. Even in hot climates, sun-drying is only
appropriate for fruit, and you need to be prepared to poke at the
drying produce two or three times a day.
Sun-drying. The simplest
dehydration method is to put your food on cookie sheets or screens in a
sunny spot, covering them with netting to keep off bugs. Although
easy, sun-drying is really only appropriate for climates with high heat
(highs in the 90s or above for extended periods), low humidity, and low
air pollution. If you can get away with it (mostly in the
southwest if you live in the U.S.), sun-drying is the cheapest method
and the UV light kills some microorganisms in your food. On the
other hand, sun-drying can take ten times as long as dehydrator drying
(which means fewer nutrients left at the end), and cloudy or rainy days
can ruin your food. Even in hot climates, sun-drying is only
appropriate for fruit, and you need to be prepared to poke at the
drying produce two or three times a day.
Drying
in a warm room.
A few foods can be successfully dried in a warm room. These
include herbs and nuts in the shell. Be sure to set up a fan to
move moisture-laden air off the drying food.
 Solar dehydrator. A solar
dehydrator like the
one we dream of building can elevate air temperature by 20 to 30
degrees Fahrenheit, so you can get away with drying food in more
temperate climates, even if you have high humidity. You're
still at the mercy of the weather and food must be rotated, but solar
dehydrators will dry food faster than sun-drying, so the food is more
nutritious.
Solar dehydrator. A solar
dehydrator like the
one we dream of building can elevate air temperature by 20 to 30
degrees Fahrenheit, so you can get away with drying food in more
temperate climates, even if you have high humidity. You're
still at the mercy of the weather and food must be rotated, but solar
dehydrators will dry food faster than sun-drying, so the food is more
nutritious.
Electric
dehydrator.
A good electric dehydrator has a thermostatically controlled heating
unit and a fan, so food is dried as fast as possible (meaning maximum
flavor and nutrients.) Top of the line units heat very evenly,
too, so they're set-it-and-forget-it, and  many even come with a
timer. After doing the math on how much it would cost me to buy
enough cookie sheets to dry our excess fruit in our very variable
climate using the sun, I decided to go ahead and buy an electric
dehydrator. More on the model we chose once it arrives and we
give it a test run.
many even come with a
timer. After doing the math on how much it would cost me to buy
enough cookie sheets to dry our excess fruit in our very variable
climate using the sun, I decided to go ahead and buy an electric
dehydrator. More on the model we chose once it arrives and we
give it a test run.
Solar/electric
hybrid dehydrator.
You can get the best of both worlds (low energy usage and fast,
nutritious food) by building a solar/electric hybrid. The solar
collector heats the food on sunny days, while the thermostatically
controlled heating unit kicks on when it's cloudy and at night. A
fan keeps air flow more uniform. I dream of turning our electric
dehydrator into a hybrid unit, but Mark wants to spend a bit more time
learning how a standalone solar dehydator works first.
I think that the path I
took --- dabbling in solar dehydrating in an old car and with the oven
--- is a good beginning to see if you like the flavor of dried
food. But if you decide to make dehydration one of your main food
storage methods, you'll probably want to build a high tech solar
dehydrator or buy one of the best consumer grade electric dehydrators
(or maybe do a little of both.)
| This post is part of our How to Dry Foods lunchtime series.
Read all of the entries: |

We had a nice journalist stop
by today to interview us on some of the finer points of rural access to
broadband internet and how it can be used to generate an income.
I made an audio recording of
Anna's chicken pasture tour with the intention of seeing if it can be
turned into a short Youtube video or something like that.
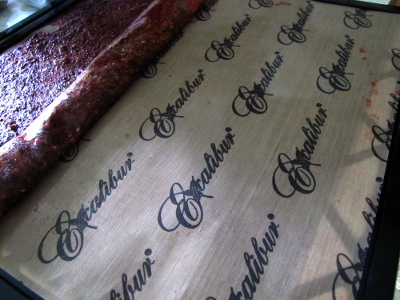
 Our dehydrator came in the
mail Tuesday, and I barely had it out of the
box before filling it up with food. I wanted to pull overripe
bananas and last fall's applesauce out of the freezer to make room for
the produce that's starting to pour in, and also wanted to give the
dehydrator a good test run. So I mixed up four types of
experimental fruit leather:
Our dehydrator came in the
mail Tuesday, and I barely had it out of the
box before filling it up with food. I wanted to pull overripe
bananas and last fall's applesauce out of the freezer to make room for
the produce that's starting to pour in, and also wanted to give the
dehydrator a good test run. So I mixed up four types of
experimental fruit leather:
- Apple: 2 cups of applesauce, 1 tablespoon of lemon juice, 2 tablespoons of honey
- Apple/strawberry: 0.5 cups of strawberry puree, 1 cup of applesauce, 0.75 tablespoons of lemon juice, 1.5 tablespoons of honey
- "Banana bread": 1.75 cups of mashed banana, 1 teaspoon of lemon zest
- Banana/strawberry: 0.5
cups of strawberry puree, 1 cup of mashed banana, 1 teaspoon of lemon
juice, 1 teaspoon of honey
(All measurements are
enough to make one trayful.)
 Four and a half hours later,
I
was peeling the first leather off the nonstick tray inserts. My
primary objective was to make the old fruit disappear into our bellies
quickly, and I'm very happy with the experiment in that respect ---
Mark
happily nibbled on the leather without any prompting.
Four and a half hours later,
I
was peeling the first leather off the nonstick tray inserts. My
primary objective was to make the old fruit disappear into our bellies
quickly, and I'm very happy with the experiment in that respect ---
Mark
happily nibbled on the leather without any prompting.
In terms of flavor, I
don't think any of these recipes are nearly as
good as pure strawberry or peach leather, but the apple/strawberry came
close. If I only had a few strawberries and plenty of apples, I
might be tempted to eke out of my strawberries this way to make them go
three times as far. In general, I've read that apple is a good
addition to other types of leather since it helps the consistency and
stretches the fruit without adding too much flavor.
The banana and
banana/strawberry leathers were the least appealing to
both me and Mark. Banana has such a strong flavor that it
overpowered the strawberry, and it lacks the sweet/tart combo we
enjoy. We concluded that even without adding honey, the dried
banana was just too sweet. That said, Mark hasn't turned up his
nose at any of the leathers --- I think I may have found a new, healthy
snack to have on hand.
 Once
I decided to spend $300 on an electric dehydrator and fruit leather
trays, I figured I'd better get my money's worth by figuring out what
else can be dried. Although many fruits and vegetables (and even
meats and fish) can be dehydrated, some dried foods taste much better
than others.
Once
I decided to spend $300 on an electric dehydrator and fruit leather
trays, I figured I'd better get my money's worth by figuring out what
else can be dried. Although many fruits and vegetables (and even
meats and fish) can be dehydrated, some dried foods taste much better
than others.
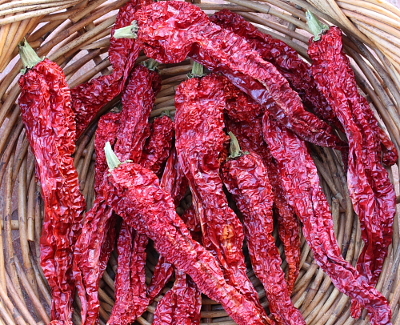
In general, Deanna
DeLong writes that vegetables often aren't worth drying. Her list
of excellent dried vegetables is very short --- garlic, onions, chili
peppers, popcorn, and tomatoes.
Vegetables that she considers good enough to dry include lima beans,
carrots, sweet corn, horseradish, mushrooms, parsley, parsnips, green
and red peppers, and sweet potatoes (as part of a leather.)
Although DeLong thinks pumpkins and winter squash are not worth drying,
I've read bloggers who swear by them, and I know my father's a fan of
dried cucumber, so it sounds like there's some
room for experimentation there.
 Fruits, on the other
hand, are often excellent dried. Since I love it so much,
tomorrow's post will be entirely about fruit leather, but DeLong's top
picks for fruits dried plain include: apples, apricots, cherries,
citrus peel, dates, figs, grapes, kiwi, nectarines, peaches, pears,
persimmons, pineapples, plums, and strawberries. In fact,
the only fruits she recommends against
drying by themselves are avocados, unprocessed berries (because of the
seeds), crab apples (too sour?), guava, pomegranates (seeds again), and
quince (too sour?).
Fruits, on the other
hand, are often excellent dried. Since I love it so much,
tomorrow's post will be entirely about fruit leather, but DeLong's top
picks for fruits dried plain include: apples, apricots, cherries,
citrus peel, dates, figs, grapes, kiwi, nectarines, peaches, pears,
persimmons, pineapples, plums, and strawberries. In fact,
the only fruits she recommends against
drying by themselves are avocados, unprocessed berries (because of the
seeds), crab apples (too sour?), guava, pomegranates (seeds again), and
quince (too sour?).
Finally, if you've got a
dehydrator, you might as well put it to use for other things.
During the winter, the dehydrator makes a great place to rise bread
(set it to 80 to 85 degrees) or incubate yogurt (110 degrees.)
You can dry flowers at 130 to 150 or recrisp crackers at 160.
Reliquify crystalized honey at 120 degrees for twelve hours, or make
dog treats or a slew of craft items. And, of course, jerky is
best made in an electric dehydrator.
For those of you who've been experimenting with drying, what vegetables
do you think make the grade? What's your favorite use for your
dehydrator?
| This post is part of our How to Dry Foods lunchtime series.
Read all of the entries: |

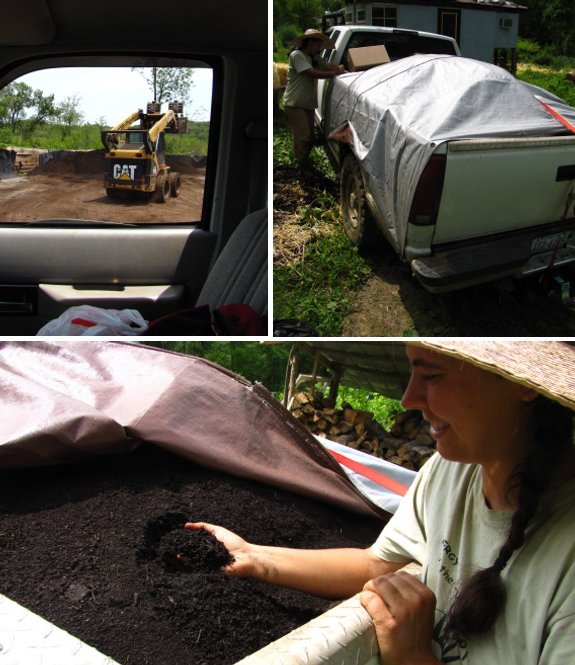
We found a super nice guy on
Craigs list that had freshly cut bales of straw for a dollar less than
the feed store which included delivery!
He was telling me that when
his father was a young man he would camp out in these fields around
harvest time working for the local farmers to bring in the crops.
According to this guy every field from here to the river was bursting
with either corn or tobacco.
The hike would have taken his
father a full day or maybe two to get here from Nickelsville, not to
mention the elevation that would have slowed them down around the
halfway point. Sounds like the kind of coming of age ritual that would
make a good movie with the right character development and a juicy
conflict to overcome that maybe involves one or more of the farmer's
daughters.
 If you're looking for large
quantities of straw for a no-till
garden (or to make a
strawbale house), it's worth starting to think about straw
season. In the past, we've bought a truckload of straw at the
feed store now and then for $5.78 per bale (factoring in tax), mostly
because I assumed people didn't really grow grains around here and thus
didn't have straw as a "waste" product. But when we started
thinking about trying to buy enough straw in one fell swoop so that we
could mulch the garden for a full year even if it sets in to raining
again and the driveway becomes impassable, I decided to check
craigslist just in case.
If you're looking for large
quantities of straw for a no-till
garden (or to make a
strawbale house), it's worth starting to think about straw
season. In the past, we've bought a truckload of straw at the
feed store now and then for $5.78 per bale (factoring in tax), mostly
because I assumed people didn't really grow grains around here and thus
didn't have straw as a "waste" product. But when we started
thinking about trying to buy enough straw in one fell swoop so that we
could mulch the garden for a full year even if it sets in to raining
again and the driveway becomes impassable, I decided to check
craigslist just in case.
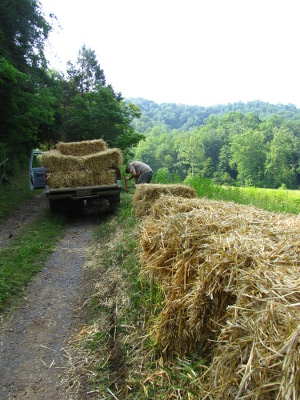 It turns out that I lucked
into the spring straw season --- three farmers within an hour and a
half drive were selling rye and barley straw for anywhere from $2 to $4
per bale. We chose the most expensive straw because it came from
just down the road and the
farmer was willing to deliver all 80 bales for free. (Plus, he's the only
one who called us back.) Yes, the farmer had to unload his
trailer at the end of the driveway and we had to ferry the bales the
rest of the way home in four overflowing truckloads, but the delivery
probably saved Mark about six hours of work and $142.
It turns out that I lucked
into the spring straw season --- three farmers within an hour and a
half drive were selling rye and barley straw for anywhere from $2 to $4
per bale. We chose the most expensive straw because it came from
just down the road and the
farmer was willing to deliver all 80 bales for free. (Plus, he's the only
one who called us back.) Yes, the farmer had to unload his
trailer at the end of the driveway and we had to ferry the bales the
rest of the way home in four overflowing truckloads, but the delivery
probably saved Mark about six hours of work and $142.
To be honest, I have to
admit that the locally baled straw wasn't as tight and regular as the
industrial strawbales --- not appropriate for building with. But
since we're just going to turn it into mulch in our garden, we're
thrilled. We're already thinking ahead for the next straw season,
which our new farmer contact tells us comes in October.
Meanwhile, I just thought I'd alert those of you with gardens in need
of mulch --- now's the time to buy straw while it's cheap!
I'm sorry for anyone who
tried to load up Walden Effect in the last day or so and had
trouble! I've been trying to change my domain registrar to the
more ethical Gandi, and clearly did it wrong. Now I know better
than to mess with domain transfers and then go to bed early.
Thanks to everyone who
emailed me to make sure I knew about the problem. I hope the rest
of you didn't go into too serious withdrawal. All should be well
as soon as you can read this.
 If you are new to drying and
like the flavor of dried fruit, I highly recommend starting with
leather. Fruit leather tends to be faster, easier, and tastier
than whole dried fruit because:
If you are new to drying and
like the flavor of dried fruit, I highly recommend starting with
leather. Fruit leather tends to be faster, easier, and tastier
than whole dried fruit because:
- The fruit is pureed, so you can mix in lemon juice and not worry about dipping fruits in sulfur or ascorbic acid to stop enzymes from degrading your dried food.
- I've found that it's much faster to take off the stems and skins, remove seeds or pits, and toss the fruit in the processor than to carefully slice pieces of equal thickness and lay them on the tray.
- There's no need to worry about checking (a process of piercing the skin of whole fruits like blueberries and strawberries so that moisture can escape.)
- You can run pureed berries through a foley mill and dry even very
seedy fruits like raspberries.
- Once you jiggle the tray, the puree spreads out evenly, so you don't have to pick off pieces that dry faster and seldom have to flip anything over.
- The thin layer of fruit puree dries faster than slices of fruit.
- Fruit leather is even tastier than fruit dried whole. This
is especially true since you can add a little bit of sweetening without
going through the elaborate glacé process.
 I've walked you through
making peach
leather and strawberry
leather, so I won't
give step by step instructions here. Instead, here are some ideas
for making fruit leather even more exciting:
I've walked you through
making peach
leather and strawberry
leather, so I won't
give step by step instructions here. Instead, here are some ideas
for making fruit leather even more exciting:
- Mix and match fruits.
Adding applesauce to other fruits helps make low pectin fruit leathers
rollable, but you can also think about mixing fruits from a flavor
point of view. You can even add small chunks of other kinds of
fruit to the puree.
- Add seasoning. I've been adding a bit of lemon and honey to my fruit leathers, and that really helps turn them into the kind of snack Mark will drag off to his lair. I also want to experiment with adding a bit of lemon zest (1 tsp per quart of puree), and perhaps making a "butternut pie" leather with pie spices. When adding seasonings to fruit leather, though, you should be aware that a little goes a long way since the puree will dry down to a much more condensed package.
- Add garnishes. My breakfast is usually fruit and nuts, so I'm excited to try adding some seeds or chopped nuts to my leather for instant meals.
- Make fun shapes. If you've got kids in your household, DeLong suggests making fruit leather shapes by pouring puree into open-topped cookie cutters. You can remove the cutter and use it over and over as long as the puree is thick enough.
- Try vegetable leather.
DeLong has recipes for several sweet-potato-based leathers in her book,
but I'm envisioning a sun-dried tomato, garlic, and basil leather.
Aren't you just itching
to try out some new fruit leather ideas? I know I am!
| This post is part of our How to Dry Foods lunchtime series.
Read all of the entries: |
It seems like we've reached a
pause in the rainy part of the season.
One lesson I learned this
year is that 25 gallons of gravel can come in handy when you need a
small increase in traction to get things moving again.
 Do you remember how our
heroes left the path against Gandalf's advice and ended up lost in
Mirkwood? (I'm writing about The Hobbit, of course.) Finally,
they decided that Bilbo would have to climb a tree in hopes of finding
a landmark to steer toward, and our less than intrepid hobbit summoned
his courage and clambered up through the scratchy limbs until "he poked
his head above the roof of leaves" and "saw all round him a sea of
green, ruffled here and there by the breeze."
Do you remember how our
heroes left the path against Gandalf's advice and ended up lost in
Mirkwood? (I'm writing about The Hobbit, of course.) Finally,
they decided that Bilbo would have to climb a tree in hopes of finding
a landmark to steer toward, and our less than intrepid hobbit summoned
his courage and clambered up through the scratchy limbs until "he poked
his head above the roof of leaves" and "saw all round him a sea of
green, ruffled here and there by the breeze."
Well, that's how I felt
on Friday morning when I started summer
pruning our largest peach tree. Luckily for me, the
tree is short enough that the job required no climbing, but the leaves
were so dense that I had to creep underneath and then pop my head up in
little openings. I could almost imagine that I was parched and
starving, perched atop a tree in the canopy of Mirkwood --- maybe
that's why I was so hungry for lunch.

 I was glad to see capped
worker brood in our new hive since that means our hive split
was definitely a success. I only lifted out the
one frame from their lower brood box to confirm the queen's activity
since the bees had been less than pleased to be poked at last
time. But, even so, I could tell that they've been working hard
because the upper brood box was heavy with dehydrating nectar.
I was glad to see capped
worker brood in our new hive since that means our hive split
was definitely a success. I only lifted out the
one frame from their lower brood box to confirm the queen's activity
since the bees had been less than pleased to be poked at last
time. But, even so, I could tell that they've been working hard
because the upper brood box was heavy with dehydrating nectar.
The mother hive was also
doing well, despite losing so many of her workers to the daughter a
month ago. The bees had plenty of uncapped honey and had already
covered over two big frames of  honey in the upper brood box
and a few small frames of honey in the super. I stole enough to extract a quart and a half since I
used up the last of my honey in our final round of strawberry
leather.
honey in the upper brood box
and a few small frames of honey in the super. I stole enough to extract a quart and a half since I
used up the last of my honey in our final round of strawberry
leather.
The only downside of a
hive split is that we won't get very much honey from either hive this
year. Maybe I can talk my movie star neighbor into giving us some
of his surplus in exchange for our "acting" on his audition tapes?
 Have you ever been around
when a real pro is grilling, making his charcoal from scratch on
site? It's quite an experience.
Have you ever been around
when a real pro is grilling, making his charcoal from scratch on
site? It's quite an experience.
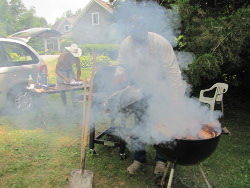
Meet Keyen. He
learned to barbecue from his father, and his stepson Anthony is
currently following in his footsteps. The duo seemed cool as
cucumbers despite being engaged in cooking up pork and chickens for a
horde of people in ninety plus degree heat.
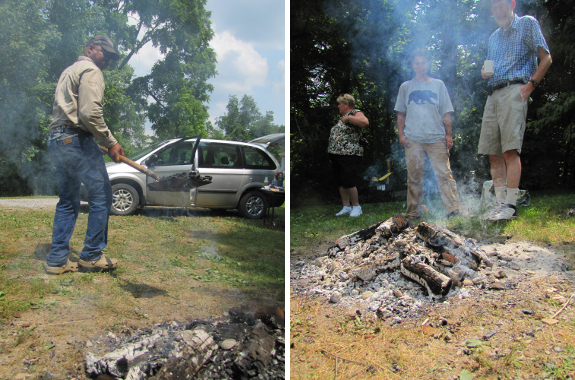
 They started out by making
charcoal out of split firewood. The burning logs on top were
heating the coals below, which Keyen shoveled out to fill the bottom
of his grill. He admonished me not to watch the temperature dial
on the front of the grill, but to instead keep an eye on the steam
billowing out the vents and to listen to the sizzle to make sure the
meat hadn't caught fire.
They started out by making
charcoal out of split firewood. The burning logs on top were
heating the coals below, which Keyen shoveled out to fill the bottom
of his grill. He admonished me not to watch the temperature dial
on the front of the grill, but to instead keep an eye on the steam
billowing out the vents and to listen to the sizzle to make sure the
meat hadn't caught fire.
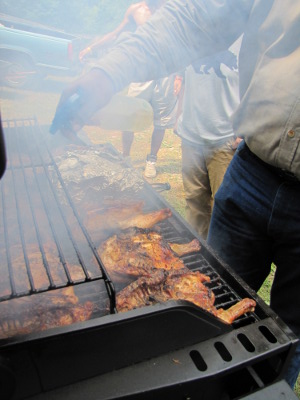
Although no one was able
to finagle the secret recipe, Keyen started out with some sort of
spice rub, marinated the meat throughout by spraying on apple juice,
and finished with his special sauce. Here's where I tell you that
I don't like barbecue...but this meat was amazing. The whole
chickens had been split in half down their backs so that they held in
the juices, and I've never tasted such succulent chicken. But the
pork loin was even more delicious.
 After an hour and a half, the
chickens were ready to go into the cooler. Since it's well
insulated, the cooler holds in the heat and lets the birds keep cooking
a little bit as they wait to be put on the table. Keyen's trick
for telling when his meat is ready to take off the grill is to twist a
leg --- if the bone pulls right out, the chicken is done.
After an hour and a half, the
chickens were ready to go into the cooler. Since it's well
insulated, the cooler holds in the heat and lets the birds keep cooking
a little bit as they wait to be put on the table. Keyen's trick
for telling when his meat is ready to take off the grill is to twist a
leg --- if the bone pulls right out, the chicken is done.
Just as I was about to
succumb to the heat and leave the grilling theater, Keyen told me
about his career as a cowboy and how he lassoed an unruly guest at his
wedding. And he wasn't even pulling my leg.
I think that if my family had
a crest, it would have an Egyptian onion
smack dab in the middle. So I thought you'd enjoy this video that
my mother and sister cooked up between them walking you through the
anatomy of the Egyptian onion while also telling how the Egyptian onion
entered our lives.
What got left on the
cutting room floor was the tale of how, when my
grandmother enthusiastically carried these "round trip onions" all the
way home to Massachusetts from Virginia, her sister smiled and
nodded. You see, my aunt Ruth (who
wrote for Organic Gardening) had been growing Egyptian
onions in
her garden next door all along.
Perhaps Egyptian onions
are just prone to being overlooked. My
own father only started cooking with them last year when I treated him
to a start from my garden's excess. Now, he's turned into an
Egyptian onion pusher too. Meanwhile, Mark's mother also got some
bulblets from
me a couple of years ago and is doing her best to populate the
entire state of Ohio. What's not to love about Egyptian onions?
Our Cochin hen just decided
to go broody on us yesterday, which is perfect timing as the latest incubation
generation comes online.
The plan is to sneak the new
chicks in with Ms. Broody tonight and hopefully she'll wake
up with her biological clock still ticking and ready to shift into
mother hen mode.
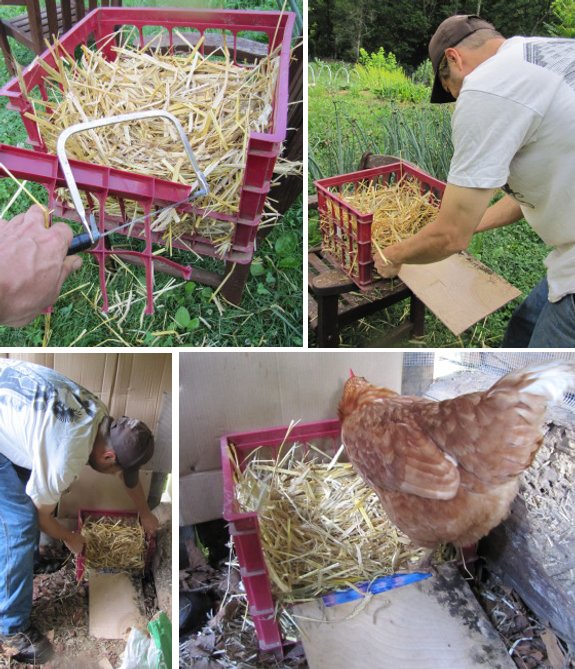
I used a plastic milk carton
looking thing called a "File Crate"
for the new and improved nest box complete with chick friendly access
ramp.
 "It
seems like you spend so much time worrying over the incubator, you
would have been better off ordering chicks through the mail," my father
said after I wrote about my chick-hatching
rollercoaster.
"It
seems like you spend so much time worrying over the incubator, you
would have been better off ordering chicks through the mail," my father
said after I wrote about my chick-hatching
rollercoaster.
In the short term, he
was right. Raising our own chicks isn't worth all the sleepless
nights and emotional highs and lows. On the other hand, by hatch
three, the only reason I woke up in the night is because four chicks
were hatching very loudly three feet away from my pillow at 2 am.
I like to peruse our blog archives and am
always amused to read about how tough various tasks were the first few
times we did them. Killing
chickens and extracting
honey were initially
traumatic, but now an
evening of chicken-plucking is restful, and I didn't
think twice about snagging
a couple of quarts of honey from the hive last
week. Ditto with waiting for chicks to poke their way out of the
shell or even deciding that a troubled chick needs to be helped
or euthanized.
In the end, self-sufficiency and "job" satisfaction are worth being
sent for a loop the first few times I try a new skill.
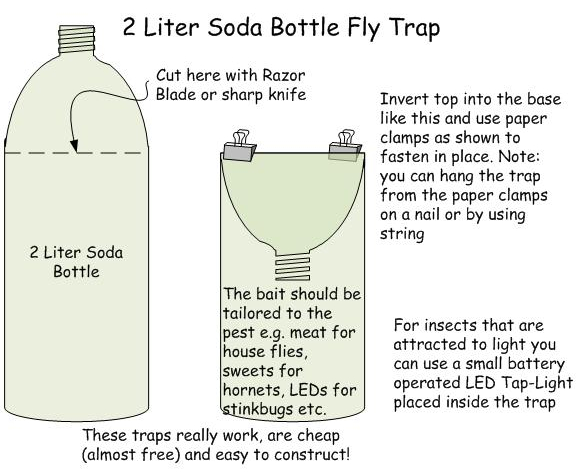
Duncan sent me this plan
for a nearly free, homemade fly trap that he made out of a plastic soda
bottle. The top of the bottle turns into a slippery funnel down
which the insects slide into the trap zone. Although a few might
find their way back out the small opening, it looks like in practice
most insects aren't that smart.
 Duncan's goal was to
keep down flies that sprang up around his chickens, but I can envision
using the same setup as a homemade Japanese beetle trap and others on
the internet use it to catch stinkbugs. Since chickens are at the
top of my mind, I'm tempted to make a trap like this with a solar LED
light at the bottom to snag nocturnal insects to feed the
chickens. (The only thing holding me back is the lack of plastic
soda bottles in our trailer at the moment!)
Duncan's goal was to
keep down flies that sprang up around his chickens, but I can envision
using the same setup as a homemade Japanese beetle trap and others on
the internet use it to catch stinkbugs. Since chickens are at the
top of my mind, I'm tempted to make a trap like this with a solar LED
light at the bottom to snag nocturnal insects to feed the
chickens. (The only thing holding me back is the lack of plastic
soda bottles in our trailer at the moment!)
For more tantilizing
inventions, read about Duncan's wheel
lift for a chicken tractor and his heated
PVC pipe chicken waterer on our chicken blog. You can also see his beautiful, homemade musical instruments on his website.
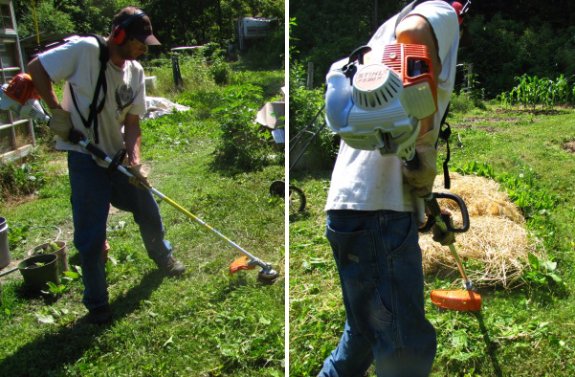
When I notice a landscaping
crew working a job site most of the time the weed eater guy is using a
Stihl.
It was this observation along
with my neighbor's recent round of research that led me to choose the
Stihl FS-90R weed eater.
Stay tuned for a full report
after I've had a chance to see how well it cuts the mustard.
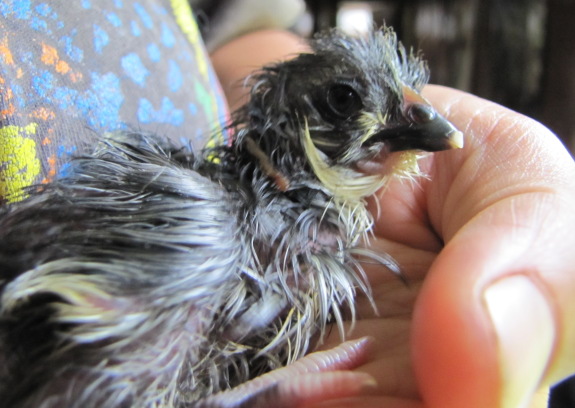
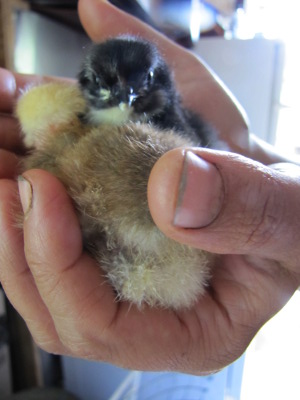
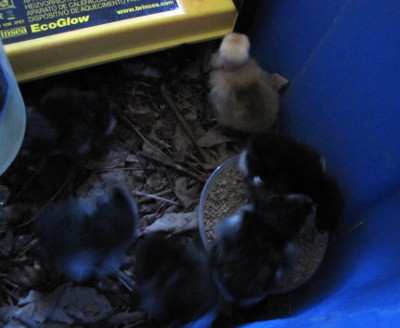 Chicks are very cute on day
1, but by day 2, I'm heartily wishing they
were all grown up and able to take care of themselves. That's why
we decided to take the risk of slipping our
newest eleven under
the
broody hen. We knew there was a chance some or all of
the chicks would die if the mother hen rejected them, but we've been
losing
nearly a quarter of our motherless birds to predators/power outages in
the first month anyway, so she can probably do the job better.
Mostly, though, the chance of foisting off motherhood on someone else
was irresistable.
Chicks are very cute on day
1, but by day 2, I'm heartily wishing they
were all grown up and able to take care of themselves. That's why
we decided to take the risk of slipping our
newest eleven under
the
broody hen. We knew there was a chance some or all of
the chicks would die if the mother hen rejected them, but we've been
losing
nearly a quarter of our motherless birds to predators/power outages in
the first month anyway, so she can probably do the job better.
Mostly, though, the chance of foisting off motherhood on someone else
was irresistable.
 The best time to introduce
chicks to a broody hen is in the evening,
after she's been sitting tight on the nest for at least a couple of
days. You're banking on the fact that chickens can't count,
either time or eggs. If she wakes up in the morning with eleven
youngsters peeping amid her feathers, she'll just assume they hatched
out of the one egg she's been sitting on for a mere three days.
Of course, the chicks need to be young enough for this to be at least
vaguely believable, so don't try to toss those two week olds under your
broody hen.
The best time to introduce
chicks to a broody hen is in the evening,
after she's been sitting tight on the nest for at least a couple of
days. You're banking on the fact that chickens can't count,
either time or eggs. If she wakes up in the morning with eleven
youngsters peeping amid her feathers, she'll just assume they hatched
out of the one egg she's been sitting on for a mere three days.
Of course, the chicks need to be young enough for this to be at least
vaguely believable, so don't try to toss those two week olds under your
broody hen.
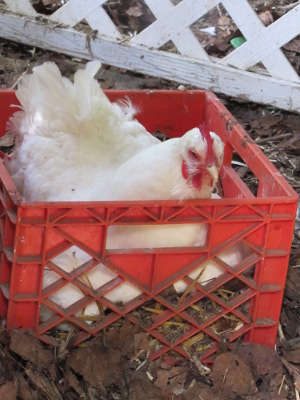
Our hen was setting in a
plastic egg crate we'd tossed in the coop as a nest box and never
modified, and when we tried to move her to Mark's more chick-friendly
brood box on Monday
night, she threw a fit and I let her return to her old nest box.
As a result, we had to make the box switch at the same time we
introduced the chicks on Tuesday night, and the broody hen was not
pleased. After taking a nice chunk out of Mark's gloves as he
lifted 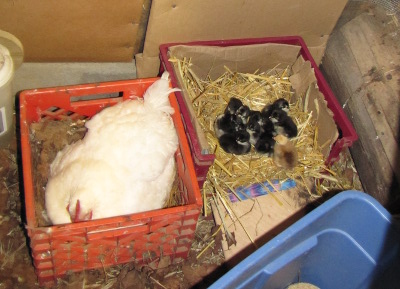 her onto the cluster of
chicks in the new brood box, she proceeded to peck at the chicks
peeking out from beneath her feathers until they squeaked in
pain. Still, it was nearly dark, and soon she couldn't see to
peck, so we crossed our fingers and went to bed.
her onto the cluster of
chicks in the new brood box, she proceeded to peck at the chicks
peeking out from beneath her feathers until they squeaked in
pain. Still, it was nearly dark, and soon she couldn't see to
peck, so we crossed our fingers and went to bed.
I figured the test would
come at dawn, so I slipped outside as soon as it grew light and padded
to the chicken coop. Ms. Broody was awake, and so were the
chicks, with several pecking at the surrounding straw while keeping
their 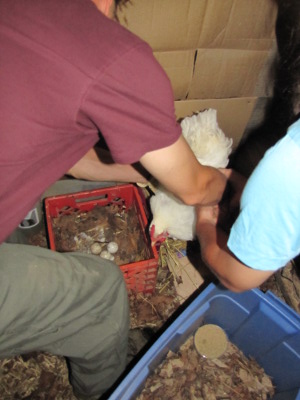 bodies warm underneath the
white feather blanket. I was glad to finally hear motherly
clucking coming from the broody hen and being answered by soft chick
twitters, but had our hen really accepted the youngsters?
bodies warm underneath the
white feather blanket. I was glad to finally hear motherly
clucking coming from the broody hen and being answered by soft chick
twitters, but had our hen really accepted the youngsters?
One of the chicks fell
out from under the mother hen as she turned to look at me (squawking
warningly.) The lost chick toddled down the ramp in the wrong
direction and quickly got cold. "Help! Where are you?" he
cheeped from the floor of the coop. "Junior, I'm this way," the
mother hen purred, and he scampered back up the ramp, pecked at his
mother's beak, and nestled down into her feathers. I guess the
adoption was a success.
For those of you keen to
try this at home, you'll probably sleep better if you follow the rules
a little better than I did. Move the box of chicks out to the
brood coop a couple of hours before introduction and their peeping will
make the mother hen think her eggs are hatching. Then slip the
chicks under the hen's feathers one by one, trying not to disturb
her. That said, internet lore to the contrary, our quick and
dirty swap seems to have worked just as well.
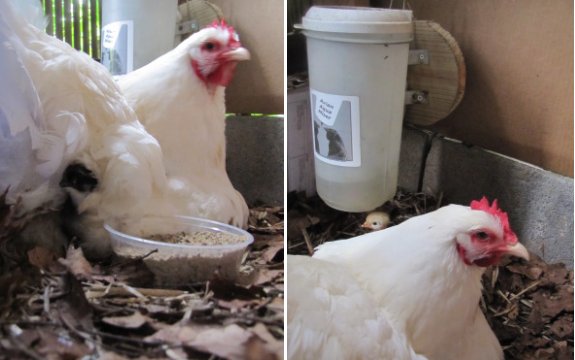
It's working!
Our
mother hen decided to spend most of the first day showing the
chicks where and how to drink.
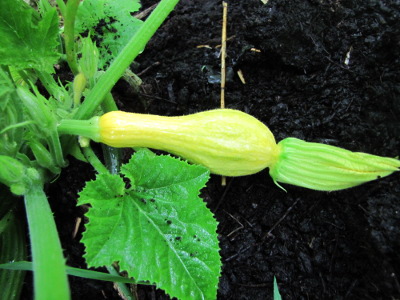 Bad bugs are a fact of life on the
organic farm. My favorite method of insect control is avoidance,
which is our new technique for combatting the squash
vine borer this
year. We love summer squash, but the yellow zucchini varieties
we'd been growing were magnets for the borer. After reading that
vine borers tend to skip yellow crookneck plantings, we decided to give
this new variety a shot, and sure enough, I saw the vine borers pass
through the garden but only found one damaged stem and none of the
squash plants wilted. The only downside is that I'd planned for
our summer squash to die young like it does every other year, so I succession
planted --- we may
soon be swimming in summer squash.
Bad bugs are a fact of life on the
organic farm. My favorite method of insect control is avoidance,
which is our new technique for combatting the squash
vine borer this
year. We love summer squash, but the yellow zucchini varieties
we'd been growing were magnets for the borer. After reading that
vine borers tend to skip yellow crookneck plantings, we decided to give
this new variety a shot, and sure enough, I saw the vine borers pass
through the garden but only found one damaged stem and none of the
squash plants wilted. The only downside is that I'd planned for
our summer squash to die young like it does every other year, so I succession
planted --- we may
soon be swimming in summer squash.
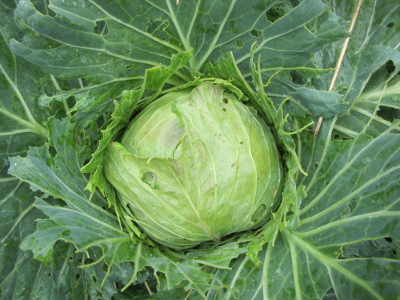 You can avoid insects with
timing as well as with variety selection. Most years, I manage to
get the broccoli in the ground early enough that I've got all of the
heads processed by the time the cabbage whites start fluttering through
the garden to lay their eggs, so I barely have to deal with cabbage worms. This year, the spring
ground was so cold that my broccoli and cabbage ran a week late, and we
ended up with lots of damage. I've resolved that if the soil
temperature is too low to plant my spring crucifers on time next year,
I'll start them indoors so that I can avoid those pesky caterpillars.
You can avoid insects with
timing as well as with variety selection. Most years, I manage to
get the broccoli in the ground early enough that I've got all of the
heads processed by the time the cabbage whites start fluttering through
the garden to lay their eggs, so I barely have to deal with cabbage worms. This year, the spring
ground was so cold that my broccoli and cabbage ran a week late, and we
ended up with lots of damage. I've resolved that if the soil
temperature is too low to plant my spring crucifers on time next year,
I'll start them indoors so that I can avoid those pesky caterpillars.
If I can't avoid them,
my next line of defense is hand-picking. Just fill a cup
with water and flick or drop the insects in --- they'll be too busy
staying afloat to fly away. If you're picking chicken-approved
insects (everything except asparagus beetles and stinkbugs in our
garden), pour the contents of the bug cup into the pasture and your
insects will quickly be converted into eggs. If your chickens
won't eat them, you can always just put a lid on the picking container
and let the bad bugs drown.
 The new trick I've discovered
this year about hand-picking is to hit the insects hard as soon as they
appear. In 2010, I dutifully squashed asparagus beetles once a
week, but there always seemed to be more to pluck. This year,
when the first beetles arrived, I picked them immediately and kept
checking on the plants at least once a day until I no longer saw
adults. Then I squashed the few larvae that got past my first
round of control three times a week until they were also gone. By
the time the asparagus ferns were fully leafed out and impossible to
check for bugs, the asparagus beetle had been eradicated! Even
though it felt like I was spending more time picking bugs than in
previous years, I was able to stop after just a few weeks, so my total
bug-picking hours for the year were actually fewer.
The new trick I've discovered
this year about hand-picking is to hit the insects hard as soon as they
appear. In 2010, I dutifully squashed asparagus beetles once a
week, but there always seemed to be more to pluck. This year,
when the first beetles arrived, I picked them immediately and kept
checking on the plants at least once a day until I no longer saw
adults. Then I squashed the few larvae that got past my first
round of control three times a week until they were also gone. By
the time the asparagus ferns were fully leafed out and impossible to
check for bugs, the asparagus beetle had been eradicated! Even
though it felt like I was spending more time picking bugs than in
previous years, I was able to stop after just a few weeks, so my total
bug-picking hours for the year were actually fewer.
In the end, most of my
insect control methods come down to timing, which is why I'm careful to
mark emergence dates on my calendar and cruise past problem plants
daily when insects are due to arrive. In a temperate climate,
winter does a remarkably good job of knocking insect populations back;
my job is just to follow along in the footsteps of cold weather
and make sure the insects stay down. Yet another reason I'm glad
I don't live in the tropics.
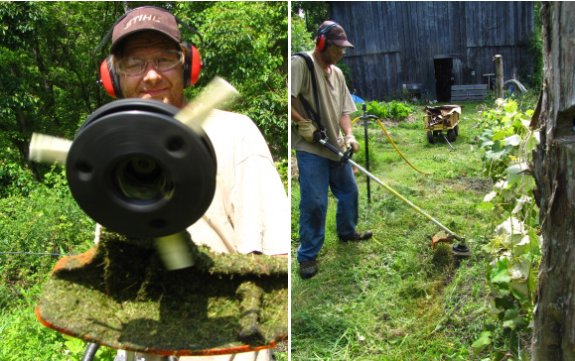
I've been using this Polycut
attachment on the new Stihl
FS-90R weed eater to cut through some tough weeds that seemed too
thick for the original string.
I like it a lot.
The sound is less high
pitched and it feels like a substantial increase in cutting power.
Expect to pay around 22 dollars. Not sure what the replacement fingers
cost, but I think it was comparable to the price of string.
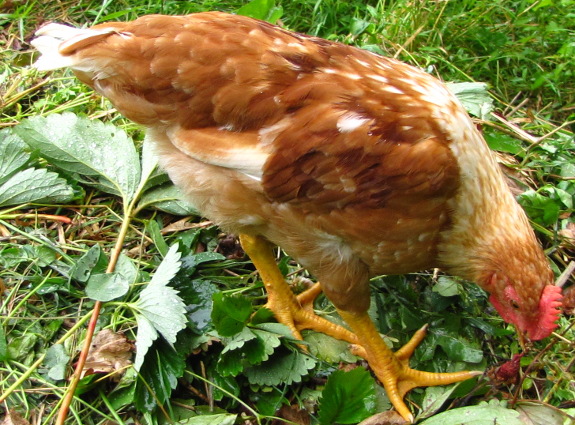
Last year, I keep track
of how
much I fed our dark cornish broilers compared to how much their dressed
carcasses weighed
and decided that it made the most sense to slaughter the birds at 12
weeks. Our tweens are just eight weeks old, so they've got
another month of grace (at least.)
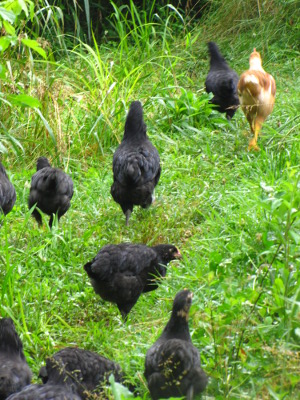 So far, our australorps (and
their golden comet leader) seem to be winning by a landslide over the
dark cornish when it comes to subsisting on found food. At three
months old, the dark cornish broilers had eaten 14 pounds of
storebought food apiece while our current tweens have only eaten 3.25
pounds of food apiece. I expect them to eat that much again over
the next month, but even that will put the current flock at less than
half the storebought feed costs of last year's broilers.
So far, our australorps (and
their golden comet leader) seem to be winning by a landslide over the
dark cornish when it comes to subsisting on found food. At three
months old, the dark cornish broilers had eaten 14 pounds of
storebought food apiece while our current tweens have only eaten 3.25
pounds of food apiece. I expect them to eat that much again over
the next month, but even that will put the current flock at less than
half the storebought feed costs of last year's broilers.
Which doesn't
necessarily mean the black australorps will be a better deal.
Since I'm currently raising light-weight egg-laying breeds rather than
heavy meat chickens, we could still end up with a feed to meat ratio
worse than that of our dark cornish. We also may need to grow our
current flock for an extra month to get them big enough to make it
worth our while to slaughter them, which might make the meat tougher.
Even though I'm
reserving judgment on whether my current meat chicken scheme makes
sense, I'm thoroughly pleased with our young flock. They go out
foraging in the rain, keep working through the heat of the afternoon,
and are generally a pleasure to look at. Thanks for the tip on
trying black australorps, Darren!
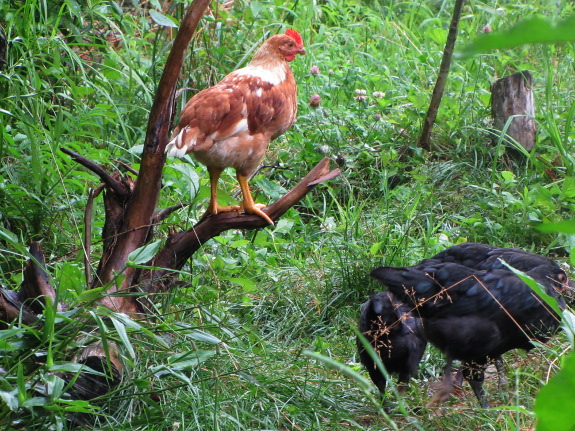
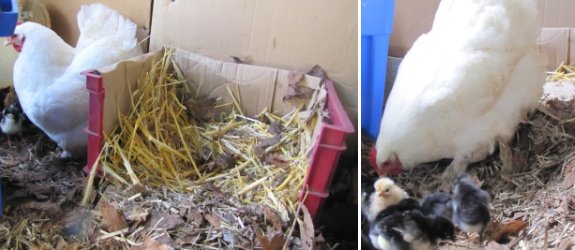
The new chick
friendly nest box is not good enough for our broody hen.
She's been hunkering down
between the water and food dish and sleeping on the floor.
I suspect the new nest box
will come in handy if we can coax her into sitting on some eggs next
year, but for now it would seem like she feels safer on the ground
where she can hide her family behind the blue plastic tub we sometimes use as a
brood house.
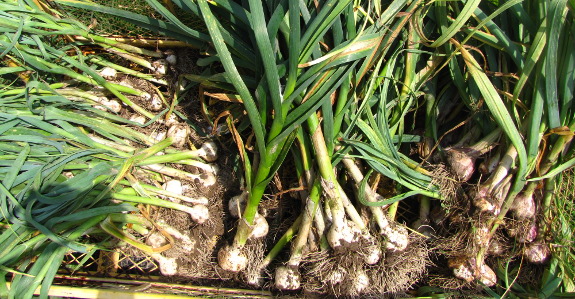

Last week, I dreamed about
Dracula. At the time, I thought it meant
I was supposed to read that classic text, but in retrospect, I think
the dream was
my subconscious telling me to go ahead and harvest our garlic crop.
When I did finally pull
them out of the ground on Friday, a few of the garlic heads had started
to split apart, but most will be good keepers. Our crop is about
the same size as last year's...which is to say HUGE! I guess my
family will be getting their Christmas presents in July this year.
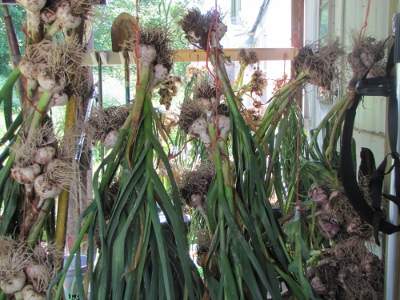 If you're looking for some
facts, check out these past posts:
If you're looking for some
facts, check out these past posts:
When
should I harvest garlic?
How
do you cure garlic?
How
do you store garlic?
How
much does it cost to grow your own garlic?
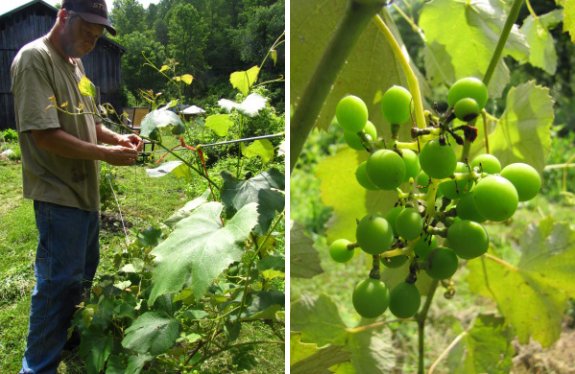
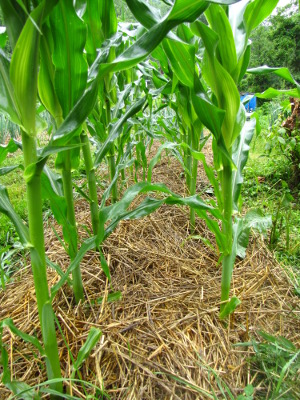 Which is better for the
vegetable garden, straw or composted
leaf mulch?
I'll have to wait a few more months before I can tell how each mulch
impacts the biology of the soil, but I'm already getting a feel for how
our two mulches are working.
Which is better for the
vegetable garden, straw or composted
leaf mulch?
I'll have to wait a few more months before I can tell how each mulch
impacts the biology of the soil, but I'm already getting a feel for how
our two mulches are working.
When it comes to ease of
application, each type of mulch has its pros and cons. Straw is
extremely easy to lay down around large plants, but is difficult to
work between tender young onions. I also tend to wait to apply
straw until seedlings are three or four inches tall since the straw
stalks can move around and overshadow youngsters. In contrast,
the composted leaf mulch takes more time and effort to shovel into the
wheelbarrow and back out, but is much easier to use around seedlings
since it stays where you put it and the soft particles can rain down
around young plants without hurting them.
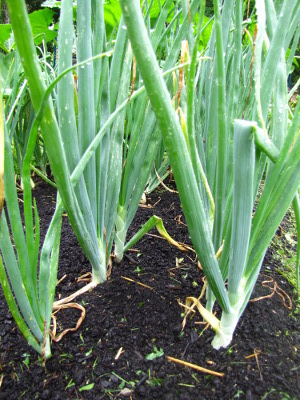 Price per bed seems to be nearly
identical for straw mulch and leaf compost mulch --- $1.40 per bed or
around 8 cents per square foot. The trouble with making this
comparison, though, is that I can't tell how long each mulch will last
before I need to reapply. My gut says that the leaf compost might
last longer, but only time will tell.
Price per bed seems to be nearly
identical for straw mulch and leaf compost mulch --- $1.40 per bed or
around 8 cents per square foot. The trouble with making this
comparison, though, is that I can't tell how long each mulch will last
before I need to reapply. My gut says that the leaf compost might
last longer, but only time will tell.
Of course, the real
deciding point will probably be how the vegetables perform surrounded
by each type of mulch. The amount of organic matter added to the
soil (measured using a worm
test) will also be
key. Maybe by this time next year, I will have decided on a
favorite type of storebought mulch (and put some thought into how to
grow it myself.)
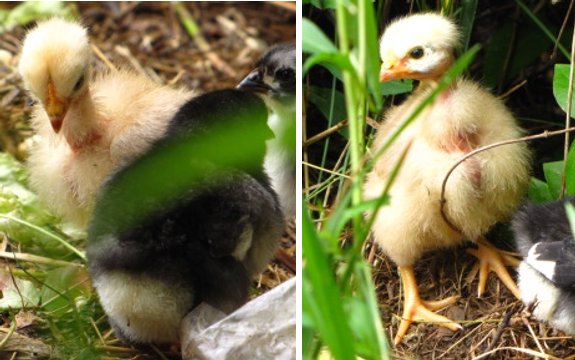
What do you get when you mate
a chicken with a turkey?
You can get a turkey/chicken
hybrid, but for some reason they only produce male eggs.
We recently got a turken
mixed in with our austalorp eggs, which is not a fancy hybrid, just a
breed of chicken that has a neck like a turkey.
I wonder what effect a misfit
like this has on the other young chicks in the mother hen mini flock?
My guess would be that a little diversity would help and each breed
could teach the other some foraging tricks the other might not be aware of.
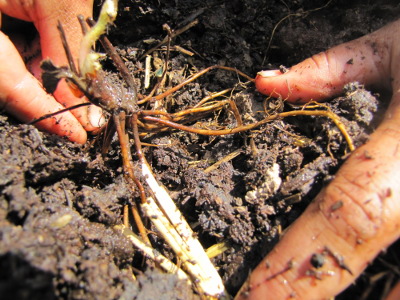 It feels almost ungrateful to
rip strawberry plants out of the ground mere days after they gave me
gallons of fruits, but that's what I was doing last week. We pull
out the oldest plants (a third to half of our beds) at this time of
year and put in new beds of rooted runners. Some of these
summer-planted strawberries succumb to the heat, but the ones that make
it are hefty enough to bear a good (but not great) crop of fruits the
next year. These are the tastiest
berries that I
reserve for eating fresh, while the more copious fruits from the two
year old
It feels almost ungrateful to
rip strawberry plants out of the ground mere days after they gave me
gallons of fruits, but that's what I was doing last week. We pull
out the oldest plants (a third to half of our beds) at this time of
year and put in new beds of rooted runners. Some of these
summer-planted strawberries succumb to the heat, but the ones that make
it are hefty enough to bear a good (but not great) crop of fruits the
next year. These are the tastiest
berries that I
reserve for eating fresh, while the more copious fruits from the two
year old 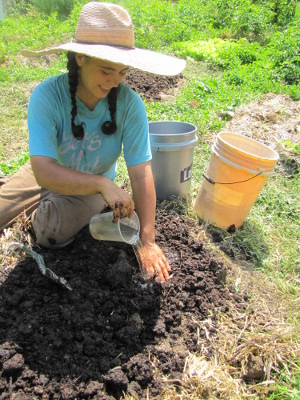 plants are used to make strawberry
shortcake, strawberry freezer jam, or strawberry
leather.
plants are used to make strawberry
shortcake, strawberry freezer jam, or strawberry
leather.
I've just about gotten
used to ripping out happy strawberry plants, but the strawberry
demolition this year was even more serious. I opted to remove all
of our latest bearing variety (Jewel) and replace them with a new
variety that I hope will taste better (All-Star.) The mail order
strawberries came in a very dormant state, so I hope they're able to
deal with the summer garden.
Any angst I felt about
pulling out such stalwart garden friends was relieved by the sheer joy
the chickens took from picking through the plants in search of rotten
berries. At least someone enjoys those not-so-great Jewel
strawberries!
 For a long time I was in search of
knives that fit my hands, my
use, and my budget. Frankly there wasn't much out there that
didn't
cost an arm and a leg, so I looked into how to make my own knives.
For a long time I was in search of
knives that fit my hands, my
use, and my budget. Frankly there wasn't much out there that
didn't
cost an arm and a leg, so I looked into how to make my own knives.
I
found a great video from Purgatory
Ironworks on youtube that
walks you
through how to make a Brake Drum Forge. By simply taking an old
brake
drum & some metal piping you can create a working forge. I
called
around the local auto repair shops and was offered 3 drums in just 5
minutes, but selected the largest for ease of work. After
installing
the simple black pipes to the bottom and attaching a hairdryer for air
supply I was off and running. On other youtube videos that Trent
at
Purgatory does, he also shows you how to make your own charcoal, a
great thing for a beginning blacksmith to know how to do.
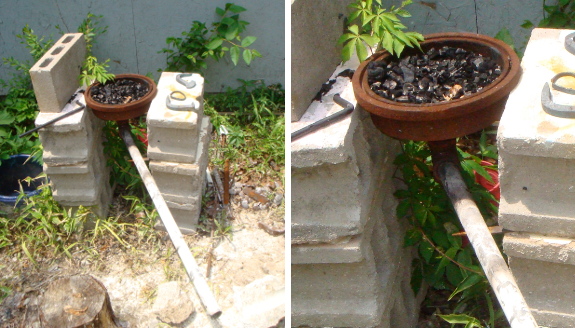
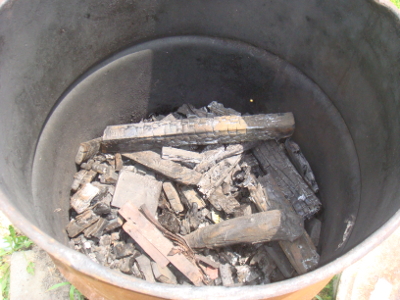 So once I got my forge built and
my charcoal made, the next step was to make an anvil. I
visited our local scrapyard and bought not only a 24" piece of railroad
track, but a 1" thick 6x15" piece of plate steel and a 2" square tubing
piece to weld onto it. By welding the plate steel and the tubing
on
the track, I was able to get a smooth flat surface with a hole to be
used for driving holes through red hot metal.
So once I got my forge built and
my charcoal made, the next step was to make an anvil. I
visited our local scrapyard and bought not only a 24" piece of railroad
track, but a 1" thick 6x15" piece of plate steel and a 2" square tubing
piece to weld onto it. By welding the plate steel and the tubing
on
the track, I was able to get a smooth flat surface with a hole to be
used for driving holes through red hot metal.
 With my charcoal
going, I simply turn my hair dryer on, get the fire and coals nice and
hot, and put my metal in to begin. The metals I usually use are
old
hand files that are now dull and have little value to most people, so
they can be obtained pretty cheap from a flea market or garage
sale. I
also use alot of old railroad steel found near local tracks by my
parents. Most of the time it's railroad spikes but every so often
there
are other random pieces of steel. The railroad spikes are then
divided into 2 piles, the
regular spikes and the high carbon spikes (you can tell by the HC on
the head of the spike). The high carbons are used on tracks in
places
of stress or curves.
With my charcoal
going, I simply turn my hair dryer on, get the fire and coals nice and
hot, and put my metal in to begin. The metals I usually use are
old
hand files that are now dull and have little value to most people, so
they can be obtained pretty cheap from a flea market or garage
sale. I
also use alot of old railroad steel found near local tracks by my
parents. Most of the time it's railroad spikes but every so often
there
are other random pieces of steel. The railroad spikes are then
divided into 2 piles, the
regular spikes and the high carbon spikes (you can tell by the HC on
the head of the spike). The high carbons are used on tracks in
places
of stress or curves.
From the forge, the metal is
extremely hot and
usually an orange to red color. I then take my tongs and put the
piece
on the anvil, then using my 3# Cross Peen or my 2# ball peen hammers, I
start to shape, draw out, and work the metal to my desired
product. It
does take many heatings and repeated sessions on the anvil, but in the
end the product is then  quenched in used motor oil to cool
it. I then
clean all of the oil off the item, polish it to the smoothness I want
for
that item (higher polish for knife blades, less for tomahawks, tools,
and other items) and temper it in an oven for around an hour.
quenched in used motor oil to cool
it. I then
clean all of the oil off the item, polish it to the smoothness I want
for
that item (higher polish for knife blades, less for tomahawks, tools,
and other items) and temper it in an oven for around an hour.
Once the metal is out of the
oven, it's usually set in a handle, I make a leather sheath,
and it's done. The only thing I'm actually paying for now
everytime I
use my forge is the little electricity to run the dryer/blower, and if
you're worried about that you can use a hand bellows just like in the
1800s. I've made knives, tomahawks and hatchets, chisels,
mountain man
flint strikers, and other items out of the scrap steel found along the
tracks or out of used files. The next goal is to forge weld some
cables into billets to make knives, and maybe even a sword out of.
Editor's
Note: I asked David how much his startup costs were and he estimates it
cost him $20 to make the forge, $13 for tools he didn't already have,
and $38 to build the anvil; everything else was supplies he already had
on hand. I suspect the setup would have paid for itself nearly
immediately if he charged the friends who have put in orders for
specific items like a lightweight hatchet/tomahawk with a hammer head,
Japanese style blades, and filet knives for processing game.
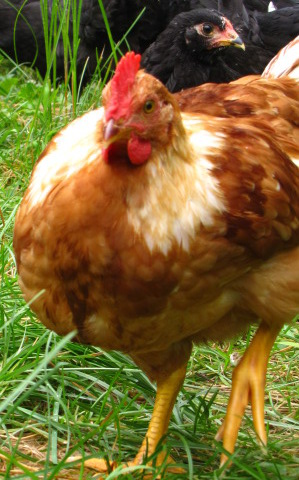 We've lost a few chicks this year
to an unknown predator.
We've lost a few chicks this year
to an unknown predator.
Last year we kept them inside till they got big enough to go out in the
world. They didn't have any problems with predators, but their foraging
skills seemed to be lacking enthusiasm.
This year we decided to get the chicks outside sooner. I'm not sure if
it was the new breed, the mother
hen, or getting on real ground sooner, but they're already better
foragers than last
year's flock.
I've considered building an automatic
chicken coop door closer, but there are so many other things on the
growing season to-do list that we've decided to absorb the loss as a
price of doing business in a more natural fashion.
 How do you know when your
wheat is ripe? First, let's start with the technical answer.
How do you know when your
wheat is ripe? First, let's start with the technical answer.
If you grew winter
wheat, in late
spring the heads will bulk up and turn beautiful, then the plant will
start to turn brown. At that point, squeeze a seed between your
thumb and forefinger to test it once or twice a week. At first,
the wheat seeds will exude a milky substance just like sweet corn does
when it's ripe, but then the punctured seeds will stop oozing (although
they will still dent under your thumbnail.)
You can start harvesting
as soon as the wheat seeds pass the milk stage, although the grains
will need to dry up and harden a bit before they're ready to eat.
It's best to go ahead and harvest on the early side since if you wait
too long, the heads will "shatter", meaning that the grains will fall
onto the ground.
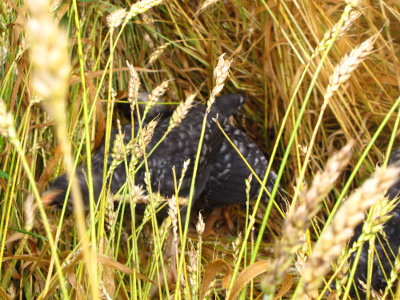 Now for the fun way to tell
if your wheat is ready to harvest --- that overlooked part of your
garden will suddenly become a magnet for animal life. First, it
was just a cardinal who took to perching on the gate of the
wheat-filled chicken pasture, but then our second
round of chicks
decided it was worth leaving the ragweed forest to see what all the
fuss was about. When I found six chickens knocking down the wheat
stalks, I knew it was time to pull the grain out of there.
Now for the fun way to tell
if your wheat is ready to harvest --- that overlooked part of your
garden will suddenly become a magnet for animal life. First, it
was just a cardinal who took to perching on the gate of the
wheat-filled chicken pasture, but then our second
round of chicks
decided it was worth leaving the ragweed forest to see what all the
fuss was about. When I found six chickens knocking down the wheat
stalks, I knew it was time to pull the grain out of there.
As for how to harvest the wheat ---
we're still crossing that bridge. Stay tuned for a later post.
 Did
you ever wonder if the same mulch is appropriate for your peach tree
and your tomato plants? Have you been itching to create your own
recipes? The July edition of Weekend Homesteader covers these
topics and more as it walks you
through:
Did
you ever wonder if the same mulch is appropriate for your peach tree
and your tomato plants? Have you been itching to create your own
recipes? The July edition of Weekend Homesteader covers these
topics and more as it walks you
through:
- Cooking up a pot of soup
- Budgeting your life
- Mulching the garden
- Freezing produce
As usual, Weekend
Homesteader: July is
available for just 99 cents in Amazon's Kindle store. And if you
don't have the spare cash, or just don't want to deal with downloading
an app so you can
read the ebook on your computer or phone, just email
me and I'll send you a free pdf copy.
 For those of you who'd
like to help me out, reviews seem to be the most important way (beyond
buying the ebook) to move it up in the rankings so that random
strangers give an unknown author a shot. If you get a chance,
please take a minute to review the July edition after you read it, and
I'm always looking for reviews of past ebooks, especially Weekend
Homesteader: June.
Thanks for taking the time to make Weekend Homesteader a success!
For those of you who'd
like to help me out, reviews seem to be the most important way (beyond
buying the ebook) to move it up in the rankings so that random
strangers give an unknown author a shot. If you get a chance,
please take a minute to review the July edition after you read it, and
I'm always looking for reviews of past ebooks, especially Weekend
Homesteader: June.
Thanks for taking the time to make Weekend Homesteader a success!
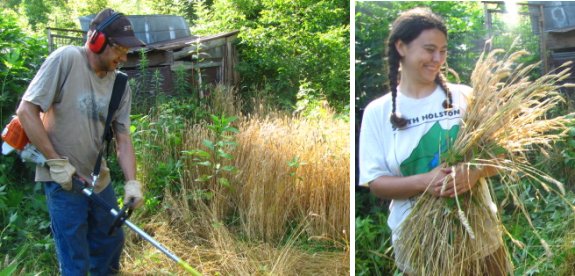
The new Polycut
attachment for the weed
eater did a quick job of cutting down this
year's wheat crop.
What worked well for us was
me cutting a small section and stepping back while Anna gathered up the
wheat.
Teamwork on a
job like this helps to get it done quicker, and in my opinion adds a
little bit of fun to the mix.
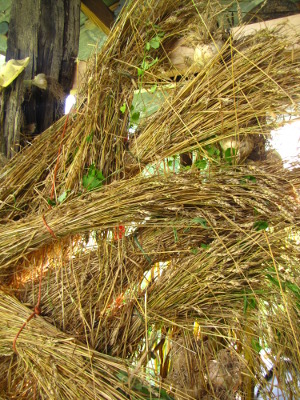 The
majority of our
wheat maxed out
around knee-high and the heads were far smaller than they should have
been. I suspect that the main problem was planting too thickly
because the wheat along the edge of the path where most of the plants
got trampled and died was over twice as tall as average and had seed
heads three times as long. But I also should have left the
chickens in that pasture longer after they ate up last summer's
buckwheat so that they could fertilize the field a little more.
Live and learn.
The
majority of our
wheat maxed out
around knee-high and the heads were far smaller than they should have
been. I suspect that the main problem was planting too thickly
because the wheat along the edge of the path where most of the plants
got trampled and died was over twice as tall as average and had seed
heads three times as long. But I also should have left the
chickens in that pasture longer after they ate up last summer's
buckwheat so that they could fertilize the field a little more.
Live and learn.
Since so many of the
stalks were puny, I knew shocks wouldn't have enough structural
integrity to dry the wheat. Instead, I tied clumps with baling
twine (leftover from straw bales) and hung them up with the
garlic under our
"porch." I might try to thresh a bit of the wheat when it's
thoroughly dried, but at the moment I'm thinking that it will make a
good treat for the chickens as is. If I threw a handful of wheat
on the stalk into the coop, the chickens could pick through to get the
grain, then scratch the straw around to refresh their deep
bedding.
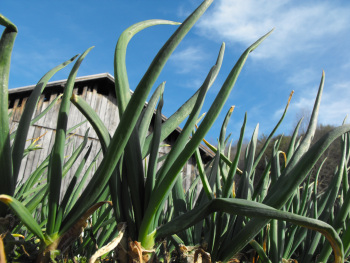
The
Egyptian onions have had another bumper year
of top-bulb production, but that's no surprise because every year seems
to be a bumper year if you're an Egyptian onion. Last year, I
sold the onions, but this year I've decided to give them away to our
loyal blog readers. This post is the first in a line of giveaways
--- I'll keep giving until they're all gone --- so don't feel bad if
you don't win.
What
will I get?
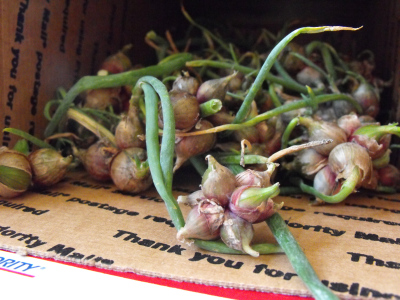 One
lucky winner will get a small, flat rate box full of Egyptian onion top
bulbs. That's multiple hundred bulbs, which is plenty to keep a
good sized family in green onions for ten months of the year. You
might even have some to give to your neighbors!
One
lucky winner will get a small, flat rate box full of Egyptian onion top
bulbs. That's multiple hundred bulbs, which is plenty to keep a
good sized family in green onions for ten months of the year. You
might even have some to give to your neighbors!
How do I enter?
To enter our
Egyptian onion giveaway, you'll need to have bought at least one of our ebooks from Amazon in 2011, or have emailed me for a free copy.
You'll be entered once for every book you buy (or email for), and since this is a
retroactive giveaway, if you bought each of our ebooks as it came out,
you could already be entered six times.
 Amazon
won't tell me who bought my ebooks, so you'll need to leave a comment
on this post letting me know how many times I should put your name in
the pot. Yes, this is on the honor system --- I figure none of
you are going to lie about how many ebooks you bought. Just be
sure to make your comment before the deadline --- June 28 at midnight.
Amazon
won't tell me who bought my ebooks, so you'll need to leave a comment
on this post letting me know how many times I should put your name in
the pot. Yes, this is on the honor system --- I figure none of
you are going to lie about how many ebooks you bought. Just be
sure to make your comment before the deadline --- June 28 at midnight.
Don't forget to check
back next Wednesday to see if you won, and then drop me an email with
your mailing address so I'll know where to send your onions. If I
don't hear from the first winner by Friday morning, I'll move on to
someone else.
Good
luck, and thanks for helping our ebooks see the light of day!
These 5 foot high rolls of
chicken wire are my new favorite form of poultry corralling.
Our local independently owned
hardware store special ordered them for us. The highest chicken wire I
was able to find at Lowe's was only 3 feet long and cost almost as much
as the bigger roll.
If you look closely you can
see 2 separate strands of slightly thinner wire holding the roll
together. What I've found works best is to cut that thinner wire
somewhere around the middle and start pulling. Do this again for the
other thin wire and you're ready to start fencing in your flock.
Succession planting will
take you a tiny bit more time (and more mental energy) than throwing in
your garden all at once, but it's worth the extra effort. Here
are the top reasons to succession plant.
As I've mentioned
before, you
can beat bugs and diseases by planning your crops so that you've got a
new bed ready to take over when the first bed succumbs.

With determinate plants
like sweet corn that bear all at once, succession planting is even more
mandatory. Wouldn't you rather eat corn on the cob throughout the
summer instead of having to deal with one big glut on the fourth of
July?
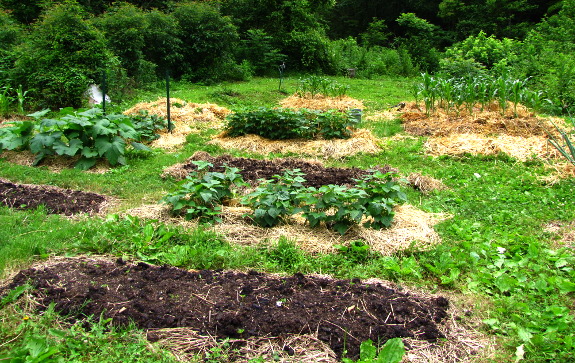
Succession planting
naturally breaks up garden work into bite-size chunks. Nearly
every week between the beginning of February and the middle of October,
I plant something. If I had to do all that work at once, I'd
probably cut back my garden's size by three quarters.
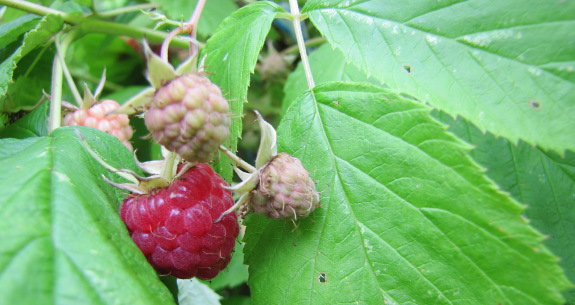
Technically, succession
planting consists of putting in a new bed of the same vegetable at
intervals throughout the growing season, but I take a more holistic
view of the concept. We plan our fruit and vegetable plantings so
that different crops span as much of the year as possible. As
soon as the strawberries end, the red and black raspberries are
bearing, then the blackberries, and so on. If you're a real pro,
you can plan your garden so that you've only got a glut of one type of
food that needs to be processed for the winter at a time, but I'm not
quite that good.
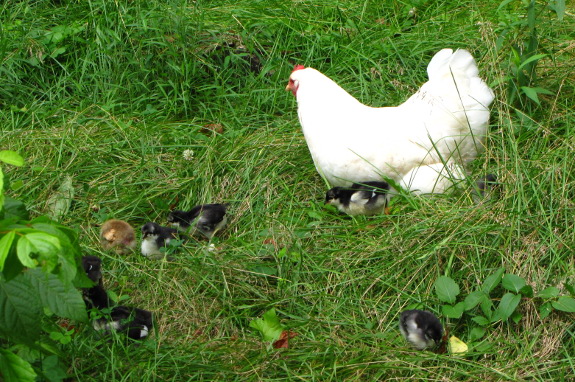
This year I even
"succession planted" our chickens. Rather than raising one big
batch of broilers and then spending all week butchering them, we've
started three smaller broods (and might incubate one more set of eggs
in July.) I'm still on the fence about whether this succession of
chickens saves work, but it does help our pastures stay green.
If you're sold on
succession planting, chances are you've still got an opportunity in
2011 to put the idea into practice. Here in zone 6, there's a lot
more succession planting of summer crops ahead and the fall garden is
also going into the ground in stages. Take a look at our summer
planting and fall
planting charts to
find out what you can plant in your neck of the woods.
I had some trouble with the
pull rope on our push
mower yesterday.
One of the things I like
about this mower is how easy it is to take apart. A good socket set
along with a philips screwdriver was all that was needed to get to the
pull rope mechanism.
The problem was a small twig
that had somehow found its way inside preventing the rope from
activating the plastic fingers that spring out and catch the flywheel
so it can turn as you pull the rope.
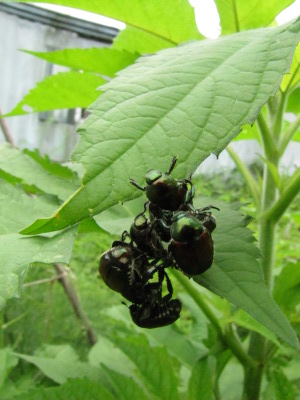 We always have some Japanese
beetles, but they
usually stay on the cherry tree, raspberries, and grapes. This
year, I have to walk through the whole garden picking bugs because the
invasive pests are chowing down on everything from Swiss chard and corn
to breadseed poppies.
We always have some Japanese
beetles, but they
usually stay on the cherry tree, raspberries, and grapes. This
year, I have to walk through the whole garden picking bugs because the
invasive pests are chowing down on everything from Swiss chard and corn
to breadseed poppies.
I can't quite figure out
what tipped the balance to create this shift. Perhaps Mark's been
keeping the lawn mowed too well so the larval stage is happier, or
maybe ripping out those French
grapes deleted my trap crop and spread the insects far and wide? Another option would
be this year's rainy weather since drought can kill Japanese beetles in
the grub stage.
Whatever the cause, I've
been handpicking like crazy and making no dent. I fed a full cup
of Japanese beetles to the chickens on Thursday and immediately saw
more insects that I'd missed. I'd be curious to hear if you're
overrun with more Japanese  beetles than usual this year
or if the plague is confined to my garden.
beetles than usual this year
or if the plague is confined to my garden.
The good news is that
our predatory insects might take up the slack before long. I've
seen hundreds of small praying mantises this year, so hopefully some of
them will rise to the occasion. Meanwhile, I started noticing
assassin bugs hanging out where the Japanese beetles land and even saw
one Japanese beetle husk --- the hard carapace remained but nothing
inside.
I think this guy is,
more specifically, a nymph Wheel Bug (Arilus
cristatus), but
all assasin bugs work pretty much alike. They use those long
mouthparts (see the yellow bit curving down below the insect's face?)
to stab insects and inject a chemical that liquifies the prey's
internal organs. Then the bugs simply suck their dinner
dry. Take that, you Japanese beetles!
 Maybe
this will be the year our 3
Hardy Kiwi
plants will start blooming?
Maybe
this will be the year our 3
Hardy Kiwi
plants will start blooming?
2011 is the first time they
went up high enough to merit a 2nd level to
the trelis.
I had some doubts on if they
were going to make it the first couple of
years, but now I've got a more optimistic view thanks to this
recent growth spurt.
Video credit goes to
ediblelandscaping.com who recommends pruning every 3 weeks in the
summer for an amazing bush like effect.
 We've been experimenting with
potato onions for two years now, and I'm
ready to pronounce them a failure. On paper, the perennial onions
looked like a great choice since you can easily save sets and don't
have to buy seeds (and baby them in the early spring.)
We've been experimenting with
potato onions for two years now, and I'm
ready to pronounce them a failure. On paper, the perennial onions
looked like a great choice since you can easily save sets and don't
have to buy seeds (and baby them in the early spring.)
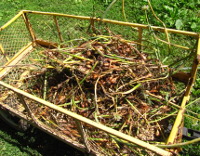
And this year's harvest
looks pretty good when I tell you that I pulled about fourteen pounds
of onions out of seven garden beds. The problem is that we've
never been able to get more than a few of our potato onions to exceed
an inch in diameter. Peeling enough potato onions to equal one
seed-started onion would take half an hour!
I've tried every trick I
could think of to get my potato onions to make bigger bulbs instead of
just lots and lots of small bulbs. I've tried different
planting dates,
snipped off the flowers when they appeared, and even dreamed that Eric
Toensmeier was right and you have to plant small bulbs to get big onions. No dice.
Even though we're not
going to replant any of this year's potato onions, I'm not quite ready
to give up on the idea of potato onions. I've noticed that
Southern Exposure Seed Exchange has stopped selling the Loretta Yellow
Multiplier Onions we bought from them and are now offering a different
variety. Maybe too many people complained and they came up with a
better option?
I'd be curious to hear
if any of you have had better luck with potato onions. Any onions
that head up to a decent size? If so, what variety did you grow?
 We recently upgraded our drill
press with the plan of increasing our production of automatic chicken
waterers by sending the old drill to a local friend so he can start
doing some of the work.
We recently upgraded our drill
press with the plan of increasing our production of automatic chicken
waterers by sending the old drill to a local friend so he can start
doing some of the work.
The design is basically the
same as the old drill press with the addition of a safety switch that
can be turned off easier if you have some sort of difficulty.
It's also got a battery
powered laser that shines two intersecting lines where the drill bit is
expected to first bite.
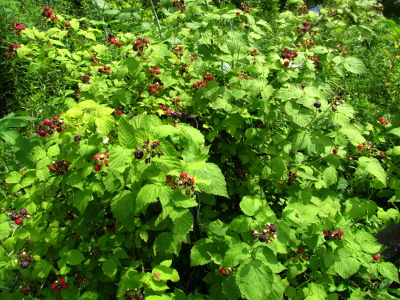 Last summer, I took two
minutes to pinch
off the tops of my black raspberry and blackberry primocanes
(the new shoots coming up that year.) This topping prompted the
brambles to bush out, and the black raspberry harvest this year has
been phenomenal.
Last summer, I took two
minutes to pinch
off the tops of my black raspberry and blackberry primocanes
(the new shoots coming up that year.) This topping prompted the
brambles to bush out, and the black raspberry harvest this year has
been phenomenal.
What started as a single
plant two years ago is now a bush six feet long, but narrow enough that
I can reach inside and get all the berries without a scratch.
While brambles are very resilient and require nearly no care, I 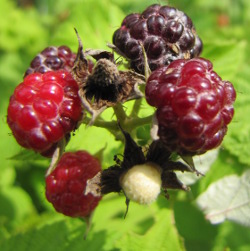 know that I'm much more
inclined to pick the fruits daily if I don't have to crawl inside a
sprawling briar patch of rooted canes.
know that I'm much more
inclined to pick the fruits daily if I don't have to crawl inside a
sprawling briar patch of rooted canes.
There's no decline in
yield resulting from the pruning either. My black raspberry plant
has produced half a gallon of berries in the last week and a half, and
more are yet to ripen. In fact, I've already snipped off the tops
of this year's primocanes in hopes of a similar large and easy harvest
in 2012.
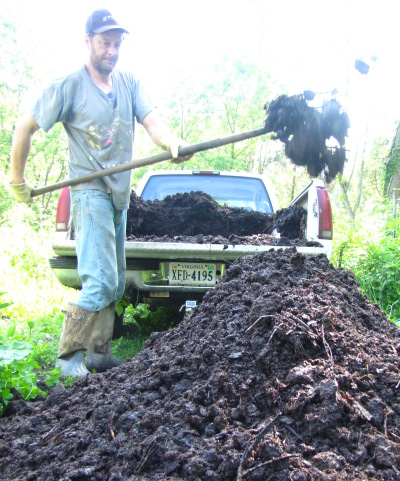 I was listening to a heated
discussion on a podcast the other day and one guy said to his
opponent, "that's a load of horse manure!" with the implication that
what he was saying was untrue.
I was listening to a heated
discussion on a podcast the other day and one guy said to his
opponent, "that's a load of horse manure!" with the implication that
what he was saying was untrue.
It occured to me that whoever
started this saying must have been a city slicker of the type that
never got his hands dirty and was most likely annoyed at the smell of
horse manure.
In my world not much out
there is truer than a large load of decomposed, smelly, horse dung.
Part of the charm for me is the smell. A sure signal that its still got
some organic life left in it.
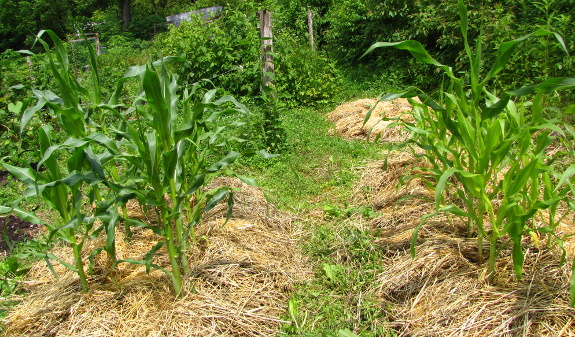
After sunlight and
water, nitrogen is the most common factor limiting plants'
growth. Can you see how the corn plants on the right have leaves
a shade yellower than the ones on the left? These yellow-green
leaves are a sure sign of nitrogen deficiency, in this case due to the spring
cover crops eating
up the compost and not rotting fast enough to give that nitrogen back
to the corn.
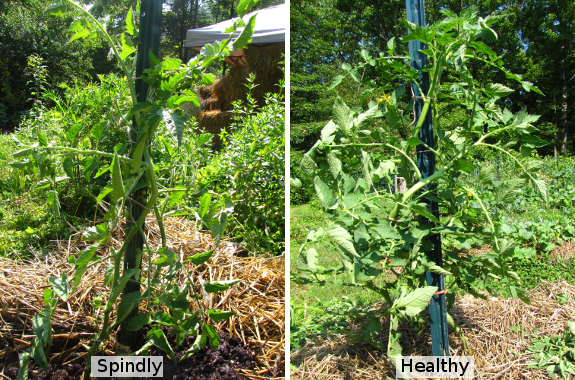
Or take a look at the
tomatoes above. The two are the same variety, started from seed
at the same time, but when I transplanted the tomato on the left into
an old hugelkultur
mound, I forgot to add any compost. The plant looks okay
color-wise but is spindly (which can also be a sign of too much shade,
though not in this case.) It's a bit tough to tell from the
photo, but the healthy tomato is half again as tall and twice as bushy
as its nitrogen-starved sibling...and that's after I cut off about half
of the plant's bulk in a severe pruning just before taking the picture.
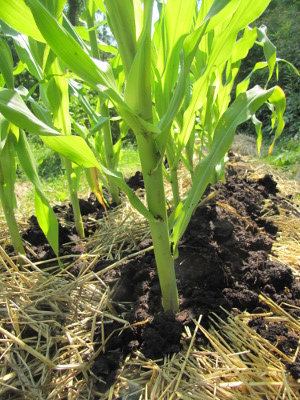
Luckily, a nitrogen
deficiency is extremely easy to fix. First, I look at the problem
short term and find a way to give the plants a dose of liquid
fertilizer. I opted to water
down some urine and
pour it into the soil around the troubled plants' roots, but you could
also make some compost or manure tea.
The next step is to
solve the problem long term by top dressing around the plants with
nitrogen-rich compost. Cover the compost up with a little extra
mulch and
I'm all done. No more nitrogen deficiency on our farm!
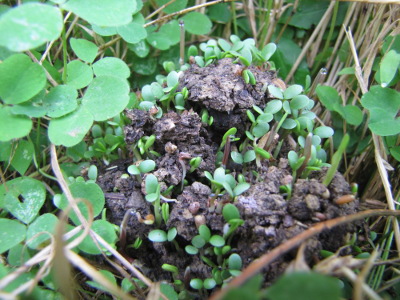 A seed ball is just what it
sounds like --- a globe of earth and seeds. Masanobu Fukuoka was
probably the first person to come up with the idea of seed balls as
part of his do-nothing
grain experiments,
but nowadays you mostly hear about seed balls from guerrilla gardeners
who use the tool to introduce floral diversity to urban
environments. Seed balls also go by the name "seed bomb," "earth
ball," "nendo dango," and "tsuchi dango."
A seed ball is just what it
sounds like --- a globe of earth and seeds. Masanobu Fukuoka was
probably the first person to come up with the idea of seed balls as
part of his do-nothing
grain experiments,
but nowadays you mostly hear about seed balls from guerrilla gardeners
who use the tool to introduce floral diversity to urban
environments. Seed balls also go by the name "seed bomb," "earth
ball," "nendo dango," and "tsuchi dango."
The purpose of a seed
ball is to make it easy to plant seeds without tilling
the ground. If you're gardening in a no-till system, you can
often just rake the mulch back and broadcast 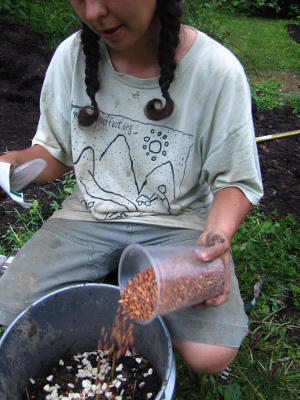 your seeds on the soil
surface, but sometimes
your seedlings will perish if they dry out too fast due to sun
exposure. Other times, birds
come along and snack on the seeds ---
this happened to me with some of my forest pasture plantings. If
your seeds are enclosed in a ball of earth, they'll be a bit more
protected without requiring you to dig up the ground to insert your
seed.
your seeds on the soil
surface, but sometimes
your seedlings will perish if they dry out too fast due to sun
exposure. Other times, birds
come along and snack on the seeds ---
this happened to me with some of my forest pasture plantings. If
your seeds are enclosed in a ball of earth, they'll be a bit more
protected without requiring you to dig up the ground to insert your
seed.
Seed balls have other
advantages as well. Guerrilla gardeners like the way you can toss
a seed
ball surreptitiously into someone else's yard without anyone
noticing. And Masanobu Fukuoka developed seed balls so that he
could plant several months' worth of crops at the same time, putting
rice, clover, and rye all in the same chunk of earth.
I've always been a bit
dubious about seed balls, but last week, I decided to try seed balls
for the first time. This week's lunchtime series covers my
experiment with this fun permaculture method.
| This post is part of our Seed Ball lunchtime series.
Read all of the entries: |
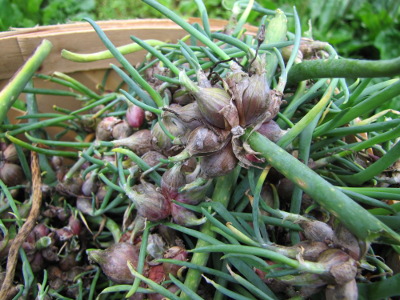 We ended up with another huge
basket of Egyptian onion top bulbs. (Thanks, Errol!)
We ended up with another huge
basket of Egyptian onion top bulbs. (Thanks, Errol!)
You've still got a day to enter our other Egyptian
onion giveaway, but we want to thank our most loyal reader even
sooner. So, the first U.S. reader who comments on this post will
win a small flat-rate box full of Egyptian onion top bulbs.
Thanks for reading!
(If you win, be sure to email
Anna with your mailing
address.)
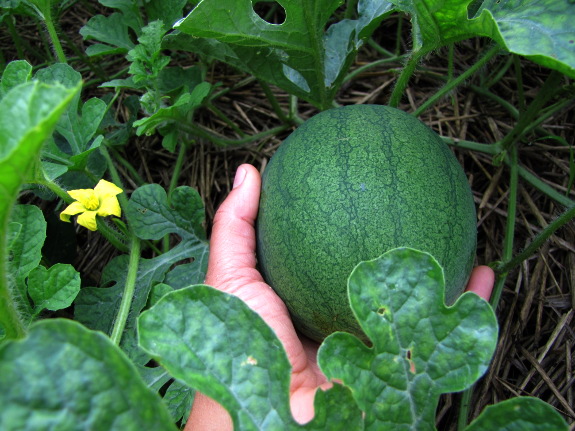
Mark and I were gone
from the farm for 34 hours this past weekend to help my father
celebrate his 70th birthday. When we got home, I couldn't believe
how much our garden had grown in that small span of time. For
example, I'm pretty sure our biggest watermelon doubled in size over
the weekend.
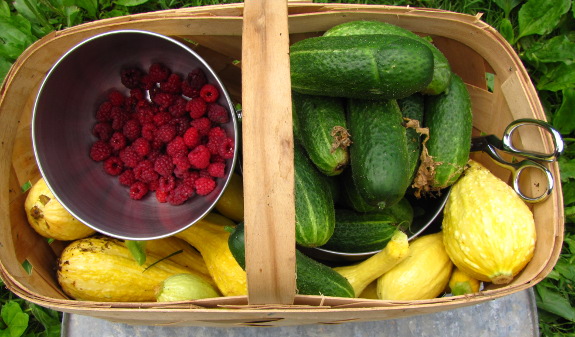
I picked every
moderately sized cucumber just before we left, feeding us cukes for
lunch and supper and even cutting up the last few to eat as road
food. I also dried about half a gallon of summer squash (which
turned into two cups of brilliant yellow morsels.) This basket
shows what I was faced with when I returned...and I haven't even
started picking the beans.
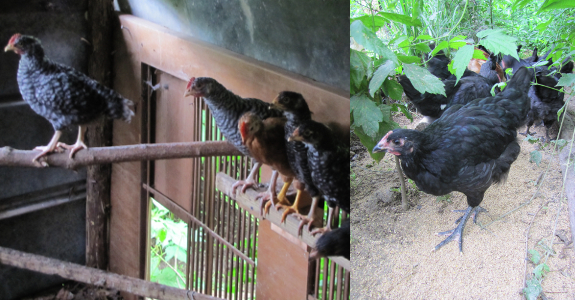
And then there are the
chickens. You wouldn't think that animals would grow enough to
notice in just a couple of days, but the birds from hatch 2 suddenly
feel like tweens. Which means the tweens are...dinner?
 Like many other oft-mentioned
permaculture methods, I have a gut feeling
that seed
balls work better on
paper than in reality. In my neck
of the woods, at least, weeds grow very fast, and a seed ball tossed
into an abandoned lot isn't going to make any headway against the
blackberry brambles and goldenrod. Anything except the very
lowest maintenance plants are also going to suffer from lack of
nutrients.
Like many other oft-mentioned
permaculture methods, I have a gut feeling
that seed
balls work better on
paper than in reality. In my neck
of the woods, at least, weeds grow very fast, and a seed ball tossed
into an abandoned lot isn't going to make any headway against the
blackberry brambles and goldenrod. Anything except the very
lowest maintenance plants are also going to suffer from lack of
nutrients.
That said, I think that
seed balls can be successful in very select
environments. If you run across an area in the city where all of
the topsoil has been bulldozed away and the ground is bare, seed balls
of clover will probably be quite helpful. And if you've harvested
one
planting in a low-weed garden environment and want to start another
without disturbing the soil, you
might also have luck with seed balls.
Seed balls are most
appropriate for very low maintenance crops, so you'll be best off  choosing from these options:
- Wildflower mixtures are a favorite of urban guerrilla gardeners.
- Weedy dynamic accumulators are useful in degraded urban environments.
- Grain and clover mixtures are appropriate for do-nothing grain plantings as long as the ground is pretty much weed-free.
For my first experiment,
I chose to focus on the third option. I haven't had very much
experience with seed balls yet, though, so I hope those of you who have
experimented more will chime in and tell me about your successes and
failures.
| This post is part of our Seed Ball lunchtime series.
Read all of the entries: |
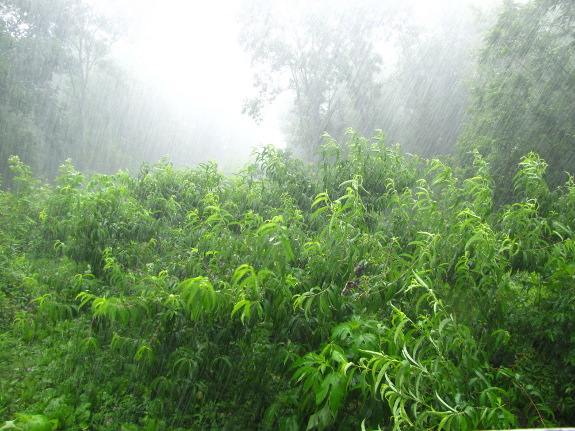
Today was a good day to let our souls catch up with our bodies after a
long but fast trip south. Why wait until you have to take a sick day
when you can instead enjoy a day of rest?
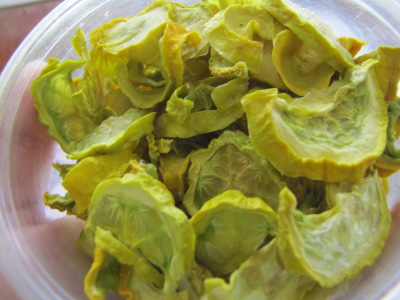 Summer squash will
freeze, but the vegetable turns mushy and is really only appropriate to
hide within tomato sauces and soups afterward. Since our glut of
summer squash is already beginning, I decided to see if they would dry
any better.
Summer squash will
freeze, but the vegetable turns mushy and is really only appropriate to
hide within tomato sauces and soups afterward. Since our glut of
summer squash is already beginning, I decided to see if they would dry
any better.
For most vegetables,
including summer squash, you'll end up with much better results if you
blanch before drying. To blanch, place cut up squash in a covered
steamer above a pot of boiling water for a couple of minutes, stirring
as necessary, until the colors turn bright. (This is the same way
you blanch before
freezing.)
If you want to make
squash chips, sprinkle some salt on your blanched squash. I've
been told that squash chips make a healthy and delicious snack, which I
can believe from nibbling on an unsalted chip, but we opted to dry
without salting so that the squash would be appropriate for winter main
dishes.
Then dehydrate your
squash at 125 degrees Fahrenheit for up to 12 hours. I wasn't
very careful to cut my slices all the same thickness, so I took out
about half the squash after 5 hours, another quarter at 6 hours, and
the final set at 7 hours. Your squash is dry if it's crispy in
consistency with no damp pockets that give between your fingers.
You'll soon be able to tell whether squash is dry at a brief touch.
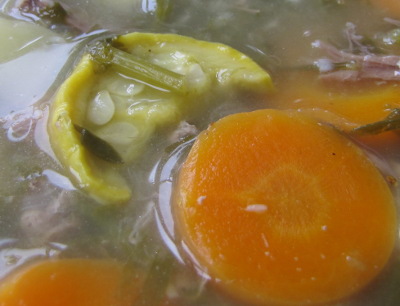 We'll store our dried veggies
in the freezer while there's space, then
move them to the fridge in late summer when iced accommodations get
scarce. I
figure one cup of dried squash is equivalent to maybe 4 cups of frozen
squash, so even if we kept the squash in the freezer full time, we'd be
ahead of
the game.
We'll store our dried veggies
in the freezer while there's space, then
move them to the fridge in late summer when iced accommodations get
scarce. I
figure one cup of dried squash is equivalent to maybe 4 cups of frozen
squash, so even if we kept the squash in the freezer full time, we'd be
ahead of
the game.
We tested our dried
crooknecks in a soup and decided that the flavor was much better dried
than frozen, nearly as good as fresh. A definite success, and our
new method of saving summer squash for the cold months.
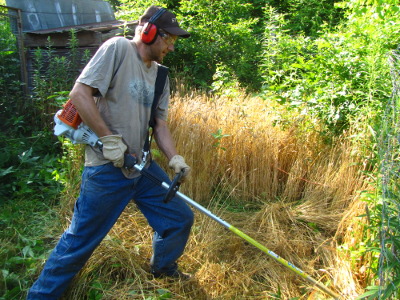 Before I tell you how to make
a seed ball, I wanted to catch you up on a year and a half of
do-nothing grain experiments. The goal is to create a nearly
self-sufficient grain patch using Fukuoka's
natural gardening techniques but tweaked to match the
southeastern U.S.'s climate.
Before I tell you how to make
a seed ball, I wanted to catch you up on a year and a half of
do-nothing grain experiments. The goal is to create a nearly
self-sufficient grain patch using Fukuoka's
natural gardening techniques but tweaked to match the
southeastern U.S.'s climate.
Experiment one consisted
of leaving the chicken tractor on a patch of ground for a month in late
winter 2010, then throwing
hull-less oat and red clover seeds onto the bare soil. Wild birds ate a lot
of the oat seeds and the chickens hadn't really killed the perennial
grasses and weeds, so I ended up with a
very small showing of oats and a healthy patch of red clover (still quite visible in the
yard.)
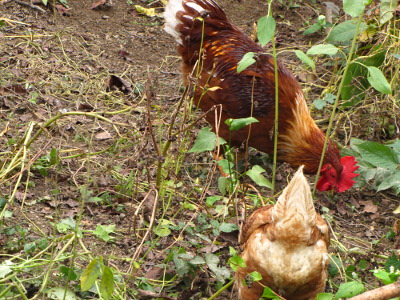 For part two of my do-nothing
experimentation, I decided to move my patch to the nearly bare earth of
our first, over-grazed chicken pasture. Mark helped me root out
most of the perennials left in place, then I raked buckwheat and red
clover seeds into the soil in late June 2010. The buckwheat came
up well, but didn't
do as much as I'd hoped because of lack of water. (The red clover
didn't seem to come up at all.) I turned the chickens into the
buckwheat paddock in October, and they ate up the bit of buckwheat that
was produced in a mere four days.
For part two of my do-nothing
experimentation, I decided to move my patch to the nearly bare earth of
our first, over-grazed chicken pasture. Mark helped me root out
most of the perennials left in place, then I raked buckwheat and red
clover seeds into the soil in late June 2010. The buckwheat came
up well, but didn't
do as much as I'd hoped because of lack of water. (The red clover
didn't seem to come up at all.) I turned the chickens into the
buckwheat paddock in October, and they ate up the bit of buckwheat that
was produced in a mere four days.
Although the yields were
disappointing, the good thing about the buckwheat experiment was that
the combination of the crop and the chickens' harvest method deleted
nearly all weeds from that paddock. I had no trouble raking
wheat seeds into the ground near the end of October, and
the
grain grew pretty well
(although I think it suffered from overseeding and perhaps a small
drought.)
 Despite my growing pains
starting the do-nothing system, I can tell that I'm starting to develop
the kind of planting Fukuoka was advocating. When we
cut the wheat a
couple of weeks ago, I noticed clover sprouting up through the dead
stalks, just like Fukuoka predicted. Those red clover seeds had
sat in the ground until they were ready to grow, and are now busy
fixing atmospheric nitrogen to fertilize the grain field.
Despite my growing pains
starting the do-nothing system, I can tell that I'm starting to develop
the kind of planting Fukuoka was advocating. When we
cut the wheat a
couple of weeks ago, I noticed clover sprouting up through the dead
stalks, just like Fukuoka predicted. Those red clover seeds had
sat in the ground until they were ready to grow, and are now busy
fixing atmospheric nitrogen to fertilize the grain field.
The wheat stubble is
tenaciously holding the soil in place too, which brings me at last to
the subject of this week's lunchtime series --- seed
balls. I
needed a way of getting the next round of grain seeds to sprout without
hoeing up the soil, so I decided to give seed balls a try. Stay
tuned for tomorrow's post to see how I went about it.
| This post is part of our Seed Ball lunchtime series.
Read all of the entries: |
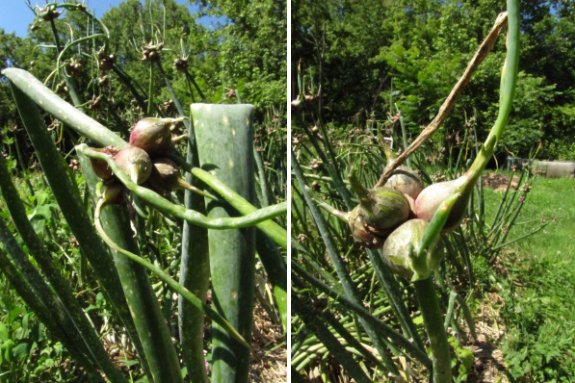
Thank you to everybody who
entered our Egyptian
Onion give away contest.
Dave V. is the winner this
time.
Just email us an address and
we'll put those in the mail this week.
 The cover crop experimentation theme during
our first year has been killing
without tilling.
Traditional farmers use one of two techniques to demolish their cover
crops --- they plow the greenery into the soil or they spray it will
herbicides. Since neither of those options is appropriate to my
garden, I've had to try out several other methods, including:
The cover crop experimentation theme during
our first year has been killing
without tilling.
Traditional farmers use one of two techniques to demolish their cover
crops --- they plow the greenery into the soil or they spray it will
herbicides. Since neither of those options is appropriate to my
garden, I've had to try out several other methods, including:
- Winter-kill. This is my
favorite technique for cover crops planted in late summer or fall that
will be replaced by vegetables in the spring or summer. All you
have to do to winter-kill is choose cover crops that will reliably die
during your winter's coldest days. We live in zone 6, and the two
cover crops that winter-killed well for us were oats and oilseed radishes. In contrast,
crimson clover, barley, and annual ryegrass all did not winter-kill. If you live
further south, you might not have any winter-kill choices, but
northerners probably have more cover crops to choose from.
- Mow-kill. Supposedly,
mow-killing can work if you have time to leave your cover crop in place
until it reaches full bloom. In practice, I found this kill
method tough to implement since I wanted to get my spring garden in
before the cover crops flowered. I'd only plan on mow-killing in
the future if I had plenty of wiggle room between cover crop maturation
time and vegetable planting time. The one exception to the
mow-kill problem is buckwheat,
which seemed to mow-kill quite reliably for me last summer.
- Smother-kill. You don't
read about this technique much in the agricultural literature because
it's not really something you'd do on the scale of a whole farm.
However, in your backyard garden, it's not too tough to mow your cover
crop down to the ground at any age, top it off with the inch of compost
you were going to add to the soil anyway, add a few inches of straw or
grass clippings, and wait a couple of weeks until the cover crop dies
from lack of sunlight. You can even plant big seeds like squash
directly into the compost immediately, and the cover crops will have
decomposed enough to feed the seedlings by the time their roots get
down to the lower layer. Just be sure to smother all the way to
the edge of your garden bed or you'll end up with a ring of cover crop
around your mulched center. I've only tried this technique on two
cover crop varieties so far, but it worked very well with barley and okay with annual ryegrass.
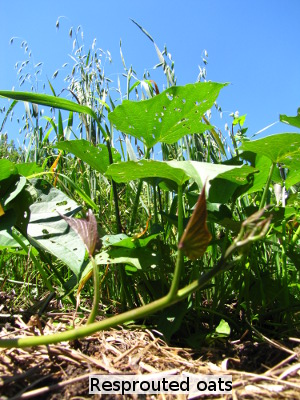 Weed-kill.
In a pinch, you can pull up your cover crops one at a time. Yes,
this is the method I used
this spring on a couple of dozen beds of oats, and yes, it did take
forever since I thought I could lay the oats back down on the soil
surface as a mulch and they instead rerooted and had to be weeded
again. In future, if I have to weed-kill, I'll take the cover
crops away to the compost pile --- the garden bed loses the biomass,
defeating the purpose of a cover crop, but at least I won't have to
keep weeding oats out of my sweet potatoes for two months.
Weed-killing should be a last resort, but it will work on any cover
crop.
Weed-kill.
In a pinch, you can pull up your cover crops one at a time. Yes,
this is the method I used
this spring on a couple of dozen beds of oats, and yes, it did take
forever since I thought I could lay the oats back down on the soil
surface as a mulch and they instead rerooted and had to be weeded
again. In future, if I have to weed-kill, I'll take the cover
crops away to the compost pile --- the garden bed loses the biomass,
defeating the purpose of a cover crop, but at least I won't have to
keep weeding oats out of my sweet potatoes for two months.
Weed-killing should be a last resort, but it will work on any cover
crop.
I'd be curious to hear
what your own experiences have been with killing cover crops without
tilling them into the soil. Am I missing any of the obvious
choices? Have you tried these techniques on cover crops I haven't
mentioned and had successes or failures to report? I'm still
learning and can benefit from anyone's experiences at this point.
 Recipes
for seed
balls vary, but the idea is to mix clay, compost
(sometimes), and seeds to make a globe that has enough structural
integrity that it can be tossed onto the ground without crumbling
apart. The compost is optional, but is a good idea if you're
going to use your seed ball anywhere other than in rich garden soil.
Recipes
for seed
balls vary, but the idea is to mix clay, compost
(sometimes), and seeds to make a globe that has enough structural
integrity that it can be tossed onto the ground without crumbling
apart. The compost is optional, but is a good idea if you're
going to use your seed ball anywhere other than in rich garden soil.
Most internet sources
recommend that you start with storebought,
powdered clay, but I couldn't stomach buying something our farm is made
of, so I just headed down to the creek 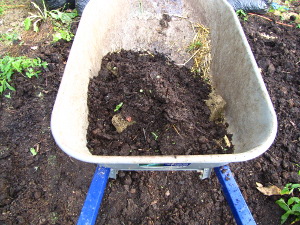 with a shovel. The
downside of using real clay instead of dried clay is that you'll have
to work a bit harder to mix the components, but who doesn't like
playing in the mud?
with a shovel. The
downside of using real clay instead of dried clay is that you'll have
to work a bit harder to mix the components, but who doesn't like
playing in the mud?
Seed ball mixtures range
from 5 parts clay and 1 part compost all the
way up to 5 parts clay and 3 parts compost. I chose a 2:1 clay to
compost ratio. To make just a few seed balls, you can do your
mixing by hand in a kitchen bowl, but I chose to whip up my seed ball
dough in a wheelbarrow
using a shovel, a trake, and my hands.
 Next, add your seeds. I eyeballed this
step, but the internet
suggests using a third as much volume of seeds as volume of
compost. Mix again until the seeds seem to be well distributed
through the soil mixture.
Next, add your seeds. I eyeballed this
step, but the internet
suggests using a third as much volume of seeds as volume of
compost. Mix again until the seeds seem to be well distributed
through the soil mixture.
If you're using dried
clay, you'll have to add water, but if you're
using real clay, the compost/clay mixture will be just the right
consistency automatically. Either way, the goal is be able to
roll out balls that hold together, but that don't turn
your hands too muddy.
 Fukuoka pushed his clay
mixture through a screen to make seed
balls, but I didn't have much luck with quarter inch hardware cloth and
instead made balls out of a small handful of material. The size
of your seed ball will
depend on your patience level and on what you're planting. Since
I was working with grains, I figured they wouldn't have too much
trouble coming up with several grains in a clump (a bit like a Native
American corn mound) as long as I spaced the seed balls far enough
apart.
Fukuoka pushed his clay
mixture through a screen to make seed
balls, but I didn't have much luck with quarter inch hardware cloth and
instead made balls out of a small handful of material. The size
of your seed ball will
depend on your patience level and on what you're planting. Since
I was working with grains, I figured they wouldn't have too much
trouble coming up with several grains in a clump (a bit like a Native
American corn mound) as long as I spaced the seed balls far enough
apart.
Some folks set their
seed balls out on cookie sheets to air dry, but I didn't find that step
to be necessary. Then it's finally time for the fun
part --- toss your seed balls where you wish!
| This post is part of our Seed Ball lunchtime series.
Read all of the entries: |
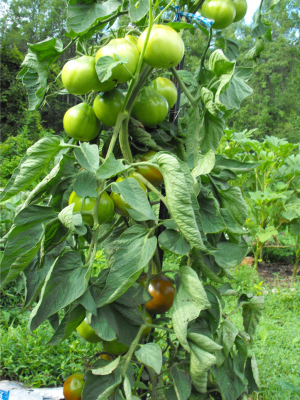 A
friend of mine asked me the other day "What's the big deal about eating a
Supermarket tomato?".
A
friend of mine asked me the other day "What's the big deal about eating a
Supermarket tomato?".
1. The average tomato farmer
in Florida spends 2000 dollars per acre in chemicals to kill all the
bugs, weeds, and molds.
2.You never know exactly
which chemicals are in play because they've got a huge arsenal to
choose from which includes endosulfan, azoxystrobin, chlorothalonil,
methamidophos, permethrin
trans, permethrin cis, fenpropathrin, trifloxystrobin, o-phenylphenol,
pieronyl butoxide, acetamprid, pyrimethanil, boscalid, bifenthrin,
dicofol p., thiamethoxam, chlorpyrifos, dicloran, flonicamid,
pyriproxyfen, omethoate, pyraclostrobin, famoxadone, clothianidin,
cypermethrin, clothianidin, cypermethrin, fenhexamid, oxamyl, diazinon,
buprofezin, cyazofamid, deltamethrin, acephate, and folpet.
You can read about more
industrial facts from segments
of Barry Estabrook's new book titled "Tomatoland" at Onearth.org.

Or explore more posts by date or by subject.
About us: Anna Hess and Mark Hamilton spent over a decade living self-sufficiently in the mountains of Virginia before moving north to start over from scratch in the foothills of Ohio. They've experimented with permaculture, no-till gardening, trailersteading, home-based microbusinesses and much more, writing about their adventures in both blogs and books.