
archives for 05/2011
 Mark
and I have had to make the hard decision to call our worm
bin project a
failure. Many of the problems have or could be fixed --- the bad
smell resulting from Lucy breaking into the compost
bin repeatedly and
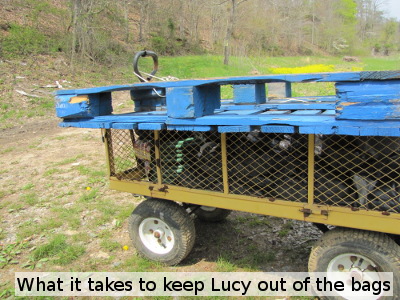
uncovering the scraps (solved), the trashy look and nastiness when Lucy
broke into the food bags before they went into the bin (solved), the
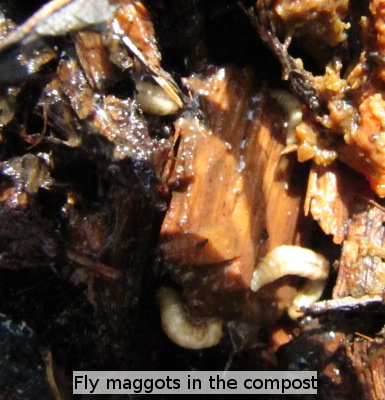
rat that made a home in the worm bin (solved), the flies that laid their
eggs in the compost bin at the advent of hot weather (solvable), the
"eww" factor when opening bags of old food scraps (solvable.) The
insurmountable problem is time.
Mark
and I have had to make the hard decision to call our worm
bin project a
failure. Many of the problems have or could be fixed --- the bad
smell resulting from Lucy breaking into the compost
bin repeatedly and
uncovering the scraps (solved), the trashy look and nastiness when Lucy
broke into the food bags before they went into the bin (solved), the
rat that made a home in the worm bin (solved), the flies that laid their
eggs in the compost bin at the advent of hot weather (solvable), the
"eww" factor when opening bags of old food scraps (solvable.) The
insurmountable problem is time.
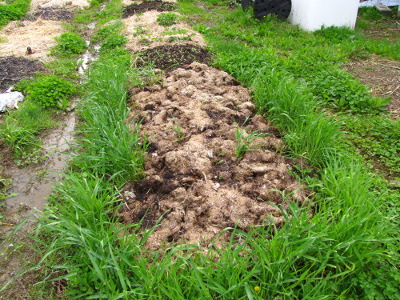
 Over
the last two months, I estimate that Mark and I have put in about
twenty hours picking up food scraps and doing worm
bin maintenance (not
counting the startup time.) In exchange, we've netted 1,226
pounds of food scraps, which I suspect might break down into about a
cubic yard of compost. To put that in perspective, it takes Mark
about two hours to shovel two cubic yards of amazing
horse manure
(basically worm castings) into the truck, or about three hours to drive
to town to pick up a similarly sized load of compost. Comparing
our worm bin project to these alternative methods of getting compost,
I'm afraid the juice just isn't worth the squeeze.
Over
the last two months, I estimate that Mark and I have put in about
twenty hours picking up food scraps and doing worm
bin maintenance (not
counting the startup time.) In exchange, we've netted 1,226
pounds of food scraps, which I suspect might break down into about a
cubic yard of compost. To put that in perspective, it takes Mark
about two hours to shovel two cubic yards of amazing
horse manure
(basically worm castings) into the truck, or about three hours to drive
to town to pick up a similarly sized load of compost. Comparing
our worm bin project to these alternative methods of getting compost,
I'm afraid the juice just isn't worth the squeeze.
 When
we embarked on the project, we had figured we'd feed some of the scraps
to our chickens, discovering just in time that we were going to be
breaking the law. If that had been possible, I suspect the food
scrap project would have been a success. The food scraps would
have been more valuable, replacing expensive storebought chicken feed
and the chickens would have dealt with rats, Lucy, and flies.
Alternatively, for folks who drive to school every day to pick up their
kids, the food scraps would have been fresh with less of a gross factor.
When
we embarked on the project, we had figured we'd feed some of the scraps
to our chickens, discovering just in time that we were going to be
breaking the law. If that had been possible, I suspect the food
scrap project would have been a success. The food scraps would
have been more valuable, replacing expensive storebought chicken feed
and the chickens would have dealt with rats, Lucy, and flies.
Alternatively, for folks who drive to school every day to pick up their
kids, the food scraps would have been fresh with less of a gross factor.
Although we're calling
it quits on collecting the school's food scraps, we aren't giving up on
worms. Now that the bin is rat-proof and the worm population is
expanding, I plan to give less-composted horse manure to the worms to
turn into castings. I suspect there will be no shortage of food
for our livestock.
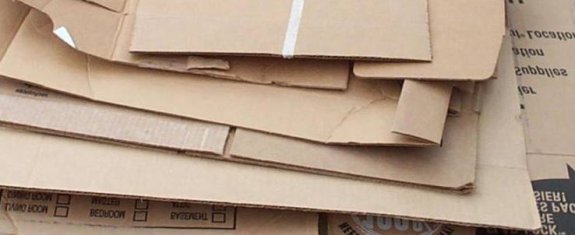
Old cardboard boxes have
found a place in our forest gardening plans as a cheap source of mulch.
We save all our household
cardboard and then get a decent amount from our chicken waterer business,
but it wasn't enough for Anna, and back in the winter she started
wondering where we could get more.
I went around to several
local retail stores and found out there is a new policy where stores
pack up their discarded boxes and ship it all back to the original
warehouse. That put a crimp in our cardboard mulching plans until
Kenneth, the super nice maintenance man at the local school where we
tried our worm experiment asked if we could use any "pasteboard",
which is what some folks call cardboard around this area.
They had a truckload and I
started getting more each time I went to pick up the food scraps for
the worm bin. I'm not sure what other places do with their waste
cardboard, but it might be a good source of mulch if you have a school
in your neighborhood.
I'm a big fan of autumn
cover crops
(especially oats and oilseed
radishes), but I'm
starting to feel like cover crops in the spring are more worry than
benefit. The trouble is that most of the fall crops that didn't winter-kill (annual
ryegrass and barley) and the cover crops I'm trialing this spring (oats and
field peas) don't
mow-kill very well. As the main spring planting date approaches,
I've ended up having to resort to more time-consuming measures to get
these cover crops out of the way without tilling.
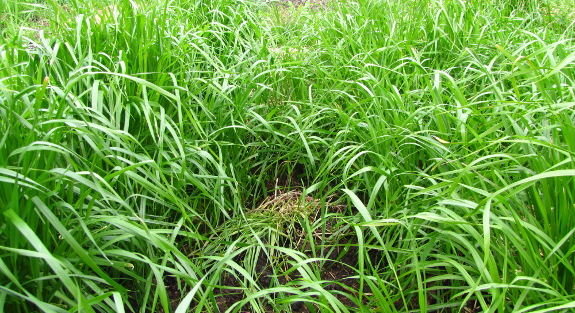
At the end of March, I cut
the barley and ryegrass as close to the ground as
possible and topped the beds off with an inch of manure and then a
heavy coating of mulch. This method was 95% effective for the
barley and about 75% effective for the ryegrass, although in both cases
the beds developed a ring of living cover crops (easy to mow repeatedly
and turn into part of the aisles.) I was left hand-weeding the
plants that were still poking up out of the middle of beds, a process
that is quite easy with barley but nearly impossible with
ryegrass. I suspect I may have to resort to a kill mulch to get rid of the ryegrass,
which won't be a big deal since I've planned late potatoes to go in
those beds and they'll enjoy the extra organic matter. Still,
it's a bit nerve-wracking to see greenery where I need to plant
shortly, especially since two months of flooding means we still can't
drive the truck off the farm to pick up more compost and mulch.
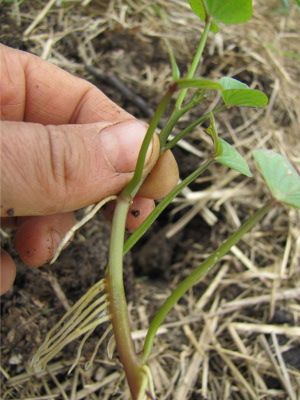
 Our
spring oats and field peas bounced right back when I tried to mow-kill
them, but since I'd put the beds' compost down when planting, I didn't
have enough allotted to smother these spring beds the way I did the
overwintering fall cover crops. Instead, I've been ripping up the
oats and peas and laying them sideways and upside down across the bed
--- pretty easy since oats come out of the ground without much
effort. The beds that I dealt with during a hot, dry spell now
have a straw-like mulch of dead oats on top, but I might have to reweed
the beds I dealt with during a rainy period.
Our
spring oats and field peas bounced right back when I tried to mow-kill
them, but since I'd put the beds' compost down when planting, I didn't
have enough allotted to smother these spring beds the way I did the
overwintering fall cover crops. Instead, I've been ripping up the
oats and peas and laying them sideways and upside down across the bed
--- pretty easy since oats come out of the ground without much
effort. The beds that I dealt with during a hot, dry spell now
have a straw-like mulch of dead oats on top, but I might have to reweed
the beds I dealt with during a rainy period.
Luckily, all of the
extra mulching we did this fall means the other garden beds are in
prime condition and I have time to mess around with experimental cover
crops. Once again, Mark was right --- it was worth every penny we
spent on mulch last year!
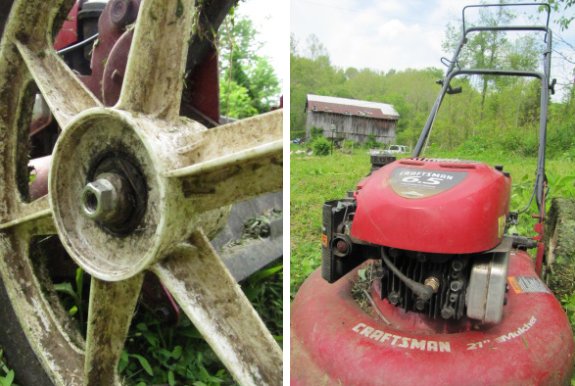
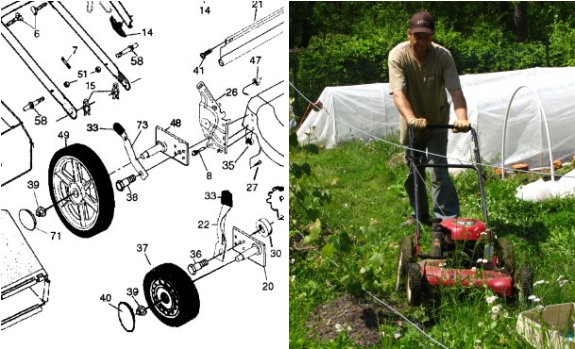
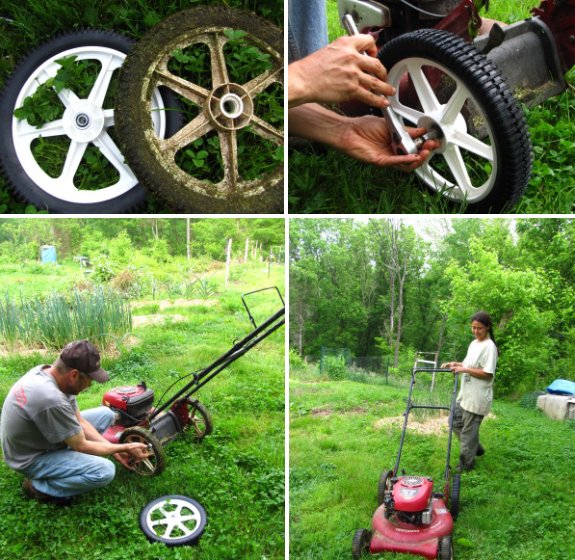
The walk behind mulching
mower still has a rear
wheel wobble due to a
parts mix up at the warehouse.
It only took about 10 minutes
to talk to a real person at Sears parts direct and I'm happy to report
the process of reporting the mistake was quick and painless thanks to a
very competent operator by the name of Fernando.
They said it would cost more
to ship the wrong wheel back to them and I should just keep it. Not
sure what I'll use it for, but this policy went a long way in helping
me to feel like a satisfied customer that will now patiently wait till
Thursday before they can ship out a proper rear wheel. In the meantime
I'll just roll with the wobble.
 On
April 21, our
hive had four full frames of brood, and I figured it might take
them about a week to reach the six frames I needed for an even
split. When
the week was up, though, the weather turned windy and rainy, so I
didn't get back into the hive until eleven days later...at which point
there were a whopping eight frames of brood!
On
April 21, our
hive had four full frames of brood, and I figured it might take
them about a week to reach the six frames I needed for an even
split. When
the week was up, though, the weather turned windy and rainy, so I
didn't get back into the hive until eleven days later...at which point
there were a whopping eight frames of brood!
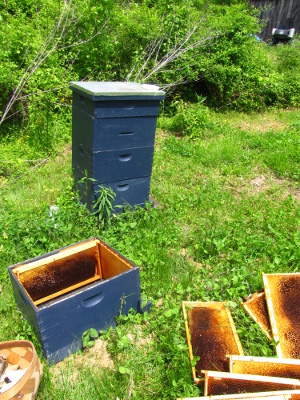
I brushed dead bees out
of one of the hives
that perished over the winter and filled the brood box up
with two frames of pollen, five frames of brood (two of which were
halfway honey), and three frames of honey. I didn't bother
brushing any bees into this new brood box because there were scads of
workers along for the ride already, especially once I took a whole
super of honey (full of more bees) off the top of our healthy hive to
add to its daughter hive.
The workers who were out
foraging when I messed up their home will all go back to the old hive,
and
any foragers who I carried to the new hive during the split will
probably drift back there as well. That's no big deal, though,
because
I included extra honey in the young hive to make up for the lack of
foragers. I also made sure that there's plenty of capped brood in
the young hive that
will hatch into new foragers within a couple of weeks, so they'll be
socking away honey before long.
 When doing an even hive
split, you don't have to find the queen, so I don't know whether she's
still hanging out in the old hive or has moved in with the newcomers in
the young hive. Wherever she's at, that hive will soon be back to
normal, gathering nectar and pollen from the big producers that are
about to bloom (black locust and tulip-tree). Meanwhile, the
queenless hive will be set back about three weeks as the bees figure
out they're queenless (a day or two), earmark a few of the eggs as
royalty (one to three days), feed the new princesses royal jelly during
their 5 day larval stage, and wait out their eight day pupal
stage. Queenless hives usually hedge their bets by making more
than one queen cell, but the queen who emerges from her capping first
will systematically kill her competitors. She soon goes on a
mating flight and then starts laying, bringing the hive back into
production.
When doing an even hive
split, you don't have to find the queen, so I don't know whether she's
still hanging out in the old hive or has moved in with the newcomers in
the young hive. Wherever she's at, that hive will soon be back to
normal, gathering nectar and pollen from the big producers that are
about to bloom (black locust and tulip-tree). Meanwhile, the
queenless hive will be set back about three weeks as the bees figure
out they're queenless (a day or two), earmark a few of the eggs as
royalty (one to three days), feed the new princesses royal jelly during
their 5 day larval stage, and wait out their eight day pupal
stage. Queenless hives usually hedge their bets by making more
than one queen cell, but the queen who emerges from her capping first
will systematically kill her competitors. She soon goes on a
mating flight and then starts laying, bringing the hive back into
production.
That's assuming all goes
well. I'm keeping my fingers crossed that within a month, we'll
have two fully active hives instead of one.
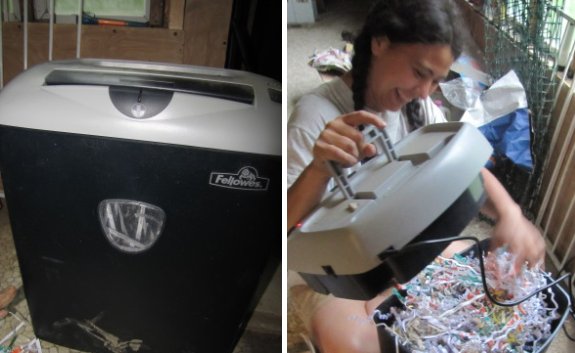
One of the lessons learned
from the worm bin experiment is the awesome mulch
making power of a good sized strip cut paper shredder.
The Fellowes PS-60 strip cut
paper shredder has proven itself over the last 4 months to be one heck
of an addition to our permaculture infrastructure.
It might qualify as an
entertainment device judging by how much fun Anna seems to have
generating these piles of mulch. Come to think of it I've never had a
chance to give it a spin due to that chore always ending up on her to
do list instead of mine.
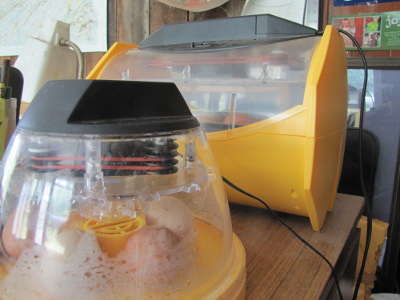
 I'm trying hard not to get my
hopes up too high about incubation
batch #2, but the
stars seem to be aligned this time around. The temperature
control on our new Brinsea
Octagon 20 Advance incubator makes our previous incubator look like a
toy. Despite external temperatures near freezing over the weekend
and trailer temperatures around 50, the incubator temperature didn't
change by more than 0.1 degree! For the sake of comparison, the Brinsea
Mini Advance internal temperature dropped down 5.6 degrees
when the trailer temperature plummeted to 40 one night last time
around, and the Mini incubator always seemed to be running a bit low
even on normal nights.
I'm trying hard not to get my
hopes up too high about incubation
batch #2, but the
stars seem to be aligned this time around. The temperature
control on our new Brinsea
Octagon 20 Advance incubator makes our previous incubator look like a
toy. Despite external temperatures near freezing over the weekend
and trailer temperatures around 50, the incubator temperature didn't
change by more than 0.1 degree! For the sake of comparison, the Brinsea
Mini Advance internal temperature dropped down 5.6 degrees
when the trailer temperature plummeted to 40 one night last time
around, and the Mini incubator always seemed to be running a bit low
even on normal nights.
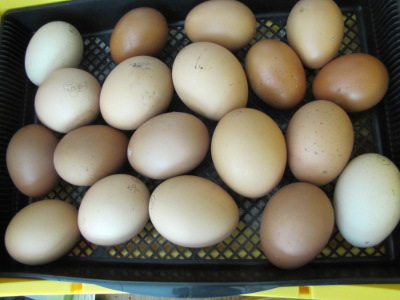
 Meanwhile, I've gotten
scientific about humidity control in the incubator and am right on
track to make the eggs lose 13% of their weight over the incubation
period. (Every time I think about this, I feel like I've enrolled
my eggs in a weight loss program --- weight watchers, maybe?) I'm
learning to keep the night-time humidity in the low 40s and the
day-time humidity in the upper 40s, and am weighing the tray of eggs
every other day to monitor progress.
Meanwhile, I've gotten
scientific about humidity control in the incubator and am right on
track to make the eggs lose 13% of their weight over the incubation
period. (Every time I think about this, I feel like I've enrolled
my eggs in a weight loss program --- weight watchers, maybe?) I'm
learning to keep the night-time humidity in the low 40s and the
day-time humidity in the upper 40s, and am weighing the tray of eggs
every other day to monitor progress.
I'm hoping for 7 living
chicks from this batch of 24 eggs, but, secretly, I'm expecting double
digits as long as nothing drastic happens in the next two weeks.
Now, if only I could listen to ancient words of wisdom and not count my
chickens before they hatch.

This piece of land won't
put you right next door, but you'll be just over 2 hours away.
Everett and Missy have decided to move closer to town and are putting
their 15 acre farm (with house, barn, and several outbuildings) on the
market for $195,000. Visit their
blog to see contact
information and scads of pictures of the stuff most of you are probably
interested in --- they've fixed the place up so that it's beautiful and
energy efficient.
 What
they don't tell you is that the farm is ready to grow all of your own
food. There's an ancient vineyard and two mature (and delicious)
apple trees leftover from previous owners. Everett and Missy have
the chicken coop in perfect repair, right beside a large pasture ready
for your goats, cows, or sheep. There's also a new no-till garden
patch already
planted --- how's that for immediate gratification?
What
they don't tell you is that the farm is ready to grow all of your own
food. There's an ancient vineyard and two mature (and delicious)
apple trees leftover from previous owners. Everett and Missy have
the chicken coop in perfect repair, right beside a large pasture ready
for your goats, cows, or sheep. There's also a new no-till garden
patch already
planted --- how's that for immediate gratification?
 The farm is located in a
slightly ritzier part of southwest Virginia than we're in, which means
more like-minded neighbors (but probably steeper taxes.) They're
also a bit higher in elevation than us, so figure on better apples and
worse peaches.
The farm is located in a
slightly ritzier part of southwest Virginia than we're in, which means
more like-minded neighbors (but probably steeper taxes.) They're
also a bit higher in elevation than us, so figure on better apples and
worse peaches.
If you've got a bit of a
nest egg and are looking to move back to the land without starting from
square one, this farm might be just right for you.
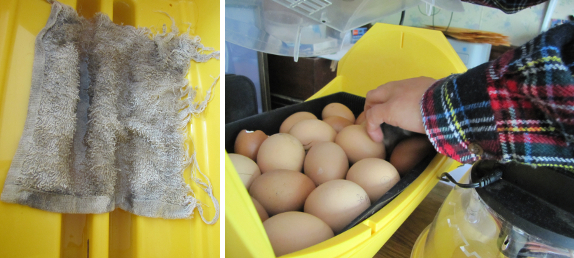
The scrap pieces of carpet
from taking
apart one of the chicken tractors are making a good hotel for worms
to visit during the night.
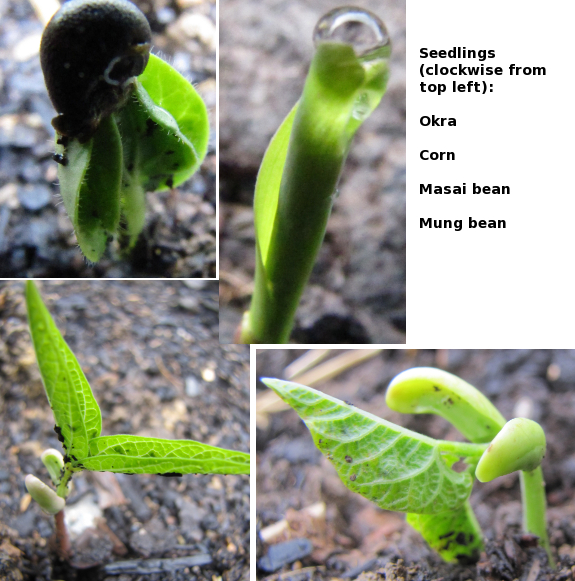
 Due
to this year's warm spring, we planted a lot of summer crops very
early. Just as the tender seedlings began to poke through the
soil, dogwood winter came along to nip their
toes. Good thing I save old, holey row cover fabric to make
emergency blankets for early birds.
Due
to this year's warm spring, we planted a lot of summer crops very
early. Just as the tender seedlings began to poke through the
soil, dogwood winter came along to nip their
toes. Good thing I save old, holey row cover fabric to make
emergency blankets for early birds.
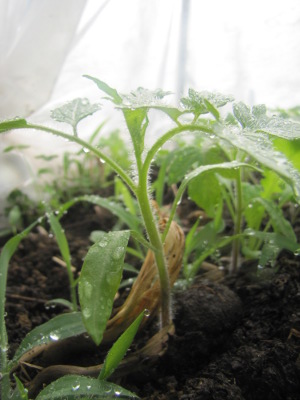
Our tomatoes, melons,
and cucumbers didn't need any extra love, already snug in their quick
hoops. These hefty tomato
seedlings are
itching to be transplanted to their new homes (or at least to be
weeded.) First thing next week the lows will be in the 50s and I
suspect the last chance of frost will have passed...as long as there's
no blackberry winter.
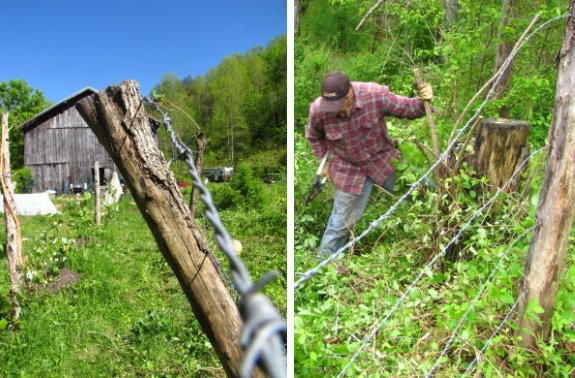
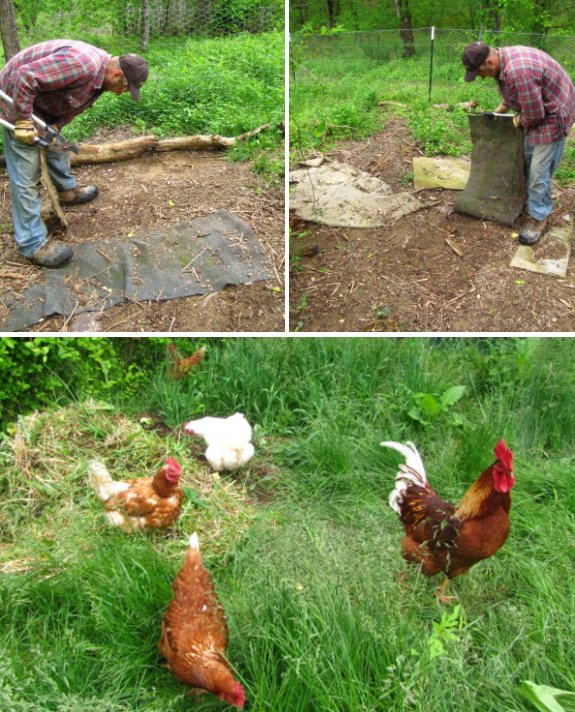
5 years ago we put up a
barbed wire fence on a limited budget.
One of the corners we cut was
using several walnut posts because we ran out of cedar and spent most
of the budget on 2 rolls of barbed wire and a new chain for the
chainsaw.
Fast forward to today when I
spent the afternoon taking part of that fence out and you can see why
walnut is a poor choice to use as a fence post. It's still a solid
piece of wood above ground, but each one I tried to remove ended up
breaking off at the base. If I had to guess I'd say a walnut post can
be expected to fail somewhere between 3 and 5 years, maybe more in a
dryer climate.
 We
have a couple of hundred garden beds that have each been treated
differently over the years, so it's a bit daunting to consider running
soil tests on them all. Luckily, there are quick and dirty,
at-home tests you can do to get an idea of the state of your
soil. My favorite is the worm test, which gives you an idea of
overall soil health (with a strong focus on organic matter.)
We
have a couple of hundred garden beds that have each been treated
differently over the years, so it's a bit daunting to consider running
soil tests on them all. Luckily, there are quick and dirty,
at-home tests you can do to get an idea of the state of your
soil. My favorite is the worm test, which gives you an idea of
overall soil health (with a strong focus on organic matter.)
To do a worm test the
right way, wait until the soil is at least 55 degrees Fahrenheit and is
damp but not sopping wet. Then dig out one cubic foot of soil ---
make a square on top of the ground one foot on each side and dig down
one foot deep. Put the dirt in your wheelbarrow or on a piece of
cardboard and root through it, counting worms as you go. If you
find at least ten worms, your soil passes the test, and more worms
means better soil. For really scientific results, repeat the worm
test in several parts of your garden that have all been treated the
same way and average your results.
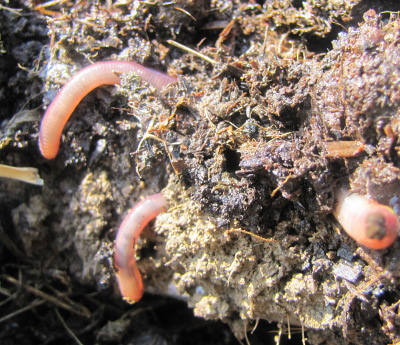
 Alternatively, there's my
method of doing a worm test. As you play in the dirt, planting
potatoes or ripping up weeds, keep an eye on how many worms you
see. This spring, I noticed that the amazing
horse manure compost
Mark got for me is a worm magnet --- one small handful of
compost-treated soil can hold as many as six hefty worms! On the
other hand, the imperfect
chicken manure compost
that I used last year to create new,
no-till beds for our tomatoes is nearly worm-free.
(The tomatoes didn't seem to mind.)
Alternatively, there's my
method of doing a worm test. As you play in the dirt, planting
potatoes or ripping up weeds, keep an eye on how many worms you
see. This spring, I noticed that the amazing
horse manure compost
Mark got for me is a worm magnet --- one small handful of
compost-treated soil can hold as many as six hefty worms! On the
other hand, the imperfect
chicken manure compost
that I used last year to create new,
no-till beds for our tomatoes is nearly worm-free.
(The tomatoes didn't seem to mind.)
If your soil is low on
worms, there could be several problems. In the case of my
imperfect compost, I suspect that high salts are responsible for
turning the area into a worm-free zone, and worms will also die if your
soil is consistently too wet, too dry, too acidic, or too
alkaline. On the other hand, worms adore mostly decomposed
organic matter (aka compost) and the damp soil underneath mulch (and
no-till gardens in general.) Since worms
do so much good in your soil, it's worth thinking of ways
to keep them happy.

This handsome frog has taken
up residence in our 5
gallon bucket solar shower drainage area.
I've noticed him for weeks
now, but each time I walk by he jumps back into his safe spot under the
old pallet.
Today was the first time I
got a good look at his features. Anna looked him up and confirmed he's
a green frog. It feels like a good omen to have a frog as a neighbor
and it gives me a smile everytime I walk by and hear him belly dive
back to his mini pond.
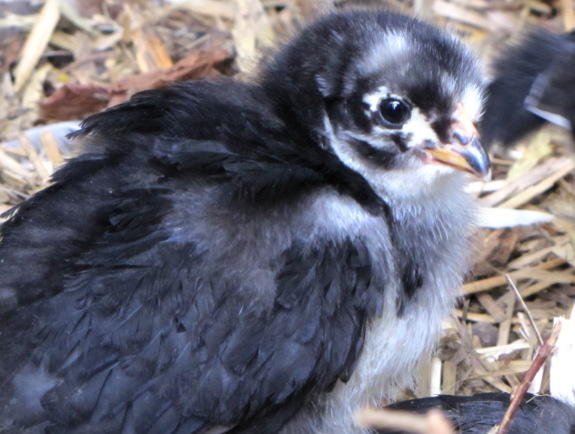
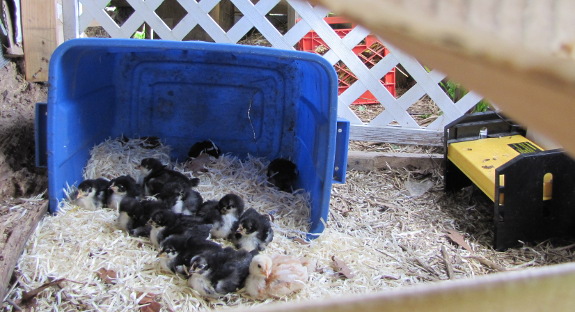
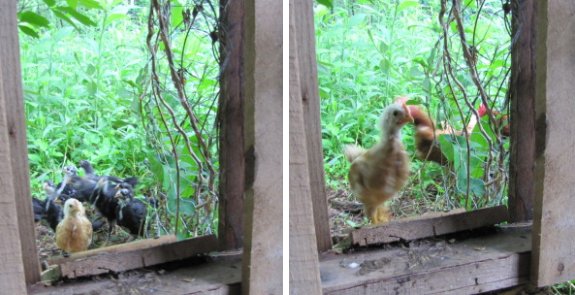
"We're not babies anymore, you know," the chicks
complained Friday. "Don't you think it's about time you let us
leave our room?"
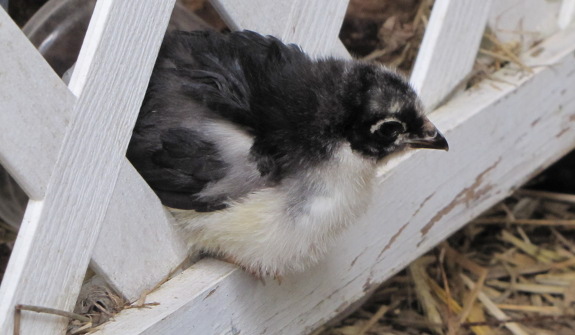
"Okay, okay," I
conceded, peeling back the wall of cardboard I'd used to separate the
chicks from the rest of the coop. Within seconds, intrepid
youngsters had figured out how to jump through the holes in the trellis
gate and were exploring their new domain. Chaos ensued as the
chicks took dust baths, scratched up worms, snagged gnats in mid-air,
and even poked their beaks out the pophole into the pasture. (The
wide world was a bit too scary, though, so they scampered back inside.)
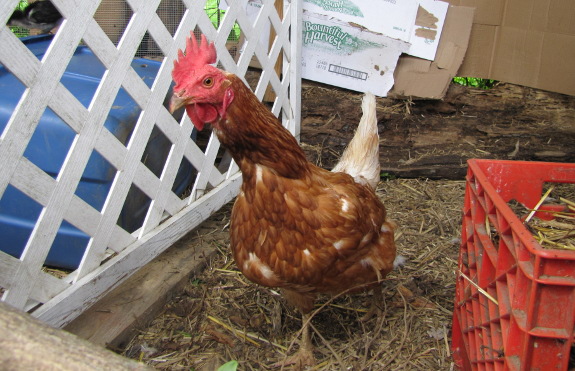
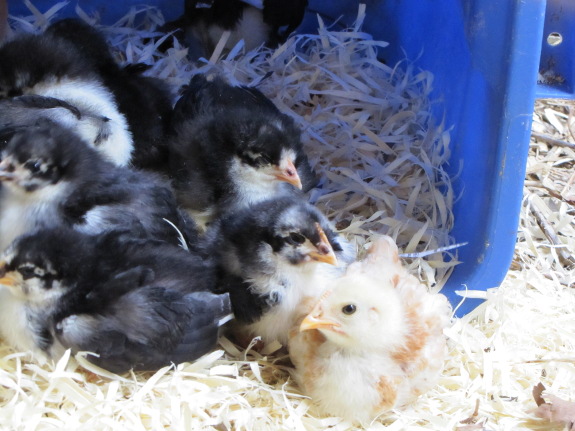
"What's all this ruckus
about?" asked the young golden comet.
A flurry of wings and
cheeps later, every chick had darted back behind the gate.
"Nothing to see here, I guess," said the hen, turning to go back
outside.
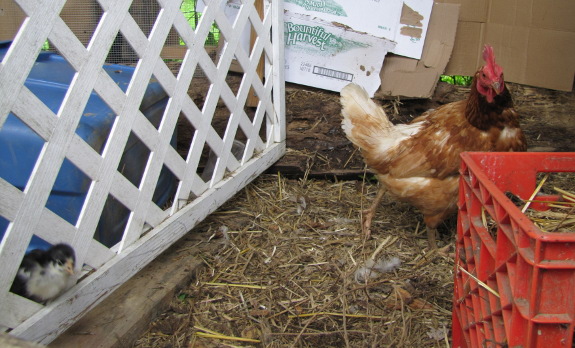
"But, wait! What's
that little fuzzball?"
"Hello?
Hello? Is somebody over there?"
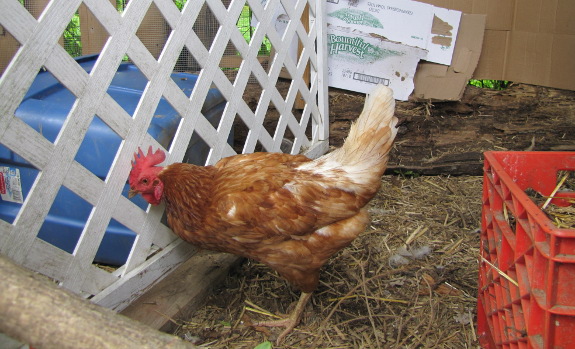
"Maybe we're not old
enough to play with the big kids yet after all," the chicks declared,
settling down for a rest.
"You know best," I
answered, rolling my eyes. "Just remember, the
brooder belongs to a new batch of chicks in a week and a half."
Nobody answered. I
guess two and a half week old chicks still need naptime.

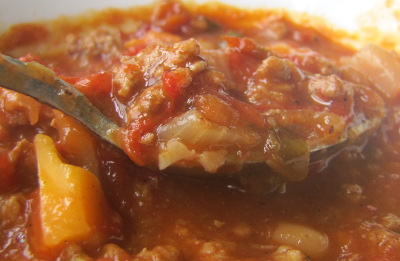 I never really understood the
purpose of chili since I don't like spicy food or cooked green peppers
(and used to detest hamburger meat when I only ate the cheap
stuff.) But as we've been increasing the
protein content of our diets and decreasing the carbohydrates, I discovered that there are
chilis that push my cooked tomato buttons without being full of empty
carbohydrates. Plus, if you make it yourself, you can keep the
spiciness mild, leave out the green peppers, and use pastured
meat. This recipe serves 5.
I never really understood the
purpose of chili since I don't like spicy food or cooked green peppers
(and used to detest hamburger meat when I only ate the cheap
stuff.) But as we've been increasing the
protein content of our diets and decreasing the carbohydrates, I discovered that there are
chilis that push my cooked tomato buttons without being full of empty
carbohydrates. Plus, if you make it yourself, you can keep the
spiciness mild, leave out the green peppers, and use pastured
meat. This recipe serves 5.
- 1 pound of dried great northern beans
- 6 cups of homemade chicken stock. (Boil a chicken carcass
in water for a few hours and pour off the liquid to get stock.)
- 1 pound of ground lamb
- 2 onions
- 4 cloves of garlic
- 1 tbsp chili powder
- 1 tsp fresh thyme (or half as much dried oregano. Our thyme
is always ready to eat and tends to taste better than our oregano, so I
use it for everything.)
- 1 tsp salt
- 0.25 tsp pepper
- 4 cups of homemade spaghetti sauce (or about 8 cups of stewed tomatoes, 1 onion, three cloves of garlic, and some basil)
Soak the beans
overnight, then pour off the water. Add the chicken stock to the
beans and simmer until the beans are soft (about two or three hours.)
 Strain the beans through a
collander, tossing the liquid in a big pot along with one cup of the
beans. Freeze the rest of the beans for later meals.
(Clearly, you could have just started with fewer beans, but I've found
that I'm far more likely to add beans to a recipe if I have them cooked
up. Also, the bits of bean left in the stock thicken the chili
without requiring you to add cornstarch.)
Strain the beans through a
collander, tossing the liquid in a big pot along with one cup of the
beans. Freeze the rest of the beans for later meals.
(Clearly, you could have just started with fewer beans, but I've found
that I'm far more likely to add beans to a recipe if I have them cooked
up. Also, the bits of bean left in the stock thicken the chili
without requiring you to add cornstarch.)
Meanwhile, sautee the
lamb in a skillet until it's about halfway cooked (adding stock as
necessary to keep the meat from sticking to the pan.) Cut up the
onions and garlic and add them to the meat, continuing to cook over
medium heat until the onions are soft. Add in the chili powder,
thyme, salt, and pepper and sautee just a bit more, then pour
everything from the skillet into your pot of stock.
Throw in the spaghetti
sauce or tomatoes. (I only used spaghetti sauce because our
freeezer is nearly bare of tomato products. As I mentioned above,
you could instead use  about eight cups of stewed
tomatoes and add a bit more garlic and onion to the previous
step. I'm not sure if we could taste the basil.) Cook over
low heat for about an hour until the flavors meld together, or for two
hours if you started with stewed tomatoes and need them to lose some
liquid.
about eight cups of stewed
tomatoes and add a bit more garlic and onion to the previous
step. I'm not sure if we could taste the basil.) Cook over
low heat for about an hour until the flavors meld together, or for two
hours if you started with stewed tomatoes and need them to lose some
liquid.
The USDA's nutritional
guidelines gives this chili a B+, probably because they don't like all
of the fat and cholesterol in the chicken stock and lamb.
However, we're believers in the nutritional
goodness of fats from pastured animals, so I'd give it an A.
Of course, the meal needs some greens on the side to round it off, and
cheddar on top of the chili makes it a treat.

It's been almost a year since
we
installed the Zereba K9 pet, lawn, and garden electric fence controller and we couldn't be happier with
the results.
First off I should say that
it only took Lucy about 10 minutes to learn when we first got chickens
that all poultry on the farm belonged to us and she was to never even
try to eat a chicken.
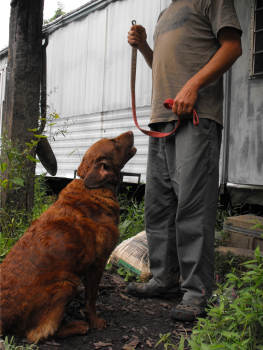 Food scraps in the new
pasture was another issue. She
kept being a bad girl, and I tried to plead with her
and build a better fence, but she was better at breaking in.
Food scraps in the new
pasture was another issue. She
kept being a bad girl, and I tried to plead with her
and build a better fence, but she was better at breaking in.
And then one day I saw the
Zereba K9 electric solution at a local hardware store and dared to
dream that this could send the clear message that I was unable to
articulate.
It only took her one shock to
realize any food scraps near the chickens were out of bounds. We moved
the flock to another pasture but did not need to install the K9 this
time as Lucy had clearly learned to keep a respectable distance.
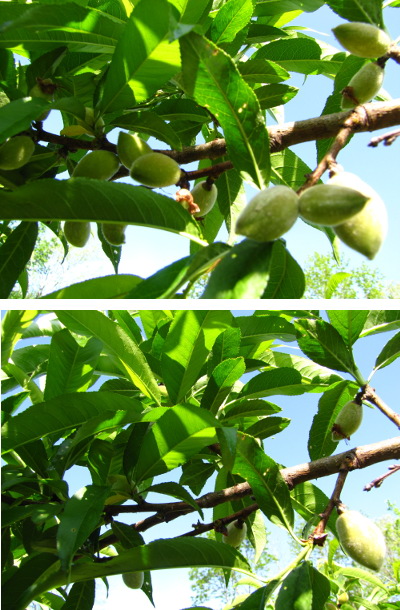 Thinning
is like editing. The process is time-consuming and mentally
difficult, but if you bite the bullet and do the hard work, the fruits
of your labor are twice as good.
Thinning
is like editing. The process is time-consuming and mentally
difficult, but if you bite the bullet and do the hard work, the fruits
of your labor are twice as good.
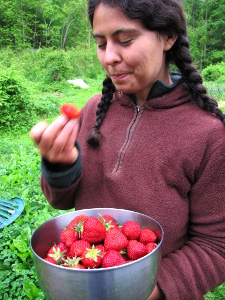
Last year, I thinned
our peaches hesitantly,
leery of removing so many
baby fruits, but my work paid off in spades. In fact, as I picked
our huge, delicious peaches that summer, I only wished I'd thinned a
little harder since the peaches that had been left close together were
of much lower quality. And despite what you might think, the big
fruits had every bit as much flavor as you'll find in the tiny peaches
on abandoned trees that never get thinned. (I also feel obliged
to add my father's experience --- he didn't thin his peaches last year
and one tree bore so heavily that branches broke all the way off!)
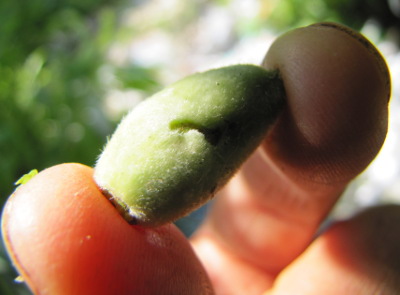 So
this year, I thinned hard, removing about seven peaches for each one I
left behind. In addition to making sure the
fruits were separated by several inches along the branch, I tried to
select for large, unblemished fruits in sunnier spots. I could
tell that the oriental
fruit moth had
already laid its eggs, so I did my best to remove the infested
fruits. (No, I never did get around to implementing any control
strategies for this pest, so I'm sure I'll be scooping out wormy
centers this summer.) The tree will probably drop a few more of
fruits in a week or two, but last year I had no problem with pruning
pre-drop, and even this "hard" thinning job isn't as extreme as most
peach experts suggest.
So
this year, I thinned hard, removing about seven peaches for each one I
left behind. In addition to making sure the
fruits were separated by several inches along the branch, I tried to
select for large, unblemished fruits in sunnier spots. I could
tell that the oriental
fruit moth had
already laid its eggs, so I did my best to remove the infested
fruits. (No, I never did get around to implementing any control
strategies for this pest, so I'm sure I'll be scooping out wormy
centers this summer.) The tree will probably drop a few more of
fruits in a week or two, but last year I had no problem with pruning
pre-drop, and even this "hard" thinning job isn't as extreme as most
peach experts suggest.
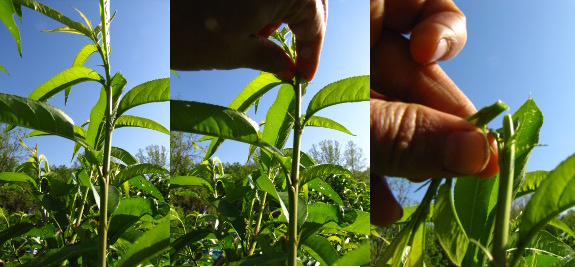
Meanwhile, I went ahead
and snapped the tops off watersprouts popping
up in the center of the tree. Peach trees pruned to the open
center system will
keep putting up watersprouts every year, and if you
leave them alone, you'll be wasting a lot of your tree's energy that
could go into building useful branches instead of toward branches that
are just going to be lopped off. Meanwhile, the watersprouts
shade the fruits, negating the purpose of the open center system
(opening up as much of the fruit zone as possible to the sun.)
I'll try to remember to come back and do another round of summer
pruning later and to
remove any twigs that wilt (signs of further oriental fruit moth
damage.) But, mostly, I'll just sit back and watch the fuzzy
fruits swell outside the kitchen window.
The same wrong wheel for the lawn mower showed up
today in the mail.
I dove a bit deeper within
the schematic and discovered what they were calling a "rear wheel" was
actually the front wheel and a bit down the list we see that the rear
wheel is just called "wheel".
What impressed me was how
fast and efficient the lady at Sears parts direct was in first
listening to my explanation of the schematic error and then fixing the
problem. She even went the extra step of giving us 10% off for our
trouble plus free shipping.
The latest call took only 15
minutes, which combined with the first call equals a bit over half an
hour. That's too much time for a simple parts order, but these things
happen sometimes. Perhaps I'm the fist person ever to need the rear
wheel replaced on this particular model of push behind mower? Getting
to keep the 2 smaller front wheels is a small consolation, but maybe
they'll come in handy for something in the future.
 Tomato planting day is one of
my favorite annual events, but it's also fraught with a lot of second
guessing. Last year, I had very good luck spacing my
tomatoes further apart (which meant setting out fewer of them ---
21 instead of 37) and pruning
them heavily, so
this year I'll be continuing that trend. I slipped 22 of the
heftiest transplants I've ever grown into the ground on Monday,
watering them in well to make up for the scorching heat.
Tomato planting day is one of
my favorite annual events, but it's also fraught with a lot of second
guessing. Last year, I had very good luck spacing my
tomatoes further apart (which meant setting out fewer of them ---
21 instead of 37) and pruning
them heavily, so
this year I'll be continuing that trend. I slipped 22 of the
heftiest transplants I've ever grown into the ground on Monday,
watering them in well to make up for the scorching heat.
 Every
year, I grow fewer slicers and tommy-toes and more romas. In
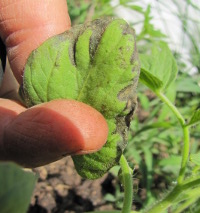
2010, I was down to 8 non-romas, and this year I only put in 5, which
feels like very few until I remind myself that they only need to keep
us in fresh tomatoes over the summer. I had planned to put in 6
non-romas, but our delicious Japanese
Black Trifele seems to have carried blight spores in its seeds, so I
quickly culled all of the affected plants. That gave me space to
upgrade to 17 romas in hopes of socking away even more sauce, dried
tomatoes, and ketchup for the winter.
Every
year, I grow fewer slicers and tommy-toes and more romas. In
2010, I was down to 8 non-romas, and this year I only put in 5, which
feels like very few until I remind myself that they only need to keep
us in fresh tomatoes over the summer. I had planned to put in 6
non-romas, but our delicious Japanese
Black Trifele seems to have carried blight spores in its seeds, so I
quickly culled all of the affected plants. That gave me space to
upgrade to 17 romas in hopes of socking away even more sauce, dried
tomatoes, and ketchup for the winter.
I put most of our
tomatoes in one long, new bed running along the south side of the
chicken pasture. This is the very sunniest spot in the garden,
and I figure I can use the fence (with some extra posts) to train the
tomatoes upright and keep them drier than ever 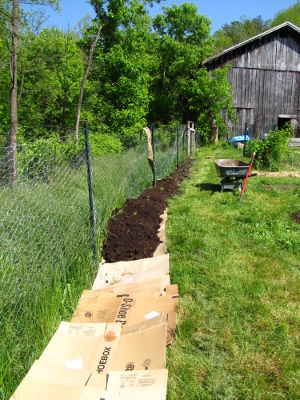 before.
In our very wet climate, dry is what tomatoes crave, and we love them
enough to give them prime real estate in the garden. I had
actually hoped to make the bed a little longer, but two solid months of
wet, wet, wet has reduced me to scraping away at the last remnants of horse
manure compost, so
the new tomato bed ended rather abruptly when the manure gave
out. If nature smiles on us and we're able to drive the truck out
this week, I'll add another ten feet of tomato bed and throw in some
more roma seeds to increase our planting --- maybe this winter we'll
have enough dried tomatoes that they don't have to be a once a month
treat?
before.
In our very wet climate, dry is what tomatoes crave, and we love them
enough to give them prime real estate in the garden. I had
actually hoped to make the bed a little longer, but two solid months of
wet, wet, wet has reduced me to scraping away at the last remnants of horse
manure compost, so
the new tomato bed ended rather abruptly when the manure gave
out. If nature smiles on us and we're able to drive the truck out
this week, I'll add another ten feet of tomato bed and throw in some
more roma seeds to increase our planting --- maybe this winter we'll
have enough dried tomatoes that they don't have to be a once a month
treat?

One of my favorite
spring/summer sounds is the swoosh swooshing of our 220
volt creek pump pushing water all the way up to our thirsty
garden.
 Although I seem to save my
obsessing for the tomatoes, I didn't want you to think
that's all we put in the garden this week. Our first round of
sweet potato slips were ready to set out early, thanks to the gravel
starting flat that
tempted shoots to grow roots before I even snipped them from the parent
tuber. And I started peppers inside this year to give us a bit of
a head start on the growing season.
Although I seem to save my
obsessing for the tomatoes, I didn't want you to think
that's all we put in the garden this week. Our first round of
sweet potato slips were ready to set out early, thanks to the gravel
starting flat that
tempted shoots to grow roots before I even snipped them from the parent
tuber. And I started peppers inside this year to give us a bit of
a head start on the growing season.
Most of our summer crops
grow from seed, though. I put in a second planting of sweet corn,
green beans, summer squash, and watermelons since the late April
seedlings are already up and thriving, and I would have put in another
set of cucumbers if I hadn't run out of seeds. (More are on the
way.) Peanuts will go in later this week, as will the first round
of butternuts.
Then, in two weeks,
it'll be time to plant many of these crops all over again. Succession
planting keeps our
summer harvest steady for crops like sweet corn that ripen up all at
once 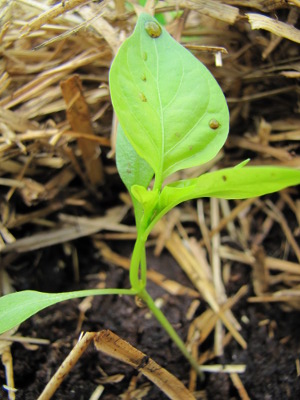 and for troublesome cucurbits
(squash, cucumbers) and beans that tend to peter out from pests or
disease after a few weeks of bearing. Midsummer planting is also
appropriate for winter squashes that will sit on the shelf through the
cold season --- the later the squashes ripen up, the more likely they
are to still be good come spring. So June is the time to plant
most of my butternuts as well as the naked seed pumpkins we're trying
out this year.
and for troublesome cucurbits
(squash, cucumbers) and beans that tend to peter out from pests or
disease after a few weeks of bearing. Midsummer planting is also
appropriate for winter squashes that will sit on the shelf through the
cold season --- the later the squashes ripen up, the more likely they
are to still be good come spring. So June is the time to plant
most of my butternuts as well as the naked seed pumpkins we're trying
out this year.
And then, just one month
from now, it'll be time to start putting in the fall garden! I'm
glad I keep all of this information in a spreadsheet because I'd never
get the planting dates right otherwise.
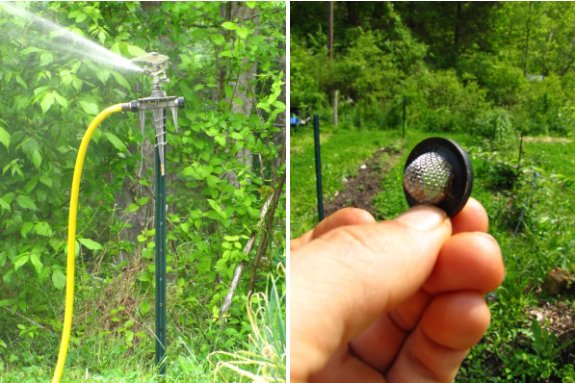
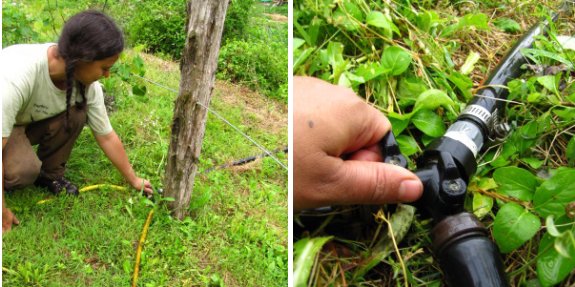
The
pump in our creek sucks
up tiny particles that eventually clog up the stainless steel filter on
our reciprocating lawn sprinklers.
We started experimenting with
deleting the filters last year. The initial concern was that the
sprinkler head might get gunked up and stop working. That hasn't
happened yet, even with the junkier plastic version.
I have a feeling this
modification wouldn't work on a system with lower pressure, but it
might be worth a try. The replacement cost for these things is less
than 10 dollars, but the feeling of security one gets knowing you can
water the garden during a dry spell is priceless.
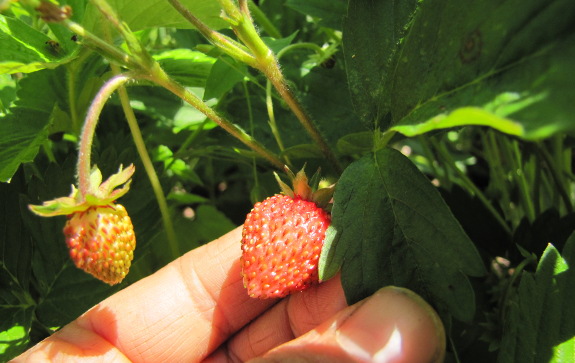
Forest gardening books
sing the praises of alpine strawberries, promising stunning flavor in a
shade-tolerant plant that bears all summer, but my experience hasn't
been as positive. I started
some alpine strawberries from seed last year and transplanted
them into a slightly shady raised bed below my ailing dwarf
cherry. The strawberries produced that same summer, but the
fruits were a bit mealy and lacked the complex flavor that I'm used to
in my homegrown strawberries.
 I figured the dull flavor
could be an artifact of the time of year, so left the alpine
strawberries in place, planning a side by side comparison this
spring. But when our first strawberries ripened up, Mark and I
both decided that the alpines didn't hold a candle to our favorite
Honeoyes.
I figured the dull flavor
could be an artifact of the time of year, so left the alpine
strawberries in place, planning a side by side comparison this
spring. But when our first strawberries ripened up, Mark and I
both decided that the alpines didn't hold a candle to our favorite
Honeoyes.
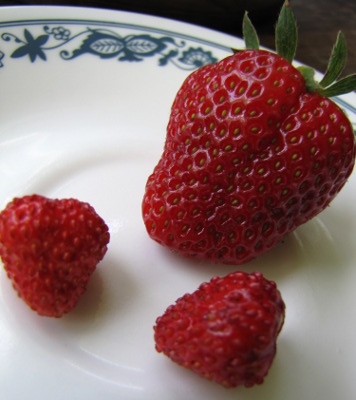
The alpines did win very
slightly on one point, though --- earliness. We ate our first
alpine strawberries on May 7 and didn't get our first June-bearing
strawberriers until May 9. Those two early fruits aren't going to
be enough to turn alpine strawberries into a core crop on our farm,
though.
That said, I wonder if
the problem with our alpine strawberries could stem from my method of
starting them from seed. Nearly all fruits are cloned rather than
grown from seed since the genetic diversity in a batch of seeds will
result in a bunch of duds and only a few winning plants. Granted,
books tell me that it's fine to start alpine strawberries from seed,
but I'm not so sure. Has anyone eaten really award-winning alpine
strawberries? Do you know what variety they were and how they
were started?
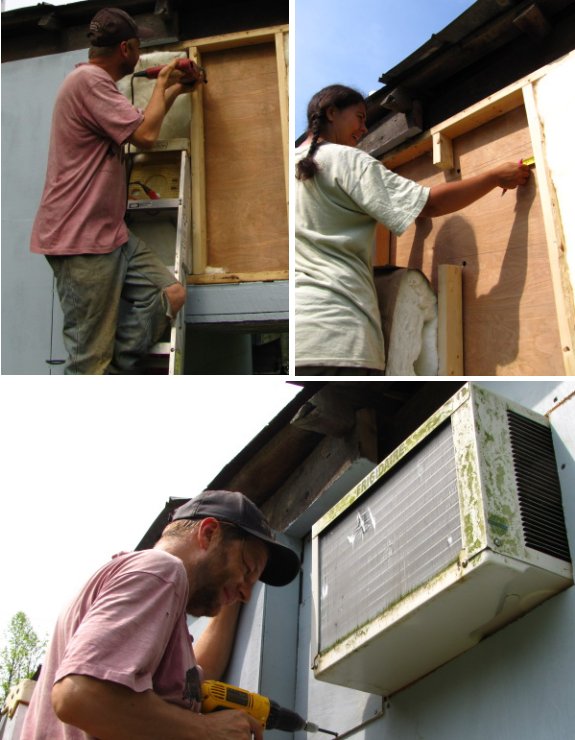
One problem I've always seen
with these window air conditioners was the limited choices a house or
trailer might have when looking for an appropriate installation spot.
I've had several of these
through the years and I often found myself standing in front of it so I
could receive the full effect of the chilled air thinking it sure would
be nice to have this artificial cool breeze blowing on me over there in
that chair.
It took Anna and me a little
over 2 hours to make the above custom fit. Now I can sit within inches
of the Arctic winter blast.
 Greens
aren't very sexy, so I don't talk about them much. But if you
considered the vegetable side of our diet, I'll bet cooked greens would
make up a quarter of the pie, so I figured it was worth trying out a
few new varieties this year. (As a side note, what I call
"greens" are often referred to in the literature as potherbs. I'm
talking about vegetables we grow to eat as cooked leaves.)
Greens
aren't very sexy, so I don't talk about them much. But if you
considered the vegetable side of our diet, I'll bet cooked greens would
make up a quarter of the pie, so I figured it was worth trying out a
few new varieties this year. (As a side note, what I call
"greens" are often referred to in the literature as potherbs. I'm
talking about vegetables we grow to eat as cooked leaves.)
Before I launch into
what I thought of the newcomers to the garden, I
should probably tell you what our old standbys are. The summer
garden is Swiss chard all the
way --- this is the only green that doesn't bolt and the plant's mild
flavor doesn't need the sweetening effects of frost. Most of the
other greens are in the crucifer family with broccoli and 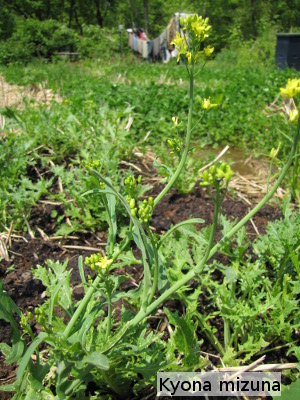 cabbages,
but swiss chard is just about alone (except for spinach, beets, and
amaranth), so garden rotations are a bit easier with swiss chard in the
mix. To top it all off, this summer green isn't bothered by cabbage worms or flea
beetles, although
last year we did get an infestation of striped blister beetles.
cabbages,
but swiss chard is just about alone (except for spinach, beets, and
amaranth), so garden rotations are a bit easier with swiss chard in the
mix. To top it all off, this summer green isn't bothered by cabbage worms or flea
beetles, although
last year we did get an infestation of striped blister beetles.
Our favorite fall and
winter green is kale.
After a frost, kale becomes so sweet that we eat it like candy, and the
plant is also our most cold hardy green, sometimes managing to
overwinter without protection in zone 6. That said, I usually
hedge my bets in the fall by also planting mustard.
The flavor of mustard isn't anything to write home about, but the
plants
love our weather and grow like crazy when nothing else will.
And mustard is a local staple, so you can get the seeds cheap at the
feed
store.
Everyone seemed to be
singing the praises of Asian
greens
last year, though, so I thought I'd better jump on the bandwagon.
On the recommendation of one of Elliot
Coleman's books, I
planted tokyo
bekana and kyona mizuna in early March hoping that these would turn
into good additions to our summer garden. The kyona mizuna is a
bit of a wash --- the leaves are thick and not very tasty, in my
opinion, and the flea beetles love them. On the other hand, Mark
and I both adore the flavor of the tokyo bekana (although the flea
beetles do too.) But I'm a bit disappointed to see that both of
these Asian greens are already starting to bolt (especially the kyona
mizuna) --- I guess they won't
be summer greens after all.
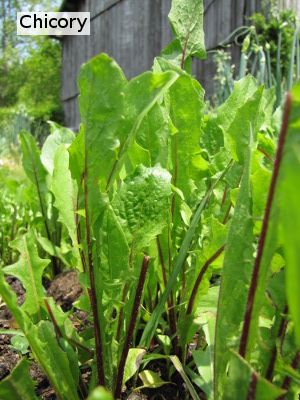 Meanwhile, I sprinkled chicory
(aka Italian Dandelion) seeds on expansions
of various tree mounds
in
the forest garden. The goal was to come up with a cultivated
perennnial green that likes partial shade and will give us tasty
dinners early in spring when annuals aren't growing. I couldn't
find any chicory specifically labelled as a perennial so this
experiment
may fail in the long run, but in the short run I'm thrilled with the
results. The Catalogna Special Italian Dandelion I planted in
early March was big enough for frequent small cuttings starting at
about
six weeks old and I've found that adding 10% chicory to a pot of other
greens adds complexity to the dish's flavor. (In earlier spring,
the leaves should be less bitter and edible on their own.)
Meanwhile, I sprinkled chicory
(aka Italian Dandelion) seeds on expansions
of various tree mounds
in
the forest garden. The goal was to come up with a cultivated
perennnial green that likes partial shade and will give us tasty
dinners early in spring when annuals aren't growing. I couldn't
find any chicory specifically labelled as a perennial so this
experiment
may fail in the long run, but in the short run I'm thrilled with the
results. The Catalogna Special Italian Dandelion I planted in
early March was big enough for frequent small cuttings starting at
about
six weeks old and I've found that adding 10% chicory to a pot of other
greens adds complexity to the dish's flavor. (In earlier spring,
the leaves should be less bitter and edible on their own.)
Coming up next in 2011's
great greens trial are a variety of amaranth
grown for summer greens and tatsoi (another Asian green) in the
fall. I also plan to experiment with several new varieties of
kale to see if I can find one that's even tastier (inconceivable!) and
more winter hardy. I'd be curious to hear which greens are your
standbys and
why.
The final chapter in my
little lawn mower saga is
a happy one.
A new and improved rear wheel
showed up in the mail. What makes this one special is the addition of 2
all metal bearings.
Makes me wonder if the
original designers planned it this way by making the original wheel
without any bearings so they could squeeze another 30 bucks out of the
customer when the plastic gives out from a few years of service?
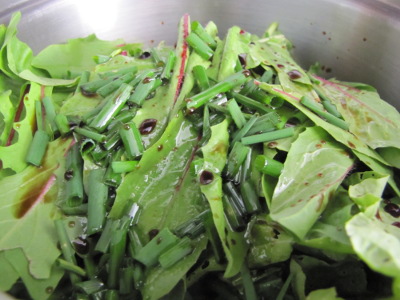 After
letting the plants take up space in our garden for four years, I've
finally found a use for chives. Let me back up, though, and tell
you about our new favorite greens "recipe." I put
"recipe" in quotes because something this simple doesn't really seem
like cooking, but the taste is surprisingly complex:
After
letting the plants take up space in our garden for four years, I've
finally found a use for chives. Let me back up, though, and tell
you about our new favorite greens "recipe." I put
"recipe" in quotes because something this simple doesn't really seem
like cooking, but the taste is surprisingly complex:
- About three quarts of loosely packed leafy greens
- About a pint of chicory leaves
- About half a cup of Egyptian onion leaves
- A healthy dash of balsamic vinegar
- A slightly less healthy dash of peanut oil
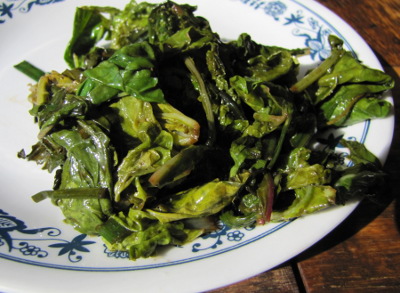 Turn
the heat on high and stir until the leaves are just barely cooked (a
few scant minutes.) The greens cook down to make just enough to
serve two. Not elegant but definitely delicious!
Turn
the heat on high and stir until the leaves are just barely cooked (a
few scant minutes.) The greens cook down to make just enough to
serve two. Not elegant but definitely delicious!
Now, back to those
chives. Egyptian onions make an appearance on our plates daily
for much of the year, but at the beginning of May, the plants begin to
put up their fruiting stalks. At that point, the onion leaves
turn thicker and lose a lot of their prime flavor, so I needed to find
a replacement for my most-used herb. That's when I remembered
that normal people cook with chives the way I cook with Egyptian
onions, and 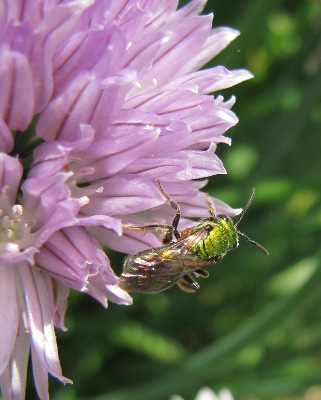 sure enough, chives made a
pretty good substitute in the recipe above. Chive leaves seem to
lose their flavor less when they're in bloom, even though I think the
leaves don't taste as good as Egyptian onion leaves during the rest of
the year.
sure enough, chives made a
pretty good substitute in the recipe above. Chive leaves seem to
lose their flavor less when they're in bloom, even though I think the
leaves don't taste as good as Egyptian onion leaves during the rest of
the year.
In case you're wondering
why I weeded and mulched chives for so long without eating them, the
answer is --- pollinators! Our halictid
bees, especially,
adore the flowers of chives, and I've seen several other pollinators
visiting from time to time. And, yes, they're pretty.

When I was a kid I saw an
episode of Gilligan's island where some radioactive seeds washed ashore
and they grew extra large vegetables as a result. The carrots provided
super enhanced vision and the spinach gave the Skipper super strong
muscles.
Parts of this concept might not be as
crazy as it sounds. In 1999 a robot was sent into the Chernobyl reactor
to map the building and found a black
fungus that was somehow thriving in the toxic environment. Some speculation suggests that
the fungi have an unknown mechanism that can use the energy radiated for growth.
Image credit goes to
vintage-ads.livejournal.com via a post from the Boing Boing blog and
the blue mushroom image is thanks to layoutsparks.com.
 I'm nervously gearing up for
hatch #2. The Brinsea
Octagon 20 Advance Incubator seems to have done its job perfectly,
never letting the interior temperature vary by more than 0.2 degrees
Fahrenheit, and I got the eggs
to lose just the right amount of weight. I'm expecting a very
high hatch rate...as long as I don't mess up these last two days.
I'm nervously gearing up for
hatch #2. The Brinsea
Octagon 20 Advance Incubator seems to have done its job perfectly,
never letting the interior temperature vary by more than 0.2 degrees
Fahrenheit, and I got the eggs
to lose just the right amount of weight. I'm expecting a very
high hatch rate...as long as I don't mess up these last two days.
Having unplugged the egg
turner and raised the humidity up for hatch, the only remaining problem
I foresee is the chicks killing each other. You may recall that
one of our chicks accidentally
speared another in the gut during the
last hatch, and I'm
concerned that the cramped conditions inside our current incubator
might create a repeat of that disaster. I moved five eggs to the Brinsea
Mini Advance incubator
Saturday afternoon so that I had space to lay all of the eggs down flat
in the bigger incubator, but even that could be a two-edged sword ---
the littler incubator might let the temperature vary more for the last
two days, but hopefully the mostly developed chicks can deal with a bit
of variation.
What I'm trying to
decide now is whether to move yet more eggs out of the big incubator
and into our faulty Little
Giant incubator once
they begin to pip. I'm far from confident about my ability to
control the temperature in there, but the extra space might be worth
sub-optimal temperature for the last day, and during my trial on
Saturday afternoon, temperatures stayed pretty steady in the styrofoam
incubator. Alternatively, I could wait until chicks hatch and
then carefully transfer them to the Little Giant for the dry-down
period, or I could just leave that incubator out of the mix
entirely. I'd love some advice from the hatchers among you.
Does more space trump better temperature control? Would you put
some eggs in the Little Giant or leave them all in the Brinsea
workhorse? (Am I crazy to think we might get 21 live chicks out
of our 24 eggs?)
This hose splitter with
control valves is metal with a plastic coating. It cost a couple bucks
more than the all metal or all plastic, but it's money well spent if
you need to leave this stuff outside all season long.
Maybe I should build a cover for it to provide some shade and reduce the UV exposure
to help it last even longer?
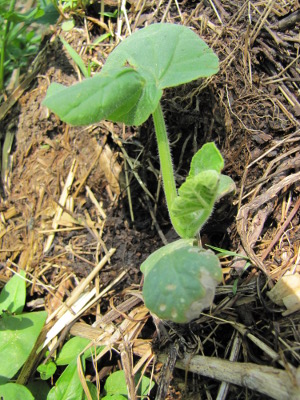 This butternut seedling is
growing on the compost pile...along with a few dozen of his brothers
and cousins. Whenever I walk by, I can't help but think about the
anthropological hypothesis that agriculture may have begun when seeds
like this sprouted out of early man's midden heaps.
This butternut seedling is
growing on the compost pile...along with a few dozen of his brothers
and cousins. Whenever I walk by, I can't help but think about the
anthropological hypothesis that agriculture may have begun when seeds
like this sprouted out of early man's midden heaps.
If you pay attention,
you'll notice that some vegetables can put up with compost piles while
others can't. At first, compost life sounds like living on easy
street, but the conditions are actually a bit rough. Sure,
there's plenty of extra fertility, but my volunteer butternuts have had
to put up with undiluted
urine baths a couple
of times a week, with lots of high carbon materials to grow around, and
with shifting soil as the compost pile settles. Despite these
potential problems, volunteer tomatoes and squashes seem to prefer the
compost heap to the garden.
When you create
a kill mulch and
plant into it right away rather than letting the no-till garden mellow
for a season before planting, you're growing in soil a lot like your
compost pile. That's why I save crops that make good compost pile
volunteers for our new no-till beds each summer, and give less hearty
garden crops the older beds. Now I just have to decide whether to
let thirty butternut plants sprawl out across the forest pasture or to
turn the compost pile and crush these volunteers.
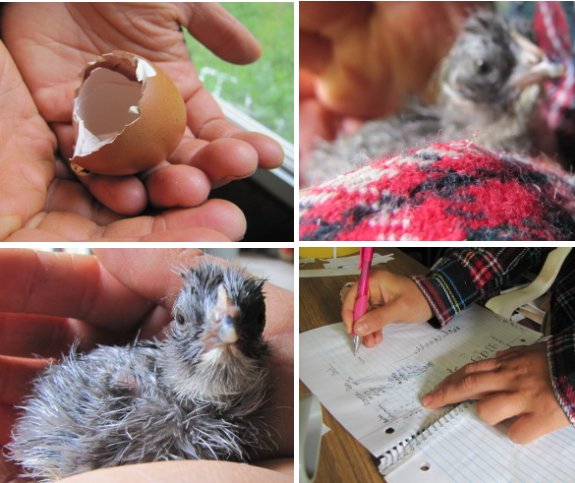
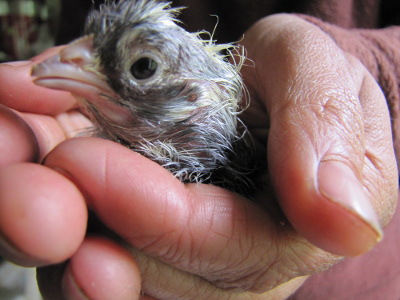
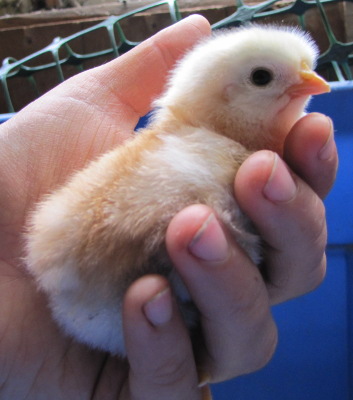
Our third homegrown
chick showed up today a bit earlier than predicted.
Not sure when we'll get
accustomed to all this eggcitement during the hatching phase.
In my opinion it's 10 times
more entertaining than any television I can remember.
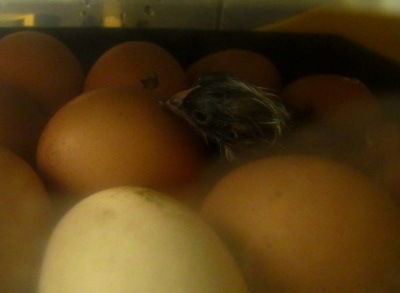
 I
still don't know how successful this
hatch will be, but fifteen hours into day 21, there are now two fully
fluffed chicks in the brooder, one wet chick flopping its
way out of the shell, and five more pipping. I've got a lot of
thoughts on the process so far:
I
still don't know how successful this
hatch will be, but fifteen hours into day 21, there are now two fully
fluffed chicks in the brooder, one wet chick flopping its
way out of the shell, and five more pipping. I've got a lot of
thoughts on the process so far:
- All of this activity has taken place in one half of the
incubator, making me wonder if temperatures aren't exactly the same
throughout. Perhaps next time I should flip the orientation of
the egg tray each time I weigh
it?
- Or maybe hatch time varies by breed? All of the fully
hatched chicks are my mail-ordered cuckoo maran eggs, and so are a
couple of the pippers.
- Humidity isn't so hard to deal with during hatch as people make it seem. Adding a wet washcloth to the bottom of the incubator under the wells and pouring in a bit of baby bottle temperature water whenever I mess around inside lets me keep humidity in the incubator quite high with the vent partly open, and the humidity rebounds in minutes when I have to open the lid.
- I was overreacting about space
in the incubator. All of the chicks who have hatched so far
have been brimming with life, not soft and easily damaged like the ones
that died in the incubator last time. Since the chicks hatch over
quite a long time period, I can take out dried off chicks and empty
shells at intervals, leaving more space for each newly hatched bird.
 That said, I still had
nightmares and woke up three times during night 20, coming in with a
flashlight to check on the eggs. In an effort to ease my mind and
get a full night's sleep for night 21, I downloaded three free ebooks
about incubation, the most useful of which has been Incubation: Natural and Artificial
by J.H. Sutcliffe. Yes, this book is over a century old, but I
was looking for tried and true information. I learned that my gut
feeling that I should turn any pipped eggs upright if their hole is
pointing to the floor instead of the ceiling is right on track and that
you can tell if an unpipped egg is alive on day 21 by using the witch
test (you know, put it in some warm water and see if it floats.) I'll save that last
tidbit of information for an emergency.
That said, I still had
nightmares and woke up three times during night 20, coming in with a
flashlight to check on the eggs. In an effort to ease my mind and
get a full night's sleep for night 21, I downloaded three free ebooks
about incubation, the most useful of which has been Incubation: Natural and Artificial
by J.H. Sutcliffe. Yes, this book is over a century old, but I
was looking for tried and true information. I learned that my gut
feeling that I should turn any pipped eggs upright if their hole is
pointing to the floor instead of the ceiling is right on track and that
you can tell if an unpipped egg is alive on day 21 by using the witch
test (you know, put it in some warm water and see if it floats.) I'll save that last
tidbit of information for an emergency.
Photos this morning
aren't very inspired since it's not quite daylight and my photographer
(Mark) is still sound asleep. I'm sure you'll see more cute
pictures tonight.
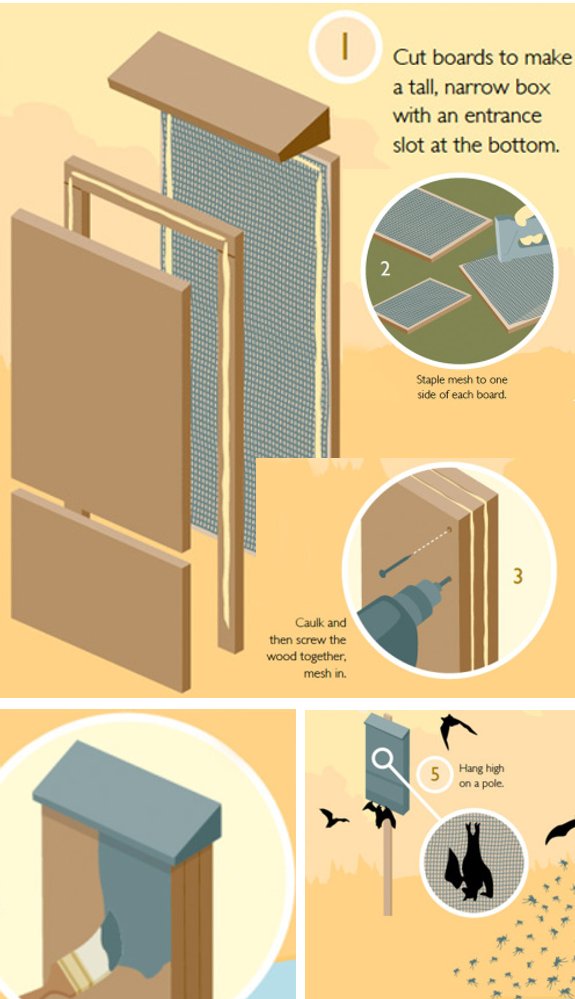
In your agrarian situation, do bats have a place in your plans?
Vester
That question brings up a
project that's been on the back burner for a while now.
I'm thinking the shady side
of our barn would be a good place to mount a few bat boxs and maybe a
bed of straw at the bottom to catch any potential guano.
Image credit goes to Lauren
Smith and Derek Fagerstrom from their intriguing book titled "More Show
Me How".
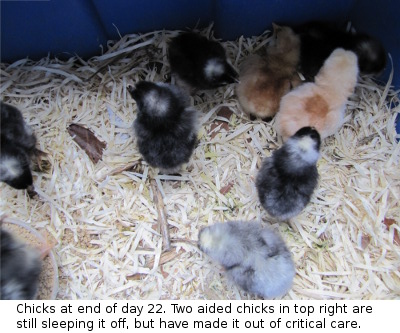
 All of the books and websites
agree that you get your best chicks by the end of day 21, so even
though I'll let the rest of the eggs sit in the incubator for another
day or two, I want to do my hatching analysis with just the chicks
hatched by Tuesday afternoon. At that time, there were five happy
chicks snuggled under the brooder, two aided and ailing chicks
in the first aid incubator (more on them tomorrow), one chick just
hatched in the big incubator, and two pipped eggs.
All of the books and websites
agree that you get your best chicks by the end of day 21, so even
though I'll let the rest of the eggs sit in the incubator for another
day or two, I want to do my hatching analysis with just the chicks
hatched by Tuesday afternoon. At that time, there were five happy
chicks snuggled under the brooder, two aided and ailing chicks
in the first aid incubator (more on them tomorrow), one chick just
hatched in the big incubator, and two pipped eggs.
Of the six chicks that
hatched on their own, five were Cuckoo Marans and only one was a
homegrown egg. Keep in mind that the Cuckoo Marans were jiggled
around by the post office and had to wait a whole week from laying
before going in the incubator, a combination of factors that often
reduces hatch rates. So why did they do so much better?
 Nine of the 24 eggs I started
with were from our four year old hens because I was hoping to pass on
their foraging genes, but I've since read that any hen older than two
years is going to produce eggs with limited viability. Even the
eggs from our "young" Golden Comet are a bit suspect since she's three
years old. Of these geriatric eggs, one hatched unaided just at
the end of day 21, I helped one out, and one is a late pipper.
For the sake of comparison, our mail order Cuckoo Marans self-hatched
42% of their eggs by the end of day 21, I helped one chick out of the
shell, and one more is a late pipper. Clearly, age of the hen
matters.
Nine of the 24 eggs I started
with were from our four year old hens because I was hoping to pass on
their foraging genes, but I've since read that any hen older than two
years is going to produce eggs with limited viability. Even the
eggs from our "young" Golden Comet are a bit suspect since she's three
years old. Of these geriatric eggs, one hatched unaided just at
the end of day 21, I helped one out, and one is a late pipper.
For the sake of comparison, our mail order Cuckoo Marans self-hatched
42% of their eggs by the end of day 21, I helped one chick out of the
shell, and one more is a late pipper. Clearly, age of the hen
matters.
As a side note, next
time I'll be sure to plan my hatch for the weekend. My ability to
focus on work while chicks are struggling out of their shells over my
right shoulder is pretty much nill. Good thing my boss is nice!
Its now been a month since
the new
poultry ramp went in and
both generations of the flock seem to be fine with getting in and out.
Home grown 2.0 is about 2 days older than the
rest of the next generation which naturally makes him their leader.
 Is
it worth it to help chicks who are having trouble getting out of the
shell? For that matter, how can you tell if they're having
trouble? If you do help, how? I'm far from an expert, but
after our second hatch, I'm starting to feel like I have a handle on
the answers to these thorny questions, so I thought I'd share.
Is
it worth it to help chicks who are having trouble getting out of the
shell? For that matter, how can you tell if they're having
trouble? If you do help, how? I'm far from an expert, but
after our second hatch, I'm starting to feel like I have a handle on
the answers to these thorny questions, so I thought I'd share.
First of all, the course
of least resistance is to not help, which is what I did with our first
hatch. If you're okay with some good chicks dying in the
incubator, this route makes sense, but you can improve your hatch rate
by giving troubled chicks a hand. That said, I wouldn't recommend
helping unless:
- You have some sort of critical care unit prepared (like a spare incubator, all warmed up.) Chicks you help out of the shell are likely to be weak and will need some extra time in a warm spot where they won't be picked on. Otherwise, your more vibrant chicks might peck them to death.
- You have a way of boosting the humidity in the incubator. Helping means opening the lid more, which can harm your currently hatching chicks. I devised an easy method of increasing the incubator humidity so that the chicks barely noticed me lifting the lid.
- You're willing to cull chicks.
The process of escaping the shell naturally kills chicks that are
damaged or are too weak to make it in life. By helping chicks out
of the shell, you're taking responsibility for euthanizing the ones
that survive but are too damaged to live in your flock. One of
the three chicks we helped had a problematic leg (not splayed legs, but
worse) that meant it would never be able to walk, and we had to put it
out of its misery. We figured out how to cull
chicks so that they die in seconds (but I'm putting the information
behind a link since I know the image will bother some of you.)
 If you aren't scared into
letting nature take its course, let's move on to when to help
chicks. In most cases, an untroubled chick will pip (peck a hole
in its shell) and then spend some time thinking about its
options. After anywhere from a few minutes to a few hours, the
chick starts hitting its beak against the shell in earnest to unzip
itself, a process that usually only takes an hour or so once
started. You can tell the chick is having trouble if it gets
stuck for several hours in the unzipping stage, either futilely banging
its beak against the hole without making further openings in the shell
or mostly unzipped but unable to kick free. A chick is also
troubled if it's pipped but hasn't started unzipping after twelve
hours, or if the bit of exposed membrane around the pipping hole is
starting to turn tan and dry. Finally, if a chick somehow
maneuvers itself so that it's trying to pip at the pointed end of the
shell, it won't be able to get out, so you might as well help from the
beginning.
If you aren't scared into
letting nature take its course, let's move on to when to help
chicks. In most cases, an untroubled chick will pip (peck a hole
in its shell) and then spend some time thinking about its
options. After anywhere from a few minutes to a few hours, the
chick starts hitting its beak against the shell in earnest to unzip
itself, a process that usually only takes an hour or so once
started. You can tell the chick is having trouble if it gets
stuck for several hours in the unzipping stage, either futilely banging
its beak against the hole without making further openings in the shell
or mostly unzipped but unable to kick free. A chick is also
troubled if it's pipped but hasn't started unzipping after twelve
hours, or if the bit of exposed membrane around the pipping hole is
starting to turn tan and dry. Finally, if a chick somehow
maneuvers itself so that it's trying to pip at the pointed end of the
shell, it won't be able to get out, so you might as well help from the
beginning.
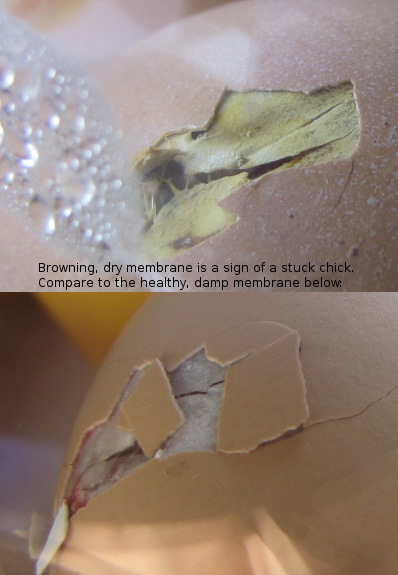
If you have a stuck
chick, how can you help? You'll need a basin of warm water (baby
bottle temperature), a clean rag, and nimble fingers. First step
is to moisten the membranes since they've probably started to dry out
if the chick has been pipped for so long. Dampen the rag in the
warm water and encircle the egg, then squeeze a few drops of water onto
the exposed membrane around the pipping hole. Be careful not to
drown the chick, though, since its beak will be right there --- you
don't want any water to actually run into the egg, just hydrate the
membrane. Since the chick has already started a hole, it should
be pretty simple to gently pick off bits of shell and membrane, opening
up a line around the shell just like the chick would have. If
your chick is worth saving, once you get the shell separated into two
halves, it will kick its way out, which is important for development of
the chick's legs. The membrane shouldn't bleed --- if it does,
the chick isn't really quite ready to hatch, so pop it back in the
incubator. (All of this is done in a warm spot outside the
incubator, by the way. You plucked out the problematic egg and
quickly reclosed the lid to keep everyone else toasty and moist.)
 I
helped three chicks during our most recent hatch, and all three of them
would have survived if I hadn't decided to cull the chick with the
troubled leg. I'm about 95% sure all three of these chicks would
have died if I hadn't helped, so I figure the time was well
spent. Plus, I didn't have dead chicks stinking up the incubator
like I did last time around, so I was able to let it keep running clear
to the end of day 22, netting one late hatcher halfway through the last
day. I'll definitely help any ailing chicks next time.
I
helped three chicks during our most recent hatch, and all three of them
would have survived if I hadn't decided to cull the chick with the
troubled leg. I'm about 95% sure all three of these chicks would
have died if I hadn't helped, so I figure the time was well
spent. Plus, I didn't have dead chicks stinking up the incubator
like I did last time around, so I was able to let it keep running clear
to the end of day 22, netting one late hatcher halfway through the last
day. I'll definitely help any ailing chicks next time.
 Since writing this post, I've perfected my
technique of helping chicks without bothering their siblings.
I've also got a better handle on when it's a good idea to help, and
when those chicks will have to be culled. Learn more about
helping chicks out of the shell in my 99 cent ebook.
Since writing this post, I've perfected my
technique of helping chicks without bothering their siblings.
I've also got a better handle on when it's a good idea to help, and
when those chicks will have to be culled. Learn more about
helping chicks out of the shell in my 99 cent ebook.
Permaculture
Chicken: Incubation Handbook walks beginners through perfecting the
incubating and hatching process
so they can enjoy the exhilaration of the hatch without the angst of
dead chicks. 92 full color photos bring incubation to life, while
charts, diagrams, and tables provide the hard data you need to
accomplish a hatch rate of 85% or more.
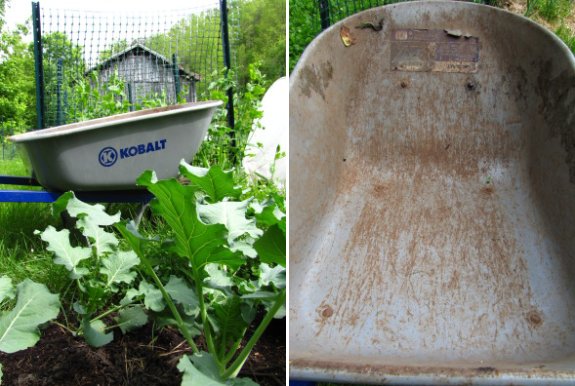
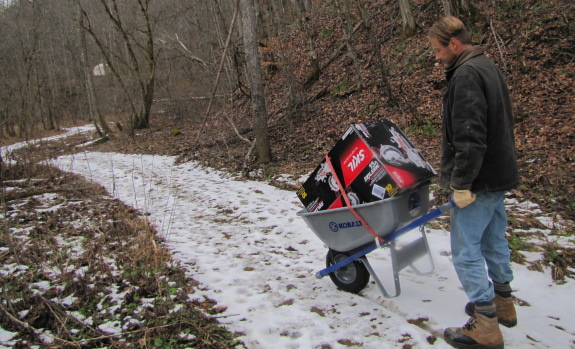 We've had the new Kobalt
never flat wheel barrow
in service for a few months now and it still feels like the best wheel
barrow money can buy.
We've had the new Kobalt
never flat wheel barrow
in service for a few months now and it still feels like the best wheel
barrow money can buy.
What would be great is if
someone would come up with a never flat wheel upgrade for the size of
wheels on the TC1840H
garden wagon.
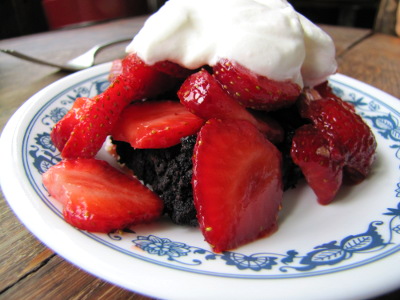
I love strawberries, but have
always been a bit undecided about strawberry shortcake. For one
thing, there just aren't enough strawberries in the dish. And
where's the chocolate? With strawberry season in full swing, I
tested out a new recipe that won everyone's heart...including my own.
Start with a big bowl of strawberries. A
gallon of strawberries will serve about seven or eight strawberry
lovers. Try not to eat too many on the way into the house.
If you must, wash the
strawberries, but only if it's been raining and the fruit is really
dirty. Then cut off the stems and slice the berries into
slivers. Sprinkle on a bit of sugar (perhaps 0.25 cups at the
most) --- you shouldn't need much, but if you couldn't wait to pick the
berries on a sunny afternoon, a bit of sugar will bring out the
flavor. Stir up the berries and set them aside. You should
have just over two quarts of lightly sweetened strawberry slices.

Now make the
brownies...I mean, shortcake. Preheat the oven to 350 degrees
Fahrenheit and butter a 9 by 13 inch pan. Melt a stick of butter
and stir in 1 cup of sugar, 2 eggs, 1.25 cups of cocoa (we used
Hershey's Special Dark because it was on sale), 0.25 c. flour, 0.5
teaspoons salt, 0.5 teaspoons baking powder, 1.5 teaspoons vanilla, and
about 2 tablespoons of water 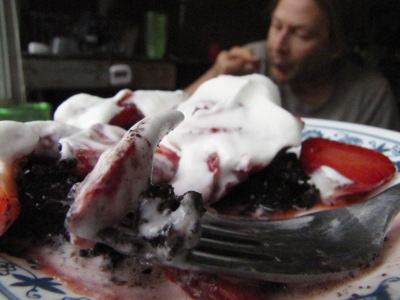 (enough to make the dough
hang togeher.) Whir up one 3.52 ounce bar of 60% dark chocolate
(we used Hershey's Extra Dark) in the food processor to turn it into
chips. Stir the chips into the dough and spread the result into
the bottom of the pan --- it won't want to spread and will be a bit
thin. Bake until a butter knife barely comes out clean.
(enough to make the dough
hang togeher.) Whir up one 3.52 ounce bar of 60% dark chocolate
(we used Hershey's Extra Dark) in the food processor to turn it into
chips. Stir the chips into the dough and spread the result into
the bottom of the pan --- it won't want to spread and will be a bit
thin. Bake until a butter knife barely comes out clean.
Now, pour a pint of
whipping cream in a bowl and turn your mixer on high to whip it.
At the end, sprinkle in a bit of sugar (perhaps 3 or 4 tablespoons) and
mix just enough to blend.
 Finally,
assemble your dessert. Brownies on the bottom, then strawberries
(being sure to pour on some of the juices), and finally whipped
cream. This recipe is too rich to eat every day, but is
definitely a great way to celebrate the height of strawberry
season. Heather deemed it worthy of a muddy trek through the
alligator swamp...and she doesn't like homemade brownies!
Finally,
assemble your dessert. Brownies on the bottom, then strawberries
(being sure to pour on some of the juices), and finally whipped
cream. This recipe is too rich to eat every day, but is
definitely a great way to celebrate the height of strawberry
season. Heather deemed it worthy of a muddy trek through the
alligator swamp...and she doesn't like homemade brownies!
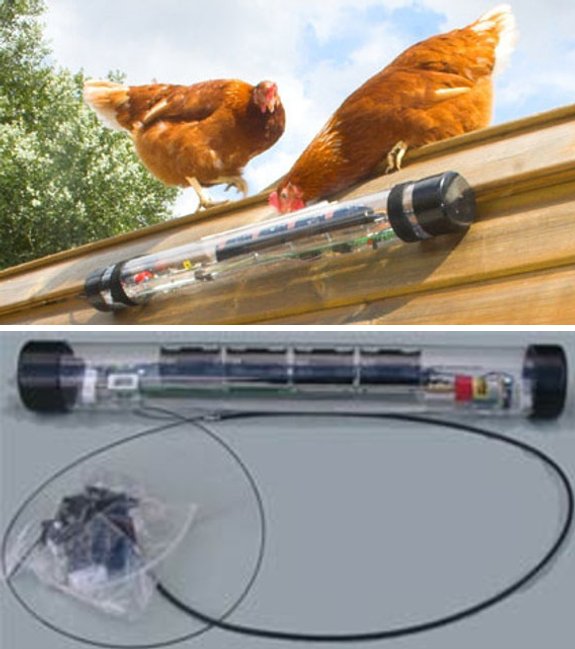
The
Pullit is a new automatic chicken coop door opener that has the
motor, controller, and timer built into a sleek see-thru tube.
Some people might say 300
dollars is too much to pay for such a device. It is the most expensive
chicken coop door opener I've seen yet, but it looks like it might last
3 or 4 times longer than the popular 100
dollar drapery motor version.
It can handle just about any
type of door and is manufactured in the U.K. which might make shipping
to the States even more expensive.

Edited to add:
After years of research, Mark eventually settled on this automatic chicken door.
You can see
a summary of the best
chicken door alternatives and why he chose this version here.
If you're planning on
automating your coop, don't forget to pick up one of our chicken waterers. They never spill or
fill with poop, and if done right, can only need filling every few days
or weeks!
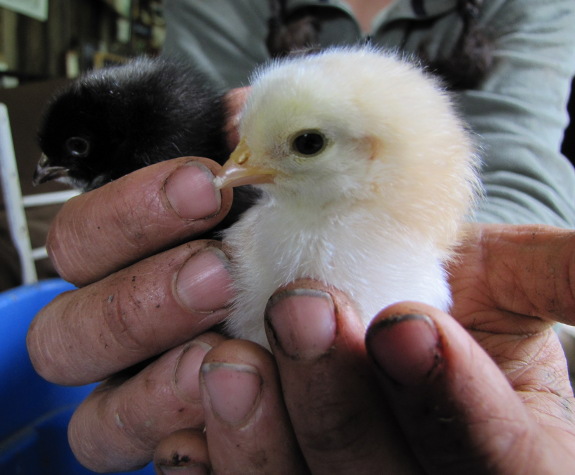
Three and a half days
after the first
chick hatched (and a
day and a half after I helped
the last chick out of its shell),
my obsession level finally diminished enough that I wasn't compelled to
check on the chicks every ten minutes. If you can believe it,
chick hatching actually trumped strawberry harvesting for a couple of
days there (which is why I had enough strawberries so early in the
season to pick a whole bowlful two days in a row and could make chocolate
strawberry shortcake.)
Maybe by the next hatch, I won't be so nervous that I'm unable to do
anything else while eggs are pipping?
 My final hatch rate was 9
living chicks (and one cull) out of 24 eggs. Certainly not as
good as I was hoping when I counted
my chickens before they hatched,
but drastically better than my first hatch (which netted 1 chick out of
7 eggs.) In fact, the hatch rate this time around was actually
better than it looks since my autopsy on day 23 showed that four of the
eggs were infertile, mostly from that old hen who just started laying a
month ago. People generally don't count infertile eggs in their
hatch
calculations, so our hatch rate was 45% --- 25% for our old hens and
58% for the prime cuckoo marans eggs.
My final hatch rate was 9
living chicks (and one cull) out of 24 eggs. Certainly not as
good as I was hoping when I counted
my chickens before they hatched,
but drastically better than my first hatch (which netted 1 chick out of
7 eggs.) In fact, the hatch rate this time around was actually
better than it looks since my autopsy on day 23 showed that four of the
eggs were infertile, mostly from that old hen who just started laying a
month ago. People generally don't count infertile eggs in their
hatch
calculations, so our hatch rate was 45% --- 25% for our old hens and
58% for the prime cuckoo marans eggs.
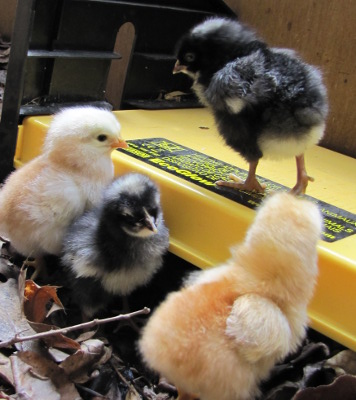 Since the folks we were
fostering half of our australorps
for probably don't want them after all, it looks like we might just
need one more hatch to reach quota for the year. We've given up
on our hens as gene donors (and are more impressed with the foraging
abilities of our black australorps anyway), so we've ordered twenty
australorp hatching eggs from Golden Willow Farm.
They're the folks who sent us the cuckoo marans eggs, and I like the
fact that their stock have access to real pasture. I'm aiming for
a hatch rate of 65% this time around (13 chicks), which I hope to
achieve by sanding off any bits of poop on the eggs. (Infection
is a common cause of egg loss midway through the incubation period,
which is the one part of the cycle where we did worse during this hatch
than the first time around. Incidentally, several of the eggs
were slightly dirty.) Wish us luck as we go into round three!
Since the folks we were
fostering half of our australorps
for probably don't want them after all, it looks like we might just
need one more hatch to reach quota for the year. We've given up
on our hens as gene donors (and are more impressed with the foraging
abilities of our black australorps anyway), so we've ordered twenty
australorp hatching eggs from Golden Willow Farm.
They're the folks who sent us the cuckoo marans eggs, and I like the
fact that their stock have access to real pasture. I'm aiming for
a hatch rate of 65% this time around (13 chicks), which I hope to
achieve by sanding off any bits of poop on the eggs. (Infection
is a common cause of egg loss midway through the incubation period,
which is the one part of the cycle where we did worse during this hatch
than the first time around. Incidentally, several of the eggs
were slightly dirty.) Wish us luck as we go into round three!
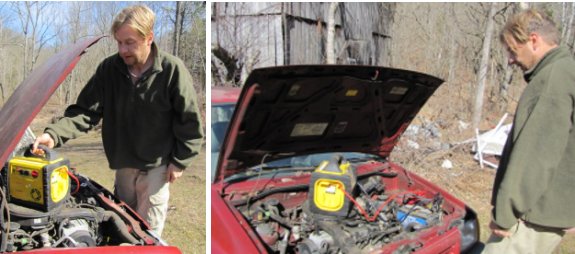
We've used the 5 in 1
portable power pack to
jump 2 vehicles so far.
The first time was on the
truck, and I guess that drained most of its energy because the next
time I tried to jump something it just wasn't enough even though the
onboard meter said it had enough energy.
I think it's too much to ask
this power pack to jump multiple batteries on a single charge.
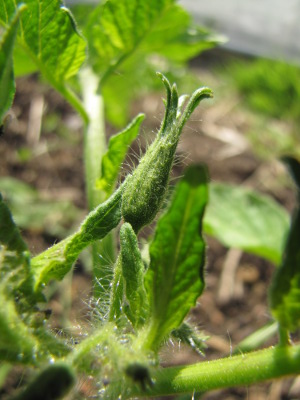 Do
you remember the blights and other fungal diseases that came with
2009's rainy summer and wiped out the garden (especially the tomatoes)?
I got a bit spooked during a rainy blackberry winter, thinking that we
might be in for a
repeat of the year without a summer, so I direct-seeded a few beds of
lettuce, greens, and broccoli. Hopefully, hot weather will make
this summer lettuce bitter and the broccoli buggy, but if the rain
takes the tomatoes, I know I'll need a consolation prize.
Do
you remember the blights and other fungal diseases that came with
2009's rainy summer and wiped out the garden (especially the tomatoes)?
I got a bit spooked during a rainy blackberry winter, thinking that we
might be in for a
repeat of the year without a summer, so I direct-seeded a few beds of
lettuce, greens, and broccoli. Hopefully, hot weather will make
this summer lettuce bitter and the broccoli buggy, but if the rain
takes the tomatoes, I know I'll need a consolation prize.
Once we finally had a
day dry enough to allow me to touch them, I also pruned
our tomatoes heavily,
even though they're a bit on the small size for pruning. If the
rain continues, I want the bottom leaves to be well above the soil
surface so that they dry off quickly and so that fungi can't splash up
from the ground. I also gave up on the driveway drying up enough
to bring in some more compost and cardboard during the optimal
transplant window, and instead put my four last sets into sunny (and
pre-built)
hugelkultur mounds in the forest garden.
A few of our tomatoes
are already sporting flower buds, so this transplant comes not a moment
too soon!
 Elsewhere
in the garden, we're in a bit of a lull (and I actually had Mark buy a
few vegetables at the store last week.) We're still enjoying
lettuce, greens, and strawberries, but the peas and broccoli are
running a week late due to the cold soil earlier this spring.
Sometime around the beginning of June, I expect the glut to begin ---
in addition to all of the above, we should soon have carrots, cabbages,
raspberries, new potatoes, and garlic all coming out of the garden in
basketloads. But it's hard to complain when I was able to turn a
gallon of strawberries into eleven cups of freezer jam on Saturday. The
freezer is no longer empty!
Elsewhere
in the garden, we're in a bit of a lull (and I actually had Mark buy a
few vegetables at the store last week.) We're still enjoying
lettuce, greens, and strawberries, but the peas and broccoli are
running a week late due to the cold soil earlier this spring.
Sometime around the beginning of June, I expect the glut to begin ---
in addition to all of the above, we should soon have carrots, cabbages,
raspberries, new potatoes, and garlic all coming out of the garden in
basketloads. But it's hard to complain when I was able to turn a
gallon of strawberries into eleven cups of freezer jam on Saturday. The
freezer is no longer empty!
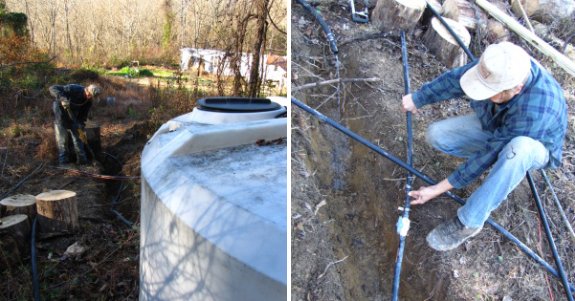
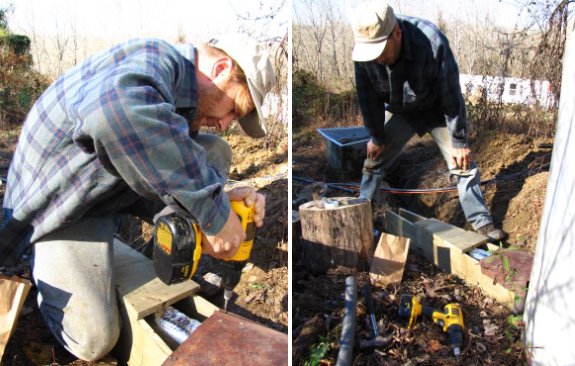
The new
anti-freeze box made it
through the 2010/2011 winter season doing its job of keeping the tank
water from freezing during the few feet before it goes underground.
Once it settled the entire
box shifted about an inch from the tank. A strip of foam pipe
insulation works well to fill in a gap like that.
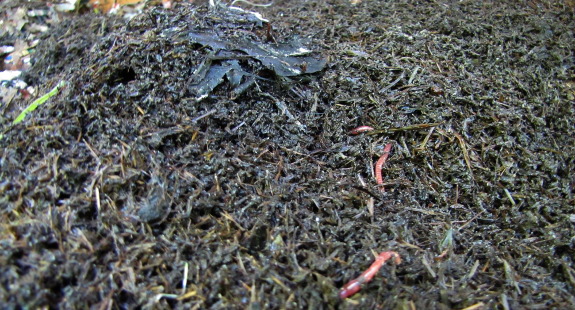
I've been mulling over
our school worm bin project ever since I
pronounced it a failure, and I think one of the
reasons I found it so easy to throw in the towel is because the worms
just weren't happy. The school food that ended up on our farm
seemed to be slightly better than what I was served as a student, but
it was still overly processed, starchy, and oily, and the worms were
lingering rather than multiplying on such substandard fare. I
didn't realize this at the time --- I just had a sinking feeling in the
pit of my stomach every time I opened the worm bin lid after the first
month or so.
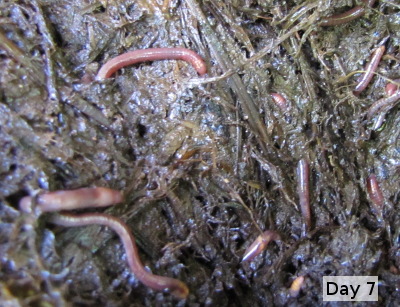 After the school food stopped
coming, I tossed ten gallons of moderately fresh horse manure in the
bin, then another ten gallons two weeks later. The worms quickly
migrated up into the manure and their population exploded. The
two and a half week old manure is still full of worms, but its
appearance has already changed over to nearly pure castings (the photo
at the top of the page), in stark contrast to the three month old food
scraps in which I can still pick out the shape of the food. So
this is what a healthy worm bin is supposed to look like!
After the school food stopped
coming, I tossed ten gallons of moderately fresh horse manure in the
bin, then another ten gallons two weeks later. The worms quickly
migrated up into the manure and their population exploded. The
two and a half week old manure is still full of worms, but its
appearance has already changed over to nearly pure castings (the photo
at the top of the page), in stark contrast to the three month old food
scraps in which I can still pick out the shape of the food. So
this is what a healthy worm bin is supposed to look like!
For future reference, I
had tried to pick out the most worm-worthy food to put in the bin, but
there just wasn't much of it, and this is what I'd been feeding the
worms (in rough order of amount):
- mashed potatoes
- green beans
- bread
- hamburgers
- french fries
- corn
- apples
- peas
- carrots
- salad
- pickles
 You
would have thought that the worms would have at least been pleased with
the fruits and vegetables, but the truth is that the only thing they
actually seemed to be enjoying was fresh spinach. The mashed
potatoes, especially, caused anaerobic pockets that quickly turned
moldy and that the worms fled from.
You
would have thought that the worms would have at least been pleased with
the fruits and vegetables, but the truth is that the only thing they
actually seemed to be enjoying was fresh spinach. The mashed
potatoes, especially, caused anaerobic pockets that quickly turned
moldy and that the worms fled from.
The moral of the story
is that run of the mill food scraps aren't very healthy for
worms. Makes you wonder, though --- if the worms won't eat this
food, should our community's children?
 The June
edition of Weekend Homesteader is now available in Amazon's kindle
store! This month's projects include:
The June
edition of Weekend Homesteader is now available in Amazon's kindle
store! This month's projects include:
- Making a small worm bin (and how to use worm castings and tea in the garden)
- Surveying your site (to discover natural paths and your yard's potential)
- Learning about nutrition (and unlearning everything you thought you knew)
- Calculating your real hourly wage (to find out if your job's driving you into debt)
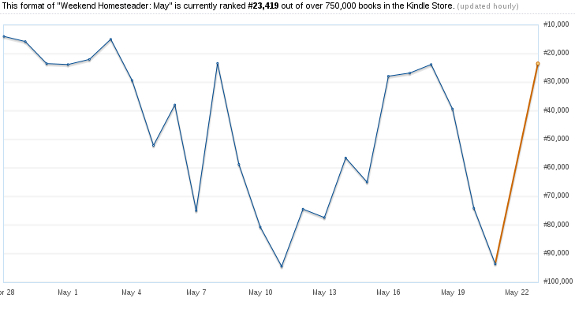
A huge thank you to
everyone who helped the May
edition of Weekend Homesteader stay in top
13% of all Amazon ebooks last month! In fact, at times the ebook
was in the top 2%, which really made my day. I was thrilled to
see a second peak in sales this month, presumably from random Amazon
folks who stumbled across the book without reading our blog due to your
good reviews. Your
actions were clearly very powerful.
 I'm hoping you can keep
the ball rolling with the June edition of Weekend Homesteader.
Even if you don't want to spend 99 cents to buy the ebook, you can help
this ebook rise in the rankings with a few simple actions:
I'm hoping you can keep
the ball rolling with the June edition of Weekend Homesteader.
Even if you don't want to spend 99 cents to buy the ebook, you can help
this ebook rise in the rankings with a few simple actions:
- Scroll down near the bottom of the Amazon page to where it says
"Tag
this product." Click on anything you
want, but I'm aiming for "homesteading" and "worm bin", and
your vote there would really help.
- Click the "like" button near the top of the Amazon page even if you don't buy the book.
- Buy the ebook if you're interested.
- Leave a review, if at all possible.
- Leave a comment on the Weekend Homesteader June resource page letting me know what you loved or hated about this second installment. Were the exercises too easy, too hard, or just right? Did you have trouble with any part of the ebook? I'll take what you say into consideration as I write the July volume.
- Tell your friends!
As a side note, if
you're one of our regular readers and are aching to
follow along, but don't have a Kindle or the know-how to download their
app
for your computer or phone, drop
me an email and I'll
send you a free,
unformatted pdf copy to read. My goal isn't to leave you out, but
to try to add more converts to the flock.
Thank you so much for
taking the time to make Weekend Homesteader a success!
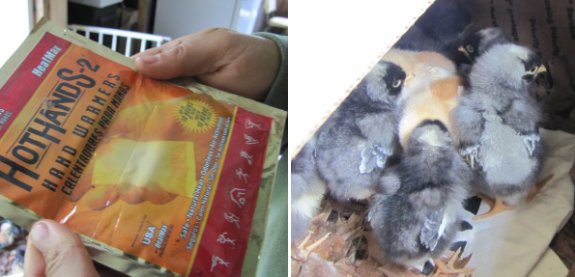
We lost power this morning
and the new chicks started complaining loudly.
One of the portable
power packs came in handy
to keep the incubator warm, but the other pack didn't have enough juice
to run the brooder. Ooops! I should have topped off that charge last
week when I tried jumping the car.
Anna had the great idea to
use a disposbale hand warmer, and it only took me 10 minutes to dig
through a box of stuff to find it. It felt a bit too hot, so we wrapped
it in a small piece of cloth. 10 minutes later the peeping shifted from
"we're too cold!" to "things are fine here".
The package claims you can
get 10 hours of heat from these things. Our power came back in about 2
hours and now we've decided to make a point to have a few of these on
hand for any future emergency chick warming.
 Although I'm
dubious about the benefits of planting comfrey underneath fruit trees
as a living mulch,
I've had great luck cutting comfrey from standalone plants to mulch the
vegetable garden. The high nitrogen leaves break down nearly as
quickly as grass clippings do, so they act as a combination of
top-dressing and weed control (with a bit more emphasis on the former
than the latter.) This shot was taken about a week after adding
the leaves to the ground, but it rained for most of the week and the
comfrey didn't wilt until last Friday. The softest parts of the
leaves are already starting to disappear into the soil four days after
wilting.
Although I'm
dubious about the benefits of planting comfrey underneath fruit trees
as a living mulch,
I've had great luck cutting comfrey from standalone plants to mulch the
vegetable garden. The high nitrogen leaves break down nearly as
quickly as grass clippings do, so they act as a combination of
top-dressing and weed control (with a bit more emphasis on the former
than the latter.) This shot was taken about a week after adding
the leaves to the ground, but it rained for most of the week and the
comfrey didn't wilt until last Friday. The softest parts of the
leaves are already starting to disappear into the soil four days after
wilting.
I estimate I'd need
about 600 comfrey plants, or a square planting 37 feet on each side, to
grow all of the mulch for my vegetable garden. If I had a better
way to harvest them than cutting with scissors, I might be tempted to
devote the space to these dynamic accumulators. As it is, my
dozen plants are all I can handle.
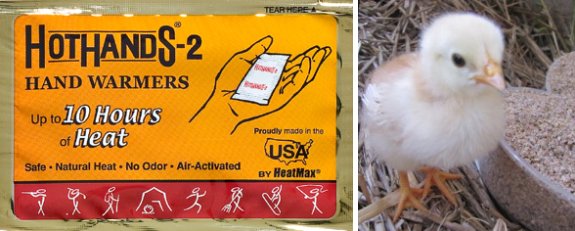
We ended up putting all the
chicks in a much smaller box to encourage them to all stay
on top of the hand warmer.
It might have been smarter to
attach the warmer to the roof of the brooder so they could have pushed
up against it.
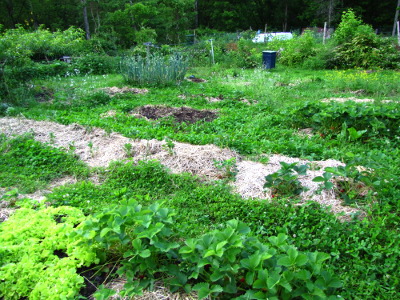 I
generally start out the weeding year by working my way regularly
through quadrant after quadrant, then cycling back around to the
beginning once I'm done. But the day inevitably comes when I get
a bit behind and have to break ranks to weed the beds that really need
it first. Which begs the question --- who needs it the most?
I
generally start out the weeding year by working my way regularly
through quadrant after quadrant, then cycling back around to the
beginning once I'm done. But the day inevitably comes when I get
a bit behind and have to break ranks to weed the beds that really need
it first. Which begs the question --- who needs it the most?
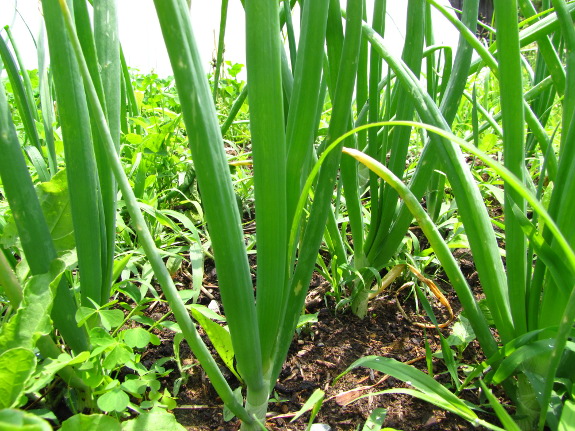
Small seedlings and slow
growers can be quickly overwhelmed by weeds. Earlier in the
season, all of the seedlings were top priorities, but summer crops like
beans, corn, and cucurbits aren't in much danger from a few weeds even
when they're barely sprouted. Instead, my biggest concern this
week are middle-aged carrots and onions --- both have been in the
ground for months now, but their leaves don't cast much shade and the
plants don't bulk up fast, so a few weeds can wipe them out
quickly. This bed of onions definitely should have been weeded a
week ago.
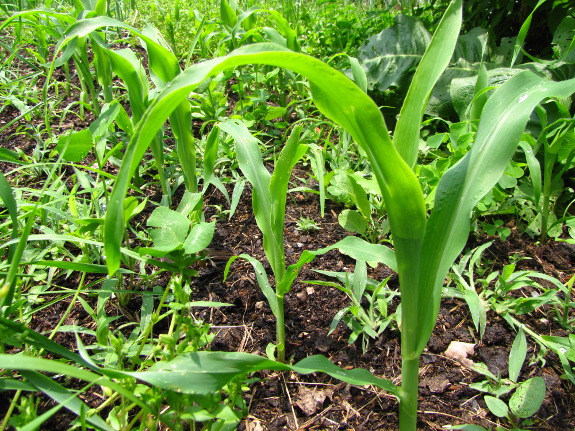
Next on the list is
those hardy summer seedlings. Sure, they won't melt away if I let
the weeds overwhelm them, but they will get stunted, and I'm always
itching for the first beans and tomatoes. While I'm weeding
between the plants, I also go ahead and do any thinning if I've put the
seeds too close together.
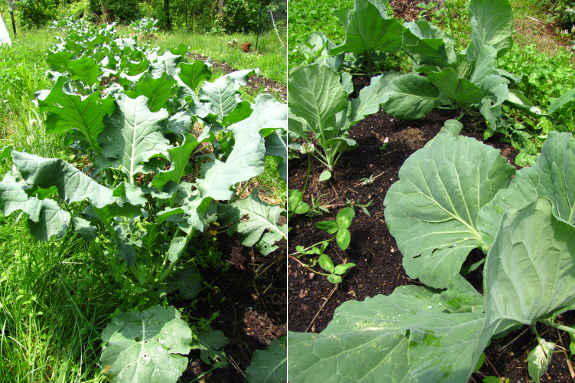
I won't get to it this
week, but the beds I'll be aiming to weed next week contain plants
currently in their prime like peas, cabbage, and broccoli. These
guys are growing so vigorously that they shade out most of the weeds
under their canopy, but it never hurts to keep the competition down.
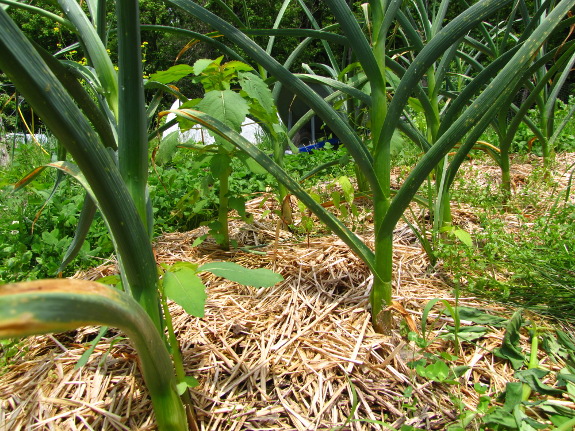
Way, way down on my list
are mature and overmature crops that will be pulled out in the next
couple of weeks, like garlic,
potato
onions, bolted spring greens, and so forth. Since I weed each
bed heavily after harvest and then immediately add compost and replant,
there's not much point in weeding these beds now unless there are huge
weeds bothering my vegetables. Granted, it would be nice to rip
out this chickweed and jewelweed before it goes to seed, but I can only
do so much.
Of course, if the
floodplain ever dried up and we were able to haul in some mulch, the
endless cycle of weeding would be reduced by 80%. Still, I have
to admit that I find the act of ripping weeds out of garden beds deeply
satisfying, especially when I have strawberry harvest to look forward
to for dessert.
 Thank
you, thank you, thank you! I'm such a pessimist that I figured
you all might get sick of the idea after the May
edition of Weekend Homesteader, but I was thrilled to be
proven wrong. Due to your continued support, the June
edition of Weekend Homesteader popped right up into the top
1% of books in the Kindle store during the first day!
Thank
you, thank you, thank you! I'm such a pessimist that I figured
you all might get sick of the idea after the May
edition of Weekend Homesteader, but I was thrilled to be
proven wrong. Due to your continued support, the June
edition of Weekend Homesteader popped right up into the top
1% of books in the Kindle store during the first day!
In order to suck in
strangers who aren't my loyal followers, though, I need some
reviews. If you've had a chance to look through your new ebook,
would you mind heading back over to Amazon and writing what you thought
of it? While you're at it, don't forget that you can also review
the May edition of Weekend Homesteader. Your reviews keep the
books vibrant over the course of the month, and I know I couldn't do it
without you!

The do
it yourself mechanical smasher worked out well at saving some
time and effort building the hanger portion of our Avian Aqua Misers, but the process was a bit
cumbersome and dangerous.

I decided to simplify the hanger design so that a pair of normal pliers
could be used to squeeze the hanger into place without as much effort
as before.
My latest idea is to use this
type of mechanism to automatically crack walnuts. Of course there would
need to be some system that fed each nut one at a time, which is the
part that has me stumped at the moment, but it's one of those low
priority problems that will have to wait a few years due to more
pressing projects.
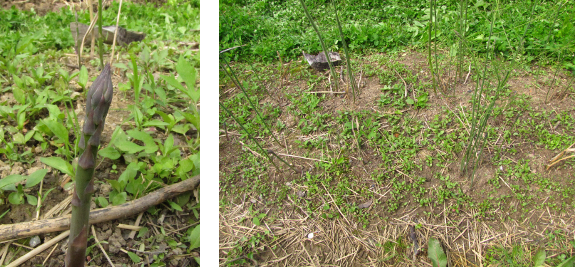
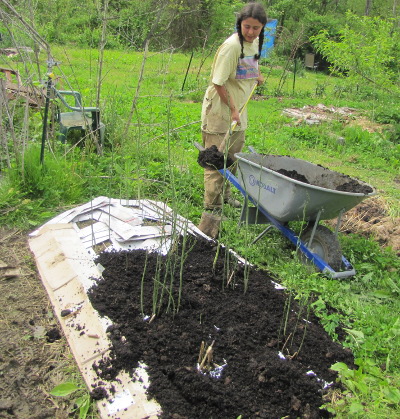
Raking
the mulch off the asparagus beds in early spring and giving it to the
chickens (combined with twice weekly bug picking early in the
season) does seem to have knocked my asparagus
beetle problem
back. Unfortunately, I neglected to deal with the bare soil, and
by early May, little plantain and ragweed seedlings were popping up all
over. Not only does asparagus not like its roots to be disturbed,
I found the idea of pulling each of those weeds very daunting.
What to do?
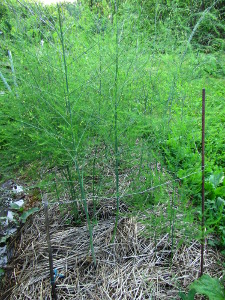
Make a kill mulch, of
course! I dealt with the weeds
right around the base of each plant, layered small sheets of cardboard
on the ground, and topped the kill layer off with compost and straw.
Three weeks later, the
bed is still weed-free and the asparagus is thriving. Kill
mulches really are a great tool for the lazy gardener. (Check out
the May
edition of Weekend Homesteader for more tips on kill
mulches.)
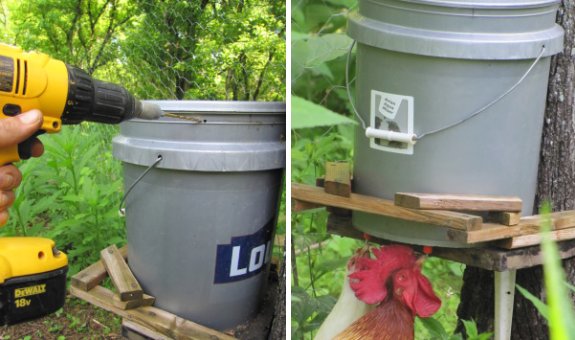
I forgot to mention one
important detail when putting
together a do it yourself automatic 5 gallon bucket chicken waterer.
Drill a small hole in the
side towards the top.
If there's no air flow the
water will stop dripping due to a suction effect.
 This week has been a bit
rough for me. Mark and I had hoped to slip away from the farm for
a long weekend in order to watch one of my favorite
cousins-in-law
graduate from my alma mater, and as the date approached, my dreams grew
more and more vivid. I was reenacting my own
graduation, walking
through research labs, and doing everything my subconscious told me my
alma mater might have wanted me to do with my degree. None of the
dreams ended well.
This week has been a bit
rough for me. Mark and I had hoped to slip away from the farm for
a long weekend in order to watch one of my favorite
cousins-in-law
graduate from my alma mater, and as the date approached, my dreams grew
more and more vivid. I was reenacting my own
graduation, walking
through research labs, and doing everything my subconscious told me my
alma mater might have wanted me to do with my degree. None of the
dreams ended well.
Meanwhile, in the waking
world, we were struggling to get the farm in shape to be left alone for
a few days. Wednesday, it all came to a head when I saw deer
damage in the garden for the first time in six months (maybe the result
of the power outage?) and one of our homegrown chicks keeled over for
no apparent reason (probably a delayed reaction to chilling a couple of days before,
also during the power outage.) We were both running on empty
already, and reluctantly decided to just stay home.
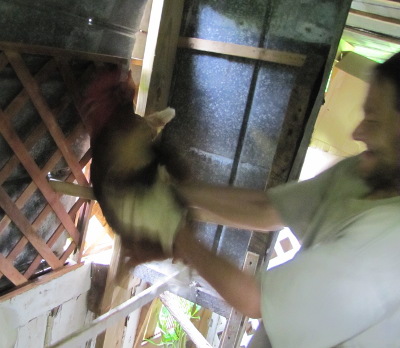 I
often find tranquility in the chicken pasture, but for the last month,
I've been barred from entry by our rooster. Once a
gentleman, now he
had decided that I was a competitor to his wives' affection, and he
flogged me violently every time I entered. I'd been saving the
rooster's demise until after our trip, figuring he could guard the
harem while we were out of town, but now there was nothing to stop us
from putting his head on the block. Thursday morning, Mark tried
to catch the rooster with a blanket --- watching the farce cheered me
up immensely, but the rooster remained uncaught. When heavy rains
produced an early dusk, we tried again, this time with Mark plucking my
nemesis off the perch.
I
often find tranquility in the chicken pasture, but for the last month,
I've been barred from entry by our rooster. Once a
gentleman, now he
had decided that I was a competitor to his wives' affection, and he
flogged me violently every time I entered. I'd been saving the
rooster's demise until after our trip, figuring he could guard the
harem while we were out of town, but now there was nothing to stop us
from putting his head on the block. Thursday morning, Mark tried
to catch the rooster with a blanket --- watching the farce cheered me
up immensely, but the rooster remained uncaught. When heavy rains
produced an early dusk, we tried again, this time with Mark plucking my
nemesis off the perch.
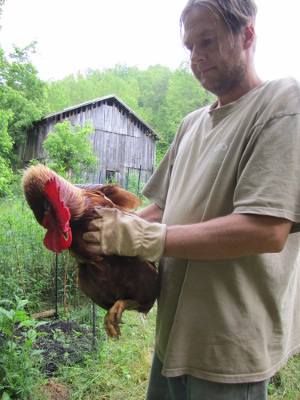 Red blood on green grass, a
patient Lucy sitting on the sidelines, the two of us thanking this
vibrant rooster for his healthy meat as we plucked his feathers, then
hosing myself down in another rainstorm as the rooster's bones simmered
on the stove. There amid the blood and smell of hot, damp flesh,
I realized I was happy.
Red blood on green grass, a
patient Lucy sitting on the sidelines, the two of us thanking this
vibrant rooster for his healthy meat as we plucked his feathers, then
hosing myself down in another rainstorm as the rooster's bones simmered
on the stove. There amid the blood and smell of hot, damp flesh,
I realized I was happy.
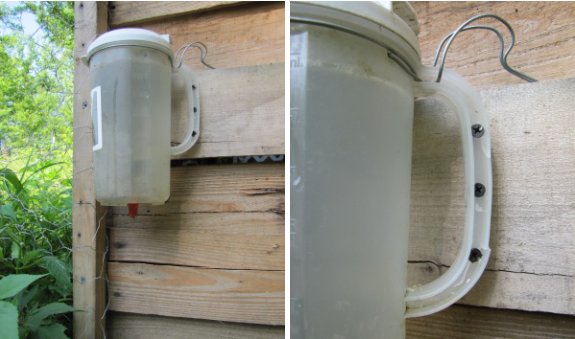
Sometimes the best spot for
an automatic chicken waterer is against the outside wall of a
coop or barn.
Instead of making a wooden
holder or hanging this one from a hook I thought I'd try this easier
mounting method and see how well it works.
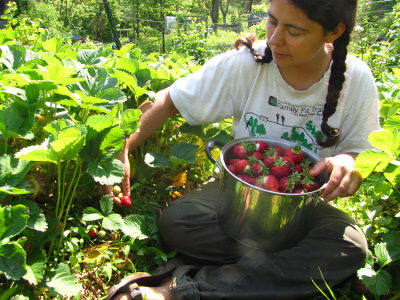 Peach
leather turned out
to be our favorite preserved fruit last year. I say "our", but
I'm ashamed to admit that I mostly ate the delicacy for my solitary
breakfasts, so Mark didn't get to enjoy the dried fruit. Once he
finally got a taste of the peach leather, it became clear that I'd
better make more this summer so that we could share from now on.
Peach
leather turned out
to be our favorite preserved fruit last year. I say "our", but
I'm ashamed to admit that I mostly ate the delicacy for my solitary
breakfasts, so Mark didn't get to enjoy the dried fruit. Once he
finally got a taste of the peach leather, it became clear that I'd
better make more this summer so that we could share from now on.
The first step in making
any kind of fruit leather is to think about supplies and dehydrator
space. Two cups of whole strawberries are going to turn into
about a cup and a quarter of fruit puree, which in turn will fill up
one medium-sized cookie sheet. Don't pick more fruit than you
have room for, or you'll just have to gorge on the excess for
supper. (Our life is so hard....)
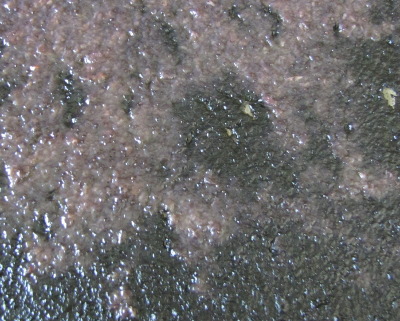
Next, check the weather
forecast. If you're relying on sunshine to dehydrate your fruit,
you'd better find at least a day and a half of hot, sunny
weather. Don't start your leather on a sunny afternoon if it's
slated to rain the next day, or your fruit will go bad. If the
leather turns gray (like this), starts to smell, or gets moldy, you'll
have to throw it out. To be on the safe side, it's best to always
start fruit leather first thing in the morning.
With all of those
preparations out of the way, it's actually very simple to make
strawberry 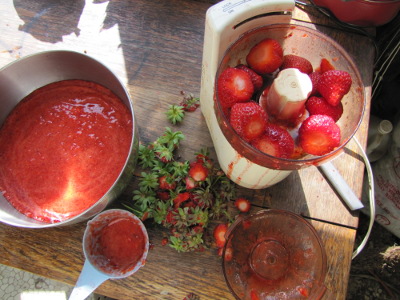 leather. Rinse your
fruits if they're truly dirty (or came from someone else's place), then
cut off the tops and turn the strawberries into puree in the food
processor. Measure how much puree you have and add 1 tablespoon
of honey and 0.5 tablespoons of lemon juice per cup --- the honey
sweetens your fruit and also helps the leather stick together while the
lemon juice preserves color and kills microorganisms.
leather. Rinse your
fruits if they're truly dirty (or came from someone else's place), then
cut off the tops and turn the strawberries into puree in the food
processor. Measure how much puree you have and add 1 tablespoon
of honey and 0.5 tablespoons of lemon juice per cup --- the honey
sweetens your fruit and also helps the leather stick together while the
lemon juice preserves color and kills microorganisms.
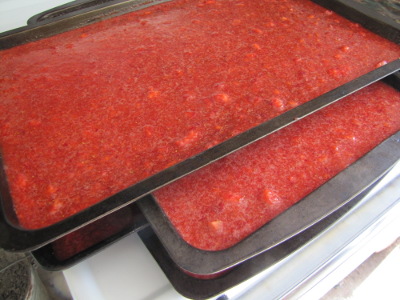 Pour about a cup and a
quarter of doctored puree into each cookie sheet and tilt the pan until
the fruit evenly covers the surface. This will make a paper-thin
leather, which is what's called for with solar dehydrating since the
thin layer of fruit will dry in a day or two. If I was running an
electric dehydrator, I might use two or even three cups of puree per
tray to make a thick leather like you'll find in the store.
Pour about a cup and a
quarter of doctored puree into each cookie sheet and tilt the pan until
the fruit evenly covers the surface. This will make a paper-thin
leather, which is what's called for with solar dehydrating since the
thin layer of fruit will dry in a day or two. If I was running an
electric dehydrator, I might use two or even three cups of puree per
tray to make a thick leather like you'll find in the store.
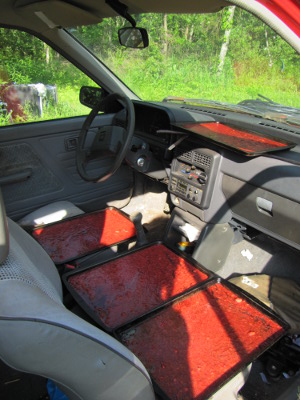 Stack your trays as shown
above and you can carry up to five trays at once as you head out to
your hot, dry spot. It's possible to simply dehydrate fruit
outside in the sun, but the process will take longer and you'll have to
cover the leather with a screen to keep out bugs while letting water
escape. Mark wishes I would let him make me a real solar
dehydrator (one of
these days!), but in the meantime we're using the parts Festiva to dry out fruit. Any
location where the temperature gets between 100 and 140 degrees
Fahrenheit will work; higher temperatures will cook your fruit rather
than drying it, reducing nutrients and flavor, while lower temperatures
won't dry the fruit before it goes bad.
Stack your trays as shown
above and you can carry up to five trays at once as you head out to
your hot, dry spot. It's possible to simply dehydrate fruit
outside in the sun, but the process will take longer and you'll have to
cover the leather with a screen to keep out bugs while letting water
escape. Mark wishes I would let him make me a real solar
dehydrator (one of
these days!), but in the meantime we're using the parts Festiva to dry out fruit. Any
location where the temperature gets between 100 and 140 degrees
Fahrenheit will work; higher temperatures will cook your fruit rather
than drying it, reducing nutrients and flavor, while lower temperatures
won't dry the fruit before it goes bad.
If you're using a
ramshackle dehydrator like ours, you'll want to check on your leather
two or three times a day, moving wetter trays into the sunniest spots
and removing finished trays. I discovered by accident that if you
leave finished trays in the car overnight, just enough moisture will
seep back into the leather that it will peel off the tray with
ease. Of course, real people use Saran wrap underneath the fruit
so that they don't have to pry it loose, but since I don't care about
appearances, I ditch the disposables.
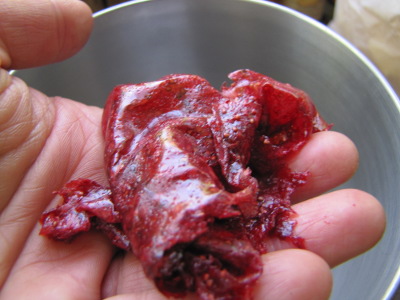 You can store dried fruit on
the shelf for a few weeks, in the fridge for a few months, or just toss
it in the freezer like we do. Since around half a gallon of
strawberries turns into about a cup of fruit leather, space in the
freezer won't be a problem. The real trouble will be keeping your
fingers out of this natural, vitamin-rich candy until the cold season
rolls back around.
You can store dried fruit on
the shelf for a few weeks, in the fridge for a few months, or just toss
it in the freezer like we do. Since around half a gallon of
strawberries turns into about a cup of fruit leather, space in the
freezer won't be a problem. The real trouble will be keeping your
fingers out of this natural, vitamin-rich candy until the cold season
rolls back around.

Somebody once asked me what
would be the best piece of technology to put aside and store for a
possible future apocalyptic scenario.
If the future ends up being
similar to Philip K Dick's vision from "Blade Runner" then perhaps a
box of the above robotic chicks would serve as a valuable token to
barter for goods and services?

In that story the environment
was damaged and the entire population was taking part in fostering
animals and insects in the safety of their homes so that one day in a
more healthy future the world could be re-populated. The size and
scarcity of the animal was how people displayed status in that society.
A wealthy family may have a horse whereas a more middle class family
might only be able to afford a chicken and the less fortunate citizens
had to bear the shame of not having anything to take care of. A black
market sprang up to provide robotic animals to those who either
couldn't afford the real thing or had their real animal kick the
bucket. Robotic technology was to the point where they had android
servants that would sometimes malfunction and kill their owners.
The above robotic chicks are only 27
dollars now, but I'm sure if that type of future takes hold you could
expect to fetch upwards of a thousand dollars or more.
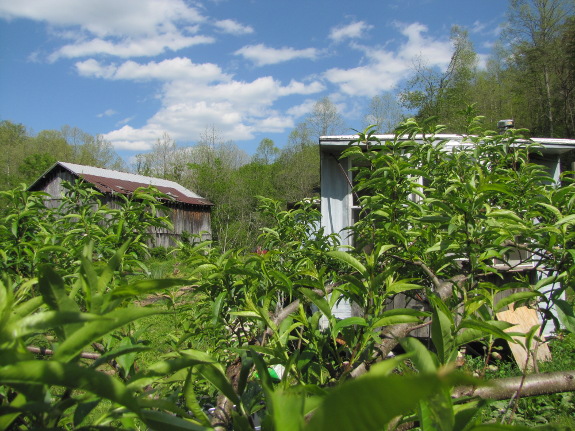
I posted a few days ago
about realizing
that now wasn't the time to go out of town for a long weekend, and I know that many of you
were thinking "Too bad they can't get away!" The truth is that we
live in paradise and would vastly prefer not to leave the farm about
95% of the time.
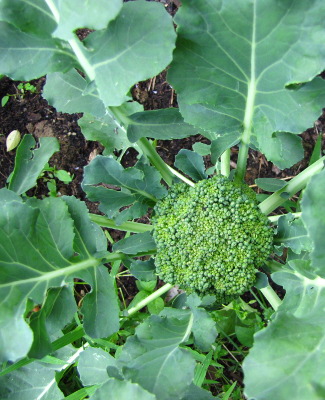 My mother(s) sometimes worry
that I'm becoming a shut-in, afraid to leave the farm, but the truth is
more complicated. The further we dissolve our lives into deep
ecology, the more the outside world becomes a fast, startling place
that leaves us drained. Watching TV, commuting to work every day,
sitting beside strangers on the subway --- all of these facets of
modern American life dull the senses and make the outside world
bearable. Without distractions to build up mental walls, we're
honestly interested in the lives of the lady at the post office, are a
bit wounded by angry couple sitting beside us in the restaurant, and
soon our heads are whirling with the lives of scores of
strangers. Mark has taken over the shopping because I've
discovered that even an afternoon trip to the big city for supplies can
require a full evening of quiet time to counteract the ads blaring from
billboards and the dose of world news that inescapably finds its way to
our ears through the TV at the hardware store.
My mother(s) sometimes worry
that I'm becoming a shut-in, afraid to leave the farm, but the truth is
more complicated. The further we dissolve our lives into deep
ecology, the more the outside world becomes a fast, startling place
that leaves us drained. Watching TV, commuting to work every day,
sitting beside strangers on the subway --- all of these facets of
modern American life dull the senses and make the outside world
bearable. Without distractions to build up mental walls, we're
honestly interested in the lives of the lady at the post office, are a
bit wounded by angry couple sitting beside us in the restaurant, and
soon our heads are whirling with the lives of scores of
strangers. Mark has taken over the shopping because I've
discovered that even an afternoon trip to the big city for supplies can
require a full evening of quiet time to counteract the ads blaring from
billboards and the dose of world news that inescapably finds its way to
our ears through the TV at the hardware store.
Lately, we've realized
there's very little we want or need from the outside world. The
one exception is visiting our family and friends, but as the farm
becomes a more and more restful place, it becomes easier and easier to
make those people come to us. In Five
Acres and Independence, Maurice Gains devoted a
whole section to tips for fending off hungry city-dwellers who want to
visit during the growing season, and my experience has been similar
(although more positive.) "I have three gallons of strawberries
that need a home," I say, and two
hours later my mother and sister are pounding on my door. When
you live in paradise, not only do you not want to leave, other people
are willing to come to you.
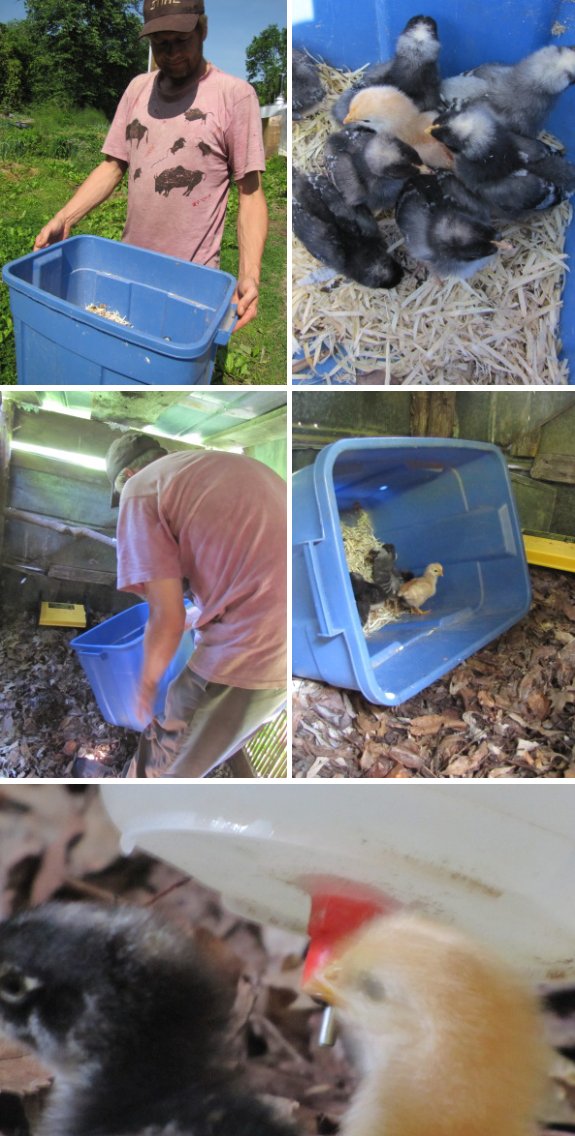
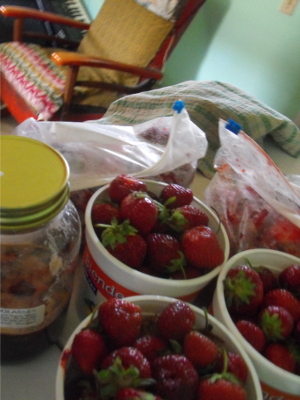 Compared
to storebought strawberries, or even to fruits from conventional
you-pick operations, any kind of homegrown strawberry is
delicious. However, once I'd been spoiled by gorging on my own
berries for two weeks, I started to notice taste differences from bed
to bed. My favorite beds became the source of strawberries for
fresh eating, while other beds were relegated freezer jam or strawberry
leather.
What's the
difference?
Compared
to storebought strawberries, or even to fruits from conventional
you-pick operations, any kind of homegrown strawberry is
delicious. However, once I'd been spoiled by gorging on my own
berries for two weeks, I started to notice taste differences from bed
to bed. My favorite beds became the source of strawberries for
fresh eating, while other beds were relegated freezer jam or strawberry
leather.
What's the
difference?
I've written previously
about how heavy
rains can cause micronutrient deficiencies that in turn degrade the
taste of strawberries.
Similarly, I mentioned that strawberries
picked on hot, sunny afternoons are tastier than those picked in the
morning or soon after rains.
These factors aren't influencing the current taste differences, though,
since all of our plants have been exposed to the same rainy weather.
Variety is one obvious
cause of taste differences. In addition to our alpine
strawberries,
we're growing two June-bearing varieties (Honeoye and Jewel) and one
ever-bearing variety (Ozark Beauty.) The fruits are smaller and
less prolific on the Ozark Beauty, but these plants are our consistent
taste-test winners. Honeoye is a close runner up, especially
early in the season, although the flavor tends to degrade as the
plants reach the end of their fruiting season. Jewel is my least
favorite strawberry for flavor, but I've kept growing it 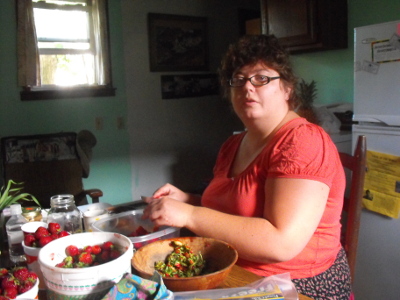 because the
fruits start a couple of weeks later than Honeoye (our earliest
variety), extending spring strawberry season to a full month. If
anyone has a favorite late, June-bearing strawberry, I'd love to hear
what
variety you grow!
because the
fruits start a couple of weeks later than Honeoye (our earliest
variety), extending spring strawberry season to a full month. If
anyone has a favorite late, June-bearing strawberry, I'd love to hear
what
variety you grow!
Another factor that
causes a decline in fruit quality is age of the
strawberry bed. Each season after the plants stop producing, I
drastically thin the beds and add a heavy top-dressing of composted
manure. Despite all of this TLC, our best-tasting strawberries
still come from the beds that I just planted
last fall.
These beds don't produce nearly as much fruit since the plants have had
less than a year to store up energy, but what they lack in quantity
they make up in quality. I suspect that the best rotation would
be allowing strawberry plants to stay in the ground for two years so
that I can have heavy yields for drying from the older beds while
saving the fruits from the younger beds for our table.
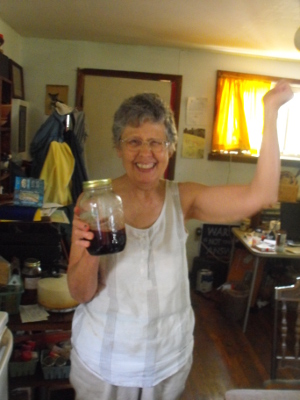 When I did a blind taste test
of our strawberry beds and compared my
flavor rating to the age of the bed, one four year old bed produced
strawberries just as delicious (or maybe more so!) than the newest
beds. This elderly bed is located in the part of the garden that
was used by the previous owners as an ash heap, and decades later, big
chunks of biochar are still visible in the soil. Could the
biochar be responsible for this aberration in flavor? I guess I
know which crops I'll use with my next biochar
experiment!
When I did a blind taste test
of our strawberry beds and compared my
flavor rating to the age of the bed, one four year old bed produced
strawberries just as delicious (or maybe more so!) than the newest
beds. This elderly bed is located in the part of the garden that
was used by the previous owners as an ash heap, and decades later, big
chunks of biochar are still visible in the soil. Could the
biochar be responsible for this aberration in flavor? I guess I
know which crops I'll use with my next biochar
experiment!
(As a side note, the
photos in this post showcase Mom and Maggie's experiments with their
three gallons of Walden Effect strawberries. Half a gallon were
given away, a gallon were topped and put in the freezer, three cups
turned into a honey-sweetened jam, and the rest were eaten raw or saved
for more experiments.)
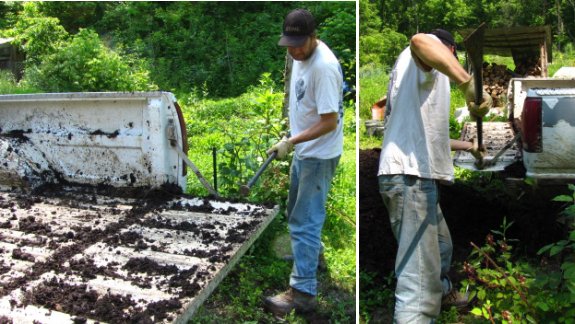
The tailgate on the truck
didn't want to stay closed today.
A little spud bar
persuasion helped one side to stay clicked in place.
The other side will have to
wait for cooler temperatures as I was unable to figure out its
mechanical riddle.

As soon as the first
2011 pullets begin to lay, I plan to delete our
ancient hens from the flock and start over with a homegrown rooster and
six hens. But which breeds will make up the new flock?
 If you've been reading our chicken blog, you can probably see the
writing on the wall --- our addiction to Golden Comets is giving way to more
homestead-worthy breeds. The Black
Australorps have
proven themselves to be the best possible foragers, and I hope that the
Cuckoo Marans will live up to their reputations as good mothers.
I want to hedge my bets on
getting a broody hen by keeping two marans, even though they're only so-so layers. Does that mean four
australorps and two marans with an australorp rooster?
If you've been reading our chicken blog, you can probably see the
writing on the wall --- our addiction to Golden Comets is giving way to more
homestead-worthy breeds. The Black
Australorps have
proven themselves to be the best possible foragers, and I hope that the
Cuckoo Marans will live up to their reputations as good mothers.
I want to hedge my bets on
getting a broody hen by keeping two marans, even though they're only so-so layers. Does that mean four
australorps and two marans with an australorp rooster?
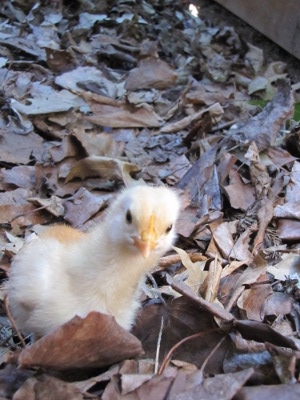 Maybe, maybe not. Both homegrown 2.0 and homegrown 3.0 (hybrids
of a Golden Comet mother and a Golden Comet X Rhode Island Red father)
are less keen foragers than their brood-mates, but are more sociable
and prone to risk-taking. All of our australorps and marans are
scared of huge, bumbling humans, but the homegrown chicks are willing
to come visit me when I walk into their space. Since their
flockmates often follow the intrepid homegrown youngsters, that makes
the whole flock less skittish and more willing to check out new
fixtures in their coop and pasture. I figure this will also
translate into the flock being faster to snap up bugs and worms I throw
their way once the old girls lose their monopoly on treats.
Maybe, maybe not. Both homegrown 2.0 and homegrown 3.0 (hybrids
of a Golden Comet mother and a Golden Comet X Rhode Island Red father)
are less keen foragers than their brood-mates, but are more sociable
and prone to risk-taking. All of our australorps and marans are
scared of huge, bumbling humans, but the homegrown chicks are willing
to come visit me when I walk into their space. Since their
flockmates often follow the intrepid homegrown youngsters, that makes
the whole flock less skittish and more willing to check out new
fixtures in their coop and pasture. I figure this will also
translate into the flock being faster to snap up bugs and worms I throw
their way once the old girls lose their monopoly on treats.
That said, I'm pretty
sure homegrown 2.0 is a cockerel, and I'm not willing to devote half
the genetics of future flocks to a Golden Comet hybrid rooster.
If homegrown 3.0 is a girl, though, I'm tempted to keep her. What
do you think? Is it worth making space for a less keen forager in
the flock to keep the other chickens tamer and more inquisitive?
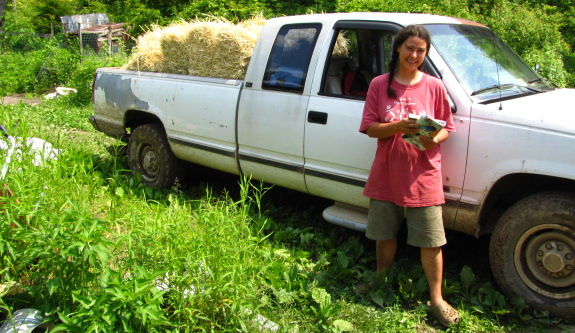
Got another load of straw
bales today.
I was a bit leary of the tailgate
not staying closed and only purchased 15 bales instead of squeezing
in 18 like previous trips.
Mulching the garden with straw has turned out to be a major time
saver for us. I know some folks are worried about weed seeds that
sometimes come with a bale of straw, but from our perspective it's
worth a few weeds when you can see and feel how much healthier the plants
seem to be.

Or explore more posts by date or by subject.
About us: Anna Hess and Mark Hamilton spent over a decade living self-sufficiently in the mountains of Virginia before moving north to start over from scratch in the foothills of Ohio. They've experimented with permaculture, no-till gardening, trailersteading, home-based microbusinesses and much more, writing about their adventures in both blogs and books.