
archives for 11/2010
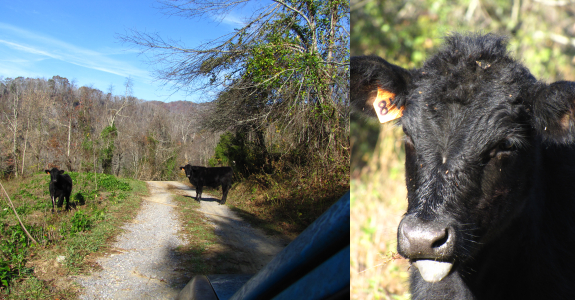
 "Hey,
Junior, would you mind moving off the road?" Maybe I wasn't being
polite enough, because the calf just stuck out his tongue at me.
"Hey,
Junior, would you mind moving off the road?" Maybe I wasn't being
polite enough, because the calf just stuck out his tongue at me.
I was on my way over to
my movie star neighbor's farm to stream
monitor when I had my bovine encounter. The folks who live in
my neighbor's intentional community spend a lot of their time off the
farm, so they let their neighbor run his beef cattle
on their fields in exchange for working on their driveway. This
calf clearly wasn't used to having anyone in his turf, but he ambled 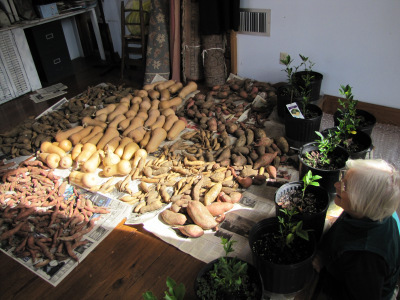 away
when I inched my car up to his snout.
away
when I inched my car up to his snout.
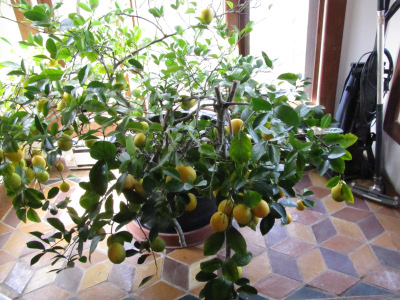
After freezing our feet
in the Clinch River, we all headed inside to warm up and enthuse over
my neighbor's stunning dwarf
Meyer lemon tree. The lemon has its own alcove (as well as a
patio where it spends its summers) and, as you can see, the tree is
completely laden with fruit. Upstairs, ten baby lemon trees are
growing up while 57 butternuts and a slew of sweet potatoes cure in the
risen warmth.
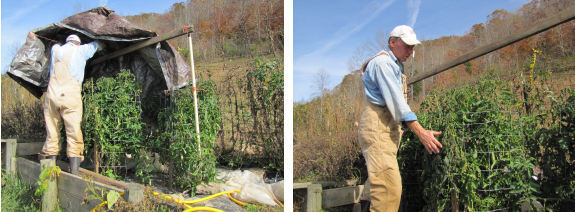
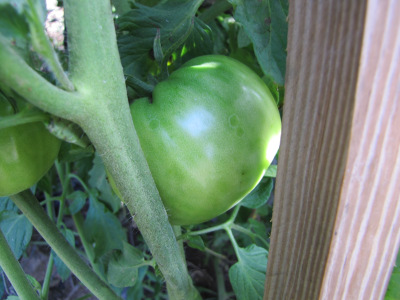 Later,
we headed down to the garden to see a surprise trio of extremely late
tomatoes. My neighbor stuck the volunteer seedlings in the ground
a month and a half ago and has been covering them with a tarp during
frosty nights. Despite getting a bit nipped on the edges, huge
tomatoes are hanging in the middle of the vines. My neighbor is
bound and determined to pick a ripe tomato on Thanksgiving, and I'm
keen on seeing how his experiment goes.
Later,
we headed down to the garden to see a surprise trio of extremely late
tomatoes. My neighbor stuck the volunteer seedlings in the ground
a month and a half ago and has been covering them with a tarp during
frosty nights. Despite getting a bit nipped on the edges, huge
tomatoes are hanging in the middle of the vines. My neighbor is
bound and determined to pick a ripe tomato on Thanksgiving, and I'm
keen on seeing how his experiment goes.
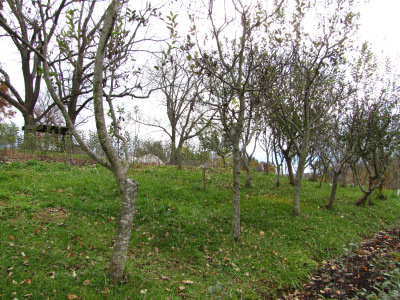
 Back
when every
yard in the Deep South had a hog butchering station, ordinary farmers used to
practice permaculture. They planted persimmons in their pastures
to feed their pigs, cows, and horses, and the smartest farmers
hand-picked persimmon varieties so that they ripened continuously from
August to February. Since no livestock --- even goats and sheep
--- like the leaves, persimmons can be planted directly into pastures
with no protection. Can you imagine seven months of free
livestock feed growing on your hillside?
Back
when every
yard in the Deep South had a hog butchering station, ordinary farmers used to
practice permaculture. They planted persimmons in their pastures
to feed their pigs, cows, and horses, and the smartest farmers
hand-picked persimmon varieties so that they ripened continuously from
August to February. Since no livestock --- even goats and sheep
--- like the leaves, persimmons can be planted directly into pastures
with no protection. Can you imagine seven months of free
livestock feed growing on your hillside?
As always, I'm looking
for plants to include in our chickens'
forest pasture, and
I think persimmons might be a good addition. The downside of
persimmons, in my opinion, is that the fruits are nearly completely
sugar, with only about 3% protein by dry weight. However, my
experience with sugary fruits lying on the ground is that they attract 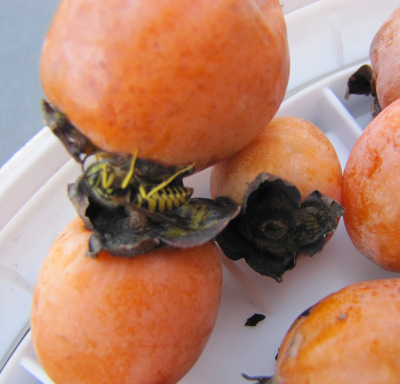 nearly their own weight in
insects, a chicken's favorite food. Even in the winter, insects
seem to show up if they've got something to eat, and fresh food of any
sort is highly appreciated by my flock during the cold season.
nearly their own weight in
insects, a chicken's favorite food. Even in the winter, insects
seem to show up if they've got something to eat, and fresh food of any
sort is highly appreciated by my flock during the cold season.
This week's lunchtime
series highlights the most interesting and useful facts about
persimmons, drawn out of Tree
Crops: A Permanent Agriculture, by J. Russell Smith, Organic
Orcharding: A Grove of Trees to Live In, by Gene Logsdon, and Two Promising Fruit Plants for Northern
Landscapes,
by E. Goodell (the last of which you can download by clicking on the
link.) It's amazing what delicious reading material turns up when
I take the time to go through my bookcase!
| This post is part of our Persimmons lunchtime series.
Read all of the entries: |
The new 18
volt DeWalt portable drill
continues to impress me with its over abundance of power.
I've been trying to estimate
when I hit halfway with the battery time and recharge it at
that point instead of waiting till it drains all the way down. This
might extend the life of each battery. It would help if the next
generation drill had a little indicator light that let you know when
you hit 50 percent.
 The
cross-quarter days (rather than solstices and equinoxes) mark the
beginnings of seasons in ancient Irish and east Asian cultures.
Even though these four days --- halfway between the solstice and
equinox --- are primarily pagan holidays, we tend to celebrate them
without knowing it with Groundhog's Day, May Day, and Halloween.
And I've noticed that the cross-quarter days do feel like more
realistic representations of the annual divide than the more mainstream
seasonal holidays of Christmas/Solstice and Easter/Equinox.
The
cross-quarter days (rather than solstices and equinoxes) mark the
beginnings of seasons in ancient Irish and east Asian cultures.
Even though these four days --- halfway between the solstice and
equinox --- are primarily pagan holidays, we tend to celebrate them
without knowing it with Groundhog's Day, May Day, and Halloween.
And I've noticed that the cross-quarter days do feel like more
realistic representations of the annual divide than the more mainstream
seasonal holidays of Christmas/Solstice and Easter/Equinox.
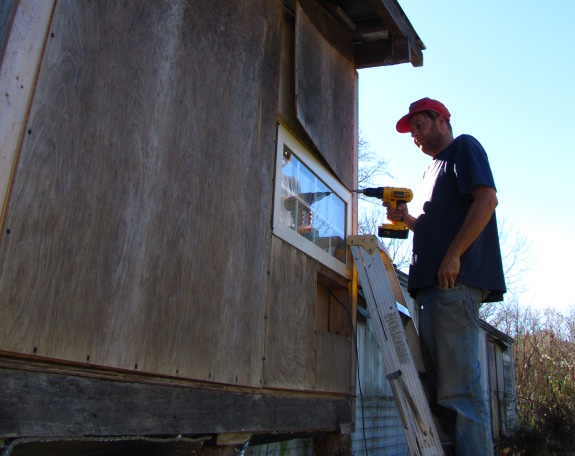
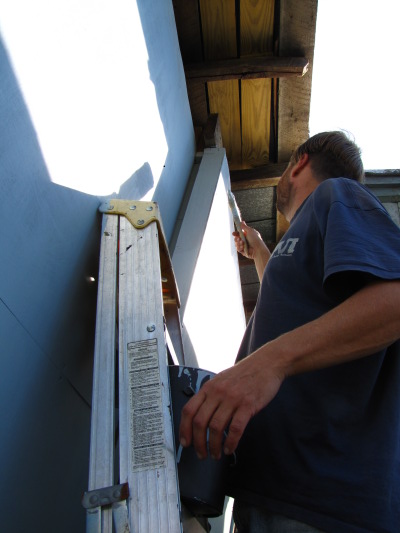
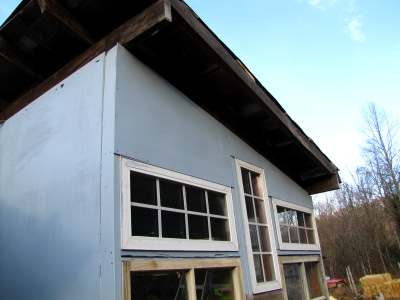 Mark
and I mostly took All Soul's Day off to celebrate the onset of
winter. (As you can see, I couldn't quite resist putting the
first coat of paint on the newly christened East Wing since the
afternoon was so brilliant.) Although a bit of greenery remains
here and there, most of the leaves have fallen and we crossed two big
hurdles this weekend --- the first fire in the wood stove and the first
summer produce thawed out of the freezer. Neither was really
necessary since days are quite warm (once the sun comes up over the
hill around 11 am) and there's still gobs of food in the garden.
But both felt like nice splurges to mark the changing seasons. Happy
Winter!
Mark
and I mostly took All Soul's Day off to celebrate the onset of
winter. (As you can see, I couldn't quite resist putting the
first coat of paint on the newly christened East Wing since the
afternoon was so brilliant.) Although a bit of greenery remains
here and there, most of the leaves have fallen and we crossed two big
hurdles this weekend --- the first fire in the wood stove and the first
summer produce thawed out of the freezer. Neither was really
necessary since days are quite warm (once the sun comes up over the
hill around 11 am) and there's still gobs of food in the garden.
But both felt like nice splurges to mark the changing seasons. Happy
Winter!
 Although I'm primarily
interested in growing
persimmons as food for livestock, the persimmon has a long
history as a people food. Here in the United States, Native
Americans added the fruit to their cornbread as sweetener, dried the
pulp for winter fruit, ground seeds into meal, and even made a
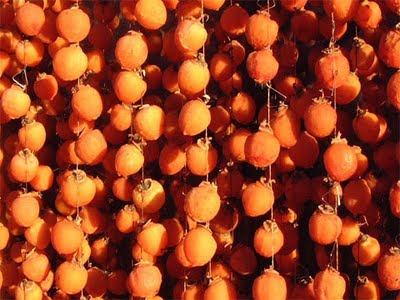
beer-like drink by combining persimmons and honey locust pods. In
Asia, persimmons were such a large part of the traditional diet that
farmers cultivated varieties perfect for eating fresh and others just
for drying, then planted them in large orchards. American
cookbooks that are at least a few decades old often include recipes for
persimmon bread and persimmon pudding, the former of which tastes to me
a lot like banana bread.
Although I'm primarily
interested in growing
persimmons as food for livestock, the persimmon has a long
history as a people food. Here in the United States, Native
Americans added the fruit to their cornbread as sweetener, dried the
pulp for winter fruit, ground seeds into meal, and even made a
beer-like drink by combining persimmons and honey locust pods. In
Asia, persimmons were such a large part of the traditional diet that
farmers cultivated varieties perfect for eating fresh and others just
for drying, then planted them in large orchards. American
cookbooks that are at least a few decades old often include recipes for
persimmon bread and persimmon pudding, the former of which tastes to me
a lot like banana bread.
There are dozens of
species of persimmons scattered around the world, but most people
talking about persimmons are interested in just two species. The
persimmon cultivated in Asia (and which you can find in fancy
supermarkets in the U.S.) is primarily Diospyrus
kaki, which has
large fruits that ship well and often competely lack the 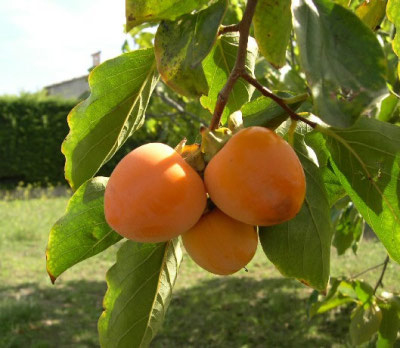 puckery astringency that
marks our native persimmon when the fruits aren't quite ripe. A
few people grow the Asian persimmon (sometimes called "kaki", "Japanese
persimmon", or "oriental persimmon") in the United States, but
cultivation is risky north of zone 7, so I'm focusing on our native
species. If you live in the Deep South, the Asian persimmon is
worth looking into since you can find dozens of named varieties, at
least one of which is bound to suit your needs.
puckery astringency that
marks our native persimmon when the fruits aren't quite ripe. A
few people grow the Asian persimmon (sometimes called "kaki", "Japanese
persimmon", or "oriental persimmon") in the United States, but
cultivation is risky north of zone 7, so I'm focusing on our native
species. If you live in the Deep South, the Asian persimmon is
worth looking into since you can find dozens of named varieties, at
least one of which is bound to suit your needs.
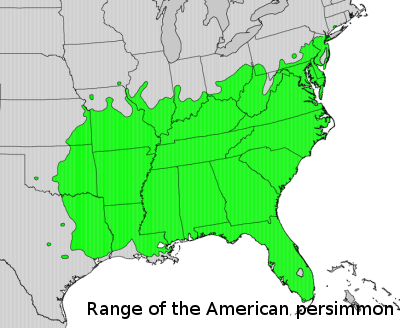
The American persimmon (Diospyrus
virginiana) grows
wild throughout the southeast and is often ignored by locals in modern
times. Little work has been done on breeding tastier varieties
and the fruits have to turn to mush before they are fully ripe, so
they're impossible to ship and will probably never show up at your
local supermarket. On the other hand, the American persimmon is a
more dependable bearer of fruit than the Asian persimmon --- American
persimmons bloom late and are almost never impacted by spring
frosts. According to may people, the American persimmon has a
better taste and is also higher in nutrients like vitamin C and calcium
than the Asian persimmon.
| This post is part of our Persimmons lunchtime series.
Read all of the entries: |
It has taken me a long time to wise up to the fact that you usually get
what you pay for when it comes to paint products.
A lesser grade paint may have
needed a 2nd or even a 3rd coat to look good, but this Kilz stuff has what it takes to
cover a wall right the first time.
We got lucky and found a few
cans of this high quality paint discounted where someone had ordered a
mixed color and wasn't quite happy with it.
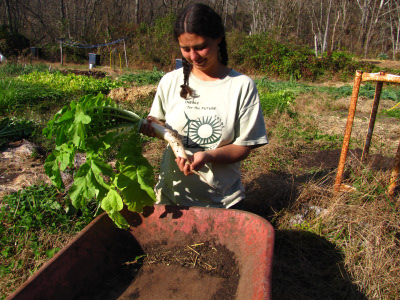
 Recent
visitors to my garden have been drawn to the brilliant yellow-green oilseed radish leaves like moths to a
flame. They skip right past all of my edibles --- lettuce,
broccoli, mustard greens, garlic, potato onions, parsley --- and beg to
eat my cover crops. I don't let them, but I am having a love
affair of my own with the oats, even delaying cutting down the waist-high stand in the
waterlogged back garden because I'm so attached to their beauty.
Recent
visitors to my garden have been drawn to the brilliant yellow-green oilseed radish leaves like moths to a
flame. They skip right past all of my edibles --- lettuce,
broccoli, mustard greens, garlic, potato onions, parsley --- and beg to
eat my cover crops. I don't let them, but I am having a love
affair of my own with the oats, even delaying cutting down the waist-high stand in the
waterlogged back garden because I'm so attached to their beauty.
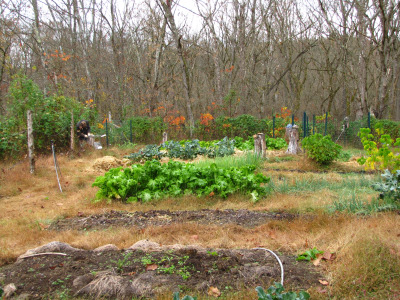
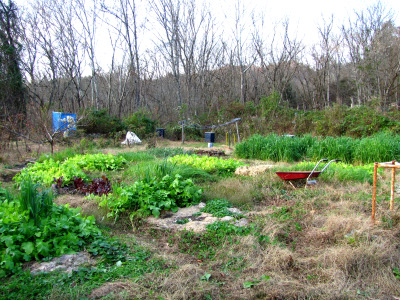 The
garden is turning into a patchwork quilt of color --- purple swiss
chard, yellow radishes, dark green oats, tan straw. This photo
shows the last corner of the garden that still needs to be put to bed
for the winter. I'll weed the strawberries and mulch them
heavily, then cover up the few bare beds. Due to my extensive
cover crop trials and a moderate fall garden, there are only a handful
of beds that have nothing growing in them. A stroll through the
vibrant garden fends off any winter blues.
The
garden is turning into a patchwork quilt of color --- purple swiss
chard, yellow radishes, dark green oats, tan straw. This photo
shows the last corner of the garden that still needs to be put to bed
for the winter. I'll weed the strawberries and mulch them
heavily, then cover up the few bare beds. Due to my extensive
cover crop trials and a moderate fall garden, there are only a handful
of beds that have nothing growing in them. A stroll through the
vibrant garden fends off any winter blues.
 Both American
and Asian persimmons can be tricky to grow, which in part explains
their absence from many permaculturalists' gardens. Although you
can buy named persimmon varieties from nurseries, you're taking a big
chance since persimmons put down a long taproot and hate to be
transplanted. In addition, Gene Logsdon reports that persimmon
seeds germinate better and trees transplant better into forest soil
rather than into garden soil, suggesting to me that there may be some
kind of soil microorganism the tree needs to associate with in order to
grow well. From
all I've read, your best bet for growing persimmons is to mimick
natural conditions, gathering wild seeds and planting them into a wild
habitat.
Both American
and Asian persimmons can be tricky to grow, which in part explains
their absence from many permaculturalists' gardens. Although you
can buy named persimmon varieties from nurseries, you're taking a big
chance since persimmons put down a long taproot and hate to be
transplanted. In addition, Gene Logsdon reports that persimmon
seeds germinate better and trees transplant better into forest soil
rather than into garden soil, suggesting to me that there may be some
kind of soil microorganism the tree needs to associate with in order to
grow well. From
all I've read, your best bet for growing persimmons is to mimick
natural conditions, gathering wild seeds and planting them into a wild
habitat.
In tomorrow's post, I'll
run through all of the tricks I've read about for getting your
persimmons to sprout and grow, but there are a few other things to
consider as you plan your planting. On the positive side, once
that seedling sprouts or that transplant puts down new roots,
persimmons can live quite well in poor soil, seeming to thrive in just
about every soil type out there. The trees will grow in the shade
(although they need sun to fruit), so you can get away with starting
them in a small gap in existing forest, opening up the canopy bit by
bit as your persimmon tree grows.
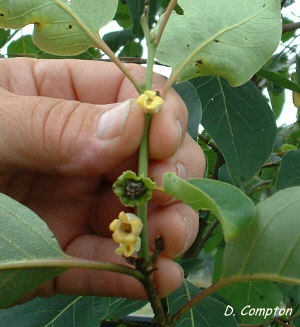
Keep in mind that
persimmons are large trees, requiring at least 30 feet spacing, and
that most trees are either male or female. Although you might get
lucky and find a variety that is self-pollinating (like the one in the
photo to the left), in general you should plan to plant at least one
male for every twelve female persimmons.
Finally, be aware that
there are two races of American persimmons and that the races can't
interbreed. The tetraploid race, with 60 chromosomes, is found in
the
southern Appalachians while the hexaploid race, with 90 chromosomes,
grows further north and west. In general, the latter has larger
fruits
that ripen earlier and has wider, more fuzzy leaves. If you're
going to try to start an orchard from seed, you may want to include
both races to extend your harvest, in which case you'll need to be sure
to plant both a tetraploid and a hexaploid male to pollinate your
females.
As a final side note,
persimmon flowers are reportedly beloved by bees. Maybe that will
push a few beekeepers over the edge into including persimmons in their forest pastures.
| This post is part of our Persimmons lunchtime series.
Read all of the entries: |
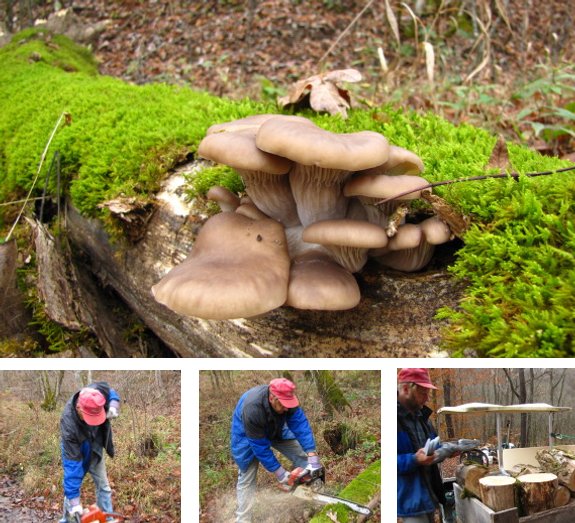
The tree we identified lately
as having wild
oyster mushrooms growing
out of it decided to fall in our driveway, which felt to me like it was
screaming "Cut me up....take me home...and Eat Me!"
I guess I'm always happy to
oblige a talking mushroom tree when it offers up such a yummy gift.
 Everett posted over on Living
A Simple Life about the things
he wishes he could do (or at least do better.) He tagged me and Mark
to share our own lists of dream skills, and I got quite inspired by the
project. I'm a student at heart, and there's nothing I love more
than setting up my own lesson plans. So, here's my current course
of study:
Everett posted over on Living
A Simple Life about the things
he wishes he could do (or at least do better.) He tagged me and Mark
to share our own lists of dream skills, and I got quite inspired by the
project. I'm a student at heart, and there's nothing I love more
than setting up my own lesson plans. So, here's my current course
of study:
- Learn all of the skills necessary to create a permaculture system that feeds us with few non-waste inputs from outside the farm. This set of skills is what the Walden Effect is all about, and includes lots of things I'm currently learning: propagating mushrooms, figuring out forest pastures, growing our own straw, pressing our own oil, and much more.
 Learning to live in the moment.
Mark has helped me make enough progress on this step that I can see how
amazing it would be to be able to fully relax and self-indulge, to let
go of time completely and simply be
from time to time. I've got a lot more to learn, though.
Learning to live in the moment.
Mark has helped me make enough progress on this step that I can see how
amazing it would be to be able to fully relax and self-indulge, to let
go of time completely and simply be
from time to time. I've got a lot more to learn, though.- Becoming fluent in Spanish. Ever since my family took me on a field trip to New York City and I heard some kids chattering away in Spanish on the subway, I've dreamed of being fully functional in another language. Despite four years of high school Spanish, though, I barely made any progress until I began studying the Platiquemos system on my own this year. Finally, I think I might be able to speak Spanish at the level of a two year old! Clearly, I have a ways to go.
 Learning to create community. My
weakest point is my extreme introversion which makes it tough to make
new friends or hang out with strangers. But I dream of tempting
some of our blog readers and other like-minded folks to settle here in
our county where we can bandy ideas back and forth a little better than
we do over the internet. I'm not sure exactly what skills I would
need to make this happen, but it's a dream, so it goes on the list.
Learning to create community. My
weakest point is my extreme introversion which makes it tough to make
new friends or hang out with strangers. But I dream of tempting
some of our blog readers and other like-minded folks to settle here in
our county where we can bandy ideas back and forth a little better than
we do over the internet. I'm not sure exactly what skills I would
need to make this happen, but it's a dream, so it goes on the list.- Learning to write fiction in a way that doesn't make me cringe. Non-fiction is easy for me to write, but I've always been drawn to a challenge, so I dream of one day writing a fiction piece that I can look at the next day without blushing.
Everett's list is 19
items long, so I feel a bit silly stopping at five, but I did include
about a dozen in the permaculture goal. I've never had a shortage
of skills I want to learn, so I'm sure that in a decade when I've
figured all of this out, I will have another five or ten items to teach
myself. What skills do you dream of perfecting?
 If you haven't already,
please read my previous post to learn about persimmon
spacing, varieties, and other factors to consider when planning your
persimmon orchard.
This post is a quick rundown on three methods of persimmon propagation.
If you haven't already,
please read my previous post to learn about persimmon
spacing, varieties, and other factors to consider when planning your
persimmon orchard.
This post is a quick rundown on three methods of persimmon propagation.
Starting
persimmons from seed.
The cheapest (and probably least problematic) method of growing
persimmons is to gather seeds from wild trees and sprout them right
where you want your own persimmon to grow. I've had mixed success
with sprouting persimmon seeds, but I now know that if you use a couple
of tricks, your persimmons will germinate quite well. First,
gather whole persimmon fruits and remove the seeds, but don't let
the seeds dry out.
Your seeds will need to stratify,
so plant them in fall or winter, no more than an inch deep in the
soil. Persimmon seeds won't germinate until late spring, so if
you want to be able to keep track of them, you might try planting your
seeds in outdoor pots at this time of year, then transplanting them
into their final location as soon as they germinate and before they
send down their long tap root. If you choose the pot method,
plant your seeds in soil taken from the woods to promote germination.
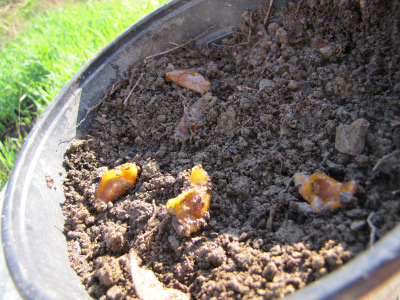
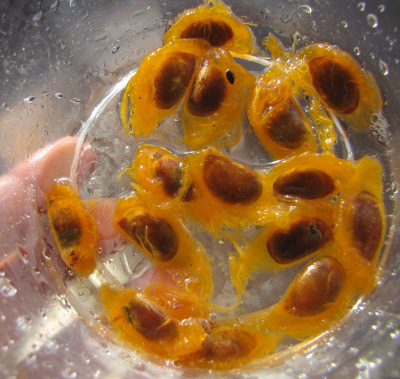 As I cleaned my first batch
of persimmon seeds, I noticed that a layer of pulp continued to cling
to the seed, so I'm experimenting with whether persimmon seeds also
need a fermentation stage. I planted half of my seeds
directly into pots of woodland soil, and am letting the other seeds
soak in water for a week or two the way I do with tomato
seeds. I'll
report back this spring about which method gave me better germination
rates.
As I cleaned my first batch
of persimmon seeds, I noticed that a layer of pulp continued to cling
to the seed, so I'm experimenting with whether persimmon seeds also
need a fermentation stage. I planted half of my seeds
directly into pots of woodland soil, and am letting the other seeds
soak in water for a week or two the way I do with tomato
seeds. I'll
report back this spring about which method gave me better germination
rates.
Grafting
persimmons.
Starting persimmons from seed is relatively easy, but your final tree
may or or may not be exactly the way you want it to be. You can
develop your own, locally adapted persimmon varieties by setting aside
a patch of land to test out dozens of different seeds. The
persimmons in your test strip can be planted much closer together since
you just need them to grow to about five feet tall, at which point they
will begin to fruit. Select your favorite varieties from this
test bed (maybe an early, mid-season, and late tree?) and graft scion
wood onto seedlings started at the same time in their permanent
location. I won't go into the basics of grafting here, but I've
read that persimmons can be grafted using the same methods you would
use to graft apples.
 Transplanting persimmons.
If at all possible, it's best to plan your persimmon orchard so that
you don't need to transplant. However, if for some reason it's
essential to move a persimmon from one spot to another, orchardists
have developed a method that is time-consuming but which seems to work.
Transplanting persimmons.
If at all possible, it's best to plan your persimmon orchard so that
you don't need to transplant. However, if for some reason it's
essential to move a persimmon from one spot to another, orchardists
have developed a method that is time-consuming but which seems to work.
The best time to
transplant is at the beginning of the third growing
season. To prepare, prune the roots the previous summer by
digging your spade into the soil a few inches from the trunk of the
tree in alternating sections, as is shown in the image to the
right. Two months later, repeat the process, cutting into the
areas that were left uncut last time. This process will make your
persimmon grow roots close to the trunk where you'll be able to dig
them up (although you'll still lose the taproot.)
During the next dormant
season, lay out black plastic in the area you
plan to transplant into. This will warm the soil up so that when
you transplant the persimmon in early spring, it is ready to grow
immediately. Prune back the top of the tree extensively so that
only half to a third of the branches remain, then transplant the
persimmon into its new location. Keep the persimmon very well
waterered until mid summer --- a flush of growth right off the bat
doesn't mean that your tree is established and can be ignored. If
your persimmon is still alive, stop watering in August to let it harden
off for the winter.
After reading all of
that, you probably think, like I do, that it's
best to just start seedlings! I'm currently gathering seeds from
persimmons that ripen at various times, with the goal of putting some
directly into the forest pasture in the spring and others into a test
strip for later grafting onto male seedlings in the pasture. Like
many parts of my forest pasture
experiment, growing persimmons is a
long term project, with seedlings slated to bloom in four to eight
years and then the grafted persimmons not beginning to fruit until
three years after that. Maybe by 2020, persimmons will make up a
significant portion of our chickens' diets.
| This post is part of our Persimmons lunchtime series.
Read all of the entries: |

I've always heard chickens
like to roost at night off the ground and on some sort of stick.
Well for whatever reason our
chickens don't seem to like the roost I made for them in the coop. They prefer hunkering down on the ground in the weeds instead.
The above stump has been a
popular place at night, which is why I thought a roost extention might
just be the thing to remind them how nice it is to sleep off the ground.
 Regular
readers may remember that we're creating
a forest garden in a patch of young woods, leaving some useful trees
but replacing others with cultivated species that do well in partial
shade when young --- mostly nuts. Since nut trees grow so big,
there's really only room for three or four trees on the little table of
flat forestland, and last year I thought I'd filled it up with a
butternut, a persimmon, and a Chinese chestnut. Now I know that persimmons
hate to be transplanted, so it's no surprise that my
Regular
readers may remember that we're creating
a forest garden in a patch of young woods, leaving some useful trees
but replacing others with cultivated species that do well in partial
shade when young --- mostly nuts. Since nut trees grow so big,
there's really only room for three or four trees on the little table of
flat forestland, and last year I thought I'd filled it up with a
butternut, a persimmon, and a Chinese chestnut. Now I know that persimmons
hate to be transplanted, so it's no surprise that my
 transplanted persimmon kicked the bucket. I didn't mark the
chestnut, and thought it had died too (although, as you'll see later,
it didn't.) Having read that Carpathian
walnuts are a more cold hardy version of the English walnut, I decided to buy a pair and
fill in the gaps.
transplanted persimmon kicked the bucket. I didn't mark the
chestnut, and thought it had died too (although, as you'll see later,
it didn't.) Having read that Carpathian
walnuts are a more cold hardy version of the English walnut, I decided to buy a pair and
fill in the gaps.
The nut orchard is too
far from our usual stomping grounds to have running water or golf cart
access, so trees planted there suffer from neglect and I decided to see
if a better planting job might help our new walnuts survive without
supplemental watering. I planted each tree in a small depression
and mounded up dirt on the downhill side to catch rainwater, then I
raked up leaves from under nearby trees to mulch each walnut
heavily. Since I'm fall planting, the trees should have time to
establish a good root structure before they're faced with any potential
summer droughts.
When
placing my second walnut, I wandered around the woods until I found the
spot with the best canopy gap, then proceeded to dig my hole, ripping
 up small trees in the surrounding area. My hands plucked out the
Chinese chestnut I'd carefully planted in the exact same spot last year
just as my brain was saying "No! Wait! That's a good
tree!" I have no clue if the seedling will survive the abuse, but
I gave it a new home thirty feet further down the the plateau, and I
really do plan to mark it...the next time I'm up that way.
up small trees in the surrounding area. My hands plucked out the
Chinese chestnut I'd carefully planted in the exact same spot last year
just as my brain was saying "No! Wait! That's a good
tree!" I have no clue if the seedling will survive the abuse, but
I gave it a new home thirty feet further down the the plateau, and I
really do plan to mark it...the next time I'm up that way.
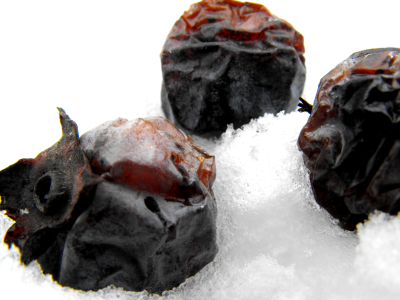
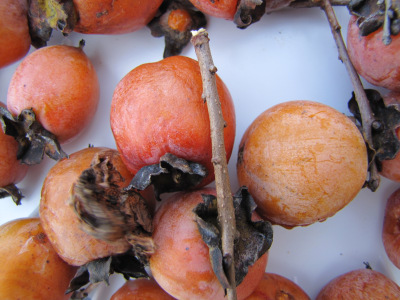
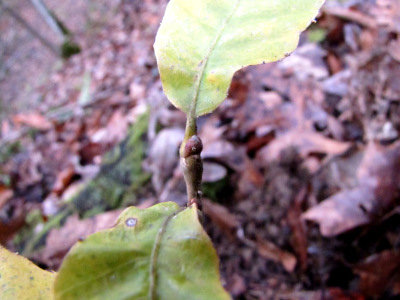
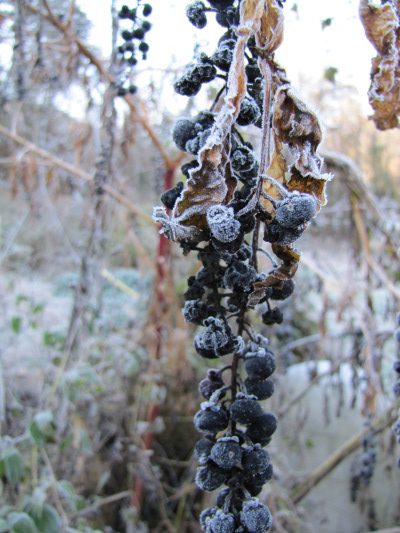
 The tannins in unripe
persimmons are thoroughly unpleasant, so it's no wonder that folklore
has arisen to teach us how to ripen the fruits. Every real
Appalachian knows that frost ripens persimmons, and some of us even go
so far as to simulate the frost. I once put a bag of persimmons
in the freezer then pulled them out a week later, hoping they would be
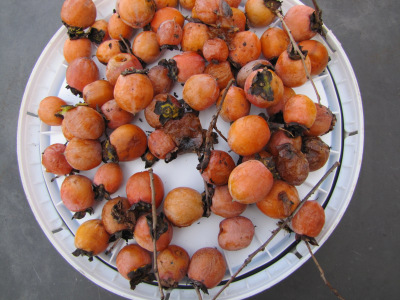
sweet and ripe. When I went over to visit my movie star neighbor
last week, I saw that he had laid his persimmons outside in a platter
so that a hard freeze would ripen them up. Too bad we were both
on the wrong track.
The tannins in unripe
persimmons are thoroughly unpleasant, so it's no wonder that folklore
has arisen to teach us how to ripen the fruits. Every real
Appalachian knows that frost ripens persimmons, and some of us even go
so far as to simulate the frost. I once put a bag of persimmons
in the freezer then pulled them out a week later, hoping they would be
sweet and ripe. When I went over to visit my movie star neighbor
last week, I saw that he had laid his persimmons outside in a platter
so that a hard freeze would ripen them up. Too bad we were both
on the wrong track.
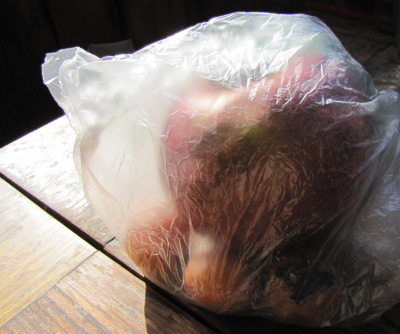
Scientists have discovered
that persimmons ripen like most other fruits, and that frost near the
time of ripening is purely coincidental. That said, you can
hasten the ripening of your fruits by putting persimmons in a plastic
bag with an apple. The ethylene released by the apple will make
your persimmon ripen up as long as the persimmon fruit has already
become somewhat soft on the tree.
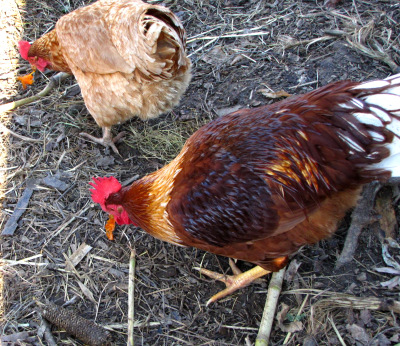 What do you do if you bite
into a persimmon and the puckery astringency makes you spit it right
back out? I tested a few puckery persimmons on our flock, and our
chickens gave persimmons two thumbs up. In fact, the persimmons
started a soccer match --- the most intense one I've seen among our
flock yet. Clearly, chickens think persimmons are delicious,
tannins or no tannins.
What do you do if you bite
into a persimmon and the puckery astringency makes you spit it right
back out? I tested a few puckery persimmons on our flock, and our
chickens gave persimmons two thumbs up. In fact, the persimmons
started a soccer match --- the most intense one I've seen among our
flock yet. Clearly, chickens think persimmons are delicious,
tannins or no tannins.
| This post is part of our Persimmons lunchtime series.
Read all of the entries: |
 1. How to make my own music.
2. How to tell a story
with animation.
3. How to make our own
electricity.
4. How to be more in
touch with nature.
5. How to fly a
powered parachute cross country.
6. How to grow more of
our own food.
7. How to meet people
as weird as myself.
8. How to sail a boat
to Mexico.
I would also like to know who
really shot JFK, what really happened on September 11th 2001, and why Huckleberry never seems to be satisfied.
Image credit goes to coverbrowser.com
for sharing the secret of perpetual motion.
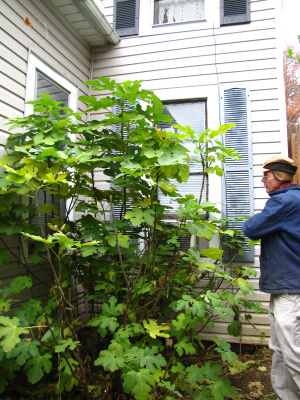
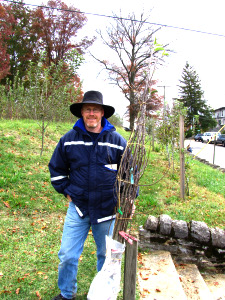
 Our Chicago Hardy Fig arrived
on the same day as our Carpathian walnuts even though it was coming
from a different nursery --- clearly, this must be prime fall-planting
time in zone 6. Like rosemary, planting figs outdoors is a
dicey proposition in our region, but I'm hopeful that careful variety
selection and winter protection will let us harvest our own fruits in a
few years.
Our Chicago Hardy Fig arrived
on the same day as our Carpathian walnuts even though it was coming
from a different nursery --- clearly, this must be prime fall-planting
time in zone 6. Like rosemary, planting figs outdoors is a
dicey proposition in our region, but I'm hopeful that careful variety
selection and winter protection will let us harvest our own fruits in a
few years.
If various fig-growers
on the internet are to be believed, the hardiest fig varieties are
Chicago Hardy, Mission, Brown Turkey, Alma, Nordland, and
Celeste. Chicago Hardy won my admiration since it's reputed to be
able to produce fruit on new wood even if the top dies back to the
ground, which means that as long as the roots don't die, we will get
some sort of crop from our fig every year. In contrast, if you're
growing another variety of fig, you will have to wait until the next
year (and risk being winter-killed again) before tasting fruits from
your fig after a cold winter.
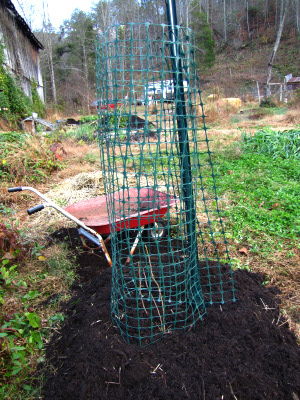
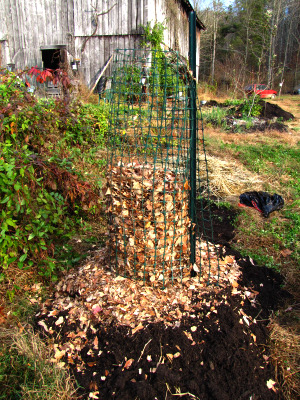 Despite the promise of cold
hardiness, I went ahead and protected my fig, staking a loop of trellis
fencing around it and then filling the loop up with leaves. In
coldier climates (zone 5), fig growers go to more extremes, sometimes
carefully bending the plant over and burying it in a trench of
soil. Other growers simply convert their fig to a potted plant
and bring it in for the winter.
Despite the promise of cold
hardiness, I went ahead and protected my fig, staking a loop of trellis
fencing around it and then filling the loop up with leaves. In
coldier climates (zone 5), fig growers go to more extremes, sometimes
carefully bending the plant over and burying it in a trench of
soil. Other growers simply convert their fig to a potted plant
and bring it in for the winter.
As a final note, growers
of Chicago Hardy do have one warning I plan to take to heart.
This particular variety of fig fruits much less if unpruned, so be sure
to cut stems back to 30 inches every year and clear out all but three
main branches. If all goes as planned, we could be tasting our
first homegrown fig as early as 2012.
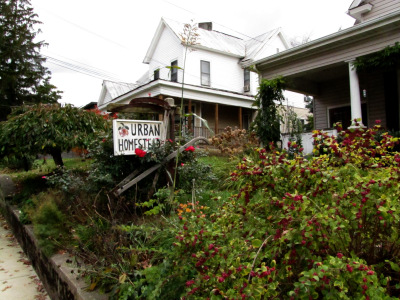 If you're looking for a wide
variety of heirloom apple trees grafted and tended by a master, the Urban Homestead in Bristol, Virginia, is the
place for you. I could spend hours poring over the descriptions of
their old-fashioned apple varieties, of which this excerpt is a prime
example:
If you're looking for a wide
variety of heirloom apple trees grafted and tended by a master, the Urban Homestead in Bristol, Virginia, is the
place for you. I could spend hours poring over the descriptions of
their old-fashioned apple varieties, of which this excerpt is a prime
example:
Ben
Davis - The most
widely planted apple variety in the South after the Civil
War. Think of it as the
nineteenth century’s Red Delicious. A
large, dull-red apple; hardy, vigorous, 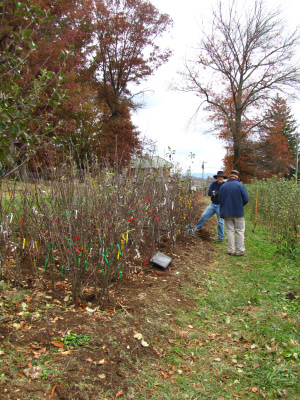 dependable, productive.
Keeps like a cobblestone. Often
described as having only passing flavor. Ms.
Genevieve Gray, an octogenarian from South Elgin, Illinois sent us a
story
several years ago that well illustrates the point:
“There was a joke going around when I was a girl about a fellow who
claimed to be such an expert in recognizing apples by taste that he
could
identify any kind blindfolded. He
was challenged, of course, and given apple after apple to
taste--identifying
each correctly. Finally, in
desperation to fool him, one of the challengers grabbed a large piece
of cork,
carved it into the shape of an apple, and offered it to him.
He bit out a chunk, hesitated, bit out another, then reluctantly
admitted
that he wasn’t real sure. “I
think it’s a Ben Davis,” he said. And
then he quickly added, “But if it is, it’s the best one I’ve ever
eaten.” We would add only that
any tree that can stand up to 125 years of ribbing
dependable, productive.
Keeps like a cobblestone. Often
described as having only passing flavor. Ms.
Genevieve Gray, an octogenarian from South Elgin, Illinois sent us a
story
several years ago that well illustrates the point:
“There was a joke going around when I was a girl about a fellow who
claimed to be such an expert in recognizing apples by taste that he
could
identify any kind blindfolded. He
was challenged, of course, and given apple after apple to
taste--identifying
each correctly. Finally, in
desperation to fool him, one of the challengers grabbed a large piece
of cork,
carved it into the shape of an apple, and offered it to him.
He bit out a chunk, hesitated, bit out another, then reluctantly
admitted
that he wasn’t real sure. “I
think it’s a Ben Davis,” he said. And
then he quickly added, “But if it is, it’s the best one I’ve ever
eaten.” We would add only that
any tree that can stand up to 125 years of ribbing 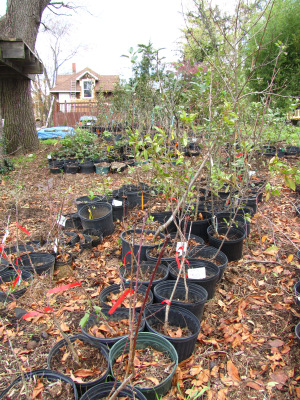 has
earned its place in the
orchard.
has
earned its place in the
orchard.
The Urban Homestead
offers just shy of 100 old and new favorites, and yet they feel obliged
to add this apologetic note to the website: "Economics dictates that we keep a tight rein on the
number of varieties
we graft each season. We have
access, however, to a large number of stock trees, and offer a custom
grafting
service for some of the harder-to-find varieties." Basically, if you've
heard of it, they can probably get it for you. I was thrilled to
read that they have not just one, but two versions of the old-fashoned
Winesap (as well as the easier to find Stayman Winesap.) I
ordered a Winesap and Liberty from them to round out our orchard.
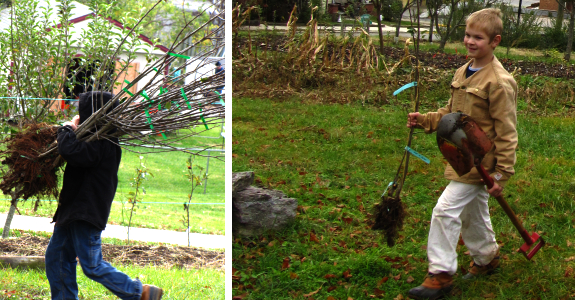
 Tim Hensley is the man behind
this 2 acre operation, which he fits into his suburban backyard and a
rented lot across the street. I was charmed to see three of his
sons digging and labeling apple trees while I snooped around the
premises, and their father said that all of his kids help out ---
except for the four year old, who isn't terribly handy yet. I'm
going to have to reserve tomorrow's post for notes on his intriguing
permaculture techniques, but suffice it to say that he's not an
old-fashioned apple grower even if his apples have deep roots.
Tim Hensley is the man behind
this 2 acre operation, which he fits into his suburban backyard and a
rented lot across the street. I was charmed to see three of his
sons digging and labeling apple trees while I snooped around the
premises, and their father said that all of his kids help out ---
except for the four year old, who isn't terribly handy yet. I'm
going to have to reserve tomorrow's post for notes on his intriguing
permaculture techniques, but suffice it to say that he's not an
old-fashioned apple grower even if his apples have deep roots.
In addition to apples
($18 to $28, depending on size of tree), Tim Hensley also sells a
selection of other edible plants, not all of which are listed on his
website. For example, I was shocked to see rows of Chicago
Hardy figs, just
like the one I mail-ordered --- I wish I'd realized I could pick them
up in person at the Urban Homestead!
 Speaking
of picking them up, if you live closeby, I highly recommend that you
make the drive to the Urban Homestead, not only to get your trees in
the ground ASAP so that they will thrive, but also to explore Hensley's
operation. Mom wants you to know that they have the best swing
she's enjoyed in years. On the other hand, don't let distance
stop you --- Tim Hensley mails his trees across the United States.
Speaking
of picking them up, if you live closeby, I highly recommend that you
make the drive to the Urban Homestead, not only to get your trees in
the ground ASAP so that they will thrive, but also to explore Hensley's
operation. Mom wants you to know that they have the best swing
she's enjoyed in years. On the other hand, don't let distance
stop you --- Tim Hensley mails his trees across the United States.
 The Urban Homestead is
located on 818 Cumberland St., behind the library in Bristol.
Give them a call at (276) 466-2931 or an email at urbanhomestead@aol.com. Don't forget that
buying heirloom apples not only preserves a vanishing tradition but
also means your trees are more likely to survive the pests that nature
throws at them with no need for posionous sprays.
The Urban Homestead is
located on 818 Cumberland St., behind the library in Bristol.
Give them a call at (276) 466-2931 or an email at urbanhomestead@aol.com. Don't forget that
buying heirloom apples not only preserves a vanishing tradition but
also means your trees are more likely to survive the pests that nature
throws at them with no need for posionous sprays.
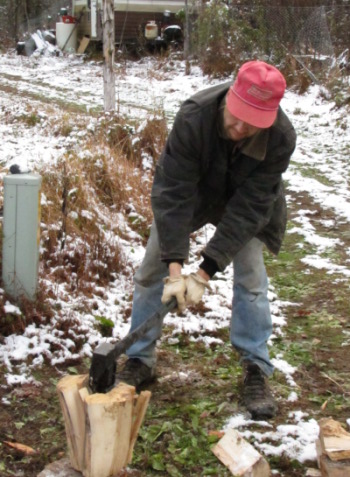
We've had the Chopper1 in service for one complete
firewood chopping season and I'm ready to declare it my all time
favorite axe.
What I like most about this
invention is the fact that it never gets stuck in a wedged sort of way
that the old Super
Splitter was prone to do.
Not only did it take more energy to separate the maul from the wood but
it breaks up your pace.
Sometimes the Chopper1 will
bounce off a log, but that's only when I haven't applied enough force
in my swing.
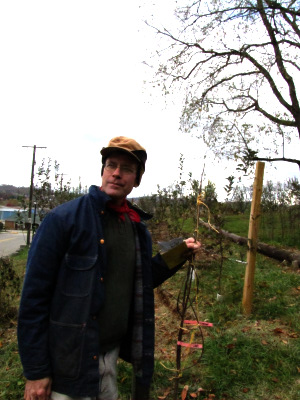
 Even
though he had customers to the Urban
Homestead showing up
right and left, Tim Hensley was kind enough to take a few minutes out
of his Saturday afternoon to give me a quick tour of his
backyard. There, I learned answers to three pressing questions
that I've been pondering for a while.
Even
though he had customers to the Urban
Homestead showing up
right and left, Tim Hensley was kind enough to take a few minutes out
of his Saturday afternoon to give me a quick tour of his
backyard. There, I learned answers to three pressing questions
that I've been pondering for a while.
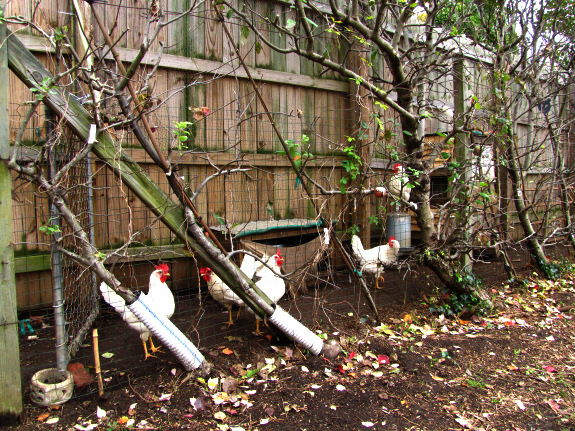
How
do you keep enough adult apple trees on hand to provide scionwood for
100 heirloom varieties in a tiny city lot? Tim espaliers many of his apple trees so
that they can fit in a small space, then he adds a permaculture twist,
running his chickens under the espaliered trees to prevent populations
of bad bugs from building up. In addition to planting these
espaliered trees just a couple of feet apart, he has a few rows of
adult trees in his nursery planted five or six feet apart.
Clearly, close spacing is okay if you're growing the trees for
scionwood (or, presumably, as a test orchard.)
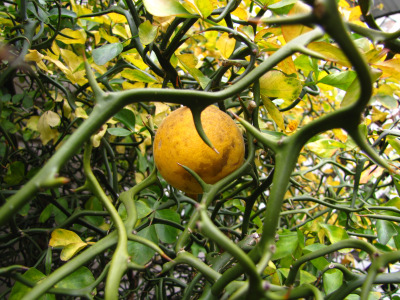 I've read that the triofliate
orange is a species of citrus that is hardy enough to fruit in zone 6,
but I've heard varying reports on its flavor. What do you think? Tim Hensley just
happened to have a Flying Dragon trifoliate orange on the side of his
house. It was loaded with lovely fruits, and I could tell the
mass of thorns would make good hedge material. However, Tim was
less impressed by the flavor. Trifoliate oranges are really only
good enough for making lemonade or marmalade, and Tim said that the
resulting food had a "plasticky" flavor. I guess I'll stop
considering planting a trifoliate orange.
I've read that the triofliate
orange is a species of citrus that is hardy enough to fruit in zone 6,
but I've heard varying reports on its flavor. What do you think? Tim Hensley just
happened to have a Flying Dragon trifoliate orange on the side of his
house. It was loaded with lovely fruits, and I could tell the
mass of thorns would make good hedge material. However, Tim was
less impressed by the flavor. Trifoliate oranges are really only
good enough for making lemonade or marmalade, and Tim said that the
resulting food had a "plasticky" flavor. I guess I'll stop
considering planting a trifoliate orange.
Will
my hardy figs survive the winter and fruit? Tim has two huge and
lovely fig trees growing in his yard. The first --- LSU Purple
--- has never fruited for him and he doesn't recommend it in our
climate. On the other hand, he told me that his Chicago
Hardy fig has never been winter-killed, perhaps because it is
tucked into a beautiful nook surrounded on two sides by his house and
with the dryer exhaust vent coming out nearby. I feel like he
told me he wasn't getting many fruits off of the Chicago Hardy, but all
of the information I was trying to take in is starting to get mushed up
in my head. Maybe Mom can chime in with her memory here....
 Finally,
I enjoyed trading broiler tales with Tim and one of his customers, Brody
from Damascus. Brody told us that he likes to soak his newly
killed chickens in a bath of icy saltwater, which he said hastens the
end of rigor mortis so that he can freeze his chickens nearly right
away and still get tender meat. I'd be curious to hear if anyone
else has had any experience with the saltwater trick.
Finally,
I enjoyed trading broiler tales with Tim and one of his customers, Brody
from Damascus. Brody told us that he likes to soak his newly
killed chickens in a bath of icy saltwater, which he said hastens the
end of rigor mortis so that he can freeze his chickens nearly right
away and still get tender meat. I'd be curious to hear if anyone
else has had any experience with the saltwater trick.
 We were thrilled when Mark's
mom gave us an external wood
furnace
a couple of years ago, and we are still very grateful. However,
over time, we've discovered that external wood furnaces have a variety
of problems associated with them:
We were thrilled when Mark's
mom gave us an external wood
furnace
a couple of years ago, and we are still very grateful. However,
over time, we've discovered that external wood furnaces have a variety
of problems associated with them:
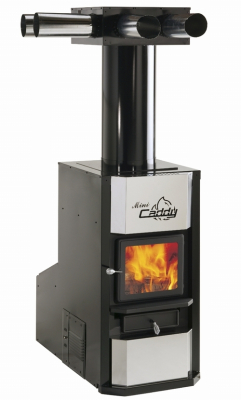
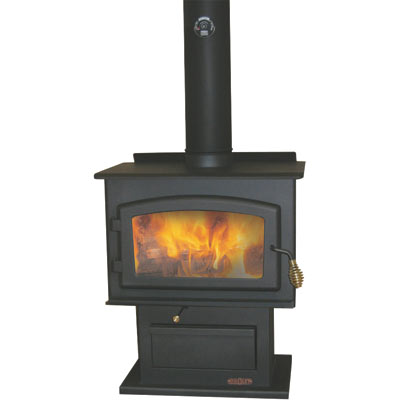
- Extremely inefficient. Even the most efficient new wood furnance I could find in my web searches (the Mini-Caddy, listed as an Energy Star furnace, and pictured here) is vastly inferior to moderately efficient wood stoves. You can download a list of EPA certified wood stoves which will tell you the emissions and efficiency of all tested models. The Caddy, which the Mini-Caddy is based on, has 6.6 g/hr emissions and 63% efficiency. Compare it, for example, to the Drolet Savannah wood stove (which has slightly less output than the Mini-Caddy and is much cheaper) --- 6.28 g/hr emissions and 75% efficiency.
- Expensive. We got very lucky and were given our furnace as a gift, so I wasn't prepared for the price tag when we considered upgrading to a more efficient model. The Mini-Caddy seems to retail for somewhere in the $2,000 range, compared to efficient, non-catalytic wood stoves that can be got for closer to $700 (and which also have higher efficiency, don't forget.) You can get a 30% federal tax credit on either purchase.
 Not suited
for indoor use. After finishing up the East Wing, we moved
in our wood furnace, figuring that we'd be able to capture some of the
heat previously lost to the outside air. I know that the term "exterior
wood furnace" should have tipped me off, but we were shocked at how
smoky the East Wing got when we lit our first fire this year.
Granted, our model (LTD Limited by Jordahl Mfg.) is very old, and its
drawing problem may not be
found in more modern wood furnaces.
Not suited
for indoor use. After finishing up the East Wing, we moved
in our wood furnace, figuring that we'd be able to capture some of the
heat previously lost to the outside air. I know that the term "exterior
wood furnace" should have tipped me off, but we were shocked at how
smoky the East Wing got when we lit our first fire this year.
Granted, our model (LTD Limited by Jordahl Mfg.) is very old, and its
drawing problem may not be
found in more modern wood furnaces.
- Fails during power outages.
Without
electricity to turn on the electric fan, we had to burn huge fires in
our furnace to keep the trailer at all habitable during last year's 10
day power outage.
 Is meant to
heat the whole house rather than a small section. You have
to burn a lot more wood in general to keep your house warm using an
exterior furnace since you depend on fans to move the hot air
throughout the house. With an indoor wood stove, you can situate
the stove in the population center of the house and burn small fires to
heat just that area.
Is meant to
heat the whole house rather than a small section. You have
to burn a lot more wood in general to keep your house warm using an
exterior furnace since you depend on fans to move the hot air
throughout the house. With an indoor wood stove, you can situate
the stove in the population center of the house and burn small fires to
heat just that area.
All told, our exterior
wood furnace has definitely been better than
heating with electric space heaters, but we run through wood like
nobody's business. This week, I'm going to post about some of the
options we're considering --- I suspect you'll all have good advice, so
please chime in!
| This post is part of our Wood Stove lunchtime series.
Read all of the entries: |
Edited to add:
Learn how to safely install an energy-efficient wood stove in a moibile
home in Trailersteading. Now available for
$1.99 on Amazon.
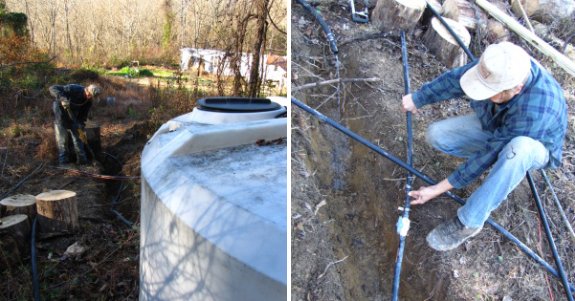
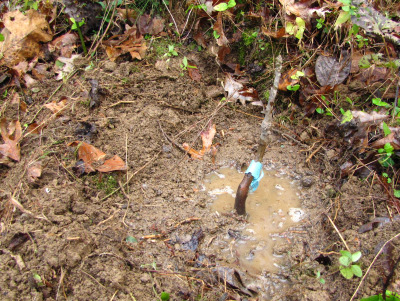
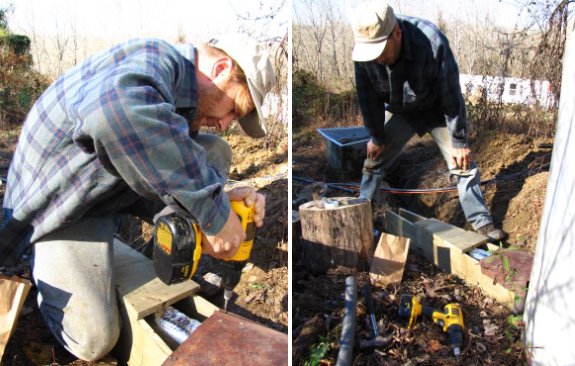
The project to bury our
waterline is now at the point where the pipe comes out of the tank.
My plan is to build a small,
insulated enclosure that follows the pipe out of the tank for 5 or 6
feet before it begins to be submerged.
Stay tuned to see if this
experiment prevents pipe freezing like I think it might.
 I
was a bit concerned by the bee hive that dropped 540 varroa mites in
three days when I tested
in the middle of September, so I decided to do a
re-test and see what the mite populations are like in early
November. This time, all I had on hand were some four inch wide
strips of cardboard that are a byproduct of the way we package our pre-made
chicken waterers, so
I went ahead and lathered those with petroleum jelly and stuck them
under the screened bottom boards of our hives.
I
was a bit concerned by the bee hive that dropped 540 varroa mites in
three days when I tested
in the middle of September, so I decided to do a
re-test and see what the mite populations are like in early
November. This time, all I had on hand were some four inch wide
strips of cardboard that are a byproduct of the way we package our pre-made
chicken waterers, so
I went ahead and lathered those with petroleum jelly and stuck them
under the screened bottom boards of our hives.
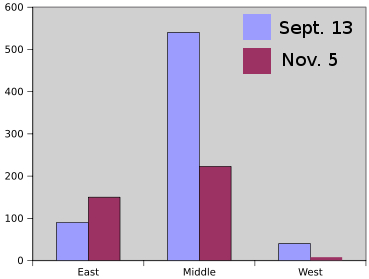 Three
days later, I counted mites and did a bit of math to determine what the
total mite fall would have been if I had put something under the entire
bottom board. As you can see from this graph, the hive with all
of the varroa mites in September dropped down to a far more manageable
level (223 mites) in November. None of the other hives have mite
populations in the danger zone at all.
Three
days later, I counted mites and did a bit of math to determine what the
total mite fall would have been if I had put something under the entire
bottom board. As you can see from this graph, the hive with all
of the varroa mites in September dropped down to a far more manageable
level (223 mites) in November. None of the other hives have mite
populations in the danger zone at all.
Most sources report that
mite numbers rise as autumn progresses, so I'm not quite sure why I saw
declining varroa mite numbers. I assume that as workers die and
aren't replaced, the hive hosts fewer varroa mites as well.
Regardless of the reason for low mite populations in my hives, I'm
happy to be heading into the winter without chemical pesticides in the
hive.
 We
started out with an exterior wood
furnace because we had been told by
reputable sources that you can't put a wood stove in a mobile
home. It turns out that's just not true. Instead, there are
a series of guidelines to follow when installing a wood stove in a
trailer, and you also need to choose a wood stove specially tested to
be
mobile home safe.
We
started out with an exterior wood
furnace because we had been told by
reputable sources that you can't put a wood stove in a mobile
home. It turns out that's just not true. Instead, there are
a series of guidelines to follow when installing a wood stove in a
trailer, and you also need to choose a wood stove specially tested to
be
mobile home safe.
This
Mother Earth News article (from which I snagged the
diagram in this post) and this more up to
date site
together tell you everything you need to know about installing a wood
stove in a mobile home. The differences between mobile home and
traditional home installation come down to six main points:
- A close clearance pipe must be used to connect the stove to the chimney.
- Spark arresters are installed in the chimney cap.
- The stove should be grounded to the home chassis.
- The stove must have tie downs to attach it to the floor so it won't shift around when the trailer is moved. (Presumably, this is only relevant if your trailer is less than forty years old and will actually be moved again.)
- The stove should use exterior air for combustion.
- Wood stoves are not permissable in mobile home bedrooms.
 In
addition, you should choose a wood stove that has been approved for use
in a mobile home. In general, these stoves are on the small to
medium side and have a top-exiting flue collar and a heat shield on the
back. These characteristics combine to make the clearance around
all sides of the stove less, which in turn lets them fit into a mobile
home. In fact, from browsing the internet, it sounds like the
small size of mobile homes is really the biggest danger feature, so
your goal should be to find a spot for your wood stove where you can
provide plenty of air space around it.
In
addition, you should choose a wood stove that has been approved for use
in a mobile home. In general, these stoves are on the small to
medium side and have a top-exiting flue collar and a heat shield on the
back. These characteristics combine to make the clearance around
all sides of the stove less, which in turn lets them fit into a mobile
home. In fact, from browsing the internet, it sounds like the
small size of mobile homes is really the biggest danger feature, so
your goal should be to find a spot for your wood stove where you can
provide plenty of air space around it.
The cheapest mobile home
compatable wood stoves that I've found are the
Drolet Savannah 55,000 BTU stove (83% efficient!) and the Century
Heating 50,000 BTU stove for $700 and $650, respectively, from Northern
Tool and Equipment. For our tiny trailer, even these would be
overkill, so I was glad to hear that many other models can be converted
to mobile home wood stoves by adding on an outside air kit (around $50
to $60.)
| This post is part of our Wood Stove lunchtime series.
Read all of the entries: |
Edited to add:
Learn how to safely install an energy-efficient wood stove in a moibile
home in Trailersteading. Now available for
$1.99 on Amazon.
I ended up using the standard
foam pipe cover and then added a couple wraps of Reflectix for the new water
tank anti-freeze box.
Now we wait for the next
freeze to see how well this protection holds up.

 For
the last few years, our first frost of the year was a killing frost,
but this year we got a bit of a reprieve. Even though our
first frost came right on schedule in the middle of October, we didn't have a killing
frost until November 6.
For
the last few years, our first frost of the year was a killing frost,
but this year we got a bit of a reprieve. Even though our
first frost came right on schedule in the middle of October, we didn't have a killing
frost until November 6.
In case you're
scratching your head in puzzlement, a killing frost is generally
considered to be a frost with temperatures at or below 25 degrees
Fahrenheit. Lighter frosts will kill your summer-loving plants
like tomatoes and okra, but fall crops shrug these baby frosts off and
keep right on growing. A killing frost, though, tends to take out
all but the 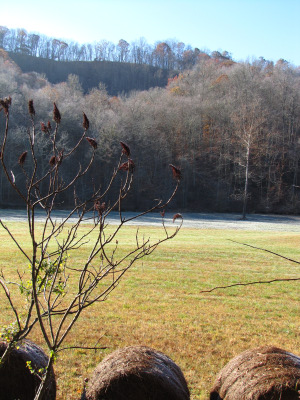 most
hardy garden plants --- the few uncovered lettuce plants were mildly
nipped by our recent frost and the broccoli was slightly damaged, but
mustard and kale were still green and happy the next morning.
most
hardy garden plants --- the few uncovered lettuce plants were mildly
nipped by our recent frost and the broccoli was slightly damaged, but
mustard and kale were still green and happy the next morning.
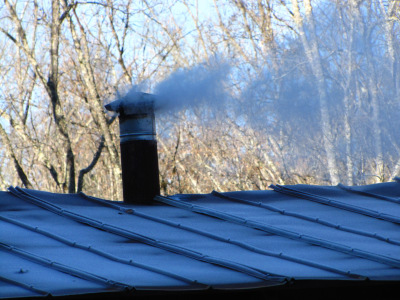
The first killing frost
also tends to knock the last of the autumn color out of the trees, so
now only a few oak leaves cling to the branches. Our hills
suddenly seem much lower when you can see through the trees.
Our homemade chicken waterer is always POOP-free.
 I've
recently come to the conclusion that there are two ways of being green
--- the Prius method and the penny-pinching method. Followers of
the Prius method spend a lot of money to buy the most expensive model,
not realizing that the increased efficiency they're paying for could be
obtained just as easily (and much more cheaply) by downsizing a
bit. For example, my 20+ year old Ford Festiva has gas mileage
nearly compatible with the Prius for a fraction of the up-front cost
(and a fraction of the construction cost since my Festiva has already
been on
the road for two decades.)
I've
recently come to the conclusion that there are two ways of being green
--- the Prius method and the penny-pinching method. Followers of
the Prius method spend a lot of money to buy the most expensive model,
not realizing that the increased efficiency they're paying for could be
obtained just as easily (and much more cheaply) by downsizing a
bit. For example, my 20+ year old Ford Festiva has gas mileage
nearly compatible with the Prius for a fraction of the up-front cost
(and a fraction of the construction cost since my Festiva has already
been on
the road for two decades.)
Which is all a way
of saying that there are two ways to buy a very
energy
efficient wood stove.
Followers of the Prius method will
jump on a catalytic wood stove, an innovation that will lower their
emissions and increase their burning efficiency. On the negative
side, catalytic wood stoves are extremely expensive, and the catalyst
will have to be replaced in two to six years, which has environmental
repurcussions and makes a deep dent in your pocketbook.
 Middle of the road wood stove
buyers will gravitate to Energy Star
non-catalytic wood stoves. The use of baffles, firebox
insulation, and preheated combustion air combine to make these wood
stoves nearly as efficient as the catalytic versions and at least 60%
more efficient than old-fashioned wood stoves. Like the catalyst
in a catalytic wood stove, the baffle in a non-catalytic wood stove may
need to be replaced from time to time, but my understanding is that
this replacement is considerably less expensive.
Middle of the road wood stove
buyers will gravitate to Energy Star
non-catalytic wood stoves. The use of baffles, firebox
insulation, and preheated combustion air combine to make these wood
stoves nearly as efficient as the catalytic versions and at least 60%
more efficient than old-fashioned wood stoves. Like the catalyst
in a catalytic wood stove, the baffle in a non-catalytic wood stove may
need to be replaced from time to time, but my understanding is that
this replacement is considerably less expensive.
Then there's the
penny-pinching route, which I'm seriously
considering. Even the most efficient wood stoves only burn at
peak efficiency if you keep your fire hot, and the smallest Energy Star
wood stoves seem to clock in at about 60,000 BTU. Although it's
only a rough guide, many sources suggest planning on 50 to 55 BTU per
square foot in the extreme north of the U.S., 30 to 35 BTU per square
foot in the deep south, and around 40 to 45 BTU per square foot here in
southwest Virginia. Using those numbers, we should be in the
market for a 20,000 to 22,500 BTU wood stove for our 500 square foot
trailer, since we'd lose a lot of efficiency by damping down a larger
wood stove. Even if a tiny stove is much less efficient than a
big Energy Star stove, we'd burn less wood and make less pollution with
the penny-pinching method. Plus, tiny wood stoves are
considerably cheaper, as I'll explain tomorrow.
| This post is part of our Wood Stove lunchtime series.
Read all of the entries: |
Step 1 in making room for the
new
woodstove is to take down the old water tower.
 We've decided to make a tiny
addition to the trailer to ease wood stove installation. The four
foot by two foot "room" will give us a bit more air space around the
stove inside and (more importantly) will allow us to send the stove
pipe straight up and then out a roof built around it, rather than
risking causing leaks by cutting a hole in the trailer roof. The
supreme ease with which you can extend the wall by a couple of feet is
one of my favorite parts of trailer
life.
We've decided to make a tiny
addition to the trailer to ease wood stove installation. The four
foot by two foot "room" will give us a bit more air space around the
stove inside and (more importantly) will allow us to send the stove
pipe straight up and then out a roof built around it, rather than
risking causing leaks by cutting a hole in the trailer roof. The
supreme ease with which you can extend the wall by a couple of feet is
one of my favorite parts of trailer
life.
While
Mark is making space outside, I took on the task of
clearing space inside. Kitchen remodeling, Walden Effect style,
consists of finding room for endless sacks of sweet potatoes and
garlic. Oh, and can I fit a few more butternut squash on that
shelf? I was very proud of myself for being able to take down
shelves from one wall and put them up in a new order on the other wall
--- an easy task for Mark, but I wouldn't have even known where to
start when faced with such a project just four years ago.
Everything I build could be better, but I don't mind living with my
imperfections since each is a lesson in self-sufficiency.
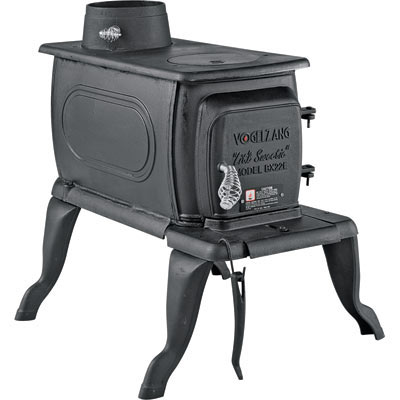 If
you're in the market for a tiny wood stove, the choices are relatively
limited. The smallest stove I've found among mainstream stores is
the Vogelzang
Lit'L Sweetie,
$199 from Northern Tool and Equipment. This cast iron stove is
marked on their website as being eligible for the federal tax credit,
which suggests that it must be efficient, but I can't seem to find any
efficiency data on the internet and the model is small enough that it
is exempt from EPA certification. On the other hand, even this 19
by 25 by 23 inch stove feels too big for us since it's rated at 63,801
BTU. Various reviews also suggest that it isn't very well put
together and may leak smoke or be unsafe.
If
you're in the market for a tiny wood stove, the choices are relatively
limited. The smallest stove I've found among mainstream stores is
the Vogelzang
Lit'L Sweetie,
$199 from Northern Tool and Equipment. This cast iron stove is
marked on their website as being eligible for the federal tax credit,
which suggests that it must be efficient, but I can't seem to find any
efficiency data on the internet and the model is small enough that it
is exempt from EPA certification. On the other hand, even this 19
by 25 by 23 inch stove feels too big for us since it's rated at 63,801
BTU. Various reviews also suggest that it isn't very well put
together and may leak smoke or be unsafe.
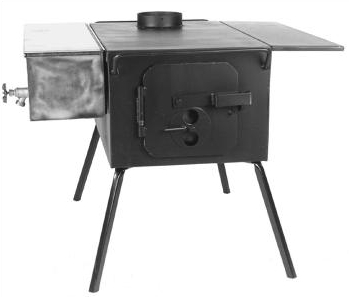 Moving down to smaller
stoves, you'll find the Two, Three, Four, and Five Dog
Stoves.
These stoves are made for use in tents and yurts, so I find them very
difficult to compare to more traditional stoves. The Four Dog
Stove ($305 once you factor in shipping) has a 15.5 by 11.5 by 24 inch
firebox
and "will heat up a 14' X 16' wall tent at -30". Its smaller
siblings heat progressively smaller spaces. All of the stoves in
the Four Dog line have baffles and an airtight gasketed door, which
make the stoves more efficient and safer while also
concentrating heat on a hot spot on the surface for cooking. On
the negative side, the stoves are light-weight with walls made of 3/32
inch hot rolled steel, no fire bricks, and aren't designed to preheat
their combustion air, so they lack some efficiency and maybe
longevity. I wonder if it
would be possible to take a Four Dog Stove (which I suspect might be
too big for us) and retrofit it with fire bricks to turn it into a more
efficient model with a smaller firebox.
Moving down to smaller
stoves, you'll find the Two, Three, Four, and Five Dog
Stoves.
These stoves are made for use in tents and yurts, so I find them very
difficult to compare to more traditional stoves. The Four Dog
Stove ($305 once you factor in shipping) has a 15.5 by 11.5 by 24 inch
firebox
and "will heat up a 14' X 16' wall tent at -30". Its smaller
siblings heat progressively smaller spaces. All of the stoves in
the Four Dog line have baffles and an airtight gasketed door, which
make the stoves more efficient and safer while also
concentrating heat on a hot spot on the surface for cooking. On
the negative side, the stoves are light-weight with walls made of 3/32
inch hot rolled steel, no fire bricks, and aren't designed to preheat
their combustion air, so they lack some efficiency and maybe
longevity. I wonder if it
would be possible to take a Four Dog Stove (which I suspect might be
too big for us) and retrofit it with fire bricks to turn it into a more
efficient model with a smaller firebox.
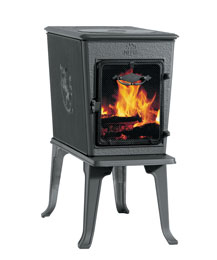 If
we want to spend an arm and a leg, the Jotul
F 602
is just the right size for us, with a 19 by 12.5 inch firebox
(with a guestimated third dimension of around 16 inches) and a heat
output of 28,000
BTU. Due to its baffles, the stove is 75% efficient, has low
emissions
of 5.2 g/hr, and is eligible for the federal tax credit. The
price
seems to be a bit harder to figure out, but one review lists it at $700
(which would end up costing us $490 after the tax credit.) One
website notes that this model is "alcove approved", perhaps because of
its heat shield, which makes me wonder if it might be the safest of the
options to put in a mobile
home. The
Jotul stove even has a
cookplate on top, which is something I'm yearning for as a backup
cooking option.
If
we want to spend an arm and a leg, the Jotul
F 602
is just the right size for us, with a 19 by 12.5 inch firebox
(with a guestimated third dimension of around 16 inches) and a heat
output of 28,000
BTU. Due to its baffles, the stove is 75% efficient, has low
emissions
of 5.2 g/hr, and is eligible for the federal tax credit. The
price
seems to be a bit harder to figure out, but one review lists it at $700
(which would end up costing us $490 after the tax credit.) One
website notes that this model is "alcove approved", perhaps because of
its heat shield, which makes me wonder if it might be the safest of the
options to put in a mobile
home. The
Jotul stove even has a
cookplate on top, which is something I'm yearning for as a backup
cooking option.
I estimate that any of
these stoves would cut our wood use (and the associated labor) at least
in half. However, we would have to install one stove in the
trailer and another one in the East Wing, so the up front cost would be
pretty steep. I'm pondering a Two Dog Stove in the tiny East Wing
($240) and a Jotul F 602 or Four Dog Stove in the trailer, and am
counting on spending a few more hundred dollars on associated hardware
for the safest installation (and we might even splurge beyond that to
pay for a professional to install the stove in the trailer.) If
we went the most expensive but most efficient route (the Jotul), it
would probably take us about six years to pay back the cost through
wood savings, whereas we'd pay ourselves back in five years using the
cheaper option.
| This post is part of our Wood Stove lunchtime series.
Read all of the entries: |
Edited to add:
Learn how to safely install an energy-efficient wood stove in a moibile
home in Trailersteading. Now available for
$1.99 on Amazon.
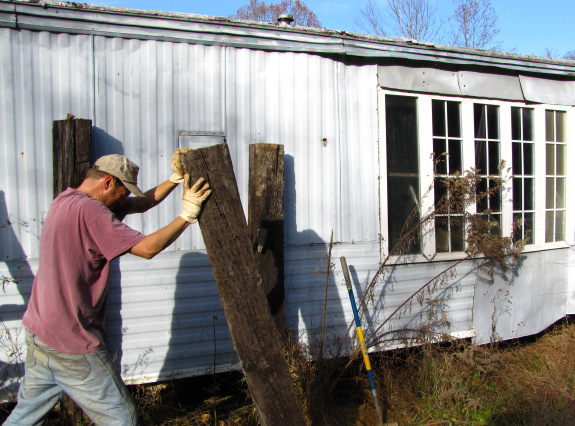
 These railroad ties were in pretty
bad shape when we got them 5 years ago.
These railroad ties were in pretty
bad shape when we got them 5 years ago.
Two of them broke off at
ground level while I was working on digging them out.
Not the best option for
making such a tower, but a whole lot cheaper than buying new lumber. I
remember paying 5 bucks apiece for these from a guy who owns a junk
yard.
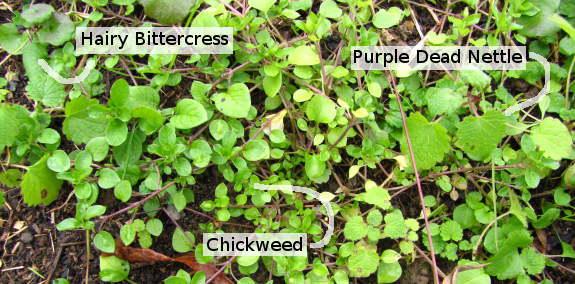
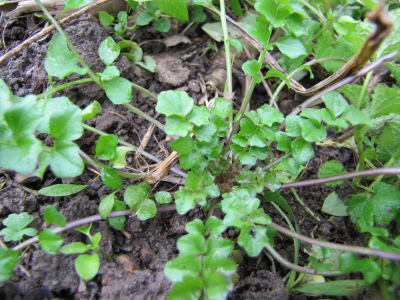
"Why mulch the garden
now?" Daddy asked when he was visiting in October. "Weeds aren't
going to grow this late in the season." It turns out that weeds were growing, and if I'd had my
act together, it would have been smarter to get the garden mulched down
by the end of September when a lot of the winter weeds
germinated. Your garden may have different trouble plants, but
these are our three most common winter weeds.
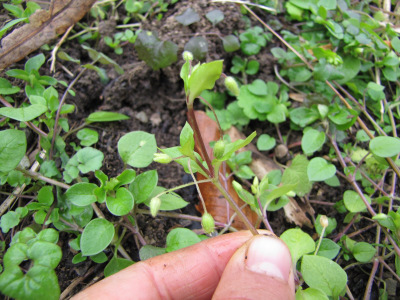 Common
Chickweed (Stellaria
media) loves
bare, disturbed ground and will quickly spread its runner-like stems
across your garden. Identify this alien species by the rosette
form of its growth, by the small, roundish leaves, and the tiny white
flowers. Although chickweed is a pain in the butt to hack out of
half-frozen ground when you want to plant your early spring crops, if
you do let the chickweed get ahead of you at least you'll know that the
chickweed greens are beloved by your flock of chickens. In fact, I've read
that common chickweed is often eaten by humans either in salad or as a
cooked green.
Common
Chickweed (Stellaria
media) loves
bare, disturbed ground and will quickly spread its runner-like stems
across your garden. Identify this alien species by the rosette
form of its growth, by the small, roundish leaves, and the tiny white
flowers. Although chickweed is a pain in the butt to hack out of
half-frozen ground when you want to plant your early spring crops, if
you do let the chickweed get ahead of you at least you'll know that the
chickweed greens are beloved by your flock of chickens. In fact, I've read
that common chickweed is often eaten by humans either in salad or as a
cooked green.
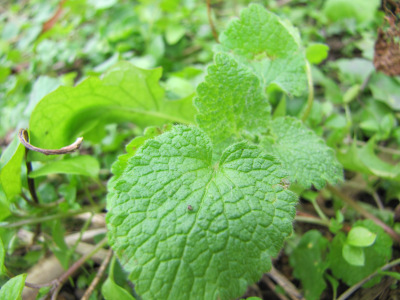 Purple Dead Nettle (Lamium
purpureum) is
easy to identify when it blooms in the early spring --- the top few
leaves turn purplish to set off the pink flowers, and the square stem
proclaims it to be a member of the mint family. At this time of
year, the non-stinging dead nettle takes a bit more care to identify,
but once you feel the fuzzy leaves, you'll realize few other wild
plants have the same gestalt. Like nearly all of our garden
weeds, Purple Dead Nettle hails from Europe, probably introduced for
the edible young leaves that can be eaten like chickweed.
Although Purple Dead Nettle does like to fill up the winter garden, the
flip side of the coin is that it will bloom even in the winter if the
weather is mild, providing food for honeybees during warm days.
Purple Dead Nettle (Lamium
purpureum) is
easy to identify when it blooms in the early spring --- the top few
leaves turn purplish to set off the pink flowers, and the square stem
proclaims it to be a member of the mint family. At this time of
year, the non-stinging dead nettle takes a bit more care to identify,
but once you feel the fuzzy leaves, you'll realize few other wild
plants have the same gestalt. Like nearly all of our garden
weeds, Purple Dead Nettle hails from Europe, probably introduced for
the edible young leaves that can be eaten like chickweed.
Although Purple Dead Nettle does like to fill up the winter garden, the
flip side of the coin is that it will bloom even in the winter if the
weather is mild, providing food for honeybees during warm days.
 Hairy
Bittercress (Cardamine
hirsuta) always
cheers me up since it's the first flower I see most years, blooming as
early as February or March. Although the bittercress grows its
leaves in a rosette, they are very different from chickweed, never
taking on the sprawling appearance and usually reaching only two or
three inches in diameter. Like the other weeds, Hairy Bittercress
is from Europe and is considered to be edible.
Hairy
Bittercress (Cardamine
hirsuta) always
cheers me up since it's the first flower I see most years, blooming as
early as February or March. Although the bittercress grows its
leaves in a rosette, they are very different from chickweed, never
taking on the sprawling appearance and usually reaching only two or
three inches in diameter. Like the other weeds, Hairy Bittercress
is from Europe and is considered to be edible.
 As I read all of the
benefits of our three "worst" winter weeds, I nearly talk myself into
leaving the ground unmulched. But I know that all three of these
guys will quickly go to seed and overrun the garden, a no-no when
running a no-till operation. Next year I hope to mulch earlier
before the seeds germinate.
As I read all of the
benefits of our three "worst" winter weeds, I nearly talk myself into
leaving the ground unmulched. But I know that all three of these
guys will quickly go to seed and overrun the garden, a no-no when
running a no-till operation. Next year I hope to mulch earlier
before the seeds germinate.

We got lucky today when we
were buying some supplies for the new
woodstove project and
happened upon the annual Lowe's military discount sale.
Usually you need to be active
duty or retired to get the 10% off, but this weekend they have decided
to extend it to former military, which includes me.
I guess that makes this
Veterans Day the luckiest one I can remember.
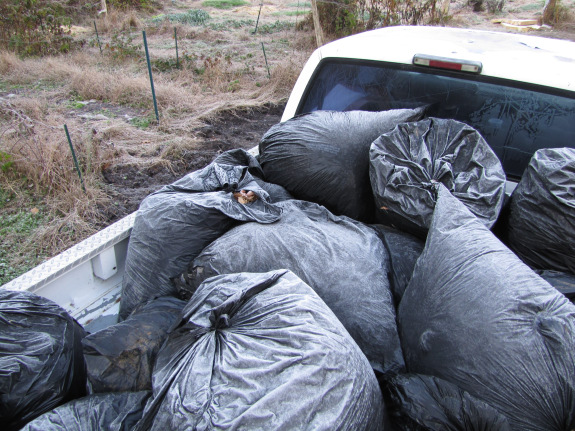
If you had told me that
I'd find anything more exciting than a pickup truck full of bagged
autumn leaves (thanks, Mom!), I would have said you were nuts.
But we spent a very, very long day in town yesterday picking up
everything we need to add heat to our trailer, and our beautiful new
stove is even more exciting than free biomass. More on that later
--- my head is still too fuzzy from eleven hours in the big city to
make an insightful post.
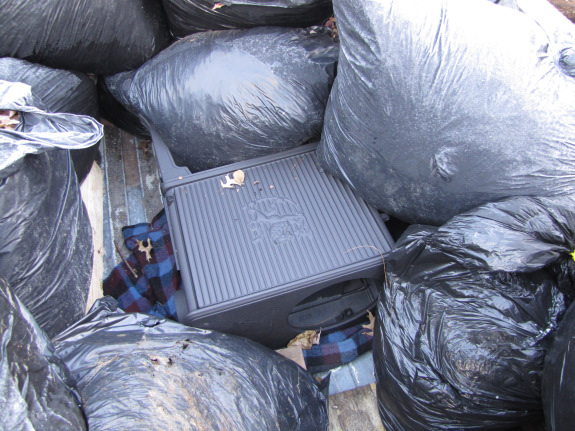
(The princess is our
highly expensive, but highly efficient
wood stove, in case
you couldn't figure that out.)
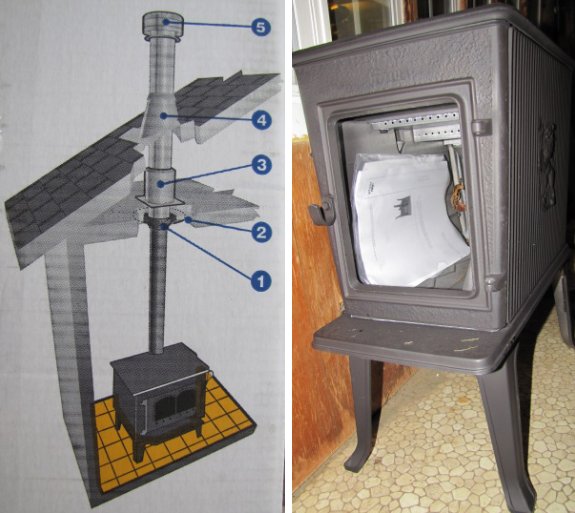

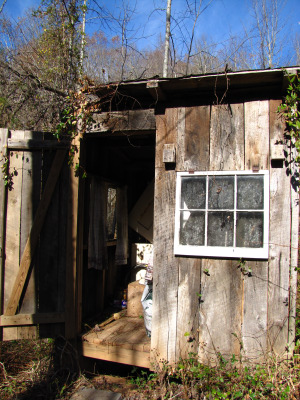 "Ooh!
That's a pretty outbuilding! I could live there," I enthused as
we toured the property Joey's renting.
"Ooh!
That's a pretty outbuilding! I could live there," I enthused as
we toured the property Joey's renting.
"That's the outhouse,"
explained my long-suffering brother, rolling his eyes. He'd
already put up with me snapping photos of his
solar array
(pictured below), the wood stove, the grape arbor meant to shade the
long wall of south-facing windows in the summer time (pictured above).
I hadn't shown nearly
enough interest in the ingenious way he'd thought
of using a car radio to work with the existing voltage in the
structure, and I had instead peered at every fruit tree, at the
uncovered hoop house, and even down the cistern.
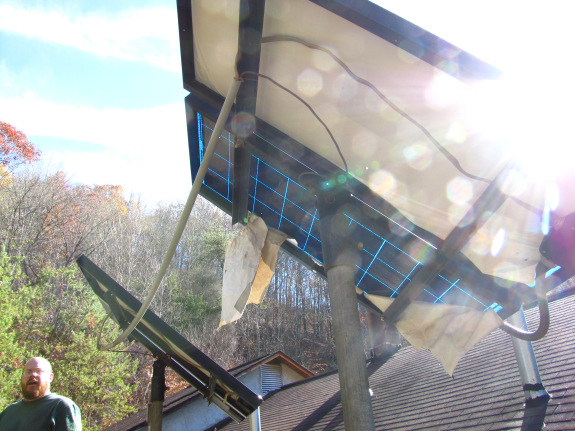
 "Did
you know you have a swiss chard plant in there?" I asked him as he
pointed out a weedy cold frame the previous owners had left
behind. "And there's a volunteer kale, and one lone
collard. Is that an apple tree?"
"Did
you know you have a swiss chard plant in there?" I asked him as he
pointed out a weedy cold frame the previous owners had left
behind. "And there's a volunteer kale, and one lone
collard. Is that an apple tree?"
Joey kindly didn't
explain to me that three tiny plants weren't going to give him enough
greens to bother picking. He just smiled and nodded as older
brothers learn to do with their babbling younger sisters.
If you ever get a
chance, I highly recommend touring someone else's
homestead. It's a great game to guess why they put this here and
that
there, and to see things in action that you've only read about in
books. All of the fun with none of the work --- what's not to
like?
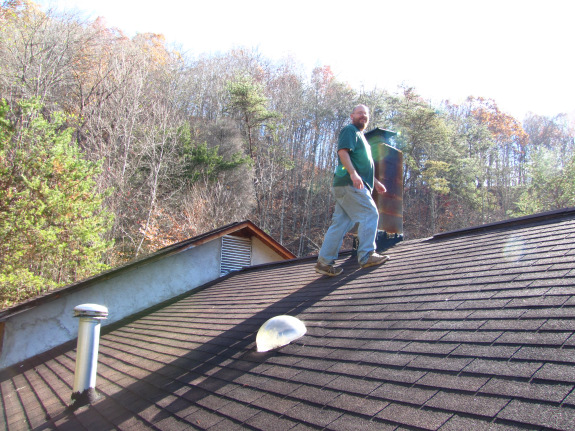
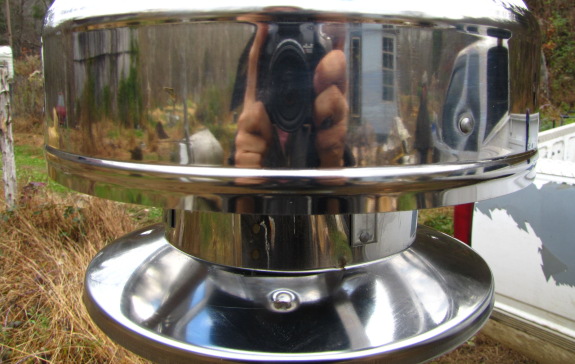
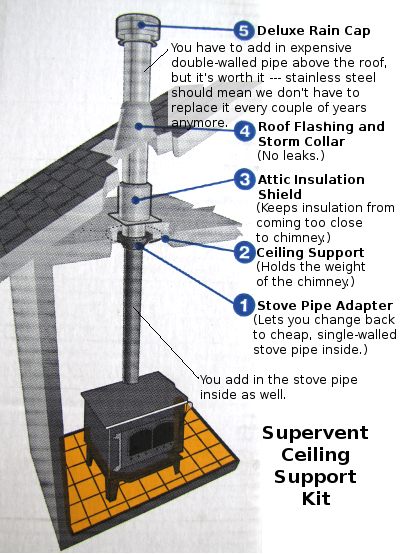 We've been guilty of somewhat
ramshackle construction around our wood stove in the past ---
permissable since it was an exterior wood
furnace.
But since we're going to be putting our
new darling in the trailer (or
at least in a tiny addition on the side of the trailer), we decided to
pay the extra money and toe the line.
We've been guilty of somewhat
ramshackle construction around our wood stove in the past ---
permissable since it was an exterior wood
furnace.
But since we're going to be putting our
new darling in the trailer (or
at least in a tiny addition on the side of the trailer), we decided to
pay the extra money and toe the line.
It probably goes without
saying, but I highly recommend that you not
buy your chimney setup from the wood stove store. The prices they
quoted us on getting smoke from the stove to the outside air were about
twice what we later found for the same products at Lowes (where Mark snagged a
10% discount as former military.)
Instead, start with the Supervent Ceiling Support Kit and you'll just
need to add in black
stovepipe, a damper, and a bit of sealant between the stove and the
ceiling and a double-walled chimney pipe to extend three feet
above the local roof (and two feet above the highest point within 10
feet on the roof.) Total cost for the chimney assemblage, done
the right way, was $261.
 This year, one of our
financial goals is to sink any extra cash into long term farm
infrastructure which will make our bills lower in the long run and
which will (hopefully) last for many years to come. If that
hadn't been our goal for the year, I might have been tempted to cobble
together some of the elements in the ceiling support kit from cheaper
components. For example, you can reproduce the double-walled
chimney pipe ($62) by sliding your six inch chimney pipe inside an
eight inch chimney pipe of the same length and filling the gap with a
non-flammable insulation like ceramic strand insulation or a welding
blanket. The attic insulation shield (part of the $158 kit) can
be made just as easily by cobbling together a box two inches away from
your double-walled pipe out of basic lumber. But for amateurs
like us, the extra cash was worth it since it's helping us piece
together the proper way to build a chimney out of pipes.
This year, one of our
financial goals is to sink any extra cash into long term farm
infrastructure which will make our bills lower in the long run and
which will (hopefully) last for many years to come. If that
hadn't been our goal for the year, I might have been tempted to cobble
together some of the elements in the ceiling support kit from cheaper
components. For example, you can reproduce the double-walled
chimney pipe ($62) by sliding your six inch chimney pipe inside an
eight inch chimney pipe of the same length and filling the gap with a
non-flammable insulation like ceramic strand insulation or a welding
blanket. The attic insulation shield (part of the $158 kit) can
be made just as easily by cobbling together a box two inches away from
your double-walled pipe out of basic lumber. But for amateurs
like us, the extra cash was worth it since it's helping us piece
together the proper way to build a chimney out of pipes.
Edited to add:
I summed up everything I
learned about installing a wood stove in a mobile home in Trailersteading, which is now available for
$1.99 on Amazon. I hope you enjoy reading it as much as I enjoyed
writing it!
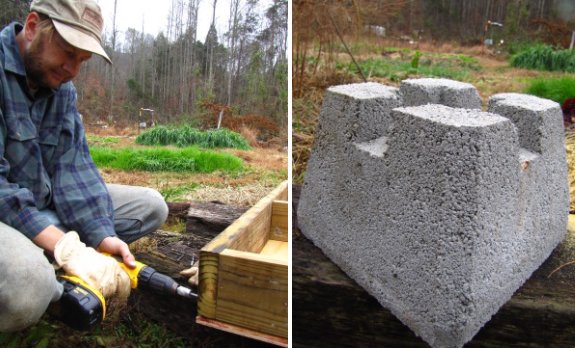
We made some good progress
today on the woodstove
alcove project.
It will be a mini-pole
structure with the above cinder block acting as part of the foundation.
The design of this type of
block brings back some good memories of building with Legos when I was a kid.
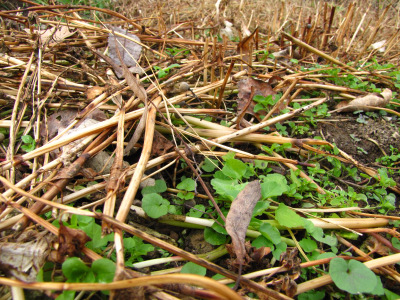 I'm
sure you're all dying to read another installment in my obsession with
cover crops, so here goes! You may remember that we last left our
heroes in a state of disarray, with the buckwheat and then the oats
cut to the ground to prevent seed-setting. So what does the
garden look like now?
I'm
sure you're all dying to read another installment in my obsession with
cover crops, so here goes! You may remember that we last left our
heroes in a state of disarray, with the buckwheat and then the oats
cut to the ground to prevent seed-setting. So what does the
garden look like now?
Buckwheat continues to
fall behind my expectations. The succulent stems melted into the
soil so quickly that weeds grew up through them just a few weeks
later. (Bonus points to readers of my winter weeds post who can identify the problem
plants in the photo above.) I had to come back by and toss a
heavy coat of straw mulch on top of the greenery to keep the weeds at
bay. My conclusion is that buckwheat has just a few advantages
and many disadvantages. On the pro side, the cover crop grows
very quickly, feeds the bees, and will cope with the summer heat (which
most other cover crops hate). But buckwheat can't handle
waterlogged clay soil and leaves very little organic matter behind,
defeating the purpose of a cover crop as a soil builder in our
garden. In the future, I'll only use buckwheat to fill quick gaps
in the summer garden that would otherwise be bare.

Oats is the exact
opposite, exceeding my expectations at every turn. The early
oats, which I mowed down with hedge trimmers, covered the ground so
well that no weeds are poking through (though I did throw a few
handfuls of straw around the edges of the beds just in case.) A
quick and dirty job of mowing killed about 90% of the plants, and I
suspect that the few green stems still standing will die back over the
winter. In addition to all of the organic matter which their
roots are depositing below ground, the oats produced such a mass of
leaf growth that the beds I cut now look nearly identical to nearby
beds that I mulched with straw. I wish I'd planted every square
inch I could get my hands on with oats!
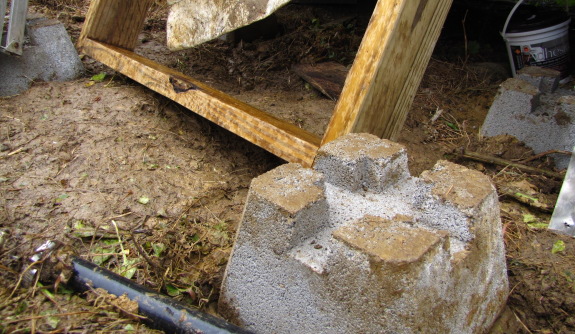
I used a spud bar to tamp down the ground for the
first three Lego
cinder blocks and then
discovered the blunt end of a 4x4 takes only half as much effort to lift and tamp.
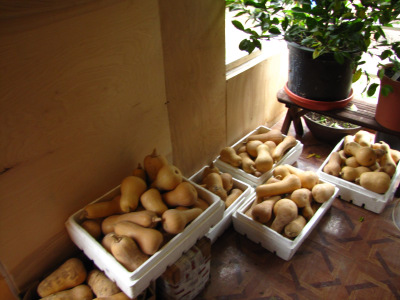 Butternut squash have only
about two-thirds the calories, pound per pound, as potatoes, but
otherwise they're relatively similar in the macronutrient
category. Protein makes up 9 to 10% of the calories, and the rest
of the calories come primarily from sugars and starches. Despite
what I read in Gardening
for Maximum Nutrition,
though, the USDA
Nutrient Database
shows butternuts trumping white potatoes in three-quarters of the
vitamins and minerals measured. If you're going to eat a
vegetable that's primarily starch, butternut isn't a bad choice.
Plus, we just plain love them.
Butternut squash have only
about two-thirds the calories, pound per pound, as potatoes, but
otherwise they're relatively similar in the macronutrient
category. Protein makes up 9 to 10% of the calories, and the rest
of the calories come primarily from sugars and starches. Despite
what I read in Gardening
for Maximum Nutrition,
though, the USDA
Nutrient Database
shows butternuts trumping white potatoes in three-quarters of the
vitamins and minerals measured. If you're going to eat a
vegetable that's primarily starch, butternut isn't a bad choice.
Plus, we just plain love them.
 So
when Mark came home with 97 butternuts, I was thrilled. The same
friend who sold him
35 butternuts for 20 bucks in the middle of August was now looking to unload
the rest of his harvest, this time with no money changing hands.
I guess that people at farmers markets in late fall feel about the same
way about butternuts as they do about zucchini in August (although I
can't imagine not wanting to eat all of those butternuts myself.)
Mark finally felt that we had enough butternuts on hand that I could
make a batch of butternut squash and
Egyptian onion soup
to go along with our butternut
squash pie ---
scrumptious! Thanks, Dennis!
So
when Mark came home with 97 butternuts, I was thrilled. The same
friend who sold him
35 butternuts for 20 bucks in the middle of August was now looking to unload
the rest of his harvest, this time with no money changing hands.
I guess that people at farmers markets in late fall feel about the same
way about butternuts as they do about zucchini in August (although I
can't imagine not wanting to eat all of those butternuts myself.)
Mark finally felt that we had enough butternuts on hand that I could
make a batch of butternut squash and
Egyptian onion soup
to go along with our butternut
squash pie ---
scrumptious! Thanks, Dennis!
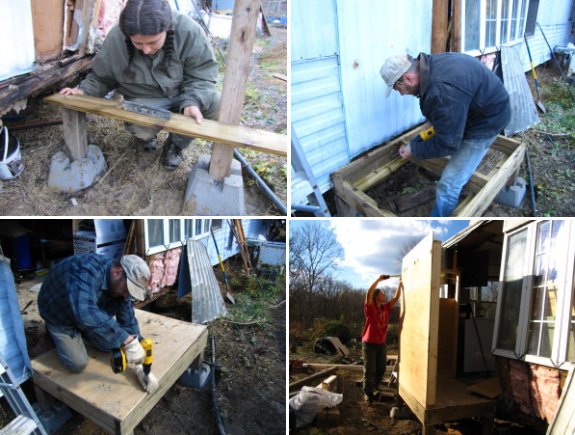
We managed to install the
floor and put up 3 walls on the woodstove
alcove project before quitting time today.
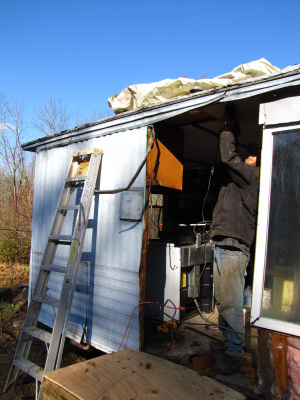 Everything
is always easier the second time around, and building is no
exception. Last year, we mulled over every step in our building
project, and I made
so many measuring mistakes that I begged my father not to point them
out when he came to visit.
Everything
is always easier the second time around, and building is no
exception. Last year, we mulled over every step in our building
project, and I made
so many measuring mistakes that I begged my father not to point them
out when he came to visit.
Although we're still
making the odd mistake here and there, our wood
stove alcove project
is flying along. Since we caught up on inside chores during a
rainy Tuesday, we were able to spend all day building on
Wednesday. We cut the piers to size, topped them with a couple of
sill plates for bracket-less joist attachment, then a box of treated
2X6s with an extra one in the middle for an extraordinarily sturdy set
of floor joists. Add a sheet of heavy plywood and we had the
subfloor in place by lunchtime, despite having to tear off the trailer
wall to get to it.
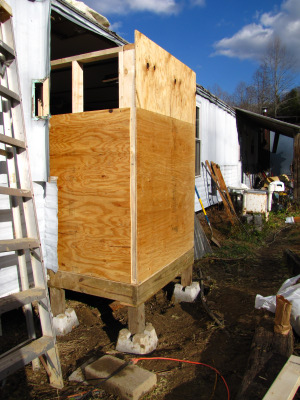 Next
came the alcove walls. After some head-scratching, we figured out
that if we put three sides of the wall box together on the ground, we
could top it off with the exterior plywood and square the wall in no
time. Then it was just a matter of adding on the top 2X4 and the
ones in the middle and we had plumb walls. Let me tell you,
nothing is plumb in the East Wing, so all of these ninety degree angles
blew me away.
Next
came the alcove walls. After some head-scratching, we figured out
that if we put three sides of the wall box together on the ground, we
could top it off with the exterior plywood and square the wall in no
time. Then it was just a matter of adding on the top 2X4 and the
ones in the middle and we had plumb walls. Let me tell you,
nothing is plumb in the East Wing, so all of these ninety degree angles
blew me away.
Now, if the rain will
just hold off while we put together the ceiling and roof....
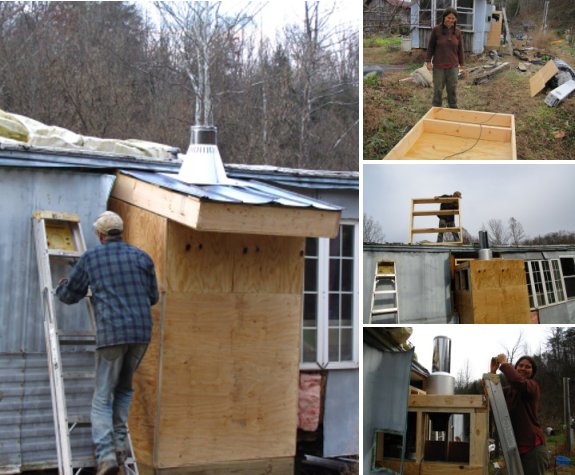
It was a lot of trips up and
down the ladder for the mobile
home woodstove project,
but well worth it when I stepped back and saw all the progress we made
today.
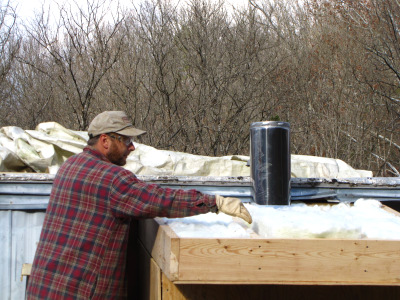 I
think of our trailer as being just a little bit better than a tent as
far as retaining heat. After all, with walls built out of 2X2s
and a roof made from 2X4s, there's barely room for insulation.
However, when we opened a
great gaping hole in the side of the trailer, I could really feel the difference, with
autumn chill creeping in as soon as it got dark. So I was very
relieved we
got the wood stove alcove nearly closed in on Thursday before showers
sent us scurrying for cover. (I'll be even more pleased when we
add in the wiring so that the kitchen isn't operating on extension
cords.)
I
think of our trailer as being just a little bit better than a tent as
far as retaining heat. After all, with walls built out of 2X2s
and a roof made from 2X4s, there's barely room for insulation.
However, when we opened a
great gaping hole in the side of the trailer, I could really feel the difference, with
autumn chill creeping in as soon as it got dark. So I was very
relieved we
got the wood stove alcove nearly closed in on Thursday before showers
sent us scurrying for cover. (I'll be even more pleased when we
add in the wiring so that the kitchen isn't operating on extension
cords.)
Continuing to learn from
past mistakes, I tore the backing paper off our leftover insulation
before handing it up to Mark to lay multiple batts in our alcove's
"attic" (between the ceiling and roof.) I had gone a bit
overboard leaving space for insulation, laying 2X8 rafters over a
ceiling made of 2X4s, which allowed us to put in around R38 in the
lowest part of the roof and more closer to the trailer. It's a
lot easier to talk me into overbuilding when we're working with a space
only twelve square feet.
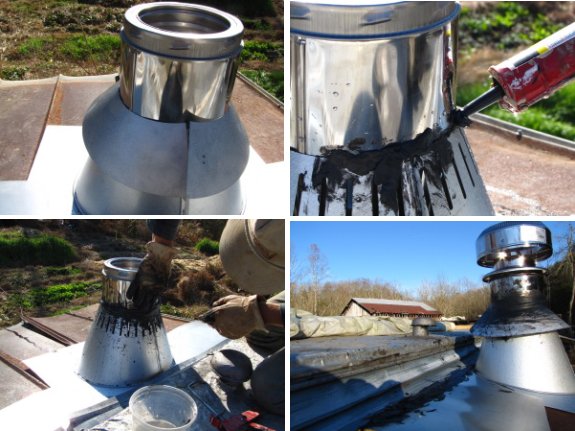
The trick to getting this
high temperature caulking to adhere to the stainless steel pipe is to
have a cup of water to dip your hands in.
Just a little moisture turns
it into more of a clay like material which can then be worked to
whatever shape you need.
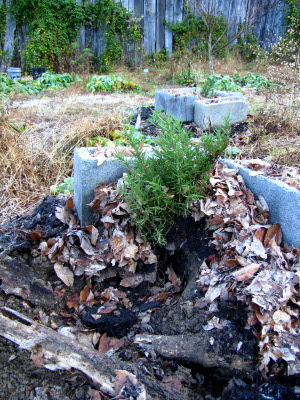 The
one problem I've run into with my hugelkultur mounds is rodents. Moles
and/or voles tend to move in, and then Lucy routes them right
out...along with two thirds of the mound. I patted the earth and
leaves back around my rosemary
plant and will hope
it survives Lucy's tough love.
The
one problem I've run into with my hugelkultur mounds is rodents. Moles
and/or voles tend to move in, and then Lucy routes them right
out...along with two thirds of the mound. I patted the earth and
leaves back around my rosemary
plant and will hope
it survives Lucy's tough love.
Rather than yelling at
Lucy (who had forgotten all about the rosemary incident), I took a deep
breath and remembered that she's a perfect dog 95% of the time, which
is at least 15% more of the time than I'm good. If Huckleberry
hadn't caught his annual mouse this week, I'd say something snarky
about our most spoiled cat here, but the truth is that he's higher in
my good graces than Lucy today.

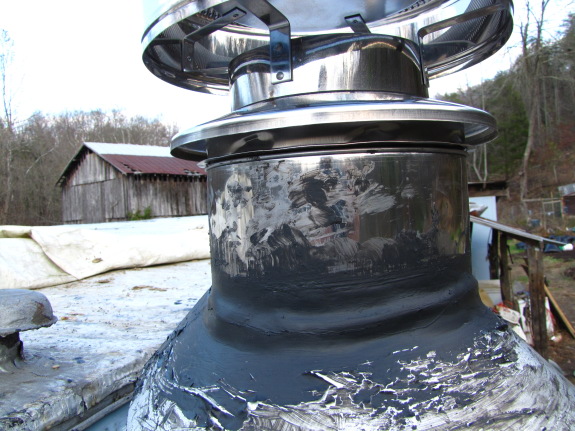
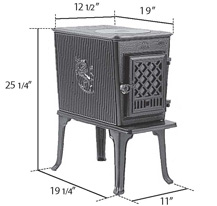 As
you've all probably figured out by now, we opted for the Jotul F 602
wood stove. Although the princess seemed tiny as we
drove her home,
staggering down the hallway with her 160 pound weight seemed to swell
her ego and she looked larger the closer she got to her
alcove.
As
you've all probably figured out by now, we opted for the Jotul F 602
wood stove. Although the princess seemed tiny as we
drove her home,
staggering down the hallway with her 160 pound weight seemed to swell
her ego and she looked larger the closer she got to her
alcove.
I'm very glad we opted
for one of the smallest stoves out there, because the required
clearances for even the tiny Jotul F 602 are pretty extreme --- 21
inches on each side, 13.5 inches off the back (18 inches if you use
single walled stove pipe), and then an 18 inch hearth off the
front. Assuming you send the stove pipe straight up rather than
out the back, that's a 21 square foot area taken up by our little
darling.
Luckily, there are ways
to safely lessen your clearances --- a heat shield on the back of the
wood stove, heat shields on the walls, and double walled stove
pipe. We didn't opt to use every one of these features, but if we
had, we could have lowered the princess's 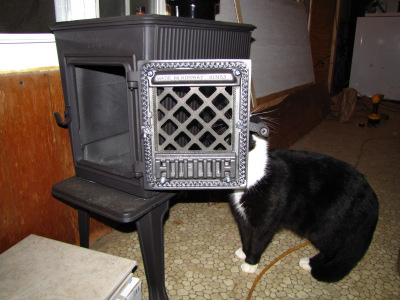 footprint
to 11 square feet. The heat shields on the walls felt like enough
for us since they can be homemade and will cut down the huge side
clearances to a mere 13 inches.
footprint
to 11 square feet. The heat shields on the walls felt like enough
for us since they can be homemade and will cut down the huge side
clearances to a mere 13 inches.
We probably won't slide
her into her new home until around Thanksgiving since we still need to
finish the inside of the alcove, but the princess already has a place
of honor in our living room. Both cats have even hopped inside
and proclaimed her worthy. (This is Strider, who is such a shy cat he even
hides his face in photos.)
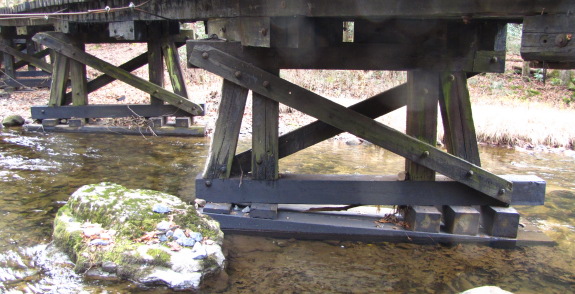
I saw this massive footbridge
today while we were out hiking and it made me stop and think of how
they used railroad ties to anchor it in the water.
I'm pretty sure our
little footbridge was too
long and a little support like this in the middle might have been
enough to save it from a premature death.
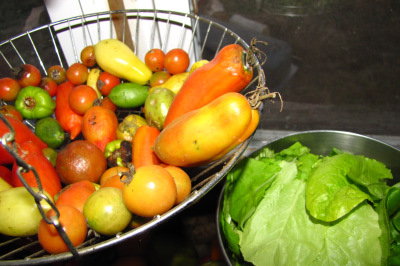 We
picked all of our semi-ripe tomatoes at the beginning of October in preparation for a
frost. A week and one light frost later, I went out and harvested
every single thing left on the vines, figuring that at the worst I'd
end up with a lot of rotten fruits to go on the compost pile. The
result has been tomatoes ripening slowly in the kitchen for six weeks,
and we still have about a third left to change color.
We
picked all of our semi-ripe tomatoes at the beginning of October in preparation for a
frost. A week and one light frost later, I went out and harvested
every single thing left on the vines, figuring that at the worst I'd
end up with a lot of rotten fruits to go on the compost pile. The
result has been tomatoes ripening slowly in the kitchen for six weeks,
and we still have about a third left to change color.
Despite the joy of
including homegrown tomatoes in a Thanksgiving salad, I do plan to
tweak my last tomato harvest a bit next year. The first tomatoes
to ripen indoors had started the process on the vine and tasted
delicious, but each subsequent round became more and more
tasteless. Now, I'm throwing all romas straight into soup since
they taste pretty insipid on their own.
On the other hand, the
Crazy tommy-toes are still ripening up to a pretty good flavor, even
the ones that I picked when they were dark green. Crazy tomatoes
also seem to be less prone to rotting on the ripening shelf, which is
one of the downfalls of eking out your fall tomato harvest.
Although our remaining
tomatoes aren't the prettiest thing around, they sure are a good way to
remind me to eat all of that lettuce growing a mile a minute in the
late fall garden!
 Weedless Gardening
by Lee Reich is another one of those books that made me say, "If only
I'd read this two years ago, I wouldn't have had to read a dozen
books and try out half a dozen methods on the ground to learn that
stuff!" Then I remembered how much I love to read and experiment,
and am glad I saved Lee Reich's book for a day when it would help me
streamline my operation rather than giving me a template to copy.
Weedless Gardening
by Lee Reich is another one of those books that made me say, "If only
I'd read this two years ago, I wouldn't have had to read a dozen
books and try out half a dozen methods on the ground to learn that
stuff!" Then I remembered how much I love to read and experiment,
and am glad I saved Lee Reich's book for a day when it would help me
streamline my operation rather than giving me a template to copy.
Lee Reich sums up his
gardening method with four simple factors
- Minimize soil disruption --- Don't till or dig.
- Protect the soil surface --- Keep a constant mulch or crop cover.
- Avoid soil compaction --- Walk on designated paths
- Use drip irrigation
Although our garden
operates better with pulsating
sprinklers
than with drip irrigation, I'm completely in favor of Lee Reich's other
three points. As he explains, keeping the soil surface mulched
and
the soil structure intact has a heaping handful of benefits, including:
- Fewer weeds --- Tilling exposes seeds below the surface to light and air, which tempts them to sprout. If you don't till and do keep the soil surface mulched, the seedbank of weeds that is inevitably found in all soil will sit in a dormant state and leave you alone.
- More moisture --- When you till, you disrupt the structure of the soil, which makes it harder for water to move up and sideways by capillary action. As a result, you have to water often or keep the roots of your plants dipping into the groundwater to prevent your crops from wilting. No-till soil develops channels that pull water up from below to hydrate your plants.
- Earlier spring planting --- It's tough to put in a spring garden if you have to wait until the ground is dry enough to till. With a no-till garden, you can plant as early as you want.
- Protection from erosion and crusting --- Heavy rain pounding into bare soil is bad news. If the water doesn't carry your precious topsoil away, it will break up the soil particles and form a crust on the surface that prevents future rain from infiltrating. A heavy mulch protects the soil surface from the problematic effects of heavy rain, as well as mitigating summer temperatures, slowing evaporation, and allowing more water to soak into the surface without running off.
 More organic matter ---
One of the best parts of the book is this amazing graph which shows how
the organic matter in prairie soil stayed steady at 5% until the land
was plowed. During the first decade of conventional farming, the
soil lost 40% of its organic matter, and by the third decade it had
lost another 20%. When you till soil, extra air comes in contact
with soil particles and sends the decomposing microorganisms into a
flurry of activity. They break down the organic matter quickly,
with the advantage that some instantly available nutrients are produced
for that year's crops. However, most of the nutrients in the
organic matter are burned too quickly and turn into gases that leave
the soil forever. We all know that organic matter is key to good
soil, so any method that burns through 40% of your soil's organic
matter in a decade is bad news.
More organic matter ---
One of the best parts of the book is this amazing graph which shows how
the organic matter in prairie soil stayed steady at 5% until the land
was plowed. During the first decade of conventional farming, the
soil lost 40% of its organic matter, and by the third decade it had
lost another 20%. When you till soil, extra air comes in contact
with soil particles and sends the decomposing microorganisms into a
flurry of activity. They break down the organic matter quickly,
with the advantage that some instantly available nutrients are produced
for that year's crops. However, most of the nutrients in the
organic matter are burned too quickly and turn into gases that leave
the soil forever. We all know that organic matter is key to good
soil, so any method that burns through 40% of your soil's organic
matter in a decade is bad news.
I assume you're all
completely sold by now on Lee Reich's weedless
gardening method, so I'll spend the rest of this lunchtime series
getting down to the nitty gritty.
| This post is part of our Lee Reich's Weedless Gardening lunchtime
series.
Read all of the entries: |
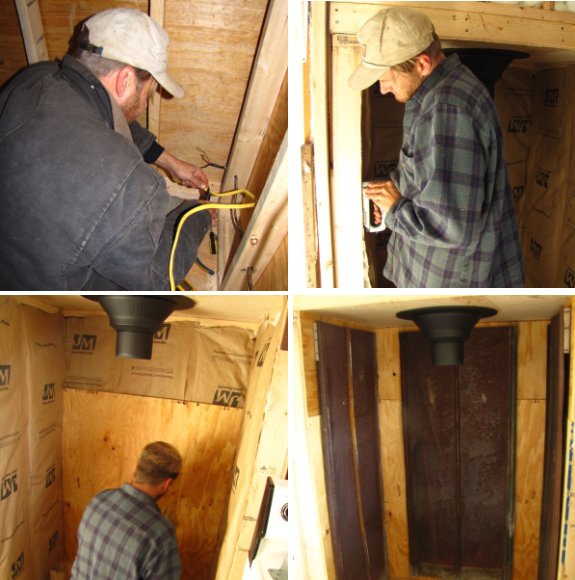
We finished the wiring,
insulation, and inner plywood walls on the woodstove
alcove project along with all 3 heat shields before I ran out of
steam today.
Tomorrow should be a good day
to learn about tile floors and concrete board.
 If
I had to list my talents, getting dirty would definitely be in the top
five. Other people somehow manage to evade dirt's magnetic
attraction, but I always figure that it's better to enjoy the world
than stay clean. Or maybe I'm just rationalizing the fact that I
am completely incapable of thinking before plopping down on the ground
or pushing my fingers into the soil. Have you ever read Beatrix
Potter's The Tale
of Tom Kitten?
That's me in a nutshell.
If
I had to list my talents, getting dirty would definitely be in the top
five. Other people somehow manage to evade dirt's magnetic
attraction, but I always figure that it's better to enjoy the world
than stay clean. Or maybe I'm just rationalizing the fact that I
am completely incapable of thinking before plopping down on the ground
or pushing my fingers into the soil. Have you ever read Beatrix
Potter's The Tale
of Tom Kitten?
That's me in a nutshell.
As a case in point,
consider our visit to Everett
and Missy's house a
few weeks ago. At 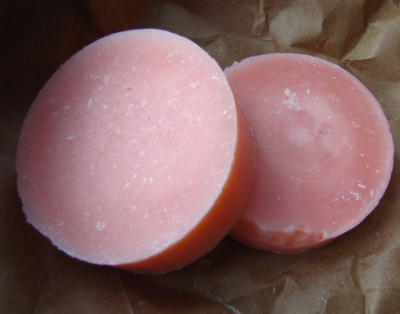 the end of our farm tour, I
was filthy and soaked from the waist down while everyone else looked
pristine, so I wasn't too surprised to be the recipient of the
thoughtful package above. Of course their beautiful homemade
soap isn't a
hint. What could they possibly be hinting about?
the end of our farm tour, I
was filthy and soaked from the waist down while everyone else looked
pristine, so I wasn't too surprised to be the recipient of the
thoughtful package above. Of course their beautiful homemade
soap isn't a
hint. What could they possibly be hinting about?
Thanks for the great
hike and the awesome soap, guys!
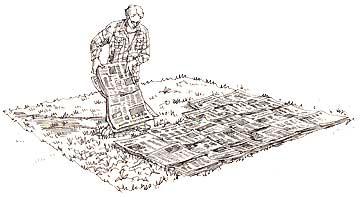 Like
Square Foot
Gardening, Lee
Reich's Weedless
Gardening is really
a
rehashing of a lot of older methods that come down to creating
permanent beds and keeping them mulched. I liked Lee Reich's book
a lot better because he included more hands on information that
answered questions I've been tossing around about my similar gardening
method. For example --- can you start a no-till garden without an
initial episode of tilling? Lee Reich's answer can be paraphrased
as "Yes, easily, and here's how..."
Like
Square Foot
Gardening, Lee
Reich's Weedless
Gardening is really
a
rehashing of a lot of older methods that come down to creating
permanent beds and keeping them mulched. I liked Lee Reich's book
a lot better because he included more hands on information that
answered questions I've been tossing around about my similar gardening
method. For example --- can you start a no-till garden without an
initial episode of tilling? Lee Reich's answer can be paraphrased
as "Yes, easily, and here's how..."
Starting a new no-till
garden is a simple matter of laying down a kill
mulch (also known as creating a lasagna bed or putting down a sheet
mulch.) Lee
Reich first
applies six cups of 5% nitrogen fertilizer per 100 square feet, then
flattens or mows the existing vegetation so that it is as low to the
ground as possible. Next, he lays down a four-sheet-thick layer
of newspaper
and tops the paper off with one to three inches of mulch. If he
plans to plant into the bed immediately, that mulch
would be compost, but the mulch could also be any of the materials I'll
discuss tomorrow if you're making a bed for later use. In
his own garden, Lee Reich lays out compost as mulch in the permanent
beds and wood chips as mulch in the aisles.
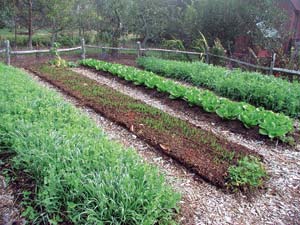 I got a bit bogged down in
Lee Reich's statement that he uses 5%
nitrogen fertilizer, as well as by his later explanation that he uses
soybean meal to give his garden a nitrogen boost every year. As
with Steve Solomon's complete
organic fertilizer,
I think that high
nitrogen inputs like this may pass the "organic" test, but fail
my permaculture test. Adding nitrogen to the soil in any
concentrated form kills off some of the beneficial soil
microorganisms, and I can't help feeling that burning oil to cultivate
fields of soybeans then using those soybeans to grow vegetables is
about as far as you can get from a closed loop. All of that said,
Lee Reich has a valid point that you need a bit of high nitrogen at the
beginning
of the no-till process to counteract the high carbon of the weeds being
killed.
Why not run chickens over that patch of ground instead, or toss down an
equivalent amount of chicken manure?
I got a bit bogged down in
Lee Reich's statement that he uses 5%
nitrogen fertilizer, as well as by his later explanation that he uses
soybean meal to give his garden a nitrogen boost every year. As
with Steve Solomon's complete
organic fertilizer,
I think that high
nitrogen inputs like this may pass the "organic" test, but fail
my permaculture test. Adding nitrogen to the soil in any
concentrated form kills off some of the beneficial soil
microorganisms, and I can't help feeling that burning oil to cultivate
fields of soybeans then using those soybeans to grow vegetables is
about as far as you can get from a closed loop. All of that said,
Lee Reich has a valid point that you need a bit of high nitrogen at the
beginning
of the no-till process to counteract the high carbon of the weeds being
killed.
Why not run chickens over that patch of ground instead, or toss down an
equivalent amount of chicken manure?
No matter how you get
the extra nitrogen to the soil, Lee Reich explains
that you don't need to (nor should you) dig up your soil by hand or
with a rototiller except in a few rare cases. If you have to make
drastic changes to your soil pH, you will need to dig the lime 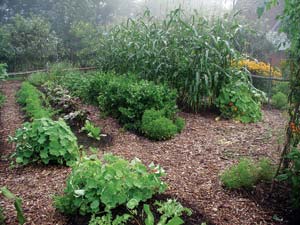 or
sulfur into the soil, and if you're the unlucky inheritor of hardpan,
you'll have to break up that tough soil layer before returning to
no-till techniques. Lee Reich is generally opposed to raised
beds, which he notes dry out quickly (and require an initial round of
digging), but he does admit that areas with bedrock just beneath the
soil surface or with a very high water table (like we have) will
benefit from raised beds.
or
sulfur into the soil, and if you're the unlucky inheritor of hardpan,
you'll have to break up that tough soil layer before returning to
no-till techniques. Lee Reich is generally opposed to raised
beds, which he notes dry out quickly (and require an initial round of
digging), but he does admit that areas with bedrock just beneath the
soil surface or with a very high water table (like we have) will
benefit from raised beds.
In most cases, though,
starting a new weedless garden is as simple as
adding a nitrogen input, mowing, tossing down a layer of paper, and
then topping it all of with mulch. In less time than it would
have taken to till the ground, you've created a new growing space and
preserved the soil structure and organic matter.
| This post is part of our Lee Reich's Weedless Gardening lunchtime
series.
Read all of the entries: |
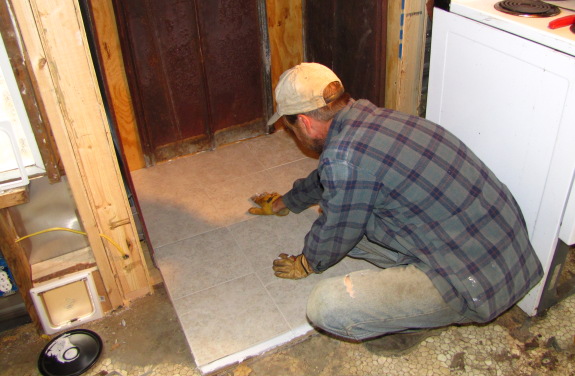
First we secured down a piece
of plywood with screws, and then liquid nailed the concrete board to
the plywood.
Twelve tiles took us about a
half hour to glue in place.
Now we wait for it to dry.
 It's
been a tough week since my horse laptop broke a leg hinge and the vet repair service said she had
to be put down
would cost as much to repair as replace. I am a very cranky
person when I have to baby my computer so that she doesn't fall in
half, and poor Mark has had to put up with my moodiness for long
enough. We decided to go ahead and get me a new laptop, then let
Mark try his hand at mending the hinge on this computer so that she can
be a good backup in case of future problems.
It's
been a tough week since my horse laptop broke a leg hinge and the vet repair service said she had
to be put down
would cost as much to repair as replace. I am a very cranky
person when I have to baby my computer so that she doesn't fall in
half, and poor Mark has had to put up with my moodiness for long
enough. We decided to go ahead and get me a new laptop, then let
Mark try his hand at mending the hinge on this computer so that she can
be a good backup in case of future problems.
 I
try to be nice to my laptops, but the truth is that I run through them
far faster than you would expect. Two years ago, I paid more for
a Lenovo laptop thinking that it would be sturdier than the HP laptop
I'd just broken, but the Lenovo turned out to last an even shorter span
of time. A
recent study
suggests that this lack of longevity on the part of laptops isn't
completely my fault, since nearly a third of all laptops fail in the
first three years. That said, there are notable differences
between manufacturers, with HP laptops failing at phenomenal rates,
Lenovo laptops coming in middle of the pack, and Toshiba and Asus
laptops lasting considerably longer.
I
try to be nice to my laptops, but the truth is that I run through them
far faster than you would expect. Two years ago, I paid more for
a Lenovo laptop thinking that it would be sturdier than the HP laptop
I'd just broken, but the Lenovo turned out to last an even shorter span
of time. A
recent study
suggests that this lack of longevity on the part of laptops isn't
completely my fault, since nearly a third of all laptops fail in the
first three years. That said, there are notable differences
between manufacturers, with HP laptops failing at phenomenal rates,
Lenovo laptops coming in middle of the pack, and Toshiba and Asus
laptops lasting considerably longer.
 The
question I'm soliciting feedback on is --- do you think it's worth
paying more for longevity when it comes to laptops? Based on the
length of warranty that Toshiba provides on their laptops, I suspect
their low end laptops last no longer than other low end laptops
(although maybe that's not a valid assumption, given the small
difference between entry-level laptops and premium laptops on this
chart and the larger difference between brands in the last
chart.) If the Toshiba Tecra laptop would survive about three
times as long as their low end Satellite laptop, is it worth paying
three times as much for that longevity?
The
question I'm soliciting feedback on is --- do you think it's worth
paying more for longevity when it comes to laptops? Based on the
length of warranty that Toshiba provides on their laptops, I suspect
their low end laptops last no longer than other low end laptops
(although maybe that's not a valid assumption, given the small
difference between entry-level laptops and premium laptops on this
chart and the larger difference between brands in the last
chart.) If the Toshiba Tecra laptop would survive about three
times as long as their low end Satellite laptop, is it worth paying
three times as much for that longevity?
We'd save pain and
suffering by going for the more expensive model, and would also save
the environmental cost of creating three laptops instead of one.
On the other hand, the industry's planned obsolescence of the low end
laptop works to the consumer's advantage in a different way since you
tend to be able to buy more computing quality every year for your
dollar. What do you think? Expensive Toshiba, cheap
Toshiba, or cheapest laptop that has the computing power I need?
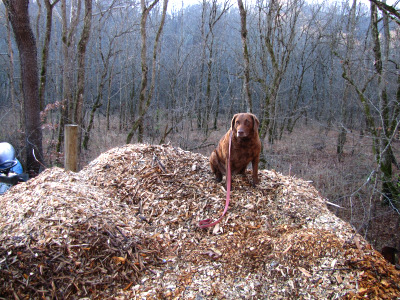 My
second gripe with Lee Reich's method is that, for most people, it will
devolve into buying a lot of off-farm mulches. If you put down a
new inch of mulch on a one acre garden every year, that means you've
come up with a whopping 134 cubic yards of mulch, or around 60+ large
pickup truck loads. I can't even imagine that much organic matter!
My
second gripe with Lee Reich's method is that, for most people, it will
devolve into buying a lot of off-farm mulches. If you put down a
new inch of mulch on a one acre garden every year, that means you've
come up with a whopping 134 cubic yards of mulch, or around 60+ large
pickup truck loads. I can't even imagine that much organic matter!
I've spent the last year
trying to rustle up enough scrounged
organic matter to mulch my garden, and we still devolved into buying
straw and rotted wood chip
mulch. A
continuous mulch won't pass
my permaculture test until I'm able to find all of the ingredients as
waste products or grow them myself. And Lee Reich didn't have
that many useful suggestions for non-storebought options:
- Compost --- This is only free if you make your own, which is possible if you can scavenge enough animal manure.
 Grass clippings ---
If we
lived in a city, I might be able to top off my garden with grass
clippings just by snagging bags from the curb, but that would be a lot
of bags since each large sack contains about a seventh of a cubic yard.
Grass clippings ---
If we
lived in a city, I might be able to top off my garden with grass
clippings just by snagging bags from the curb, but that would be a lot
of bags since each large sack contains about a seventh of a cubic yard.- Hay --- People always talk about finding spoiled hay for free, but this dream has never materialized for me. That said, if you were able to get a dozen of the big round bales of hay every year,that would top off your acre. (After you compost them well to kill the weed seeds, of course.)
- Leaves --- My mom generally comes through every year with a couple of dozen bags of autumn leaves that she finds by the curb. I adore these leaves, but they disappear so fast! Like bags of grass clippings, we'd need about 938 bags to mulch an acre garden.
- Sawdust --- Lee Reich and my father agree that you can often get sawdust for free at a local sawmill. This is on my list as a source of biomass to track down next year.
- Wood chips --- So far, this is the only kind of free biomass we've been able to find in large quantities. My favorite utility line workers dropped off another big truckload last week, and I've already earmarked it for about a dozen uses. I estimate that I'd have to get them to deliver about fifteen truckloads a year to keep me happy, which might be the most feasible of all of my mulch options. Lee Reich notes that wood chips make a perfectly safe mulch even on the vegetable garden as long as you don't work them into the soil.
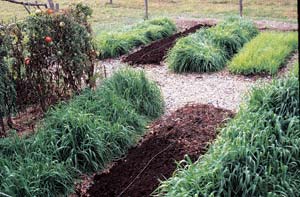 Cover crops --- The other
feasible option for a permaculture-friendly mulch is to grow your own
during the garden's off season in the form of cover crops. Lee
Reich seemed to be at about the same level of experimentation that I'm
at, trying to find a series of cover crops that winter kill or are
easily killed by mowing, mentioning barley, buckwheat, oats, rape, and
a sorghum-sudangrass hybrid as being reliably winter killed through
zone 6. He lists annual ryegrass as hardy in our zone, but notes
that it is very easy to mow-kill, along with all of the previously
mentioned cover crops except oats.
Cover crops --- The other
feasible option for a permaculture-friendly mulch is to grow your own
during the garden's off season in the form of cover crops. Lee
Reich seemed to be at about the same level of experimentation that I'm
at, trying to find a series of cover crops that winter kill or are
easily killed by mowing, mentioning barley, buckwheat, oats, rape, and
a sorghum-sudangrass hybrid as being reliably winter killed through
zone 6. He lists annual ryegrass as hardy in our zone, but notes
that it is very easy to mow-kill, along with all of the previously
mentioned cover crops except oats.
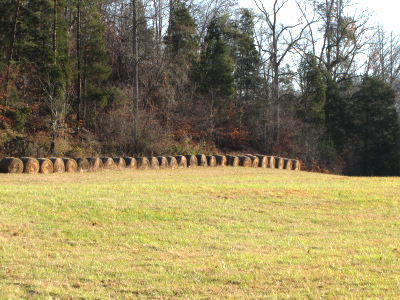 I
guess it wasn't fair to think that Lee Reich would be able to provide
the silver bullet of free mulch products since this type of system is
bound to be unique to each person's area. I'll keep hunting down
as much biomass as I can, and will dream of finding enough to one day
mulch my whole garden. Meanwhile, on my daily walk, I covet the
neighbor's biomass.
I
guess it wasn't fair to think that Lee Reich would be able to provide
the silver bullet of free mulch products since this type of system is
bound to be unique to each person's area. I'll keep hunting down
as much biomass as I can, and will dream of finding enough to one day
mulch my whole garden. Meanwhile, on my daily walk, I covet the
neighbor's biomass.
| This post is part of our Lee Reich's Weedless Gardening lunchtime
series.
Read all of the entries: |
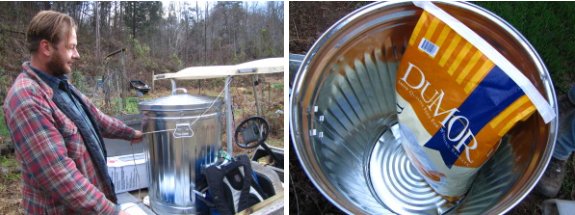
This metal trash can was
about 4 dollars more than the same size in plastic.
I estimate we've lost the
equivilent of around 2 bags of feed on and off the last year while I
kept trying to seal up the lid with silicone.
I'm guessing a plastic trash
can that gets sun exposure all day will only last 5 or 6 years before
the lid starts to crack and break.

What's Thanksgiving
without a pie, or two, or three? I promised
to bring a couple to our family's feast, and couldn't resist making two
small butternut
squash pies and one
huge cranberry raisin pie.
I've been doing a bit of
experimenting with using our homegrown honey,
so the recipes you'll get by following the links above can be made
totally sugar-free. Look in the comments section to see the honey
version of the butternut pie and notice the tweaks I've made to the
cranberry raisin pie recipe to keep the filling from sticking to the
bottom of the pot.
Happy Thanksgiving!
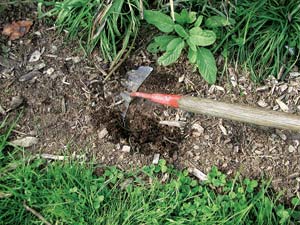 After
laying out his initial weedless garden, Lee Reich's gardening
year is almost too simple. He estimates that he spends only about
five
minutes a week weeding his 2,000 square foot garden, making sure that
he catches the few weeds that appear before they set seed.
Usually, he simply yanks up tiny weeds by hand, but if a slew of small
weeds pop up, he cuts the plants off just beneath the soil surface
using a colinear hoe, hula hoe, or (his favorite) the winged weeder.
After
laying out his initial weedless garden, Lee Reich's gardening
year is almost too simple. He estimates that he spends only about
five
minutes a week weeding his 2,000 square foot garden, making sure that
he catches the few weeds that appear before they set seed.
Usually, he simply yanks up tiny weeds by hand, but if a slew of small
weeds pop up, he cuts the plants off just beneath the soil surface
using a colinear hoe, hula hoe, or (his favorite) the winged weeder.
One problem I've noted
in my own endless hand-weeding is that I yank up
quite a bit of good garden soil around the roots of large weeds and
end-of-the-year crop debris (like dead corn stalks and broccoli.)
Lee Reich has a great solution to this problem. He uses a sharp
knife to cut a circle in the soil around the plant, severing the large
roots so that he can simply twist the main stalk out with a jerk of his
hand. Not only does the precious soil stay in place, there is
less disruption that will allow weed seeds to sprout. As an added
bonus, the small roots left behind quickly rot, leaving channels
through which air and water can move, and increasing the organic matter
of the soil.
At the end of the year
(or earlier if he sees bare spots), Lee Reich
adds another layer of mulch to the garden. He generally uses
leaves or wood chips around his perennials, wood chips in his garden
aisles, and weedless compost as mulch on the vegetable beds. An
inch of compost feeds his garden while all perennials except his prize
fruit trees receive enough nutrients from their three annual inches of
wood chip mulch alone.
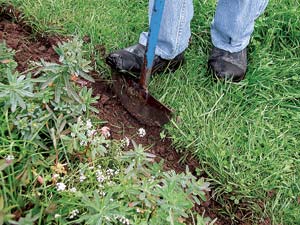 I probably spend about a
third of my weeding time dealing with the grass and clover that creep
up from our aisles into the garden beds.
Lee Reich agrees that edging is a pain in the butt and most of his
solutions are tedious and time-consuming --- hand weeding or cutting
off the invaders with a half moon edger are the two cheap
options. At the other exreme, if you can spare the biomass, using
wood chips in your aisles and as a buffer around your garden will not
only cut back on this time-consuming work, but will also feed your soil
and give your garden plants a bit more space to spread their
roots. One day, I dream of converting my aisles to wood chips ---
maybe if my buddies drop off another dozen truckloads full.
I probably spend about a
third of my weeding time dealing with the grass and clover that creep
up from our aisles into the garden beds.
Lee Reich agrees that edging is a pain in the butt and most of his
solutions are tedious and time-consuming --- hand weeding or cutting
off the invaders with a half moon edger are the two cheap
options. At the other exreme, if you can spare the biomass, using
wood chips in your aisles and as a buffer around your garden will not
only cut back on this time-consuming work, but will also feed your soil
and give your garden plants a bit more space to spread their
roots. One day, I dream of converting my aisles to wood chips ---
maybe if my buddies drop off another dozen truckloads full.
Lee Reich even has
contingency plans for what to do if you accidentally
let a portion of your garden become over-run with weeds. Just
throw down a new kill mulch complete with paper weed barrier and keep
right on planting!
| This post is part of our Lee Reich's Weedless Gardening lunchtime
series.
Read all of the entries: |
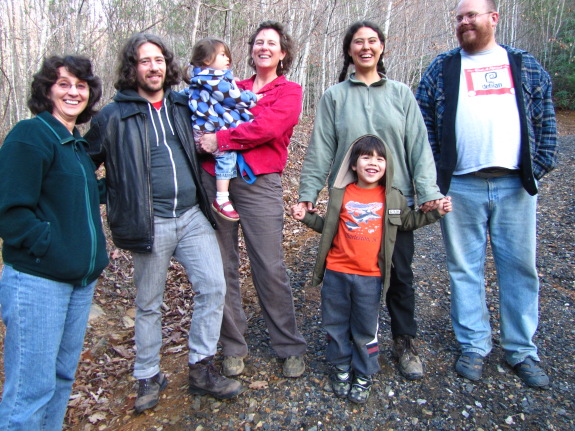
What am I thankful for?
It's been such a great year I
don't even know where to begin.
A little person named Kai
asked me that today and the first thing that came to my mind was the
plate of mustard greens I was passing along, but the truth is just the
top 10 on that list would have taken several minutes to get through.
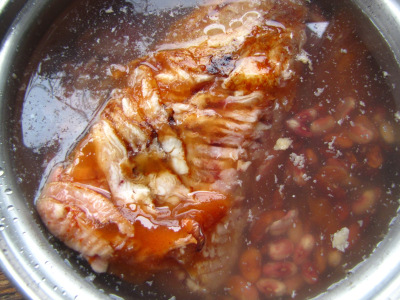 If
you haven't thrown out those ham bones and turkey carcasses, you're
sitting on a gold mine! While the rest of our family fought over
leftover meat, I snagged my favorite meat remnant --- the ham
bone. I'll cook the bone up in a pot of beans today, then freeze
the result in small segments to turn into refried beans and additions
to soups. The final bare bone will go to Lucy as her
post-Thanksgiving treat.
If
you haven't thrown out those ham bones and turkey carcasses, you're
sitting on a gold mine! While the rest of our family fought over
leftover meat, I snagged my favorite meat remnant --- the ham
bone. I'll cook the bone up in a pot of beans today, then freeze
the result in small segments to turn into refried beans and additions
to soups. The final bare bone will go to Lucy as her
post-Thanksgiving treat.
How about those turkey
carcasses? Although I was a bit lax when we lived on storebought
birds, raising
our own broilers
this year has given me a new appreciation for eating every part of the
fowl. After picking off all of the meat, I cook the remnants in a
big pot of water all afternoon, then pour off the first round of stock
to be used as the base of soups. I used to throw out the carcass
at this point, but during my summer flurry of putting away garden
produce, I needed extra chicken stock for all those harvest
bounty soups,
and I quickly learned that you can get another batch of rich broth by
stewing the bones all over again. Don't forget to throw in a bit
of vinegar to tempt more calcium to migrate out of the bones and into
the water. After two rounds of simmering, the poultry bones are
so soft that they seem to disappear when tossed back to our chickens,
boosting the all-important calcium levels of our laying hens and giving
them a high protein fix that perks them right up.
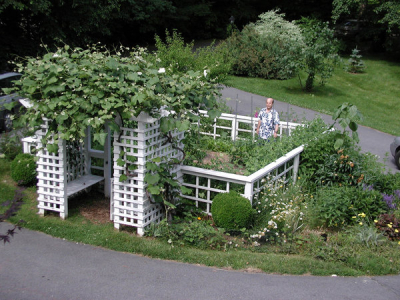 I was going to end by telling
you that Weedless Gardening
is definitely a book worth checking out of your local library since it
is the simplest and clearest explanation of why and how to run a
no-till garden that I've read. But I got an email from the
author, who kindly overlooked my use of his copyrighted photos, and who
mentioned that he sells his books over on his website. It turns
out that a signed copy of Weedless
Gardening is only $8.95 direct from the author, with a very
minimal $2.50 shipping charge (at least to Virginia.) The book is
worth every penny of that price and more, so I've changed my tune ---
go buy a copy for yourself, and another copy for that nice neighbor who
can't seem to understand why you don't use a rototiller.
I was going to end by telling
you that Weedless Gardening
is definitely a book worth checking out of your local library since it
is the simplest and clearest explanation of why and how to run a
no-till garden that I've read. But I got an email from the
author, who kindly overlooked my use of his copyrighted photos, and who
mentioned that he sells his books over on his website. It turns
out that a signed copy of Weedless
Gardening is only $8.95 direct from the author, with a very
minimal $2.50 shipping charge (at least to Virginia.) The book is
worth every penny of that price and more, so I've changed my tune ---
go buy a copy for yourself, and another copy for that nice neighbor who
can't seem to understand why you don't use a rototiller.
Lee Reich also gave me a bit more information about his gardening
methods, which I wanted to repeat here for those of you who don't read
every comment on our blog:
As far as mulch, your garden is much bigger than most gardens, perhaps bigger than it has to be. I grow a year round supply of vegetables for me and my family on a couple of thousand square feet of space. Wood chips, perhaps a couple of loads per year are delivered free. Leaves are delivered free or I pick them up in suburban neighborhoods. I make many tons of compost from garden and kitchen waste, hay scythed from a half acre field here, and, occasionally, some horse manure waste from a local horse farm.
As far as the soybean meal, I've pretty much abandoned it. One inch depth of compost should supply all plants nutritional needs. Also, I question the killing of microorganisms from soybean meal; some will thrive on the N, others won't. The N is released slowly into the soil via the action of microorganisms. Chickens would mess up the garden and, anyway, don't provide free nitrogen if you feed them. (Mine get fed only enough to know where home is.) They mess up the beds so aren't allowed in my garden.
If you're still dying for more information, add Lee Reich's blog to your feed reader like I have. I'm sure he's got a lot more tips to share with us!
| This post is part of our Lee Reich's Weedless Gardening lunchtime
series.
Read all of the entries: |
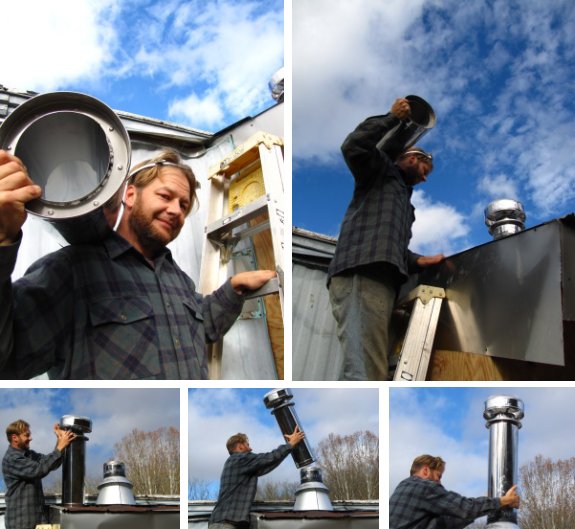
These extra 24 inches cost
around 75 dollars due to it being stainless steel.
It was easy to screw on and
secure in place with a locking ring and proved to be the last finishing
touch to the mobile
home woodstove alcove project.
 After
nearly two weeks of laboring over her new home, we fired up the
princess for the first time Friday afternoon. The instructions
admonished us to light five progressively larger fires, allowing the
stove to cool completely between each one, before burning a
full-fledged fire, so we haven't yet tested how much heat our Jotul
F 602 will put off
at full speed. So far, though, I can tell you that she's a joy to
work with.
After
nearly two weeks of laboring over her new home, we fired up the
princess for the first time Friday afternoon. The instructions
admonished us to light five progressively larger fires, allowing the
stove to cool completely between each one, before burning a
full-fledged fire, so we haven't yet tested how much heat our Jotul
F 602 will put off
at full speed. So far, though, I can tell you that she's a joy to
work with.
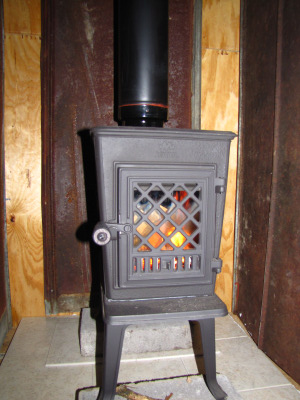 I'm
a very inexperienced fire-maker, and starting our exterior
wood furnace (aka
the beast) was nearly always beyond my ability. Mark could get
the beast going with judicious application of storebought firestarter
logs (wax and sawdust), but even he had to labor quite a bit to build
the fire to the point where it wouldn't go out when he shut the
door. There was no point in leaving a small fire burning in the
furnace because you'd come back to unburnt kindling and a cold stove.
I'm
a very inexperienced fire-maker, and starting our exterior
wood furnace (aka
the beast) was nearly always beyond my ability. Mark could get
the beast going with judicious application of storebought firestarter
logs (wax and sawdust), but even he had to labor quite a bit to build
the fire to the point where it wouldn't go out when he shut the
door. There was no point in leaving a small fire burning in the
furnace because you'd come back to unburnt kindling and a cold stove.
The princess is nothing
like that. I crumbled up several sheets of newsprint, topped them
off with about a dozen mostly dry twigs and a few thinly chopped bits
of box elder kindling, and lit her up. The Jotul is completely
airtight and is designed so that the air intake at the front of the
stove forms a roaring wind inside as soon as you close the glass
door. By the second of the five mini fires, I had figured out
that I could just close the door soon after lighting the paper, and  the stove would do the rest
of the fire-starting by herself. Within minutes, the flames were
so well established that I felt quite confident leaving her alone ---
no babysitting involved.
the stove would do the rest
of the fire-starting by herself. Within minutes, the flames were
so well established that I felt quite confident leaving her alone ---
no babysitting involved.
Clearly, the princess is
going to be the cure to my constant winter refrain --- "Honey, sweetie
pie, darling, will you please light me a fire?" We may be
fighting over who gets to light the fire this
season.

We used a jack
out of the car and the truck on each side of the Jotul
F 602 to slowly raise it
up to a point where it connected with the stovepipe.
A solid cinder block was a
nice fit for the front feet to rest on and we only had to add a couple
of spare tiles to the back block to even it out.
I would say this raises our
comfort level more than any other investment we've made in the past.
 Take
a peek at the smoke coming out of our chimney while the Jotul
is operating nearly at full blast. Oh, you don't see
anything? I could hardly make out a hint of smoke either, just a
bit of a heat shimmering right around the rain cap. For the sake
of comparison, check out this
photo, which was
pretty typical of the huge plume of gray smoke exiting the chimney of
our exterior wood furnace.
Take
a peek at the smoke coming out of our chimney while the Jotul
is operating nearly at full blast. Oh, you don't see
anything? I could hardly make out a hint of smoke either, just a
bit of a heat shimmering right around the rain cap. For the sake
of comparison, check out this
photo, which was
pretty typical of the huge plume of gray smoke exiting the chimney of
our exterior wood furnace.
The Jotul's efficiency
isn't only obvious out the chimney, but also inside the firebox.
The one part of our tiny wood stove that I was leery of was the lack of
a tray for ashes. Wouldn't the little firebox just clog up after
an hour of burning and need to be cleaned out? Nope. After
our first four small and medium-sized fires, there was only about a
quarter of an inch of fluffy ash in the bottom of the stove --- not
even enough to bother scooping out. The instruction manual
suggests cleaning out the ashes every day or two, which sounds about
right.
By fire number three, I
could tell that the Jotul puts off a lot of heat. On a frosty
morning, fire number four heated up the trailer in no time, despite the
fact that I opened the back door to air out the scent of curing
paint. (As Roland mentioned and the 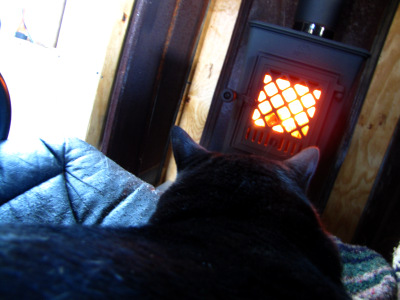 instruction
book for the stove reiterated, you need to be aware that a new stove
will probably stink like the dickens the first few times you light it
as the paint on the outside cures.) I figure we burned perhaps
two small logs in fire number four, which would have barely been enough
to push heat into the trailer with our exterior wood furnace but which
the princess used to warm up the whole front half of the trailer to
high room temperature. It sure is nice to be turning that wood
straight into heat instead of into smoke and ashes. As you can
see, even Huckleberry approves of our new space heating direction.
instruction
book for the stove reiterated, you need to be aware that a new stove
will probably stink like the dickens the first few times you light it
as the paint on the outside cures.) I figure we burned perhaps
two small logs in fire number four, which would have barely been enough
to push heat into the trailer with our exterior wood furnace but which
the princess used to warm up the whole front half of the trailer to
high room temperature. It sure is nice to be turning that wood
straight into heat instead of into smoke and ashes. As you can
see, even Huckleberry approves of our new space heating direction.
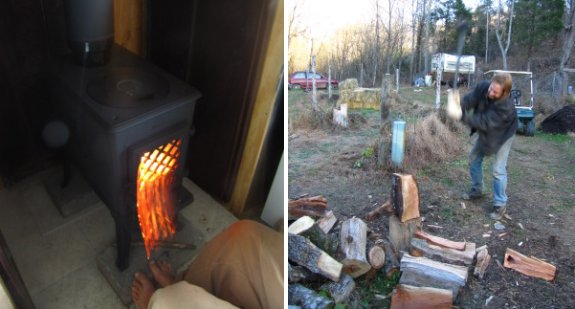
A damper is a valve or plate
that stops or regulates air flow inside the chimney.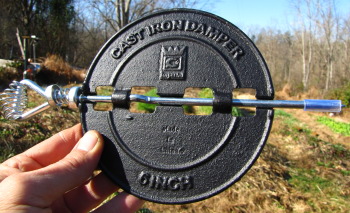
We bought a damper thinking it was part of what we needed, but found
out just in time that our Jotul
F 602 does not require
one due to it being air tight and having a rain cap to prevent Santa and other critters from entering.
The downside to a damper is how it restricts air flow even when it's
open and makes cleaning the chimney a lot more difficult.

Now that we finally have
an operational wood stove, it's time to pay attention to the wood
pile. For most homesteaders, that would mean getting the wood
entirely under cover so that it wouldn't be damp when they go to light
a fire. We do plan to cover up our wood, but right now I'm more
interested in picking through the logs
salvaged from the oyster mushroom tree to make sure we don't
accidentally burn any innoculated with edible mushrooms. Sure
enough, two of the log sections are sprouting oyster mushrooms, so I
snuck them away to live in the forest
garden island.
Between me snagging
mushroom logs and Lucy dragging off huge pieces of firewood to gnaw on,
Mark has to chop quite a bit more wood than he should. I don't
know why he puts up with us, but I sure am glad he does.
 Binet Payne's Worm Cafe documents her journey to
keep her school's food waste out of the landfill. She got other
teachers, students, and cafeteria staff on board to collect their food
and paper waste and process it through four medium-sized worm
bins. During the first school year, her 400 student school
composted 3600 pounds of cafeteria waste (and a bunch of paper) and
saved $6,000 in dumpster fees. Meanwhile, the school was able to
grow some of their own food using the worm castings and the kids were
involved in hands on science.
Binet Payne's Worm Cafe documents her journey to
keep her school's food waste out of the landfill. She got other
teachers, students, and cafeteria staff on board to collect their food
and paper waste and process it through four medium-sized worm
bins. During the first school year, her 400 student school
composted 3600 pounds of cafeteria waste (and a bunch of paper) and
saved $6,000 in dumpster fees. Meanwhile, the school was able to
grow some of their own food using the worm castings and the kids were
involved in hands on science.
Even if you're not ready
to take on the lead role in turning a local school's waste into black
gold, Worm Cafe is a great book for any
budding vermiculturalist to read. As you'll see in this week's
lunchtime series, Binet Payne's book is invaluable if you're interested
in expanding beyond the little kitchen worm bin or even if you just
want to know more about how worms work. Stay tuned for all of the
details of Binet Payne's mid-scale vermicomposting project.
| This post is part of our Worm Cafe lunchtime series.
Read all of the entries: |
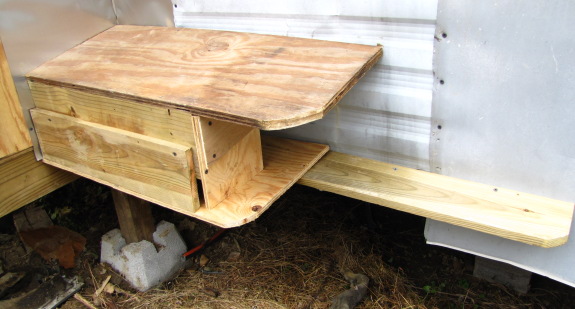
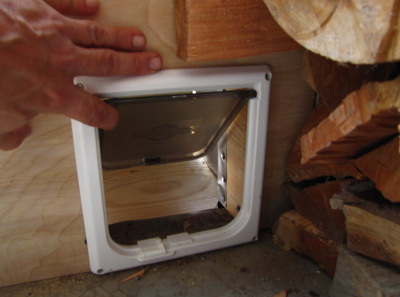
The new cat door now has its own enclosed porch for maximum feline
comfort.

We were too busy to
celebrate the days, but September 14 marked the fourth anniversary of
our move to the farm and September 26 marked the second anniversary of
the Walden Effect! We've met so many
great people in that time period, both real live neighbors and virtual
neighbors who've dropped by our blog --- 333,147 people have visited
the Walden Effect from at least 200 countries and territories and have
read over half a million pages between them.
Although we probably
don't say it enough, we really value our readers. You change the
Walden Effect from our personal journal into a vibrant community as you
share their experiences and knowledge. Meanwhile, for
all of you old and new readers, I wanted to give you a chance to ask us
any questions that you've been pondering but which might have felt off
topic or like we probably answered them before you started
reading. Leave a comment here or on facebook with your question
and we'll make some posts to answer them in the near future. If
you're especially interested in hearing either Mark's or my take on a
question, be sure to mention that too.

While you're at it, feel
free to make an account and
a user page so that we'll know who you
are. If you happen to have a friend in Svalbard, Greenland,
Western Sahara, Mauritania, Sierra Leone, Ghana,
Benin, Niger, Chad, Central African Republic, Gabon, Equitorial Guinea,
Eritrea, North Korea, or French Guiana, you'd make my day if you drop
them an email and ask them to visit the Walden Effect to round out my
world map. And thanks for reading!
 Binet Payne's worm bins are
as simple as you can get, but using her figures you can make a worm bin
as fancy as you please. When designing your worm bin, plan to
keep it pretty shallow --- twelve inches deep worked well for her ---
and to provide one cubic foot of bin space per pound of daily food
waste. A family that produces a pound or two of food waste per
day can get away with a 2 cubic foot worm bin (2 feet by one foot by
one foot), but Binet Payne's school produces perhaps ten times that
amount of food waste per day so she built her bins to be about 32 cubic
feet.
Binet Payne's worm bins are
as simple as you can get, but using her figures you can make a worm bin
as fancy as you please. When designing your worm bin, plan to
keep it pretty shallow --- twelve inches deep worked well for her ---
and to provide one cubic foot of bin space per pound of daily food
waste. A family that produces a pound or two of food waste per
day can get away with a 2 cubic foot worm bin (2 feet by one foot by
one foot), but Binet Payne's school produces perhaps ten times that
amount of food waste per day so she built her bins to be about 32 cubic
feet.
The most basic worm bin
is simply a wooden frame made of 2X12s with a plywood bottom and
lid. To keep costs low, Binet made her bins 8 feet by 4 feet, so
each one used three pieces of lumber for the sides and one full sheet
of plywood for the top and another for the bottom. She warns not
to use treated wood, but she didn't find any problems when using cedar
to extend the life of her worm bin.
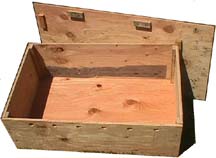 Binet's bins were propped up
on railroad ties or cinderblocks to provide a bit of air space
underneath, and she drilled half inch holes every nine inches along the
width of the bottom and every 18 inches along the length. In my
own experience, I've found that the worm tea is the most valuable
byproduct of vermiculture, so I'd add some sort of collection basin
underneath to capture any liquid that seeps out the holes. Lay a
sheet of black plastic on top of the bin contents below the plywood
lid, and your quick and dirty bin is complete.
Binet's bins were propped up
on railroad ties or cinderblocks to provide a bit of air space
underneath, and she drilled half inch holes every nine inches along the
width of the bottom and every 18 inches along the length. In my
own experience, I've found that the worm tea is the most valuable
byproduct of vermiculture, so I'd add some sort of collection basin
underneath to capture any liquid that seeps out the holes. Lay a
sheet of black plastic on top of the bin contents below the plywood
lid, and your quick and dirty bin is complete.
For those of you who
have gone beyond the under-the-sink worm bin scale, what does your bin
look like? I'd love to hear from anyone who's built a bin that
keeps the worms happy, collects compost tea, and is still cheap to put
together.
| This post is part of our Worm Cafe lunchtime series.
Read all of the entries: |
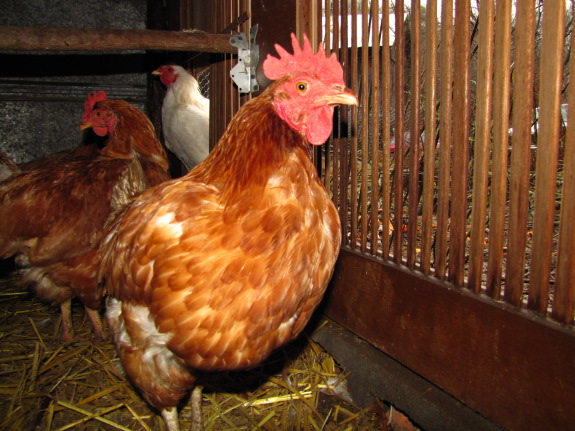
The new indoor
nest box was a failure
due to multiple birds using it as a sleeping roost.
Everything was fine for the
first few nights, but eventually all the extra weight took its toll on
the plastic structure and it collapsed onto the floor.
My new goal is to improve the
night time roosting options by adding some sort of corner perch a bit
higher up than the one shown in the picture and about twice as thick
and sturdy....maybe a 2x4 with the edge rounded.

Or explore more posts by date or by subject.
About us: Anna Hess and Mark Hamilton spent over a decade living self-sufficiently in the mountains of Virginia before moving north to start over from scratch in the foothills of Ohio. They've experimented with permaculture, no-till gardening, trailersteading, home-based microbusinesses and much more, writing about their adventures in both blogs and books.