
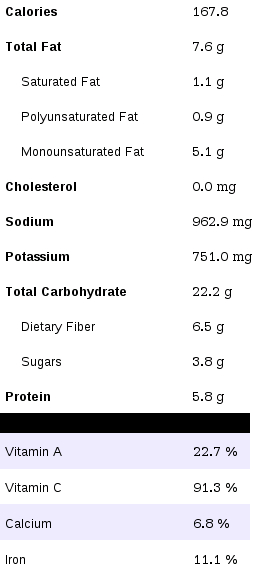
archives for 10/2010
 I
don't know if you can call a dish that lacks eggplant ratatouille, but
whatever this is, it's a delicious way to use up a lot of late summer
veggies. The broiled okra completely lacks sliminess and the
other flavors meld together into a feast. Plus, by roasting the
vegetables nearly whole, you retain
most of the vitamins.
I
don't know if you can call a dish that lacks eggplant ratatouille, but
whatever this is, it's a delicious way to use up a lot of late summer
veggies. The broiled okra completely lacks sliminess and the
other flavors meld together into a feast. Plus, by roasting the
vegetables nearly whole, you retain
most of the vitamins.
To make the ratatouille,
first fill your basket with:
- 4 summer squash or zucchini
- 2 large, sweet bell peppers (or several smaller ones)
- 12 to 20 small okra
- 4 large tomatoes (or an equivalent number of tommy-toes)
- 2 large onions
- 6 cloves of garlic
 Cut
the squash in half, core the peppers and cut them in halves or
quarters, chop off the okra tops and cut them in half, and cut the
tomatoes in half --- all cuts are long-ways. Peel the onions and
cut them into half inch wedges. Put the garlic through a garlic
press and add it to the rest of the vegetables.
Cut
the squash in half, core the peppers and cut them in halves or
quarters, chop off the okra tops and cut them in half, and cut the
tomatoes in half --- all cuts are long-ways. Peel the onions and
cut them into half inch wedges. Put the garlic through a garlic
press and add it to the rest of the vegetables.
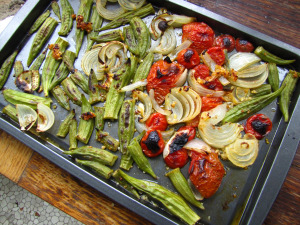
Pour a few tablespoons
of olive oil and a liberal amount of salt and pepper onto the
vegetables and mix them up until all of the surfaces are lightly
oiled. Then lay the vegetables out on cookie sheets, cut sides
down. Broil in the oven until the vegetables are soft and the
skins are very slightly blackened. (About five minutes, less for
the peppers.)
While you're broiling,
rush out into the garden and clip a cup of basil leaves and chop them
into bits. Add a cup and a half of pre-cooked beans and two
tablespoons of balsamic vinegar.
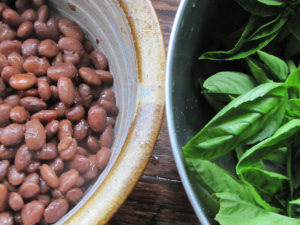
Once the vegetables are
cool enough to handle, chop them into bite-size pieces and throw them
in with the beans and basil. If necessary, add more salt and
pepper.
We ate our ratatouille
over rice, and this recipe looked like it would serve about
eight. Mark rated it 7 out of 10 (probably losing points because
of the presence of beans and lack of meat) while I rated it an
8.5. Definitely worth repeating!
 I've often wondered whether I could taste good nutrition, and I'm
tempted to say the answer is yes. The winter squash highest in nutrients is the butternut --- my favorite. The most nutritious fruits are those grown under a bit of nitrogen stress in the bright sun --- again, my favorites. I vastly prefer the flavor of frozen beans
to canned beans and love to saute, steam, and stir fry. Fresh
fruit is in an entirely different (and better) taste category for me
from any cooked or otherwise processed fruit.
I've often wondered whether I could taste good nutrition, and I'm
tempted to say the answer is yes. The winter squash highest in nutrients is the butternut --- my favorite. The most nutritious fruits are those grown under a bit of nitrogen stress in the bright sun --- again, my favorites. I vastly prefer the flavor of frozen beans
to canned beans and love to saute, steam, and stir fry. Fresh
fruit is in an entirely different (and better) taste category for me
from any cooked or otherwise processed fruit.
Although our bodies get
quickly confused when exposed to fake flavors,
colors, and added salts and sugars, we've clearly evolved some basic
cues for determining which foods are nutritious. In some cases,
natural sugars seem to be the key to the rich taste of fresh,
nutritious food --- higher than usual sugar content in a vegetable can
be a cue that the vegetable is also higher in vitamin C. In other
cases, bright colors hint at higher than ordinary vitamin A --- deep
orange peaches have much higher vitamin A content than white peaches.
Some days, I wish I had
a chemical laboratory in my backyard where I
could test the micronutrient levels of every piece of produce grown in
our garden. Is it really twice as high in nutrition compared to
the grocery store version, just as it is twice as high in flavor?
Without more data to back up my gut feeling, I'll have to assume that
anything that tastes good when I eat it raw is also
good
for me.
| This post is part of our Gardening for Maximum Nutrition lunchtime
series.
Read all of the entries: |
 I've
been making slow progress on sealing up the skylight.
I've
been making slow progress on sealing up the skylight.
Each application yields
better results, but it still has a small leak.
It feels good to learn a new
skill, but I'm ready for this project to be over so we can move on to
the next one.
 I broke my own cardinal rule this spring when
I planted parsley in the waterlogged back garden --- no root
crops in heavy clay with high groundwater. I don't think of
parsley as a root crop, but this relative of carrots and parsnips
clearly thinks of itself as a root. Half of my plants achieved
such an advanced state of root rot that the tops literally fell
off. Needless to say, we've only had just enough parsley to make
a weekly batch of soup.
I broke my own cardinal rule this spring when
I planted parsley in the waterlogged back garden --- no root
crops in heavy clay with high groundwater. I don't think of
parsley as a root crop, but this relative of carrots and parsnips
clearly thinks of itself as a root. Half of my plants achieved
such an advanced state of root rot that the tops literally fell
off. Needless to say, we've only had just enough parsley to make
a weekly batch of soup.
So, on a whim, I tossed
a handful of parsley seeds on an empty bed in the loamy side of the
garden near the end of August. Unlike the rest of our fall crops,
the parsley sprouted and grew so thickly that I carefully transplanted
the two-leaved seedlings this week to fill up a couple of nearby
beds. Already, the leaves are almost big enough to eat --- the
plants are growing about twice as fast as the spring parsley that has
had all summer to get established.
The real test will be
the killing frost. Will our baby parsley be big enough to
withstand the cold, or will it die back in a few weeks when
temperatures drop into the twenties? I'm keeping my fingers
crossed that we'll have crisp, sweet parsley through the winter just
like last year.
You can buy a new
power antenna unit for
around 35 bucks, and with a little imagination make it open and close
your chicken coop door.
Rob
from nifty-stuff.com has all the details. He's the guy who put together
the electric
door interlock solution I
posted about last year which only closed the door whereas this power
antenna will open it back up the next morning.
What I like about this design is how easy the installation must be
compared to a few of the other do it yourself automatic chicken coop
door openers out there. You'll need to supply 12 volts DC to the
antenna which can be done with a 20 dollar adapter at Radio Shack. The
next step is to control it with a timer or one of those gadgets that
turns something on when the sun goes down and off when it comes back up.

Edited to add:
After years of research, Mark eventually settled on this automatic chicken door.
You can see
a summary of the best
chicken door alternatives and why he chose this version here.
If you're planning on
automating your coop, don't forget to pick up one of our chicken waterers. They never spill or
fill with poop, and if done right, can only need filling every few days
or weeks!
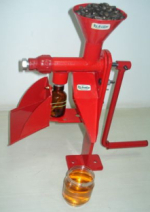
 Since
our sunflower
seed crop was such a
great success, we decided to buy an oil expeller so that we could make
our own cooking oil. An extensive search of the internet shows
only two oil expellers costing less than a thousand bucks. Everett
bought the slightly cheaper and more common model (the Piteba for $139), so we decided to go for the
other to give us a real comparison of the two options.
Since
our sunflower
seed crop was such a
great success, we decided to buy an oil expeller so that we could make
our own cooking oil. An extensive search of the internet shows
only two oil expellers costing less than a thousand bucks. Everett
bought the slightly cheaper and more common model (the Piteba for $139), so we decided to go for the
other to give us a real comparison of the two options.
 The
Rajkumar oil expeller comes all the way from India
for $155 (shipping included). My first hint that this wasn't an
ordinary transaction came after I filled in my payment information in
paypal. I got back the following email:
The
Rajkumar oil expeller comes all the way from India
for $155 (shipping included). My first hint that this wasn't an
ordinary transaction came after I filled in my payment information in
paypal. I got back the following email:
We request you to give us your complete postal address with Zip code and telephone no. so that we may dispatch the machine at the earliest from our end. Awaiting for your reply asap.
Thanks & Regards
Naresh Gambhir
(Director)
Since I had just typed in my whole postal address and zipcode, I was a bit confused, but I replied with a repeat of my shipping information, along with the phone number that I didn't see why they would need. Three weeks passed, and I had almost forgotten about our oil expeller when an amazing parcel showed up at the post office.
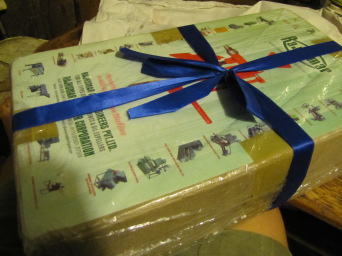
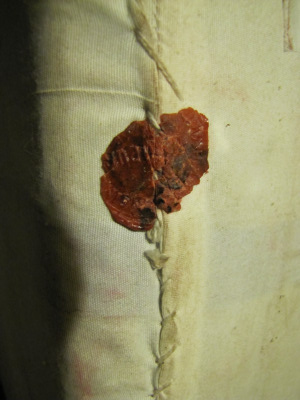
As you can see from the photos, the box was wrapped in a cloth sack, stitched together and sealed along the sides with red sealing wax! After I teased out the stitches and slid back the bag, I could see that the box was decked out in a bright blue bow. Now, I have to admit that even though I have thoroughly grown out of Christmas presents, I do miss the awe of opening an unknown package. When I was a kid, I spent hours testing the presents under the tree, trying to guess what was inside each one --- generally far more fun than I got out of the presents themselves. Here I was on layer two of my new oil expeller, and I was getting that same Christmas rush.
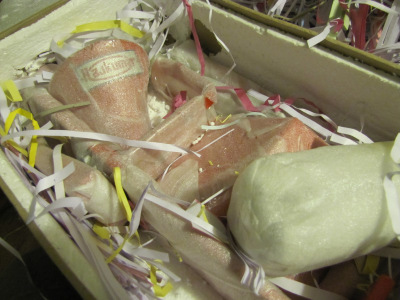
I untied the bow and ripped off the layer of plastic wrap underneath, then untaped the box. Lifting the lid, a shower of brightly colored paper shreds spilled across the table. Nestled down amid this packaging were about a dozen expeller parts, each one individually wrapped in a thin sheet of foam. I'm getting the impression that the postal service in India isn't very careful, since I had to go through five layers of packaging to get to my expeller (six layers if you count the bow.) From the state of the box, I don't think this packaging was excessive.
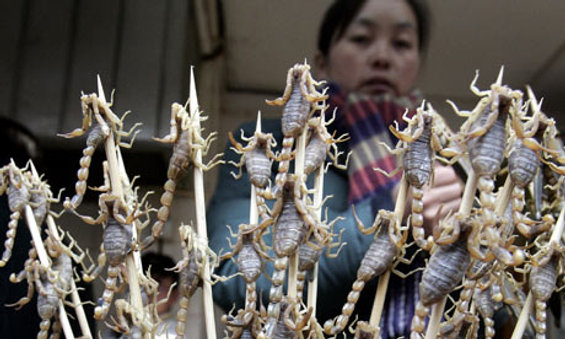
I've been researching insect
farming on and off for over a year now since I posted about the possibility of feeding
meal worms to our chickens instead of the laying pellets we buy at the feed store.
 We've since settled on a black
soldier fly direction,
but I'm still interested in finding other easy to cultivate bugs. It
turns out there's over 1400 insects that are known to be eaten by
people all over the world.
We've since settled on a black
soldier fly direction,
but I'm still interested in finding other easy to cultivate bugs. It
turns out there's over 1400 insects that are known to be eaten by
people all over the world.
Some experts predict a world
population of over 9 billion by the year 2050. This prompted the United
Nations to hold a meeting in Thailand back in 2008
on the subject of insect farming and how it might help to mitigate
greenhouse gases and offer a substitute for meat in some countries. A
world congress on the subject is being planned for 2013.
I'll bet a person could
travel to a few Asian countries and learn a thing or two about insect
cultivation with the right translator and an iron stomach.
 Once
you start deleting pre-made food from your grocery cart, meals take
longer to prepare. But there are a few tasty and healthy meals
that can be thrown together in fifteen minutes from on-farm
materials. Here's my favorite omelet recipe, one that I consider
a full meal all by itself for about three people.
Once
you start deleting pre-made food from your grocery cart, meals take
longer to prepare. But there are a few tasty and healthy meals
that can be thrown together in fifteen minutes from on-farm
materials. Here's my favorite omelet recipe, one that I consider
a full meal all by itself for about three people.
- 1 medium head of broccoli
- 1 cup of fresh mushrooms
- 6 eggs
- 1 cup of loosely packed Egyptian Onion tops
- a couple of tablespoons of sour cream and onion flavoring powder
Cut the broccoli florets
into bite-size pieces. Then peel the tough skin from the base of
the broccoli stalk and chop the stalk into half inch rounds.
 Discard
the mushroom stems. Tear the mushroom caps into bite-size pieces
and add them to a skillet with the broccoli. Pour in as little
oil as possible and saute on high heat until the mushrooms and broccoli
are nearly tender.
Discard
the mushroom stems. Tear the mushroom caps into bite-size pieces
and add them to a skillet with the broccoli. Pour in as little
oil as possible and saute on high heat until the mushrooms and broccoli
are nearly tender.
Break the eggs into a
bowl. Cut the Egyptian Onion tops into one-inch segments and add
them to the eggs. Throw in a couple of tablespoons of sour cream
and onion flavoring powder if you want a really tasty omelet. (I
don't know what's in the stuff, but Daddy gets it for me from his local
Mennonite store and a hint of the powder is enough to turn this omelet
into quite a treat. I'm sure it's not healthy, though....)
Beat the eggs, green
onions, and powder together with a fork and pour it over the broccoli
and mushrooms. I like my omelets to be more like scrambled eggs
with stuff in them rather than the typical omelet consistency, so I
stir continuously for a couple of minutes until the eggs are done.

I haven't included
nutritional information because the sites I've been using to mock up
those analyses don't distinguish between types of mushrooms and think
that my eggs are equivalent to storebought eggs. Suffice it to
say that the omelet has a lot of vitamins and minerals.
As a side note, I led a
hike at the High
Knob Naturalist Rally
this weekend and came home with a huge chunk of Hen
of the Woods mushroom
to try out. I plugged the new mushroom variety into this recipe
and it was just as tasty as the shiitakes and oysters I'd tried in the
past!
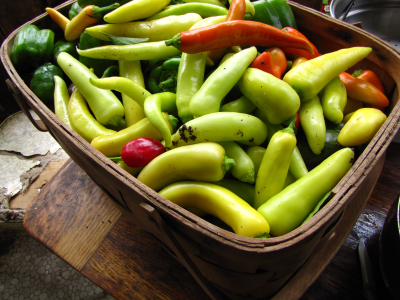 It's
been a good year for peppers.
It's
been a good year for peppers.
We're planning for our first
frost of the year sometime this week and decided to harvest everything
that might get nipped.
If it doesn't frost we'll
have lost out on some yumminess, but sometimes it's better to play it
safe.
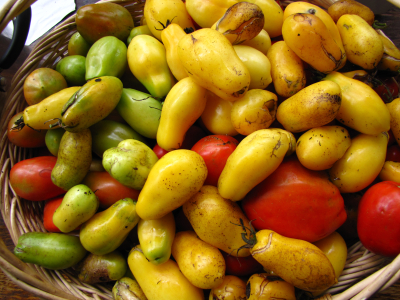 By
the calendar, we should have at least another week of frost-free
weather, but our forecast mentioned a low of 36 F tonight. Over
the years we've lived here, I've noticed that our temperatures may drop
as much as five degrees below the predicted low so I consider any
forecast less than 37 to be a frost watch.
By
the calendar, we should have at least another week of frost-free
weather, but our forecast mentioned a low of 36 F tonight. Over
the years we've lived here, I've noticed that our temperatures may drop
as much as five degrees below the predicted low so I consider any
forecast less than 37 to be a frost watch.
If I was desperate to
extend our summer harvest, I would run around tossing row covers over
everything. But we've had a good summer, so I'm instead
harvesting any ripe or  ripenable
fruits that would be damaged by freezing, then letting the summer go
gracefully. I stewed up a gallon of ripe tomatoes to go in the
freezer and laid out any with a blush of color to ripen
over the next few weeks.
ripenable
fruits that would be damaged by freezing, then letting the summer go
gracefully. I stewed up a gallon of ripe tomatoes to go in the
freezer and laid out any with a blush of color to ripen
over the next few weeks.
I'm ashamed to say that
I left the really green tomatoes on the vine to rot. I've never
gotten excited about fried green tomatoes, but if you comment with a
more interesting green tomato recipe in the next few hours, I'll rush
out and collect them. Instead of worrying over the last tomatoes,
I'm instead focusing my energy today on harvesting squash,
beans, swiss chard, and the last watermelon.
Huckleberry wants you to
know that even though I closed the windows and put on long johns and
two sweaters, he still thinks it's warm enough to sit outside...for five
minutes at a time.

Step 1. Drill twelve 3/4 inch
holes in our new
magnolia stump.
Step 2. Carefully cram mycelium
impregnated cardboard into the holes.
Step 3. Seal up holes with melted bees wax.
Step 4. Don't forget to check
on stump in about 9 months.
 We
haven't made much progress on our goal to propagate our own mushroom
spawn because this year's hot summer wasn't conducive to mushroom
fruiting. So when I found wild
oyster mushrooms, I
decided to give propagation a shot even though I knew that spring was
the best time to propagate mushrooms. I cut the stem butts off
all three of our oyster mushroom clusters and sandwiched
them between several layers of pre-soaked, corrugated cardboard.
We
haven't made much progress on our goal to propagate our own mushroom
spawn because this year's hot summer wasn't conducive to mushroom
fruiting. So when I found wild
oyster mushrooms, I
decided to give propagation a shot even though I knew that spring was
the best time to propagate mushrooms. I cut the stem butts off
all three of our oyster mushroom clusters and sandwiched
them between several layers of pre-soaked, corrugated cardboard.
Ten days later, the
mycelium was running! I suspect that if I waited another week, I
would have had a whole bowlful of spawn, but I wanted to get the
mycelium into its final habitat so that it would have some time to get
established before winter. So I tore off all of the 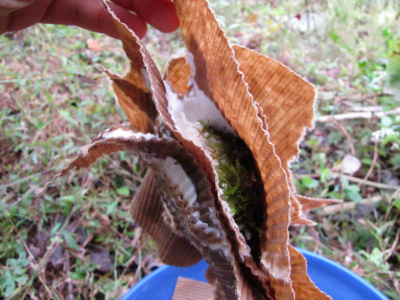 white
spawn, then discarded the un-inoculated cardboard around the
edges. Look at this mass of spawn gluing several sheets of
cardboard together --- that's a healthy fungus!
white
spawn, then discarded the un-inoculated cardboard around the
edges. Look at this mass of spawn gluing several sheets of
cardboard together --- that's a healthy fungus!
Next step was choosing
something to inoculate. In the past, we've had good luck with inoculating logs, but I've been curious about
inoculating
stumps as a way of
hastening decomposition while producing a delicious food. We have
plenty of stumps in our garden area, but most are too old to inoculate
--- wild mushrooms have beat me to it. Luckily, Mark
cut down a magnolia this spring to give me space for forest
pasture trees, and the stump has sprouted a bush of new branches.
I hope the vigor of the tree means that it was able to fight off
invading fungi between April and October, but that the tree has lost
enough life that it won't be able to kill my oyster mushrooms.
 Mark
already showed you the inoculation
step --- drilling the holes, stuffing in the spawn, then sealing
each one up with melted beeswax. Our three stem butts turned into
enough spawn to fill up a dozen holes, and I even had one huge stem
butt leftover to bury in the soil at the base of the stump. Maybe
next fall we'll be harvesting completely homegrown oyster mushrooms!
Mark
already showed you the inoculation
step --- drilling the holes, stuffing in the spawn, then sealing
each one up with melted beeswax. Our three stem butts turned into
enough spawn to fill up a dozen holes, and I even had one huge stem
butt leftover to bury in the soil at the base of the stump. Maybe
next fall we'll be harvesting completely homegrown oyster mushrooms!
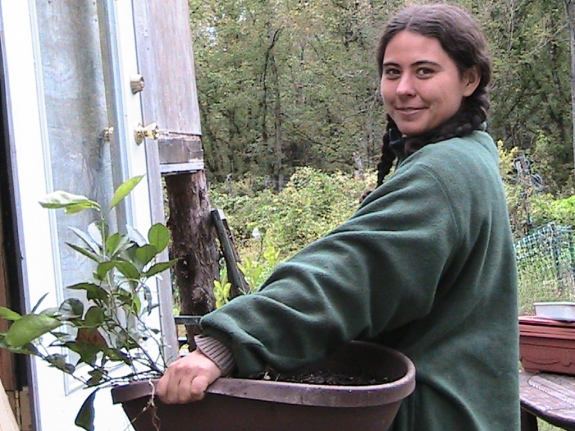
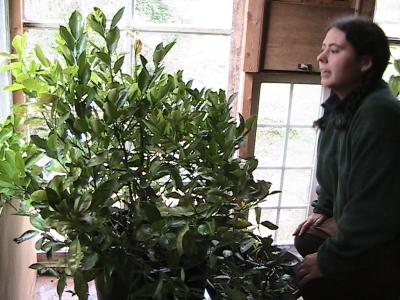 It
didn't frost last night, but I'm glad we got all the vulnerable citrus
plants moved indoors.
It
didn't frost last night, but I'm glad we got all the vulnerable citrus
plants moved indoors.
They should get more sun in
this new location thanks to the
storage building project from 2009 that turned into an
office/bedroom when we realized how nice it was looking.
 I've
been posting all year about our forest pasture experiment over on our Avian Aqua Miser blog. For those of you
haven't been following along over there, the
idea is to create a permaculture system that feeds our chickens with
very little input of storebought food. Our first season of
experimentation was very much a learning experience --- now I know that
even heirloom
broiler breeds have been bred to bulk up quickly on grain, so they look at foraging
about the same way a modern teenager looks at the idea of getting rid
of his TV and Wii. I'm changing my focus now to a forest pasture
system that will keep our
I've
been posting all year about our forest pasture experiment over on our Avian Aqua Miser blog. For those of you
haven't been following along over there, the
idea is to create a permaculture system that feeds our chickens with
very little input of storebought food. Our first season of
experimentation was very much a learning experience --- now I know that
even heirloom
broiler breeds have been bred to bulk up quickly on grain, so they look at foraging
about the same way a modern teenager looks at the idea of getting rid
of his TV and Wii. I'm changing my focus now to a forest pasture
system that will keep our  laying
hens happy and healthy, with the goal of revisiting persnickety meat
birds in the future.
laying
hens happy and healthy, with the goal of revisiting persnickety meat
birds in the future.
With the broilers in the
freezer, our forest pasture experiment started making progress.
In late August, I realized that our
two pastured chickens were so happy on their diet of kitchen scraps and
wild edibles that they didn't want any storebought grain. For six weeks now,
I've only given them a cup of feed every couple of weeks, on days when
I felt like our kitchen scraps weren't quite up to snuff.
Meanwhile, I seeded
the fallow paddock with buckwheat and shelling beans, which are now mature.
With our coop remodelled to accommodate laying hens, we turned our four
prime layers into the fallow paddock, expecting them to gorge on the
high quality seeds. Instead, they focused their energy on
nightshade berries, tender young chickweed leaves, calcium-rich snails,
and bugs found by scratching through the old compost pile.
 In
fact, now that I could look at our tractored chickens and pastured
chickens side by side, I was shocked to realize that the former were
not the epitome of avian health I'd thought they were. The
pastured chickens have brilliantly red combs --- a sign of good health
--- while our confined birds' skin is a much paler shade. Keep in
mind that our tractored birds have as much grass as they can eat, along
with occassional bugs that hop through their tractor, but that they get
the majority of their nutrition from the corn and soybeans in their
laying pellets. Clearly, a grain-based diet is no better for them
than
it is for me.
In
fact, now that I could look at our tractored chickens and pastured
chickens side by side, I was shocked to realize that the former were
not the epitome of avian health I'd thought they were. The
pastured chickens have brilliantly red combs --- a sign of good health
--- while our confined birds' skin is a much paler shade. Keep in
mind that our tractored birds have as much grass as they can eat, along
with occassional bugs that hop through their tractor, but that they get
the majority of their nutrition from the corn and soybeans in their
laying pellets. Clearly, a grain-based diet is no better for them
than
it is for me.
With the garden's
exuberance winding down, I'm sure I'll have to continue feeding our
laying hens grain through the winter, but my long term goal is to come
up with a system that deletes the grain entirely. Two more
paddocks are on the horizon, which will allow us to rotate our flock
frequently enough to give them plenty of forage during the growing
season. Our Illinois
Ever-bearing Mulberry
and Nanking
Cherries should be
reaching full productivity in a few years, which will go a long way
toward feeding the flock during the summer months. Buying less
and less processed food in the grocery store will also mean more and
more food byproducts to give the chickens year round --- for example,
our oil
expeller will
produce high protein seed cakes perfect for chicken feed. We'll
continue to work on insect
farming as a
supplemental food option, and will keep you updated as our forest
pasture experiment progresses.
These windows were salvaged
from an old high school by a neighbor. He kept them in storage for
years with the intention of building a green house, but eventually
decided to drop the indoor garden dream and gave several of them to us.
Thank you Bill Boyd.
It feels good to put salvaged
material back to work, but I wonder how much heat we'll lose compared
to putting in double pane windows? The plan is to make some sort of
indoor panel with attached insulation that can be inserted in place to
keep in more heat at night.
I'm thinking some of that
thin plywood with a layer or two of Reflectix might work.
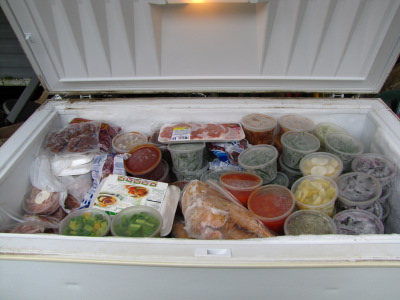 Our
freezer is now officially full. I like to stack my
produce in careful columns --- all of the squash in one
row, all of the greens in another --- but over the last week, I've had
to overcome my compulsive arranging and fit in food willy-nilly.
Not counting sauces, chickens, and fruit, we've got over 28 gallons of
vegetables in our frozen larder!
Our
freezer is now officially full. I like to stack my
produce in careful columns --- all of the squash in one
row, all of the greens in another --- but over the last week, I've had
to overcome my compulsive arranging and fit in food willy-nilly.
Not counting sauces, chickens, and fruit, we've got over 28 gallons of
vegetables in our frozen larder!
It's a good thing the
freezer is full because we're totally out of freezing containers.
We buy them in bulk on our visits to Mark's family in Ohio, and I guess
I didn't expect such a bumper garden crop this year. Just as the
freezer started bulging at the gills, we rounded up the stray
containers that had been pressed into service holding screws or chicken nipples
and put them back into the food chain. Even then, we ran out of
containers just a few shy of filling every last gap in the freezer.
With no more space in
the freezer and nothing to freeze the excess in, we're now just eating
out of the garden. I feel like I've been given a gift of time ---
a whole free day a week that I used to spend processing the bounty.
I should probably have researched the batteries in this old solar-powered house before I installed a charge controller. I had assumed that the 24 6-volt batteries in the house's battery bay were standard lead-acid deep cycle batteries. It wasn't until I stumbled over a receipt from 1997 that I learned that the batteries are really NiCads. Specifically Saft model STM5-180.
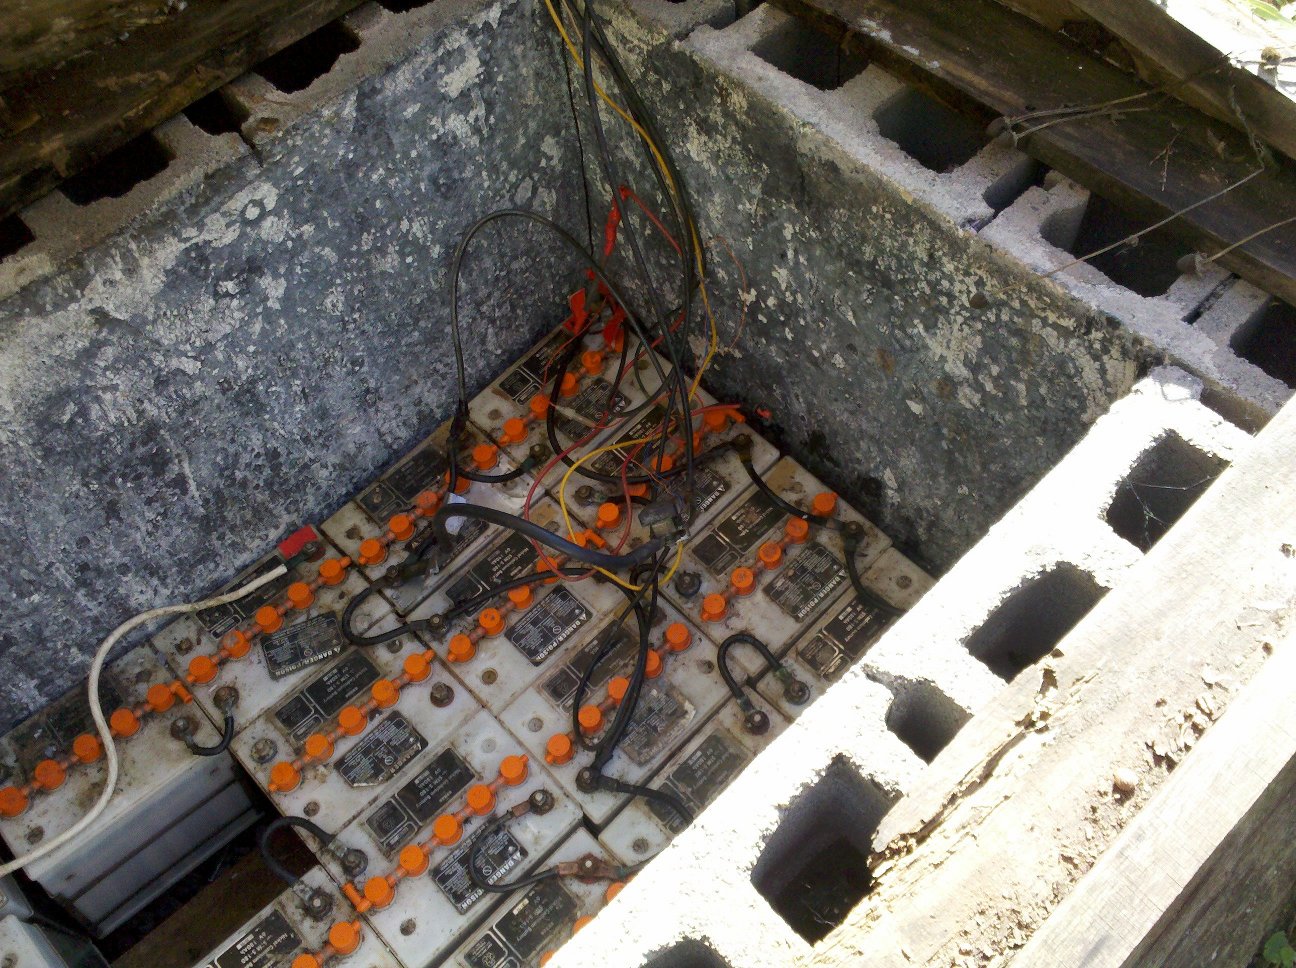 Thirty of these were purchased in 1997 from
TVA in Chatanooga,
for $350 total. An amazing price, since a single deep cycle battery is
in that ballpark, new. These batteries were used, they had been in a "bus" --
perhaps it was a
1995 Chrysler TEVan, or
maybe one of the pilot electric buses running there in the late 90's.
They were probably not in
this '79 VW TVA Bus.
All mentions of these batteries I can find involve electric vehicles --
it's unusual for them to be used to power a house.
Thirty of these were purchased in 1997 from
TVA in Chatanooga,
for $350 total. An amazing price, since a single deep cycle battery is
in that ballpark, new. These batteries were used, they had been in a "bus" --
perhaps it was a
1995 Chrysler TEVan, or
maybe one of the pilot electric buses running there in the late 90's.
They were probably not in
this '79 VW TVA Bus.
All mentions of these batteries I can find involve electric vehicles --
it's unusual for them to be used to power a house.
Being vented NiCads probably accounts for these batteries' long useful life -- surely at least 15 years. Still, with only twenty-four good ones left, they are probably toward the end of their lifespan and need to be taken care of in order to last.
Once I realized they were NiCads, I knew the charge controller was charging them wrong. NiCads like to be charged at a higher voltage than the 13 or so volts used for lead acid. I would have liked to charge them at 16 volts, but that would feed back through the house wiring, and could fry 12 volt stuff. Checking ratings, 15 volts seemed the highest voltage I could risk.
Coming back a week later, I found the batteries charged up to 13.4 volts. And they are now working great. Through several cloudy days, we had all the power we needed. And when the sun was out fully, I sometimes saw the solar panels charging the batteries at 125 watts -- fully half of the panels' rated capacity, and much better than before. The batteries start each evening at 13.4 volts, and only drop to 13.3 by morning. We started using electric lights more, and then just leaving them on all evening, and the freedombox online all night, and the batteries remained at the magic 13.3 in the morning. This is because NiCad batteries have a near-constant voltage until they are perhaps 30% discharged. In other words, I had been charging them less than half full before.
I have figured out how to combine the two banks the batteries are in into one large bank, and once I get the cables to do that, I hope to have battery capacity to get through up to a week of solid clouds in midwinter.
 |
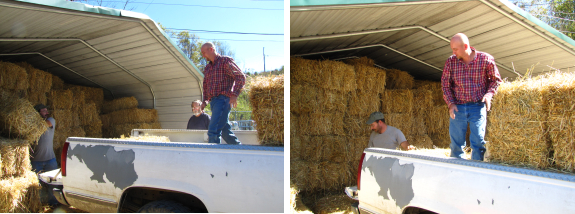
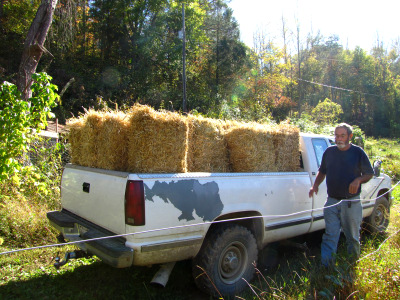
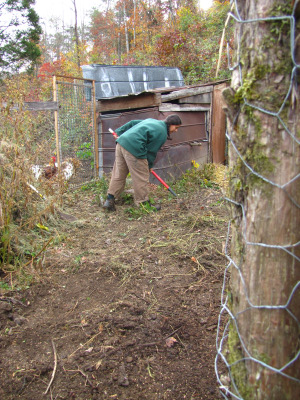
 When
Mark
came home with 18 bales of straw, I thought he was being a
little decadent. Who needs 18 bales of straw? Me, clearly.
When
Mark
came home with 18 bales of straw, I thought he was being a
little decadent. Who needs 18 bales of straw? Me, clearly.
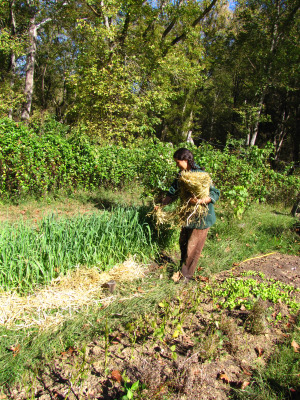
First, I just mulched
the garlic
beds as I put them
in, but then I decided to go ahead and mulch around everything
else. After a careful weeding job, I put straw around the edges
of any of the cover crops and winter crops which hadn't quite covered
their beds.
My new goal is to have
every bit of the garden either under mulch or cover crop
for the winter. I know from experience that every little bit of
energy you sink into putting the garden to bed in the winter is repaid
threefold by less work in the spring. Autumn
leaves did a pretty
good job last year, but since then I've read that a high
carbon mulch promotes a higher fungal to bacterial ratio than most
garden plants enjoy,
so straw seems to make more sense as a vegetable mulch.
 About
halfway through my mulch campaign, the unimaginable happened --- I ran
out of straw. "Mark, I only have four bales left," I said sadly,
and Mark rolled his eyes, refrained from saying "I told you so", and
instead sent me and my father (currently visiting for the weekend) out
to the feed store for one more truckload. I feel even more
decadent now, but I'm looking forward to an even more healthy garden in
2011.
About
halfway through my mulch campaign, the unimaginable happened --- I ran
out of straw. "Mark, I only have four bales left," I said sadly,
and Mark rolled his eyes, refrained from saying "I told you so", and
instead sent me and my father (currently visiting for the weekend) out
to the feed store for one more truckload. I feel even more
decadent now, but I'm looking forward to an even more healthy garden in
2011.
 Our broody hen has
decided that this outdoor nest is a more proper home for her 11 eggs.
Our broody hen has
decided that this outdoor nest is a more proper home for her 11 eggs.
That's what I get for
procrastinating on building those coop nest boxes.
Maybe she'll reconsider once
I make something more cozy and higher up?
 I
dragged Daddy to the fruit stand on Friday, where we peered in the
cooler at two big baskets of chestnuts. "Nice looking chesnuts,"
I said to the clerk, making conversation. "They're buggy ---
we're going to throw them out this evening," he replied.
I
dragged Daddy to the fruit stand on Friday, where we peered in the
cooler at two big baskets of chestnuts. "Nice looking chesnuts,"
I said to the clerk, making conversation. "They're buggy ---
we're going to throw them out this evening," he replied.
My biomass detectors
perked right up. Five minutes later, I had a bushel of wormy
chestnuts in my possession, hoping that I'll be able to find a way to
feed them to the chickens. I know my flock won't be able to peck
their way through the tough skins, and I don't want to crack each one
open individually. Does anyone have any ideas for busting a bunch
of wormy chestnuts far enough out of their shells so that a chicken
beak can get to them?
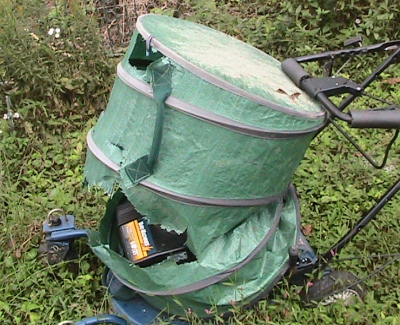 The collapsible
lawn and leaf bag has seen better days.
The collapsible
lawn and leaf bag has seen better days.
We should have known better
and stored it in the barn when the season was over.
I'm afraid too much sunlight
exposure has weakened the tarp material resulting in a few fatal rips
that duct tape can't fix.

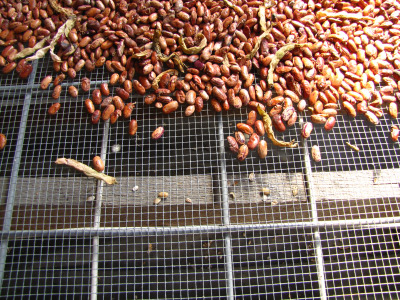 While
poking around the fruit stand in search of my favorite apples, I
stumbled across what was clearly a dried bean shelling station.
Since I'm just getting into growing my own dried
beans, I was
intrigued to see how a medium-scale operation like this cleans their
beans without mechanical equipment.
While
poking around the fruit stand in search of my favorite apples, I
stumbled across what was clearly a dried bean shelling station.
Since I'm just getting into growing my own dried
beans, I was
intrigued to see how a medium-scale operation like this cleans their
beans without mechanical equipment.
As best I can tell, the
beans are first hand-shelled, then this setup is used to separate the
chaff, stones, and bad beans from the good beans. A wooden frame
with a relatively fine mesh stapled to the bottom sits on top 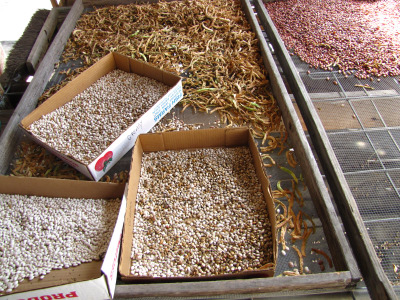 of a table topped by crossed
rebars. I can just imagine tossing all of my shelled beans into
the frame, shaking it vigorously, and watching bits of chaff and small,
malformed beans drop out the bottom.
of a table topped by crossed
rebars. I can just imagine tossing all of my shelled beans into
the frame, shaking it vigorously, and watching bits of chaff and small,
malformed beans drop out the bottom.
I'm sure it's not
cost-effective to sell your homegrown beans after putting so much
effort into their processing, but I don't mind putting in extra time to
feed my own family more nutritious food. As I learned when my
father came to visit, shelling beans is a great thing to do with your
hands while visiting. I now have a solid cup of urd beans just waiting to be sprouted
into about a gallon of bean sprouts.
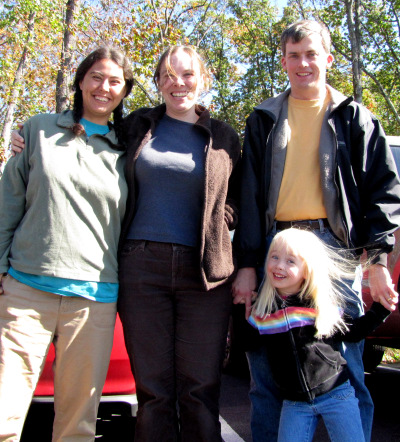
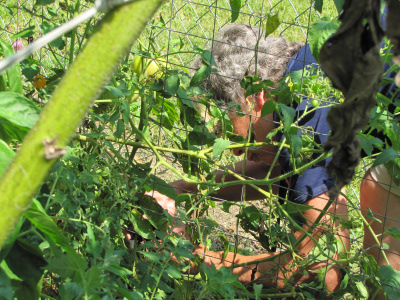 My
mom (Adrianne) has a beautiful and dynamic garden in her small city
backyard. It's very much like a cottage
garden, with flowers
and vegetables tucked together in arrangements that are not only
visually appealing, but also quite productive.
My
mom (Adrianne) has a beautiful and dynamic garden in her small city
backyard. It's very much like a cottage
garden, with flowers
and vegetables tucked together in arrangements that are not only
visually appealing, but also quite productive.
As a special treat, I've
talked her into making a few guest posts this week for a lunchtime
series. I hope you enjoy this glimpse into an urban homestead!
| This post is part of our Urban Homesteading lunchtime series.
Read all of the entries: |
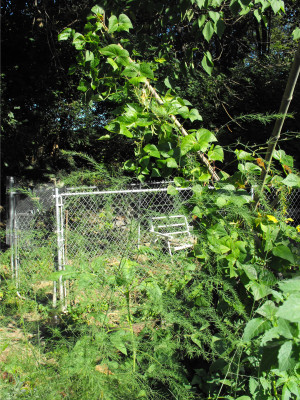
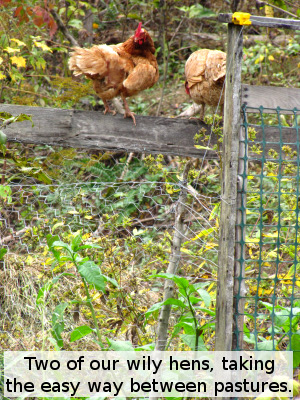
 When we introduced our chicken
tractor girls to the new pasture area they quickly found a back door
that had been carved out by Lucy back before she discovered the power
of a K9
fence unit.
When we introduced our chicken
tractor girls to the new pasture area they quickly found a back door
that had been carved out by Lucy back before she discovered the power
of a K9
fence unit.
It makes me wonder why the broody hen and
the grown up
new chick never ventured out for a peek. Maybe they just weren't
interested in anything on the other side?
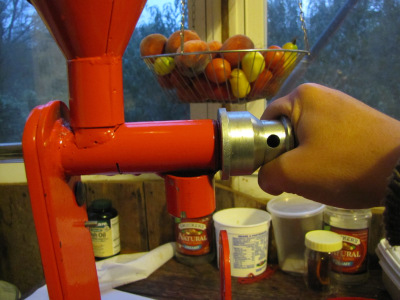
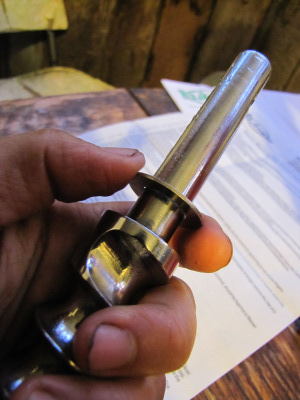 The
assembly instructions that came with our Rajkumar oil expeller left a
lot to be desired, but I figured it out pretty easily by looking at the
picture below, snagged from their website.
The
assembly instructions that came with our Rajkumar oil expeller left a
lot to be desired, but I figured it out pretty easily by looking at the
picture below, snagged from their website.
To be fair, it's
possible that the hand-lettered CD that came with the expeller might
have included more pictorial instructions, but I couldn't open the
files on my computer. In case you follow my lead and buy the
Rajkumar expeller, I've included step by step assembly instructions
below.
Your expeller will come
partially assembled, but you have to remove the expeller screw and wash
it, along with the rest of the expeller, prior to the first use.
Once the parts are  clean
and dry, slip one of the two included washers over the handle end of
the expeller screw and grease it with cooking oil, as shown above on
the right. The instructions note "This washer is exposed to very
high pressure and should always be well greased."
clean
and dry, slip one of the two included washers over the handle end of
the expeller screw and grease it with cooking oil, as shown above on
the right. The instructions note "This washer is exposed to very
high pressure and should always be well greased."
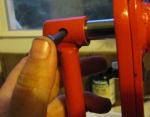
Next, slide the expeller
screw into the press cage (the main part of the expeller) until the
smooth end pops out the other side.
 The
handle slides right over the end of the expeller screw --- just be sure
to line up the holes. The longest bolt in the kit seems to be the
only one that fits to put these two parts together.
The
handle slides right over the end of the expeller screw --- just be sure
to line up the holes. The longest bolt in the kit seems to be the
only one that fits to put these two parts together.
 The
cap screws easily onto the other end of the press cage. Depending
on the type of seed you will be processing, you may also need to screw
the adjustment bolt into the cap. We left the bolt off since
we'll be expelling sunflower seeds first.
The
cap screws easily onto the other end of the press cage. Depending
on the type of seed you will be processing, you may also need to screw
the adjustment bolt into the cap. We left the bolt off since
we'll be expelling sunflower seeds first.
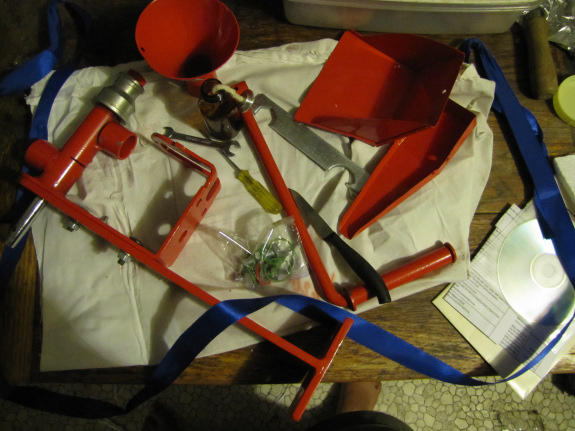
Those of you following
along at home may have realized by now that, up until this point, the
Rajkumar expeller is completely identical to the Piteba model, except
for the bigger stand bolted to the back. A  close
look at both websites makes me pretty sure that the two brands are in
fact identical, but that the Rajkumar expeller has added in the bigger
stand and three handy funnels. These funnels are made of much
less strong material than the angle iron and heavy pipes that make up
the main body of the expeller, but I'm sure they will hold up well
under the light use they'll be put to.
close
look at both websites makes me pretty sure that the two brands are in
fact identical, but that the Rajkumar expeller has added in the bigger
stand and three handy funnels. These funnels are made of much
less strong material than the angle iron and heavy pipes that make up
the main body of the expeller, but I'm sure they will hold up well
under the light use they'll be put to.
The longest funnel
(shown above) is meant to channel the oil away from the expeller so
that you can collect your product in a larger jar than you could with
the Piteba expeller. The oil funnel is attached with a single
screw threaded through the back of the expeller.
 If
you're smarter than I was, you'll rubber-band your bottle of lamp oil
to the rounded part of the expeller before moving on to the next step,
but I didn't have any lamp oil on hand, so I went ahead and screwed the
seed cake funnel to the front of the expeller with the other small
screw. I'll have to remove this funnel and attach the "lamp"
before operating the expeller.
If
you're smarter than I was, you'll rubber-band your bottle of lamp oil
to the rounded part of the expeller before moving on to the next step,
but I didn't have any lamp oil on hand, so I went ahead and screwed the
seed cake funnel to the front of the expeller with the other small
screw. I'll have to remove this funnel and attach the "lamp"
before operating the expeller.
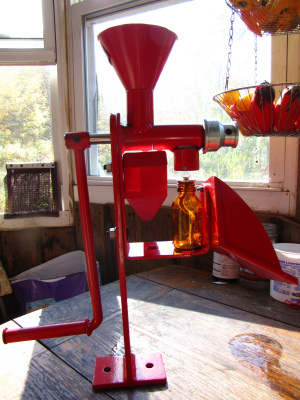 To complete assembly of the oil expeller, I
popped the round funnel on the top, having to bend the base a bit so
that it slid on smoothly. This last photo shows the completely
assembled expeller, with the lamp bottle in place to show its location.
To complete assembly of the oil expeller, I
popped the round funnel on the top, having to bend the base a bit so
that it slid on smoothly. This last photo shows the completely
assembled expeller, with the lamp bottle in place to show its location.
Despite this long post,
assembling the Rajkumar oil expeller only took about 15 minutes, and
that includes a bit of head-scratching. The kit came with
absolutely everything you might need, too, including a tiny screwdriver
and wrench. I would say that assembly is within the reach of even
the beginner DIYer.
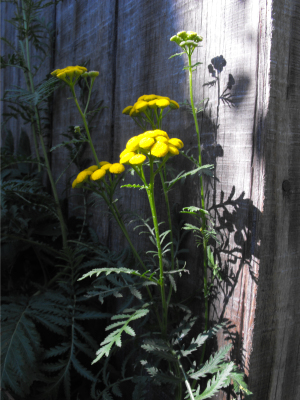 I've
had tansy ever since my mother brought a start to me from South
Weymouth, Massachusetts, probably from her own yard, and probably, too,
originally from her sister, Ruth
Tirrell. My
mother
would have little
sprigs of the tansy flower mixed in with barberry bush sprigs, in a
vase
on her windowsill over the sink. These little "button" seedheads
stay
yellow for ages, and keep their bitter, aromatic smell even longer.
I've
had tansy ever since my mother brought a start to me from South
Weymouth, Massachusetts, probably from her own yard, and probably, too,
originally from her sister, Ruth
Tirrell. My
mother
would have little
sprigs of the tansy flower mixed in with barberry bush sprigs, in a
vase
on her windowsill over the sink. These little "button" seedheads
stay
yellow for ages, and keep their bitter, aromatic smell even longer.
The
reason for tansy was to keep ants away. In my mother's kitchen
this never
seemed to work! But I guess she kept tansy as a comforting
decoration,
anyway!
I've looked up a tansy
cookie
recipe, in the Rodales
Herb
Book, ed. by
Williamk Huilton, 1974: Beat 1/2 c. honey and 1/2 c. butter. Add
1 egg,
then 2 c. whole wheat flour, 1/4 tsp. baking soda, 1/4 tsp. salt, 1
tsp.vanilla and
1 1/2 tsp. tansy (probably dried leaves), plus 1 tbsp. yoghurt.
Roll out to
1/8 in. thick, cut into rounds, sprinkle with more tansy and bake at
375
for 10 min.
Because it is a "bitter
herb"
the cookies were eaten at Easter, and the
dried leaves were eaten at Passover. The seeds can be eaten
as a worm
expellent. There are other medicinal uses, of the tea brewed from
the
leaves: for eye imflammtion and styes, and in compresses  for
varicose
veins!
for
varicose
veins!
Tansy is supposed to
deter
mosquitoes, and squash bugs, besides ants.
Some say it therefore attracts aphids. Some say it deters
cucumber
beetles, some say it attracts them. I have my tansy tangled up
with a
volunteer blackberry vine, and have never had Japanese beetles
there. Some
others plant tansy under fruit trees.
This is a ferny perennial
that
is started best from small starts, not
seeds. Mine has grown to 6 feet, taller than the usual 4.
Worth growing
for its distinctive smell and flowers.
| This post is part of our Urban Homesteading lunchtime series.
Read all of the entries: |
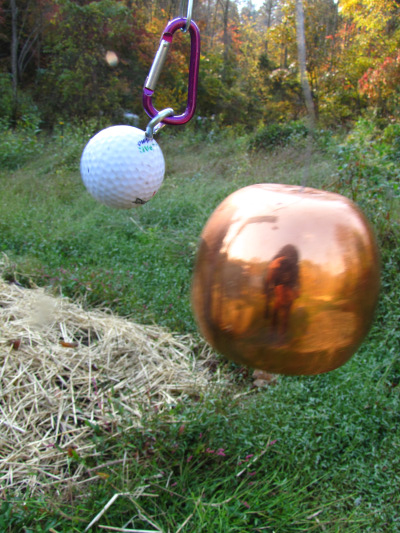
I installed our 3rd rotisserie
motor deer deterrent in the garden today.
This new design is much more
solid and dependable.

I'm offering 2 free Walden Effect T-shirts to anyone out there industrious enough to build one of these and report back on it with a few pictures.
 We haven't seen any deer
damage in our garden in a couple of months, and even then their
depredations were minimal. Compare that to years past when our
entire growing area was repeatedly defoliated by the hooved fiends, and
you'll understand why I think Mark is a genius.
We haven't seen any deer
damage in our garden in a couple of months, and even then their
depredations were minimal. Compare that to years past when our
entire growing area was repeatedly defoliated by the hooved fiends, and
you'll understand why I think Mark is a genius.
Last year, I was
thrilled by the deer deterrents Mark made using old
display motors, but those motors burnt out quickly and left holes in
our defenses. His most recent incarnation uses rotisserie motors,
which seem more hard core and also go a bit more slowly so that that
the noise is harder for deer to acclimate to. To put the icing on
the cake, the golf balls now hit brass cups, which makes the noise more
pleasing to human ears --- very similar to a wind chime.
To be fair, it's really
tough to find the true cause of our current absence of deer because
every year is a bit different. Maybe wild foods are especially
abundant this year, but we don't seem to be having a mast year on our property. And
the deer pressure is still quite strong --- a neighbor told me that
he'd recently cruised down our two and a half mile road and counted
fifty deer. Granted, I did take a potshot over the head of a deer
a few months ago when he found a gap in our deterrents and ate my
beans, but the efficacy of scare tactics like that has been short term
in the past. In previous years, I've lost the entire fall garden
in one fell swoop to the deer.
We're hoping to have
some guinea pigs test out deer deterrents around their own garden to
give us a bit more data --- Mark
has offered two free t-shirts to anyone who sends us some photos (and
feedback) on their deterrents in action. Your first step
should be to read our instructions to make
your homemade deer deterrent. Those instructions
use a motor that we no longer recommend, but it should be simple to add
in the rotisserie motor and take out the drill, transformer, and
resistor using the information Mark has been posting on his deer deterrent blog. You can leave a
comment here or there if you have trouble and we'll point you in the
right direction. I estimate that your total cost to produce a
deterrent (assuming you buy everything new) will be about $30...or
considerably less if you do a bit of scavenging for components.
I know that we have a
lot of handy readers, so I'm looking forward to seeing what you come up
with. Erich, Zimmy, consider yourselves challenged.

 leaves. I'd read that carrots are their
best companion plants, so I did
try to start carrots near each tomato. The companion plant that I
also had
to put near them was peppers, and some basil. But the interloper,
volunteer, 3 tall sunflowers, I also kept, in spite of their
competing
for sun with the tomatoes. These tomatoes have been amazing--very
solid,
not watery--and I've wondered if maybe the tomato plants actually got a
boost from the birds pooping as they ate up the sunflower seeds!
leaves. I'd read that carrots are their
best companion plants, so I did
try to start carrots near each tomato. The companion plant that I
also had
to put near them was peppers, and some basil. But the interloper,
volunteer, 3 tall sunflowers, I also kept, in spite of their
competing
for sun with the tomatoes. These tomatoes have been amazing--very
solid,
not watery--and I've wondered if maybe the tomato plants actually got a
boost from the birds pooping as they ate up the sunflower seeds!| This post is part of our Urban Homesteading lunchtime series.
Read all of the entries: |
I installed this outdoor nestbox for the more discriminating hens of
our flock.
There still seems to be some
confusion when it comes to finding the right roost for the night.
Maybe this extra nest will
help to smooth out some ruffled feathers?

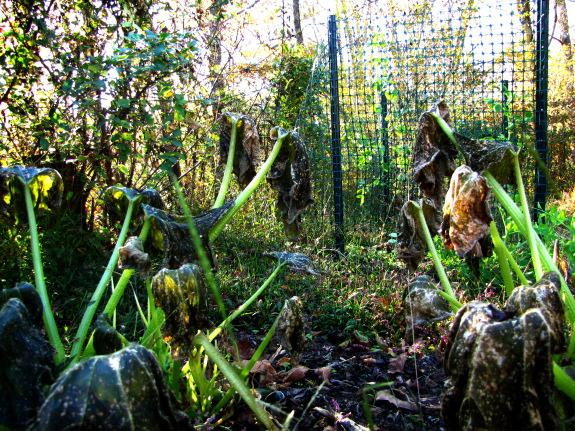
 Cover
crops take almost no effort, but you do need to keep an eye on them and
make sure they don't go to seed. I thought that buckwheat planted
on August 24 would be killed by the first frost just as it reached peak
maturity, but we dodged the early frost bullet last week, and now our
buckwheat is starting to develop young fruits.
Cover
crops take almost no effort, but you do need to keep an eye on them and
make sure they don't go to seed. I thought that buckwheat planted
on August 24 would be killed by the first frost just as it reached peak
maturity, but we dodged the early frost bullet last week, and now our
buckwheat is starting to develop young fruits.
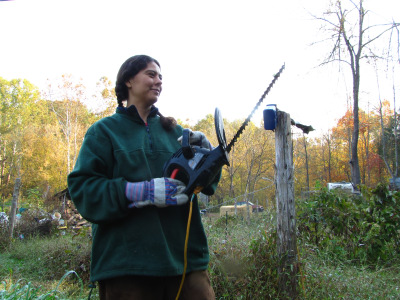
I mowed down
our first round of buckwheat, but I wasn't very happy
with the results ---  buckwheat
bits flew everywhere, and some plants got mashed down and then
regrew. This time, I decided to try out the electric hedge
trimmer Mark got at a yard sale for $10.
buckwheat
bits flew everywhere, and some plants got mashed down and then
regrew. This time, I decided to try out the electric hedge
trimmer Mark got at a yard sale for $10.
As you can see, the
sickle-type mowing blade made short work of our succulent buckwheat
stems. I slid the hedge trimmer through the buckwheat about an
inch above the ground and was done cutting in about a minute. A
minute after that, I'd finished tossing the few stems that slid off the
bed back on top of the growing area.

The buckwheat worked as
advertised in our loamy upper garden --- maturity in precisely six
weeks. Of course, the real test will be the quantity of dried
organic matter we get, compared to the amount of organic matter that
results from our slightly shorter but tougher oat stems.
No matter which cover
crops win my long term attention, I can tell that the electric hedge
trimmer has a future in our grain experiments.
 Two
different types of pole beans are gradually stopping blooming in my
garden now. Both I got from Deni and Tom Peterson at a seed
exchange this
winter. Both I've grown on bamboo "tipis", with the Hidasa Shield
Figure
Bean, from the Plains, further away from the mulberry trees that
shade that part of the garden, which was a bad tomato
blight spot last
year.
Two
different types of pole beans are gradually stopping blooming in my
garden now. Both I got from Deni and Tom Peterson at a seed
exchange this
winter. Both I've grown on bamboo "tipis", with the Hidasa Shield
Figure
Bean, from the Plains, further away from the mulberry trees that
shade that part of the garden, which was a bad tomato
blight spot last
year.
The Hidasa Shield Figure
Beans are rather flat and wide, a light green, and sturdy.
The dried beans are white, with a brown "shield" which also has a white
center in it. According to the Petersons (at
tpeterson@asdevelp.org) they
were grown in Buffalo Bird Woman's Garden, and were selected to Slow
Food's "Ark of Taste." They grew really well and traveled onto a
pea fence
that was next to their poles.
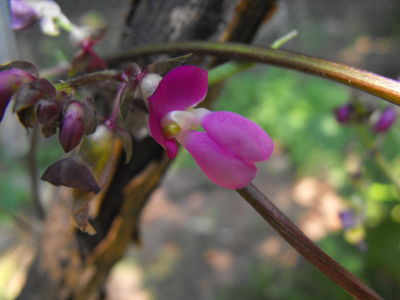 The
other type, with purple blooms, is the Cherokee Trail of Tears, that
also has a purplish bean that turns green when cooked. Or has the
black
seeds when dried. This has been grown since the late 1830s.
It did well in
partial shade, climbing on poles that slanted back toward the mulberry
branches, so that I, too, had to climb up on a ladder to pick them!
The
other type, with purple blooms, is the Cherokee Trail of Tears, that
also has a purplish bean that turns green when cooked. Or has the
black
seeds when dried. This has been grown since the late 1830s.
It did well in
partial shade, climbing on poles that slanted back toward the mulberry
branches, so that I, too, had to climb up on a ladder to pick them!
The only drawback to
these beans is their strings, with the Hidatsa bean
pods being quite tough to break, while the Cherokee are almost
stringless, with an infinitesimal string, almost as tender as a corn
silk!
No bugs at all on these
beans, compared to Blue Lake, I also grew.
Conventional "half-runners" had much more persistent strings, too.
To grow these beans is to
touch history, in a spiritual way.
| This post is part of our Urban Homesteading lunchtime series.
Read all of the entries: |
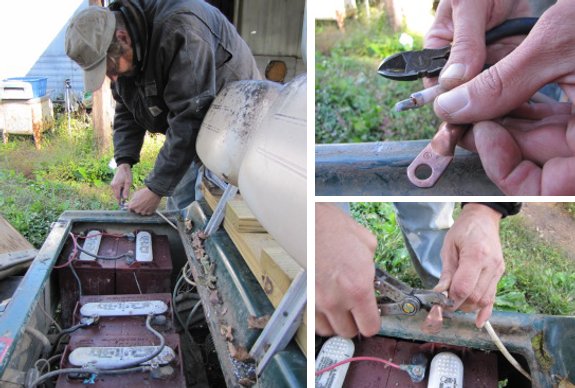
One problem that's happened a
few times with the golf cart is battery gunk eating its way through the
battery cable connectors.
You can find a replacement
cable at most auto parts stores somewhere in the battery section, but
these copper connectors will work as a replacement end at less than half
the cost.
 I
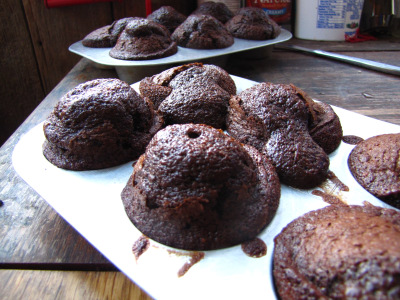
am a chocoholic, so I was thrilled when I realized you can substitute
cocoa for flour in baked goods and end up with the same
fluffiness and texture as in the original, but with double the
chocolate
content. My first trial was a chocolate
crust for our butternut pie, then I created this dark
chocolate cocoa muffin recipe based on our favorite chocolate cake recipe.
I
am a chocoholic, so I was thrilled when I realized you can substitute
cocoa for flour in baked goods and end up with the same
fluffiness and texture as in the original, but with double the
chocolate
content. My first trial was a chocolate
crust for our butternut pie, then I created this dark
chocolate cocoa muffin recipe based on our favorite chocolate cake recipe.
Mark and I agree that
this is every bit as good as the world class
chocolate muffins we enjoyed on our cruise a year ago, and the muffins
are unbelievably easy to throw together. If you currently fulfill
your chocolate cravings with cake mix or pre-made cakes from the
grocery store, you can save a bundle (and delete some of the bad
ingredients) by using this recipe instead.
- 1 c. sugar
- 1/3 c. plus 1/4 c. white flour
- 2/3 c. cocoa
- 3/4 tsp. baking soda
- 3/4 tsp. baking powder
- 1/2 tsp. salt
- 2 eggs
- 1/2 c. milk powder, dissolved in water to yield 1/2 c. of dense
milk
- 1/4 c. peanut oil
- 1 tsp. vanilla extract
- 1/3 c. boiling water
Preheat the oven to 350
F. Grease two medium cookie tins --- this recipe will make 12
muffins.
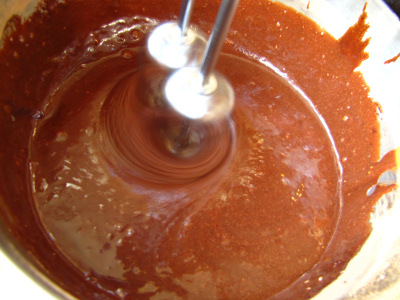
Stir together the sugar,
flour, cocoa, baking powder, baking soda and salt in large bowl.
If you're adventurous, feel free to increase or decrease the flour and
cocoa quantities until you find just the right chocolate point for you
--- the sum of the two quantities should equal 1.25 cups.
Add eggs, dense milk, oil and vanilla. Beat on medium speed with
the mixer
for two minutes while bringing some water to a boil.

Stir in the boiling
water. Pour batter into muffin tins and bake until done. (I
can't tell you an exact baking time because the numbers have rubbed off
my oven temperature dial and I'm not certain I was baking at exactly
350.)
I've
tried several times adding chocolate chips to these muffins, but try as
I might, the chips drop to the bottom. I even whirred the chips
in the blender to make them smaller and still ended up with
chips-on-the-bottom. If anyone can figure out a way to make my
chocolate chips stay suspended in the thin batter, I'd be forever
grateful!
 This
plastic milk carton was easy to attach to the wall with several dry
wall screws.
This
plastic milk carton was easy to attach to the wall with several dry
wall screws.
Installing it near a hole
makes egg access easy without entering the coop.
What you don't see is a roost
at the half way point to make getting up there easier for the girls.
 What
happens when you merge three chicken flocks together? Lots of
excitement!
What
happens when you merge three chicken flocks together? Lots of
excitement!
To refresh your memory,
the forest pasture had been home to our broody
white cochin and her foster son for a couple of months while our three
oldest hens lived together in one tractor and one younger hen lived
alone in another tractor. The youngest hen's sister currently
lives in another tractor until we find time to turn her into sausage
--- she developed
some sort of egg-laying problem that can't be solved and she
isn't worth feeding through the winter.
I rushed the move to
pasture a bit because I felt bad about the hen living all by herself in
a tractor, but at first our loner seemed to have been better off in
solitary confinement. The mother hen and her son teamed up to go
after the newcomers until all four lived in fear (and were cut off from
the food.) While the three oldsters had each other for moral
support, our youngest hen hovered on the periphery and went so far as
to fly out of the pasture in her efforts to escape harassment.
That was the status quo
for a few days, until I decided to open up the other coop door to let
the chickens use both pastures. Our old hens are about ten times
smarter than the others, so they figured out right away that they could
pop into the coop on one end and out the other end into a tyrant-free
paradise. I started feeding the three wise hens in their own
pasture, and the other three birds in the broody hen's pasture.
 A
week after flock merger, our poor loner was out of the pasture again,
and this time I decided to pop her back into the wise hens' pasture
rather the other one. This small decision seems to have changed
the entire flock dynamic --- a couple of hours later, I discovered the
rooster in the wise hens' pasture, lording over four hens who all got
along just fine. Maybe he knew how to change pastures all along,
but saw no reason to follow along after middle-aged biddies?
A
week after flock merger, our poor loner was out of the pasture again,
and this time I decided to pop her back into the wise hens' pasture
rather the other one. This small decision seems to have changed
the entire flock dynamic --- a couple of hours later, I discovered the
rooster in the wise hens' pasture, lording over four hens who all got
along just fine. Maybe he knew how to change pastures all along,
but saw no reason to follow along after middle-aged biddies?
Our rooster's regard
seems to have flip-flocked our youngster's status from loner to
flockmate. The wise hens used to peck at her when she got too
close, but under the rooster's reign, the pasture was full of serenely
scratching hens.

Meanwhile, the mean
white cochin hardly seemed to notice that her son had defected.
Will she eventually make her way into the popular pasture? Will
she maintain her rank at the top of the pecking order once I merge all
of the chickens back into one pasture to plant winter wheat in the
other?
I can't imagine why I
would need to watch TV with so much drama right in my backyard.
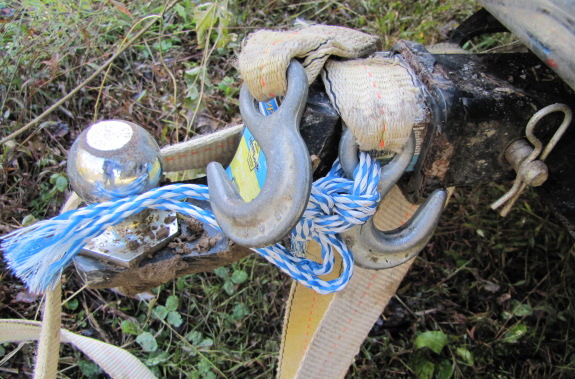
I've discovered that a good
cloth tow strap is a great addition to the homesteading tool box.
We used ours recently to tow
the golf cart back to the trailer when it had a problem.
It's also handy when winching
out something that's stuck in the mud.
 Even
though it didn't frost a week and a half ago, it turns out that harvesting
all of the blushing tomatoes was a good move. Our
vines are laden with fruits of all ages, and it seemed like when I
picked all of the slightly ripe fruit, the remaining green fruit
started ripening faster.
Even
though it didn't frost a week and a half ago, it turns out that harvesting
all of the blushing tomatoes was a good move. Our
vines are laden with fruits of all ages, and it seemed like when I
picked all of the slightly ripe fruit, the remaining green fruit
started ripening faster.
I decided to go ahead
and repeat the maneuver this week in hopes of getting even more
ripenable fruits off our vines before the frost. We now have a
three story hanging basket completely full of ripening tomatoes and
peppers, along with another basket of greener tomatoes and a collander
of green peppers. There are still two weeks' worth of green
tomatoes out in the garden, if by chance the frost holds out that long.
Poor Daddy had to put up
with peppers in every meal while he was visiting. Roast peppers,
peppers on salad, ratatouille, peppers in fajitas...I
suspect he won't be eating another pepper anytime soon.
 The current plan is to move the 5
gallon bucket waterer from the side of this tree to inside
the pasture coop.
The current plan is to move the 5
gallon bucket waterer from the side of this tree to inside
the pasture coop.
I've got a few ideas
involving the Ice and Easy heater coupled
with some insulation that might prevent our chicken water from freezing
this winter.
 Mark
and I took a quick trip up north this past weekend to experience our
first real sailing lesson, to hang out with old buddies, and then to
enjoy a beautiful wedding. (Congratulations, Kira and Erskin!)
Mark
and I took a quick trip up north this past weekend to experience our
first real sailing lesson, to hang out with old buddies, and then to
enjoy a beautiful wedding. (Congratulations, Kira and Erskin!)
We thoroughly enjoyed
the decadence of eating out, luxuriating in a hot bath, and having no
chores. But after just two days, we were sick of the big
city. Despite seeking out vegetables on every menu and snacking
on a big bag of fruit stand apples lugged from home, I was starting to
feel malnourished without my farm fresh produce, greenery, and fresh
air.
Back home, we see the
frost came calling while we were gone. I always have mixed
feelings about the first frost. Seeing the blackened leaves on
the tomatoes, okra, squash, 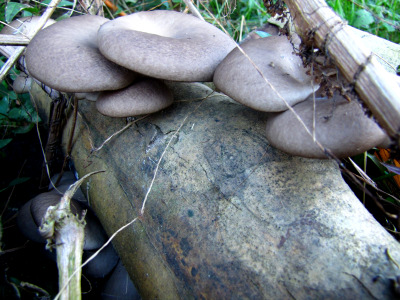 and
basil, I know that the bounty of summer is truly over. On the
other hand, summer weeds have blackened too, so the first frost gives
me an inkling of the serenity of winter. I know that in just a
few months I will be aching for an excuse to push my hands into the
soil again.
and
basil, I know that the bounty of summer is truly over. On the
other hand, summer weeds have blackened too, so the first frost gives
me an inkling of the serenity of winter. I know that in just a
few months I will be aching for an excuse to push my hands into the
soil again.
Of course, the first
frost brings its own bounty. Oyster mushroom logs that sat
dormant all summer have sprung into life! Good thing I found a
small stack of freezer containers in the barn while preparing for our
trip. I guess I could squeeze a few more quarts into our
jam-packed freezer.
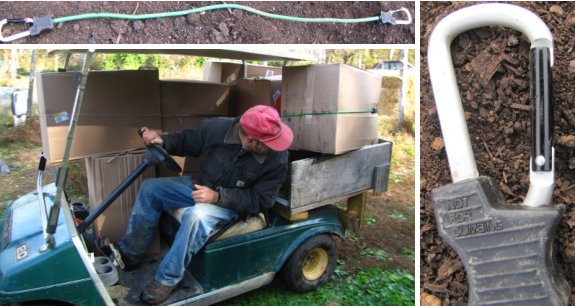
I'm not sure what took the
bungee cord industry so long to wise up to the innovation of a
carabiner instead of a hook, but it sure makes overloading the golf
cart much easier compared to more traditional bungee cords.
 We
stayed at Village
Inn in Annapolis, MD,
during last weekend's trip
north. Since this is me we're talking about, you probably won't
be terribly surprised that I learned about a new garden vegetable in
the process, right?
We
stayed at Village
Inn in Annapolis, MD,
during last weekend's trip
north. Since this is me we're talking about, you probably won't
be terribly surprised that I learned about a new garden vegetable in
the process, right?
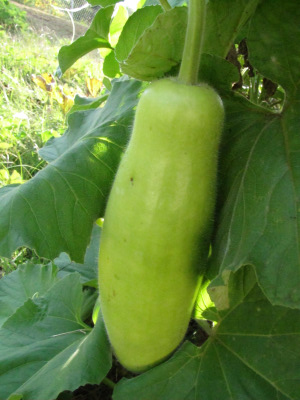
The motel is run by an
Indian family, and they were growing a squash
I'd never seen before. The vine was exuberant, running out across
the lawn in every direction just like any other squash, but when I
walked closer, I saw that the fruits were fuzzy! The crinkly
white flowers were unique too, and I was positive I'd never seen such a
thing before.
I bearded one of the
proprietors in the office and picked his brain
about this vegetable, which turned out to be an Indian Long
Squash. He told me that his family eats the long squash like a
vegetable (presumably like a summer squash?), cooks it into sweets
(like pumpkin pie?), and even  uses it to lower their
cholesterol.
I was dying for more information, but he had to answer the phone, and
we had a sailing lesson starting up any minute.
uses it to lower their
cholesterol.
I was dying for more information, but he had to answer the phone, and
we had a sailing lesson starting up any minute.
As I walked out the
door, though, the nice gentleman called after
me. "No chemicals!" he exclaimed --- just making sure I knew that
his beautiful garden was organic. I wouldn't be exaggerating if I
told you this stay in a budget motel was the best hotel experience of
my life.
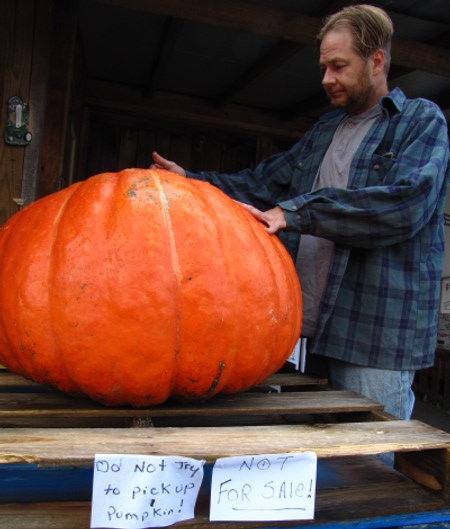
Anna and I saw this huge pumpkin on our
trip up north last week at Burke's fruit stand outside of Abingdon.
It's by far the biggest one
I've seen this year.
The sign says it's not for
sale, but if I had to guess I would say it might go for 40 or 50
bucks...maybe more in a bigger city.
If someone had asked me
yesterday how long wood chips need to age before they can be used as
mulch, I would have said, "You should probably wait two years.
And even then there could be pockets of chips too young to mulch
with. Wait until your chips have turned black."
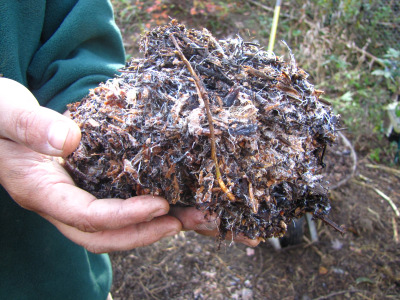 Today,
I'll tell you something completely different. With a flock of
broilers scratching through and fertilizing fresh wood
chips, and with wild
fungi colonizing the substrate, your wood chips could be perfect mulch
in just 6 months. And black isn't the prime color --- white
is. The best mulch will be held together by huge masses of
mycelium, bringing the fungi to
bacteria ratio to
the point that trees love.
Today,
I'll tell you something completely different. With a flock of
broilers scratching through and fertilizing fresh wood
chips, and with wild
fungi colonizing the substrate, your wood chips could be perfect mulch
in just 6 months. And black isn't the prime color --- white
is. The best mulch will be held together by huge masses of
mycelium, bringing the fungi to
bacteria ratio to
the point that trees love.
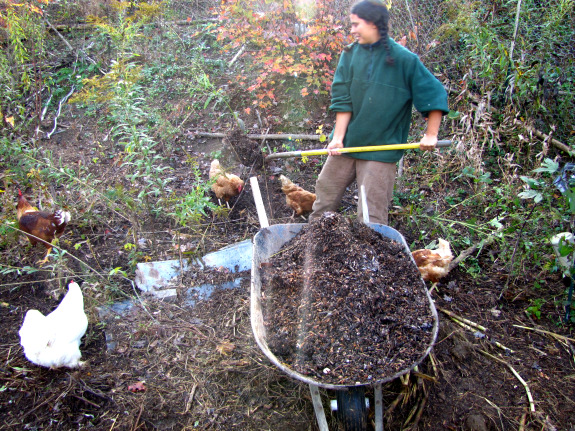
As I shoveled the world
class mulch out of the forest pasture, I had to keep my wits about me
so that I didn't cut off any hen toes. My wise old hens knew that
worms and grubs like to hide out under mulch, and they also knew that
the hen closest to the shovel always gets the prize.
The chickens feed the
wood chips, the wood chips feed the orchard, and the grubs feed the
chickens. I love it when permaculture systems fit so well
together.
Adding a couple of ladder
hooks on the tail gate of the golf
cart dump box makes
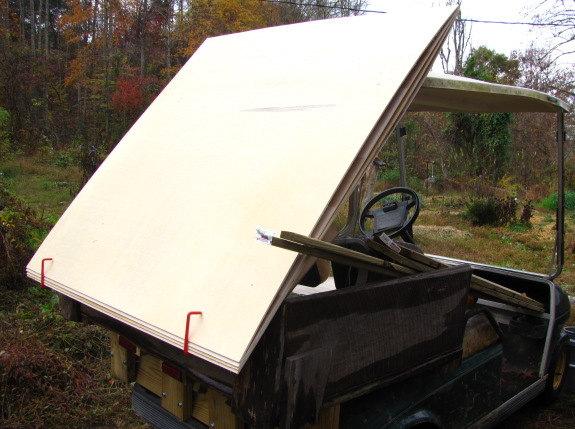
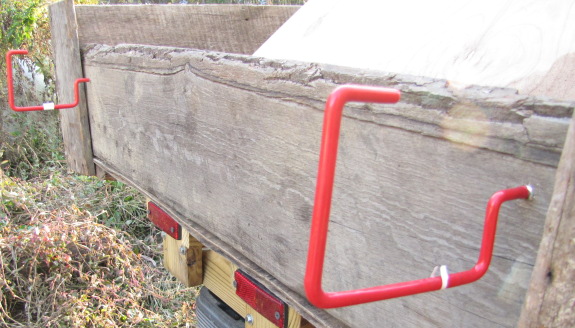
hauling over sized pieces like this plywood a breeze.
 Every
year, I splurge and spend a hundred bucks on new perennials.
Although it seems like a lot of cash, fruit trees take a long time to
mature and it just makes sense to find the money to sink into long term
farm infrastructure as soon as possible.
Every
year, I splurge and spend a hundred bucks on new perennials.
Although it seems like a lot of cash, fruit trees take a long time to
mature and it just makes sense to find the money to sink into long term
farm infrastructure as soon as possible.
This year, Mark talked
me into spending even more on perennials since
we've got several gaps in the forest garden, remnants of the days when
I didn't realize that there is
no point in planting fruit trees in the
waterlogged soil without raising them up on significant mounds and that I should plant
disease resistant varieties rather than just my favorite foods.
So I put in an order for Liberty and
old-fashioned Winesap apples, Redhaven and Cresthaven peaches, Prima
and Bounty Almonds, Carpathian walnuts (to go in the
other forest
garden where there's
room for mammoths), timber bamboo, dwarf Korean
nut
pine, and Chicago hardy fig.
The old saw admonishes
us to dig a $10 hole for a $2 tree, and I'm now
a firm believer in every part of the saying except the hole part.
Take a look at the photos above, and you'll probably become a believer
too. The peach on the left was planted on a large mound of rich
soil that I expanded over the next two years by piling garden weeds
around the mound edges. That peach gave us a glut of
delicious
peaches this
year. The peach on the right was planted one year
later on a much smaller mound that was never expanded. It gave us
four peaches this year, and its leaves have always been a yellowish
color instead of the vibrant green of the peach planted in a $10
mound. The dark green peach is actually 25 feet further away from
the camera, but it looks nearly as big as the yellow peach, doesn't it?
In actuality, our happy peach is about twice as big around.
I've learned my lesson
and have resolved to plant this year's perennials in $20 mounds.
After laying down a sheet of cardboard to kill
vigorous weeds, I hauled four wheelbarrow loads of composted weeds from
the forest pasture, then topped the mound with a 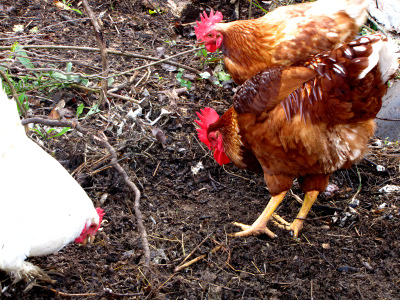 wheelbarrow
load of
the world's
best wood chip mulch.
Unfortunately, I ran out of the prime composted weeds after mound
number three, so I need to come up with some other awesome soil to
build the other half of the mounds.
wheelbarrow
load of
the world's
best wood chip mulch.
Unfortunately, I ran out of the prime composted weeds after mound
number three, so I need to come up with some other awesome soil to
build the other half of the mounds.
As a side note, the
chickens were just as helpful when it came time to shovel compost as
when I was shovelling wood chips. I was impressed to see how well
our merged flock plays together now that the
rooster has taken all of the biddies under his wing. Just a week
ago, our broody hen would never have let the loner forage so close to
her sharp, sharp beak.
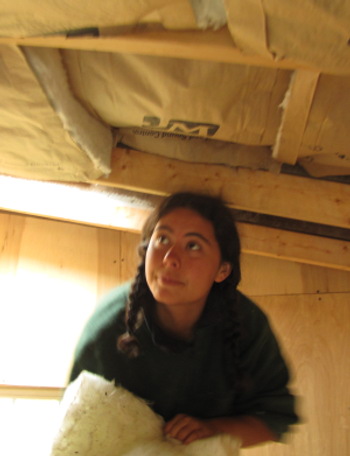
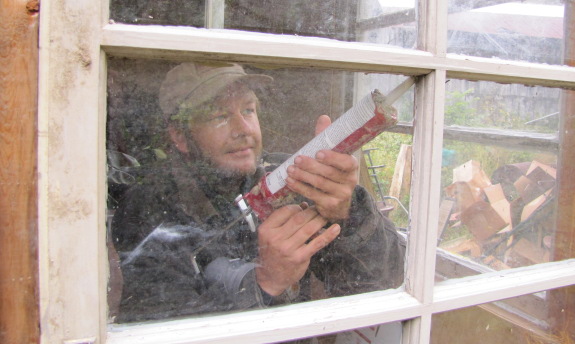
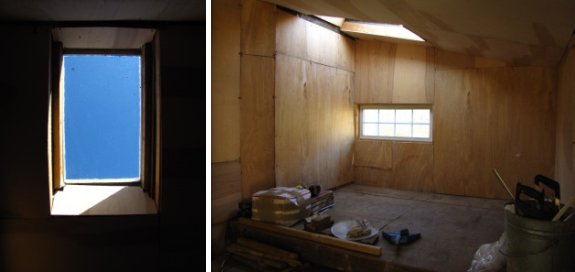
The skylight passed its final test last week when it held back a good
size downpour with no leakage.
Today was the day it
graduated to being fully insulated and covered up with plywood.
We went for two layers of
insulation and it wasn't so bad getting it to stay in place with a good
staple gun.
It's hard to describe just
how good it feels to almost be finished with this project
that we began a year ago this week.
 Although
I left laying pellets to tide our chickens over, they
clearly got a bit hungry while we were out of town for four days.
They had ignored
the buckwheat and beans before we left, but when we
returned I saw that our flock had eaten up every seed and scratched the
ground into a crumbly texture perfect for planting.
Although
I left laying pellets to tide our chickens over, they
clearly got a bit hungry while we were out of town for four days.
They had ignored
the buckwheat and beans before we left, but when we
returned I saw that our flock had eaten up every seed and scratched the
ground into a crumbly texture perfect for planting.
I shut the flock back
into the larger paddock and planted our winter wheat in the newly bare
ground. The combination of frost and chickens had broken down
even the stems of the previous crop so that I could easily rake the
wheat seeds into the soil.
I would have liked to
plant our wheat earlier, but it's very important to pay attention to
the Hessian fly free date when seeding wheat for grain. This
little insect burrows into leaves of young wheat before the frost, and
heavily infected fields will struggle so much that you get little or no
wheat harvest the next spring. By waiting until cold weather hits
to plant your wheat, you can bypass this pest. Each part of the
country has a Hessian fly free date after which it is safe to plant
your grain.
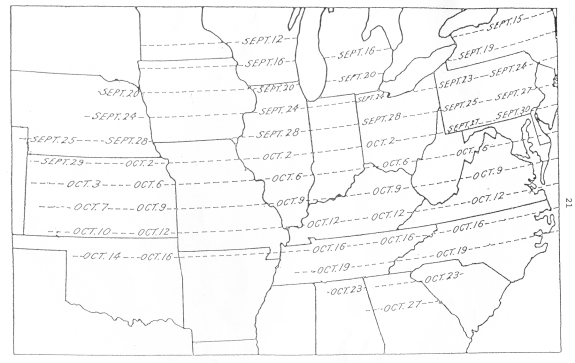
This map of Hessian fly
free dates from Purdue
University is the
best I've found, but I wonder about its accuracy here in the
mountains. I waited a few days longer than the map suggested,
until a frost made me confident that Hessian flies were long
gone. If all goes well, I should be able to graze
the chickens on the winter wheat in about a month, providing
a bit of winter greenery in their diets, then still get grain in spring
of 2011.
One of the last things I need
to do is fabricate some sort of shutter system so the skylight can be
closed half way or all the way or somewhere in between.
 Just
a week after noticing that the
six week old buckwheat was going to
seed, I saw these
beautiful oat flowers popping out of my two month old
oats. Since I'm growing the oats as a cover crop right now, I
went ahead and mowed them down with the hedge trimmer.
Incidentally, the hedge trimmer got slightly bogged down in the
thickest parts of the oat beds, so I wouldn't want to use it on
anything tougher than ripening oat stalks.
Just
a week after noticing that the
six week old buckwheat was going to
seed, I saw these
beautiful oat flowers popping out of my two month old
oats. Since I'm growing the oats as a cover crop right now, I
went ahead and mowed them down with the hedge trimmer.
Incidentally, the hedge trimmer got slightly bogged down in the
thickest parts of the oat beds, so I wouldn't want to use it on
anything tougher than ripening oat stalks.
Meanwhile, I'm
continuing to go a little overboard testing out every
possible autumn cover
crop. Two
weeks ago, I planted
several beds with crimson clover, the only fall-planted legume cover
crop that is supposed to be at least semi-reliably winter-killed in our
region.
Early October is late to be planting crimson clover, but the seeds are
already up and I have high hopes we'll get enough growth to give me an
idea of the quality of the variety before our first hard freeze.
I've got a lot more beds
opened up now that the summer garden is
officially dead, so I'm going to try out one last cover crop this year
--- barley. If you're curious about the pros and cons of
different cover crops in your region, I highly recommend that you
download Managing
Cover Crops Profitably.
This 4.5 MB, 248 page pdf file gives a lot of regional pointers that
will help
you figure out which cover crops are worth a shot and which ones should
be avoided at all costs. The results you'll get from a cover crop
are highly dependent on your climate and soil, so it's worth doing a
bit of research rather than just planting the cover crops that have
done well on someone else's farm.

We're already looking forward
to our next sailing lesson.
Last week we rented a 33 foot
sailboat with an instructor to show us the ropes.
It didn't go quite as
planned.
We both recorded our experiences over at ClinchTrails.com.
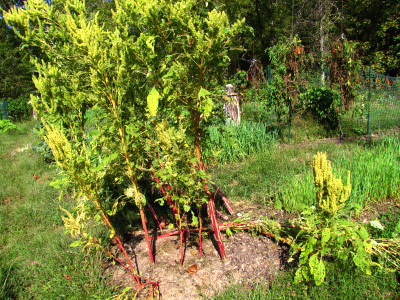 Our
quinoa disappeared into a deer- and bug-eaten mess this spring, but our
amaranth
sprang up far above my head. By late summer, the plumes of
flowers were going to seed, and the red stalks were four inches in
diameter. Clearly, the growing part of our amaranth experiment
was a success. (This photo was taken near the end of September
when the plants were mostly mature. Next year, I'll give them
some supports, since about half of the plants fell over under the
weight of their fruits.)
Our
quinoa disappeared into a deer- and bug-eaten mess this spring, but our
amaranth
sprang up far above my head. By late summer, the plumes of
flowers were going to seed, and the red stalks were four inches in
diameter. Clearly, the growing part of our amaranth experiment
was a success. (This photo was taken near the end of September
when the plants were mostly mature. Next year, I'll give them
some supports, since about half of the plants fell over under the
weight of their fruits.)
 After the first frost, I
snipped off all of the plumes with scissors and stuffed them into two
paper grocery bags. Although I've read that it's easier to thresh
your amaranth if you let the seed heads dry thoroughly first, I didn't
have space to spread the plumes out and I was a bit afraid of them
molding in their bags. So I moved on to processing the grain.
After the first frost, I
snipped off all of the plumes with scissors and stuffed them into two
paper grocery bags. Although I've read that it's easier to thresh
your amaranth if you let the seed heads dry thoroughly first, I didn't
have space to spread the plumes out and I was a bit afraid of them
molding in their bags. So I moved on to processing the grain.
When I researched
homegrown grains last winter, the accepted method for home-threshing
seemed to be to lay out your heads of grain on an old sheet and whack
them into submission with a stick or plastic bat. The more I
thought about this idea, the more it seemed like I'd end up with grain
everywhere except on the sheet. Plus, we're kinda low on sheets.
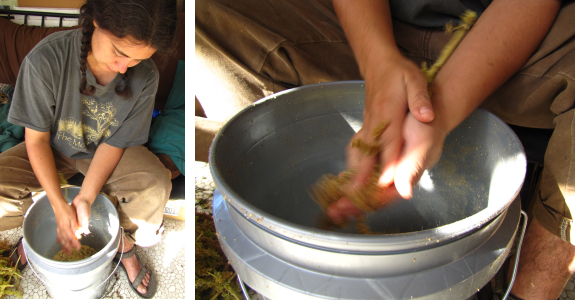
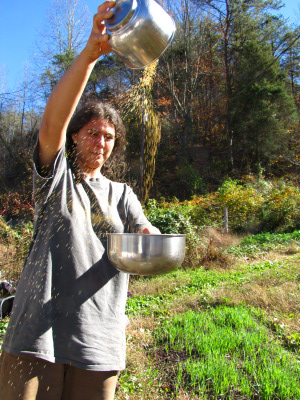 There
are several other methods people use to thresh grain at home, but as
small as our experimental harvest was, it seemed easier to go with a
more time-consuming method that required no elaborate setup. I
just rubbed the plumes one by one between my hands, letting the seeds
fall into a clean bucket.
There
are several other methods people use to thresh grain at home, but as
small as our experimental harvest was, it seemed easier to go with a
more time-consuming method that required no elaborate setup. I
just rubbed the plumes one by one between my hands, letting the seeds
fall into a clean bucket.
To winnow, I headed
outside with two bowls and poured my grain from one to the other until
the breeze had carried away all of the chaff. (The chaff mostly
ended up on Lucy's head since she came to sit at my feet like any
faithful dog would.) As I got more confident, I lifted the bowl
higher and higher, until I could see the beautiful rain of seeds
falling directly downward to ping in my metal bowl, while the light
chaff floated away in another column.
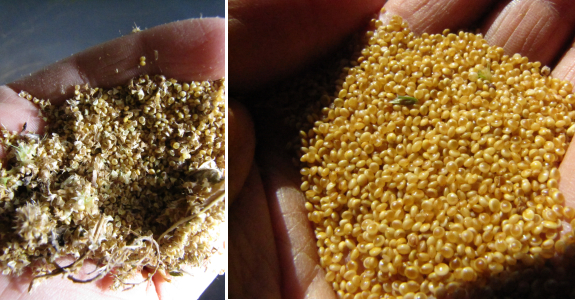
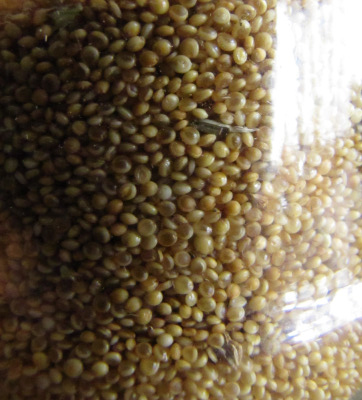 There were a few bits of
chaff left in my bowl even after several rounds of winnowing, pieces of
seedhead that were about as heavy as the seeds themselves. Some
people pass their seeds through a windowscreen at this point, but I
just picked out the half dozen big pieces and moved on. The
photos above show my amaranth before (left) and after (right) winnowing.
There were a few bits of
chaff left in my bowl even after several rounds of winnowing, pieces of
seedhead that were about as heavy as the seeds themselves. Some
people pass their seeds through a windowscreen at this point, but I
just picked out the half dozen big pieces and moved on. The
photos above show my amaranth before (left) and after (right) winnowing.
I threshed and winnowed
about a quarter of our harvest and came up with a cup of seeds. I
figure a quart of the tiny seeds is a pretty good haul for one
experimental bed of amaranth. Next step: to see if we like the
taste.

Saturday was a perfect day
for my first powered parachute orientation flight.
This is a picture of me
looking down from a cruising altitude of 420 feet.
I first read about these
contraptions over 20 years ago in the classified section of Popular
Science and have dreamed about flying in one ever since.

It was awesome!
My fortune cookie at the Chinese buffet afterwards seemed to be
synchronized with the day.
The guy you see in the
picture below is Jim Mac Leay. He's the super nice instructor and
powered parachute owner that did most of the flying until he gave
control over to me.
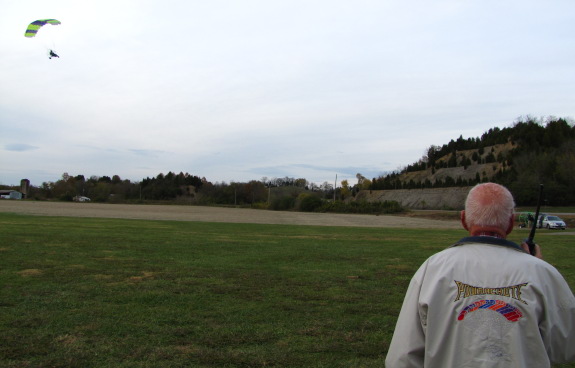
You pull back on the throttle
to go higher, push on it to go down, and steer either left or right
with your feet. It's just that easy. It doesn't go faster than 35 miles
per hour and feels sort of like a golf cart in the sky.
The view up there is amazing!
I took a 2 and a half minute video that will be up on ClinchTrails.com next week.
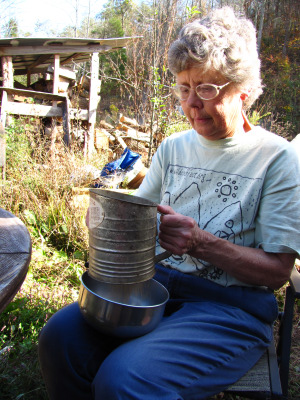 "How
would you like to come over and help me thresh
amaranth?" I asked
my mom, and she gamely agreed. She was a great help as we worked
through two big grocery bags of seed heads, but when it came time to
winnow, Mom clearly didn't think too much of my bowl method.
Instead, she suggested that I use my flour sifter to separate the seeds
from the chaff.
"How
would you like to come over and help me thresh
amaranth?" I asked
my mom, and she gamely agreed. She was a great help as we worked
through two big grocery bags of seed heads, but when it came time to
winnow, Mom clearly didn't think too much of my bowl method.
Instead, she suggested that I use my flour sifter to separate the seeds
from the chaff.
Sure enough, amaranth
seeds are just small enough to drop through the holes in the mesh
bottom while most of the chaff stays up in the chamber to be dumped
out. Sifting is also considerably faster than the bowl method
since one round in the sifter is equivalent to several rounds of
pouring the seeds from bowl to bowl.
After a great deal of
trial and error, we figured out that a combination of the bowl method
and the sifter method are best for winnowing amaranth. We would
sift a time or two, then use the bowl method to remove the chaff small
enough to fit through the screen. Then, if we felt like it, we
might sift again to get the seeds really clean.
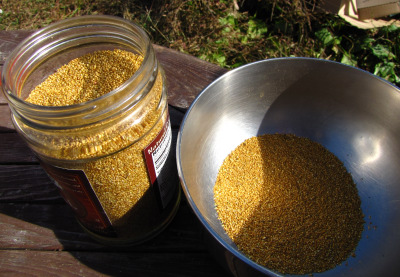 Once
our seeds were winnowed, Mom noticed another potential problem ---
there were dozens of tiny bugs wandering around on our amaranth
kernels. I've read that you can bake grain in the oven for a
short time to kill bugs before storing it, but I want to be able to
save some of the seeds to plant next year. So I popped the grain
in the freezer instead, and also plan to eat our amaranth over the next
month or two rather than doling it out over the next year.
Once
our seeds were winnowed, Mom noticed another potential problem ---
there were dozens of tiny bugs wandering around on our amaranth
kernels. I've read that you can bake grain in the oven for a
short time to kill bugs before storing it, but I want to be able to
save some of the seeds to plant next year. So I popped the grain
in the freezer instead, and also plan to eat our amaranth over the next
month or two rather than doling it out over the next year.
Total harvest from one
garden bed was 3.5 cups and we took about an hour or two to process it
(but we weren't in any hurry.) I'm thrilled by the harvest and by
the relative ease of processing our first real batch of homegrown
grains. We
will definitely expand our amaranth planting next year.
 I used to think I was the only
one capable of turning paradise into purgatory. Then I went to
visit Everett and realized that most type
A people probably share my unique skill.
I used to think I was the only
one capable of turning paradise into purgatory. Then I went to
visit Everett and realized that most type
A people probably share my unique skill.
Four years ago, I
finally got a chance to live my dream --- turning a chunk of swamp and
berry brambles into a self-sufficient homestead. You would have
thought I would have been in hog heaven, right? Well, I did enjoy
a lot of the first few years on the farm, but I also spent a
considerable amount of time so stressed out that I couldn't see the
immense beauty around me. Rather than noticing the tremendous
changes Mark and I had made on the farm, all I could see were the dozen
huge projects we seemed to never have time to deal with.
Contrast this mindset
with Mark's approach to homesteading. Mark is the world's hardest
worker...when he's working. But he doesn't peer up at the
tattered barn roof with the same heart-wrenching worry I experience;
instead, he enjoys the silhouette of the pole structure against the
blue sky. Once we've done everything on our list for the week, he
kicks back and enjoys the weekend.
Perhaps you're already a
type B person, fully adept at living in the moment. But just in
case you're type A and turning heaven into hell, I wanted to share
coping techniques I've developed in the last few years to regain my
bliss.
| This post is part of our Coping With Paradise lunchtime series.
Read all of the entries: |
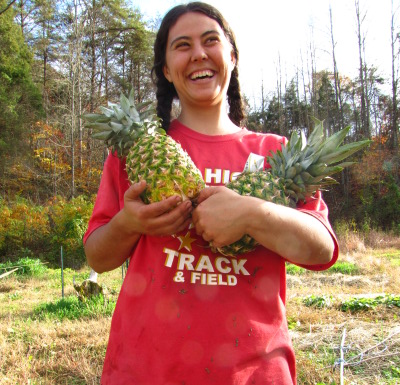 One
way to test the ripeness of a pineapple is to pull on a leaf. If it pulls off too easy then you might have an over ripe fruit.
One
way to test the ripeness of a pineapple is to pull on a leaf. If it pulls off too easy then you might have an over ripe fruit.
We got these 2 from the store.
If you follow a guy named Rick's
directions you can
propagate one of these store bought fruits at home as long as you've
got a warm place for it during the winter.
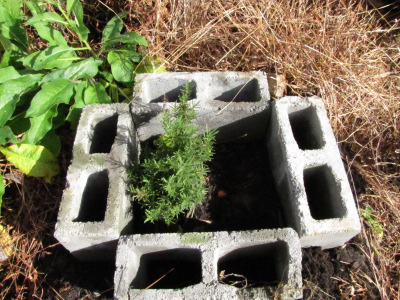 Here
in zone 6, we're right on the edge of rosemary's hardiness area.
Despite the fact that friends of mine fifty miles south can grow huge
bushes of rosemary where nearby pavement holds in heat around their
city yards, I've never managed to get mine to survive the winter.
Our shady valley chills down fast and stays cold all winter --- we've
had four frosts already that have completely taken out the summer
garden while my city friends are still lingering on the edge of summer.
Here
in zone 6, we're right on the edge of rosemary's hardiness area.
Despite the fact that friends of mine fifty miles south can grow huge
bushes of rosemary where nearby pavement holds in heat around their
city yards, I've never managed to get mine to survive the winter.
Our shady valley chills down fast and stays cold all winter --- we've
had four frosts already that have completely taken out the summer
garden while my city friends are still lingering on the edge of summer.
This year, I decided to
start experimenting with ways of protecting rosemary so that it will
survive the winter outdoors. The first step was too keep its
roots very dry. I built hugelkultur mounds in the sunniest (but also
most waterlogged) part of the garden. For the first time ever, my
rosemary thrived through the summer, turning from a rooted cutting into a nice little
bush. The soil felt bone dry when I rooted around in it, but the
rosemary seemed to get plenty of moisture.
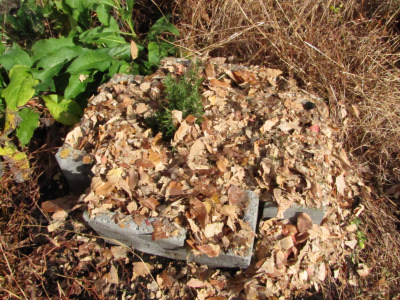 Now
that cold weather is on its way, I made a little den for the rosemary
out of four cinderblocks liberally filled with autumn leaves.
(Thanks for collecting those, Mom!) I hope the plant won't mind
not being able to photosynthesize with its lower leaves, and that the
combination of cinderblock thermal mass and leaf insulation will keep
the roots from freezing.
Now
that cold weather is on its way, I made a little den for the rosemary
out of four cinderblocks liberally filled with autumn leaves.
(Thanks for collecting those, Mom!) I hope the plant won't mind
not being able to photosynthesize with its lower leaves, and that the
combination of cinderblock thermal mass and leaf insulation will keep
the roots from freezing.
I also hedged my bets a
month ago by buying two cold hardy rosemary varieties from a nearby
nursery --- Hill Hardy and Arp. I've read various reports on the
internet, some of which suggest that these varieties will survive the
winter in zone 6, and others that are less promising. If I'd
known what I was doing, I would have planted these hardy rosemary
plants in the spring like I did my homegrown cutting so that they would
have all summer to get established --- that's what I'll try next year
if my insulating barriers fail to protect our three rosemary plants
through the winter. If even that fails, I'll let Mark build me
the mini-greenhouses he's been dying to make to keep our delicious herb
green all year.
 If
you're a type A person overwhelmed by the nitty-gritty of realizing
your dreams, one
solution is to draw up a realistic timeline. I
found it very useful to sit down with Mark and write out a list of big
projects we want to accomplish on the farm. These tend to be the
expensive and/or time-consuming goals that make me twitch when I gaze
out over our homestead and realize we haven't even begun to work on
them, things like growing our own meat or becoming more energy
independent.
If
you're a type A person overwhelmed by the nitty-gritty of realizing
your dreams, one
solution is to draw up a realistic timeline. I
found it very useful to sit down with Mark and write out a list of big
projects we want to accomplish on the farm. These tend to be the
expensive and/or time-consuming goals that make me twitch when I gaze
out over our homestead and realize we haven't even begun to work on
them, things like growing our own meat or becoming more energy
independent.
If you're playing along
at home, this is your chance to get everything
that keeps you up at night off your chest and onto paper, so write
every little thing
down. The image to the right is this year's incarnation of our
big picture goals. I broke our farm goals down into four
categories, mostly to make myself pay attention to things other than
the garden (which I've channeled most of our energy toward over the
last four
years.)
After listing everything
we ache to achieve, Mark and I each rated the
importance of the goals within each category. So, for example,
Mark and I both felt that dealing with our creek crossing was the most
important goal in the Other category, but Mark wanted to improve the
driveway next while I wanted to finish burying our water line so that
it wouldn't freeze in the winter. I averaged our two ratings for
each goal to give us a list of priorities within each category.
For the record, here are our prioritized long term goals in each
category:
Buildings:
- Biochar toilet
- Finish the storage building
- Bathing room
- Fix fridge root cellar
- Build another woodshed
- Insulate the trailer floor
- Build a second fridge root cellar
- Porch on the north side of trailer with summer kitchen
- Barn roof repair
- Porch on south side of trailer with steps
- Hobbit caves (underground sleeping area)
Garden:
- Find a way to keep constant mulch cover
- Be able to reproduce mushrooms
- Grains
- Oil
Livestock:
- Start fencing/hedging pastures
- Figure out chicken reproduction
- Plant forest pasture trees
- Consider sheep, pig, goats, meat chickens
Other:
- Creek crossing
- Finish burying water line
- Wood chipper
- Find a temporary caretaker to mind the farm when we take trips
- Deal with mud around the house
- Solidify the driveway with more rocks
- Off grid lights and stove fan
- More efficient wood stove
- Solar hot water heater
- Powered parachute
- Perimeter trail
We repeat this exercise
once a year in January, so this list is
slightly out of date. Tomorrow, I'll tell you how this list makes
life less overwhelming,
rather than more so.
| This post is part of our Coping With Paradise lunchtime series.
Read all of the entries: |
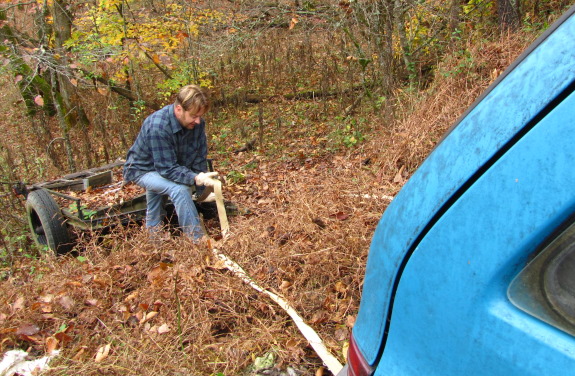
Last winter I was adjusting
the position of our utility trailer beside this hill and it got away
from me. Luckily it stopped by a young box elder tree near the
bottom.
Today was the day we decided
to pull it back up the hill with the tow
strap to make room for some future piles of wood chips from the
local tree cutting crew.
It's still at the bottom of
the hill.
The tongue kept rubbing on
the hillside while the Ford Festiva exhaust blew extra strong puffs in
my direction.
We'll attack this problem
another day when I can figure out a more reasonable approach that
involves more oxygen and less carbon monoxide.
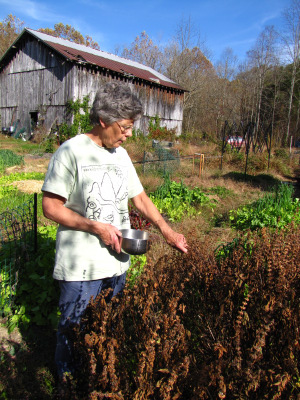 I
added basil to my list of garden
plants with easy to save seeds this year. We always
plant a whole garden bed of basil, carefully snipping off any flowers
in early summer to keep the leaves small and tender. But by late
summer, we've frozen as much pesto as we want and only need about a
quarter of the bed to pick fresh leaves for seasoning. So this
year I let the unused portion of the bed go to seed, and after the
frost Mom and I stripped the seed heads off a few of the plants.
I
added basil to my list of garden
plants with easy to save seeds this year. We always
plant a whole garden bed of basil, carefully snipping off any flowers
in early summer to keep the leaves small and tender. But by late
summer, we've frozen as much pesto as we want and only need about a
quarter of the bed to pick fresh leaves for seasoning. So this
year I let the unused portion of the bed go to seed, and after the
frost Mom and I stripped the seed heads off a few of the plants.
Due to our success with winnowing
amaranth, the flour
sifter had become my new favorite tool for seed-saving. I rubbed
the basil pods with my hands to break them open, passed them through
the sifter, then dropped the remains from one bowl to another.
Ten minutes after going out the door, we had a tablespoonful of clean
basil seeds, plenty for next year's garden. I can't imagine why
I've been buying basil seeds for the past few years!
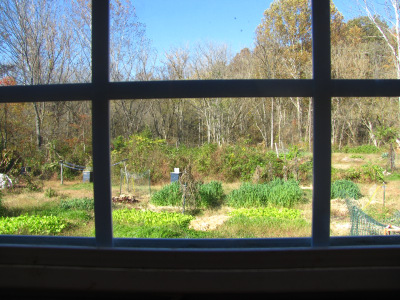 Once
you've figured out your shared long-term
goals, it's much
easier to
break those goals into bite-size segments. We like to choose ten
big picture goals to work on each year, taking the top-ranked two or
three goals out of each category. You can see our 2009 and 2010 goals in past posts.
Once
you've figured out your shared long-term
goals, it's much
easier to
break those goals into bite-size segments. We like to choose ten
big picture goals to work on each year, taking the top-ranked two or
three goals out of each category. You can see our 2009 and 2010 goals in past posts.
Now for the important
part --- let your long term list do all of the
worrying about goals not on this year's agenda. If something
didn't make it onto your list for this year, forget about it!
This rule will hold true for the other lists I'll discuss this week too.
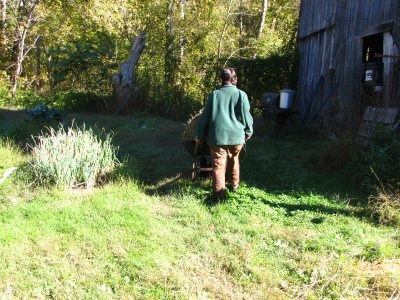 Ten
goals may not sound like much to put on your agenda for a solid
year, but it's important to realize that life on a farm takes a lot of
work just to stay afloat. During the growing season, we spent
almost no time working on long term goals, filling our days with
weeding, harvesting, mowing, killing chickens, and so forth
instead. Even
in the winter, splitting wood and cooking from scratch use up a
considerable amount of time. If anything, I would recommend that
folks just getting started on the farm cut back to half a dozen long
term goals for the first few years rather than expanding to a score,
only to see your dreams dashed.
Ten
goals may not sound like much to put on your agenda for a solid
year, but it's important to realize that life on a farm takes a lot of
work just to stay afloat. During the growing season, we spent
almost no time working on long term goals, filling our days with
weeding, harvesting, mowing, killing chickens, and so forth
instead. Even
in the winter, splitting wood and cooking from scratch use up a
considerable amount of time. If anything, I would recommend that
folks just getting started on the farm cut back to half a dozen long
term goals for the first few years rather than expanding to a score,
only to see your dreams dashed.
In fact, one of my
biggest pieces of advice for type A homesteaders is
--- always put only half as many projects on any list as you think you
can complete in the slated period of  time.
You'll feel really,
really good if you complete everything on your list and can work ahead,
while you'll feel just as terrible if you only get a third of your list
done. Why not prime the pump of happiness rather than despair?
time.
You'll feel really,
really good if you complete everything on your list and can work ahead,
while you'll feel just as terrible if you only get a third of your list
done. Why not prime the pump of happiness rather than despair?
It also helps to lower
your standards a bit and realize that it's not
essential for your farm to look like the pictures in the glossy
magazines, at least not at first. The most fun part of farming is
figuring it all out, so why rush through the early days in search of an
elusive goal when you could be taking a process-oriented approach and experiencing
bliss?
| This post is part of our Coping With Paradise lunchtime series.
Read all of the entries: |

I finished triming off 2 and
a half minutes of my powered
parachute video recently
and posted it on our ClinchTrails.com site. If you look closely you can see a
bald eagle resting in a tree when we fly over the river.
It takes 15 to 20 hours of
instruction to obtain the new Sport Pilot certification which allows
you to operate a 2 seater legally.
Powered parachute flying is
mainly a warm weather sport, and even then you usually have to restrict
flying to a few hours in the morning and evening when the winds are
below 15 mph.
 We
tried a heaping handful of experimental crops in this year's garden,
and I've already reported on some of the successes (like our amaranth and urd beans) as well as some of our
failures (like some of our other experimental
beans.) In the
interest of sound science, here are the yields of three of our low to
moderately successful crops.
We
tried a heaping handful of experimental crops in this year's garden,
and I've already reported on some of the successes (like our amaranth and urd beans) as well as some of our
failures (like some of our other experimental
beans.) In the
interest of sound science, here are the yields of three of our low to
moderately successful crops.
Temuco
quinoa was our
absolutely least successful experiment --- we got nothing out of our
experimental bed. On the one hand, the quinoa was heavily nibbled
by deer, but everything else in the garden somehow managed to rebound
while the quinoa sat there for weeks looking sadder and sadder until I
pulled it out. I might try another variety of quinoa another
year, but for now I'm marking it off my list.
Afghan
sesame is also an
experimental crop I won't be replanting. Most of our sesame
plants came down with some sort of disease that twisted their stalks
and held them back, but they did grow and bloom. I was thrilled
to see seed pods forming, but less thrilled when I realized that the
variety I had planted ripens pods a few at a time. My internet
research had let me to suspect that I could just harvest the entire
stalks after the frost, but I instead decided to yank them out a few
weeks early since about a third of the pods had already opened and
released their seeds. When I finally got around to threshing and
winnowing the dried pods, I discovered that my total yield from the
garden bed was about a tablespoon. In the plant's defense, I had
grown the sesame in the waterlogged back  garden,
and I now know they prefer dry feet. Still, I'll be doing more
research before trying sesame again.
garden,
and I now know they prefer dry feet. Still, I'll be doing more
research before trying sesame again.
Hungarian
breadseed poppy
was a moderate success. Total yield from half of a garden bed was
about three or four tablespoons --- enough for a few special
treats. On the other hand, Renee's Garden sent me a tiny, tiny
packet of seeds, so I suspect I could have planted the seeds more
thickly and gotten a higher yield. Since poppies provide early
spring nectar for the honeybees, I'll keep planting them even though
they weren't terribly productive.
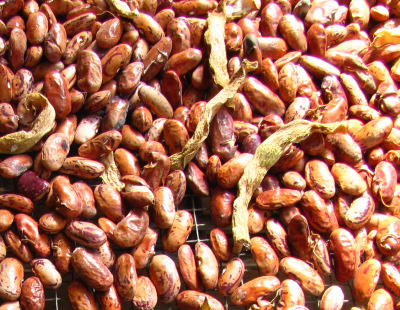 This
lunchtime series is really leading up to the list of lists I promised
you all a month ago --- the series of lists I use to keep myself
sane. Like the rest of this lunchtime series, this post is
primarily for the bean-counters among our readers. The other 50%
of you will probably get more out of looking at the pictures than
reading the words.
This
lunchtime series is really leading up to the list of lists I promised
you all a month ago --- the series of lists I use to keep myself
sane. Like the rest of this lunchtime series, this post is
primarily for the bean-counters among our readers. The other 50%
of you will probably get more out of looking at the pictures than
reading the words.
Without further ado, my
list of lists:
2. List of one year goals.
3. Annual calendar. Many of the tasks you hope to complete this year will probably have a solid deadline --- for example, we have to finish burying our water line before the ground freezes. You may know when you're going to be too busy with day to day chores to do much long term work (April through September for us). Use the combination of deadlines and otherwise busy months to scatter the big ticket items throughout the year.
4. List of this month's (or this season's) goals. I know this list of lists is getting a bit silly, but it really works, so bear with me here! First write down all of the projects that aren't big enough to go on your one year plan but must get done that month --- for example, our fall list includes things like gathering firewood, preserving food, mulching the perennials, etc. Now, estimate how long each project will take, and figure you're going to spend about a quarter of the month working on projects you didn't think of or that spring up out of the blue --- like hauling in several loads of compost while the driveway is dry, or fixing a leak in the roof. If you are starting to overfill the month list, put spillover items on a tentative list for next month instead of lengthening the current list. Whatever you do, don't put more on your list than you can accomplish during your agreed upon working hours --- you won't have
 time to get even that much done, and you'll
just feel awful if you have
more on your list. (More on these agreed upon working hours in
tomorrow's post.)
time to get even that much done, and you'll
just feel awful if you have
more on your list. (More on these agreed upon working hours in
tomorrow's post.)5. List of this week's goals. Based on your one month plan, you can now list everything you want to get done next week, including the little things that don't make it onto the month list. Write down all of the basic chores first (soaking mushrooms, weeding the garden), then fill in the most important or most timely of the month's chores. Over time, you'll learn roughly how much work you can get done in a week, and then you will be much happier. A lot of my angst in the early years came from putting two weeks' worth of work on a single week's list, and then feeling like I didn't get anything done.
6. Daily list. Now it should be simple to jot down a quick list of what you want to do today. If you have a memory, you may not even need to write it down.
7. List of this week's accomplishments. As you finish a task, mark it down on your weekly list of accomplishments. With so many balls in the air, it's easy to think that you haven't gotten anything done after spending a full week working on the farm. So
 whenever I finish a task, I note
it down at the bottom
of that week's page in my planner. By Friday, our list of
accomplisments is so long that I feel quite happy taking the weekend
off.
whenever I finish a task, I note
it down at the bottom
of that week's page in my planner. By Friday, our list of
accomplisments is so long that I feel quite happy taking the weekend
off.
I'm sure
that type B people nodded off about ten paragraphs ago, but I hope that
my obsessive list of lists will help type A people find joy on the farm.
| This post is part of our Coping With Paradise lunchtime series.
Read all of the entries: |
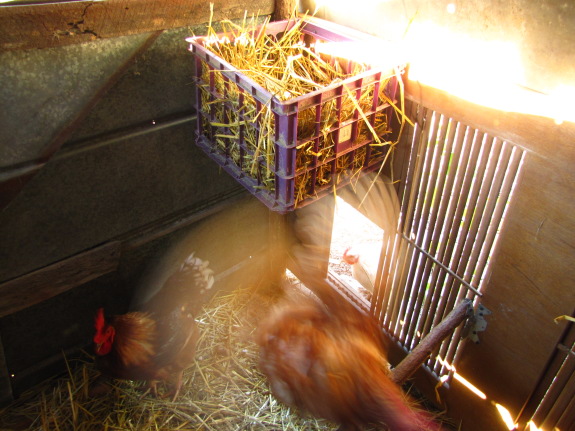
It's been 2 weeks since I
installed the outdoor
nest box in the chicken pasture and the lack of even one egg proves
how unpopular this location is for egg laying.
I think it was too much in
the open, which is why I moved it inside just above the entrance.
Now it seems to be good
enough for at least one hen, but still someone within the flock insists
on laying her egg on the straw floor.
 I've
never been the pretty girl who a dozen boys fought over, and I never
thought I wanted to be one. But lately I can understand the
appeal. You see, as hunting season approaches, our 58 acres of
deer-laden woods and swamps is definitely the pretty girl that every
guy wants to be with. Our mechanic tried to fix our car for free
so that his son could hunt here, our neighbor's brother dropped by and
offered to trade horse manure for the right to hunt, and one of the
local wood chippers dropped off two loads of chips and promised us
more...and by the way, could he hunt?
I've
never been the pretty girl who a dozen boys fought over, and I never
thought I wanted to be one. But lately I can understand the
appeal. You see, as hunting season approaches, our 58 acres of
deer-laden woods and swamps is definitely the pretty girl that every
guy wants to be with. Our mechanic tried to fix our car for free
so that his son could hunt here, our neighbor's brother dropped by and
offered to trade horse manure for the right to hunt, and one of the
local wood chippers dropped off two loads of chips and promised us
more...and by the way, could he hunt?
I'm starting to see how
a pretty girl might string a dozen guys along
just for the sake of the presents. Sure, your son can hunt on the
east end of the property --- we like having happy neighbors.
Maybe you could hunt on the west end, Mr. Wood Chip. If that
manure materializes, we'll have to try to fit Mr. Horse in too.
All this free biomass is clearly starting to go to my head....
 My
list of lists really isn't meant to
expedite getting things done. Instead, its primary purpose is
marital harmony and promotion of relaxation. Here's what my world
looked like before my obsessive lists:
My
list of lists really isn't meant to
expedite getting things done. Instead, its primary purpose is
marital harmony and promotion of relaxation. Here's what my world
looked like before my obsessive lists:
Of course, our world
looked very different from Mark's point of view:
 The major flaw in our
early relationship was that I am obsessively type A while Mark is
relentlessly type B. I now know that this combination makes for a
very well-rounded team, but then it just meant that we fought a lot.
The major flaw in our
early relationship was that I am obsessively type A while Mark is
relentlessly type B. I now know that this combination makes for a
very well-rounded team, but then it just meant that we fought a lot.
Part of the solution was
my list of lists, but the other part was to
clarify our expectations and compromise right up front. I'd
gotten used to working seven days a week and had forgotten what
holidays were, while Mark knew that the real value of life comes from
taking the time to embrace the world's beauty. After months of
discussion, we settled on a weekly routine where we work from 9 to 4
Monday through Friday (with an hour lunch break), take the weekends
off, discuss which holidays to honor and which to skip, and also take
(increasingly frequent) random days and afternoons off.
Taking time off was
difficult for me at first. Rather than enjoying the time to read,
write, and wander in the woods, I spent many weekends chomping at the
bit and feeling guilty that I wasn't getting anything done. I
hope that very few of you are as problematically type A as I was, but
just in case the idea of doing nothing constructive all weekend fills
you with dread, here is the solution I settled on --- Friday afternoon,
I write down the week's  accomplishments and draft next week's list of
chores, then release everything on the list from my head until Monday
morning. I'll even admit that Mark is right --- we do get more
done by giving ourselves weekends and vacations to recharge and think
outside the box, and I've loved having free time to embark on my own
course of independent study about permaculture and homesteading topics.
accomplishments and draft next week's list of
chores, then release everything on the list from my head until Monday
morning. I'll even admit that Mark is right --- we do get more
done by giving ourselves weekends and vacations to recharge and think
outside the box, and I've loved having free time to embark on my own
course of independent study about permaculture and homesteading topics.
In the modern world,
most couples spend no more than a handful of hours per week working and
playing together. I've noticed that many couples who move back to
the land as a unit are shocked by how difficult it is to work with
their mate, and a large percentage of them aren't willing to put in the
time to compromise and turn into a team. Even couples who have
been together a decade longer than we have look like newlyweds when I
see them hashing out their differences on the farm.
Although working together can be tough at first, the payoff is
huge. Lately, I've noticed that Mark and I are the happiest
couple I know. If anyone asked me whether it's worthwhile to go
back to the land as a couple, I would say an unconditonal "yes!"
If you don't kill each other in the first few years, you will
definitely live happily ever after.
| This post is part of our Coping With Paradise lunchtime series.
Read all of the entries: |
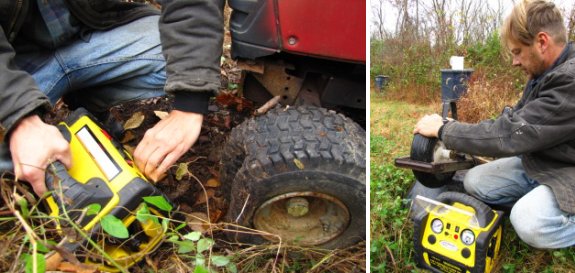
I finally got a chance to
give the 5 in 1
power pack a workout the
other day.
It's not got quite enough
gusto to air up a tubeless wheelbarrow tire, but the onboard air
compressor inflated the above lawn mower wheel with no problem.
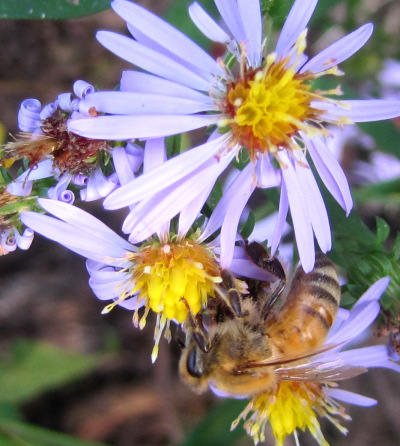 Last
year, I watched dozens of bees visit the New England Aster my mom had
planted in her city front yard, and before I left, I'd begged some
seeds from her bee-beloved plants. I scattered the seeds in the
forest garden, then ignored them as they came up through weeds this
spring.
Last
year, I watched dozens of bees visit the New England Aster my mom had
planted in her city front yard, and before I left, I'd begged some
seeds from her bee-beloved plants. I scattered the seeds in the
forest garden, then ignored them as they came up through weeds this
spring.
When four plants made it
to the blooming stage, I watched with baited breath, expecting a three
ring circus. But our bees rolled their eyes at me and went back
to feeding on the wild asters growing here, there, and everywhere
around our homestead. My guess is that honeybees like asters in general, and that the New England
Aster was such a big hit in my mother's yard just because so few people
in the city grow asters of any sort.
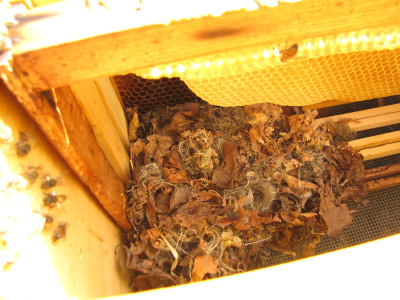
Despite frosts, our bees
are still hard at work gathering nectar and pollen from our asters, so
I had planned to leave off their mouse guards until activity began to
slow. But when I checked
on the colonies this week, I found a mouse nest in the back corner of
one of the
hives. The mouse wasn't present, but it had clearly spent a lot
of time ferrying in leaves and dried grass to make its home.
I raked out all of the
 leaves and even shook the bottom board off to
clean it. (The bees didn't seem to mind my housekeeping all that
much.) Then I put the hive back together and installed an
entrance reducer to keep out further squatters. The bees will
just have to work those asters through the small hole from now on.
leaves and even shook the bottom board off to
clean it. (The bees didn't seem to mind my housekeeping all that
much.) Then I put the hive back together and installed an
entrance reducer to keep out further squatters. The bees will
just have to work those asters through the small hole from now on.
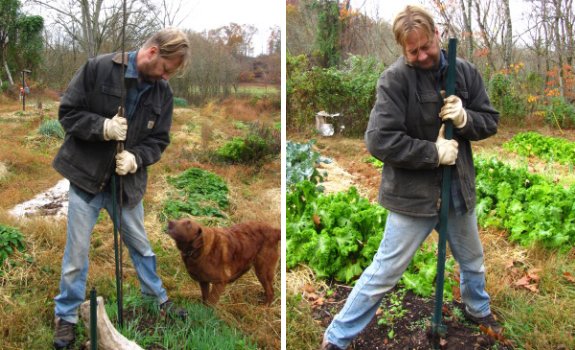
The taking in of the garden
stakes is turning out to be a point in the year when winter feels close
at hand.
Good bye summer....see you
next year.
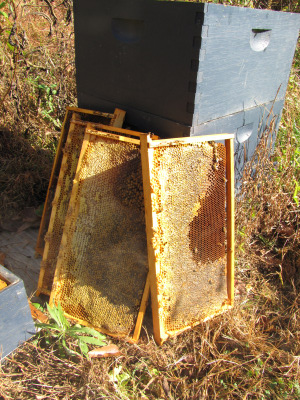 The
double deep system netted us an amazing
harvest of 4.5 gallons of honey this year, but there is one small
problem with the design --- weight. One deep frame of honey
weighs 7 pounds, so if your bees fill up the top brood box, it's going
to weight 70 pounds. The most macho of my readers may be able to
shift that, but I know I can't (at least without breaking my back.)
The
double deep system netted us an amazing
harvest of 4.5 gallons of honey this year, but there is one small
problem with the design --- weight. One deep frame of honey
weighs 7 pounds, so if your bees fill up the top brood box, it's going
to weight 70 pounds. The most macho of my readers may be able to
shift that, but I know I can't (at least without breaking my back.)
Only the hive that was
double deep from the get-go this year managed to fill its top brood box
to the point where I couldn't lift it, so I've just skipped checking
that hive's lower brood box for the last couple of months. I
needed a good tally of honey stores, though, to make sure each hive has
the 50
to 60 pounds required to get them through the winter in Virginia. So I took out half of
the frames, then heaved the still-quite-heavy brood box to the side.
Down below, our busy
bees had socked away an entire other brood box full of honey and
pollen! I estimate that the total honey stores in that hive
easily top 80 pounds (and all of the other hives also clocked in well
above the bare minimum.) Most beekeepers would have extracted
nearly half of that honey, but I like the idea of restricting
our harvests to the spring so that my bees have no
shortage through the cold weather. The excess honey will be just
as sweet come spring, and my hive will be prepared in case of an
extremely cold winter.
I've slept on water beds,
futons, hamocks, air matresses, park benchs and the backseat of a car.
I even remember a bed at a Holiday Inn when I was a kid that had a box
on the night table with a slot for a coin. You put a quarter in and the
bed vibrated for 10 minutes...which I could never figure out why folks
would want the bed to vibrate when they went to sleep, and then I grew
up and figured it out.
Anyway....I decided to
recently try one of those new fangled memory foam mattresses I kept
hearing about. It came by mail in 4 medium sized boxes.
It's hands down the most
comfortable bed I've ever encountered so far and I wouldn't trade it
for 10 vibrating beds.

Or explore more posts by date or by subject.
About us: Anna Hess and Mark Hamilton spent over a decade living self-sufficiently in the mountains of Virginia before moving north to start over from scratch in the foothills of Ohio. They've experimented with permaculture, no-till gardening, trailersteading, home-based microbusinesses and much more, writing about their adventures in both blogs and books.