
archives for 06/2013
 I
haven't been the only one having fun with grafting and rooting this
year --- two of our readers emailed this week with updates on
experiments of their own. Brian
wrote in to say that he ended up with accidentally-rooted fig cuttings
in his Tennessee garden:
I
haven't been the only one having fun with grafting and rooting this
year --- two of our readers emailed this week with updates on
experiments of their own. Brian
wrote in to say that he ended up with accidentally-rooted fig cuttings
in his Tennessee garden:
(I would have put an
exclamation point at least somewhere in that paragraph, so I'll add two
here for you to use as you see fit --- !!)
Brian also had quite
good success with his more intentional grafting and rooting efforts,
managing to salvage some very subpar cuttings I sent him. His
only real failure was trying to graft hardwood cuttings onto a peach
--- my understanding is that peaches are best budded in the summer, although I've
never tried it myself.
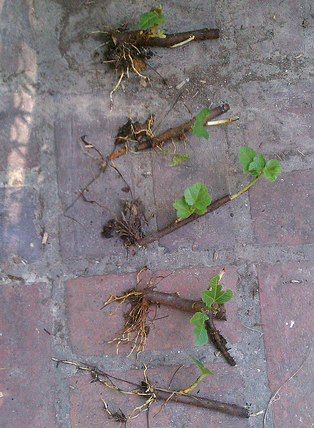
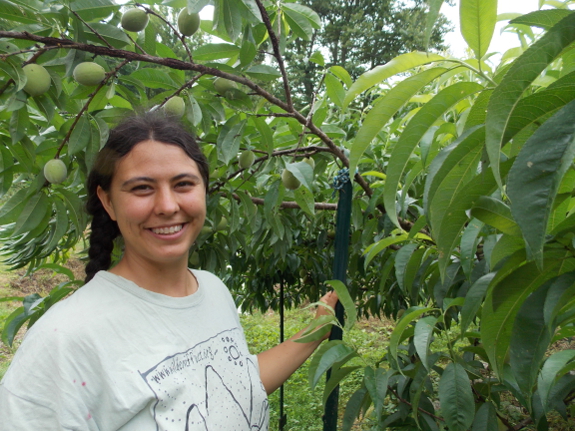
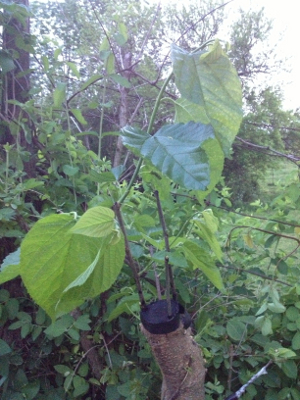 Meanwhile, you may recall Gary,
who is experimenting with propagating Illinois Everbearing mulberries. The cuttings that
callused for him didn't end up rooting, but he had much better luck
with grafting Illinois Everbearing onto wild red mulberries around his
farm. He wrote:
Meanwhile, you may recall Gary,
who is experimenting with propagating Illinois Everbearing mulberries. The cuttings that
callused for him didn't end up rooting, but he had much better luck
with grafting Illinois Everbearing onto wild red mulberries around his
farm. He wrote:
I owe you updates on my
own rooting and grafting experiments (which have been a mixed bag, but
with some great successes). That will have to wait for another
post, though. In the meantime, I hope you'll be inspired by these
two success stories to give home-propagation of woody perennials a try.
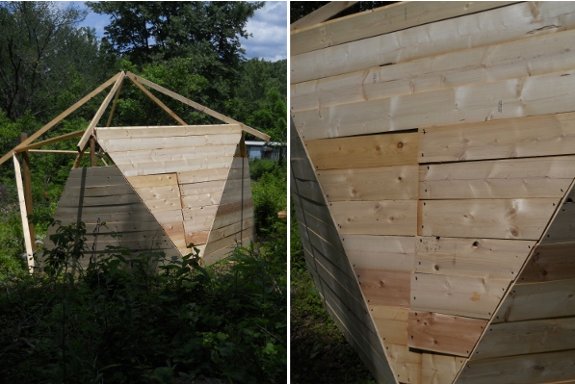
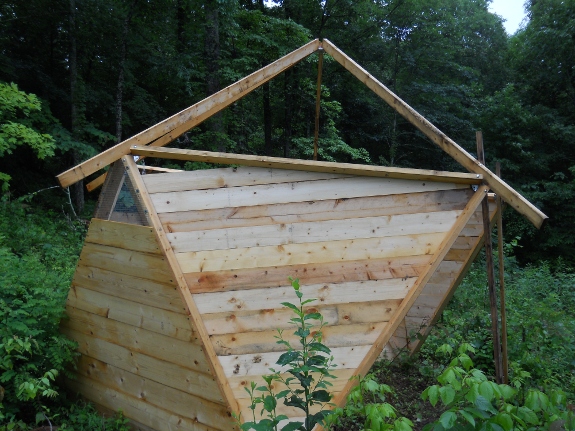
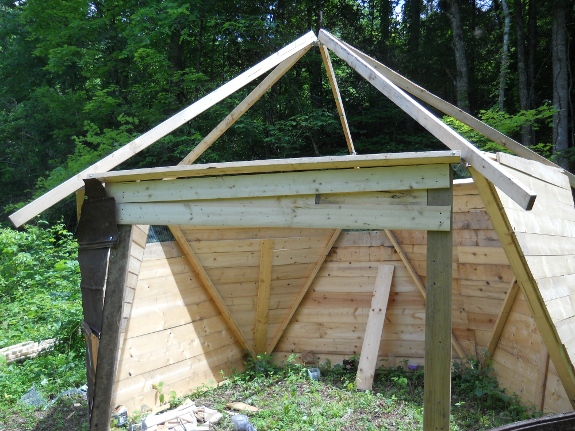
In a perfect world the scrap
pieces from one star plate triangle wall should fit together for the
next triangle.
I think maybe Lucy carried
off one of the pieces from the second triangle, but instead of cutting
a new replacement piece we decided to overlap the ill fitting pieces.
The overlapping seems to make
the wall more secure and still looks acceptable.
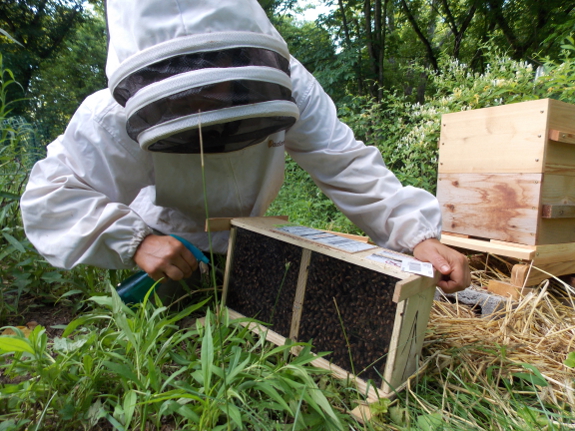
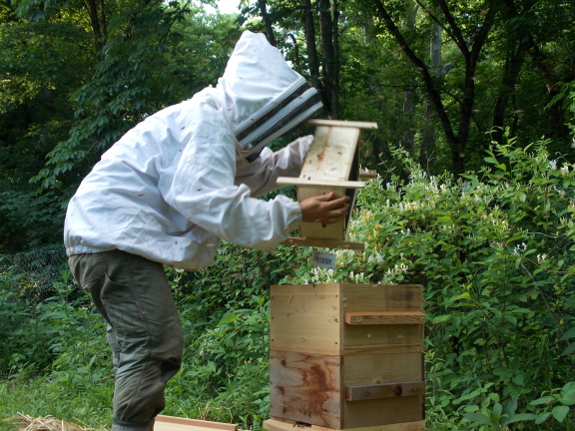
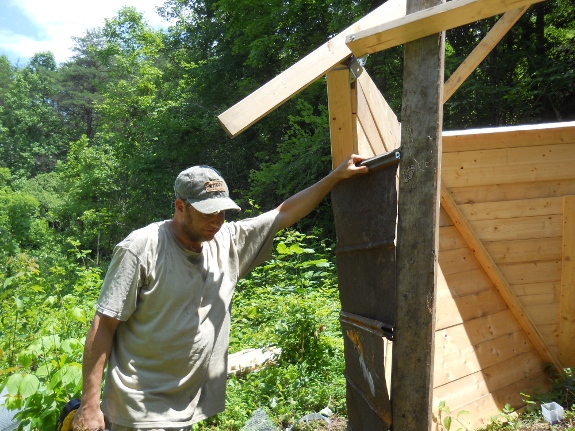
I put off deciding
whether to buy another package
of bees until April,
which means that our bees only went in the mail Friday. With such
a late start ahead of them, I figured it wouldn't hurt to prime the
pump by giving the new hive a box of nearly-drawn comb, partially
filled with pollen and nectar.
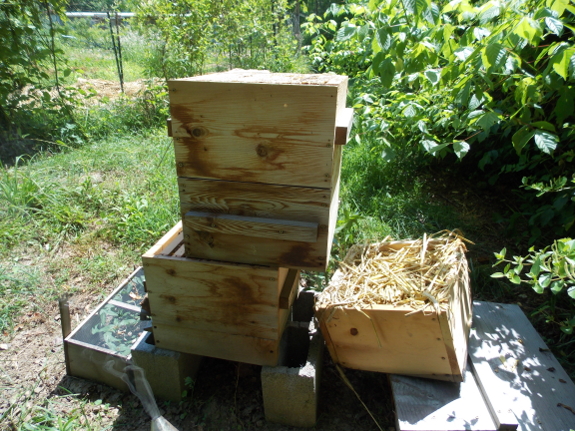
 It was time to nadir the old hive anyway, so I
killed two birds with one stone, lifting the top two boxes from that
hive to the side, replacing the bottom box with two empty boxes, then
adding the full boxes of brood back on top. In a perfect world, I
would have left the quilt and roof on during this procedure, but I was
working by myself and figured that I could cut corners (and weight) by
removing those two components. I left the sheet of burlap on the
top box, though, so I don't think the procedure messed with the Nestduftwarmebindung of the hive too much.
Weight of the two boxes of brood was just shy of too heavy for me
(maybe forty pounds? or perhaps thirty since the bulkiness was the real
hindrance?).
It was time to nadir the old hive anyway, so I
killed two birds with one stone, lifting the top two boxes from that
hive to the side, replacing the bottom box with two empty boxes, then
adding the full boxes of brood back on top. In a perfect world, I
would have left the quilt and roof on during this procedure, but I was
working by myself and figured that I could cut corners (and weight) by
removing those two components. I left the sheet of burlap on the
top box, though, so I don't think the procedure messed with the Nestduftwarmebindung of the hive too much.
Weight of the two boxes of brood was just shy of too heavy for me
(maybe forty pounds? or perhaps thirty since the bulkiness was the real
hindrance?).
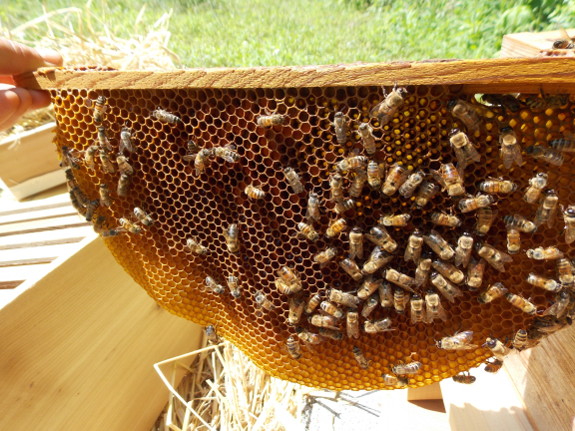
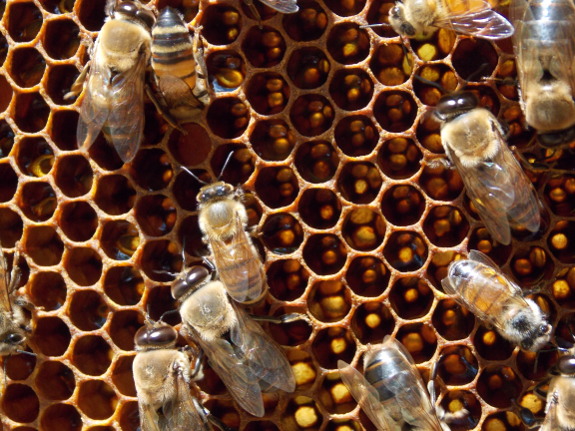
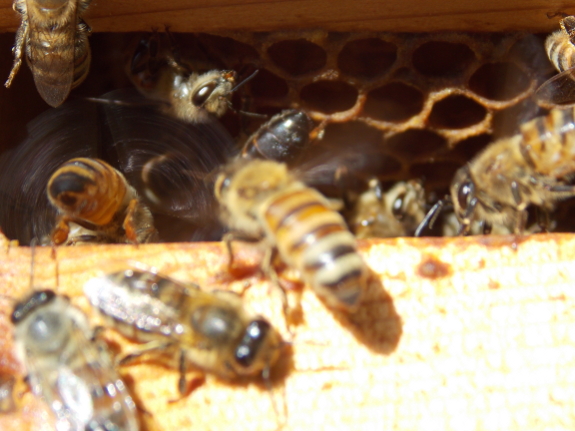
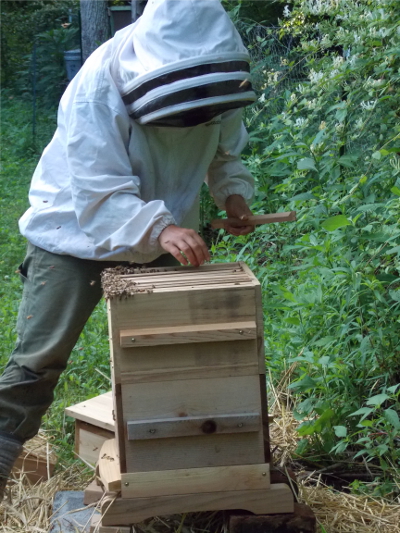
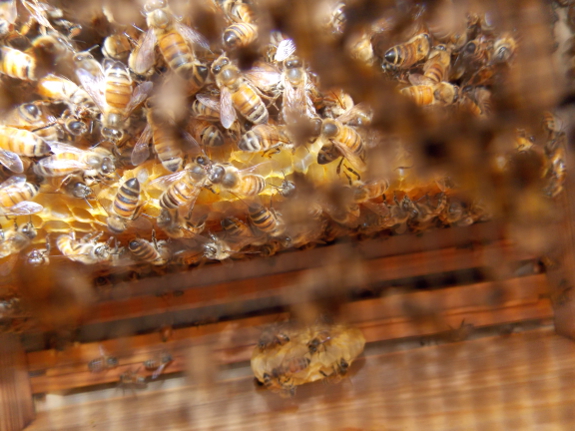
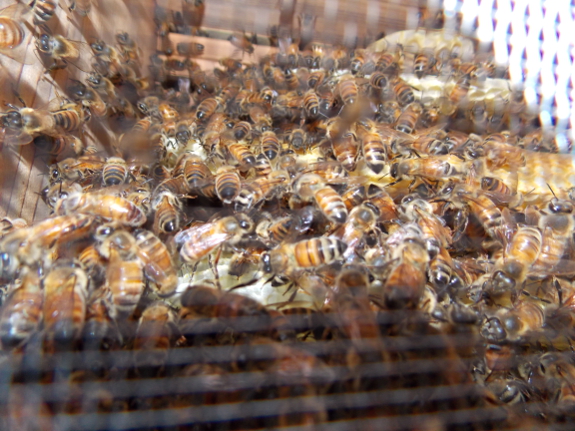
 Over at the new hive spot, I
got to scratch my bee-photographing itch. That's one of the major
downsides of the Warre hive --- you're not supposed to mess with
individual frames, so you rarely get to see your bees in action.
Isn't that beautiful, straight comb drawn without
foundation?
Over at the new hive spot, I
got to scratch my bee-photographing itch. That's one of the major
downsides of the Warre hive --- you're not supposed to mess with
individual frames, so you rarely get to see your bees in action.
Isn't that beautiful, straight comb drawn without
foundation?
I didn't bother brushing
off the workers and drones who came along for the ride in the relocated
box, but I figure they'll go home tonight. Then I'll plug up the
door so they don't come back tomorrow and rob all that nectar right
back to their old hive.
The Skil drill press is still going strong with its new
return spring.
We tried using it on the StarPlate building, but ended up using the
electric hand powered one.
The issue was power.
Extension cords can only go so far before they lose some punch.
Perfectionism has
long been a character failing of mine. When other kids were
aiming for straight As in high school, I figured I should keep an
average of 98 and above --- 97s were a sign I needed to work
harder. I'm afraid I carried that need for 98% perfection
over to the homestead.
Years ago, Mark
helped me awaken to the fact that striving for perfection results
in missing the true joys of this imperfect life. But try as
I might, I only managed to make about a C- on pop quizzes in that
subject.
While reading and
watching introductory
permaculture materials over the last few weeks, though, I had an epiphany.
My main trouble is that I treat our entire homestead like zone 1,
with all the high upkeep that choice entails. (Okay, I treat
the house like zone 4, but that's neither here nor there.)
Two people can't maintain over
an acre in zone
1 conditions with hand tools and stay sane.
I need to think more
about how to plan certain portions of the farm as zones 2 and
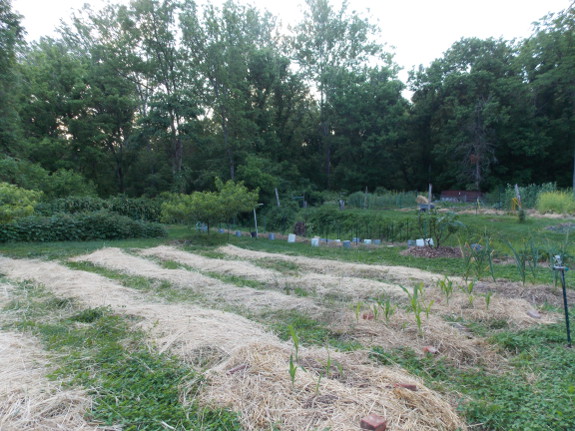
above, but in the meantime, I decreased my stress considerably
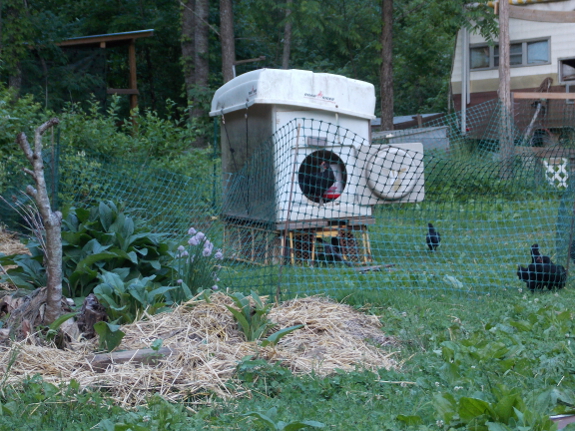
with some stopgap measures. The broiler pastures are getting
severely overgrazed since the Starplate
coop is taking
longer than anticipated to finish, but moving at least one flock
into temporary pastures is easing pressure there. We've been
wanting to install drip irrigation for the blueberries and
mini-apples, but it occurred to me that rearranging my sprinklers a bit would allow quick
coverage in the meantime. And I decided most of the woody
perennials are going to get a quick-and-dirty
kill mulch
rather than a real weeding job this month.
The result? I
got an A+ in noticing the sheer beauty and peace of the farm this
weekend. Creek-walking, bathing in the rain, reading while
watching chicks, mini-experiments with silkworms, lightning bugs
in the dark. That's why I moved to the farm, after all ---
I'd better enjoy it!

I've ordered a total of 8
mulching mower blades from Yard Parts Express.com. Most of the time the blade shows
up the next day through UPS. They really do earn the express part of
their name
I think the unique twist
shape of the blade is what helps to re-circulate the clippings back up
to be mulched, but it also makes it more sensitive to warping if you
hit the occasional stump.
We've almost got all the
stumps taken care of, but I might not choose a mulching mower
in the future due to this issue.
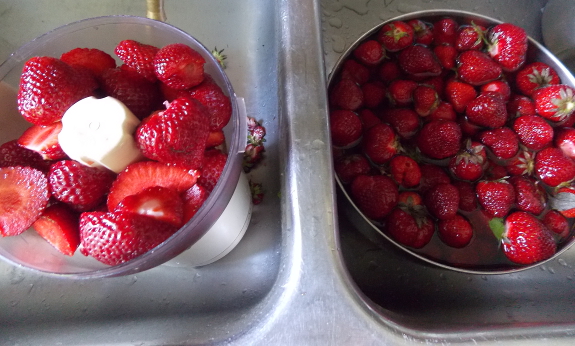
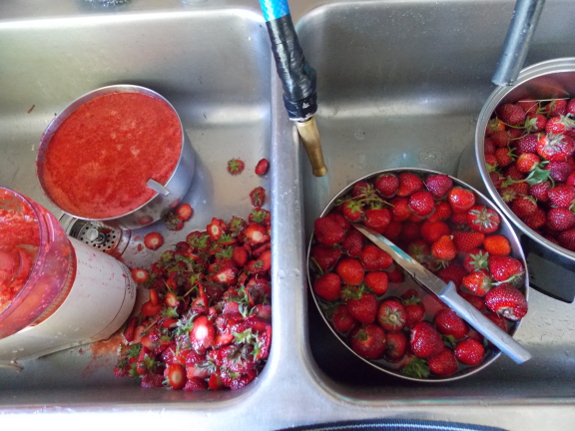
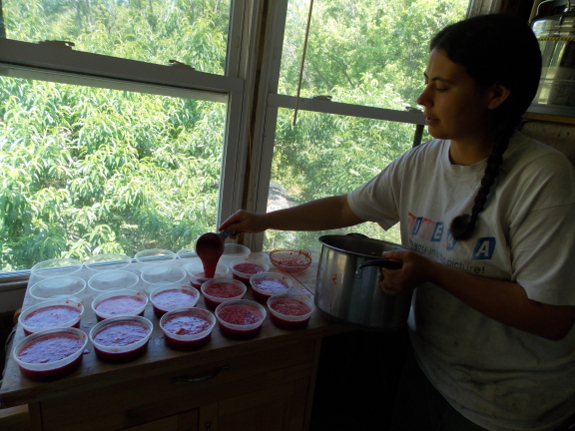
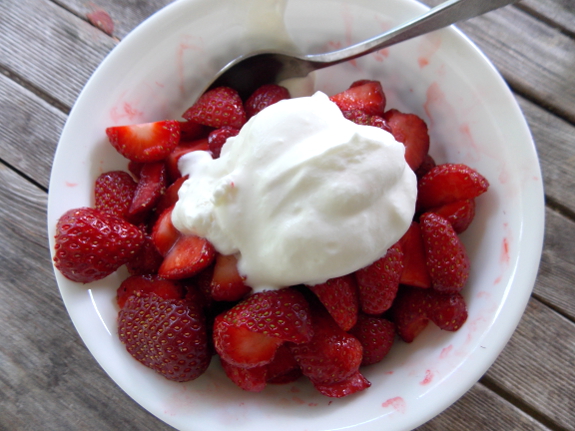
The harvest is upon
us! After a week of simply gorging on the fruits, the
strawberry harvest has grown beyond even my ability to consume
it. So I cleaned up the food
dehydrator and started the first gallon drying. I
figure we may need to do a load a day all week to keep up with the
bounty.
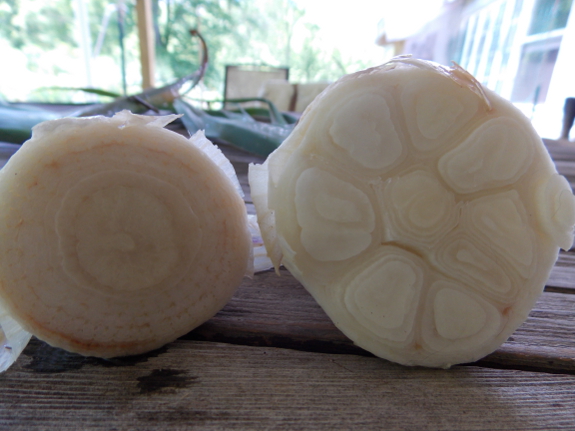
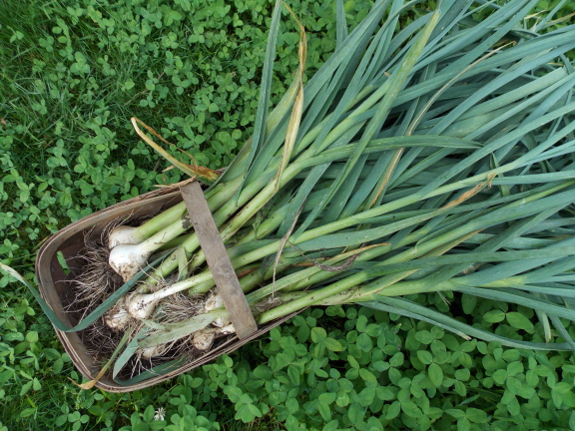
Meanwhile, the
Italian Softneck garlic (on the right) is ready
to dig. Music (on the left) and Silverwhite Silverskin are
slightly slower to mature and aren't quite ready to harvest yet.
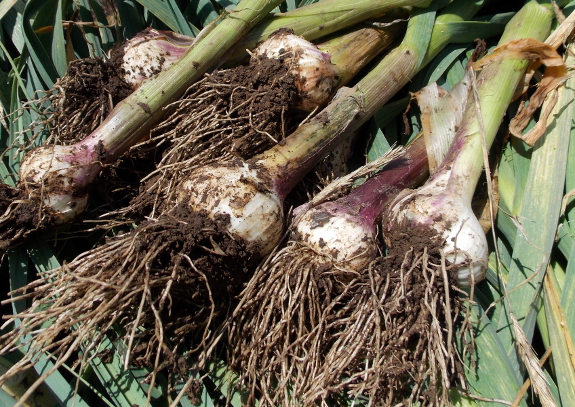
I'm a bit
disappointed in the size of our garlic heads this year.
Unlike last year's XXL heads, these are only large. I
suspect the difference is the sawdust our horse manure source
started using as bedding last summer instead of straw ---
lower-nitrogen compost means smaller vegetables. On the
other hand, we always have far too much garlic, so this year we
simply won't give any away.
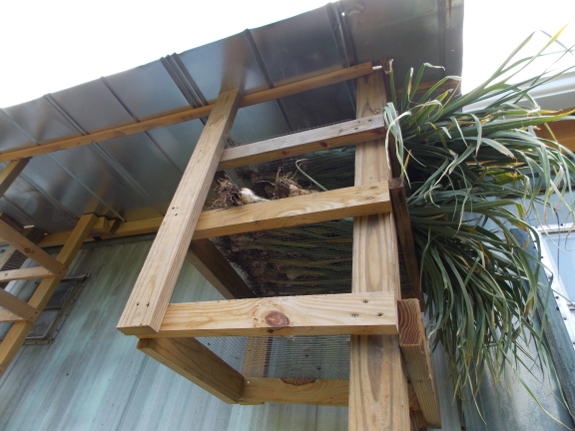
The curing
rack is back at work, drying up the Italian Softneck
garlic. These racks stayed busy nearly all of the warm
season last year, and I suspect they'll keep plugging away all
this summer too. Every year, things are just a little bit
easier!

67 bales of straw grown on
half an acre.
It went up from 4 to 5 dollars per bale plus 20
dollars for delivery.
Still a better deal than the
local feed store with the bonus that these bales are tighter.
Part of the reason we
had to wait
so long for our package of bees is that I wanted fancy bees
that had been raised without chemicals. Last year's
chemical-free bees have done very well for us, and, granted, most
packages do well the first year, but we have high hopes that
spending a bit more on natural bees will make them more likely to
survive in the long run without chemicals.
 This package of bees was even more pricey
than last
year's --- $169
--- but it's also nearly local and thus more likely to go the
distance in our neck of the woods. We purchased the bees
from AzureB in Maryland, but the
bees actually came from the mountains of Tennessee.
This package of bees was even more pricey
than last
year's --- $169
--- but it's also nearly local and thus more likely to go the
distance in our neck of the woods. We purchased the bees
from AzureB in Maryland, but the
bees actually came from the mountains of Tennessee.
Our new colony is a
cross of Carniolan and Russian, raised on small-cell, natural
comb. They're bred to be hygenic, meaning the bees spend a
lot of time grooming off mites. By skipping the miticides
and breeding the survivor bees, the company is able to raise bees
that are much more likely to survive without chemical
intervention.
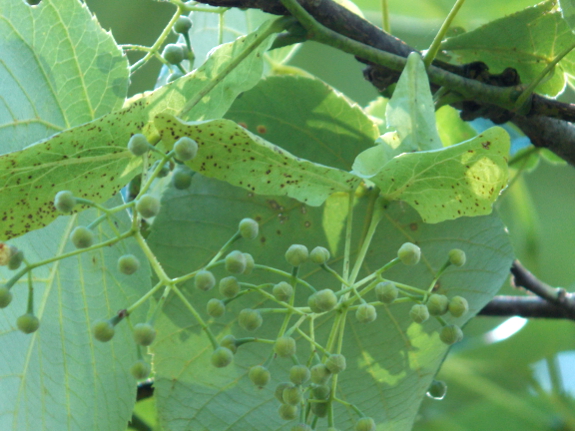
You can read last
year's lunchtime series if you're interested in the nuts and bolts
of our package installation into a Warre hive. We'll be feeding
our newest colony for a while, but I suspect will be able to slack
off in a week or two when the basswood buds unfurl into
nectar-laden flowers.

The Harbor Freight people
sent the missing
hardware pretty fast, but
our priorities shifted a bit and the new ATV
trailer project got moved
down the list.
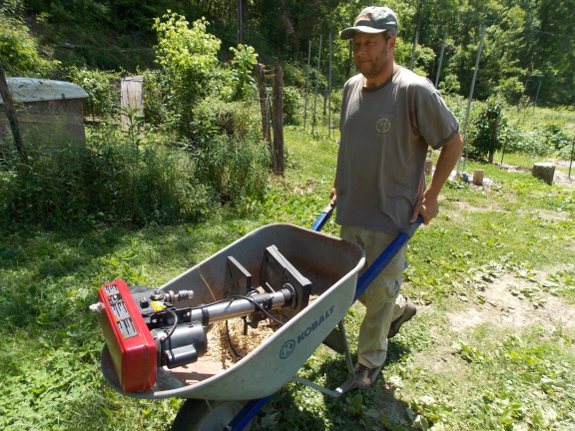
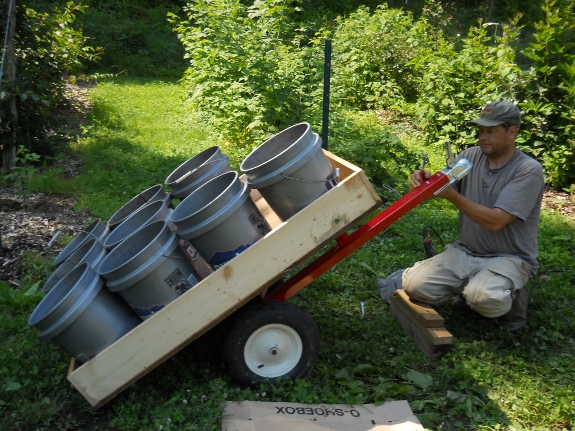
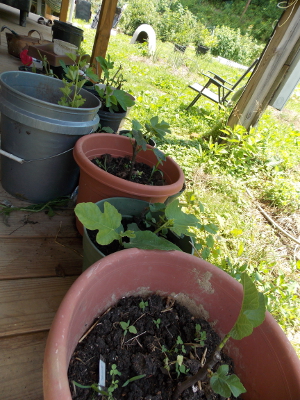
Seven full buckets of moist
and aged horse manure is really too much weight for this lawn
trailer, but the lazy side of me didn't want to do an extra trip.
Anna says these 21 buckets
should be enough for this week and with any luck we'll get the new
trailer finished and modified to carry either 9 or 12 at a time for
next week.
Usually, we have
three strawberry
varieties in
the garden --- early, midseason, and late. I hated the late
variety we tried last year (Allstar), though, so I ripped it out
and didn't replace it with a new late variety (Sparkle) until this
spring. Instead, I just increased my plantings of the early
and midseason varieties.
That sounded like a
good idea at the time, but then the peak harvest came on...all at
once. Monday,
I filled the dehydrator with two gallons of fruits and we ate
perhaps another half gallon. Tuesday was the same, but it became clear
the strawberries needed to get picked even faster. So I
asked Mark to get me low-sugar pectin at the grocery store,
invited one of our young
helpers over as
a picker, and planned for Wednesday to be strawberry day.
 Before I regale you with what we did with
Wednesday's five gallons of strawberries, I should give you the
bad news. This spring's cool, wet conditions were perfect
for fungal spread, and the many of the Honeoye plants came down
with strawberry leaf spot (Mycosphaerella
Before I regale you with what we did with
Wednesday's five gallons of strawberries, I should give you the
bad news. This spring's cool, wet conditions were perfect
for fungal spread, and the many of the Honeoye plants came down
with strawberry leaf spot (Mycosphaerella
fragariae). This fungus
causes a decline in vigor, which means the fruits aren't as sweet
and are more prone to rotting. My solution is to cut out the
rotten bits, add more honey than usual when making fruit leather,
and mix in the virtually-untouched and still-very-sweet Ozark
Beauties. (Think of this as like making cider --- a
combination of varieties leads to a fuller-bodied taste.)

Leaf spot aside,
there were still plenty of fruits to preserve for the
winter. I
filled the dehydrator once, put aside enough to fill it again before bed, then
moved on to a double recipe of strawberry freezer
jam.
We've already
preserved more strawberries this week than all of last year, and I
figure we'll need at least one more massive strawberry day to use
up the rest.
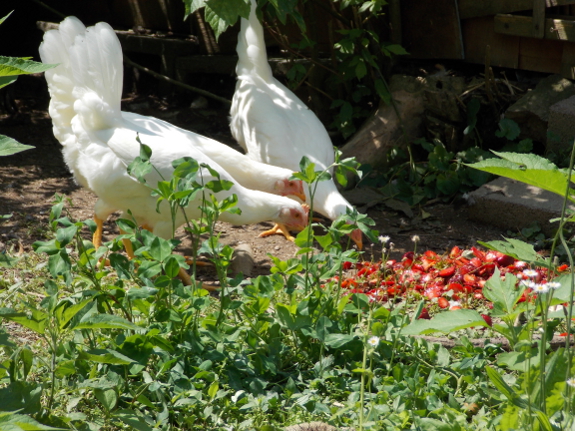
Even the chickens
were happy. With all of the rotten strawberries and tops, I
had to split a gallon of waste between three flocks to ensure it
would all get eaten. "No problem!" our Leghorn pullets
declared. "We can clean that up lickety-split!"

I've got the base of the new Haul Master ATV trailer together today.
The current plan is to make
it 3 inches wider on each side by attaching wood which will also be
used to fabricate the walls.
These modifications should
allow for 9 five gallon buckets to fit snugly inside and maybe by
extending the front and back I could squeeze the total to 12.
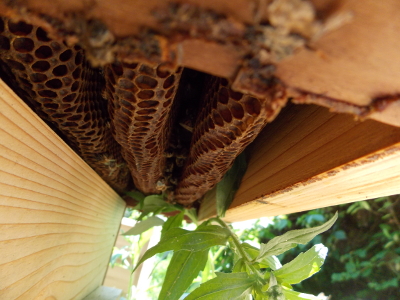
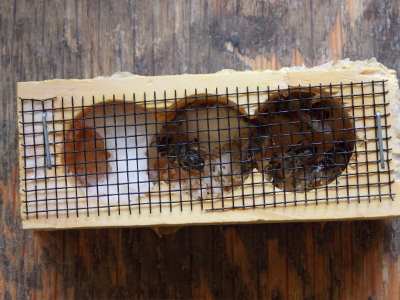 Our package
of bees was in
the mail longer than expected because they got stuck at the post
office over the weekend. The can of syrup still had food in
it when they arrived four days later, but the attendant bees had
all died. (Luckily, the queen was okay.) And there was
even a palm-sized piece of comb hanging from the top of the box!
Our package
of bees was in
the mail longer than expected because they got stuck at the post
office over the weekend. The can of syrup still had food in
it when they arrived four days later, but the attendant bees had
all died. (Luckily, the queen was okay.) And there was
even a palm-sized piece of comb hanging from the top of the box!
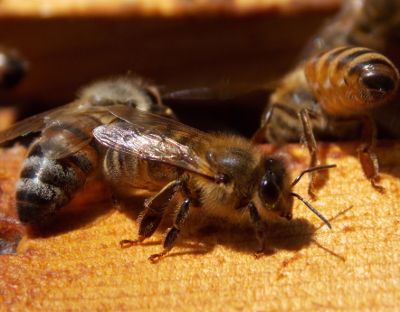
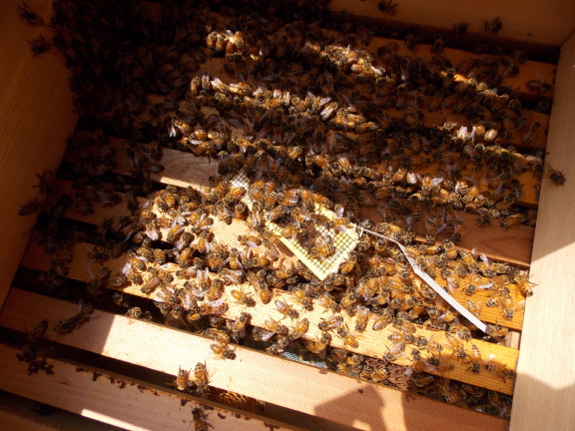
Two days after
installing the package, I opened the hive back up to take the
queen cage out. I must have done a better job than usual
poking a hole in the candy end, because our matriarch had freed
herself and was already lost in the mass of workers and drones.
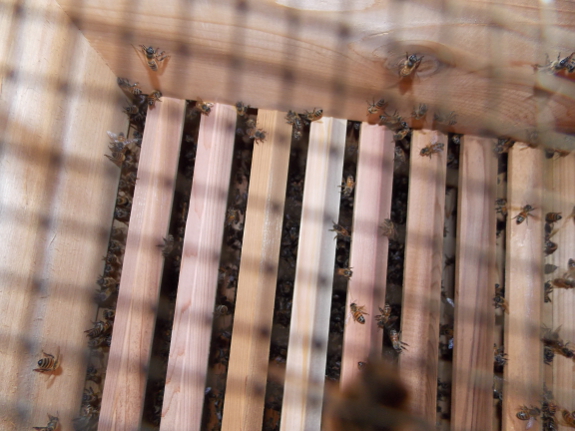
The photo above is a
shot up through the bottom of the hive. It's tough to tell
if our new package of bees has done much because I gave
them a box of partially-drawn comb to prime the pump, but they do look busy
in there. Now I'll just feed and nadir as necessary for the
rest of the summer --- a hive of bees is definitely a zone 3
endeavor.

Got the ATV
lawn trailer base
together today.
Seeing it with the wheels
helped me to decide that it should be able to handle 12 five gallon
buckets.
Being able to haul a dozen
buckets makes me want to increase the truck bed bucket limit from 21 to
24. I'm pretty sure I could stack a few buckets near the cab and
ratchet strap them down.
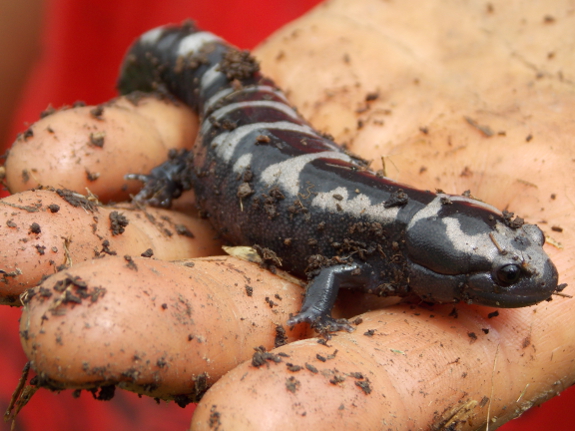
I found this marbled
salamander under the mulch while planting Thursday. In the
next few minutes, I also turned up a toad and a ringneck snake,
along with one of those wolf spiders 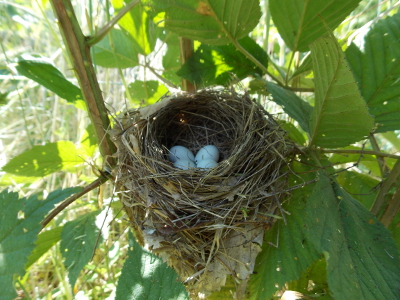 with her tiny babies all clinging to her
back.
with her tiny babies all clinging to her
back.
Earlier in the week,
a large snapping turtle crawled up through the gate and laid her
eggs in the driveway, and a minuscule blue-gray gnatcatcher has
been hanging out in the garden while we eat our dinners.
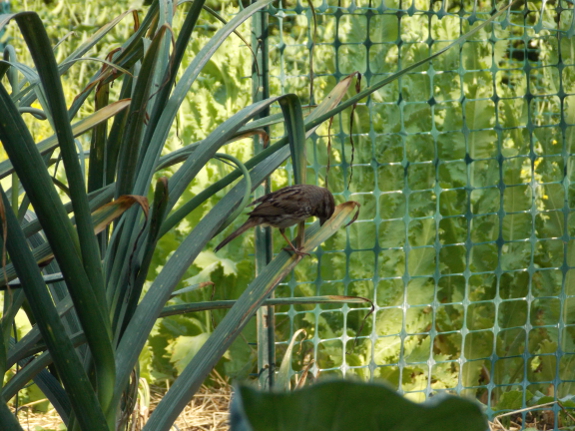
Meanwhile, Mark was careful enough to leave this song sparrow nest
behind while cutting rye and weeds in the old house area.
Quite a wild and
wonderful week in (south)west Virginia!
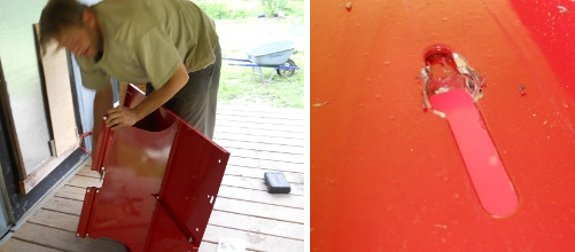
I hate the dumping feature on
lawn trailers.
Maybe it works okay for
people with "lawns"...but our driveway has enough bumps to trigger the
dump feature while moving, which is why I modified ours to never dump.
It was easy to drill a hole
where the dump lever slides in and out. A short bolt with a couple of
washers and a nut keeps it in no-dump mode for good.

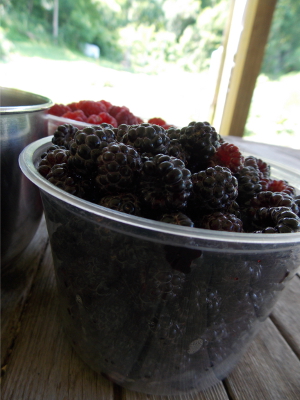
 After the astonishing, five-gallon
day, our
strawberry harvest began to decline. Now we're down to just
a gallon or two a day, but that's okay because I'm sated...and the
red raspberries are starting to ripen.
After the astonishing, five-gallon
day, our
strawberry harvest began to decline. Now we're down to just
a gallon or two a day, but that's okay because I'm sated...and the
red raspberries are starting to ripen.
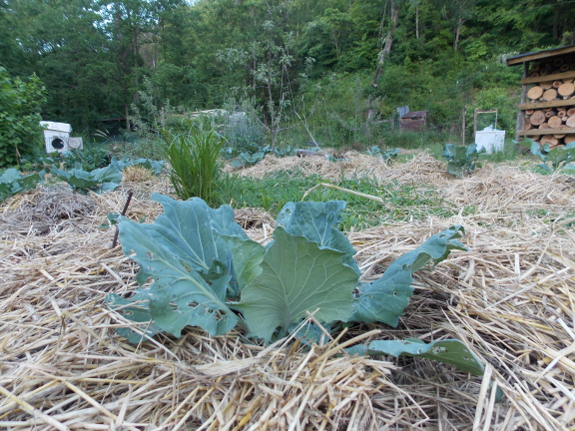
Similarly, the kale
buds have nearly all turned into flowers, removing raab from the
menu, but broccoli is taking their place. The broccoli heads
(like this
year's garlic)
are smaller than average, but the cold weather has also resulted
in very few cabbage worms, so I'm happy. Other vegetables
we're currently eating in profusion include snap peas and lettuce.
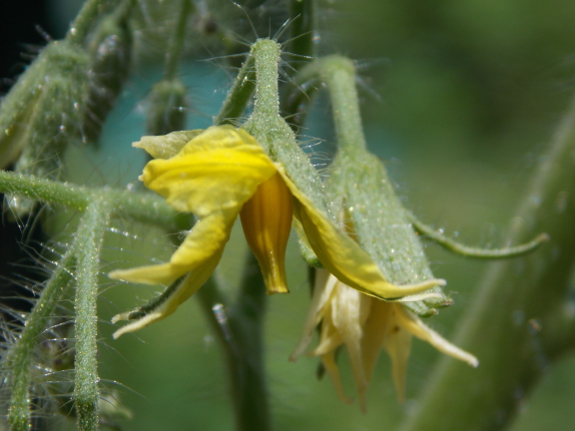
 The whole garden is starting to look like the
coming-attractions section of a homesteading movie. The
first tomato flowers don't mean much since those fruits take a
long time to ripen, but cucumber and bean flowers mean we could be
enjoying those two vegetables within a week or two. And
don't get me started on the peaches, apples, gooseberries, and
blueberries studding the trees and bushes or I'll go back out with
the camera and make this post far too long.
The whole garden is starting to look like the
coming-attractions section of a homesteading movie. The
first tomato flowers don't mean much since those fruits take a
long time to ripen, but cucumber and bean flowers mean we could be
enjoying those two vegetables within a week or two. And
don't get me started on the peaches, apples, gooseberries, and
blueberries studding the trees and bushes or I'll go back out with
the camera and make this post far too long.
What's ripe (or ripening) in your garden?
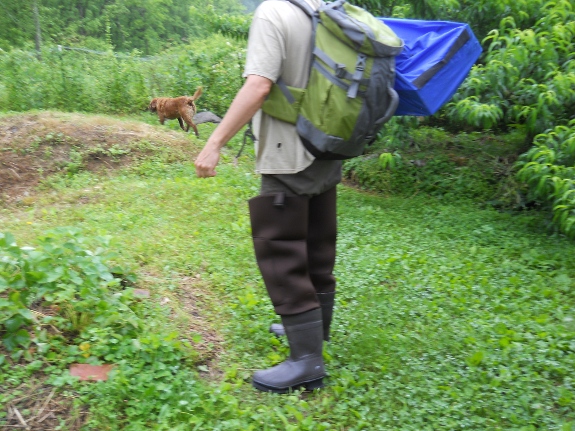
I sent back the leaky
chest waders and tested
out the new neoprene hip waders on Friday.
The boot part is more solid
than other waders I've tried... more like a Muck boot.
I decided the chest waders
were too heavy and if the water is higher than my hips I don't need to
be crossing the creek that day anyway.
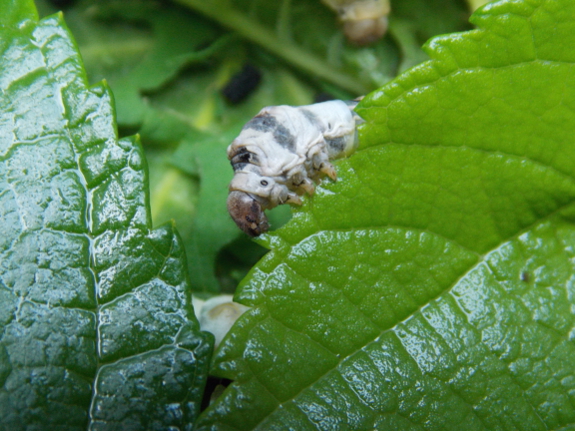
Since I
last posted here about our silkworms, they have grown...a lot. The more serious
side of our foray into insect farming is playing out over on our chicken blog,
where recent posts have included:
...and I've got a lot
more tidbits coming up on topics like how to kill two-hundred
silkworms in one fell swoop (oops) and which types of leaves the
caterpillars prefer.

However, I thought
even those of you uninterested in the nuts and bolts of silkworm
culture might like to hear how they eat mulberry leaves using the
typewriter method --- nibble in a semi-circle until you come to
the end of the line, then skip back to the beginning to start
again. I also tried out a few silkworms on our
broody hen's flock and the chicks deemed the caterpillars
"wicked!" (Or at least I'm assuming the speed with which
they gulped those silkworms down was an implied superlative.)
Finally, if you don't
care for bugs, even combined with cute chicks, here's a song
sparrow in the garden to brighten your Monday morning instead.
 As I delved into the next
round of permaculture
lectures, it
became clear that the professor had included some topics out of
order to fit his field-trip schedule. Since we don't have
that restriction, I recommend you skip around with me and watch
lectures 5, 11, and 12 as a set before moving on to lecture 6.
As I delved into the next
round of permaculture
lectures, it
became clear that the professor had included some topics out of
order to fit his field-trip schedule. Since we don't have
that restriction, I recommend you skip around with me and watch
lectures 5, 11, and 12 as a set before moving on to lecture 6.
Lecture 11 should
really have gone along with the slideshow
tour of the professor's urban homestead since this later
"lecture" is a field trip to the professor's house. You'll
end up seeing some of the same information over again, but lecture
11 adds in Hooker's wife's perspective, and you also learn more
specifics about variety selection (Black Mission is his favorite
fig) and design. (Keep in mind that varieties that work well
for him are more likely to suit your homestead if you live in an
urban environment near Raleigh, North Carolina, which is in zone
7b. Some of his favorites have failed miserably for us here
in rural zone 6.)
My favorite part of
the tour was the twenty minutes Hooker spent in the chicken run
(starting around an hour and four minutes into the video).
I'm still working on the best way to match chickens up with
compost, and I liked his method of keeping an open-topped compost
bin in the chicken run and just letting the chickens hop in and
eat what they want. Although pastures provide more food if
you have the space, Hooker's mulched yard also 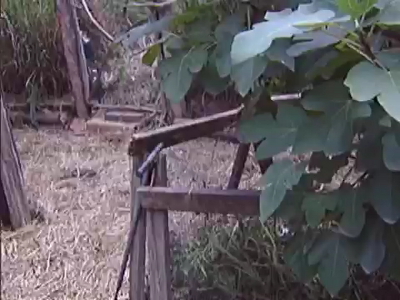 looked very effective for
the urban environment. He provides about 10 square feet per
bird, keeps the whole area mulched with straw, then rakes out the
mulch every two to four weeks to use on the garden. Finally,
he has planted peaches, figs, and kiwis in the run, protecting the
last with 3-foot lengths of black PVC pipe, which keeps chickens
from eating the tender vines and also protects their bases from
late freezes.
looked very effective for
the urban environment. He provides about 10 square feet per
bird, keeps the whole area mulched with straw, then rakes out the
mulch every two to four weeks to use on the garden. Finally,
he has planted peaches, figs, and kiwis in the run, protecting the
last with 3-foot lengths of black PVC pipe, which keeps chickens
from eating the tender vines and also protects their bases from
late freezes.
Stay tuned for my
next post, which will cover lectures 5 and 12, and also the
reading for this section of the course:

Took the ATV in for some repair work today.
The brakes stopped working
and I couldn't determine what's wrong.
Figured out it will drive off
a trailer this size with no problem, but ramps are needed to get it on.
We used a couple of 2x6's, but might think about getting some proper
ramps in the future so we can drive it up into the bed of the truck and
transport it without the trailer.
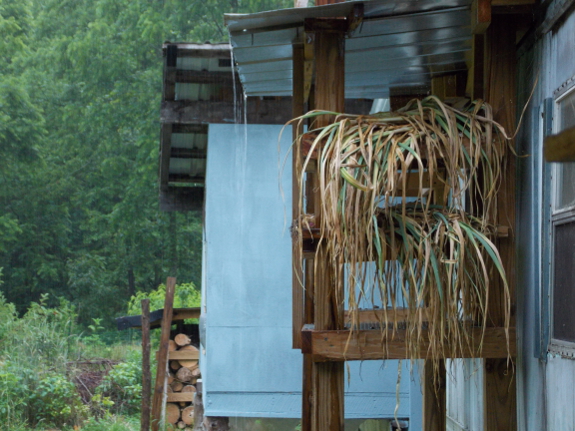
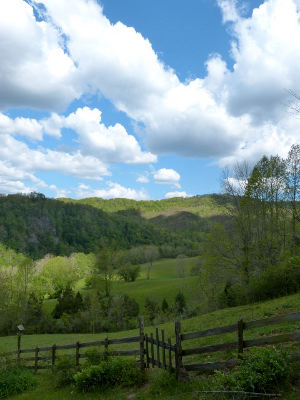
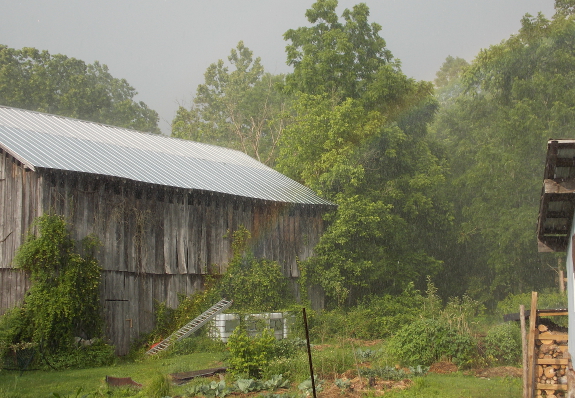
This light rain was a constant in Aug. '75, when I had morning-sickness and was trying to sort thru curing onions, at the Old House at the Store. A year or 2 earlier, still in that house, it rained all summer, and the bushes expanded, the trees drooped, and Geoff Greene called it "the Mendoty Blues"! Good weather for ducks....
Rain has been a near
constant on the farm so far this year, with no end in sight.
This is our seventh year here, and most have been moderate or "dry"
except for this year and the summer of 2009. (I put "dry" in
quotes because even our driest years are pretty wet, with our
average rainfall being about an inch per week for all twelve
months.)
So I'm taking evasive
action. A few of the peach branches are drooping down toward
the ground under the weight of the developing fruits. I
probably should have thinned harder, but as a stopgap measure, I'm
propping the low limbs up on fence posts to keep them out of the
three-foot fungal zone right above the ground.

And, of course, I'm pruning
and training our tomatoes hard. The toughest part this year has been
finding a time when the leaves are dry enough to touch!
Some of the
strawberries are rotting in the wet, but there are so many that
even losing 20% barely makes a dent in the harvest. I've
taken to picking the fruits slightly unripe, though, to keep decay
at bay.
What kind of
non-chemical fungal-prevention techniques do you use?
 The theme of Will
Hooker's lecture
5 is biomes and trees, and even though I have a poster of the
former on my bedroom wall and adore the latter, the lecture bored
me stiff. If you're going to skip one lecture, it should be
this one. Hooker's take-home message, though, is very valid
--- if you're not settled in one spot yet, be sure to learn about
the ecosystem you move into and tweak your permaculture plans
accordingly.
The theme of Will
Hooker's lecture
5 is biomes and trees, and even though I have a poster of the
former on my bedroom wall and adore the latter, the lecture bored
me stiff. If you're going to skip one lecture, it should be
this one. Hooker's take-home message, though, is very valid
--- if you're not settled in one spot yet, be sure to learn about
the ecosystem you move into and tweak your permaculture plans
accordingly.
On the other hand,
the associated readings were riveting, so that's what I'll write
about today. As you'll recall, both Toby Hemenway and Bill
Mollison included a chapter on forest gardening in their
introductory texts, and it's fascinating to compare and contrast
their recommendations.
Both gurus recommend
interplanting trees, shrubs, and herbs, but Mollison focuses in on
including lots of legumes
to make your forest self-fertilizing, and he also writes about using animals
in your orchards.
"Should you be so unfortunate as to inherit a monocultural
orchard," he wrote, "add 3-4 hens, a pig, and 4-6 large leguminous
trees per 1000 square meters (1/4 acre), with many smaller
legumes." Mollison went on to recommend introducing pigs to
your orchard when the trees are three-to-seven years old, then
sheep and cattle at seven-to-twenty years.
 Although both
authors wrote about cover crops and
kill
mulches, I preferred Hemenway's suggestions to kill mulch
zones 1 and 2, then use low-maintenance cover crops in zone 3.
(Specifically, Hemenway prefers a mixture of clover, annual rye,
yarrow, dill, fennel, and daikon radishes that only needs to be
mown once or twice a year.) Mollison adds that your orchard
for personal use should be considered zone 2, while any commercial
operation extends out into zone 3.
Although both
authors wrote about cover crops and
kill
mulches, I preferred Hemenway's suggestions to kill mulch
zones 1 and 2, then use low-maintenance cover crops in zone 3.
(Specifically, Hemenway prefers a mixture of clover, annual rye,
yarrow, dill, fennel, and daikon radishes that only needs to be
mown once or twice a year.) Mollison adds that your orchard
for personal use should be considered zone 2, while any commercial
operation extends out into zone 3.
My main
disappointment with both explanations of forest gardens is their
recommendation to include prolific understory herbs. In
fact, Mollison writes that broadleaf plants are much better around
the feet of young trees than grass is, but my own experience has
shown that anything interfering with the
root zone of young trees slows growth markedly when compared to a solid
mulch. Of course, my original soil is terrible, so those of
you with deep, well-drained loam might have better luck applying
these guru's wisdom without tweaking.

I decided to use 3/4 inch
treated plywood to extend the base of the new ATV
lawn trailer.
Thank you Roland for the
suggestion.
8X4 3/4 inch plywood costs 41
dollars and I figure this project will use about 40% of the sheet. The
guy at our local lumber store made the cuts for free to make
transporting it easier, but we'll have to wait until we get the ATV back to haul it the rest of the
way.

One of the first
things I learned to root was grapes, and thus we
set out quite a number of vines near the beginning of our time on
the farm. But we didn't have the cash to buy fancy varieties
then, so we got the cuttings from a friend who was raising grapes
conventionally (with lots of chemicals) to make wine. Since
I wasn't willing to dose our new vines, they came down with every
malady under the sun, and last year we completely ripped them
out.
 Now we're selecting for disease resistance,
and also for seedlessness since Mark doesn't like grapes with
seeds. (To be honest, I prefer seedless grapes too, even
though I'm a pro at popping a tough-skin, seeded grape in my
mouth, masticating, then spitting out the seeds.) So far,
our young Mars Seedless grapes seem to be doing well in the first
department, but we won't know about fruiting for a year or two
more.
Now we're selecting for disease resistance,
and also for seedlessness since Mark doesn't like grapes with
seeds. (To be honest, I prefer seedless grapes too, even
though I'm a pro at popping a tough-skin, seeded grape in my
mouth, masticating, then spitting out the seeds.) So far,
our young Mars Seedless grapes seem to be doing well in the first
department, but we won't know about fruiting for a year or two
more.
This spring, Brian
sent me a bunch of cuttings from his plants, and the grapes are
rooting wonderfully. So we'll be adding Marquis, Reliance,
and Thomcord to our experimental planting this year too.
Check back in two to
four years for results on my disease-resistant, seedless grape
experiment. In the meantime, perhaps our readers would like
to chime in about which seedless grapes have done well in their
gardens without sprays?
 Even though I'm
telling you to watch it out of order, lecture 12 seems to go along
with this section on trees
and forest gardening. The video consists of a field
trip to AJ Bullard's experimental orchard in Calypso, North
Carolina (zone 8). This seventy-plus-year-old man has been
experimenting with fruit tree varieties on his farm since 1967,
and distance learners like us really miss out by not getting to
taste all of the fruits being offered. We can, however, take
advantage of his wisdom to learn about varieties we might want to
try in our own gardens.
Even though I'm
telling you to watch it out of order, lecture 12 seems to go along
with this section on trees
and forest gardening. The video consists of a field
trip to AJ Bullard's experimental orchard in Calypso, North
Carolina (zone 8). This seventy-plus-year-old man has been
experimenting with fruit tree varieties on his farm since 1967,
and distance learners like us really miss out by not getting to
taste all of the fruits being offered. We can, however, take
advantage of his wisdom to learn about varieties we might want to
try in our own gardens.
Bullard tested 35
varieties of pears for dessert quality (flavor) and resistance to
fire-blight, and proclaimed Shin-li his favorite (although one of
his trees of this variety had moderate fire-blight damage).
An even more extensive fig planting resulted in the recommendation
of Celeste, Kadota, and King, while his favorite Asian persimmon
is Fuyu.
Mulberry stars
(which Bullard explained are his third-favorite type of fruit)
consist of Silk Hope and Pakistan alba. In fact, I
planted the former in my garden this past winter and am
still looking forward to tasting the fruits, although I'm
disappointed to learn in this video that the variety was named
after a town and actually produces leaves unpalatable to silkworms.
And, although Bullard's description of Pakistan alba sounds
fascinating, I recommend that readers outside his location take
the internet's advice and only plant this early-wakening mulberry
in coastal areas of zone 8, California, and Oregon, where late
frosts are seldom a problem.
Next up (in a week...or
more), Lecture 6 will return to basics with an emphasis on
design. The assignments to prepare for the lecture include:
- End of
Suburbia
- Gaia's Garden --- chapter 3
- Introduction to Permaculture --- the part of chapter 2 on design (although I'll probably just read the whole chapter), the part of chapter 3 on patterns (ditto), and pages 95 to 111 in chapter 5 (not sure what pages this is in my older edition)
I hope you'll join me as
we continue to work through this free permaculture video series.
Yesterday I mentioned how I was going to wait until we get the ATV back to haul in the plywood piece, but the need for horse manure is strong this time of year...strong enough to inspire a do it yourself rope harness.
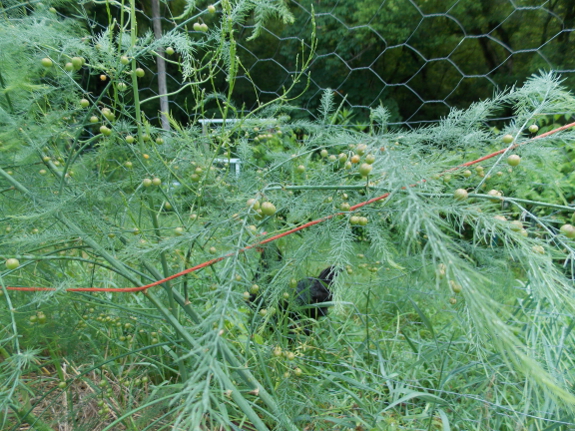
Last fall, I wrote
that the offspring
of my all-male asparagus plants looked like they might be all-male
as well.
Less than half of the young plants had bloomed their first fall,
but every bloomer at the time was male. Unfortunately, it
turns out that only the males bloomed their first year, because
now asparagus alley is sporting lots of tiny green balls on the
feathery fronds. In fact, the planting turned out to be 60%
female! I could pull out the female plants now that they've
identified themselves and add some new seeds, but the truth is
that getting to eat asparagus next year from this planting trumps
higher yields in the long run for me, so I'll leave it
as-is. But it's a handy data-point --- saving seeds from
all-male asparagus doesn't necessarily give you any gender
advantage in the offspring.
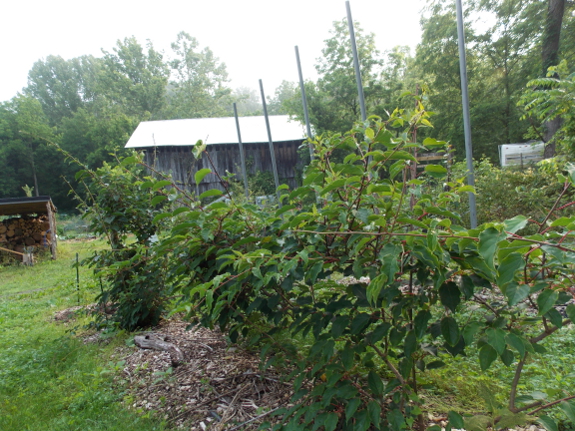
Another problematic
perennial that's come to my attention this week is our hardy
kiwis. We
planted two females and a male in July 2008, and have been waiting
for fruits ever since. For years, I thought the problem was
late spring frosts that inevitably nipped back the kiwis' young
growth, but this year's cold spells missed all but the lowest
leaves...and still no blooms. Hardy kiwis are supposed to
fruit by year 5 at the latest, and this is year 6. Any
ideas, or will I be forced to pull out my elegant vines, to be
replaced with something more productive? I've got newly
rooted figs and gooseberries looking for a spot in the garden, so
the area won't go to waste, but I hate to give up on my dream of
homegrown kiwis.
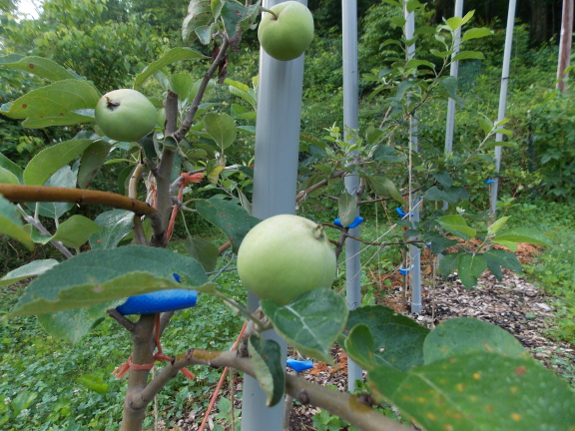
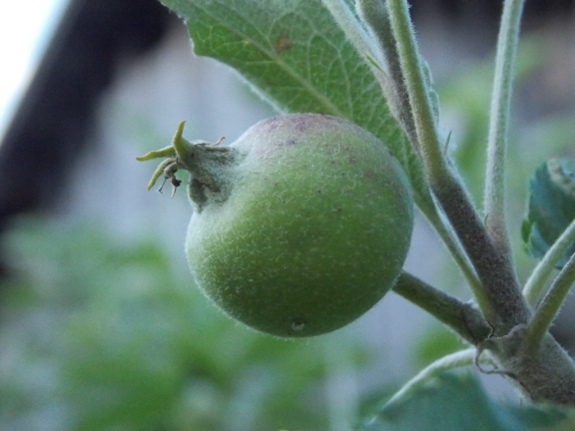
Lest you think our
perennials are all depressing, I should note that several of our
apple trees seem to be keeping their
fruits.
In fact, apples on the Early Transparent (a variety that usually
ripens in late June in our neck of the woods) are starting to hang
pendant and to look like real apples! I can hardly wait to
taste apples from our own trees, and I'm thrilled that one of the
first will be a taste test of the same variety in a high
density method
versus in a forest garden environment.

The high demands of the
summer garden slowed down for just a minute today allowing me to do
some work on the Star
Plate chicken coop.
We decided to leave a vent
hole towards the top of three of the walls.
I attached hardware cloth
with drywall screws and washers to keep out predators.
Even though I didn't
mention it on my
post about fungal-disease prevention, another big facet of my campaign is summer
pruning.
This is something I do anyway to allow light to hit fruits and to
prevent trees from putting too much energy into watersprouts, but
the process has a side effect of letting fruits dry off faster so
they're less prone to blights.
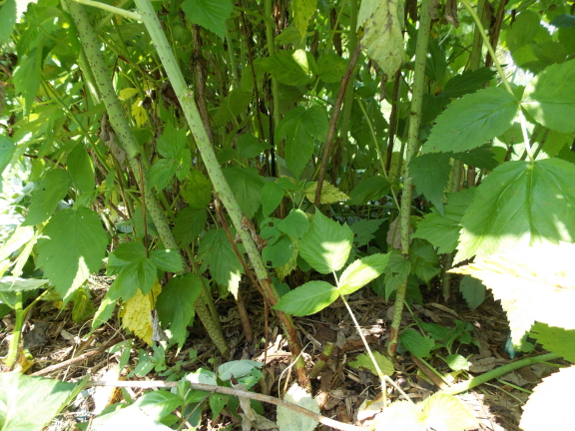
With that in mind, I
started wondering if thinning the fall-fruiting canes of my
everbearing raspberries was in order. I thin out the
overwintering canes so the spring-bearing shoots are spaced apart,
but last year I felt I should have repeated the endeavor in early
summer to get larger fall berries. The raspberry patches had
turned into quite a thicket this year (even more so than usual),
so my urge to thin was also prompted by wanting to be able to see
the currently ripening fruits during this first harvest season of
the year.
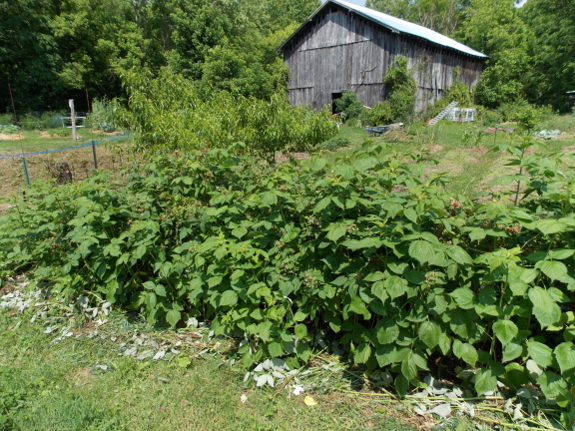
This is an experiment
(so replicate it at your own risk) since I've never read about
anyone thinning their raspberries in the summer. But it felt
right --- the photos above both show the patch after thinning out over half
of the fall shoots, and you can tell the canes are still quite
dense. As an added benefit, I was able to layer the cut-off
stems (and any weeds I found in the patch) along the sides of the
row to top off the mulch.
Of course, I'm also
thinning the trees I usually visit at this time of year (primarily
the peaches, although heavy fruit set has resulted in fewer
watersprouts this year than usual). When I stopped by our
largest fig, I wasn't sure whether it needed any pruning, but I
did decide to rip up any small shoots around the trunk. It
turns out three had already rooted! If I didn't kill them by
leaving them in a bucket of water during a blazing afternoon,
these baby figs will go into pots with my other
rooting cuttings
and then into the ground this fall.
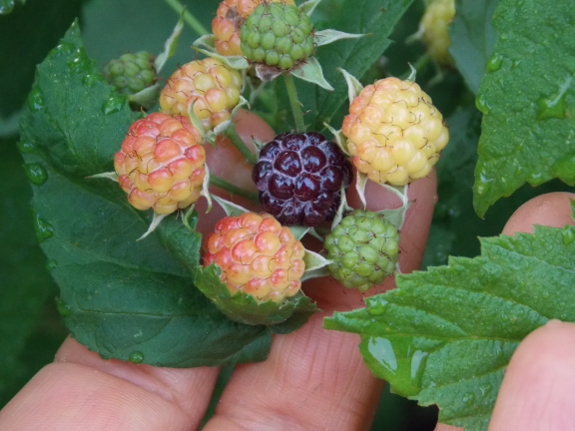
The last item on my
summer-pruning agenda is the black
raspberries and blackberries, who get their tops pinched instead of being
thinned. Looks like we'll be adding another variety to our
daily berry harvest soon!
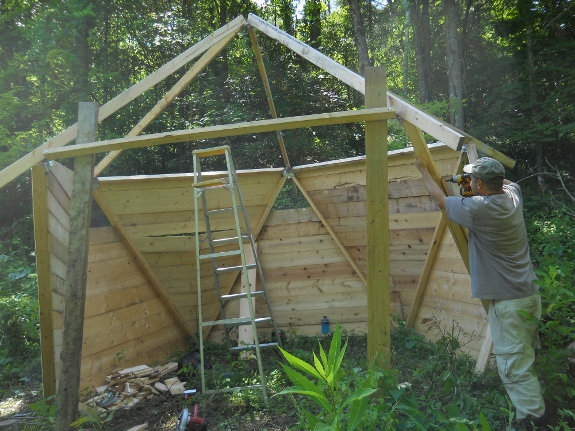
Got 2 more walls on the StarPlate
chicken coop done today.
Next up is the roof, a nice
door, and 2 half wall sections next to the door.
 Even though the technical name for
strawberries that crop all at once is "June-bearing," our
June-bearers are usually May-bearers. This year's cool
spring pushed the fruits forward in time, but even so, we're
nearing the end of our harvest
season.
Monday, I put the last load in the dehydrator (bringing us to over
two gallons of strawberry leather preserved for winter), and ever
since we've been gorging on a mere 3 quarts a day.
Even though the technical name for
strawberries that crop all at once is "June-bearing," our
June-bearers are usually May-bearers. This year's cool
spring pushed the fruits forward in time, but even so, we're
nearing the end of our harvest
season.
Monday, I put the last load in the dehydrator (bringing us to over
two gallons of strawberry leather preserved for winter), and ever
since we've been gorging on a mere 3 quarts a day.
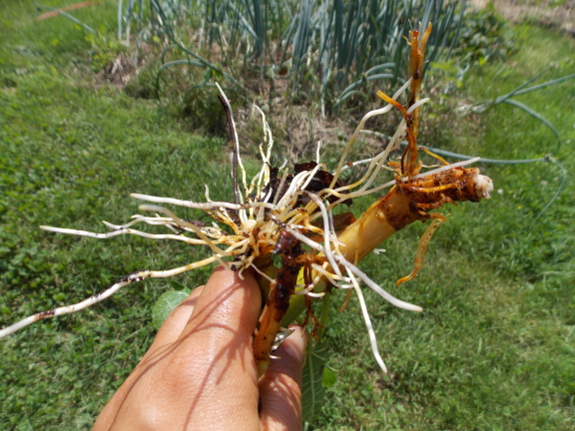
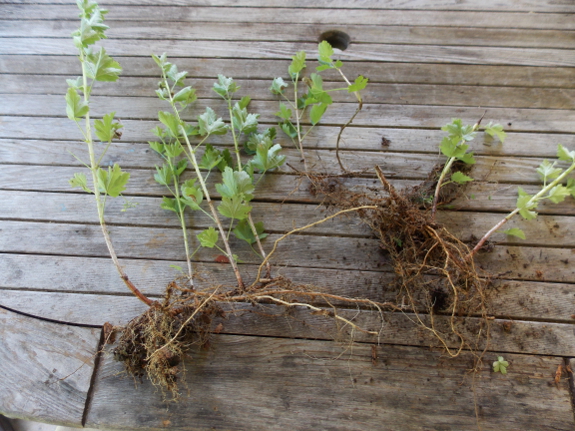
 Next year, matters will be different because
we'll once again have a late-bearing
variety to join our early and midseason varieties. I ordered 25
Sparkle strawberries from Nourse Farms and have been highly
impressed by the plants' vigor. The roots were about four
times as large as those I got from Burgess last year, and the
plants are already trying to bloom. (I snip the flowers off
so we'll get good crops next year.)
Next year, matters will be different because
we'll once again have a late-bearing
variety to join our early and midseason varieties. I ordered 25
Sparkle strawberries from Nourse Farms and have been highly
impressed by the plants' vigor. The roots were about four
times as large as those I got from Burgess last year, and the
plants are already trying to bloom. (I snip the flowers off
so we'll get good crops next year.)
In the meantime,
we're eating red raspberries, the first black raspberries, and are
hoping the blueberries and gooseberries start to bear before the
last strawberries disappear. It's so sweet to have eaten no
storebought fruit for weeks.
The ATV
bucket hauler is near
completion.
Adding the plywood
extension will increase
the capacity from 6 buckets to 12.
I guess I should paint the
wood red to match the tongue, but will most likely go with whatever
exterior paint I can find in the barn.
 Creating
a Life Together,
by Diana Leafe Christian, is a step-by-step guide for building
intentional communities. Rather than summing up the key
points the way I usually do in my book reviews, though, I want to
take this opportunity to go off on a tangent and explore one of
the exercises the book recommends as part of a community visioning
process. The idea is to write about times when you've felt
like part of a community or a shared group activity, then to use
these recollections to consider what makes community-building work
for you specifically.
Creating
a Life Together,
by Diana Leafe Christian, is a step-by-step guide for building
intentional communities. Rather than summing up the key
points the way I usually do in my book reviews, though, I want to
take this opportunity to go off on a tangent and explore one of
the exercises the book recommends as part of a community visioning
process. The idea is to write about times when you've felt
like part of a community or a shared group activity, then to use
these recollections to consider what makes community-building work
for you specifically.
Beyond my family, the
first community I met was the science-fiction club at college,
which turned out to be a sort of non-drinking,
non-gender-specific, geeky fraternity. In retrospect, it's
easy to see why the community worked so well --- we had shared
interests, we ate nearly every lunch and dinner together (four
meals a week is the book's recommendation as the minimum shared
meals in a community), most of us went to folk-dance classes
together (shared movement seems to bond people), and we had a high
tolerance for unconventional or even problematic members (since
that was most of us at one time or another). On the other
hand, our club had a seamy underbelly in that people who attended
fewer events were considered para-club members, and they were
never really included. Later, I was to discover that this
aspect holds true across many communities and makes it tough for
introverts to find a good balance of personal space and community
involvement.
During my year
abroad, I spent
four months in Monteverde, Costa Rica, where a
band of expatriat American Quakers had developed an intentional
community in the midst of Hispanic culture. Although my
father is a Quaker, he didn't convert until I was a teenager  and he didn't drag the
rest of us along with him, so I was definitely in the "para"
category in Monteverde. (My short-term stay also put me in
that category, since the community sees lots of lookie loos
passing through and can't commit limited energy to each one of
them.) So even though I was inspired by the community
potlucks, their shared library accessible by walking paths, and
the way they seemed to involve their Costa Rican neighbors, I
never felt like part of the Monteverde community.
and he didn't drag the
rest of us along with him, so I was definitely in the "para"
category in Monteverde. (My short-term stay also put me in
that category, since the community sees lots of lookie loos
passing through and can't commit limited energy to each one of
them.) So even though I was inspired by the community
potlucks, their shared library accessible by walking paths, and
the way they seemed to involve their Costa Rican neighbors, I
never felt like part of the Monteverde community.
Fast forward ahead a
decade, and Mark and I had settled a mile down the road from
another intentional
community.
After a few years of sporadically attending their events (and
perhaps because most of them knew my parents during the 70s and
80s), there were even noises about asking us to join. I like
my crazy experiments (no way urine
fertilizer and
trailersteading were going to fly
there), and I'm just too antisocial to live that close to anyone
except Mark, so we graciously declined. Again, we've ended
up in a para-community situation, although this time I feel a
little closer to the core because we're definitely in the area for
the long haul and we share many of the community's ideals.
 But we still miss having
like-minded friends our own age around. (As you probably
gathered, the neighboring intentional-community members are
primarily from our parents' generation.) So Mark and I have
considered crazy community-building concepts of our own from time
to time. We'd tossed around the idea of buying up a large
tract of land, planning it as a community, then selling tracts to
interested and interesting folks. Or perhaps finding a
couple-sized homestead nearby and partnering with someone who
might trade labor for the cost of the land. Or finding a
partner to do the day-to-day work but being involved in the
bigger-picture planning and implementation of an
educational/internship program. The truth is, though, that
even if we found just the right people, neither Mark nor I has the
socializing budget to put in the hours required to build a real
community from scratch.
But we still miss having
like-minded friends our own age around. (As you probably
gathered, the neighboring intentional-community members are
primarily from our parents' generation.) So Mark and I have
considered crazy community-building concepts of our own from time
to time. We'd tossed around the idea of buying up a large
tract of land, planning it as a community, then selling tracts to
interested and interesting folks. Or perhaps finding a
couple-sized homestead nearby and partnering with someone who
might trade labor for the cost of the land. Or finding a
partner to do the day-to-day work but being involved in the
bigger-picture planning and implementation of an
educational/internship program. The truth is, though, that
even if we found just the right people, neither Mark nor I has the
socializing budget to put in the hours required to build a real
community from scratch.
Which brings me to my
main complaint about Creating a Life
Together
(and the intentional-community movement it portrays so
well). Even though most of the communities in the book are
located in rural settings, they're essentially country homes for
city people --- the inhabitants generally come from urban areas,
they live clustered together on their new land, and they are
presumably highly-social people. There's a short segment
titled "Creating privacy in the midst of community," but the page
basically consists of telling you to plan your house so you can
feel alone when you're indoors. Isn't the whole point of
homesteading to be able to do whatever you want outdoors?
So here's my
thought-question for our readers. Have you ever met a
community that adequately involves introverts without draining
their social energy past their limits? Or is community
really just for extroverts, no matter where it's located?
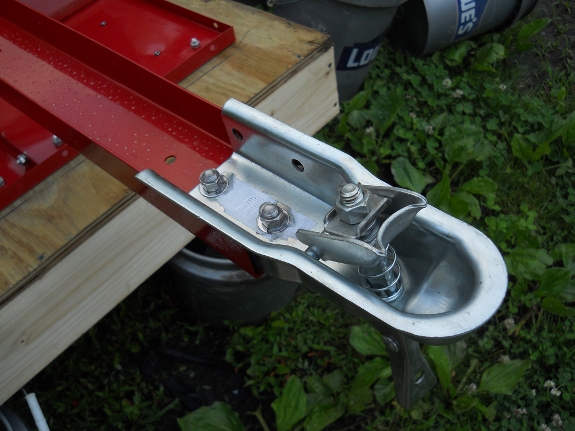
Adding a proper
hitch coupler to the ATV
bucket hauler turned out
to be easy.
One of the top holes lines up
with the Haul Master tongue. The other hole is just
barely off. Securing the first hole with a bolt and nut makes for the
perfect drill guide for the second hole.
I topped it off with a somewhat
toxic adhesive to keep
the nuts from loosening. Since Toluene was banned in Europe in 2004 for
sale to consumers I make sure to not get any on my skin.
Our new
package hasn't
done all that much, but they seem to have settled into their box
of partially-drawn comb, and perhaps have drawn a bit more.
By listening at the side of each box, I gather that the top box is
completely empty still, so the colony has plenty of room to spread
out. These guys are going through a quart of heavy
sugar water
every two to three days, but seem to be finding lots of wild food
as well. Since the workers are bringing home plenty of
pollen, I'm assuming the queen is laying and the hive will be
expanding soon.
Since I added
two empty boxes to the bottom of our oldest warre hive, taking a photo up
through the bottom only tells me so much. But I'm guessing
by the mass of bees I can see between the bottom box's bars (and
by listening at the side of each box) that the bees have drawn
comb in the next box up and are hard at work there. They're
also buzzing busily in the third box from the bottom, but the
fourth box up has gone much quieter, suggesting it's full of
capped honey.
Neither hive needs
another box yet, but I'm going to keep a close eye on them since
the basswood
buds look
nearly ready to open. This has been a stellar year for
nectar, and I suspect that with the help of the basswood, I'll be
getting an appreciable harvest from the older warre hive despite
their swarm.
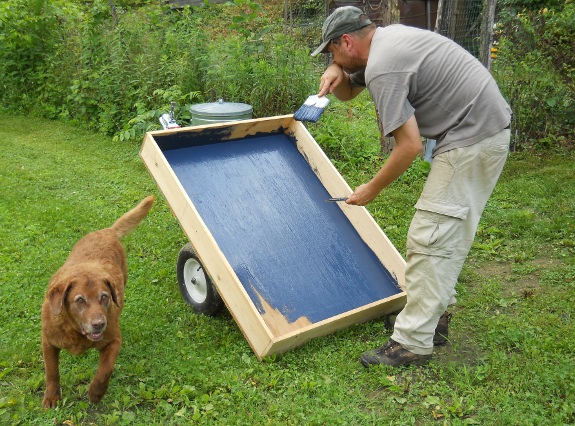
Found a can of good blue
exterior paint that we got from the Lowes reject bin years ago.
There should be enough to do
the underside and maybe a second coat.
I guess I'll be checking out
the reject bin the next time I'm there...It's very convenient to have a
can standing by for future projects.
Two
weeks ago, I harvested our Italian Softneck garlic, and this week the Music
and Silverwhite Silverskin were finally ready to join their
precocious siblings on the curing racks. It's shaping up to
be a mediocre year for alliums, probably because of a cold winter,
lack of sun during the critical bulking up period this spring, and
perhaps mineral
burn. 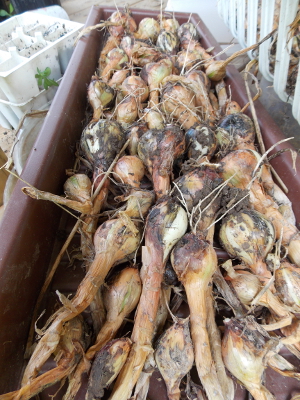 Although I'm a bit disappointed that my
garlic heads are only 75% to 100% as large as storebought rather
than 100% to 200% as large, we plant extra to hedge our bets, so
we'll still enjoy a garlicky season.
Although I'm a bit disappointed that my
garlic heads are only 75% to 100% as large as storebought rather
than 100% to 200% as large, we plant extra to hedge our bets, so
we'll still enjoy a garlicky season.
Half of the potato
onions were also ready this week (with the ones closer to the
shady hill needing a bit more time). Again, the bulbs were
smaller than last
year, but
larger than the year before when I gave
up on one variety and changed
over to this one.
With the curing racks completely full of garlic, I had to cobble
together makeshift arrangements for the onions. Most went
into old freezer baskets propped off the ground, but I'm hoping
even the ones on this gutter downspout (not under the gutter) have
enough airflow to dry well.
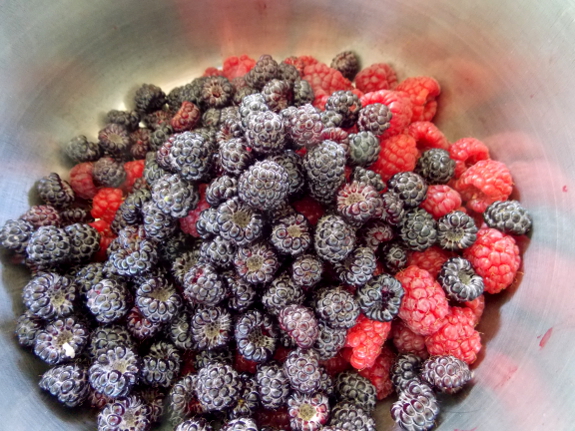
Completely unrelated,
we're making the transition to raspberries, and loving every
minute of it. At the peak of strawberry season, I can't
imagine wanting any other berries, but now that the quality is
declining in the strawberry beds, the raspberries become my
favorites. A delicious quart full!
The last full wall to be
filled in on the StarPlate
chicken coop didn't have
much space for board attachment, which is why I decided to install
these boards on the inside.

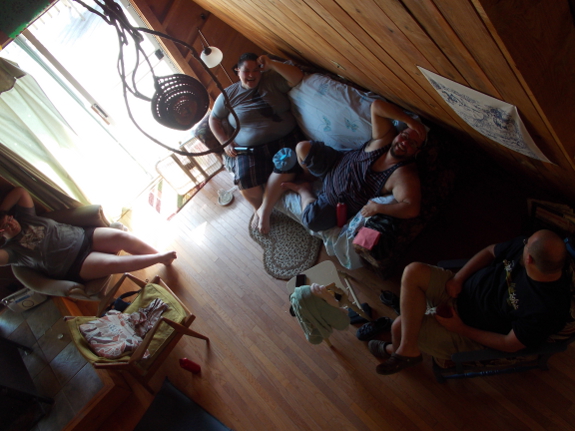
My brother
and sister-in-law are visiting from California, a twice-per-decade event, so
I'm mostly playing hooky this week. I apologize in advance
if my posts are on the light side, or if I bore you with family
photos. (For the record, the images above are not representations of my
family. I managed to take 17 pictures of silkworms and 16
pictures of plants on my first visiting day...but none of my
long-lost family members. I'll try to do better. But
silkworms are just so darn cute!)
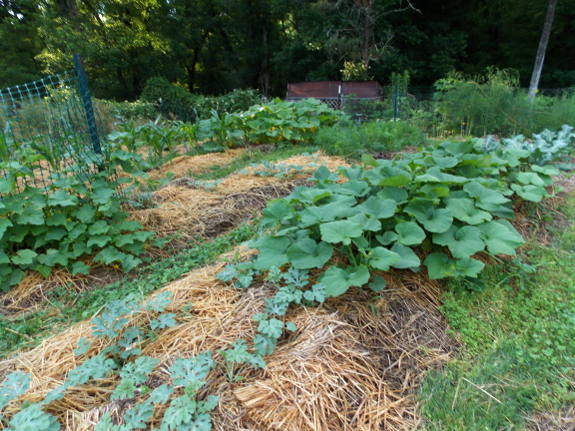
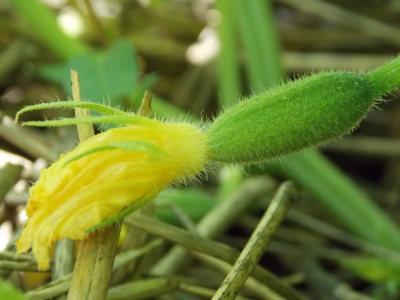
Anyway, on to the
meat of this post, which is --- cucurbits! It's officially
summer when the members of Cucurbitaceae begin to take over the
world.
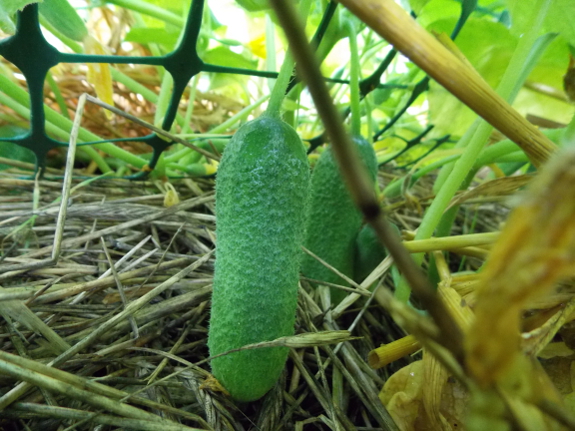
 We ate our first cucumber on Tuesday, and
many more are just about ready to be consumed. The summer
squash are also starting to bloom, albeit only male flowers at
first.
We ate our first cucumber on Tuesday, and
many more are just about ready to be consumed. The summer
squash are also starting to bloom, albeit only male flowers at
first.
Mark asked me a
couple of weeks ago if we'd planted fewer cucumbers than last
year, when I sent him to town with bagsful to dispose of and even
the librarians got sick of the bounty. I'm ashamed to say, I
kept my planting at the same size. If our new varieties and
methods overflow our coffers with cucumbers again this year, I'll
cut back, but with the wetness of the season, I'm kinda glad I'm
hedging my bets by overplanting.
I decided to fill in the
StarPlate half walls with some scrap tin.
The bottom piece sits in a 3
inch trench to discourage digging.
This has been a great
year for free fruiting perennials. Not only do our figs and grapes seem to be rooting very
well, I found another eight gooseberry plants that have popped
up around the base of one of our older gooseberries. With such a
profusion of riches on hand, the question becomes --- how many of
these newly-rooted fruit plants should I put in the ground this
fall, and how many should I give away? Plus, I also want to
fit in another hardy kiwi since I've decided to give ours a few
more years' grace and also to try
the specific variety and source Throwback at Trapper Creek
suggested.
There are two main
factors involved in my decisions --- filling in physical gaps in
the core homestead and filling in temporal gaps in our fruiting
schedule. Starting with the latter, the table below sums up
fruit plants we already have on the farm (or are definitely
installing this fall):
| Variety | Harvest date | Dependability | Work |
Fruiting now |
| Honeyberry, Blue Sea | ?early May | High? | High | |
| Honeyberry, Blue Velvet | ?early May | High? | High | |
| Strawberries | mid-May to mid-June | High | High | x |
| Raspberry, Caroline Red | June through Fall | High | High | x |
| Black Raspberry, Jewel | early June | Medium-high | High | |
| Raspberry, Bristol Black | mid to late June | Medium-high | High | x |
| Apple, Early
Transparent |
late June |
Medium? |
Low |
x |
| Red Currant | late June | High? | High | |
| Gooseberry, Poorman | late June | High | High | x |
| Gooseberry, Invicta | late June | High | High | x |
| Blueberry |
late June to ?Aug. |
High |
High |
x |
| Blackberry | July | Medium | High | x |
| Plum, Imperial Epineuse | ?July | Low? | Low | |
| Apple, Pristine | July to Aug. | Medium? | Low | |
| Apple, Summer Rambo | July to Aug. | Medium? | Low | |
| Grape, Mars Seedless | ? late July to early Aug. | Medium? | Medium | |
| Grape, Thomcord | August | Medium? | Medium | |
| Peach, White | mid August | Low | Low | x |
| Peach, Cresthaven | md Aug. | Low | Low | |
| Plum, Seneca | mid Aug. | Low? | Low | |
| Grape, Reliance | ? mid Aug. | Medium? | Medium | |
| Fig, Celeste | ? Aug to frost | High? | Low | |
| Apple, Zestar! | Sept. | Medium? | Low | |
| Grape, Marquis | ? Sept. | Medium? | Medium | |
| Kiwi, Hardy, Dunbarton Oaks | Sept - Oct | Low? | Low | |
| Apple, Liberty | Sept to Oct. | Medium? | Low | |
| Apple, Sweet Sixteen | Sept. to Oct. | Medium? | Low | |
| Fig, Chicago Hardy | Sept. through frost | High? | Low | x |
| Pear, Seckel | Sept. (and keeps) | High? | Low | |
| Pear, Keiffer | late Sept. (and keeps) | High? | Low | |
| Apple, Winesap | late Sept. (and keeps) | Medium? | Low | |
| Watermelon | October | Medium-high | Low | x |
| Kiwi, Hardy, Ananasnaya | Oct. | Low? | Low | |
| Apple, Virginia Beauty | Oct. (and keeps) | Medium? | Low | x |
| Apple, Red Empire | Oct. to Dec. | Medium? | Low | x |
| Apple, Grimes Golden | Oct. to Jan. | Medium? | Low | |
| Apple, Enterprise | Oct. to Jan. | Medium? | Low |
Even though it seems
like we've got the whole fruiting season covered, it's worth
noting that some plants are very undependable --- for example,
we've only gotten fruits from our peaches one year in three so
far. Other plants --- like most berries --- are quite
dependable, but take so much time to pick that I can only handle
so many plants. Plus, who knows which of the varieties that
haven't yet fruited will end up working for us, and which ones
will be ripped out for one reason or another?
 All of that said, there are potential gaps in
August (if the peaches fail), September (if the apples fail), and
among keepers. Increasing our fig planting seems like a good
way to potentially fill the August and September gap with a
dependable and only medium-work fruit, and grapes might also hedge
our bets during the late-summer period. I suspect we don't
really need any more gooseberries, though, since they produce at
the same time as Early Transparent apples, black raspberries, and
red currants, but I'll slip in a couple since gooseberry bushes
are small and fruit even in partial shade, so they help fill
troublesome spatial gaps.
All of that said, there are potential gaps in
August (if the peaches fail), September (if the apples fail), and
among keepers. Increasing our fig planting seems like a good
way to potentially fill the August and September gap with a
dependable and only medium-work fruit, and grapes might also hedge
our bets during the late-summer period. I suspect we don't
really need any more gooseberries, though, since they produce at
the same time as Early Transparent apples, black raspberries, and
red currants, but I'll slip in a couple since gooseberry bushes
are small and fruit even in partial shade, so they help fill
troublesome spatial gaps.
Speaking of which,
where do I have room for new plants? We're working hard not
to expand our boundaries (except for potential pastures), but
there are still a remarkably large number of sites right here in
our core homestead:
| Location |
Characteristics |
Possible
plants |
| By well |
shady, kill-mulched
spot |
1 gooseberry |
| Along pasture fence |
shady, kill-mulched
spot |
1 gooseberry |
| Pastures |
semi-shady |
extra gooseberries |
| Gaps in forest garden |
Mostly sunny,
high-groundwater (but can plant on mounds) |
5 figs |
| Old grape row in mule
garden |
Sunny, trellised |
3 grapes (or 2 grapes
and 1 kiwi) |
| South-facing side of
gully |
Sunny, would have to
be terraced (lots of work) |
3 grapes |
| South side of front
porch |
Scorching sun in
summer, but potential frost pocket |
Grapes? |
 The spots to slip in gooseberries are pretty
obvious, and the figs will work well in the forest garden as long
as I build quality mounds to keep their feet dry. But what's
a good fit for the porch-side plantings, which have the primary
goal of shading our living quarters in the summer? I'm
leaning toward grapes at the moment, although I'm not sure the
plants will thrive there.
The spots to slip in gooseberries are pretty
obvious, and the figs will work well in the forest garden as long
as I build quality mounds to keep their feet dry. But what's
a good fit for the porch-side plantings, which have the primary
goal of shading our living quarters in the summer? I'm
leaning toward grapes at the moment, although I'm not sure the
plants will thrive there.
I know it seems very
early to be planning our perennial plantings, but if I set my
sight on new spots now, I can just dump wheelbarrows full of weeds
there to build mounds and act as a kill mulch, keeping soil
preparation time to a bare minimum. Plus, knowing how much
room I have for new perennials keeps me from trying out twenty new
varieties that won't fit in our core homestead. (That said,
if you have types of fruit to suggest that would round out our
planting, I'm always open to suggestions because there's nothing I
love more than trying new plants.)
The ground we built our StarPlate chicken coop on has a medium degree slant.
We decided chickens didn't
need a perfectly level floor, so we elected to not dig out a flat spot
or prop one end up.
Making the door frame square
seems to be a good way of correcting for the hillside slant.
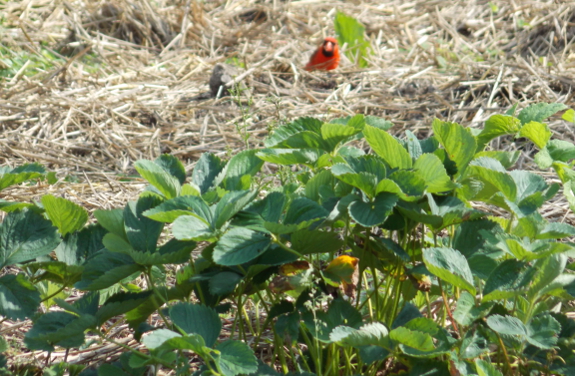
--- I've forgotten who posted this question, but someone did a few weeks ago
 We don't generally have problems with birds
in the strawberries. (In the photo above, the cardinal is
actually stealing some buckwheat seeds that weren't adequately
covered by straw.) However, I've noticed a lot of bird
activity in the black raspberries, and a minimal amount of damage
to the red raspberries.
We don't generally have problems with birds
in the strawberries. (In the photo above, the cardinal is
actually stealing some buckwheat seeds that weren't adequately
covered by straw.) However, I've noticed a lot of bird
activity in the black raspberries, and a minimal amount of damage
to the red raspberries.
I don't know why the
blacks are preferred --- perhaps just because they're small enough
for a bird to easily gulp down, or the higher proportion of seeds
makes them more nutritious. But even with lots of birds
eating, we've been getting quite a good harvest.
I may change my tune
when our blueberries come into full production, but so far, I
don't net any of our berries or worry too much about bird
predation. There's so much wild food around that our berries
are just a side dish for them, and a main crop for us.
In the meantime, I've
noticed phoebes picking cabbage worms off the broccoli and have
even noticed a cardinal swooping down to catch an insect in
midair. (I'm well aware that cardinals are supposed to be
obligate seed- and fruit-eaters, but clearly they don't know
that.) So, in the long run, having birds in our garden is a
net plus.

I used a total of twenty 3/4
inch sheet metal screws to attach the plywood
extension to the base of
the Haul Master lawn trailer.
The rear side has 6 holes you
can use that were meant for a side brace if you add the right size
washer. The other 14 points will need a pilot hole.
Tales of books read,
berries wildcrafted, and rivers swum.
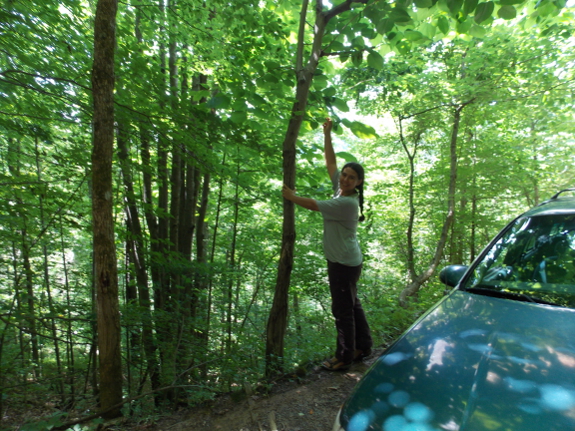
Only family truly
understands how awesome it is that there's a mulberry tree along
the driveway near where you're visiting, so you can snag some
silkworm fodder on the way home.
 I forgot to mention that the new neoprene
hip waders have the Cabelas
brand name.
I forgot to mention that the new neoprene
hip waders have the Cabelas
brand name.
The neoprene material seems
much better suited for this application than the previous rubber hip
waders. I think the rubber dried out a bit and started cracking which
caused small leaks.
Neoprene cost a lot
more...these were close to 100 dollars, but well worth it if they last
twice as long as the rubber ones.
 Wendy Jehanara Tremayne
sent me a copy of her beautiful and unconventional book, The
Good Life Lab a few weeks ago, and once I finally cracked
the cover, I swallowed the whole thing down in a few
sittings. The first two-thirds is a memoir/treatise on how
and why Wendy and Mikey quit the fast life in New York City for a
small-town homestead in New Mexico, and the last third is full of
useful tips such as using rainwater in place of distilled water in
batteries. I suspect that anyone who enjoys this blog would
love Wendy's book (and chances are you'd also enjoy the blog she shares
with her partner and the profile I included about Wendy and
Mikey in Trailersteading).
Wendy Jehanara Tremayne
sent me a copy of her beautiful and unconventional book, The
Good Life Lab a few weeks ago, and once I finally cracked
the cover, I swallowed the whole thing down in a few
sittings. The first two-thirds is a memoir/treatise on how
and why Wendy and Mikey quit the fast life in New York City for a
small-town homestead in New Mexico, and the last third is full of
useful tips such as using rainwater in place of distilled water in
batteries. I suspect that anyone who enjoys this blog would
love Wendy's book (and chances are you'd also enjoy the blog she shares
with her partner and the profile I included about Wendy and
Mikey in Trailersteading).
The book's spare,
easy-to-read prose has deep thought underneath, combined with just
the right level of mysticism to make me think without turning me
off. Wendy explains that people in Truth or Consequences,
New Mexico, barter everything...except the one thing that person
uses to make a living, which is always paid for. She writes
about turning online community into real
community with the addition of a week-long, in-person visit
of her favorite bloggers, and she walks you through her decision
to keep her businesses at the cottage level so that she and her
partner can do it all at home.
Wendy also has a
solution for one of the most thorny issues I see among
homesteaders --- they want to quit their jobs, but don't know how
they would fill their time instead. She wrote:
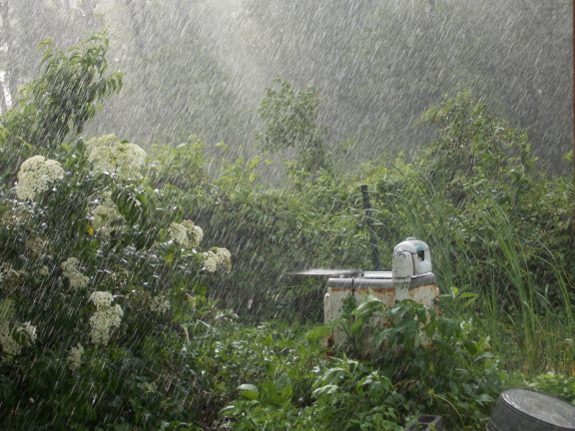
(Apparently, what I
most wished to do this weekend was to play in the rain, and a
storm obliged by raging through. If I had any doubt that I
live in paradise, a rainbow ending in the side of the barn helped
clear up that issue. Which is a long way of explaining that
the photos in this post have nothing to do with Wendy's book,
except for inspiration.)

In addition to the two holes
on top of the hitch
coupler you can also use
two on each side.
I'm thinking the top two
will be enough, mainly because I couldn't quite figure out the best way
to line up where to drill the hole on the tongue.
One thought I had was to use
a nail on the coupler side and hit it with a hammer to make an indent
where the hole needs to be drilled, but it's a difficult space to get a
hammer in and I was ready for it to be done.
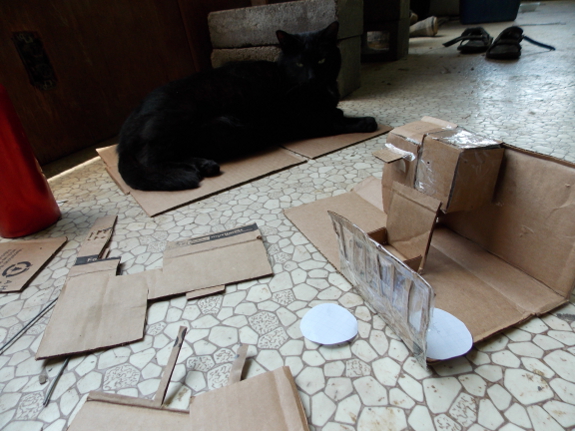
As much as I love
maps and other two-dimensional representations of the world,
sometimes it's easier to think if you visualize in three
dimensions. So Huckleberry and I sat down to model various
options for sunroom or greenhouse add-ons
to the south side of the trailer.
The more we cut and
pasted, the more we began to lean toward the sunroom option with a
face of windows and a solid roof. We live in an area with
both cold winters and hot summers, so it's always a balancing act
to decide which aspect we mitigate most. A greenhouse would
really boost winter temperatures and provide much more growing
area...but would result in a heat problem in the summer.
I've been reveling in the lower interior temperatures (high of 82
instead of 100 on ultra-hot days) since our new
trailer roof
went on, and I don't want to risk overheating our interior
again. So my current thought is that anything attached to
our living space should be a sunroom with a non-translucent roof.
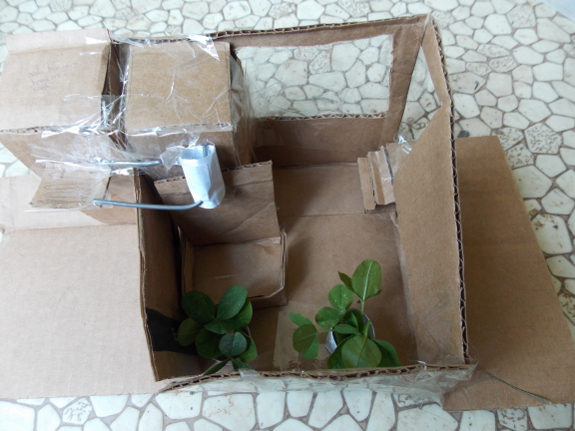
That said, I do want
to ensure we have space for two large dwarf citrus plants
(represented by clover in the model above) as well as a real
bathtub/shower. After playing around with the model for a
while, I settled on including one of our IBC tanks to collect roof water
and feed a thermosyphon solar hot water heater (located outside
--- summer use only), while also providing thermal mass inside the
sunroom.
Questions I'm
pondering about this aspect of the project:
- Will the tank be high enough to provide the water pressure
Mark craves from his shower without a pump or pressure tank?
- Is it feasible to elevate the heavy, water-filled IBC tank
that high?
- If we opt for a concrete slab floor (extra work, but more
thermal mass and easier to deal with watery projects), will it
make it a nightmare to plumb an exit pipe channeling overflow
from the rainwater collection tank and the bathtub out to the greywater
wetland?

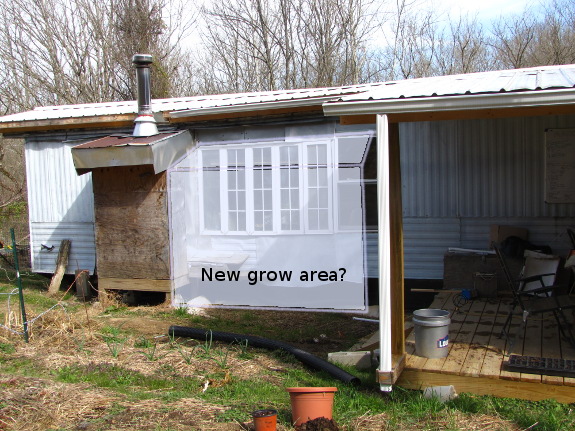 In terms of location, I've been envisioning
this add-on buffering the area between the wood stove alcove and
the front porch, where we already have a bank of south-facing
windows opening into the trailer. This zone gets lots of
sun, is close to our primary heat-source (so will be relatively
easy to keep above freezing for the citrus in the winter), and
will back up against one openable window (making it easy to
monitor airflow between the sunroom and the main trailer.
In terms of location, I've been envisioning
this add-on buffering the area between the wood stove alcove and
the front porch, where we already have a bank of south-facing
windows opening into the trailer. This zone gets lots of
sun, is close to our primary heat-source (so will be relatively
easy to keep above freezing for the citrus in the winter), and
will back up against one openable window (making it easy to
monitor airflow between the sunroom and the main trailer.
On the other hand,
this location basically negates the windows we already have in
place. Perhaps it would be smarter to turn part of the
current front
porch into a
sunroom, since adding windows there would increase our solar gain
(and the whole project would be much cheaper since the roof is
already on the porch). But the porch location would also add
more to our heating costs since I currently keep the portion of
the trailer behind the front porch only minimally heated in the
winter, and the citrus would need more warmth.
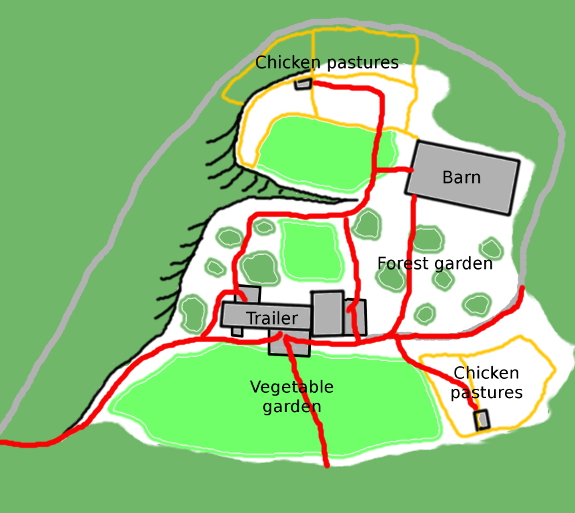
 And then there's
human (and dog) traffic patterns to consider. The map above
shows our current major activity routes, all of which have
wider-than-usual access so that Lucy doesn't accidentally trample
my garden when she's excited and so we don't have to be constantly
brushing past plants when we carry things in and out. A
sunroom between the wood stove alcove and front porch would block
one of those paths, which might cause problems with Lucy in the
garden and would definitely inconvenience Mark twice a week when
he lugs bulky bags of chicken waterers down the shortcut to
town.
And then there's
human (and dog) traffic patterns to consider. The map above
shows our current major activity routes, all of which have
wider-than-usual access so that Lucy doesn't accidentally trample
my garden when she's excited and so we don't have to be constantly
brushing past plants when we carry things in and out. A
sunroom between the wood stove alcove and front porch would block
one of those paths, which might cause problems with Lucy in the
garden and would definitely inconvenience Mark twice a week when
he lugs bulky bags of chicken waterers down the shortcut to
town.
So, lots to ponder,
but at least our model got the ball rolling. I suspect the
sunroom will be our big, expensive project of the year, so I want
to put as much thought into planning as possible.
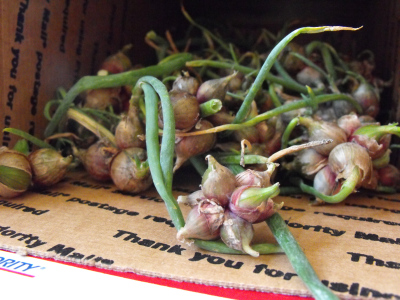 It's that time again --- the season to
send out more Egyptian onion propagules into the world!
Those of you who have read The
Weekend Homesteader know that this perennial green onion is easy to grow and to
cook with. (You can
read more about it here.) To sweeten the pot, Egyptian onions produce top
bulbs copiously at this time of year, which is an incentive to
share with friends.
It's that time again --- the season to
send out more Egyptian onion propagules into the world!
Those of you who have read The
Weekend Homesteader know that this perennial green onion is easy to grow and to
cook with. (You can
read more about it here.) To sweeten the pot, Egyptian onions produce top
bulbs copiously at this time of year, which is an incentive to
share with friends.
This year's Egyptian onion giveaway is an
everyone-wins affair. Just share your favorite Walden Effect
post on the social media platform of your choice (facebook, google
plus, twitter, pinterest, your blog, etc.), email
anna@kitenet.net with your mailing
address, and I'll mail a box of about 100 onion top bulbs to
your doorstep to fill your garden (and neighborhood) with
green-onion goodness. I'll keep mailing out top bulbs
until we run out (at which point I'll make a note on this post),
but I expect we'll have enough for at least the first twenty
folks. Enjoy!
Edited to add: All of the onions have been homed. Thanks to
everyone who entered!
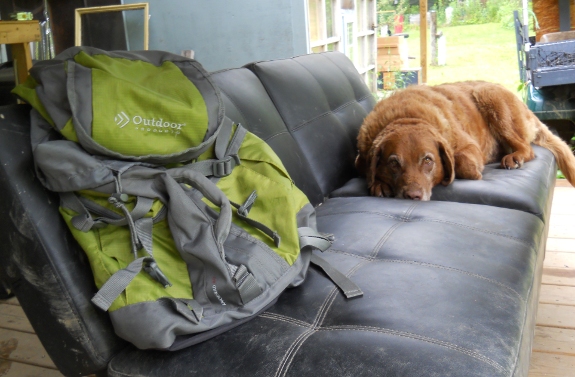
I'm really liking this new Outdoor
Products Arrowhead 8.0
framed back pack.
I've had it for a few months
now and think it's superior to all the other book bags.
It's got a hefty handle that
lets you carry it as a bag and plenty of zippered pockets to stow that
back up flashlight.
One of our fun
projects this past winter was creating a greywater wetland to deal
with the water coming out of our kitchen sink. You can read
more about the wetland by following the links below:
- Inspiration
for the wetland. (Be sure to follow the links at the
bottom of the post for the rest of the lunchtime series.)
- Planning the wetland
- Digging out the wetland area
- Planning the pipes
- Rocking in the inlet to prevent erosion
- Installing the pipes
- More
on the pipes (and pond)
- Greywater wetland's first inundation
- Plans
for the future
So far, the wetland
has been quite effective, although it has the usual growing
pains. I'll show you what's working (and what's not) below.

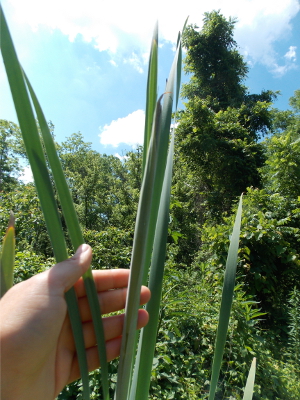 The water from our kitchen sink is enough to
keep the area where I planted cattails (just below the inlet)
sodden. This has resulted in very happy plants, one of which
is putting up a flowering spike. I'm ultra-excited about the
spike because I've wanted to taste cattail flowers ever since Eric
blogged about them, but I'm too busy at this time of year to make weekly trips
to the wetland up the holler to check on the cattails'
progress. This year, we'll definitely get to taste at least
one cattail flower!
The water from our kitchen sink is enough to
keep the area where I planted cattails (just below the inlet)
sodden. This has resulted in very happy plants, one of which
is putting up a flowering spike. I'm ultra-excited about the
spike because I've wanted to taste cattail flowers ever since Eric
blogged about them, but I'm too busy at this time of year to make weekly trips
to the wetland up the holler to check on the cattails'
progress. This year, we'll definitely get to taste at least
one cattail flower!
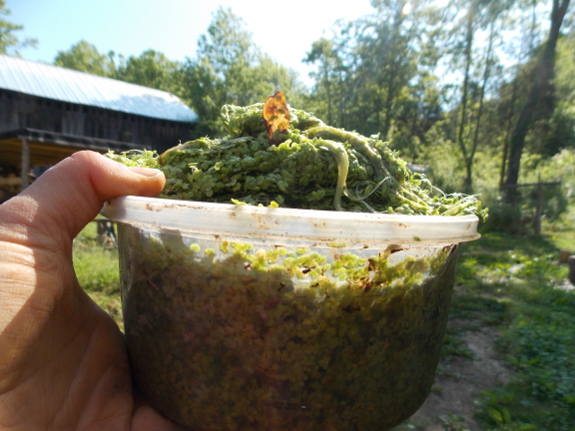
 The pond is also doing very well, and has already produced
half a gallon of duckweed for the garden. Too bad our
chickens still won't eat the stuff.... If we had a much larger pond,
though, I could see harvesting duckweed to use as a high-nitrogen
mulch around seedlings.
The pond is also doing very well, and has already produced
half a gallon of duckweed for the garden. Too bad our
chickens still won't eat the stuff.... If we had a much larger pond,
though, I could see harvesting duckweed to use as a high-nitrogen
mulch around seedlings.
You'll notice I also
installed a Chinese lotus in the little pond (which is just barely
deep and large enough to keep such a hefty plant happy). The
inspiration for the lotus came from Paradise Lot, whose author explains
that the seeds produced by lotuses are large, tasty nuts.
(I'll admit that lotuses are also one of the few ornamental plants
I just love and would install without a use.)
The one failed
experiment related to the pond is the mushroom logs serving as a
retaining wall on the banks. While the logs work well and do
help anchor the pond visually, they weren't shaded enough, so the
bark dried up and flaked off, killing the fungi. This
experiment might have worked if I'd had the shrubs established on
the retaining wall a year before adding the mushroom logs, but
shouldn't be repeated as-is.
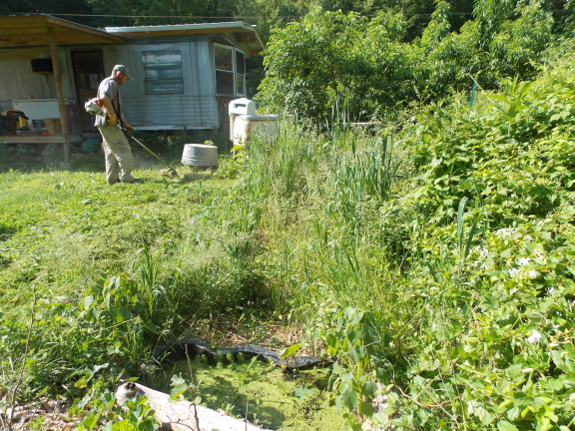
Another factor to
consider if you're replicating our design is maintenance.
Without a weedeater, it would be much tougher to keep the
irregular edges of the wetland in line, but, luckily, Mark is a
pro at cutting exactly where I ask him to. (This is a trait
to put on your list for World's Best Permaculture Husband, in case
you're still single.)
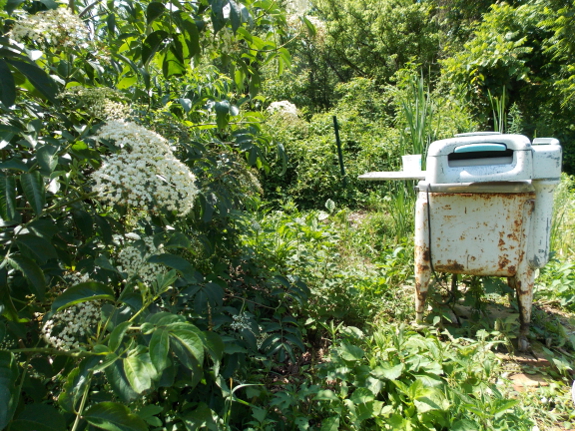
Okay, this picture
isn't really informative, but I love the elderberry flowers and
our wringer washer together.
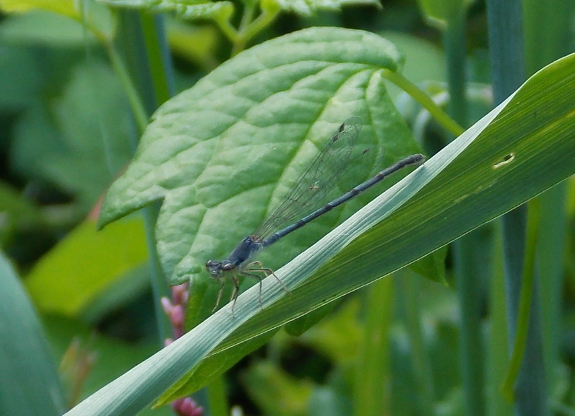
And, speaking of
beauty, the pond is attracting lots of fascinating (and useful)
life, like the damselfly above. A frog has also taken up
residence, and a large black rat snake slithered away when I
approached to take photos.
Okay, I can hear you
saying, but what about the primary purpose of the wetland ---
dealing with greywater? On the plus side, we no longer have
a swamp in the path outside our back door, and the wetland itself
doesn't seem to have any odor or to attract Lucy's
attention. However, in the last month, we've noticed a
swampy smell wafting up the pipes into the kitchen sink.
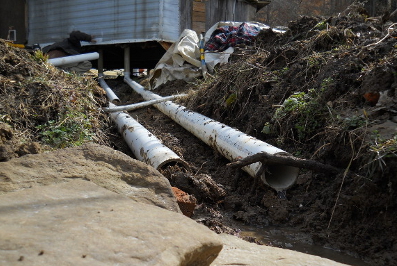 Oddly enough, we never had a smell problem
from our much lower-tech drain-out-back, which makes me think
the issue is that I didn't get the junction between the ten-foot
pieces of pipe completely level. If that area dipped down,
food scraps (or just nutrient-rich water) could collect there and
rot anaerobically, creating the swampy smell.
Oddly enough, we never had a smell problem
from our much lower-tech drain-out-back, which makes me think
the issue is that I didn't get the junction between the ten-foot
pieces of pipe completely level. If that area dipped down,
food scraps (or just nutrient-rich water) could collect there and
rot anaerobically, creating the swampy smell.
The short-term
solution seems to be leaving the strainers in the sink, which
blocks nearly all the smell. In the longer-run, our first
fix attempt will be to hook up at least one of the gutter outlets
to each of the greywater lines (as originally planned) so heavy
rains will flush out any pockets of food. If that fails, we
can always add a trap to our sink drains as
Dirk suggested,
which should block any smell from wafting back into the house.
That small problem
aside, we wholly recommend the greywater wetland for those of you
living in climates with cold winters and plenty of rain. If
you want to put the greywater to more use (and don't have freezing
winters), you might instead check out mulch
basins.
But, whatever you do, don't waste energy by sending greywater down
the drain into a sewage system!
Mark, you could just attach the wheel base
panels ( The triangle and
the shaft ) directly to the wood... Only 8 bolts there, plus the middle
iron support brace. I am not getting why you need to sandwich the base
panels between the wheels and the wood?
Thanks for the question
Pedro. I hear what you are saying, and it may have been quicker to do
it that way, but keep in mind you will need to have a bolt head
protrude through and I wanted a smooth shoveling surface for days when
we use it for mulch or sawdust. The metal also functions as a splash
guard where water is most likely to splash up to when going across the
creek.
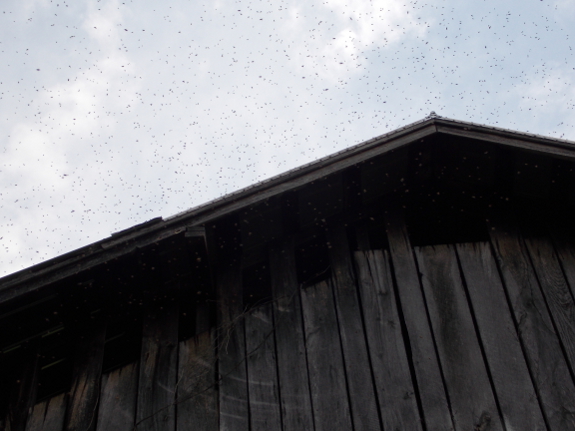
 The basswood started blooming Monday,
and Tuesday afternoon I walked over to see how much bee activity
there was around that prime nectar source. "Wow, that's a
lot more bees than I recall from previous years!" I thought to
myself as the roar of bees washed over me. But then the bees
literally passed over me and headed en masse toward the
barn! Yes, we were finally being the recipient (rather than
the donor) of a swarm!
The basswood started blooming Monday,
and Tuesday afternoon I walked over to see how much bee activity
there was around that prime nectar source. "Wow, that's a
lot more bees than I recall from previous years!" I thought to
myself as the roar of bees washed over me. But then the bees
literally passed over me and headed en masse toward the
barn! Yes, we were finally being the recipient (rather than
the donor) of a swarm!
If I'd known, I
should have seen the signs that something was brewing
Monday. I noticed a worker bee poking around in the extra
Warre quilt (small bee box) sitting on the porch beneath a
slightly offset lid. More telling was the group of a hundred
or so bees that were buzzing around the peak of the barn Monday
afternoon. But I'd seen that kind of bee activity around the
barn last year, with no result, so figured maybe I was seeing some
kind of native bee that was just now coming out of
hibernation. Wrong! What I observed on Monday was,
first, a scout bee checking for possible hive cavities and,
second, scout bees gaining critical mass as they chose a new hive
location. (I'm assuming that last year, our barn was a
runnerup location, thus the lack of further activity. This
year, we won!)
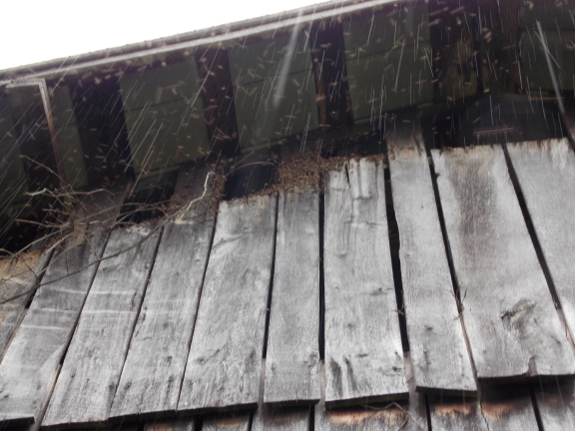
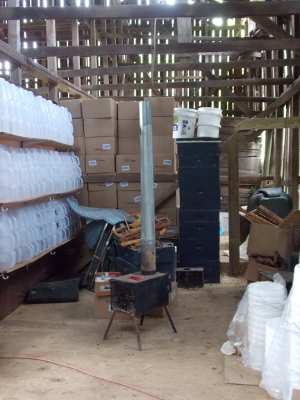 Anyway, back to Tuesday afternoon when the
cloud of bees came from the southwest, flew low over the trailer,
then ended up at their destination in front of the aeration holes
just under the peak of the barn roof. Soon, I could tell
that the bees were working their way through the labyrinth of
rafters and over to the six-foot-high stack of Langstroth
equipment that has been sitting vacant in the barn ever since our
last hives died two years ago and we moved over to Warre
equipment. A gap between two carelessly-stacked boxes was
large enough for the bees to move in, and within a couple of hours
(spurred on by a short storm), the colony was entrenched in its
new home.
Anyway, back to Tuesday afternoon when the
cloud of bees came from the southwest, flew low over the trailer,
then ended up at their destination in front of the aeration holes
just under the peak of the barn roof. Soon, I could tell
that the bees were working their way through the labyrinth of
rafters and over to the six-foot-high stack of Langstroth
equipment that has been sitting vacant in the barn ever since our
last hives died two years ago and we moved over to Warre
equipment. A gap between two carelessly-stacked boxes was
large enough for the bees to move in, and within a couple of hours
(spurred on by a short storm), the colony was entrenched in its
new home.
(As a side note, the
bees completely ignored the top
bar swarm trap
just behind the barn, but I don't have any data about whether they
would have liked a real swarm attractant better than the used
Langstroth equipment. After installing our package, I got sidetracked and
never put the roof on our Warre-hive
attractant, so
it's not yet in play.)
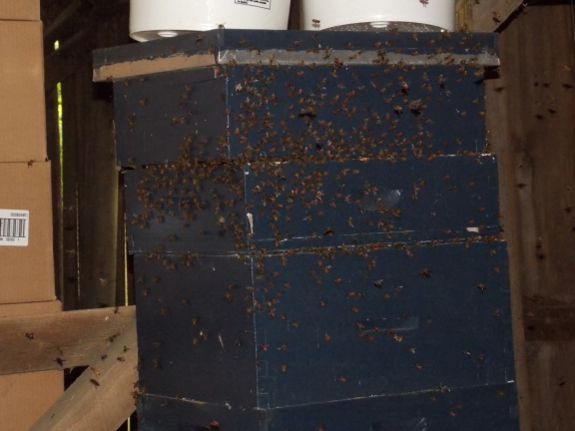
A breathless call to
my beekeeping mentor later, I realized that I needed to see what
the insides of those Langstroth boxes looked like if I was going
to let the bees stay in them and just move the relevant boxes out
into the yard as a new hive. My neglect had resulted in most
of the wax in my old Langstroth boxes getting eaten up by wax
moths, but I was able to cobble together a brood box full of
partially- or fully-drawn comb with little moth damage. I
started to assemble some good supers too, but it turned out the
reason the bees had selected the boxes they had was because the
two supers they were moving into had the best comb in the
barn. There were three frames missing from one of the
supers, though, so I'm glad I went through and filled that gap in
before the bees could built wonky comb in the empty space.
I was a little afraid
to mess around with the bees while they were settling in because I
was afraid they might decide to hit the road, but they put up with
my intrusion gamely and just kept streaming into the hive to join
their queen. The swarm had showed up in the garden around
3:30 pm, I did my hive manipulation around 4 to 4:30, and by 6:00,
nearly ever bee was inside the hive. Swarm capture
success! (Granted, I didn't have to move the swarm to a new
box, so there wasn't much that could have gone wrong. Still,
I'll take my successes where I find them.)
More on how we moved the hive to its permanent location in a later
post. But, for now, I just want to end by mentioning that
I'm 99% sure these bees didn't come from my hives, and instead
sprang from the same location where the swarm I lost earlier ended
up. I wonder if there's a beekeeper somewhere to the
southwest who gained a swarm a few weeks ago and lost one yesterday?
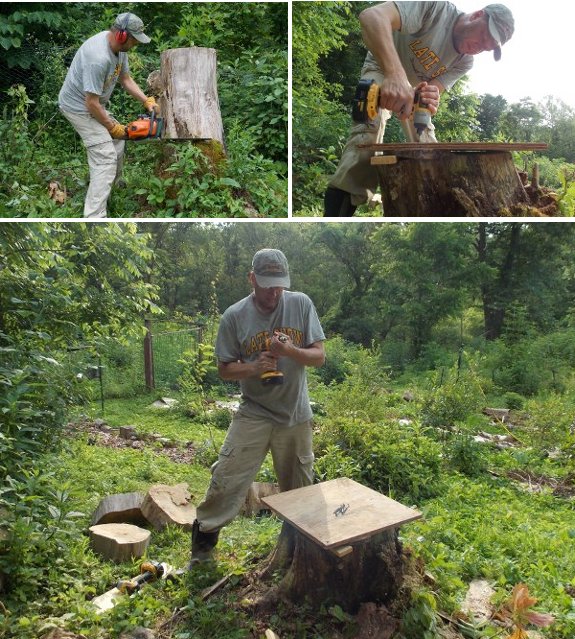
We normally support bee hive
boxes with a couple of cinder blocks, but getting some without the ATV
would have been a chore...plus Anna says she would like this new box a
little higher.
I'd say it took less than a
half hour to cut the stump to size and level off a piece of scrap
plywood so it sits at a slight incline so water won't drain inward.
It would have been nice to
put a layer of paint on it...but since we were moving the new swarm in within the hour I elected to
let it go bare. I don't know if paint fumes would have been enough to
drive them away, but we didn't want to chance it.
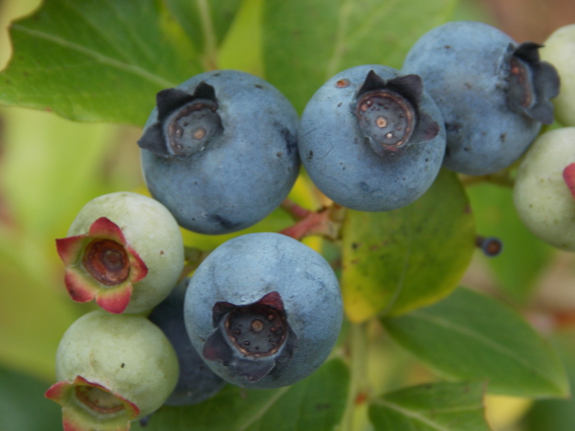
I suspect this will
be remembered as the first year of really awesome fruit.
Sure, we've been eating strawberries and blackberries and
raspberries since year two, we had one big peach year, and we've
enjoyed little handfuls of blueberries and gooseberries and
figs. But 2013 marks the point where our fruit production
has started to feel bountiful.
In large part, the
fruit success isn't even due to more plants bearing (although they
are). I've also started putting "pick berries" on my list
every day, allotting twenty minutes in the morning to plucking
four bowls of raspberries (and whatever else is ripe) to provide
dessert for lunch and supper. As such, berry-picking has
changed from a rushed event that I sometimes neglect tacking onto
the end of a long day, to a meditative (and tasty) pause in the
morning's work.

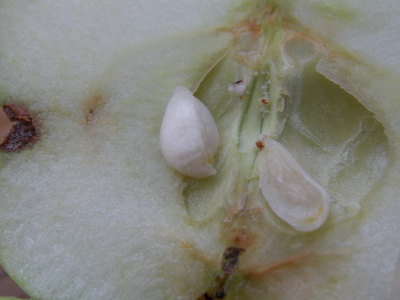 Speaking of those new plants getting old
enough to bear, we ate our first homegrown apple Wednesday!
As you can see from the photo to the left, I should have waited
another week or two until the seeds turned brown, but the Early
Transparent apple was still richly tart and delicious. More
on high-density versus forest garden fruits once the other five
apples are fully ripe.
Speaking of those new plants getting old
enough to bear, we ate our first homegrown apple Wednesday!
As you can see from the photo to the left, I should have waited
another week or two until the seeds turned brown, but the Early
Transparent apple was still richly tart and delicious. More
on high-density versus forest garden fruits once the other five
apples are fully ripe.

Mark and I have
slightly different preferences in fruit department, so I like to
perform flavor tests when something new starts up in order to find
out what our average affinity for that new variety is. I'm a
fruit snob and enjoy a complex blend of sweet, tart, and other
flavors, and I'm willing to work around seeds or whatever else it
takes to make that snobbishness a reality. Mark likes his
fruit easier to eat and higher in sugar content. With that
data in mind, here are our current berry favorites, from awesome
to pretty good, based on this week's taste test:
| Mark |
Anna |
| Caroline red raspberries |
Poorman gooseberries |
| blueberries |
black raspberries |
| black raspberries (too seedy) |
blueberries |
| Poorman gooseberries (too
grapey) |
Caroline red raspberries (a
bit insipid) |
| Invicta gooseberries (too
grapey) |
Invicta gooseberries (a bit
insipid) |
I use this data to
plan which varieties to expand, which is why our red raspberry
patch has gotten bigger every year due to the sparkle it brings to
Mark's eyes. It looks like I should probably get around to installing a
later-summer-bearing red raspberry sooner rather than later, and
maybe I will put all those baby Poorman gooseberries in the ground
here after all. (You can read more about our
fruit-expansion plans here.)
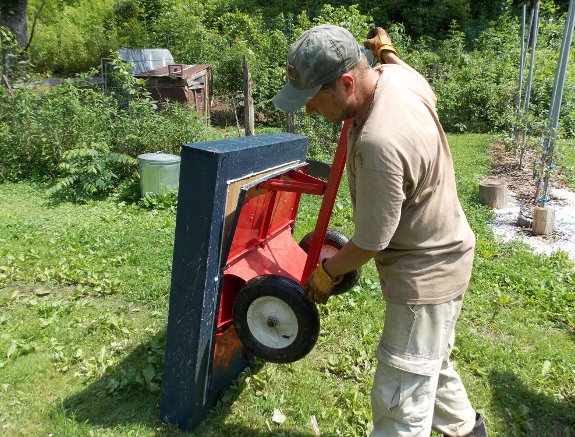
Found out today the 10 front plywood
attachment screws are not
enough.
I got about 3/4 of the way
back fully loaded when it gave out on me.
I'm thinking 4 or 8 well
placed bolts with nuts should keep it together.
 Mark has been lobbying
for hot water for years, and I thought now would be a good time to
finally give in...as long as we choose a sustainable option.
At the moment, we just heat up gallon pots of hot water on the
stove, one or two of which are generally plenty for dishes or
bathing.
Mark has been lobbying
for hot water for years, and I thought now would be a good time to
finally give in...as long as we choose a sustainable option.
At the moment, we just heat up gallon pots of hot water on the
stove, one or two of which are generally plenty for dishes or
bathing.
We definitely want to
make (or possibly buy) a solar hot water heater as part of our
upgrade, but we're thinking of doing something low-tech (an
open-loop system) that will be drained for the winter. As
such, it would be handy if we had a traditional hot-water-heater
tank to thermosyphon the solar-heated water into. In a
perfect world, we could leave that tank turned off all summer,
then would turn it on once or twice a day, half an hour before
using it, in the winter. The primary uses would be dishes
and bathing, and we're quite happy to plan both around the
weather.
Here's where I'm
getting stuck --- household hot water heaters are huge! The
smallest one I saw on the Lowes website was 28 gallons, but I
figure we only need a capacity of one to three gallons.
Keeping the water heater turned off until we need it wouldn't be
very efficient if we're heating ten times as much water as we use
each time.
 I had originally decided against point-of-use
(aka demand) water heaters because I wanted a tank for our solar
system to feed into. However, a bit of research shows
that there are point-of-use mini-tanks of 1.3 to 6 gallons that
might work for us. However, these mini-tanks probably aren't
very well insulated since they're intended to provide hot water
much more frequently than we'd use it, and since they're meant to
be left on all the time. Do you think a point-of-use
mini-tank would operate the way I want it to --- as a reservoir
for solar hot water and as a winter heater than can just be turned
on right before use?
I had originally decided against point-of-use
(aka demand) water heaters because I wanted a tank for our solar
system to feed into. However, a bit of research shows
that there are point-of-use mini-tanks of 1.3 to 6 gallons that
might work for us. However, these mini-tanks probably aren't
very well insulated since they're intended to provide hot water
much more frequently than we'd use it, and since they're meant to
be left on all the time. Do you think a point-of-use
mini-tank would operate the way I want it to --- as a reservoir
for solar hot water and as a winter heater than can just be turned
on right before use?
We're very much still
in the planning stages, so suggestions are welcome. Perhaps
you've bought a certain brand of any of the options mentioned
above and loved it (or hated it)? Or maybe you built your
own? Please do chime in and make Mark's life a little
warmer.

Hauling 12 five gallon
buckets full of horse manure might work on a driveway without a creek
to cross, but I think it's too much for our situation.
I knew it was close to the
limit when the ATV spun out going up the ford and required a switch
over to 4 wheel drive.
Cutting a foot off the box
brings the capacity down to 9 five gallon buckets, which I think will
work out nicely if I increase the truck capacity to 27 by stacking and
strapping the last 7.
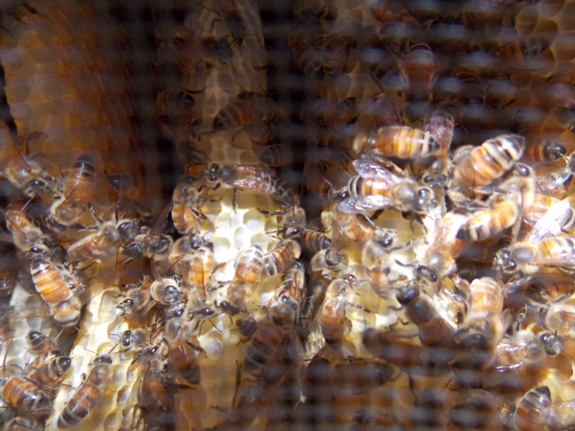
In the wild,
honeybees start at the top of a cavity and build their comb
straight down. When we add supers on top of a Langstroth
hive, we're asking our bees to do something counterintuitive, and
sometimes they balk, especially if you're asking bees to build
without foundation. Warre hives usually prevent this problem
since you nadir (add boxes below) instead of super (add boxes
above), but the first few weeks after package installation, I
generally see the same issue. Which is all a long way of
explaining why I opened up the hive rather than just putting a new
box underneath when a photo up through the bottom showed that the
bottom box, at least, was crammed full of comb.
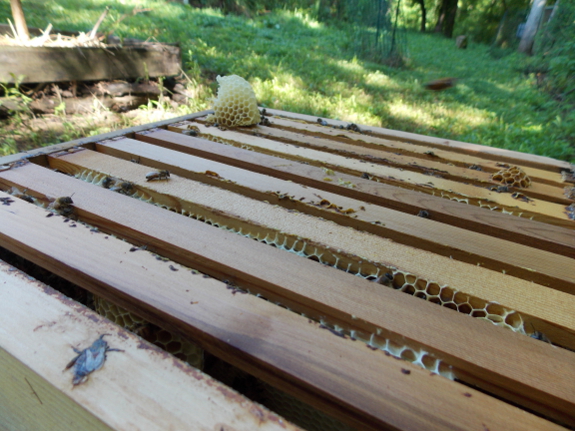
Sure enough, the top
box was completely empty...except for two bits of comb that the
bees had started building up from top bars of the box below.
I scraped away those pieces of comb, put the quilt onto this full
box (now the top box), and added the empty box underneath. I
didn't perform this swap last year, and I suspect that's why I
ripped comb apart when I finally opened up the hive to inspect in
September.
I think the technique
for installing
a package in a Warre hive could be tweaked to prevent the need to swap the
boxes a couple of weeks in. Or perhaps I should just
automatically swap the boxes when I take
out the queen cage a couple of days later. I'll ponder that for the
future, and will enjoy our happy bees for now.

A nice bonus of the new bee stump is that it can be seen from the
porch.
It's going to be a race of
survival for them to see if they can store enough honey to get through
the winter.
Our hope is that a steady
supply of sugar water will make up for the late start they got.
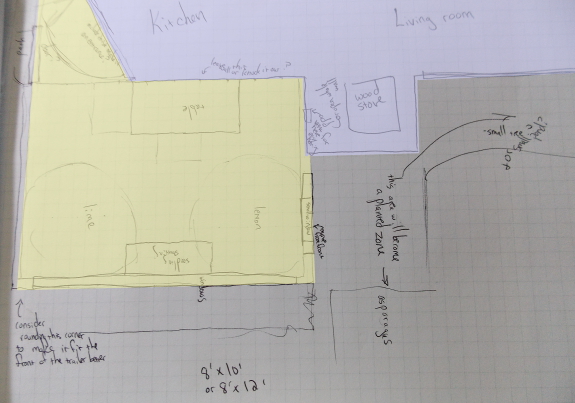
After some
brainstorming (and a lot of good thoughts from your comments on
our sunroom and hot
water posts),
Mark and I have decided that:
- The sunroom is a lower
priority than hot water, and may wait until another year.
Part of this reasoning is based on the fact that Mark actually
doesn't consider it a hardship to wash up outside in the winter
--- I thought he did. (Personally, I'm pretty content with
our current bathing setup, although I might like to lounge in a
real bathtub some days.) That makes setting up a bathtub
and shower much easier since we can just put it on the other
side of the wall from the kitchen sink, allowing us to easily
plumb directly into the graywater
system and to get hot and cold water with minimal fuss.
(As a side note, I also changed my mind about where the
potential sunroom should go --- you can see my current thoughts
in the diagram at the top of this post.)
- The solar hot water system
and the backup electric hot water system don't necessarily
need to connect together. Since we use hot water
almost entirely in the late afternoon, a batch-type solar hot
water system could serve as collector and reservoir during the
warm months. I still haven't decided whether the best
option is the trailer's old hot water heater, painted black and
placed inside a glass-fronted box (would the insulation keep the
tank from soaking up the sun's rays?) or a couple of hoses
inside a similar box (or just up on the trailer roof).
Without the complication of a thermosyphon system, though, it
definitely feels simple enough to build ourselves.
 Our best option for
conventional hot water during the winter is probably a
19-gallon tank, which we'd turn on a few minutes before using
just like Tom suggested they do in Mexico. A
point-of-use unit could be good, but has two potential problems
in our unconventional circumstances --- it would need fancy
wiring since it draws so much juice all at once, and it might
not work with our low water pressure (we get 1 gpm, or possibly
less, depending on how full our
tank is). You'll also notice that I increased the
size of the reservoir we're looking at since I forgot that we
currently use boiling water to mitigate water temperature, while
a hot water heater (even set on high) is only going to raise the
temperature of the water to 150 degrees Fahrenheit. As
such, my calculations suggest that we'd need a 19-gallon tank in
the winter to raise water from around 40 degrees to 105 degrees
to fill a 35 gallon tub. Presumably, we'll learn to tweak
how long we wait between turning on the heater and using the
water so that we don't waste energy heating too much water
during lower-water-use projects like showering and dishes.
Our best option for
conventional hot water during the winter is probably a
19-gallon tank, which we'd turn on a few minutes before using
just like Tom suggested they do in Mexico. A
point-of-use unit could be good, but has two potential problems
in our unconventional circumstances --- it would need fancy
wiring since it draws so much juice all at once, and it might
not work with our low water pressure (we get 1 gpm, or possibly
less, depending on how full our
tank is). You'll also notice that I increased the
size of the reservoir we're looking at since I forgot that we
currently use boiling water to mitigate water temperature, while
a hot water heater (even set on high) is only going to raise the
temperature of the water to 150 degrees Fahrenheit. As
such, my calculations suggest that we'd need a 19-gallon tank in
the winter to raise water from around 40 degrees to 105 degrees
to fill a 35 gallon tub. Presumably, we'll learn to tweak
how long we wait between turning on the heater and using the
water so that we don't waste energy heating too much water
during lower-water-use projects like showering and dishes.
Mark tells me we
usually see a very slight lull in our workload in late July, so
hopefully we'll have time to set up our bathing chamber, hot water
heater, and solar hot water system then. If not, it will
definitely be our winter infrastructure-improvement project.
Now I'm off to research whether low-flow faucets and shower heads
will work with already very low water pressure....
A guy at the Auto Parts store
told me about a nearby source of ethanol
free fuel I didn't know about.
You won't find it on Google
maps...a lot of things around here are like that...but if you drive
about 5 minutes outside of St Paul going towards Dante and the Breaks
park you'll see the Kwik Way Sunoco
station on your left not far past Pete Bradley's wrecker yard.
I found the image above
playing with Google street view.

Or explore more posts by date or by subject.
About us: Anna Hess and Mark Hamilton spent over a decade living self-sufficiently in the mountains of Virginia before moving north to start over from scratch in the foothills of Ohio. They've experimented with permaculture, no-till gardening, trailersteading, home-based microbusinesses and much more, writing about their adventures in both blogs and books.