
archives for 12/2010
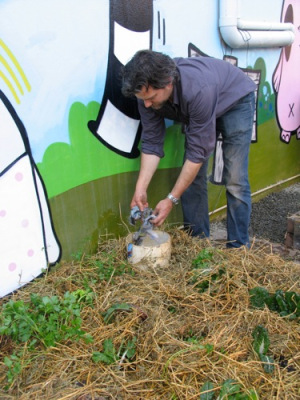 Darren pointed me toward worm
towers, which are a
way of integrating small-scale worm bins into your garden. As Milkwood explains, "Essentially a
worm tower is an in-garden worm farm that allows the
worms and their nutrients to interact directly with the surrounding
garden bed."
Darren pointed me toward worm
towers, which are a
way of integrating small-scale worm bins into your garden. As Milkwood explains, "Essentially a
worm tower is an in-garden worm farm that allows the
worms and their nutrients to interact directly with the surrounding
garden bed."
Simply take a two foot
long, 6" diameter PVC pipe, drill a bunch of holes around it for
aeration, bury it a foot deep in the soil of your garden, and fill it
with worms and bedding. Top the worm tower with a cap (like an
upturned flower pot) to protect the worms from the sun and then toss in
your food scraps and extra bedding just as you could in a normal worm
bin.
The innovative part is
that the plant roots and microorganisms in the surrounding soil can
also interact with the worm bin, sucking up worm tea and eating
castings as they appear. The worms can migrate down into the
below-ground portion of the worm tower when cold weather strikes, which
makes  this small-scale worm bin
much more able to deal with outdoor winter temperatures than the
typical household-size worm bin.
this small-scale worm bin
much more able to deal with outdoor winter temperatures than the
typical household-size worm bin.
I'm enthralled by the
idea and am suddenly envisioning a worm tower in each of our garden
beds, fed each week with cafeteria scraps and paper waste from the
local school. I guess the sticking point would be Lucy --- would
she dig up the worm tower to get to those rotting hamburgers?
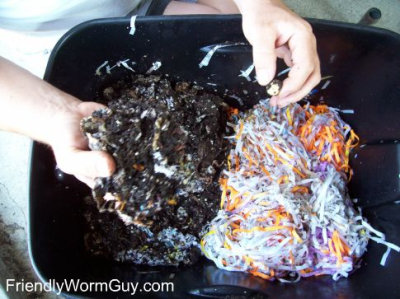 Although
various waste products (like sawdust and wood chips) can be used as
bedding in the worm bin, Binet Payne found that shredded paper was the
most effective. I've just about talked myself into buying a
shredder to turn junk mail into worm bedding since that's one of the
few waste products we don't fully utilize on our farm, and since I've
had bad luck keeping worms going in the bedding materials I've used in
the past (leaves, unshredded paper, etc.) The trick is that worm
bedding should be high in carbon to counteract the high nitrogen food
wastes, should hold water well to keep the worms moist, and should stay
fluffy to allow plenty of air to circulate through the bin.
Although
various waste products (like sawdust and wood chips) can be used as
bedding in the worm bin, Binet Payne found that shredded paper was the
most effective. I've just about talked myself into buying a
shredder to turn junk mail into worm bedding since that's one of the
few waste products we don't fully utilize on our farm, and since I've
had bad luck keeping worms going in the bedding materials I've used in
the past (leaves, unshredded paper, etc.) The trick is that worm
bedding should be high in carbon to counteract the high nitrogen food
wastes, should hold water well to keep the worms moist, and should stay
fluffy to allow plenty of air to circulate through the bin.
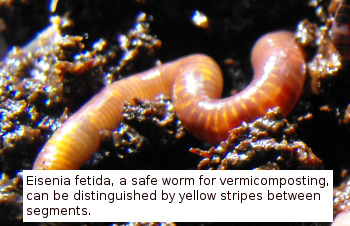
When preparing your worm
bin the first time (or adding bedding later to
cover up food), soak your shredded paper with three times its weight in
water. The perfect bedding is damp but not soggy, so you can't
squeeze any water out by hand. If the bedding is too wet, just
let it drain in the bin for a while before adding your worms. As
the bedding drains, sprinkle a shovelful of dirt over the damp paper to
provide grit for your worms and to stock bacteria to expedite the
decomposition process. Then toss in a bit of food waste and
manure worms (Eisenia fetida), cover them up, and let
your worms get to work.
 You
need to provide two pounds of worms for every daily pound of food
waste you'll be adding to the bin, which should also equal two pounds
of worms for every cubic foot of bin space. So, your 2 cubic foot
kitchen sink worm bin will need to start with 4 pounds of worms, and
your 8 foot by 4 foot by 1 foot bin will need 64 pounds of worms.
These
aren't the same worms you can dig up in your backyard, and buying
manure worms can be expensive, so you might need to stock your bin
with fewer worms than is recommended. In that case, add less food
waste to the bin at first, slowly putting in more as the worm
population grows. Binet Payne notes that 8 pounds of worms will
fully stock a 32 square foot bin within three months.
You
need to provide two pounds of worms for every daily pound of food
waste you'll be adding to the bin, which should also equal two pounds
of worms for every cubic foot of bin space. So, your 2 cubic foot
kitchen sink worm bin will need to start with 4 pounds of worms, and
your 8 foot by 4 foot by 1 foot bin will need 64 pounds of worms.
These
aren't the same worms you can dig up in your backyard, and buying
manure worms can be expensive, so you might need to stock your bin
with fewer worms than is recommended. In that case, add less food
waste to the bin at first, slowly putting in more as the worm
population grows. Binet Payne notes that 8 pounds of worms will
fully stock a 32 square foot bin within three months.
| This post is part of our Worm Cafe lunchtime series.
Read all of the entries: |
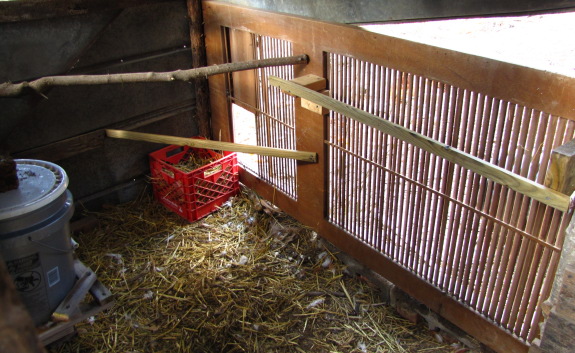
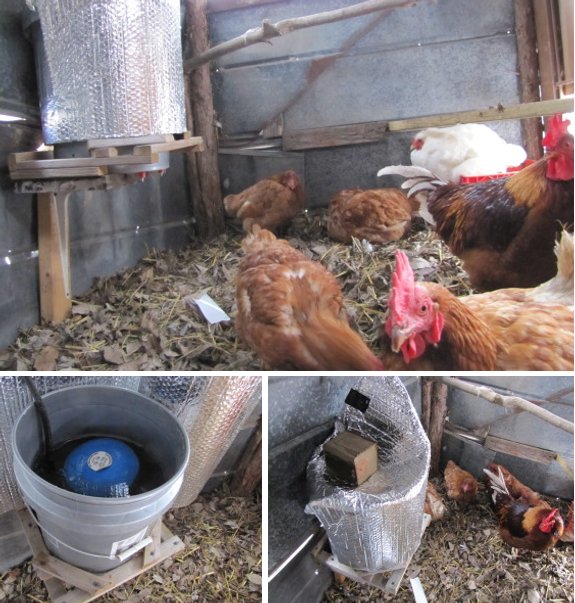
We spent some time today re-organizing the roost and nest box
placements in the chicken coop.
A fourth roosting location is
in the corner you don't see in the picture, which might be high enough
for our
rooster to finally feel like he's captain of the coop.
I'll check in on them a bit
after their bedtime tonight to see who ended up roosting on the top spot.
 I've
been doing a lot of thinking about self-sufficiency lately. When
I was in my early twenties and dreaming of (and saving for) a
homestead, my goal was complete self-sufficiency. I imagined
parking at the corner of my wooded property and walking back to a tent,
where I lived until I'd cut down enough trees to make my home. I
had absolutely no contact with the outside world in this dream, and
needed none.
I've
been doing a lot of thinking about self-sufficiency lately. When
I was in my early twenties and dreaming of (and saving for) a
homestead, my goal was complete self-sufficiency. I imagined
parking at the corner of my wooded property and walking back to a tent,
where I lived until I'd cut down enough trees to make my home. I
had absolutely no contact with the outside world in this dream, and
needed none.
Age (and Mark's
mitigating influence) have slowly redefined my vision of
self-sufficiency to include the local community and beyond.
Rather than living without electricity for a couple of decades until we
saved enough for an off-grid power setup, we went ahead and plugged
into the cheap, mainstream grid, and reaped the benefits by making a living online. We take advantage of
the copious waste in American society, living
in a forty year old trailer that was being thrown away and trading
fresh eggs for horse manure. Nowadays, my vision
of self-sufficiency involves tricking talking enough like-minded
--- but subtly different --- neighbors into settling nearby so that we
could trade peaches for fresh milk and homegrown honey for half of a
pig rather than having to raise every sort of livestock ourselves.
That said, I have to
admit that I love days when we're flooded in and it becomes clear how
self-sufficient our homestead already is. Even without high creek
waters, we generally only go into town two days a week to mail our chicken waterers, hitting the grocery store
once every week or two for the scant provisions we don't grow
ourselves, and visiting the big city perhaps once or twice a month for
other supplies. Who cares if it floods Tuesday night when you're
not due to go into town until Friday anyway?
Binet Payne's method of
worm bin management is quite complex, but it can be summed up as
follows:
 Only add
as much food as your bin can handle. The first step is to
audit your food waste over the course of a month and then build an
appropriately sized bin that you stock with the right number of
worms. Then weigh your food waste each day as you put it in the
bins to make sure the amount of food is close to the daily
average. If you get a sudden glut of food waste, use the extra in
a traditional compost pile or feed it to your chickens rather than
overwhelming the worm bin (and promoting fruit flies.)
Only add
as much food as your bin can handle. The first step is to
audit your food waste over the course of a month and then build an
appropriately sized bin that you stock with the right number of
worms. Then weigh your food waste each day as you put it in the
bins to make sure the amount of food is close to the daily
average. If you get a sudden glut of food waste, use the extra in
a traditional compost pile or feed it to your chickens rather than
overwhelming the worm bin (and promoting fruit flies.)- Keep food under cover. Every day when Binet's students add new food to her bins, they dig a trench across the width of the bin, put in the food, break up any large pieces of food with a shovel, then completely cover the food with bedding.
- Turn bins at least once a week
to double the compost speed. If you use the complicated
filling method I'll outline below, you'll need to turn each section
separately so that you don't mix old and new food waste together.
- Give your worms six weeks for the first round of composting. Binet Payne splits each of her four bins into eight sections and fills alternate sections every day, so she has completely filled the 32 sections in her bins at the end of six weeks. Although the method is complicated, I can see the utility --- you don't overload one bin all at once, and worms can move between areas with lots of fresh food waste and areas with fresh bedding as necessary to keep themselves healthy.
 Tempt
your worms to migrate to fresh bedding after six weeks.
After the first six weeks passes and each of the sections in her four
bins are full, Binet Payne rakes the contents of each bin to one side,
leaving three quarters of the bin bare. The bare part of the bin
is filled with fresh bedding and is then divided into six sections,
which she will fill with food waste in the same alternate manner she
used to fill the bin the first time. Meanwhile, worms will be
migrating out of the older composting materials and into the fresh
bedding as they finish composting the older section.
Tempt
your worms to migrate to fresh bedding after six weeks.
After the first six weeks passes and each of the sections in her four
bins are full, Binet Payne rakes the contents of each bin to one side,
leaving three quarters of the bin bare. The bare part of the bin
is filled with fresh bedding and is then divided into six sections,
which she will fill with food waste in the same alternate manner she
used to fill the bin the first time. Meanwhile, worms will be
migrating out of the older composting materials and into the fresh
bedding as they finish composting the older section.- Move nearly completed compost to the finishing bin. Five to ten days after raking the old material to one side of the bin, begin to move those castings to a finishing bin. The worms should have migrated sideways and down out of the top two inches of the old material, so you can rake that part off wth a hand rake. Wait a day and rake two more inches and repeat until you're near the bottom of the bin. The last bit of material may be chock full of worms, in which case it is scattered across the new material in the rest of the bin to speed up decomposition.
- Use castings only from the
finishing bin. The finishing bin is like another worm bin,
but the materials inside are nearly or completely done
composting. Binet Payne found that compiling all of the finished
castings into one bin made it easy for other members of the school to
use them in gardening projects and science experiments without
bothering the busy worms in active bins.
 When I first read Binet
Payne's method, it felt overly complex, but as I sum it up for you, I
can see the importance of each step. For anyone who's not an
obsessive list-maker, though, I suspect this sytem would be tough to
stick to, which makes me think somebody needs to invent a system that
does all of the thinking for you. I've seen worm bins where you
fill the bottom bin up, stack on another bin which you fill up and into
which worms migrate as they finish the bottom bin, and so forth, but
this would be a very bulky system on any scale larger than a few cubic
feet. I'm sure we can come up with something better. Any
suggestions on how to scale this idea up to a farm-sized version?
When I first read Binet
Payne's method, it felt overly complex, but as I sum it up for you, I
can see the importance of each step. For anyone who's not an
obsessive list-maker, though, I suspect this sytem would be tough to
stick to, which makes me think somebody needs to invent a system that
does all of the thinking for you. I've seen worm bins where you
fill the bottom bin up, stack on another bin which you fill up and into
which worms migrate as they finish the bottom bin, and so forth, but
this would be a very bulky system on any scale larger than a few cubic
feet. I'm sure we can come up with something better. Any
suggestions on how to scale this idea up to a farm-sized version?
| This post is part of our Worm Cafe lunchtime series.
Read all of the entries: |
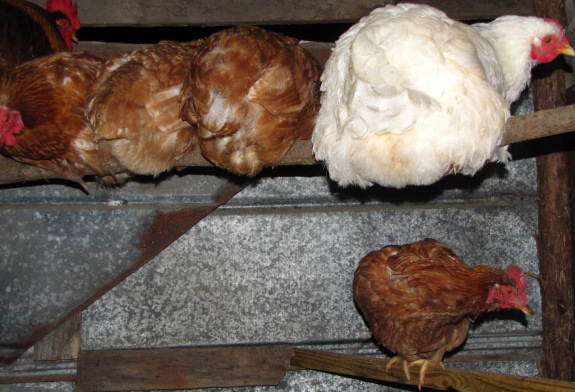
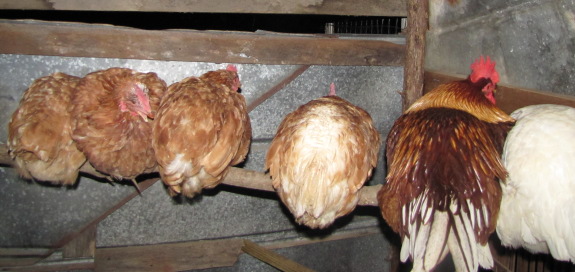
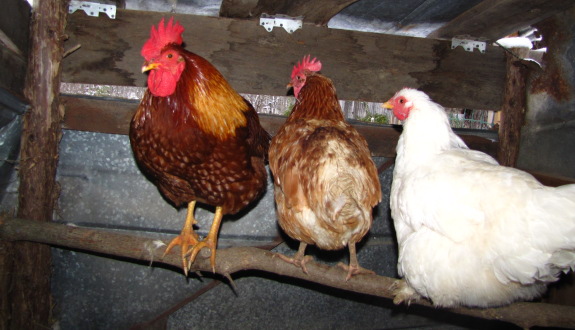
It was a relief to see all 6
chickens off the ground and on a roost last night.
The fact that one of our hens
is on a lower perch is more than likely some sort of expression of our
particular flock dynamics.
I suspect it's the white Cochin hen who is not letting the loner girl
play any reindeer games.
 Even
though I've got some last mulching and transplanting to slip into the
early winter, we've turned a lot of our attention inside for the colder
months. One of the projects I hope to tackle is turning Mark's
old bedroom into a chicken waterer construction
room and general work space, and the first thing it needed was a big
work bench.
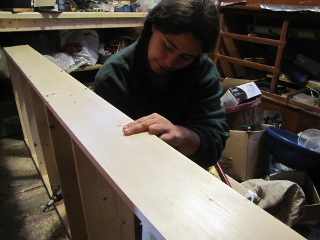
Even
though I've got some last mulching and transplanting to slip into the
early winter, we've turned a lot of our attention inside for the colder
months. One of the projects I hope to tackle is turning Mark's
old bedroom into a chicken waterer construction
room and general work space, and the first thing it needed was a big
work bench.
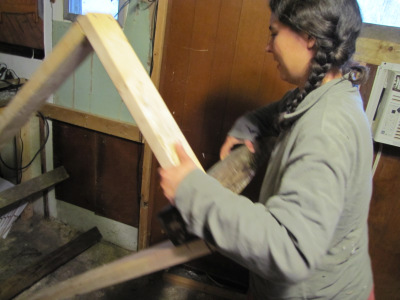
Mark's usually the
carpenter in the family, but he was nice enough not to mind me 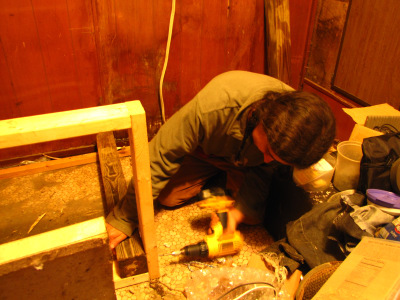 spreading
my craftsman wings. As usual, the goal was to build something
with as little storebought materials as possible. After a bit of
poking around, I came up with a used kitchen counter (from Mark's mom
--- thanks, Rose Nell!), some used 4X4s (from my mom --- thanks, Mom!),
and some slightly used 2X4s that we'd taken out of another
project. The only really storebought component was a heaping
handful of screws, worth perhaps four dollars.
spreading
my craftsman wings. As usual, the goal was to build something
with as little storebought materials as possible. After a bit of
poking around, I came up with a used kitchen counter (from Mark's mom
--- thanks, Rose Nell!), some used 4X4s (from my mom --- thanks, Mom!),
and some slightly used 2X4s that we'd taken out of another
project. The only really storebought component was a heaping
handful of screws, worth perhaps four dollars.
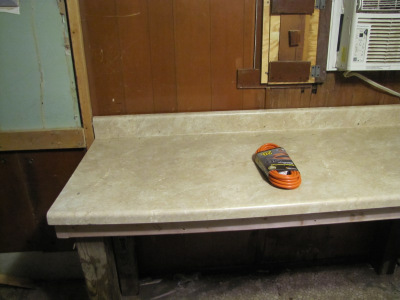 I
built a box the shape of the counter out of the 2X4s, attached the 4X4s
in each corner as legs, and screwed the counter on top. Instant
work bench! Next, I plan to add a shelf underneath and a bunch
more shelves on the walls to get our tools organized and off the ground.
I
built a box the shape of the counter out of the 2X4s, attached the 4X4s
in each corner as legs, and screwed the counter on top. Instant
work bench! Next, I plan to add a shelf underneath and a bunch
more shelves on the walls to get our tools organized and off the ground.
It's hard to believe
that I didn't even know what a cordless drill was when we embarked on
this adventure four years ago. Mark has been a very patient
teacher, and has barely cringed when I broke his favorite drill bit,
sometimes offering a gentle "Are you sure you want to do it that way?",
but generally letting me make my own mistakes. Thanks, honey!
 I'm ashamed to say that we
haven't done very well with our worms in the
past. Part of the problem is that we had very little waste to
give
them since nearly all of our food scraps go to the chickens, and
another part of the problem is that I didn't use optimal bedding.
From
reading Binet Payne's Worm Cafe, though, I'm also starting
to realize
that small-scale worm bins are inherently finicky, a problem that is
overcome by expanding the worm bin to compost more waste.
I'm ashamed to say that we
haven't done very well with our worms in the
past. Part of the problem is that we had very little waste to
give
them since nearly all of our food scraps go to the chickens, and
another part of the problem is that I didn't use optimal bedding.
From
reading Binet Payne's Worm Cafe, though, I'm also starting
to realize
that small-scale worm bins are inherently finicky, a problem that is
overcome by expanding the worm bin to compost more waste.
Binet Payne notes that
her 32 cubic foot worm bins are very forgiving
of environmental conditions. She places them in the shade, but
otherwise doesn't worry too much about the weather even though the bins
are located outside. When the top layer of vermicompost freezes
in the
winter, the worms just move a bit deeper into the part of the bin where
microbial decomposition warms the bedding. During the summer when
 school is out, the worms do
fine coasting along on just a couple of
feedings. Not only do mid-scale worm bins provide enough castings
to actually make a dent in a homestead's needs, they are also easier to
handle.
school is out, the worms do
fine coasting along on just a couple of
feedings. Not only do mid-scale worm bins provide enough castings
to actually make a dent in a homestead's needs, they are also easier to
handle.
But where do you get ten
to twenty-five pounds of food waste per day? After failing at our
attempt to beg food waste from the local grocery store, I've got my eye
on the school down the road. I'm on the fence about whether to
try to find funding so that I could help them implement Binet Payne's
entire program (estimated cost $1,000 to $3,000), or whether I just
want to come up with air-tight containers that we could pick up on our
bi-weekly trips to town and then compost the food waste on our own
farm. I'll probably present both ideas to their principal and see
which one seems most exciting to her.
| This post is part of our Worm Cafe lunchtime series.
Read all of the entries: |
Training
chickens is a new way of learning dog training skills.
Operant conditioning from
B.F. Skinner involves a clicker and yummy snacks for reinforcement. You
can train a chicken to discriminate between shapes, navigate an
obstacle course, or just ring a bell.
I wonder if a chicken could
be trained to open and close an automatic
chicken coop door by
pushing the right button?
Does anybody reading this have an especially outrageous task they've
always wanted to train a chicken to do?
 Out
of curiosity, I've had Mark keep track of how much wood he's been
splitting and stacking for our new Jotul
wood stove this
week. Even though the Jotul is very efficient, I've been very
profligate with wood, keeping the trailer perhaps ten to fifteen
degrees warmer than we did last winter with the beast, and temperatures
have been on the lower end of average outside. Even so, at the
rate we're burning, it would take us nearly two months to run through a
cord of wood. For the sake of comparison, we burned 1.75 cords of
wood in perhaps four to six weeks last year and then were cold for the
rest of the winter.
Out
of curiosity, I've had Mark keep track of how much wood he's been
splitting and stacking for our new Jotul
wood stove this
week. Even though the Jotul is very efficient, I've been very
profligate with wood, keeping the trailer perhaps ten to fifteen
degrees warmer than we did last winter with the beast, and temperatures
have been on the lower end of average outside. Even so, at the
rate we're burning, it would take us nearly two months to run through a
cord of wood. For the sake of comparison, we burned 1.75 cords of
wood in perhaps four to six weeks last year and then were cold for the
rest of the winter.
 But
are we saving any time? We've discovered that it's a lot easier
to fit wood into the Jotul's smaller firebox if it's split well, and
since the fire is so easy to start I've been letting it go out a lot
and restarting it with finely split box-elder kindling. And some
of the logs are too long to fit in our new stove, so we cut them in
half with the miter saw. That's a lot more prep per log than our exterior
wood furnace
required. Even so, I estimate that Mark spent only about 15
minutes per day splitting, cutting, and hauling wood, which is probably
half the time he spent processing wood for the beast.
But
are we saving any time? We've discovered that it's a lot easier
to fit wood into the Jotul's smaller firebox if it's split well, and
since the fire is so easy to start I've been letting it go out a lot
and restarting it with finely split box-elder kindling. And some
of the logs are too long to fit in our new stove, so we cut them in
half with the miter saw. That's a lot more prep per log than our exterior
wood furnace
required. Even so, I estimate that Mark spent only about 15
minutes per day splitting, cutting, and hauling wood, which is probably
half the time he spent processing wood for the beast.
All things considered, I
think the Jotul is actually going to save us more time and money than I
initially estimated. We had been planning on a cheaper option for
the East Wing, but we're now seriously considering just saving our
pennies and buying a second Jotul.
The loner
hen now gets to sleep on
the top roost, but the trio of popular girls still won't let her perch
at their table.
 I find it hard to believe
that it's December and we're still eating fresh produce for almost
every meal. I snagged these oyster mushrooms a couple of days ago
while walking Lucy --- they had sprung up on the part of the fallen
oyster mushroom log that I thought was mushroom-free and thus left
behind. Even though the mushrooms were frozen solid, they thawed
out to make tasty fajitas.
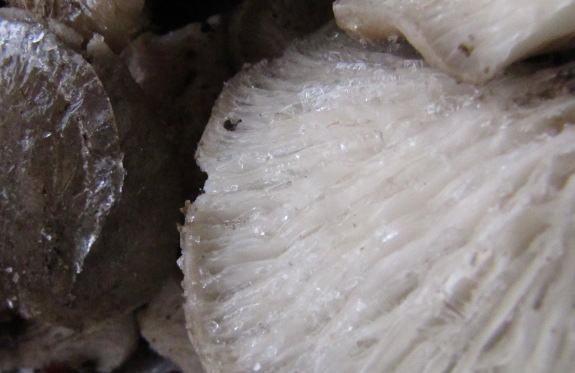
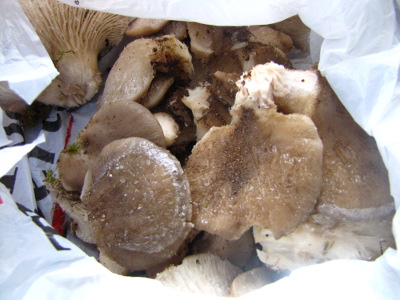
I find it hard to believe
that it's December and we're still eating fresh produce for almost
every meal. I snagged these oyster mushrooms a couple of days ago
while walking Lucy --- they had sprung up on the part of the fallen
oyster mushroom log that I thought was mushroom-free and thus left
behind. Even though the mushrooms were frozen solid, they thawed
out to make tasty fajitas.
Meanwhile, we're filling
our salad bowls with lots of lettuce and the steamer with masses of
mustard and swiss chard greens along with a weekly dose of broccoli
side florets. There are parsley and Egyptian onion tops for extra
fresh greenery, and our house is full of stored sweet potatoes, white
potatoes, butternuts, and garlic. We've still got a few ripening
tomatoes, but they're not anything to write home about.
In the interest of
variety, we've thawed out a gallon and a half of vegetables from the
freezer, but in terms of quantity, we could still be eating entirely
from the garden if we felt like it. Even though half of our fall
garden didn't germinate, the plants that did come up have given us the
tastiest early winter ever!
I think a good way to
determine if it's going to be a cold day is when our flock decides to stay in.
Today was one of those cold
days.

Although I'm sure 75% of
you know all about this, I was thrilled to be clued into one of Mark's
best tool add-ons --- the quick change adapter on the cordless
drill. This adapter hooks onto the front of the drill and allows
special drill bits and drivers to be popped in and out with a  flick
of your wrist. (To be more literal, on our drill, you just push
part of the adapter backwards and the drill bit pops out. I've
read that different brands require slightly different motions, but
they're all easy to do with your hands full.) Some other names
for the same thing include hex-shank or ultralok drill bits.
flick
of your wrist. (To be more literal, on our drill, you just push
part of the adapter backwards and the drill bit pops out. I've
read that different brands require slightly different motions, but
they're all easy to do with your hands full.) Some other names
for the same thing include hex-shank or ultralok drill bits.
With a quick change
adapter in place, it's simple to swap back and forth between drilling
pilot holes and then driving in the screw. The only problem is
that you have to use special bits with a hexagonal (rather than round)
base, so if you lose your favorite snap-in drill bit, you might spend
as long looking for it as you would have swapping between the drill bit
and the phillips head driver. Maybe once all of our tools are
organized, we won't have this problem any more?
Ice and Easy de-icer
+ 4 feet of Reflectix=
Experimental chicken water heater.
We'll know in the morning if
this will be good enough to keep the automatic chicken nipple from
freezing.
 My
maternal grandfather died when I was six, so I can't actually remember
anything about him. But lately I've realized that I probably get
my obsessive list-making from Grandpa Eckberg.
My
maternal grandfather died when I was six, so I can't actually remember
anything about him. But lately I've realized that I probably get
my obsessive list-making from Grandpa Eckberg.
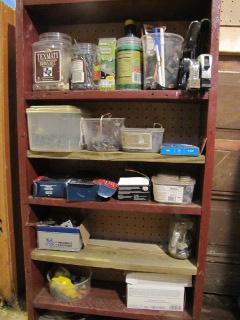
I also inherited this
little red bookcase from him. The story goes that Grandpa made
this bookcase out of orange crates while he and his family were
stationed in California during World War II. Were the wooden
orange crates disposable, a slightly more sturdy version of the half
bushel cardboard boxes of oranges you can buy today? Was Grandpa
reusing the wood because he couldn't bear to throw the boxes away, or
was it just an example of Yankee frugality? Either way, I figured
that Grandpa wouldn't mind me adding a couple of extra shelves and a
back to his bookcase to make it easier to fill up with containers of
screws.
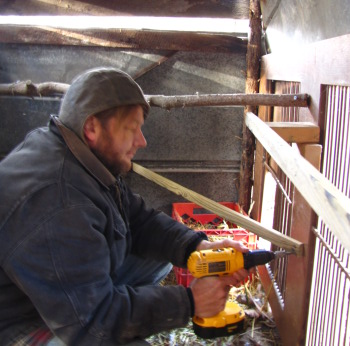
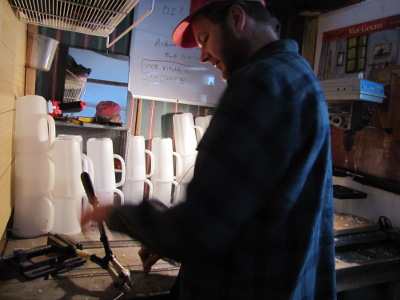 The
pile of miscellaneous stuff awaiting organization in the middle of our
office doesn't seem to be getting any smaller, but the space is already
easier to use. This photo of Mark working on our homemade chicken
waterers doesn't
look like much, but you have to realize that just a year and a half ago
Mark was making waterers under a tent in the backyard. When you
start with nothing, every little improvement is exciting.
The
pile of miscellaneous stuff awaiting organization in the middle of our
office doesn't seem to be getting any smaller, but the space is already
easier to use. This photo of Mark working on our homemade chicken
waterers doesn't
look like much, but you have to realize that just a year and a half ago
Mark was making waterers under a tent in the backyard. When you
start with nothing, every little improvement is exciting.
The Ice
and Easy did a good job keeping the water from freezing in the
bucket, but last night it got down to 17 degrees farenheit, which
equaled frozen chicken nipples this morning.
They both thawed out this
afternoon when the temperature got around 25 degrees.
I installed a light with
another layer of Reflectix to keep some of the heat within the nipple
drinking area. We'll see tomorrow morning if this is enough to keep
water flowing during this sub freezing cold spell.
 Do
you
remember learning in high school biology class about mitochondria,
those tiny organelles inside your cells which convert sugars into
energy? Remember how they fold their cell membranes up into a
convoluted mass to provide surface area for all those reactions?
That's what I've been thinking about all week as I add surface area
(aka shelves) to the office, turning it into the powerhouse of the
trailer.
Do
you
remember learning in high school biology class about mitochondria,
those tiny organelles inside your cells which convert sugars into
energy? Remember how they fold their cell membranes up into a
convoluted mass to provide surface area for all those reactions?
That's what I've been thinking about all week as I add surface area
(aka shelves) to the office, turning it into the powerhouse of the
trailer.
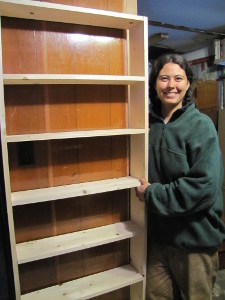
My most recent addition
is a homemade bookcase, sized just right to fit
into that difficult spot beside the door. Although not as elegant
as Grandpa's
bookcase, it will
hold twice as many odds and ends.
Yes, scary pile in the middle of the floor, I'm talking about you.
It works!
Now I need to simplify the
design. Maybe have the light automatically switch off during the day
and when it's above freezing, or experiment with Roland's
idea of applying heat through an electrical current directly to the
nipple in question.
Visit our heated
chicken waterer page for more details on designing your own.
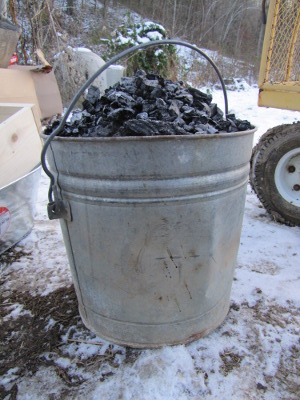 Once
I started damping our Jotul
F 602 wood stove
down at night, I realized that the stove makes copious amounts of first
class charcoal. Thirteen days of fires filled up our bucket
beyond the brim --- time to figure out how to filter the charcoal from
the ash.
Once
I started damping our Jotul
F 602 wood stove
down at night, I realized that the stove makes copious amounts of first
class charcoal. Thirteen days of fires filled up our bucket
beyond the brim --- time to figure out how to filter the charcoal from
the ash.
Both wood ashes and
charcoal are good for the garden, but they have different uses.
Ash is high in potassium, and also contains quite a bit of phosphorus,
magnesium, and various trace minerals. More important, though,
wood ashes are a quarter to a half calcium carbonate (aka "lime"), so
you have to be aware that you will raise the pH of your soil by
applying the ashes. Since our soil already has a pH around 6 and
our potassium levels are naturally very high, I don't want to apply too
much ash or I'll raise the pH above the optimal 6.5 recommended for a
vegetable garden and possibly bring the potassium up to toxic levels.
The charcoal is what I'm
really excited about. We've been sold on the benefits of
biochar to soil,
but haven't
been ready to put in the time to build a biochar production
chamber. Sure is nice of the airtight wood stove to do that job
for us while also producing plenty of heat to keep my toes warm.

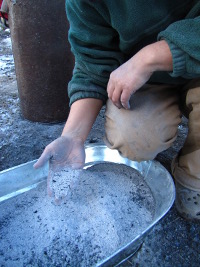
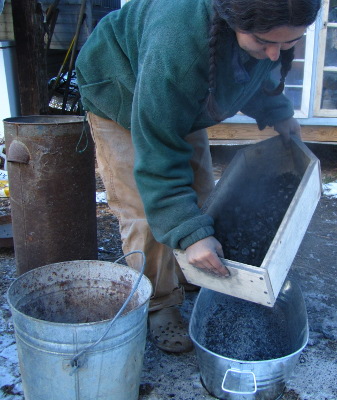
I built a sifting box to
separate the charcoal from the ashes, a process that went pretty
smoothly but needs a bit of tweaking. First of all, even though
the coals had been sitting in the ash bucket for nearly twelve hours,
some were still burning, and I scorched the wood 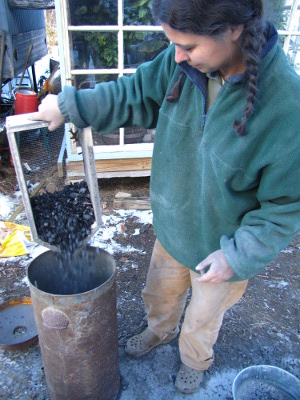 on
the inside of my sifter. Mark suggested adding flashing to the
inside, which is a great idea. The job was also pretty messy, with ash flying everywhere --- maybe I need to add a lid to the top of the sifter?
on
the inside of my sifter. Mark suggested adding flashing to the
inside, which is a great idea. The job was also pretty messy, with ash flying everywhere --- maybe I need to add a lid to the top of the sifter?
Despite needing some
optimizing, the sifting operation went quickly once I realized I should
only dump in about four inches of stove debris at a time and jiggle the
sifter a lot to get the ashes to fall through the holes. The
really difficult bit will be figuring out how to crush the biochar into
powder. We could use the chunks as they are, but my understanding
is that we get more surface area and more microbial action if we crush
the biochar into much smaller pieces. While we put our thinking
caps on, I'll be storing our charcoal in a metal container so that it
can't burn through the bottom and start a fire.
 Going
up our little hill to fetch 3 pails of water takes about 5 minutes once
you break a hole in the top layer of ice in the tank.
Going
up our little hill to fetch 3 pails of water takes about 5 minutes once
you break a hole in the top layer of ice in the tank.
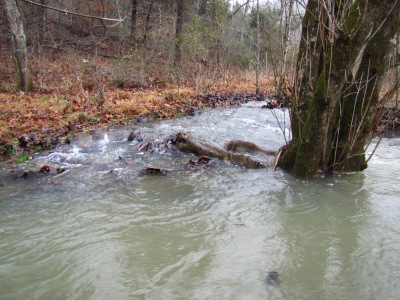
While I'm doing this I often
compare it to the early days of getting water from the creek where the
main problem was finding a deep enough spot so the bucket would mostly
fill up.
I estimate this tank method
is 4 to 5 times faster and easier.
 We've
been operating under deep freeze conditions all week. Friday
night, the snow started falling, and by the end of the weekend we had
about four inches. Then the temperatures dropped way down, with
days below freezing and nights in the teens and single digits.
For the sake of comparison, December's average high is 48 and our
average low is 26 --- waking up to ice in my water bottle inside the
trailer is highly unusual, but that's what Thursday morning was like.
We've
been operating under deep freeze conditions all week. Friday
night, the snow started falling, and by the end of the weekend we had
about four inches. Then the temperatures dropped way down, with
days below freezing and nights in the teens and single digits.
For the sake of comparison, December's average high is 48 and our
average low is 26 --- waking up to ice in my water bottle inside the
trailer is highly unusual, but that's what Thursday morning was like.
Even though our water
line is buried to within four feet of the house, we didn't finish it up
because of a
kink in the plan.
Usually, a frozen water line isn't a big deal --- you fill up a few
pots with wash water and a few jugs with drinking water, and the line
thaws out in the afternoon a day or two later. Not this
week. Instead, it stayed so cold that the snow sat on the ground
and the line stayed frozen solid until Mark
busted some ice out of the thousand gallon tank to carry wash water to
the house.
The positive part of
this deep freeze is that it's been a real test of our other winter
projects. Mark's homemade
heated chicken waterer was still operating on a 9 degree Fahrenheit
morning, which is just about as cold as it ever gets around here.
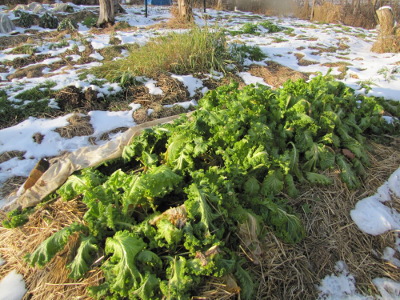
And when the snow finally melted enough that I could pull back the row
covers in the mule garden, I was able to pick fresh, beautiful mustard
greens for our lunch.

The enclosed pet
porch suffered a set back this week when water leaked in and formed
a solid sheet of ice on the floor.
I decided to use some
Reflectix to block the water path, which should also help to hold in
some heat if one or both of the cats decide they want to sleep there.
They've both figured out how
to use it and seem to like the new freedom.
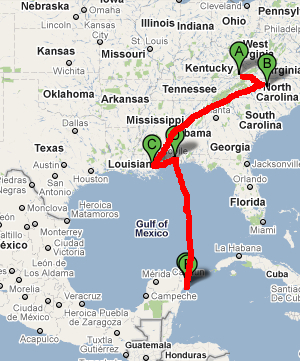 Last
year's honeymoon
cruise to the Yucatan
exceeded my wildest
expectations, so we decided we had to give it another shot, but a
little later in the year once the garden was sound asleep. This
evening, we'll be taking the train south, then jumping aboard a cruise
ship to drift through the Gulf of Mexico, explore Mayan ruins, and
experience a Mayan steam lodge. So, for all of those people who
would usually call me on my birthday, please send me an email instead
--- I'll be away from the phone and having a blast!
Last
year's honeymoon
cruise to the Yucatan
exceeded my wildest
expectations, so we decided we had to give it another shot, but a
little later in the year once the garden was sound asleep. This
evening, we'll be taking the train south, then jumping aboard a cruise
ship to drift through the Gulf of Mexico, explore Mayan ruins, and
experience a Mayan steam lodge. So, for all of those people who
would usually call me on my birthday, please send me an email instead
--- I'll be away from the phone and having a blast!
One of our readers ---
Shannon --- kindly offered to mind the homestead
while we're sunning ourselves in Mexico, and once I learned the sheer
quantity of firepower he possesses, we couldn't turn him down.
Mark felt better about me announcing to the world that we'd be away
from home once he saw Shannon's arsenal. Don't have a heart
attack, Mom, he's a nice guy despite the guns! Single female
readers, Shannon is available and a very hearty woodchopper --- very
good farm-husband material.
 The real point of this post
(there's a point?) is to let you know that
our internet access will be spotty over the next week and a half, so
your comments might languish for a while in moderation. We've
saved up a bunch of fun posts to tide you over until we return to the
homestead, but my crontab syntax needs a bit of work, and there's a
chance my auto-posts just won't go through --- I apologize in advance
if you have to go a day without the Walden Effect. Please do keep
commenting as usual --- I love coming home to tidbits of information
from our loyal readers. Have a great solstice!
The real point of this post
(there's a point?) is to let you know that
our internet access will be spotty over the next week and a half, so
your comments might languish for a while in moderation. We've
saved up a bunch of fun posts to tide you over until we return to the
homestead, but my crontab syntax needs a bit of work, and there's a
chance my auto-posts just won't go through --- I apologize in advance
if you have to go a day without the Walden Effect. Please do keep
commenting as usual --- I love coming home to tidbits of information
from our loyal readers. Have a great solstice!
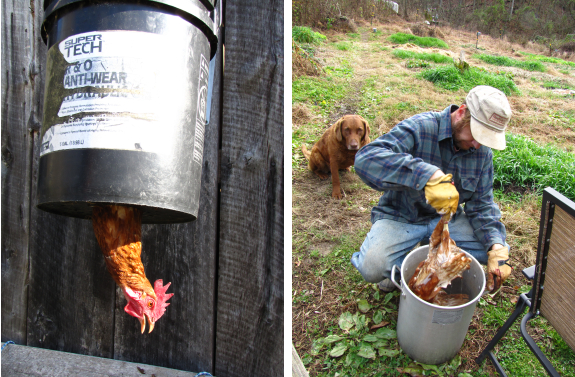
 We
finally got around to killing one of our hens who hadn't laid an egg
since the spring. After a couple of months by herself with top
notch food, I determined that she had developed a defective
shell gland that wouldn't heal and that she needed to be culled
from the flock. You might be interested in reading my post over
on our chicken blog about my philosophy on when
to cull chickens from your flock.
We
finally got around to killing one of our hens who hadn't laid an egg
since the spring. After a couple of months by herself with top
notch food, I determined that she had developed a defective
shell gland that wouldn't heal and that she needed to be culled
from the flock. You might be interested in reading my post over
on our chicken blog about my philosophy on when
to cull chickens from your flock.
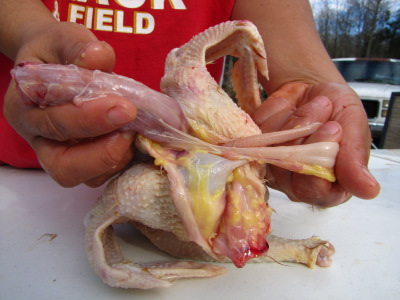 I'm
ashamed to say that I procrastinated all fall and never put the hen's
demise on our list until the end of November. Those five minutes
a day I spent giving her individualized attention and the cup of food
per day she ate while laying no eggs really adds up, and I hope that
I've learned my lesson not to procrastinate in the future. After
all, it took less than an hour of concerted attention to dispatch,
pluck, and gut her.
I'm
ashamed to say that I procrastinated all fall and never put the hen's
demise on our list until the end of November. Those five minutes
a day I spent giving her individualized attention and the cup of food
per day she ate while laying no eggs really adds up, and I hope that
I've learned my lesson not to procrastinate in the future. After
all, it took less than an hour of concerted attention to dispatch,
pluck, and gut her.
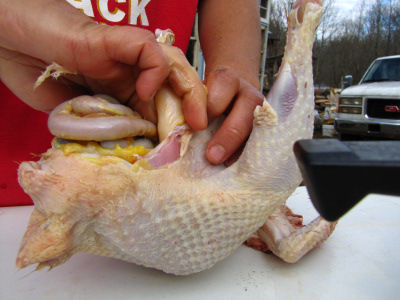 Usually,
I would turn an old hen into potstickers or
another sausage-type dish, but I was a bit worried about the condition
of this hen's meat. As soon as we slit her throat, fecal matter
came bubbling up from her crop, and it was impossible to keep the
manure off the meat. I assume there was some kind of physical
blockage inside her, which contributed to her egg-laying problem, but I
just didn't feel good about eating the questionable meat. So we
cut her into quarters as a winter treat for Lucy, who wants all dog
owners to know that uncooked poultry bones are a
perfectly safe (and very nutritious) addition to the canine diet.
Usually,
I would turn an old hen into potstickers or
another sausage-type dish, but I was a bit worried about the condition
of this hen's meat. As soon as we slit her throat, fecal matter
came bubbling up from her crop, and it was impossible to keep the
manure off the meat. I assume there was some kind of physical
blockage inside her, which contributed to her egg-laying problem, but I
just didn't feel good about eating the questionable meat. So we
cut her into quarters as a winter treat for Lucy, who wants all dog
owners to know that uncooked poultry bones are a
perfectly safe (and very nutritious) addition to the canine diet.
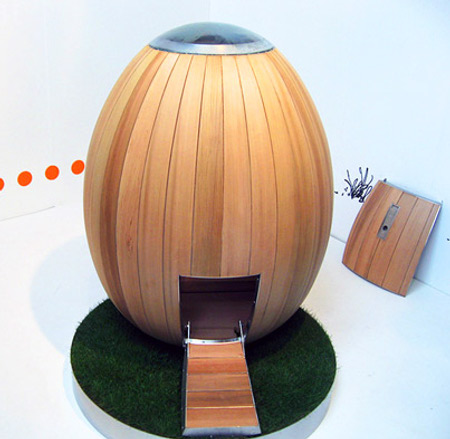
I'm not sure how practical this chicken coop is, but it sure impresses
me with its sleek design and egg like curves.
It's called the Nogg, and it has wheels hidden
underneath and is made from cedar.
The website doesn't list the
price, which I assume is because it costs a small fortune.
 In 1968, Eliot Coleman (quite
literally) bought Helen and Scott
Nearings'
back 40 acres and started farming. His farm is on the
coast of Maine --- zone 5 --- where many people think growing
conditions are tough for even producing a summer crop. But
Coleman didn't want to think so small. Instead, he dreamed of
developing a low tech and economical way to harvest fresh vegetables
year round. The
Winter Harvest Handbook
is a beautifully illustrated and clearly written guide that sums up
forty years of gardening experience and tells precisely how to harvest
salad greens and a few other crops all winter long.
In 1968, Eliot Coleman (quite
literally) bought Helen and Scott
Nearings'
back 40 acres and started farming. His farm is on the
coast of Maine --- zone 5 --- where many people think growing
conditions are tough for even producing a summer crop. But
Coleman didn't want to think so small. Instead, he dreamed of
developing a low tech and economical way to harvest fresh vegetables
year round. The
Winter Harvest Handbook
is a beautifully illustrated and clearly written guide that sums up
forty years of gardening experience and tells precisely how to harvest
salad greens and a few other crops all winter long.
Coleman started his
journey by looking into the past. 150 years ago, Parisian farmers
(maraichers)
grew all of the city's vegetables and even exported some to England
using just 6% of the city's land area as growing space. Their
highly intensive
gardens depended on copious amounts of horse manure from the city
stables --- sometimes as much as 400 tons per acre. (For the sake
of comparison, Lee
Reich's mulch campaign,
which I thought was beyond my ability to achieve, used only about 90
tons of organic matter per acre,  assuming
a conversion rate of about 1350 pounds per cubic yard.) This
French manure was used fresh as the heat source in hotbeds for winter
growing, with panes of glass over the top and then a mat of straw for
additional night-time insulation as needed. They also used
thousands of glass cloches (bottomless jars) to protect individual
plants.
assuming
a conversion rate of about 1350 pounds per cubic yard.) This
French manure was used fresh as the heat source in hotbeds for winter
growing, with panes of glass over the top and then a mat of straw for
additional night-time insulation as needed. They also used
thousands of glass cloches (bottomless jars) to protect individual
plants.
The French intensive
gardening system was clearly successful, but it
was also hugely labor-intensive. The hotbeds and cloches could
overheat on sunny days, so farmers would spend hours walking down the
rows and manually propping them open in the morning, then closing each
one back up as the sun fell at night. Modern winter-growers have
replaced all of this labor with high tech thermostats and self-opening
vents and fans, but Coleman wanted to find a system somewhere in the
middle. This week's lunchtime series details his method that
combines the simplicity of the French system with enough modern
conveniences to let you grow winter greens without quite so much
back-breaking labor.
| This post is part of our Winter Harvest Handbook lunchtime series.
Read all of the entries: |
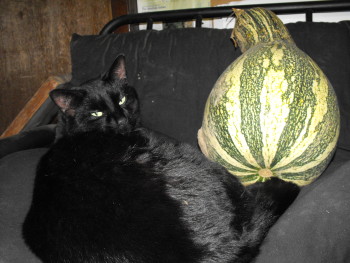 A
few years ago, I decided to figure out which winter squash suited our
tastebuds and garden the best, so I tested out Baby Bear, Howden, and
Jack-o-lite Pumpkins, Butternut Squash, Royal Acorn Squash, and
Cushaw. They all produced something, but the Cushaw was
definitely the most productive in terms of pounds of vegetables per
vine while Butternuts were quickly decided to be the taste test winner.
A
few years ago, I decided to figure out which winter squash suited our
tastebuds and garden the best, so I tested out Baby Bear, Howden, and
Jack-o-lite Pumpkins, Butternut Squash, Royal Acorn Squash, and
Cushaw. They all produced something, but the Cushaw was
definitely the most productive in terms of pounds of vegetables per
vine while Butternuts were quickly decided to be the taste test winner.I have a bit of a French mindset when it comes to food --- I believe that we should eat what tastes good, but consider high carb foods to be a treat to be eaten in small quantities now and then. We'd much rather eat a butternut pie once a week than a pumpkin pie twice a week because the former is just so much tastier! As a result, we haven't grown pumpkins since our trial year, and have found that butternuts are seldom bothered by pests or diseases.
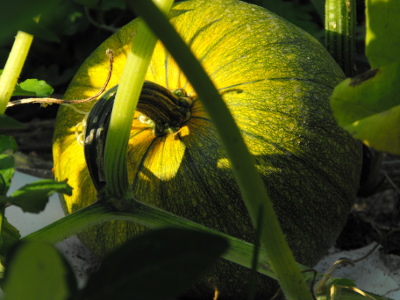 If
you're bound and determined to grow pumpkins, though, I have a few
words of advice from fighting my own battles to grow summer squash
here. The first step is to figure out what's killing your
pumpkins. Is it one of the fungi or bacteria which love moist
conditions? If so, plant your pumpkins far apart in the sunniest
spot like
we do with our tomatoes so that they dry out quickly
after rains. Or are your pumpkins succumbing to the squash vine
borer, which is our
personal bane? Variety selection seems to be your best bet when
fighting the vine borer, so try a half dozen types this year and see
which one does best. Good luck!
If
you're bound and determined to grow pumpkins, though, I have a few
words of advice from fighting my own battles to grow summer squash
here. The first step is to figure out what's killing your
pumpkins. Is it one of the fungi or bacteria which love moist
conditions? If so, plant your pumpkins far apart in the sunniest
spot like
we do with our tomatoes so that they dry out quickly
after rains. Or are your pumpkins succumbing to the squash vine
borer, which is our
personal bane? Variety selection seems to be your best bet when
fighting the vine borer, so try a half dozen types this year and see
which one does best. Good luck!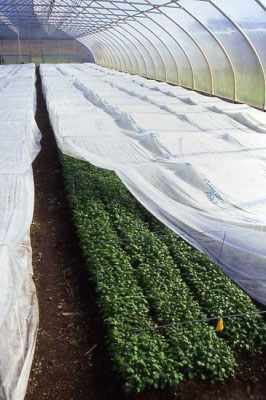 The heart of Eliot Coleman's
winter gardening is a two-tiered method of protecting the plants from
winter cold. He grows his vegetables under floating row covers
inside simple greenhouses (hoop houses), and the combination of the two
is the equivalent of moving his garden 1,000 miles south to where it is
three climatic zones warmer. The majority of his growing area ---
and the part I will be discussing in this lunchtime series --- is
completely unheated, but he does note that for some people who have a
cheap source of heat, it might be worthwhile to warm the greenhouses
until they stay just above freezing.
The heart of Eliot Coleman's
winter gardening is a two-tiered method of protecting the plants from
winter cold. He grows his vegetables under floating row covers
inside simple greenhouses (hoop houses), and the combination of the two
is the equivalent of moving his garden 1,000 miles south to where it is
three climatic zones warmer. The majority of his growing area ---
and the part I will be discussing in this lunchtime series --- is
completely unheated, but he does note that for some people who have a
cheap source of heat, it might be worthwhile to warm the greenhouses
until they stay just above freezing.
I've always been leery
of hoop houses and greenhouses because of
disease and pest buildup, and Eliot Coleman notes that permanent
greenhouses also have the side effect of building up soil nutrients to
poisonous levels. By cutting your growing space off from the
outside world, you're promising to keep the ecosystem in balance, which
is a tough job when we haven't even identified all of the
microorganisms at work in our soil. Coleman has a solution ---
let nature do that hard work for you. His greenhouses are light
enough that his tractor can pull them to a new patch of ground a couple
of times a year, allowing nature to heal the wacky greenhouse ecosystem
left behind. His movable greenhouses also have the side benefit
of allowing him to grow heat-loving summer crops in the greenhouse
until late October, then move the greenhouse onto two-month-old fall
crops just as the killing frosts commence --- in essence, he gets
fourteen months of greenhouse time per year for each structure.
The row covers Coleman
uses inside his greenhouse are the same
spun-bonded fabric you can purchase in many seed catalogs and which
you'll see in my garden. (He uses Agribon brand row covers from
Johnny's.) Since the greenhouse blocks wind and heavy weather,
you can simply drape your row covers over twelve inch tall wickets made
of #9 wire and spaced every four feet along the bed. Snap a few
clothespins on to hold the fabric in place, and you're done with your
second tier of protection. Unlike glass-topped cold frames or
cloches, row cover fabric is self-venting and only needs to be removed
when warm spring days in March begin to overheat your crops.
 I was glad to see that
Coleman did some research to determine the best
kind of row cover since I've been confused by all the choices in the
past. Your first decision is whether to choose polyvinyl alcohol
fabric or the simple spun-bonded fabric which is more readily
available. The former has marked advantages of lasting about four
times as long, allowing 90% of light to pass through (versus 30 to
85%), and keeping the air underneath about one degree warmer, but with
a price tag five times higher, polyvinyl alcohol probably isn't worth
it.
I was glad to see that
Coleman did some research to determine the best
kind of row cover since I've been confused by all the choices in the
past. Your first decision is whether to choose polyvinyl alcohol
fabric or the simple spun-bonded fabric which is more readily
available. The former has marked advantages of lasting about four
times as long, allowing 90% of light to pass through (versus 30 to
85%), and keeping the air underneath about one degree warmer, but with
a price tag five times higher, polyvinyl alcohol probably isn't worth
it.
Next choice is --- light
fabric or heavy fabric? In the seed
catalogs, you'll see the heavy fabrics listed as protecting your plants
several degrees colder, but in Coleman's experience, these heavy
fabrics block so much of the sun's light that the ground actually ends
up colder in the long run. Instead, he recommends the thinnest
row covers, which are rated as protecting your plants only down to 28
degrees Fahrenheit, but which Coleman said provide increasing amounts
of protection as the weather gets colder.
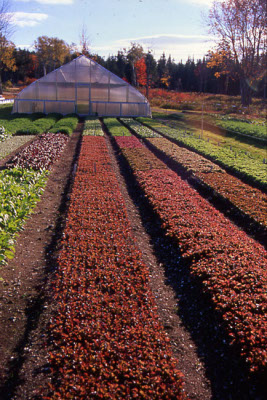
I won't go into the
specifics of Coleman's greenhouse construction
since his scale of greenhouse --- 48 feet by 22 feet --- is beyond the
scope of our homestead garden. If you want to know more, check
his book out of the local library, or visit his website (from which I snagged these
photos.) Or stay tuned for tomorrow's
post, in which I'll consider ways to apply Coleman's method to the
backyard.
 This post is part of our Winter Harvest Handbook lunchtime series.
Read all of the entries: This post is part of our Winter Harvest Handbook lunchtime series.
Read all of the entries: |
 When
we embarked on the East Wing project, Mark floated the idea of using a
bit of the extra space opened up in the trailer to put in a modern
washing machine. At first, the idea seemed okay, but the more I
thought about it, the more I clung to my wringer
washer.
When
we embarked on the East Wing project, Mark floated the idea of using a
bit of the extra space opened up in the trailer to put in a modern
washing machine. At first, the idea seemed okay, but the more I
thought about it, the more I clung to my wringer
washer.
On summer days, doing
laundry in the wringer washer is pure joy.
I sink my hands in the soapy water to pull out a shirt, pass it through
the wringer into the rinse water, then back through the wringer into
the laundry basket. Later, I hang up the load in the sunniest
spot of the yard, shared by our three bee hives, and the workers come
to explore the damp clothing. Now and then, a guard bee gets
pissed off at me working five feet from her door and she buzzes me
until I back off a bit, before trying again.
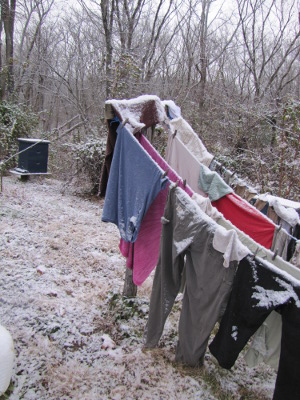 In
the winter, laundry can be a bit tricky, but the experience is almost more enjoyable.
Once the laundry basket starts to fill up, I scan the ten day weather
forecast looking for the most sunny, beautiful day. Here in zone
6, there's generally at least one beautiful day per
month, even in the dead of winter, and looking forward to laundry on
that day makes it extra special. Since we dry our clothes
on the line, we need that warm day anyway to suck moisture from the
clean clothes, and I suspect that if we got a washing machine, I'd soon
be ignoring the weather and buying a drier. Meanwhile, wringing
each piece of clothing by hand reminds me to wear our clothes
until they're truly dirty rather than dropping a clean sweather in the
laundry basket after one light wearing. Plus, the wringer washer
drains completely by gravity, so it can be left outside all winter
rather than taking up heated space in the house.
In
the winter, laundry can be a bit tricky, but the experience is almost more enjoyable.
Once the laundry basket starts to fill up, I scan the ten day weather
forecast looking for the most sunny, beautiful day. Here in zone
6, there's generally at least one beautiful day per
month, even in the dead of winter, and looking forward to laundry on
that day makes it extra special. Since we dry our clothes
on the line, we need that warm day anyway to suck moisture from the
clean clothes, and I suspect that if we got a washing machine, I'd soon
be ignoring the weather and buying a drier. Meanwhile, wringing
each piece of clothing by hand reminds me to wear our clothes
until they're truly dirty rather than dropping a clean sweather in the
laundry basket after one light wearing. Plus, the wringer washer
drains completely by gravity, so it can be left outside all winter
rather than taking up heated space in the house.
I know that Mark was
trying to save me work by offering a modern
washing machine, but right now I feel like I don't want to set foot on
that slippery slope. Maybe I'll change my tune in February....
 Eliot
Coleman's method of growing winter crops under row covers inside
unheated greenhouses clearly works like a charm for the market
gardener, but can those of us just growing for ourselves follow
suit? First of all, Coleman writes that true southerners (those
in zones 8 and 9) can probably get away with growing winter crops under
just row covers, and my father's experience in South Carolina bears
that out. And Coleman also presents a simpler alternative that
may provide all the protection we would need here in zone 6 --- quick
hoops.
Eliot
Coleman's method of growing winter crops under row covers inside
unheated greenhouses clearly works like a charm for the market
gardener, but can those of us just growing for ourselves follow
suit? First of all, Coleman writes that true southerners (those
in zones 8 and 9) can probably get away with growing winter crops under
just row covers, and my father's experience in South Carolina bears
that out. And Coleman also presents a simpler alternative that
may provide all the protection we would need here in zone 6 --- quick
hoops.
Coleman makes his quick
hoops by bending ten foot lengths of 1/2" electrical conduit into half
circles, then sinking ten inches of each end into the ground so that
the hoop covers an area about six feet wide. After placing a hoop
every five feet along the rows, he covers them with ten foot wide
sections of row cover which are weighed down on the edges with
sandbags. Once very cold weather threatens, he adds a sheet of
plastic on top (primarily to shed snow?)
 In effect, Coleman's quick
hoops are a combination of a floating row cover and a hoop house.
He notes that a quick hoop costs only 5% as much as the same square
footage of greenhouse and protects low-growing overwintering crops like
onions, spinach, and lettuce so that they can be harvested very early
in the spring on his farm in Maine.
In effect, Coleman's quick
hoops are a combination of a floating row cover and a hoop house.
He notes that a quick hoop costs only 5% as much as the same square
footage of greenhouse and protects low-growing overwintering crops like
onions, spinach, and lettuce so that they can be harvested very early
in the spring on his farm in Maine.
I'm tempted by his quick
hoop concept much more than by his larger scale greenhouses, but I have
a few reservations. First of all, I'm not thrilled by the
recurring cost of buying row cover fabric --- under heavy use, it tends
to last only a year or two. On the other hand, I could cover most
of the mule garden with row cover fabric for only $40, which would
probably be about equivalent to the cost of cooling that amount of
summer produce over the winter in the freezer. The sticking point
would be whether our cats and dog love jumping on the quick hoops and
tearing them to pieces as much as they love ruining my cold frames ---
if so, buying row cover fabric multiple times a year just wouldn't be
worth it.
The other question is
--- are quick hoops enough to protect a winter harvest here in chilly
zone 6? Coleman didn't seem to think so, but he also advocated
using the lowest tech solution first to try it out before moving up to
more expensive solutions, so I think he would approve of us trying
quick hoops on our farm.
| This post is part of our Winter Harvest Handbook lunchtime series.
Read all of the entries: |
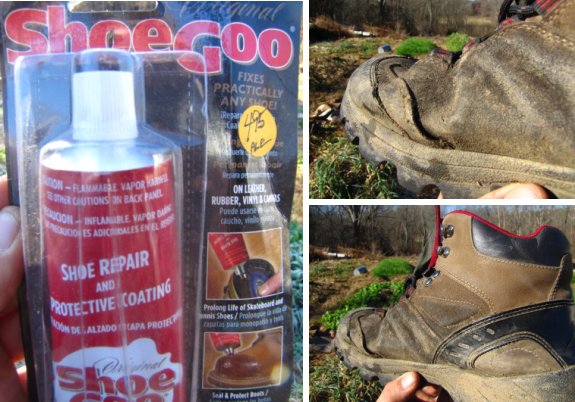
The work load here on Wetknee
farm has proven to be rough on work boots.
I thought an expensive pair
of Timberlands would last
longer. Turns out they started to fail within the same time frame as
cheaper boots which prompted me to keep going with Ozark Trail, which usually sells
for 30 dollars but can sometimes be found for 20.
The weak point is always
where my toes bend. This time I tried to extend the life of the above
pair with a product called Shoe Goo.
I made sure they were nice and dry and applied a liberal amount within
the gaps and gave it the full 48 hours of set up time.
My feet got wet the first day
just by stepping in puddles while chopping wood.
I think this product would
work well if you needed to re-attach the sole to the shoe as pictured
on the package. It might even form a decent protective coating to seal
up some shoes, but I don't think it's up to the task of bringing back
footwear that is so far gone they get your socks wet everytime you
cross the creek.
 After
years of experimentation, Eliot Coleman concluded that most plants stop
growing when the day length drops below 10 hours. After this
time, even if you protect your vegetables from the cold, they are
merely existing in a semi-hibernatory state.
After
years of experimentation, Eliot Coleman concluded that most plants stop
growing when the day length drops below 10 hours. After this
time, even if you protect your vegetables from the cold, they are
merely existing in a semi-hibernatory state.
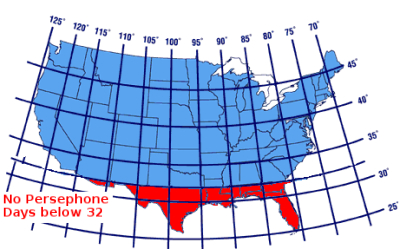
Coleman coined the term
"Persephone Days" to refer to this deep winter
period of short days, which occurs from November 5 to February 5 on his
farm in Maine, from December 1 to January 10 in Charlotte, North
Carolina, and from about November 22 to January 19 here in southwest
Virginia. Those of you who are lucky enough to live south of the
32nd parallel have no Persephone Days and can keep your crops active
all winter if you play your cards right.
The trick to a long
winter harvest is to plant your crops at just the
right stage of the late summer and fall so that they are just shy of
maturity when the Persephone Days begin. Young plants are much
hardier than older ones, so planting dates are even more important in
the fall than in the spring --- planting too early is just as bad as
too late. You'll also need to pay close attention to succession
planting so that you'll have a continuous harvest throughout the winter
rather than a mass of lettuce one week and then no more for the rest of
the year. In effect, you're not extending the growing season,
just the harvest season.
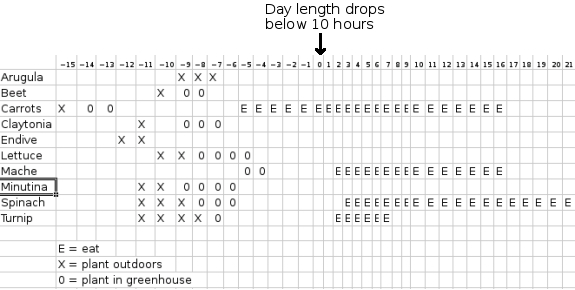
I mocked up the chart
above based on information in The
Winter Harvest Handbook,
but converted it over to the type of planting calendar I find so
helpful. Rather than placing the last or first frost date
at 0 the way I do with my spring
planting and fall planting
calendars,
I've placed the onset of the Persephone Days there, but the chart is
otherwise read in the same manner. For example, Eliot Coleman's
Persephone Days begin November 5, so he plants his first arugula nine
weeks before, around September 3. Since my Persephone Days begin
on November 22, I should plant my first arugula on September 20.
 You'll also notice that
Coleman lists outdoors and greenhouse planting
times for many of his crops. As I mentioned in a previous post,
the greenhouse crops don't really need to be covered for a couple of
months in many cases, so his "greenhouse-planted" carrots seeded
fourteen weeks before his Persephone Days are actually planted in
the open, then have a greenhouse moved over top of them in late
October.
You'll also notice that
Coleman lists outdoors and greenhouse planting
times for many of his crops. As I mentioned in a previous post,
the greenhouse crops don't really need to be covered for a couple of
months in many cases, so his "greenhouse-planted" carrots seeded
fourteen weeks before his Persephone Days are actually planted in
the open, then have a greenhouse moved over top of them in late
October.
A word of warning ---
all of Coleman's data is for the far
northeast, so I expect I'll need to play around with these planting
dates by as much as a week or two to find the optimal planting times
for my climate. If you've already developed a planting calendar
for winter harvest in the southeastern or mid-Atlantic states, I'd be
curious to hear your specifics.
| This post is part of our Winter Harvest Handbook lunchtime series.
Read all of the entries: |
 I'd
heard tidbits of Eliot
Coleman's wisdom
secondhand, which is what tempted me to plant
extra mustard greens and leave them be through the fall in hopes of a
winter harvest.
I planted several beds on August 20, then planted more on September
9. Both sets of greens grew beautifully, but the August-planted
mustard greens reached and passed peak maturity before our Persephone
Days began, and soon
the oldest greens were absolutely loaded with aphids.
I'd
heard tidbits of Eliot
Coleman's wisdom
secondhand, which is what tempted me to plant
extra mustard greens and leave them be through the fall in hopes of a
winter harvest.
I planted several beds on August 20, then planted more on September
9. Both sets of greens grew beautifully, but the August-planted
mustard greens reached and passed peak maturity before our Persephone
Days began, and soon
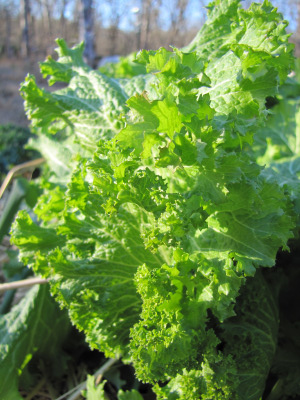
the oldest greens were absolutely loaded with aphids.
I subscribe to the
belief that insect infestations are a sign that I'm doing something
wrong, especially when it comes to aphids. The question is, which
of the three factors that separate the aphid-covered greens from the
healthy greens is the cause of the infestation?
- Early planting --- Eliot
Coleman advises that crops for winter harvest should just be reaching
maturity as the Persephone Days begin, and the buggy mustard was
overmature. Mustard in the later-planted beds is aphid-free and
vibrant.
- Protected microclimate
--- I used row cover fabric over the buggy plants earlier than I used
it over the non-buggy plants. I wonder if the fabric helped the
aphids survive freezing temperatures.
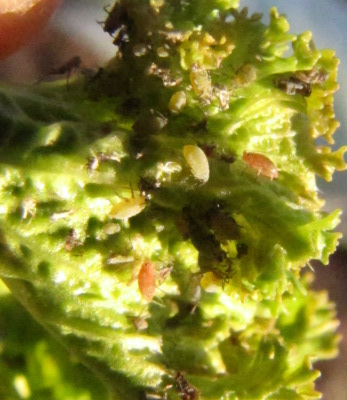 Poor soil and shade --- Even though all
of the aphid-coated mustard was planted early, one early-planted bed
skipped the aphid infestation. The buggy beds are at the west end
of the mule garden where they get more shade and where the soil is much
thinner --- the plants were probably already struggling a bit before
the aphids moved in. The happy but elderly mustard is in the
better soil of the east end of the mule garden and receives the most
winter sun.
Poor soil and shade --- Even though all
of the aphid-coated mustard was planted early, one early-planted bed
skipped the aphid infestation. The buggy beds are at the west end
of the mule garden where they get more shade and where the soil is much
thinner --- the plants were probably already struggling a bit before
the aphids moved in. The happy but elderly mustard is in the
better soil of the east end of the mule garden and receives the most
winter sun.
Since I don't know which
factor is the primary cause of my aphid infestation, I'll try to
correct all three for next year. Meanwhile, I've discovered that
you don't even notice the aphids once the greens are cooked --- extra
protein.
 Eliot
Coleman experimented with dozens of
types of cool season vegetables to discover the ones that work best for
winter harvest. His overall winner --- and the crop to which he
devotes half of his greenhouse space during the cold season --- is spinach. I've played with
spinach a bit and ended up mainly deleting it from our cycle since I
felt it wasn't as cold hardy as kale, the leaves were slow to pick
compared to other greens, and its germination can be quite
spotty. However, spinach has the benefit of being willing to put
out new leaves all winter, while even the most cold hardy crucifers
like kale just sit dormant during the darkest months. Clearly,
spinach is worth another try.
Eliot
Coleman experimented with dozens of
types of cool season vegetables to discover the ones that work best for
winter harvest. His overall winner --- and the crop to which he
devotes half of his greenhouse space during the cold season --- is spinach. I've played with
spinach a bit and ended up mainly deleting it from our cycle since I
felt it wasn't as cold hardy as kale, the leaves were slow to pick
compared to other greens, and its germination can be quite
spotty. However, spinach has the benefit of being willing to put
out new leaves all winter, while even the most cold hardy crucifers
like kale just sit dormant during the darkest months. Clearly,
spinach is worth another try.
Coleman's other top
winter crops are listed below:
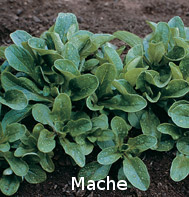 Mache
is a hardy salad
green that grows all winter like spinach. Unlike spinach, though,
you have to succession plant mache since you harvest the entire plant
rather than snipping off leaves.
Mache
is a hardy salad
green that grows all winter like spinach. Unlike spinach, though,
you have to succession plant mache since you harvest the entire plant
rather than snipping off leaves.- Leeks are a year-round crop for Coleman. I consider leeks too nitpicky for our garden when we can get the same results with less work using Egyptian onions, but The Winter Harvest Handbook reminded me that growing Egyptian onions inside a quick hoop would probably turn this nearly evergreen crop into a true all-winter producer.
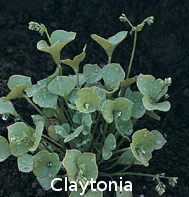
- Claytonia is another very cold-hardy salad green.
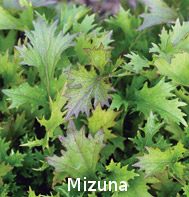
- Asian greens --- specifically mizuna, mibuna, tatsoi, pak choi, and tokyo bekana --- are among Coleman's favorites, again due to their hardiness.
- Lettuce is listed as less hardy than many of the other crops, making me think that we could extend our winter salad season by a month or two just by swapping crops. Although lettuce has no problem growing with only eight hours of sunlight per day, cool soil temperatures slow it down considerably.
 Kale can
be used as both
a salad green (for which he prefers Dwarf Scotch Curled Kale) or as a
cooking green (for which he prefers Tuscan Kale.)
Kale can
be used as both
a salad green (for which he prefers Dwarf Scotch Curled Kale) or as a
cooking green (for which he prefers Tuscan Kale.)- Carrots are part of his fresh-from-the-garden harvest from October through February. Although they can keep longer, he's noticed (as have I) that once the top growth begins in the spring, the flavor declines markedly. Coleman plants Napoli for winter harvest, then another crop of Nelson carrots in late December for an early spring crop.
- Turnips are a favorite of his customers, so he grows them even though they only last until Christmas in his greenhouse. Hakurei is his favorite variety for sweet roots and tasty greens.
As you can see, the
majority of the winter harvest is salad and cooking
greens, but anything fresh from the garden tastes better than the most
carefully frozen summer bounty by February. I've read blogs of
homesteaders who nearly delete their stockpile of summer goodies,
instead relying on the bounty of the winter garden to feed them during
the cold months. Although I'm not ready to give up my freezer of
corn, beans, squash, and tomatoes, I hope that next year's cold season
will bring more fresh food from the garden to our plates.
| This post is part of our Winter Harvest Handbook lunchtime series.
Read all of the entries: |
 This was such a thought-provoking question that Mark and I
discussed it over the dinner table that night. It turns out that
there is almost nothing we would change about our property if we had to
do it over again, but I have to admit that I didn't realize all of the
positive points of this property when I bought it. As we see it
now, here are the major advantages of our land:
This was such a thought-provoking question that Mark and I
discussed it over the dinner table that night. It turns out that
there is almost nothing we would change about our property if we had to
do it over again, but I have to admit that I didn't realize all of the
positive points of this property when I bought it. As we see it
now, here are the major advantages of our land:- Cheap land in an area with cheap land prices. Most people like to think of their home as an investment, but I would have to be in extremely dire straights to sell our beloved farm. Instead of looking for a property that will increase in value, I recommend that folks consider looking for land that they can buy without going into debt and which will maintain a low value so that their property taxes will stay within reasonable bounds. We pay just over $25 per month on property taxes but know people who pay twenty times that much. Do you really want to keep working a mainstream job just to pay property taxes?
- Rural, non-swanky neighborhood.
Although Appalachia has lots of problems, it
 also has a slew of
benefits. Around here, building codes are really only an issue in
cities, and even the mayor of a nearby town told Mark that he wouldn't
apply for a building permit for a project like our East Wing.
When I think of all of the hoops we could have had to jump through to
run our seat-of-the-pants operation, I feel very lucky that the long
arm of the law doesn't reach our farm. Our half mile driveway,
passable only by golf carts and four-wheel-drive vehicles, helps us
maintain that independence.
also has a slew of
benefits. Around here, building codes are really only an issue in
cities, and even the mayor of a nearby town told Mark that he wouldn't
apply for a building permit for a project like our East Wing.
When I think of all of the hoops we could have had to jump through to
run our seat-of-the-pants operation, I feel very lucky that the long
arm of the law doesn't reach our farm. Our half mile driveway,
passable only by golf carts and four-wheel-drive vehicles, helps us
maintain that independence.
- Plentiful water. I chose our farm in part because of the huge creek that runs along a boundary and the smaller creek that flows into it, but I didn't realize until we moved here how useful that water really is. Our climate is naturally wet, and many people farm without irrigating, but it's nice to have unlimited water at our beck and call. We also pump that water up into a storage tank to gravity feed to the house for unlimited wash water, which means we can just drink out of our well and not worry about running low on potable water.
 Starting with nothing. Although
at first it seems like it would have been easier to step into an
operational farm, in retrospect I'm very glad we started with nothing
except a briar patch. If our farm had come with a pasture,
I suspect we would have immediately bought sheep and a milk cow, and
then we would have had our hands full with serious livestock and
bushhogging weeds while we were still wet behind the ears. Having
to start new garden areas from scratch with hand tools also helped me
rein in my boundless garden dreams to more manageable
proportions. Each year, we add a bit more infrastructure as we
can afford the time and money, and the slow growth gives us time to
really learn all of the skills we need (and to enjoy the journey.)
Starting with nothing. Although
at first it seems like it would have been easier to step into an
operational farm, in retrospect I'm very glad we started with nothing
except a briar patch. If our farm had come with a pasture,
I suspect we would have immediately bought sheep and a milk cow, and
then we would have had our hands full with serious livestock and
bushhogging weeds while we were still wet behind the ears. Having
to start new garden areas from scratch with hand tools also helped me
rein in my boundless garden dreams to more manageable
proportions. Each year, we add a bit more infrastructure as we
can afford the time and money, and the slow growth gives us time to
really learn all of the skills we need (and to enjoy the journey.)
- A lot of the other factors
mentioned in Everett's post about why
he chose his property.
I won't repeat them all here, but they're very good points that folks
looking for land should consider.
All of that said, there
are some things I wish we had that didn't come with our property.
Our homestead is on the north side of a hill, so the sun doesn't peep
up over the trees on winter mornings until around 11 am --- a southern
exposure would have been nice. Two-thirds of our growing area is
nearly pure clay and half of that is waterlogged, so it will take a lot
of love before it becomes fully productive (but I have to admit that
building soil is a delight for me, so I almost consider this to be in
the "start with nothing" positive category.) I would love to own
the entire watershed, but the truth is that our 58 acres nearly always
feels big enough to let me spread my wings without worrying about the
neighbors, and I wouldn't want to be paying a big mortgage or working a
city job just to own another hundred acres.
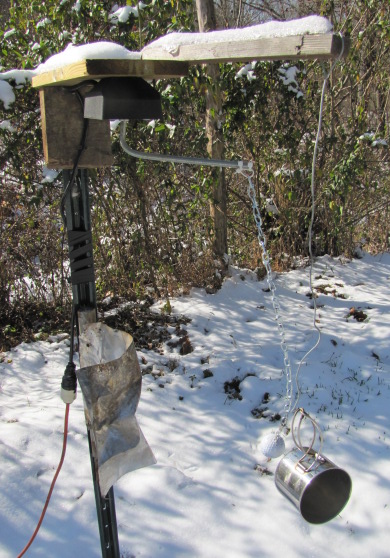
Since I've already
written far too much, I'll point you to a previous lunchtime
series to answer your question about what
longer term things I wished we'd started earlier. The only thing I
would add to that list is getting up my courage to quit my outside job
sooner. Mark and I are quite adept at living simply, and I
suspect that if my job hadn't been draining our vitality, we could have
become financially
independent sooner,
giving us yet more time to sink into our farm.
And, to answer your last
question --- I wish we'd gotten our deer deterrents working sooner rather than
fencing at all! For all of the time and money we put into
building fences around the garden that the deer made their way through
anyway, we could have made dozens of deer deterrents and had a garden
as beautiful as the one I've enjoyed this fall.

Our ship docked
yesterday morning, and we both decided that this year's adventure was
even more amazing than last year's. Despite that, we're aching to
be back home to pet the cats and dog, relax in front of the fire, and
eat homegrown produce.


There's so much to
digest that I'll be posting about it for weeks, primarily over on Clinch Trails but I've also got a bunch of
pictures of thatched roofs that I want to share on Walden Effect.
For now, though, here are a few of the top photos from our trip
to tide you over until we're back in the world of unlimited internet.

 I've
put off answering this question for a long time since it's far more
tricky than it at first appears. In general, I think there are
three axes of homesteading difficulty --- skills you have to learn,
time spent either mastering the concept or on daily upkeep, and money
spent on the project. For me, growing my own vegetables can't be
termed difficult because I have an affinity to plants, but it is
certainly time consuming. I actually think that fruit trees are
easier than vegetables, but since you sometimes have to wait as much as
a decade for them to bear fruit, the learning curve takes longer and
the time itself might put them in the "difficult" category (even though
annual time spent on upkeep of the orchard would drop them back down to
"easy.") Producing all of your own energy isn't hard if you buy a
pre-made system, but the financial cost is certainly steep. If I
added up an estimated difficulty on each of the three axes, I might
come up with the list below, starting with "easy" tasks and running up
to "hard" ones:
I've
put off answering this question for a long time since it's far more
tricky than it at first appears. In general, I think there are
three axes of homesteading difficulty --- skills you have to learn,
time spent either mastering the concept or on daily upkeep, and money
spent on the project. For me, growing my own vegetables can't be
termed difficult because I have an affinity to plants, but it is
certainly time consuming. I actually think that fruit trees are
easier than vegetables, but since you sometimes have to wait as much as
a decade for them to bear fruit, the learning curve takes longer and
the time itself might put them in the "difficult" category (even though
annual time spent on upkeep of the orchard would drop them back down to
"easy.") Producing all of your own energy isn't hard if you buy a
pre-made system, but the financial cost is certainly steep. If I
added up an estimated difficulty on each of the three axes, I might
come up with the list below, starting with "easy" tasks and running up
to "hard" ones:- Water
- Fruit
- Heat
- Grains
- Vegetables
- Oil
- Meat
- Electricity
- Milk
 But then I got even more bogged down with the concept
of self-sufficiency.
To be truly self-sufficent, I'd have to add hundreds of items to
the list above, and I don't know that I necessarily want to spend weeks
making a pair of shoes just so that I can say I'm entirely
self-sufficient. Lately, I've been feeling like our true goal is
not self-sufficiency but happiness --- by living simply enough and
meeting many of our own needs, we can eat food that makes us feel good
and have time left over to pour into our friends, family, and
hobbies. Perhaps the most difficult task on the homesteader's
list is finding the balance between doing it all yourself and enjoying
the journey --- finding balance.
But then I got even more bogged down with the concept
of self-sufficiency.
To be truly self-sufficent, I'd have to add hundreds of items to
the list above, and I don't know that I necessarily want to spend weeks
making a pair of shoes just so that I can say I'm entirely
self-sufficient. Lately, I've been feeling like our true goal is
not self-sufficiency but happiness --- by living simply enough and
meeting many of our own needs, we can eat food that makes us feel good
and have time left over to pour into our friends, family, and
hobbies. Perhaps the most difficult task on the homesteader's
list is finding the balance between doing it all yourself and enjoying
the journey --- finding balance.
It was a bit of a shock
to go from this:

...to this:
...in just a few
days. Hello, winter!
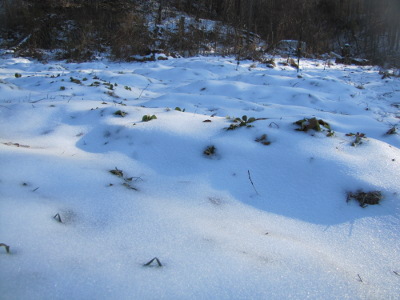 The
last leg of our journey was exhausting ---
a fitful Saturday night in the loud New Orleans, then another fitful
night sleeping on the train, then driving the last three and a half
hours home in the frigid dark. We were barely conscious when we
pulled into the driveway Monday morning, looking forward to a ride in
the golf cart back to the trailer. But the
wheels/axles/brakes/something were frozen up from driving through the
creek on our way out, so we ended up having to brave the waters on foot
(which was a bit chilly when I switched to sandals since my work boots
were too short for the high water.)
The
last leg of our journey was exhausting ---
a fitful Saturday night in the loud New Orleans, then another fitful
night sleeping on the train, then driving the last three and a half
hours home in the frigid dark. We were barely conscious when we
pulled into the driveway Monday morning, looking forward to a ride in
the golf cart back to the trailer. But the
wheels/axles/brakes/something were frozen up from driving through the
creek on our way out, so we ended up having to brave the waters on foot
(which was a bit chilly when I switched to sandals since my work boots
were too short for the high water.)
We slipped and slid our
way home across frozen snow and ice, seeing
firsthand the effects of the ice storm we'd heard about. After
being pampered for ten days, the farm seemed a bit cold and
difficult...for about five minutes until I took advantage of the pile
of dry, split wood that the firewood fairies had left behind in our
living
room. (Thanks, Shannon!) One very spoiled cat and one
ecstatic dog greeted us immediately, and our skittish Strider showed up
half an hour later, looking remarkably well fed for a cat who our
caretaker had never even seen.
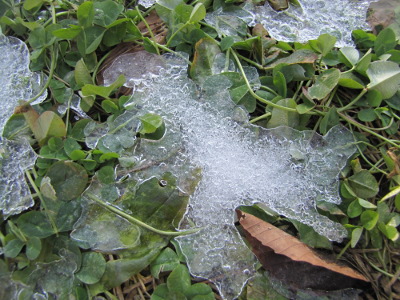 Mark's
homemade
heated chicken waterer, version 2.0, was still liquid ---
Shannon
reported that the nipple did freeze when temperatures dropped down to
around 0 Fahrenheit, but soon thawed. On the human water front, I
was very glad that I'd taken the time to fill up a couple of dozen milk
jugs with drinking water during the thaw before we left since the
ground is very cold and I don't expect to be running any water this
week.
Mark's
homemade
heated chicken waterer, version 2.0, was still liquid ---
Shannon
reported that the nipple did freeze when temperatures dropped down to
around 0 Fahrenheit, but soon thawed. On the human water front, I
was very glad that I'd taken the time to fill up a couple of dozen milk
jugs with drinking water during the thaw before we left since the
ground is very cold and I don't expect to be running any water this
week.
 Only
two casualties in our absence, one of
which was expected and a bit of a relief. We've had a very old
hen who seemed to get sick during every cold spell this winter.
In early December, the rooster kicked her out of the flock and Mark
made her a little spot out behind the coop. Just before we left
home, the elderly hen stopped accepting any food and water, and I knew
the end was near. Thinking of the comments several of you have
made on my old post about fasting
to death, I am
starting to see how deciding when to die might make
sense for humans as well as an aged and ailing hen. Shannon
reported that our oldest hen died a couple of days after we left, and
was buried with
respect behind the hen house.
Only
two casualties in our absence, one of
which was expected and a bit of a relief. We've had a very old
hen who seemed to get sick during every cold spell this winter.
In early December, the rooster kicked her out of the flock and Mark
made her a little spot out behind the coop. Just before we left
home, the elderly hen stopped accepting any food and water, and I knew
the end was near. Thinking of the comments several of you have
made on my old post about fasting
to death, I am
starting to see how deciding when to die might make
sense for humans as well as an aged and ailing hen. Shannon
reported that our oldest hen died a couple of days after we left, and
was buried with
respect behind the hen house.
The other casualty was
almost as expected --- during the coldest night,
the space heater we left on in the East Wing didn't keep temperatures
high enough, and both of our Dwarf
Cavendish Bananas
were nipped back. I'd actually been
thinking for a while that these trees were just a bit too tropical for
 our
highly fluctuating winter temperatures, so I'll nurse the
rootstocks back to life, if possible, and pass them on to folks who
have thermostatically controlled heat. Our citrus, on the other
hand, had
no problem dealing with a minor freeze and didn't even seem to lose
their baby fruits.
our
highly fluctuating winter temperatures, so I'll nurse the
rootstocks back to life, if possible, and pass them on to folks who
have thermostatically controlled heat. Our citrus, on the other
hand, had
no problem dealing with a minor freeze and didn't even seem to lose
their baby fruits.
Is it crazy that I'm
thrilled to be home to frozen waterlines and wood
heat after a cruise in the Caribbean? Travel is great as an eye-
and mind-opener, but in the long run I prefer ice-covered outhouse
seats and pure peace and quiet.
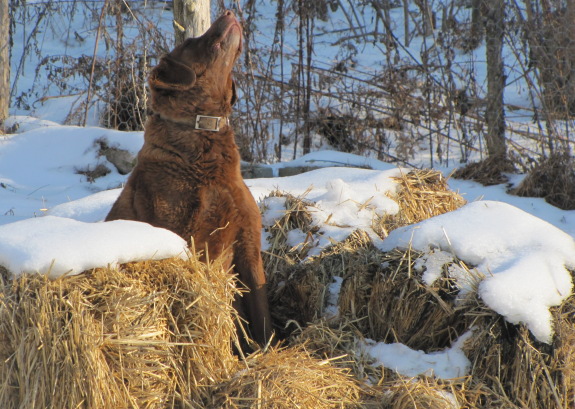
Lucy made herself a nice and
warm spot on top of the latest batch of straw bales we bought in October.
It's a good thing they got stacked in such a
neat fashion. (Thanks, Errol.)
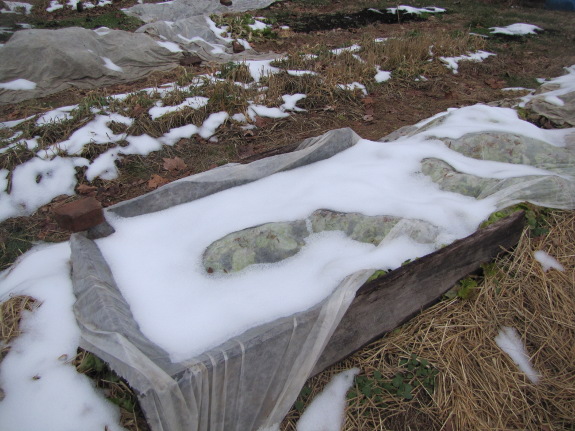
I was very curious to
see how the garden had dealt with abnormally low temperatures while we
were gone. Row covers actually didn't seem to have made much
difference, probably because we had a heavy snow cover before the cold
spell that helped insulate the plants. Broccoli pretty much
kicked the bucket whether it was under the row cover or not while
greens were happily growing in both places.
By Tuesday afternoon,
the snow had melted enough that I could roll back the row cover fabric
and check on the lettuce as well. These salad greens seemed to be
midway between broccoli and cooking greens in their tolerance to the
cold, with lots of frost-damaged leaves where the lettuce had touched
the cold fabric but also enough fresh leaves that I could pick and
choose a nice salad for supper. (I added in some young kale for
variety and topped it off with a winter version of our sweet
corn, bean, and tomato salad.)

We grew two different
varieties of lettuce this fall --- Bibb on the left and Black-seeded
Simpson on the right. Black-seeded Simpson is usually my favorite
since it stays sweet for a long time and is well adapted to our local
climate, but the mayor of our closest town, who also runs the local
hardware store, gave us some Bibb seeds to try out and I decided to
give them a shot. I won't be trying Bibb again. As you can
see in the paired photos, Bibb seemed much less tolerant of freezing
snow cover than Black-seeded Simpson, and I also find the leaves a bit
coarser and not as sweet.
Of course, for next year
I know that I should try some of the even more cold-hardy
winter greens like
spinach and mache. And I can definitely see the merits of quick
hoops now --- I
suspect the lettuce leaves wouldn't have been nipped at all if the
heavy snow hadn't pushed the fabric down on top of them. For this
winter, though, I just count us very luck to be eating sweet, fresh
leaves on the Winter Solstice.

Install a few of those rubber
coated storage hooks at an upward angle where they can bite into a good
piece of wood and you got yourself a do it yourself stringed instrument
wall hanger.
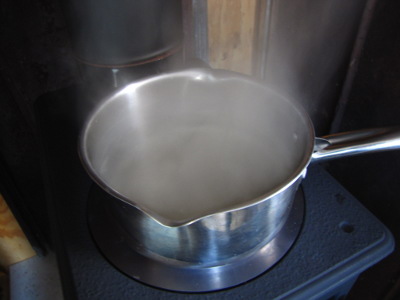 Although
the primary reason for upgrading to Jotul
wood stove was to
use less firewood, we were also spooked by ten days without
power at this time last year and wanted to be prepared for future
outages. So when I was shopping for small
wood stoves, one of
the features I looked for was a stove that concentrated its heat in a
burner on the stove surface.
Although
the primary reason for upgrading to Jotul
wood stove was to
use less firewood, we were also spooked by ten days without
power at this time last year and wanted to be prepared for future
outages. So when I was shopping for small
wood stoves, one of
the features I looked for was a stove that concentrated its heat in a
burner on the stove surface.
Of course, having a
backup cooking surface does no good if you don't know how to use it, so
I've been experimenting to see what's easy and tough to cook on the
wood stove. Boiling water for tea or to do dishes is easy,
especially in the early morning or late evening when I burn a hot fire
to heat up the trailer fast. Beans, stock, and soups do very well
on the wood stove too, simmering on the late morning and early
afternoon heat when I often let the stove slowly burn its way
out. I've found that I cook a lot more beans and soup lately
since I've got the wood stove right there putting off heat.
With the low-hanging
fruit figured out, next I plan to try slightly more complicated
cooking. Dutch ovens are made for this application and I'm
looking forward to giving mine a shot on top of the wood stove, while
Mark has dreams of building me a little stovetop oven to cook muffins
in. I'm not sure if the surface gets hot enough for sauteing, but
I'll give that a shot too. For those of you who cook on a wood
stove but not a wood cook stove, do you have any tips?
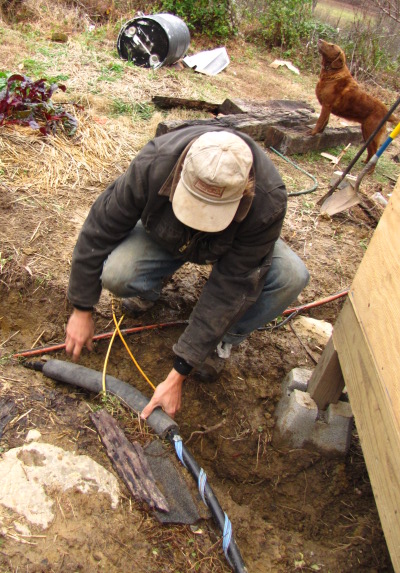
The blue tape like product you see in the picture here is designed to
heat up when the temperature drops below freezing and then turn off
when it warms.
Even though the instructions
stated to not use it on plastic pipe I decided to give it a try on our
gray water pipe to see what might happen.
I don't think it gets hot
enough to melt the pipe material, but it did seem to help decrease the
amount of time it takes to thaw back to normal.
 While
you're planning your Christmas dinner, this is a good time to take a
stroll through your storage
fruits and vegetables
and see how they're doing. I'm sure you've heard that a rotten
apple can spoil the barrel --- time to catch those rotten apples before
they have a chance.
While
you're planning your Christmas dinner, this is a good time to take a
stroll through your storage
fruits and vegetables
and see how they're doing. I'm sure you've heard that a rotten
apple can spoil the barrel --- time to catch those rotten apples before
they have a chance.
We tried out two
different methods of storing our white potatoes this year --- under my
bed and in
the fridge.
Neither is optimal, but with just a few vegetables prefering root
cellar conditions, we didn't think it was worth adding to our busy fall
by fixing the refrigerator
root cellar.
Over the last month or so, I noticed that the under-the-bed potatoes
were starting to sprout, while those in the fridge were still hard as
rocks, but my most recent foray into under-the-bed tubers shows dark
spots popping up in their flesh. I suspect that last week's
serious cold spell froze the tubers touching the floor, cutting their
shelf life down and putting them into the "eat now" category.
Still, keeping potatoes for 5 months with no special storage facilities
isn't bad at all.
Next up, I'll be
checking over the sweet potatoes, garlic, and butternuts. I've
noticed that a few of the butternuts have rotten spots --- probably
time to roast them up and freeze the flesh for later eating now that
there's a bit of space opened up in the freezer. A little bit of
management every month tends to keep us eating fresh food all winter,
and I get a kick out of checking over our produce and seeing how much
bounty remains after the solstice.
I noticed the other day one
of the springs must have fallen out of the Chopper 1 axe.
It seems to continue to split
with no problems.
This time I've decided to
find a more local option for spring replacement if I can remember to
put it on the list for the next hardware store trip.
 Our original plan for getting
heat out of the wood stove
alcove included one
of those nifty stove pipe fans, which are designed to turn on when the
stove pipe heats up, blowing the hot air into the room. You can
find a couple of different kinds on the internet, where they go by
names ranging from "Magic Heat Reclaimer" to the more simple "Stove
Pipe Heat Reclaimer" and cost anywhere from $100 to nearly $200.
Our original plan for getting
heat out of the wood stove
alcove included one
of those nifty stove pipe fans, which are designed to turn on when the
stove pipe heats up, blowing the hot air into the room. You can
find a couple of different kinds on the internet, where they go by
names ranging from "Magic Heat Reclaimer" to the more simple "Stove
Pipe Heat Reclaimer" and cost anywhere from $100 to nearly $200.
However, after some
online research and then looking at the real fan in the store, we
decided against the stove pipe fan. The model sold at Tractor
Supply says right on the box that it's not suitable for use with an
efficient stove, and various reviews on the internet note that the fan
reduces the stove's draft and causes excessive creosote buildup in the
pipe. In addition --- and here we admit to being a bit lazy ---
the fan doesn't wrap around an existing pipe the way we thought it
would. Instead, you have to take apart your chimney, cut the
stove pipe sections to size, and then install the fan as one of the
pipe sections. Since we
went to a lot of trouble to get our stove pipe straight and beautiful
with no cutting,
we're not willing to take it back apart to install a fan that looks
like it would make our stove work improperly.
 There do seem to be a few
applications where the stove pipe heat reclaimers make sense, so I
thought I'd post in case some of you were considering a similar
purchase. If you're burning coal, you might be okay --- the
higher heat fires and lack of creosote in the smoke delete some of the
potential pitfalls of the stove pipe fan. Also, if you're running
a really inefficient stove, you're probably sending a lot of heat up
the chimney pipe and might want to try to reclaim it even if the fan
messes with other parts of your stove. For our own application,
though, Mark's on the prowl for a small, metal-bladed fan that he can
mount on the front ceiling of the alcove to do the same job for less
cash and no impact on our princess's job performance.
There do seem to be a few
applications where the stove pipe heat reclaimers make sense, so I
thought I'd post in case some of you were considering a similar
purchase. If you're burning coal, you might be okay --- the
higher heat fires and lack of creosote in the smoke delete some of the
potential pitfalls of the stove pipe fan. Also, if you're running
a really inefficient stove, you're probably sending a lot of heat up
the chimney pipe and might want to try to reclaim it even if the fan
messes with other parts of your stove. For our own application,
though, Mark's on the prowl for a small, metal-bladed fan that he can
mount on the front ceiling of the alcove to do the same job for less
cash and no impact on our princess's job performance.
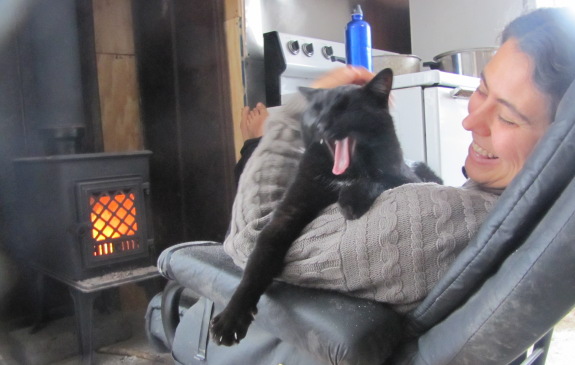
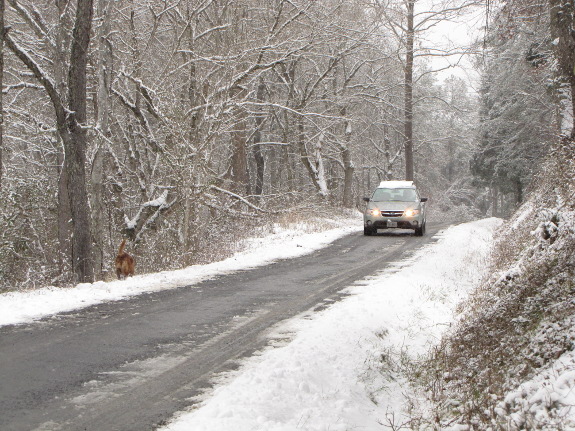
 Mark
and I were treated to the Virginia premier of Obselidia on Christmas night, complete
with door to door service by one of the stars. Okay, so our movie
star neighbor actually picked us up at the mailbox only because we were
afraid we wouldn't be able to get our car out of the driveway with all
of the snow....
Mark
and I were treated to the Virginia premier of Obselidia on Christmas night, complete
with door to door service by one of the stars. Okay, so our movie
star neighbor actually picked us up at the mailbox only because we were
afraid we wouldn't be able to get our car out of the driveway with all
of the snow....
The movie hit close to
home, and I almost felt like I should be taking notes for the blog at
times. As Mark likes to say, Obselidia had a lot of heart, and it
definitely would have been one of my favorite movies of the year even
if our friend hadn't starred in it. If you'd like to see a
romantic comedy where intellectuals are real, well-rounded people
rather than superficial cliches, Obselidia
is your best bet.
Plus, honeybees are characters!
Obselidia showed at Sundance and
various other film festivals, but you can't see it anywhere at the
moment. Our neighbor begged a copy off the producer, mostly
because all of his friends (like me) kept bugging him about how we
could see the movie. For those of you without that inside track,
you might try adding the film to your netflix queue and hoping it will
come out on dvd soon.

"Is it that you might offend many in the masses by simply saying
Merry Christmas?...gag".
Thanks for the question,
Dennis.
No....anybody who knows me
learns real quick that I don't really care much about offending the
masses, but there is a statement between the lines that I think you
might be reading the wrong way.
In my opinion Christmas feels
more like a war between Jesus and Santa these days, and by saying
Winter Holiday instead of Merry Christmas I'm making a statement that I
prefer my Solstice celebration to be more about observing the journey
of the sun...not The Son, or Santa, or whoever else is trying to
hi-jack what I feel is the true reason for the season.
This year Anna and I made
more of an effort to slow down during the days before and after the
Solstice and it felt good. I figure the more synchronized we get with
the cycles of nature the better our chances are of experiencing maximum
joy on a daily basis.


Yes.....this means I'm a Pagan, which originally meant someone who lives in the country.
In 1913 Daniel Webster brought religious church dogma to the English
language when he added to the definition of Pagan- "One who worships false gods". This
is exactly the kind of distraction I'm talking about. Is Jesus or Santa
true or false? I say neither....they both act as a diversion and both
happen to be of the male gender who are trying desperately to take one's
attention away from Mother Nature who I think most people agree has a
distinct feeling of being female. Is this really a conflict between Yin
and Yang forces?
I don't know.....all I'm sure
of is that I want less Santa and Jesus and more Mother Nature and if it
takes saying Happy Holidays instead of Merry Christmas to communicate
that then I'm prepared to keep it up till the cows come
home....wait...we don't have any cows...so I guess that means till I
stop hearing cashiers ask me if I'm "Ready for Christmas yet?".
Image credit goes to Danilo
Pivato for the amazing full day
exposure of a Solstice sun moving across the sky in 2005 near Fiumicino, Italy.
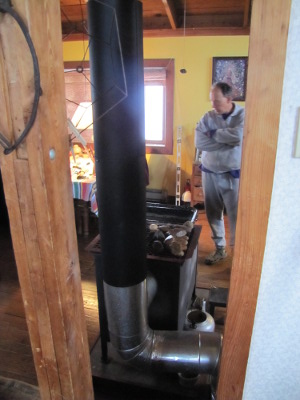 Our
movie star
neighbor's home is three stories tall, and the wood stove is in the
main living space on the second floor. He made bubble-wrap
partitions (see the top photo) to close hot air out of the seldom-used
third floor while letting light shine down into the living room.
But his bathroom is downstairs, so he is stuck with the difficult
question --- how do you make hot air go down?
Our
movie star
neighbor's home is three stories tall, and the wood stove is in the
main living space on the second floor. He made bubble-wrap
partitions (see the top photo) to close hot air out of the seldom-used
third floor while letting light shine down into the living room.
But his bathroom is downstairs, so he is stuck with the difficult
question --- how do you make hot air go down?
A couple of years ago,
he installed a heat pump, but his experience matches my research ---
heat pumps are only marginally effective in cold weather in our
region. Still, the heat pump turned out to be the solution.
Our neighbor built a sleeve around the chimney pipe of his wood stove
and tapped it into the return air duct for the heat pump. Then,
when he wants to heat the downstairs, he simply turns on the fan for
the heat pump. The fan sucks hot air from above the stove,
through the sleeve where it is heated even more, then down to the lower
floors. Voila --- hot air running downhill!
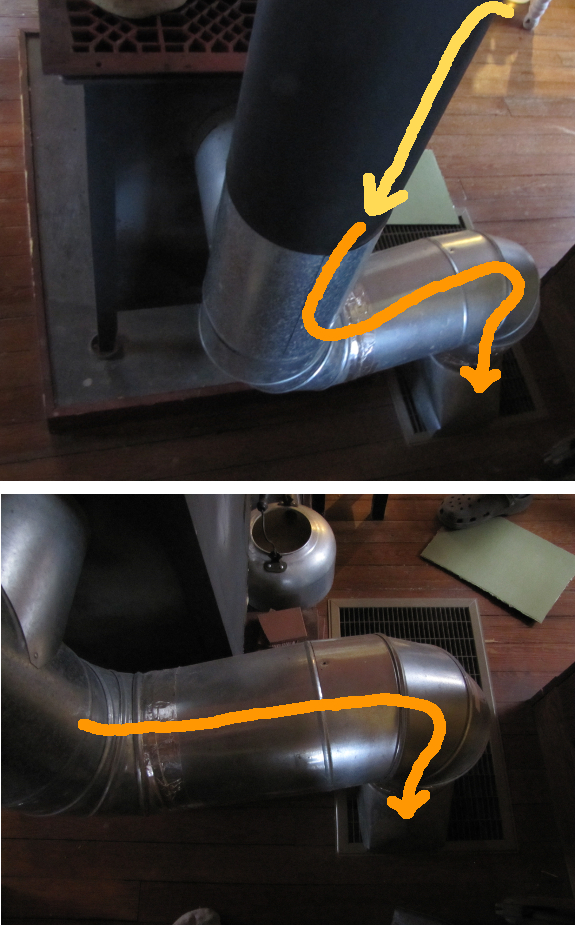
 2010 has been a year of experimentation. We've tried out new
crops, new ways of raising our chickens, nearly a dozen mulches,
alternative methods of caring for our honeybees, and much more.
Some experiments were failures, some were successes, and some were
jumping off points for further experimentation.
2010 has been a year of experimentation. We've tried out new
crops, new ways of raising our chickens, nearly a dozen mulches,
alternative methods of caring for our honeybees, and much more.
Some experiments were failures, some were successes, and some were
jumping off points for further experimentation.
Although we've tried to
remember to faithfully report on the conclusions of each experiment,
it's tough to know when an experiment is really over when you're
working with complicated permaculture systems. And I have to
admit to the failing that afflicts many scientists --- I'm less prone
to publish negative results. So for the next two weeks, our
lunchtime series will regale you with the highlights (and lowlights) of
the year's experimentation. I hope that seeing the experiments
summed up in one place will help you choose which ones will work well
in your own homestead or garden.
This post is part of our 2010 experiments lunchtime series.
Read all of the entries:
|
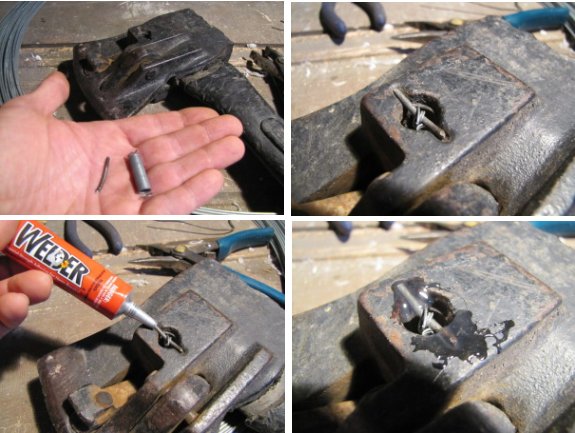
The local hardware store had
a spring that was close to the original Chopper 1
spring for 30 cents.
A short stub of 12 gauge wire
seems to be enough to anchor the spring once I glued it in place with a
product called Liquid Welder.
I'll let it dry overnight and
then give it a test drive to see if this repair can hold up under heavy
chopping.
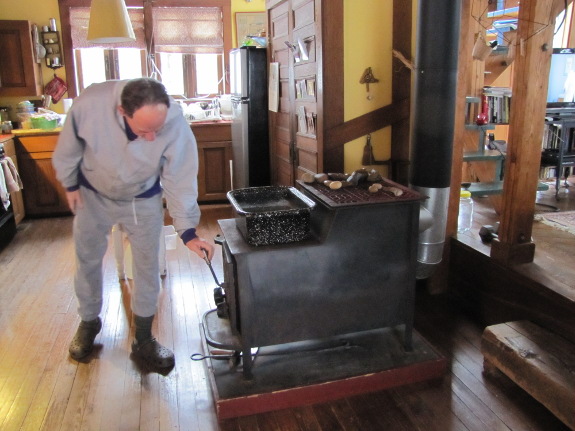
 "It's
amazing how much time we spend just dealing with the cold at this time
of year." Our movie star neighbor hit the nail on the head, which
is why our pre-film entertainment revolved
around the wood
stove. We wanted to know all about it --- what kind it was
(Fisher Papa Bear), what he thought of it (good, but not as efficient
as his neighbors' fancy new stoves), and if he'd done anything special
with
it (lots!)
"It's
amazing how much time we spend just dealing with the cold at this time
of year." Our movie star neighbor hit the nail on the head, which
is why our pre-film entertainment revolved
around the wood
stove. We wanted to know all about it --- what kind it was
(Fisher Papa Bear), what he thought of it (good, but not as efficient
as his neighbors' fancy new stoves), and if he'd done anything special
with
it (lots!)
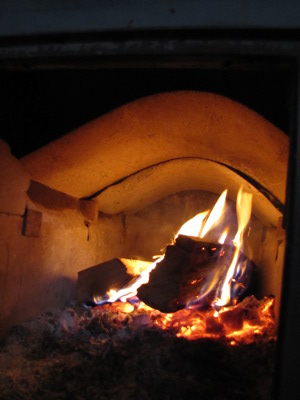 The first thing our neighbor
did when he got his stove was to add a
plate to the top of the fire box, which acts like a baffle and
increases the efficiency. More recently, he tapped
into the house's ductwork to pull hot air downstairs.
The first thing our neighbor
did when he got his stove was to add a
plate to the top of the fire box, which acts like a baffle and
increases the efficiency. More recently, he tapped
into the house's ductwork to pull hot air downstairs.
Outside, I was
enthralled by his woodshed, with latticework walls to
let air flow through and dry the wood. He likes to split cedar
logs into thin sticks of kindling to start his stove, and he saves the
beautiful, knotty pieces for decoration. Back inside, I'm always
drawn to the well polished river rocks he keeps on top of the stove to
warm your hands.
Reading homesteading
blogs at this time of year, you'll probably notice
that we go on and on about wood heat, and I don't think it's just
because we spend so much time feeding the fire. There is a
surprising amount of art to be found in the winter heat regimen, and
our neighbor's setup epitomizes that utilitarian beauty.
 Our
honeybee experiments aren't really unique to our farm, but they are
outside the mainstream. They all began nearly two years ago when
we got our bees and chose to use foundationless frames
to decrease varroa mite
potential without chemicals (and to cut costs.) This year, we
added to the experiment by changing over to double deep brood
boxes to help the
colonies bulk up quicker in the spring and to prevent
swarming. We
also used a non-mainstream honey harvest technique of robbing
the bees in the late spring rather than in the fall to make sure the hive would
have enough food over the winter without feeding
sugar water.
Our
honeybee experiments aren't really unique to our farm, but they are
outside the mainstream. They all began nearly two years ago when
we got our bees and chose to use foundationless frames
to decrease varroa mite
potential without chemicals (and to cut costs.) This year, we
added to the experiment by changing over to double deep brood
boxes to help the
colonies bulk up quicker in the spring and to prevent
swarming. We
also used a non-mainstream honey harvest technique of robbing
the bees in the late spring rather than in the fall to make sure the hive would
have enough food over the winter without feeding
sugar water.
The results are a mixed
bag, but are primarily positive. So far, hive checks suggest that
our varroa
mite levels are
under control without resorting to pesticides, although one hive had
higher levels than I hoped when
I sampled in November.
We didn't see any swarming activity in the spring, so the double deep
with checkerboarding definitely worked as swarm prevention. And
the hive that we changed to double deep earliest in the spring stocked
up the majority of our year's honey, so double deeps are also
quite effective for getting more honey. Finally, we made it
through the first winter with no mortality, so harvesting in the spring
was a good choice.
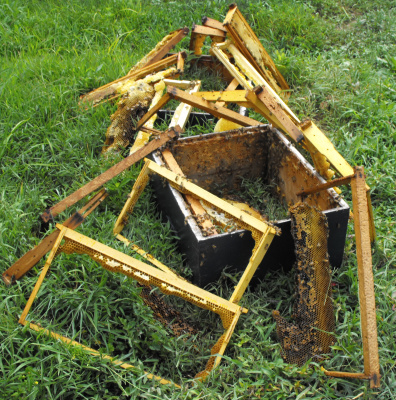 The primary problem we had
was a comb collapse
during hot weather soon after our honey harvest. I think that the
comb collapse was the result of all of my alternative methods merging
together in just the wrong way, and could easily be prevented in the
future by keeping all of the boxes at 10 frames rather than getting greedy
and downgrading to 9.
The primary problem we had
was a comb collapse
during hot weather soon after our honey harvest. I think that the
comb collapse was the result of all of my alternative methods merging
together in just the wrong way, and could easily be prevented in the
future by keeping all of the boxes at 10 frames rather than getting greedy
and downgrading to 9.
How do our results stack
up compared to those using traditional management (frames with
foundation, early fall harvests, chemicals in the hive to kill varroa
mites, and then feeding copious sugar water and/or corn syrup to get
the bees through the winter?) In terms of honey harvested, our
numbers were low --- the Kentucky extension service 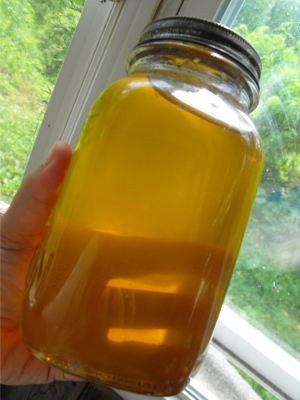 suggests that the average
yield per hive should be 50 pounds (about 4 gallons), and we only got
4.5 gallons from all three hives combined. On the other hand, our
costs were also low --- we could have spent about $60 on foundation,
$25 on varroa mite medication, and maybe another $75 on feed for the
hives. In addition, we didn't have a single swarm and didn't lose
any hives. Clearly, our method fits the homesteading model of a
sustainable harvest even if it doesn't maximize yields.
suggests that the average
yield per hive should be 50 pounds (about 4 gallons), and we only got
4.5 gallons from all three hives combined. On the other hand, our
costs were also low --- we could have spent about $60 on foundation,
$25 on varroa mite medication, and maybe another $75 on feed for the
hives. In addition, we didn't have a single swarm and didn't lose
any hives. Clearly, our method fits the homesteading model of a
sustainable harvest even if it doesn't maximize yields.
In year three, we'll be
faced with yet more decisions in our natural honeybee setup. Do
we requeen or let the hives replace the queen when they see fit?
Should we try to split a hive to increase our numbers so we'll have
more honey for gifts? Should we cut out any of the old wax and
make them rebuild? If we do decide to split, should we try out
top bar hives for the sake of comparison? We're looking forward
to researching these and other questions in the year ahead.
This post is part of our 2010 experiments lunchtime series.
Read all of the entries:
|
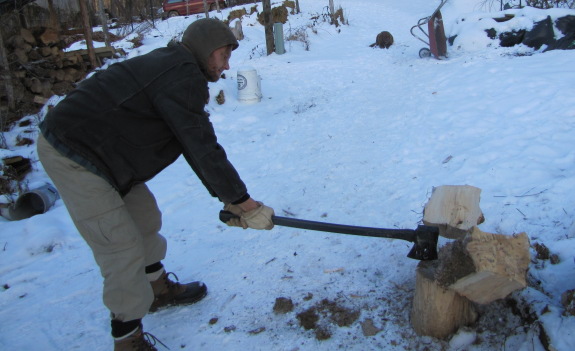
Yesterday's Chopper
1 spring repair fix held
up well during a moderate wood splitting session today.
The unknown factor is how
long will it last. I suspect the adhesive I added might help to
increase the time before a new one needs to be installed.
I think keeping the Chopper 1
stored inside will extend the time between part replacements and I
blame myself for letting it sit outside all summer long, which is most
likely what caused the shortened spring life in this case.
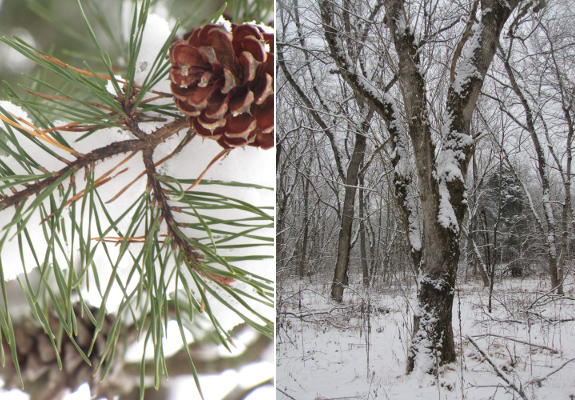
 It dawned on me this past
weekend that our farm has had snow on it (at least on the shady side)
every day of December! We've had four storms (I think --- they're
starting to run together), and the new snow always falls before the old
crystals thaw. Perhaps we were accidentally transported to New
England?
It dawned on me this past
weekend that our farm has had snow on it (at least on the shady side)
every day of December! We've had four storms (I think --- they're
starting to run together), and the new snow always falls before the old
crystals thaw. Perhaps we were accidentally transported to New
England?
I'm looking forward to a
return to the South this weekend with Friday and Saturday's highs in
the mid 50s. Maybe I'll be able to get to the greens currently
hidden by snow, fill up the thousand
gallon tank with
wash water for January, and even do
some laundry.
 We
embarked on three chicken experiments in 2010 --- incubating our own
homegrown chicks, raising broilers, and running chickens on a forest
pasture. Clearly, each of our experiments needs a bit more work.
We
embarked on three chicken experiments in 2010 --- incubating our own
homegrown chicks, raising broilers, and running chickens on a forest
pasture. Clearly, each of our experiments needs a bit more work.
Incubating chicks can be
pretty simple, but I managed to do absolutely everything wrong.
In the spring of 2010, our flock was all girls, so we had to hunt
down fertilized eggs and try to keep them alive on the long trip back
to our farm.
We also thought we were going to use an incubator, then realized at the
last minute that our
house is not climate-controlled enough to make cheap incubators work. By the time we
tricked our broody hen into doing her job, most of the eggs had died,
and we
only hatched out one chick --- the rooster who will
make 2011's experiments much easier. I have high hopes that this
coming year will see us hatching out a full nest of chicks, just in
time since our old layers are producing ever smaller numbers of eggs.
 Our
broiler experiment was also problematic. We opted to raise a
heritage breed --- Dark
Cornish --- rather
than the traditional Cornish Cross, and soon realized that if
you're raising them on storebought feed, heritage broilers just don't
make fiscal sense.
(They sure are tasty, though!) We may eventually just give in and
raise Cornish Cross broilers like everyone else does, but for our 2011
experiment, I want to veer off in the exact opposite direction.
My goal will be to raise chicks with good foraging genes (the offspring
of our best laying hens) on the theory that even though they will gain
weight even slower than the Dark Cornish, they will eat much less
storebought food in the process. Since we now have the ability to
reproduce our own flock at will, we'll also raise two or three small
batches of broilers rather than 25 at once, which will make our farm
scraps go further toward feeding the flock (and will make it less
stressful to kill them all at once.) Or at least, that's what I
hope will happen if everything goes as planned....
Our
broiler experiment was also problematic. We opted to raise a
heritage breed --- Dark
Cornish --- rather
than the traditional Cornish Cross, and soon realized that if
you're raising them on storebought feed, heritage broilers just don't
make fiscal sense.
(They sure are tasty, though!) We may eventually just give in and
raise Cornish Cross broilers like everyone else does, but for our 2011
experiment, I want to veer off in the exact opposite direction.
My goal will be to raise chicks with good foraging genes (the offspring
of our best laying hens) on the theory that even though they will gain
weight even slower than the Dark Cornish, they will eat much less
storebought food in the process. Since we now have the ability to
reproduce our own flock at will, we'll also raise two or three small
batches of broilers rather than 25 at once, which will make our farm
scraps go further toward feeding the flock (and will make it less
stressful to kill them all at once.) Or at least, that's what I
hope will happen if everything goes as planned....
 Our
final chicken experiment of the year is the forest
pasture, and it's
such a long term project that I can't really say whether it was a
success or failure after less than one year. We started out by
putting our broilers on pasture, but they were ill-suited to the
habitat and barely browsed. On the other hand, once we turned our
wilely old hens onto the pasture, we could really see the potential ---
they
quickly became more healthy and were clearly getting
quite a bit of their food from the combination of wild forage and
kitchen scraps. (In fact, I didn't feed two of the chickens at
all for six weeks in late summer.) Now that we've trained the
chickens to perch in the coop, we're also capturing at least half of
their fertility in a deep
bedding system,
which I figure is as much as made it into the garden with my old method
of running the chickens in tractors in the aisles and then cutting the
grass to put on the garden. Finally, chickens
scratching and pooping on piles of wood chips and garden debris
expedited compost action, turning the chicken pasture
into a compost machine.
Our
final chicken experiment of the year is the forest
pasture, and it's
such a long term project that I can't really say whether it was a
success or failure after less than one year. We started out by
putting our broilers on pasture, but they were ill-suited to the
habitat and barely browsed. On the other hand, once we turned our
wilely old hens onto the pasture, we could really see the potential ---
they
quickly became more healthy and were clearly getting
quite a bit of their food from the combination of wild forage and
kitchen scraps. (In fact, I didn't feed two of the chickens at
all for six weeks in late summer.) Now that we've trained the
chickens to perch in the coop, we're also capturing at least half of
their fertility in a deep
bedding system,
which I figure is as much as made it into the garden with my old method
of running the chickens in tractors in the aisles and then cutting the
grass to put on the garden. Finally, chickens
scratching and pooping on piles of wood chips and garden debris
expedited compost action, turning the chicken pasture
into a compost machine.
 In a few years, we'll have
mulberries and Nanking cherries producing for the chickens, and this
year I also plan to add persimmons and bamboo to the pasture,
but until the woody crops mature, it's clear that we need a much larger
pasture for our birds. I'm currently envisioning a couple of
winter pastures in the sunniest part of the yard (currently unused, but
slated for a planting of grapes and almonds) and additional summer
pastures made by fencing in the main forest garden and more of the
powerline cut. It's a lot of fencing, but I can feel the
permaculture potential of a healthy flock that nearly feeds itself
while cutting down insect pests around tree crops, making compost, and
depositing their waste into a deep bedding pile. This is
definitely the 2010 experiment that had the most potential and will be
top of my mind all through 2011.
In a few years, we'll have
mulberries and Nanking cherries producing for the chickens, and this
year I also plan to add persimmons and bamboo to the pasture,
but until the woody crops mature, it's clear that we need a much larger
pasture for our birds. I'm currently envisioning a couple of
winter pastures in the sunniest part of the yard (currently unused, but
slated for a planting of grapes and almonds) and additional summer
pastures made by fencing in the main forest garden and more of the
powerline cut. It's a lot of fencing, but I can feel the
permaculture potential of a healthy flock that nearly feeds itself
while cutting down insect pests around tree crops, making compost, and
depositing their waste into a deep bedding pile. This is
definitely the 2010 experiment that had the most potential and will be
top of my mind all through 2011.
This post is part of our 2010 experiments lunchtime series.
Read all of the entries:
|
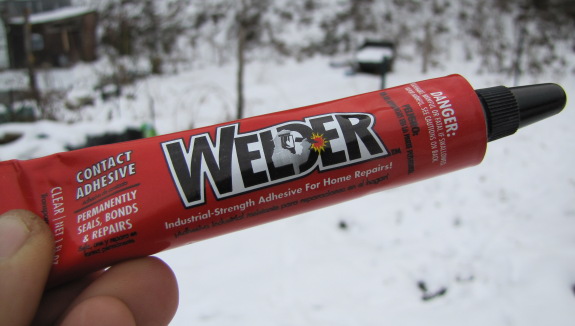
One item I've always tried to
keep in the tool box is a tube of cyanoacrylate (SuperGlue).
I usually get to use a tube 2
or 3 times before it clogs up...even the more advanced containers still
seem to eventually stop flowing well before the glue is gone.
Welder is a new all purpose
contact adhesive I've had great luck with in the past year that's made
with a chemical known as Toluene.
It's somewhere between SuperGlue and a 2 part epoxy and is easy to work
with and even easier to open back up a few months later without the cap
being permanently stuck.
 I
got a bit spoiled for the first month of the princess's reign. We
filled
up the wood shed at
the end of last winter with a lot of scavenged wood off the property
and with some cherry that Joey delivered, and the bone dry wood burned
beautifully. The shed was still two thirds full at the beginning
of the week, but we hit a snag --- most of the scavenged wood was too
punky to burn well. Instead, it seemed to dissolve in the fire,
producing very little heat.
I
got a bit spoiled for the first month of the princess's reign. We
filled
up the wood shed at
the end of last winter with a lot of scavenged wood off the property
and with some cherry that Joey delivered, and the bone dry wood burned
beautifully. The shed was still two thirds full at the beginning
of the week, but we hit a snag --- most of the scavenged wood was too
punky to burn well. Instead, it seemed to dissolve in the fire,
producing very little heat.
Since the wood shed has
three rows of wood in it, my original plan had been to empty a third,
fill it with wood that had been sitting out in the elements, and cycle
through the other old wood so that by the time we got back to the new
third the wood was bone dry. Our efficient
wood stove uses so
little wood that I figured we'd have perhaps a month or two between
putting the wood in the shed and burning it, which would be plenty of
time for the winter snow to melt off it and for the  wood
to dry back up.
wood
to dry back up.
The punky wood nixed
that plan. Instead, this week I've been burning wood that's only
been in the shed for a week or two, and the result has been slightly
cooler fires and actual smoke coming out the chimney. (Granted,
the smoke is all white, which means it's primarily water vapor, but I
still don't like it.) Although there's no remedy in the short
run, I went ahead and pulled all of the punky wood out of the shed so
that I can replace it with  good
wood and have dry firewood at least by February.
good
wood and have dry firewood at least by February.
Live and learn!
Now I have a better eyeball estimate of what kind of wood is too rotten
for firewood, and I also have a bunch of punky wood that I already put
to use in the garden. Stay tuned to see how....
 The
invertebrate side of our farm did very badly in 2010. First of
all, we never got to our project of creating a black
soldier fly bin because we just didn't have enough excess food
scraps to make it worthwhile. And, yes, I actually managed to
kill our worms.
The
invertebrate side of our farm did very badly in 2010. First of
all, we never got to our project of creating a black
soldier fly bin because we just didn't have enough excess food
scraps to make it worthwhile. And, yes, I actually managed to
kill our worms.
In 2009, we had a simple,
under-the-sink worm bin that worked quite well, but
at certain times of the year it was overloaded by the scraps our
chickens wouldn't eat. We could tell because we ended up with a
fruit fly infestation, and we figured the clear solution was to build a
bigger bin. A bigger bin would not only allow us to compost
additional waste, it would be less sensitive to environmental extremes,
so we could keep it outside year round.
Mark turned
our heavy hauler into a worm bin, but due to my bad advice,
the faucet to drain off the worm tea clogged up and the bottom of the
bin became waterlogged. Since  the
bin was in the sun, the top of the bin got too hot, and the poor worms
were stuck with the choice of being baked or drowned. Meanwhile,
I had added a lot of horse manure from the neighbor to get the bin
going quickly, but before the worms had time to really work on it I ran
out of compost and had to take the manure back off to put on the
garden. The result was total eradication of worms from the bin
--- drat!
the
bin was in the sun, the top of the bin got too hot, and the poor worms
were stuck with the choice of being baked or drowned. Meanwhile,
I had added a lot of horse manure from the neighbor to get the bin
going quickly, but before the worms had time to really work on it I ran
out of compost and had to take the manure back off to put on the
garden. The result was total eradication of worms from the bin
--- drat!
Our potted plants have
especially missed the nutrient-rich worm tea, so we definitely plan to
remedy our worm situation in 2011. We may make something as
simple as Binet
Payne's medium-scale bins, but adding in an ability to
drain off the tea for our plants, and we may try out worm towers as well. This time, I
plan to go ahead and buy a paper shredder so that we'll have a more
optimal bedding too. And if we can talk a local school into
giving us their scraps, we'll also have enough nutrient-rich waste to
experiment with black soldier flies.
This post is part of our 2010 experiments lunchtime series.
Read all of the entries:
|
How cold is too cold for a 48
volt Club Car golf cart?
I would say somewhere below
the freezing point. We had some sunshine today that managed to melt one
of the back tires loose, but the other is still frozen in place.
If we really needed it I
think a bit of leverage from the spud bar with someone else driving would
be enough to free it up. Of course an even easier solution is to wait
till tomorrow.
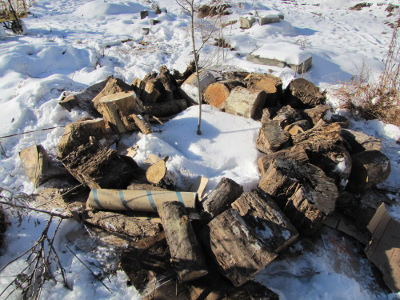 We're
trying out the concept of a Day of Autonomy, and the first thing I
wanted to do with this spare time was to poke around the forest
garden. I've noticed over the past year that the health of our
fruit trees is directly proportional to the size of their raised beds,
so I've been planning to expand all of the beds by at least a foot or
two on each side. But where would I find enough organic matter to
pull that off?
We're
trying out the concept of a Day of Autonomy, and the first thing I
wanted to do with this spare time was to poke around the forest
garden. I've noticed over the past year that the health of our
fruit trees is directly proportional to the size of their raised beds,
so I've been planning to expand all of the beds by at least a foot or
two on each side. But where would I find enough organic matter to
pull that off?
Luckily, I had just removed a
lot of punky wood from the wood shed, so I decided to use a
modified Hugelkultur technique to expand the
first bed. This time around, I laid down cardboard first to
prevent weeds from coming up through the wood, which had been a problem
in the old beds, then I set out all of my punky wood in a circle around
our Early Transparent Apple. Rather than backfilling with soil, I
filled the gaps between logs with high nitrogen chicken compost to
expedite the decomposition process. Finally, I topped it all off
with leaves.
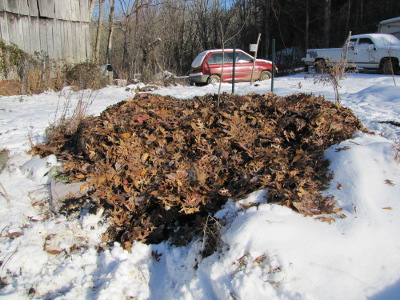 I
don't expect the rotting wood to be helpful to the fruit tree right
away, but I suspect that by the end of the summer the apple's roots
will have found the pockets of compost. And in the long run, the
expanded bed should help the tree keep its roots out of the high
groundwater, while the copious organic matter that will result from the
decomposing wood will hold moisture during the dry summers. I
figure the apple is big enough to deal with Lucy's
rodent-digging
without much trouble, which was one major downside of Hugelkultur in
our garden.
I
don't expect the rotting wood to be helpful to the fruit tree right
away, but I suspect that by the end of the summer the apple's roots
will have found the pockets of compost. And in the long run, the
expanded bed should help the tree keep its roots out of the high
groundwater, while the copious organic matter that will result from the
decomposing wood will hold moisture during the dry summers. I
figure the apple is big enough to deal with Lucy's
rodent-digging
without much trouble, which was one major downside of Hugelkultur in
our garden.
Now I just need to find
enough organic matter to repeat the process for another dozen
trees. Why didn't we cut more punky wood?
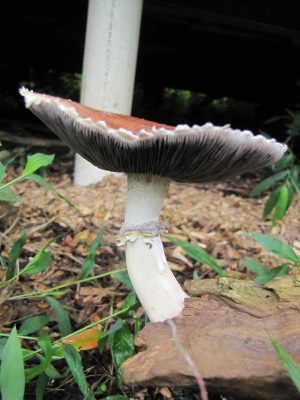 Like many of our other 2010
experiments, our mushroom projects remain a work in progress. Our
goal is to incorporate edible mushrooms into our landscape in a more
sustainable way, meaning that I don't want to have to keep buying plug
spawn every year and I wouldn't mind if the fungi did more than just
create food for us.
Like many of our other 2010
experiments, our mushroom projects remain a work in progress. Our
goal is to incorporate edible mushrooms into our landscape in a more
sustainable way, meaning that I don't want to have to keep buying plug
spawn every year and I wouldn't mind if the fungi did more than just
create food for us.
The least successful
experiment was our King
Stropharia graywater bed. While the wood chips
did soak up all of our kitchen wastewater, only one
mushroom popped up
to form our dinner. The problem probably wasn't the small amount
of bleach in the water since the graywater bed actually produced more
mushrooms than the similar beds I innoculated with King Stropharia
spawn under various fruit trees. (Those beds didn't produce any
mushrooms at all.) Instead, I suspect that our climate is a bit
too hot and dry for King Stropharia to be a low-work mushroom. I
watered the beds a few times but didn't keep them well moistened all
through our hot summer, and I suspect most of the spawn dried out and
died. So, graywater mushroom beds are a good idea, but King
Stropharia isn't going to a golden bullet outside the Pacific Northwest.
 A
more successful --- and very simple --- mushroom experiment this year
was cutting
wild mushroom logs up to bring them home. There's really not
much to say except that if you find
wild oyster mushrooms
and bring their log home, the log will produce right outside your
kitchen window where you're more likely to notice the fruits. Yum!
A
more successful --- and very simple --- mushroom experiment this year
was cutting
wild mushroom logs up to bring them home. There's really not
much to say except that if you find
wild oyster mushrooms
and bring their log home, the log will produce right outside your
kitchen window where you're more likely to notice the fruits. Yum!
Our main mushroom
experiment for the past year and half has been trying to figure out a
way to propagate our own mushrooms without a laboratory. Last
year, I zeroed in on oyster mushrooms as one of the easiest to
propagate, and this year I discovered that the trick is to begin your
propagation during the warmest weather possible. Since oyster 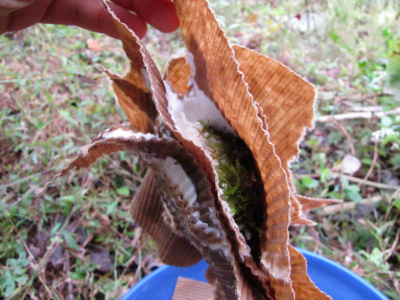 mushrooms
fruit the most in the cool weather of the fall, you'll want to cut
off stem butts from the earliest fruiters and propagate them between
soaked layers of corrugated cardboard (with the non-corrugated top and
bottom sheets taken off.) Before cold weather
fully hits you should have enough spawn to stuff
in holes in a fresh stump or log and then cover it up with wax just like you would
innoculate a stump or log with storebought spawn. We made it all
the way to the innoculation stage with homegrown spawn this fall, so
now we just have to wait and see if mushrooms will pop out of our stump
next year.
mushrooms
fruit the most in the cool weather of the fall, you'll want to cut
off stem butts from the earliest fruiters and propagate them between
soaked layers of corrugated cardboard (with the non-corrugated top and
bottom sheets taken off.) Before cold weather
fully hits you should have enough spawn to stuff
in holes in a fresh stump or log and then cover it up with wax just like you would
innoculate a stump or log with storebought spawn. We made it all
the way to the innoculation stage with homegrown spawn this fall, so
now we just have to wait and see if mushrooms will pop out of our stump
next year.
Assuming that our
low-budget oyster mushroom propagation worked, there are still some
other avenues I want to explore. I've read intriguing reports of
folks not just expanding spawn on cardboard but also making mushrooms
go all the way through their fruiting cycle on paper waste. I'm
very curious to see if fungi would eat up that glossy, colored junk
mail that doesn't make good firestarter or mulch.
This post is part of our 2010 experiments lunchtime series.
Read all of the entries:
|
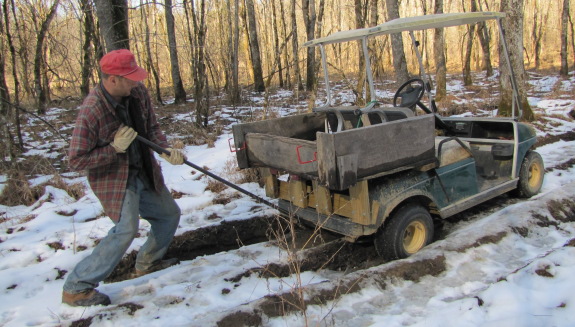
I think the main problem with
the golf cart was how solid the wheels froze with the surrounding
ground.
Maybe a few more loads
of gravel in the summer
will remedy the situation.

Or explore more posts by date or by subject.
About us: Anna Hess and Mark Hamilton spent over a decade living self-sufficiently in the mountains of Virginia before moving north to start over from scratch in the foothills of Ohio. They've experimented with permaculture, no-till gardening, trailersteading, home-based microbusinesses and much more, writing about their adventures in both blogs and books.