
archives for 06/2010
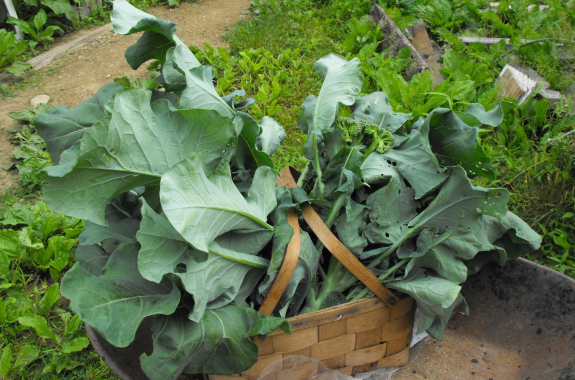
We've been eating broccoli for a week, but the crop
finally reached critical mass Monday. Perhaps a third of the
plants had heads at full maturity --- if I left them any later, they'd
start to degrade. So I picked a basketful...
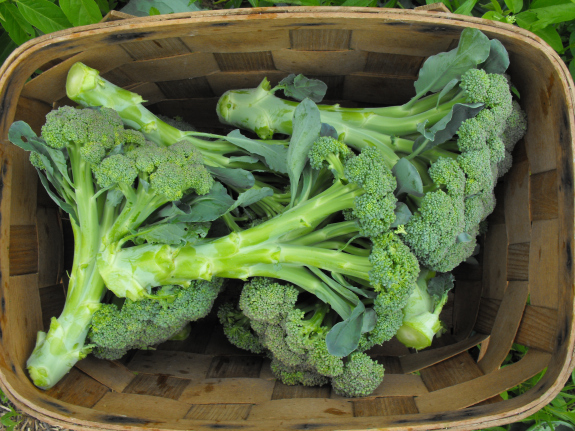
 ...and
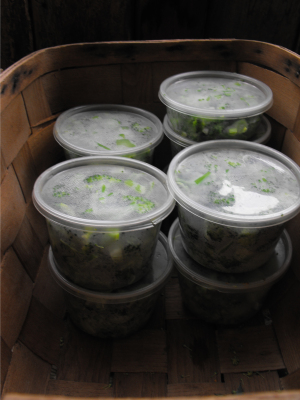
put over a gallon away for the winter.
...and
put over a gallon away for the winter.Last fall, I cut the tops off our broccoli and let the plants send out side florets for a couple of months, but I manage spring broccoli quite differently. With my spring crop, I cut down the whole plant when I harvest the top, peeling the stems to be added to the steamer pot.
Part of the reason for this different management is pests. As we reach June, the few, easily-picked cabbage worms are joined by the southern cabbageworm, which burrows up under the florets and is very difficult to pry out. I figure it's not worthwhile to fight the bugs for a few sideshoots.
I also planted the broccoli a bit too close together this spring, so it's good to thin the crop and give the smaller plants room to grow. Once the little guys mature, I want to hurry and put in a different summer crop in the broccoli beds while it still has time to grow. Finally, I just really love the taste of broccoli stalks!
While I was at it, I froze 5 pints of spinach, collards, and swiss chard. I've resolved that we will not have to resort to buying vegetables next March and April!
 The
primary reason for the mixed reports on comfrey's efficacy stems from a
confusion of terms. Even after reading the entire chapter in
Hills' Russian Comfrey about comfrey species, I had
to do a bit more research to make sure I had the story straight.
The
primary reason for the mixed reports on comfrey's efficacy stems from a
confusion of terms. Even after reading the entire chapter in
Hills' Russian Comfrey about comfrey species, I had
to do a bit more research to make sure I had the story straight.
There appear to be three
comfrey species in cultivation at the moment
(as well as several others growing wild.) The least interesting
from a permaculture point of view is Prickly Comfrey (Symphytum
asperrimum, aka S. asperum.) This comfrey is
easily identified by its sky blue flowers, and is only useful as an
ornamental.
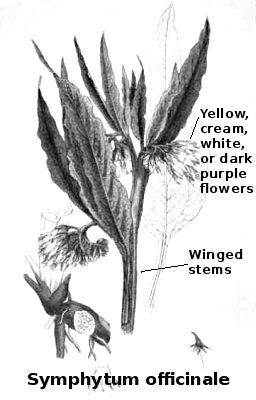
On the other hand,
Common Comfrey (sometimes just called Comfrey, Symphytum
officinale) is
largely cultivated as a
healing herb. The plant usually has winged stems and yellow,
cream, white, or dark purple flowers. Common Comfrey is
relatively easy to confuse with the third species of comfrey, but
yields much less biomass.
Finally, Russian Comfrey
is the star of the permaculture show. To
make it nice and simple, Russian Comfrey has been known by the
following scientific names: S.
peregrinum, S.
officinale x asperrimum, S.
uplandicum, or S.
asperum x officinale.
To cut through the Latin for you, that means that some folks think
Russian Comfrey is a hybrid between the first two comfrey species I
discussed, while others think it merits species status.
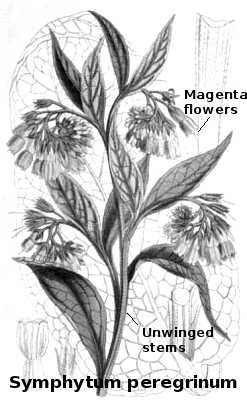
The best Russian
Comfreys --- which may not be all of them --- are very
palatable to livestock, have magenta flowers (or perhaps blue flowers
that fade to pink), and have solid, wingless flower stems.
Russian Comfrey can produce up to 120 tons of plant matter per acre per
year, while Common Comfrey clocks in at about a third that.
Although he didn't write
about it in his book, Lawrence Hills apparently
went on to select a super productive Russian Comfrey now known as
"Bocking 14". Since I'm pretty sure that the comfrey I've been
playing with is merely Common Comfrey, I've put "Bocking 14" on my
plant wish list. Anyone out there have a cutting you can spare?
| This post is part of our Comfrey lunchtime series.
Read all of the entries: |

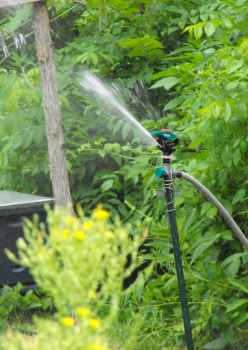
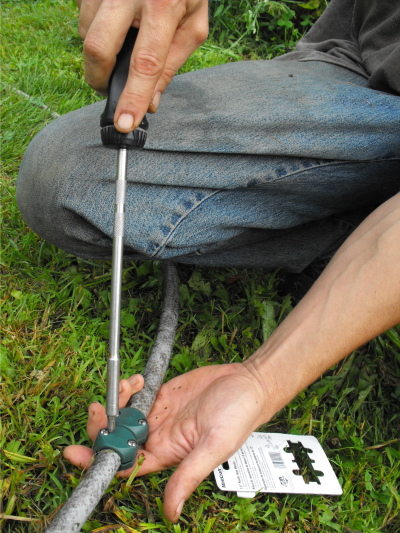
When we first started using
the large
well pump to supply water to the irrigation sprinklers I was timid
about how long it should be used at one time.
I was concerned that too much
continued pumping might damage the motor, but little by little we kept
using it for longer episodes. Now it's not uncommon to see them going
for hours at a time.
Every now and then a
sprinkler head will get clogged with some creek debris, but it only
takes a minute to unscrew the hose and remove any offending algae or
sand.
What's most challenging is
getting 220 volts from the trailer to the creek. More on that in part 2
of this creek pumping series.
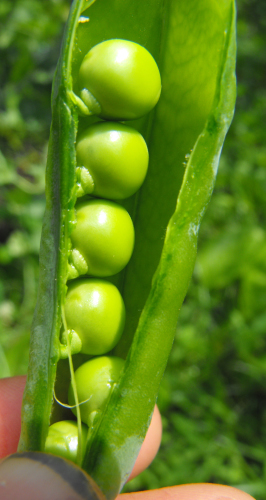
 Internet
sources tell me to harvest new potatoes when:
Internet
sources tell me to harvest new potatoes when:
- The potatoes begin to bloom.
- The calendar changes to June.
- The peas are ripe.
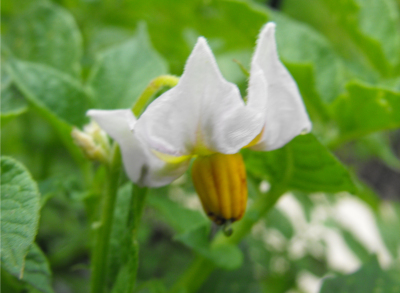
I noticed the first
flowers on our potato plants this weekend, so I decided to dig around
and see what's there. The result? The potatoes are past the
tiny new potato stage I love, and are already swelling into the
half-fist-size zone. I guess option 3 is the best indicator for
my garden since the peas have been ripe for a week or two, which is
just about when I should have harvested new potatoes.
 Most
people harvest new potatoes by grubbing them out from around the bases
of plants, leaving some tubers in place to finish growing. I
opted to just yank out two plants since they were encroaching on my
biggest tomato's growing zone. This gave me a great opportunity
to explore the benefits of my modified
Ruth Stout method,
and I'm totally sold on the heavy mulch. The potatoes required
just a little digging with the trake, but they came out clean and
beautiful, with nary a spot of green. The area is also nearly
weed-free despite never being weeded (though I did toss a few more
handfuls of grass clippings on insipient weeds a few weeks ago.)
Most
people harvest new potatoes by grubbing them out from around the bases
of plants, leaving some tubers in place to finish growing. I
opted to just yank out two plants since they were encroaching on my
biggest tomato's growing zone. This gave me a great opportunity
to explore the benefits of my modified
Ruth Stout method,
and I'm totally sold on the heavy mulch. The potatoes required
just a little digging with the trake, but they came out clean and
beautiful, with nary a spot of green. The area is also nearly
weed-free despite never being weeded (though I did toss a few more
handfuls of grass clippings on insipient weeds a few weeks ago.)
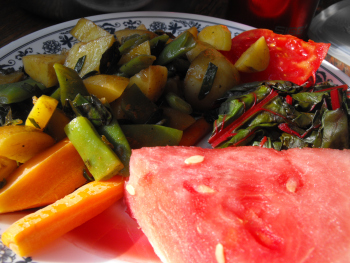
I picked a bowlful of
our stunning sugar snap and snow peas, cut up the first basil leaves of
the year, and added the rest of the ingredients for a modified Green Bean and
Potato Salad.
The taste of summer!
 The
traditional farm use for comfrey has
been as livestock food. Once dried, comfrey contains up to 26%
crude protein, along with an assortment of minerals sucked from the
subsoil by eight foot deep roots. In addition, comfrey contains
less fiber than grass does (10.9% of dry weight), which makes it a good
feed for non-ruminants like pigs and chickens that have a hard time
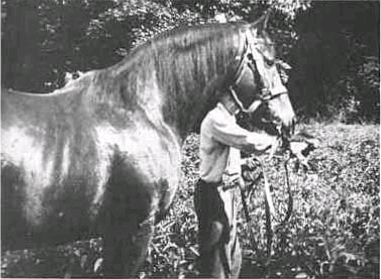
digesting fiber. Anecdotal evidence exists for feeding comfrey to
horses, cows, donkeys, sheep, goats, chickens, and pigs, and at the
time Lawrence
Hills wrote his book (the early 1950s), race horses were being fed
comfrey as a way of keeping the animals in top condition.
The
traditional farm use for comfrey has
been as livestock food. Once dried, comfrey contains up to 26%
crude protein, along with an assortment of minerals sucked from the
subsoil by eight foot deep roots. In addition, comfrey contains
less fiber than grass does (10.9% of dry weight), which makes it a good
feed for non-ruminants like pigs and chickens that have a hard time
digesting fiber. Anecdotal evidence exists for feeding comfrey to
horses, cows, donkeys, sheep, goats, chickens, and pigs, and at the
time Lawrence
Hills wrote his book (the early 1950s), race horses were being fed
comfrey as a way of keeping the animals in top condition.
The question is --- how
much of these animals' traditional diets can be replaced by
comfrey? Little data existed at the time Hills' book was written,
but he suggested several hypotheses based on information about various
animals' known nutritional needs and a few on-the-ground trials.
One farmer noted that providing pigs unlimited comfrey allows you to
lower their storebought feed by 50%, and another farmer used the exact
same figures with his two horses. Comfrey can be used to replace
up to 10% of chickens' feed without lowering egg yield (though chickens
are the most sensitive to excess roughage of all the livestock
mentioned, so you might not want to go much higher than that.)
Lawrence suggests slowly increasing the proportion of comfrey included
in an animal's diet until signs of negative effects are noted.
When I first heard that
chickens eat comfrey, I got excited and tossed some in the
tractor...and my girls looked at me like I was crazy. Hills says
that most livestock will learn to like comfrey, but not in the fresh
form. The prickly hairs that make me use gloves when harvesting
can't be pleasant in an animal's mouth, but luckily the prickles are
merely a thin layer of silica stiffened with water. If you cut
the leaves and wilt them for a day or so, animals can eat the comfrey
with no ill effects --- I'll have to give that a shot! Other
farmers cut comfrey to make hay for the winter, or even turn goats and
sheep (who don't mind the prickles) onto a pasture of comfrey in the
spring and fall when grass pasture quality is at its worst.
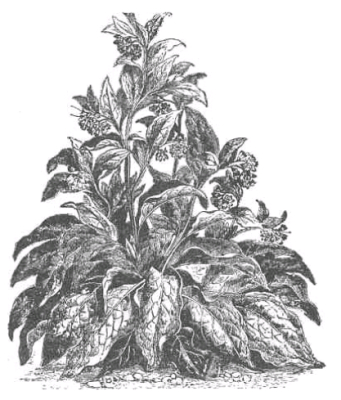
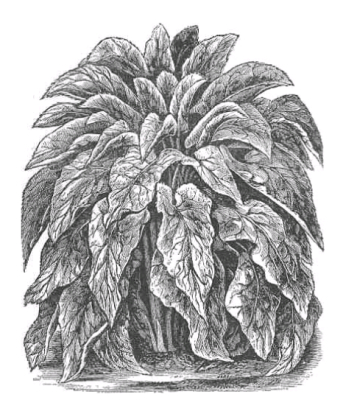
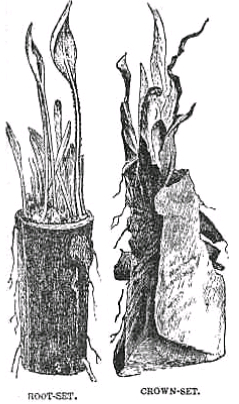
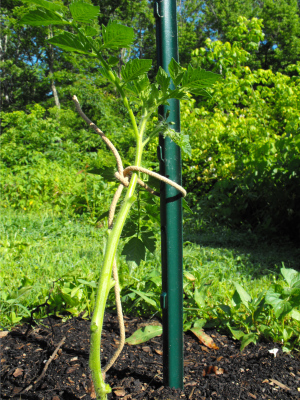
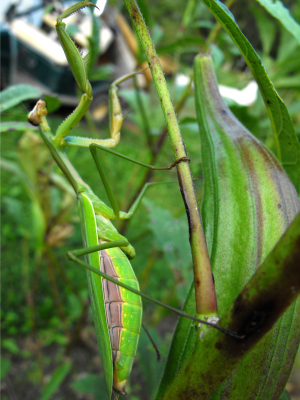
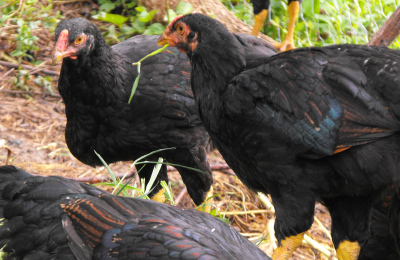
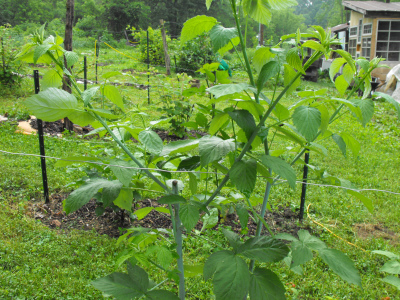
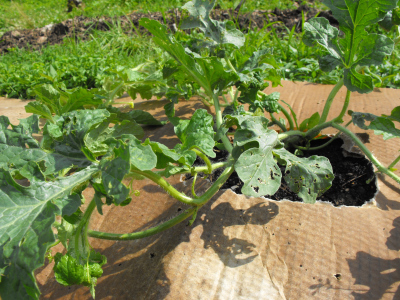
If you're considering
comfrey as animal feed, you should cut your comfrey often so that it
never sends up flower stalks (like those shown in the second
image.) The percentages listed in this post are all for comfrey
in the leafy stage, while flower stalks have nearly double the fiber
and less than half the protein.
Have you tried feeding
comfrey to your animals? What did you think?
| This post is part of our Comfrey lunchtime series.
Read all of the entries: |

When we first started this irrigation
project the budget was a bit limited.
I'm sure it breaks every law
of proper electric wiring, but sometimes you've got to do what you've
got to do.
It's basically four 100 foot extension cords cobbled together and wired
so each pole is carrying 110 volts. I'm pretty sure this is close to
the maximum distance you should think about stretching these cords.
Electrical tape works well for sealing up the junctions where each cord
is plugged into.
We're going on the third year
of this setup. There was a problem in the
beginning with the pump connections, but I solved that by figuring out
how to make the contact points waterproof.
If you feel like you're
testing the limits of safety try picking up the
cord in question to see if it's giving off much heat while you have
your pump working. It's this heat
that can be dangerous and must be dealt with by making the distance
shorter or the electrical cord thicker.
 Mark and I are thinking
of printing up some Walden Effect t-shirts roughly based on a
petroglyph, but tweaked to more closely resemble our farm. Poll
time!
Mark and I are thinking
of printing up some Walden Effect t-shirts roughly based on a
petroglyph, but tweaked to more closely resemble our farm. Poll
time!
Even if you hate
t-shirts, please vote in the first poll so that we can get an idea of
the size of our readers. We want to make sure to have the right
sizes on hand for giveaways.
What
size t-shirt do you
wear most frequently?
Are
you interested in
buying this t-shirt (somewhere in the $10 to $15 range)?
Do you like this t-shirt
design?
Would you be interested
in a t-shirt larger than XL even though it costs about $5 more?
Thanks! Once we
get an idea for sizes and quantity, we'll figure out a price --- our
cost plus shipping --- and will put in an order.
 Hills
boldly states that no other
plant will produce as much biomass for composting when grow in an out
of the way corner as comfrey. In addition, comfrey is a
much-lauded dynamic
accumulator, able to
stretch its roots deep into the
subsoil and draw up calcium, potassium, phosphorus, and trace minerals
that are out of reach of most other plants. Finally, comfrey's
C:N ratio is so low that it nearly
melts into the soil, creating
compost in next to no time. What's not to like?
Hills
boldly states that no other
plant will produce as much biomass for composting when grow in an out
of the way corner as comfrey. In addition, comfrey is a
much-lauded dynamic
accumulator, able to
stretch its roots deep into the
subsoil and draw up calcium, potassium, phosphorus, and trace minerals
that are out of reach of most other plants. Finally, comfrey's
C:N ratio is so low that it nearly
melts into the soil, creating
compost in next to no time. What's not to like?
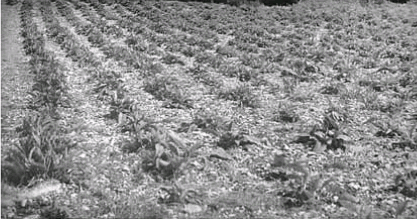
When growing comfrey as
the raw material for compost, Hills recommends
taking six to eight cuttings between April and November. If
you're using a highly productive Russian Comfrey variety, you can
produce 100 or more tons of leaves per acre in this manner, and you
could
potentially double or triple that yield in heavily fertilized patches
on a small scale. The plants are cut two inches above the ground
when they are between one and three feet tall, allowed to dry for 48
hours to lower their moisture content, then gathered and
added to the compost pile.
 An alternative use of comfrey as a fertility
plant is found in forest
gardening literature, which suggests planting
comfrey below fruit
trees as a sort of
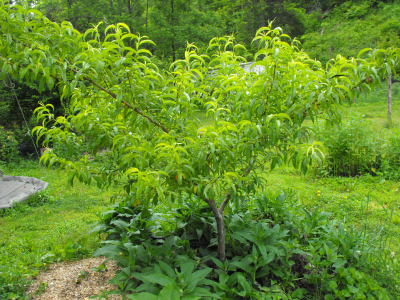
living mulch. Last year, I tried this out, planting comfrey
around the
base of our nectarine, and now I'm cutting the comfrey every week or
two, allowing the leaves to drop down and produce a heavy mulch and
then compost around the tree's trunk.
An alternative use of comfrey as a fertility
plant is found in forest
gardening literature, which suggests planting
comfrey below fruit
trees as a sort of
living mulch. Last year, I tried this out, planting comfrey
around the
base of our nectarine, and now I'm cutting the comfrey every week or
two, allowing the leaves to drop down and produce a heavy mulch and
then compost around the tree's trunk.
On the positive side, I've
noticed that the under-tree area requires nearly no weeding, but I feel
like the comfrey may be competing with the tree more than it's giving
back with my frequent cuttings --- the nectarine's leaves aren't as
vibrantly green as the leaves of our two peach trees.
Unfortunately, I have no other nectarines to compare mine to, so the
data is very inconclusive. However, Hills agrees with my gut
reaction, noting that comfrey will steal potassium from fruit trees and
requires more nitrogen than the tree can handle well. I'm going
to keep searching for some other literature to the contrary, but for
now I'm thinking I would probably be better off planting comfrey beyond
the tree's spread and cutting the leaves to drop around my tree's base.
| This post is part of our Comfrey lunchtime series.
Read all of the entries: |
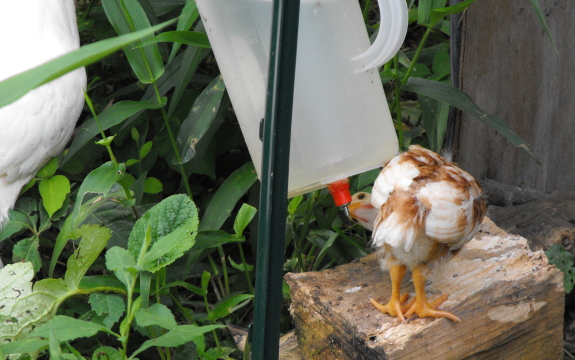
Having a mother hen
cooped up with a baby chick
presents a small adjustment issue for the Avian Aqua Miser that is
easily resolved with a booster step.
I prefer the look of
something natural like this piece of firewood that Lucy has long since carried away and gnawed.
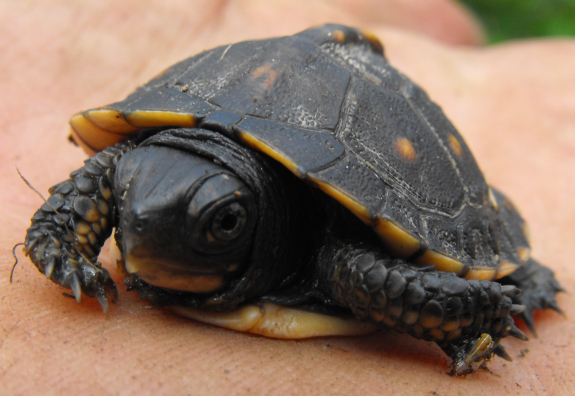
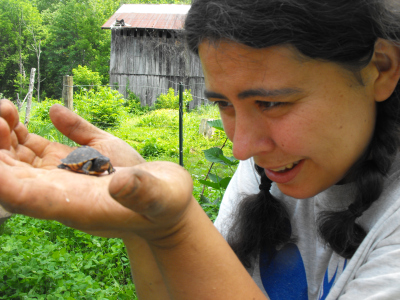 Weeding
may be a boring job, but it has its perks. While ripping up big
weeds in the upper raspberry patch, Mark came across this tiny box
turtle. Ten minutes later, he found another! I guess our
berry patch has the box turtle seal of approval.
Weeding
may be a boring job, but it has its perks. While ripping up big
weeds in the upper raspberry patch, Mark came across this tiny box
turtle. Ten minutes later, he found another! I guess our
berry patch has the box turtle seal of approval.
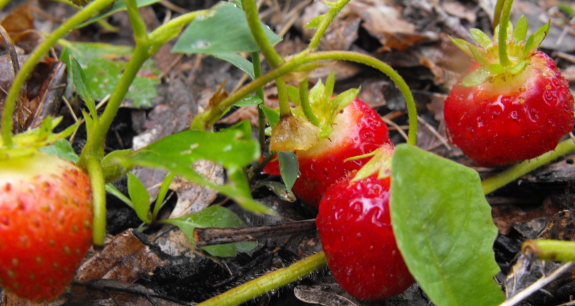
I have to admit that I'm
a bad, bad farmer. A good farmer would move the box turtles out
of the area since they like to eat strawberries and tomatoes.
Instead, I carefully relocated the pair to the shade under the worm bin and gave them a strawberry
apiece. What can I say --- finding a hatchling box turtle has
been my life-long dream.
 Hopefully
you're sold by now and can think of at least one use for comfrey on your homestead. So
how do you grow it?
Hopefully
you're sold by now and can think of at least one use for comfrey on your homestead. So
how do you grow it?
Choose
a good location.
Comfrey isn't picky about soil quality, but it requires deep soil with
no hardpan, rock layer, or high water table to prevent the roots from
reaching
deep. Heavy clay is no problem, and is in fact preferred.
Although comfrey is moderately shade tolerant, it will be less
productive when planted out of the sun.
Propagate
your plants.
Comfrey is only grown from cuttings, so unless your pockets are deep
you will want to buy a few plants and then divide them up. The
good news is that one good-sized comfrey plant can be divided into
dozens of small plants, many of which can be harvested starting the
first
year. First dig up the large plant and cut off sections near the
top containing leaves --- each leaf crown area can become its own
plant. Then take all of the small roots that are left, cut them
into one inch sections, and plant them in a nursery bed one inch deep
and two inches apart. These youngsters can be transplanted into
permanent locations the next spring.
 Prepare your ground.
Comfrey will outcompete almost anything once it gets a foothold, but
you could lose your crop to weeds while it's getting established.
So take a bit of time to root out any perennial weeds.
Prepare your ground.
Comfrey will outcompete almost anything once it gets a foothold, but
you could lose your crop to weeds while it's getting established.
So take a bit of time to root out any perennial weeds.
Plant
your comfrey.
Comfrey needs a permanent location, much like an orchard, since it's
very difficult to eradicate once comfrey has gained a foothold on a
plot of
ground. Space plants three feet apart in good soil, or half that
in poor soil. Plant in the fall (September to November) or spring
(March to May.)
 Weed and
fertilize.
One tantilizing system consists of planting comfrey in the chicken
run. Since chickens don't like unwilted comfrey leaves, the birds
will weed
between the comfrey and fertilize it in the process, only requiring you
to add wood ashes or another form of potassium every few years to
balance the fertility. You can cut a plant or two every day while
feeding your chickens, and the poultry will eat up the cuttings the
next day once they're wilted. If you're not using chickens, dig
out any perennial weeds by hand and fertilize annually.
Weed and
fertilize.
One tantilizing system consists of planting comfrey in the chicken
run. Since chickens don't like unwilted comfrey leaves, the birds
will weed
between the comfrey and fertilize it in the process, only requiring you
to add wood ashes or another form of potassium every few years to
balance the fertility. You can cut a plant or two every day while
feeding your chickens, and the poultry will eat up the cuttings the
next day once they're wilted. If you're not using chickens, dig
out any perennial weeds by hand and fertilize annually.
Harvest. You can begin
cutting leaves as early as the first year, but the plants produce the
maximum yield
starting in the third year. After several more years,
productivity will
begin to decline as the centers of the huge comfrey plants die
out. This is the point at which you'll want to dig up the plants
and divide them, or just turn in pigs to root out the comfrey and start
a new comfrey patch elsewhere.
| This post is part of our Comfrey lunchtime series.
Read all of the entries: |
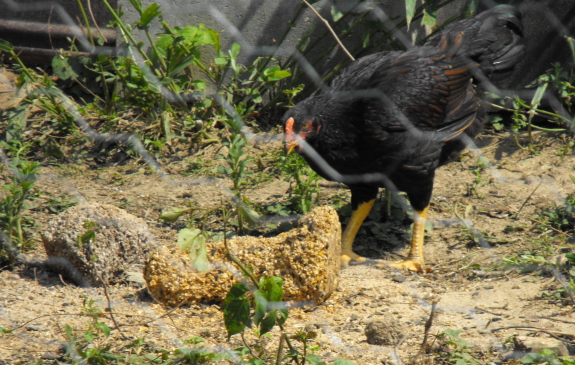
The flock block is
wearing down to more of a bowl shape.
It seems to be a good value compared to the 50 pound bags of feed due
to what I think is an increase in protein.
 Let's
look at a contest between the six beds of shelling peas I planted in
early March and the six beds of broccoli I transplanted in early
April. This week, I've harvested about a quarter of the shelling
peas, and about two thirds of the broccoli, freezing all of the peas
and most of the broccoli. Elapsed harvest and freezing
time? Half an hour for the peas, an hour and a half for the
broccoli.
Let's
look at a contest between the six beds of shelling peas I planted in
early March and the six beds of broccoli I transplanted in early
April. This week, I've harvested about a quarter of the shelling
peas, and about two thirds of the broccoli, freezing all of the peas
and most of the broccoli. Elapsed harvest and freezing
time? Half an hour for the peas, an hour and a half for the
broccoli.
So far the two crops
seem to be about even, right? Now let's look at how much food
we've gotten out of those beds --- one cup for the peas, two gallons for the broccoli. When
you look at the food produced per hour harvest time, that's like the
difference between being paid $2.50 per hour and $50 per hour --- I
know which one I'd choose.
Granted, peas do have a
lot going for them in other ways. They provide protein for our
bodies, and also fix nitrogen to feed the soil. They freeze well
(but so does the broccoli) and are finished in time for me to plant a
summer crop (though broccoli wins here, coming out a precious week or
two earlier.) We find them tasty and easy to cook with, too, but
no more so than broccoli.
This is the fourth year
we've grown shelling peas, and each year I was certain the problem was
the pea variety. Having run through four different varieties now,
I'm ready to accept that maybe shelling peas aren't the best crop for
our farm. Our snow and sugar snap peas seem to produce about four
times as much plant matter per bed, but we can't really grow more of
them since we only like them fresh. Maybe we'll skip the shelling
peas next year and double up on broccoli instead?
In fact, we could have
tripled our broccoli planting since I still have five empty beds that
are waiting to be filled with the other half of our sweet potato slips,
slowly budding in the sun room. Why maintain empty beds all
spring when they could be feeding us broccoli?
I'm not suggesting we
actually get $50 worth of food per hour with the broccoli. I
didn't count in the planting, transplanting, weeding, and watering
time, and I actually have no clue how much frozen broccoli costs in the
store.
Did we really need the extra Trake?
Yes...the Trake is one of
those garden instruments that when backed up with a twin can become
twice the tool if you've got the extra hands to wield them.
 I've
been known to tell prospective apiarists that bee stings don't
hurt. "It's about like getting a shot," I tell them. "You
feel it for a minute, but pretty soon you've forgotten it even
happened." Friday, I learned that I was lying.
I've
been known to tell prospective apiarists that bee stings don't
hurt. "It's about like getting a shot," I tell them. "You
feel it for a minute, but pretty soon you've forgotten it even
happened." Friday, I learned that I was lying.
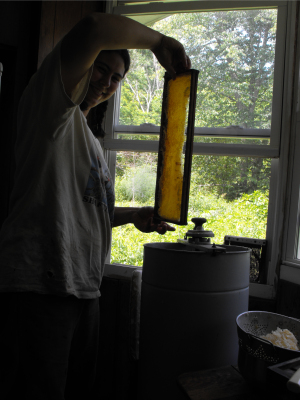
I've been going into the
hives every week lately, trying to keep the brood boxes open while the
bees try to fill them with honey in preparation for an eventual swarm
that I'm determined won't happen. Last week, I added a second
brood box on one of the hives, checkerboarding empty frames and full
frames so that the hive now had two half empty brood boxes rather than
one mostly full one. I wanted to see how that experiment was
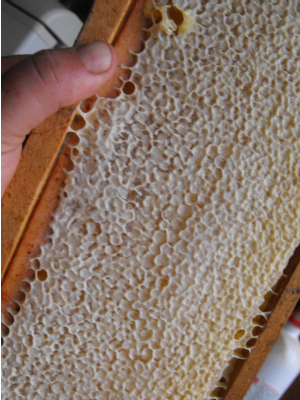
working out, but when I opened the hive all I saw was honey.
We've barely had any
rain in the last few weeks, so I shouldn't have been too surprised to
see that two supers were chock full of mostly or completely capped
honey. I carefully removed two frames for extraction, and paged
through the other frames to make sure the queen hadn't moved up to lay
in the supers. So far so good --- all twenty frames were brood
free. But there was just so much honey that I accidentally nicked
a couple of frames, and sweet, gooey honey dripped down through the
hive.
Maybe the open honey got
the bees' dander up, or more likely the bees sensed the first few
clouds converging and the dropping barometric pressure that forecast a
storm moving into our neighborhood. All I know is that halfway
through my inspection of the top brood box, a bee stung me on the
arm. Whatever --- no big deal. But I know that when one bee
stings, the other bees can smell it and I should close up the
hive. Unfortunately, a sting also jars me out of my "bee zone"
--- a zen-like state where I move slowly and the bees barely know I'm
there. I started to close the hive too quickly and the second
sting came, then the third.
Those of you who've been
following along at home have probably noticed that I wear a pretty
tight shirt when checking on the hive. It shouldn't be that tight
since having cloth appressed to skin makes it easy for a bee to sting
through, but it's the only light-weight, non-button-up, long-sleeved
shirt I own (a wardrobe choice that is soon to be remedied.)
Anyway, the bees were mad, and they made straight for the big things
bulging out at them, which unfortunately happened to be a very
sensitive portion of my anatomy. Ten stings later, the hive was
closed, and I was nearly in tears.
 Once
I calmed back down and did a bit of research, I discovered that --- as
usual when I get stung --- I was doing several things wrong. As
soon as I noticed the first clouds gathering, I should have packed
everything up and gone home. Secondly, I should have stuck to
either checking on the brood box or robbing honey, not both.
Finally, when I did get stung, I should have immediately left the hive, puffed a little
smoke on the wound, and given both the bees and myself a couple of
minutes to calm down. I suspect if I'd taken that first sting as
a warning, brought myself back to the bee zone, and closed up the hive
slowly, all would have been well. I certainly don't want to leave
any potential beekeepers thinking that the hive is a dangerous place,
but it is quite easy to get stupid, especially as a newbie.
Once
I calmed back down and did a bit of research, I discovered that --- as
usual when I get stung --- I was doing several things wrong. As
soon as I noticed the first clouds gathering, I should have packed
everything up and gone home. Secondly, I should have stuck to
either checking on the brood box or robbing honey, not both.
Finally, when I did get stung, I should have immediately left the hive, puffed a little
smoke on the wound, and given both the bees and myself a couple of
minutes to calm down. I suspect if I'd taken that first sting as
a warning, brought myself back to the bee zone, and closed up the hive
slowly, all would have been well. I certainly don't want to leave
any potential beekeepers thinking that the hive is a dangerous place,
but it is quite easy to get stupid, especially as a newbie.
One final note: Although
the bees clearly won that round, as you'll see in my next post, the
ending was sweet....
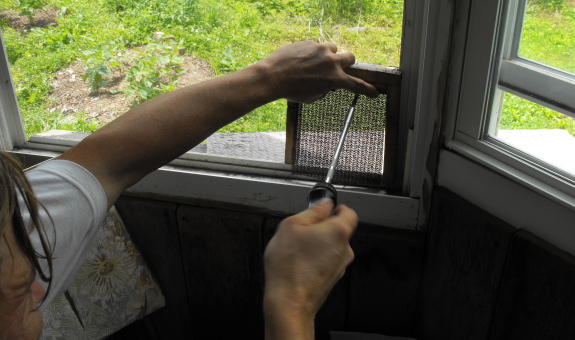
The first do
it yourself pet door lasted a few months before the screen
broke free. Not a good choice of material.
I found some see through
material that is working out much better once I installed a layer on
each side.
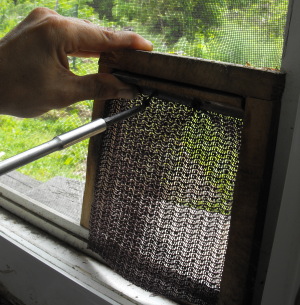
It got Huckleberry's meow of
approval, but Strider is still reserving judgment due to his fear of
change.
 Although
I was running toward the trailer at top speed and swatting at my
breasts, I still had
the presence of mind to grab those two full frames
of honey. My beekeeping mentor (aka movie star neighbor)
had admonished me that, at this time of year, the frames need to go
back on
the hive ASAP. Within a couple of hours, he warned, bees will
start building comb willie nillie to fill that empty space. So,
even though I mostly felt like crawling into bed, I needed to extract
our honey and open the mean hive back up.
Although
I was running toward the trailer at top speed and swatting at my
breasts, I still had
the presence of mind to grab those two full frames
of honey. My beekeeping mentor (aka movie star neighbor)
had admonished me that, at this time of year, the frames need to go
back on
the hive ASAP. Within a couple of hours, he warned, bees will
start building comb willie nillie to fill that empty space. So,
even though I mostly felt like crawling into bed, I needed to extract
our honey and open the mean hive back up.
I iced my wounds, but my
head wasn't quite on
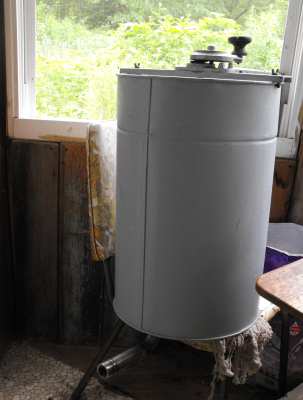
straight when I got to work on the honey. In fact, this post
really should be called "how to do everything wrong while extracting
honey." I hope you'll learn by seeing
the error of my ways.
Step
1: Remove the bees from the honey.
I actually managed to do this step well, moving the frames a good
distance from the hives (which calmed the bees down),
then gently brushing one frame at a time free of bees.
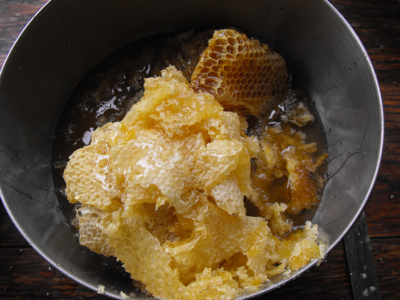
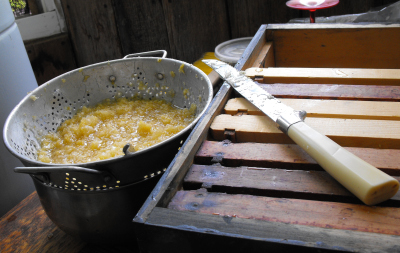
Step
2: Uncap the honey.
Here's where I failed miserably. For future reference, a plain
kitchen knife will mangle your comb so that it falls apart in the
extractor. A bread knife works great.
Step
3: Extract the comb honey. Place the cappings in a
collander on top of a bowl and mash the wax with a spoon to let the
honey begin to drain out.
 Step 4: Place a bowl under the spout at the
bottom of the extractor. With the state my head
was in, I'm surprised I remembered this step.
Step 4: Place a bowl under the spout at the
bottom of the extractor. With the state my head
was in, I'm surprised I remembered this step.
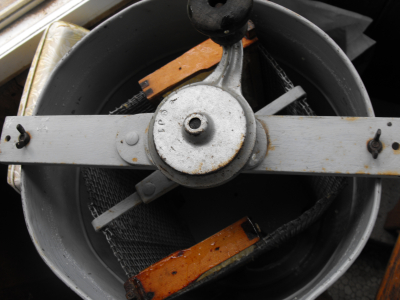
Step
5: Extract.
Place
the frames in the extractor opposite each other so that they are
balanced. With new comb like ours, it's best to gently spin the
extractor a few times, then flip the frames around and fully empty out
the other side of each frame, before flipping the frames a second time
and giving the handle a few hard spins. My beekeeping mentor
explained
this to me in great detail, but when I tried the gentle spin, I
couldn't see honey coming out (even though it was), so I spun
harder. As a result, the comb on my mangled frame from step 2
fell apart, and even the other frame got a bit distorted.
 Step 6: Cut out the mangled frame to join the
cappings.
Oops.
Step 6: Cut out the mangled frame to join the
cappings.
Oops.
Step
7: Put the frames back on the
angry, angry hive, along with an extra super since the bees are clearly
making honey faster than we can extract it. Your hive won't be
angry. Mine was because I made a mistake.
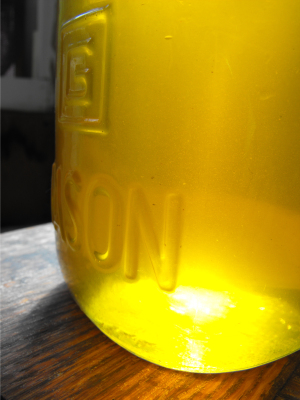
Step
8: Pour the honey from under the collander and from under the extractor
into canning jars for storage. No need to can ---
honey will keep indefinitely if harvested when fully capped and stored
in an 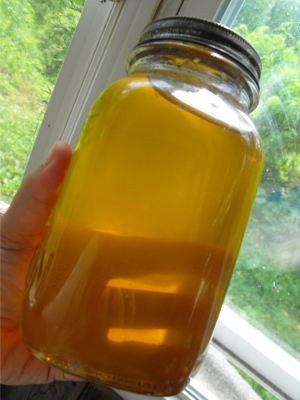 air-tight container.
Some people strain the honey first to remove the little bits of wax,
but I didn't bother.
air-tight container.
Some people strain the honey first to remove the little bits of wax,
but I didn't bother.
Step
9: Taste a bit of honey. It was all worth it!
I'm actually glad I
tried a couple of frames before embarking on a larger extracting
expedition. Now I'll know what I'm doing this week when we remove
a gallon (!!!) from the hive.
 Several
friends of mine have neither the inclination, time, nor space to grow
their own vegetables, so they join a CSA
to be part of the local food
system. Inevitably, a few weeks in, they regret the
decision. "What do I do with a huge basket of mixed greens?" they
moan. Or, "Five butternut squash? I
don't know how to cook squash!"
Several
friends of mine have neither the inclination, time, nor space to grow
their own vegetables, so they join a CSA
to be part of the local food
system. Inevitably, a few weeks in, they regret the
decision. "What do I do with a huge basket of mixed greens?" they
moan. Or, "Five butternut squash? I
don't know how to cook squash!"
The truth is that the
beginning gardener often feels the same
way. We're used to buying whatever vegetables suit our fancy or
are mandated by our favorite recipes, and we don't know how to make a
salad when we realize that lettuce and tomatoes are never in season at
the same time. On a similar note, we might want to start a
garden, but we don't know which vegetables are within our reach and
which ones are the domain of experienced green thumbs. How can we
even start when the whole endeavor looks so daunting? It's much
easier to pick up some organic produce at the grocery store and figure
we're doing our part to save the world.
Although I know that
many of our readers are long time gardeners and
cooks who use in-season produce without thinking about it, I also
suspect that others of
you are afraid to put the first plants in the ground because you just
don't know how to go from seed to gourmet feast. This week's
lunchtime series launches a new facet of this blog geared toward giving
beginners the information they need to start a quick and easy garden
and then to enjoy the bounty. I hope that you experienced
gardeners and
foodies will read along and add your own advice on which plants are
easy to grow in your neck of the woods, and on simple recipes you use
to produce delicious, in-season meals.
| This post is part of our Beginner's Guide to Gardening and Eating in
Season lunchtime series.
Read all of the entries: |
 I
picked my beekeeping mentor's brains this weekend, and decided to go
ahead and harvest
a lot more honey out
of the overflowing hive. My mentor told me that when he harvests
honey, he takes the super off the hive, closes the hive back up, turns
the super on its side on top of the hive, and blasts the bees out with
a leaf blower. Wow!
I
picked my beekeeping mentor's brains this weekend, and decided to go
ahead and harvest
a lot more honey out
of the overflowing hive. My mentor told me that when he harvests
honey, he takes the super off the hive, closes the hive back up, turns
the super on its side on top of the hive, and blasts the bees out with
a leaf blower. Wow!
I was a bit too scared
to do that (and don't have a leaf blower), so I tried the same method I
used last week, carrying the frames around to the other side of the
trailer to confuse the guard bees, then brushing off the frames one at
a time. Since I took two whole supers off the hive this time,
though, rather than just a couple of frames, the method didn't work so
well. There were gobs of bees present, and when I brushed them
loose, they flew around the front door in a writhing (and not very
amused) mass.
No major stings
resulted, but I had once again riled up the hive. They began to
harass Mark in the garden so much that he had to come inside, and when
my cousin-in-law stumbled in from the yurt, he was a bit surprised to
be divebombed on his way through the door.
Apparently I'm still
making basic beginner mistakes. Next time, I'll try brushing the
bees off near the hive so that they can head home quickly. It
also turned out that only five of the frames were fully capped, so I
probably would have been better off picking frames out of the hive
rather than disrupting so many workers' lives. Still, no harm
done, and we've now harvested about five and a half quarts of honey.
I still haven't even
opened up the most productive hive, though. Maybe in a few days
once my poor cousin-in-law flees the farm.
 The
easiest way to lose the gardening bug permanently is to start a huge
garden with a bunch of vegetable varieties suited only to an expert,
then see everything disappear down insect gullets in a few
months. I recommend that beginning gardeners instead start small,
with just a few vegetables that are nearly impossible to kill.
Here are my top contenders:
The
easiest way to lose the gardening bug permanently is to start a huge
garden with a bunch of vegetable varieties suited only to an expert,
then see everything disappear down insect gullets in a few
months. I recommend that beginning gardeners instead start small,
with just a few vegetables that are nearly impossible to kill.
Here are my top contenders:
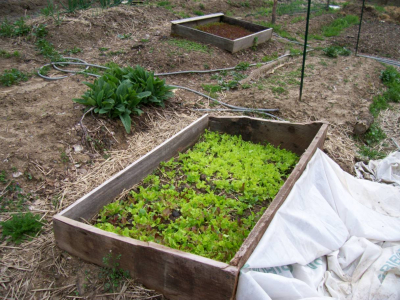
Leaf
lettuce - The
time has
already passed for this cool season crop, but fall will be here before
you know it. Lettuce is great for beginners because you can't do
anything wrong and you get to harvest a month after planting. One
of the easiest to grow in our area is Black-seeded Simpson, but I like
to mix in a red variety for eye candy. Read all of my tips
on growing lettuce here.
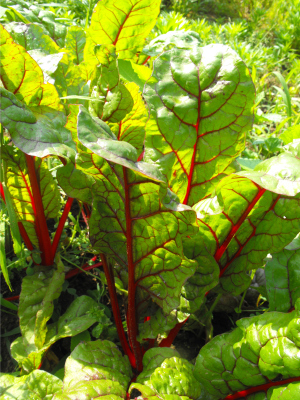 Swiss chard - Most greens are
extremely easy, but Swiss chard takes the cake. Unlike other
greens, swiss chard doesn't get bitter, nor does it bolt the first
year. The greens are mild in flavor and can be substituted in
recipes which call for spinach (a vegetable that does bolt quite
quickly.) Although they taste the same as the white-stalked
variety, urban gardeners will love Swiss chard varieties with leaf
stalks ranging in color from white to yellow to red since they're
pretty enough to mix into your flower border. This warm season
crop should be planted after your frost-free date ---
for nearly all of you, that means you can go ahead and plant now.
Once
the leaves are four inches tall, I start cutting them just like leaf
lettuce once or twice a week, making sure I don't cut the growing bud,
but taking most other leaves.
Swiss chard - Most greens are
extremely easy, but Swiss chard takes the cake. Unlike other
greens, swiss chard doesn't get bitter, nor does it bolt the first
year. The greens are mild in flavor and can be substituted in
recipes which call for spinach (a vegetable that does bolt quite
quickly.) Although they taste the same as the white-stalked
variety, urban gardeners will love Swiss chard varieties with leaf
stalks ranging in color from white to yellow to red since they're
pretty enough to mix into your flower border. This warm season
crop should be planted after your frost-free date ---
for nearly all of you, that means you can go ahead and plant now.
Once
the leaves are four inches tall, I start cutting them just like leaf
lettuce once or twice a week, making sure I don't cut the growing bud,
but taking most other leaves.
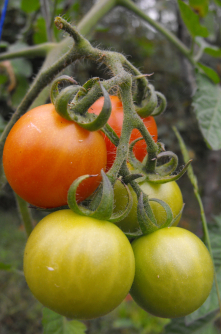 Tomatoes - In my opinion,
tomatoes are really a year two crop, but the flavor difference between
a homegrown tomato and a storebought one is so great that few people
can resist planting them. For the raw beginner, you should go
ahead and buy a transplant or two from the feed store and put them out
after the frost-free date. Choose a slicer or a tommy-toe (or
both). Be sure to cage or stake your tomato, and if you're
starting this year, I
highly recommend pruning since the blight is still in the air. In
later
years, I think you'll be happier starting your own tomatoes from seed
and growing primarily romas for ease of storage, but in year one you
should stick to simple vegetables that go straight on your plate.
Tomatoes - In my opinion,
tomatoes are really a year two crop, but the flavor difference between
a homegrown tomato and a storebought one is so great that few people
can resist planting them. For the raw beginner, you should go
ahead and buy a transplant or two from the feed store and put them out
after the frost-free date. Choose a slicer or a tommy-toe (or
both). Be sure to cage or stake your tomato, and if you're
starting this year, I
highly recommend pruning since the blight is still in the air. In
later
years, I think you'll be happier starting your own tomatoes from seed
and growing primarily romas for ease of storage, but in year one you
should stick to simple vegetables that go straight on your plate.
Basil - I see people buy basil
transplants, and I can't figure out why. Basil is the easiest
herb you can grow --- throw the seeds on the ground around your
frost-free date and you'll be picking off leaves a couple of weeks
later. The trick to a summer-long harvest is to cut your basil
back regularly (at least once a week) and never let it bloom.
With lettuce and swiss chard, I told you to be careful not to harvest
the central growing bud, but with basil I advocate the reverse.
Cut the whole top off the plant, leaving one or two pairs of older
leaves at the base, and it will branch out into a bush. Keep
cutting the youngest, tastiest leaves, and your plant will just get
bigger and bushier. When the basil does start trying to bloom,
pick off the flower buds. I recommend a simple Sweet Italian or
Genovese basil for your first year, but later you can branch out into
the varieties that taste great in other ethnic foods.
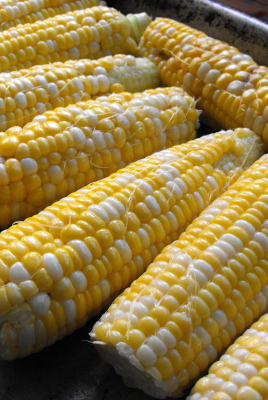 Sweet Corn - The only major
thing that can go wrong with corn is lack of pollination if you plant
too small of an area. I try to plant at least two short rows
together, and three or four are better. Your corn will mature
nearly all at once, so for a full summer harvest, I plant a bed on our
frost-free date, and continue planting another bed every two weeks
until the end of June. Like tomatoes, there's no comparison
between homegrown and storebought sweet corn. But this is the one
vegetable where I like to stick with fancy hybrids --- heirloom
varieties are starchy instead of sweet.
Sweet Corn - The only major
thing that can go wrong with corn is lack of pollination if you plant
too small of an area. I try to plant at least two short rows
together, and three or four are better. Your corn will mature
nearly all at once, so for a full summer harvest, I plant a bed on our
frost-free date, and continue planting another bed every two weeks
until the end of June. Like tomatoes, there's no comparison
between homegrown and storebought sweet corn. But this is the one
vegetable where I like to stick with fancy hybrids --- heirloom
varieties are starchy instead of sweet.
Okra - Okra may seem like an
odd choice for the beginner, but in the South few crops beat its ease
of growth. In fact, the plant has such huge, beautiful flowers
that okra can easily pass for an ornamental. Plant the seeds at
the frost-free date, and in a couple of months you'll see blooms and
little, furry fruits. Cut the whole fruit off at the stem when it
is less than three inches long and steam it --- the trick to defeating
okra slime is to never let water touch the interior of the fruit.
We eat our steamed okra with our fingers, holding it by the stem and
eating the fruit portion off, but you could cut the tops off after
steaming them if you like. The traditional method of eating okra
is to slice, batter, and fry it, but I can't really recommend that
approach. Our favorite variety is Clemson Spineless.
The beginner should pick
two to four of these varieties to try out their first year,
steering clear of okra if you live in the north and of tomatoes if you
live in a very hot area like Texas. Plant a very small garden, no
more than perhaps 100 feet square, and mulch the whole thing if
possible to cut down on weeding. If you have anther choice, steer
clear of pots, which are harder than they look, and keep good records
of when and where you planted and what happened. Most of you
still have time to start something this year, so go do it!
| This post is part of our Beginner's Guide to Gardening and Eating in
Season lunchtime series.
Read all of the entries: |
I only made it 2 weeks before
I hit another fatal stump with the mower which took out the new
flywheel shaft key that
was installed recently.
This time I used a different
guy who was a lot closer and 3 bucks cheaper. I was all ready with a
long screw driver/pry bar and mini-sledge to try to do the operation
myself, but once I started taking it all apart I realized the first guy
tightened down some of the nuts too tight. I remember him using an air
wrench, and not seeing a torque wrench being applied. Most experts
think they can gauge it by feel, but this nut was on so tight I broke
2 sockets trying to get it off.
The moral of this story is to
make sure your nuts don't get over tightened.
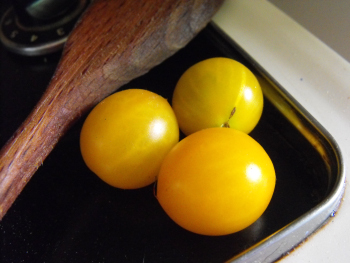
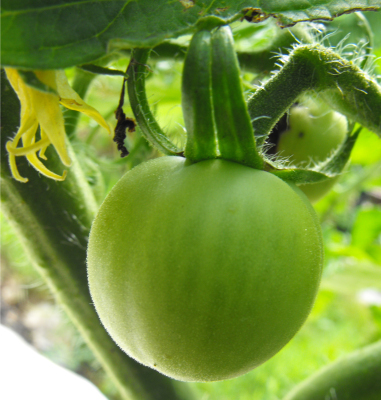
 If
you ask ten gardeners the best way to manage tomatoes, you'll get
twenty answers. We've tried out a different method every year,
and still haven't found one we're truly happy with. This year
we're using out the old standby --- one stake per plant, then prune to
three main stems.
If
you ask ten gardeners the best way to manage tomatoes, you'll get
twenty answers. We've tried out a different method every year,
and still haven't found one we're truly happy with. This year
we're using out the old standby --- one stake per plant, then prune to
three main stems.
The Master Gardeners of
Santa Clara County have a very comprehensive page about the advantages
and disadvantages of different tomato support methods. They note that the
one stake method results in less productive plants, which is the reason
I've steered clear of pruning in the past.
On the other hand, the
tomato blight is still in the air this year across the eastern U.S.,
and I'm willing to accept a lower yield if I actually get something. Pruning does have the
advantage of keeping the plant drier, which means that fungi don't have
the humid environment they need to thrive. Here's hoping that
drastic pruning and other blight
prevention will give
us a crop.
 If
you take my advice and plant a few of the easy vegetables
mentioned in
my last post, you will quickly be overrun with fresh produce. Now
what do you do with it?
If
you take my advice and plant a few of the easy vegetables
mentioned in
my last post, you will quickly be overrun with fresh produce. Now
what do you do with it?
First of all, it's
essential that you get over the grocery store
mentality that a slight blemish means a vegetable gets tossed in the
trash. Your vegetables may have a bug nibble here and there, or
even a crack in the side. Don't worry about it. I can't for
the life of me find a link, but I was recently told about a sect of
monks who were quite healthy vegans until they began to buy commercial
produce and came down with nutritional deficiencies. It turned
out that the insects they were accidentally ingesting in their previous
diet of non-commercial vegetables had been keeping them healthy.
I don't wash our homegrown produce, and we find it delicious, bugs,
dirt, blemishes, and all.
 Chances
are, once you discover how good your homegrown vegetables
taste, a good amount of the bounty won't even make it out of the
garden. Eventually, you'll probably want to present the
vegetables as part of the meal, which is the purpose of this
post. Tomorrow I'll
give you pointers on becoming a bit fancier.
Chances
are, once you discover how good your homegrown vegetables
taste, a good amount of the bounty won't even make it out of the
garden. Eventually, you'll probably want to present the
vegetables as part of the meal, which is the purpose of this
post. Tomorrow I'll
give you pointers on becoming a bit fancier.
Lettuce - By the time fresh
tomatoes and cucumbers reach my plate, lettuce is long gone, which
blows my traditional salad out the window. Here are some in-season salad ideas.
Swiss
chard - The
easiest way
to prepare stellar greens is to cut them into bite-size pieces and
steam them for a few minutes until the stems are soft. Drizzle
them with balsamic vinegar and eat. Once you get bored with that,
try sauteing the greens in a large pot in a bit of oil, adding minced
garlic for the last minute of cooking.
Tomatoes - Once you get sick of just
eating tomato slices (if ever), try our cucumber and tomato salad. Some people add goat
cheese and/or mozarella to the mix for a heartier salad.
 Basil - Pesto is the obvious
solution to an overdose of basil. I've posted my recipe for chestnut pesto, but we usually use walnuts
in our daily lives. Pine nuts are the classic pesto component,
but are extremely pricey.
Basil - Pesto is the obvious
solution to an overdose of basil. I've posted my recipe for chestnut pesto, but we usually use walnuts
in our daily lives. Pine nuts are the classic pesto component,
but are extremely pricey.
Sweet
corn - In my
opinion, the
only way to eat sweet corn is to very lightly cook it. Bring a
big pot of water to a boil while you shuck the corn, then drop the ears
in for less than a minute, just until they change color.
Carefully pull them out with a pair of tongs and eat immediately (with
salt and/or butter if you prefer.)
Okra - I already mentioned that I
prefer steaming okra, and that most people fry it. What's your
favorite way to eat okra?
Whatever you do,
remember that freshness is key. As soon as you
pick an ear of corn, the sugars begin to turn to starches and the
flavor declines. Although the difference isn't quite as
pronounced with other vegetables, the trend is the same. For
maximum flavor and nutrition, pick produce right before eating it.
| This post is part of our Beginner's Guide to Gardening and Eating in
Season lunchtime series.
Read all of the entries: |
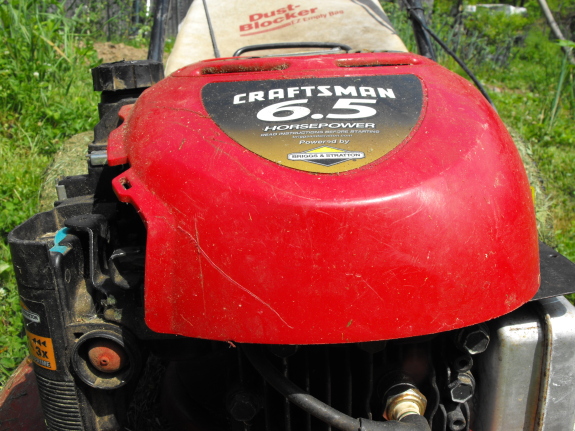
I was all set to get a
Craftsman 24 inch pry bar/flywheel remover when I found this one for
only 4.99
at Harbor Freight.
Usually the Craftsman no
questions lifetime warranty is enough to push me into spending more for
a tool, but in this case I think I'll be okay with the cheaper
model....especially when it also has a lifetime warranty at a third of
the price.
It says Pittsburgh, but it's
made in Taiwan and it feels heavy duty. Stay tuned to see how it handles
some real world pressure when I replace my first flywheel
shaft key in hopefully what will be far in the future.
 If
the beginner
recipes in my last
post look boring to you, you're
probably ready to become an experimental, in-season chef. Most
cookbooks are chock full of fascinating recipes...which call for
ingredients from three different seasons per dish. Here are my
intermediate tips for learning to cook in season.
If
the beginner
recipes in my last
post look boring to you, you're
probably ready to become an experimental, in-season chef. Most
cookbooks are chock full of fascinating recipes...which call for
ingredients from three different seasons per dish. Here are my
intermediate tips for learning to cook in season.
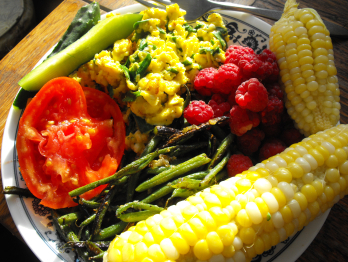
First, start with the
ingredients. Rather than saying, "I feel
like lasagna tonight," take a look in the garden and see what's
ripe. Our recipes at the moment revolve around snow and sugar
snap peas, new potatoes, eggs, broccoli, greens, basil, and parsley,
which is why we've been making meals like pesto pasta with balsamic
vinegared greens and a fried egg on the side.
 Once
you know what you're cooking with, head to one of the recipe
websites like epicurious and type your
ingredients into the search
box. The website will spit out a whole string of recipes for you
to choose between.
Once
you know what you're cooking with, head to one of the recipe
websites like epicurious and type your
ingredients into the search
box. The website will spit out a whole string of recipes for you
to choose between.
Chances are, you still
won't have all of the ingredients required by a
recipe, so you should be willing to substitute for a more appropriate,
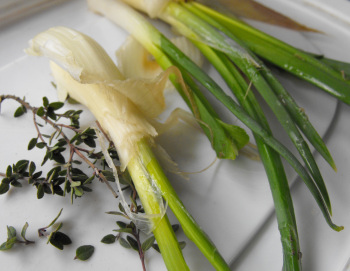
in-season vegetable or herb. Some of my favorite replacement
plants are Egyptian onions for leeks and parsley for celery since I can
harvest Egyptian onions and parsley for at least 11 months out of the
year.
Finally, some vegetables
are such good keepers that they can be
considered to almost always be in season. Bulb onions, potatoes,
garlic, and carrots are a few examples. You can add them to your
recipes with impunity.
| This post is part of our Beginner's Guide to Gardening and Eating in
Season lunchtime series.
Read all of the entries: |
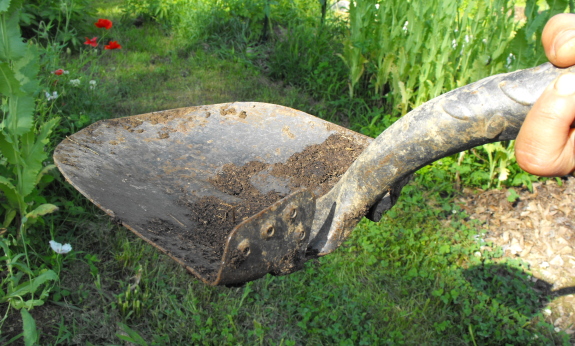
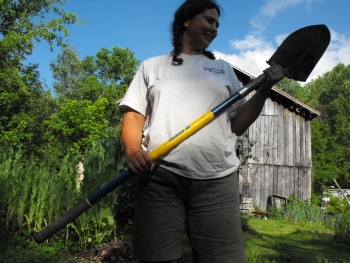 The
Jackson Titanium Xtra is hands down the best shovel I've ever moved
dirt with.
The
Jackson Titanium Xtra is hands down the best shovel I've ever moved
dirt with.
The soft rubberized grip makes it easy to hold, but what sold me was
the power step feature, which increases leverage by allowing your foot
and legs to do more of the work.
It costs over twice what a cheaper shovel goes for, but well worth it
in my opinion.
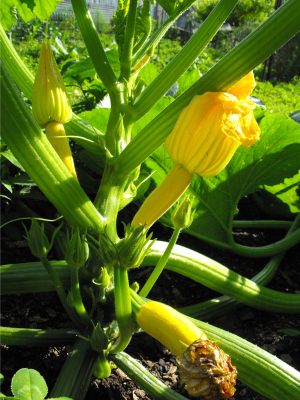 The squash vine
borer will be
hitting our farm shortly --- I know because the first brilliant flowers
have come out on the summer squash. With the impending collapse
of our plants looming, I've resolved to find a better solution than
Bt. Bacillus
thuringiensis is
rated organic but is still a relatively broad spectrum insecticide,
which means it may be doing more harm than good by killing beneficials
that would otherwise wipe out the borer. In addition, try as we
might to spray once a week and after rains, Bt doesn't seem to be
preventing the total destruction of our summer squash crop each
year. We're both willing to do without summer squash for a year
or two, if need be, while we figure out a better option.
The squash vine
borer will be
hitting our farm shortly --- I know because the first brilliant flowers
have come out on the summer squash. With the impending collapse
of our plants looming, I've resolved to find a better solution than
Bt. Bacillus
thuringiensis is
rated organic but is still a relatively broad spectrum insecticide,
which means it may be doing more harm than good by killing beneficials
that would otherwise wipe out the borer. In addition, try as we
might to spray once a week and after rains, Bt doesn't seem to be
preventing the total destruction of our summer squash crop each
year. We're both willing to do without summer squash for a year
or two, if need be, while we figure out a better option.
This year, we're keeping
our experiments simple. I'm planting a new bed of summer squash
every two weeks to give me an idea of the timing of the
infestation. In the north, you can just plant your summer
squashes late, after the fourth of July, and the vine borer 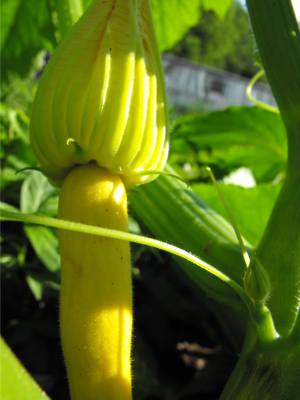 will
have finished its flying stage. In the south, though, the vine
borer has multiple generations, so I'm not sure how early I can plant
squash and still miss the insect's depradations. A planting at
the beginning of August 2009 netted us a bounty of summer squash...for
about two weeks before the frost hit. I'm hoping to be able to
plant a bit earlier than that and still miss the borer.
will
have finished its flying stage. In the south, though, the vine
borer has multiple generations, so I'm not sure how early I can plant
squash and still miss the insect's depradations. A planting at
the beginning of August 2009 netted us a bounty of summer squash...for
about two weeks before the frost hit. I'm hoping to be able to
plant a bit earlier than that and still miss the borer.
Other options to try in
later years if the easy route fails include:
- Planting a more resistant summer squash variety such as Summer
Crookneck
- Using a floating row cover over the plants to physically exclude attack
- Wrapping something around the stem (panty hose and aluminum foil
have both been used) to keep the larvae out
- Mounding up dirt over the stem at intervals to promote rooting
(which would require a different squash variety since we've been
planting bush squash)
 This
week's lunchtime series has barely scratched the surface of learning to
start a small garden and eat the fruits of your labor. If you
catch the bug, you're sure to want to learn more. Of course,
you'll keep reading our blog, but where else should you turn?
This
week's lunchtime series has barely scratched the surface of learning to
start a small garden and eat the fruits of your labor. If you
catch the bug, you're sure to want to learn more. Of course,
you'll keep reading our blog, but where else should you turn?
Barbara Kingsolver's Animal,
Vegetable, Miracle
may help to get you inspired, and also includes some in-season
recipes. For more solid information about
growing your food, many beginners report getting a lot out of Square Foot
Gardening,
despite its flaws. The basic spacing, planting, and harvesting
information about all vegetables can be found on extension service
websites using a quick google search. (I've found keyword
combinations like "tomato cultivation" get good results.)
Year one is a good time
to start learning about the soil food web, and Teaming
With Microbes
is a quick, fun way to open your eyes to what's going on beneath the
surface. I don't have specific books to recommend, but other
important topics to consider include composting and
beneficial insects.
Finally, why not take a
master gardener class? Most state
extension services now offer these semester-long classes for a small
fee. You'll meet other gardeners in your area and will come away
with a great grounding in basic concepts.
Whatever you do, don't
put the process off until next year. If all you have the time and
energy for is throwing one tomato plant in the ground, do it!
Right this instant! Turn off your computer, pick up your trowel,
and plant!
| This post is part of our Beginner's Guide to Gardening and Eating in
Season lunchtime series.
Read all of the entries: |
I've decided these plastic hose repair kits are better than the metal
ones.
It's easier to install, and
most importantly won't snag on every other thing that comes by.
I know the metal might stand
the test of time better, but this is some hard plastic, and I'll do
almost anything to prevent any more entanglement with the mower.
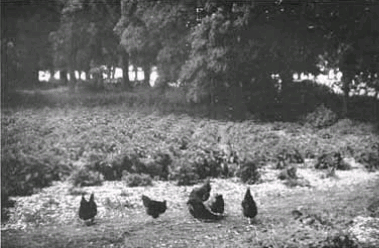
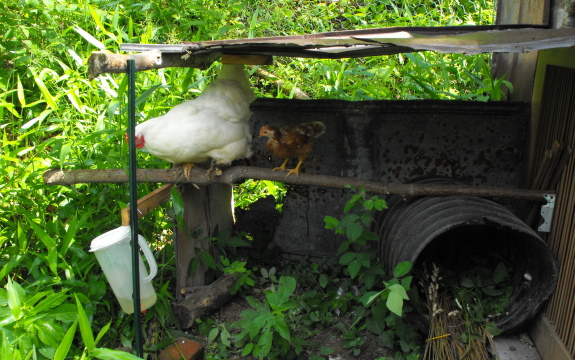
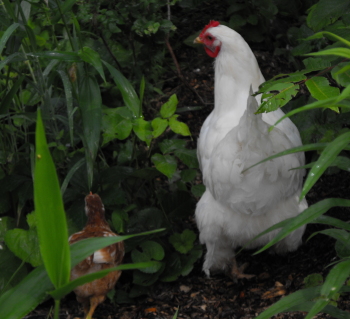
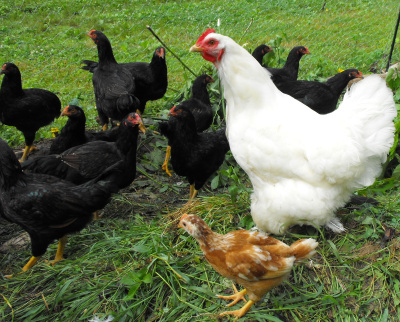 The
current small subset of the forest pasture has finally been mostly
denuded. In
preparation for switching the cockerels over to the larger paddock
(where the weeds are now waist-high), I opened the dividing gate and
let the mother hen and her chick mingle with the flock.
The
current small subset of the forest pasture has finally been mostly
denuded. In
preparation for switching the cockerels over to the larger paddock
(where the weeds are now waist-high), I opened the dividing gate and
let the mother hen and her chick mingle with the flock.
I was a bit concerned
that the lone chick
would be no match for 25 mostly grown cockerels, but I needn't have
worried. When I went in to feed the combined flock Friday
morning, the cockerels stampeded me and even rushed out the door.
Were they starving? Nope. They were just terrified of Mama
Hen, who was walking behind them.
 All
the mother hen has to do is glare in their general direction and 25
teenage males scatter in terror. How's that for a matriarch?
All
the mother hen has to do is glare in their general direction and 25
teenage males scatter in terror. How's that for a matriarch?
On a semi-related note,
next week we'll be slaughtering our first round of cockerels. If
you're not ready to see that part of the life cycle, you have now been
forewarned.
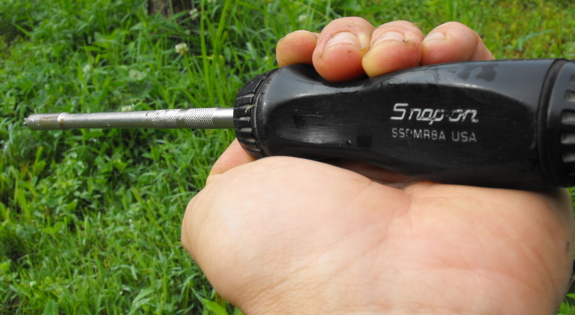
Was that a Snap
On magnetic, ratcheting, screwdriver I saw in yesterday's
picture of the plastic hose repair kit?
Kevin, Carlsbad,
CA.
You've got a keen eye for
quality.
Yes, It's one of the few
tools I still have from my copier repair days of the 1990s.
The handle is hollow and can
be used to store spare bits, but what I like most is the magnetic tip
and long reach. The additional leverage combined with the ratcheting
feature make this screwdriver in my opinion the best money can buy.
It's got a steep price of 67
bucks, but somehow I justified it by using it 5 days a week as the main
tool that began each copier operation. Could I have gotten by with a
cheaper one? Sure, but one stripped screw in a hard to reach place can
really ruin your day and once I started applying the added leverage the
days of stripped screws were long gone.
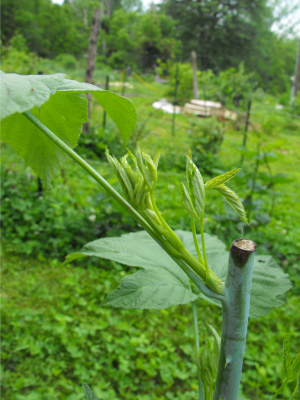 Two
weeks ago, I pinched off the tops of the
black raspberry canes. Left to their own devices, black raspberry
primocanes will grow so long they bend down and root a new plant at
their tip. This trait is useful if you're looking to expand your
berry patch, but is less useful if you actually want to be able to get
into the patch to pick berries.
Two
weeks ago, I pinched off the tops of the
black raspberry canes. Left to their own devices, black raspberry
primocanes will grow so long they bend down and root a new plant at
their tip. This trait is useful if you're looking to expand your
berry patch, but is less useful if you actually want to be able to get
into the patch to pick berries.
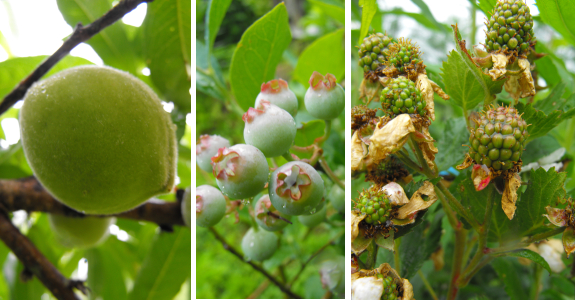
If you choose to keep
your plants contained, you can pinch off the tips
when the brambles reach waist high. In most plants, apical
dominance tells the plant to put all of its energy into growing the
main shoot, but if that main shoot is gone, the side buds are allowed
to grow. The bottom photo shows what one plant looks like two
weeks after pinching. Notice how the side shoots have grown out
--- these will all be coated with fruits next year when the primocane
becomes a floricane.
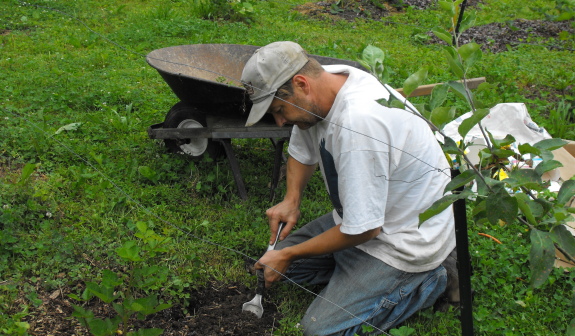
 I've
similarly pruned our cultivated
blackberries.
Blackberries usually aren't tip-rooters, but
mine are, and I've also found that they will grow primocanes a dozen
feet long if left to their own devices. I prefer the plants to
stay contained in my obsessive rows, so I take a few minutes to summer
prune.
I've
similarly pruned our cultivated
blackberries.
Blackberries usually aren't tip-rooters, but
mine are, and I've also found that they will grow primocanes a dozen
feet long if left to their own devices. I prefer the plants to
stay contained in my obsessive rows, so I take a few minutes to summer
prune.

 Common
wisdom (perhaps apocryphally) holds that children were originally sent
home from school for three months of working on the farm in the
summer. Although we're child-free by choice, I wouldn't mind a
few extra field hands at this time of year.
Common
wisdom (perhaps apocryphally) holds that children were originally sent
home from school for three months of working on the farm in the
summer. Although we're child-free by choice, I wouldn't mind a
few extra field hands at this time of year.
June is the overlap zone
between spring and summer, when we're harvesting honey, chickens,
broccoli, peas, and greens as fast as we can, but are also nurturing
the summer crops in preparation for the main event. Meanwhile,
we're starting to plant the first of the fall crops in beds freed up by
the spring bounty, and Mark's mowing his heart out, trying to stay
ahead of the grass.
In the winter, I
literally can't remember the tastes, scents, and sights of June.
The days are so long, the garden and woods so green, that I wake up at
dawn ready to get to work. Garden tasks feel urgent --- we both
know how easy it would be to lose all of our hard work in just a few
weeks of getting behind on the weeding.
 When the sun finally sets
around 9:30, lightning bugs drifting through the garden and tree frogs
calling from the floodplain, my eyelids are drooping. We're
currently subscribed to one netflix at a time, and I can't remember the
last time I actually made it through the movie before falling asleep.
When the sun finally sets
around 9:30, lightning bugs drifting through the garden and tree frogs
calling from the floodplain, my eyelids are drooping. We're
currently subscribed to one netflix at a time, and I can't remember the
last time I actually made it through the movie before falling asleep.
Which is all a long way
of saying --- our lunchtime series will be going on summer vacation
starting this week. Look for a return to deep thoughts in a few
months when I want to dream of the garden again, rather than live in
it. (There may be a series thrown in here and there if I just
can't resist, though, so don't get your hopes up too high.)
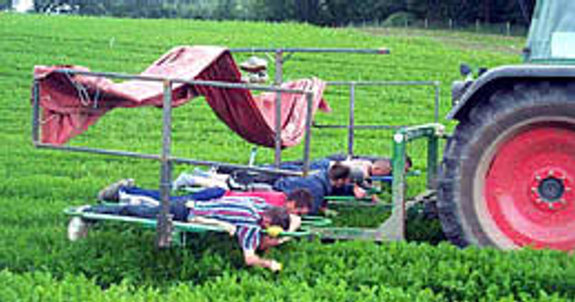
This is what's called a 6
person bed weeder.
I like the idea of always
having a shade cover that follows you around and it seems like it has
to be easier on the back than the old standard method.
Afternoon siestas must be
mandatory when you have such a shady place to lay down at after lunch?
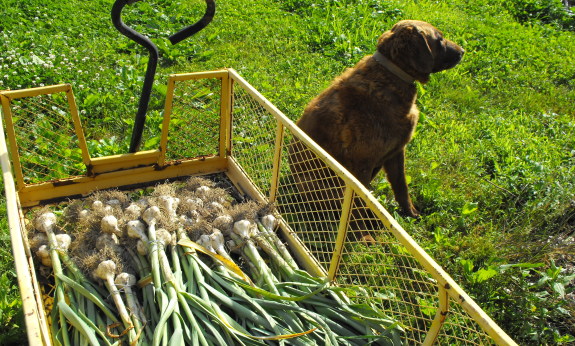
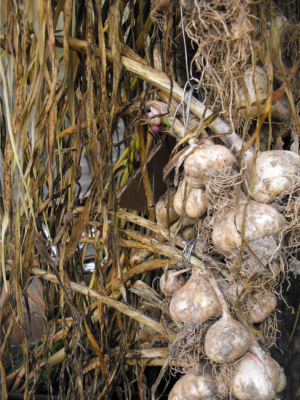 Mark
dug the rest of the garlic on Monday and hung it under the eaves to
dry. I can honestly tell you that there's more garlic beside our
front door than I've ever seen in one spot in my life!
Mark
dug the rest of the garlic on Monday and hung it under the eaves to
dry. I can honestly tell you that there's more garlic beside our
front door than I've ever seen in one spot in my life!
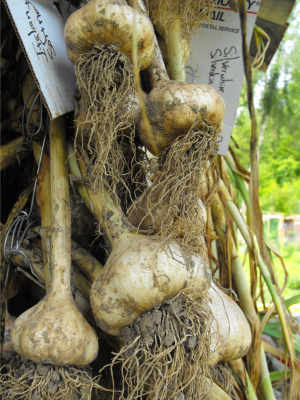
Learning from last
year's drying fiasco, we hung up the garlic in
small clumps immediately after digging. This photo shows some of last
week's garlic ---
notice how it's already drying up nicely due to the air movement around
the exposed bulbs and leaves. If we had room indoors, we could
also have spread the plants out in a single layer on screens to dry.
Either way, the bulbs
will be thoroughly cured and ready to move to storage two weeks after
harvest. At that point, the garlic will have sucked all of the
nutrients out of the leaves and roots, so it's safe to cut off the
excess plant material. We store our garlic in mesh bags we save
from buying winter oranges.
 Last
year's garlic is still lingering on our kitchen shelf, proving that it
is quite possible to eat your own garlic for an entire year without any
special storage area. The trick for preventing your garlic from
sprouting is counter-intuitive --- keep it warm. Once garlic has
been cooled and then re-warmed, the plant thinks it has survived a
winter and starts to grow. Keep the heads warm (but not hot) and
they'll linger in an eternal summer.
Last
year's garlic is still lingering on our kitchen shelf, proving that it
is quite possible to eat your own garlic for an entire year without any
special storage area. The trick for preventing your garlic from
sprouting is counter-intuitive --- keep it warm. Once garlic has
been cooled and then re-warmed, the plant thinks it has survived a
winter and starts to grow. Keep the heads warm (but not hot) and
they'll linger in an eternal summer.
One last note on garlic
curing and storing --- be sure to pull out the biggest heads for next
year's planting. I'm pretty sure that the few small heads mixed
in with our many large heads were due to me not being vigilant enough
about planting only the biggest cloves from the biggest heads last
fall. Even though you might want to brag by giving away those
beautiful big heads to your friends and family, just think how much
more you'll get to brag next year when every one of your garlic heads
is that size!
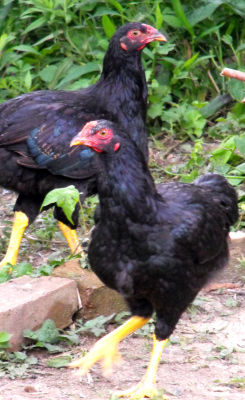
 These
new dark
cornish chickens we've been pasturing are said to be more predator
resistant than most birds.
These
new dark
cornish chickens we've been pasturing are said to be more predator
resistant than most birds.
We've yet to see any signs of
predator trouble thanks to Lucy and the new K9
electric fence strand.
What predator resistant
really means for this operation is a substantial increase in the
challenge to catch your bird when it's time to process.
It gets easier with practice,
but I think we'll experiment with a different breed next time.
 We
dispatched
the first third of our cockerels Tuesday morning. They
were quite small at 12 weeks old, dressing out to only 2.25 pounds
apiece (not counting the necks and giblets), and they clearly don't
compete with grocery store prices at $5.64 per bird. Of course,
we didn't set out to save money with these broilers or we would have
stuck to the traditional Cornish
Cross. The
real test will be
flavor --- can we tell a difference between our pastured chickens and
storebought?
We
dispatched
the first third of our cockerels Tuesday morning. They
were quite small at 12 weeks old, dressing out to only 2.25 pounds
apiece (not counting the necks and giblets), and they clearly don't
compete with grocery store prices at $5.64 per bird. Of course,
we didn't set out to save money with these broilers or we would have
stuck to the traditional Cornish
Cross. The
real test will be
flavor --- can we tell a difference between our pastured chickens and
storebought?
We're going to kill
another third of the cockerels in a month, and then
the last third at 16 weeks old, testing to see how the price per pound
and the flavor of the meat changes over time. Although everyone
is in agreement that Cornish Crosses should be
killed at around eight weeks, the internet lists widely
varying
maturity dates for the Dark Cornish, and I like experimentation.
On the other hand,
despite enjoying the experiment, I don't think we'll
be raising Dark Cornish again. They didn't live up to the hype of
being good foragers --- they mostly sat around and waited for their
feed, even going so far as to run away when I tossed grubs into their
pasture. Instead, I'm torn between several alternatives:
- Cornish Cross --- This is
the traditional way to go, but raising these grain-only-eating broilers
at home is little better for the environment and our bodies than buying
grocery store meat. Also, since they're hybrids, we would have to
buy chicks every year, which doesn't pass the sustainability test.
- Freedom Rangers --- Many small growers swear by this breed, reporting that Freedom Rangers are good foragers (although they said that about Dark Cornish too.) The major downside is that we couldn't create our own breeding flock since Freedom Rangers are a cross of carefully bred parental lines owned by European corporations.
- Create our own Cornish cross
--- We could save back the biggest cockerel and cross him with our
Plymouth Rocks to create our own Cornish
Cross. We might get hybrid vigor, but I can't quite see where the
foraging ability would come from, and I'm bound and determined to grow
chickens without such large inputs of grain.
- Eat the roosters from our layer
flock
--- Traditionally, farmers used to just raise dual purpose breeds and
eat the roosters from their flock along with the old hens. We've
been well trained to think we want big breasts and tender meat, so
I'm not sure if we could stomach this option. But it would
definitely be the most sustainable, and probably the best for our
health if we stuck to a good forager like Rhode Island Red.
What do you think?
Have you given some of the above options a
shot and think they've got merit (or should be avoided at all
cost?) We won't be raising another batch of broilers until next
year, but we need to make a decision soon about whether to save back
one of the Cornishes from the chopping block.
Things got a bit more crowded for the mother hen and her cute chick
today when I installed a west wing door to the coop.
This allows us to cut off the
previous pasture so we can give it a rest and plant something more
edible than the weed buffet they started off with.
 I'm
sure you've all been perched on the edge of your seats for the last
couple of weeks wondering: Will cardboard
mulch retard water
penetration and harm our plants? A couple of days after I posted
about our cardboard mulch, Mark had the great idea of poking a bunch of
holes in the cardboard with a pitchfork. Even so, I was a bit
concerned that the perforated cardboard would keep the soil too dry.
I'm
sure you've all been perched on the edge of your seats for the last
couple of weeks wondering: Will cardboard
mulch retard water
penetration and harm our plants? A couple of days after I posted
about our cardboard mulch, Mark had the great idea of poking a bunch of
holes in the cardboard with a pitchfork. Even so, I was a bit
concerned that the perforated cardboard would keep the soil too dry.
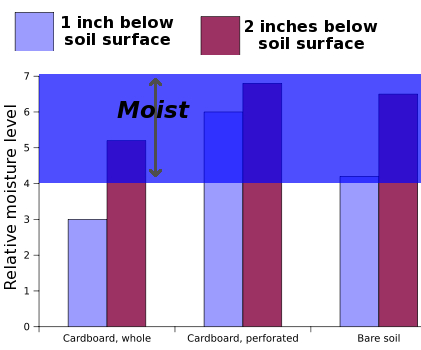 Rather than waiting to see if
our vegetables started
struggling, we
bought a $10 moisture meter from Lowes and took some
measurements. As you can see, the perforated cardboard actually
kept the soil wetter than either whole cardboard or bare soil,
especially in the top inch of the soil. Whole cardboard, on the
other hand, was a loser --- I headed out with the pitchfork to
perforate the overlooked bed right after taking these measurements.
Rather than waiting to see if
our vegetables started
struggling, we
bought a $10 moisture meter from Lowes and took some
measurements. As you can see, the perforated cardboard actually
kept the soil wetter than either whole cardboard or bare soil,
especially in the top inch of the soil. Whole cardboard, on the
other hand, was a loser --- I headed out with the pitchfork to
perforate the overlooked bed right after taking these measurements.
Some days, I wish I had
about ten acres of research farm and three or
four interns to turn my little play experiments into real
experiments. I'm well aware that three data points for each
treatment isn't enough information to draw any
scientific conclusions. But the numbers were remarkably uniform,
suggesting that perforated cardboard mulch is definitely a plus when it
comes to water retention.

We took the morning off to be interviewed by fellow bloggers Travis and
Kacy from the Portrait
of a Farm blog.
They're on a cross country
adventure that will evenutally end up in Ashland, Oregon.
I liked the questions they
focused on and was refreshed by their enthusiasm for this project,
which is to interview farmers and homesteaders along their way back to
the upper west coast with a twist towards permaculture
techniques.
We have a huge basswood at
the edge of the yard. It shades part
of the garden in the late afternoon, but pays for itself in the middle
of June when the flowers open up and feed every insect within a few
mile radius. I'm not exaggerating here --- before we got our
honeybees, the basswood attracted so many bees from our neighbor's
hives that it hummed like a not-so-distant highway.
Like many nectar
trees,
basswood can't be depended on to bloom every year. It
often blooms heavily one year, skips the next year, then works back up
to a heavy bloom over the next few years. Our tree took last year
off, and this year seems to be only blooming at about 50%.
But even 50% seems to be
a lot of nectar, and our honeybees are going
crazy. I'll be harvesting more honey today since I suspect our
bees will fill up their supers in short order with the current basswood
flow.

I've been interested in taking advantage of geothermal energy for
heating and cooling since I first heard of the idea.
The main problem is the high
installation and material cost.
After several hours of
research I finally found some comprehensive information on tackling a
project like this from an angle that won't break the bank.
Free home air conditioning
is a simple website that covers several details I wouldn't have thought
of. Like how important moisture control is and if you select the wrong
material you might create favorable conditions for mold to multiply.
I would not try to dig trenches like this by hand unless it
was an emergency situation. The time and energy a Ditch Witch can save
is what makes this project practical.
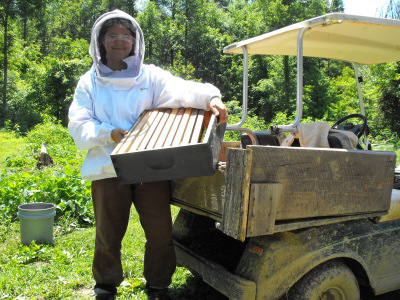 I'm
ashamed to admit that I've been bee-shy ever since the rout. Sure, I
got right back on the horse, but I felt like I flubbed
the second honey harvest (though not as badly as the first.) I
was scared and grabbed two full supers, one of which had a bit of drone
brood at the bottom edge. In retrospect, I think it was stealing
the drone brood that made the hive so angry.
I'm
ashamed to admit that I've been bee-shy ever since the rout. Sure, I
got right back on the horse, but I felt like I flubbed
the second honey harvest (though not as badly as the first.) I
was scared and grabbed two full supers, one of which had a bit of drone
brood at the bottom edge. In retrospect, I think it was stealing
the drone brood that made the hive so angry.
No matter what the
cause, I riled up the hive so much during honey harvest two that our
bees have been mad at me ever since. As I weed the garden, they
chase me away from the poppies. As I hang up the clothes, they
buzz me, then get stuck in my hair, and I retreat to the house to
frantically flick the worker free. (It's a bit daunting to have a
bee buzzing angrily an inch from your ear, even when you know that
she's just trying to tease herself loose.)
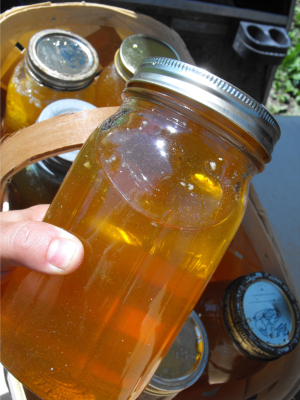 Being bee-shy is a vicious
cycle. I'm leery of the bees, so I don't act calmly around them,
and that makes them madder, which makes me act stranger.
Being bee-shy is a vicious
cycle. I'm leery of the bees, so I don't act calmly around them,
and that makes them madder, which makes me act stranger.
Luckily, I have a
thoughtful husband who knows the right times to overcome my resistance
to spending money. "That settles it," Mark said firmly.
"We're getting you a real bee jacket."
Friday morning, I donned
my new suit and the jitters faded away. (Cleaning out the smoker
so that it worked again was also helpful.) When I opened up the
first hive, bees rose up around me, but I felt safe in my fancy jacket
and the bees soon shrugged and got back to work.
This time, I went
slowly, picking through each super on all three hives to remove just
the fully capped honey. Then I loaded fourteen frames into the
golf cart for the short ride to the edge of the forest garden.
(Last time, I carried heavy supers in my arms from the apiary, and the
next day my back told me not to do that again.)
I had gently brushed off
the frames of honey near each hive, but there were still plenty of bees
clinging to their winter stores. So I braked a good distance from
the trailer and brushed the frames again, sending the last few workers
up into the air somewhere other than around our front door.
Four hours later, I had
extracted ten quarts of honey, returned the supers to the hives, and
not been stung or scared a single time. It sure tastes sweet to
conquer my fear.

If you live near a lake or
some other source of cold water you could pump that water through an
old radiator and then blow the coldness out with a simple fan.
I found this clever solution
at the Straw
Bale Retreat blog.
Now I'm wondering how much
cold air I could harvest from our nearby creek using this method?
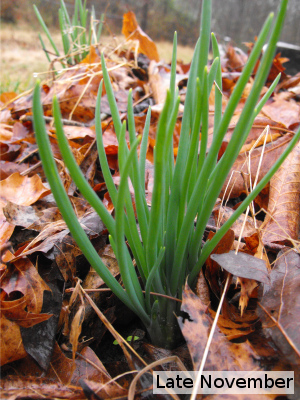 Potato onions were
one of our experimental vegetables this year, and I'd be
hard-pressed to call them a success. The total production from
one garden bed was 60 bulbs, but most were too small to bother skinning
for
supper. I figure that all together they'd add up to enough onion
flesh to feed us for about two weeks.
Potato onions were
one of our experimental vegetables this year, and I'd be
hard-pressed to call them a success. The total production from
one garden bed was 60 bulbs, but most were too small to bother skinning
for
supper. I figure that all together they'd add up to enough onion
flesh to feed us for about two weeks.
On the other hand,
potato onions do have a
lot of potential. These storage onions can be grown from
multiplied bulbs, a bit like Egyptian
onions, with no need
to buy seed or sets
every year. If we tweak our growing technique a bit, I
think we could turn potato onions into a dependable part of our annual
harvest.
We began our experiment
with an eight ounce starter package of Loretta
Yellow Multiplier
Onions from Southern Exposure Seed Exchange. The company told us
that we could choose to plant bulbs in the fall for a larger yield, but
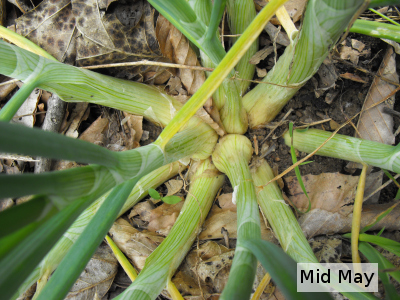 also a higher likelihood of losing onions to freezing, or could wait
and plant in the
spring. We opted to toss them all in the ground at the beginning
of November.
also a higher likelihood of losing onions to freezing, or could wait
and plant in the
spring. We opted to toss them all in the ground at the beginning
of November.
I'd
like to say that we lost a third of the bulbs to winter cold, but
instead I have to admit to mismanagement. After planting, I
mulched the bed heavily with autumn leaves since I knew from experience
that garlic will push up through a heavy mulch with
no problem. Potato onions are made of weaker stuff, though,
and the bulbs under the thickest mulch languished and died.
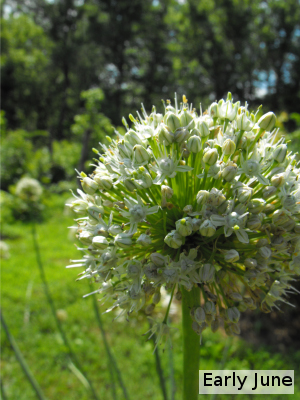 Spring
came, and our remaining onions were doing well. As
the original bulb divided into multiple bulbs, the plant pushed the
dirt aside and I was able to watch the onions grow. I was pleased
to see each individual plant turn into six to ten smaller plants, and
then the bulbs began to swell.
Spring
came, and our remaining onions were doing well. As
the original bulb divided into multiple bulbs, the plant pushed the
dirt aside and I was able to watch the onions grow. I was pleased
to see each individual plant turn into six to ten smaller plants, and
then the bulbs began to swell.
I thought we were in for
a bumper crop, but then over half of the
potato onions threw up flower stalks. An exhaustive search of the
internet turns up little data about potato onion flowers, except that
they're rare and channel energy away from the bulbs. A few
anecdotes suggest
that potato onions are more likely to bloom when fall planted, so next
year I'll stick to spring planting. I was disappointed but not
surprised to find that the
blooming plants produced only small bulbs.
The
few non-blooming onions, though, sparked my interest. Each plant
produced one to two big bulbs about two thirds the size of a
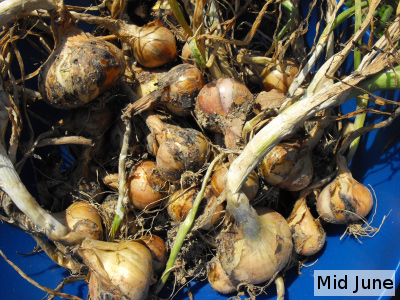 storebought onion, along with several small bulbs for replanting.
I plan to eat the big bulbs and put all of the small ones in the ground
early next spring. If we can tweak our planting
method to prevent blooming, I foresee doing away with fiddly seed
onions and expensive and ephemeral onion sets and instead planting
potato onions every year from our own offset bulbs.
storebought onion, along with several small bulbs for replanting.
I plan to eat the big bulbs and put all of the small ones in the ground
early next spring. If we can tweak our planting
method to prevent blooming, I foresee doing away with fiddly seed
onions and expensive and ephemeral onion sets and instead planting
potato onions every year from our own offset bulbs.


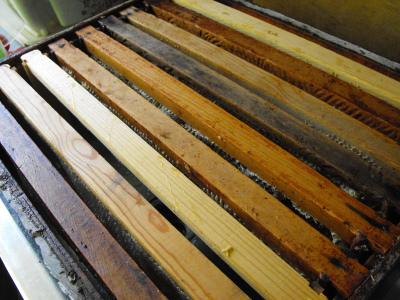 Mark's
friend Dennis looked at my first
honey extraction post
and gently asked Mark, "Do you all use nine frame supers or ten frame
supers?" The honest truth is that I'd read about nine frame
supers, but hadn't quite wrapped my head around them.
Mark's
friend Dennis looked at my first
honey extraction post
and gently asked Mark, "Do you all use nine frame supers or ten frame
supers?" The honest truth is that I'd read about nine frame
supers, but hadn't quite wrapped my head around them.
A quick search of the
internet explained that a nine frame super is quite simple --- you
remove one frame from each honey super and space the remaining frames a
little further apart. The bees will extend the wax out further
from the frame, making the frame much easier to uncap during
extraction. As an added bonus, some websites suggest that nine
frame supers actually hold more honey than ten frame supers since you
lose less room between frames.
When I was harvesting
honey last week, I turned all of our ten frame supers into nine frame
supers, which had the added bonus of providing me with an extra super
full of frames to pop onto the third hive. Some people buy
special tools to let them space nine frames apart evenly, but I just
spaced the frames by eye. I guess we'll see how the nine frame
supers do on our next honey harvest day.
 I
made the mistake of using my goat gloves
during our recent round of chicken
feather plucking.
I
made the mistake of using my goat gloves
during our recent round of chicken
feather plucking.
This material isn't bouncing
back like leather.
I suspect the chicken dunking
is what caused them to dry up in such a stiff manner.
 I
hope you all didn't miss us too much. Our power's been out for
the last day or so, but an intrepid worker just came and cut the tree
off our line, restoring juice. Stay tuned for your regularly
scheduled farm updates returning tomorrow.
I
hope you all didn't miss us too much. Our power's been out for
the last day or so, but an intrepid worker just came and cut the tree
off our line, restoring juice. Stay tuned for your regularly
scheduled farm updates returning tomorrow.
If you need your
homesteading fix (Walden Effect Junkie, this is for you), you might
enjoy reading all of the details of our forest pasture experiment which
I've spared you all by posting on our chicken blog instead.
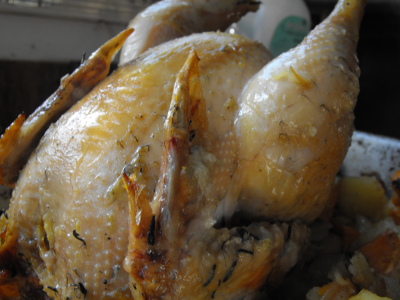 I didn't want you all to
think we had a bad taste in our mouth about Dark
Cornish chickens.
Sure, they're
inefficient at converting feed to meat and can't forage to save their
lives, but the
flavor is phenomenal! We roasted up one of our cockerels, and
it turned out as juicy and tender as those rotisserie chickens in the
grocery store.
I didn't want you all to
think we had a bad taste in our mouth about Dark
Cornish chickens.
Sure, they're
inefficient at converting feed to meat and can't forage to save their
lives, but the
flavor is phenomenal! We roasted up one of our cockerels, and
it turned out as juicy and tender as those rotisserie chickens in the
grocery store.
The last couple of times
we've killed and eaten our own chickens, we thought we'd get the best
flavor by eating the meat as fresh as possible. Since then, I've
read that it's best to let the chicken sit in the refrigerator for a
couple of days so that rigor mortis can relax, tenderizing the
meat. I suspect the two day wait was part of the reason our
latest home grown chicken was the best I've ever tasted.
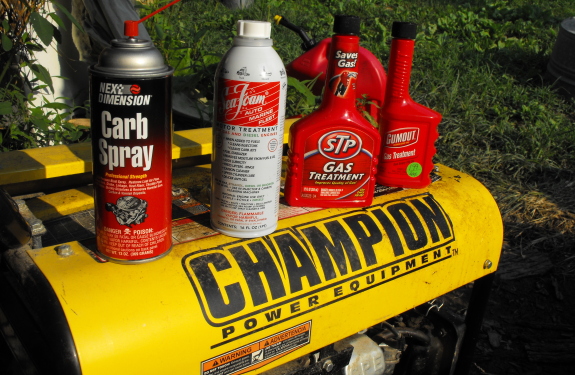
The Champion
generator started on the
second pull Monday night when the power
first failed here.
Tuesday rolled around and I
made a big mistake by topping it off with some old gas. I thought the
fuel was fine due to just using some in the lawnmower, but I guess this
generator is more sensitive.
My first solution was limited
by our local hardware store and the Dollar shop. They only had STP and
Gumout, which I think is the same thing. I added both with very little
results to show for it. It would start up...but putter and stall due to
what I assume was the bad gas or water in there somewhere? My second
mistake was not deleting as much of the old gas as I could before
adding the supplements.

The next round of repairs
involved a longer trip where one can find a proper auto parts store. I
went right for the Seafoam and after a short consult with
one of the clerks was off to the gas station for some premium grade
petrol.
Dumping out the old gas and
adding the Seafoam helped, but it continued to putter and eventually
stalled due to what I'm guessing is some sort of blockage. I think it's
going to take running it a while for it to smooth out.
Luckily the electric guy
showed up with a chainsaw and a smile and cut down the offending tree
that was hanging on one of our power lines. It was touch and go for a
while as I watched the line hold the entire weight of the tree and
finally allow it to fall without breaking. I let out a loud
enough cheer so he could hear me and we had power restored within the
hour.
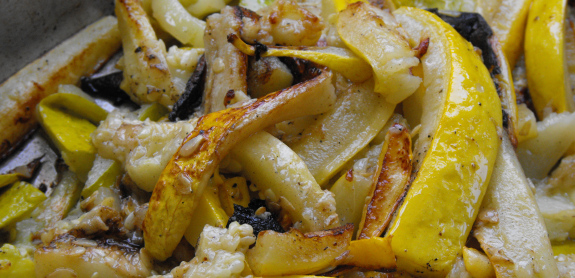
 After
the internet, what I missed most during our power outage was the
ability to pack food away for the winter. With the freezer closed
and halfway full, 30 hours without power wasn't a big deal, but there
was no way I could introduce warm food without negatively impacting the
old. So I watched the summer
squash achieve, then surpass, their optimal size, and as soon as the
power came back on I was ready to freeze.
After
the internet, what I missed most during our power outage was the
ability to pack food away for the winter. With the freezer closed
and halfway full, 30 hours without power wasn't a big deal, but there
was no way I could introduce warm food without negatively impacting the
old. So I watched the summer
squash achieve, then surpass, their optimal size, and as soon as the
power came back on I was ready to freeze.
Roasted
squash, cabbage for winter potstickers, and a few meals worth of
green beans left the garden for cold storage. I also dug into our
fresh
garlic to make nine
cups of pesto for quick winter
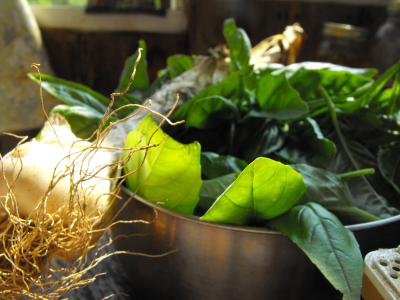 lunches. While I was at it, I picked the second to last meal of broccoli --- these plants are buggy
and ugly since they took so long to grow, but they still tasted great
in cheese sauce for supper.
lunches. While I was at it, I picked the second to last meal of broccoli --- these plants are buggy
and ugly since they took so long to grow, but they still tasted great
in cheese sauce for supper.
While poking around, I
discovered that we are overflowing with cucumbers for the first time
ever. Our farm is hard on cucurbits, and cucumbers are the worst,
coming down with some kind of wilt disease every year just as they
start to bear. This year, I sprang for a wilt-resistant hybrid
--- Diamant --- that is vigorous enough to (mostly) withstand our
annual bane. Since we don't like pickles, I'm suddenly serving
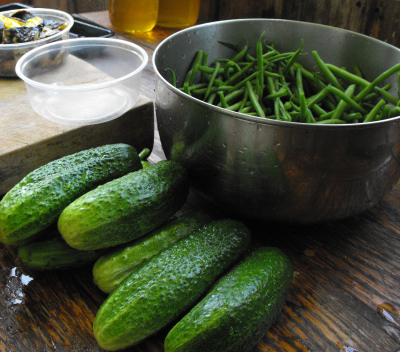 fresh cucumbers with every lunch and dinner (and am seriously
considering making the prolific vegetables part of a complete
breakfast.)
fresh cucumbers with every lunch and dinner (and am seriously
considering making the prolific vegetables part of a complete
breakfast.)
Last year, the weather
was against us and we only managed to pack away 13 gallons of food for
the winter. As a result, we bought grocery store produce for a
couple of months this spring, and I vowed to do better. With 6
gallons of vegetables, 7 cups of pesto, and 7 whole chickens already in
the freezer before the end of June, we're starting to ponder what we'll
do with the excess.
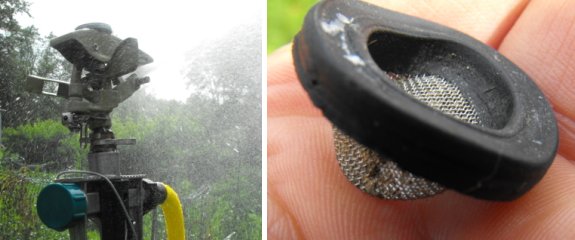
After much trial and error
I've concluded that the water we
pump from the creek is
too rich in particles for these little screen filters to handle.
Anna started experimenting
with deleting the filters back in the spring. So far the results
suggest we don't need them for this application. I suspect the high
pressure is enough to push any stray particles out through the
sprinkler nozzle.
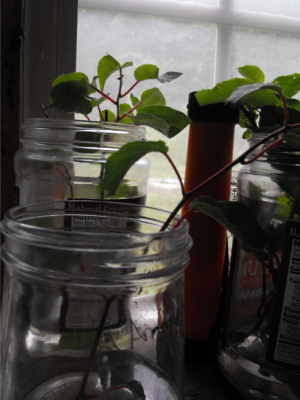 Our hardy
kiwi plants sulked
for the first two years, but as we begin their third summer, they're
suddenly acting like vines. Each plant has put up multiple stems,
the longest of which has twined for five feet along its trellis
wire. At this stage, I want the kiwis to focus their energy on
one main trunk, so I clipped off the extra shoots springing up from
each rootstock. Time to propagate!
Our hardy
kiwi plants sulked
for the first two years, but as we begin their third summer, they're
suddenly acting like vines. Each plant has put up multiple stems,
the longest of which has twined for five feet along its trellis
wire. At this stage, I want the kiwis to focus their energy on
one main trunk, so I clipped off the extra shoots springing up from
each rootstock. Time to propagate!
Hardy kiwis are best
grown from softwood cuttings, which means cuttings taken from new
growth during the summer. (In contrast, grapes
are best grown from hardwood cuttings, which are the dormant,
woody stems pruned out in the winter.) I clipped the excess kiwi
stems into six inch lengths, cut off the growing tips, and then clipped
each leaf in half. Although people who want 100% success often
root softwood cuttings under misters using rooting hormone and applying
bottom heat, I prefer a simpler method with a lower success rate ---
put an inch of water in a jar, drop in the cuttings, and ignore for
three weeks.
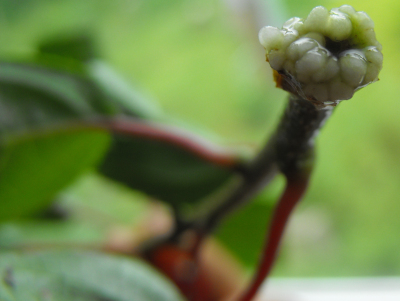 And
now, look --- little roots all over the ends of the cuttings!
Once the roots expand enough to feed the cuttings, I'll put my new
kiwis in the ground in a permanent location. My original kiwis
arrived in late July two years ago, so I assume the nursery used the
exact same tricks I did, and that these new cuttings will really take
off in the summer of 2012.
And
now, look --- little roots all over the ends of the cuttings!
Once the roots expand enough to feed the cuttings, I'll put my new
kiwis in the ground in a permanent location. My original kiwis
arrived in late July two years ago, so I assume the nursery used the
exact same tricks I did, and that these new cuttings will really take
off in the summer of 2012.
Getting started with
perennials is always pricey --- our three hardy kiwis came to nearly
fifty bucks. But if you're in it for the long haul, you can turn
that initial investment into a large orchard. I'll bet at this
time next year, I'll be giving baby kiwi plants away to everyone who
can fit one in their garden.
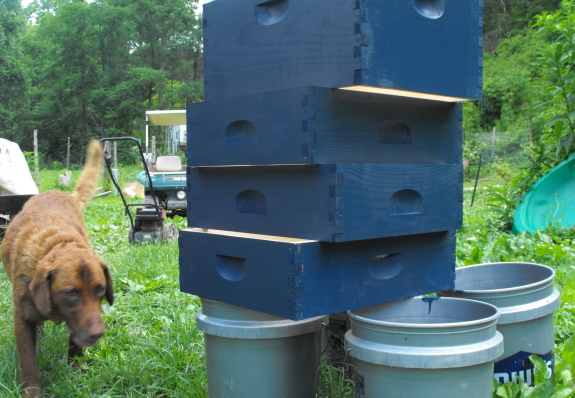
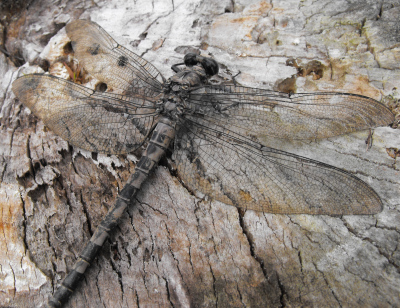 Although
it seems hard to believe at the end of two weeks with highs in the 90s,
now is the time to start your fall garden. Luckily, your spring
garden should be pretty much kaput --- all we have left is a stray
broccoli plant or two, and some bedraggled potatoes fading back into
the soil. You can fill the gaps your spring garden left behind
with most of the same crops, just switching around locations to ensure
each plant family is in a new spot.
Although
it seems hard to believe at the end of two weeks with highs in the 90s,
now is the time to start your fall garden. Luckily, your spring
garden should be pretty much kaput --- all we have left is a stray
broccoli plant or two, and some bedraggled potatoes fading back into
the soil. You can fill the gaps your spring garden left behind
with most of the same crops, just switching around locations to ensure
each plant family is in a new spot.
This coming week, we'll
be direct seeding broccoli, beets, parsnips, and carrots (along with
some late beans and corn). In a few more weeks, we'll throw in
peas, turnips, lettuce, and spinach. Then come greens (and more
lettuce) in August and garlic (and yet more lettuce) in September.
If you want to put in a
fall garden, but this teaser just leaves you confused, check out last
year's lunchtime series about the fall
garden. On the
other hand, if you have garden areas that need some help and don't have
time to tend fall vegetables, why not plant some buckwheat as a cover
crop?
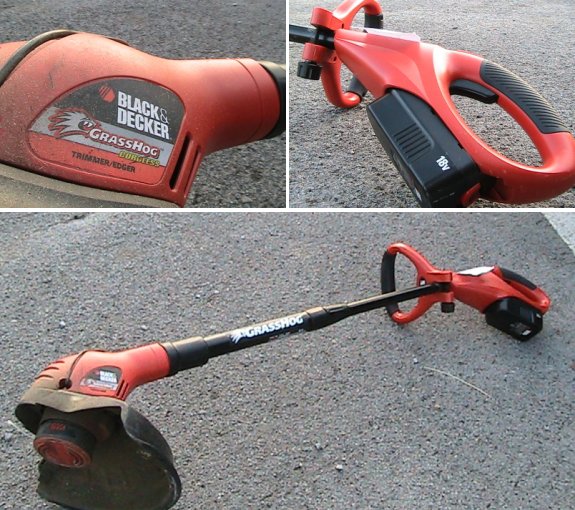
I found this used battery
powered weed eater today for 40 bucks at a yard sale.
The guy included an extra
battery, which just happens to be the same size as my old Black and
Decker drill, which I
still have 2 good batteries for.
Stay tuned for a full review
on how well this so called "Grass Hog" lives up to its name.
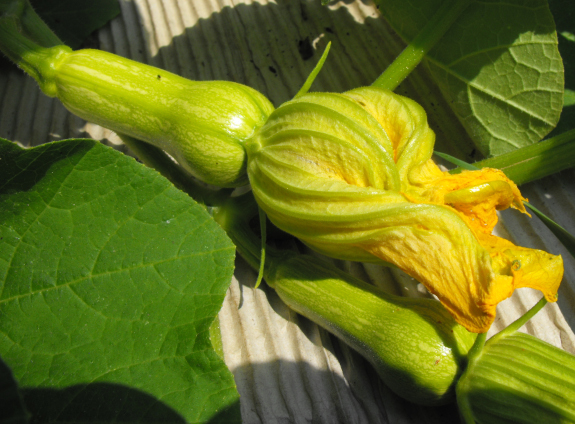
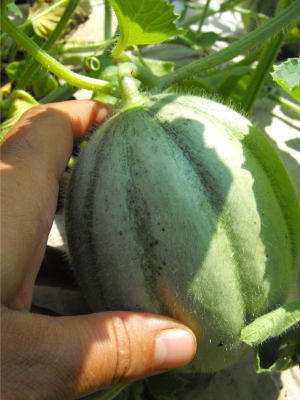 If
2009 was the year without a summer then 2010's heat has made up for
every drippy, rainy day. Luckily, with our irrigation
system humming along
happily, garden plants are thrilled by the heat and sunlight.
If
2009 was the year without a summer then 2010's heat has made up for
every drippy, rainy day. Luckily, with our irrigation
system humming along
happily, garden plants are thrilled by the heat and sunlight.
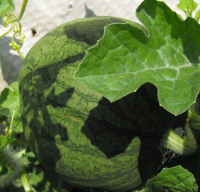
Look at this --- baby
butternut squashes! Little watermelons hiding under the
leaves! Plump tomatoes just waiting to turn color! And
could that really be a canteloupe, the first one we've ever
successfully grown on our farm?
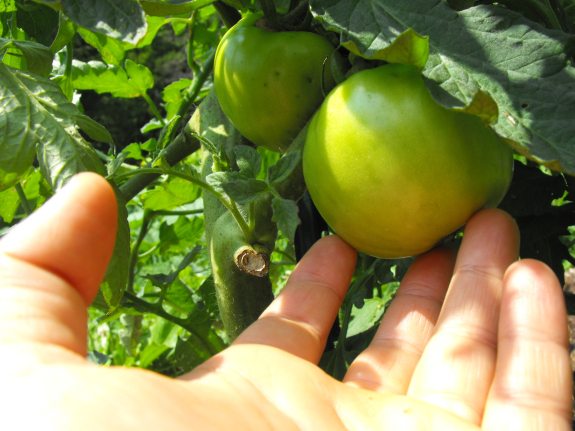
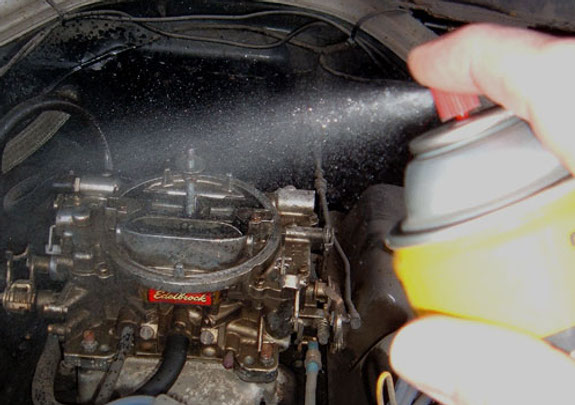
 When we first got our used tiller
it worked fine for the first season, but when I went to get it going
the next year it wouldn't seem to start, so I used a couple squirts of
Starting Fluid spray and off it went. I only did this a few times, but
that was enough to get our innocent Statesman tiller addicted to Ether,
which is the main ingredient in this wicked spray. Now it won't start
without this high end boost.
When we first got our used tiller
it worked fine for the first season, but when I went to get it going
the next year it wouldn't seem to start, so I used a couple squirts of
Starting Fluid spray and off it went. I only did this a few times, but
that was enough to get our innocent Statesman tiller addicted to Ether,
which is the main ingredient in this wicked spray. Now it won't start
without this high end boost.
Don't get me wrong...in the
hands of a qualified expert a short spray of Starting Fluid can be used
to safely troubleshoot several specific problems.
The trouble happens when a
back yard mechanic like myself was never told in Health class how
repeated use of Starting Fluid begins to wear off the oil that usually
coats the inner walls of each cylinder, which leads to accelerated wear
on the rings, piston, and the cylinder itself. This creates a decrease
in compression and explains the increased difficulty in starting.
Is there any kind of rehab
center I can send my tiller to? I would assume a complete engine
rebuild would be in order to get the compression back where it once
was. Maybe one of those expensive oil additives might rejuvinate
things back to normal? It's been a couple of years since I've had to
till up new ground due to our no-till
method of growing and the
tiller repair is way at the bottom of the "fix me now" list.
Image credit of the close up
shot of Starting Fluid being sprayed goes to dazecars
at FordMuscle.com.
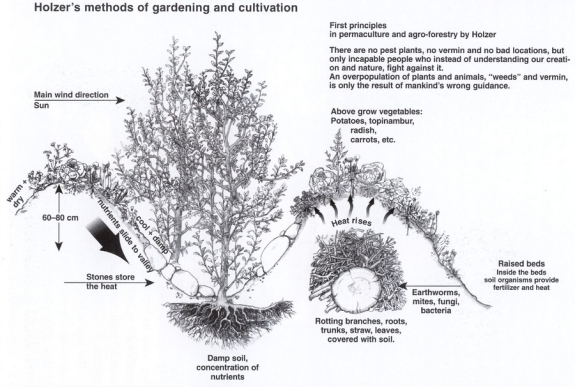
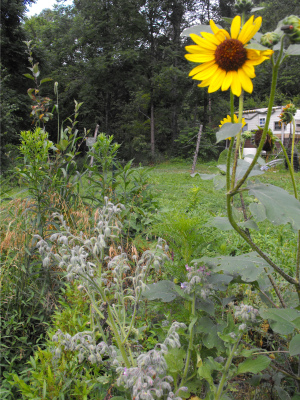 Davia
asked me if I'd ever heard of Hugelkultur. I thought the
answer was no, until I googled the term and discovered that hugelkultur
is very
similar to the mounds
I built last fall using dirt tossed over decomposing branches. Putting a name to the
method really expedited my research and turned up a lot more
information than I thought was out there. Thanks, Davia!
Davia
asked me if I'd ever heard of Hugelkultur. I thought the
answer was no, until I googled the term and discovered that hugelkultur
is very
similar to the mounds
I built last fall using dirt tossed over decomposing branches. Putting a name to the
method really expedited my research and turned up a lot more
information than I thought was out there. Thanks, Davia!
The idea is pretty
simple --- adding wood to a raised bed acts as a sponge, evening out
soil moisture so that the ground doesn't become waterlogged and also
doesn't dry up. As the wood rots, it turns into wonderful organic
matter a lot like the stump
dirt I rave about.
However, I think I made
a few mistakes with my hugelkultur beds. If you research the
technique, you'll discover that the correct way to make the beds is to
bury the woody material at least a foot or two under the earth. I
just built up piles of partly rotten branches and shoveled dirt in the
gaps, a method that worked okay for the hazels and wildflower mixes I
grew there, but that wouldn't have worked for vegetables. I'm
sure the branches are locking up nitrogen out of the soil as I type,
but everything I put in the beds is extremely resilient and seems to be
surviving.
The real problem is that
my beds are too dry. The wood hasn't rotted down enough yet to
act as a sponge, and the loosely shoveled clay has a lot of air pockets
that let water drain right through. Granted, I located the mounds
in an area where the groundwater is so high nothing will grow there, so
this "problem" isn't so bad --- it made a nice spot to put in rosemary
without ending up with root rot the way my rosemary plants usually do.
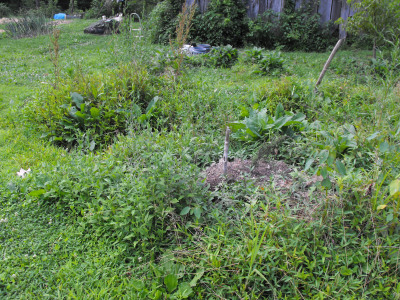 Problem number two is also
related to my haphazard construction. I left bits of branches
sticking out around the edges, which made Mark very leery of mowing up
to the sides of the mounds. Add to that the fact that my mulch
mostly blew away over the winter and I forgot to refresh it or weed the
mounds, and the result is a weed thicket. Surprisingly, the
thickly seeded wildflowers seem to be holding their ground against the
weeds, and the honeybees consider this area their second home, so all
is not lost.
Problem number two is also
related to my haphazard construction. I left bits of branches
sticking out around the edges, which made Mark very leery of mowing up
to the sides of the mounds. Add to that the fact that my mulch
mostly blew away over the winter and I forgot to refresh it or weed the
mounds, and the result is a weed thicket. Surprisingly, the
thickly seeded wildflowers seem to be holding their ground against the
weeds, and the honeybees consider this area their second home, so all
is not lost.
Now that I know more
about the technique, though, I want to try hugelkultur again as another
winter project. This time, I'll bury the wood deeper and plant a
cover crop to add fertility for the first year or so before planting
anything important. I'll be curious to see how quickly the
rotting wood starts benefiting my plants.
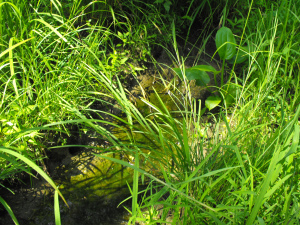 Every
morning, I walk our dog through the floodplain and
peer at
puddles. A few months ago, high waters stranded baby fish in
ephemeral pools, puddles that are bound to dry up before the summer
ends. My first instinct was to scoop these babies out and carry
them back to the creek, but then I paused to consider the consequences
of my actions.
Every
morning, I walk our dog through the floodplain and
peer at
puddles. A few months ago, high waters stranded baby fish in
ephemeral pools, puddles that are bound to dry up before the summer
ends. My first instinct was to scoop these babies out and carry
them back to the creek, but then I paused to consider the consequences
of my actions.
While it seems like a
good idea to save the minnows, how do I know that
these stranded fish aren't part of another animal's life cycle?
Do crawdads depend on pools like this for easy prey or do tree roots
need the quick burst of nitrogen left behind as the minnows' bodies
break down in the parched puddle?
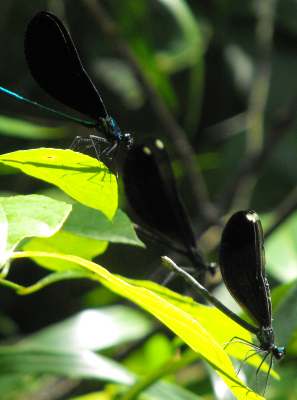 And
what if moving those fish back to the
creek disrupts the ecosystem there? Will I singlehandedly
overpopulate the stream, lowering reproductive rates of the other
fish? What if my minnows are better competitors but are actually
less fit because their offspring will be more likely to drift into
puddles and die without continued human intervention?
And
what if moving those fish back to the
creek disrupts the ecosystem there? Will I singlehandedly
overpopulate the stream, lowering reproductive rates of the other
fish? What if my minnows are better competitors but are actually
less fit because their offspring will be more likely to drift into
puddles and die without continued human intervention?
In the end, I left the
puddles alone, choosing to let the fish die
rather than setting off a chain reaction, the results of which I can't
begin to
predict. The experience sent me off on a thought tangent, though,
one that ballooned out into a lunchtime series (even though the
lunchtime series is supposed to be on summer vacation.) This
week's topic is pretty controversial and is bound to make many of you
decidedly uncomfortable, so I hope you'll bear with me rather than
jumping to the wrong conclusions. In fact, I'll even make you
wait until tomorrow to learn the theme. How's that for a teaser?
| This post is part of our Ethics of Vegetarianism lunchtime series.
Read all of the entries: |

When we first moved to the farm here one of the chores was to haul
water from the creek in 5 gallon buckets to a small raised bed of baby
apple trees.
 This
was before we were living here full time and pre-electricity. I
remember trying to run a small pump off the power of the truck in
desperation. This produced a small trickle and seemed to strain the
engine to the point where I figured it wasn't worth the risk of blowing
a fuse or worse.
This
was before we were living here full time and pre-electricity. I
remember trying to run a small pump off the power of the truck in
desperation. This produced a small trickle and seemed to strain the
engine to the point where I figured it wasn't worth the risk of blowing
a fuse or worse.
Pictured here is the Q-Drum,
invented by Hans Hendrikse in 1996. It can carry 20 gallons with ease
thanks to the rolling nature of it's design. From what I can gather
it's only available in South Africa and cost around 500 Rands. This
invention might have been enough to hydrate those poor little apple
trees. The unusaully dry summer was a problem, but the real mistake was
not mulching. A couple of Q-Drums might have saved the day.
I've often tried to imagine what would be the ultimate water storage
container for a possible future where energy is scarce. This might be
it.
I wonder how much it would
take to make the inner walls glass or copper?
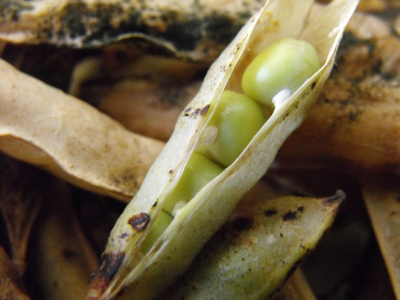 As
long as you choose a non-hybrid variety, peas are
one of the easiest garden vegetables for seed-saving. To that end, I let
the snow peas stay in the ground for a couple of weeks after the pods
began to turn woody, giving them time to mature their seeds.
As
long as you choose a non-hybrid variety, peas are
one of the easiest garden vegetables for seed-saving. To that end, I let
the snow peas stay in the ground for a couple of weeks after the pods
began to turn woody, giving them time to mature their seeds.
Last year, I left the
pods on the vine until they were completely brown, but this year I'm
experimenting with harvesting them a bit earlier when they're in the
pale yellow stage. My goal is to counteract the mildew that
struck about a third of last year's seeds. Rather than expecting
the pods to dry on the plant like last year, this year I carefully
shelled out the peas and put them on a rack to dry.
The
point of my
fishy anecdote
yesterday is simple --- choosing to protect
an individual animal may be harmful to the entire ecosystem.
Caring people are often attracted to vegetarianism
because we hate the thought of killing a living thing. But what
if swearing off meat has the same effect as transplanting that minnow
out of its puddle? What if we're actually doing more harm than
good with our well-intentioned actions?
While I understand the
horror many
people feel when they think of slitting a chicken's throat and cutting
out its innards, I think a more important measure of the ethics of our
dietary choices is the overall ecosystem. How many thousands of
bacteria, fungi, insects, salamanders, lizards, snakes, birds, and
mammals died when the farmer plowed his thousand acre field of soybeans
to make your veggie burger? How many more will die due to global
warming resulting from the gas burned to till that field, the chemical
fertilizer produced to feed the field, and the transportation of the
veggie burger to your table? I believe that the sheer number of
lives dependent on a native ecosystem should give that ecosystem more
importance than the life of any single meat animal.
When you look at the big
picture, food choices should revolve around minimizing the two worst
agricultural byproducts: habitat destruction and global
warming. Tomorrow, I'll crunch the numbers on the former, so
let's discuss the latter for a minute. A very thought-provoking
study by Edwards-Jones
et al.
showed that we have a long way to go before we can assess the effects
of our current agricultural system on global warming. He noted
that while many people focus on transportation as the largest energy
cost of farming, for many crops the biggest problem is actually the
production of fertilizer.
Why do we have to drench
our fields with
fertilizer? The answer
is simple --- we've taken animals out of the equation. Natural
ecosystems are made up of mixtures of plants and animals, and
productive agricultural systems are no different. On the small
family farm, manure feeds the crops, which feed the animals, which feed
the people.
A recent study by Peters
et al.
considered the ability of New York state's current agricultural areas
to feed its people. While the traditional American diet fared
badly in their calculations, the authors noted that New York could feed
more people eating a moderate amount of meat and dairy than if those
people were vegetarians. Not only would the animals be preventing
global warming by providing organic fertilizer for the crops, they
would also be
lessening habitat loss since a smaller acreage of land would be
required to
feed the same number of people. It's time to do some
soul-searching and see whether we really think the life of a cow is
more
important than the life of thousands of animals living in a native
forest.
| This post is part of our Ethics of Vegetarianism lunchtime series.
Read all of the entries: |
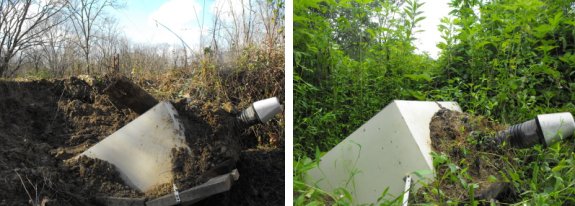
The refrigerator
root cellar is being over taken by weeds due to its low position on
the "list of things to fix before winter".
Digging it out and installing
a roof over the top will most likely be a winter project.

 Some
people give their hives just one deep brood box apiece (plus several
supers), but I've read that if you provide the bees a second deep brood
box, you'll have a larger colony and can harvest more honey. Last
year I didn't know any better, but this spring I decided to give the
double deep method a shot.
Some
people give their hives just one deep brood box apiece (plus several
supers), but I've read that if you provide the bees a second deep brood
box, you'll have a larger colony and can harvest more honey. Last
year I didn't know any better, but this spring I decided to give the
double deep method a shot.
In the middle of May, I
added a second brood box to our middle hive,
checkerboarding the drawn brood frames with empty frames so that the
bees were using both deep boxes to raise their young. After
extracting a bit more honey Tuesday, I added up how many frames I'd
taken from each hive --- 2 frames from the east hive, 4 frames from the
"mean" hive, and 20 frames from the double deep middle
hive!
Since I've been
extracting all of the capped frames of honey I see this summer, I
figure these statistics are a pretty accurate assessment of how hard
the hives have been working. If 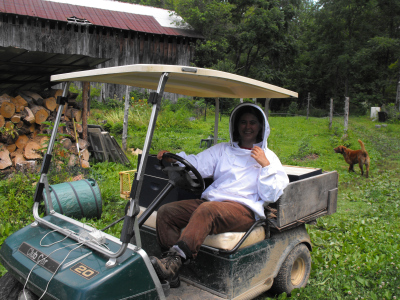 anything,
I think the middle hive has produced even more honey than it seems ---
the second brood box has a lot of honey in it that I've just left alone.
anything,
I think the middle hive has produced even more honey than it seems ---
the second brood box has a lot of honey in it that I've just left alone.
Now all three hives are
converted over to double deeps. I don't expect it to do much good
for this year, but now I'll be ready for the queens to lay like
gangbusters next spring. In fact, barring another serious honey
flow (and both basswood and sourwood are now past), I think I'm
going to let the bees save the rest of the year's honey for their own
consumption. Four and a half gallons of honey --- not a bad haul
for three hives in year two!
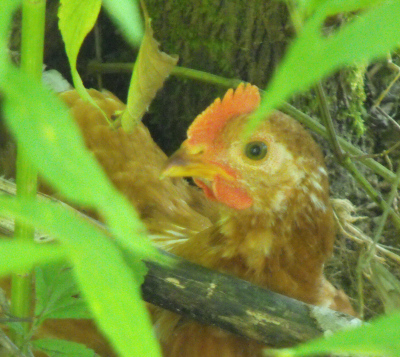 The
effects of dietary choices on global warming are hard to disentangle,
but all we need is a bit of number crunching to look at the amount of
calories we can produce
per acre when growing different kinds of food. The numbers below
are drawn from a lot of different sources for U.S. agriculture and
include dozens of assumptions, but they should give you a rough idea of
comparative acreage required to produce a few staple crops.
The
effects of dietary choices on global warming are hard to disentangle,
but all we need is a bit of number crunching to look at the amount of
calories we can produce
per acre when growing different kinds of food. The numbers below
are drawn from a lot of different sources for U.S. agriculture and
include dozens of assumptions, but they should give you a rough idea of
comparative acreage required to produce a few staple crops.
| Food |
Million
calories per acre |
Assumptions |
| Wheat |
6.4 |
Irrigated |
| Corn |
12.3 |
Irrigated |
| Potatoes |
17.8 |
Irrigated |
| Soybeans |
2.1 |
Irrigated |
| Beef |
1.1 |
Cows fed
solely on corn, feed to meat conversion ratio of 8, 1000 calories per
pound of beef |
| Pork |
3.5 |
Pigs fed
solely on corn, feed to meat conversion ratio of 3.5, 1385 calories per
pound of pork |
| Chicken |
1.4 |
Chickens fed
solely on corn and soybeans, feed to meat conversion ratio of 3, 591
calories per pound of meat |
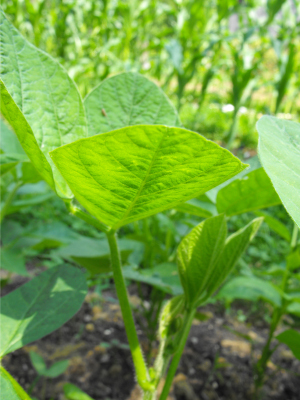 I remember when I first started considering my
dietary options, I was
told that we could feed many more people with the same amount of land
if we all became vegetarians. I was swayed...until I realized
that we're talking about feeding people only corn and potatoes.
The truth is that creating protein is
expensive in terms of land use whether you're growing soybeans or
raising cattle, and if we compare apples to apples you'll notice that
pigs actually win over beans.
I remember when I first started considering my
dietary options, I was
told that we could feed many more people with the same amount of land
if we all became vegetarians. I was swayed...until I realized
that we're talking about feeding people only corn and potatoes.
The truth is that creating protein is
expensive in terms of land use whether you're growing soybeans or
raising cattle, and if we compare apples to apples you'll notice that
pigs actually win over beans.But the table at the top of this post only considers conventional agriculture (aka CAFOs for meat.) What about if we instead raise our livestock on pasture and feed them food waste where appropriate? For cows, you won't see much difference, but pigs and chickens really begin to shine once you return to a more traditional feeding system. Both of these animals are well adapted to foraging on scraps --- the Vermont Compost Company raises chickens on compost alone while Sugar Mountain Farm cuts their feed bills drastically by raising their pigs on pasture with the addition of waste dairy products.
In societies that don't depend on huge agricultural corporations to feed the masses, a family is likely to have a pig and a flock of chickens that they feed mostly or solely on waste from the farm and kitchen. Remember that adding some livestock to your diversified homestead also equates to manure to fertilize your veggies, and it's suddenly hard for me to merit the idea of planting a field of soybeans instead.
| This post is part of our Ethics of Vegetarianism lunchtime series.
Read all of the entries: |
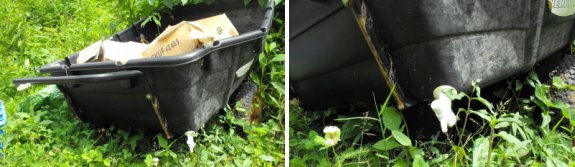
The biggest mistake I made
with the do it
yourself garden cart worm bin was to not allow enough space at
the bottom for the tea to drip to.
The next error was to use a
drinking container spigot as a drain valve. It needs to be bigger with
the ability to be turned on and left on as opposed to the push button
mechansim of the spigot.
The good news is that the
worms did great! Which goes to show you how easy it is to grow your own
worms. Once the kinks are worked out I think this garden cart will make
a fine over sized worm bin. One that will provide buckets and buckets
of compost tea in the future.

Or explore more posts by date or by subject.
About us: Anna Hess and Mark Hamilton spent over a decade living self-sufficiently in the mountains of Virginia before moving north to start over from scratch in the foothills of Ohio. They've experimented with permaculture, no-till gardening, trailersteading, home-based microbusinesses and much more, writing about their adventures in both blogs and books.