
archives for 04/2010
I finally planted the
first of the hedges I've been talking about all
winter. For this initial stage, I'm simply starting a solid mass
of Osage-Orange, with plans to intersperse
other hedge plants in gaps at a later date. Osage-Orange was a
no-brainer as the hedge base since this first hedge is in the floodplain (optimal Osage-Orange
habitat, but likely to kill many other plants due to the waterlogged
soil.) The trees will be liberally decked with thorns and will
form a prickly, impenetrable barrier that works well at keeping animals
in. In addition, the seeds are reputed to be edible to humans and
beloved by squirrels, so maybe the eventual inhabitants of the forest
pasture will get something to eat from the Osage-Orange.
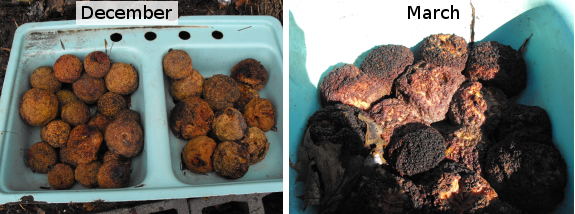
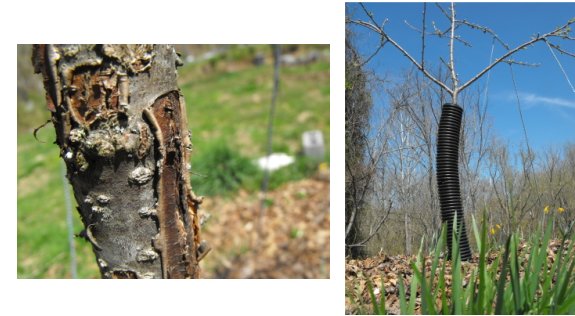
 The
first step in the Osage-Orange process was a unique type of
stratification. I put the fresh Osage-Orange fruits in a sink in
the shade and let them soak up the rain and snow all winter. When
I went to look at them Wednesday morning, the result was not
appetizing, but the weather had done its job. I was able to mash
the fruits up easily with the trake,
exposing the seeds to view. (The pulp is pretty stinky --- you might
want to wear gloves for this step if you're following along at home.)
The
first step in the Osage-Orange process was a unique type of
stratification. I put the fresh Osage-Orange fruits in a sink in
the shade and let them soak up the rain and snow all winter. When
I went to look at them Wednesday morning, the result was not
appetizing, but the weather had done its job. I was able to mash
the fruits up easily with the trake,
exposing the seeds to view. (The pulp is pretty stinky --- you might
want to wear gloves for this step if you're following along at home.)
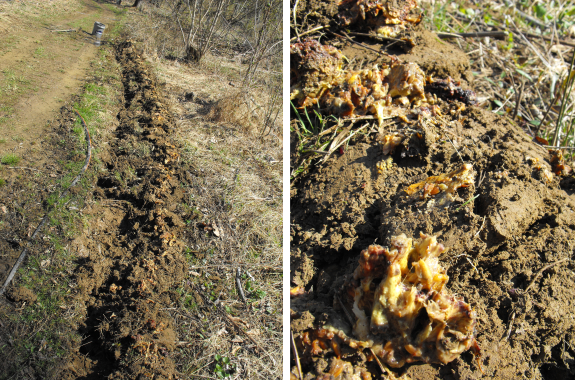
Next, I created a very
basic mound where I wanted the hedge to go. Internet sources
suggest planting Osage-Orange seeds in a shallow trench, but I've
learned my lesson with other trees --- nothing grows directly in the
ground in damp spots on our farm. I smeared the Osage-Orange goo
liberally across the turned over sod, planting thickly so that the tree
seedlings will be able to compete with the weed roots I was too lazy to
remove from the soil. I didn't cover the seeds, though maybe I
should have? If I see any squirrels at work, I'll head back down
and cover them up. For future reference, my sinkful of fruits
created about two gallons of pulp, which in turn seeded about 35 feet
of hedge.
 In
addition to our grains for human consumption, I plan to incorporate
some grains into the non-forested part of our new chicken
forest
pasture. I'll
let the chickens scratch up one of the flat areas
well, then turn the birds into another paddock while I broadcast
buckwheat, millet, and perhaps corn seeds into the distressed
ground. After three months, I'll be able to rotate the chickens
which we plan to keep for the winter into the grain paddock so that
they can supplement their winter foraging with grains.
In
addition to our grains for human consumption, I plan to incorporate
some grains into the non-forested part of our new chicken
forest
pasture. I'll
let the chickens scratch up one of the flat areas
well, then turn the birds into another paddock while I broadcast
buckwheat, millet, and perhaps corn seeds into the distressed
ground. After three months, I'll be able to rotate the chickens
which we plan to keep for the winter into the grain paddock so that
they can supplement their winter foraging with grains.
I've already outlined
the method for growing
buckwheat and
everyone
knows how to grow corn. But how do you grow millet?
Unfortunately, several different species (each in their own genus, so
only vaguely related) are called by the name "millet" and each has its
own growing requirements. Pearl millet has the largest seeds
and the advantage of threshing free from its hulls naturally, but pearl
millet also requires warm
temperatures and may not set seed in cold climates. Proso millet
can be grown in cooler areas since it requires only 60 to 90 days to
mature, and Titus emailed me that her chickens adore the seeds so I
suspect the hull doesn't bother them. Have you grown millet in
your garden? If so, what kind, and how did it do?
| This post is part of our Homegrown Whole Grains lunchtime series.
Read all of the entries: |
Step 2: Decide on location,
choose and trim suitable cedar posts, and install.
Step 3: Catch your breath and
have a glass of ice tea.
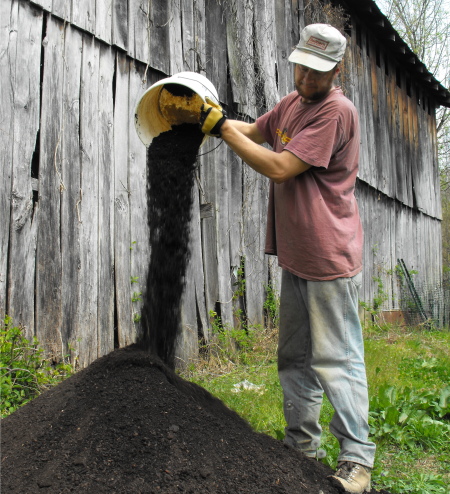
 Warm
weather dried up the creek enough that I was able to haul in a golf
cart load of the storebought
compost that Mark so valiantly gathered in
the big city. I'm afraid I hurt his feelings when I arrived back
at the trailer --- he was expecting exuberant hugs, but I was actually
a bit disappointed by the compost's quality.
Warm
weather dried up the creek enough that I was able to haul in a golf
cart load of the storebought
compost that Mark so valiantly gathered in
the big city. I'm afraid I hurt his feelings when I arrived back
at the trailer --- he was expecting exuberant hugs, but I was actually
a bit disappointed by the compost's quality.
The color is a beautiful
dark brown, but the compost's structure is heavier than I would like
and the smell is musty instead of earthy. Since it was mixed and
aged in a warehouse, the usual beneficial microorganisms seem to be
absent (thus the lack of a woodsy aroma). I think the heaviness
is due to the high proportion of chicken manure in the compost, which
results in a very high N-P-K for compost
(3-4-4), but less organic matter than I'd like. My holy grail of
compost is the sponge-like stump
dirt I gather in the
woods, and I'm
beginning to think that type of compost may be impossible to create on
an industrial level.
In loamy soil,
a compost high in fertility and low in organic matter would be fine, but in my clay I
need the organic matter even more than the fertility. Luckily,
the bulk of my garden won't be going into the ground for 4 to 8
weeks, so I've got time to rectify the compost's disadvantages.
I'm going to sprinkle the compost over the top of my leaf
mulch in the
May garden beds and hope that the influx of nitrogen will make those
leaves compost quickly. I use no-till
techniques, so my soil is
brimming with decomposers and ready to take on the job!
 The last component of this year's grain
experiment is equipment. Backyard gardeners often skip growing
grains because of the complicated harvesting,
threshing, winnowing, and dehulling procedures. But Home-grown
Whole Grains
introduced two pieces of DIY equipment that I'm putting on my honey-do
list.
The last component of this year's grain
experiment is equipment. Backyard gardeners often skip growing
grains because of the complicated harvesting,
threshing, winnowing, and dehulling procedures. But Home-grown
Whole Grains
introduced two pieces of DIY equipment that I'm putting on my honey-do
list.
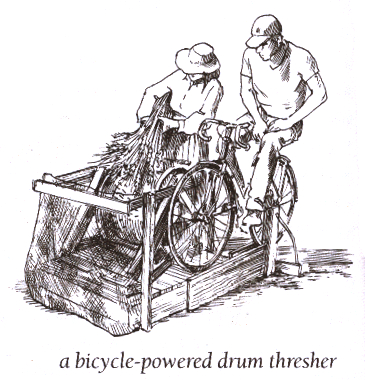
The first is a
pedal-power drum thresher --- I've stolen the picture from the book
just this once because I can't find anything like it on the
internet. Basically, a bicycle is hooked up to a utility-wire
spool. The spool is inside a collection bin of some sort and is
studded with xd nails, pounded in every two to three inches. One
person pedals, which causes the drum to spin, while another person
holds the grain heads against the drum. The nails pull seeds
out of the grain heads relatively quickly --- you can thresh about 40
pounds of grain in an hour with the DIY thresher.
If you're growing a
grain that has difficult to remove hulls (like buckwheat), you'll be
interested in Southern
Exposure Seed Exchange's method of converting a hand-cranked
grain mill into a DIY huller. Basically, you temporarily replace
the stationary disk on your grain mill with a rubber disk made by
gluing soft rubber onto a washer. With a bit of adjustment, your
mill will be able to crack the hull on seeds without breaking the grain
kernels. I can't find any pictures of this apparatus on the
internet either, but once we grow our buckwheat I'll give it a shot and
post about it.
| This post is part of our Homegrown Whole Grains lunchtime series.
Read all of the entries: |

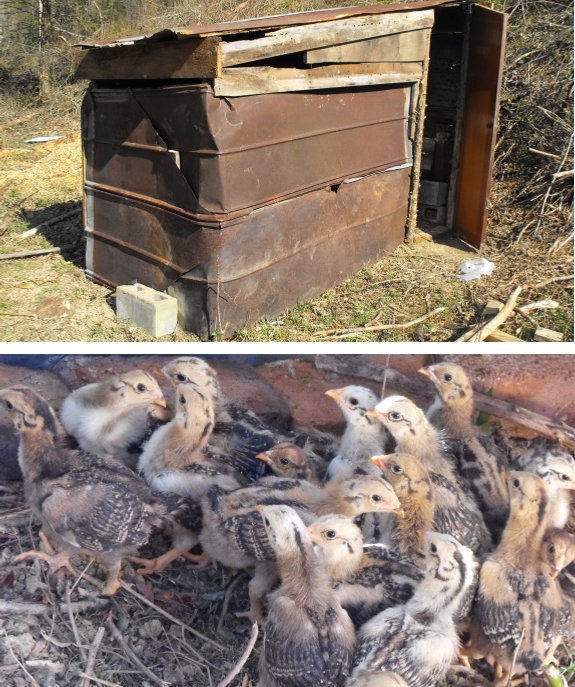
Estimated cost of the chicken
pasture coop so far is somewhere between 1 to 2 dollars for a
handful of sheet rock screws.
The salvaged brackets
continue to prove themselves as a flexible fastener, especially when you have a good size
hammer to help preach your philosophy of bracket transformation.
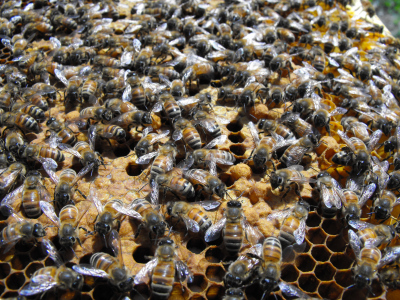 In
the last week and a half, our three beehives have been churning out the
babies. Last time I checked on them, two hives
had a little bit of brood,
but now all three hives have brood of all ages on several frames.
They're also packing away pollen like nobody's business, and are
starting to dehydrate nectar into new honey. None of them have
started using the second super yet, though --- maybe once the fruit
trees and dandelions really start blooming.
In
the last week and a half, our three beehives have been churning out the
babies. Last time I checked on them, two hives
had a little bit of brood,
but now all three hives have brood of all ages on several frames.
They're also packing away pollen like nobody's business, and are
starting to dehydrate nectar into new honey. None of them have
started using the second super yet, though --- maybe once the fruit
trees and dandelions really start blooming.
In other pleasant news,
the raised brood cell that I thought might be
an incipient queen cup in one hive earlier in March turned into a bit
of drone brood (the few bumps in the photo above), which means I
haven't crowded the hive too much. I went ahead and opened all of
the brood boxes up, though, to stave off any feelings of overcrowding
in the near future. "Opening up the brood box" sounds confusing,
but it's actually quite simple --- just take the empty frames that
naturally gravitate to the sides of the box and intersperse them
between frames full of brood and pollen. As you leaf through the
opened brood box from one end to the other, it now reads "empty, full,
empty, full, empty, full, empty, full, empty, full" rather than "empty,
empty, full, full, full, full, full, empty, empty, empty." The
theory is that if the queen has empty frames near her, she won't think
she's running out of space, so she won't instigate a swarm. Hives
that don't swarm produce a lot more honey, so swarm prevention is key
to getting a good harvest.
In February, I got
concerned that our two weaker hives might be running low on honey,
so I stole three frames from the strongest hive to give them
backup. When I checked this week, though, the strongest hive had
eaten nearly every drop of its copious honey, presumably fueling the
huge egg-laying campaign it has embarked on. So I moved two small
frames of honey back from one
of the weaker hives to the strongest hive. This type of maneuver
is a sure sign of a far-too-hands-on beekeeper, but I can't help being
a nervous nellie about our livestock.
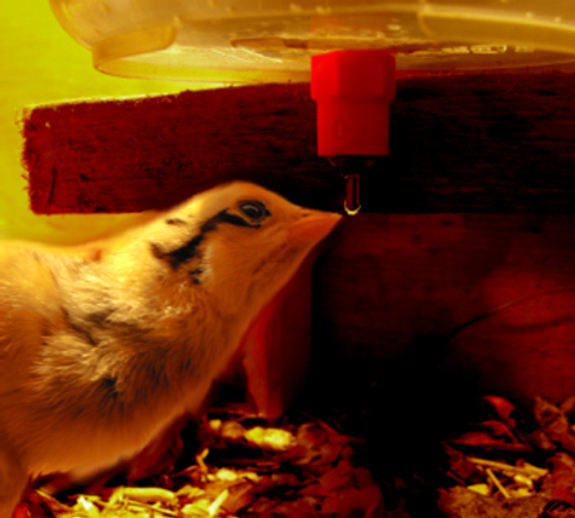
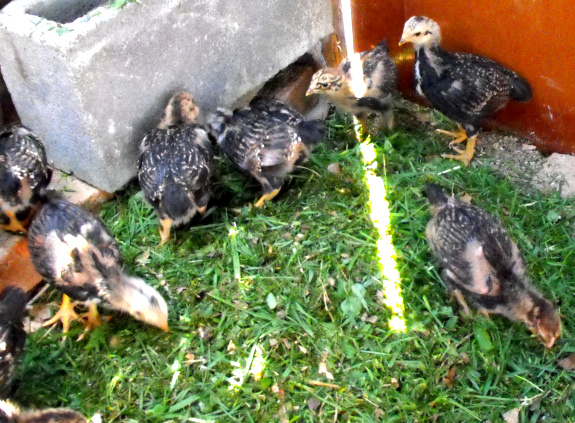
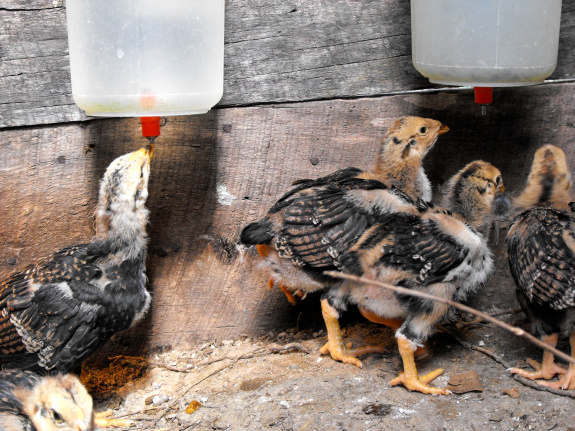
One detail to note is the
placement of an Avian Aqua
Miser in respect to new chicks.
I started off with one in
each corner on the starboard side of the box. The height turned out to
be a problem when all 24 chicks decided to crowd into that corner
during a brief
fire episode. The chicks
who were bunched up close to the nipple were activating the valve and
dumping water on themselves and their immediate neighbors. I'm no
expert, but wet chicks on a cold night sounds a bit too close to a
country western song for my comfort level.
The lesson is to avoid corner
placements of your automatic
chicken waterer for the first couple of weeks. After that you
should be able to raise the waterer to avoid any such issues in the
future.
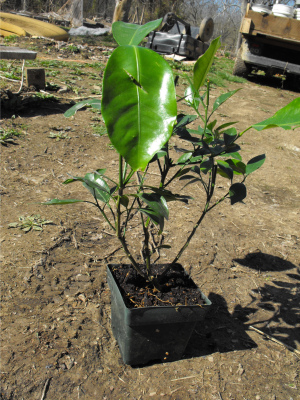 Meet
our newest dwarf citrus --- Washington Navel Orange. Isn't she
cute?
Meet
our newest dwarf citrus --- Washington Navel Orange. Isn't she
cute?
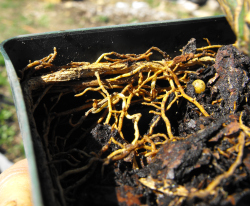
Unfortunately, she is
the textbook definition of rootbound. One large root had
literally grown all the way around the perimeter of the pot...although
the plant had eschewed the stagnant dirt in the pot's bottom.
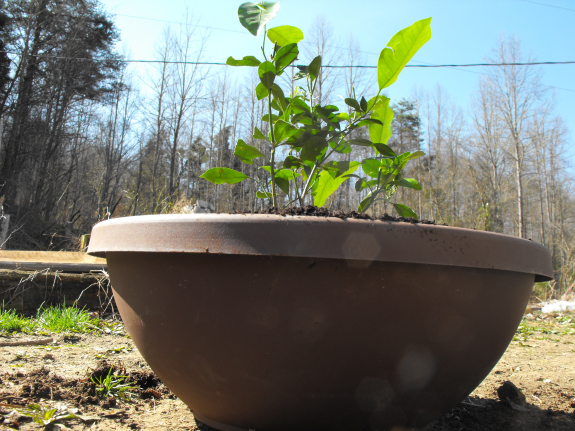
When I asked Mark
to buy me a pot, he came up with the absolutely best pot
possible. Notice how shallow and wide this pot is? No more
wasted soil on the bottom of the citrus pot!
I teased the orange's
roots out and planted the tree in a mixture of partially decomposed
horse manure and storebought
compost. I
usually try to use worm castings or stump
dirt for repotting,
but I'm all out! If the little orange tree seems to be
struggling, I'll pop it back out and hunt down some better soil.

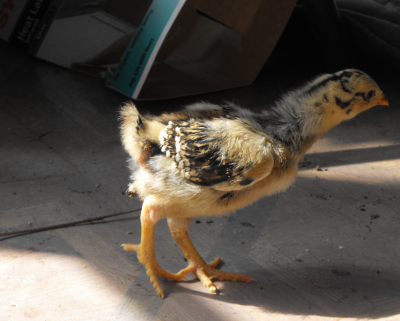
One obvious omission to the do
it yourself table top brood coop is the lack of a front or back
door.
The chicks have a moving day
planned for tomorrow as soon as I fence in a small segment of the new
chicken pasture coop building. That's when I'll remove one of the
brood coop panels and cut out a door opening so they can be free to
come and go during the day as their nap schedule permits.
Photo credit goes to the
intriguing heyburton blog,
who has an interesting article on chicks
doing some low level math.
 Plant
a fruit tree and learn patience. You'll tend them and love them
for three years, or four years, or five years before tasting the first
sampling of their fruit. But then the harvest will steadily grow,
until within a decade you have buckets and barrels full of apples,
pears, peaches, and plums.
Plant
a fruit tree and learn patience. You'll tend them and love them
for three years, or four years, or five years before tasting the first
sampling of their fruit. But then the harvest will steadily grow,
until within a decade you have buckets and barrels full of apples,
pears, peaches, and plums.
At least that's the
dream. Our first stab at making it a reality
failed when we planted fruit trees directly into our wet clay soil and
ended up with so many dead sticks. So we planted again in 2007,
this time in raised beds, starting small as we
figured out what we'd done wrong, then adding more trees in the
following years.
It was really too early
to see any fruits last year, but profuse blooms
on our oldest peach made me hope for a harvest. Then a late
freeze wiped out every bloom, and I went back to pruning and training
and mulching with no reward.
My fruit tree
spreadsheet, though, says that this year may be
different. Peaches and dwarf cherries can fruit at three years,
and our two oldest trees are coated with bumpy flower buds. In
fact, even our two year old peach and nectarine are similarly laden,
though I refuse to get my hopes up about premature fruit this year.
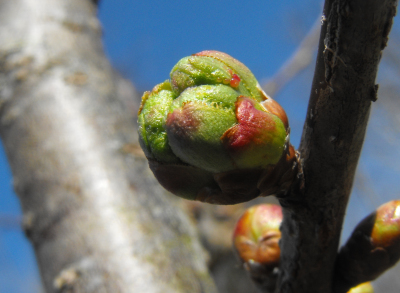
I've been watching the
flower buds all winter with avid curiosity, and
Sunday the inevitable happened. A week of summer-like
temperatures tempted peaches to go from green bud to red bud stage (top
picture), while the cherry buds actually burst open (second picture),
revealing the individual flower buds within. Finally, I reached
the nectarine, planted in the sunniest spot against the side of the
barn. I saw a hint of brilliant pink in one bud and just kept
photographing my way around the tree until...
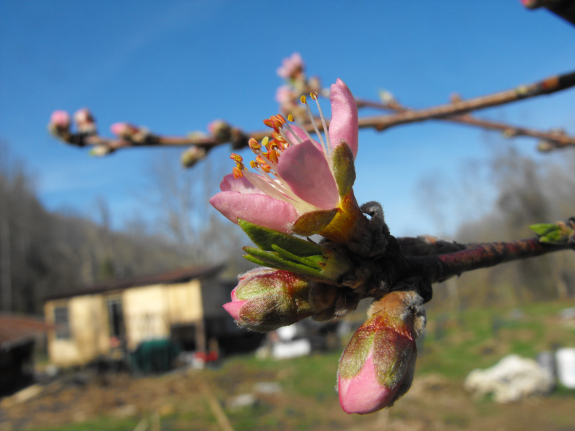
...a fully opened bloom!
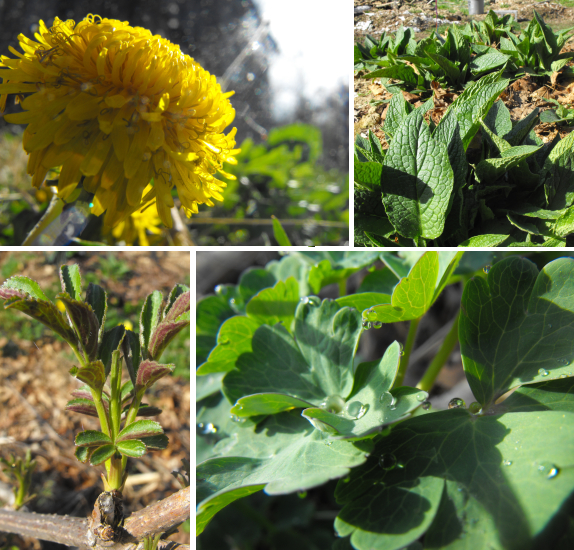
I can't resist throwing
in a few more shots of the signs of spring that
have been bursting out in the garden this week. The dandelions
are now in full bloom, and the comfrey (top right) has leaves bigger
than my hand, ready to take back their job of mulching
the nectarine.
Elderberry leaves (bottom left) have been growing slowly for weeks ---
these seem to be the first spring tree leaves on the farm.
Finally, the columbine has really caught hold and looks to
have bloom buds on the way. Spring!
 Instead
of playing the lottery, I play interlibrary loan. Each week, I
hit the library with a stack of request slips for books I've heard
about that aren't stocked by our tiny rural book-lender, and every week
something trickles down from northern Virginia to fill my voracious
book appetite. This is the saving grace of our tiny library ---
interlibrary loans are free.
Instead
of playing the lottery, I play interlibrary loan. Each week, I
hit the library with a stack of request slips for books I've heard
about that aren't stocked by our tiny rural book-lender, and every week
something trickles down from northern Virginia to fill my voracious
book appetite. This is the saving grace of our tiny library ---
interlibrary loans are free.
I try to put in requests
for an equal number of fiction and non-fiction books each week, but as
luck would have it, this week's haul was entirely fiction. I
gulped in dismay, and headed back into the library's one small room of
non-fiction on the off chance that their linear foot of gardening books
included a tome I'd not yet read. And there in front of my snooty
nose was a book every bit as good as the ones I'd requested from afar.
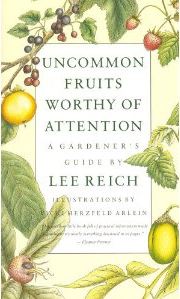
In fact, even though I'd
never heard of Lee Reich's Uncommon
Fruits Worthy of Attention,
all of my permaculture gurus clearly had. Information about
species like the hardy kiwi and the Nanking cherry had eluded me
because these plants were nearly impossible to find on the internet
(even though every permaculture book mentioned them.) I flipped
open Lee Reich's book and found that it was chock full of cultivation
and propagation information for these and seventeen other unusual
species. By the end of the week, at least four of these species
will be adequately represented on the internet --- stay tuned!
| This post is part of our Uncommon Fruits Worthy of Attention
lunchtime series.
Read all of the entries: |
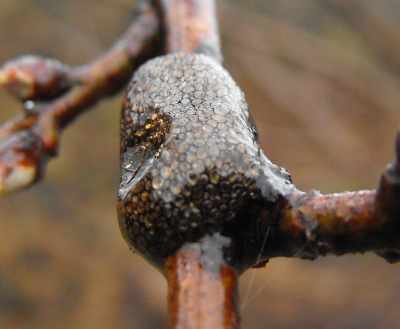 I
noticed some shiny egg masses wrapped around the twigs of our biggest
peach tree this winter, but I left them in place since I didn't know
what they were. Sunday, tiny tent caterpillar webs began
radiating out from the egg masses. Bad news!
I
noticed some shiny egg masses wrapped around the twigs of our biggest
peach tree this winter, but I left them in place since I didn't know
what they were. Sunday, tiny tent caterpillar webs began
radiating out from the egg masses. Bad news!
If you live east of the
Rockies, you've probably seen the tent caterpillar before, even though
you may not have known what it is. The caterpillars live inside a
spiderweb-like tent of white silk that can reach about a foot in
length, easily visible around the limbs of wild black cherries as you
drive down the highway. Tent caterpillars are voracious eaters
and can defoliate entire trees in a season.
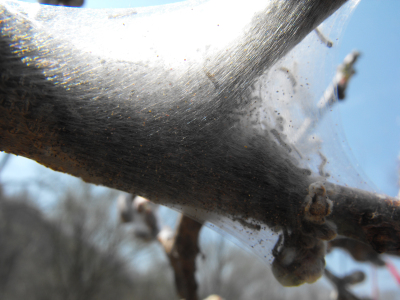
Although wild black
cherries are their favorite food, tent caterpillars enjoy pretty much
every fruit tree you'd plant in your yard. They like apples,
pears, cherries, plums, and peaches. Large orchards spray
chemicals to kill tent caterpillars, but on the backyard scale they're
extremely easy to pick off the branch either in the egg stage or soon
after the caterpillars hatch. And our hens want you to know that
a web full of tiny caterpillars is a very tasty treat.
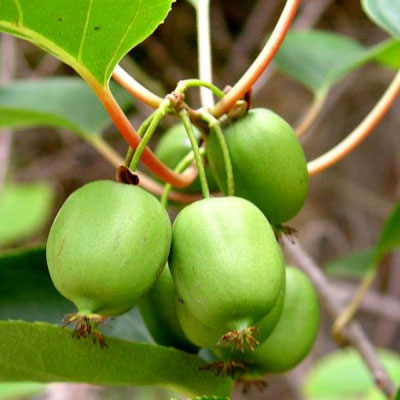 If
you don't live in the Deep South, you probably thought the luscious
kiwi fruit was beyond your grasp --- I know I did. Enter the
Hardy Kiwi (Actinia
arguta),
whose vigorous vines will ripen fruits up to zone 4. The Hardy
Kiwi originated in China, where it grows naturally in humid mountain
forests that share so many species with our own Appalachian
mountains. Asian people have eaten kiwis for centuries, and
in
1983, 130,000 tons of kiwi fruit were harvested from wild vines of
several kiwi species in China alone.
If
you don't live in the Deep South, you probably thought the luscious
kiwi fruit was beyond your grasp --- I know I did. Enter the
Hardy Kiwi (Actinia
arguta),
whose vigorous vines will ripen fruits up to zone 4. The Hardy
Kiwi originated in China, where it grows naturally in humid mountain
forests that share so many species with our own Appalachian
mountains. Asian people have eaten kiwis for centuries, and
in
1983, 130,000 tons of kiwi fruit were harvested from wild vines of
several kiwi species in China alone.
Hardy Kiwi produces
fruits that taste very similar to the kiwi fruits that you buy in the
store (from Actinidia
deliciosa),
but they are much smaller and are hairless. My understanding is
that you pop Hardy Kiwis in your mouth like grapes, and can also store
them in root-cellar-like conditions (just above freezing and at 95%
humidity) for nine months. Since one plant can produce up to 100
pounds of fruit, you might be able to provide your winter dessert with
just a few vines.
The internet is full of
sites singing the praises of the Hardy Kiwi, but it is sorely lacking
in specific cultivation information. Luckily, Uncommon
Fruits Worthy of Attention walks you through the whole
process from propagating to planting to pruning and harvesting.
Here's a quick summary:
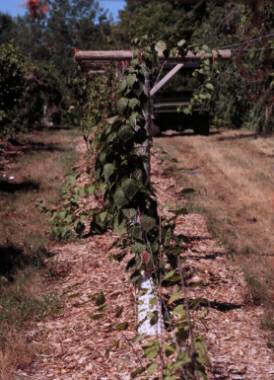
Where
should I plant my Hardy Kiwi?
Hardy Kiwis are sensitive to late spring frosts, so they are best
planted on north-facing slopes where they are shaded from early spring
sun. Provide well-drained soil (or plant
on mounds), and build a strong trellis to support the plants.
Kiwis should be at least 15 to 20 feet apart.
Do I need more than one plant? Since Hardy Kiwis have
separate male and female plants, you will need to provide at least one
of each to produce fruit. Only one male is necessary for each
eight female plants, as long as the female plants are within 35 feet of
the male.
How do I train and prune my Hardy Kiwi?
The initial training is a lot like training a young grape vine.
During the first year, develop a trunk by training the strongest shoot
up along a one to two inch thick pole, cutting away all other
shoots.
When the trunk reaches the lowest trellis wire, split it into two
cordons by training one arm along the trellis in each direction.
Once cordons are seven feet long, cut them back to that length each
winter and develop fruiting arms at one foot intervals along the
cordon. At the same time that you cut back the cordons, prune
fruiting arms to
eight buds beyond where they fruited last year.
How do I propagate the Hardy Kiwi?
If you want to perpetuate the same variety, take cuttings. Hardwood
cuttings
work, but softwood cuttings root even more easily when taken from new
growth in early summer, removing the tips and clipping leaves in
half. Softwood cuttings will root in two to four weeks.
Hardy Kiwis can also be propagated from seed (although you will end up
with more variable offspring, half of which will be male.) To
grow them from seed, put the whole fruits in a blender with some water
just long enough to create a mush, then sow the pulp and seeds
together, stratifying for two months. Hardy Kiwis bear at two
years from cuttings and at three to four years from seed.
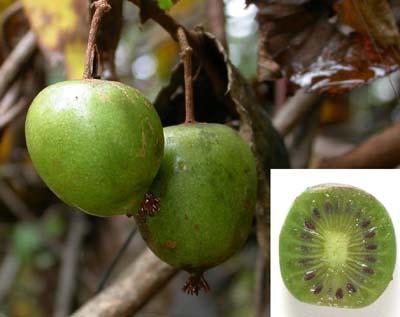
When do I harvest the fruits?
Hardy Kiwi fruits are ready to be picked when the seeds are black, even
though the fruits are still hard. Allow them to soften for a week
at room temperature.
Why is the Hardy Kiwi a permaculture
favorite?
Permaculture admonishes us to grow plants that are well-suited to our
environment and don't require lots of sprays and babying. The
Hardy Kiwi fits a niche very similar to a grape, but
seems to have no diseases or pests (beyond Japanese Beetles) in the U.S.
Are you growing them? We
planted two females (Dunbarton Oaks and Ananasnya) and a male in fall
of 2008. They sulked for the first year, but I hope they'll take
off this year --- I'll keep you posted.
| This post is part of our Uncommon Fruits Worthy of Attention
lunchtime series.
Read all of the entries: |
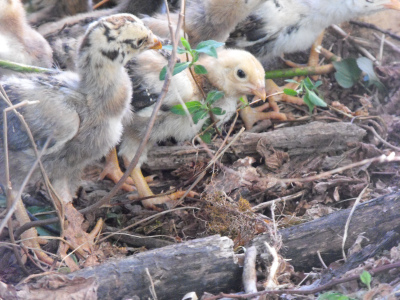
I can already feel an
increase of happiness within the new flock after today's move. Now with a bigger
space and some real ground to scratch they should start to settle down and feel at home.
A couple of the more brave
chicks managed to jump out of the table
top brood box the last few days, which probably means they needed
more room a week ago.
We'll still keep a close eye
on their well being, but the care taking should be a lot easier now that
they have some elbow room.
 Monday
morning, I opened the door to the building where we're keeping our
chicks and something skittered away to hide in the corner. Was it
a mouse drawn to the open bag of chick feed? Nope, it was a chick
who had hopped all the way out of the brood box and then flown or
fallen to the floor.
Monday
morning, I opened the door to the building where we're keeping our
chicks and something skittered away to hide in the corner. Was it
a mouse drawn to the open bag of chick feed? Nope, it was a chick
who had hopped all the way out of the brood box and then flown or
fallen to the floor.
Even though I put a lid
on the end of the brooder where our homemade chicken
waterer's mount
provided chicks with a handy stopping stool, our little cockerels were
clearly ready for a bigger home. I caught one perched on
the top of the box, then on Tuesday had to chase down two chicks who
had flown out and were busily exploring the seed starting area on the
floor.
 As
a result, I was thrilled when Mark pushed through the heat on Tuesday
to finish up the chicken
coop and expand our
chicks' home by a factor of ten. It took the cockerels about a
minute to get their bearings, but then they started to peck and scratch
like mad. I'm not sure what, if anything, they were actually
finding to eat --- I suspect the chicks were just practicing their
foraging, testing out sticks and stones and leaves to see which ones
tasted like food.
As
a result, I was thrilled when Mark pushed through the heat on Tuesday
to finish up the chicken
coop and expand our
chicks' home by a factor of ten. It took the cockerels about a
minute to get their bearings, but then they started to peck and scratch
like mad. I'm not sure what, if anything, they were actually
finding to eat --- I suspect the chicks were just practicing their
foraging, testing out sticks and stones and leaves to see which ones
tasted like food.
Two weeks is very early
to move chicks outside, but the weather has been unseasonably warm and
I've given them a heat lamp to take the chill off the spring
nights. Next week, we'll let them out of the coop and into the
as-yet-unbuilt pasture, the true start to our forest
pasture experiment.
The Nanking Cherry showed up
on a list of edible hedge species, but I didn't know if the
plant was actually a cherry botanically and (more importantly) what it
tasted like. Uncommon
Fruits Worthy of Attention, as usual, cut right to the
chase.
Is the Nanking Cherry a cherry?
Nanking Cherry (Prunus tomentosa)
is in the same genus as cherries, plums, and peaches, but is a
different species than either sweet cherries (P. avium) or sour cherries (P. cerasus).
This means that your Nanking Cherries can't be pollinated by either of
these species, just as sweet cherries won't pollinate sour cherries and
vice versa.
Does the Nanking Cherry taste like a
cherry?
Flavor of the Nanking Cherry seems to be extremely variable, probably
due to the fact that American nurseries grow the plants from
seed. In stark contrast, the Nanking Cherry is the most common
garden fruit in the Russian Far East, where many named varieties
exist. Some varieties taste like tart cherries and others like
sweet cherries (though a quick search of the internet suggests that the
former flavor predominates among unnamed varieties in the U.S.)
 How do I plant my Nanking Cherry?
Since Nanking Cherries are shrubs or small trees reaching between nine
and fifteen feet tall and wide, they should be planted about fifteen
feet apart. Alternatively, they can be planted four feet apart
and trimmed into a hedge. Be sure to plant more than one Nanking
Cherry for cross-pollination. Place them in an area with full sun
and well-drained soil.
How do I plant my Nanking Cherry?
Since Nanking Cherries are shrubs or small trees reaching between nine
and fifteen feet tall and wide, they should be planted about fifteen
feet apart. Alternatively, they can be planted four feet apart
and trimmed into a hedge. Be sure to plant more than one Nanking
Cherry for cross-pollination. Place them in an area with full sun
and well-drained soil.
Where can I grow the Nanking Cherry?
They can be planted in zones 3 to 6, which makes them a good choice in
more northern areas where traditional cherries can't be grown.
How do I propagate the Nanking Cherry?
If you don't mind the plants not breeding true, seeds are easiest (and
will grow a long, drought-resistant taproot, absent in plants grown
from cuttings.) Remove the seeds from the pulp, air dry slightly,
then stratify for three months. Seedlings bear by the third
year. Alternatively, take softwood cuttings when the fruit is
ripening, treat the base with rooting hormone, then keep the cuttings
under a mist. Or take 8 to 12 inch hardwood cuttings of one year
old wood, planting in well-drained soil in the fall or spring.
Why is the Nanking Cherry a
permaculture favorite?
Permaculture emphasizes making maximum use of your gardening
space. Since the Nanking Cherry is a shrub, it can fit into parts
of the garden where a standard cherry couldn't grow. Using the
Nanking Cherry as an edible hedge plant has forest
pasture implications as well.
Are you growing them? I'd like to find a named variety (or someone's backyard
shrub) that tastes like a sweet cherry, but in the meantime I bought a couple of seedlings to get us started. If you've tried them and have tasty plants, I'd love to
trade for some seeds or cuttings!
| This post is part of our Uncommon Fruits Worthy of Attention
lunchtime series.
Read all of the entries: |
Our cat Huckleberry has been
using 2 of our young fruit trees for a scratching post lately.
Let's see him try to scratch
them now.
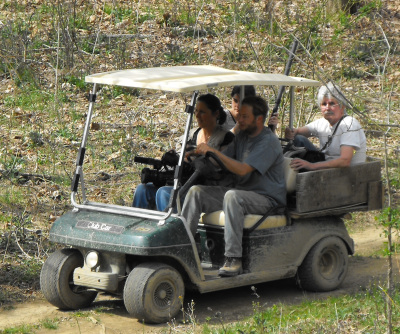 A
film and radio crew came by the farm Wednesday to interview us for the
local radio station. They were doing a piece on how the internet
brings opportunity to an economically depressed area, and our Avian Aqua Miser business fit the bill.
Hopefully the segment will air and I'll be able to point you to the
station's website to listen and/or watch, but for now I thought you
might enjoy reading some highlights of our interview.
A
film and radio crew came by the farm Wednesday to interview us for the
local radio station. They were doing a piece on how the internet
brings opportunity to an economically depressed area, and our Avian Aqua Miser business fit the bill.
Hopefully the segment will air and I'll be able to point you to the
station's website to listen and/or watch, but for now I thought you
might enjoy reading some highlights of our interview.
We try not to make
guests walk through the floodplain (aka the alligator swamp) unless
they really want to, so Mark drove the golf cart to pick up the
crew. Four people, a big camera, and an even bigger microphone
crammed onto the cart --- I'm glad Mark added
on the truckbed in the back since it seated two. "Hold on
tight!" Mark warned, and they were off. And then, with a bump,
one was quite literally off --- the camera woman lost her hold and
ended up in the mud. Luckily, the camera came through fine.
Back at our homesite, we
showed off our chickens (though the journalists seemed even more struck
by Mark's deer deterrent.) Then we headed
inside our frantically-cleaned-up-this-morning trailer, which is still
barely presentable. Good thing Huckleberry was on hand to take
their attention away from the cobwebs --- he seemed bound and
determined to answer their questions, and kept meowing as we
talked. (Strider doesn't take well to unusual events like cleaning so he was absent.)
Thanks for coming by Rich, Mimi, and Sylvia! I hope the dunking
in the mud doesn't scare you off for good.
 I'm
familiar with currants and gooseberries by name alone since my New
England relatives grew the bushes in their gardens. I'd barely
tasted the fruits and wasn't all that excited until I read
that currants were a favorite of Robert
Hart's since they will produce
fruit even in the shade. As usual, Uncommon
Fruits Worthy of Attention had answers to all of my top
questions.
I'm
familiar with currants and gooseberries by name alone since my New
England relatives grew the bushes in their gardens. I'd barely
tasted the fruits and wasn't all that excited until I read
that currants were a favorite of Robert
Hart's since they will produce
fruit even in the shade. As usual, Uncommon
Fruits Worthy of Attention had answers to all of my top
questions.
What's
the difference between a currant and a gooseberry? Gooseberries and
black, white, and red currants are all in the Ribes genus. Gooseberries
are a hybrid of R.
uva-crispa and R.
hirtellum,
and they counteract their big thorns with large, sweet berries.
Currants are thornless, but have smaller fruits that are quite tart and
are less often eaten uncooked. They come in two categories ---
black currants are a mixture of R. nigrum, R.
odoratum, and R.
americanum and
red and white currants are both a mixture of R. rubrum, R. sativum, and R.
petraeum.
Both kinds of currants are unrelated to the raisin-like "currants",
which are actually a dried grape like any other raisin.
Where
can I grow currants and gooseberries?
Currants and gooseberries are great for northern climates (some are
even hardy in zone 2), and some can be grown further south. In
all cases, if you're planting them toward the southern end of their
range (below zone 5), you should give them some shade, perhaps plant
them on the north side of a hill, and mulch them heavily to keep
moisture around their roots. Gooseberries are often listed as
growing all the way to zone 8, while currants are often listed only
down to zone 5 or 6.
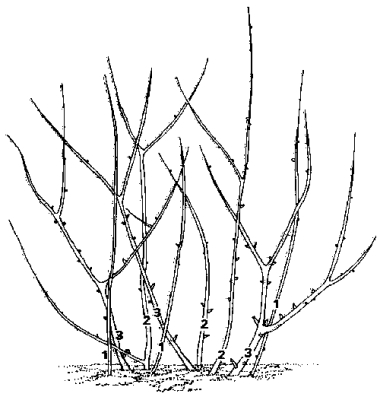 How do I grow and prune them?
Plant currant and gooseberry bushes four to six feet apart in heavy
soil
with plenty of organic matter. Each year, thin out the new shoots
so that only two or three stems for red currants or six stems for
gooseberries remain from that year, leaving older stems in place.
After three years for currants or four years for gooseberries, begin to
remove the oldest set of stems as well during the winter pruning.
The result is a mixture of stems of different ages ranging from one to
three years for currants and from one to four years for
gooseberries. Pruning for black currants is a bit different since
these bushes bear primarily on one year old wood --- cut out two to
five of the oldest branches each year and shorten other branches.
How do I grow and prune them?
Plant currant and gooseberry bushes four to six feet apart in heavy
soil
with plenty of organic matter. Each year, thin out the new shoots
so that only two or three stems for red currants or six stems for
gooseberries remain from that year, leaving older stems in place.
After three years for currants or four years for gooseberries, begin to
remove the oldest set of stems as well during the winter pruning.
The result is a mixture of stems of different ages ranging from one to
three years for currants and from one to four years for
gooseberries. Pruning for black currants is a bit different since
these bushes bear primarily on one year old wood --- cut out two to
five of the oldest branches each year and shorten other branches.
How
do I propagate gooseberries and currants?
All can be grown from seed as long as you don't mind them not breeding
true; the seeds require three to four months of stratification, and
will bear at two to three years. To maintain your varieties, use
one of the several methods of cloning instead. Twelve inch long
hardwood
cuttings (excluding the tip) should be taken in the early fall before
all the leaves have dropped for gooseberries, or in early spring,
autumn, or the end of summer for currants. An even easier way to
propagate gooseberries or black currants is tip layering --- bending
down a branch and covering it with soil and a rock, then cutting the
new plant free once roots have formed.
What
about the white pine blister rust?
The reason that gooseberries and currants are seldom grown in the
United States is that they were illegal for decades. In the early
twentieth century, the white pine blister rust showed up in America and
began wiping out what was then an important timber tree. Since
some Ribes
species were an alternate host for the rust, planting gooseberries or
currants was prohibited by federal law, and Civilian Conservation Corps
crews began to rip the plants out of gardens and woodlands.
Later, scientists discovered that most cultivated Ribes
are resistant to white pine blister rust and don't spread the disease,
and the federal ban was finally lifted in 1966. However, you may
still face state restrictions against planting gooseberries and
currants, especially against black currants which are most susceptible
to the white pine blister rust.
Why
are gooseberries and currants permaculture favorites?
Permaculture advocates filling every available niche with a useful
plant so that weeds don't have a spot to gain a foothold. Since
gooseberries and currants can fruit in partial shade, they can be used
to turn orchards from trees-amid-lawn to a multi-storied forest
garden.
Are
you growing them?
We ordered two
gooseberries (Poorman and Invicta) that will be arriving this
month. We chose gooseberries over currants since I am first and
foremost a fresh fruit fanatic.
| This post is part of our Uncommon Fruits Worthy of Attention
lunchtime series.
Read all of the entries: |
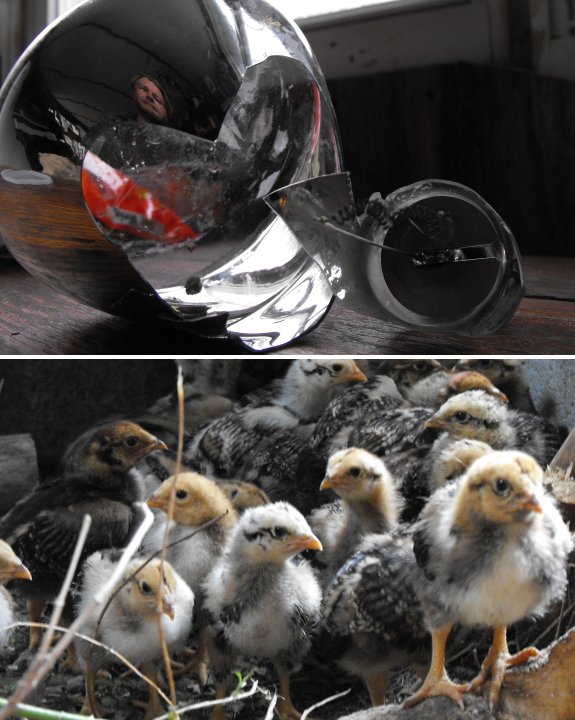
The heat lamp we had in the new
brood coop somehow got damp during this afternoon's rain storm
which resulted in a small explosion.
Luckily there were no
casualties. I guess I should hurry up and build that heat pad chick
warmer that Anna dreamed up a few weeks ago.
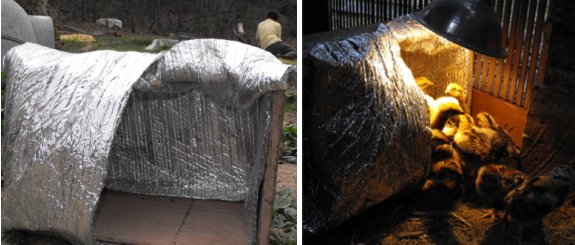
We had to switch to the
smaller back up bulb due to the larger heat
lamp exploding yesterday.
I used a piece of scrap
Reflectix and an old wooden box to form a cozy insulated corner that
can hold in enough heat to keep the chicks comfortable.
Stay tuned for more details
on the up and coming heat pad chick warmer, which might not make it off
the drawing board till the next generation of chicks.
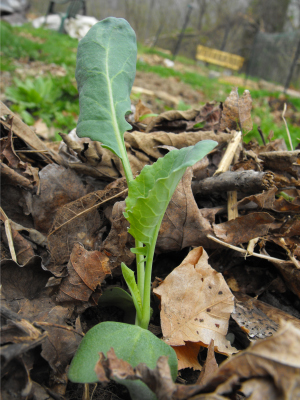
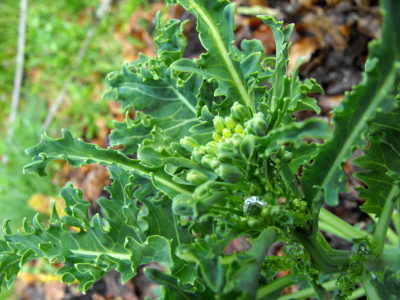
 A
month after planting seeds in my cold frame,
the broccoli is big and
vibrant. Many of the seedlings are working on their third true
leaves, which means they're ready to be transplanted into the main
garden. With rainy weather predicted for the afternoon and a
general cool-down from our recent abnormal heat, Thursday seemed like
the perfect day to set them out.
A
month after planting seeds in my cold frame,
the broccoli is big and
vibrant. Many of the seedlings are working on their third true
leaves, which means they're ready to be transplanted into the main
garden. With rainy weather predicted for the afternoon and a
general cool-down from our recent abnormal heat, Thursday seemed like
the perfect day to set them out.
 I was a bit leery of transplanting the broccoli, though, because the
weather
forecast says our temperature will drop to 34 Fahrenheit on Friday
night. I
know that barely sounds chilly, but our lows are generally about 5
degrees beneath what the nearest weather station reports.
Would 29 F be too cold for our tender broccoli seedlings?
I was a bit leery of transplanting the broccoli, though, because the
weather
forecast says our temperature will drop to 34 Fahrenheit on Friday
night. I
know that barely sounds chilly, but our lows are generally about 5
degrees beneath what the nearest weather station reports.
Would 29 F be too cold for our tender broccoli seedlings?
A search of the
internet suggests that broccoli won't get harmed unless
the temperature drops to 25, but I still wasn't entirely
confident. Luckily, I always start too many broccoli seeds
because I like having seedlings to give away. So I set out the
biggest broccoli plants and put the row cover fabric back on the cold
frame
to protect the seedlings left behind. If my transplanted
seedlings get nipped, I'll just re-transplant next week. If they
don't get nipped, I'll get an extra week of growth --- a conundrum has
been transformed into a win-win situation.
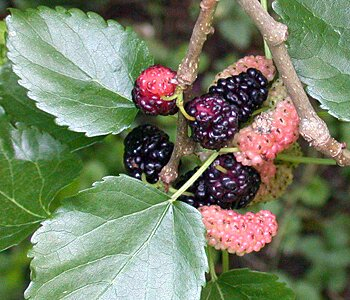 Every
year when we were kids, my siblings and I picked mulberries out of a
large tree in a nearby park. We liked the fruit, but not as well
as the blackberries and raspberries that ripened at the same time, and
our one attempt at a mulberry pie was pretty awful. So I put
mulberries out of my mind...until I started reading that mulberries
can provide all of the food you need for a pig or flock of chickens for
several months in the summer. Then, of course, my
ears perked up.
Every
year when we were kids, my siblings and I picked mulberries out of a
large tree in a nearby park. We liked the fruit, but not as well
as the blackberries and raspberries that ripened at the same time, and
our one attempt at a mulberry pie was pretty awful. So I put
mulberries out of my mind...until I started reading that mulberries
can provide all of the food you need for a pig or flock of chickens for
several months in the summer. Then, of course, my
ears perked up.
What
are the different kinds of mulberries? There are three
species of mulberries that can be found growing in the United
States. The White Mulberry (Morus alba)
is native to Asia, but was widely introduced in the nineteenth century
as fodder for a silk industry that never panned out. White
Mulberries are cold hardy, but have rather insipid fruits. Red
Mulberries (M. rubra) are a U.S. native with
tastier fruits than White Mulberries. Finally, Black Mulberries (M. nigra)
are members of another Asian species, this one selected primarily for
the highly tasty fruits. Unfortunately, Black Mulberries can't be
grown in many parts of the U.S. (like the southeast), but hybrids
between Red and White Mulberries (like the Illinois Everbearing
Mulberry) produce the best of both worlds --- tasty fruits on hardy
trees.
How
do you grow and prune mulberries?
Mulberries are one of those trees you mostly leave alone. Plant
them in full sun with fifteen feet of space on every side, then prune
out dead branches if you feel like it.
How
do you propagate mulberries?
Mulberries are difficult to grow from seeds since you must wait at
least a decade to know whether you've developed a good variety, and
since trees can change sex when young. More tried and true
propagation techniques include hardwood, softwood, or root cuttings and
grafting. When taking hardwood cuttings, split the lower ends of
the cutting or include a small heel of two year old wood to promote
rooting. Take softwood cuttings in midsummer and treat with a
rooting hormone.
How
do you harvest mulberries?
Be prepared for your tree to grow for a decade or more before it feels
like fruiting, especially if grown from seed. Once mulberries
begin to fruit, though, they're highly dependable since they bloom late
and are rarely affected by late spring frosts. Depending on which
variety you have, your tree will ripen its fruits over a month to three
months during the early to late summer. To harvest the fruits,
spread a sheet under the tree, shake the branches, then pour the
results into a bucket of water. The fruits will sink and
everything else will float off.
Why
are mulberries a permaculture favorite?
Mulberries are one of the least picky fruit trees out there. They
don't mind drought, pollution, or poor soil, and often grow as weeds
even in harsh city environments. Even the varieties that aren't
quite up to par as people food produce wholesome berries that can feed
your pigs or chickens for up to three months during the summer.
The leaves are high in protein too.
Are
you growing them?
I'd planned to buy an everbearing variety to put into our new forest
pastures this year
or next, but this post pushed me over the edge and I put in an order
for an Illinois Everbearing Mulberry in March.
| This post is part of our Uncommon Fruits Worthy of Attention
lunchtime series.
Read all of the entries: |
One of my mother's
favorite expressions is "all ye of little faith" --- it's in reference
to me, mostly. Every year, I plant an early bed
of peas around Valentine's day.
And every year, I give up on the bed less than a month later and
replant
it. As a result, I'm never quite sure whether the Valentine's
peas came up, or whether what I'm seeing is the later peas. This
year, I got smart (though no more faithful) and marked my early row of
peas, planting the replacement row a couple inches to the side.
So I could tell that both rows of peas came up, and
that the Valentine's row came up a week earlier than the March row.
Now what do I do with
two rows of peas where one is supposed to be? Just as I was
pondering this problem, I dropped by Eliza's awesome blog and learned
that young
pea shoots taste similar to snow peas.
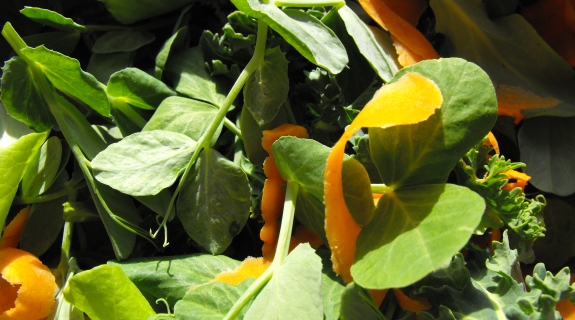
Just what I needed to round out the first completely-from-the-farm
salad of the year! Lettuce, pea shoots, baby kale (wintered
over), and the last of the fall carrots melded into a delectable side
dish. Last year we
lived on salads for the entire month of March, but I say better late than
never!
We've had this portable wall
of willow branches since the winter(Thanks Mom), and today was the day I found its
first use.
I put it up by the door to
give the chicks some room to scurry off to while I installed the new
Reflectix
chick warmer.
Soon we'll have a proper area
for the boys to run and scratch during the day.
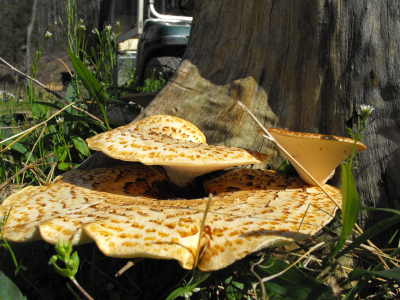 Did
you know that you can inoculate
stumps with edible mushrooms soon after you cut the trees down?
Since the roots are buried in the moist soil, the stump will stay damp
enough for the mycelium to run through the wood, then mushrooms will
pop out of the cracks. After a few years of creating mushrooms,
the stump will have broken down into good compost, and the mushrooms
might
even spread into the soil of your garden and help your vegetables grow.
Did
you know that you can inoculate
stumps with edible mushrooms soon after you cut the trees down?
Since the roots are buried in the moist soil, the stump will stay damp
enough for the mycelium to run through the wood, then mushrooms will
pop out of the cracks. After a few years of creating mushrooms,
the stump will have broken down into good compost, and the mushrooms
might
even spread into the soil of your garden and help your vegetables grow.
Sadly, I didn't know
this five years ago when we cleared our garden area, so the mushrooms
coming out of our stumps are of dubious edibility (though they are
quite beautiful.) I wish I'd been reading my blog when I started
working on the farm! (Although a time loop like that might do
more harm than would be merited by a few extra mushrooms.)

Our new Craftsman lawnmower is a lot easier to work on than
its older cousins.
It only took a bit over an
hour to take it apart, clean the points, and put it all back
together with no parts left over.
It's still a little rough to
start, which I suspect is due to a slight warp in the blade. These
blades have a more complex twist to them so they can work as a mulcher
and throw the grass cuttings back towards the bag. It's this complexity
that seems to make it more sensitive than most mowers and I would have
to say gives it a disadvantage for folks like us who have the
occasional stump to work around.
Of course this problem should
work itself through as we continue to delete the stumps and level out
the mowing area.
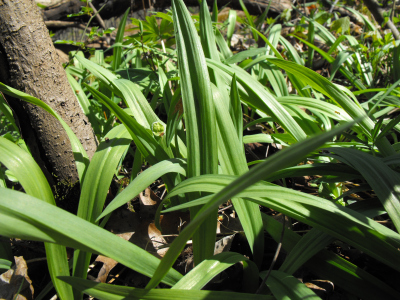 Ramps
are a prime candidate for forest
gardening.
They are an early
spring ephemeral that will keep nutrients cycling through the soil
before trees leaf out, they prefer growing in shady spots under
deciduous trees, and they are considered a delicacy by many. Once
a patch gets going, it can outcompete other herbs and turn into a solid
groundcover, as this photo from the wild shows.
Ramps
are a prime candidate for forest
gardening.
They are an early
spring ephemeral that will keep nutrients cycling through the soil
before trees leaf out, they prefer growing in shady spots under
deciduous trees, and they are considered a delicacy by many. Once
a patch gets going, it can outcompete other herbs and turn into a solid
groundcover, as this photo from the wild shows.
There are two species of
ramps in our area --- the stereotypical Allium
tricoccum and the
slightly smaller Allium
burdickii,
sometimes known as Burdick's wild leek. I know spots where both
of these grow, but the latter is found at a lower elevation in
conditions more like those in my garden, so I thought I'd give it a
shot first.
I'd prefer to plant
ramps from seeds, but the fruits are difficult to find in the wild, so
I dug a few seedlings from the edges of a wild clump. When
digging wild plants, I never take more than 10% of a population
(preferably much less), and try to remove plants that are already
threatened in some way. The plants I dug were in the middle of a
trail and were already damaged by hiking boots, so I figure they'll
have a better chance in my garden than if left in place in the woods.
My Burdick's wild leeks
have found a new home nestled amid the leaf mold under my oldest peach
tree. If this experiment works, I may try for some Allium
trioccum in a few
weeks when the higher elevation plants are out. I hope to expand
the clump by seed once the ramps become established, and to begin to
harvest leaves in a few
years.
For more information about ramp cultivation, check out this extension
service factsheet.
To see the masses of wildflowers I stumbled across during my ramp hunt,
visit my Appalachian ecology site.
 Outside
the kitchen window, our peach tree is buzzing with pollinators. I
can see hundreds of insects at a time, but they fly too quickly to
really count. Despite having three honeybee hives, our
domesticated pollinators make up a scant 1% of the peach tree
pollinator haze, and other gaudy pollinators like butterflies and
bumblebees are also in the
minority.
Outside
the kitchen window, our peach tree is buzzing with pollinators. I
can see hundreds of insects at a time, but they fly too quickly to
really count. Despite having three honeybee hives, our
domesticated pollinators make up a scant 1% of the peach tree
pollinator haze, and other gaudy pollinators like butterflies and
bumblebees are also in the
minority.
I spent a few minutes
last week snapping shot after shot of the vibrant
insect population on the peach tree, then went inside to try to figure
out who all of these wild pollinators were. That's when I
stumbled across Bug Guide,
a website run by amateur entomologists who want to share their love of
insects with you. You can browse through their online guide,
which is chock  full of photos and
fascinating information. Then,
when you get stumped, you can submit photos of your mystery insects and
their experts will give you an ID, often within an hour or two.
full of photos and
fascinating information. Then,
when you get stumped, you can submit photos of your mystery insects and
their experts will give you an ID, often within an hour or two.
This week's lunchtime
series showcases four common pollinators that
you've probably never heard of. I hadn't heard of most of them
either, and had to ask the experts at Bug Guide for a bit of
identification help. I make no promises that these are the most
common
pollinators out there --- in fact, the take home message I got from my
time spent peering at peach blossoms is that there are dozens of
species of native pollinators and no single insect is the silver bullet
to make sure your plants produce fruit. Rather than focusing
on saving the honeybee, we'd be much better served to encourage a
diversity of wild pollinator species by keeping our farms and gardens
on the wild side.
 This post is part of our Native Pollinators lunchtime series.
Read all of the entries: This post is part of our Native Pollinators lunchtime series.
Read all of the entries: |
 Big
thanks to Vester for pointing me in the flywheel key direction in the
comments section of yesterday's post.
Big
thanks to Vester for pointing me in the flywheel key direction in the
comments section of yesterday's post.
I had to replace the
blade twice last summer, and it stands to reason that the flywheel
key is now the problem with the uneven timing and toughness to start.
Here's a good 5 minute video
on exactly how to replace this part, but in the comments section of
the video someone pointed out how the guy used a hammer and a large
screw driver to get the flywheel off, which can result in damage to the
flywheel if you're not careful.
The fear of fly wheel damage prompted me to order a special
flywheel puller tool which is pictured above. This type works on most
of the Briggs and Stratton flywheels, but you'll need to check your
engine number to see if it's a proper match.
The lesson for today is to
check out the comments. You might just learn something new about the
wonderful world of small engine repair.
I transplanted
two beds of broccoli
last Thursday then three more a day later. As expected, it
frosted both Friday and Saturday night --- I can't tell you how cold it
got since our exterior thermometer is still inside the collapsed
refrigerator root cellar, but I'd say it got into the
high 20s. All of my broccoli seedlings got nipped, but the ones
transplanted on Thursday were only midly damaged while those
transplanted on Friday ended up on death's door. See for yourself
--- here is a typical Thursday seedling:
And here's a typical
Friday seedling:

I suspect that the
Friday seedlings were still dealing with the worst of their transplant
shock when the frost hit, while the Thursday seedlings were in prime
condition. If I had it to do over again, I would have
transplanted earlier in the week to give the seedlings more time to get
situated. I wonder if the seedlings wouldn't have been damaged at
all if they'd had a few more days to get their roots under them?
Good thing I've got
spares! I replaced all of the badly nipped seedlings and put out
a couple more beds' worth Monday evening. No frost is forecast
for the next week, so they should do fine.
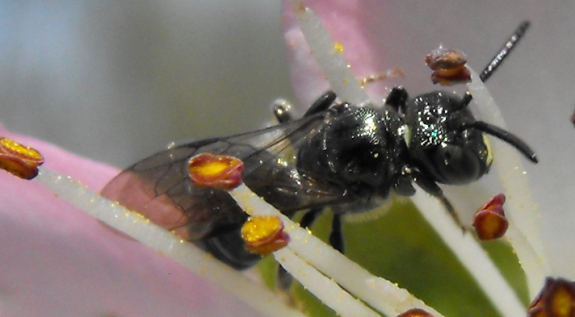
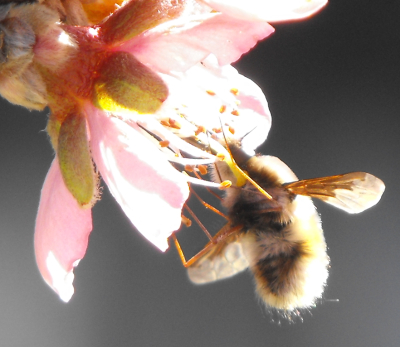
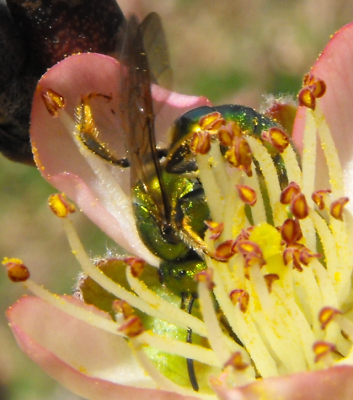 Halictid
bees, also known as sweat bees, make up a large family of insects with
over 2,000 species. Although some are
drab colored, the common species that visited our peach (Augochlora
pura) was a
brilliant, metallic green, which is typical of many other types of
halictids as well.
Halictid
bees, also known as sweat bees, make up a large family of insects with
over 2,000 species. Although some are
drab colored, the common species that visited our peach (Augochlora
pura) was a
brilliant, metallic green, which is typical of many other types of
halictids as well.
Halictids get their
common name from their tendency to lick salt off
our sweaty skin, making them one of the better known classes of insects
despite their small size. They're also easily startled, and I get
stung by sweat bees more than by any other insect, but the pain
fades
quickly and is a small price to pay for their pollination expertise.
Like bumblebees,
halictids are buzz
pollinators,
which means they're better than honeybees at pollinating blueberries
and tomatoes. They are also generalist pollinators who are glad
to visit any flower full of pollen and
nectar. The combination adds up to a very useful pollinator
species that should definitely be encouraged in your garden.
The best way to build a
healthy population of wild pollinators is
to understand their nesting and foraging requirements and then provide
them with good habitat. Sweat bees nest in bare patches of soil
or in wood, packing brood cells full of pollen and nectar then laying
an egg on top. When the egg hatches out, the larval sweat bee
feeds itself with no help from its parents, then makes its way out of
the nest to live as an adult. Give them a patch of bare ground
and a steady flow of flowers throughout the year and sweat bees will be
industrious pollinators in your garden.
| This post is part of our Native Pollinators lunchtime series.
Read all of the entries: |

I installed a small roost
training limb in the chicken
pasture coop today.
Folks around here speak of a
mysterious benefit from using cedar in chicken coops.
Someday I'll try to figure
out the logic behind that Appalachianism. In the meantime I'll keep
using cedar in future chicken
tractors and coops just because it looks so good and feels very natural.
Except for last
weekend's Dogwood Winter, we seem to have skipped right
over spring and moved on to summer. The pollinator
haze on the
peach is starting to die down as the flowers pass their prime and
leaves pop out. Our other fruit trees --- like this pear --- are
following suit.
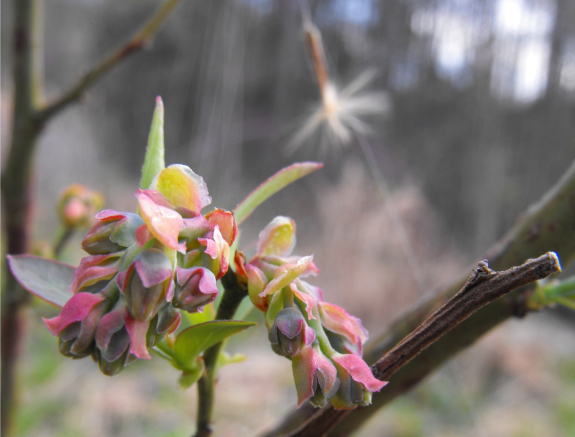
The blueberry bushes are
coated in flower buds, and I keep having to
remind myself not to count my berries until the frost free date.
I considered rabbiteye
blueberries an
experiment here in zone 6, but
they seem to be happy and healthy. We only lost one --- the
large, older plant my friends threw into the order so that Mark and I
would get to sample blueberries the first year. The loss is a
handy reminder that older woody plants tend to transplant badly and
often do
worse than a youngster of the same species.
Despite all of the
promise, the beginning of summer brings trials and tribulations.
This year's abnormally hot,
dry spring led to low germination rates in my spinach and swiss chard,
and I can't seem to find a single onion seedling. I know that I
should just plant some onion sets, but sets don't produce good storage
onions (and cost so much that it's barely worth your while to grow
them.) Instead, I'm going to be nutty and replant the onion seeds
in a shady corner, hoping for a miracle.
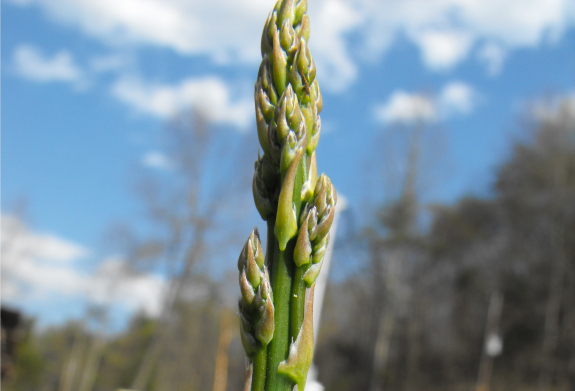
Our asparagus also
breaks my heart. Last year's asparagus
beetle
infestation killed back the fronds by early summer, and the spears now
poking up out of the ground are far thinner than they should be as
three year old plants. The calendar says that we should be able
to eat asparagus this year,
but I suspect the right thing to do is give the plants another year to
recover...assuming I can keep the asparagus beetles at bay. I've
already squashed a few and had better come up with a solution fast!
But the rest of the
garden is growing like gangbusters. I meant to go back and add
some mulch under the nectarine, but the comfrey has done that for me.
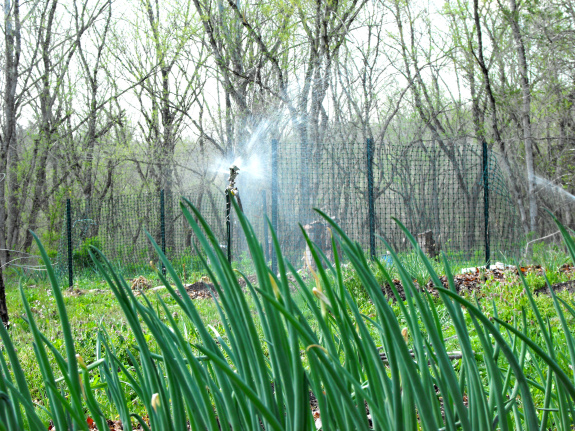
Of course, the real clue
that it's summer came when I turned on the sprinklers. I should have done
that two weeks ago --- it might have saved my seed onions!
Over half of the
pollinators visiting our peach tree were miniscule and
flighty, hard to catch a glimpse of let alone capture on film. I
did manage to snag a photo of this Small Carpenter Bee (Ceratina sp.),
which might be better named Teeny-tiny Carpenter Bee. Small
Carpenter Bees are sometimes confused with sweat bees, but the carpenter bees
have a club-shaped abdomen, a dull metallic color (versus the brilliant
color of some sweat bees), inconspicuous hair, and a pale yellow patch
on the face.
Small Carpenter Bees (Ceratina sp.)
are related to the larger carpenter bees that drill holes in your porch
and weaken the integrity of the wood, but their life cycle is a bit
different. Ceratina bees are much more likely to
be found in wild areas,
where they nest in the pith of broken plant stems. We have all
five of their favorite nesting species on our farm --- elderberry, box
elder, sumac, blackberry, and sunflower --- and I have a sneaking
suspicion the bees might also use the large, woody stems of wingstem
which are so prevalent in our floodplain.
Small Carpenter Bees
make good pollinators because they can be quite
numerous and aren't picky about the flowers they visit. To
encourage them in your yard, leave some brushy, wild areas around for
the bees to nest in, or plant sunflowers and leave the stems standing
all winter. You may be rewarded with a horde of tiny bees
visiting your flowers in the spring.
| This post is part of our Native Pollinators lunchtime series.
Read all of the entries: |
The new goat gloves
are breaking in better than the competition.
I suspect the smooth molding process is thanks to the elastic like
black fabric between each finger.
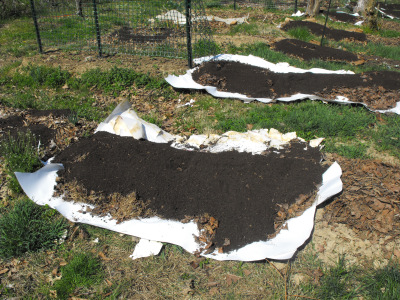 The
four tons of compost Mark bought me a few weeks
ago was actually more than
I needed.
I can't quite understand the concept, but I added a five gallon bucket
to each of my garden beds and had a lot leftover, enough to make some
extra raised beds using the lasagna method. I put down layers of
cardboard and paper as a weed retardant, then piled up masses of
compost, leaves, and mostly composted wood chips. The wood chips
are full of happy soil critters, and I'm hoping they'll inoculate the
whole pile before I need to plant the beds in a month.
The
four tons of compost Mark bought me a few weeks
ago was actually more than
I needed.
I can't quite understand the concept, but I added a five gallon bucket
to each of my garden beds and had a lot leftover, enough to make some
extra raised beds using the lasagna method. I put down layers of
cardboard and paper as a weed retardant, then piled up masses of
compost, leaves, and mostly composted wood chips. The wood chips
are full of happy soil critters, and I'm hoping they'll inoculate the
whole pile before I need to plant the beds in a month.
I was so pleased with
myself...until I went out to look at my new beds
after last week's rain. Did you know that if you buy compost that
has been allowed to dry out all the way, 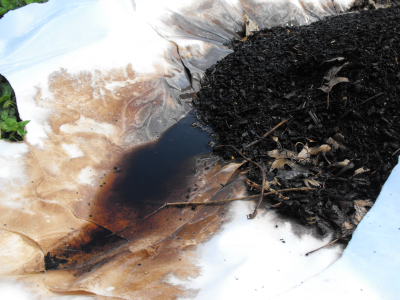 the
compost becomes hydrophobic and is
very difficult to rewet? Despite nearly an inch of rain, our
lasagna beds were bone dry. Yikes!
the
compost becomes hydrophobic and is
very difficult to rewet? Despite nearly an inch of rain, our
lasagna beds were bone dry. Yikes!
So we hooked up the
sprinklers and started soaking the new raised
beds. I watered half the beds for an hour, then let the liquid
percolate down through the compost while I soaked the other beds for an
hour. Alternating this way for about fifteen hours finally wet the majority of the compost and I'm hoping the dry spots will equalize out over time.
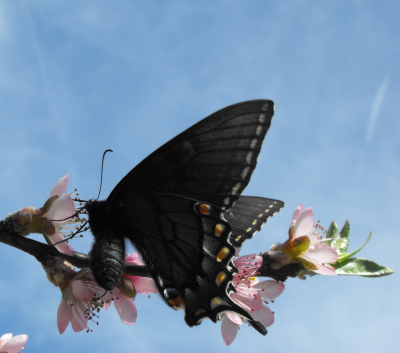
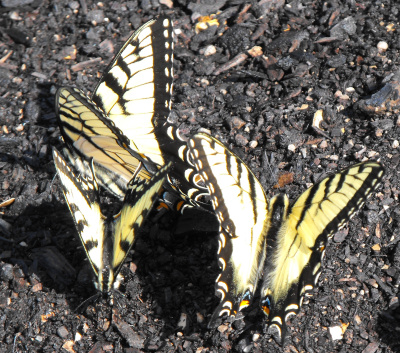 As
with any farm trauma, there's always a silver lining. The
tiger swallowtails are quite happy with the damp compost and have
gathered
by the dozen on newly wet raised beds. Nothing like hordes of
fluttering butterflies to brighten your day!
As
with any farm trauma, there's always a silver lining. The
tiger swallowtails are quite happy with the damp compost and have
gathered
by the dozen on newly wet raised beds. Nothing like hordes of
fluttering butterflies to brighten your day!
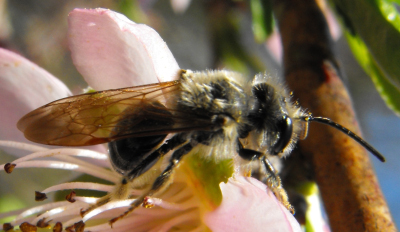 Miner
bees (also called mining or digger bees, in the genus Andrena) seem to be custom made for
fruit tree pollination. The adults are present only during March
and April, right when your trees are blooming, and the bees are seldom
distracted by ground-flowering weeds. (Our honeybees, in
contrast, seem to be spending most of their time on dead nettles at the
moment.) Miner bees are also able to fly at chillier temperatures
than many of the other pollinators I've discussed this week, so they're
active during the morning and evening and on drippy days.
Miner
bees (also called mining or digger bees, in the genus Andrena) seem to be custom made for
fruit tree pollination. The adults are present only during March
and April, right when your trees are blooming, and the bees are seldom
distracted by ground-flowering weeds. (Our honeybees, in
contrast, seem to be spending most of their time on dead nettles at the
moment.) Miner bees are also able to fly at chillier temperatures
than many of the other pollinators I've discussed this week, so they're
active during the morning and evening and on drippy days.
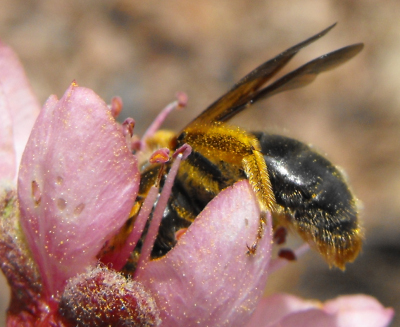 I
found at least two species of miner bees on
our peach tree, which is to be expected since 1,300 Andrena
species exist worldwide. The
bees are similar in size to a honeybee --- one of my species is a bit
smaller and one a bit larger --- but sparser hair on the bee's body
gives the miner bee
a mean look. Luckily, they're not mean at all, and are even less
likely than a honeybee to sting. You can distinguish miner bees
by their dark-tinted wings and extra-hairy back legs. These
pollen brushes seem to go, as one website put
it, "seemingly in their 'armpits'".
I
found at least two species of miner bees on
our peach tree, which is to be expected since 1,300 Andrena
species exist worldwide. The
bees are similar in size to a honeybee --- one of my species is a bit
smaller and one a bit larger --- but sparser hair on the bee's body
gives the miner bee
a mean look. Luckily, they're not mean at all, and are even less
likely than a honeybee to sting. You can distinguish miner bees
by their dark-tinted wings and extra-hairy back legs. These
pollen brushes seem to go, as one website put
it, "seemingly in their 'armpits'".
Despite being
custom-made for fruit-tree pollination, miner bees aren't
all that common in large-scale orchards. The bees won't fly very
far to forage, so they require a wild nesting site close to the trees
they feed from. To encourage Andrena
in your garden, provide them with some loose soil near or under shrubs,
preferably on a warm, south-facing bank. Your miner bees will dig
a burrow in the soil and lay eggs in brood cells full of pollen and
nectar, just like sweat bees
do. The adults will die in late spring soon after laying their
eggs, and won't be seen again until your peach trees are once again in
bloom.
| This post is part of our Native Pollinators lunchtime series.
Read all of the entries: |
 It
finally happened.
It
finally happened.
We finally hauled enough compost
to satisfy the heavy organic needs of this year's compost quota.
The new goal is to always
have a healthy size pile on hand for emergency fertilizing.
Next to that will be an even bigger pile of mulch.
 Thus begins Toby Hemenway's thought-provoking
article "Is Sustainable
Agriculture an Oxymoron?" Those of you who were
intrigued (or irritated) by my post that people
worked only 3 hours per day before the Industrial Revolution should take a look at
Hemenway's article.
Thus begins Toby Hemenway's thought-provoking
article "Is Sustainable
Agriculture an Oxymoron?" Those of you who were
intrigued (or irritated) by my post that people
worked only 3 hours per day before the Industrial Revolution should take a look at
Hemenway's article.Anthropologist Yehudi Cohen broke societies down into five categories, the relevant three being foragers (hunter-gatherers), horticulturalists (gardeners), and agriculturalists (farmers.) Based on historical and anthropological data, Hemenway comes to the conclusion that agricultural societies are inherently unsustainable, but he doesn't make the leap several of you made upon reading my previous post that the only solution is to return to a hunter-gatherer existence. Instead, we can meet in the middle as horticulturalists:
Mark and I have been going back and forth for years about whether we are farmers or gardeners. On the one hand, we are serious enough about our endeavor that we consider ourselves farmers. On the other hand, we don't use tractors or sell our excess --- two signs that we're merely gardeners. Maybe I should start calling us horticulturalists?
Thanks to Vester for passing on this intriguing article! I'd love to hear from anyone with an anthropology background who could suggest a bit of reading material for me to bone up on traditional horticultural societies.
 "I've
started seeing a different kind of bee lately," Mark said as April
rolled in. "It's a bit smaller than a honeybee
and...simpler."
"I've
started seeing a different kind of bee lately," Mark said as April
rolled in. "It's a bit smaller than a honeybee
and...simpler."
I knew exactly what he
was talking about since I'd noticed the same
insect hovering in mid-air as I worked around the yard. It looked
like a child's drawing of a bee --- just one big hunk of fluff with
wings. But it wasn't a bee.
The Greater Bee Fly (Bombylius
major)
is a fly that mimics a bee both in appearance and in behavior.
Once our peach flowers opened up, about a tenth of the pollinators
drawn to the abundance of nectar and pollen were bee flies. The
flies are easy to distinguish from true bees since they have a habit of
hovering, hummingbird-like, in front of flowers, or landing and showing
off their extra long legs.
Like many garden
insects, bee flies aren't really good or bad.
They're a great pollinator, but the flies also parasitize solitary bees
and wasps, thus cutting down on the population of other pollinators and
predators. Unlike other bee mimics that try to piggy-back on
predators' aversion to stinging insects, bee flies probably mimic bees
so that they can get close to the bees' burrows and fling their eggs
inside. When the bee fly eggs hatch out, the larval flies feed on
the larval bees, killing the bees in the process. Despite the
death toll, I consider the presence of bee flies a good sign since it
signals
a healthy and varied insect population. It's best not to put all
of your pollinator eggs in one basket.
| This post is part of our Native Pollinators lunchtime series.
Read all of the entries: |
The home
made golf cart dump box is holding up nicely under some serious
hauling.
I think adding a couple of
seat backs to the protruding frame might help to soften the bumps for a couple of
passengers in the back.
Homesteading teaches
flexibility. I was absolutely certain that I would have time to
finish weeding the beds of garlic and spring seedlings this week and
that Mark would have time to fence in our first chicken pasture. In reality, we each
got about halfway to our goal. It just seemed more important to
visit Mark's mom and my dad, to get the irrigation
system back up and running, and to cut the weeds before they were
too high for the mower.
I felt a bit bad about
leaving the chicks in their coop over another weekend, so I tossed in a
bag of weedy grass clippings. The shady side of the yard came up
in a dense stand of chickweed and bittercress this winter, and I didn't
get the mower over there before these weeds went to seed. I
figured it was a better idea to let the chicks pick through the weedy
clippings than to put them straight on a garden bed, and the chicks
agreed. "These are tasty!" they exclaimed, then proceeded to play
king of the hill.
I raised the automatic chick
waterer height yet again due to the rapid growth rate of the new
flock.
If everything goes as planned
they should be running free in their new pasture sometime around
the middle of next week.
My winter
leaf mulches were a
wonderful success. They kept the weeds down admirably, and seem
to have improved the soil quality in the process. While transplanting
broccoli last week, I was stunned by the moist, crumby structure of
the soil in the loamy upper garden, and by the ubiquity of worms and
other good soil critters.
Unfortunately, I can't
just keep the leaves in place for the summer. Some of the mulch
has blown away or rotted into the ground, while the big leaves left
behind are prone to move onto small seedlings and drown them out.
I raked a few dozen beds bare in March to plant peas and greens, and
now weeds are already starting to crowd my vegetables. Time to
experiment with some summer mulches:
 Grass
clippings. Last year, I learned that grass/clover
clippings make a great summer
mulch since they are high in nitrogen and feed the soil while drowning
out weeds. We did make a mistake and mulched two beds with
clippings
that had already gone to seed, with predictable results, but all of the
other beds mulched with grass clippings are happy and healthy.
The
downside of grass clippings is that they decompose very quickly and
need to be refreshed within a month. Since we get about 32 beds
worth
of clippings per month, I figure we have nearly 200 other garden beds
that will soon be in need of mulch.
Grass
clippings. Last year, I learned that grass/clover
clippings make a great summer
mulch since they are high in nitrogen and feed the soil while drowning
out weeds. We did make a mistake and mulched two beds with
clippings
that had already gone to seed, with predictable results, but all of the
other beds mulched with grass clippings are happy and healthy.
The
downside of grass clippings is that they decompose very quickly and
need to be refreshed within a month. Since we get about 32 beds
worth
of clippings per month, I figure we have nearly 200 other garden beds
that will soon be in need of mulch.
 Newspapers.
My father has had good luck with wetting down newspaper and using it as
a weed barrier around his plants once they're large seedlings. We
don't subscribe to the newspaper, but we do get some catalogs made of
newsprint. I soaked the catalogs and ripped them into segments
about ten pages thick.
Newspapers.
My father has had good luck with wetting down newspaper and using it as
a weed barrier around his plants once they're large seedlings. We
don't subscribe to the newspaper, but we do get some catalogs made of
newsprint. I soaked the catalogs and ripped them into segments
about ten pages thick.
 Cardboard and
junk mail. Last year, I put a lot of cardboard and junk
mail in our summer worm
bin, but the worms just didn't have the gumption to eat it once the
paper and cardboard matted down into damp layers. I teased the
layers apart and am using the wet cardboard as a mulch.
Cardboard and
junk mail. Last year, I put a lot of cardboard and junk
mail in our summer worm
bin, but the worms just didn't have the gumption to eat it once the
paper and cardboard matted down into damp layers. I teased the
layers apart and am using the wet cardboard as a mulch.
- Tree leaves. I figure that tree leaves will work as a mulch around more established plants, like our peas that are already several inches high.
I'm trying all four
mulches around our peas in the back garden, and will report back in a
month or so once I can tell how they're doing. I'm a bit
concerned that the newspaper and cardboard will dry up and blow around
since I didn't put anything on top of it, but it's worth a shot!
Anything that reduces our garden's weed pressure makes me a happy
camper.

I first blogged about Mike
Turner towards the end of
July of last year.
Imagine my surprise when I saw him and his AeroCivic at a farmers
market down in South Carolina this past Friday.
Turns out he's got some new
ambitions on adding an electric 5th wheel
to push the car under certain road conditions. At the moment it's not
economically feasible due to the high cost of good batteries, but it
might not be too long before some clever engineer comes up with
a better and cheaper battery that perhaps is somewhat environmentally
responsible to produce.
If you'd like to learn more
about Mike check back in tomorrow to see a short video interview I did
with him where he describes what happened when he hit a deer with the
AeroCivic and how it just dented the hood and flipped over the top.
He's also got an excellent
website which has a
generous supply of construction images while the
AeroCivic was being born.
 Driving home from our whirlwind visit to my
father in South Carolina, we seemed to be travelling back in
time. The tree leaves shrank back into their buds until they were
a mere haze and black locust flowers gave way to redbuds. As we
crossed the border of our home county, we passed a large strawberry
field coated with row cover fabric --- a good reminder to check the
weather and notice a frost warning in effect. I followed the
strawberry farmer's lead and covered as many of my strawberry and
broccoli beds as I could, even though the light frost didn't seem to
harm the plants left unprotected.
Driving home from our whirlwind visit to my
father in South Carolina, we seemed to be travelling back in
time. The tree leaves shrank back into their buds until they were
a mere haze and black locust flowers gave way to redbuds. As we
crossed the border of our home county, we passed a large strawberry
field coated with row cover fabric --- a good reminder to check the
weather and notice a frost warning in effect. I followed the
strawberry farmer's lead and covered as many of my strawberry and
broccoli beds as I could, even though the light frost didn't seem to
harm the plants left unprotected.
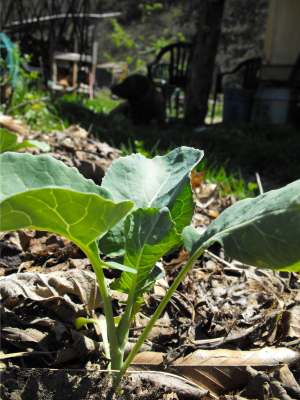 Lucy had broken into one of the chicken
tractors while we were gone, not to eat the chickens but to eat their
scraps. So I chased down three hens as they happily scratched
through my garlic's mulch (then chased them down again half an hour
later when I realized where the hole in their cage was.) Across
the yard, the chicks seem to have eaten the majority of the grass
clippings I gave
them, along with a gallon of feed, and were begging for more. We
were only gone for 36 hours! Could everything really have
grown so much in a day and a half?
Lucy had broken into one of the chicken
tractors while we were gone, not to eat the chickens but to eat their
scraps. So I chased down three hens as they happily scratched
through my garlic's mulch (then chased them down again half an hour
later when I realized where the hole in their cage was.) Across
the yard, the chicks seem to have eaten the majority of the grass
clippings I gave
them, along with a gallon of feed, and were begging for more. We
were only gone for 36 hours! Could everything really have
grown so much in a day and a half?
 The
method's founder claims that square foot gardening allows you to grow
the same amount of food in 20% of the space, saving time and money in
the process. Although several people I know swear by it, I find
it hard to believe that square foot gardening lives up to the
hype. Is square foot gardening a trend or a useful technique?
The
method's founder claims that square foot gardening allows you to grow
the same amount of food in 20% of the space, saving time and money in
the process. Although several people I know swear by it, I find
it hard to believe that square foot gardening lives up to the
hype. Is square foot gardening a trend or a useful technique?
Mel Bartholomew outlines
his method at great length (sometimes much greater then I'd prefer) in Square
Foot Gardening.
He divides his garden into beds four feet on each side, then subdivides
each bed into sixteen blocks, each one square foot in size. These
small sections are devoted to single crops --- big plants like cabbage
fill an entire square while smaller crops may have several evenly
spaced plants in the square. That's pretty much all there is to
it.
| This post is part of our Square Foot Gardening lunchtime series.
Read all of the entries: |
Mike
Turner tells the story of hitting a deer with his AeroCivic in this
short video.
If you're inspired to learn
more about homemade aerodynamic automobile modifications then you'll
want to check out the Ecomodder.com
website. It's a community of above average people taking fuel effeciency into
their own hands by experimenting with aero modifications and sharing
their results.
The removeable
boat tail project for a Geo Metro looks very promising.
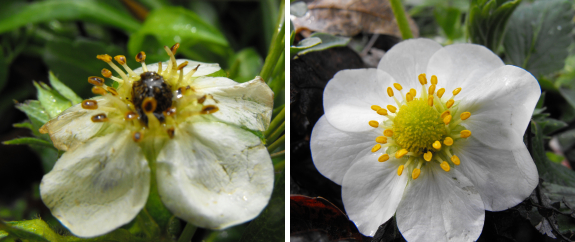
What does a light frost
(around 30 F minimum) do in the garden in April? Strawberry
flowers in full bloom were damaged --- notice the blackened ovary in
the center of the flower on the left compared to the yellow center of
the one on the right. The former was unprotected while the latter
spent the night under
a row cover.
The frost-damaged bloom won't bear fruit, but the damage isn't a big
deal since the plant has several other flowers waiting to open.
Newly emerged potato
leaves were a bit nipped as well, but I'm not overly concerned about
them either. As you can see, only the tips of the leaves were
frozen, and there's plenty more growth to come from the tubers
underground.
What did I protect
unnecessarily? The broccoli
and cabbage seedlings, although still small, are now well established
and didn't even notice the cold. The fruit tree flowers also
seemed unphased. Let's hope the rest of the spring temperatures
don't drop below 30 and we'll be in good shape!
 The
meat of square foot
gardening is
permanent beds, but Mel Bartholomew
didn't invent the concept. Alternative gardeners have been using
permanent beds for a long time --- for example, camellones
have been used in Central America for centuries. My
own garden is completely made up of permanent raised beds, both because our soil tends
to get waterlogged and because I want to concentrate the topsoil and
prevent soil compaction.
The
meat of square foot
gardening is
permanent beds, but Mel Bartholomew
didn't invent the concept. Alternative gardeners have been using
permanent beds for a long time --- for example, camellones
have been used in Central America for centuries. My
own garden is completely made up of permanent raised beds, both because our soil tends
to get waterlogged and because I want to concentrate the topsoil and
prevent soil compaction.
I've experimented
with a lot of permanent bed sizes
and shapes over the past few years, and the four by four square
advocated by square foot gardening is one of
my least favorite formats. I like to be able to weed and plant
and harvest
sitting down, but I can't reach the center of a four foot bed without
either leaning on the bed or standing up and bending over --- hard on
the
back. My favorite beds are three feet wide but quite long.
In fact,
the best bed shape for me seems to be a long row that I can work my way
down it, never turning a corner, pushing the wheelbarrow ahead of me as
I go.
 Which
brings me to the next flaw in Mel Bartholomew's garden design ---
the aisles. In order to fit his
garden into 20% of the space used by a traditional garden, Bartholomew
lays down 12
inch lumber and walks on this one foot wide path. I started out
with
aisles that are two feet wide, and I can barely fit my wheelbarrow down
them, often harm plants on
the ends of beds when turning corners, and can't get the lawnmower
through
some of the aisles at all. As with permanent bed widths, three
feet seems to be the magic number that keeps me from feeling cramped,
with four or five foot aisles along
main thoroughfares allowing for easier hauling.
Granted, my method uses more space than Bartholomew's, but I suspect it
saves time since I don't have to prop back up the plants I break when I
lose my balance and fall into the bed.
Which
brings me to the next flaw in Mel Bartholomew's garden design ---
the aisles. In order to fit his
garden into 20% of the space used by a traditional garden, Bartholomew
lays down 12
inch lumber and walks on this one foot wide path. I started out
with
aisles that are two feet wide, and I can barely fit my wheelbarrow down
them, often harm plants on
the ends of beds when turning corners, and can't get the lawnmower
through
some of the aisles at all. As with permanent bed widths, three
feet seems to be the magic number that keeps me from feeling cramped,
with four or five foot aisles along
main thoroughfares allowing for easier hauling.
Granted, my method uses more space than Bartholomew's, but I suspect it
saves time since I don't have to prop back up the plants I break when I
lose my balance and fall into the bed.
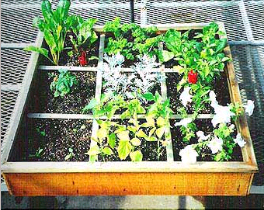 Despite
being very critical of square foot gardening, I do think it has a
place. If you live in a city and have only
a tiny bit of space out front but the neighbors would yell
if you put in a traditional vegetable garden, the formal lines of
square foot gardening might fit the bill. If you work forty hours
a week and always plant a huge rambling garden, only to see it
disappear into weeds in July when you run out of time, it might be best
to scale back to a smaller garden like Bartholomew's (but, perhaps,
laid out in a more ergonomic fashion.) On the other hand, if
you're a
homesteader with lots of land and a wish to grow most of your own food,
square foot gardening probably doesn't have much for you.
Despite
being very critical of square foot gardening, I do think it has a
place. If you live in a city and have only
a tiny bit of space out front but the neighbors would yell
if you put in a traditional vegetable garden, the formal lines of
square foot gardening might fit the bill. If you work forty hours
a week and always plant a huge rambling garden, only to see it
disappear into weeds in July when you run out of time, it might be best
to scale back to a smaller garden like Bartholomew's (but, perhaps,
laid out in a more ergonomic fashion.) On the other hand, if
you're a
homesteader with lots of land and a wish to grow most of your own food,
square foot gardening probably doesn't have much for you.
(All of the images on
this page are official square foot gardens from the Square Foot
Gardening Foundation. I'm actually a bit shocked that these
are
the best images they have to offer.)
| This post is part of our Square Foot Gardening lunchtime series.
Read all of the entries: |
We used a U-Haul car trailer
to tow the new parts Festiva from South Carolina to home this past
weekend. (Thanks, Errol.)
The rental price was just
over 80 bucks, and I'm happy to report on how smooth the whole
operation went even on the large North Carolina hills.
If I ever do it again I'll
insist on being the one to ratchet down the front wheel straps. The guy
who did ours was in a rush and bunched up part of the fabric causing a
small delay in unhooking everything when we got home.
My mother and brother looked up in alarm as the mulch knocked loose a cable, releasing fuel into the darkening afternoon. Then...a crack of thunder...a flash of lightning...and suddenly the tank was ablaze.
"We're going to die!" Joey howled as he pushed my mother behind him to shelter her from the wall of flame. Mom ran one way, Joey the other, as the inevitable explosion shook the farm.
Then I woke up.
What, you don't dream about the possible dangers of your mulch choices?
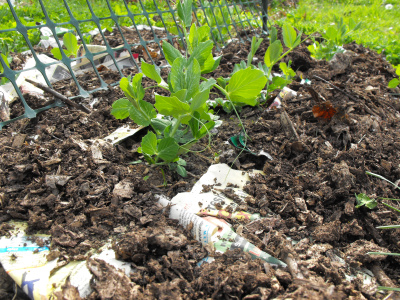 My
mulch nightmare was brought on by Daddy's explanation that he always
weighs down his newspaper
mulch with something
to keep it from blowing away. Sure enough, when we got back from
our trip, an uncharacteristic wind had whipped through our farm and
blown around about a tenth of the paper mulch. In contrast, last
year's partially decomposed junk mail and cardboard was still in place,
suggesting a long term solution to the blowing paper problem. For
now, I just dribbled a bit of composted wood chip mulch on top of the
newspaper to hold it in place and stave off those terrifying mulch
nightmares.
My
mulch nightmare was brought on by Daddy's explanation that he always
weighs down his newspaper
mulch with something
to keep it from blowing away. Sure enough, when we got back from
our trip, an uncharacteristic wind had whipped through our farm and
blown around about a tenth of the paper mulch. In contrast, last
year's partially decomposed junk mail and cardboard was still in place,
suggesting a long term solution to the blowing paper problem. For
now, I just dribbled a bit of composted wood chip mulch on top of the
newspaper to hold it in place and stave off those terrifying mulch
nightmares.
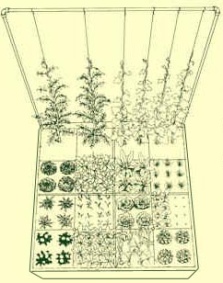 I
think that Mel Bartholomew could have summed up the unique
aspects of square foot gardening in about fifteen pages. So in
order
to turn his idea into a book, he had to add about 300 pages of
fluff ranging from basic seed-starting advice to how to weed and
water. While I wholeheartedly agree with many aspects of his
method, none of them is really new. In addition to permanent
beds, he advocates:
I
think that Mel Bartholomew could have summed up the unique
aspects of square foot gardening in about fifteen pages. So in
order
to turn his idea into a book, he had to add about 300 pages of
fluff ranging from basic seed-starting advice to how to weed and
water. While I wholeheartedly agree with many aspects of his
method, none of them is really new. In addition to permanent
beds, he advocates:
- Heavy mulches to keep down weeds
- Starting only the seeds you're going to have space for in your garden rather than planting dozens and thinning
- Succession planting so that your garden is full from early spring to late fall
- Vertical gardening by running tomatoes and cucurbits up trellises
(which is a method I need to work a bit harder on myself)
On the other hand, I
can't get behind some of Bartholomew's other assertions. He
thinks that crop rotation will take care of itself since you're
constantly filling up new squares and are unlikely to put the same
plant family in a location twice in a row. In a mathematical
puzzle, that might be the case, but in a real life garden you'll
discover that your carrots like the spot with deep soil and the spring
peas like the sunniest area by the trellis, and you'll tend to
plant each crop in the same place from year to year. Keeping
track of planting
locations is
essential to prevent a buildup of diseases in the soil.
I think the point where
Bartholomew really lost me, though, was when he asked who
would want more than four heads of broccoli in a year.
Um, me?!!! I know that Bartholomew's goal is to cut down on work,
but after a while, I started to wonder if he really
likes vegetables.
| This post is part of our Square Foot Gardening lunchtime series.
Read all of the entries: |

The new chicken
pasture is one step closer to completion with the final stretch of
fence going up today.
Next up is to fabricate a
light gate for easy access to the pasture and coop.
 Eliza's
suggestion to eat
young pea shoots as a salad green inspired me to make better use of
other sub-prime crops in the garden. About a third of last year's
kale successfully made it through the winter, but after a couple of
weeks of leaf harvests, hot weather prompted the plants to bolt.
I was tempted to let the kale go and save the seeds, but instead
decided to clip the flower buds off and eat them like broccoli (or,
really, broccoli raab.)
Eliza's
suggestion to eat
young pea shoots as a salad green inspired me to make better use of
other sub-prime crops in the garden. About a third of last year's
kale successfully made it through the winter, but after a couple of
weeks of leaf harvests, hot weather prompted the plants to bolt.
I was tempted to let the kale go and save the seeds, but instead
decided to clip the flower buds off and eat them like broccoli (or,
really, broccoli raab.)
Meanwhile, the first
shiitakes are coming out on our mushroom
logs, and here the
warm, dry weather has been a boon. The mushrooms actually started
breaking free of the wood a few weeks ago, but lack of humidity
retarded their growth and caused a cracked cap. The result is not
only beautiful, but is considered by gourmet chefs to be the highest
grade shiitake out there. Mixed with our kale buds, copious Egyptian
onion leaves, and
eggs from our chicken
tractors, the
shiitakes were absolutely delicious!
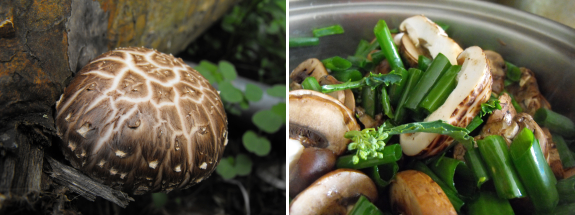
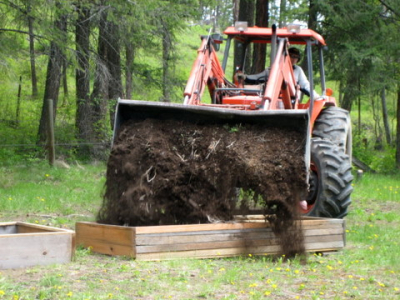 In
addition to using permanent beds with small aisles and copious
trellises, Mel Bartholomew gets more vegetables in a smaller space
because he brings in a lot of soil amendments. I'm of two minds
about this part of his gardening strategy.
In
addition to using permanent beds with small aisles and copious
trellises, Mel Bartholomew gets more vegetables in a smaller space
because he brings in a lot of soil amendments. I'm of two minds
about this part of his gardening strategy.
On the one hand, it's
clearly expensive (and not very sustainable) to
buy bags of peat
moss, potting soil,
and vermiculite to give your soil good drainage
and then add chemical fertilizers to boost the plants' growth.
Mel Bartholemew is basically creating a large container garden, which
means that he isn't tapping into the strength of a diverse soil
food web.
On the other hand,
Bartholomew might be able to get many of the same results by doubling
down on compost and manure. His point is well taken that if you
divide the size of your garden in half, you can double the amount of
soil amendments on each square foot, possibly resulting in a doubled
(or at least larger) crop in the smaller space.
However, I don't grow
vegetables just to get the largest fruits from
the smallest tract of land. I've discovered that the tastiest
(and, I think, most healthful) fruits and vegetables have to struggle a
little to find nitrogen, potassium, and
phosphorus. The fruits are often smaller, but they're jam-packed
with flavor, and I suspect have more micronutrients from their
roots' elongated journey through the soil. I'm not willing to
give up that
quality in favor of quantity; otherwise, I might as well just buy my
produce at the grocery store.
A permaculture
approach to soil is completely different. Instead of focusing on
the plants' output per unit space, a permaculturalist would focus on
maintaining a healthy soil ecosystem and on adding varied soil
amendments that would boost micronutrient levels. I would love to
see a study comparing the vitamins and minerals in a leaf of lettuce
grown in my type of garden versus one grown in Mel Bartholomew's.
Could science tell a difference?
| This post is part of our Square Foot Gardening lunchtime series.
Read all of the entries: |
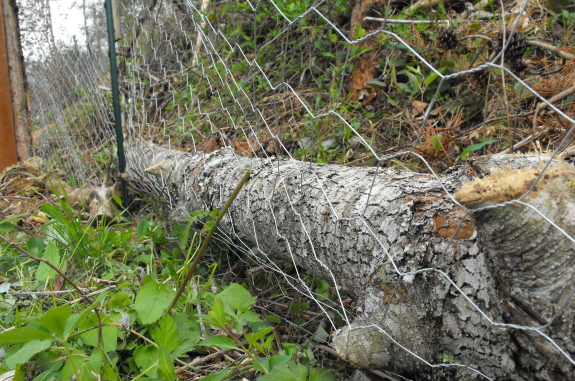
The most vulnerable spots for
the new chicken
pasture fence will likely
be near the ground.
Since we've got plenty of
logs laying around I decided to line them up along the bottom edges to
provide a solid wooden surface to staple the fence material to.
I should get the gate
installed tomorrow, which will make everything ready for the new flock
to get out and roam for the first time.
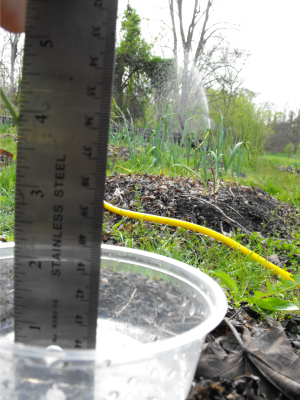 Most
fruits and vegetables require one inch of water per week during the
growing season.
Sprinklers are a great backup to natural rainfall, but how long do you
turn them on to get that precious inch? How do you know if your
garden is being evenly watered?
Most
fruits and vegetables require one inch of water per week during the
growing season.
Sprinklers are a great backup to natural rainfall, but how long do you
turn them on to get that precious inch? How do you know if your
garden is being evenly watered?
Last year, I learned
that it's best to
situate your sprinklers so they provide head
to head coverage,
but that trick isn't enough to ensure even watering with an irregularly
shaped garden. Instead, you'll need to put your sprinklers where
you think they should go, then run
some irrigation tests. Scatter empty containers every few yards
across the garden, blast the sprinklers for an hour, then go back and
measure the amount of water in each container.
To help you visualize
wet and dry spots, draw a rough map of the garden and write in the
water depth at each container location. Do a bit of math to
figure out the average water depth across the garden, then circle areas
which ended up with less than average water.
Now it's time to move
the sprinklers a bit to make those dry spots go away. If you're
lucky, you will have noticed an abnormally wet spot on one side of a
sprinkler and an abnormally dry spot on the other side. In this
case, you can simply move the sprinkler a few feet closer to the dry
spot and away from the wet spot.
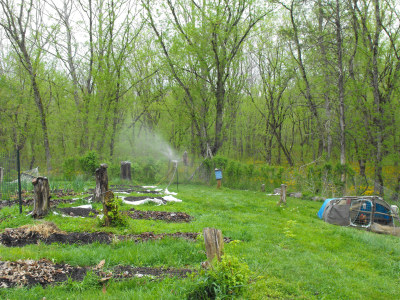 On
the other hand, you may simply have too few sprinklers in play.
If there are dry spots at the outer limits of two sprinklers, you may
need to add a third sprinkler to fill in the gaps.
On
the other hand, you may simply have too few sprinklers in play.
If there are dry spots at the outer limits of two sprinklers, you may
need to add a third sprinkler to fill in the gaps.
Once you move the
sprinklers, run another irrigation test and repeat the process until
your garden is getting the same amount of water in every
container. I chose to stop tweaking the sprinklers once the
containers were all within the same ballpark --- how obsessive you get
about this is up to you.
It will take a few hours
of your time to get the sprinklers set up properly, but the irrigation
tests are well worth the work. Now your garden will be evenly
hydrated, and you will even know how long it takes to provide that
critical inch of water. Due to different sprinkler orientations,
I figure I need to run each set of sprinklers for three hours to get an
inch of water in the upper garden and for two hours to get an inch in
the mule garden. I guess it only took three and a half inches of
water to saturate that hydrophobic
compost --- not
nearly as bad as I thought.
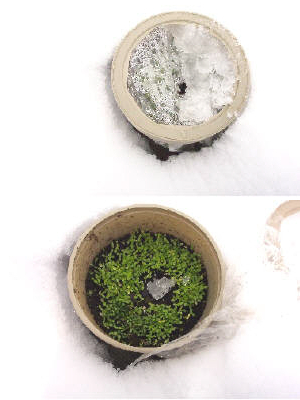 While
I'm on the subject of techniques that I consider to be overhyped, I
can't resist a post about winter sowing. According to the
official website, "Winter Sowing is done outdoors during Winter using
mini-greenhouses
made from recyclables; there are no heating devices, no energy wasting
light set-ups or expensive seed starting devices."
While
I'm on the subject of techniques that I consider to be overhyped, I
can't resist a post about winter sowing. According to the
official website, "Winter Sowing is done outdoors during Winter using
mini-greenhouses
made from recyclables; there are no heating devices, no energy wasting
light set-ups or expensive seed starting devices."
Just take a container
and turn it into a pot by poking
a few holes in the bottom. Then put in your soil, drop in some
seeds, and cover the pot with a clear plastic lid doctored with a few
slits. The container acts like a mini greenhouse and germinates
the seeds a few weeks before they would germinate if sown directly into
the
garden.
Winter sowing is
basically a replacement for the easy-to-do-wrong method of starting
your seedlings on a sunny windowsill or under grow lights.
Beginning gardeners often fall into a couple of traps when using the
windowsill method, both of which result in leggy seedlings that
transplant badly --- they usually can't get enough light to their
plants, and they start the seedlings too early. Damping off is
another potential problem since moist potting soil tends to grow a
nasty fungus that will kill your seedlings. Then, when you bring
your remaining seedlings outside to plant in the garden, they have a
severe shock --- they're used to the climate-controlled conditions
inside your house, so unless you slowly harden them off, many will die.
 But
while winter sowing is preferable to starting seeds inside, I think
that a cold frame is even better. Like winter sowing, it gives
your seeds a few weeks' head start, but the cold frame provides more
protection from freezing temperatures since the seedlings are in direct
contact with the temperature-mitigating earth. Your seedlings
have more room to spread their roots through the soil, ensuring a
healthy plant, and the permeable row cover fabric I use to cover the
frames ensures that you don't have to water your seedlings or worry
about them overheating.
But
while winter sowing is preferable to starting seeds inside, I think
that a cold frame is even better. Like winter sowing, it gives
your seeds a few weeks' head start, but the cold frame provides more
protection from freezing temperatures since the seedlings are in direct
contact with the temperature-mitigating earth. Your seedlings
have more room to spread their roots through the soil, ensuring a
healthy plant, and the permeable row cover fabric I use to cover the
frames ensures that you don't have to water your seedlings or worry
about them overheating.
Over the last few years,
I've tried starting seeds both indoors under a grow light and outdoors
in these cold frames and I've decided that the cold frame is preferable
for lettuce, cabbage, broccoli, and tomatoes. On the other hand,
peppers are just too tender --- they came up no sooner in a cold frame
than when directly sowed in the ground, so I'm starting a few indoors
this year. Read my post about how to build a cold frame for a couple of dollars
worth of screws and give it a shot --- I suspect you'll never go back
to either windowsill starting or winter sowing.
| This post is part of our Square Foot Gardening lunchtime series.
Read all of the entries: |
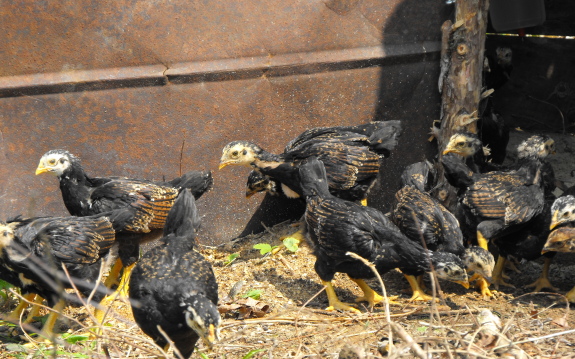
The new
flock finally got their first taste of freedom today.
Next up will be to build them
a large Avian Aqua Miser
bucket waterer so we don't have to keep topping the little ones off
everyday.
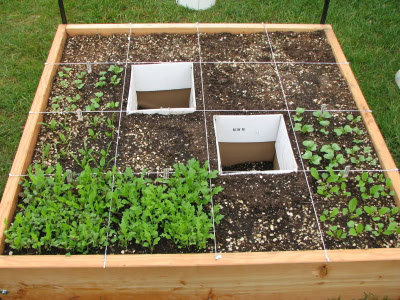 I
was thrilled when Ron wrote me an email to tell me the other side of
the story on square foot
gardening. All
of the images here are of Ron's garden, which he describes as follows:
I
was thrilled when Ron wrote me an email to tell me the other side of
the story on square foot
gardening. All
of the images here are of Ron's garden, which he describes as follows:
I hear constantly about property values.
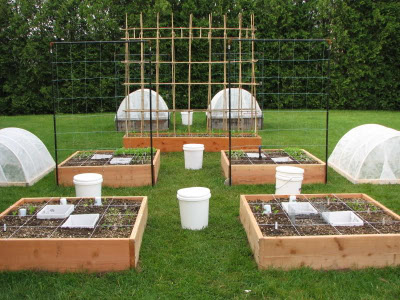
This started four years ago and I reside in Upstate NY.
While I live in suburbia, I have “pest” problems.
 Our heavy clay soil that turns into muck in
the rains.
Our heavy clay soil that turns into muck in
the rains.Having absolutely NO garden knowledge, I recalled PBS show,
Such a success, 3rd year, I added, 6 – 3’x8’ beds
 Each year I add more compost. Also add other
supplements
Each year I add more compost. Also add other
supplementsPro vs. Con – every method has some of both
My goal is to try replicating the “Urban Homestead”
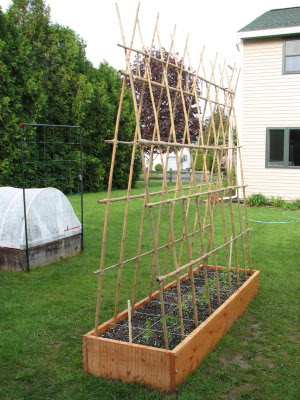
Also a strong follower of Mother Earth News.
I love growing a wide variety of specialty
I’ve attached latest layout in .pdf format [one page of which is reproduced above].
Hope this changes some of your thoughts.
Take care
Ron
I'd love to hear from
other readers who have tried square foot gardening. What did you
think about the technique's pros and cons?
| This post is part of our Square Foot Gardening lunchtime series.
Read all of the entries: |
It seems like old
chimney bricks have hundreds of uses.
I wedged these together
between the 2 gate posts of the chicken pasture in an effort to discourage Lucy from trying to
dig her way under in order to help herself to any future scraps that
might get tossed that way.
Luckily she fully understands
that chickens themselves are off limits. It's just the delicious food
scraps that bring out the bad girl in her.
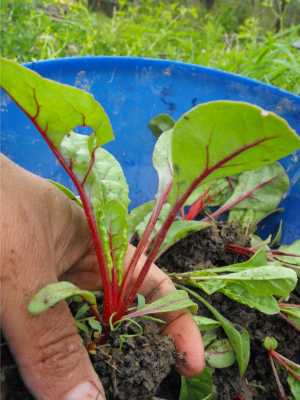 As
I weeded the peas this week, I stumbled across a patch of volunteer
swiss chard growing amid the tendrils. The swiss chard plants
were about three times as big as the seedlings which came up in this
spring's bed, sending me off in mental gyrations.
As
I weeded the peas this week, I stumbled across a patch of volunteer
swiss chard growing amid the tendrils. The swiss chard plants
were about three times as big as the seedlings which came up in this
spring's bed, sending me off in mental gyrations.
I never let my swiss
chard go to seed last year, so these volunteers were clearly sprouting
from last spring's seeds. Why didn't those seeds sprout in
2009? Do some swiss chard seeds always take two years to
germinate (while others clearly germinate right away)?
Why were the volunteer
swiss chard so much bigger than this year's version? Did they
sprout sooner, protected by mulch then warmed in the sunniest part of
the garden? Or do they just like the drainage in the mule garden
better than the back garden?
I have no answers, but I
do suddenly have a bed of swiss chard that will be big enough to eat
next week. I transplanted the volunteers out of the pea bed and
into the many gaps in this year's swiss chard bed, and am anticipating
a copious harvest shortly.
How are the deer deterrents working
for you this year, have you done any adjusting to your technique?
Earl from Baton Rouge, LA
Thanks for asking Earl. Its
been a nibble free year so far. The deer deterrent tinkering sort of
took on a life of its own and required a separate website which we now
call BackYard Deer.com.
The goal is to give away the
data we have so far in an effort to stimulate some widespread
experimentation to see how well this works
in other environments.
We've had some good feedback
so far, and Anna posted an interesting piece on a study
done by the Canadian government concerning what they learned
about keeping deer out of airports.
Image credit goes to Mr
Granito for his cave painting of a deer hunt in action.
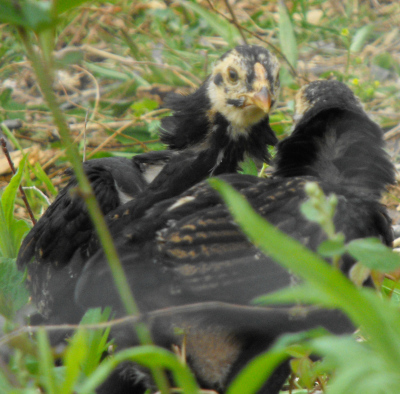 My
brother and I sat by the chicken pasture for an hour on Saturday,
watching the game. "Look!" I exclaimed. "Cock fight!"
Two chicks faced off, their ruff feathers standing on end. After
several seconds of staring, one cockerel leapt into the air, and the
other fled all the way back to the coop.
My
brother and I sat by the chicken pasture for an hour on Saturday,
watching the game. "Look!" I exclaimed. "Cock fight!"
Two chicks faced off, their ruff feathers standing on end. After
several seconds of staring, one cockerel leapt into the air, and the
other fled all the way back to the coop.
Then, more drama.
25 pairs of eyes peered upwards, and then 25 pairs of feet hit the
ground as every chick ran for shelter. "Hawk! Hawk!
Hawk!" they were clearly thinking, although the dark shape swooping
down from above was just a butterfly.
 For
our continued amusement, I went inside and brought out the bucket of
chicken scraps --- the first time our chicks had been fed human
food. But the cockerels were confused by the odd shapes and
instead preferred to run after aerial insects, capturing them in flight.
For
our continued amusement, I went inside and brought out the bucket of
chicken scraps --- the first time our chicks had been fed human
food. But the cockerels were confused by the odd shapes and
instead preferred to run after aerial insects, capturing them in flight.
All chicken amusement
aside, I'm excited that our chicken pasture experiment is
underway. If any of you have had
experience raising foraging chickens, I'd appreciate it if you'd fill
out our poll. Once I come up with
an appropriate prize, we'll be starting an exciting chicken pasture
contest shortly --- stay tuned!
 Steve
Solomon's Gardening
When It Counts: Growing Food in Hard Times is the opposite of Square Foot Gardening in almost every way.
While Square
Foot Gardening is
aimed at the suburban hobby gardener, Gardening
When It Counts is
written for the serious homesteader. I complained about pages of
fluff in Square
Foot Gardening
(which Ron
rightly reminded me
was useful information for the beginning grower), but I wish Solomon
had spent twice as much space on many of the topics in his book.
Steve
Solomon's Gardening
When It Counts: Growing Food in Hard Times is the opposite of Square Foot Gardening in almost every way.
While Square
Foot Gardening is
aimed at the suburban hobby gardener, Gardening
When It Counts is
written for the serious homesteader. I complained about pages of
fluff in Square
Foot Gardening
(which Ron
rightly reminded me
was useful information for the beginning grower), but I wish Solomon
had spent twice as much space on many of the topics in his book.
I'm going to attempt to
hit the highlights of Gardening
When It Counts in
a special, two week lunchtime series, but like my series on Growing Gourmet and Medicinal
Mushrooms and
Edible
Forest Gardens,
I highly recommend that you check the book out of your local library
and read it from cover to cover. Twice. If I'd read Gardening
When It Counts
two years ago, I would have saved myself a solid year of
experimentation. You can save that year!
This post is part of our Gardening When It Counts lunchtime series.
Read all of the entries:
|
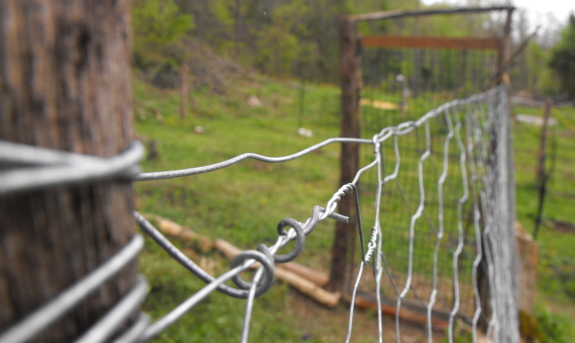
The downside to using this 5
foot tall chicken wire on the new forest pasture fence is how flimsy it gets
towards the top.
I've found that a semi tight
stretch of electric fence wire helps to firm it up.
It took me a few times to
figure out, but it's a lot easier to measure
out the distance first and cut the wire to size and then weave it
through.
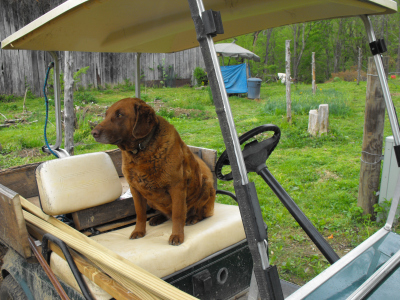 The
first mowing of the year is always the hardest on our farm. The
stump locations are long forgotten, and this year our chipping
experiment left
branches strewn around in unlikely spots. Adding to the mess,
Lucy's firewood fetish results in hunks of wood hidden here and there
in the high grass where she dragged them, chewed for a while, then
wandered off to do doggie things. Basically, there's a lot of
picking up to be done before we can safely run the mower over our
"lawn."
The
first mowing of the year is always the hardest on our farm. The
stump locations are long forgotten, and this year our chipping
experiment left
branches strewn around in unlikely spots. Adding to the mess,
Lucy's firewood fetish results in hunks of wood hidden here and there
in the high grass where she dragged them, chewed for a while, then
wandered off to do doggie things. Basically, there's a lot of
picking up to be done before we can safely run the mower over our
"lawn."
Luckily, the grass comes
into production at different times on different parts of the
farm. The north side of the garden always starts growing first
since it gets the best winter sun, and I've mowed that area twice
already. In contrast, the south side of the yard is shaded by the
hill and only started growing a week or two again. I'd been
ignoring that area, but by Monday morning the weeds were clearly
getting out of control, so Mark and I tag-teamed it --- I picked up
debris while he pushed the mower. Our farm suddenly looks almost
manicured!
 Steve Solomon started his garden journey
in the 1970s and jumped right
on the intensive gardening bandwagon. Intensive gardening is a
term
Solomon uses to encompass techniques like square
foot gardening
and lasagna gardening
(and, to some extent, my garden) that promise to grow more vegetables
in less space using raised beds and high influxes of organic matter and
water.
Solomon was so enthusiastic that he wrote books on
the subject, but over time his feelings changed.
Steve Solomon started his garden journey
in the 1970s and jumped right
on the intensive gardening bandwagon. Intensive gardening is a
term
Solomon uses to encompass techniques like square
foot gardening
and lasagna gardening
(and, to some extent, my garden) that promise to grow more vegetables
in less space using raised beds and high influxes of organic matter and
water.
Solomon was so enthusiastic that he wrote books on
the subject, but over time his feelings changed.
In 1979, he founded Territorial Seed company and began to grow large
trial gardens to test out his company's vegetable varieties. He
wrote:
Solomon goes on to argue that Peak Oil will soon make fertilizers
(organic and chemical) and electricity to pump water more
expensive. At
the same time, more and more people will need to grow their own food
for
financial reasons. Solomon notes that his methods will not only
save money
by reducing the input of fertilizers and water, but will also require
only about half the time you'd spend tending an intensive garden.
Even
if you don't believe in Peak Oil, if your goal (like ours) is to grow
as much of your own food as possible, it just makes sense to save
yourself time and money in the process.
This post is part of our Gardening When It Counts lunchtime series.
Read all of the entries:
|
I was waiting in line today
at Tractor Supply with a 50 pound bag of chick feed on
my shoulder when I noticed for the first time how they sell disposable
hand warmers that last 10 hours. That got me to thinking about how much
heat might be captured from something like that with a 5 gallon bucket
covering it?
We don't need that level of
protection tonight, but it might come in handy if a sudden ice age
reared its cold shoulders.
I guess the only way to know
would be to test and measure the temperature, but it might work as a
last ditch effort to save an outdoor plant if it got more than 10
degrees lower than freezing.
Despite the fact that
our neighbors are planting big hothouse tomato transplants, our frost
free date is still two and a half weeks away. Sure enough, we
have a frost watch in effect for two days this week.
Time to haul back out my
holey row-covers. Learning from redbud
winter's frost, I
chose to use my limited protection on the strawberries, some of the
potatoes, and our hardy
kiwis. The
latter lost their first flush of leaves to a previous frost, and I'm a
bit concerned they might have a bad year if they lose their second
flush of leaves too. Here's hoping temperatures don't drop so low
that anyone else is harmed.
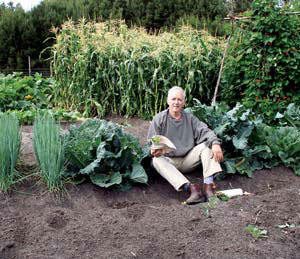 Steve
Solomon grows vegetables in an area about 2,000 square feet in size
(about 2,700 feet if paths are included) to feed himself and
his wife half of their daily calories. He is currently able to
use copious soil amendments and irrigation, and also benefits from
gardening in an area where the soil doesn't freeze solid in the
winter. Without those advantages, Solomon estimates that he could
need as much as 9,000 square feet to feed his family. If he
wanted to include potatoes and sweet potatoes in his garden to fulfill
more
of his food requirements, he would add another 1,000 to 1,500 square
feet for a total of a tenth to a quarter of an acre to feed two adults.
Steve
Solomon grows vegetables in an area about 2,000 square feet in size
(about 2,700 feet if paths are included) to feed himself and
his wife half of their daily calories. He is currently able to
use copious soil amendments and irrigation, and also benefits from
gardening in an area where the soil doesn't freeze solid in the
winter. Without those advantages, Solomon estimates that he could
need as much as 9,000 square feet to feed his family. If he
wanted to include potatoes and sweet potatoes in his garden to fulfill
more
of his food requirements, he would add another 1,000 to 1,500 square
feet for a total of a tenth to a quarter of an acre to feed two adults.
In addition to this
garden area, Solomon sets aside another area of
equal size and rotates his entire garden every three to five
years. He argues that if you live in an area where the ground
doesn't freeze solid in the winter, disease and insect infestations
will build up to a point where your yields begin to decline after a few
years, even if you rotate crops. So
he manages a ley equal in size to his current garden, where he grows
grass and clover, cutting the greenery a few times a year and letting
the clippings rot into the ground to increase the soil's
fertility. After a few years, he tills up the ley and turns it
into garden, then sows the old garden into a ley.
This is one of the areas
where I wish that Gardening
When It Counts
went into a little greater depth. While I agree that people have
been letting land lie fallow and rotating vegetables through these
areas at intervals for a long time, I wonder whether a permaculture
approach could result in a garden ecosystem that was resilient enough
to prevent disease and pest outbreaks. I'll discuss in a later
post how Solomon uses a mixture of seedmeal, lime, guano, and kelpmeal
as his primary fertilizer and only adds a relatively small amount of
compost. If he added more organic matter to his soil every year,
would this whole garden rotation be unnecessary since the plants
wouldn't get micronutrient
deficiencies and
would be healthy enough to resist diseases and pests? The
necessity of tri-annual tilling using Solomon's method turns me off,
but I can't say for sure whether my method will be any better since
this is only our fourth garden year.
This post is part of our Gardening When It Counts lunchtime series.
Read all of the entries:
|
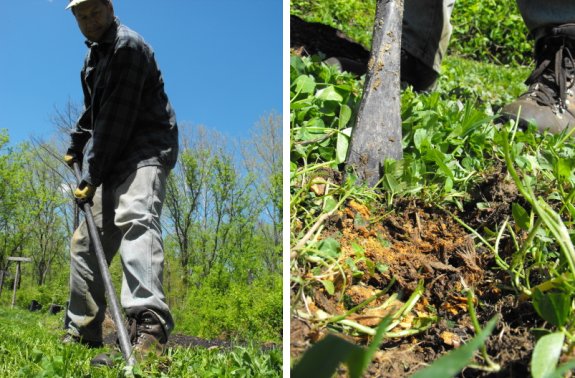
I still think it's wrong that
the government took away the ability to use
dynamite from the regular farmer.
If only it were invented 120
years earlier, then perhaps our founding fathers would have included it
somewhere in the 2nd
amendment.
Stump clearing would never be
the same.
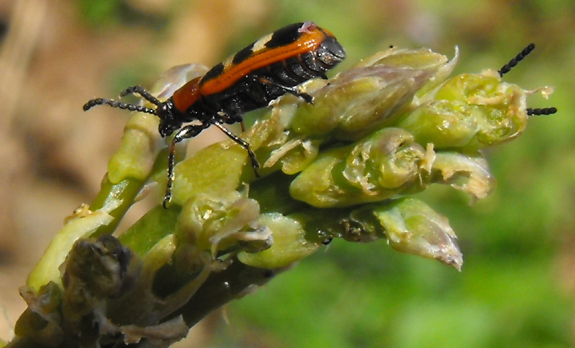
I've resolved to keep
the asparagus
beetles from
denuding my asparagus fronds so that hopefully we can finally harvest
asparagus next year. So far, I've just been patrolling my
asparagus a couple of times a week and knocking the adult beetles into
a cup of water, then tossing them to the chickens. Even though
the beetles are tiny, my favorite foragers (the old Golden Comets) are
quite capable of picking them out of the grass before they fly away.
The picture on the left
shows the eggs laid by the beetles. These are more difficult to
deal with, but I've had pretty good luck squashing the eggs between my
thumb and finger, a technique that seems to work better than trying to
rub the eggs off. I'm hopeful that killing the adult beetles and
squashing the eggs will be sufficient to break their cycle of
predation, but if the evil little grubs hatch out, I'm prepared to
spray Bt to stop them in the
act. I learned last year that if I let the grubs go, the beetles
will reproduce several times in a year and will eat my fronds
completely bare.
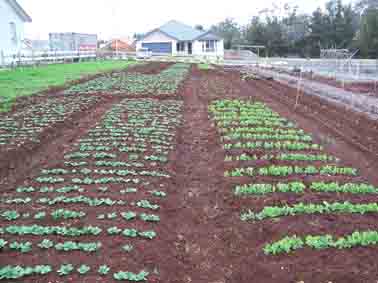 So what does Solomon's garden
look like? He makes raised beds nearly identical to my
beds,
only shallower (two to three inches high.) When working up new
land, first he tills or shovels to break up the sod. Either
way, he loosens the soil to a depth of twelve inches, marks out three
to four foot wide beds, and scoops dirt out of the aisles to increase
the beds' height. (It's worth noting that Solomon recommends 20
to 24 inches for bed width instead in non-irrigated areas or for
certain crops.)
So what does Solomon's garden
look like? He makes raised beds nearly identical to my
beds,
only shallower (two to three inches high.) When working up new
land, first he tills or shovels to break up the sod. Either
way, he loosens the soil to a depth of twelve inches, marks out three
to four foot wide beds, and scoops dirt out of the aisles to increase
the beds' height. (It's worth noting that Solomon recommends 20
to 24 inches for bed width instead in non-irrigated areas or for
certain crops.)
This sounds a lot like
an intensive garden, right? Although he
does like raised beds, Solomon differs markedly from intensive
gardeners when it comes to fertilization, seed starting, and plant
spacing.
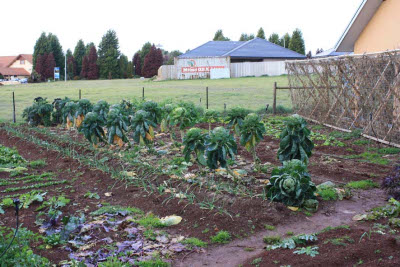 Rather than enriching an
entire bed, Solomon uses a modified Native
American technique and plants cucurbits and tomatoes in what he calls
hills --- shallow mounds about twelve to eighteen inches in diameter
with lots of concentrated soil amendments inside. The high
fertility
soil in the mound helps the plants get off to a fast start so that they
can outcompete the weeds. He uses a similar method in miniature
to give transplants a quick boost and get them growing quickly.
With smaller plants, he will enrich an entire bed, but just rakes the
amendments into the top inch of the soil to give the plants a similarly
fast start.
Rather than enriching an
entire bed, Solomon uses a modified Native
American technique and plants cucurbits and tomatoes in what he calls
hills --- shallow mounds about twelve to eighteen inches in diameter
with lots of concentrated soil amendments inside. The high
fertility
soil in the mound helps the plants get off to a fast start so that they
can outcompete the weeds. He uses a similar method in miniature
to give transplants a quick boost and get them growing quickly.
With smaller plants, he will enrich an entire bed, but just rakes the
amendments into the top inch of the soil to give the plants a similarly
fast start.
That said, Solomon
doesn't fiddle with transplants much. He
argues that (with the exception of tomatoes, peppers, and eggplants),
most vegetables will reach harvest nearly as quickly if you direct seed
as if you begin seedlings indoors and transplant them. These
direct seeded vegetables also tend to be much healthier. Not only
do they never have to deal with transplant shock, they keep their
taproots (often damaged during transplanting) and are more
drought-resistant.
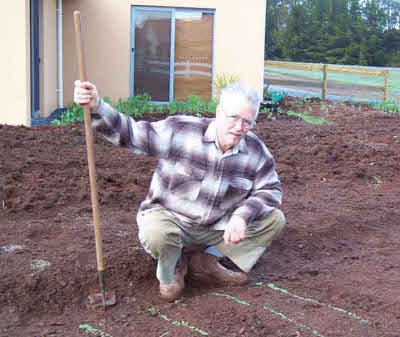
Up to this point in the
book, I was nodding along happily. Then
Solomon started writing about plant spacing. The table below
shows a comparison of Solomon's recommended plant spacing for some
common vegetables and the spacing recommended by intensive gardeners
(and me.) He recommends spacing plants even further apart if you
don't plan to irrigate, so that the vegetables will be able to suck
water out of the surrounding soil.
| Crop |
Intensive
spacing (inches) |
Solomon
spacing (inches) |
| Beans, bush green |
6X6 |
12X18 |
| Broccoli |
15X15 |
24X48 |
| Cabbage, late |
18X18 |
24X30 |
| Carrots |
3X3 |
1.5X18 |
| Cucumber |
12X12 |
36X48 |
| Chard, Swiss |
8X8 |
12X24 |
| Collards |
8X8 |
24X24 |
| Kale |
15X15 |
24X24 |
| Lettuce, looseleaf |
8.5X8.5 |
10X18 |
| Melons |
15X15 |
48X48 |
| Okra |
12X12 |
24X24 |
| Onion, bulbing |
4X4 |
3.5X18 |
| Parsley |
5X5 |
6X18 |
| Peas, bush |
3X3 |
2X18 |
| Peppers |
12X12 |
24X24 |
| Potatoes |
9X9 |
10X48 |
| Squash, summer |
18X18 |
48X48 |
| Squash, winter |
18X18 |
N/A |
| Sweet corn |
15X15 |
N/A |
| Sweet potatoes |
9X9 |
15X48 |
| Tomatoes, indeterminate |
24X24 |
48X48 |
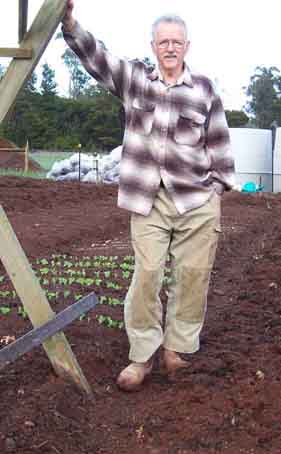 Part of the goal of Solomon's
wide spacing is to be able to fit a hoe
between the plants even when they're mature. I have to admit that
I'm extraordinarily jealous of his estimate that he spends about an
hour
a week hoeing his 2,000 square foot garden --- my garden is maybe half
again as big and it takes me more like 5 hours a week to weed.
Now I understand why his method takes half the work!
Part of the goal of Solomon's
wide spacing is to be able to fit a hoe
between the plants even when they're mature. I have to admit that
I'm extraordinarily jealous of his estimate that he spends about an
hour
a week hoeing his 2,000 square foot garden --- my garden is maybe half
again as big and it takes me more like 5 hours a week to weed.
Now I understand why his method takes half the work!I can't wrap my mind around putting lettuce and greens so far apart since I prefer to harvest them in the baby stage, but I may take his advice with some of our larger plants this summer. Maybe I should try out some test beds and compare the results of two different spacing methods?
This post is part of our Gardening When It Counts lunchtime series.
Read all of the entries:
|

I appreciate all the ideas
for alternative
stump removal from yesterday's post.
This is a new stump we plan
on inoculating with Oyster mushroom spawn we've been
nursing with wet cardboard all winter.
The plan will be to drill a
bunch of holes, push in the cardboard with mycelium, seal it up with
some bees wax and check back in about 10 months to see if we beat any
other mushroom variety that may have already introduced itself.
In most ways, I'm
completely uninterested in appearances. I
happily wear goodwill clothes for a decade, until holes in inauspicious
places make them inappropriate for public consumption. I'm
pleased as punch with my free
trailer, and have no
dreams of big, fancy
houses. When I see people drive by with shiny sports cars, I roll
my eyes.
But there is a seamy
underside to my supposed disdain for mere looks. A place where I
fall prey to beauty before utility, where my common sense is forgotten
in the face of mere charisma.
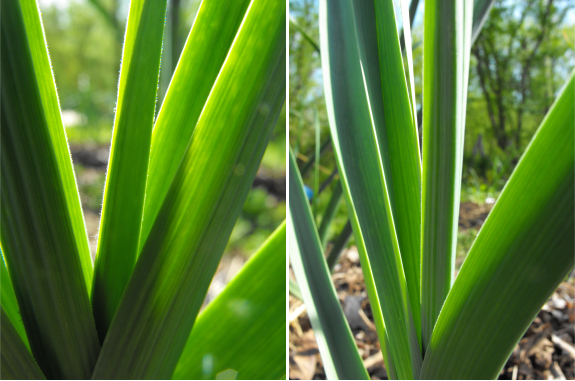
You guessed it ---
garlic! Despite the fact that Silverwhite
Silverskin is by far the best producer in our garden, I snuck in two
beds of Music Garlic last fall. Music is a huge hardneck garlic
that looks stunningly vibrant when the more productive Silverwhites
seem a bit dusty and tired. In a few weeks, Music will uncurl its
scape and put
on an even more intriguing show. Sure,
hardneck garlics don't yield as well as softnecks unless you offer them
perfect conditions, but the eye candy is worth it.
 USDA
data shows that the average nutritional content of grocery store
vegetables has declined by 25 to 33% over the last 25 years. Read
that line again, because this is a phenomenal finding! You need
to eat a third to a quarter again as many vegetables as your
grandparents did to be
healthy.
USDA
data shows that the average nutritional content of grocery store
vegetables has declined by 25 to 33% over the last 25 years. Read
that line again, because this is a phenomenal finding! You need
to eat a third to a quarter again as many vegetables as your
grandparents did to be
healthy.
Part of the reason for
this decline in nutrition can be attributed to
the vegetable varieties being grown today. Solomon writes that
modern plant varieties --- both hybrids and open-pollinated "heirlooms"
--- are less nutritious than those developed before 1870. His
reasoning for why this decline came about seems a bit strained to me,
so I'll let you check out Gardening
When It Counts
and read for yourself.
A more solid cause for
the lack of nutrition in our vegetables is a decline of soil
micronutrient levels in recent years. The map above clearly shows
that the entire
continental United States suffers from a medium to widespread zinc
micronutrient deficiency, and other micronutrients show a similar
decline. If the soil doesn't have a certain micronutrient in
it, there's no way the vegetables grown there will supply that
micronutrient to your body.
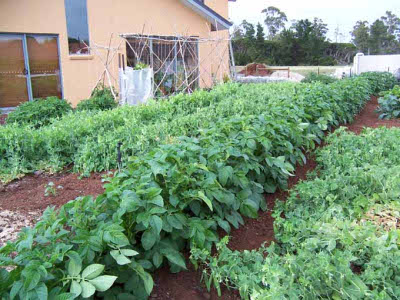 Steve Solomon argues that fertilizing our
gardens primarily with
compost and manure from the surrounding area can accentuate these
micronutrient deficiencies. Manure quality will vary widely
depending on what the animals were fed, with animals raised on
substandard pasture producing micronutrient deficient manure.
Similarly, if you make compost out of your garden waste, it will be
just as deficient in micronutrients as the garden soil itself.
Steve Solomon argues that fertilizing our
gardens primarily with
compost and manure from the surrounding area can accentuate these
micronutrient deficiencies. Manure quality will vary widely
depending on what the animals were fed, with animals raised on
substandard pasture producing micronutrient deficient manure.
Similarly, if you make compost out of your garden waste, it will be
just as deficient in micronutrients as the garden soil itself.
I'll discuss Steve
Solomon's solution --- fertilizing with a mixture of
seedmeal, lime, guano, and kelpmeal --- next week. But as a
permaculture addict, I have to admit that I'm dubious that adding large
quantities of external fertilizers is the right solution to the
micronutrient problem. We all know that dynamic
accumulators can
suck up micronutrients from deep in the subsoil, then make those
micronutrients available to plants rooting closer to the surface.
Wouldn't it make more sense to create compost out of a diverse mixture
of different dynamic accumulators, ensuring a well-balanced compost
that
adds organic matter to the soil as a bonus? I'm willing to risk
some failures as I build a more
sustainable fertilizing regimen.
This post is part of our Gardening When It Counts lunchtime series.
Read all of the entries:
|
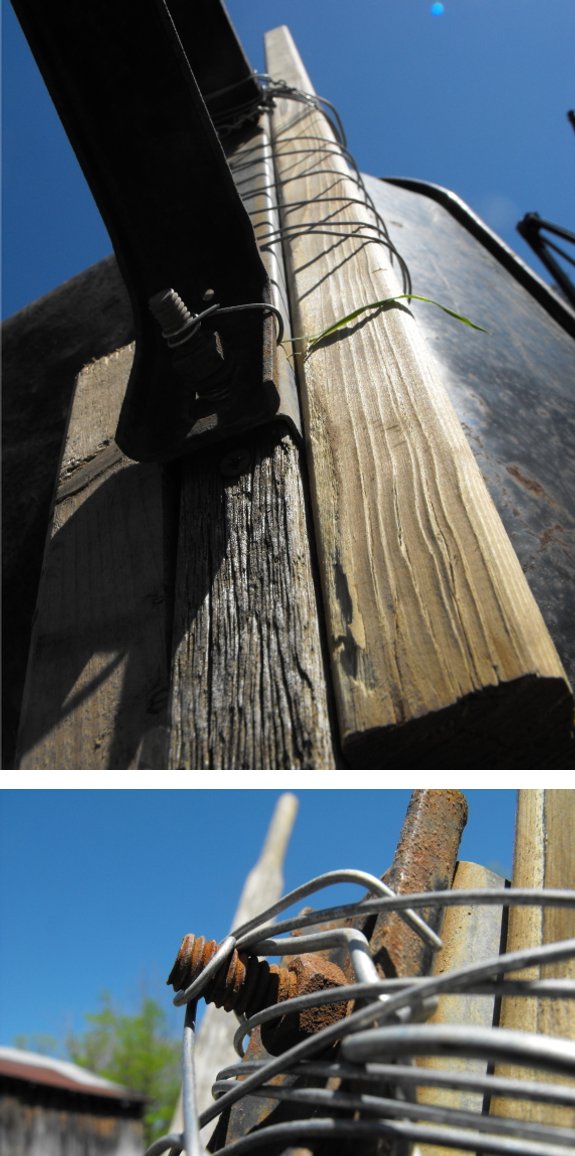
This wheelbarrow insists that
it has at least one more season left in it after some quick repairs
today.

Or explore more posts by date or by subject.
About us: Anna Hess and Mark Hamilton spent over a decade living self-sufficiently in the mountains of Virginia before moving north to start over from scratch in the foothills of Ohio. They've experimented with permaculture, no-till gardening, trailersteading, home-based microbusinesses and much more, writing about their adventures in both blogs and books.