
How to measure the ethanol content of gasoline
 "Ok, so an (Amazon Associate paid link to
a) graduate cylinder, and what I assume is fuel. But no details
on what test you're doing, how you're doing it, or how to
interpret the results. Let me rush right out to click your link,
buy the cylinder, and pour some gas into it. Not that I'd know
what the hell anything meant, but hey, you'd make a dime,
right?"
"Ok, so an (Amazon Associate paid link to
a) graduate cylinder, and what I assume is fuel. But no details
on what test you're doing, how you're doing it, or how to
interpret the results. Let me rush right out to click your link,
buy the cylinder, and pour some gas into it. Not that I'd know
what the hell anything meant, but hey, you'd make a dime,
right?"
While this comment is
a remarkably trollish response to a blog post meant to show you
tidbits of our personal life, I had been meaning to give our
readers more details on how simple it is to perform a test for
ethanol content of gasoline. All you need is something that
easily measures volume --- a 100 mL or larger graduated cylinder
takes nearly all the math out of your hands, but you could just as
easily use a ruler in a straight-sided glass cup or jar.
The idea is that when
you mix water with gas, any ethanol in the gas comes out of
solution and joins the water instead. So all you have to do
is know how much water you initially added to the gas, subtract
that out of the clear layer at the bottom of your graduated
cylinder at the end of the experiment, and the rest of the clear
substance is ethanol.
When starting your
ethanol test, the first step is to take your gas sample
carefully. As a
far-more-constructive commenter mentioned, you should run at least a gallon
of gas into your car before taking a sample from any pump that
uses a shared hose. Then pump a sample into a container and
bring the gas home to experiment.
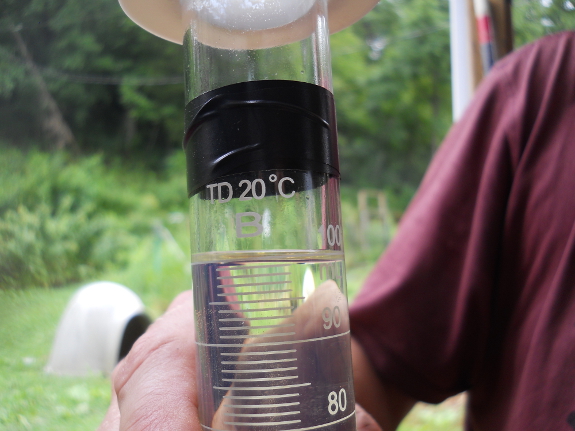
In the meantime, you
should take a minute to prep your graduated cylinder (assuming
you're like us and only bought a 100 mL one instead of a cylinder
with a larger capacity). Later in the experiment, you'll
need to know where the 110 mL line is, which is easy to guestimate
by measuring the distance between the 90 and 100 mL lines, then
measuring that same distance above the 100 mL line. To keep
things simple, use a piece of tape to wrap around the graduated
cylinder at the 110 mL line, marking its location.
Now you're ready to
add the gas. I found it much easier to pour some gas into a
small container rather than trying to fill the graduated cylinder
from the gas can. You want to add gas up to the 100 mL line,
and don't forget your chemistry lessons --- read from the bottom
of the meniscus!

Top the gas off with
10 mL of water, meaning that the total liquid level should match
the taped 110 mL line. Then mix the contents.
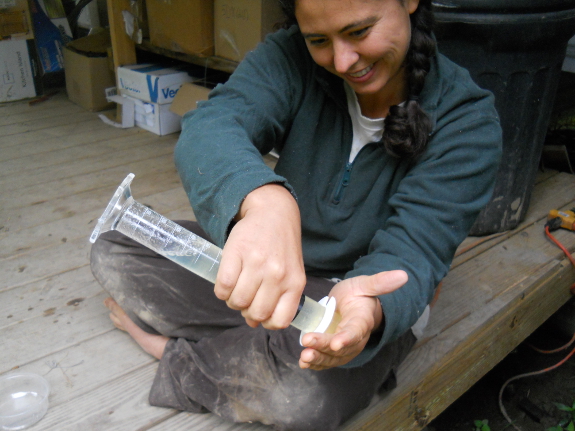
(Mixing was the
hardest part for me because our graduated cylinder didn't come
with a stopper, and I ended up slopping a bit of liquid out while
plugging the top with my palm. I think a better solution
would have been to use a sandwich baggie pulled over the top of
the graduated cylinder, or to invest in some parafilm.
Either way, thorough mixing is imperative.)
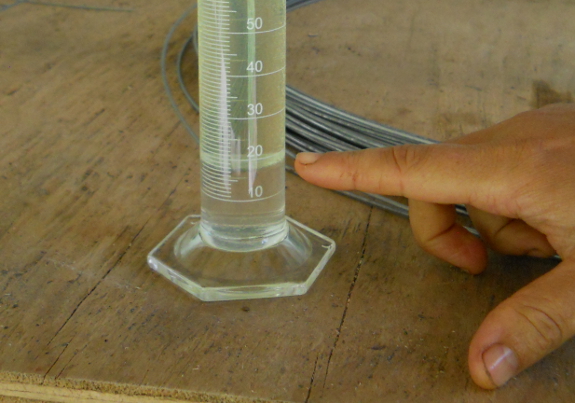
After mixing, the
clear ethanol and water will settle to the bottom, while the
colored gas will sit above it. You can easily measure how
much water and ethanol is present, then subtract 10 mL from that
to find the percent ethanol in the water. Probably because
of my sloppy mixing, our clear layer came to 17 mL, producing a
reading of 7% ethanol instead of the 10% listed on the pump at the
gas station. (If you didn't use the exact amounts of gas and
water I listed above, you'll have to do a bit more math: ((Clear
layer - Water)/(Gas))x100%.)
As Mark has mentioned
previously, ethanol
in gas can wreak havoc on many of the small engines found on our farm, so
it's useful to know for sure that the ethanol-free gas we've
hunted down really doesn't have any ethanol in it. We'll be
testing gas stations soon and hoping to find one near us that is
really ethanol-free.

Or explore more posts by date or by subject.
About us: Anna Hess and Mark Hamilton spent over a decade living self-sufficiently in the mountains of Virginia before moving north to start over from scratch in the foothills of Ohio. They've experimented with permaculture, no-till gardening, trailersteading, home-based microbusinesses and much more, writing about their adventures in both blogs and books.
Want to be notified when new comments are posted on this page? Click on the RSS button after you add a comment to subscribe to the comment feed, or simply check the box beside "email replies to me" while writing your comment.
Hi Anna and Mark,
Just got back from Lex, VA. I wonder whether I was near you?
Also, It would seem that if only small amounts of ethanol fuel are needed you could add water to your fuel can, mix and then decant "clean" fuel?
And confirm things are OK by remeasuring the ethanol in the output product?
Since Anna is a chemist, what do you think?
John
I don’t know why you even bothered to give “Anonymous” space on your site. Even though you didn’t provide allot of details in the post it didn’t take much thought to understand what you were attempting and how to go about it.
I completely enjoy your site. In fact it is only one of two that I check daily. The other belongs to a family member. You are constantly doing something new or updating a previous project and are generous enough with your time to share it with us. Sometimes the posts leave me scratching my head but they always give me something to think about.
Keep up the good work and thank you for sharing. It is appreciated.
Ned www.newbyshomesteadhideawayfarm.com
You don't have to tape off 110 ml. Just fill it up with 90 ml of gasoline, and add 10 ml of water. Approximately* everything over 10 ml is ethanol. ( * If you mix 50 ml of ethanol with 50 ml of water you don't end up with 100 ml, but slightly less because you're dealing with partial molar volumes)
Say you do it like this and get a level of 19 ml doing this. That means ≅ 19 - 10 = 9 ml of water soluable stuff (presumably ethanol) in the gasoline. The ethanol content of the gasoline is then ≅ 9/90 = 10% by volume. This is of course different from the content by weight