
Building a garlic raised bed
I started to write a
lengthy manifesto about how even back-to-the-landers and other crunchy
types get sucked into the consumerist trap. I wrote about how
Mark and I valiantly strive to steer clear of the consumerist world by
dumping the TV, living in a trailer, and so on and so forth...and I
could see every reader quickly clicking on an ad just to get away from
the endless drivel. 
 So let's stick to
specifics, why don't we? You've probably seen raised bed kits
promising you the ease of uncompacted soil which requires no tilling,
prevents the spread of crabgrass and other rooting weeds, and protects
the fertility of your garden for only $50, $200, or even $800.
This is one of my pet peeves since I can personally attest that you too
can have the delight of raised beds for the all time low price
of...drumroll please...$0!!!
So let's stick to
specifics, why don't we? You've probably seen raised bed kits
promising you the ease of uncompacted soil which requires no tilling,
prevents the spread of crabgrass and other rooting weeds, and protects
the fertility of your garden for only $50, $200, or even $800.
This is one of my pet peeves since I can personally attest that you too
can have the delight of raised beds for the all time low price
of...drumroll please...$0!!!
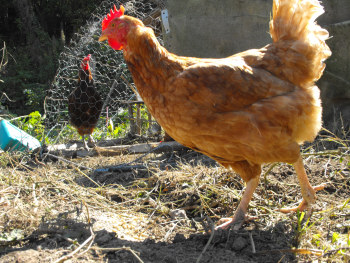
The first step in
building a new raised bed is to break up the soil. I'm getting
ready to plant garlic in an area where I'd had potatoes this year, so
after I dug the potatoes I ran the chicken tractor across the new
ground for a week or two. The chicken poop will fertilize the
soil, providing phosphate which my soil is a little low on and which
garlic loves.
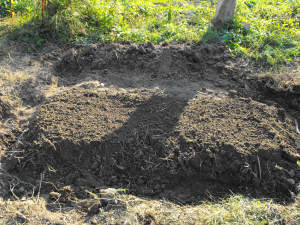
Once
the chickens have been moved on to their new location, I start to dig
the aisles, mounding the dirt up onto the area where I want the bed to
be. I dig the very top layer of soil only since this is the good
stuff full of organic matter. Don't put clay in your raised
bed! The whole point is to get a double helping of top soil.
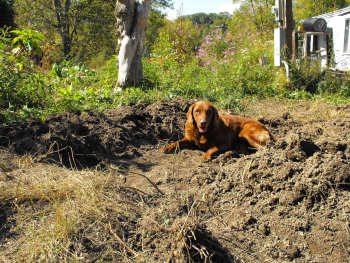 In my garden, I try to to keep beds running in perfect rows,
but this bed will be at an angle to the other beds since it would
otherwise bisect one of Lucy's paths. I've learned the hard way
that it's a lot easier to plan your beds around where the dog runs than
to try to train the dog to run somewhere else!
In my garden, I try to to keep beds running in perfect rows,
but this bed will be at an angle to the other beds since it would
otherwise bisect one of Lucy's paths. I've learned the hard way
that it's a lot easier to plan your beds around where the dog runs than
to try to train the dog to run somewhere else!
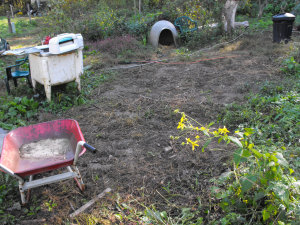
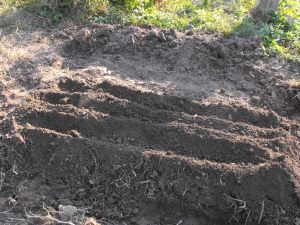
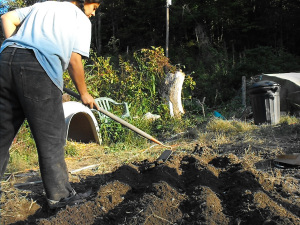
The first year, my raised beds ended up too close together. The
more space you have in the aisles, the happier you'll be when it comes
time to mow weeds. The picture below shows my measuring
system --- both the bed and the aisle should be as wide as the handle
of the shovel is long. (It's always handy to use your tools as
measuring implements rather than running inside for a tape measurer.)
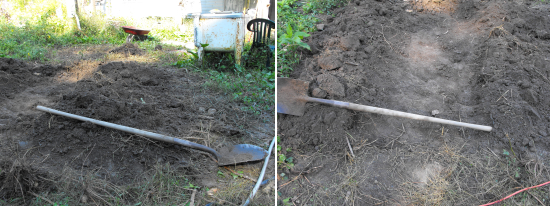
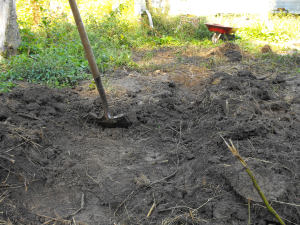
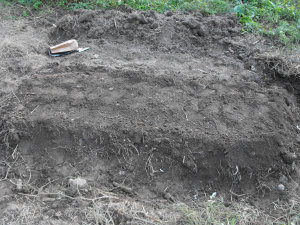
 The
picture to the left shows the completely dug bed. Notice that
I've dug a bit of an aisle on all sides, even the sides which will butt
up against lawn or other new beds. Aisles prevent rooting weeds
from wandering up onto the edge of your bed. Whenever I got lazy
at the edge of previous beds and let them run straight into the
surrounding "yard", I was sorry!
The
picture to the left shows the completely dug bed. Notice that
I've dug a bit of an aisle on all sides, even the sides which will butt
up against lawn or other new beds. Aisles prevent rooting weeds
from wandering up onto the edge of your bed. Whenever I got lazy
at the edge of previous beds and let them run straight into the
surrounding "yard", I was sorry!
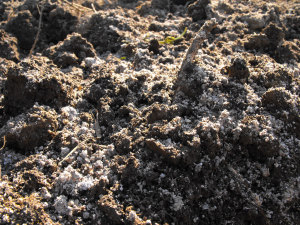
I
added a light sprinkling of wood ashes to my dirt next since garlic
likes neutral soil and my soil is slightly acidic. Wood ashes
will also add a bit more phosphate, which is a plus.
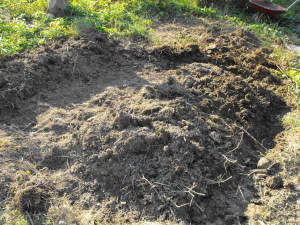
Now
it's time to rake your bed. Pull the rake through the soil
repeatedly, breaking up any clods of dirt and pulling out roots.
The more you rake, the fewer weeds you'll have coming up in your new
bed --- rake as long as you can stand it!
The
fully raked bed has all of the roots and debris removed and has the
soil broken up into relatively fine particles.
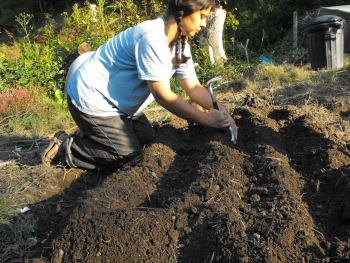
 Next,
I use the hoe to dig trenches into the bed. These can be very
shallow if you're planting something like carrots, and can even be
ignored altogether when broadcasting lettuce or greens seeds over the
whole bed.
Next,
I use the hoe to dig trenches into the bed. These can be very
shallow if you're planting something like carrots, and can even be
ignored altogether when broadcasting lettuce or greens seeds over the
whole bed.
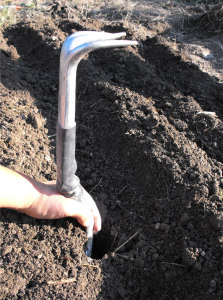
I
use a trowel to dig a little deeper to plant each garlic bulb.
This is the same technique you might use to plant bulbs in your yard
without digging up the grass.
Notice
that I never stand on the bed and always keep my weight on the
aisles. One of the major benefits of raised beds is that the soil
doesn't become compacted because you never walk on it.
Once all the garlic bulbs are planted, I use my hoe to drag soil back
in to close up each trench. Then I tamp down the soil gently with
the back of the hoe as seen below.

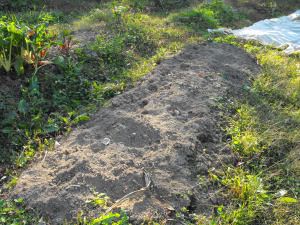
Here
is the finished garlic bed, made and planted in an hour or two at no
expense. I will add compost and mulch as needed, but won't till
up this bed again so the soil microorganisms will build up to high
levels.
The
bed to the right is a two year old bed which I just pulled old corn
stalks out of. I'll rake it and mulch it well for the winter,
then in the spring it'll be ready to rake and plant.
So there you have it --- a free raised bed made with simple hand
tools! I hope you'll give it a try.

Or explore more posts by date or by subject.
About us: Anna Hess and Mark Hamilton spent over a decade living self-sufficiently in the mountains of Virginia before moving north to start over from scratch in the foothills of Ohio. They've experimented with permaculture, no-till gardening, trailersteading, home-based microbusinesses and much more, writing about their adventures in both blogs and books.
Want to be notified when new comments are posted on this page? Click on the RSS button after you add a comment to subscribe to the comment feed, or simply check the box beside "email replies to me" while writing your comment.
- Remove comment
- Remove comment
- Remove comment
- Remove comment