
Quick and dirty rain-barrel installation
 Although we'd most like to have a rain barrel over by the composting toilet,
every time I walked past our unused rain barrel, it said, "Put me
up!" Our preferred location will take a few hours to assemble, but
I was confident that I could install the rain barrel on the edge of our
front porch in half an hour. That location would save me a few
steps every day when I carry water to the heavy-drinking ducks,
so it seemed worth the effort. And, with one rain barrel under
our belt, I figured our next installation will be even simpler.
Although we'd most like to have a rain barrel over by the composting toilet,
every time I walked past our unused rain barrel, it said, "Put me
up!" Our preferred location will take a few hours to assemble, but
I was confident that I could install the rain barrel on the edge of our
front porch in half an hour. That location would save me a few
steps every day when I carry water to the heavy-drinking ducks,
so it seemed worth the effort. And, with one rain barrel under
our belt, I figured our next installation will be even simpler.
So, what did I do to
install the rain barrel? Mark was in town when I got the
water-collection bee in my bonnet, so I did it myself...and took about
an hour instead of half an hour (probably because I didn't know where
all of Mark's tools were).
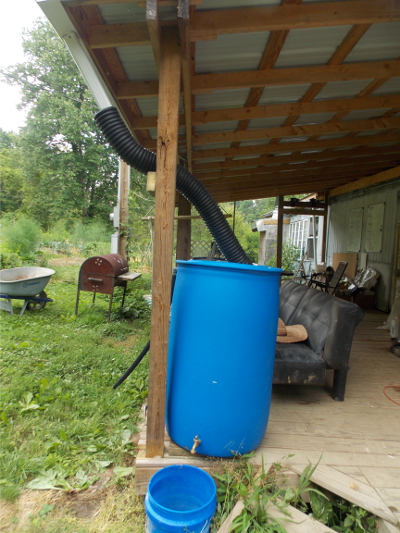
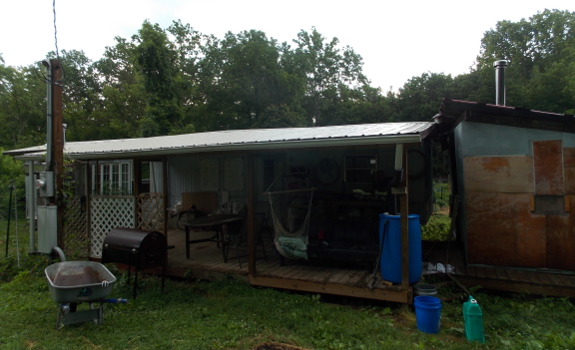
The first step was
figuring out where to place the rain barrel. If I'd been making
one from scratch, I would have preferred to make the faucet stick out
past the front of the porch rather than coming off to the side near the
steps, but since the overflow pipe is on the left side of this rain
barrel, the orientation shown above seemed the best. I stuck a few
scrap pieces of 2X6 under the barrel to make it easy to get a bucket
out from under the faucet, then called the elevation job done.
(Yes, this is the very quick-and-dirty version of rain barrel installation. Mark would never let that kind of jurryriggery fly.)
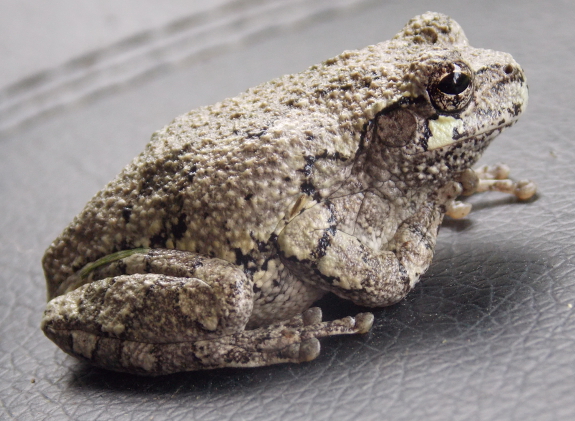
 Now
it was time to cut the downspout from the gutter. I eyeballed the
height and used a sawzall...then carefully worked around the gray treefrog who hopped out of the drain.
Now
it was time to cut the downspout from the gutter. I eyeballed the
height and used a sawzall...then carefully worked around the gray treefrog who hopped out of the drain.
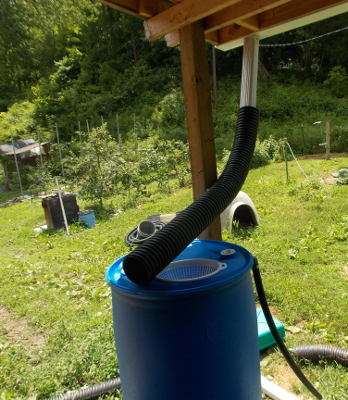
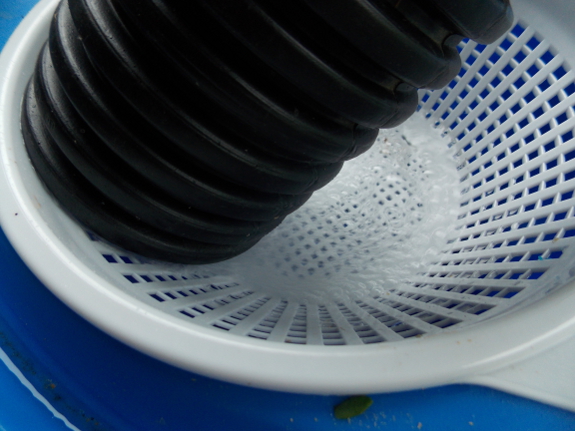
Next, I cut a piece of
black corrugated pipe to slip over the downspout and send water into the
rain barrel, but the black pipe didn't want to bend right to send water
down instead of to the side. So I added a piece of wood on the
porch post (see top photo) to give the pipe the appropriate curve.
(The photo to the right shows the pipe pre-curve.)
Literally minutes after I
finished putting away Mark's tools, the sky opened up and began to fill
the barrel. It was a joy to listen to water gurgle into the
barrel, although I did have to add a third piece of wood under once side
when the container started to tilt to one side. As Mark mentioned
in his post, I also discovered that the faucet leaks slightly when only sealed with plumber's tape, so that problem will need to be solved at a later date.
It only took a quarter of
an inch of rain to fill the barrel, and just before any slipped out the
overflow pipe, the storm passed us by. I figure one rain per week
would be sufficient to keep enough water in the barrel for my
fowl-watering duties, saving me a few minutes every day since I'll no
longer have to lug buckets from the back side of the trailer to do duck
duty. That hour of installation will trickle back into my time
bank account in just a few weeks!

Or explore more posts by date or by subject.
About us: Anna Hess and Mark Hamilton spent over a decade living self-sufficiently in the mountains of Virginia before moving north to start over from scratch in the foothills of Ohio. They've experimented with permaculture, no-till gardening, trailersteading, home-based microbusinesses and much more, writing about their adventures in both blogs and books.
Want to be notified when new comments are posted on this page? Click on the RSS button after you add a comment to subscribe to the comment feed, or simply check the box beside "email replies to me" while writing your comment.
Hello Mark and Anna, Love your posts!! I was wondering if you have thought about using a hose to siphon water from your rain barrels to help prevent future problems with your faucet sticking out at the bottom of the barrel. That is what I did, I didn't want to risk going thru all that work of installing the faucet then have a leak I couldn't fix. I decided to buy a 4 way pvc, I put a 4 inch pipe on each side of it, a high pressure kind of see thru hose on the end of the 4 way, the hose goes down into the barrel and a shut off valve opposite of the hose. I let the 4 way dangle above the opening of the barrel, when I need water I shut off the valve, pull the hose out of the barrel enough to get to my bucket and turn on the valve. As long as the water in the hose is below the water line in the barrel before I turn on the valve I get an automatic siphon. I love it. I hoping you two wouldn't mind taking weekly snapshots of whole garden. Its darn nice from the pictures I've seen. Thanks a lot JOHN