
How to install a package of bees
Yesterday, you learned what
a package of bees is,
so today I'm going to walk you through installing a package into a
hive. Evening is the best time to hive a package since the coming
night makes bees more likely to stay in their new home. If your
bees arrive early, put them in a room-temperature, quiet place to await
the hour before sunset. (A closet, garage, or spare room works
fine.)
 Meanwhile, you should be
gathering your supplies. All you really need to hive a package is
a hive tool and a nail or piece of wire to puncture the candy in the
queen cage, but you might find some other equipment handy.
Meanwhile, you should be
gathering your supplies. All you really need to hive a package is
a hive tool and a nail or piece of wire to puncture the candy in the
queen cage, but you might find some other equipment handy.
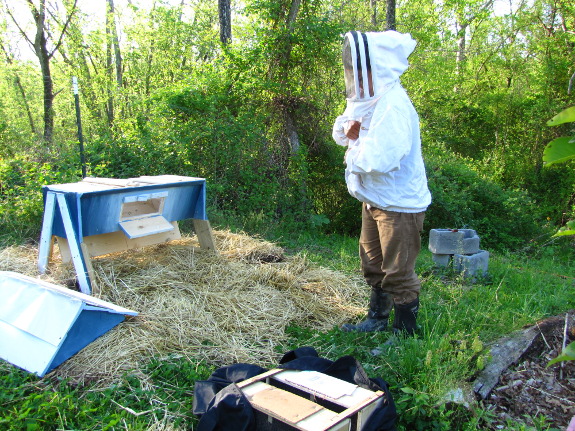
Bees in a package are
very gentle, but they're also confused and will land all over your
head, hands, and arms. I recommend wearing a veil at the least,
and you might feel more comfortable in a full bee suit. If you're
able to allow bees to settle on your bare skin without batting at them,
this is one procedure that works much better without gloves, but go
ahead and wear hand protection if you're going to be nervous without.
Other tools you might
use include:
- Scissors (in case your queen cage is attached to a fabric strap)
- Spray bottle of sugar water (in case the bees freak you out and you need to sedate them)
- Screw and screwdriver or staple gun (in case you need to attach the queen cage to a top bar)
- Bee brush (to move
addled bees out of the way when closing the hive back up)
 With
your tools assembled, take another few minutes to prepare your
hive. Each type of hive is prepped differently, and I'll cover
the specifics for Warre hives and top bar hives in later posts.
If you're installing a package into a Langstroth hive, I recommend
doing a little additional research to find out those details. At
its most basic, hive preparation consists of making a space into which
you can pour bees.
With
your tools assembled, take another few minutes to prepare your
hive. Each type of hive is prepped differently, and I'll cover
the specifics for Warre hives and top bar hives in later posts.
If you're installing a package into a Langstroth hive, I recommend
doing a little additional research to find out those details. At
its most basic, hive preparation consists of making a space into which
you can pour bees.
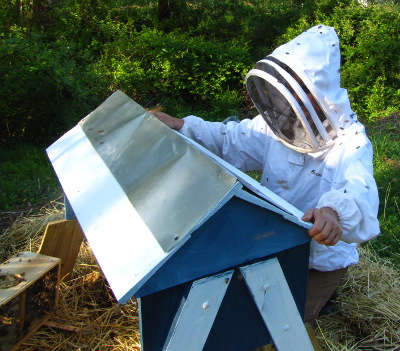
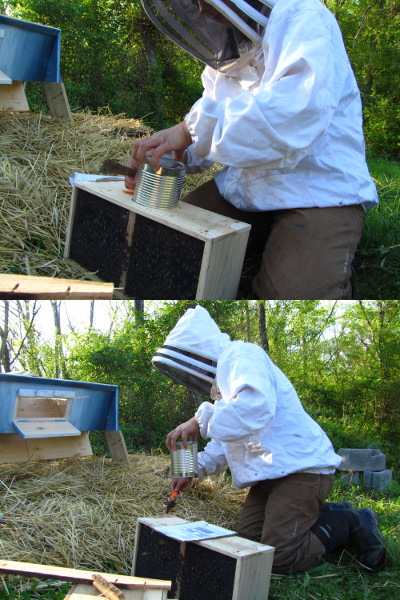
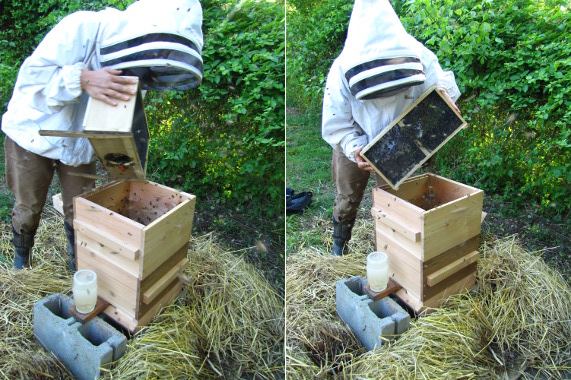
Now you can start to pry
your package apart. If you ordered more than one package and they
were mailed as a single unit, use your hive tool to separate the
packages. Next, pry off the cardboard or plywood cover on top of
one package, as is shown above.
 Underneath the cardboard or
plywood lid, you'll see the top of the can of syrup. There will
also be a strap --- either fabric or thin metal --- that attaches to
the queen cage. It's very important that you don't knock the
queen cage off this strap and that you don't let the queen cage fall
into the package of bees. Both mistakes can be remedied, but
beginners will do better to prevent them.
Underneath the cardboard or
plywood lid, you'll see the top of the can of syrup. There will
also be a strap --- either fabric or thin metal --- that attaches to
the queen cage. It's very important that you don't knock the
queen cage off this strap and that you don't let the queen cage fall
into the package of bees. Both mistakes can be remedied, but
beginners will do better to prevent them.
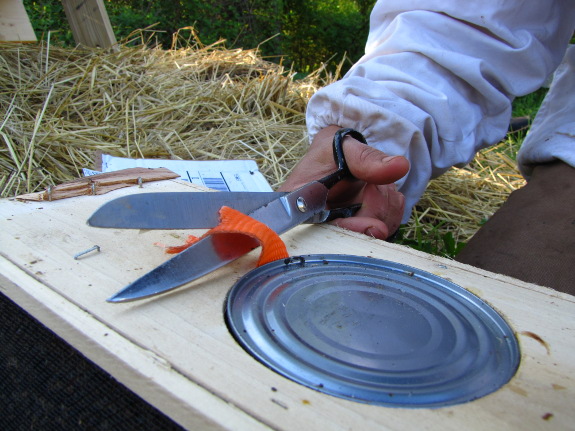
 If the strap is metal, you
should be able to pry it loose from its staple, but I had to cut my
fabric strap. I was careful to leave enough strap that I could
hold onto the remainder while pulling out the can of syrup.
If the strap is metal, you
should be able to pry it loose from its staple, but I had to cut my
fabric strap. I was careful to leave enough strap that I could
hold onto the remainder while pulling out the can of syrup.
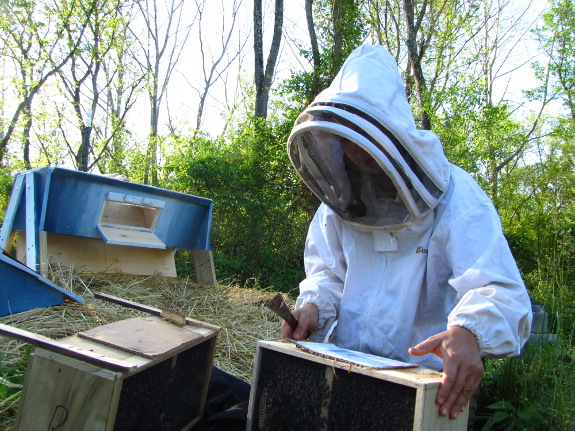
You'll notice that you
really need three hands for this procedure, but you'll find a way to
make do with two. Using the hive tool, pry at the top of the can
of syrup until you can get a grip on it. Then hold onto the queen
strap with one hand while pulling out the can of syrup with the
other.
Set the can of syrup
aside while pulling out the queen cage and placing the cardboard or
plywood lid back on the package so bees don't stream out. (Yes,
some bees will escape during this procedure --- don't worry about it.)
 What you should be focusing
on now is the queen cage.
If the weather is chilly, brush off attendant bees and stick the queen
cage in
your pocket until you're ready to deal with her. If it's warm,
just set her aside while you get the tools for the next part of the
procedure. But don't lose her!
What you should be focusing
on now is the queen cage.
If the weather is chilly, brush off attendant bees and stick the queen
cage in
your pocket until you're ready to deal with her. If it's warm,
just set her aside while you get the tools for the next part of the
procedure. But don't lose her!
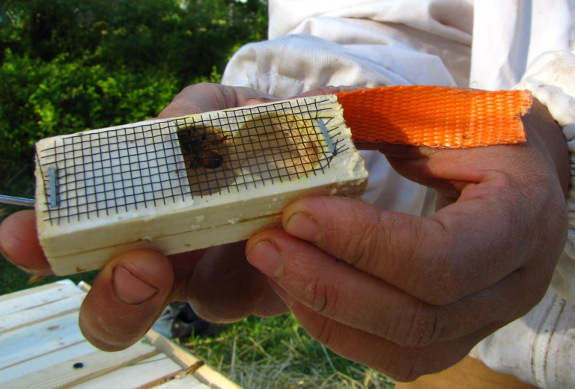
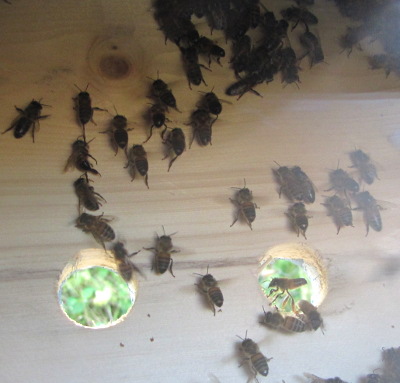
You'll notice that the
queen cage has corks on two ends, one of which leads directly into the
queen's living area (right side of the above photo) and the other of
which goes into the candy plug (left side of the above photo).
Beginners should leave the cork on the living area side alone and
instead focus on removing the cork that leads into the candy.
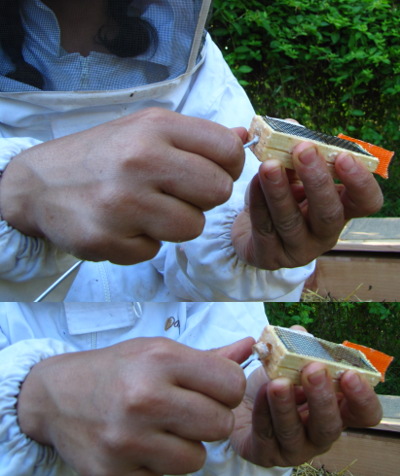
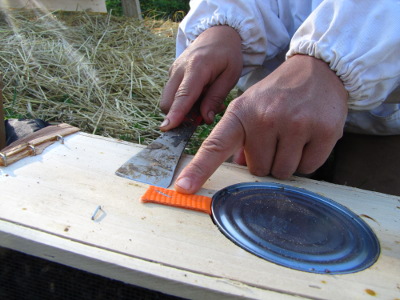
You can take out the
cork with anything you want. Pros often use the corner of their
hive tool, but I found it much easier to spear the cork with a piece of
wire and pull it loose.
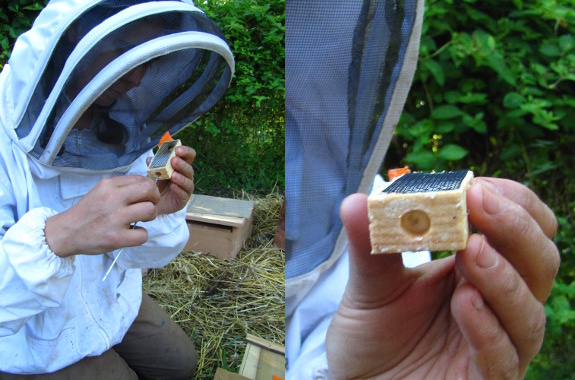
 Underneath
the cork is a plug of candy. You want to make a hole in the candy
large enough for the queen's scent to waft through, but not so large
that the queen herself can crawl out. The queen should have to
chew for a day or two before she can escape.
Underneath
the cork is a plug of candy. You want to make a hole in the candy
large enough for the queen's scent to waft through, but not so large
that the queen herself can crawl out. The queen should have to
chew for a day or two before she can escape.
To get this effect,
pierce the candy with a nail or wire. Be careful that you don't
skewer the queen!
The candy in one of my
queen cages had partially melted (see the photo on the right).
It's not the end of the world if your hole doesn't really work --- you
can let the queen out in a few days if she hasn't escaped on her own.
Where you put the queen
depends on what kind of hive you're using. Do a little research
on your own or read my posts about top bar and Warre hive installation
(coming soon for those reading this post as I write it, or linked at
the bottom if you're reading this post later). I'm assuming
you've installed the queen before you move on to the next step below.
Now for the fun (read:
scary) part --- pouring the bees into the hive! Bees in a package
tend to cluster near the top, and you want them loose and
pourable. If you're scared of your bees, spray them with sugar
water now (but that's not really necessary --- I didn't). Next,
tap the box of bees solidly on the ground to knock them loose, take off
the lid, then quickly upend the box over top of the open hive.
Pouring worker bees out
of a package takes a bit of skill. You'll end up tilting the box
from side to side so bees drop out the entrance hole, and you'll
probably stop several times to tap the box again and knock bees
loose. This is when bees will fly all around and scare you, but
remember that hiveless bees are gentle and very unlikely to sting.
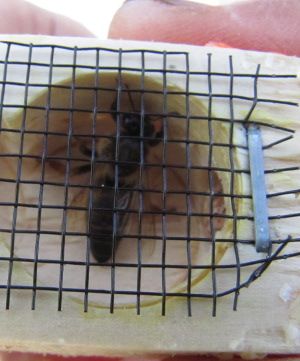
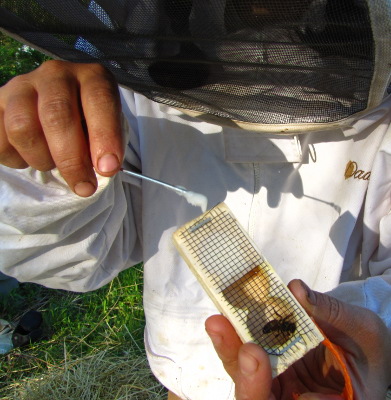
 Later posts will tell you how
to close your hive and make sure your
package install was a success, but I've got a bit more advice for
the installation phase. First, don't worry about all those bees
buzzing around in the air. As soon as the workers in the hive get
their feet under them, some will go to the entrance and start fanning
air full of queen pheremone out to attract stragglers. (You can
see one bee fanning in the photo here, taken through the observation
window in our Easy Hive.)
Later posts will tell you how
to close your hive and make sure your
package install was a success, but I've got a bit more advice for
the installation phase. First, don't worry about all those bees
buzzing around in the air. As soon as the workers in the hive get
their feet under them, some will go to the entrance and start fanning
air full of queen pheremone out to attract stragglers. (You can
see one bee fanning in the photo here, taken through the observation
window in our Easy Hive.)
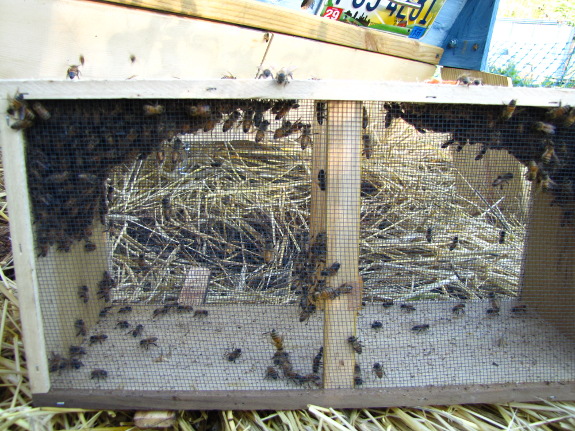
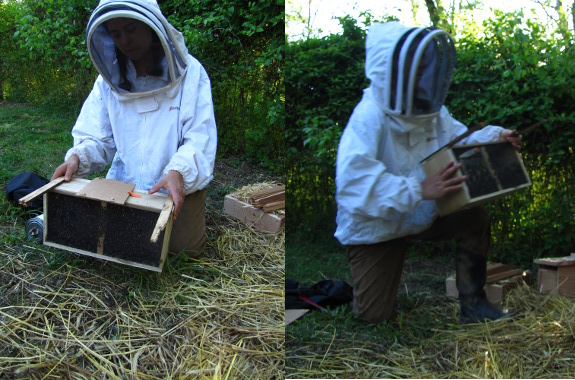
 The bees stuck in the package
are more problematic. If you're a better thumper and shaker than
I am, you might get them all out the first time, but I find that it's
easier to wait until ten or fifteen minutes after the hive has been
closed up and everyone has settled down, then to come back and check on
the package. Chances are, you'll see bees clustering in the upper
corners, as in the photo above.
The bees stuck in the package
are more problematic. If you're a better thumper and shaker than
I am, you might get them all out the first time, but I find that it's
easier to wait until ten or fifteen minutes after the hive has been
closed up and everyone has settled down, then to come back and check on
the package. Chances are, you'll see bees clustering in the upper
corners, as in the photo above.
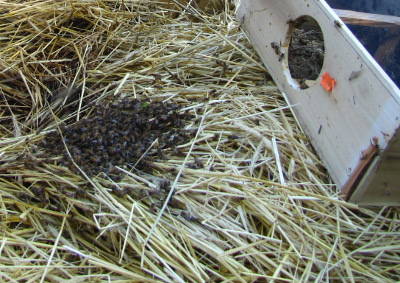
 A couple of thumps and shakes
are all it takes to knock most of the remaining bees out onto the
ground, which will make it easier for the bees to find their way to the
hive. Place the package in front of the hive, hole-side-up, and
nearly every bee will be in the hive come morning.
A couple of thumps and shakes
are all it takes to knock most of the remaining bees out onto the
ground, which will make it easier for the bees to find their way to the
hive. Place the package in front of the hive, hole-side-up, and
nearly every bee will be in the hive come morning.
Weekend
Homesteader is full of fun and easy projects to help guide you onto
the path to self-sufficiency.