
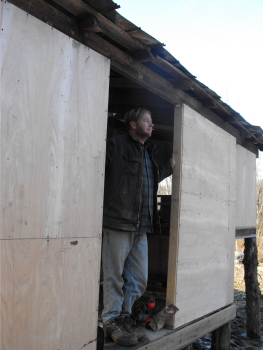
What I learned on the roof
 Like
every part of our homemade
storage building
project, the roof was a learning experience. We chose to reuse
salvaged tin from the old house we tore
down, and I wish I'd
taken the time during demolition to mark the order in which the sheets
of tin came off the roof. Instead, we ended up with a mixture of
pieces of tin from different parts of the roof, and when we put them up
on the new roof, the holes in the overlapping ridges didn't line up
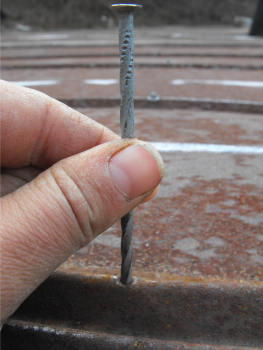
from one piece to the other. It wasn't too hard to make a pilot
hole in the bottom piece of tin with a nail then fit in the roofing
screw, but extra holes in your roof are never a good thing.
Like
every part of our homemade
storage building
project, the roof was a learning experience. We chose to reuse
salvaged tin from the old house we tore
down, and I wish I'd
taken the time during demolition to mark the order in which the sheets
of tin came off the roof. Instead, we ended up with a mixture of
pieces of tin from different parts of the roof, and when we put them up
on the new roof, the holes in the overlapping ridges didn't line up
from one piece to the other. It wasn't too hard to make a pilot
hole in the bottom piece of tin with a nail then fit in the roofing
screw, but extra holes in your roof are never a good thing.
Learning experience two
was all about lining up the tin. Our building isn't quite square,
and I decided to line up the long side of the tin with
the short edge of the building and let the short side of the tin be not
quite parallel with the long edge of the building. Mistake!
By piece of tin number three, it was clear that my tin was no longer
 going to cover the top wooden cross-piece unless I gave in and tugged
it up a bit. I ended up with a roof with slightly jaggedy top and
bottom edges rather than straight lines across. Hopefully when we
add the gutter, the jaggediness will be less visible.
going to cover the top wooden cross-piece unless I gave in and tugged
it up a bit. I ended up with a roof with slightly jaggedy top and
bottom edges rather than straight lines across. Hopefully when we
add the gutter, the jaggediness will be less visible.
Mark kindly didn't
comment on my roofing inadequacies.... Thanks, honey!
| This post is part of our Building a Storage Building from Scratch
series.
Read all of the entries: Part 1: Foundation
Part 3: Walls and scavenging lumber
Part 5: The roof
|

Or explore more posts by date or by subject.
About us: Anna Hess and Mark Hamilton spent over a decade living self-sufficiently in the mountains of Virginia before moving north to start over from scratch in the foothills of Ohio. They've experimented with permaculture, no-till gardening, trailersteading, home-based microbusinesses and much more, writing about their adventures in both blogs and books.
Want to be notified when new comments are posted on this page? Click on the RSS button after you add a comment to subscribe to the comment feed, or simply check the box beside "email replies to me" while writing your comment.
Erich --- I didn't know you could cut metal with a circular saw. We may have to get one!
Daddy --- I probably should have, but I didn't realize what the problem was until we were halfway done.
Some time ago I saw an interesting sheet metal sawblade on the woodworking for engineers website. It's a very interesting site if you're into woodworking. His home-made joinery rigs are quite impressive.