
archives for 11/2013
Sometimes it's a wonder
we get anything done around here. Take yesterday for
example. It was raining after lunch, so I wrote for an extra half
hour, then went out to pull up the peppers in preparation for some of
our last rye planting of the year.
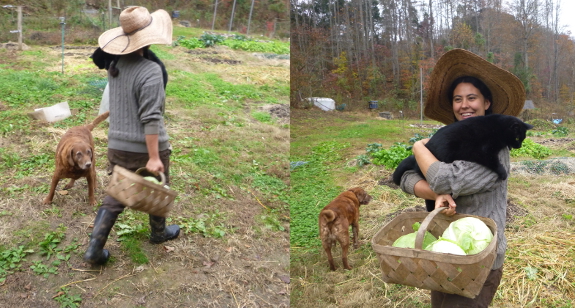
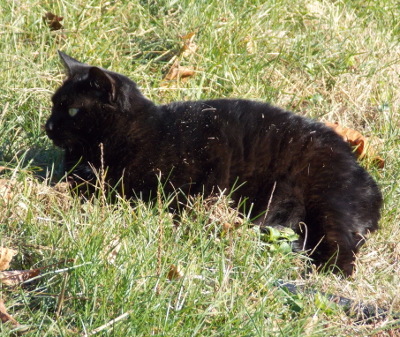
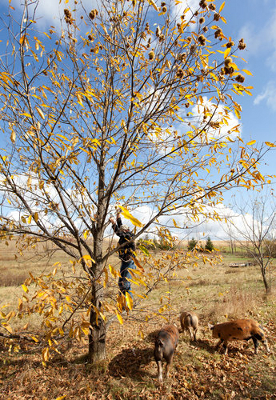
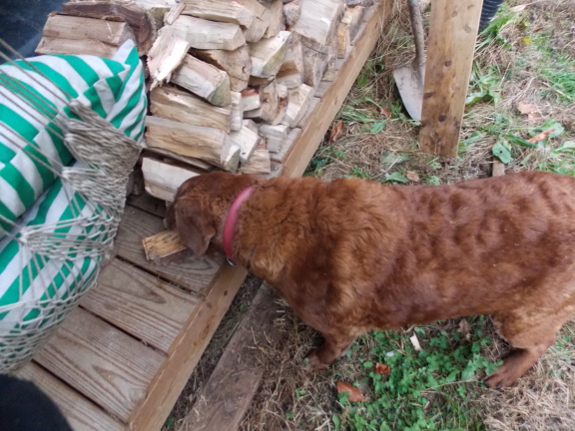
But Huckleberry followed me out and danced around enough that he got stung on the tip of his tail by a honeybee. He ducked into my quick hoop
for safety, so I had to drag him out from the lettuce, then carried the
spoiled feline home along with a basket of cabbages. It sure is a
good thing Lucy is our usual work companion, not Huckleberry.
 (If you haven't already,
you'll want to start with part
1, part
2, part
3, and part 4
from the very beginning of Growing
Into a Farm.)
(If you haven't already,
you'll want to start with part
1, part
2, part
3, and part 4
from the very beginning of Growing
Into a Farm.)
In early 2004, I
attended a grafting class and came home with a dozen baby apple
trees to begin my long-dreamed-of orchard. With the help of
my family, I ripped back honeysuckle and brambles and put the
trees in the ground...where they were soon eaten by deer and
overcome by weeds.
Meanwhile, the farm
slowly began to feel less like a retreat. During a weekend
over-night in April, I left my car parked along the secluded
country road and woke to found it had rolled down the hill into my
neighbor's field, just a few feet shy of being dunked in the
creek. Later, I learned that high-school kids enjoy spending
Friday nights partying down the road from my farm, and I can just
imagine their drunken enthusiasm at giving my little clown-car a
heave and watching it drift away. But at the time I felt
like the car episode was a malicious attempt by the local
community to push me out, and I began jumping at every sound when
camping at the farm. I had no phone and knew no one in the
area well—what would I do if my car ended up in the creek and I
was stranded there with no way out?
 By the end of April, my
journals had gone strangely silent. I was still living an
hour-and-a-half's drive away from my property, and the chances of
moving in anytime soon seemed increasingly slim. My own
idealism, reinforced by that of my father and by my slim wallet,
made it unthinkable to consider buying materials or labor to build
my house, and I knew deep down that I couldn't finish it by
myself.
By the end of April, my
journals had gone strangely silent. I was still living an
hour-and-a-half's drive away from my property, and the chances of
moving in anytime soon seemed increasingly slim. My own
idealism, reinforced by that of my father and by my slim wallet,
made it unthinkable to consider buying materials or labor to build
my house, and I knew deep down that I couldn't finish it by
myself.
Over the next year,
I dropped by the farm from time to time to take pictures of the
wildlife, but my first relationship seemed to be at a
standstill. All that dreaming, planning, and saving, and one
winter had worn me down to a nubbin.
Want to know what
happens next? Growing
into a Farm is free on Amazon today! Even though
the ebook can
be read on any device, I'll also email you a free pdf copy today if
you'd rather --- just email
anna@kitenet.net with your request.
| This post is part of our Growing into a Farm lunchtime series.
Read all of the entries: |

Reading the reviews on Lucy's
Lectro
Heated Kennel Pad taught
me that the device has been known to malfunction, causing the
thermostat in the pad to keep it on all the time creating a situation
where it's too hot and will most likely burn out and stop working.
Lucy has been using hers a
lot lately, which makes me happy knowing she's comfortable, but I've
started testing it once a week by putting my hand on it to see if it's
too hot or burned out.
 Do you want lots of fruit trees, but don't have much cash? As long as you're willing to experiment with grafting
(you'll pick it up fast), all you need is rootstock and
scionwood. Rootstock is pretty cheap (usually $2 to $4, plus
shipping), and you can also make your own by stooling (something I'm experimenting with this year --- more on that in a later post). Meanwhile, scionwood is often free if you find someone willing to swap with you.
Do you want lots of fruit trees, but don't have much cash? As long as you're willing to experiment with grafting
(you'll pick it up fast), all you need is rootstock and
scionwood. Rootstock is pretty cheap (usually $2 to $4, plus
shipping), and you can also make your own by stooling (something I'm experimenting with this year --- more on that in a later post). Meanwhile, scionwood is often free if you find someone willing to swap with you.
Last year, I pointed you toward (and used) the Northern Nut Growers' Association Scionwood Swap
(and also did some swapping here on the blog). But this year I
found an even better resource and wanted to make sure you all were aware
of it --- The North American Scion Exchange yahoo group. I think you have to join the group to see anything, then you go here
and look through each member's list, trying to find someone who has
what you want and wants what you have. I already tracked down a
source for my three wished-for apple varieties of the year --- Kidd's
Orange Red, King David, and Chestnut Crab.
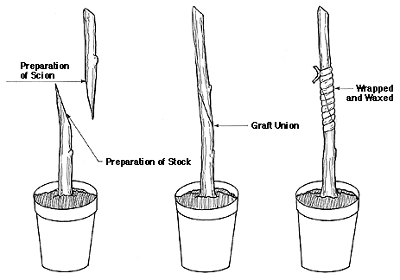 There
are also various in-person scionwood swaps scattered across the
country, but I don't think there are any near us. And some
extension agents (like ours) offer grafting workshops every year where
you pay a small fee for your rootstock and are given a wide range of
scionwood to choose from.
There
are also various in-person scionwood swaps scattered across the
country, but I don't think there are any near us. And some
extension agents (like ours) offer grafting workshops every year where
you pay a small fee for your rootstock and are given a wide range of
scionwood to choose from.
The downside of all of
these ways of getting nearly-free fruit trees is that you have to wait
about two extra years for fruit. But, especially once your first
trees are bearing, it starts to feel like a good deal to get ten new
fruit trees for the price of one.
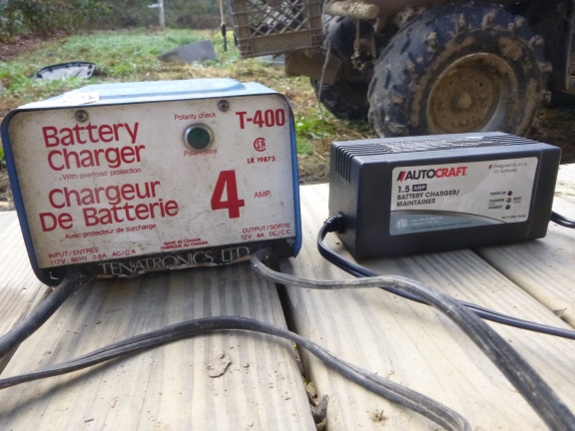
I think I may have damaged
the battery on our first ATV back in the early Summer when I
trickled charged it all night with this ancient charger.
A little research will show
that 4 amps is a lot for a small battery, and you need to disconnect it
after so many hours before it starts to overcharge.
The new AutoCraft charger
shuts off automatically and then shifts into a maintanance mode that
will slowly send a charge but only when it needs it. No more guess
work on when to shut off the old charger.
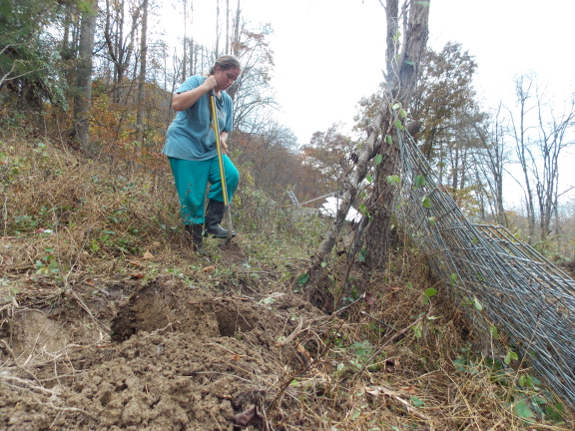
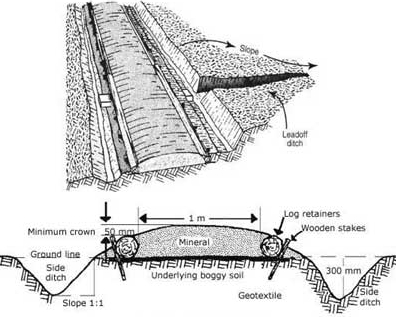 I really appreciated everyone's feedback on my ditch experiment, especially the reader who sent me to this excellent webpage.
Apparently, mounding the dirt from the ditches up on top of the road is
the solution, a technique known as a turnpike. For best results,
we'll want to splurge on some geotextile fabric to go under the new dirt
--- the stuff at Lowes is expensive ($1/linear foot and up), but
probably worth it. Maybe that will be our next big expenditure
(plus renting heavy equipment to make the digging go easier) once chicken waterer season kicks in next year and we're feeling more flush.
I really appreciated everyone's feedback on my ditch experiment, especially the reader who sent me to this excellent webpage.
Apparently, mounding the dirt from the ditches up on top of the road is
the solution, a technique known as a turnpike. For best results,
we'll want to splurge on some geotextile fabric to go under the new dirt
--- the stuff at Lowes is expensive ($1/linear foot and up), but
probably worth it. Maybe that will be our next big expenditure
(plus renting heavy equipment to make the digging go easier) once chicken waterer season kicks in next year and we're feeling more flush.
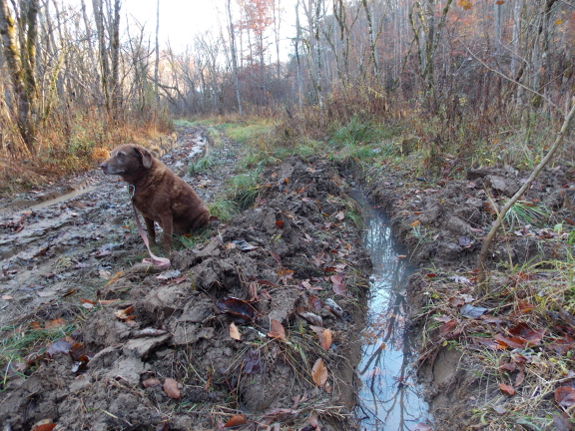
In the meantime, I
thought you might like to see the results of our hand-dug
experiment. Wednesday night's rain raised the groundwater level by
six or seven inches, so it was easy to see what was going on in our
little ditches. They definitely filled up, but they don't seem to
be moving the water away from the road so much as collecting it in
place.
I suspect that we need to commit to making the perpendicular ditch slope
all the way down to the alligator swamp (the old bed of Sinking Creek)
if we want the ditches to be effective in draining moisture away from
the road. If we feel really industrious this winter, we may dig
that side ditch out by hand, but it's brutal digging in the swamp --- so
much easier to forget about the problem and hope it goes away....
 50 pounds of rye seed in the ground! (Actually, I gave Kayla about four pounds, so I guess I can only take credit for 46.)
Where did I fit all that rye? Since my oats went in early this year, most started to bloom in late September, so I scattered rye seed amid the oats and had Mark weed-eat the latter down.
(You can see the result, several weeks later, in the photo at the top
of this post.) Meanwhile, I planted rye in the beds where crops
like tomatoes and squash died after our first frost, and in empty soil left after digging the fall carrots.
 Of course, I still had rye seeds left after all that, so I started moving dirt around. I posted here about my gully terraforming experiment, and you'll need to visit my chicken blog
this week if you want to read about the swales Kayla and I dug in the
newest pasture to create tree alleys (and about the cute box turtle we
found in the process). All of that digging created bare soil, so I
topped it off with rye and finally hit the bottom of the bag!
Of course, I still had rye seeds left after all that, so I started moving dirt around. I posted here about my gully terraforming experiment, and you'll need to visit my chicken blog
this week if you want to read about the swales Kayla and I dug in the
newest pasture to create tree alleys (and about the cute box turtle we
found in the process). All of that digging created bare soil, so I
topped it off with rye and finally hit the bottom of the bag!
Of all our cover crops, I feel like rye handles wet soil the best and
produces the most biomass, so planting a full bag of rye feels a bit
like investing in an internet startup company --- a little bit of effort
for (hopefully) a lot of return. I'll report in the spring about
whether the rye I planted latest (November 1) covered the ground
adequately, and about whether I have any problem mow-killing it before our summer crops go in.
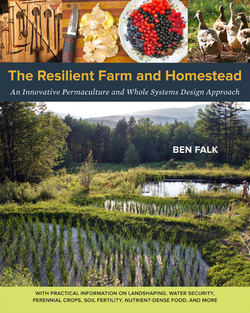 The kind of books I love the most are
inherently flawed, so let me start with the flaws up front in case
they're enough to scare you away (and then I'll tell you why The Resilient Farm and Homestead is tied with Paradise Lot as the best book of 2013
for permaculture homesteaders to read). Ben Falk's book
jumps around between personal experience (which I adore) and
rehashed theory from other books (which bores me, since I've read
the originals). The text doesn't entirely hold together and
is more like reading back through our blog archives
(if they were first sorted by subject), complete with
more-frequent-than-you'd-like typos.
The kind of books I love the most are
inherently flawed, so let me start with the flaws up front in case
they're enough to scare you away (and then I'll tell you why The Resilient Farm and Homestead is tied with Paradise Lot as the best book of 2013
for permaculture homesteaders to read). Ben Falk's book
jumps around between personal experience (which I adore) and
rehashed theory from other books (which bores me, since I've read
the originals). The text doesn't entirely hold together and
is more like reading back through our blog archives
(if they were first sorted by subject), complete with
more-frequent-than-you'd-like typos.
Those couple of
minor flaws aside, what drew me into The Resilient Farm and Homestead is that the book is 100%
genuine. The author has been experimenting with permaculture
techniques on his ten-acre Vermont farm for a decade, and he's up
front about what did and didn't work...even if it flies in
the face of mainstream permaculture wisdom. The book has
many beautifully-drawn diagrams, but it's also chock-full of
(equally beautiful) photos proving that Falk's methods really
work. Perhaps that's why my notes don't just hit pertinent
points from the text, they also include projects the book inspired
me to want to try on our own farm.
The Resilient Farm and Homestead is also handy for me,
especially, because Falk is farming on my level. Most
permaculture books today focus on the urban or suburban homestead
covering a fraction of an acre of land, but how do those
techniques fare in more extensive settings? At the other
extreme, there are Sepp Holzer and a
few other practitioners who make you want to turn hillsides into
terraces and to fence in dozens of acres of pasture...with what
heavy equipment? Falk's book walks right down the middle,
presenting techniques you can maintain at the few-acre scale with
(primarily) hand tools.
I'm going to
highlight Falk's most intriguing suggestions in this week's lunchtime
series, but this is one book you owe it to yourself to read from
cover to cover. If Goldilocks were reviewing this book,
she'd say, "This is not too big or too small --- it's just right!"
| This post is part of our The Resilient Farm and Homestead lunchtime series.
Read all of the entries: |
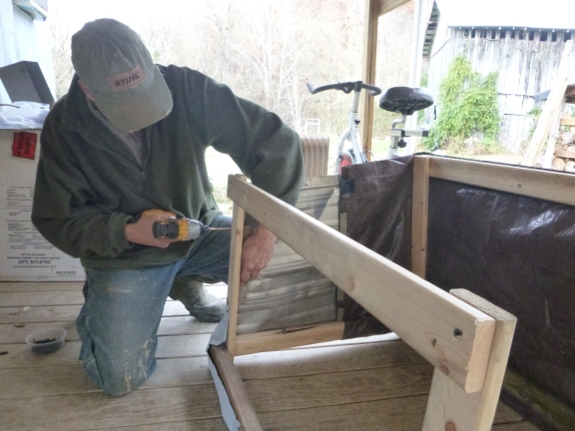
We decided to build a new
holding coop for an upcoming chicken retirement day.
Keeping it under 2 feet tall
makes it easy to reach in and grab a chicken.
First, a little bit of business. Congratulations to Stephen, winner of our free homesteading calendar! Be sure to email me
your mailing address and your calendar will go in the mail next
week. Jayne tells me the calendars will be showing up at her house
by the end of the week and she'll be mailing them out soon thereafter,
so this is a perfect time for everyone else to place your orders while the calendars are in stock. Now, back to the real post....
Every few years, I go
through my bookcase and pull out tomes I'm no longer using.
Fiction goes to the library and general-interest non-fiction goes to my
mother, but in-depth homesteading geekery needs another home.
Perhaps yours?
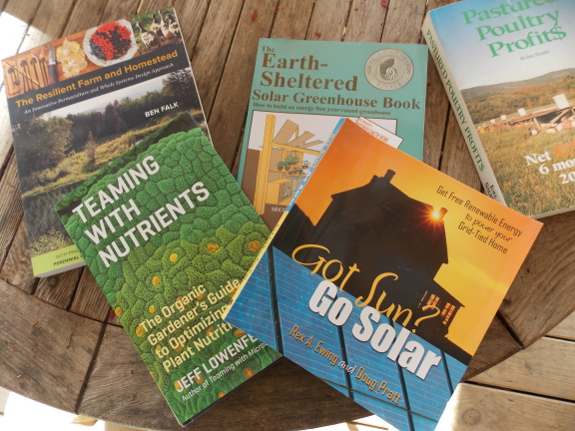
The following books are free to a good home. (I'll even pay postage.) It's first come, first served, so email anna@kitenet.net ASAP if you'd like a copy. I'll mark out each title as it's taken:
- Pastured Poultry Profits --- Joel Salatin
- Got Sun? Go Solar --- Rex A. Ewing and Doug Pratt
- The Earth-Sheltered Solar Greenhouse Book --- Mike Oehler
- Teaming With Microbes --- Jeff Lowenfels
- The Resilient Farm and Homestead --- Ben Falk
- Restoration Agriculture --- Mark Shepard. (Lunchtime series upcoming, so that link is just to Amazon.)
As a side note, my books
became much happier once I added wooden dividers to keep them all lined
up straight. My new method of spending half an hour on a
long-ignored household problem once a week is paying off!
Ben Falk's book
details his experiments at Whole Systems Research Farm, a ten-acre
tract of west-facing hillside on the border of zones 4 and 5 in
Vermont. The land was very run-down when Falk bought it, having been
logged, sugar mapled, pastured, and then clearcut for skiiing, with the
result that most of the soil had eroded away. Although soil maps
showed prime farmland over much of his land, the reality was actually
silty, gravelly clays covered by 0 to 4 inches of topsoil, with bedrock
within two feet of the surface in some places.
While others would have
been daunted by the poor soil, Falk took it as a challenge. He
embarked on ten years of experimentation, with the help of interns,
PDC groups and other visitors, and some hired summer help. The
result is six acres of silvopasture (perennial crops and grazing area
combined), along with rice paddies, vegetable
gardens, and some wild woodland.
One of the things I like most about Falk's writing is that he was inspired
by permaculture theory, but is a realist. He's found that, on the
ground, many of those theories don't hold water once you go beyond the
backyard scale, and he writes about how he tweaked various theoretical
systems to make them work on his farm. He also warns that,
although you can see inklings of how your experiments will turn out by
year five, you really need to wait at least one decade (or, better yet,
two) before declaring any system a success or failure.
My next few posts will delve deeper into Falk's systems, but I want to
end this installment with two words of wisdom I couldn't fit in anywhere else:
- If you have a big homestead, put a specimen of each crop in zone 1
as a barometer so you know when to harvest and when problems appear on the more far-flung crops.
- A great way to activate biochar is to toss it into your composting toilet.
Intrigued? Stay tuned to the blog for tomorrow's post to read more.
Don't have time to improve ten acres? Weekend Homesteader helps you focus on the most important (and easiest) projects to start where you're at.
| This post is part of our The Resilient Farm and Homestead lunchtime series.
Read all of the entries: |
It's been about a year since we started using our composting toilet, and the first bin is filled to the brim. Time to add another seat and change bins!
 When we first built the composting toilet, I planned to store the sawdust in the central bin just like the author does in The Humanure Handbook.
Since then, though, I've decided it's better to simply fill up a big
trashcan with sawdust and use that to fill our five-gallon bucket, which
sits by the seat for ease of scooping.
When we first built the composting toilet, I planned to store the sawdust in the central bin just like the author does in The Humanure Handbook.
Since then, though, I've decided it's better to simply fill up a big
trashcan with sawdust and use that to fill our five-gallon bucket, which
sits by the seat for ease of scooping.
What's wrong with keeping
the sawdust in the middle bin? Filling a bucket out of the
central bin requires awkward bending over, the sawdust there has begun
to decay a lot due to contact with the wet ground, and it's also caught a
tiny bit of seepage from the used bin beside it, which makes the
sawdust much less fun to handle. Even if that last point is really
all in my head (I only saw a smidgen of toilet paper amid the sawdust
and doubt there was much seepage), it still seemed like a good idea to
shovel the sawdust out and use it as the bottom bedding in the new bin
since we want to fill our bin halfway with high-carbon material before
we start using it anyway. Plus, this way we can fill the middle
bin next year and give this past year's bin a full twenty-four months to
decay before it goes on the garden.
Deciding on sawdust
placement only took a couple of minutes, and I spent the rest of the day
building the new seat, but this post is already too long, so I'll save
that story for another day.
 Ben
Falk is very adamant about peak oil and climate change, but he makes a
good argument for using heavy equipment for certain purposes while we
have fuel available. He wrote:
Ben
Falk is very adamant about peak oil and climate change, but he makes a
good argument for using heavy equipment for certain purposes while we
have fuel available. He wrote:
Mark tends to drag me
along kicking and screaming into a similar world of permaculture
realism, so I was interested to see what Falk considers worth spending
fossil fuels on. He focuses on five "leverage points" --- ways to
quickly improve your farm using the minimum amount of time and energy
--- and several of these strategies require heavy equipment on his
ten-acre scale:
- Clearing trees. Like us, Falk has found that it's tough to start with a forest as the base of your farm. He's very willing to pull out the chainsaw when it comes to clearing trees.
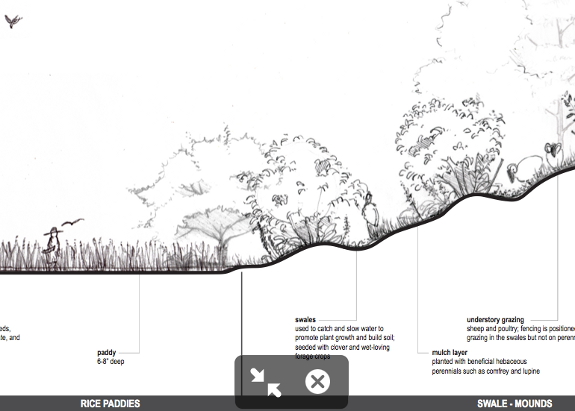
- Swales and fertigation. Rather than fighting waterlogged soil, Falk chose to create ponds and rice paddies that catch water during heavy storms, then ditches that can channel that water slightly uphill during droughts. Ducks in smaller ponds infuse the water with nitrogen, and that rich water is used to fertilize the rice paddies. Meanwhile, in drier parts of the farm, on-contour swales capture rain to hydrate trees planted upon the double-dose of topsoil along the downhill sides of the trenches. Elsewhere, island mounds (like what I use in the forest garden) raise plants out of waterlogged soil. All of these earthworks are easily created with Falk's favorite tool --- the excavator.
- Tilling and scraping to produce bare soil. Heavy equipment comes in handy here too, to create the disturbance required to give seeds and new plants a spot to grow. (On the smaller scale, I advocate kill mulches for this, but on a multi-acre scale, I'm not sure there's a fast alternative to tilling.)
- Broadcasting seeds and putting in perennials.
Now we're out of the stages that require lots of heavy machinery and
into the biological realm, which I always feel is pretty
self-explanatory. A couple of interesting points from Falk's book
include using a stropharia root dip for newly-planted trees, which allowed him to inoculate his
 orchard
mulch for two-year yields of mushrooms, and intercropping buckwheat
between large vegetables (squash and tomatoes), then pulling out the
cover crop as the vegetables need space. I'll write more about
Falk's plant systems in a later post.
orchard
mulch for two-year yields of mushrooms, and intercropping buckwheat
between large vegetables (squash and tomatoes), then pulling out the
cover crop as the vegetables need space. I'll write more about
Falk's plant systems in a later post. - Grazing animals, especially ruminants and chickens.
As I'm sure you've heard elsewhere, animals round out ecosystems and
help close the fertility loop. Falk felt that goats and pigs
didn't fit his farm, that sheep were useful but should eventually be
phased out since they tend to need medications (perhaps to be replaced by cows), that broilers are handy, and that ducks are the perfect livestock for his farm.
If this post isn't already incendiary enough, I'll end with a Falk's stance on another energy source --- cold hard cash:
What do you think of
using the current wealth of gasoline and money to fuel the beginning
stages of permaculture systems? Is it a worthwhile expenditure if
the maintenance stages can be performed with little cash and with hand
tools?
| This post is part of our The Resilient Farm and Homestead lunchtime series.
Read all of the entries: |
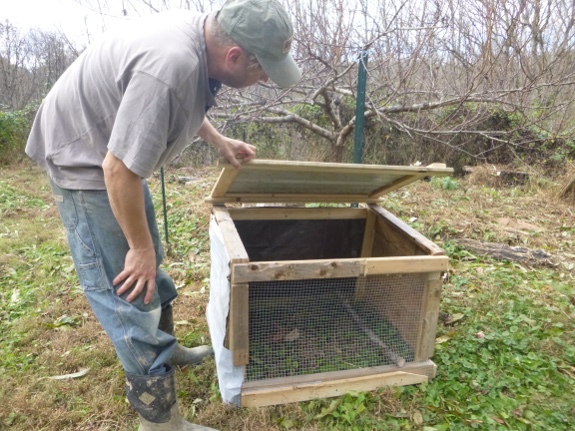
We got the new chicken
holding coop done today.
The roof is sloped a bit to
let rain run off and the bottom is open to the ground.
When Bradley built our composting toilet
for us last year, we had to decide whether to have him put in one seat
or more. We opted for one, on the grounds that we'd likely change
our mind about the design later and want to make the second a little
differently. (Plus, it's hard enough to explain composting toilets
to visitors --- what if they accidentally used the wrong hole?)
Now that it's time for the bin swap, it's up to us to build the second seat.
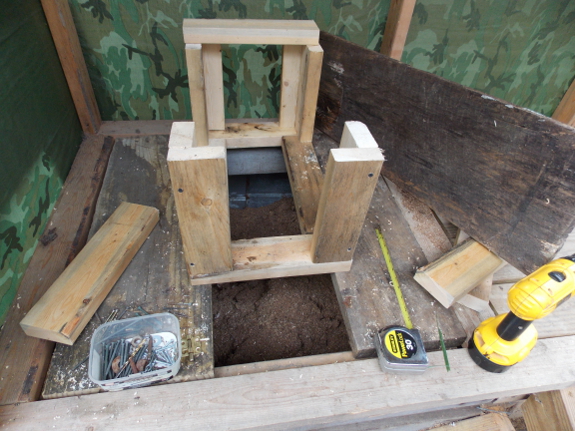
The task was simple
enough that Mark let me try my hand at construction. So all the
photos will be from a distance, so you can't tell how edges don't quite
meet up right and a couple of screws didn't go all the way in....
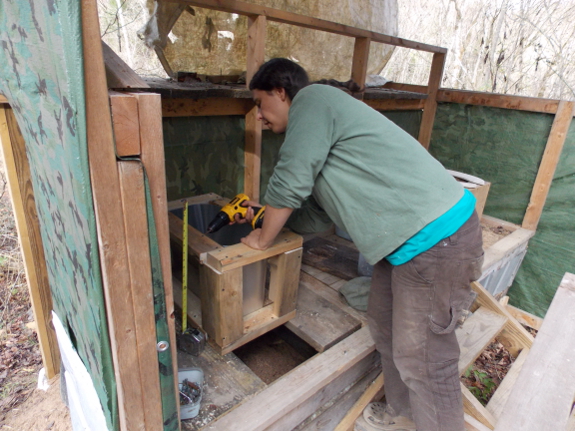
We actually were quite
happy with Bradley's design, so I mostly did the same thing again.
However, I've noticed that the floor in front of the seat tends to get
wet when women pee, so I decided to make a liner out of metal
flashing. I figure this'll make sure everything goes straight down
the hole and doesn't end up soaking into the floor.
Hopefully there won't be
anything else to post about the composting toilet until this time next
year, but I'll keep you posted if we hit any snags.
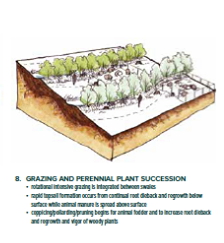
 When
Ben Falk first moved to his farm, much of it was pasture, but he felt
it was "crazy to use fossil fuel to mow down the field every year, and I
let it go." At the time, he believed that allowing succession to
take place in the field (with grasses giving way to taller herbs and
finally woody plants) was the best way to heal his troubled soil.
However, when he finally got ready to add animals to his farm, Falk
discovered that neglect had been a severe mistake since "abandoned
poor-soil fields have a stubborn inertia." In other words,
reclaiming the grass was a tough process.
When
Ben Falk first moved to his farm, much of it was pasture, but he felt
it was "crazy to use fossil fuel to mow down the field every year, and I
let it go." At the time, he believed that allowing succession to
take place in the field (with grasses giving way to taller herbs and
finally woody plants) was the best way to heal his troubled soil.
However, when he finally got ready to add animals to his farm, Falk
discovered that neglect had been a severe mistake since "abandoned
poor-soil fields have a stubborn inertia." In other words,
reclaiming the grass was a tough process.
Falk's first impulse was
to scythe the old fields in hopes of returning them to quality pasture,
but he soon discovered that mowing and scything don't have the same
effect. While mowing patchy fields increases stem density of
grasses (filling in the gaps), scything actually tends to retard grass
growth unless you cut the ground very often. Infrequent scything
drops tall stems to the ground, where they form a mulch on the surface
and shade out new growth.
 Next,
Falk figured grazing might do the trick. Unfortunately, grazing a
poor pasture with no mechanical cutting stage afterwards just selects
for the plants your livestock don't like, so his pastures weren't
getting any better. However, once Falk began grazing, then coming
behind the animals to mow and spread grass seeds, his pastures began to
provide more food for his sheep and poultry. Recently, he's also
been experimenting with burning as a way of jump-starting this process.
Next,
Falk figured grazing might do the trick. Unfortunately, grazing a
poor pasture with no mechanical cutting stage afterwards just selects
for the plants your livestock don't like, so his pastures weren't
getting any better. However, once Falk began grazing, then coming
behind the animals to mow and spread grass seeds, his pastures began to
provide more food for his sheep and poultry. Recently, he's also
been experimenting with burning as a way of jump-starting this process.
All of this isn't to say
that Falk is no longer a fan of scything. He's found that once
burning, grazing, seeding, and mowing have set back succession, he's
able to keep the pastures in check with grazing followed by
scything. Just like with his earth-moving,
Falk believes that it's worthwhile to use fossil fuels during the early
stages of reclaiming his land, but hopes to move away from machinery as
his farm improves.
| This post is part of our The Resilient Farm and Homestead lunchtime series.
Read all of the entries: |
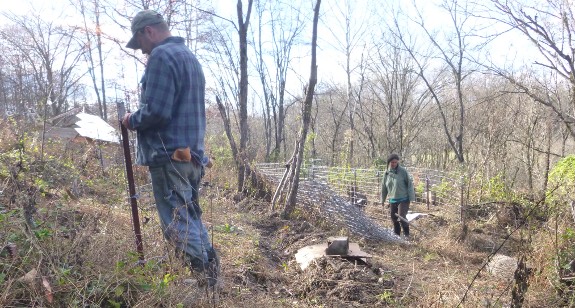
Anna and I installed 8 cattle panels today in the new StarPlate pasture.
 Planting
season begins around March on our farm, and for the rest of the spring,
summer, and early fall, the garden swallows up my time. I tend to
come up with ideas for about half a dozen ebooks while weeding each
summer, but don't have time to write during warm weather. The ones
that scratch the hardest at the insides of my eyeballs are the ones I
hit first in the fall, which this year was Growing into a Farm.
Planting
season begins around March on our farm, and for the rest of the spring,
summer, and early fall, the garden swallows up my time. I tend to
come up with ideas for about half a dozen ebooks while weeding each
summer, but don't have time to write during warm weather. The ones
that scratch the hardest at the insides of my eyeballs are the ones I
hit first in the fall, which this year was Growing into a Farm.
However, Growing into a Farm
has an unusual half-sister --- a young-adult novel about a
seventeen-year-old girl who returns the abandoned intentional community
where she was conceived. While I'm not so sure the book will be
any good (or will ever get finished since it currently seems to be
causing much weeping and gnashing of teeth), that's what I'm working on
at the moment.
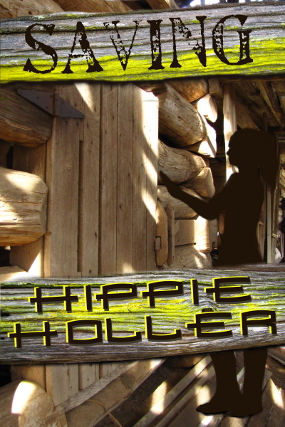
I've gotten far enough into Saving Hippie Holler
that it asked for a cover, so I started experimenting. You can
see version 1.0 above --- Mark told me he liked it...but that it looks
like a science fiction book about aliens. Version 2.0 (below)
probably captures the theme better, but still seems to be lacking
something. Ideas?
 In case you're curious, other book ideas waiting in the wings include:
- Low-cost greenhouse add-on
--- I'm actually already about 80% through formatting and updating this
book which my father wrote when I was an infant, so it'll definitely
get finished the next time Saving Hippie Holler starts making me tear out my hear.
- Garden ecology --- I've been working on this one in my head for years, and I might finally be getting to the point where I have enough photos and data to make it a book.
- Several new chicken ebooks --- I just can't decide whether I'd rather write about chicken behavior, wild chicken feed, or designing a forest pasture.
- Permaculture deer --- We finally seem to have (mostly) won the war, so now might be a good time to share ways to work around (and with) the deer that want to destroy your homestead.
- I'm also vaguely considering trying to make print copies of my most popular ebooks available, but didn't hear too much enthusiasm when I broached the idea on facebook, so I might let this one lapse.
As a side note, I seem to have very low self esteem when it comes to writing fiction, so I could I could use some
comments stating, "What a great idea, Anna! I'd love to read a
fictional, young adult book!" Feel free to copy and paste those two sentences into the comment form below....
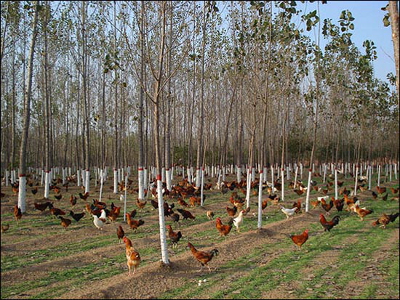
 The
facet of Falk's farm that I was most interested in was his forest
pastures. He started his permaculture adventures with Edible Forest Gardens
and followed many of the authors' guidelines at first, but soon
discovered that on the multi-acre scale, he had to tweak the design a
bit. The first thing to go was complicated guilds, which were too
much trouble to keep up by hand, but Falk found that grazing animals
made a good replacement for herbs under the trees.
The
facet of Falk's farm that I was most interested in was his forest
pastures. He started his permaculture adventures with Edible Forest Gardens
and followed many of the authors' guidelines at first, but soon
discovered that on the multi-acre scale, he had to tweak the design a
bit. The first thing to go was complicated guilds, which were too
much trouble to keep up by hand, but Falk found that grazing animals
made a good replacement for herbs under the trees.
Next, Falk discovered
that rows are under-rated. Many in the permaculture community like
to scatter plants around willy-nilly, but on a large scale, rows save
time and money since you can fence animals out of a planting easily and
can get equipment between rows. Most of Falk's rows are on-contour
hedges of black locust and seaberry, both of which are planted close
together (half a foot to a foot apart for the locusts and four to eight
feet apart for the seaberries), then pollarded
to form hedges (and to produce firewood). Falk warns that it's
essential to commit to mulching trees heavily for the first three to
four years and to fencing out deer for the first two or three
years. After that, the more-established trees are resilient and
can handle a certain amount of neglect.
 Although
I was intrigued by Falk's silvopasture system, I was disappointed to
see only diagrams, rather than photos, in his book --- that's always a
warning sign that an idea is still in its infancy. In addition,
Falk takes the permaculture party line about invasives, which I tend to disagree with, so he doesn't mention that seaberries are related to autumn olives and goumis and are potentially quite invasive, at least in Canada.
Although
I was intrigued by Falk's silvopasture system, I was disappointed to
see only diagrams, rather than photos, in his book --- that's always a
warning sign that an idea is still in its infancy. In addition,
Falk takes the permaculture party line about invasives, which I tend to disagree with, so he doesn't mention that seaberries are related to autumn olives and goumis and are potentially quite invasive, at least in Canada.
Those caveats aside, Falk's book definitely got me thinking about things I'd like to try, like tree alleys in our new pasture. If you want to read about his other systems --- like his rice paddies --- you'll have to check out The Resilient Farm and Homestead for yourself.
| This post is part of our The Resilient Farm and Homestead lunchtime series.
Read all of the entries: |

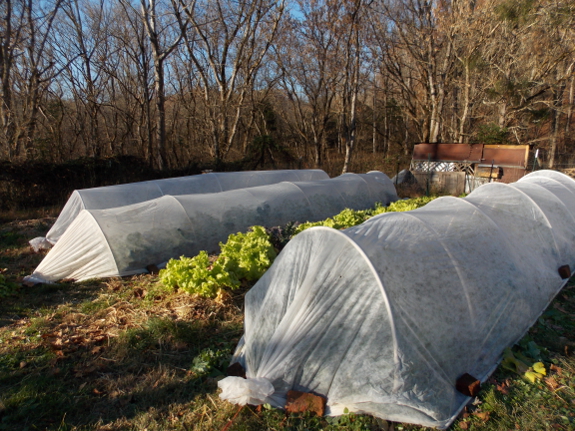
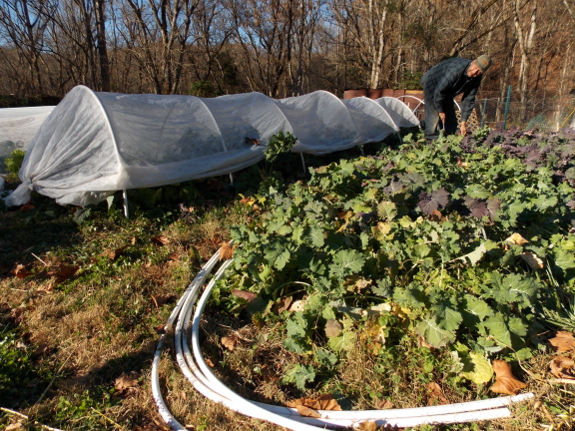
A cold snap last night
motivated us to put up three more quick
hoops today.
Looks like we'll have even
more kale
than last year, which was a fair amount.
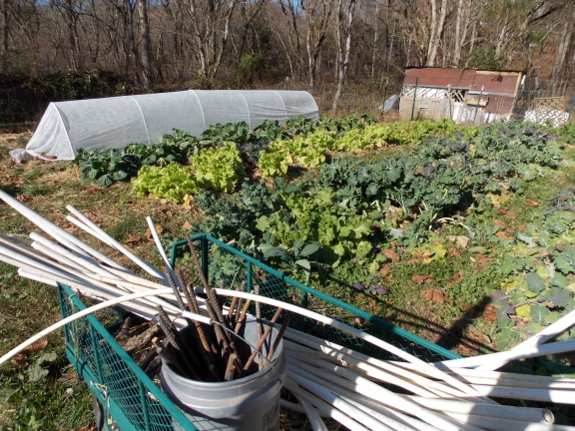
 I put up a quick hoop over our last planting of lettuce in October,
and I meant to erect the other three quick hoops then too. But I
needed to make a decision about who to protect, and vacillation can take
awfully long time.
I put up a quick hoop over our last planting of lettuce in October,
and I meant to erect the other three quick hoops then too. But I
needed to make a decision about who to protect, and vacillation can take
awfully long time.
By the time I came back
to the project this week, a few things were clear. We started
eating Brussels sprouts from a few beds recently, but the long bed of
sprouts that got a lot of shade before the leaves fell from the trees
was trailing behind those in sunnier spots. If we want to enjoy
Brussels sprouts from that bed this year (which we adamantly do), we
need to extend the season, so that's one quick hoop accounted for.
The other two quick hoops are earmarked for leafy greens, but which ones? We've got three kinds of kale, tokyo bekana, tatsoi, mustard, and Swiss chard
in the ground, and there's not enough row cover fabric to protect them
all. While I could make another quick hoop, I don't think we'd eat
more greens than that anyway, so it's best to stick to two hoops of
leafy greens.
 Huckleberry
reminded me that a few of these greens varieties are so tender they
won't last into December even under quick hoops. Despite the
brilliant coloration of the tokyo bekana pictured above, showing how
healthy the plants are, both this and the other Asian green are going to
bite the dust soon, as will our mustard. Those beds are best left
uncovered so I'll be sure to eat the tender greens up before real cold
weather hits.
Huckleberry
reminded me that a few of these greens varieties are so tender they
won't last into December even under quick hoops. Despite the
brilliant coloration of the tokyo bekana pictured above, showing how
healthy the plants are, both this and the other Asian green are going to
bite the dust soon, as will our mustard. Those beds are best left
uncovered so I'll be sure to eat the tender greens up before real cold
weather hits.
Since I'm opting to cover
the most winter-hardy greens in hopes of enjoying their leaves all
winter long, kale is the obvious winner. We devoted two whole
quick hoops to beds of kale, and still have other plants that will be
left uncovered for November munching.
One change I made to our leafy-greens coverage compared to other years
is that I went ahead and covered our Swiss chard as well as our
kale. This decision mostly came about because the chard is at the
end of the Brussels sprouts row and didn't require its own hoop, but I
also noticed last winter that Fordhook Giant appears to be just about as
winter hardy as our favorite kales (Red Russian and Dwarf
Siberian). (Our third kale variety this year is Laciniato --- I'll
report on its hardiness next spring.)
If you're still interesting in reading more about our quick hoops, I devoted a whole chapter to the topic in The Weekend Homesteader. (You can also read the same information in the 99 cent ebook Weekend Homesteader: October.)
Despite having to do more mending this year, we're going into our third
season using the same fabric, so the cost comes to about 10 cents per
square foot per year, and drops every year the structure stays in
use. I can't say enough good things about quick hoops and eating
fresh food all winter --- try it and you'll be sold too!
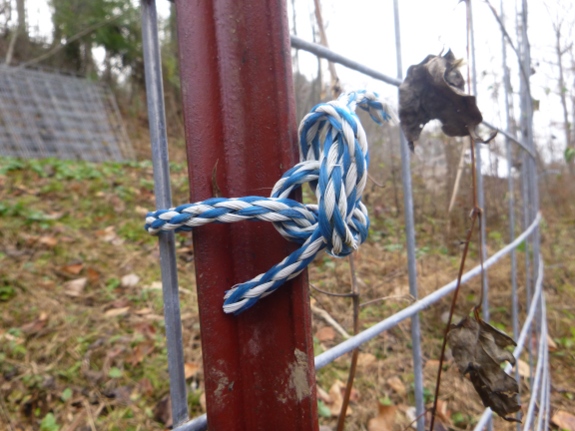
We attached our cattle
panels with some nylon
rope.
Future adjustments will be
easier this way.
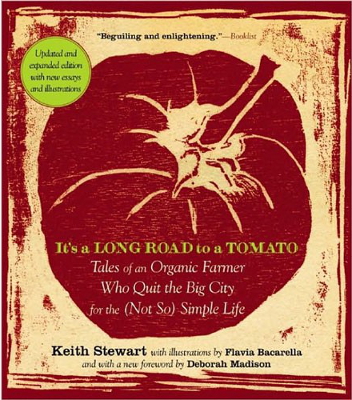 It's a Long Road to a Tomato,
by Keith Stewart, wasn't quite what I expected. For some reason, I
figured the book was one of those
city-guy-goes-to-the-country-and-gets-a-chicken books (which I often
enjoy), and in some ways that is the gist of the story. Stewart
and his wife did move out of New York City to start an farm...but the
book sums up twenty years of experience, and the author did far more
than keep a chicken.
It's a Long Road to a Tomato,
by Keith Stewart, wasn't quite what I expected. For some reason, I
figured the book was one of those
city-guy-goes-to-the-country-and-gets-a-chicken books (which I often
enjoy), and in some ways that is the gist of the story. Stewart
and his wife did move out of New York City to start an farm...but the
book sums up twenty years of experience, and the author did far more
than keep a chicken.
Stewart developed a
12-acre organic-vegetable farm, run by himself with the seasonal help of
six interns per year (who require more management than Hispanic
laborers would have, but who he pays less). Not counting large
investments (like tractors, of which Stewart owns three), his annual
expenses come to just shy of $150,000, which should give you an idea of
the scale of his operation. He grows all of the usual high-end
vegetables and herbs, with garlic being one of his favorites, and he
trucks the produce into the big city to sell in a Manhattan farmer's
market every week.
While I heartily recommend It's a Long Road to a Tomato
for anyone considering beginning their own market garden, the book has a
wider appeal. If you're new to the topic, you'll probably learn a
lot about problems with our current agricultural system, running the
gamut from encroaching development to government regulations. And
even if you're not interested in agricultural policy or starting your
own organic farm, you'll probably enjoy the chapters in which Stewart
writes about life on the farm, while you'll definitely love his wife's
woodcuts.
In the end, I didn't learn anything new from It's a Long Road to a Tomato, but I enjoyed the read. Chances are you'll feel the same.
Friday was one of our
winterization days.
This is the second year in a
row we remembered to run our small engines dry.
The getting ready for winter
ritual is almost complete.

The best way to get good apples is to grow them yourself. We're getting there, but it takes time.
The second best way would
be to team up with a farmer whose tastes and growing philosophy mesh
with your own and pick your apples from his orchard. Or buy his apples at a farmer's market. I wish I'd gotten more than half a bushel of those delectable Winesaps, but I'm afraid they're all gone now.
Third best is to find a
fruit stand that sells semi-local apples by the bushel. While
these are never quite as delectable as homegrown, they're much tastier
(and cheaper) than store-bought. The Bureau of Labor Statistics
says Red Delicious apples averaged $1.41/pound in September. In
contrast, the going rate for a bushel of Winesaps in our area seems to
be about $24, or 50 cents a pound. (And they taste vastly better
than Red Delicious.)
We couldn't eat a bushel of apples before they go soft if we kept them in the house, but the fridge root cellar
has room between baskets of carrots to keep apples crisp. They
say not to store apples with potatoes, but my carrots don't seem to mind
the ethylene-producing neighbors.
What do you stock up on from the fruit stand to keep your winter meals cheap and tasty?
 Several of you recommended that I check out Restoration Agriculture: Real-World Permaculture for Farmers
by Mark Shepard, and I can see why since the book documents the rare
example of an extensive food-forest system in its prime.
Unfortunately, the gems are deeply buried --- I barely found anything
worth noting down until I was halfway through the book. There are
also lots of typos, and several glaring mis-statements that put the rest
of his facts in question, along with pages of rants and regurgitation
of other books. So, I can't entirely recommend Restoration Agriculture, but if you're willing to skim and think critically, it can be a handy addition to your permaculture education.
Several of you recommended that I check out Restoration Agriculture: Real-World Permaculture for Farmers
by Mark Shepard, and I can see why since the book documents the rare
example of an extensive food-forest system in its prime.
Unfortunately, the gems are deeply buried --- I barely found anything
worth noting down until I was halfway through the book. There are
also lots of typos, and several glaring mis-statements that put the rest
of his facts in question, along with pages of rants and regurgitation
of other books. So, I can't entirely recommend Restoration Agriculture, but if you're willing to skim and think critically, it can be a handy addition to your permaculture education.
I'll post more about the
nitty-gritty of Mark Shepard's system later in the week, but for now,
let me give you a quick run-down on his farm and vision. Shepard's
parents were hobby farmers, so he soon became familiar with the basics
of growing his own vegetables. However, as an adult, he rejected
the conventional backyard system, realizing that most of us aren't
growing anywhere near all of our own food since we continue buying
staples from the grocery store (which equates to buying from factory
farms). Could he develop a system in which farmers can grow
perennial staples (preventing erosion, providing wildlife habitat,
etc.), so crops like chestnuts and hazelnuts replace corn and beans in
the average American's diet?
Shepard put his dream to
the test on a 106-acre farm in southwest Wisconsin, on the border
between zone 3 and 4. He developed methods of mixing tree, vine,
and bush crops with livestock in such a way that some of the work could
be done by conventional equipment that most medium-to-large-scale
farmers already have. Stay tuned for more on the design of New
Forest Farm in later posts.
| This post is part of our Restoration Agriculture lunchtime series.
Read all of the entries: |
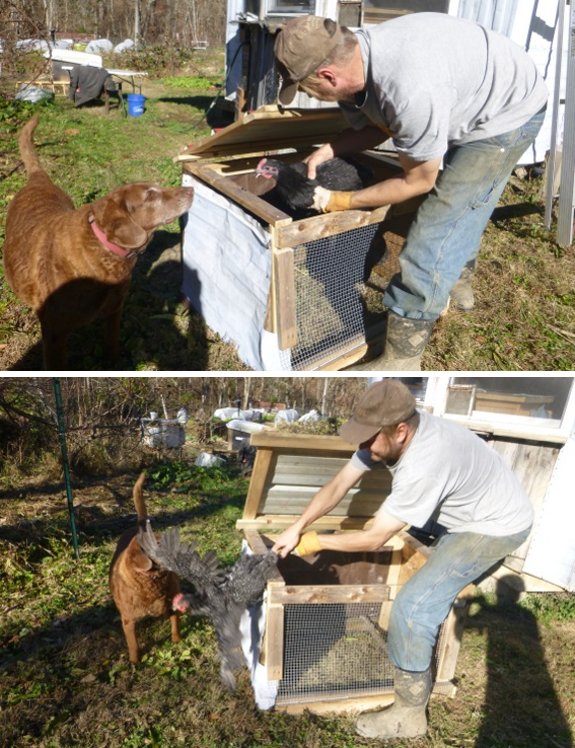
The new chicken
holding coop is a huge
improvement for processing day.
We had no problems with the
first 5 birds, but the last one had plans of escaping before I caught
him by the leg.
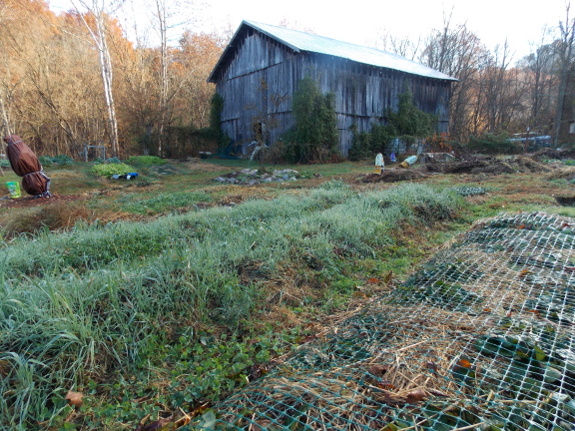
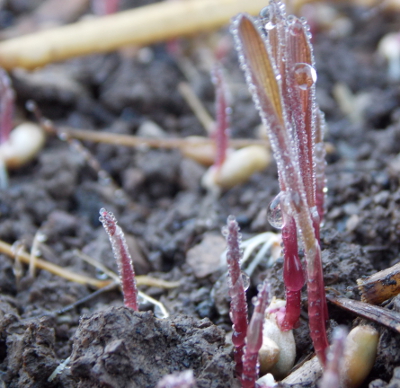
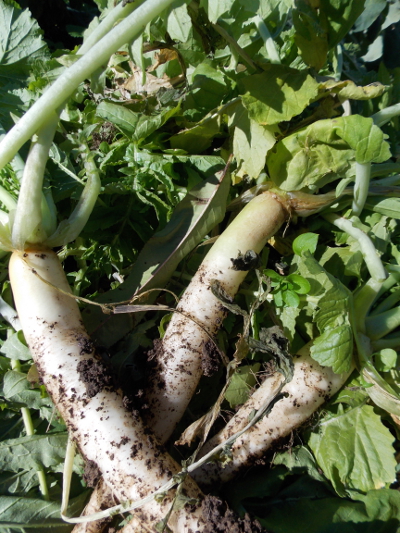 When Mom came over to visit last weekend, she oohed and awed over the beauty of my cover crops,
as usual. But this time around, she had more purpose to her words
--- she wanted to know if the radishes were the same as the daikon
radishes she's been buying at the grocery store.
When Mom came over to visit last weekend, she oohed and awed over the beauty of my cover crops,
as usual. But this time around, she had more purpose to her words
--- she wanted to know if the radishes were the same as the daikon
radishes she's been buying at the grocery store.
I've
posted before that the oilseed radishes grown as cover crops are in the
same species as daikon radishes, but probably aren't varieties bred for
flavor, so I felt
like it couldn't hurt anything to give Mom a few roots to sample.
She took them home, sliced them up, and gave me one thumb up. "I
like them OK," Mom emailed. "They don't seem quite as spicy as the
Daikons, which sell, bigger, at Food City for $3.19, but they are about as spicy as most regular radishes."
On the other hand, my sister enjoyed the flavor of the cover crops, so I'm pulling up a few more to toss in the fridge root cellar.
I could leave them in the ground, but with lows forecast to reach 10
degrees this week, I don't want to risk them freezing and rotting.
As a side note to locals, the winter forecast for our region is finally out from my favorite weather guru:
 "So
based upon the OPI Index (October Pattern Index) they are basically
saying a cold, wintry start mid-November to early December will give way
to mildness that dominates the heart of winter through January 2014
before more average, colder conditions develop in February toward end of
the season."
"So
based upon the OPI Index (October Pattern Index) they are basically
saying a cold, wintry start mid-November to early December will give way
to mildness that dominates the heart of winter through January 2014
before more average, colder conditions develop in February toward end of
the season."
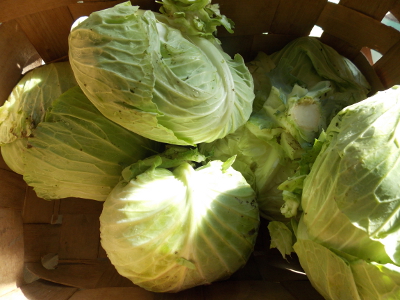
In other words, don't
lose heart during this frigid week, but do take your cabbages in and
frost protect any last figs out there.
 I left you hanging in yesterday's post,
so I figure several of you are probably wondering --- what exactly does
Mark Shepard's farm look like? He based his design on the natural
oak savanna ecosystem, but replaced wild plants with productive,
domesticated species and laid everything out in rows with 23-foot alleys
in between the trees. His primary species include:
I left you hanging in yesterday's post,
so I figure several of you are probably wondering --- what exactly does
Mark Shepard's farm look like? He based his design on the natural
oak savanna ecosystem, but replaced wild plants with productive,
domesticated species and laid everything out in rows with 23-foot alleys
in between the trees. His primary species include:
- American X Chinese chestnuts
--- Those of us further south can just plant Chinese chestnuts, but
Shepard lives too far north for the pure Asian stock to thrive and is
experimenting with hybrids. He plants his chestnuts 12 feet apart.
- Apples --- Since Shepard is trying to make a profit from his farm products, the trickiness of growing blemish-free apples organically
is something he had to figure out. His solution is to use most of
his apples for juice, to plant resistant varieties, to prune high, to
graze in early spring to get rid of diseased leaves, and to let pigs eat
the blemished fruits off the ground. His apples are planted 24 feet apart.
- American X European hazelnuts --- There's been quite a bit more breeding since I wrote this lunchtime series on the topic, but the ideas are the same. In Shepard's system, hazels are planted four feet apart in rows with apples.
- Berries --- Shepard also plants raspberries, blackberries, currants, gooseberries, and grapes in the understory. He trains his grapes onto tree limbs, then prunes the tree leaves above the grapes so the latter get plenty of light.
- Edible and medicinal mushrooms --- These are grown on logs under the trees.
In the alleys between
these trees and shrubs, livestock clip back the grasses and add another
food (and income) source. Shepard recommends using Salatin-style grazing,
with the number of each type of animal based on the number of
cattle. For example, if your farm has just one cow, Shepard
recommends two hogs (Tamworth, Red Wattle, or Berkshires), four turkeys,
one sheep, and variable chickens (with the amount of chickens dependent
on how much you want to feed them). Geese or goats can replace
sheep, although Shepard seemed very anti-goat.
I wish Shepard had given
us many more details on his farm, but this is all I could pull out of
his book! Hopefully it will be enough to give many of you new
ideas, though, just as it set me off on my tree alley experiments.
| This post is part of our Restoration Agriculture lunchtime series.
Read all of the entries: |
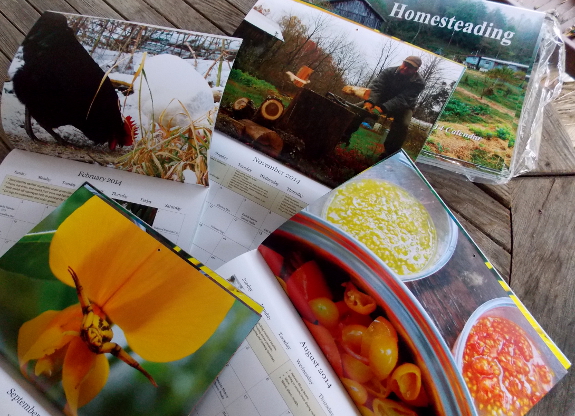
What's the best way to be an arm-chair homesteader? With one of our calendars, of course.
Our copies just showed up in
the mailbox, and those of you who preordered will probably see yours
soon too. The real thing looks twice as nice as the proof copy
did.
Mom says she doesn't mind
gift-wrapping and inserting a gift note at no extra charge. Just
leave a message in your order when you check out via paypal.
Then you and your loved ones can enjoy all of the beauty of homesteading with none of the work. Now that's the way to be an arm-chair homesteader.
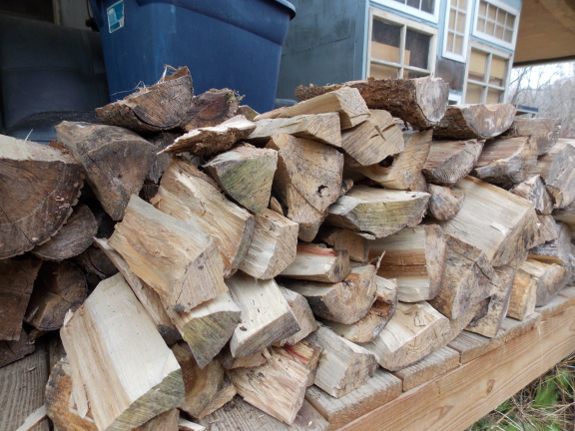
I thought I had
fire-starting all figured out until this year, when we got our firewood
from a different ecosystem. Usually, our homegrown firewood comes
from the floodplain, meaning that we have plenty of box-elder for
kindling and walnut for hotter fires; when we buy wood, it tends to be
oak from national forest mountain nearby.
But the drier Starplate pasture
was full of scrubby trees that grow up in old fields. None
(except one tulip-tree) were very large in diameter, but some resisted
the splitting ax like crazy. I'm guessing that maybe this ultra-hard wood is hop-hornbeam?

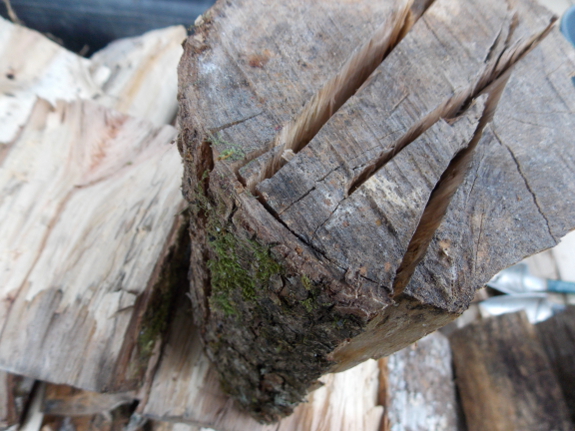
I'm so used to starting
fires with box-elder kindling that I thought pale wood equated to easy
starts. It turns out that was a false correlation, as I discovered
when I tried to start a fire with another pale wood (not sure what it
was since the bark had fallen off). Since then, I've realized that
the easy way to tell which variety to use for kindling (especially if
you don't know the species and can't look up its Btu potential) is to
heft the round in your hand. Heavy wood takes more effort to catch
a flame, while light-weight wood will flare up in an instant.
(That's assuming your firewood is dry, of course.)
Some things never change,
though. Lucy continues to be a firewood thief, so I figure these
new species taste about the same as the old did to a dog palate.
And the cats still love curling up in front of the stove. Don't
worry, Emily, Strider was in the comfy chair too until seconds before I
snapped that shot.

Although I complained earlier that Restoration Agriculture
included too much rehashing of other books, my very favorite part was
actually his explanation of water management using keylines. I've never
tracked down a copy of P.A. Yeomans' book on the subject and thus
didn't really understand the system, so I appreciated Mark Shepard's summary.
I've heard people bandy
around the term "keyline" for years, and it took me a while to realize
they weren't talking about ley lines. (Yes, my brain does
automatically turn off when I hear, or think I hear, certain
words.) I'd also read several authors writing about bringing water
from the valleys to the ridges, and I couldn't quite figure out what
they were talking about since we all know that water flows
downhill. Mark Shepard's chapter on the topic cleared up all of my
misunderstandings.
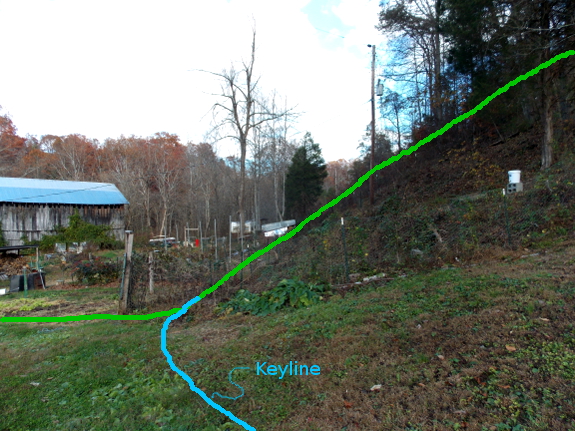
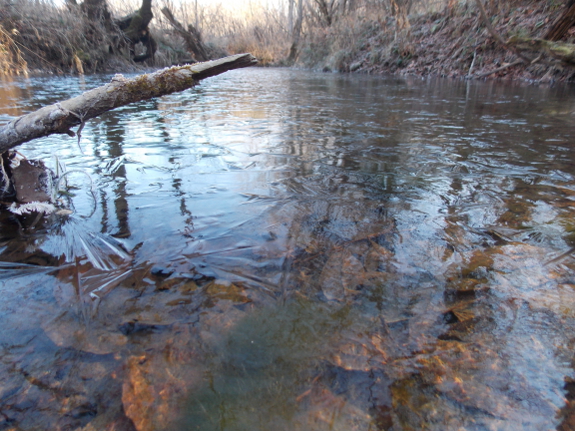
First of all, a keyline
is simply the spot on the landscape where a steep slope turns shallow,
as you can see in the photo above. The idea is that by managing
water along this line, you can move the least dirt while having a large
effect downhill.
Why do you want to have
any effect at all? I chose to photograph the hill I did because
that's the one that feeds the extremely high groundwater in our forest
garden. According to Yeomans (the originator of the keyline
concept), swampy bottomland results from mismanaging the water
upstream. To correct the problem, you dig a swale (an on-contour
ditch) along the keyline so that water doesn't whoosh right down into
the swampy bottom, but instead flows gently (along a 1% downhill slope)
to drier areas to the side. This is known as a spreader swale, and
it's what folks mean when they talk about moving water from the valleys
to the ridges --- you're not technically bringing water uphill, but you
are moving it from a wetter area to a drier area. The result is a
more productive, damper area to the side of the keyline, and a more
productive, drier area in the flat zone directly downhill.

Another facet of the keyline system is pocket ponds, which are just like my sky pond,
but are located at keypoints (the center of the keyline). These
vernal pools aren't meant to stay wet all year, but they do act as surge
protectors, giving you somewhere to store excess water during wet
seasons and then disbursing that water to the surrounding area once
things dry out.
The final part of the
keyline system consists of subsoiling (running a small plow deep in the
earth) parallel to the swales each year to break up hardpan.
Similarly, you can build more swales parallel to the keyline swale and
plant trees along them, resulting in easy-to-handle rows that still work with (rather than against) your site.
Understanding keylines got me thinking that I should definitely give the
concept a try above the forest garden. I've had pretty good luck
moving trees upward into raised mounds, but wouldn't it be wonderful not
to have a swamp there each winter? Sounds like another fall
earth-moving project just waiting to be explored!
| This post is part of our Restoration Agriculture lunchtime series.
Read all of the entries: |

I've been using these Stihl
work gloves for about 6 months now.
I liked them at first, but it
turns out the band at the wrist tends to slip forward creating a
situation where the fit isn't as tight, causing rubbing during
aggressive activities.
The next pair of work gloves
I buy will be the Palomino
grain cow hide gloves I
started out using back in 2008.
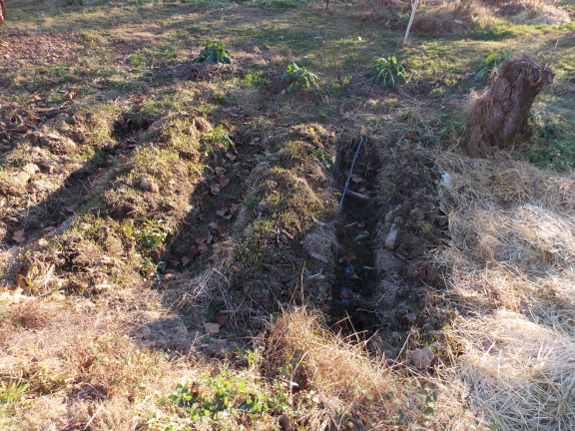
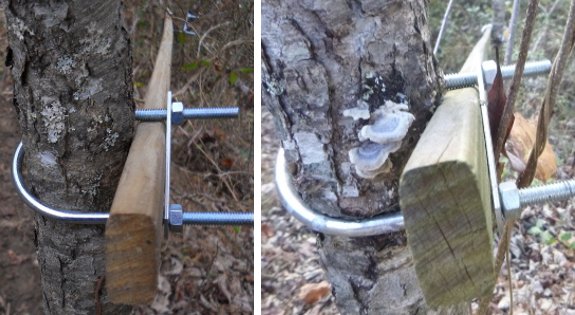
This is an excellent question, and one I didn't really really pay
attention to when I first pulled out my shovel. I made the raised
beds parallel to the slope with no drainage option, mostly because you
want raised beds to be flat on top, and it's much easier to make them
flat if you build parallel to the slope.
 Since reading Eric's comment, I've been keeping my eye on the beds and I've been pleasantly surprised to see very little water
building up in the aisles between. Granted, it's been
relatively dry here (you know, an average of only about half an inch of
rain per week), so the groundwater isn't terribly high. But my sky
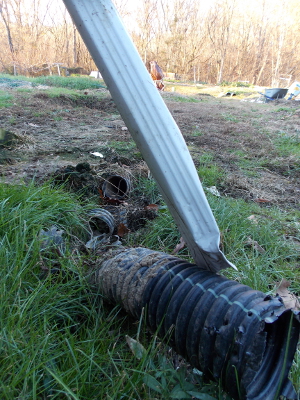
pond is still about halfway full, despite the fact that Lucy thought
there was some kind of critter in the drainpipe from the roof and ripped it to shreds
a couple of months ago, meaning only groundwater is recharging the
pond. (I really should fix that....)
Since reading Eric's comment, I've been keeping my eye on the beds and I've been pleasantly surprised to see very little water
building up in the aisles between. Granted, it's been
relatively dry here (you know, an average of only about half an inch of
rain per week), so the groundwater isn't terribly high. But my sky
pond is still about halfway full, despite the fact that Lucy thought
there was some kind of critter in the drainpipe from the roof and ripped it to shreds
a couple of months ago, meaning only groundwater is recharging the
pond. (I really should fix that....)
Barring extreme waterlogging in my new gully beds, I figure I'll just
plant with the water in mind. For example, I discovered this
summer that the watermelons planted in a raised bed above some very
soggy soil did much better than those in the main part of the garden, so
those would be a good choice for our chinampa beds. And for all I
know, next year will be as dry as this one was wet, and I'll be glad
for every ounce of water retained.
Or maybe I'll change my mind and add some drainage! Only time will tell.

By the way, I decided not to bore you with a full-blown advertising post, but did want to alert you to the new sale on our chicken waterer website
--- I hope it makes your holiday shopping easier! Cold weather
has been keeping me inside, so I'm also making changes to my email lists
--- please stay alert and click to confirm that you want to stay on my
lists if you see an email from me in your inbox. Thanks for
bearing with the marketing interruptions!
 The last tidbit I mined out of Restoration Agriculture
was really a venue for further exploration. Shepard explained
that the USDA has five officially-sanctioned types of agroforestry,
which means we can hunt down scientific studies on each of these topics
to give us jumping-off points for our own explorations. The first
two --- wind breaks and riparian buffers --- are self-explanatory and
are more about protecting the rest of the farm and ecosystem than they
are about growing food, but the others have food potential.
The last tidbit I mined out of Restoration Agriculture
was really a venue for further exploration. Shepard explained
that the USDA has five officially-sanctioned types of agroforestry,
which means we can hunt down scientific studies on each of these topics
to give us jumping-off points for our own explorations. The first
two --- wind breaks and riparian buffers --- are self-explanatory and
are more about protecting the rest of the farm and ecosystem than they
are about growing food, but the others have food potential.
Despite the name, forest
farming (as defined by the USDA) isn't the same as forest gardening (as
defined by the permaculture community). This is a closed-forest
type of setting with shade-tolerant plants including medicinal herbs
(ginseng, etc.), ramps, gooseberries, currants, and edible mushrooms
grown underneath the trees. I feel like this form of agroforestry
is most useful for folks who need a cash crop, less so for trying to
feed ourselves.
Silvopastures are a concept I've written about here before (and which have informed my own pasture experiments).
The idea is to combine trees and pasture, with the aim of producing 40
to 60% canopy coverage. An easy way to start a silvopasture is to
plant trees along permanent fencelines, focusing primarily on
deep-rooted species so they don't compete too much with the grass.
Fruit trees, pecans, walnuts, hickories, chestnuts, and pines have all
been used in official studies.
 The
final type of USDA-approved agroforestry is alley cropping, with rows
of trees separated by annual field crops. The trees are often
oaks, walnuts, or pecans, and the trick (again) is to keep the trees'
roots from competing with the annual crops. Since most people are
plowing their annual crop fields, they generally use a subsoiler each
year as well to cut back tree roots that are trying to invade the main
fields, tempting the trees' roots instead to dig deep.
The
final type of USDA-approved agroforestry is alley cropping, with rows
of trees separated by annual field crops. The trees are often
oaks, walnuts, or pecans, and the trick (again) is to keep the trees'
roots from competing with the annual crops. Since most people are
plowing their annual crop fields, they generally use a subsoiler each
year as well to cut back tree roots that are trying to invade the main
fields, tempting the trees' roots instead to dig deep.
If you're trying to
create your own perennial-based system like I am, I highly recommend
checking out extension-service documents about these various
agroforestry systems online. It's always a good idea to know
what's been tried before you go out to reinvent the wheel.
| This post is part of our Restoration Agriculture lunchtime series.
Read all of the entries: |

We woke up this morning with
a frozen driveway.
The truck was frozen too, but
once we jump started her she was ready for some trips to the barn.
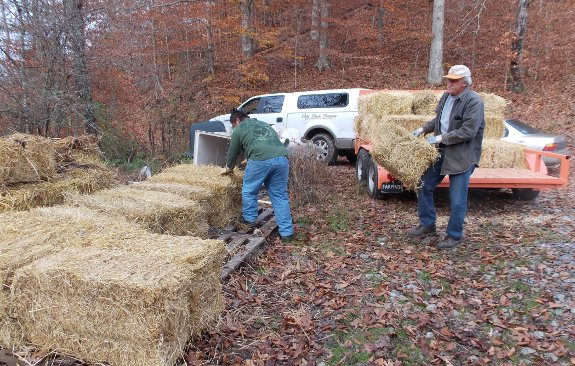
A few loads of straw and
most of our garbage got hauled before the ground thawed.
I don't think I ever
understood the expression "Seize the day" until I moved to the
farm. But now I know that, sometimes, it's worth throwing the list
out the window and going with the flow.
 Thursday
morning, we woke to a 14-degree farm, and when I took Lucy for her walk
through the floodplain, nothing even crunched under my feet --- the mud
was solid. The weather was so wet this year that we haven't had a
single day in which we could drive the truck back to our core
homestead, but frozen works too.
Thursday
morning, we woke to a 14-degree farm, and when I took Lucy for her walk
through the floodplain, nothing even crunched under my feet --- the mud
was solid. The weather was so wet this year that we haven't had a
single day in which we could drive the truck back to our core
homestead, but frozen works too.
Three hours later, the
truck started slipping around as it brought in the last load of straw,
and Mark had to pull it out of the ruts with the ATV. But we'd filled the barn with 33 bales of straw and had cleared out a year's stock-piled garbage (two truckloads full). If Mark had tried to do all of that hauling with the ATV, it would have taken him at least a week.
By the way, Mark's newest heated chicken waterer incarnation was still flowing at 14 degrees. Want to guess how low it'll go?

I hooked up a medium
sized hot water tank
today.
It's on a switch because we
plan to only use it once or twice a day.
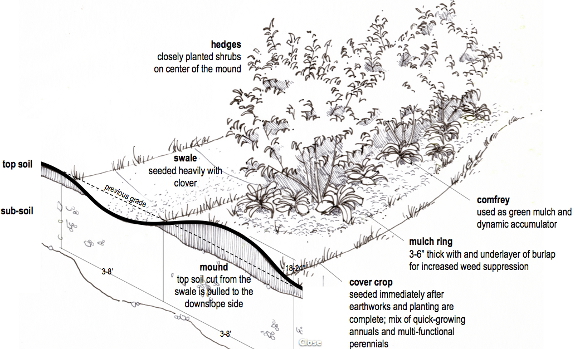
See the comfrey bed above? I dug out every single root I could find from that spot last year,
broke the plants up into smaller segments and stuck them into the
ground elsewhere with no water or care. Not only did all the new
starts thrive, the bed now appears to be just as full as comfrey as it
was before I dug the plants out. Time to do it all again!
While I'm on the subject,
I thought comfrey transplanting day would be a good time to regale you
with the comfrey dos and don'ts I've learned over the years:
Comfrey dos:
- Do use comfrey medicinally as a poultice.
I once cut my foot wide open running barefoot amid glass. The
wound really should have had stitches, but Mom gave me a comfrey
poultice, and it healed right up in no time.
 Do plant comfrey in pastures.
Although the mature leaves are not their favorite food, chickens will
eat comfrey if you accidentally let the pasture get overgrazed. The birds also enjoy young comfrey leaves even when they have other options. Best of all, comfrey plants are so hardy even chickens can't kill them.
Do plant comfrey in pastures.
Although the mature leaves are not their favorite food, chickens will
eat comfrey if you accidentally let the pasture get overgrazed. The birds also enjoy young comfrey leaves even when they have other options. Best of all, comfrey plants are so hardy even chickens can't kill them.- Do plant comfrey beyond the eventual spread of your fruit trees. I've started lining paths in the forest garden with comfrey. I can cut the leaves and use them as nutrient-rich mulch, and as long as the comfrey isn't close to my trees, they don't compete much for nitrogen.
- Do start a comfrey nursery bed. Within a couple of years, one plant can turn into dozens of plants that are ultra-easy to move elsewhere.
Comfrey don'ts:
 Don't take comfrey internally. According to some sources, comfrey can be a carcinogen, so I figure it's better not to risk it.
- Don't put a comfrey poultice on an infected wound. Comfrey makes your skin grow back over a cut so quickly that it can seal infections in, so wash that wound well first!
- Don't plant comfrey within the root zone of young fruit trees. If you have awesome soil, you might get away with this, but comfrey stole nitrogen from my fruit trees and caused their leaves to yellow. Comfrey didn't seem to cause problems in the deeper shade beneath a mature peach, though.
- Don't expect to ever plant anything else where your comfrey is now. Comfrey doesn't run like mint (although it will slowly spread to each side over the years), but it is just as tough to eradicate. So, think hard about what you want to have in that spot in twenty years before putting in your comfrey.
- Don't mulch with comfrey stems. Leaves make a great mulch, but the stems can root and
start a new comfrey patch where you don't want one. Similarly, you
won't want to let even a tiny root end up in your compost pile or the
soil will be full of comfrey plants.
Anything else you'd add to my comfrey instruction sheet?
This bungee 4X5 cargo net expands our garbage hauling capacity by about 50%.
 "I'm curious about your book experience. After doing many ebooks and one big book what
is would be your preference for future books? Are you finding that
sales are still doing well for all your books or are there standout
ones?"
"I'm curious about your book experience. After doing many ebooks and one big book what
is would be your preference for future books? Are you finding that
sales are still doing well for all your books or are there standout
ones?"
I know this question
isn't really homesteading-related, but several of our readers have
self-published ebooks and/or have been holding out to sign on with a
publisher, so I thought the topic would be helpful for more than just
Mikey to hear about. I also highly recommend ebooks to
homesteaders as a potential income source, so even if you haven't
written one yet, you might want to take note.
Of course, this post is also partly because I just wanted a chance to crunch data. After all, I let a publisher take The Weekend Homesteader and run with it as an experiment to test this precise question. And no experiment is worth much without a conclusion.
First, a caveat: I don't actually know how exactly many paper books I've
sold and how much I've made from the operation. I won't get my
first statement and royalty check until next month (yes, that is 19
months after turning in my manuscript). I'm also a bit fuzzy on
how much I'll make per book --- I think it's about 65 cents, but that
depends on how each book was sold. (For comparison's sake, I make
35 cents every time one of my 99 cent self-published ebooks is sold and
75 cents every time one of my $1.99 ebooks is sold.)
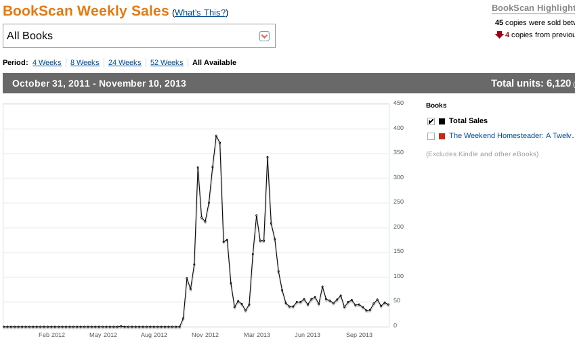
What I do have is Bookscan data about The Weekend Homesteader
from Amazon's Author Central website. (They warn that the data is
usually underreported by about 25%, so I'm correcting it slightly in
the calculations below.) In the chart above, you can see that I
sold a lot of books for a couple of months, sold only a few when my
first printing ran out and we had to wait on the second set of books to
arrive, and then, after another couple of months of high sales, settled
in to selling about 50 books a week.
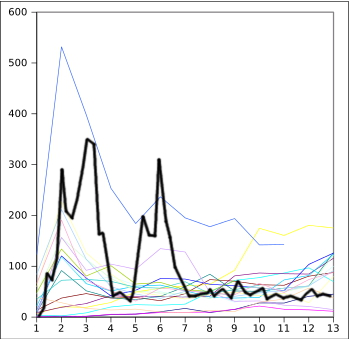 Selling
a lot of books during the launch then a slow-but-steady stream later
seems to be the case with my ebooks as well. The chart to the left
shows estimated income from my paperback (in bold) versus all of my
ebooks over their first 13 months in the public eye. As you can
see, my best-selling ebook --- Trailersteading
--- actually made significantly more than my paperback did during that
period (and I didn't have to wait a year and half for the money).
My other ebooks didn't make quite as much as my paperback, but on the
other hand you have to keep in mind that the paperback is equivalent to
12 ebooks, so I figure I made a lot more per word even with my
moderately-selling ebooks. (As a side note: data for ebooks that
have come out in 2013 hasn't been added to this chart --- $10 Root Cellar looks like it might give Trailersteading a run for its money.)
Selling
a lot of books during the launch then a slow-but-steady stream later
seems to be the case with my ebooks as well. The chart to the left
shows estimated income from my paperback (in bold) versus all of my
ebooks over their first 13 months in the public eye. As you can
see, my best-selling ebook --- Trailersteading
--- actually made significantly more than my paperback did during that
period (and I didn't have to wait a year and half for the money).
My other ebooks didn't make quite as much as my paperback, but on the
other hand you have to keep in mind that the paperback is equivalent to
12 ebooks, so I figure I made a lot more per word even with my
moderately-selling ebooks. (As a side note: data for ebooks that
have come out in 2013 hasn't been added to this chart --- $10 Root Cellar looks like it might give Trailersteading a run for its money.)
 But
did the paperback boost my "brand" enough that it was worth taking the
per-word hit? The chart to the right looks at ebook sales two
years before, one year before, and then during the time my paperback has
been out. Although it looks like the paperback might have
increased ebook sales during the launch period (which is also when Trailersteading came out), if anything, it decreased sales later in the year. That's because once my publisher's version of The Weekend Homesteader became available in ebook form, my individual-month ebooks were no longer eligible for Amazon's KDP Select program,
which is a real money-maker. Plus, I'll only get about 65 cents
if someone buys the publisher's ebook or paperback, while I'd make $4.20
if that person instead bought all 12 months straight from me.
But
did the paperback boost my "brand" enough that it was worth taking the
per-word hit? The chart to the right looks at ebook sales two
years before, one year before, and then during the time my paperback has
been out. Although it looks like the paperback might have
increased ebook sales during the launch period (which is also when Trailersteading came out), if anything, it decreased sales later in the year. That's because once my publisher's version of The Weekend Homesteader became available in ebook form, my individual-month ebooks were no longer eligible for Amazon's KDP Select program,
which is a real money-maker. Plus, I'll only get about 65 cents
if someone buys the publisher's ebook or paperback, while I'd make $4.20
if that person instead bought all 12 months straight from me.
So, to answer Mikey's
question, I don't plan to publish any more print books with a publisher
anytime soon --- in this digital age, it doesn't feel like I really need
a middle man. (And wouldn't you rather spend $1.99 for an ebook
than $13.50 for a paperback?) Perhaps if I was the kind of person
who liked to go on tour, having a paper book would boost the brand
enough to make the it worthwhile, but since I'm a confirmed hermit,
ebooks seem to work better for me.
Which is not to say I regret publishing The Weekend Homesteader
on paper --- if nothing else, it probably reached a lot of eyes my
words wouldn't otherwise have appeared to. And I always like
experiments! But for those of you who are on the fence about
uploading your words straight to Amazon, I say go for it --- you
probably won't regret it.
I'm stealing Mark's
posting spot to apologize for any website problems you've had this
weekend. Joey and I have been playing around with the site to make
it go a little faster, but unfortunately it broke a few times in the
process. The good news is that using the search and comment
features now seems to be about twice as fast! Thanks for putting
up with site maintenance --- I think it's all over now (unless I break
anything else).
Edited to add:
I'm making one more change at 6:30 pm, so you may have trouble again
for a few hours Sunday evening. Tomorrow, hopefully, this will all
be sorted out!
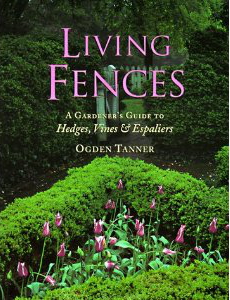 Long-time
readers will know that I'm interested in hedges, even though I haven't
really experimented much with them. I like the idea of planting a
living barrier that will keep deer out and chickens in even after our
metal fences rot into the ground. It would be a major bonus if
that barrier also produced food for the chickens and for us. So I
was thrilled when I stumbled across Living Fences: A Gardener's Guide to Hedge's, Vines, & Espaliers, by Ogden Tanner, in our local library.
Long-time
readers will know that I'm interested in hedges, even though I haven't
really experimented much with them. I like the idea of planting a
living barrier that will keep deer out and chickens in even after our
metal fences rot into the ground. It would be a major bonus if
that barrier also produced food for the chickens and for us. So I
was thrilled when I stumbled across Living Fences: A Gardener's Guide to Hedge's, Vines, & Espaliers, by Ogden Tanner, in our local library.
Unfortunately, the book
isn't really what I was looking for (which I suspect might not exist),
since it's mainly a list of species you might want to use in ornamental
living fences, along with some data on their construction from a
landscaper's point of view. However, I did find some information
that will be helpful when I finally get our borders weed-free enough
that I can start my hedge experiments. Here are species that might
make the cut:
| Species |
Features |
Spacing in a hedge |
Questions |
| Flowering quince (Chaenomeles speciosa) |
Thorny barrier; edible fruits; informal hedges 4-6' tall |
2.5-4' |
Can fruiting quinces be used the same way? |
| Cornelian cherry (Cornus mas) |
Edible fruit; informal or form hedges 4-15' tall |
1-4' |
|
| Cockspur hawthorn (Crataegus crus-galli) |
Thorny barrier; informal hedge up to 30' tall |
3-4' |
Would fruits be edible to chickens? |
| European beech (Fagus sylvatica) |
Classic European hedge plant; formal or informal hedge 6-20+' tall |
2-10' |
Would American beech work as well? Can chickens eat their nuts? |
| Beach plum (Prunus maritima) |
Edible fruits; informal hedge 6-10' tall |
3-6' |
|
| Alpine currant (Ribes alpinum) |
Withstands shade; formal or informal hedge 2-5' tall |
2' |
Will more tasty currants and gooseberries work in a hedge? |
| Roses (Rosa sp.) |
Some have edible hips; informal hedge 6-7' tall |
2' (or 3-6' for Rosa rugosa) |
And, of course, if I want
to screen off an area but don't need the plants to repel animals, I
could use vines alone fencelines instead. Top edible vines include
hardy kiwis and grapes.
If you'd like more information on hedges, I've made a few other research posts, and also reported on an ill-fated osage-orange experiment.
(The conclusion to the experiment was: trying to start a hedge in an
area that's currently covered in tall weeds and young trees just doesn't
work.) Here are the research posts to get you started:
- Gene Logsdon on trees along fencelines
- Traditional British hedges
- Bouche-Thomas hedges (really an espalier)
- A previous species list of potential edible hedge plants
If you've experimented
with edible hedges and/or hedges used as livestock fences (or have found
a good source for information about them), I'd love to hear about it!
 Growing into a Farm leaned onto the fluffy side, so I wanted to give you a more technical ebook next. Low-Cost Sunroom: Heating Your Home With Free Solar Energy
is based on a booklet my father wrote while building low-cost
greenhouse add-ons in the early 1980s. You can learn a lot about
passive-solar space heating from this updated ebook, and the book also
includes step-by-step directions and diagrams to expedite building your
own sunroom.
Growing into a Farm leaned onto the fluffy side, so I wanted to give you a more technical ebook next. Low-Cost Sunroom: Heating Your Home With Free Solar Energy
is based on a booklet my father wrote while building low-cost
greenhouse add-ons in the early 1980s. You can learn a lot about
passive-solar space heating from this updated ebook, and the book also
includes step-by-step directions and diagrams to expedite building your
own sunroom.
Here's the blurb:
A sunroom built onto the south side of an existing building is the most cost-effective way to capture the energy of the sun. The add-on not only lowers your heating bills, it also provides space to start seeds in the spring and to extend your gardening season in the fall.
This book includes 32 photos and diagrams, including scale drawings to make your building project simple.
 The rest of this week's lunchtime series is going to regale you
with the first section of Low-Cost Sunroom, but if you want to read it all, you'll have to splurge 99 cents on a copy
of the complete book (which can
be read on nearly any device). I'll also be setting the book free on
Friday so my loyal readers can pick up a copy without paying, and
those of you who prefer a pdf copy can email me Friday to get an
emailed copy instead.
The rest of this week's lunchtime series is going to regale you
with the first section of Low-Cost Sunroom, but if you want to read it all, you'll have to splurge 99 cents on a copy
of the complete book (which can
be read on nearly any device). I'll also be setting the book free on
Friday so my loyal readers can pick up a copy without paying, and
those of you who prefer a pdf copy can email me Friday to get an
emailed copy instead.
As a side note, you can also read about my top fifty favorite homesteading books in Best Books for Homesteaders, a free download when you sign up for my book email list. To join the list, just go to Wetknee Books and input your name and email address in the form on the sidebar.
Thanks for reading (and double thanks
if you find the time to leave a review on Amazon). I hope you learn as much from this ebook as I did!
| This post is part of our Low-Cost Sunroom lunchtime series.
Read all of the entries: |
Don't forget to warm up before you start a vigorous task like wood splitting.
Putting the Chopper 1 inside for a couple of hours before hand seems to help too. Warm fingers make for easy splits.

I seem to have opened a can of worms with my words: "Don't
take comfrey internally. According to some sources, comfrey can
be a carcinogen, so I figure it's better not to risk it."
Some of our readers feel that comfrey is an herb that's been used for
hundreds of years and is safe by default, while others became concerned
that maybe the leaves aren't even safe enough to feed to their livestock
(and that problems might pass on to humans if we eat meat or eggs from
animals that consumed comfrey).
 I
should admit up front that I hadn't done much research on that
assertion before throwing it into a post. I grew up drinking
comfrey-mint tea that my mom made by clipping comfrey and mint leaves,
putting them in a mason jar, pouring hot water over top, then
refrigerating. After we drank the iced beverage, I chewed up the
greenery and was well satisfied.
I
should admit up front that I hadn't done much research on that
assertion before throwing it into a post. I grew up drinking
comfrey-mint tea that my mom made by clipping comfrey and mint leaves,
putting them in a mason jar, pouring hot water over top, then
refrigerating. After we drank the iced beverage, I chewed up the
greenery and was well satisfied.
However, during my
teenage, rebellious years, I started questioning things. This was
before I used the internet, so I'm not sure what book I found the data
in, but some source told me comfrey leaves can be carcinogenic. I
passed the data on to Mom, who changed her recipe to mint only, and my
rebellion was over.
Since many of you seemed
worried about the topic, I decided it was high time to find out the
truth, which meant delving into the scientific literature. The
issue is turns out to be that comfrey contains pyrrolizidine alkaloids,
chemicals that have caused liver cancer in rats at various doses.
In one study, cancer was induced by feeding rats comfrey leaves for 1.5
to 2 years. In another study, the extracted alkaloids were
injected into the rats at a rate of 20 mg/kg three times a week and
caused liver damage within 18 weeks.
One of our readers sent me to this refutation of comfrey problems,
so I checked that out next. However, even my quick search of the
internet turns up problems with their refutation. For example,
leaves instead of roots were used in the studies I saw, and at least one
study consisted of animals eating comfrey leaves instead of being
injected with extracted chemicals. In addition, that website only
looks at common comfrey, while many permaculturalists are using Russian comfrey
in the same ways. Finally, it's worth noting that the author
clearly has a financial interest in making comfrey available as an herb.
I don't have any solid
conclusions since I think we each have to make health decisions for our
own families and animals. I still am unlikely to take comfrey
internally, am quite happy to apply it externally, and will keep feeding
the leaves to chickens since our working birds have a shelf life of 1.5
years or less. If we ever owned breeding or milk animals that I
wanted to really go the distance, though, I might keep them away from
comfrey, and I wouldn't eat any animal's liver if it looked weird.
I hope that clears, rather than muddies, the waters!
 The purpose of Low-Cost Sunroom is to show how anyone
who is of average handiness with simple tools can construct a
durable, well-insulated eight-by-eight-foot solar greenhouse. First,
there are a few simple facts concerning the sun and heat retention
(insulation) that the greenhouse builder must keep in mind. For a
more complete coverage of the following subjects, The Passive
Solar Energy Book, by Edward Mazria, is recommended as a basic
primer.
The purpose of Low-Cost Sunroom is to show how anyone
who is of average handiness with simple tools can construct a
durable, well-insulated eight-by-eight-foot solar greenhouse. First,
there are a few simple facts concerning the sun and heat retention
(insulation) that the greenhouse builder must keep in mind. For a
more complete coverage of the following subjects, The Passive
Solar Energy Book, by Edward Mazria, is recommended as a basic
primer.
The word “solar” in solar greenhouse means that
the greenhouse is designed to do three things an ordinary greenhouse
cannot do. The purpose of most older greenhouses was to let in
adequate light to grow plants in winter and spring and to protect
the plants from direct contact with the elements. The old greenhouse
had to have a heat source to keep soil and air temperatures warm
enough to grow plants. The solar greenhouse (1) uses the sun as its
main heat source, (2) is well-enough insulated that it does not lose
too much heat overnight, and (3) has a system of storing and
releasing heat obtained from the sun.
To see the complete plans for this greenhouse, download the diagrams in this pdf file. Then learn to build it with the 99 cent ebook Low-Cost Sunroom.
| This post is part of our Low-Cost Sunroom lunchtime series.
Read all of the entries: |
Reading Low-Cost
Sunroom reminded us of a few cracks we noticed last winter where a
small draft was sneaking in on those really windy nights.
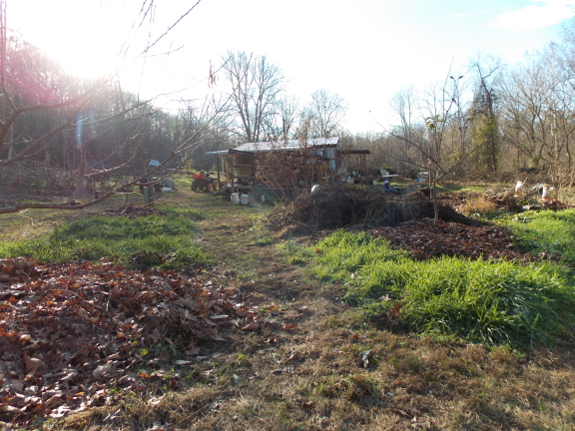
I figured it was a bit of
a gamble to topdress my fruit trees in November last year instead of
waiting until spring. The danger is that if you feed them too
early, the trees might put out extra top growth, which would
winter-kill. On the other hand, feeding and mulching your trees in
the fall can promote root growth during the period between when the
leaves fall and when the ground gets cold enough to make the trees truly
dormant, in essence extending your growing season. Plus, putting
compost and mulch over possibly-diseased tree leaves that have fallen to
the ground prompts the latter to decompose quickly so the disease
doesn't overwinter. And, from a purely human point of view,
November is a less-busy gardening month than March is, so anything I can
do now lowers stress later.
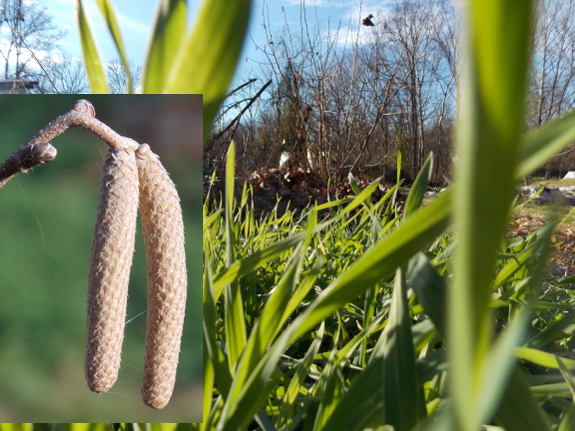
And the gamble paid
off. I didn't see any winter-killing last year, so fall feeding
definitely didn't hurt. I might as well lather, rinse, and repeat
this year!
First, each tree gets weeded or kill mulched (depending on how bad the weeds are), I scatter a bit of rotted horse manure
around the base, then I top it all off with leaves raked out of the
woods. As you can see, rye out beyond the trees' canopy is growing
well and will give me some supplemental mulch come May to carry us
through the year.
(And, look! It seems like my hybrid hazel
will fruit for the first time next year if the number of flower buds is
any indication! I'd better get Mark at work designing a nut
cracker.)

Getting to spend time
around my fruit trees is always a treat, no matter what the
season. I always notice something new, like the lichen coating the
trunks of my apple trees. My peaches don't seem to grow lichen,
maybe because they grow more quickly, or perhaps the bark is just the
wrong texture? Either way, the eye candy is appreciated.
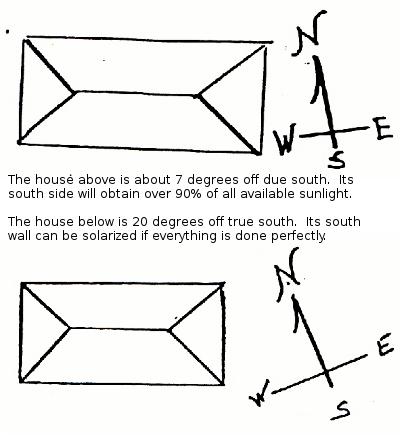 In order to obtain maximum benefit from the sun,
the glazing (window wall) of the greenhouse should face nearly due
south. In adding a greenhouse onto an existing house, the wall can
be up to 30 degrees off true south without losing too much benefit
from the sun. A wall between 30 to 45 degrees off true south will
benefit by using the triangular design described at the end of Low-Cost Sunroom, as might those marginal ones
between 20 and 30 degrees.
In order to obtain maximum benefit from the sun,
the glazing (window wall) of the greenhouse should face nearly due
south. In adding a greenhouse onto an existing house, the wall can
be up to 30 degrees off true south without losing too much benefit
from the sun. A wall between 30 to 45 degrees off true south will
benefit by using the triangular design described at the end of Low-Cost Sunroom, as might those marginal ones
between 20 and 30 degrees.
There are two ways of finding solar orientation.
One is to use a magnetic compass. Check with your
library or high
school science teacher to find out how far off true south magnetic
south is where you live (a figure known as declination). Or
visit
http://www.ngdc.noaa.gov/geomag-web/ to find
declination for your location online. If your declination
consists
of only a few degrees, and if the wall you want to put the
greenhouse on is close to true magnetic south, you have nothing to
worry about. If, on the other hand, the compass shows your
wall is
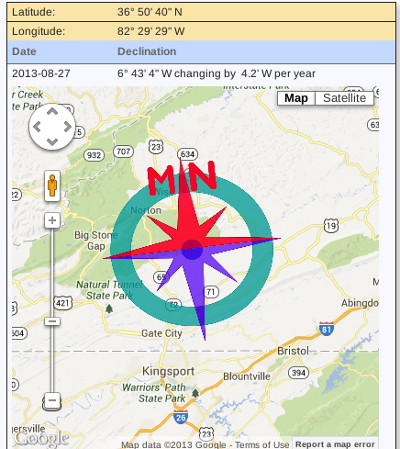 10 to 15 degrees off true south, make sure the difference between
true and magnetic south is not great enough to throw you beyond 20
degrees off true south.
10 to 15 degrees off true south, make sure the difference between
true and magnetic south is not great enough to throw you beyond 20
degrees off true south.
True south is where the sun is at solar noon. The
other way of finding out how close to south your building is facing,
is to
find out when solar noon is in your location and to use a post or
perpendicular stick to cast a shadow on the wall at solar noon. If
the wall is facing due south, the shadow will stand straight up on
the wall, and will be perpendicular to the wall on the ground in front.
The distance that the shadow is off from this description shows the
number of degrees the wall varies from true south. You can use a
protractor where the shadow on the ground meets the wall to measure the angle.
When this booklet was first written (1981), Scott
County, Virginia, had a declination of only 3 degrees, so the
compass reading could be used without correction. However,
declination changes in each location over time, and the area's
declination is now 6.75 degrees.
To read more about building a greenhouse add-on for less than $15 per square foot, download the 99 cent ebook Low-Cost Sunroom.
| This post is part of our Low-Cost Sunroom lunchtime series.
Read all of the entries: |

Putting a trellis in front of
these windows should give us some Summer shade.
I overlapped 2 eight foot
long furring strips to equal the 12 foot span.
Now we just have to wait for
the grapes
to grow and twist their way to the top.
 "I have a nectarine tree that fruits like crazy but the fruit rots every
time before a single fruit can be harvested. The tree just seems sickly
and I'm thinking I might just have to remove it. However, I was watching
a video by Alex Ojeda and he said he dug a circle around a sickly lemon
tree, placed sticks and such in the trench, and recovered it with the
dirt (in essence, creating an "after the fact" hugelkulture). Have you
ever tried this (I know you planted your trees in hugelkultures but it's
too late to do that with this tree)? If so, would I dig the circle at
the drip line or further in? And would it help with the fruit issue or
is that just a fungus issue (I was hoping if the tree was healthier, it
could fight off the fungus better, if that is the problem)? Thanks for
any help you can give."
"I have a nectarine tree that fruits like crazy but the fruit rots every
time before a single fruit can be harvested. The tree just seems sickly
and I'm thinking I might just have to remove it. However, I was watching
a video by Alex Ojeda and he said he dug a circle around a sickly lemon
tree, placed sticks and such in the trench, and recovered it with the
dirt (in essence, creating an "after the fact" hugelkulture). Have you
ever tried this (I know you planted your trees in hugelkultures but it's
too late to do that with this tree)? If so, would I dig the circle at
the drip line or further in? And would it help with the fruit issue or
is that just a fungus issue (I was hoping if the tree was healthier, it
could fight off the fungus better, if that is the problem)? Thanks for
any help you can give."
I'm afraid that what you're likely looking at is brown rot,
the bane of peaches, nectarines, and other stone fruits in the humid
South. While boosting a tree's health with hugelkultur is always a
good idea, it's unlikely to prevent this kind of fungal disease if your
weather conditions are right for it. We battle brown rot pretty
hard, and after a few years of trial and error, these are my top tips:
- Plant resistant varieties. Unfortunately, most nectarines are more susceptible to brown rot than peaches are (and even peaches get it pretty bad). We ended up cutting down our nectarine because it seemed to be a disease magnet.
- Prune your trees high and open.
If I could go back in time, I'd change my pruning strategy so the
scaffold branches didn't come off the tree lower than three feet above
the ground. Brown rot is produced by a fungus, fungi like damp,
and the ground is always the dampest spot. I am happy with my
open-vase form, though, since that lets sunlight penetrate the whole
tree and dries fruits quickly once the rain stops.
 Try to manage insect pests that damage fruits. Brown rot usually enters fruits through tiny holes created by insects, in our case by the Oriental fruit moth.
I do my best to manage Oriental fruit moth populations by cutting off
damaged twigs and soaking them in water to drown the insects, but I only
have moderate success with this.
Try to manage insect pests that damage fruits. Brown rot usually enters fruits through tiny holes created by insects, in our case by the Oriental fruit moth.
I do my best to manage Oriental fruit moth populations by cutting off
damaged twigs and soaking them in water to drown the insects, but I only
have moderate success with this.
- Thin fruits optimally.
Brown rot also thrives where two fruits butt up against each other as
they swell. If you're careful to thin your tree so every bloom is
at least six inches from another, you'll prevent this damp, fungus-prone
location.
 Monitor your tree daily starting a couple of weeks before full ripe. By
pulling off any fruits that have borderline brown rot, you can keep the
fungus down to a dull roar. And picking good fruits once the ground
color shows ripeness, but before they're soft, allows you to ripen them
inside, beyond the fungal zone.
Monitor your tree daily starting a couple of weeks before full ripe. By
pulling off any fruits that have borderline brown rot, you can keep the
fungus down to a dull roar. And picking good fruits once the ground
color shows ripeness, but before they're soft, allows you to ripen them
inside, beyond the fungal zone.
All of that said,
hugelkultur certainly won't hurt. If you live in a damp location
(which I assume you do if you're having trouble with brown rot),
you don't really even need to dig a trench. Just toss a bunch of
wood, one layer thick, on the soil surface around the drip line.
As the wood rots, the tree roots will grow up to claim the
nutrients. Good luck!
| Equinox |
Summer
solstice |
Winter
solstice |
|
| 90 |
113.5 |
66.5 |
|
| Your
latitude |
-(
) |
-( ) | -( ) |
| Sun angle |
( ) | ( ) | ( ) |
| Equinox |
Summer
solstice |
Winter
solstice |
|
| 90 |
113.5 |
66.5 |
|
| Your
latitude |
-37 |
-37 |
-37 |
| Sun angle |
53 |
76.5 |
29.5 |
At a latitude of 37 degrees, the noonday sun at the
beginning of winter is about 30 degrees above horizontal. This is
the sun’s lowest point in the sky; in spring, fall and summer, it is
much higher. But, since this is when we need the sun’s heat the
most, we use 30 degrees to find out whether anything blocks the
sun from lighting the greenhouse when it is needed. Trees, even with
their leaves gone, can block a large portion of the sun. Other
buildings, hills, etc. need to be sited in such a way that you
know they don’t shade needed sun from the greenhouse.
Ninety percent
of all usable sunlight occurs between the hours of 9:00 AM and 3:00
PM. To be precise, this is solar time. If solar noon is
at 12:45 PM
in your location, then the above should read “9:45 AM and 3:45
PM.” You should also be sure to take Daylight Savings Time into
account when figuring out solar noon.
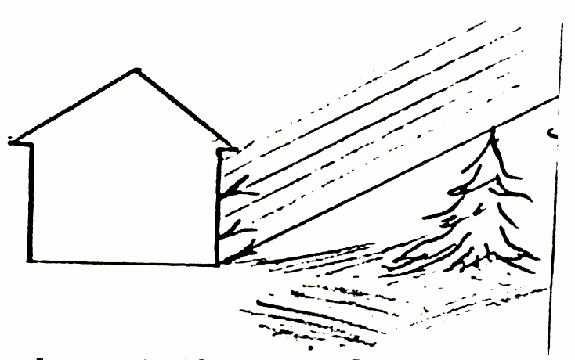
A tree may block some, all, or none of your sunlight.
When figuring out what may or may not block
access to the sun, remember that the sun rises low in the east, sets
low in the west, and is at its high point only at noon. So a chart
showing solar obstructions will be in the shape of an arc.
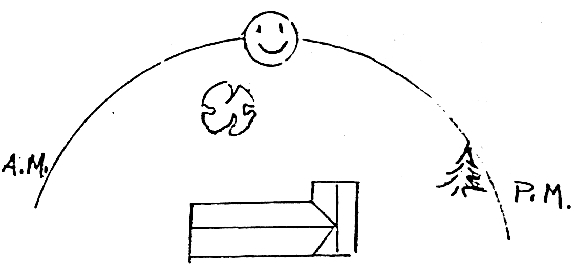
The tree due south of the home above will block less light than the tree to the west.
While the sun may shine over the tree in the
above drawing at noon, the same tree the same distance away in the
east or west, might shade the sun. To avoid grief, before locating the greenhouse,
you must consider these points of solar access.
To read more about building a greenhouse add-on for less than $15 per square foot, download the 99 cent ebook Low-Cost Sunroom.
| This post is part of our Low-Cost Sunroom lunchtime series.
Read all of the entries: |

We retired the last seven
chickens of our broiler flock today.
I've experimented with a
variety of blades for this task and think I've finally found the best
knife for killing chickens.
The one I settled on has a
3-1/2-inch blade with a gut hook that should come in handy for this
upcoming deer
season.
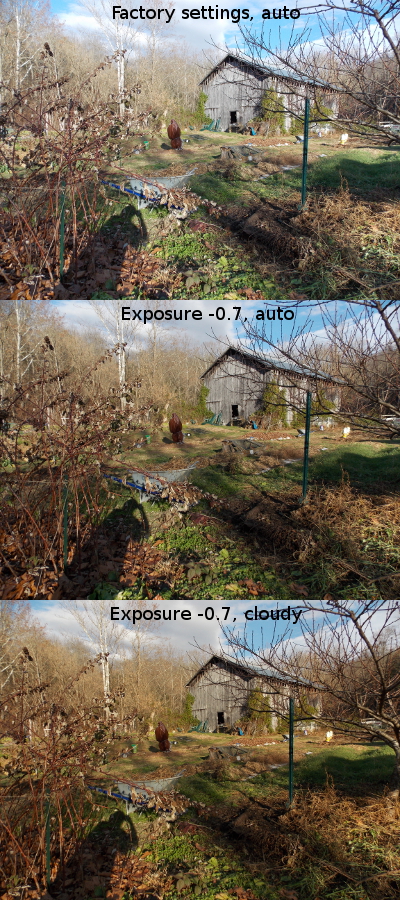 I got a new camera back in May --- a Nikon Coolpix L810. I've been very happy with the video
and supermacro features, but for day-to-day use, the pictures have been
disappointing. Sure, it's been a pretty gray year, but the colors
in my photos always felt washed out. And when I scaled them down
to put up on the blog, they always ended up subtly blurry.
I got a new camera back in May --- a Nikon Coolpix L810. I've been very happy with the video
and supermacro features, but for day-to-day use, the pictures have been
disappointing. Sure, it's been a pretty gray year, but the colors
in my photos always felt washed out. And when I scaled them down
to put up on the blog, they always ended up subtly blurry.
Mark suggested playing with the exposure compensation, since his Nikon
generally requires that to be downgraded a notch or two to get
good-quality photos. Following his lead helped a bit (middle
photo), but not enough, so I resorted to what should have been my first
step --- reading the manual from cover to cover.
There, I discovered the white balance menu option. On "auto",
everything looks gray and "daylight" fares a little better. But
"cloudy" (even on a rare sunny afternoon) was the winner, making colors
really glow (especially when paired with downgrading the exposure
compensation a bit). Success!
So, what about the blurry
resized images? There, the issue appears to have been choosing an
option that compresses the files more --- the difference between 16M*
and 16M. Or possibly it helped that I turned off vibration
reduction and motion detection (although you would think those would
have helped, not hurt, the issue).
All of the specifics aside, the moral is clear. Knowing how to use
your tools nets big dividends. I wonder what else I've been using
wrong?
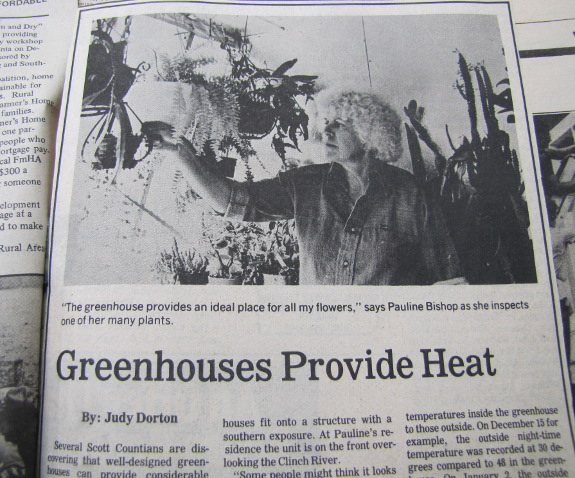 For the sun to be used as the main heat source in
a greenhouse, there must be some way of collecting and storing heat
during the day and releasing it at night. There has to be enough
storage available to absorb excess heat in the daytime so that the
temperature does not get too hot, as well as to store enough heat
that supplemental heat is not needed on a normal winter’s night.
For the sun to be used as the main heat source in
a greenhouse, there must be some way of collecting and storing heat
during the day and releasing it at night. There has to be enough
storage available to absorb excess heat in the daytime so that the
temperature does not get too hot, as well as to store enough heat
that supplemental heat is not needed on a normal winter’s night.
There are two common systems of heat storage: one using containers
of water, the other using some type of masonry. If you can scrounge
free water containers, water storage is cheaper. In the greenhouse
described here, the owner must find a source of heat storage.
Storage containers should be painted black, dark green, or dark blue
for maximum heat absorption, and must be placed where the winter
sunlight will hit them directly. Because of the corrosive nature of
water, metal drums should have a rust inhibitor added to the water
to prolong their lives.
It is a good idea to put storage containers
underneath the plant beds so that they keep the soil warm. A plant
bed can be a simple wooden box sitting on top of 55-gallon
water-filled drums.
Masonry storage can be: a concrete floor, or one
of brick, tiles or even dirt, sand, or gravel; or a stack of rocks,
bricks, etc. supporting growing containers. In any case, there
should be insulation underneath the masonry to prevent heat loss to
the ground. This insulation can be as simple as bricks stacked on an
old wood pallet, keeping them off the ground.
Did you enjoy these excerpts from Low-Cost Sunroom? If so, download the whole thing --- it's free today on Amazon! Thanks for reading.
| This post is part of our Low-Cost Sunroom lunchtime series.
Read all of the entries: |

I hooked up the Thermo
Cube again in the refrigerator
root cellar.
We added some jugs of water
for heat storage.
It's still doing the job of
turning the little
space heater on so our
apples don't freeze.
Some people are saying it
might get as cold as 10 degrees.
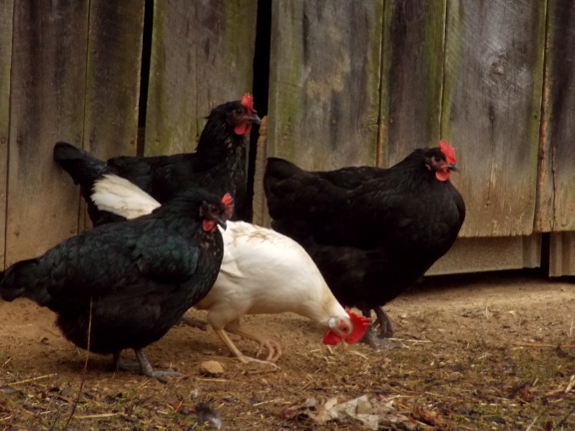
Even the chickens agreed
that Friday was a good day to hunker down out of the rain. I took
advantage of the "bad" weather to spend all day writing, bringing my young-adult novel to the (perhaps) halfway point. Maybe that means it'll all be downhill from here?
This post is to remind me that my previous post about the times when the Dungannon dump is closed was wrong. There's a new sign, but they refuse to take down the old one.
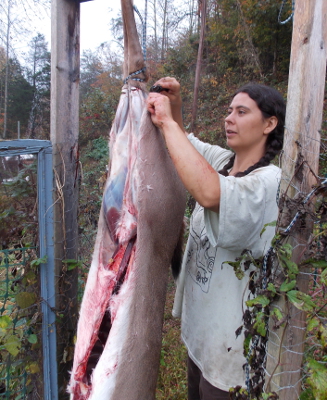 In
case you've never gone hunting, there are scads of seasons, even if you
limit your sights to deer. There's bow season, muzzle-loader
season, youth deer season...and either-sex firearms season. That
last one is when you really want to wear orange if you leave the road,
and is when I tend to hear four or five gunshots during a short walk
with Lucy.
In
case you've never gone hunting, there are scads of seasons, even if you
limit your sights to deer. There's bow season, muzzle-loader
season, youth deer season...and either-sex firearms season. That
last one is when you really want to wear orange if you leave the road,
and is when I tend to hear four or five gunshots during a short walk
with Lucy.
It's also when I use my
lazy-woman's version of hunting to bag a deer. Here's how I hunt
--- I sit on our futon, glancing out our big bay of south-facing windows
in between writing blog posts, reading novels, and petting
Huckleberry. A deer super-highway runs right along the southwest
corner of our core homestead, and when I see a deer walking by, I grab
the rifle, walk quietly out the door so I can steady the gun along the
top of the picnic table on the porch, and take a shot.
This year, I bagged a mature doe, the biggest one we've ever gotten. That means the meat is a little tougher than the yearling delicacies
we've enjoyed in previous years, but I'm confident I can make it shine
via brining, stewing, etc. Not counting the liquid and meat we
picked off the bones after cooking them into broth, here's the haul:
- Hams --- 15.3 lb.
- Steak --- 4.4 lb.
- Hamburger --- 4.3 lb.
- Stew --- 5.2 lb.
- Total --- 29.1 lb.
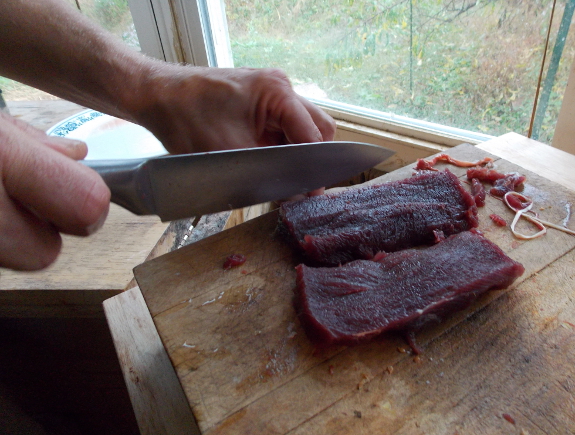
(As a side note, we cut
each ham in half because it was so big. And we saved back a lot of
stew meat rather than grinding it all this time because I've learned to
cook with stewing chunks more. Plus, Mark got sick of grinding,
eventually. On the other hand, Mark turned out to be vastly
superior to me in terms of meticulously cutting up steaks, although I
did have to give him a lecture on cutting meat on a wooden cutting
board.)
Since we've only shot
perhaps five bullets this year, that's less than 17 cents per pound ---
pretty cheap meat! For those of you keeping track at home, I'm
still leading the deer competition 3.5 to 1.5 ahead of Mark. Now,
if I can just nab one more deer this week....
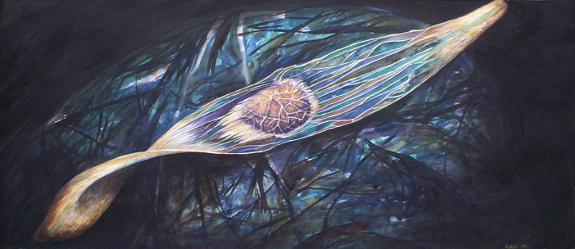
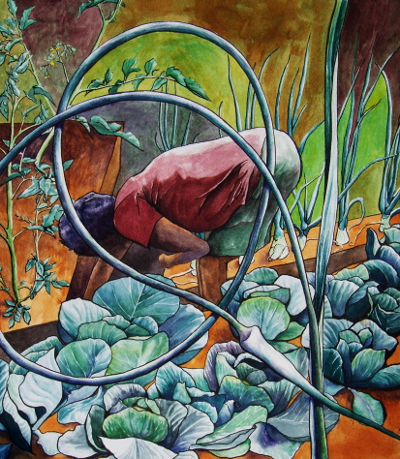 From
about age 13 through
23, art was one of my passions. I painted intricate watercolor
landscapes of closeup natural worlds, and the art ended up in at
least eight states (and, I think, in Japan). The paintings shown
here are some of my favorites that are on those walls far away.
From
about age 13 through
23, art was one of my passions. I painted intricate watercolor
landscapes of closeup natural worlds, and the art ended up in at
least eight states (and, I think, in Japan). The paintings shown
here are some of my favorites that are on those walls far away.
Once I moved to the farm,
though, my homestead became my canvas, and I stopped painting. While cleaning out behind
my desk last week, I came across some of my paintings, hidden
away in a portfolio to protect them from the dust. I don't like having
my art on my own walls because I'm hypercritical of my own efforts (and
there just aren't many spare walls in our trailer that aren't full of
shelves for books, canning jars, and so forth). So I decided to see if
these kittens...ahem, paintings...could find good homes if I cut the price in half and shared them on the blog.

 I'm picking out one main
painting and one or two studies to share with you each day this week at noon EST.
I've tried to choose paintings for each day that go together. They're
mostly unmatted and unframed (I'll mention if the art has either treatment), and
you can buy one at a time, or can save by buying all together.
I'm picking out one main
painting and one or two studies to share with you each day this week at noon EST.
I've tried to choose paintings for each day that go together. They're
mostly unmatted and unframed (I'll mention if the art has either treatment), and
you can buy one at a time, or can save by buying all together.
Be sure to check back right at noon each day if you're interested, since
they're first-come, first-served. However, if you've bought
paintings from me in the past and want a sneak preview, email me and
I'll let you get first dibs.
If nothing else, I hope a week of nature art will brighten everyone's day! And hopefully these original works of art will find someone to appreciate them, perhaps as holiday gifts?
| This post is part of our Nature Art lunchtime series.
Read all of the entries: |
After soaking our wood cutting board in bleach water I decided we
needed a second cutting board.
What's the best
cutting board for meat?
We'll drive this one around the block a few times and report back on
how useful the juice groove is and if it makes the cut.
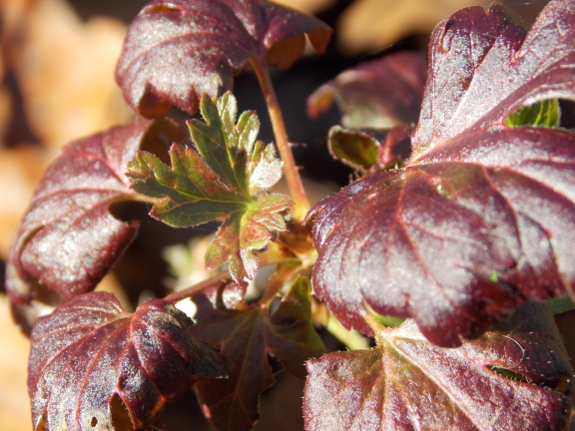
As usual, we're putting
in a bunch of new perennials over the winter. The unusual part is
that over half of them are homegrown. As I've mentioned
previously, we set out five figs
in late July, four started from cuttings and one from a rooted shoot
found under our Chicago Hardy tree. I didn't blog about it, but I
also set out an Issai hardy kiwi at the same time, a bit later in the
summer I planted out a couple of Poorman gooseberries from our nursery
bed, and last week I transplanted five seedless grapes (Reliance,
Thomcord, and Marquis) to their new homes as well. Over half of
these new plants came from cuttings a reader sent us --- thank you,
Brian!
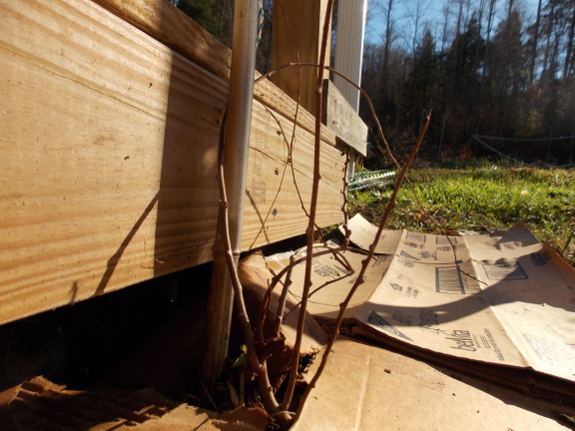
With so much bounty
coming our way for free, my annual $100 perennial budget stretched in
some interesting directions. We'll be adding a new variety of red
raspberry (Taylor) in the spring, and will be giving hardy kiwis another
shot with an Anna plant from One Green Word, as was recommended by another reader.
Last year's store-bought apple rootstock (Bud 9) will be stooled this
year and will let me graft new dwarf trees in spring 2015, but in the
meantime, I bought another five rootstocks of a larger variety (M7),
three of which will be grafted to new varieties, one of which will
expand Kayla's orchard, and one of which will go into our nursery bed to
be stooled in 2015. Five OHxF pear rootstocks will be spread out
in a similar manner (although I'll probably give Kayla two of
those). And, since I still had some cash left over in my budget, I
splurged on two named varieties of hybrid hazels --- Jefferson and Eta
--- since my previous hybrid hazel is from a few breeding generations previous to that.
So many exciting possibilities! What are you adding to your perennial garden this winter?
As I mentioned in yesterday's post, I'll be selling my original watercolors at half price this week
in hopes of finding every painting a good home (and of clearing up that
space behind my desk). Today's theme is Out of the Blue. If
you buy one or more of the paintings below, they'll go in the mail
early next week and will probably take roughly another week to arrive.
29.5" x 22"
Sold
$200 + $50 S&H
This painting was
inspired by the rock piles I found in old-farmland-turned-forest in the
mountains of West Virginia. Whenever I stumbled across the piles on my
hikes in the woods, I was amazed by the hard work of the farmers, who
built them one rock at a time without heavy machinery. I
was also reminded of the cairns I'd sometimes find on European
mountaintops, which people would add to, putting something special
(usually a rock) on top after climbing to the peak. I felt like
this striking mushroom was definitely something special and worthy of its own cairn.
 |
Seed Dispersal
11.125" x 8.25"
matted
$30 + $25 S&H
This pencil-and-watercolor drawing highlights a sycamore seed drifting over a western river. Only if it's very lucky will the water-loving seed find a damp enough spot to root and grow. |
 |
Willow Bud 13.5" x 11.75" $25 + $25 S&H This study of a willow bud catches it in its dormant, winter mode, but the bud is just biding its time until spring.
|
$250 + $50 S&H
I hope you enjoyed the eye candy!
| This post is part of our Nature Art lunchtime series.
Read all of the entries: |
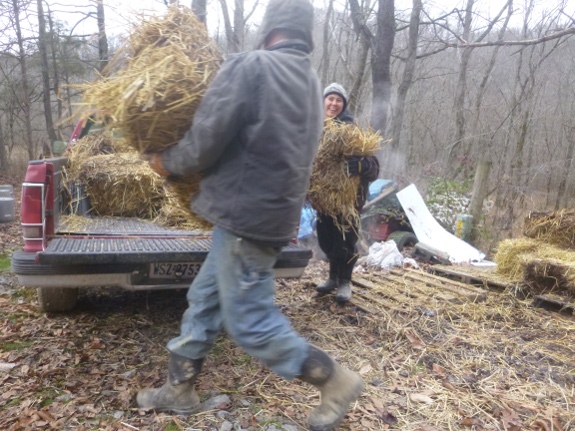
We had our second frozen
opportunity of the year this morning.
It's a good feeling knowing
the straw
bales are tucked into the barn for the winter.
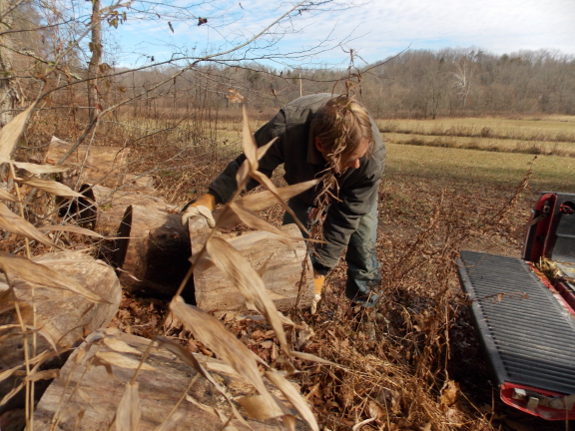
Mark and I don't give birthday and holiday gifts to each other, but if we did, this is what I'd want --- huge, punky oak logs well-inoculated with woodland fungi. I'm going to consider this truckload a pre-Thanksgiving present --- thanks, honey!
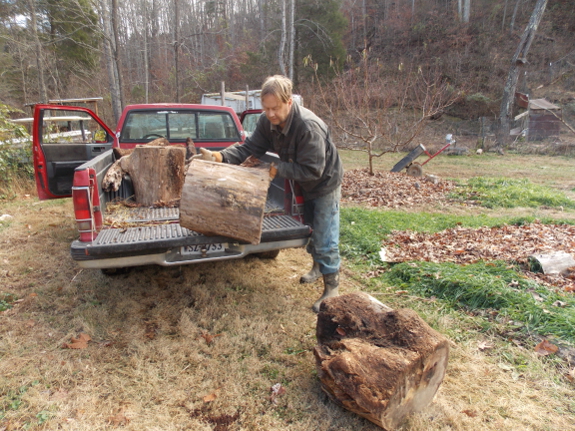
The wood was extra ---
our third trip after hauling in a truckload of straw and another
truckload of bathtub. By the time we filled the truck with logs,
the floodplain was just starting to thaw, but Mark barreled through and
dropped off log after log right where I needed them in the forest
garden. These will feed the soil and raise the earth level around
our three most waterlogged trees --- two American plums and an apple.
If we get lucky enough to
haul in the other two truckloads of wonder wood still waiting at the
parking area, I'll give some to our oldest Celeste, who is in a wetter
part of the gully than the neighboring Chicago Hardy fig and thus hasn't
done as well. After that, I'm not sure where the wood will go ---
maybe in the newly-reclaimed parts of the gully for awesome planting spots next year?
As I mentioned in Sunday's post, I'll be selling my original watercolors at half price this week
in hopes of finding every painting a good home (and of clearing up that
space behind my desk). Today's theme is High and Dry since oaks
live on ridgetops in our region, and since the Virgin's Bower pictured
has clearly climbed to higher ground. If
you buy one or more of the paintings below, they'll go in the mail
early next week and will probably take roughly another week to arrive.
 |
Virgin's Bower
29.75" x 22.5" double-matted Sold $220 + $50 S&H This cluster of Virgin's Bower seeds is about to break apart. The seeds will waft away from the parent plant and drift to a new home in the mountains. |
 |
Oak Community II
29.25" x 18.75" Sold $100 + $50 S&H This second-generation study of a cluster of fallen white-oak leaves brings the dead to life. |
 |
Oak Community I
13.5" x 7.75" Sold $25 + $25 S&H This is a smaller rough draft for the painting above. |
Thanks for looking!
| This post is part of our Nature Art lunchtime series.
Read all of the entries: |
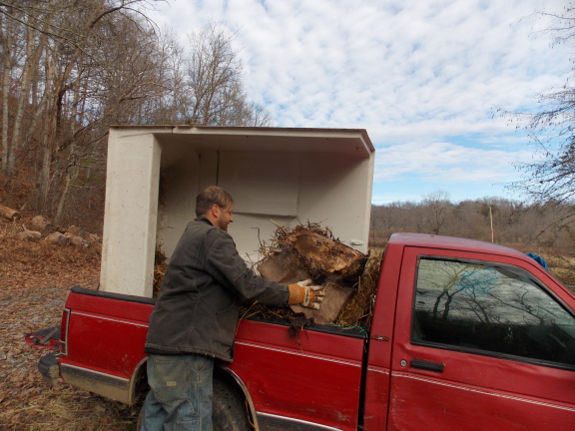
We finally got our used
bathtub back to the barn yesterday.
It's a good thing, because
today's rain is turning into a flood as I type this.
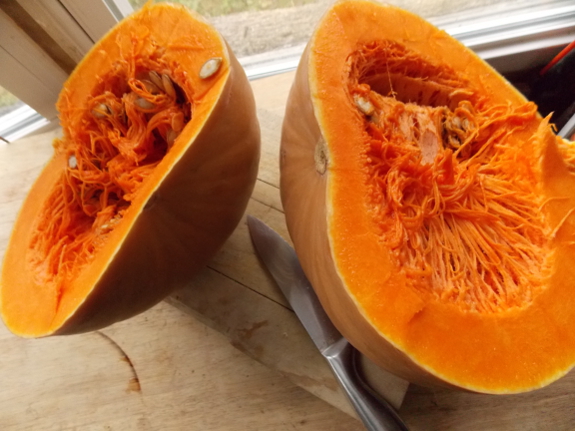
As several readers pointed out, I chewed Mark out incorrectly about using a wooden cutting board for meat. It turns out that wooden cutting boards are probably safer,
in actuality, since the bacteria tend to sink down into the wood, where
they slowly die off. In contrast, plastic cutting boards keep any
bacteria closer to the surface, and once the plastic boards have been
scarred by cutting action, those bacteria can move off the board and
back onto food relatively easily.
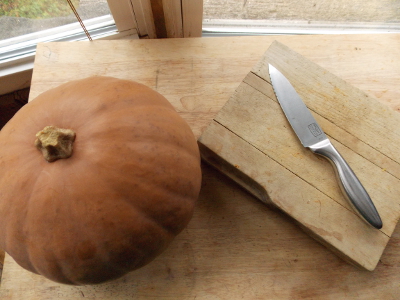 On
the other hand, it's generally considered good practice to have two
cutting boards in your kitchen, one for meat and one for everything
else. Since meat is going to be cooked before eating, any bacteria
present will be killed by the high heat, but if you cut apples on a
cutting board that has been used for meat then eat the apples fresh,
you're at risk of getting food poisoning. In the past, I've just
cut up meat on a plate (annoying, but I don't do it often), but since
we'll now have a wooden and a plastic cutting board, I'll keep using the
wooden one for fruits and vegetable. We'll be extra-careful to
disinfect the plastic board after cutting up meat, which can be done by
washing the board and then soaking it in bleach water, exactly the
method Mark naturally gravitated toward.
On
the other hand, it's generally considered good practice to have two
cutting boards in your kitchen, one for meat and one for everything
else. Since meat is going to be cooked before eating, any bacteria
present will be killed by the high heat, but if you cut apples on a
cutting board that has been used for meat then eat the apples fresh,
you're at risk of getting food poisoning. In the past, I've just
cut up meat on a plate (annoying, but I don't do it often), but since
we'll now have a wooden and a plastic cutting board, I'll keep using the
wooden one for fruits and vegetable. We'll be extra-careful to
disinfect the plastic board after cutting up meat, which can be done by
washing the board and then soaking it in bleach water, exactly the
method Mark naturally gravitated toward.
While doing all this
research, though, I did learn one maintenance technique I need to add to
my arsenal --- oiling our wooden cutting board. Now I just need
to hunt down some food-grade mineral oil and give my grandmother's board
a new lease on life.
As I mentioned in Sunday's post, I'll be selling my original watercolors at half price this week
in hopes of finding every painting a good home (and of clearing up that
space behind my desk). Today's theme is New Leaves. If
you buy one or more of the paintings below, they'll go in the mail
early next week and will probably take roughly another week to arrive.
 |
Dangling
double-matted 29.5" x 21.25" $220 + $50 S&H A young redbud pod is just beginning to plump up in front of the still-tender leaves. I painted this when I was first getting to know Mark, so it's a bit melodramatic for reasons you'll understand if you've read Growing into a Farm. |
 |
First Leaves
26.25" x 17.5" Sold This study portrays a tulip-tree bud just starting to burst open in the spring. |
Stay tuned for tomorrow's art, with an invertebrate theme.
| This post is part of our Nature Art lunchtime series.
Read all of the entries: |
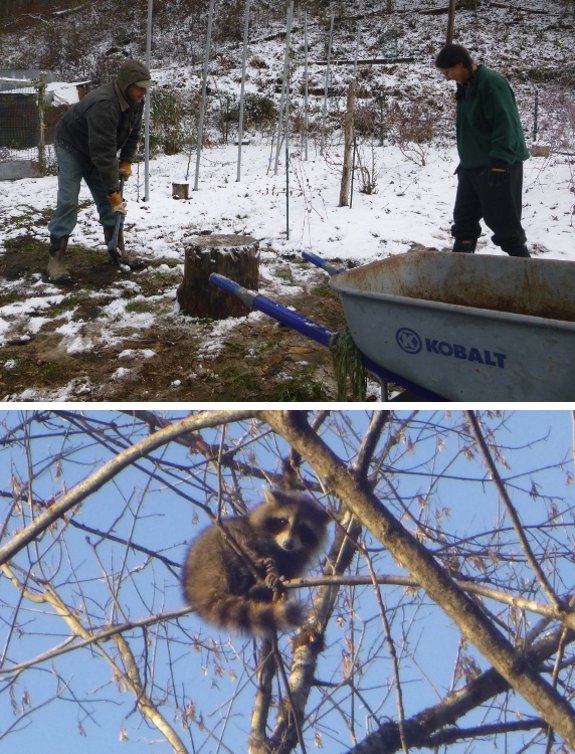
Lucy chased a raccoon up a tree that was getting close to the chicken coop and Anna and I chopped a couple rounds of firewood, but other than that we took the day off to rest up for a day of traveling tomorrow.
All week, I've been living in another world. The piece of young-adult fiction
I started in June fermented all summer, started and stopped in October,
and then swallowed five days of my life this week. I'd wake at 6,
a chapter already written in my head, type until my brain went foggy,
tend to the animals, type some more, pause for lunch, type, eat, type,
sleep, repeat.
Now, waking back into the
real world, I feel a bit like I do after spending days in bed due to
the flu. The snow crunches beneath my feet and I feel I'm obeying
Thich Nhat Hanh who admonished us to "Walk as if you are kissing the
Earth with your feet."
I haven't written fiction
in years, and what I wrote then was pretty bad. But this time I
don't just have a feeling I want to wallow in, I also have a world and
thought problem I want to explore and share. Now that the first
draft is done, I've promised to ignore the book for a week so I can edit
it with rested eyes, and hopefully I'll be able to share the result
with you before Christmas. Unless my rested eyes say the story is
terrible, of course.
Which is all a long way
of saying that what I'm most thankful for this year is the freedom to
let a project swallow me whole. I'm thankful for a warm fire to
type in front of, and for two cats who are sometimes actually willing to
sit somewhere other than on top of my arms so I can do that
typing. (Yes, it is possible to type with two cats on your
lap...barely.) I'm thankful for a husband who doesn't mind that I
haven't really been present for the last week, and for a mother who let
me mix up her history with my own and cook the result down until it
gelled without any added pectin.
Later today, I'll also be thankful for pie. Have a wonderful Thanksgiving wherever you are!
(By the way, the chickens in these photos are being thankful for a rare day of sun last week.)
As I mentioned in Sunday's post, I'll be selling my original watercolors at half price this week
in hopes of finding every painting a good home (and of clearing up that
space behind my desk). Today's theme is Insects. If
you buy one or more of the paintings below, they'll go in the mail
early next week and will probably take roughly another week to arrive.
 |
Daddy-Long-Legs
29.75" x 21.75" $200 + $50 S&H Everyone's favorite spider, this daddy-long-legs is walking through a field of Indian Strawberry leaves. |
 |
Dragonfly Eruption
27" x 21.75" $150 + $50 S&H This empty exoskeleton is all that remains after a dragonfly changes from its watery nymph stage into its aerial adult form. |
$300 + $50 S&H
My last series tomorrow has a wintery theme. Don't forget to stop back by.
| This post is part of our Nature Art lunchtime series.
Read all of the entries: |
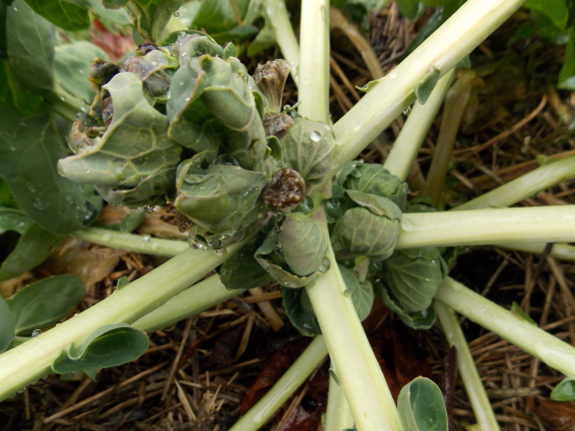
Is it worth topping your Brussels sprout plants if you don't think of it until late October? I meant to answer this question by topping every other plant and then comparing the results over the winter.
The trouble is that the
tops tasted really good. And the topped plants just seemed to be
growing bigger sprouts over the following week. So I topped them
all...meaning I have no useful data.
What I do have is scads
of brussels sprouts plumping up on the stems of my plants.
Although not a good experiment, this is definitely a culinary and
gardening success. Yum!
As I mentioned in Sunday's post, I'll be selling my original watercolors at half price this week
in hopes of finding every painting a good home (and of clearing up that
space behind my desk). Today's theme is Winter. If
you buy one or more of the paintings below, they'll go in the mail
early next week and will probably take roughly another week to arrive.
 |
Winter Wonderland
27.75" x 21.75" Sold $150 + $50 S&H Ground Cedar in the snow reminded me of a Christmas scene in miniature. |
 |
The Longest Night
29.5" x 21.75" $150 + $50 S&H Although shriveled by the time the winter solstice arrives, this acorn is still full of life and is ready to sprout in the spring. |
I hope you've enjoyed this journey back in time into my head a decade ago. Thank you to everyone who has bought art!
| This post is part of our Nature Art lunchtime series.
Read all of the entries: |
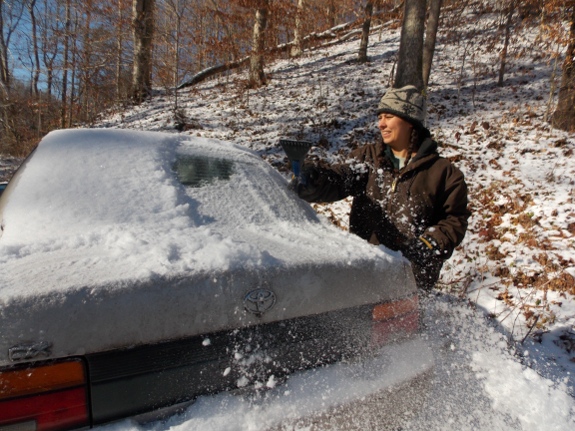
Anna and I had a nice and
safe trip to North Carolina yesterday.
I do most of the driving
while Anna handles the ice scraping and navigation.
One
of our readers commented that he figured we'd drive in all of that
delicious punky wood by the end of the week based on our weather
forecast. He was right about the cold, although not about our energy levels. A day baking pies followed by a day of extended driving and visiting
meant that Mark and I just wanted to be lazy during the second frigid
morning in a row. We even missed a couple of eggs in the nest box,
which froze solid and cracked --- a treat for Lucy once they thaw.

I try not to bore our
readers by talking too much about the weather, but I think about it a
lot. A low of twelve degrees and a high near freezing for two days
means morning chores are cold and the wood stove is blazing. I
can't feed us lettuce because the leaves are frozen solid, but I can
push down through the snow to gather leafy greens and Brussels sprouts (although my fingers get cold in the process!). Our wash water line freezes up, but we still have drinking water since that line stays waterless except when the pump is running, and the fridge root cellar stays barely above freezing with the help of a backup heater attached to a thermocube. (0.3 kwh of electricity used so far.)
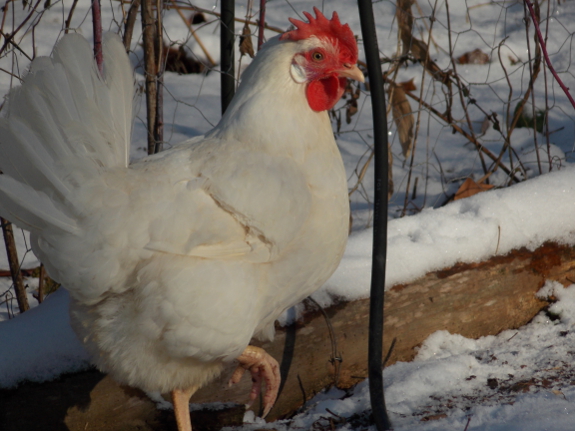
The chicken tractor stays
put since Mark threw a tarp over top of it before the snow started,
leaving a bit of snowless ground in the current location but none in the
surrounding yard. Even though I don't have to move the tractor,
morning chores take longer because I need to swap out the Avian Aqua Miser Original in the tractor and backup coop (and check on the heated waterer,
although it's still flowing so far). On the plus side, cold
weather also settled down the one pesky Leghorn who is living in that
backup coop because she spent the last month breaking into the yard to
hide her eggs hither and yon. For a week after being cooped back
up, bad hen paced the fenceline, but chickens really don't like walking
in the snow, so she finally gave up, settled down, and laid in her nest
box.
I always find the
temperature extremes fascinating, but I have to admit that I'm glad I
live in a region of quickly changing weather. Before we can get
heartily sick of the snow, it starts to melt, and by this time next
week, we'll be enjoying a high of 60 degrees. I feel for those of
you who live in the frigid north and won't see bare ground until spring,
but you can laugh at us next summer when we're sweltering in the sun.
 The control to adjust the water
temperature on our low
pressure hot water system is behind a blue plastic panel.
The control to adjust the water
temperature on our low
pressure hot water system is behind a blue plastic panel.
I increased it by 12 degrees
recently.
We talked about installing a spring
loaded mechanical wall timer, but so far it's not been a problem
remembering to shut it off.

Or explore more posts by date or by subject.
About us: Anna Hess and Mark Hamilton spent over a decade living self-sufficiently in the mountains of Virginia before moving north to start over from scratch in the foothills of Ohio. They've experimented with permaculture, no-till gardening, trailersteading, home-based microbusinesses and much more, writing about their adventures in both blogs and books.