archives for 07/2013

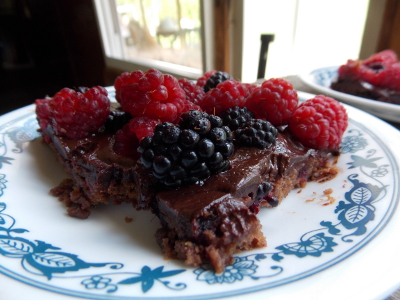
(Photo-shy) friends
came over this weekend, so of course I wanted to feed them
something special. However, I realized the night before that
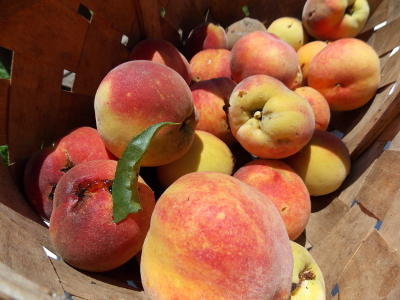
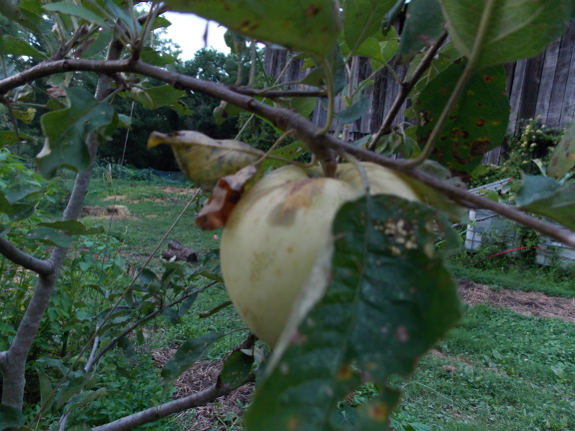
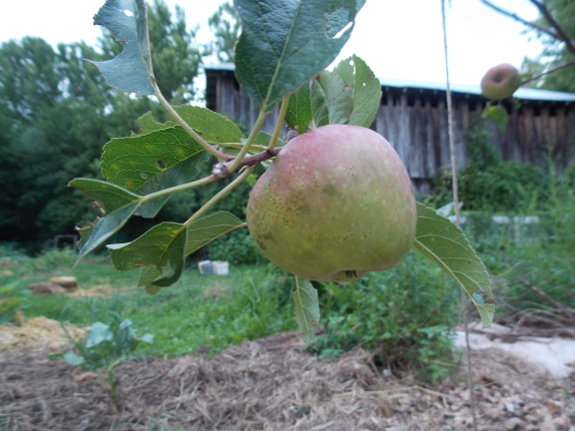
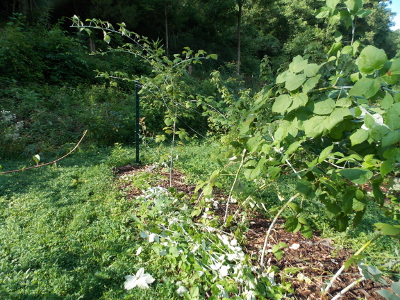
our bountiful
berries had
just passed their peak and we only had about a quart on the
bushes. How do you make a quart of raspberries feed five
people? Stretch it with chocolate, of course.
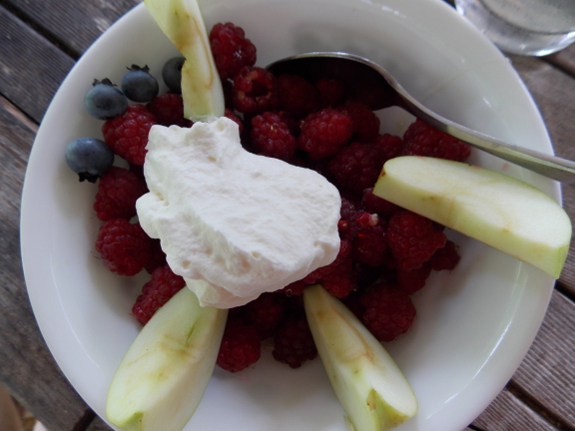
Torte
ingredients:
- 0.5 cups of almonds
- 2 ounces of dark chocolate
- 2 tablespoons of butter
- 2 eggs
- 0.5 cups of sugar
- 0.75 cups of flour
- 1 teaspoon of baking powder
- 0.5 teaspoons of salt
- 0.5 cups of raspberries
Topping
ingredients:
- 0.25 cups of heavy cream
- 6 ounces of dark chocolate
- 3.5 cups of raspberries
Preheat the oven to
350 degrees Fahrenheit and butter a 9-by-13-inch cake pan.
Toast the almonds
until they're lightly brown, then grind them for about 5 minutes
in a food processor until the nuts start to release their
oils. Meanwhile, melt the chocolate and butter in the
microwave.
At the same time,
beat the two eggs until they're fluffy. Add the sugar to the
eggs and continue beating. Then mix in the almond paste,
butter-and-chocolate mixture, flour, baking powder, and
salt. Once the batter is thoroughly mixed, lightly fold in
the raspberries, trying not to break them apart.
Pour the batter into
the pan, spread to cover the whole bottom, then bake until a knife
comes out clean. (This won't take long since the batter is
such a thin layer. I didn't time it though; sorry.
Maybe 10 minutes?)
 While the cake is baking, heat the cream in a
saucepan over medium-high heat until it just boils. Remove
from the heat, stir in the chocolate, and continue stirring until
the chocolate melts and mixes with the cream.
While the cake is baking, heat the cream in a
saucepan over medium-high heat until it just boils. Remove
from the heat, stir in the chocolate, and continue stirring until
the chocolate melts and mixes with the cream.
Once the cake is
done, spread the chocolate-and-cream mixture over top, then
sprinkle on fresh raspberries generously. (We had a couple
of blackberries and included them, and I'll be blueberries would
be equally delicious.) Cool for a few hours to set the
chocolate.
Serves about 10 and
combines the taste of fresh and cooked raspberries with rich
chocolate and nutty almonds, with none of the flavors overwhelming
the others. Definitely a favorite for fresh-fruit and
dark-chocolate lovers like me!
(Based loosely on this
recipe.)
One of our most-read
posts is a reader's
rebuttal to my
square foot gardening lunchtime series. This weekend, Ron
sent me a followup detailing the next three years of his gardening
trials. I'll let him tell you about the seven-year-old,
square-foot garden in his own words.
 If there is any interest,
I would like to add some up-to-date information on my square foot
garden and offer some answers to raised questions.
If there is any interest,
I would like to add some up-to-date information on my square foot
garden and offer some answers to raised questions.On this date, June 29, 2013, I now have 19 square foot garden beds (last reported was 13 - I've added six, 3' x 8' beds). This is so addicting!!! I am now in my seventh year.
In the garden area, the grass is now gone (covered by newspaper, cardboard, mulch and woodchips). I found the constant mowing, trimming and pulling of weeds a waste of time and a real pain. The most recent benefit is when the latest storms hit, my soil became a "mosh pit" of clay while the mulched area was well drained and workable.
 Your readers have a real
fascination with my bamboo trellis. It was made from a childhood
memory of an old Italian gardener neighbor. Somewhat a testament
to him. He truly loved his garden and would always go that
extra mile to make things, just right, just so. This memory goes
back to the 60's.
Your readers have a real
fascination with my bamboo trellis. It was made from a childhood
memory of an old Italian gardener neighbor. Somewhat a testament
to him. He truly loved his garden and would always go that
extra mile to make things, just right, just so. This memory goes
back to the 60's.It took me hours to construct and was based on using 8 foot sections of bamboo, jute twine and a refamiliarization of an old Boy Scout handbook with lessons on "rope lashing." After a couple of hard Upstate New York winters, the jute rotted and had to be constantly maintained.
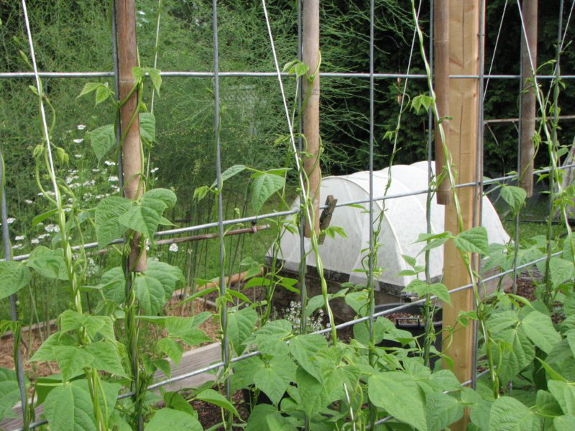
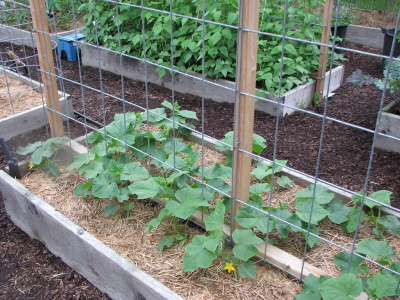
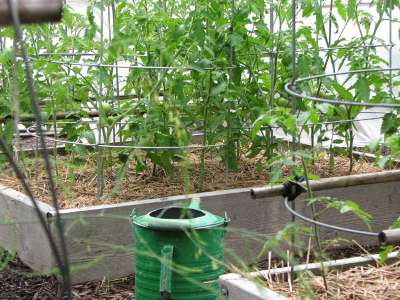
Needing something more beefy and multifunctional, I discovered cattle fencing with wood framing. Since my standard beds are 3' x 8', I can simply unbolt my frames from the beds and use elsewhere (crop rotation). I am also am a user of 24" Texas Tomato cages. With them, in a 4' x 4' bed, I can plant 16 each saladette or cherry tomato plants and not have them tumble over with the weight of hundreds and hundreds of tomatoes.
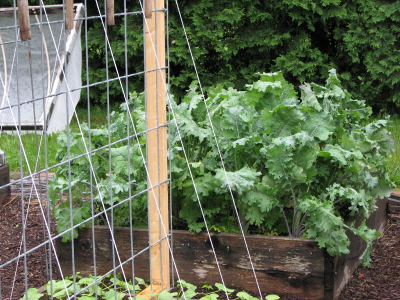 In one 3' x 8' bed, I have
24 cucumber plants started and growing totally vertical. That's
one plant per square foot.
In one 3' x 8' bed, I have
24 cucumber plants started and growing totally vertical. That's
one plant per square foot.Yes, the elegant bamboo frame is now gone (not really, taken apart and repurposed). I still enjoy the memory of making it and the images of my old Italian neighbor in his garden who spent the majority of his day there tending it and feeding his family.
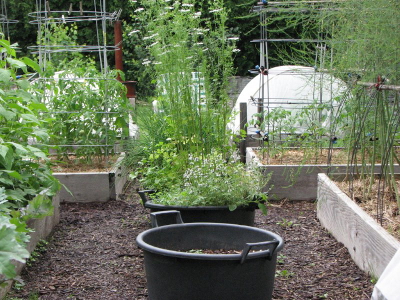
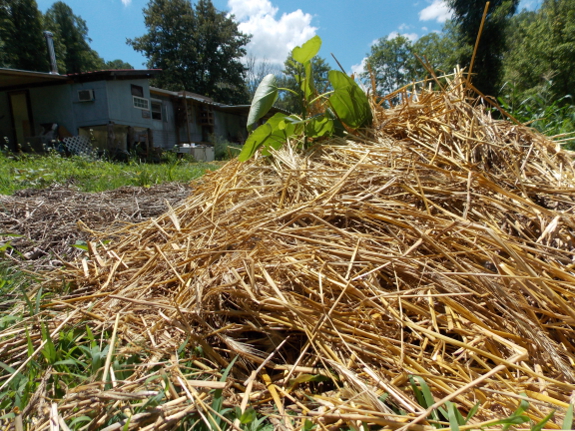
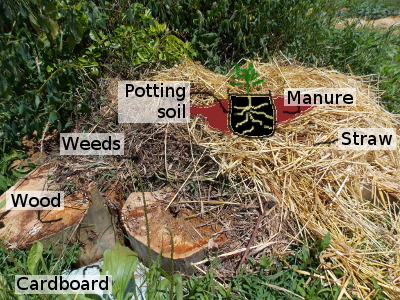
I constantly experiment. The cardboard boxes in the beds shown, were in fact, the mini planting areas for fingerling potatoes. The boxes allowed me to bury deep and by stacking another, I could hill the potatoes higher by adding another cardboard box. Did it work, yes, but not really a sure winner of an idea. Win some, lose
some.
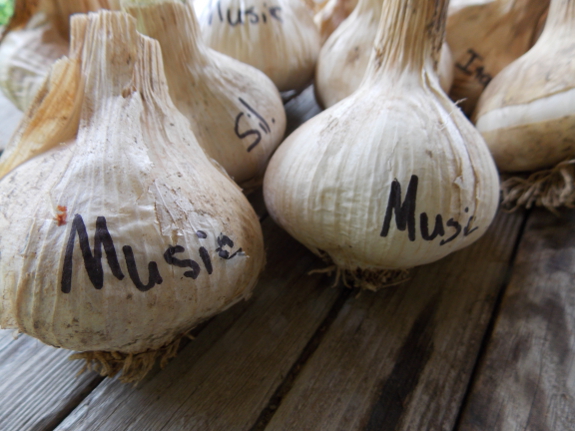
This year experiments include 3 full 3'x8' beds of fall planted hard neck rocambole garlic. I have added Azomite, kelp meal, and I just started spraying compost tea to this years' crop. Shortly, I hope to obtain rabbit manure, compost it, and then add red wigglers for their castings. All to add to the beds in the fall. It's all about building up the soil.
We are now deep into canning, freezing, and dehydrating. This year's garlic scape pesto is beyond belief!
 As a reminder, I live in
suburbia. My neighbors pray to the ChemLawn Gods. "Why grow
your own when a grocery store is a half mile away?" So
sayeth the neighbors. Frankly, trying to live a sustainable
lifestyle up here is a hard sell with this bunch. Wait when they
see the chickens in a few years!
As a reminder, I live in
suburbia. My neighbors pray to the ChemLawn Gods. "Why grow
your own when a grocery store is a half mile away?" So
sayeth the neighbors. Frankly, trying to live a sustainable
lifestyle up here is a hard sell with this bunch. Wait when they
see the chickens in a few years!I believe, loosely, with slight modifications, square foot gardening works and is legitimate method for all experience levels based on their available land, soil conditions and neighborhoods. I will also note and praise, I envy your lifestyle and your more rural conditions.
Would also like to add, in addition to the methods used by the Dervaes family, I would also recommend and make mention to your readers to watch the Youtube videos of Laszlo Horvath and GrowingYourGreens. They have taken suburban square foot gardening to new levels and demonstrate its viability.
Best wishes from Upstate New York.
--- Ron
Anna and I have been talking
about the sunroom
addition and we both
realized at the same time that we don't eat as many lemons as we once
did. I gave up Iced Tea a couple of years ago when I discovered most black
teas have high amounts of Fluoride due to chemicals used in the
growing process.
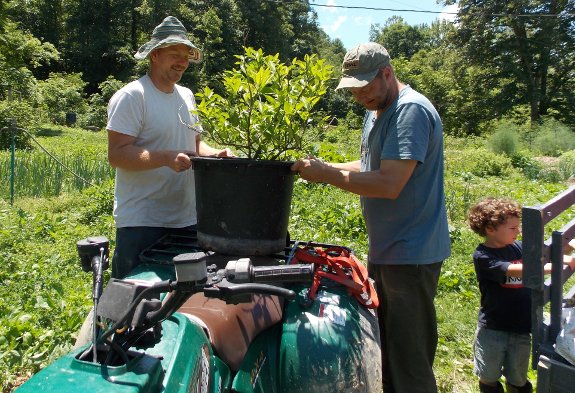
We had some friends over
recently and they happily agreed to give our Myers
Lemon tree a good home.
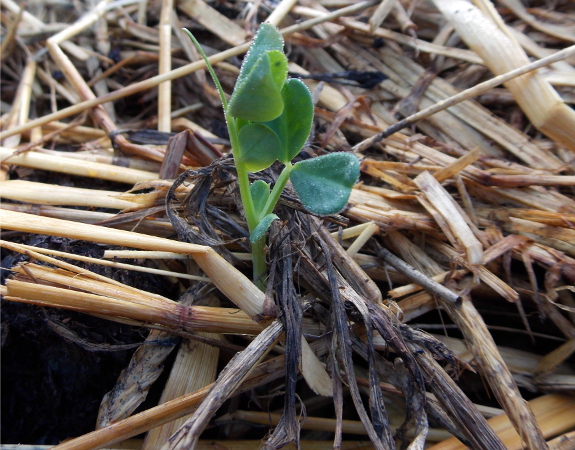
I haven't regaled you
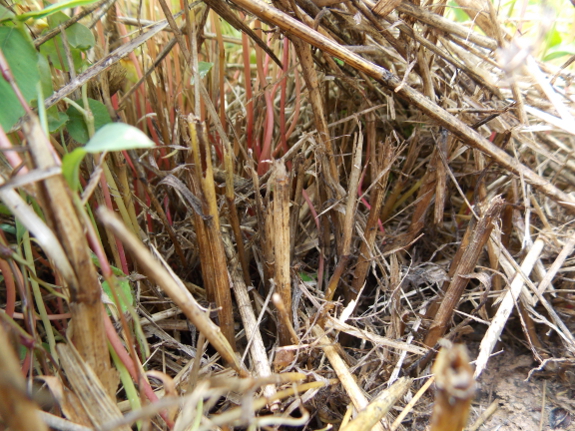
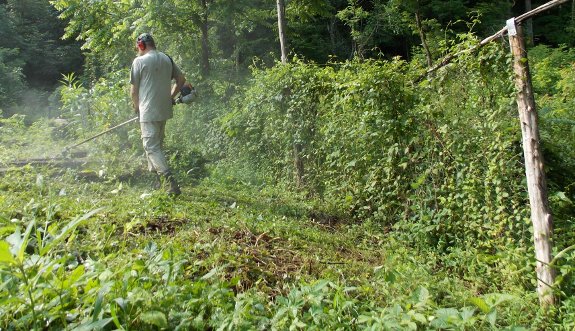
with tales of cover crops in a while, but that
doesn't mean we haven't been experimenting. First of all, cutting
rye with the weedeater right at ground level was highly effective, although my
scything a little higher up resulted in some resprouting.
The plants we cut early, just as they were barely starting to
bloom, were also more likely to resprout. A final warning
--- the rye did hold onto nitrogen much harder than any other
cover crop I've grown, so a few broccoli sets I transplanted
directly into manure poured on top of the stubble took a week or
two to really start getting the nutrients they needed. But,
overall, we were very pleased with our rye experiment and will
definitely repeat it, especially in problematic soil areas where
the rye built masses of organic matter.
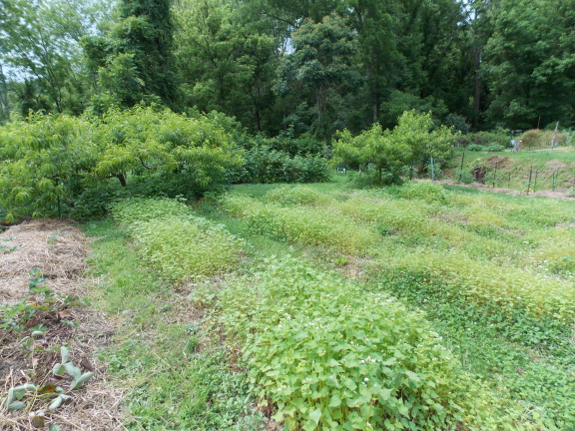
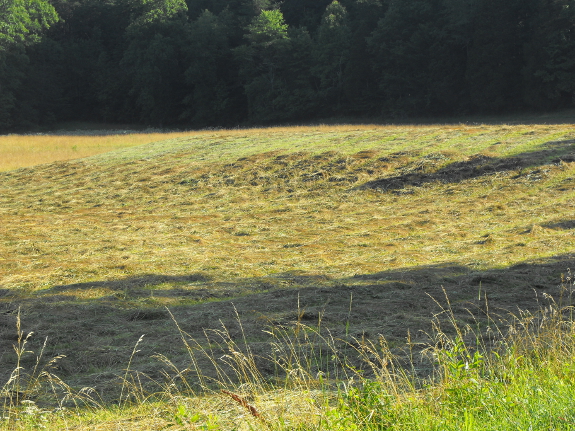
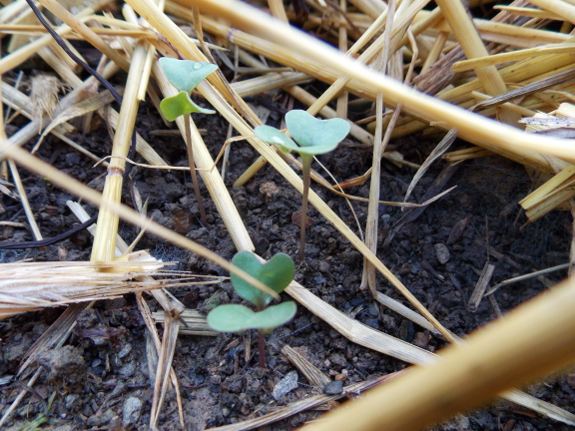
Most of the back
garden is fallow this year as I prepare
it for next year's tomato crop, so I broadcast buckwheat seeds into the rye before
Mark cut it. Mark and I both spread our pee on certain areas
for a week or so (until the buckwheat started sprouting) to add
nitrogen to the ground, but the buckwheat is struggling. It
definitely came up well through the rye stubble, but I've always
had a problem getting much growth out of buckwheat in areas with a
very high groundwater, and this year is no exception. We'll
get a bit of growth out of the back garden buckwheat, but I'm
thinking of trying some sunflowers next.

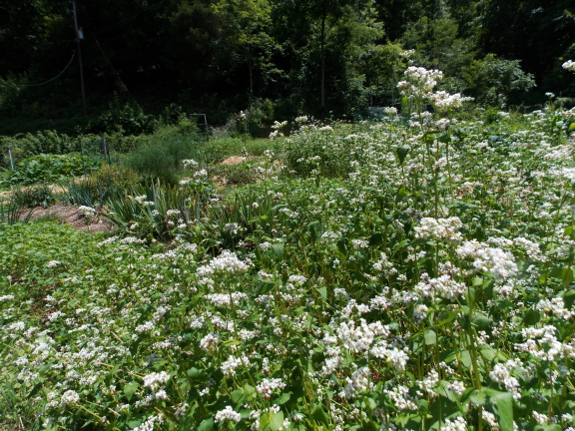
In contrast, the
buckwheat I've planted into good garden areas is over twice as
large and is thriving. I've already made inroads into my buckwheat
challenge,
having planted about 4.5 gallons of seed so far this spring and
summer.

But our big
experiment came into my inbox as a whim. Harvey
Ussery is
testing out sunn hemp (Crotalaria juncea), and wanted to send out
samples to his readers for us to try in different parts of the
country. This legume gets up to eight feet tall and produces
huge amounts of biomass before frosts kill the plants in the
fall. You can cut the plants at 60 days as a high-nitrogen
addition to the garden or compost pile, or wait a bit longer, at
which point the carbon levels rise and sunn hemp becomes a quality
mulch. In addition, cutting the plants once at four feet
tall results in resprouting and even more biomass
production. I slipped the seeds into gaps in the forest
garden where broccoli was coming out, and I envision the
high-carbon stems at the end of the year will make good mulch
around fruit trees. I'll keep you posted about the results
of my experiment, and you'll be able to read how sunn hemp did for
us and other experimenters this fall or winter in an article by
Harvey Ussery in Mother Earth News.
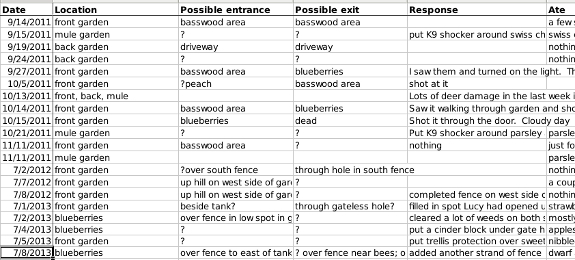
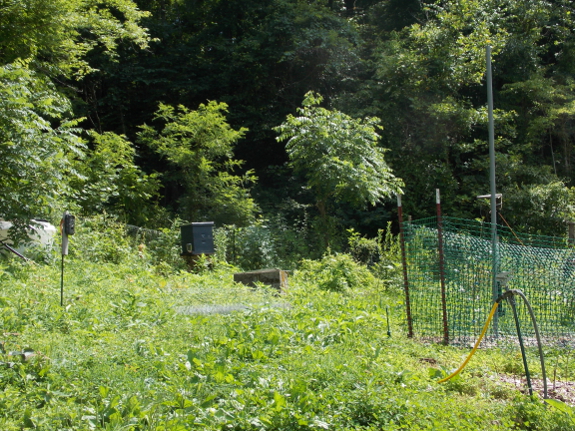
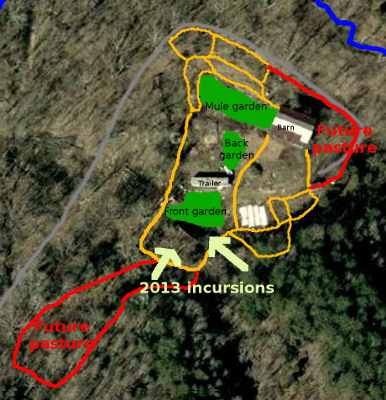
We recently noticed our first
deer damage of the year.
It's hard to know for sure,
but we think she came in through our weakest fence line.
Weed eating around the fence
and repairing the weak spot might help to make this deer think twice
before coming in, but it might also be time to ask the local Game
Warden for another deer
killing permit.
It's been a while
since I've written a sumup of the garden, which is mostly because
both the produce and the weeds are growing like crazy.
Broccoli and pea season has come and gone. For about a week
in the middle of June, the broccoli heads became so full of
southern cabbageworms that I barely wanted to cook them, but then
the checkered white butterflies stopped laying eggs, and recent
heads have been pristine. (The more common cabbage
worms from the cabbage white are still around in small
numbers, but they're not nearly as big of a deal for us.)
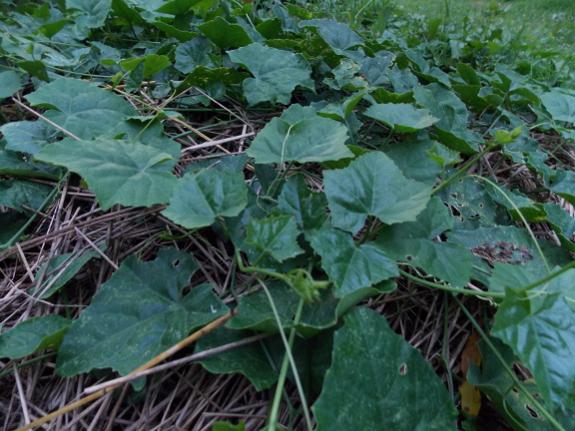
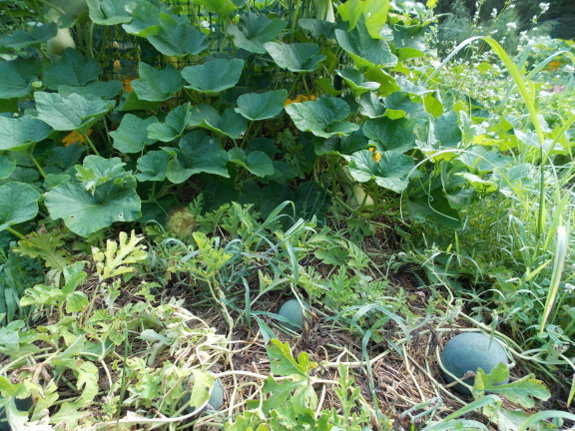
These early crops
were quickly replaced by cucumbers, which immediately began to
overwhelm us to the point where we had to give extras away.
Although I could cut back on my planting next year, it's nice to
have a quick, easy vegetable that scales up to feed an unlimited
number of mouths on a moments' notice, so I probably won't scale
down.
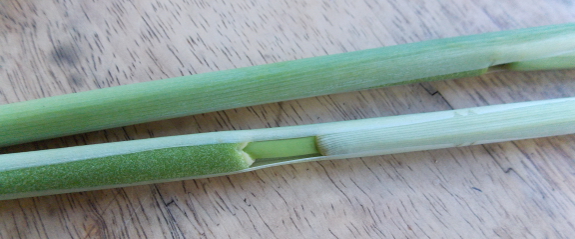
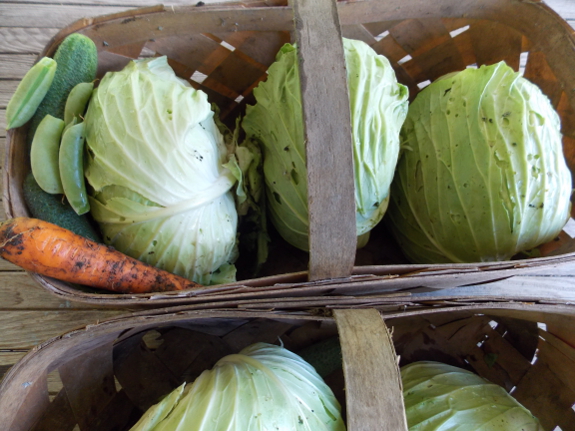
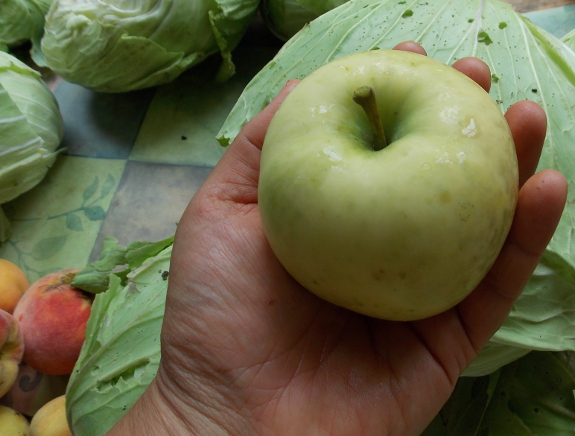
We're also enjoying
yellow crookneck squash, green beans, and the first huge cabbage
heads. Monday, Mark and I sampled cattail flowers for the
first time, which you're supposed to pick when they're still
enclosed in their sheath, remove from their husk, boil for 3
minutes, then eat like corn on the cob. Although Eric in
Japan reported cattails taste like avocadoes (one of our favorite
storebought addictions), Mark and I were less than impressed by
the cattail heads and deemed them mere survival food.
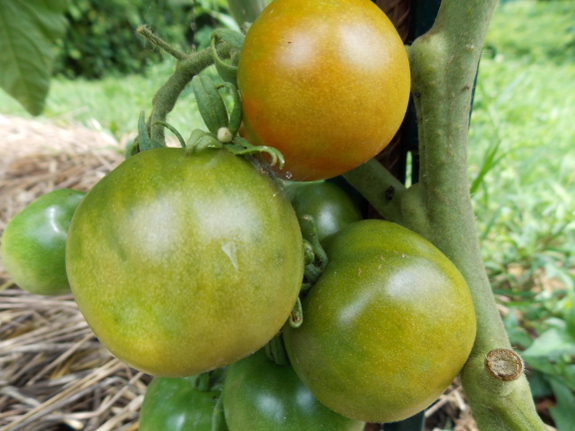
 While waiting for the tomatoes to ripen
(which will mark the beginning of major preservation season),
we're staying busy planting late crops, renovating
the strawberry beds, weeding, mowing, and saving
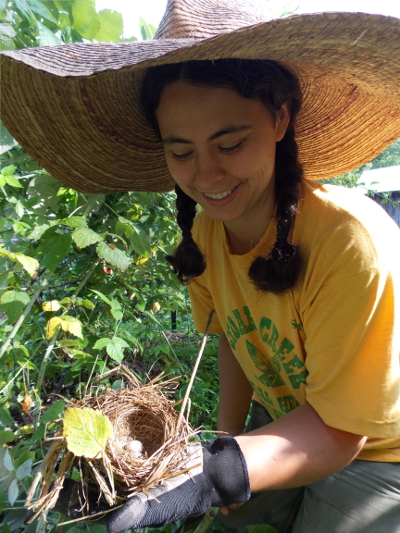
seeds (kale, tokyo bekana, and peas so far). The kale
plants I left to go to seed are so vigorous, I'm considering using
the vegetable as a cover crop in areas that don't need to be
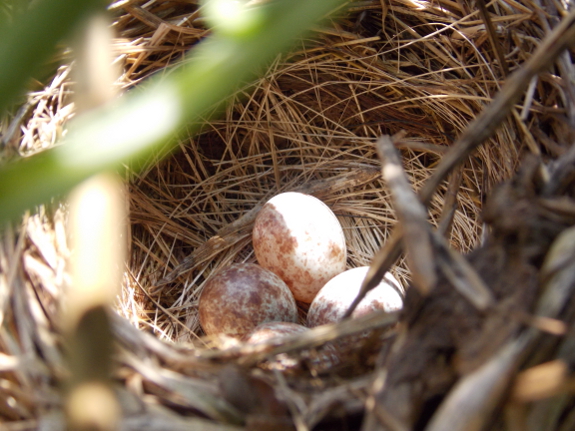
planted until mid summer, and the dying plants are still doing
double duty by sheltering a song sparrow nest. Kale plants
that have already given me their quota of seed (and that aren't
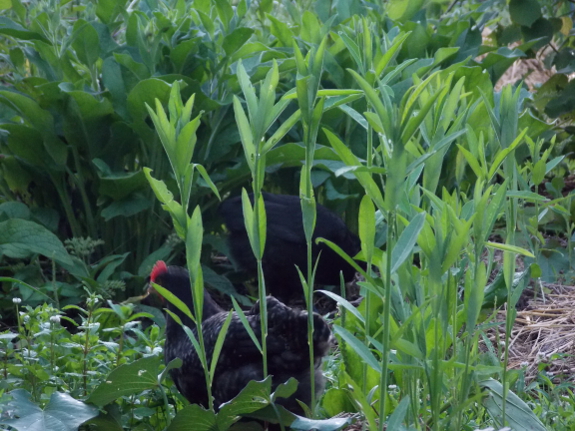
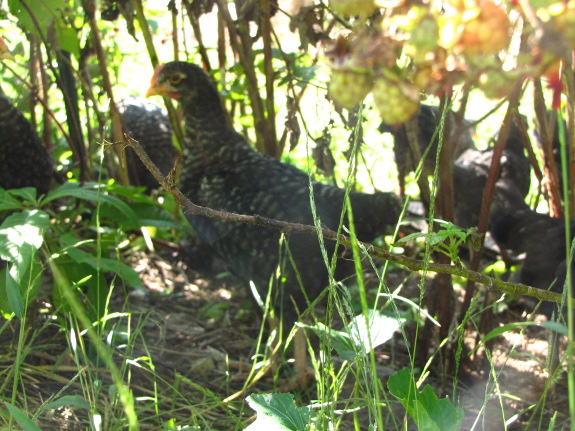
housing wildlife) made good deep bedding in the chicken coop.
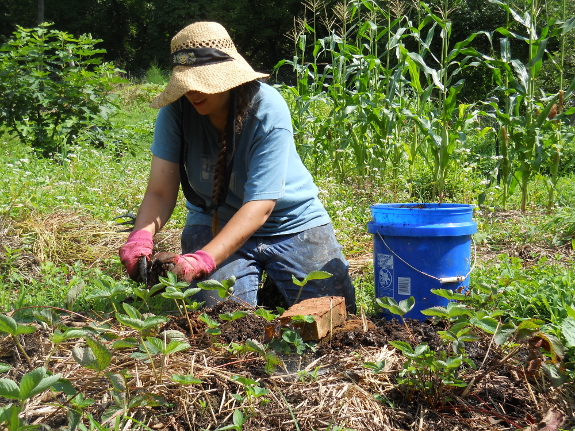
While waiting for the tomatoes to ripen
(which will mark the beginning of major preservation season),
we're staying busy planting late crops, renovating
the strawberry beds, weeding, mowing, and saving
seeds (kale, tokyo bekana, and peas so far). The kale
plants I left to go to seed are so vigorous, I'm considering using
the vegetable as a cover crop in areas that don't need to be
planted until mid summer, and the dying plants are still doing
double duty by sheltering a song sparrow nest. Kale plants
that have already given me their quota of seed (and that aren't
housing wildlife) made good deep bedding in the chicken coop.
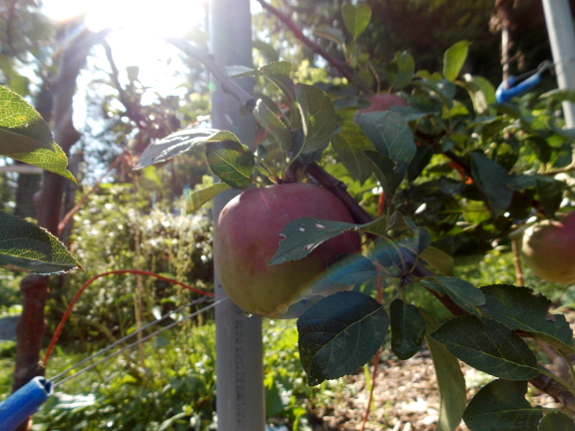
It continues to rain
nearly every day, but so far I haven't seen the fungal diseases
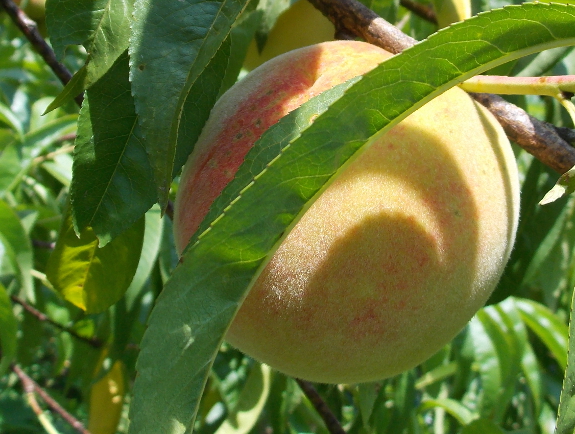
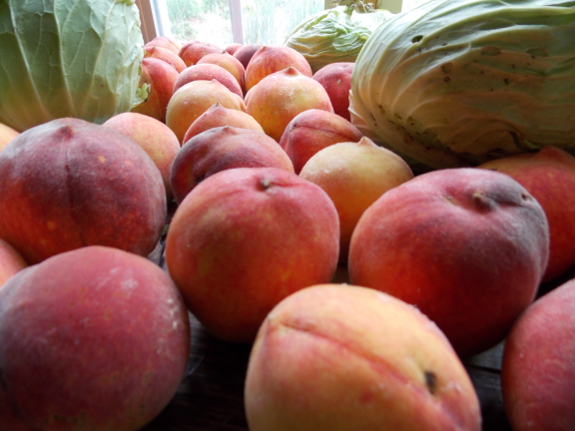
I've been dreading. Our first peaches (Redhaven) are already
thinking of ripening up, and despite insect damage to many fruits,
I suspect we'll enjoy a bountiful crop.
How's your garden
doing now that summer is officially here?
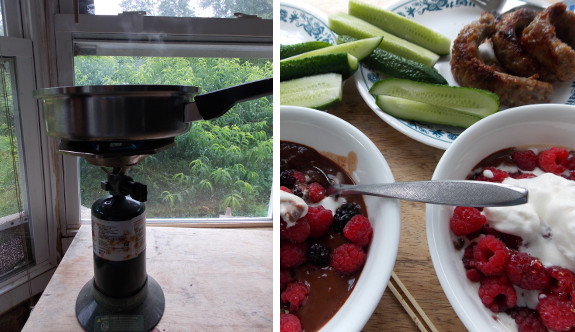
Aerial line maintenance has caused two power outages this week.
A short summer power
outage is no big deal, though. Anna whipped up supper on the
camp stove and we enjoyed an afternoon of quiet.
It does remind us to check
back over our emergency
preparedness goals. We've come a long way, but still
have several items to check off the list.
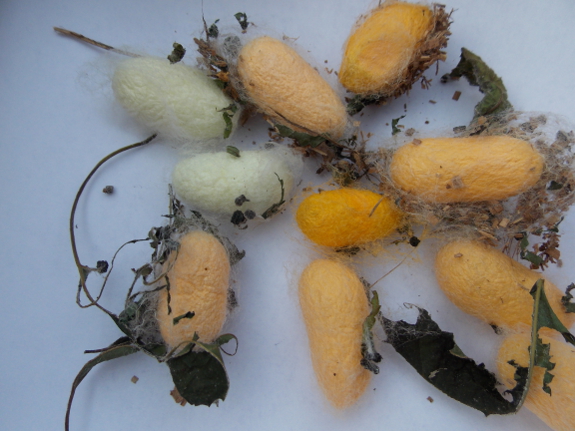
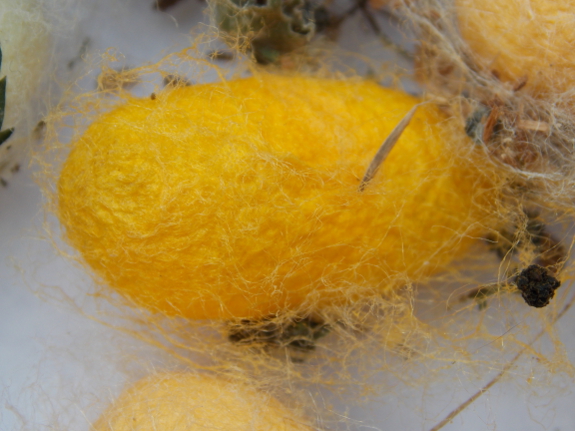
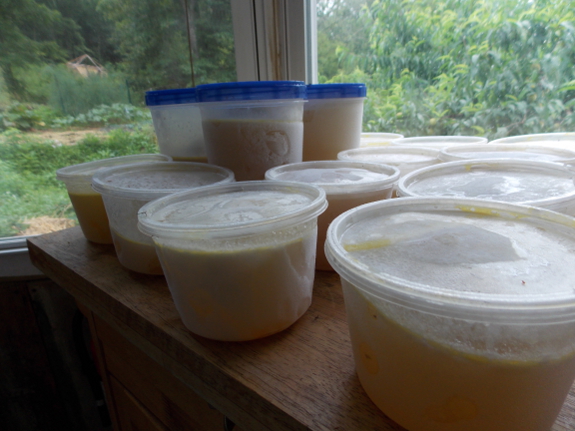
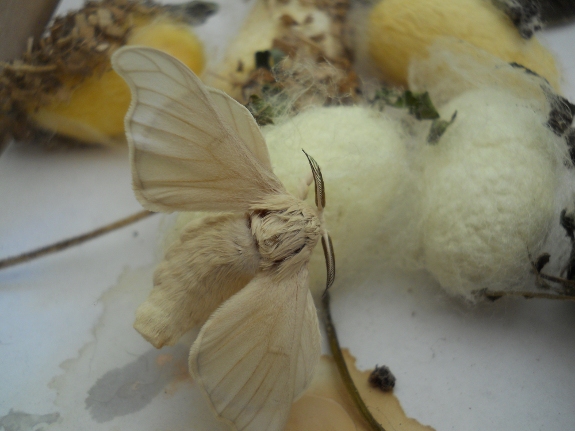
Due to some dieoff
during our final
silkworm week,
we ended up with only ten silkworm cocoons, but that should be
enough to carry our livestock on to the next generation. I
was amazed by the colors of the cocoons, especially the brilliant
orange one that almost looks fake. My understanding is that
commercial silkworm producers select for white cocoons so that
they don't have to bleach the silk before dying it.
One of our chicken blog readers wrote in to ask
if she could have our cocoons after we're done with them, which
made me realize it's far from common knowledge how silk is
produced. Unfortunately, you have to decide whether to use
your cocoons to make silk or whether to let the moths escape and
breed, so our cocoons will end up being useless from a fiber
perspective.
If you're not trying to
breed the moths, though, it is quite feasible to make silk on the
backyard scale if you're up for some tedious labor. Just
boil the cocoons once they're fully formed, which kills the pupae
inside and dissolves the glues binding the silk together.
Each cocoon is made up of one extremely long strand, which you can
tease apart and wind up, then weave like any other thread.
The reason you can't raise the moths and still use the thread is
that the mature insect gnaws its way to freedom, breaking that
long thread into many smaller pieces that are much less useful.
Mark and I are still
on the fence about whether silkworm culture is an efficient use of
time, but we're definitely going to breed our moths and start
tweaking the procedure so it works better. Stay tuned for
round two, coming up next month.

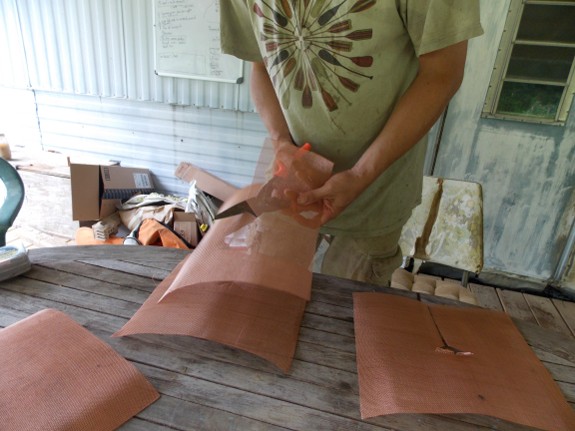
We celebrated Independence Day with some bucket
hauler sparks.
I used 16 heavy duty exterior wood screws for a second attempt at plywood
attachment.
They ended up protruding through the plywood side and needed to be
grinded off to achieve a smooth surface. I also used 4 bolts with
washers and nuts to be on the safe side. The nut side sticks out a bit,
but I located each hole so it fits in a gap between buckets.
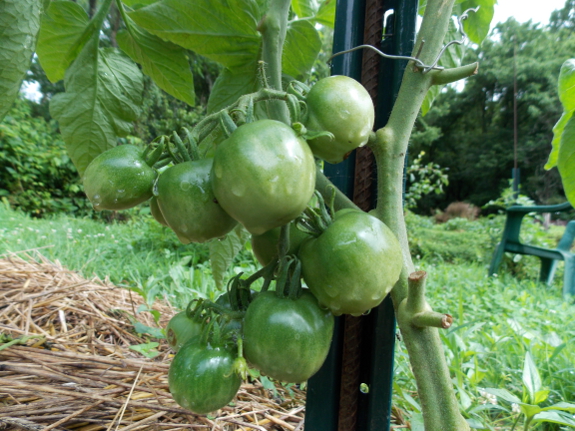
 The interest in Mark's
post about fighting tomato blight with pennies has been
astounding. Even though I'm dubious about pocket change's
effect on fungal diseases, that post's popularity made me decide
to experiment with a slightly different form of copper.
The interest in Mark's
post about fighting tomato blight with pennies has been
astounding. Even though I'm dubious about pocket change's
effect on fungal diseases, that post's popularity made me decide
to experiment with a slightly different form of copper.
My budget for the
project was the $80 we've made in ad revenue from folks coming to
check out our tomato blight post, but I tacked on another $10 so I
could try two types of copper --- this
expensive and high-quality copper screen and this
ultra-cheap mesh.
Mark cut the screen into eight sections (each of which was a foot
square with a 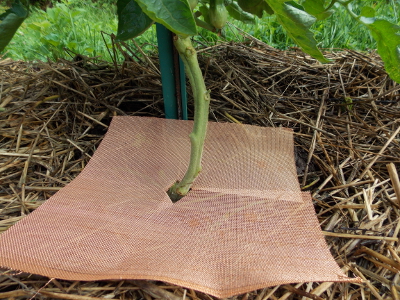 notch to allow the screen to slide around the
tomato stem), and I cut the mesh into four lengths that cover
about the same area. My test subjects consisted of a row of
yellow romas, where I alternated control (no copper), mesh, and
screen beneath subsequent plants.
notch to allow the screen to slide around the
tomato stem), and I cut the mesh into four lengths that cover
about the same area. My test subjects consisted of a row of
yellow romas, where I alternated control (no copper), mesh, and
screen beneath subsequent plants.
The theory is that
the anti-fungal properties of copper will prevent fungal spores
from being splashed up from the soil line into the lower leaves
(where blight usually first takes hold of a tomato plant).
Organic farmers sometimes 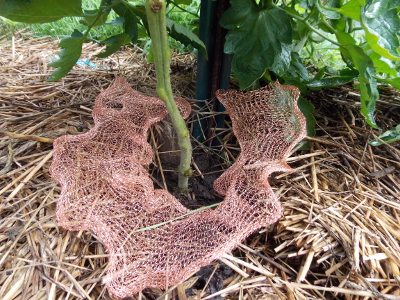 use powdered copper on tomatoes for this
purpose, but that technique is dicey from a permaculture
standpoint since the powdered copper gets into the soil and kills
beneficial fungi as well as disease-causing species. Only
time will tell whether a solid copper mesh will serve the same
purpose without the harm to ecosystem life.
use powdered copper on tomatoes for this
purpose, but that technique is dicey from a permaculture
standpoint since the powdered copper gets into the soil and kills
beneficial fungi as well as disease-causing species. Only
time will tell whether a solid copper mesh will serve the same
purpose without the harm to ecosystem life.

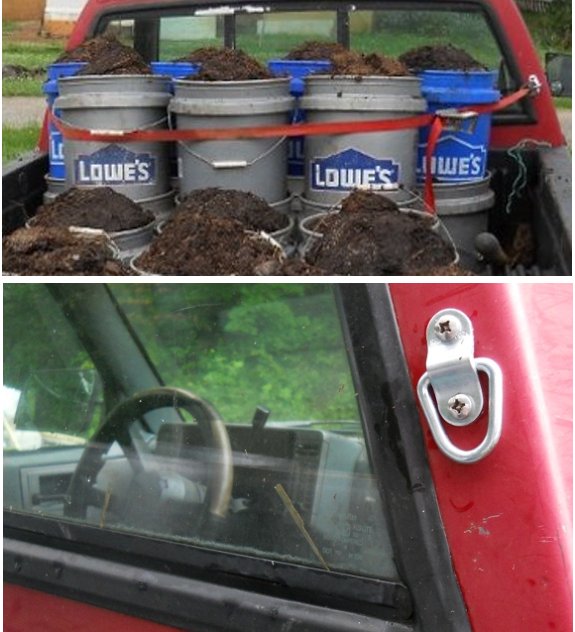
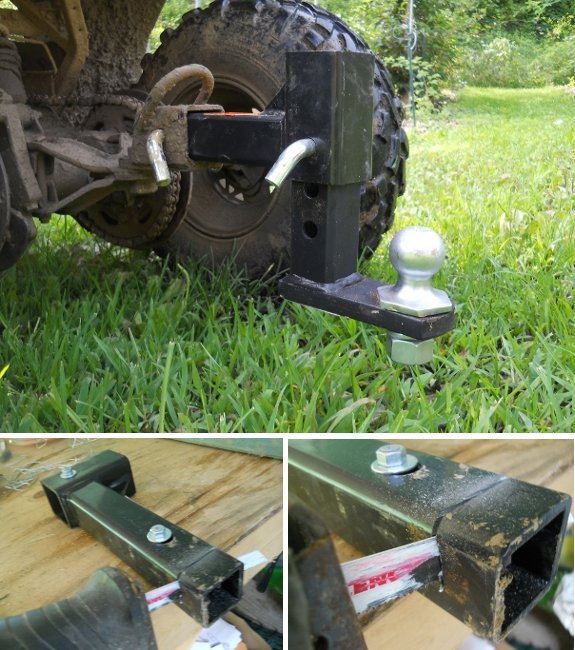
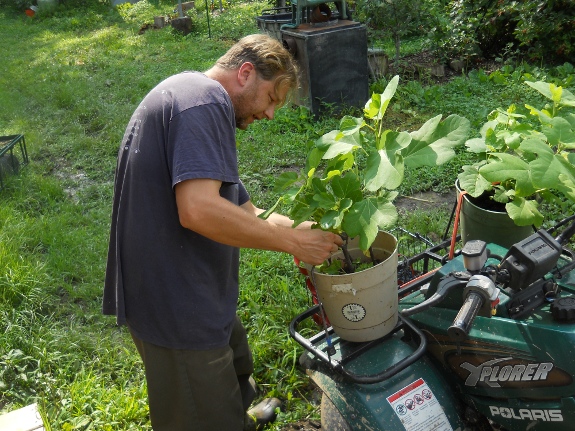
We got the ATV back from the shop last week and
it's better, but not quite fixed.
The problem was no brakes. We
had the back pads replaced and made sure the front pads had enough life
in them.
It slows down, but I have to
pump the brake handle and be careful not to hit anything. I think maybe
the caliper got damaged and we may have to plan on having it replaced
in the future, but for now we'll get by with half brakes so we can get
caught up on manure hauling.
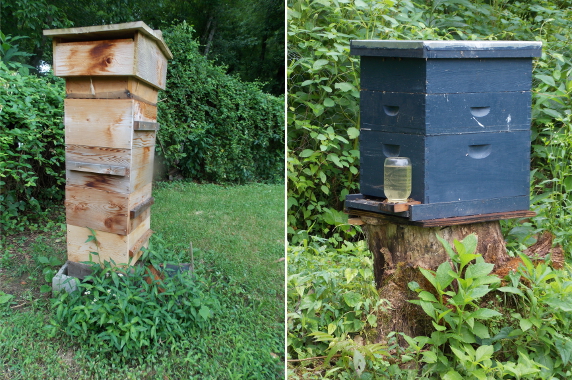
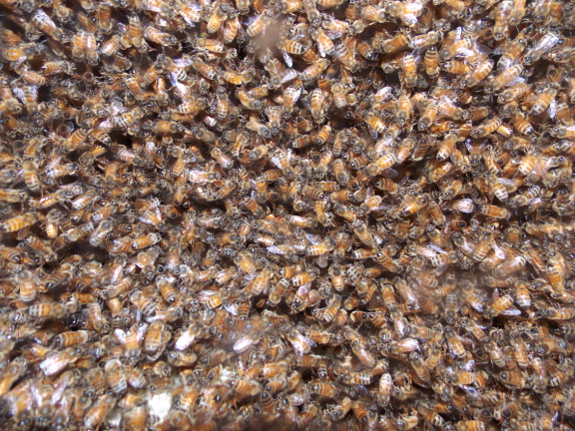
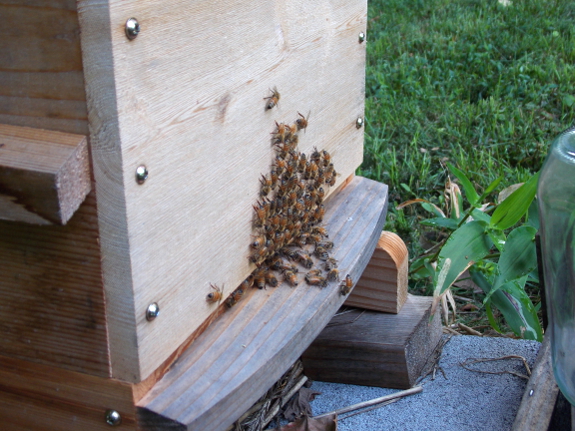
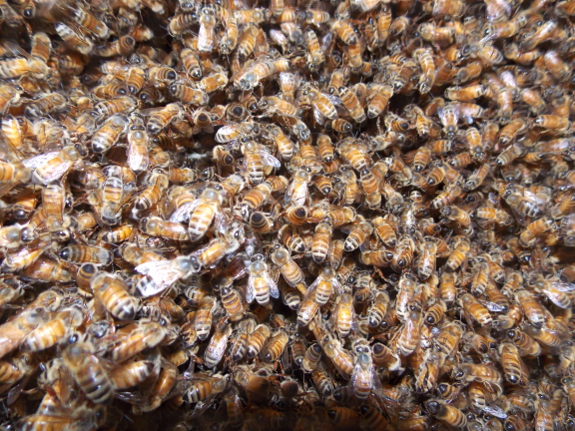
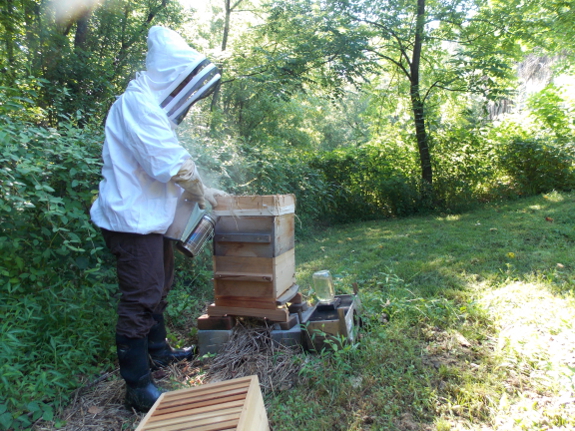
I hadn't really
intended to get back into Langstroth beekeeping anytime soon, but
when
the bees speak,
I listen. I figured I might as well leave our new swarm in
the boxes they chose...with a few modifications.
My first step in the
modification process was to brainstorm the primary features of a Warre hive, and ways I might easily
modify the Langstroth hive to serve the same purpose:
| Warre hive
feature |
Purpose |
Possible
retrofit to Langstroth |
| Quilt |
Insulation and winter drip
prevention |
Modify an extra super to
become a quilt. (Easy.) |
| Fancy roof |
Air flow? |
Built a similar roof.
(Hard.) |
| Small entrance |
Not positive, but bees select
for this in the wild, so it must be important, perhaps in
guarding the hive and/or maintaining Nestduftwarmebindung. |
Entrance reducer. (Easy.) |
| Thick hive walls |
Insulation |
Rebuild boxes out of thicker
boards. (Hard.) |
| Top bars |
Prevent varroa mites using
small cell size. |
Foundation
strips. (Easy.) |
| Smaller boxes |
Winter temperature
maintenance? |
(I don't like the idea of
using all supers instead of deeps, which would be easy, and
am not sure this is actually an important feature of the
Warre hive.) |
| Hive opened only once a year |
Maintain Nestuftwarmebindung
and don't make bees waste propolis. |
Raise up base of hive so I
can photograph underneath and monitor bees' progress that
way. (Moderate.) |
| Nadiring |
A subset of the feature
above. |
Add larger handles on sides
of the boxes so entire hive can be raised at once for
nadiring. (Easy.) |
| Allow swarming |
Creates a break in disease
cycle. |
Don't use swarm
prevention techniques. (Easy. But, this is
one feature of a Warre hive I might consider ditching in the
long run since it drastically reduces honey
production. The health of the bees is my first
priority, though, so I'm keeping it for now.) |
| Queen works throughout hive. |
Allows cycling of wax if you
crush and strain, which prevents disease. |
Don't use excluder, do nadir,
and remove honey from top. (Easy.) |
Once we get a spare
minute in the garden, I plan to apply the easiest of these
features to our Warre hive, notably the quilt and raising the box
up so I can slide my camera underneath. (I already installed
foundation strips so the bees will build most of their own
wax.) The bees shouldn't need to be nadired this year since
they already have the equivalent of four Warre hive boxes, but
Mark and I will plan to suit up (or wait until winter) and add
handles to the boxes before next spring. It will be
interesting to see whether a Langstroth hive with a few simple
modifications will be as effective as the more expensive and less
common Warre equipment.
There's fuzzy evidence that a
deer is still sneaking in at night...but the damage lately has been
minimal.
I was happy to see one of the
old mechanical
deer deterrents start up
with no problem, although it didn't seem to stop this one...but maybe
the noise shortened her stay.
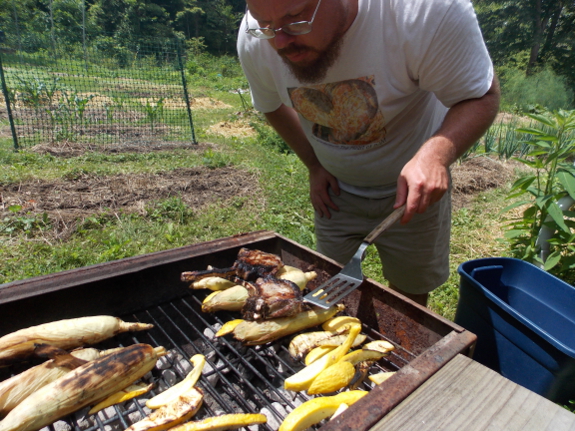
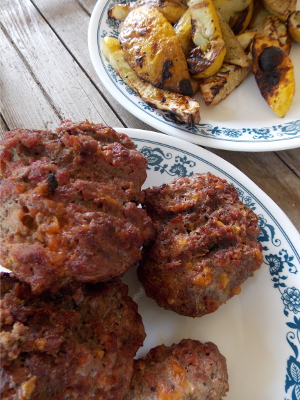
Joey brought over
four pork chops and threw them on the grill, along with some of
our overabundant summer squash and some storebought corn.
The pork chops were pastured, brined overnight in an
herb-salt-and-water solution, then cooked a bit faster than we'd
planned. (In the photo above, Joey's letting them finish off
atop some ears of corn to get the meat further away from the
heat.)
 I'd never tasted pastured pork before, but every other
pastured meat I've tried has been ten times better than feedlot
produce. So I shouldn't have been surprised that this pork was
also phenomenal. We'll definitely be making an order of our
own soon.
I'd never tasted pastured pork before, but every other
pastured meat I've tried has been ten times better than feedlot
produce. So I shouldn't have been surprised that this pork was
also phenomenal. We'll definitely be making an order of our
own soon.
Meanwhile, if you
live in or near Rogersville, Johnson City, or Knoxville,
Tennessee, J.E.M. Farm likely delivers to your
town and even offers a CSA. I'm looking forward to a field
trip to tour their operation once our own garden slows down for
the year.
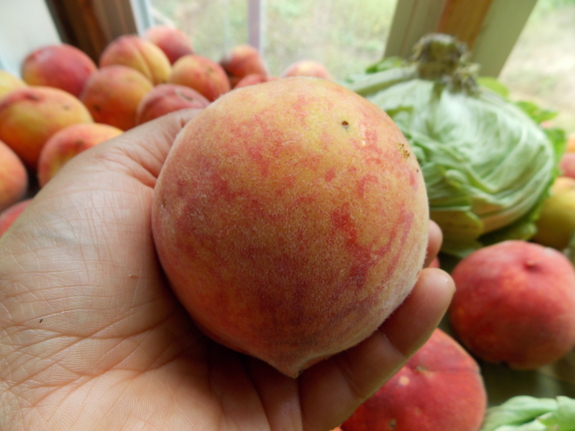
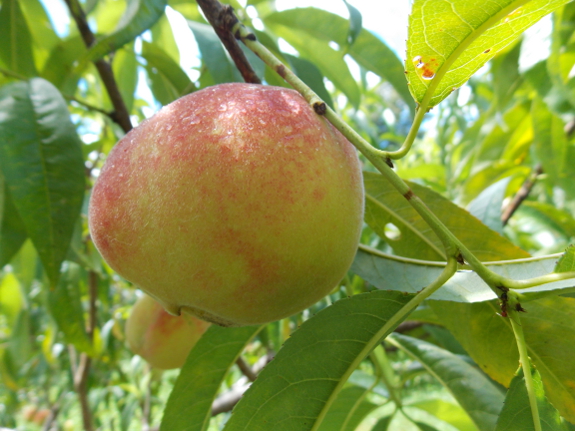
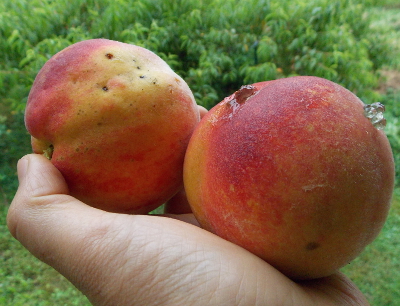 Every time I looked at the
huge, red-blushed peaches on our Redhaven tree last week, I
reminded myself the chances of eating any were slim to none.
We'd seen the sun for about ten hours of that week and had enjoyed
rains at least once a day, so I knew
Every time I looked at the
huge, red-blushed peaches on our Redhaven tree last week, I
reminded myself the chances of eating any were slim to none.
We'd seen the sun for about ten hours of that week and had enjoyed
rains at least once a day, so I knew 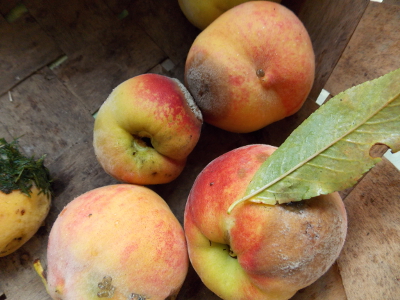 In the meantime, I'm
trying out some mitigating measures. The first year we
fought brown rot, I didn't know what it was and wasn't paying
attention, with the result that we basically got no crop.
This time around, I'm using the same techniques I use on other
fungal diseases --- an eagle eye and removal of infected tissue as
quickly as possible. The jury's still out on whether that
will allow at least a few peaches to ripen to perfection on the
tree.
In the meantime, I'm
trying out some mitigating measures. The first year we
fought brown rot, I didn't know what it was and wasn't paying
attention, with the result that we basically got no crop.
This time around, I'm using the same techniques I use on other
fungal diseases --- an eagle eye and removal of infected tissue as
quickly as possible. The jury's still out on whether that
will allow at least a few peaches to ripen to perfection on the
tree. I have to confess that my
grand plan of slowly working through both
I have to confess that my
grand plan of slowly working through both  warnings about when each
project is likely to succeed or fail. 90% of the time, I
even agree with him, even though Mollison gardens in dry Australia
and I garden in wet Appalachia.
warnings about when each
project is likely to succeed or fail. 90% of the time, I
even agree with him, even though Mollison gardens in dry Australia
and I garden in wet Appalachia.
 "Why not just give in and
spray high risk crops with Neem Oil (or whatever fungicide you are
comfortable with)?" ---
"Why not just give in and
spray high risk crops with Neem Oil (or whatever fungicide you are
comfortable with)?" ---  Without chemicals, you have to be a bit
smarter, willing to experiment, and able to handle failures.
In some cases, we've come up with systems that work perfectly for
our climate. For example, instead of spraying
Without chemicals, you have to be a bit
smarter, willing to experiment, and able to handle failures.
In some cases, we've come up with systems that work perfectly for
our climate. For example, instead of spraying  again for the first time in years, but
after a round of squashing, I started noticing more wheel bugs and
ladybug larvae on the asparagus and no more asparagus beetles.
again for the first time in years, but
after a round of squashing, I started noticing more wheel bugs and
ladybug larvae on the asparagus and no more asparagus beetles.
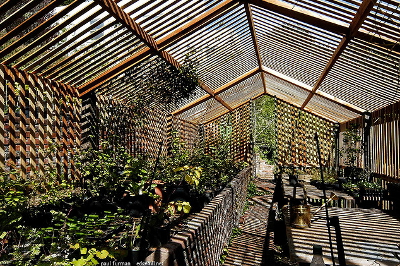
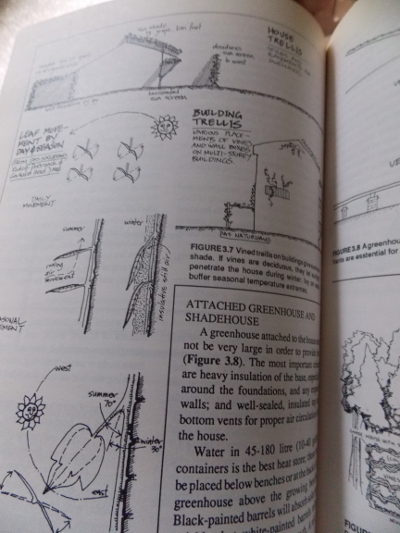
 A shade house also provides
other much-needed uses on the summer homestead as well. You
can add an outdoor bathing station, and should definitely consider
raising mushrooms there and rooting cuttings in the shade.
We've yet to find the best environment for mushroom logs in the
summer, and although my cuttings do pretty well in the semi-shade
of the porch edge, I can see how a shade house would make
propagation even easier.
A shade house also provides
other much-needed uses on the summer homestead as well. You
can add an outdoor bathing station, and should definitely consider
raising mushrooms there and rooting cuttings in the shade.
We've yet to find the best environment for mushroom logs in the
summer, and although my cuttings do pretty well in the semi-shade
of the porch edge, I can see how a shade house would make
propagation even easier.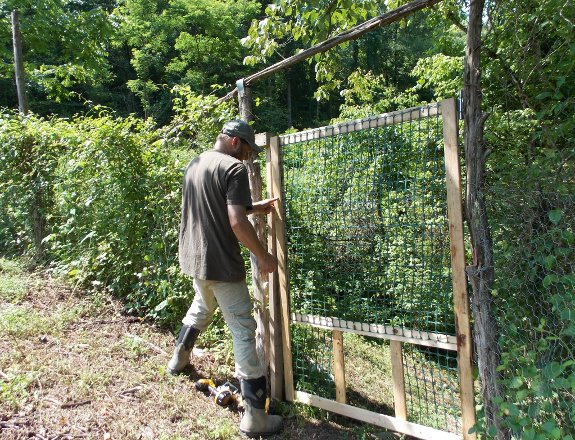
 Of course, the tips from
Mollison's book that I'm most likely to put into action pertain to
plants and ecosystems. I especially enjoyed the way Mollison
suggested alternative uses for features I'd already
considered. For example, I tend to deal with my boggy ground
by building up so I can plant there, but perhaps I should instead
dig out some areas to create open water. (The swamp downhill
from the East Wing might be a good location for
bog-to-shallow-pond experimentation.) And Mollison suggests
considering hedges to be mulch sources and weed barriers as well
as animal barriers and producers of food.
Of course, the tips from
Mollison's book that I'm most likely to put into action pertain to
plants and ecosystems. I especially enjoyed the way Mollison
suggested alternative uses for features I'd already
considered. For example, I tend to deal with my boggy ground
by building up so I can plant there, but perhaps I should instead
dig out some areas to create open water. (The swamp downhill
from the East Wing might be a good location for
bog-to-shallow-pond experimentation.) And Mollison suggests
considering hedges to be mulch sources and weed barriers as well
as animal barriers and producers of food.


 A little over a year ago,
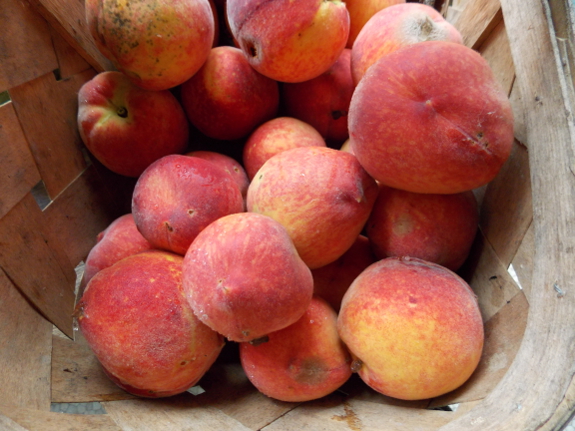
 Shifting gears, Lecture 8
contained a good introduction to permaculture gardening techniques
--- I recommend that video for beginners. I enjoyed Hooker's
reiteration of the admonition to start gardening wherever you are,
even if you're renting; your first garden will be far from
perfect, so you might as well begin the trial and error process
now rather than putting it off until you have the perfect
plot. He also
Shifting gears, Lecture 8
contained a good introduction to permaculture gardening techniques
--- I recommend that video for beginners. I enjoyed Hooker's
reiteration of the admonition to start gardening wherever you are,
even if you're renting; your first garden will be far from
perfect, so you might as well begin the trial and error process
now rather than putting it off until you have the perfect
plot. He also 


 Whether you have 2,000 tomato plants like us, or just 2, these tips
should really help push your harvest a little earlier.
Anyone have a favorite variety to share? Maybe a helpful
trick? Feel free to share with everyone in the comments!
Whether you have 2,000 tomato plants like us, or just 2, these tips
should really help push your harvest a little earlier.
Anyone have a favorite variety to share? Maybe a helpful
trick? Feel free to share with everyone in the comments! 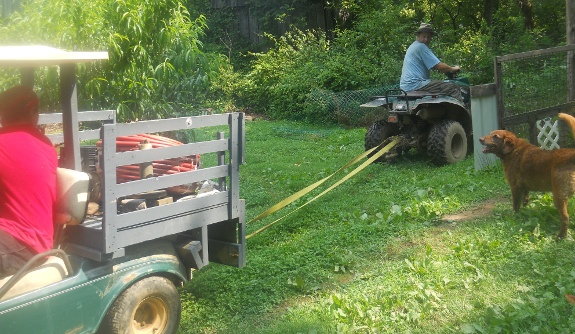
 This is the first year
we've been
This is the first year
we've been 
 I know that some of you missed out on
our
I know that some of you missed out on
our 
 Winners

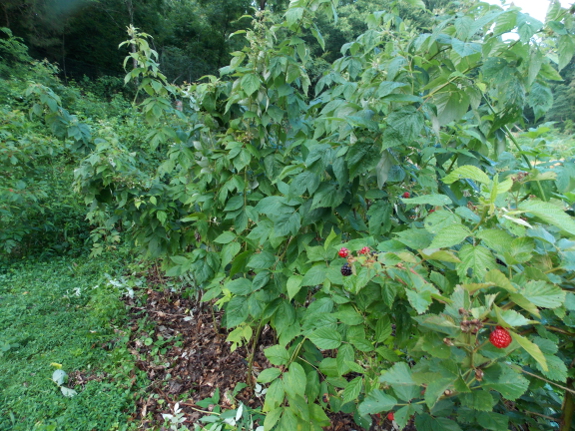
 Now's also a good time to
tie up those new, vigorous canes so we don't end up picking
berries from a sitting position the way I had to on some plants
this year. This will also keep the berries out of the way of
the lawnmower and out of the rot zone close to the damp ground.
Now's also a good time to
tie up those new, vigorous canes so we don't end up picking
berries from a sitting position the way I had to on some plants
this year. This will also keep the berries out of the way of
the lawnmower and out of the rot zone close to the damp ground.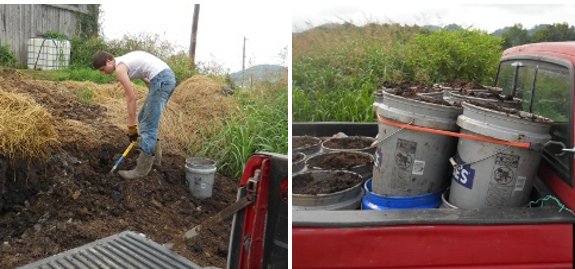


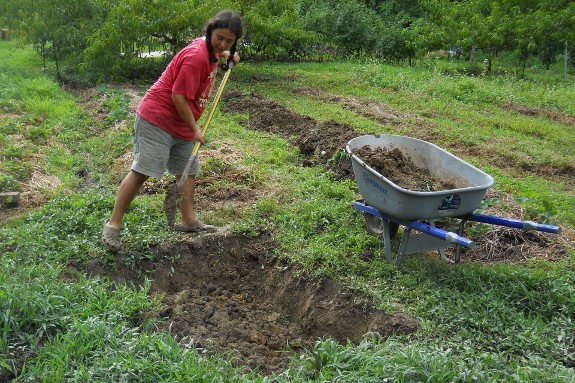
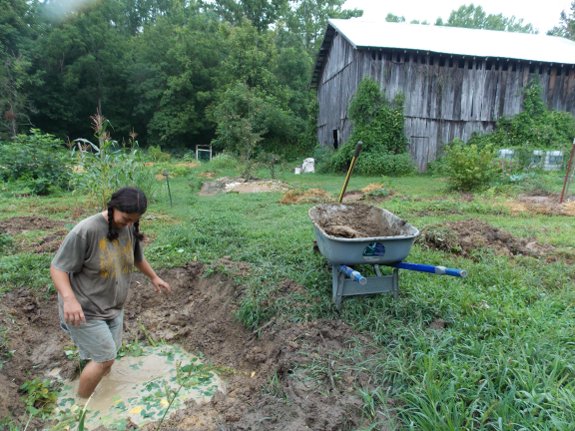
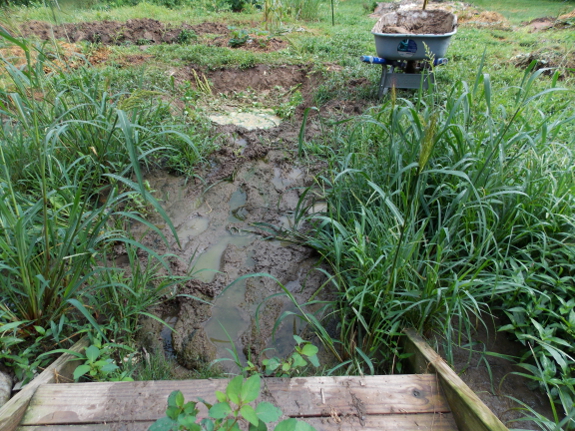
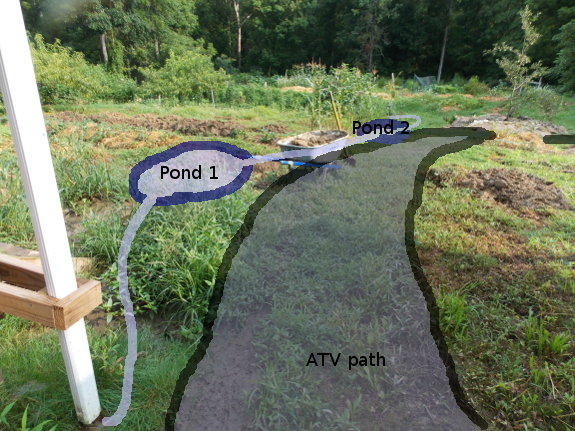
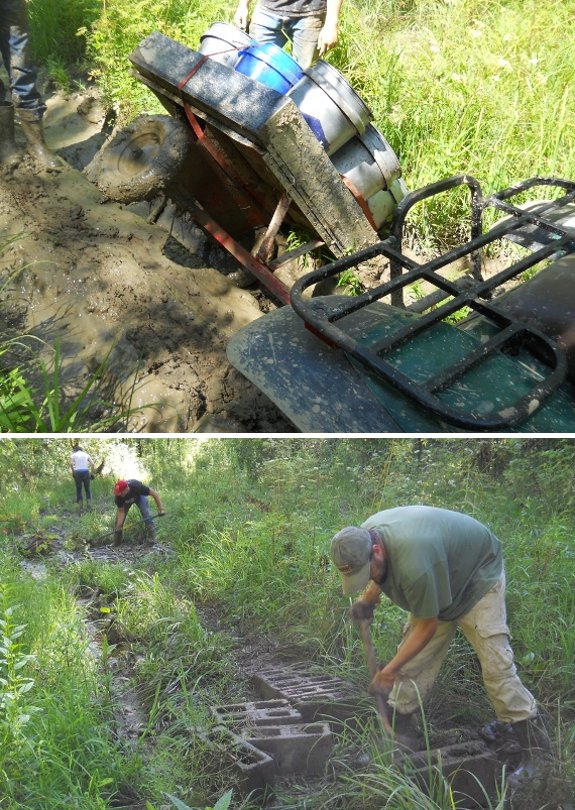
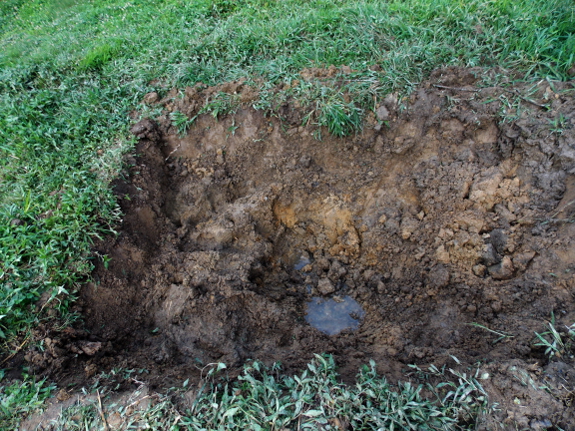
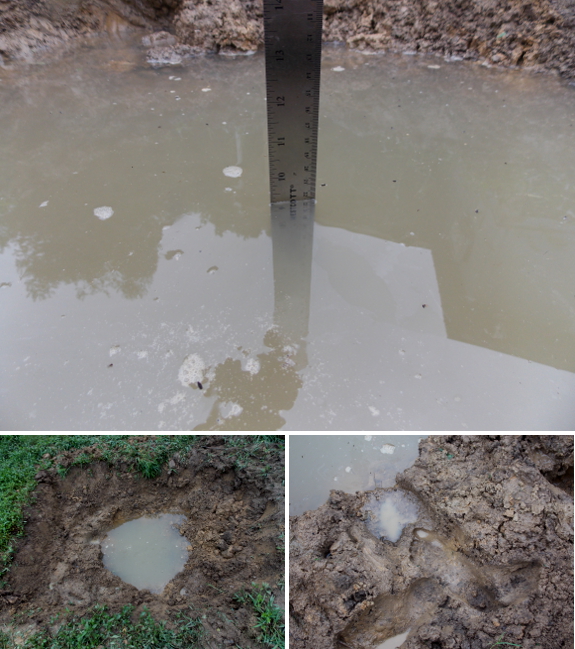
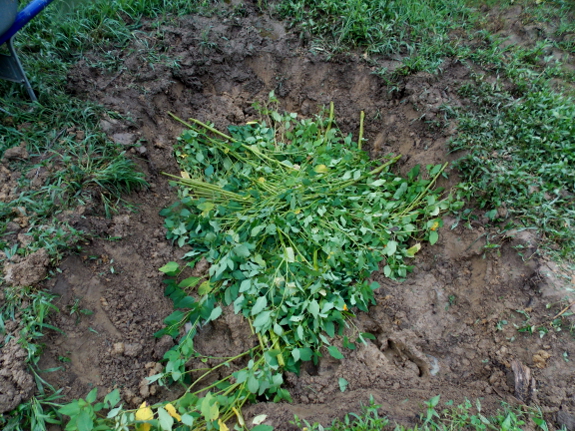
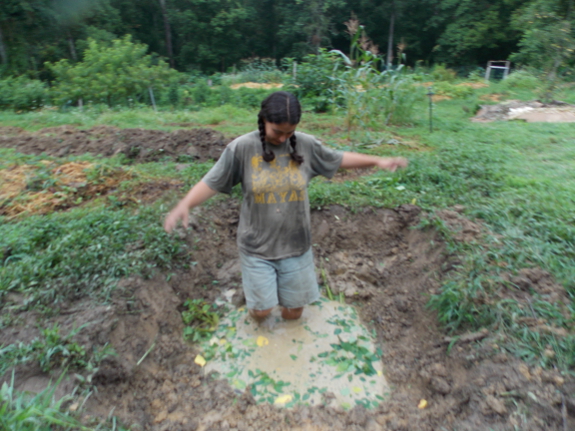
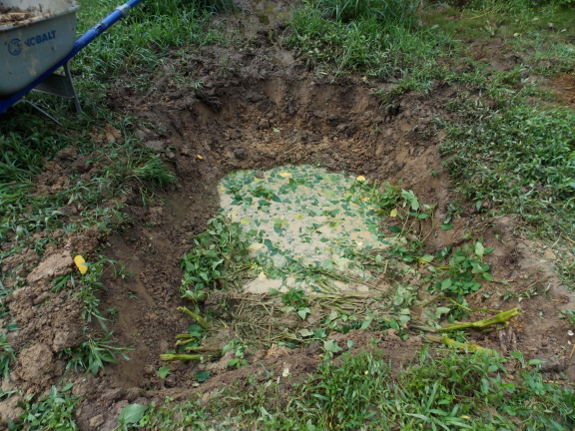
 What don't I like about
version 1.0? I mounded up the excavated soil to make big
walls around the wetland, which makes it tough to mow (Mark uses a
weedeater) and makes the whole thing stick out of the landscape a
bit. For version 2.0, I'm instead using the dug-out earth to
raise up garden beds in the waterlogged back garden.
What don't I like about
version 1.0? I mounded up the excavated soil to make big
walls around the wetland, which makes it tough to mow (Mark uses a
weedeater) and makes the whole thing stick out of the landscape a
bit. For version 2.0, I'm instead using the dug-out earth to
raise up garden beds in the waterlogged back garden.