
archives for 02/2013
 The
Cows Are Out by
Trudy Chambers Price is a good farm memoir to read on a rainy
day. The author, her husband, and their two sons spent 23 years
on a moderate-sized dairy farm (25 to 75 Holsteins) in Maine. The
story itself is very engaging, aided by the frequent family photos and
the author's pleasant style, but as Mom told me when she lent me the
book, "It's the wrong kind of dairy farm!"
The
Cows Are Out by
Trudy Chambers Price is a good farm memoir to read on a rainy
day. The author, her husband, and their two sons spent 23 years
on a moderate-sized dairy farm (25 to 75 Holsteins) in Maine. The
story itself is very engaging, aided by the frequent family photos and
the author's pleasant style, but as Mom told me when she lent me the
book, "It's the wrong kind of dairy farm!"
Mom was coming fresh
from reading Folks,
This Ain't Normal,
so she was struck by the amount of time the Prices' cows spent in
confinement on concrete floors. From what I read, though, dairy
cows are a whole 'nother ball game, and it takes a lot of extremely
careful planning to raise them on pasture alone. The Prices did
have lots of grazing area they turned the cows into in the summer, and
I suspect stockpiled
winter grazing
hadn't hit the forefront during the sixties, seventies, and eighties,
so folks didn't have any other option than to feed their cows hay in
the barn all winter.
While I'm willing to
give the operation a pass on the confinement score, I do think it
should be read as a cautionary tale about debt. First the couple
went into debt to buy the farm, then they went further into debt to
purchase machinery (and yet more machinery as time wore on). Two
years after moving to the land, the author had to start teaching school
to pay the bills, and it was clear that even after 23 years, they had
yet to break even.
This cycle of debt is
par for the course in mainstream American farming today, but I think
it's also what drives the little guy out and turns our farmland over to
mammoth agribusinesses. In the Prices' shoes, I'd like to say
that Mark and I would have thought outside the box and dreamed up
value-added products so we could keep equipment purchases to a minimum
and make a living wage, but it's hard to think straight if you're up at
3:30 every morning to do the milking.
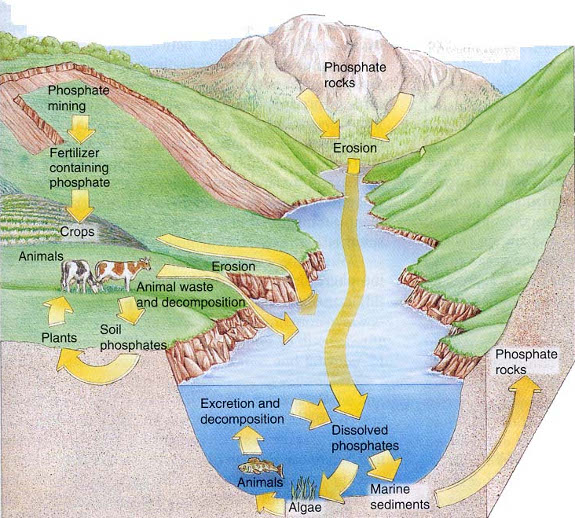
The last thorny soil
issue I want to cover is phosphorus. Steve
Solomon's worksheets
aim for an equal amount of phosphorus and potassium in the soil, while Michael
Phillips thinks more phosphorus is better and recommends building
orchard soil to have twice as much phosphorus as potassium. On
the other hand, Harvey
Ussery explained
that excessively high phosphorus levels cause a decline in mycorrhizal
fungi, which means that plants actually have a harder time finding enough
phosphorus and can experience a deficiency. In a worst case
scenario, extra phosphorus can even wash into streams and cause
eutrophication. Fertilizing with manure (especially chicken
manure) boosts phosophorus levels in the soil quickly, so the question
is --- should I be concerned about phosphorus excesses?
| Location | lbs P2O5/acre | Deficit or excess P |
| Powerline pasture | 56 | −237 |
| CP3 and CP4 | 225 | −209 |
| CP5 | 117 | −196 |
| Forest aisles | 269 | −127 |
| Blueberries | 345 | unsure |
| Front berries | 778 | −21 |
| Forest garden | 1136 | 180 |
| Back garden | 1599 | 354 |
| Front garden | 2029 | 487 |
| Mule garden | 2246 | 551 |
Using Solomon's
recommended phosphorus levels, it's clear that our native soil is low
on phosphorus, but that my preferred horse manure fertilizer has
increased levels within the vegetable garden beyond the recommended
range. Of course, if I was using Phillips' goal instead of
Solomon's, the vegetable garden would actually be considered deficient
in phosphorus like the rest of our homestead.
Solomon backs up
Phillips by writing that excess phosphorus is seldom a problem since it
will actually increase the nutrient density of your produce. In
fact, in a perfect world, Solomon believes our soil would have 2,000
to 5,000 pounds of phosphorus per acre, at which level enough of the
mineral would
naturally be released each year to feed our crops with no additional
applications of fertilizer. Based on these figures, I suspect we
can carry on with my heavy manuring for another five or so years before
phosphorus levels in our vegetable garden exceed biologically healthy
amounts.
On the other hand, my
readings suggest that excess phosphorus can be an issue in the blueberry
patch, where the
extra phosphorus can cause some of the same deficiency symptoms you'll
notice from high pH or high calcium levels. I doubt that we're
anywhere near that level yet, but it might be worth focusing on
building acidic, low phosphorus, low calcium compost for that patch for
the future. And, one of these days, I'll probably have to escape
my reliance on off-farm manure and bring our homestead into more of a
closed loop. Stay tuned for a lunchtime series based on How
to Grow More Vegetables on that very topic soon.
This
post is part of our The Intelligent
Gardener lunchtime series.
Read all of the entries:
|
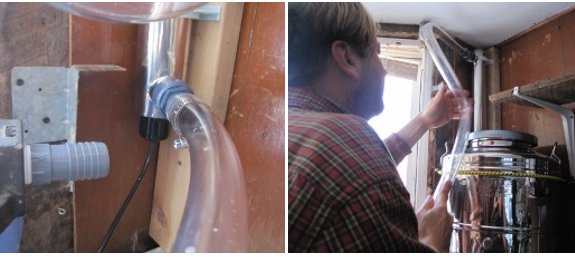
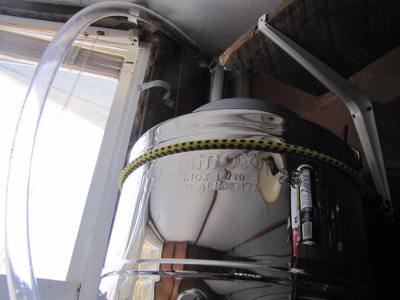
We upgraded our drinking
water filter system today.
It comes into the house and
enters a sediment filter, and then goes to our new UV filter, which is
3 times bigger than the old one.
The attractive stainless
steel container is made in Italy by a company called Minox. We found it on Amazon for
170 dollars.
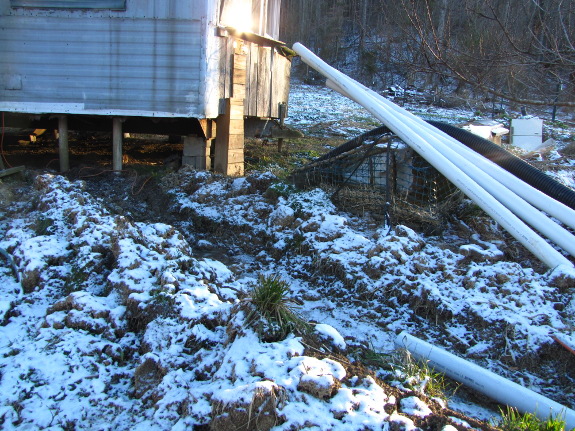
It's been nearly a month
since I last posted about our partially-completed
greywater wetland,
but I haven't been entirely idle. Whenever the water's low enough
to cross the creek without hip waders and I don't have anything more
pressing to carry in from the parking area, I've tossed a ten-foot
section of pipe over my shoulder during my morning walk. I guess
that means the floodplain has been easily passable 6 days out of the
last 28.
With all the pipe nearby
for channeling water from the trailer to the
wetland, I finally dug the last part of the trench. I'd left two
feet
of buffer area right where the current pipes discharge so that the
soggy mess didn't end up in the trench until I was ready for it, but
now I dug on through.
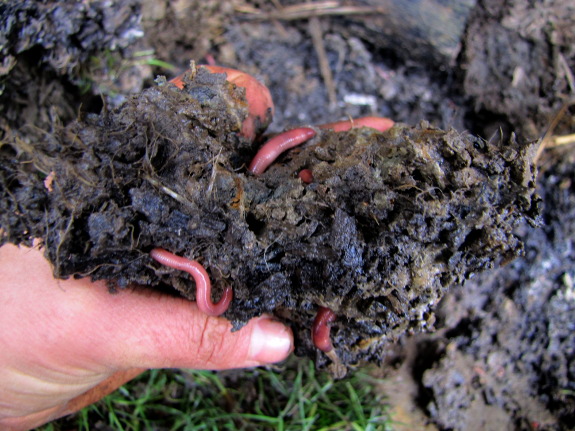
What I discovered
underneath our current drain
out back was a
fascinating system I didn't know existed. Two feet out from the
discharge spot, the clay turned grey --- clearly it had gleyed itself. Closer in, a
band of white...something...had built up right around the base of the
pipes but a few inches under the soil. And atop that white band
was an astonishing number of earthworms.
True, the drain out back
created a soggy mess in front of our back door, and a mild swampy smell
in certain seasons. But I'm impressed by the earth's ability to
take lemons and make lemonaide. Given how well my non-system
works, I have high hopes an actual greywater wetland will work even
better.

The spigot that came with the
new Minox container was nice, but it didn't have a
place to attach a hose.
A new brass spigot with
matching utility hose cost about 10 dollars and only took a few minutes
to install.
I've been thinking about
Roland's comment yesterday where he suggested using copper to take
advantage of its anti-bacterial effects. Anna and I talked about it for
a while and she has an interesting idea to try suspending a mesh bag
full of pennies near the middle of the container.
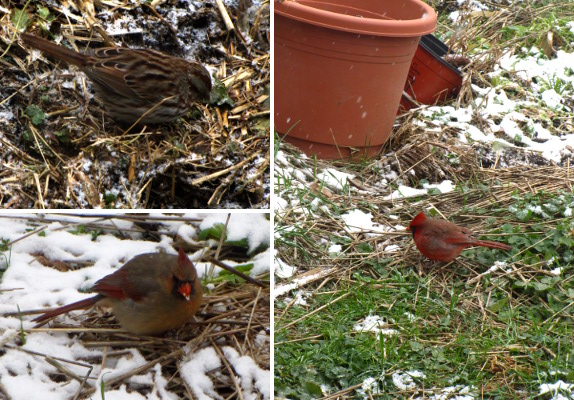
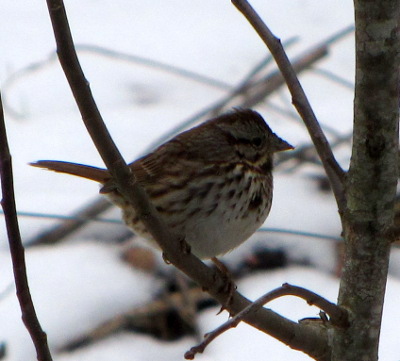
No self-respecting
groundhog would have been out in yesterday's below-freezing, snowy
weather, but a flock of ten cardinals and half a dozen song sparrows
dropped by the garden for an afternoon snack. We don't
purposefully feed the birds, but our homestead does seem to provide
quite a lot of food for the local wildlife. I'm going to assume
that these seed-eating birds were hunting down grass and plantain
seeds, lowering my weeding pressure for the year to come.
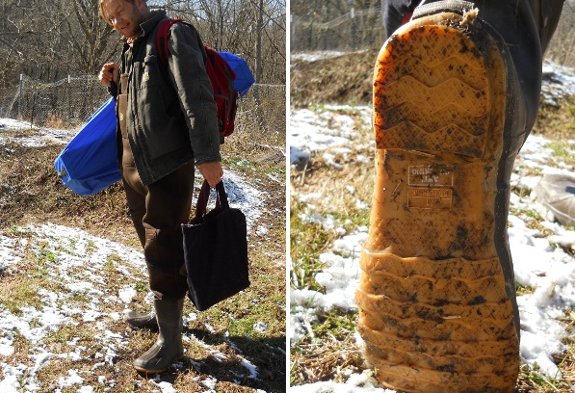
These new chest waders are a
bit harder to put on than my
old hip waders, but the
extra distance and warmth makes up for the small hassle.
The boot tread is better
suited for our conditions here compared to the felt bottom on the hip
waders.
I went with a neoprene
material from Pro Line for 180 dollars.
This has been our
tastiest winter yet, especially when you consider the vegetables we're
still eating fresh.
 When the snow and freezes
allow access, we're harvesting as many greens as we can eat out of the quick
hoops, although the
lettuce is starting to fade. Arugula has turned out to be a
quality winter salad green, growing faster than the lettuce and holding
up to colder weather, plus the sweet, spicy leaves are delicious when
they make up about 10% of a salad. I'd say we planted just the
right amount of lettuce (three beds) and arugula (one bed), and
actually grew too much kale (six beds under cover and fifteen more beds
of kale and other greens uncovered). (In case you're keeping
track at home, I use "bed" to mean an area about 18 square feet in
size.)
When the snow and freezes
allow access, we're harvesting as many greens as we can eat out of the quick
hoops, although the
lettuce is starting to fade. Arugula has turned out to be a
quality winter salad green, growing faster than the lettuce and holding
up to colder weather, plus the sweet, spicy leaves are delicious when
they make up about 10% of a salad. I'd say we planted just the
right amount of lettuce (three beds) and arugula (one bed), and
actually grew too much kale (six beds under cover and fifteen more beds
of kale and other greens uncovered). (In case you're keeping
track at home, I use "bed" to mean an area about 18 square feet in
size.)
Brussels
sprouts have been a
major boon, especially because they're tall enough that I can harvest
the little heads through a deep snow. We didn't grow nearly
enough, with only one bed in full production and three beds finally
starting to bear from their shadier spot in the front garden.
Next year, we'll put more plants in the sun as this variety moves off
our experimental list and onto our list of mainstays.
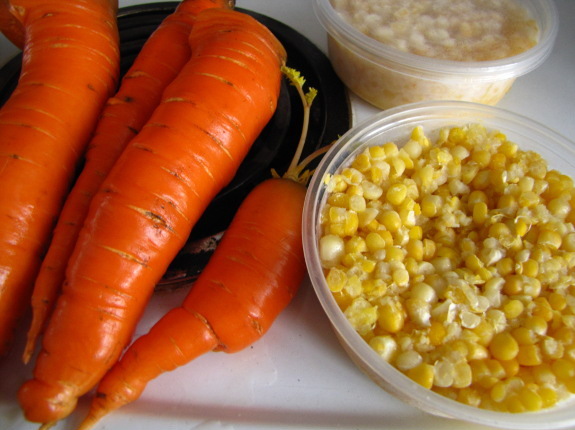
 That's
it for the crops we're still harvesting out of the garden, except for
bits of Egyptian onions, thyme, parsley, and celery. But our
other stores are also doing admirably. The queen has been carrots, which have held up
perfectly in the fridge
root cellar (where they returned after a
week on the kitchen floor
covered by a towel during the coldest spell in January). We've eaten
fresh carrots, carroty soups, given away bagsful, and still have plenty
to carry us through until the spring crop. If anything, we could
probably get away with planting a little less than six beds next year,
but we'll probably hold steady.
That's
it for the crops we're still harvesting out of the garden, except for
bits of Egyptian onions, thyme, parsley, and celery. But our
other stores are also doing admirably. The queen has been carrots, which have held up
perfectly in the fridge
root cellar (where they returned after a
week on the kitchen floor
covered by a towel during the coldest spell in January). We've eaten
fresh carrots, carroty soups, given away bagsful, and still have plenty
to carry us through until the spring crop. If anything, we could
probably get away with planting a little less than six beds next year,
but we'll probably hold steady.
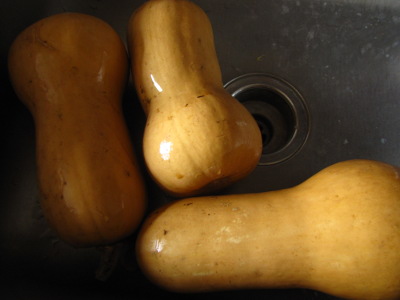
We haven't eaten as many
butternuts as in previous years because we mostly consume them in
butternut pies, which depend on good eggs, and we've started eating
eggs for breakfast, so we're perennially short. The stems are
beginning to go a bit hollow and imperfect squashes are starting to
rot, so I'm roasting up the many we have remaining to go in the
freezer. I'd say we should grow many fewer butternuts next year,
but if we increase our egg supply, that might not be true, and chickens
adore the seeds.
 We ate the last cabbage out
of the fridge root cellar last week, and it wasn't a pretty
sight. I suspect cabbages would like it just a hair warmer than
carrots, or perhaps they just don't have as much keeping power, because the last cabbage
split open and started to grow a new head from the crack. We'll
grow the same amount this year because I clearly haven't entirely got a
handle on the crop, but I suspect we may scale up at a later date.
We ate the last cabbage out
of the fridge root cellar last week, and it wasn't a pretty
sight. I suspect cabbages would like it just a hair warmer than
carrots, or perhaps they just don't have as much keeping power, because the last cabbage
split open and started to grow a new head from the crack. We'll
grow the same amount this year because I clearly haven't entirely got a
handle on the crop, but I suspect we may scale up at a later date.
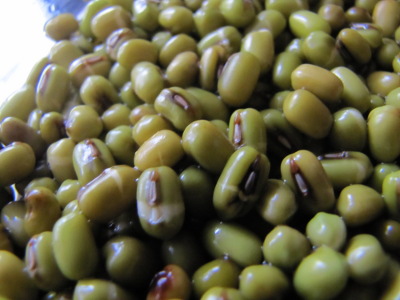
Of course, we've still
got garlic and sprouting beans and white potatoes (the last of which we
hardly eat), though we're a bit low on sweet potatoes (due to this
recipe increasing
our consumption). And then there's the contents of the freezer,
which seem to be holding up very well despite us eating soup about once
a day. While I won't mind fresh asparagus at all once April rolls
around, I don't think we'll be craving it quite as hard as we have in
the past.
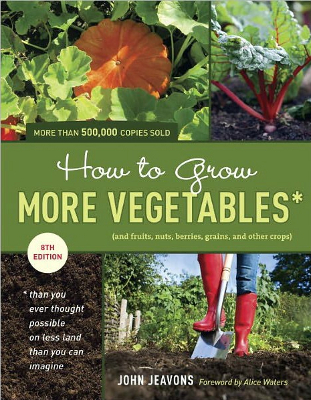 How
to Grow More Vegetables by John Jeavons was an
interesting read, but I suspect it won't be as helpful to many backyard
growers as other gardening guides might be, mostly because How
to Grow More Vegetables is one of those books that
tells the "one true way" to garden. Rather than explaining the
science behind his gardening choices so you can pick bits and pieces to
apply to your own environment, the author assumes you will want to
completely mimic his GROW BIOINTENSIVE method in your garden.
How
to Grow More Vegetables by John Jeavons was an
interesting read, but I suspect it won't be as helpful to many backyard
growers as other gardening guides might be, mostly because How
to Grow More Vegetables is one of those books that
tells the "one true way" to garden. Rather than explaining the
science behind his gardening choices so you can pick bits and pieces to
apply to your own environment, the author assumes you will want to
completely mimic his GROW BIOINTENSIVE method in your garden.
(Yes, the term GROW
BIOINTENSIVE is in all caps throughout the book. Yes, this did
drive me a little nutty. No, I won't be repeating the term in all
caps throughout this post and those that follow.)
John Jeavons' method is
one he and his group, Ecology Action, have been polishing on their
California farm since 1971, when they heard about Alan Chadwick's
biointensive gardening tehcnique and decided to give it a try.
Chadwick had, in turn, compiled his own methodology from two sources:
the French-intensive
methods that have inspired others like Eliot Coleman, and Rudolf Steiner's
biodynamic system from the 1920s.
I'll write more about
the Grow Biointensive method (which is the term Jeavons coined for his
own offshoot) in later posts in this lunchtime series, but for now,
it's worth understanding the purpose behind his methodology.
Unlike the average backyard gardener who is primarily interested in
cutting costs and/or feeding her family the most delicious and
nutritious food available, Jeavons' plan is to save the world.
His goal is to reduce the land area, water, and petroleum required to
grow food so that we can fit many more people on the earth without
starvation. As a result, you'll see a lot of focus on calories
per square foot and much less emphasis on taste and nutrition.
 My final major peeve with
this book stems from the fact that biodynamic
practitioners and I have a different worldview. Jeavons doesn't write
about gnomes, but he does anthropomorphicize his plants ("Plants...do
like to have human companionship..."), and he includes information that
is dicey at best (such as his assertion that hummingbirds will hang
around to pollinate crops --- I can't think of any major vegetables
pollinated by hummingbirds). You'll find a chapter on planting by
the moon along with lots of unsupported companion-planting data, and
the scientific-minded reader will soon start to doubt the more relevant
parts of Jeavons' method due to their proximity to less scientific
assertions.
My final major peeve with
this book stems from the fact that biodynamic
practitioners and I have a different worldview. Jeavons doesn't write
about gnomes, but he does anthropomorphicize his plants ("Plants...do
like to have human companionship..."), and he includes information that
is dicey at best (such as his assertion that hummingbirds will hang
around to pollinate crops --- I can't think of any major vegetables
pollinated by hummingbirds). You'll find a chapter on planting by
the moon along with lots of unsupported companion-planting data, and
the scientific-minded reader will soon start to doubt the more relevant
parts of Jeavons' method due to their proximity to less scientific
assertions.
All of that said, the
book is worth a read with a critical eye if you're a serious gardener
and feel able to separate the wheat from the chaff. I'll include
a little of both in later posts this week.
| This post is part of our How to Grow More Vegetables lunchtime series.
Read all of the entries: |
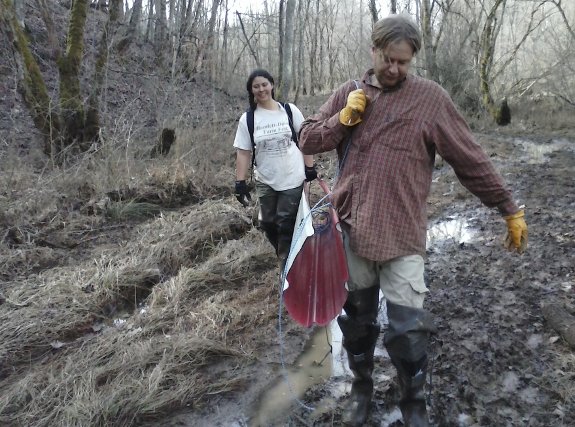
"Fold it up like a taco", was Bradley's advice on the best way to carry
in the red roofing tin last week.
To hold it in place tie a
rope around each end, which can double as a shoulder strap.
Image credit goes to our new
helper BJ.
Mark's a big fan of
backups, and our dual water system is a good example of why his
methodology is perfect for the farm. As I've written previously,
we have two water systems --- one for potable (drinking) water and one
for nonpotable water.
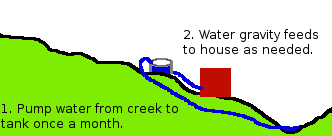 The
nonpotable
water system involves pumping water from the creek to a 1,000
gallon tank. The creek drains a large watershed, so the water is
only moderately pure, meaning it's only good for washing and
irrigation. But there's a lot of it, and once we fill the tank,
water gravity-feeds to the house with no need for electricity for about
a month. That means during power outage situations, we still have
a lot of semi-pure water with little effort that we can use for washing
hands, dishes (with a bit of bleach), and clothes. On the
negative side, though, we haven't quite got this waterline to the point
where it doesn't freeze when lows drop into the mid-teens, although
water does start flowing again pretty quickly once temperatures rise
above freezing. So we spend what amounts to perhaps five full
days a year with the nonpotable water inaccessible due to cold weather.
The
nonpotable
water system involves pumping water from the creek to a 1,000
gallon tank. The creek drains a large watershed, so the water is
only moderately pure, meaning it's only good for washing and
irrigation. But there's a lot of it, and once we fill the tank,
water gravity-feeds to the house with no need for electricity for about
a month. That means during power outage situations, we still have
a lot of semi-pure water with little effort that we can use for washing
hands, dishes (with a bit of bleach), and clothes. On the
negative side, though, we haven't quite got this waterline to the point
where it doesn't freeze when lows drop into the mid-teens, although
water does start flowing again pretty quickly once temperatures rise
above freezing. So we spend what amounts to perhaps five full
days a year with the nonpotable water inaccessible due to cold weather.
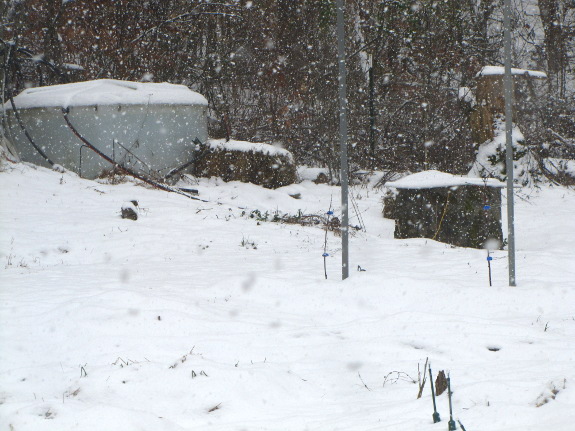
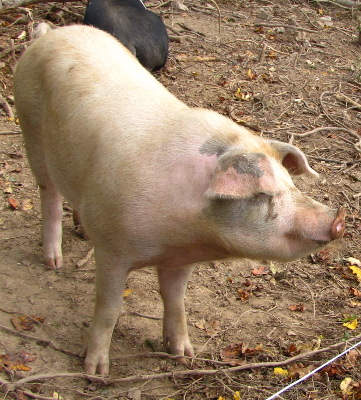
 Our
potable water supply is pumped up out of a shallow well (which looks
like a dark box in the photo at the top of this post), then is piped
through a sediment
filter and a UV light,
before ending up in the new,
larger reservoir
Mark recently installed in our kitchen. The main benefit of the
well is that we own its entire (small) watershed and the land is
completely wooded, so our well water is almost certainly free of
pesticides and herbicides. There's much less of the well water,
though, and it seems wasteful to run water through the UV light
(requiring electricity) and a sediment filter (that has to be changed
every few months) for uses other than washing and cooking. On the
other hand, the line never freezes, so as long as we have power, we
have water of some sort.
Our
potable water supply is pumped up out of a shallow well (which looks
like a dark box in the photo at the top of this post), then is piped
through a sediment
filter and a UV light,
before ending up in the new,
larger reservoir
Mark recently installed in our kitchen. The main benefit of the
well is that we own its entire (small) watershed and the land is
completely wooded, so our well water is almost certainly free of
pesticides and herbicides. There's much less of the well water,
though, and it seems wasteful to run water through the UV light
(requiring electricity) and a sediment filter (that has to be changed
every few months) for uses other than washing and cooking. On the
other hand, the line never freezes, so as long as we have power, we
have water of some sort.
Having two systems means
we probably spend twice as long fixing things that inevitably go wrong,
and it definitely cost more to set up than a single system would
have. But it's nice knowing that our water supply is completely
under our own control, and I suspect we end up paying less than
neighbors on city water even in a climate where water is
plentiful. There are several other options that could have worked
as well --- collecting rainwater off the roof, using different kinds of
filters --- but this system seems to suit our farm very well.
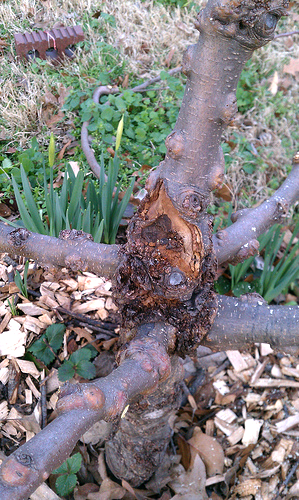 One
of our readers, Brian, sent me an email for help "or harsh reality"
about his troubled apple tree. He wrote:
One
of our readers, Brian, sent me an email for help "or harsh reality"
about his troubled apple tree. He wrote:
"The tree came from a place I wouldn't buy from again (directgardening.com) and it was a whip that had been topped and was bud grafted with supposedly 5 different varieties. It appears all the branches have the knots forming and I may just be growing a tree that is the rootstock.
"What do you think? Do you think I should just cut it down and try cleft grafting the trunk and start over?"
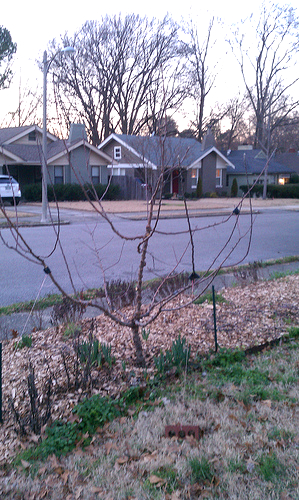 It's always tough to pull out
a fruit tree you paid good money for and babied for multiple years, and
I have to admit I know next to nothing about burr knot. Hopefully
one of you can help Brian out. What do you think --- does the
burr knot on the branches mean the whole tree is rootstock? Is it
a goner?
It's always tough to pull out
a fruit tree you paid good money for and babied for multiple years, and
I have to admit I know next to nothing about burr knot. Hopefully
one of you can help Brian out. What do you think --- does the
burr knot on the branches mean the whole tree is rootstock? Is it
a goner?
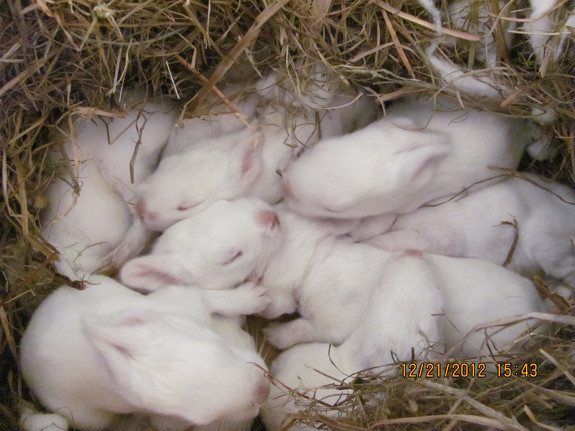
(This post is in place
of an update on Shannon's
rabbits since life
is still hectically busy down south. Shannon does report that
"The baby rabbits are eating voraciously," so hopefully he'll have more
information in a week kor two.)
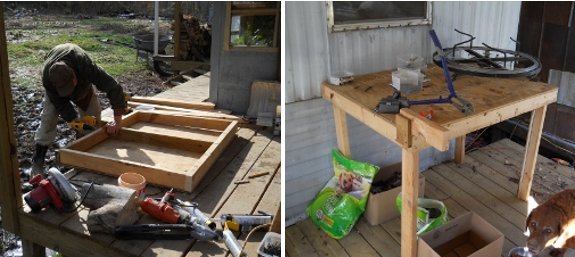
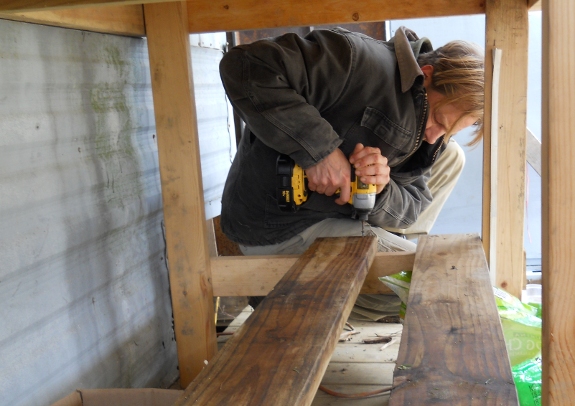
This do it yourself workbench
went together in about an hour today.
It will function as our new
14 gauge wire cutting station for chicken waterers.
Total material cost is just
under 20 dollars.
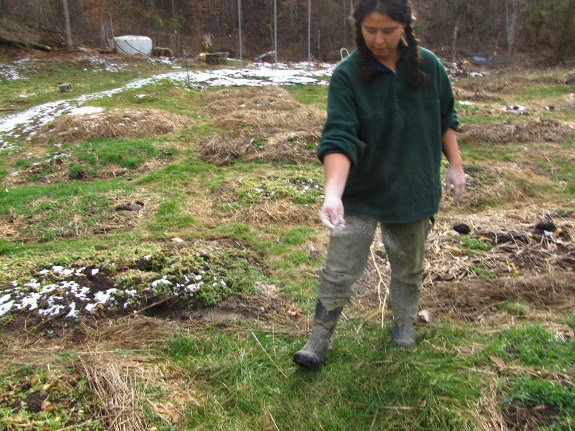
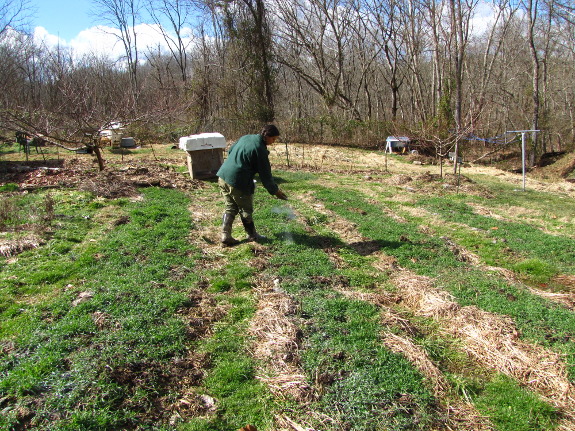
I did the first round of
remineralization of our garden soil this week. If you haven't
been reading along, you can learn how I
figured out how much of each mineral I needed here and here, and I also recommend
checking out the book The
Intelligent Gardener
for more information on why we want to remineralize our soil.
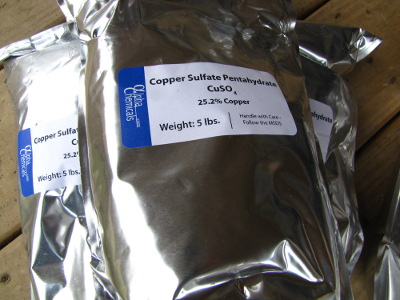
After doing the math to
calculate amounts, the next step was to come up with the
minerals. I could have asked our feed store to order 50 pound
bags of each, saving about 50% per pound. But we only needed 10
or 15 pounds of several different minerals, and you have to keep
moisture out of some of the compounds during storage. In our wet
climate, I figured it made more sense to order smaller quantities
online, and Alpha
Chemicals seemed to
be the cheapest choice for most.
As a side note, I'm 95%
sure that even though 20 Mule Team Borax is marketed as a laundry
additive, the box contains pure borax. If my garden
starts sudsing up, I'll let you know....
I used a scale and some
mixing bowls to weigh out the quantities of the minerals I'm adding in
small amounts --- manganse sulfate, copper sulfate, zinc sulfate, and
borax. Even though my soil analysis called for salt, my
understanding of soil cations talked me into leaving the
salt out this year. Every part of our garden is getting gypsum to
flush out excess cations, and sodium is the cation that clings least
tenaciously to the soil particles. My understanding of the
chemistry says that if I add salt and gypsum at the same time, I'd be
flushing my salt right out of the dirt.
Solomon recommends
mixing all of the trace minerals together, then adding them to the
items you use in bulk (like gypsum and lime). I followed his lead
on my first garden area, but I won't in the future. Our gypsum
came from the feed store pelletized, and the other minerals are
powders, so the latter tend to sink to the bottom of the wheelbarrow no
matter how carefully you mix them together. Luckily, I spread
sparingly, making three passes over the garden, so each garden spot
probably got a relatively even helping of the trace minerals as well as
the gypsum. (There's no lime in this garden area, but I plan to
mix the lime and gypsum together for areas that use both.)
I crunched the numbers
to include spreading amendments on the aisles as well as on the
beds. I could have saved cash by only treating the latter, but I
figure some vegetables probably spread their roots out beyond the bed
boundaries, and we sometimes use grass clippings as mulch, so it's best
to remineralize everything.
Each garden zone gets
its individual prescription, and I've only treated the front garden so
far. I'll let you know how I change my technique as I hit the
other areas in turn. Meanwhile, I should tell you that we've
already spent $169 on the trace minerals, and we'll be spending at
least that much again on the gypsum and lime, so this isn't a cheap
proposition. If we can taste the results in the first year,
though, it'll be worth it.
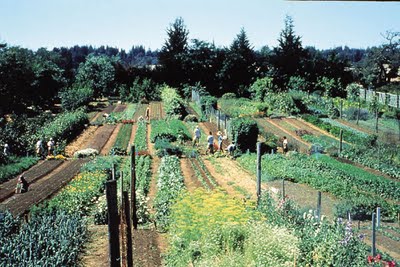
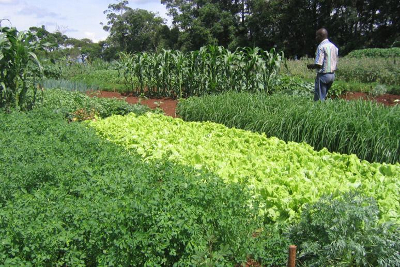
 One of Jeavons' goals in his
Grow Biointensive garden is to create a closed loop, growing all of his
compost on-farm. Finding enough compost can be an issue for
sustainable gardeners since you won't get nearly enough organic matter
from your garden "waste" to feed next year's plants. Jeavons
solves that problem by focusing a huge proportion of his growing area
on grains that not only produce a lot of calories, but also build
carbon for the compost pile.
One of Jeavons' goals in his
Grow Biointensive garden is to create a closed loop, growing all of his
compost on-farm. Finding enough compost can be an issue for
sustainable gardeners since you won't get nearly enough organic matter
from your garden "waste" to feed next year's plants. Jeavons
solves that problem by focusing a huge proportion of his growing area
on grains that not only produce a lot of calories, but also build
carbon for the compost pile.
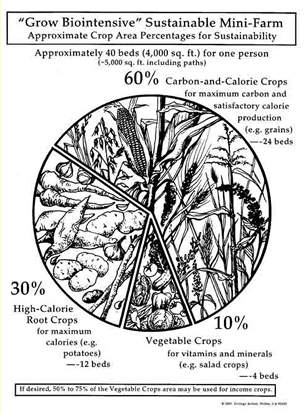
The diagram to the
right, from Ecology
Action's website,
shows how the group breaks their farm down into categories:
- 60% grains (wheat, rye, oats, barley, triticale, corn, sorghum,
amaranth, quinoa, pearl millet, and also non-grains such as fava beans,
sunflowers, filberts, and grapes)
- 30% roots (leeks, garlic, parsnips, sweet potatoes, salsify,
potatoes, Jerusalem artichokes)
- 10% vegetables (everything else, including lower-yielding roots like turnips and onions)
Looking at Jeavons
numbers, I'm a bit shocked by his ratios --- I'd be concerned if my
diet consisted nearly entirely of grains
and roots. Jeavons allots 4,000 square feet of growing area
(excluding
aisles) to totally feed each person, which means I'd have to grow all
of the non-root vegetables the two of us eat in 800 square feet --- a
bit
less space than we currently commit to tomatoes and leafy greens.
Meanwhile, I'd have to drastically expand the 21% of our garden (and
diet) we
commit to high-carbohydrate crops (roots and grains), and would
actually
increase our total vegetable growing area by 45% to match Jeavons'
numbers.
 As with other parts of How
to Grow More Vegetables, I feel like Jeavons' garden
divisions are based more on ideology than on reality. Yes, the
concept of creating a closed-loop farm is intellectually interesting,
but why is it unsustainable to bring in manures if they're being heaped
up in a stack of "waste" by your neighbors? Alternatively, why
not add animals to your own farm --- many studies have shown that
small-scale, human-labor systems generally produce more calories per
acre if you include animals wisely in multi-layered systems than if you
stick to growing plants alone.
As with other parts of How
to Grow More Vegetables, I feel like Jeavons' garden
divisions are based more on ideology than on reality. Yes, the
concept of creating a closed-loop farm is intellectually interesting,
but why is it unsustainable to bring in manures if they're being heaped
up in a stack of "waste" by your neighbors? Alternatively, why
not add animals to your own farm --- many studies have shown that
small-scale, human-labor systems generally produce more calories per
acre if you include animals wisely in multi-layered systems than if you
stick to growing plants alone.
On the other hand,
Jeavons' system can be considered from another point of view as a way
of including cover crops that are useful for more than one
purpose. Rather than planning your grains to be winter-killed
or mow-killed, if
you've got the space to let them go to seed (and the equipment to
process the grain), you'll end up with even more organic matter plus a
high-calorie crop. In traditional farming systems from a century
or two ago, this is exactly what most farmers would do...but then
they'd feed most of those grains to the chickens, pigs, and milk cow to
produce high-quality protein for the family.
| This post is part of our How to Grow More Vegetables lunchtime series.
Read all of the entries: |
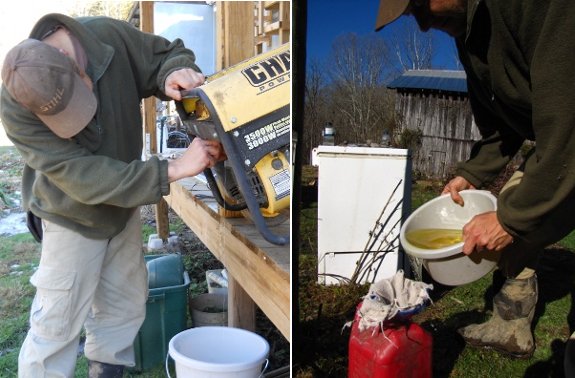
It takes a full hour to drain
a gallon of fuel from our Champion
generator.
Using an old rag to filter
the fuel will hopefully eliminate any particles that may have found
their way into the bucket during this operation.
Once the tank is empty I
start it up to burn off any remaining fuel.
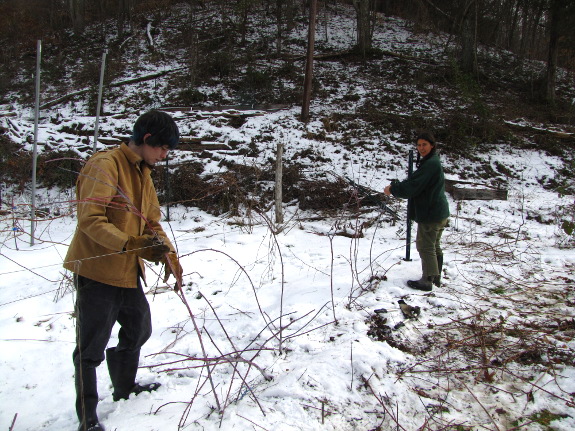
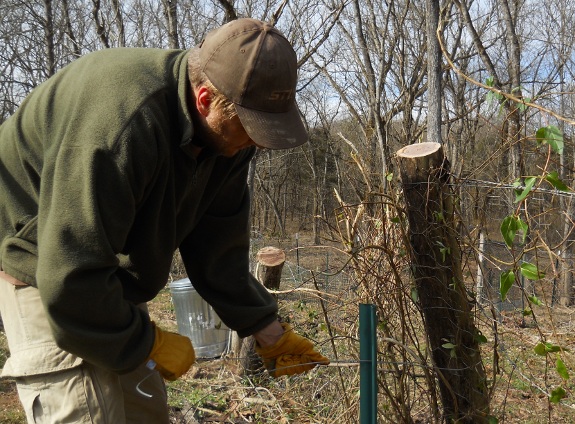
I don't usually let
anyone help me with pruning, partly because I'm a control freak but
mostly because I'm still feeling my way along and don't feel
comfortable enough giving instruction. The raspberries
and blackberries are
pretty straightforward, though, and B.J. picked up my pruning method
astonishingly quickly Monday. (Yes, he is shaping up to be
indispensible. No, you can't have him.)
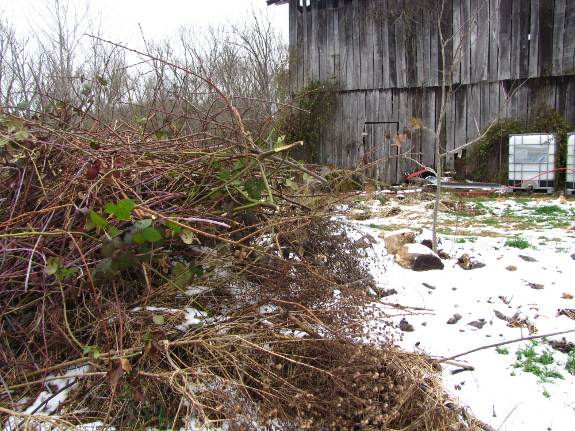
Last year, the brush
pile full of
pruned-off branches did okay in the middle of the forest garden, so I
decided to repeat the experiment. The previous pile had sunk down
to where it was only a few feet tall, so this year's prunings didn't
really raise the height up beyond the previous levels. Hopefully
my work eradicating weeds growing up through the pile last summer will
make the area semi-weed-free this year, and last year's cuttings should
be rotten enough by now that the nearby apple roots can take advantage
of the compost.
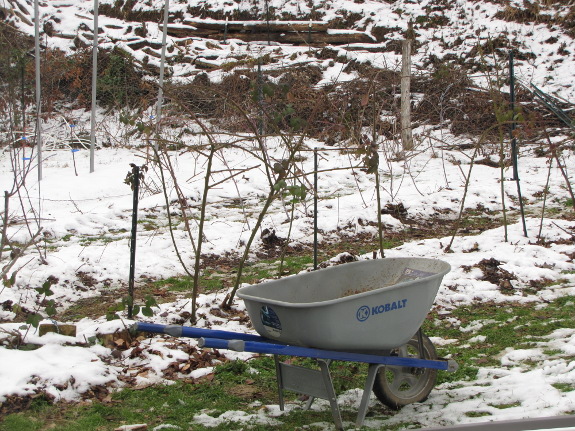
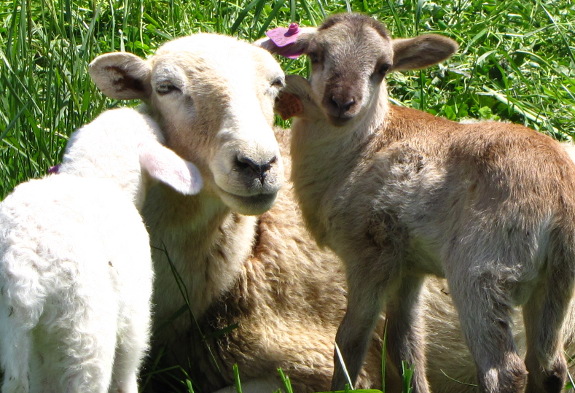
Here's the finished
product --- blackberries, red raspberries, black raspberries, and kiwis
are now all pruned. They look a bit like shorn sheep against the
snow, but I've found that heavy pruning is entirely worthwhile with
brambles. You get huge, delicious fruits that are easy to pick,
so you eat more of them.
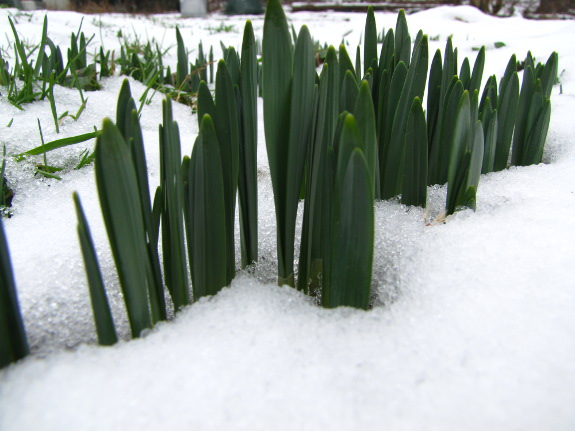
 Plus,
it's just fun out to be out in the garden in early February, watching
the daffodil leaves poke up through the snow and the song sparrows flit
about. Pruning week is one of my favorite times of the year, so
I'm glad I've still got all the fruit trees to go. Now, if I can
just learn to wear gloves so I don't have to bite thorns out of the
pads of my fingers all week....
Plus,
it's just fun out to be out in the garden in early February, watching
the daffodil leaves poke up through the snow and the song sparrows flit
about. Pruning week is one of my favorite times of the year, so
I'm glad I've still got all the fruit trees to go. Now, if I can
just learn to wear gloves so I don't have to bite thorns out of the
pads of my fingers all week....
 The chapter in Grow
More Vegetables that
held up best to scientific scrutiny covered compost. Jeavons'
compost pile is very different from many I've seen because he
incorporates a lot of soil and keeps the C:N ratio quite high (44:1) as
a way of maximizing humus creation rather than minimizing cooking
time. This is where a lot of the grain
leaves and stems from his garden end up, along with kitchen waste,
twigs, and small branches, and the lignin in the woodier materials
tends to create more humus in the final product. While Grow
Biointensive piles take four months or more to fully cure, the organic
matter they produce also lasts much longer in the soil.
The chapter in Grow
More Vegetables that
held up best to scientific scrutiny covered compost. Jeavons'
compost pile is very different from many I've seen because he
incorporates a lot of soil and keeps the C:N ratio quite high (44:1) as
a way of maximizing humus creation rather than minimizing cooking
time. This is where a lot of the grain
leaves and stems from his garden end up, along with kitchen waste,
twigs, and small branches, and the lignin in the woodier materials
tends to create more humus in the final product. While Grow
Biointensive piles take four months or more to fully cure, the organic
matter they produce also lasts much longer in the soil.
Intriguing, but less
scientifically supported, compost facts in Jeavon's book include a
qualitative analysis of compost types. He asserts that compost
made from plants is four times better than that made from manure, and
that roots rotting directly in the soil are twice as good as plant
compost. With no extra information or citation, I'm left guessing
that maybe Jeavons means plant roots rotting directly into the soil are
most likely to turn directly into humus, but I'd be curious to hear
from anyone with more information.
| This post is part of our How to Grow More Vegetables lunchtime series.
Read all of the entries: |
Thank you BSmith for
commenting the other day about my lack of bracing on the DIY
work bench.
It had a slight wobble, but
two 2x4's on the bottom firmed it up and provided a place to install a
heavy duty shelf.
I also put an L bracket on
one of the rear legs to secure it to the deck.
 We're zipping right through
the easy section of our emergency
preparedness goals,
with this week's addition being smoke and carbon monoxide
detectors. Even though I put it on the easy list, though, I soon
discovered that choosing a smoke detector is quite complex.
We're zipping right through
the easy section of our emergency
preparedness goals,
with this week's addition being smoke and carbon monoxide
detectors. Even though I put it on the easy list, though, I soon
discovered that choosing a smoke detector is quite complex.
You have to select either a model that relies on ionization to detect
open flames, or on a photoelectric sensor to notice smoldering
fires. Although there are some detectors that lead you to believe
they do both plus monitor for carbon monoxide, once you read the fine
print, none do.
In the end, we chose to
pay a bit more to cover all of our bases, getting a First
Alert SA320CN smoke detector (photoelectric and ionization) and a First
Alert CO400 carbon monoxide detector for the outside of each
sleeping area. Although the versions that hook into your
electrical systems do avoid the problem of forgetting to change
batteries, we opted for battery-powered models since power-outage
situations are when we have more open flames around and need smoke
detectors the most.
 I would tell you about how
and where to install detectors in this post, but each device we bought
came with a huge, fine-print-filled instruction sheet that was
approximately the size of our kitchen table. So as long as you
take the time to read the instructions that come with your detector,
you'll know far more than you ever thought you needed to know about
installation and maintenance.
I would tell you about how
and where to install detectors in this post, but each device we bought
came with a huge, fine-print-filled instruction sheet that was
approximately the size of our kitchen table. So as long as you
take the time to read the instructions that come with your detector,
you'll know far more than you ever thought you needed to know about
installation and maintenance.
Other aspects of
Jeavons' Grow Biointensive system are less unique. Grow
More Vegetables sums
up the method with seven techniques:
- Double-digging
- Compost use
- Close plant spacing
- Companion planting
- 60-30-10 proportions of carbon-efficient, calorie-efficient, and other crops
- Open-pollinated seeds
- Interrelated farm system
 Of the techniques I haven't
discussed in earlier posts, the one I'm most on the fence about is
double-digging (which is followed by loosening up the soil between
crops with broad forks, aka U-bars). Our oldest garden plot is
ready to go into its seventh growing season since the ground was last
dug into, and the plants there seem to do better every year, so I can't
say that loosening the soil is really essential. On the other
hand, I'm very careful to keep foot traffic on the aisles, and I can
see from Grow
More Vegetables
that Grow Biontensive's wider beds are often impacted by human traffic
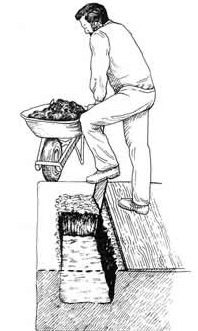
--- for example, the author actually pictures a board you're supposed
to sit or stand on atop the bed while loosening the soil or
planting. If you regularly put human weight on your garden soil,
you probably do need to fluff it up from time to time.
Of the techniques I haven't
discussed in earlier posts, the one I'm most on the fence about is
double-digging (which is followed by loosening up the soil between
crops with broad forks, aka U-bars). Our oldest garden plot is
ready to go into its seventh growing season since the ground was last
dug into, and the plants there seem to do better every year, so I can't
say that loosening the soil is really essential. On the other
hand, I'm very careful to keep foot traffic on the aisles, and I can
see from Grow
More Vegetables
that Grow Biontensive's wider beds are often impacted by human traffic
--- for example, the author actually pictures a board you're supposed
to sit or stand on atop the bed while loosening the soil or
planting. If you regularly put human weight on your garden soil,
you probably do need to fluff it up from time to time.
Companion planting is
another dicey topic, and one I don't really feel expert enough to delve
into in depth. I used to lap up information on companion
planting, but my limited trials have shown no improvement when mixing
multiple types of vegetables together in the same bed. Meanwhile,
companion planting seems to always make the vegetables harder to
harvest and has lowered yields in my garden. Until I see some
side-by-side scientific studies proving that specific types of
companion planting work, I'll stick to my diverse garden with each
variety segregated in its own little bed.
I know I've been pretty
critical of a book that many seem to find ground-breaking, so I thought
I'd offer the same exposure to the other side of the argument.
After a similar series about square
foot gardening, a
reader sent me a lot of photos and an explanation of why the method
worked for him.
If there's a Grow Biointensive fan out there who wants to share their
side of the story, just email
me and I'll set the
record straight.
| This post is part of our How to Grow More Vegetables lunchtime series.
Read all of the entries: |
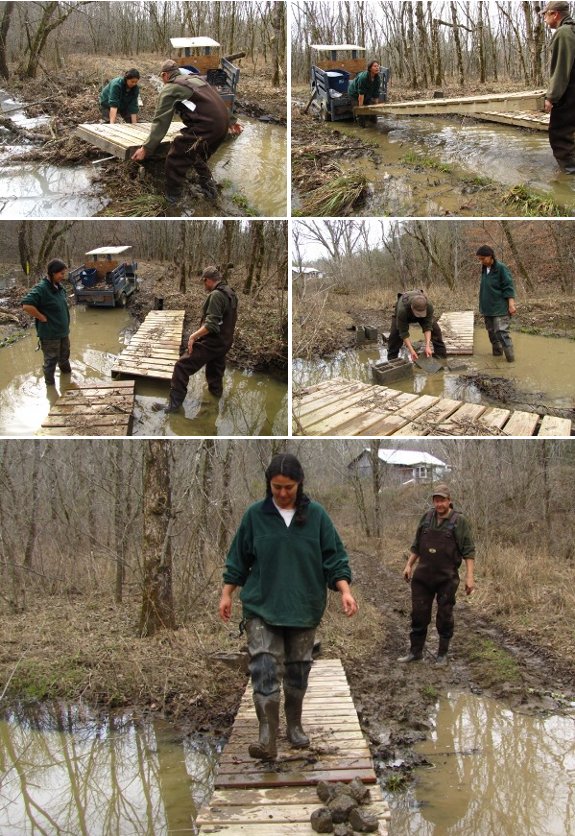
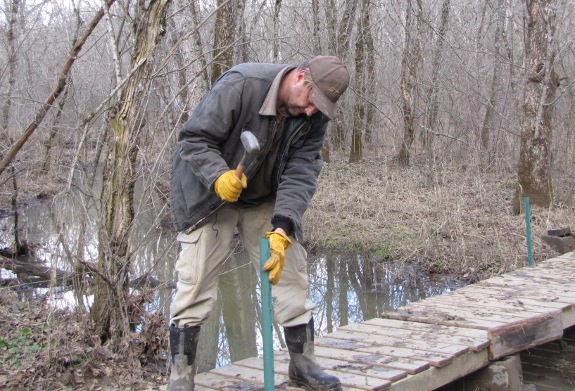
It took some wrangling, but
we managed to get the swamp bridge back in place.
We added a few more cinder
block supports which firmed it up nicely.
The next step will be to
anchor it down before the next flood.
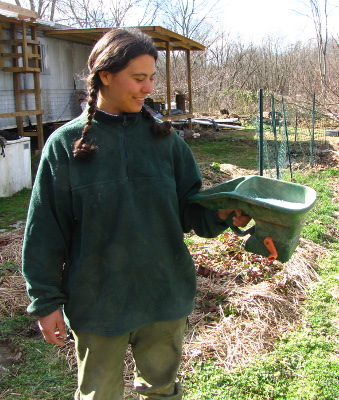 For
round two of my remineralization campaign, I decided to take
Roland's advice and at least prevent skin contact with the
copper. Our first idea was to use a seed spreader, but the
mineral powders didn't seem to want to flow out, so I moved on to plan
B --- wearing gloves.
For
round two of my remineralization campaign, I decided to take
Roland's advice and at least prevent skin contact with the
copper. Our first idea was to use a seed spreader, but the
mineral powders didn't seem to want to flow out, so I moved on to plan
B --- wearing gloves.
We still have to buy
more gypsum and lime, but the trace minerals are all in place. I
skipped the blueberries because I couldn't decide
what to do there, and I skipped chicken pastures 1 and 2 because I
didn't test the soil in those areas.
The only other area I
left out was the three rows in the mule garden currently covered by
quick hoops. We're still eating greens and lettuce out of there
daily, and I don't want to risk imbibing a lot of metals
accidentally. I figure the quick-hoop-covered beds can also be my
control. If I see a huge problem everywhere else but none there,
I'll know the minerals are at fault.
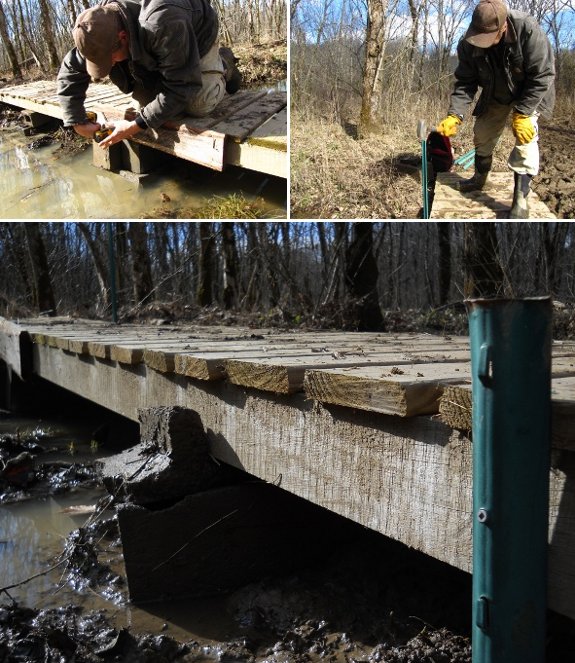
1. Re-attach 2 pieces at the
center of the swamp
bridge.
2. Pound in metal fence posts
on all 4 corners.
3. Secure each post to the
side with an exterior screw.
The next flood will be the
real test to see if all this prevents it from floating away.
 My father commented to ask
what's the difference between remineralization
and using chemical fertilizers. The answer is --- not much in the
short term, but hopefully a lot in the long term.
My father commented to ask
what's the difference between remineralization
and using chemical fertilizers. The answer is --- not much in the
short term, but hopefully a lot in the long term.
Most (perhaps all?) of
the minerals I've been applying are approved for
organic gardening because they're mined rocks, but they're really just
chemicals. I
don't believe that just because something's "natural" that it's safe
for my soil, and I don't kid myself by thinking that there may not be
some short-term damage to my soil microorganisms resulting from this
winter's application. I'm hopeful that by spring, though,
everything will have evened out.
That's the short-term
picture, but what about the long term? The purpose of
remineralization is to correct imbalances
in the soil that develop over millenia of rainfall and leaching. The theory is that if
you boost levels of trace minerals that have been washed out of the
earth, you can bring your soil back into balance and not have to repeat
the endeavor. (That said, it may take a few years of soil tests
and remineralization to return to the optimal levels, especially since
Solomon places application limits on several of the minerals, like
borax.)
 In contrast, the chemical
fertilizers used in mainstream farming are generally meant to be
applied before every crop, and tend to create a cycle of dependency in
the soil. For example, if you use chemical nitrogen fertilizers,
the microorganisms in your soil that usually cycle nitrogen and make it
available to plants perish, so you have to keep applying chemical
nitrogen fertilizers. If remineralization works correctly, it
does the opposite --- you add minerals that microorganisms will keep
cycling in your garden indefinitely.
In contrast, the chemical
fertilizers used in mainstream farming are generally meant to be
applied before every crop, and tend to create a cycle of dependency in
the soil. For example, if you use chemical nitrogen fertilizers,
the microorganisms in your soil that usually cycle nitrogen and make it
available to plants perish, so you have to keep applying chemical
nitrogen fertilizers. If remineralization works correctly, it
does the opposite --- you add minerals that microorganisms will keep
cycling in your garden indefinitely.
Whether the theory will
stand up to reality is up for debate. I feel there's a 10% chance
I'll regret spreading all these chemicals on the soil, a large chance I
won't see any difference, and perhaps a 20% chance my strawberries will
taste astonishingly rich this year. Only time will tell.
(And, yes, it's all about the strawberries.)
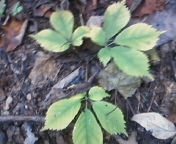 This is ginseng. What I like to
call, Appalachian Gold. I started hunting for the herb two years ago.
It was very hard to find at first, but after about a month or so I
could spot it very easily. Ginseng, in my personal opinion, is the most
beautiful plant in the forest.
This is ginseng. What I like to
call, Appalachian Gold. I started hunting for the herb two years ago.
It was very hard to find at first, but after about a month or so I
could spot it very easily. Ginseng, in my personal opinion, is the most
beautiful plant in the forest.
'Seng starts off the season
with bright green leaves and red berries in the center. Toward the end
of the season, the leaves turn to a vibrant yellow and the berries have
usually fallen off. A young plant has one or two prongs (branches) and
an older plant has three or four prongs. The photo above is about
mid-season. You can actually see the color change. Very beautiful!
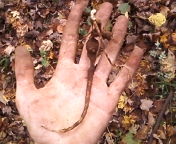 It was my dad, who introduced me
to the herb. He, being a master ginseng hunter, has taught me a lot
about the herb and its medicinal properties. Have a headache? Simply
add about a teaspoon of dry, ground ginseng to some green tea. After
brewing is complete, use honey and a dash of cinnamon for sweetening,
and you have a natural energy drink that can knock a headache clean out
of your head.
It was my dad, who introduced me
to the herb. He, being a master ginseng hunter, has taught me a lot
about the herb and its medicinal properties. Have a headache? Simply
add about a teaspoon of dry, ground ginseng to some green tea. After
brewing is complete, use honey and a dash of cinnamon for sweetening,
and you have a natural energy drink that can knock a headache clean out
of your head.
I have yet to learn
everything about the herb, but I will keep you posted. Feel free to let
me know anything you may know about ginseng or any other plants and
herbs. I am always wanting to learn new things about plants and herbs.

Scraps of 2x4's spaced a
couple of inches apart is all it takes to store hip and chest waders in
a proper vertical fashion to prevent creasing.
 I've played
around with taking advantage of willows' natural rooting hormones in the past, but have never
gotten very serious about it. However, an actual tested recipe in
The
Reference Manual of Woody Plant Propagation (combined with some gifted
fig cuttings) prompted me to give it another try.
I've played
around with taking advantage of willows' natural rooting hormones in the past, but have never
gotten very serious about it. However, an actual tested recipe in
The
Reference Manual of Woody Plant Propagation (combined with some gifted
fig cuttings) prompted me to give it another try.
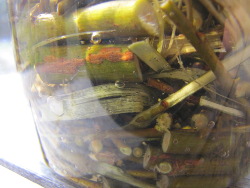
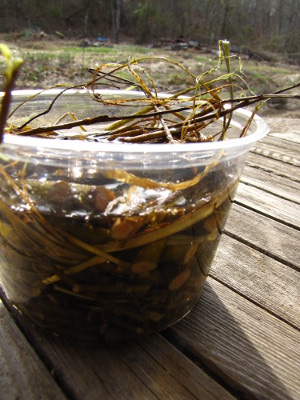
To make rooting hormone
tea from first-year willow twigs, just strip off leaves (if any are
present), cut the wood into small pieces, and cover them up with
water. After 24 hours of steeping, pour off the liquid and use it
immediately, or store it in your fridge for up to six years.
Since willow rooting
hormone isn't as strong as commercial preparations, it's best to let
the base of your cuttings sit in the willow juice for a day before
moving them to their rooting chamber. I'm treating half my fig
cuttings with willow rooting hormone and letting half sit in water for
a day as a control and will let you know if I see a difference in
rooting.
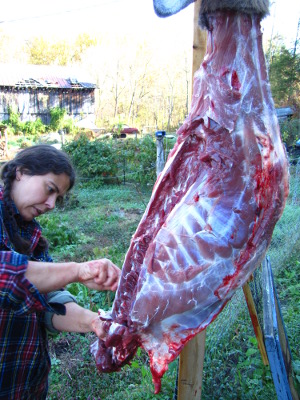
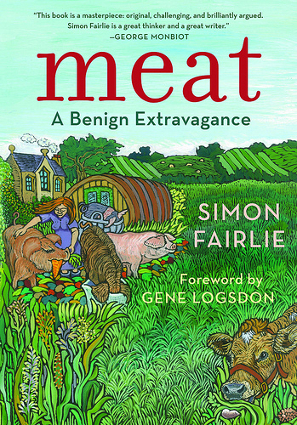 Meat:
A Benign Extravagance
by Simon Fairlie is an excellent book that I recommend to anyone who
cares about the environmental impact of your food, whether you're a
vegan, a fan of pastured meat, or are somewhere in between. While
the book doesn't touch on health issues or whether the actual act of
slaughtering animals is ethical, the author does an admirable job of
poring over the literature, crunching the numbers, and figuring out
whether
we're kidding ourselves when we think we can raise meat in a way that
heals the earth.
Meat:
A Benign Extravagance
by Simon Fairlie is an excellent book that I recommend to anyone who
cares about the environmental impact of your food, whether you're a
vegan, a fan of pastured meat, or are somewhere in between. While
the book doesn't touch on health issues or whether the actual act of
slaughtering animals is ethical, the author does an admirable job of
poring over the literature, crunching the numbers, and figuring out
whether
we're kidding ourselves when we think we can raise meat in a way that
heals the earth.
My favorite part of Meat is that Fairlie gives both
sides of the aisle fair consideration. He admits up front that
he's not a fan of CAFOs from an ethical perspective, and that he spent
several years as a vegetarian before beginning to raise his own dairy
goats and to eat the male kids. But he sets his own biases aside
and bashes all of the infomercials in which authors twist the numbers
to suit their ideology, whether the texts are written by vegans or by
industrial agribusinesses.
I put off reading Meat for several months because
the inside doesn't look inviting. There are a lot of footnotes,
no pictures, the text is a bit small, and it just looks like a tough,
academic read. Luckily, the author is engaging, and if you ignore
the footnotes, the text isn't nearly as dense as it first
appears. Instead, you'll likely have the most trouble translating
from British English to American English, and even that's not so
hard. (Just remember that soya is soybeans, ground nuts are
peanuts, and lucerne is alfalfa.)
This week's lunchtime
series will sum up the highlights of Simon Fairlie's book, but this is
one that I highly recommend you hunt down and read for yourself.
As usual, I'm looking at the author's information with an eye toward
tweaking our own permaculture setup, not to changing society, so I've
left out huge portions of Fairlie's argument that will be relevant to
those of you who depend more on the grocery store. If you're
interested in the bigger picture, it's worth putting in the time to
read Meat yourself.
| This post is part of our Meat lunchtime series.
Read all of the entries: |

This walnut tree functioned
as a fence post for about 6 years.
It was in line with other
fence posts, so we just trimmed off the lower limbs and attached the
fence.
I might think twice about
taking a short cut like this in the future and use a treated 4x4 or
maybe even a 2x4 which would most likely last decades.
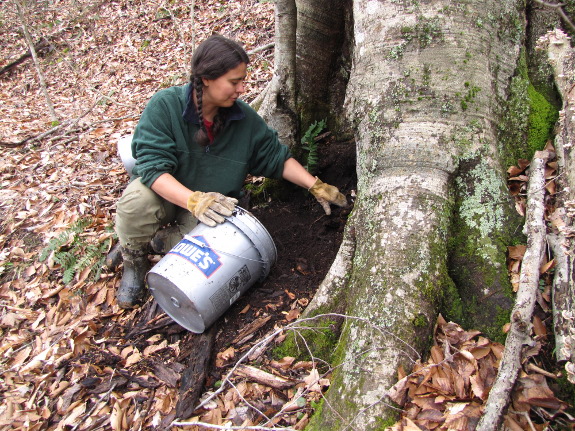
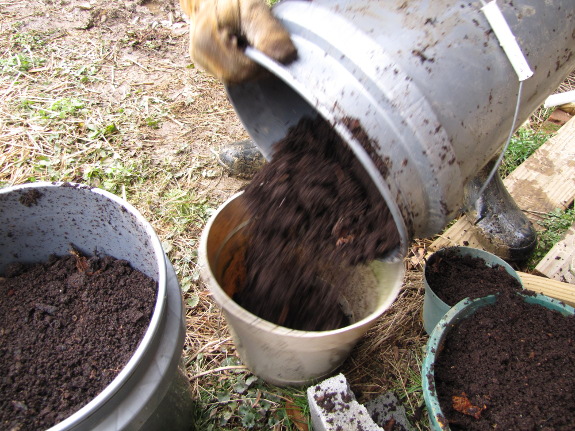
My favorite stump-dirt tree has been good to us
this year. I've already used about six gallons of beetle
castings, and B.J.
and I easily brought home another seven gallons or so Monday
afternoon. I figure there are even a couple more bucketsful left
for later seed starting, and of course the tree will fill back up over
the summer, fall, and winter and give us the same again next year.
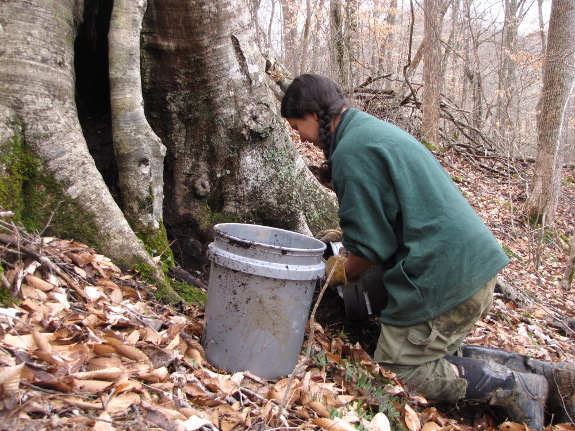
If I look like I'm
praying to the tree, I kinda am. Who wouldn't be grateful for
such perfect humus? This individual tree makes the best potting
soil I've ever used --- just the right levels of nutrients and
water-holding capacity. Stump dirt from box-elders isn't even in
the same ball park, and tulip-trees and apples are head and shoulders
below this beautiful old beech.
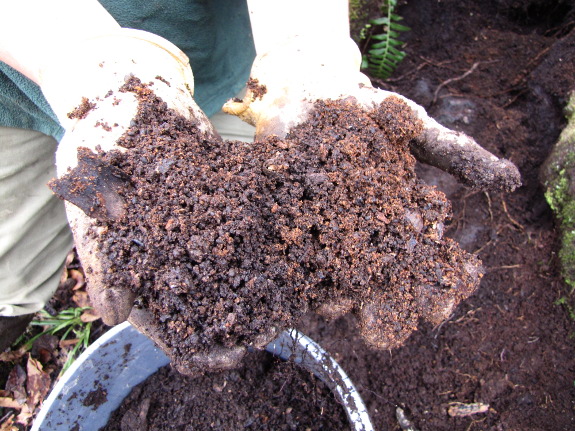
The best stump dirt is
really little balls of beetle poop, and nearly everything spilling out
of this tree fits the bill.
More on what I used my
stump dirt for in a later post.
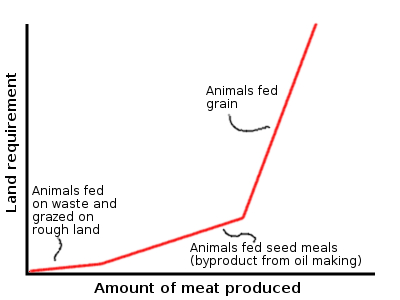
 I've written previously about
the
argument that eating meat is bad for the environment because it's an
inefficient use of land. The figure most
people bring up is that it takes 10 times as much land area to produce
meat as to produce grain. My gut feeling is that the figure
seemed too simplistic, so I was very glad to see someone willing to put
more time into crunching the numbers and thinking the issue through.
I've written previously about
the
argument that eating meat is bad for the environment because it's an
inefficient use of land. The figure most
people bring up is that it takes 10 times as much land area to produce
meat as to produce grain. My gut feeling is that the figure
seemed too simplistic, so I was very glad to see someone willing to put
more time into crunching the numbers and thinking the issue through.
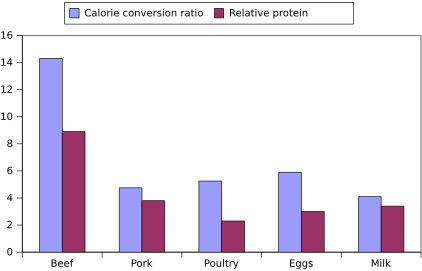
Simon
Fairlie began with
the basics --- feed
conversion ratio
for a few types of factory-farmed livestock. Next, he went a step
further and considered the protein conversion ratio, factoring in the
figure (agreed on by both pro- and anti-livestock folks) that animal
protein is 40% more valuable nutritionally than plant protein.
The results are  shown in the graph at the top
of this post, with beef being very inefficient (14.3:1 energetically
and 8.9:1 in terms of protein) and poultry being relatively efficient,
especially when it comes to protein (2.3:1). Personally, I feel
that the protein conversion rate is the most important since that's
usually the sticking point when trying to feed yourself from a small
tract of land.
shown in the graph at the top
of this post, with beef being very inefficient (14.3:1 energetically
and 8.9:1 in terms of protein) and poultry being relatively efficient,
especially when it comes to protein (2.3:1). Personally, I feel
that the protein conversion rate is the most important since that's
usually the sticking point when trying to feed yourself from a small
tract of land.
As I'll explain later
posts, there are other mitigating factors that change the feed
conversion ratios mentioned above, but this is a good starting point
for an unbiased consideration of the value of meat, especially if you
just buy your food from the grocery store. The conclusion Fairlie
comes too is that meat is a luxury product...but so are most fruits,
vegetables, and oils. For example, soybean oil actually requires
more arable land to produce than pastured dairy, and pigs can often
make fats more efficiently than soybeans as well. If you belive
that it's unethical to use more land producing your food than is
absolutely necessary, you should probably follow
the lead of the Grow Biointensive method and get nearly all of your
food from grains.
| This post is part of our Meat lunchtime series.
Read all of the entries: |
When the walnut
tree fence post fell it
took out another one close by.
It pushed back in place, but
needed some help staying up.
I've seen the Power Company
shore up a pole this way, and with any luck the 14 gauge galvanized
wire will hold it in place for many years in the future.
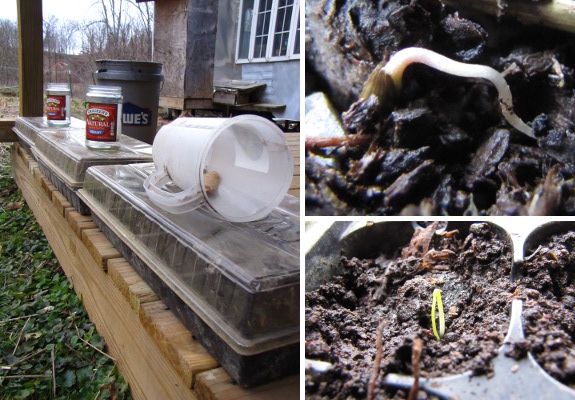
Valentine's Day week is
when we often achieve the first rumblings of spring lift-off here on
the farm. Sure enough, taking the cover off the newly-seeded
lettuce quick hoop
just before a big rain resulted in sprouts the next day.
Meanwhile, my three
flats of onion seeds are starting to come up, so I've moved them to the
porch to capture sunlight on pretty days. Yes, this year I'm
going to be one of those overambitious gardeners who carries flats in
and out since she doesn't have enough growing space indoors.
Luckily, onion seedlings can take a light freeze, so they won't be too
much bother.
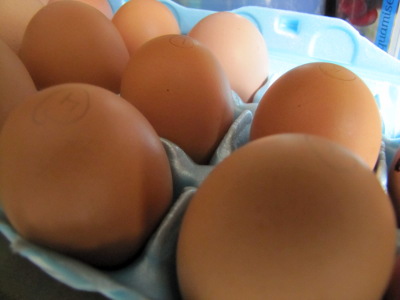 Finally, there are the eggs
waiting to go in the incubator Thursday or Friday. I
was going to start my first round of chicks a little later this year,
but Sarah's letting me get in on her chick order to add some good
laying genetics to our flock, and I want my chicks to hatch when hers
arrive.
Finally, there are the eggs
waiting to go in the incubator Thursday or Friday. I
was going to start my first round of chicks a little later this year,
but Sarah's letting me get in on her chick order to add some good
laying genetics to our flock, and I want my chicks to hatch when hers
arrive.
Any signs of spring in
your garden?
 The
efficiency figures in my last post for raising various types of
meat make some big assumptions that aren't even true in cultures like
ours where most livestock are raised in factory farms, and are even
less true in other parts of the world. For example, the
astonishingly inefficient beef figures are mitigated by the fact that
most cattle, even in the U.S., are raised on pasture with little or no
grain during their youth, and are only moved to feedlots to be fattened
before slaughter. Next, consider that the hides of cows are used
for leather, collagen from connective tissue is used to make glue,
gelatin is eaten and used in plastic, and fats are used in soaps and
other applications. Factoring in these two new bits of data,
Fairlie further crunches the numbers to lower the feed conversion ratio
of beef in industrial societies to around 7:1 or 8:1.
The
efficiency figures in my last post for raising various types of
meat make some big assumptions that aren't even true in cultures like
ours where most livestock are raised in factory farms, and are even
less true in other parts of the world. For example, the
astonishingly inefficient beef figures are mitigated by the fact that
most cattle, even in the U.S., are raised on pasture with little or no
grain during their youth, and are only moved to feedlots to be fattened
before slaughter. Next, consider that the hides of cows are used
for leather, collagen from connective tissue is used to make glue,
gelatin is eaten and used in plastic, and fats are used in soaps and
other applications. Factoring in these two new bits of data,
Fairlie further crunches the numbers to lower the feed conversion ratio
of beef in industrial societies to around 7:1 or 8:1.
Pigs and chickens
produce fewer useful side products and don't get as much out of grass,
so their feed conversion ratios stand firm if you stick to industrial
conditions. However, if we went back in time even twenty years,
before it became illegal to feed wasted human food to livestock, pigs
especially would become much more efficient converters of grain to
meat. Fairlie suggests that if we simply used the food thrown
away by Americans every day, swill would supply 9% of the diet of the
pigs in our current factory farms, and that doesn't factor in other
historical feeds such as whey, spoiled produce on farms, and
slaughterhouse wastes. In poorer countries that haven't
implemented anti-swill-feeding 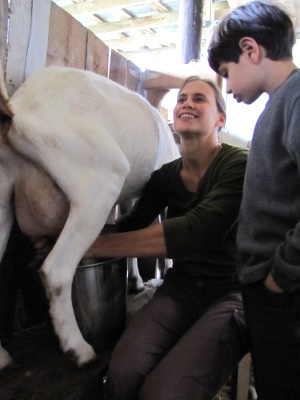 laws, pigs are often fed only
1.76 pounds of grain for every pound of meat produced, which would be
an astonishing feed conversion rate of 1.1:1 calorically, if my math is
right. (I'm guessing 1385 calories per
pound of pork and 898 calories per pound of grain.)
laws, pigs are often fed only
1.76 pounds of grain for every pound of meat produced, which would be
an astonishing feed conversion rate of 1.1:1 calorically, if my math is
right. (I'm guessing 1385 calories per
pound of pork and 898 calories per pound of grain.)
While swill is most
important when making chickens and pigs more efficient, ruminants like
cows and sheep pull their weight in areas with lots of non-arable
ground. For example, most of our farm couldn't be plowed without
producing extreme erosion, but if I were willing to cut down trees, we
could rotationally graze ruminants on our entire acreage and get food
from "unusable" land. In the UK, dairy cattle were historically
raised in spots like this, getting half their protein from grass and
half from grain, with a protein conversion rate for the milk of
1.5:1. Considering that animal protein is thought to be 1.4 times
as nutritionally beneficial as plant protein, that sounds like a very
efficient use of grain!
| This post is part of our Meat lunchtime series.
Read all of the entries: |
I first wanted the more heavy
duty fence posts to anchor the swamp
bridge, but realized we
used them all up on the high
density orchard experiment.
Turns out the thinner and
cheaper metal fence post was a better fit for this application.
The flat side snugged up
nicely with the swamp bridge and the pre-drilled holes made securing it
easy.
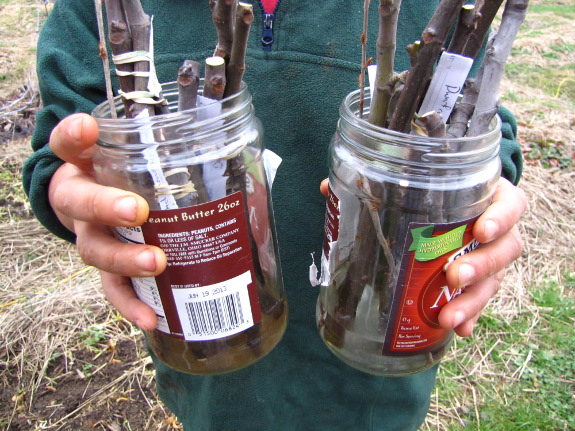
I felt much better about my
two previous fig-rooting failures when the experts explained that rooting
anything is dependent on a dozen different conditions, so you can think
you're doing the same thing and get completely different results from
different batches. Nevertheless, I'm also pretty sure I did
several things wrong in my previous fig-rooting experiments, so I'm
hopeful I'll see success in round three.
First of all, I didn't
use rooting hormones previously, and figs are supposed to be one of the
plants that do well with the chemical nudge. While it would be
easy to buy the exact rooting hormone recommended for figs (1,000 ppm
IBA in a 5 second dip), I wanted to test out my willow
rooting hormone.
So I soaked half my figs in water and half in willow tea the day before
potting them up.
I'm pretty sure my stump
dirt is just fine as
a rooting medium, so I'm repeating that part of 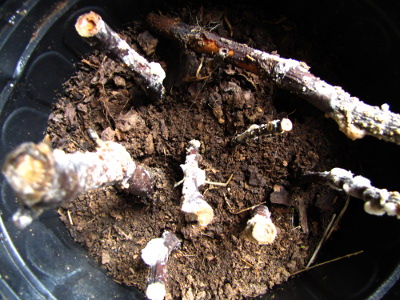 the procedure. However,
I think I was actually keeping things too damp and hot previously, thus
the overwhelming
fungal growth.
the procedure. However,
I think I was actually keeping things too damp and hot previously, thus
the overwhelming
fungal growth.
The step where someone
recommended wrapping
the cuttings in wet newspapers and sealing them inside a ziplock bag
also appears to have flaws. My new understanding is that this
procedure was meant to callous the cut tissue, but that would have
happened better without the damp paper towels. Rather than
modifying it, I decided to completely skip the callousing step this
time around.

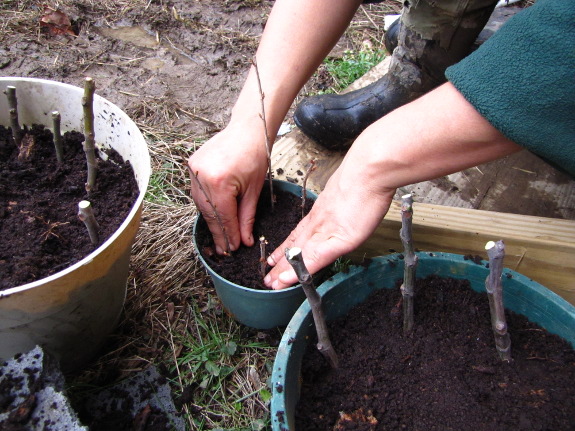
I'm also opting to leave
off the humidity dome (aka plastic bag) I'd previously put over top of
my pots. While necessary for softwood cuttings (if you don't have
a misting setup), holding in too much moisture can actually be a bad
idea with hardwood cuttings.
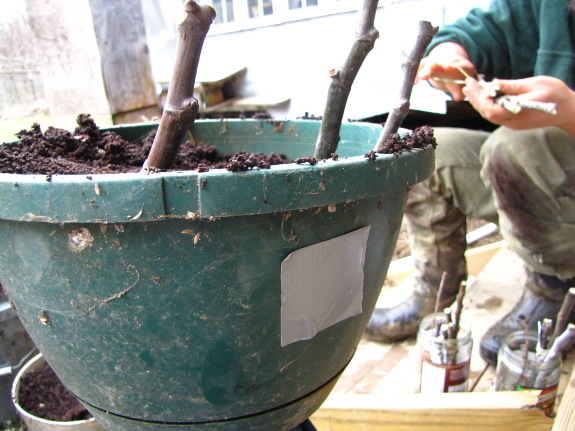
So fig rooting
experiment 3 is going to be ultra simple. I snipped the terminal
buds off any cuttings that had them, cut the bottoms of all the
cuttings to expose fresh tissue (since they'd been sent through the
mail), and pushed them most of the way into a pot of stump dirt.
I put four pots partially on a heating pad on low, and will water them
if the soil seems to be drying up.
I now know that an
absence of leaves is good news early on. You want the cuttings to
be putting all of their energy into root growth, so I won't worry if
the twigs don't leaf out for several weeks. That's also why too
much heat is a bad thing --- it can tempt the plants to use up fleeting
carbohydrates above ground before they have enough roots to become
active. Our house is pretty cool in the winter, though, so I
figure a heating pad on low will help rather than hurt.
Now it's just a matter
of waiting and hoping. Maybe three will be the charm? (By
the way, Brian also gave me a few Hinnonomuki Red Gooseberry cuttings,
which I'm treating the same way. Thanks so much for the excellent
scionwood, Brian!)
 What I've been leading up to
with my previous two posts is Fairlie's distinction between what he
calls "default livestock" and luxury animals. By Fairlie's
definition, default livestock are the animals we could raise primarily
on byproducts, food waste, or uncultivable land, with seed meal being a
halfway house --- it is a byproduct, but is also valuable by
itself. The chart above shows that if we stuck to default
animals, especially if we exempt seed-meal-fed animals from our
calculations, we'd be using barely any land at all to produce our meat
and dairy products. Although Fairlie doesn't come right out and
say it, I'll go out on a limb and say that at the default animal level,
it's more efficient to eat meat than not. Beyond that, meat is an
inefficient use of land.
What I've been leading up to
with my previous two posts is Fairlie's distinction between what he
calls "default livestock" and luxury animals. By Fairlie's
definition, default livestock are the animals we could raise primarily
on byproducts, food waste, or uncultivable land, with seed meal being a
halfway house --- it is a byproduct, but is also valuable by
itself. The chart above shows that if we stuck to default
animals, especially if we exempt seed-meal-fed animals from our
calculations, we'd be using barely any land at all to produce our meat
and dairy products. Although Fairlie doesn't come right out and
say it, I'll go out on a limb and say that at the default animal level,
it's more efficient to eat meat than not. Beyond that, meat is an
inefficient use of land.
 So what would your diet look
like if you only ate default livestock? Each person would get
about 40 pounds of meat per year plus about 86 pounds of milk (or 8.6
pounds of cheese). I don't keep track of how much dairy we buy,
but I figure Mark and I currently eat about 100 pounds of meat per year
apiece, over twice the default figure but less than the American
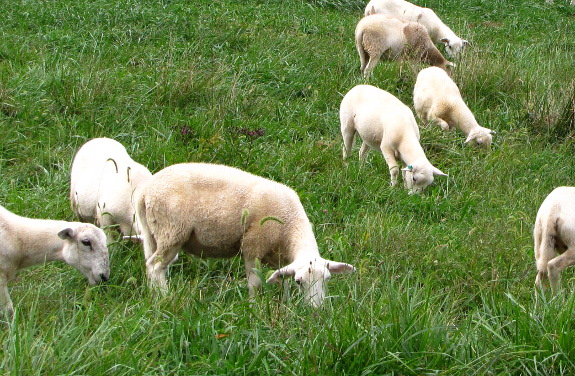
average of 166 pounds per year. Of our meat, the 76 pounds of
lamb and deer could probably count as default livestock since both
graze on non-arable land, but the 60 pounds of chicken meat is
grain-fed, as is the storebought bacon and ham we use to round out our
diet.
So what would your diet look
like if you only ate default livestock? Each person would get
about 40 pounds of meat per year plus about 86 pounds of milk (or 8.6
pounds of cheese). I don't keep track of how much dairy we buy,
but I figure Mark and I currently eat about 100 pounds of meat per year
apiece, over twice the default figure but less than the American
average of 166 pounds per year. Of our meat, the 76 pounds of
lamb and deer could probably count as default livestock since both
graze on non-arable land, but the 60 pounds of chicken meat is
grain-fed, as is the storebought bacon and ham we use to round out our
diet.
Of course, this is only
math until you start considering what default animals would really look
like on your homestead. Stay tuned for more tomorrow.
| This post is part of our Meat lunchtime series.
Read all of the entries: |
I went with a medium sized
cedar post we had laying around for today's chicken pasture gate
frame rebuild.
We decided to go with a
bigger width for times when we need to push a wheel barrow through.

I decided to do things a
little differently with our first bed of peas this year. Rather
than just soaking
the seeds to get
them off to a quick start, I put them in the sprouter and sprinkled 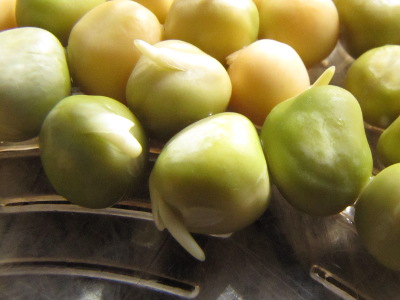 them with water several times
a day until the tiny roots began to push out of the seeds.
them with water several times
a day until the tiny roots began to push out of the seeds.
I also opted to plant
this early bed under the quick hoops, pulling out some declining
lettuce to make room. We'll know in a few months if these slight
alterations to our usual pea-planting method produce earlier edible-pod
peas.
 For me, the most interesting part
of Fairlie's
book is his
suggestions for integrating livestock into permaculture systems.
The idea is that if your animals have jobs other than just meat
production, they are no longer an inefficient use of land.
For me, the most interesting part
of Fairlie's
book is his
suggestions for integrating livestock into permaculture systems.
The idea is that if your animals have jobs other than just meat
production, they are no longer an inefficient use of land.
The most obvious
non-edible use of livestock is collecting the animals' manure to
fertilize the garden. However, Fairlie points out that even
there, fertilizing your garden with animal manure is about 10% to 43%
less land-efficient per calorie than setting aside a third of the
growing area to produce legume and grain compost crops. (The
different percentages depend on what type of animal you're raising to
make the manure, and both factor in the value of the meat and/or dairy
produced by the animals as well as by the crops.)
While you lose some
land-efficiency by depending on animals to concentrate organic matter
and nitrogen, traditional societies have long known that livestock are
worth the effort in varied landscapes. Grazers
on non-arable land will eat up nitrogen (atmospherically deposited or
fixed by legumes) and bring it home when they come to the stable at
night, then their manure can be used to fertilize the main growing
area. In other words, animals are acting as self-powered
nitrogen-accumulators, a bit like you might plant dynamic
accumulators in the
garden to bring up minerals from the subsoil that your garden plants
can't usually reach.
Meanwhile, livestock can
be a good buffer against famine, especially in the absence of
refrigeration. You can fatten a pig during a time of plenty, then
kill it and eat the meat when the days get short and not much is
growing. On a larger scale, Fairlie considers eating meat to be a
buffer against large-scale problems --- if we're used to the
inefficiency of feeding grains to pigs and eating the pigs, when times
get tough, we can just eat the grains and have a bit of wiggle room to
change what we're doing before we really go hungry.
 In general, though, the biggest bonus of
animals if you're trying to save energy is that they move by
themselves. If we used our livestock to transport people and
heavy objects, to mow between orchard trees, to clear new land, to turn
compost, and to control insects in our gardens, they would probably
look a lot more efficient than they do now. On the other hand, as
enticing as it is to consider returning to a previous era when a rugged
dairy cow might be expected to give milk and also to haul our supplies
through the mud from the parking area, energy is just so cheap at the
moment that mechanized transportation seems to make more sense.
In general, though, the biggest bonus of
animals if you're trying to save energy is that they move by
themselves. If we used our livestock to transport people and
heavy objects, to mow between orchard trees, to clear new land, to turn
compost, and to control insects in our gardens, they would probably
look a lot more efficient than they do now. On the other hand, as
enticing as it is to consider returning to a previous era when a rugged
dairy cow might be expected to give milk and also to haul our supplies
through the mud from the parking area, energy is just so cheap at the
moment that mechanized transportation seems to make more sense.
Perhaps the real lesson
homesteaders should take away from Fairlie's book is that we need to
ensure we're using the right default
livestock before
branching out. Are all of your food scraps being consumed by an
animal? If not, try adding a few chickens or a pig. Do you
have a lot of rough land and an absence of fertility in your
garden? Maybe you need to graze ruminants and fold them in a barn
or fallow field at night to get that manure.
Rather than planning
ahead for an apocalyptic vision where we don't have enough land to feed
our population, I think it's more useful to make changes in our lives
now to increase sustainability and also bliss. How would you like
to tweak your homestead to make its livestock more effective?
| This post is part of our Meat lunchtime series.
Read all of the entries: |

The bad news is that our Brinsea
EcoGlow chick Brooder we
love so much stopped working. It's getting power but the indicator
light blinks instead of being a steady glow and there's no heat.
The good news is we can send
it back to Brinsea to be repaired. How much will it cost? Anna forgot
to ask and the lady didn't say. I put it in the mail today with a
return authorization number, so I guess we'll find out sometime next
week.
We're debating ordering a
second EcoGlow chick brooder to make sure we have one ready to go in 3
weeks for our first chicks of 2013 and to have a back up in case we
want to increase our hatching numbers in the future.
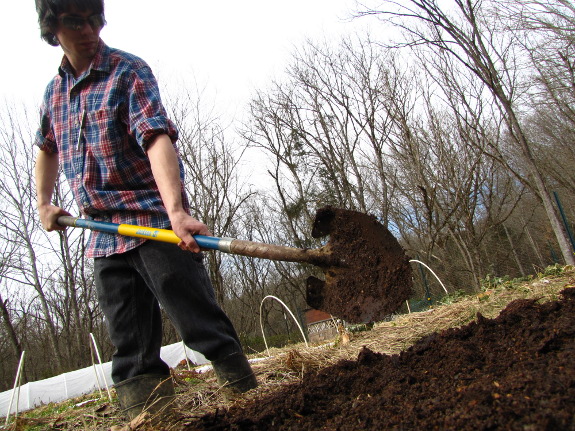
Astute readers will
probably notice that B.J. has been around a
lot. Mark and I decided to make him Walden Effect's very first intern, so you'll be seeing more of
him in the days to come.
During his first week
here, it became clear that B.J. has quite a knack
for growing things and for photography, in addition to his deep
understanding of the Appalachian
tradition of wildcrafting.
I'll admit that part of the reason we keep him around is because
listening to him talk is like reading a Foxfire book --- I keep
learning things all day long.
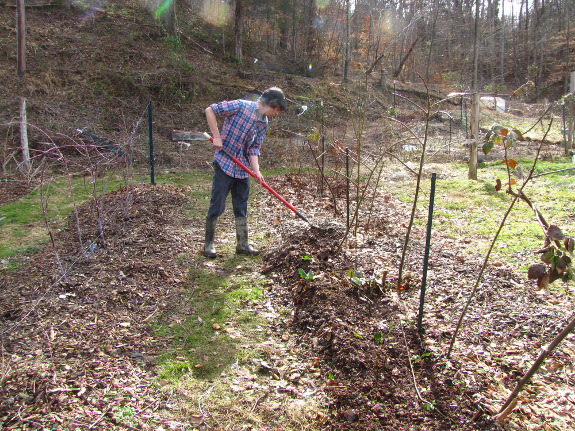
Plus, B.J. isn't
allergic to facebook the way I am. In the week he's been on the
job, B.J. has already spiced up our
facebook page
into a flourishing community...replacing the stale auto-posting board
it used to be. (Part of this may be because we promised him a
bonus of a nice camera when we hit 1,000 fans --- help him along and
friend us today.)
The main reason Mark and
I decided to go ahead and take the internship
plunge, even though we were vacillating last year, is that B.J. is a
local guy. That means we're not responsible for making sure he
has a place to stay, food to eat, or friends to hang out with. So
we can be antisocial most of the time and just enjoy his rivetting
company three hours a day.
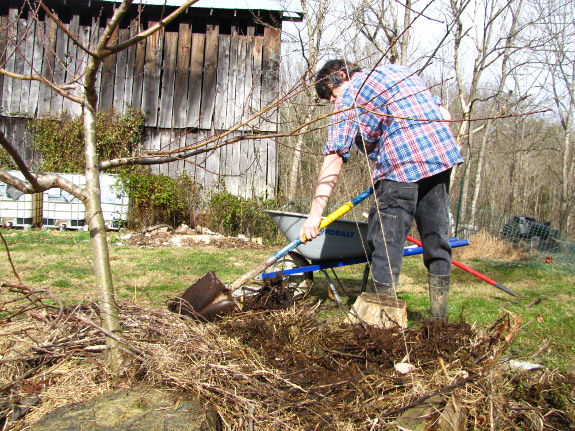
Meanwhile, B.J. is our
guinea pig in another way. I hypothesize
that Appalachia wouldn't have to be so poverty-stricken if everyone
with a passion --- regardless of their level of education --- developed
some kind of online empire to bring in money from the outside
world. B.J. clearly has enough knowledge to write a stellar ebook
about old timey Appalachian skills, so hopefully you'll see me announce
that here
before the summer's out.
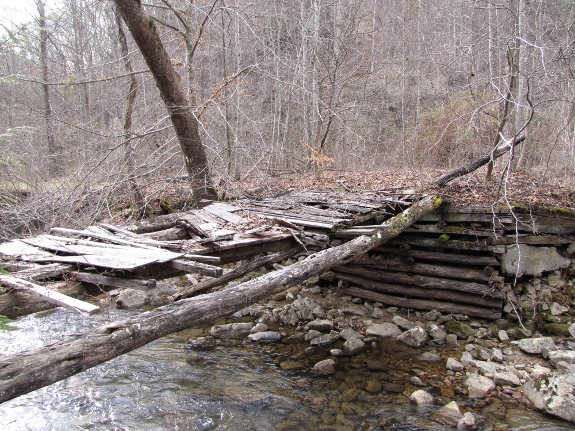
On my way to Hanging Rock, I
passed this very old bridge. I can't tell you much about it, other than
it is very old, but it is still an interesting sight. Perhaps someone
could inform me on the technique in which this bridge was built?

Little Stoney Creek was a popular location for moonshiners back in the day. The frigidly cold water, flowing from the top of High Knob, is said to make the best moonshine around.
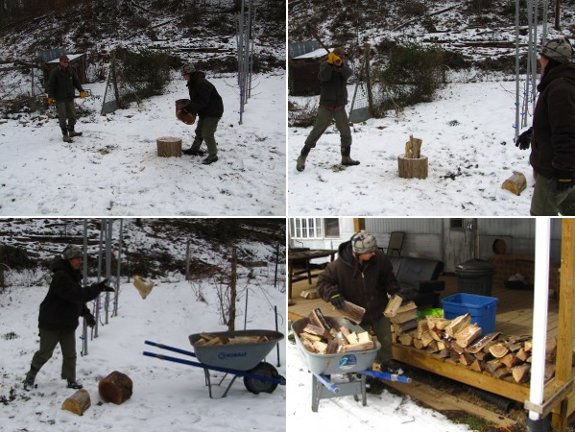
1. Anna sets them up.
2. I chop with the Chopper
1.
3. Anna collects pieces while
I catch my breath.
4. Stack a wheel barrow load
on the porch and repeat.
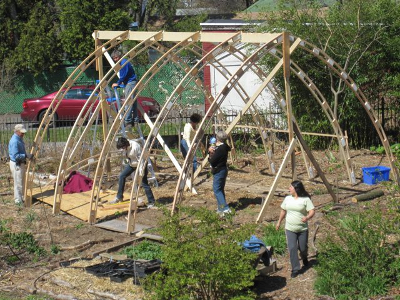 I've
been pretty negative about the idea of a greenhouse in the past
because our quick hoops do a great job with cold-hardy crops, and I'm
simply not willing to heat a greenhouse to keep tropicals going all
winter. However, Paradise
Lot (which I'll
review later) included information on what they call bioshelter
greenhouses, one of which they report allows citrus to grow without
additional heat during Massachusetts winters. After some web
browsing, I realized that bioshelters are really just a rebranding of
what was called a passive-solar greenhouse in the 1970s --- both types
of structure are designed to keep a greenhouse as warm as possible with
no heat source other than the sun.
I've
been pretty negative about the idea of a greenhouse in the past
because our quick hoops do a great job with cold-hardy crops, and I'm
simply not willing to heat a greenhouse to keep tropicals going all
winter. However, Paradise
Lot (which I'll
review later) included information on what they call bioshelter
greenhouses, one of which they report allows citrus to grow without
additional heat during Massachusetts winters. After some web
browsing, I realized that bioshelters are really just a rebranding of
what was called a passive-solar greenhouse in the 1970s --- both types
of structure are designed to keep a greenhouse as warm as possible with
no heat source other than the sun.
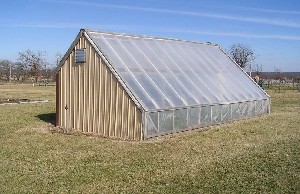 Websites galore sing the
praises of bioshelters, which some folks combine with fish ponds,
chickens, or rabbits to create a winter permaculture paradise.
However, I didn't find any data on nighttime low temperatures until I
stumbled across this
excellent page by
the Missouri Extension Service. Eric Lawman built a 12-by-24-foot
greenhouse, insulated on the north side and covered with two layers of
plastic on the south side, in zone 5 in Missouri. With the help
of twenty 55-gallon barrels, the greenhouse lows hover between about 35
and 45 Fahrenheit all winter long. The total construction cost
was $3,275 in 2005, and electricity is only used to run exhaust fans on
hot days and to run another small inflater fan to keep the two layers
of plastic spread apart on the south wall.
Websites galore sing the
praises of bioshelters, which some folks combine with fish ponds,
chickens, or rabbits to create a winter permaculture paradise.
However, I didn't find any data on nighttime low temperatures until I
stumbled across this
excellent page by
the Missouri Extension Service. Eric Lawman built a 12-by-24-foot
greenhouse, insulated on the north side and covered with two layers of
plastic on the south side, in zone 5 in Missouri. With the help
of twenty 55-gallon barrels, the greenhouse lows hover between about 35
and 45 Fahrenheit all winter long. The total construction cost
was $3,275 in 2005, and electricity is only used to run exhaust fans on
hot days and to run another small inflater fan to keep the two layers
of plastic spread apart on the south wall.
 Of course, even with the
heat problem dealt with, greenhouses do have the pest issue, but
information on such a well-designed passive solar greenhouse does push
me closer to considering the option. Maybe that would be the best
use of the sunniest spot in our core homestead --- the vertical bank on
the south-facing side of the gully.
Of course, even with the
heat problem dealt with, greenhouses do have the pest issue, but
information on such a well-designed passive solar greenhouse does push
me closer to considering the option. Maybe that would be the best
use of the sunniest spot in our core homestead --- the vertical bank on
the south-facing side of the gully.


The outdoor
worm bin soil temperature is below freezing today. We can only hope
there's a less freezing spot near the middle to keep them alive till
Spring.
I wonder if a small plexiglass
window in the door would help to raise the temperature enough to
provide a small area of warmth?
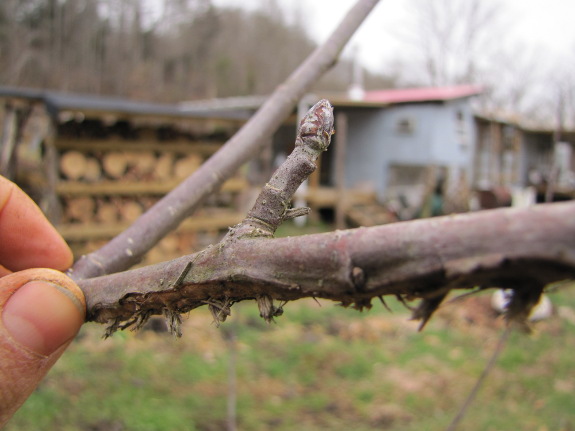
Remember how last
year's periodic cicadas laid their eggs in all my young fruit tree
branches and wrought havoc? It turns out even the
damage had a silver lining.
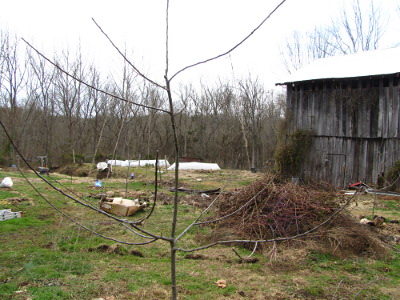 I've read that some
orchardists get sick of waiting for their apples to bear, so they very
carefully and partially girdle twigs to tempt the tree to produce
flower buds. Despite my impatience to taste our first homegrown
apple, I haven't really been tempted to give such a dicey technique the
time of day. But our cicadas seem to have done the job for me.
I've read that some
orchardists get sick of waiting for their apples to bear, so they very
carefully and partially girdle twigs to tempt the tree to produce
flower buds. Despite my impatience to taste our first homegrown
apple, I haven't really been tempted to give such a dicey technique the
time of day. But our cicadas seem to have done the job for me.
While I was out pruning
and training our young apple trees, I noticed that the cicada-damaged
twigs seemed to be full of flower buds, while the undamaged twigs
weren't. Perhaps cicadas in 2012 will mean apples in 2013?
I'm not holding my breath, but it's an interesting coincidence if those
plump buds do open into flowers.
 I've got
two new chicken books for your reading pleasure this week. First,
the free one....
I've got
two new chicken books for your reading pleasure this week. First,
the free one....
Hop,
Step, Peck...RUN! is a children's picture book I wrote before I
learned to self-publish. It stars Lucy and our first set of
chickens, back when we kept them in tractors.
Rather than selling the
picture book separately, I added it as a bonus at the end of The
Working Chicken.
If you've bought that ebook on Amazon, you should get an email from
them shortly letting you know that you can download the updated
version for free. If you don't have the Amazon ebook, just
email anna@kitenet.net and I'll send you a pdf copy
to read on your computer. There are no strings attached, but I
will add you to my book email list unless you ask not to be included.
 The second ebook is more
serious (and is written for adults). Permaculture
Chicken: Pasture Basics sums up all of my readings and research to
make it easy to keep chickens and grass happy together. I'll post
highlights here over the course of the week, or you can splurge
99 cents to get your own copy on Amazon (which can
be read on
nearly any device.)
Here's the blurb:
The second ebook is more
serious (and is written for adults). Permaculture
Chicken: Pasture Basics sums up all of my readings and research to
make it easy to keep chickens and grass happy together. I'll post
highlights here over the course of the week, or you can splurge
99 cents to get your own copy on Amazon (which can
be read on
nearly any device.)
Here's the blurb:
Included in this volume are an explanation of chicken digestion and behavior, pasture specifics like size and shape, a rundown on which traditional pasture plants chickens enjoy, tips on maximizing plant growth during rotation, and an explanation of how to establish new pastures and maintain existing grazing areas. Cut your feed costs with pastured chickens!
As usual, I'll also make the ebook free on Amazon on Friday for those
who want to wait for a free copy, and you can email me Friday for a
free pdf copy as well. Thanks for reading (and
double thanks if you find the time to leave a review on Amazon)!
| This post is part of our Permaculture Chicken: Pasture Basics
lunchtime series.
Read all of the entries: |

It took some creative
winching, but we managed to get the utility trailer back up the hill.
I think it was about 3 years
ago when I was trying to move it and it got away from me and slid down
the hill.
We used Bradley's portable
winch combined with some
elbow grease.
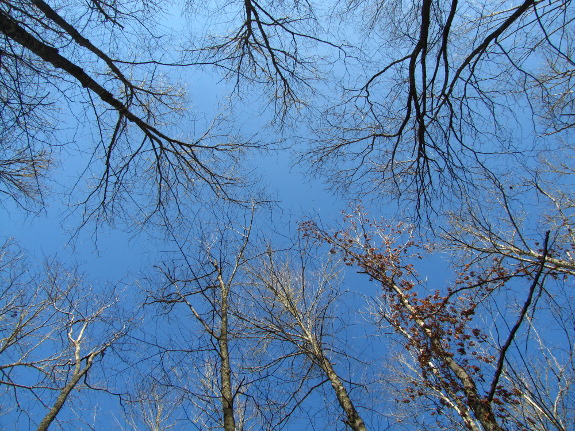
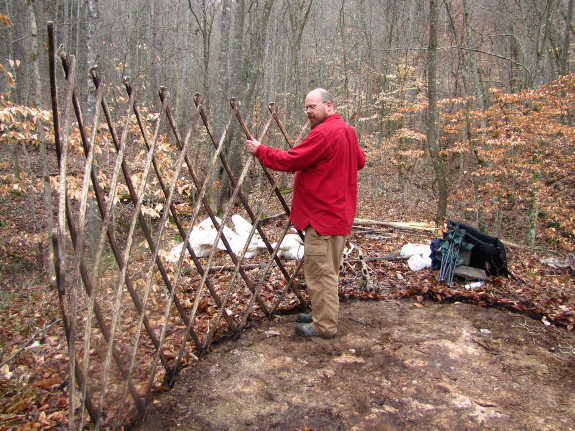 Remember the yurt circle? I've had the patch of
bare ground in the back of my mind for the last month. Planting
anything useful there butts up against some severe design restrictions:
Remember the yurt circle? I've had the patch of
bare ground in the back of my mind for the last month. Planting
anything useful there butts up against some severe design restrictions:
- Full shade. I mean really full shade, not the kind you'll find under a fruit tree.
- Deer. The yurt circle isn't on a particular deer path, but anything outside our core homestead will get nibbled if it's tasty.
- Lack of attention.
I only walk that way a few times a year and we can't currently even get
a wheelbarrow out there. So anything I plant will need to mostly
fend for itself.
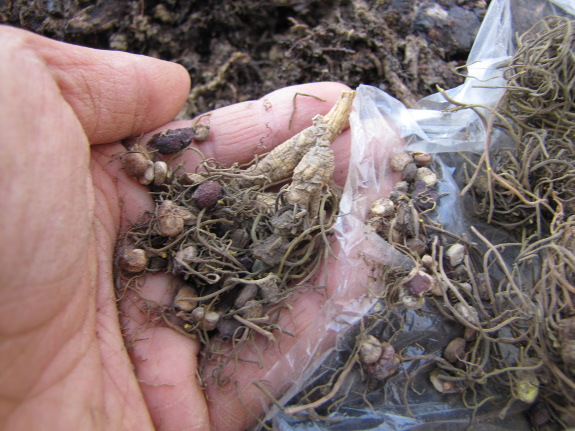
When B.J. brought over some ginseng
seeds, tiny ginseng roots, and goldenseal roots, a plan began to form
in my mind....
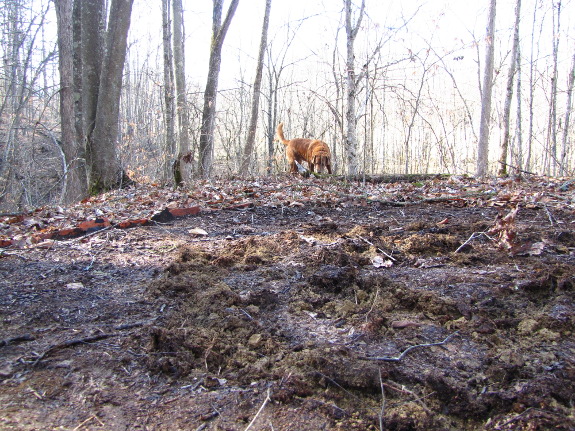
 I realized that forest herbs
like ginseng, goldenseal, and ramps
need no attention except for the harvest and are adapted to heavy
shade. On the other hand, they could get eaten down to the ground by deer if I don't
fence the browsers out, but could a ring of thorny gooseberries create
an edible fence?
I realized that forest herbs
like ginseng, goldenseal, and ramps
need no attention except for the harvest and are adapted to heavy
shade. On the other hand, they could get eaten down to the ground by deer if I don't
fence the browsers out, but could a ring of thorny gooseberries create
an edible fence?
I'm not willing to buy
gooseberries to test out my hypothesis, but I did put the ginseng and
goldenseal into the ground and will plan to propagate some of my
gooseberries this summer. If I end up with a heaping helping of
gooseberries, it'll be worth trying some in deep shade.
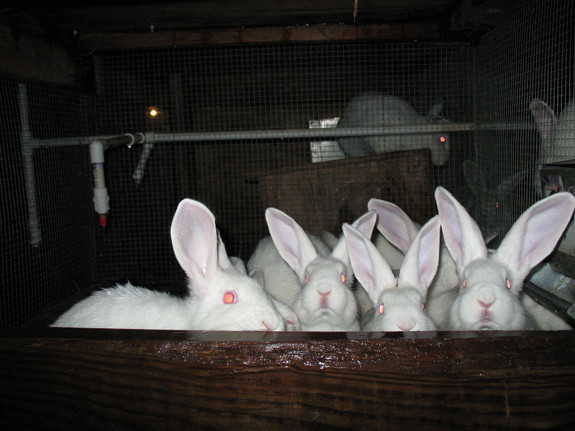
It's been a while since we've
written a rabbit post. In that time, we've separated the
litter from the mother. She had started thumping her foot at
the kits in early January, and since the mother showed signs of
becoming irritable with the kits, we decided it was probably best to go
ahead and wean them. Since then, they've been eating quite
voraciously and growing fast.
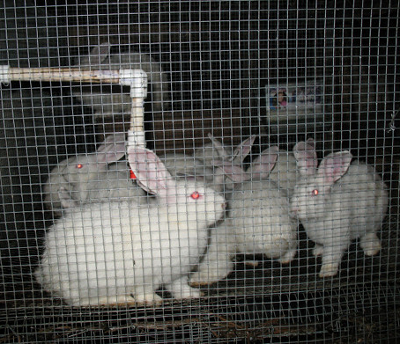 We bought what is advertised as a 5 lb
capacity feeder from tractor supply and we are having to fill it at
least once a day, sometimes twice. We purchased a feeder rather
than making
another simply due to the lack of time that we've had available as
of late. The purchased feeder holds a volume of two quarts of
rabbit feed which seems a bit less than 5 lbs to me. In addition
to rabbit feed, we have been supplementing with clover, hay, lettuce,
carrots, and other items from the garden & scraps. The
stereotype of rabbits and carrots seems accurate. Dawn reports a
4 inch piece of carrot had three young bunnies devouring it at once,
and would have been more if they could have fit in the circle.
We bought what is advertised as a 5 lb
capacity feeder from tractor supply and we are having to fill it at
least once a day, sometimes twice. We purchased a feeder rather
than making
another simply due to the lack of time that we've had available as
of late. The purchased feeder holds a volume of two quarts of
rabbit feed which seems a bit less than 5 lbs to me. In addition
to rabbit feed, we have been supplementing with clover, hay, lettuce,
carrots, and other items from the garden & scraps. The
stereotype of rabbits and carrots seems accurate. Dawn reports a
4 inch piece of carrot had three young bunnies devouring it at once,
and would have been more if they could have fit in the circle.
The kits have taken to their
new accomodations quite well, though some seem a bit skittish.
Perhaps our busy life lately hasn't allowed enough interaction with
them. Individual personalities show through though as some of
them will approach the front of the hutch when we open it for feeding,
while others crowd to the rear. Dawn says the runt is the
friendliest of the bunch.
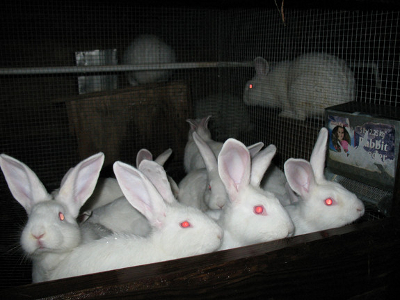 Some information sources
recommend that kits should be sexed and separated at the time of
weaning. At present, we have all the kits together. This is
partly due to practical reasons - we haven't had time to build another
hutch - and partly due to the age at which we weaned them. At 4-6
weeks, they are difficult to sex. There are a couple of reasons
given for separation of the sexes at an early age. One being a
claim that they mature more quickly when separated by sex. The
other reason is that there should be less fighting as they mature and
no chance of breeding when they are past three months of age.
Some information sources
recommend that kits should be sexed and separated at the time of
weaning. At present, we have all the kits together. This is
partly due to practical reasons - we haven't had time to build another
hutch - and partly due to the age at which we weaned them. At 4-6
weeks, they are difficult to sex. There are a couple of reasons
given for separation of the sexes at an early age. One being a
claim that they mature more quickly when separated by sex. The
other reason is that there should be less fighting as they mature and
no chance of breeding when they are past three months of age.
With the way life has been
lately, I am quite thankful that our rabbits have required little
attention of late. We still try to interact with them as much as
we can so that they remain docile, but also so that hopefully their
life is a bit more pleasant with some interaction.
Shannon and Dawn
will be sharing their experiences with raising meat rabbits on Tuesday
afternoons. They homestead on three acres in Louisiana when time off
from life and working as a sys admin permits.

This post is mainly to record
the date when we changed the oil in the generator.
The book says to change it
every 8 hours of operation or 6 months, whichever comes first.
I'm planning on adding
synthetic oil, which should last longer than conventional oil and give
the engine more protection. One way to know for sure when the oil needs
to be replaced is to measure the viscosity with a new device I saw in Farm
Show magazine called Lubricheck. I'm not sure how well it works,
but it might pay for itself in a few years at only 40 dollars.
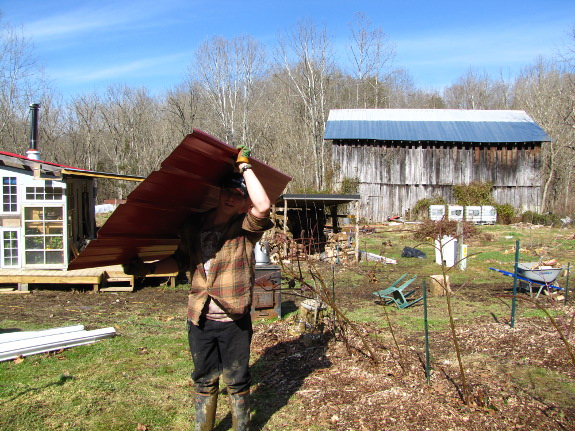
For some reason, we
always want to haul a lot of heavy things in and out in February,
despite this being the time when the
floodplain is muddiest.
In previous years, we've stressed over the transportation issue, but
we've gotten a bit more creative this year.
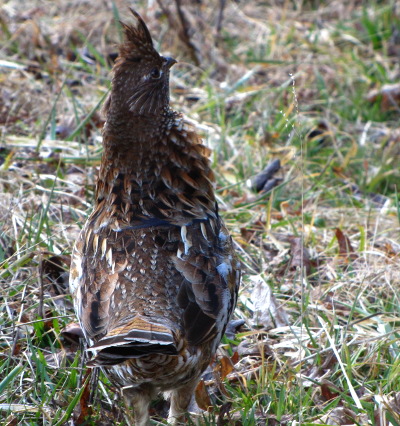 B.J.'s
cousin Dillon asked if he could come over and make some spending money
for paintball on a couple of snow days, and we quickly turned him into
a pack mule. While I figure we'd save a little cash by running a
motorized vehicle in and out, human power is actually pretty efficient
monetarily, especially if you have a ninth grader on hand who wants to
build his muscles for football. He didn't grouse at all.
B.J.'s
cousin Dillon asked if he could come over and make some spending money
for paintball on a couple of snow days, and we quickly turned him into
a pack mule. While I figure we'd save a little cash by running a
motorized vehicle in and out, human power is actually pretty efficient
monetarily, especially if you have a ninth grader on hand who wants to
build his muscles for football. He didn't grouse at all.
Meanwhile, we're
embarking on a truck-share arrangement with B.J. He needs a
vehicle and we want to be able to haul things about once a month.
We figure if we get him a truck and he maintains it, we won't end up
with the problem where a good truck goes bad from sitting around most
of the time. There's even a possiblity we might be able to borrow
Dillon's four wheeler to haul the golf cart up to the trailer for some
TLC.

All of this means more
time for me to do the things I love most --- like raking leaves out of
the woods and kill-mulching spots for new berries. Mark talked me
into going a little overboard with our perennial order this year, and I
felt confident enough that we'd have time to dote on the new berries
that I went ahead and ordered red currants, honeyberries, mulberries,
and a Siberian pea shrub. With berry bushes on their way and a
cat in my lap, this is very blissful time of year.
 Although
I've been experimenting with the best way to pasture chickens
for about a decade, the real root of my journey began in
childhood. The photo to the left shows my sister feeding some of
the
chickens that ran wild in our suburban
neighborhood, foraging for a living in backyards and in a small wooded
lot.
Although
I've been experimenting with the best way to pasture chickens
for about a decade, the real root of my journey began in
childhood. The photo to the left shows my sister feeding some of
the
chickens that ran wild in our suburban
neighborhood, foraging for a living in backyards and in a small wooded
lot.
A few people tossed out
bird seed for our neighborhood flock from time to time,
but the fowl primarily made their own way in the world, roosting in
trees, raising their chicks in secluded bramble patches, and hunting
through the leaves for dinner. I figured if these feral chickens
could make a living in the city, surely I could replicate their success
in a more controlled fashion on my own homestead.
Not counting the wild
chickens that roamed our street when I was a
child, I began my chicken-keeping career roughly a decade ago  with
the
traditional coop-and-run combo that most old-school chicken-keepers
favor. As you can see in the photo to the right, the run quickly
turned into a bare, muddy mess. In
retrospect, I wonder if my flock was any better off than
factory-farmed hens, who at least don't have to deal with cold, wet
feet.
Lesson learned: you can't pasture a lot of chickens in a small space
with
no rotation and expect any greenery to remain.
with
the
traditional coop-and-run combo that most old-school chicken-keepers
favor. As you can see in the photo to the right, the run quickly
turned into a bare, muddy mess. In
retrospect, I wonder if my flock was any better off than
factory-farmed hens, who at least don't have to deal with cold, wet
feet.
Lesson learned: you can't pasture a lot of chickens in a small space
with
no rotation and expect any greenery to remain.

After Mark and I moved
to our homestead, I read Andy Lee and
Patricia Foreman's Chicken Tractor
and decided the authors had come up with a brilliant solution to the
puzzle of
pastured poultry. Our homemade
tractors allowed us
to pull the
flock to a new patch of lawn every day, ensuring the hens didn't spend
long on muddy ground and that they always had something green to enjoy.
 But the chicken tractor
system also turned out to be imperfect for our
homestead. When we decided to scale up past a few laying hens to
raise our own meat birds, we learned that roosters and small tractors
don't
mix, and that big tractors are heavy and hard to move by hand.
Meanwhile,
we were becoming discontented with chicken tractors during the winter,
not because the chickens couldn't take the cold in an exposed tractor,
but because our lawn doesn't grow during the winter months. So
our
chickens
eventually ended up with the cold, muddy feet I was trying to avoid.
But the chicken tractor
system also turned out to be imperfect for our
homestead. When we decided to scale up past a few laying hens to
raise our own meat birds, we learned that roosters and small tractors
don't
mix, and that big tractors are heavy and hard to move by hand.
Meanwhile,
we were becoming discontented with chicken tractors during the winter,
not because the chickens couldn't take the cold in an exposed tractor,
but because our lawn doesn't grow during the winter months. So
our
chickens
eventually ended up with the cold, muddy feet I was trying to avoid.
Our next experiment
involved rotational
chicken pastures, a
modified
version of which we still use today. The first year, I raised
broilers and a broody hen in the pastures and kept our main laying
flock in tractors. After the meat birds went into the freezer, I
added the rest of the layers to the pasture and was struck by the
difference in comb color between our broody hen (who had been on
pasture all summer) and the tractored layers of the
same age. The truly-pastured  broody
hen had a brilliant red comb,
a sure sign of good health, while our tractored hens looked drab in
comparison—the rotational pasture had proven its worth.
broody
hen had a brilliant red comb,
a sure sign of good health, while our tractored hens looked drab in
comparison—the rotational pasture had proven its worth.
But, of course, I still had a steep learning curve ahead of me.
The photo to the left shows my first rotational pasture after a summer
of
hard chicken scratching. Yes, it did turn into a moonscape nearly
as bad as my non-rotational chicken run. I had a lot left to
learn
about maintaining a quality rotational-pasture system, a topic that
fills the bulk of Permaculture
Chicken: Pasture Basics.
 As you can tell, I made a lot
of mistakes on my way to chicken
self-sufficiency,
and I'll be the first to admit that I'm not entirely there yet.
Building any kind of permaculture system is a process of trial and
error as you create a cultivated ecosystem that matches your climate
and
growing area. But hopefully my experiences will jumpstart your
own chicken-pasturing experiments so you reach your goal as quickly as
possible.
As you can tell, I made a lot
of mistakes on my way to chicken
self-sufficiency,
and I'll be the first to admit that I'm not entirely there yet.
Building any kind of permaculture system is a process of trial and
error as you create a cultivated ecosystem that matches your climate
and
growing area. But hopefully my experiences will jumpstart your
own chicken-pasturing experiments so you reach your goal as quickly as
possible.
| This post is part of our Permaculture Chicken: Pasture Basics
lunchtime series.
Read all of the entries: |

It seems like the Champion generator holds half a quart of oil.
Tilting one of the wheels up
makes adding the oil easier, but it needs to be level for a dip stick
check.
The next emergency power
project will be to see if we can find a kit to convert this engine over
to using propane.
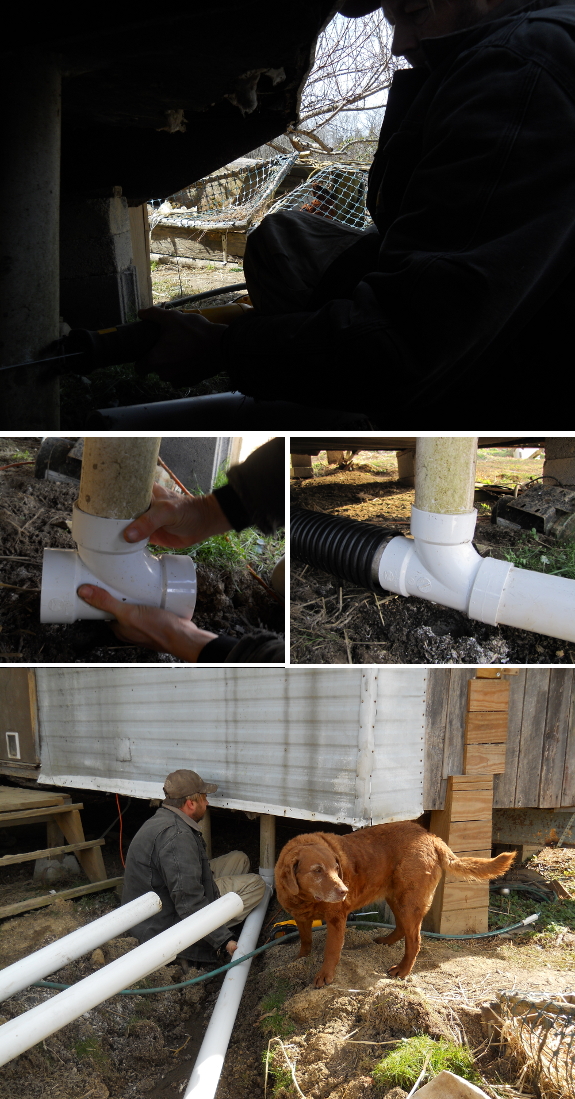
After I
carried in all the pipes, I got scared of doing the
plumbing and put off finishing our greywater
wetland for a couple
of weeks. Mark kindly gave me a hand cutting the existing drain
and installing the connectors, and then he helped me lift the world's
largest rock to expand the inlet
area.

We tested the flow
before adding extra rocks, and then afterwards. It looks like
it's going to work, but we'll wait a few days before burying the pipes
to make sure we didn't forget anything important.
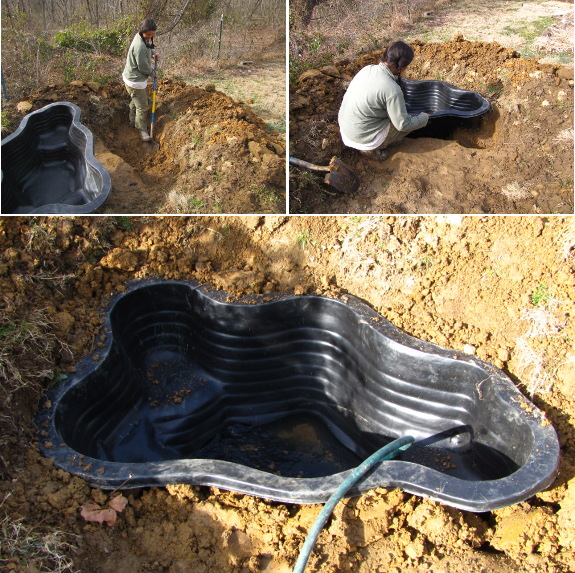
In the meantime, I got a
bee in my bonnet and decided to install a tiny pond liner Mark's mom
had given us years ago. I put it at the very end of the wetland,
raised up a couple of inches so that water won't flow in unless the
whole thing is well inundated. The pond has no real farming
significance and will probably just be home to a couple of goldfish and
maybe a lotus, just for fun.
Actually, the whole
greywater project feels like fun. I'm itching to plant into it
once we get an idea for which parts will stay sodden and which will
just be damp.
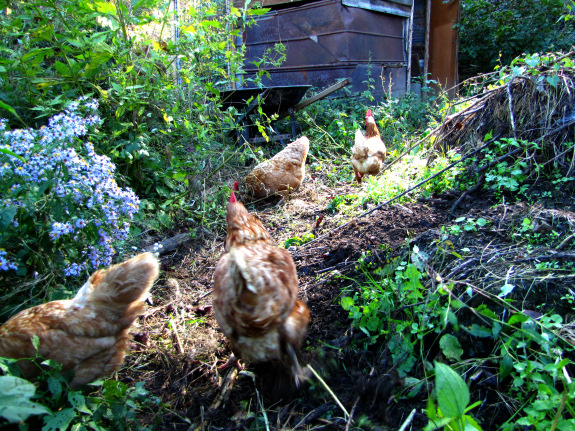
So what do chickens eat
on pasture? I started out my
adventure
assuming that a
pasture for chickens was the same as a pasture for cows and other
ruminants, but I was very wrong, for reasons you'll soon understand.
 A
good place to start when learning about chicken nutrition is with the
birds' wild counterparts. Most scientists believe that chickens
were
domesticated from red junglefowl (Gallus
gallus), which
currently live in southeast Asian. There
may have also been a bit of
hybridization between the red junglefowl and their cousin the gray
junglefowl (Gallus
sonneratii)
when developing the domesticated chicken, but we'll stick with
exploring the red junglefowl's diet here.
A
good place to start when learning about chicken nutrition is with the
birds' wild counterparts. Most scientists believe that chickens
were
domesticated from red junglefowl (Gallus
gallus), which
currently live in southeast Asian. There
may have also been a bit of
hybridization between the red junglefowl and their cousin the gray
junglefowl (Gallus
sonneratii)
when developing the domesticated chicken, but we'll stick with
exploring the red junglefowl's diet here.
Neither kind of
junglefowl is a vegetarian. Scientists who cut
open the crops of wild junglefowl discovered that more than half of the
mashed up food therein typically consisted of insects and other
invertebrates (especially
termites). Various plant matter was
also represented, with an emphasis on fruits, berries, bamboo seeds,
nuts, and
young leaves.
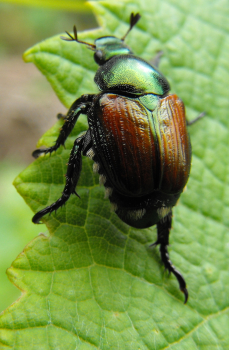 Harvey
Ussery sums up this
information in a slightly different fashion in The Small-Scale Poultry Flock.
He suggests that we need to consider three food groups when nourishing
our flock:
Harvey
Ussery sums up this
information in a slightly different fashion in The Small-Scale Poultry Flock.
He suggests that we need to consider three food groups when nourishing
our flock:
Seeds and fruits for a high-energy source of carbohydrates and fats (and some protein).
Animals (whether that's bugs or beef liver) for well-rounded protein.
Sounds a lot like a
healthy human
diet, doesn't it? If you think of
the worms your chickens scratch up as shrimp, the grasshoppers they nab
out of the air as beef, the sourgrass as
lettuce, and the grass seeds as rice, then you'll realize your chickens
are getting a well-rounded meal out of pasture.
| This post is part of our Permaculture Chicken: Pasture Basics
lunchtime series.
Read all of the entries: |

We've had this second hand
sink for years(Thanks Silas),
and today it came in handy for parts.
The greywater
project required some
sink modifications, and I didn't want to drop everything for a hardware
store trip so I shifted into scavenger mode.
It was tricky getting the
huge nut to turn without oversized channel locks and took several
coordinated wacks with a hammer and screwdriver to free up.
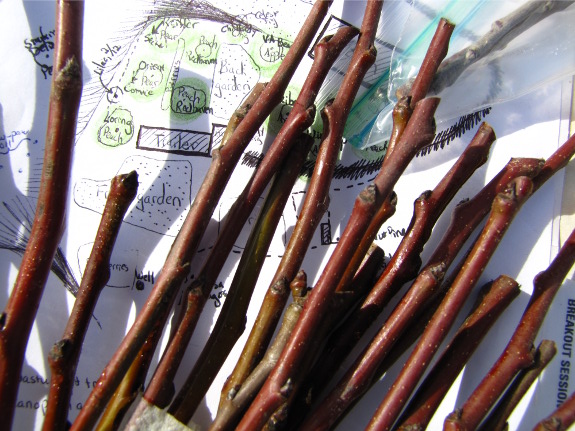
The positive side of our
topworking
failure last year is
that the pear trees produced lots of small
twigs at just the right spot to do the easier whip-and-tongue
graft
this year. I've been swapping scionwood with several readers,
too, so
I have plenty to graft onto every twig in the right size range, meaning
that I was really frameworking
this year instead of topworking.
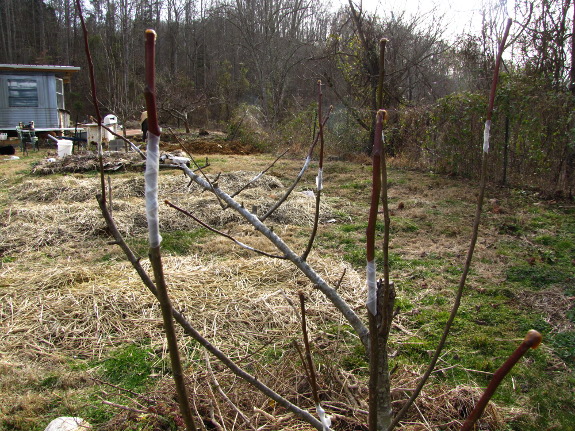
I also splurged on real
grafting supplies
this winter, which made the project easier. Hopefully at least a
few of the twelve grafts I made will take this summer, at which point I
can prune away wood of the old variety. Here's hoping we'll have
tastier pears in a few years!
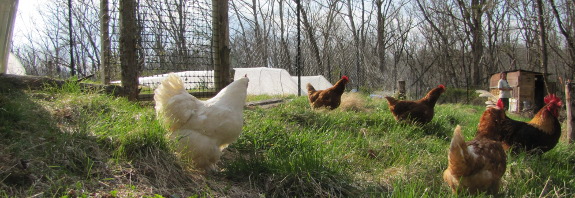
The gist of my
last post is—a chicken cannot live on
grass alone. But why not, if a cow can?
 A cow's digestive system is
very different from that of a
chicken. Cows are ruminants with a four-chambered stomach and
with the
ability to chew their cud (regurgitating swallowed food to grind it up
further at their leisure). In addition, the cow's gut contains a
large quantity of bacteria, fungi, and protozoa that help digest the
cellulose that makes up such a large percentage of the grass
leaf. That means a cow can get energy from tough, woody blades of
grass (or from hay, which is nearly entirely cellulose), while most
other animals can't.
A cow's digestive system is
very different from that of a
chicken. Cows are ruminants with a four-chambered stomach and
with the
ability to chew their cud (regurgitating swallowed food to grind it up
further at their leisure). In addition, the cow's gut contains a
large quantity of bacteria, fungi, and protozoa that help digest the
cellulose that makes up such a large percentage of the grass
leaf. That means a cow can get energy from tough, woody blades of
grass (or from hay, which is nearly entirely cellulose), while most
other animals can't.
Chickens don't have any
of those digestive assets. The birds
don't even have teeth (although they do grind up food in their gizzards),
so they can't break apart tougher blades of grass in order to swallow
them. And chickens wouldn't want to eat tough grass anyway, since
they'd quickly fill up their small gizzards with low-quality food and go
hungry. Instead, if you watch a chicken on pasture, you'll see
the birds nibbling on tender young grass leaves, but spending more time
snapping up bugs, pecking apart
easily-digestible broadleaf plants, and swallowing seeds.
To read more about
pasturing chickens, check out my ebook Permaculture
Chicken: Pasture Basics, which is free on Amazon today. If
you enjoy the read, please consider taking a few minutes to leave a
review so strangers will take a chance on my ebook. Thanks for
reading!
| This post is part of our Permaculture Chicken: Pasture Basics
lunchtime series.
Read all of the entries: |
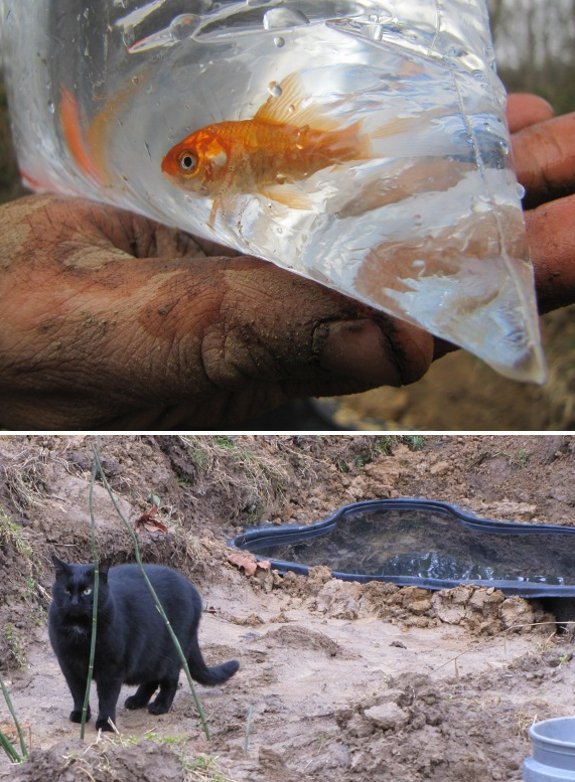
Don't tell Huckleberry that. He seems to think they're a surprise birthday gift.
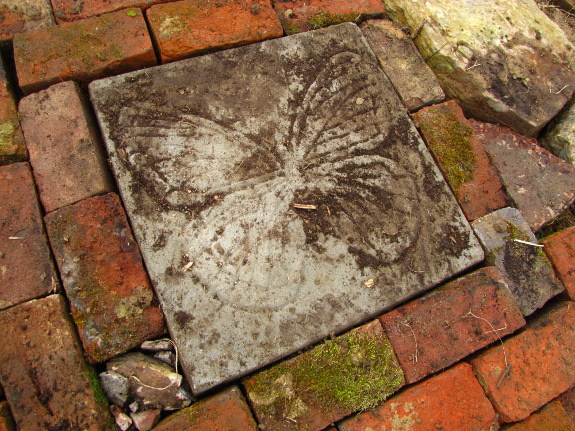
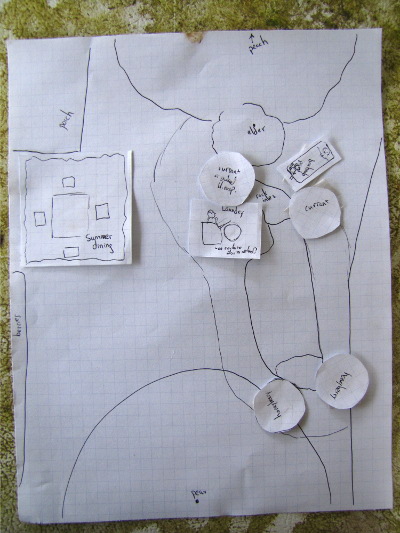 I'm
lavishing a lot of love on the greywater
wetland because (with the addition of a porch allowing access to the back
door) that spot will likely become a summer living area. I
figured I should put in a bit of time to plan out the elements I wanted
to include rather than tossing them together willy-nilly.
I'm
lavishing a lot of love on the greywater
wetland because (with the addition of a porch allowing access to the back
door) that spot will likely become a summer living area. I
figured I should put in a bit of time to plan out the elements I wanted
to include rather than tossing them together willy-nilly.
I started out by making
a mostly-to-scale map on graph paper, then cut out a summer dining
area, a laundry nook, and a bathtub. I tossed in some fruiting
shrubs, too, since I have some on the way that can go here just as well
as in the blueberry patch. A bit of moving pieces around resulted
in the diagram to the left.
I decided to start with
the laundry nook, which I'm envisioning as a cobbled area right next to
the greywater wetland. That way we won't have to mow around the
wringer washer any more, and I'll be able to just pour the water onto
the stones to run into the wetland with our dishwater. The result
turned out so pretty that I may be forced to paint our rusting wringer
to fit in.
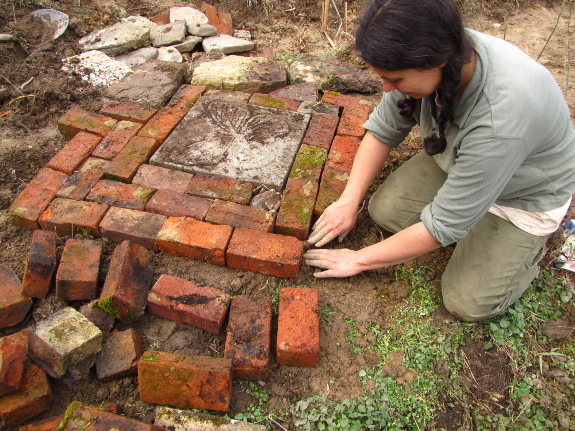
I'm well aware I did
several things wrong with my brick-laying, but I suspect the results
will be just fine. I didn't have enough rocks to go around, so I
used the best-looking hand-made bricks from the old chimney even though
they'll probably crumble with age. I also didn't lay 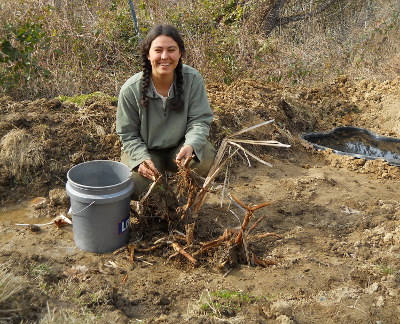 down any sand underneath,
although I did have a pretty even bed of bare soil to work with.
Still, adding big stones from the old house around the edges will
probably hold it all together, and I like the idea of a bumpy,
ancient-looking surface.
down any sand underneath,
although I did have a pretty even bed of bare soil to work with.
Still, adding big stones from the old house around the edges will
probably hold it all together, and I like the idea of a bumpy,
ancient-looking surface.
The next step was to add
some wetland plants to the damp spot where dishwater enters the
swamp. B.J. did an excellent job finding cattails and horsetails
in the woods from my vague directions, but the other plants weren't yet
showing above the ground. I'll add more species later, to the
pond as well as the swampy ground.

There's lots more fun to
be had with my greywater wetland, but for now I'll close with a photo
showing the night's dishwater running out into the swamp. Yes, it
was already dark so I had to use the flash, but you can see that the
cattails will probably thrive with daily inundations of high-nutrient
water.
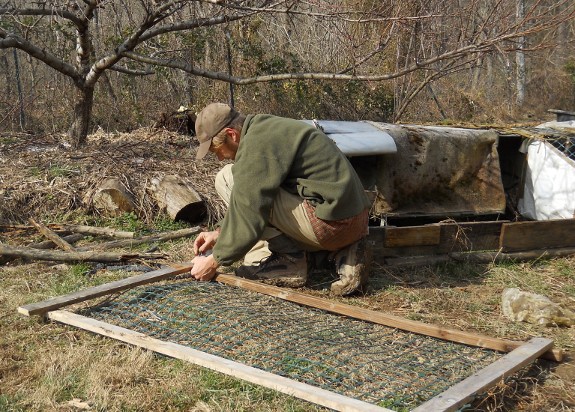
This chicken
tractor is going on 4
years old.
The original frame for the
door was made with cedar branches, but they started breaking down
sometime last year.
We've been using it lately to
nurse a sick hen back to health.
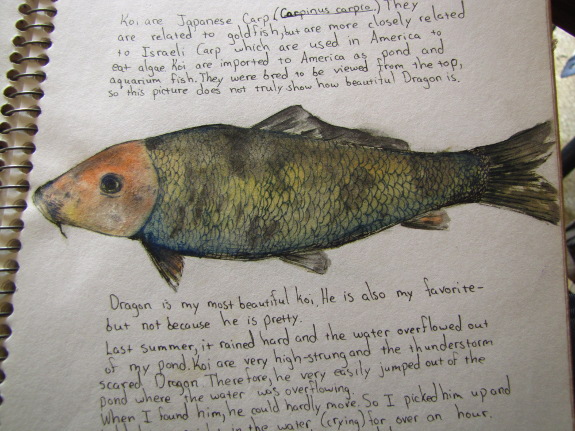
Until I sat down on
Friday afternoon to watch my three tiny
goldfish soar
through their watery environment, I'd forgotten how much joy I used to
get from the three little ponds I built in my city backyard as a
high-school kid. Yes, while normal people were out doing whatever
teenagers do, I was building a resilient pond ecosystem (a success),
trying to get moss to grow on concrete (a failure), and making daily
sketches of whatever caught my eye.
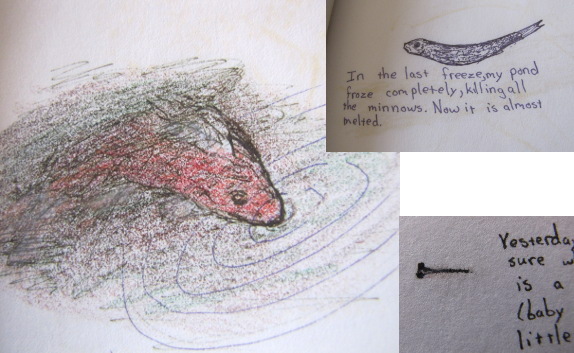
I flipped back through
the sketchbooks this weekend to refresh my memory about what exactly
was in that pond ecosystem. The fish, of course, got top
billing. I tried to add minnows out of a nearby creek, but most
died immediately due to low dissolved oxygen levels in the unmoving
water, and the last ones froze over the winter. Koi were
beautiful, but really too big for my "mud puddles" (as annoyed siblings
were known to call them), and not winter hardy. On the other
hand, I'm pretty sure my feeder goldfish froze solid one winter and
came back to life that spring. They even got big enough to fill
the ponds with tiny goldfish fry!
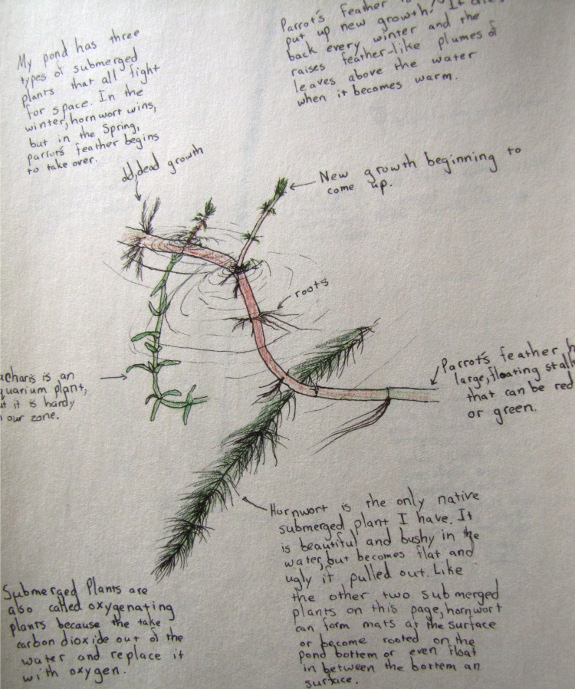
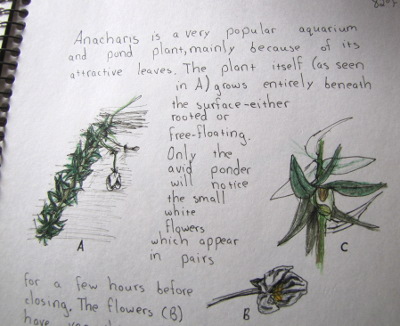 Even though the fish were the
most eye-catching, what I wanted to recall were the details about my
submerged plants. I suspect it was my trio of parrot's feather,
anacharis, and hornwort that kept oxygen levels high enough for the
fish to survive, and also gave them plenty of places to hide.
Hornwort was the most cold hardy and the one I want to add to my
current pondlet, but I didn't make any notes in my sketchbooks about
where the plants came from. (I'm pretty sure the other two
species came from the pet store, so maybe the hornwort did too?)
Even though the fish were the
most eye-catching, what I wanted to recall were the details about my
submerged plants. I suspect it was my trio of parrot's feather,
anacharis, and hornwort that kept oxygen levels high enough for the
fish to survive, and also gave them plenty of places to hide.
Hornwort was the most cold hardy and the one I want to add to my
current pondlet, but I didn't make any notes in my sketchbooks about
where the plants came from. (I'm pretty sure the other two
species came from the pet store, so maybe the hornwort did too?)
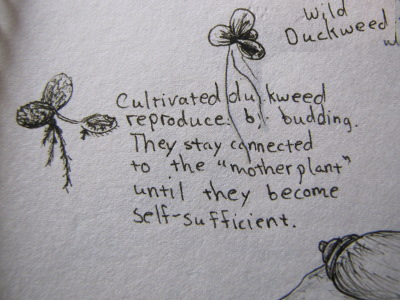 Duckweed was another secret
ingredient to successful pond culture. I included two species,
one of which came from the aquarium store, was fuzzy on top, and died
out eventually. The other was a good, hardy native that is still
present in the remaining pond in my mother's backyard twenty years
later. (Unfortunately, despite internet claims to the contrary,
my chickens think hardy duckweed is for losers. Maybe they would
have liked the cultivated species better?)
Duckweed was another secret
ingredient to successful pond culture. I included two species,
one of which came from the aquarium store, was fuzzy on top, and died
out eventually. The other was a good, hardy native that is still
present in the remaining pond in my mother's backyard twenty years
later. (Unfortunately, despite internet claims to the contrary,
my chickens think hardy duckweed is for losers. Maybe they would
have liked the cultivated species better?)
Of course, there were
more photogenic plants too. I played with just about everything
from lilies to flags to forget-me-nots, and most of them slowly petered
out when the pond froze 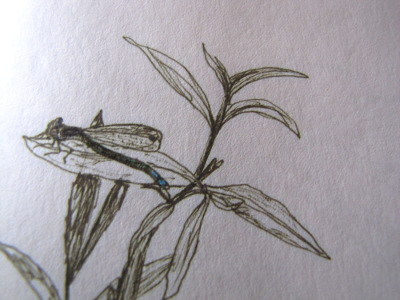 through. Having some
emergent plants was handy, though, because it seemed to attract insect
life --- damselflies, dragonflies, and water striders all showed up and
bred. Frogs arrived too, one of whom actually sat on a lily pad,
to my extreme surprise --- I thought that behavior was only a
characteristic of cartoon animals. I even learned to identify
song sparrows when they came to bathe at the pond on warm afternoons.
through. Having some
emergent plants was handy, though, because it seemed to attract insect
life --- damselflies, dragonflies, and water striders all showed up and
bred. Frogs arrived too, one of whom actually sat on a lily pad,
to my extreme surprise --- I thought that behavior was only a
characteristic of cartoon animals. I even learned to identify
song sparrows when they came to bathe at the pond on warm afternoons.
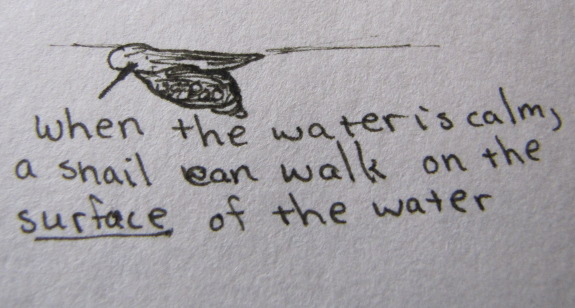
I'm not sure where the
water snails came from, but they were real winners. I identified
them (rightly or wrongly) as tadpole snails, and they laid gelatinous
masses of eggs on the submerged plants, creating a host of mini-snails
who grew like gangbusters. The snails kept things clean, and as I
discovered one still day, could even slide across the underside of the
water surface using water tension, like a water strider in reverse.
(I think these guys have a potential for chicken feed, if we can figure
out how to prepare them properly.)

 If I had built my guilds
perfectly, you'd think the pond would still contain just as much
diversity 16.5 years after I graduated and left the aquatic ecosystem
to its own devices. Instead, everything seems to have disappeared
except the duckweed (and possibly the tadpole snails). I mostly
blame the decline in biodiversity on the small scale --- it's tough to
keep a fifteen-gallon world in balance.
If I had built my guilds
perfectly, you'd think the pond would still contain just as much
diversity 16.5 years after I graduated and left the aquatic ecosystem
to its own devices. Instead, everything seems to have disappeared
except the duckweed (and possibly the tadpole snails). I mostly
blame the decline in biodiversity on the small scale --- it's tough to
keep a fifteen-gallon world in balance.
On the bright side, I do
seem to have finally managed to grow moss on my laughing Buddha.
Too bad he needs to stand guard over the first generation and can't
move to my new digs. Maybe I'll find a new mascot for my
twenty-first century pondlet?
 We wanted the 3 inch PVC pipe for
the new greywater
wetland system to have a
slight downhill slope.
We wanted the 3 inch PVC pipe for
the new greywater
wetland system to have a
slight downhill slope.
There's no glue holding the
pieces together to take advantage of a little wiggle room that allows
the pipe to point a shade downward instead of straight ahead.
A brick underneath holds it
in place without any leaks.
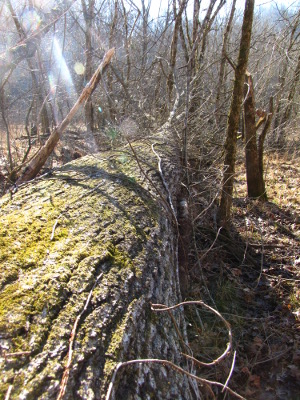 This oak tree is both
literally and figuratively a windfall. Oaks are an extremely
handy genus, but we have few of them on our property, mostly because
oak trees like it high and dry and our property is low and wet.
So having a huge oak tumble down near our parking area set me to
pondering what's the best use for this quality wood.
This oak tree is both
literally and figuratively a windfall. Oaks are an extremely
handy genus, but we have few of them on our property, mostly because
oak trees like it high and dry and our property is low and wet.
So having a huge oak tumble down near our parking area set me to
pondering what's the best use for this quality wood.
My first thought was to
saw the trunk into boards. The trouble is that it's not worth
most sawyers' while to cut up a single trunk, no matter how tall and
straight it is. We could possibly do it ourself with the chainsaw
log mill, but that
procedure was slow as molasses, exhausting, and not very precise last
time we tried it.
Mark had the
permaculture suggestion of turning the oak into mushroom logs. "Shiitake"
literally means "oak mushroom," and even though the fungal species will
grow on other types of trees, they like oak best. I'm wondering
if inoculating the 28-foot-long main trunk with shiitakes wouldn't
result in harvests lasting a decade or longer (although we might get
sick of pounding in 1,400 plugs), or we could just cut logs from the
medium-sized limbs. Another option would be to try out maitakes (aka hen of the woods) on
the big root mass.
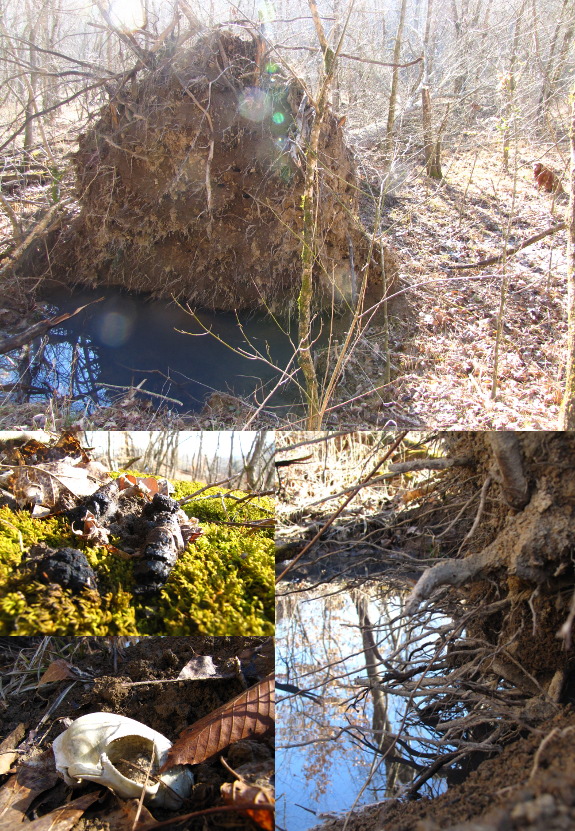
Finally, there's always
firewood. I suspect that even cutting up the "little" limbs that
aren't much use for anything else would keep us warm for a whole winter.
In the meantime, the raccoons (or maybe foxes?) have already marked the
trunk as their own, and I can't help thinking the water-filled root pit
will be perfect habitat for the frogs who have just started to
call. It will be intriguing to see how this disturbed area
changes over the years.
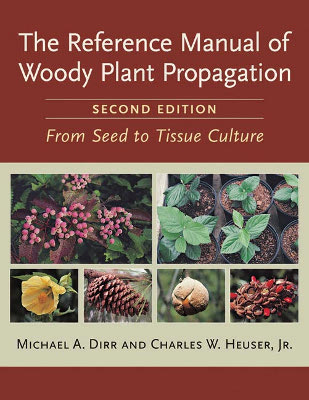 The
Reference Manual of Woody Plant Propagation by Michael Dirr and Charles
Heuser, Jr., is an excellent reference for plant geeks to have on their
shelves. Yes, you can read between the lines there and figure
that if you're a dabbler, this book can easily go over your head, but
that's part of the fun and you'll likely grow into it.
The
Reference Manual of Woody Plant Propagation by Michael Dirr and Charles
Heuser, Jr., is an excellent reference for plant geeks to have on their
shelves. Yes, you can read between the lines there and figure
that if you're a dabbler, this book can easily go over your head, but
that's part of the fun and you'll likely grow into it.
The book is divided into
two parts --- an explanation of general propagation techniques (about
90 pages of relatively easy reading) and an encyclopedic review of the
literature detailing the best way to propagate many woody plants.
You really need to read the first part to understand the second part
--- for example, here's what they say about fig cuttings:
Got all that?
These summaries made a lot more sense once I brushed up the best
techniques for taking cuttings, which I'll summarize in this week's
lunchtime series.
In addition to the
book's density, I've already found a few species not listed in the
manual, most notably grapes and gooseberries. I suspect no manual
is 100% complete, but if you've found a reference you like better for
this type of information, I hope you'll leave a comment and let me
know. In the meantime, this is the book I'll be recommending to
intermediate-level homesteaders who want to turn one mulberry tree into
a dozen, or to sprout weird seeds that need intense stratification and
scarification.
| This post is part of our Reference Manual of Woody Plant Propagation
lunchtime series.
Read all of the entries: |

We took the day off to attend
a funeral on the other side of the mountain.
Rest In Peace Silas.
The view from the top is
always worth stopping for.
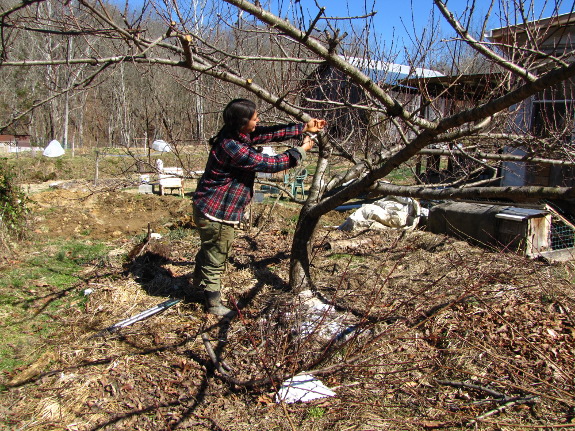
With our largest fruit
trees, we're starting to move out of training mode and into maintenance
mode. We finally hit summer
pruning at the right
time, so there wasn't terribly much to cut off, but I did a lot of
nitpicky snipping to remove branches that were hidden underneath their
neighbors.
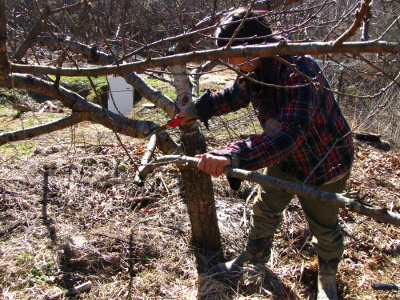 I did cut off two main
scaffold limbs on our biggest peach, which was a bit scary but seemed
like the right thing to do. Over time, these branches had bent
down under the weight of fruit and were now well within the fungal zone
(the moist area right above the soil surface). Luckily, higher
branches had filled in over top, so removing the low branches didn't
leave a gap in the tree.
I did cut off two main
scaffold limbs on our biggest peach, which was a bit scary but seemed
like the right thing to do. Over time, these branches had bent
down under the weight of fruit and were now well within the fungal zone
(the moist area right above the soil surface). Luckily, higher
branches had filled in over top, so removing the low branches didn't
leave a gap in the tree.
We've missed eating
peaches for two years now. Hopefully 2013 will once again be the
year of the peach?
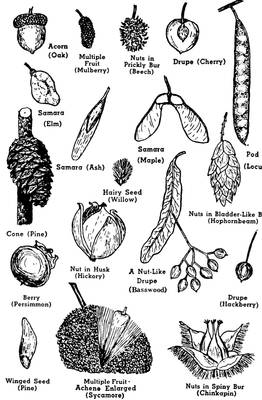 The Reference
Manual of Woody Plant Propagation begins with a discussion of
the four main methods you can use to take one plant and make
several. Each has its pros and cons, so it's worth taking a look
at all four before you decide which one(s) you want to use.
The Reference
Manual of Woody Plant Propagation begins with a discussion of
the four main methods you can use to take one plant and make
several. Each has its pros and cons, so it's worth taking a look
at all four before you decide which one(s) you want to use.
For those of us used to
working with annuals, the most obvious form of propagation is to grow
plants from seed. The great thing about growing from seed is that
you end up with lots of new plants quickly and at a low cost. The
bad part is that every seedling is going to be a little different ---
very few woody plants have been line bred to the point where you can
save the seeds and end up with similar offspring the way you could with
an heirloom tomato. On the homestead, it's most handy to grow
woody plants from seed if you're working with species likely to breed
true (often self-pollinators like peaches), if there aren't many named
varieties (often the case for nuts, Nanking cherries, etc.), or if
you're just producing rootstocks to graft onto.
Which brings us to
grafting. As I explained in my lunchtime series about The
Grafter's Handbook,
grafting is a method of producing a clone of a variety you like, such
as a winesap apple. The major advantage of grafting is that it's
fast and dependable once you know what you're doing. The downside
is that you either have to buy or grow rootstocks (produced from seed
or by rooting cuttings), so grafting tends to be more expensive than
most other types of propagation.
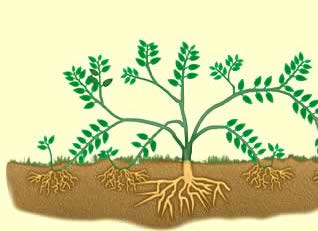 Rooting is the poor man's
grafting. Once again, you end up with an exact clone of the plant
you like, but the process can cost absolutely nothing in many
cases. The Reference
of Woody Plant Propagation notes that it's cheaper to root
cuttings than to graft if your rooting success rate is at least 50%,
but on the downside, rooting generally takes a year or two longer to
produce fruit than if you grafted. I'll spend most of the rest of
this week's lunchtime series writing about rooting cuttings, but it's
also worth noting that many plants self-root automatically at the tips
of their branches.
Rooting is the poor man's
grafting. Once again, you end up with an exact clone of the plant
you like, but the process can cost absolutely nothing in many
cases. The Reference
of Woody Plant Propagation notes that it's cheaper to root
cuttings than to graft if your rooting success rate is at least 50%,
but on the downside, rooting generally takes a year or two longer to
produce fruit than if you grafted. I'll spend most of the rest of
this week's lunchtime series writing about rooting cuttings, but it's
also worth noting that many plants self-root automatically at the tips
of their branches.
The final method of
propagation --- tissue culture --- requires lots of lab equipment, so I
won't write about it here. The benefit of tissue culture is that
you can produce lots of clones very quickly, but there is a large price
tag attached.
| This post is part of our Reference Manual of Woody Plant Propagation
lunchtime series.
Read all of the entries: |
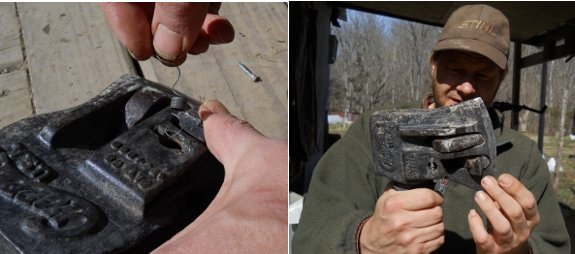
The last Chopper
1 spring repair lasted
over two years.
I guess all that pounding
took its toll on the adhesive bond and caused the support pin to work
its way loose. Luckily it stayed attached to the spring and all I
needed to do was re-seat the pin, glue it in place and hook the spring
back up.
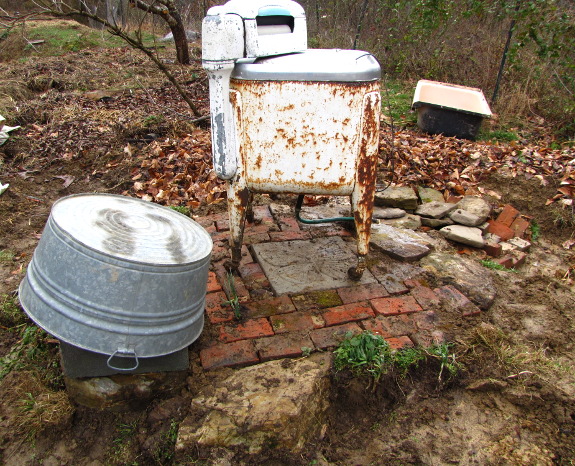
B.J. helped me move our
old wringer washer onto its new stone
patio. Now the
question is, what color(s) should we paint it? With honeybees on
his mind, B.J. suggested black and yellow stripes.
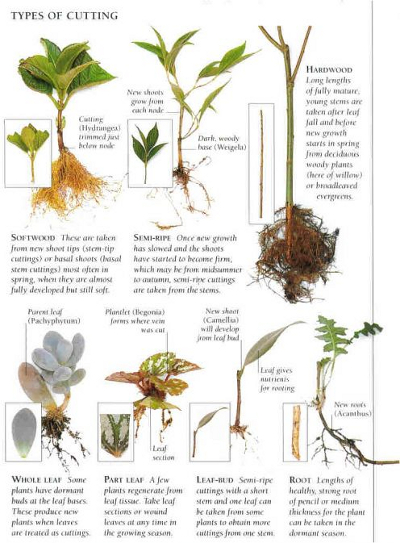 I've
only taken two types of cuttings in the past, but it turns out there
are five options. Leaf cuttings are more often used with
non-woody plants, although if you want to root rhododendrons, magnolia,
red maple, or clematis, you may want to check out this technique.
The other seldom-used technique is root cuttings, which take a lot of
time and attention, so are often tried after all else fails.
I've
only taken two types of cuttings in the past, but it turns out there
are five options. Leaf cuttings are more often used with
non-woody plants, although if you want to root rhododendrons, magnolia,
red maple, or clematis, you may want to check out this technique.
The other seldom-used technique is root cuttings, which take a lot of
time and attention, so are often tried after all else fails.
The last three types are
all stem cuttings, which are
distinguished by the time of year at which you take the cutting.
The one I've found easiest is hardwood
cuttings, which
involve taking
six to twenty inches of last year's growth in the fall or winter (just
like you'd cut scionwood for grafting). It's
important to discard
the tips of the cuttings and to keep hardwood cuttings cool so
they don't start growing before roots form. (If the cuttings leaf
out too soon, they'll use up all the energy stored in the wood and then
die.) I'll write in a later post about techniques you can use to
increase your success rate, but in general, hardwood cuttings are
sometimes treated with rooting hormones, are sometimes callused, and
then are generally just stuck in the ground to go about their business.
Softwood cuttings are
more finnicky than hardwood cuttings, but this
method works on some species that don't respond well to the previous
method. Softwood cuttings are taken from tender wood that's newly
grown that spring, usually before it hardens to the point where you
can't bruise the twig with your fingernail. On the other hand,
you don't want 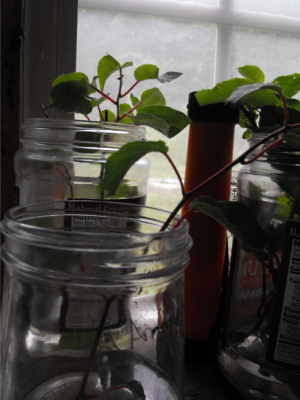 the cutting to be so tender
that it wilts
immediately. Time of year is also critically important, with a
few
species rooting from softwood cuttings throughout the growing season,
but with most refusing to respond after July or August. (The
authors of The
Manual of Woody Plant Propagation note that you will see much
better results for most species if you take the cutting as early as
possible.)
the cutting to be so tender
that it wilts
immediately. Time of year is also critically important, with a
few
species rooting from softwood cuttings throughout the growing season,
but with most refusing to respond after July or August. (The
authors of The
Manual of Woody Plant Propagation note that you will see much
better results for most species if you take the cutting as early as
possible.)
When taking softwood
cuttings, cut a two to five inch
piece of twig that includes several leaves, treat with rooting hormone
(usually), and be sure to keep the cutting moist with a misting
apparatus or humidity dome. You'll know when your cutting has
rooted because a gentle tug will meet with resistance --- at that
point, wean the plant off the mist (or the humidity dome), but keep it
in your nursery area for quite a bit longer. Some softwood
cuttings can be planted out the first fall, but most do better if you
overwinter them under protection and then plant in the spring, or even
let them stay in
rooting bed for two years. This is where I've had trouble with
softwood cuttings in the past --- I want to rush them out to the real
world, where they inevitably peter out and die.
The final type of
cutting is a semi-hardwood cutting, sometimes known as a greenwood
cutting. This is a niche technique, a bit like stem and root
cuttings, with most species responding better to either softwood or
hardwood cuttings. However, evergreens (both broadleaf and
needle) seem to enjoy greenwood cuttings. To take a greenwood
cutting, cut your twigs after the wood has firmed up, the leaves have
matured, and growth has ceased, usually between mid July and early
September. Remove the tip if it's soft,  then
cut your twig down to three to six inches long and remove leaves from
the lower half. Wounding (which I'll cover in a later post) is
sometimes used to promote rooting, and hormones are usually used, as
well as mist. Greenwood cuttings usually root in one to three
months.
then
cut your twig down to three to six inches long and remove leaves from
the lower half. Wounding (which I'll cover in a later post) is
sometimes used to promote rooting, and hormones are usually used, as
well as mist. Greenwood cuttings usually root in one to three
months.
Each kind of plant
responds well to one or more method of rooting, so it's useful to do a
bit of research before choosing your technique. If you have a
choice, though, I recommend trying out hardwood (and now's a good time
to do so). I'm experimenting with rooting grapes, mulberries,
figs, and gooseberries this winter and know that at least the first
will do well since I've had success with them before.
| This post is part of our Reference Manual of Woody Plant Propagation
lunchtime series.
Read all of the entries: |
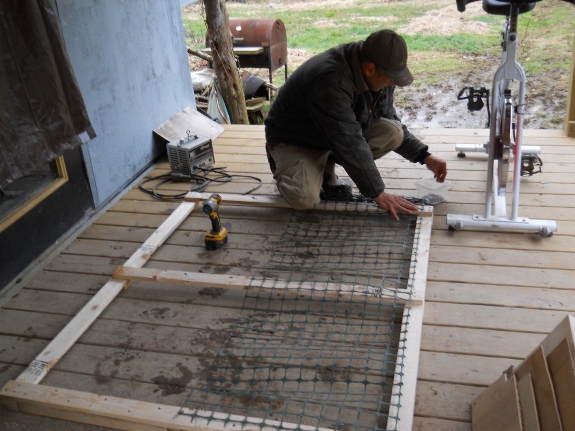
This new chicken
pasture gate may be the biggest one yet.
Enough clearance for a wheel
barrow plus some elbow room.
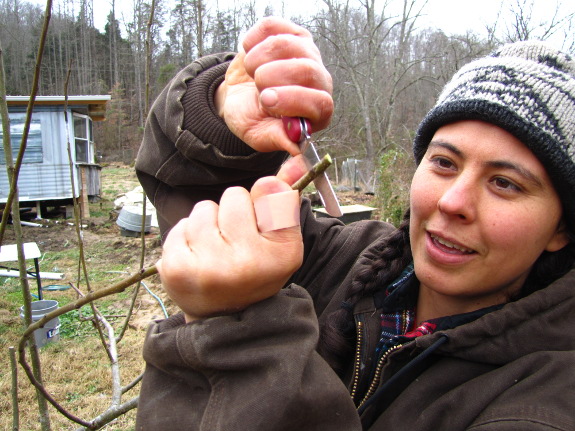
I finished up the last
of the grafting and pruning Wednesday when another round of scionwood
came in the mail. The
first pear I frameworked last week has been converted to
Seckel, but I frameworked the second pear with two separate
varieties. One was Comice and the other was described as follows:
(How could I turn
something like that down?)
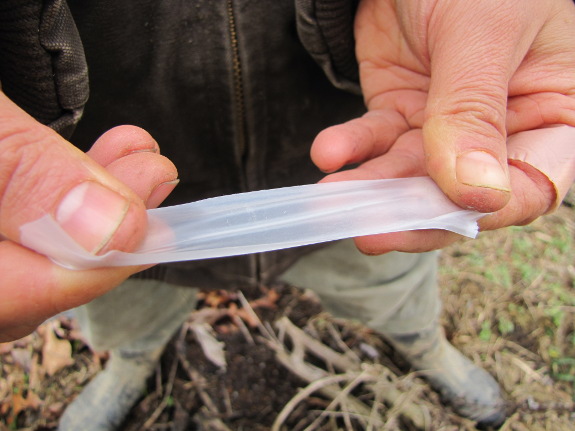
Meanwhile, I changed two
other trees into fruit
cocktail trees by
grafting a new variety onto one limb apiece. Both trees were
already pretty big, so I don't know how tough it'll be to make sure the
newly grafted twigs have adequate growing area, especially since I
added a plum limb to a peach in one case. (I had swapped for plum
scionwood thinking I'd add it to 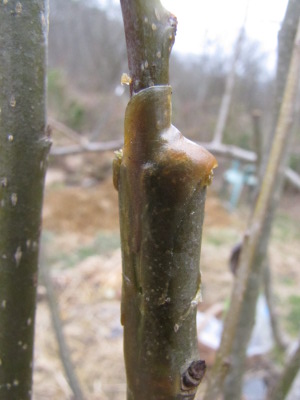 my
Methley plum, but she's ailing and might get yanked out, and I didn't
want the scionwood to go to waste.)
my
Methley plum, but she's ailing and might get yanked out, and I didn't
want the scionwood to go to waste.)
Here's what I learned
during my grafting afternoon:
- Slowly but surely, I'm getting better at making the right
cuts. It is tougher to
graft onto a tree in the ground than to bench graft, though.
- Grafting knives are sharp! See bandaid. (Don't worry, Mom, it's only the equivalent of a paper cut.)
- Parafilm grafting tape is easiest to use if you prestretch it before starting to bind your grafting wound.
- Trowbridge's
grafting wax is excellent around a little cleft graft and not bad
on the tips of scionwood.
Now I just have to
pretend to be patient until everything starts to leaf out.
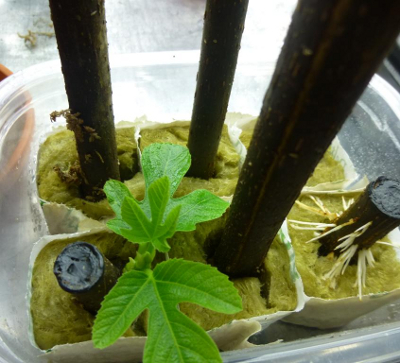 One of the main tricks
horticulturalists use to increase their success rooting cuttings is to
treat the twig with the proper rooting hormone. Rooting hormones
feel a bit strong to me, so I usually try without them first, and am
currently experimenting with a
much weaker solution made from willow twigs. That said, certain
species are unlikely to root without the extra help.
One of the main tricks
horticulturalists use to increase their success rooting cuttings is to
treat the twig with the proper rooting hormone. Rooting hormones
feel a bit strong to me, so I usually try without them first, and am
currently experimenting with a
much weaker solution made from willow twigs. That said, certain
species are unlikely to root without the extra help.
Using rooting hormones
is much more complicated than I'd at first thought, with various
options existing for the type and concentration of hormone, the
solvent, and the application method. In terms of types of
hormones, most people use either IBA or NAA, with gamma form of first
and alpha
form of the last being most effective. Although some plants
prefer one hormone over the other, most will root quite well with
either, in which case you might be inclined to go for NAA since it's
much cheaper. On the other hand, NAA is more prone to burn plants
if you don't get the concentration just right.
Speaking of
concentration, that's a point where you either need to search the
literature or use a lot of trial and error since each plant likes their
rooting hormone at a different strength. The stronger your
hormone, the less time you want to allow your cutting to sit in the
solution, with a five minute dip working for strong solutions of
rooting hormones, but with up to 24 hours necessary if they're diluted.
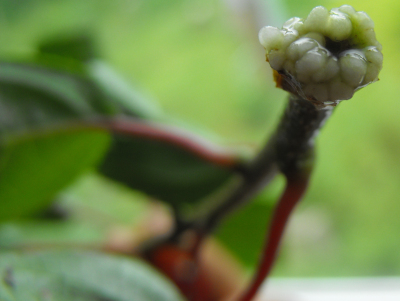 Another
factor influencing how effective a rooting hormone will be is the
solvent it's dissolved in. Although some people dip into powdered
hormones, the solid is apparently much less effective than if you
dissolve the rooting hormones in water or in some form of
alcohol. Alcohol is more effective at ensuring the rooting
hormone actually works its way into the plant, but some species get
shocked by having their stems stuck in alcohol and can drop their
leaves or die. If you do want to use alcohol, you can buy rooting
hormone already dissolved in ethanol, or can make some yourself using
rubbing alcohol (isopropyl alcohol).
Another
factor influencing how effective a rooting hormone will be is the
solvent it's dissolved in. Although some people dip into powdered
hormones, the solid is apparently much less effective than if you
dissolve the rooting hormones in water or in some form of
alcohol. Alcohol is more effective at ensuring the rooting
hormone actually works its way into the plant, but some species get
shocked by having their stems stuck in alcohol and can drop their
leaves or die. If you do want to use alcohol, you can buy rooting
hormone already dissolved in ethanol, or can make some yourself using
rubbing alcohol (isopropyl alcohol).
I'll keep you posted if
I decide to change over to chemical rooting hormones in the
future. In the meantime, a gentle tug on my fig cuttings suggests
both the control and the willow-treated stems might already be starting
to root ten days after placing them in pots. So maybe I don't
need the chemicals?
| This post is part of our Reference Manual of Woody Plant Propagation
lunchtime series.
Read all of the entries: |

We got the new chicken
pasture gate hung today.
I'm thinking a coat of paint
might make it last a few years longer.

Or explore more posts by date or by subject.
About us: Anna Hess and Mark Hamilton spent over a decade living self-sufficiently in the mountains of Virginia before moving north to start over from scratch in the foothills of Ohio. They've experimented with permaculture, no-till gardening, trailersteading, home-based microbusinesses and much more, writing about their adventures in both blogs and books.