
archives for 02/2011
 When I last checked our two
remaining honeybee hives, one
seemed to be doing fine, but the other had a cluster
as small as the cluster of our now-dead hive when I checked them before
their demise. Every morning thereafter, I put an ear up to the
small hive, and couldn't hear a sound, but warm days this past weekend
did tempt a few bees out to fly around. I have a hard time
imagining that such a tiny hive could bulk back up and survive, but the
frigid temperatures of December and January seem to have broken, so
maybe the cluster will be large enough to make it.
When I last checked our two
remaining honeybee hives, one
seemed to be doing fine, but the other had a cluster
as small as the cluster of our now-dead hive when I checked them before
their demise. Every morning thereafter, I put an ear up to the
small hive, and couldn't hear a sound, but warm days this past weekend
did tempt a few bees out to fly around. I have a hard time
imagining that such a tiny hive could bulk back up and survive, but the
frigid temperatures of December and January seem to have broken, so
maybe the cluster will be large enough to make it.
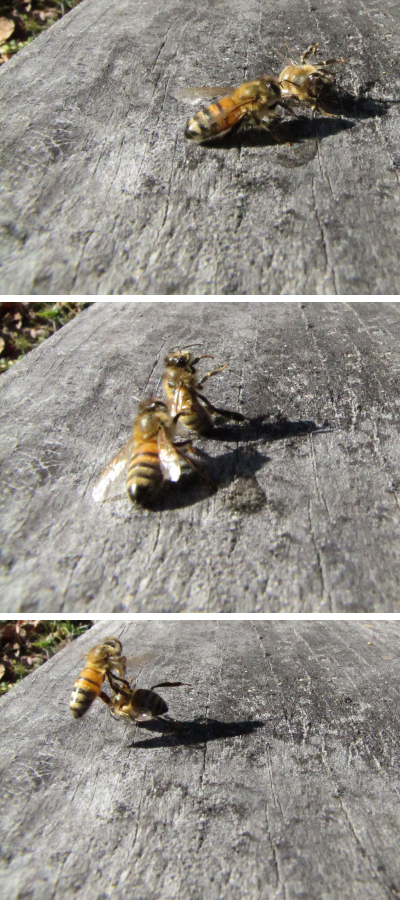
Why this hive has such
low numbers is a mystery to me. They didn't seem to have gone
through a starvation cycle like our dead hive --- there was honey
within easy reach of the cluster each time I checked. They show
none of the classic signs of varroa mite overinfestation either ---
after watching one valiant worker struggle to haul out dead bee after
dead bee, I swept out about twenty carcasses and saw no mites or
deformed wings. But the colony's population is so low that
something is clearly wrong.
Reading
Ross Conrad's Natural
Beekeeping has
helped me realize that your second winter with a hive is when trouble
is likely to begin. When you receive a package of bees, they
generally arrive relatively disease-free, and it takes a while for
pests and diseases to make their way to the hive. If I'd known
 better, I would have been sure to split my hives last year, which would
have helped break the cycle of problems and set each hive back closer
to their package, disease-free state. The good news is that any
hive or hives that survive this second winter are keepers, and I should
be able to split it or them and go into later years with a better
adapted apiary. Still, it's painful to watch and wait and hope
that this tiny colony won't bite the dust.
better, I would have been sure to split my hives last year, which would
have helped break the cycle of problems and set each hive back closer
to their package, disease-free state. The good news is that any
hive or hives that survive this second winter are keepers, and I should
be able to split it or them and go into later years with a better
adapted apiary. Still, it's painful to watch and wait and hope
that this tiny colony won't bite the dust.
 Ross
Conrad's theory of natural beekeeping can be summed up as focusing on a
strong, healthy colony rather than on maximum honey output. That
means leaving 60 to 80 pounds of honey on the hive to get them through
his Vermont winters and feeding only in emergencies. If he does
have to feed, he tries to feed honey, then falls back on white sugar.
Ross
Conrad's theory of natural beekeeping can be summed up as focusing on a
strong, healthy colony rather than on maximum honey output. That
means leaving 60 to 80 pounds of honey on the hive to get them through
his Vermont winters and feeding only in emergencies. If he does
have to feed, he tries to feed honey, then falls back on white sugar.
Conrad also believes
that natural beekeepers should aim for genetic diversity and try to
build up hives adapted to our local area. We should let our bees
requeen rather than killing our queen every year or two and ordering a
new one. If you do have to buy a queen, he recommends finding her
locally rather than shipping in bees from across the country which are
adapted to very different climates.
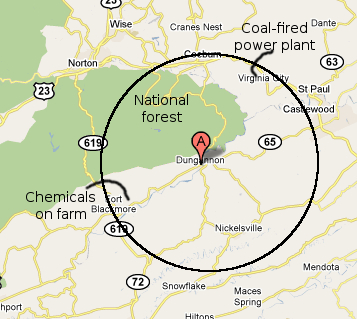 Finally,
he points out that you need to consider an area up to 17 miles in
diameter when keeping your bees happy and healthy. In regular
conditions, studies have shown that about 10% of worker bees fly up to
5.5 miles in search of distant nectar and pollen sources, and that they
may fly as much as 8.5 miles when feed is scarce. So the organic
paradise we offer our bees may be offset by the coal-fired power plant
eight miles away and by the pesticides and herbicides used on the large
strawberry and tomato farm a similar distance in the other
direction. As beekeepers, our work is cut out for us keeping our
far-ranging livestock healthy.
Finally,
he points out that you need to consider an area up to 17 miles in
diameter when keeping your bees happy and healthy. In regular
conditions, studies have shown that about 10% of worker bees fly up to
5.5 miles in search of distant nectar and pollen sources, and that they
may fly as much as 8.5 miles when feed is scarce. So the organic
paradise we offer our bees may be offset by the coal-fired power plant
eight miles away and by the pesticides and herbicides used on the large
strawberry and tomato farm a similar distance in the other
direction. As beekeepers, our work is cut out for us keeping our
far-ranging livestock healthy.
| This post is part of our Natural Beekeeping lunchtime series.
Read all of the entries: |
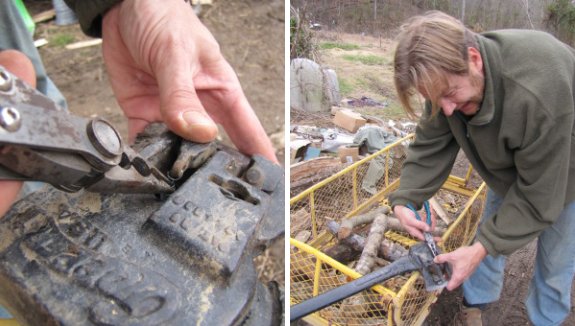
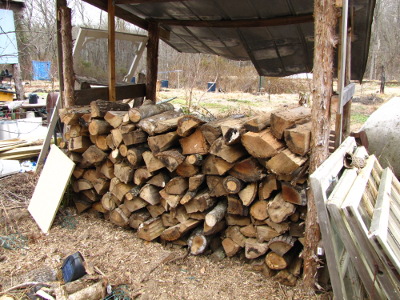
The repair
job I did on the Chopper 1
axe gave out on me today.
It only took a few minutes to
rework the spring and attach it to the splitting finger, but the short
interval between repairs tells me that I should try to find a smaller
replacement spring closer to the size of the original one which is
still doing its job on the other finger with no signs of slowing down.
 By Tuesday, the
honeybees had just about mined all the easy fungal spores out of the
sawdust pile.
Or so I assume since only a handful of bees were visiting the patch at
any given time.
By Tuesday, the
honeybees had just about mined all the easy fungal spores out of the
sawdust pile.
Or so I assume since only a handful of bees were visiting the patch at
any given time.
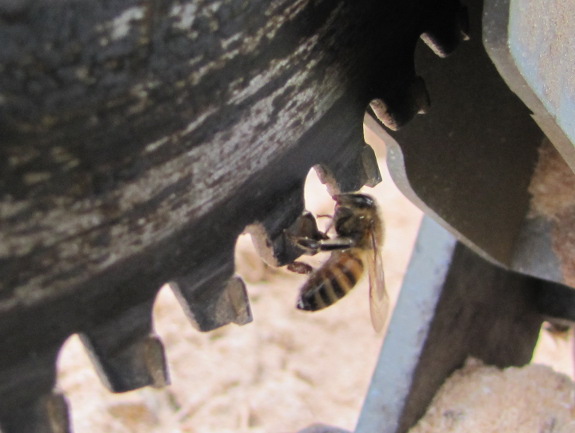
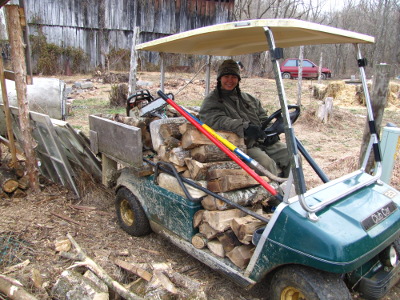
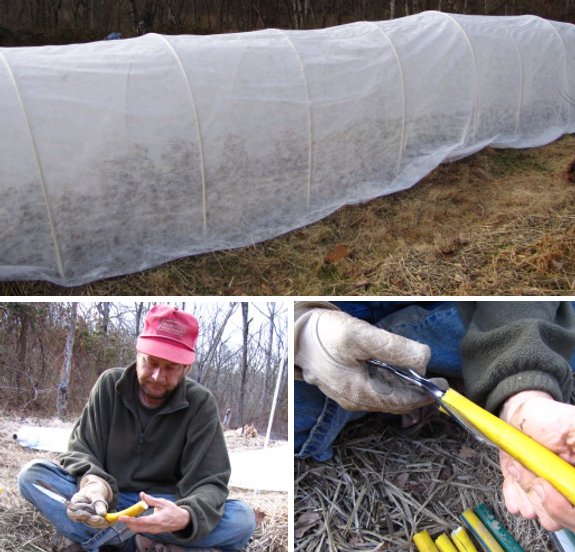
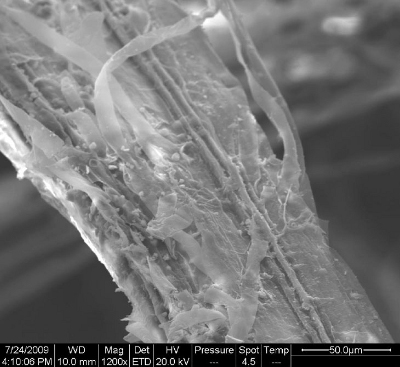
Until, that is, Mark cut
our firewood to length and was suddenly bombarded with honeybees.
One or more of those logs must have been far more full of fungi than
the previous logs were because the bees gathered so many spores I could
see objects in the bees' pollen baskets. (The spores are the
brown clump halfway down the hind leg of the bee in this photo.)
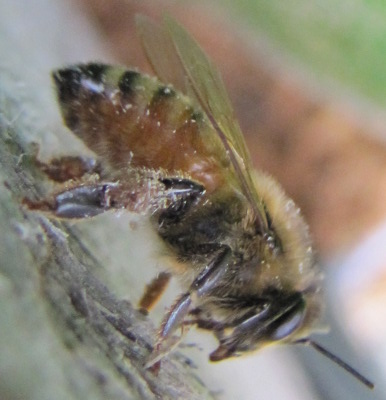
I still have no proof
that these are actually fungal spores being gathered so avidly by our
honeybees, but it sure doesn't look like sawdust in that pollen basket.
 Did
you know that around 38% of U.S. bee hives die each year, a number that has more than tripled in the last decade? Most of those deaths aren't from colony
collapse disorder, though, and many can be prevented.
Did
you know that around 38% of U.S. bee hives die each year, a number that has more than tripled in the last decade? Most of those deaths aren't from colony
collapse disorder, though, and many can be prevented.
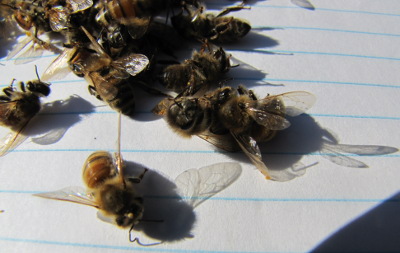
One of the most valuable
parts of Natural Beekeeping is
information on conducting a hive autopsy. I've excerpted the four
most interesting/likely causes of bee death below, but you'll want to
check the book if you've got conditions that don't fit those listed
here.
- Colony Collapse Disorder is implicated if there are few or no adult bees on the combs or bottom boards --- the bees have just disappeared. There should be capped brood and honey present, and the latter will usually be untouched be robber bees.
- Varroa mites have killed your hive if you see lots of bees with deformed wings and short abdomens and lots of varroa mites on the dead bees, brood, and bottom board. Also look for tiny holes in brood cappings.
- Starvation signs include bees with their heads tucked into comb in search of absent honey and a lack of honey within two inches of the remains of the cluster.
- Pesticide or chemical poisoning results in dead bees in front of the hive with their tongues sticking out.
Knowing the cause of
death will help you decide whether you can reuse
the equipment (yes, unless your bees died of one of the contagious
diseases not mentioned here) and how you can prevent the same fate
befalling your other hives. So dry your tears and poke through
the rubble to become a better beekeeper.
| This post is part of our Natural Beekeeping lunchtime series.
Read all of the entries: |

One of the many advantages to
living in a mobile home is easy access to the roof.
Total time for this chimeny
sweep operation was under 5 minutes.
 We
like to prune our everbearing
raspberries so that they produce both a summer and a fall crop,
which is a bit trickier than the conventional method of mowing the
plants all the way down in the winter and getting one big fall
crop. If you're looking for a double harvest, you still prune in
the winter, but have to be a bit more specific about what you cut off.
We
like to prune our everbearing
raspberries so that they produce both a summer and a fall crop,
which is a bit trickier than the conventional method of mowing the
plants all the way down in the winter and getting one big fall
crop. If you're looking for a double harvest, you still prune in
the winter, but have to be a bit more specific about what you cut off.
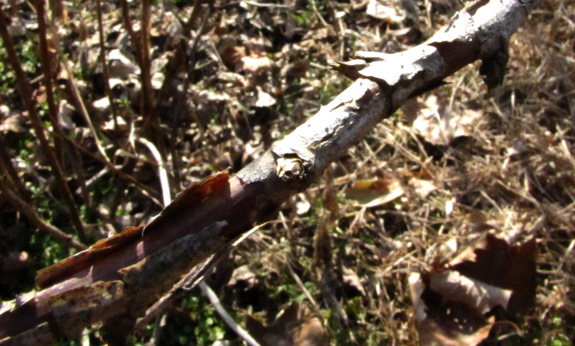
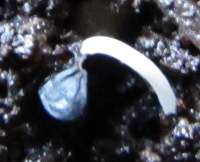
The first step is to
remove all of the dead canes. These are the canes that fruited
last spring, and they're pretty easy to pick out since they've turned
brown and their bark is peeling, like the cane in the 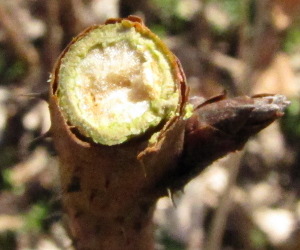 first
photo.
first
photo.
Next, you want to cut
the tops off the canes that fruited in the fall. Most people
admonish you to cut off the top third, but the truth is that you're
cutting off the dead part. After snipping off a few tops, you'll
start getting an eye for guessing the point at which the plump, live
cane turns into the more shriveled, dead cane. To check your
work, look down at the cut end --- you should see a thin ring of green,
showing that you've cut all the way down to the living tissue.
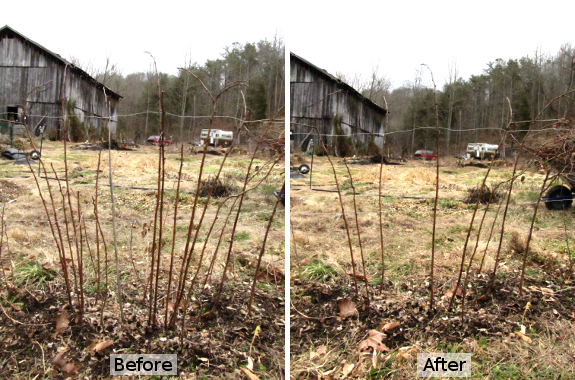
 If you wanted, you could stop
pruning here, but thinning out some of the living canes will give you
bigger, healthier berries in the spring. The rule of thumb is to
leave four or five of the thickest canes per linear foot of row.
The photo above is a before and after shot of this last step in pruning
our raspberry patch.
If you wanted, you could stop
pruning here, but thinning out some of the living canes will give you
bigger, healthier berries in the spring. The rule of thumb is to
leave four or five of the thickest canes per linear foot of row.
The photo above is a before and after shot of this last step in pruning
our raspberry patch.
Now throw down some
compost and a thick layer of mulch and wait for the sweet, juicy
berries in June!
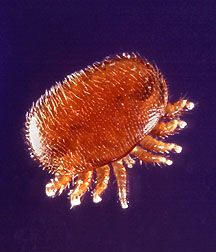 Ross Conrad spends 50 pages
talking about
the varroa mite, which he considers to be the current bane of the
organic beekeeper. Although I'm not interested in trying out his
"soft chemical" controls (which are on a toxicity level similar to Bt),
I'm intrigued by some of the other solutions he presents. Conrad
recommends using many or all of the options below in concert, and
warns that ignoring mites will kill your hive within one to two years
without some mite-reduction actions.
Ross Conrad spends 50 pages
talking about
the varroa mite, which he considers to be the current bane of the
organic beekeeper. Although I'm not interested in trying out his
"soft chemical" controls (which are on a toxicity level similar to Bt),
I'm intrigued by some of the other solutions he presents. Conrad
recommends using many or all of the options below in concert, and
warns that ignoring mites will kill your hive within one to two years
without some mite-reduction actions.
1.
Breed for resistant bees.
Natural beekeepers seem to be unanimous in their admonition to stop
buying out of town bees and to instead learn to breed bees that are
well-suited to
your local conditions. Bees resistant to varroa mites may be more
hygenic, brushing or biting mites off other bees' backs, and they may
also be more prone to swarm. Short of scientifically measuring
these traits, if you reproduce the genetics of the hives that
survive the winter in your apiary, you're automatically selecting for
bees that will do better in your area. (More on how to breed bees
in a later post.) Of course, this is a long term measure and
won't help your bees survive this year.
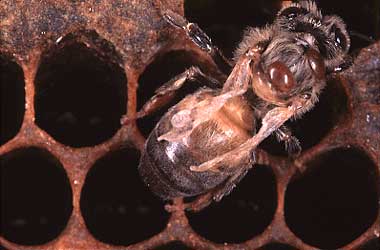 2. Monitor
for mites to know when to
take drastic action. Although Conrad
mentions several mite-counting
techniques, he takes
a simpler approach and keeps his eye out for
signs of high mite levels when he checks the hive. Noticing mites
on drone brood pulled apart during your hive
check, or wandering around in the hive, is a sign that mite populations
may be increasing and you need to keep an eye on the hive. If you
begin to see deformed wings on worker bees --- caused by a virus
carried by varroa mites --- then mite levels are too high and you must
take emergency measures.
2. Monitor
for mites to know when to
take drastic action. Although Conrad
mentions several mite-counting
techniques, he takes
a simpler approach and keeps his eye out for
signs of high mite levels when he checks the hive. Noticing mites
on drone brood pulled apart during your hive
check, or wandering around in the hive, is a sign that mite populations
may be increasing and you need to keep an eye on the hive. If you
begin to see deformed wings on worker bees --- caused by a virus
carried by varroa mites --- then mite levels are too high and you must
take emergency measures.
3.
Split off nucleus colonies.
The simple action of propagating your hive seems to put a damper on
mite reproduction since splitting causes a pause in brood production
within the
hive. Varroa mites reproduce by laying eggs on bee brood, so if
the bees aren't producing brood, the mites can die out.
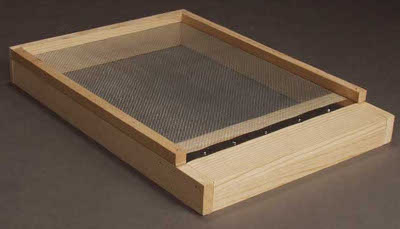 4. Use screened bottom boards.
By using a screened bottom board instead of a solid bottom board, when
mites fall off a bee's back, they tend to fall through the holes onto
the ground and die rather than jumping aboard the next bee who passes
by. Screened bottom boards reduce your mite levels by 10 to 20%,
and Conrad notes that even in his northern location, leaving screened
bottom boards open all winter doesn't cause increased winterkill.
4. Use screened bottom boards.
By using a screened bottom board instead of a solid bottom board, when
mites fall off a bee's back, they tend to fall through the holes onto
the ground and die rather than jumping aboard the next bee who passes
by. Screened bottom boards reduce your mite levels by 10 to 20%,
and Conrad notes that even in his northern location, leaving screened
bottom boards open all winter doesn't cause increased winterkill.
5.
Encourage mites to fall.
Various techniques can be used in conjunction with screened bottom
boards to cause even more mite casualties by tricking mites into
loosening their hold on a bee. Plugging up all the holes in a
hive and then filling the hive with the smoke of tobacco, black walnut,
cedar, grapefruit leaves, or creosote bush for 30 to 60 seconds before
airing the hive out causes major mite falls (although tobacco and
creosote smoke may also harm the bees.) Alternatively, you can
sprinkle confectioner's sugar over your bees, which tempts the bees to
groom mites off (but don't use confectioner's sugar during cold weather
since it contains an inert ingredient that your bees will need to void
from their systems.) Both of these techniques should be used when
no honey is present in the hive to prevent contamination, and most
should be repeated two or three times over the course of a few weeks to
catch mites on bees who were out foraging or were in capped brood cells
during the first treatment.
 6. Trap mites. Since
varroa mites like drone brood much better than worker brood, you can
kill a lot of mites by putting a sheet of drone foundation in your
hive, waiting for it to be drawn out and filled with capped brood, then
freezing the frame for 26 to 30 hours to kill drones and mites.
You should repeat this technique throughout the year, moving the drone
frame throughout the hive, but it does seem a little hard on all of
those dead drones (who you need if you're going to breed your own new
queens.) Alternatively, Conrad builds mite traps that look like a
deep frame, but with boards on each side covered in slits too small for
a bee to fit through. In the bottom of this little box, he puts a
piece of sticky paper covered with methyl palmitate bait to attract and
then catch the
mites. The sticky paper needs to be changed once in the middle of
summer and the whole trap is removed in August.
6. Trap mites. Since
varroa mites like drone brood much better than worker brood, you can
kill a lot of mites by putting a sheet of drone foundation in your
hive, waiting for it to be drawn out and filled with capped brood, then
freezing the frame for 26 to 30 hours to kill drones and mites.
You should repeat this technique throughout the year, moving the drone
frame throughout the hive, but it does seem a little hard on all of
those dead drones (who you need if you're going to breed your own new
queens.) Alternatively, Conrad builds mite traps that look like a
deep frame, but with boards on each side covered in slits too small for
a bee to fit through. In the bottom of this little box, he puts a
piece of sticky paper covered with methyl palmitate bait to attract and
then catch the
mites. The sticky paper needs to be changed once in the middle of
summer and the whole trap is removed in August.
7.
Use heat to kill the mites.
A temperature of 116.6 degrees Fahrenheit will kill varroa mites, but
not bees, so some beekeepers build special heating chambers into which
they pour their bees once a year to delete the mites. This sounds
pretty tricky, but Conrad also mentions that painting your hive boxes
a dark color might do the job for you --- at temperatures above 97,
brood within the hive will die, but it might be worth it to let the
hive get too hot a few times a year to keep mite levels manageable.
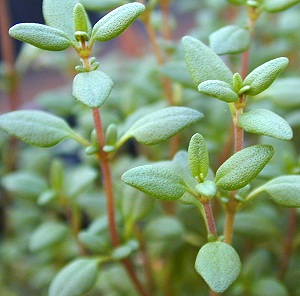 8. Use essential oils of thyme and
mint. A
variety of chemical companies have started making
"organic" mite controls out of thymol and L-menthol dissolved in a
grease patty, but Conrad admits that these chemicals cause a temporary
lull in egg-laying by the queen, which doesn't sound very healthy for
the hive. I wonder if you could plant a bed of thyme and mint
around your hive and get mites to drop off workers as they pass over
the anti-mite planting?
8. Use essential oils of thyme and
mint. A
variety of chemical companies have started making
"organic" mite controls out of thymol and L-menthol dissolved in a
grease patty, but Conrad admits that these chemicals cause a temporary
lull in egg-laying by the queen, which doesn't sound very healthy for
the hive. I wonder if you could plant a bed of thyme and mint
around your hive and get mites to drop off workers as they pass over
the anti-mite planting?
9.
Make your foundation cells smaller.
I've discussed the benefits of foundationless frames
previously. Suffice it to say that if you get your bees to build
cells a more natural size, mites don't fit in as well and mite
populations plummet.
We're already using
options 2 and 4 (and 7 accidentally when we had our
hive meltdown
last summer), and this year I plan to split our hives to
start working on options 1 and 3. I'm curious to see whether
throwing a few black walnut leaves in the smoker when I check on the
hive in the summer might act as a milder version of option 5, and I
hope to remember to plant mint around the hives this year. What
organic techniques do you use to keep your hives' varroa mite levels
within bounds?
| This post is part of our Natural Beekeeping lunchtime series.
Read all of the entries: |
 Today
was the first day of 2011 where I had to dig out the digital alarm
clock, and I'm happy to report it only got used once in 2010.
Today
was the first day of 2011 where I had to dig out the digital alarm
clock, and I'm happy to report it only got used once in 2010.
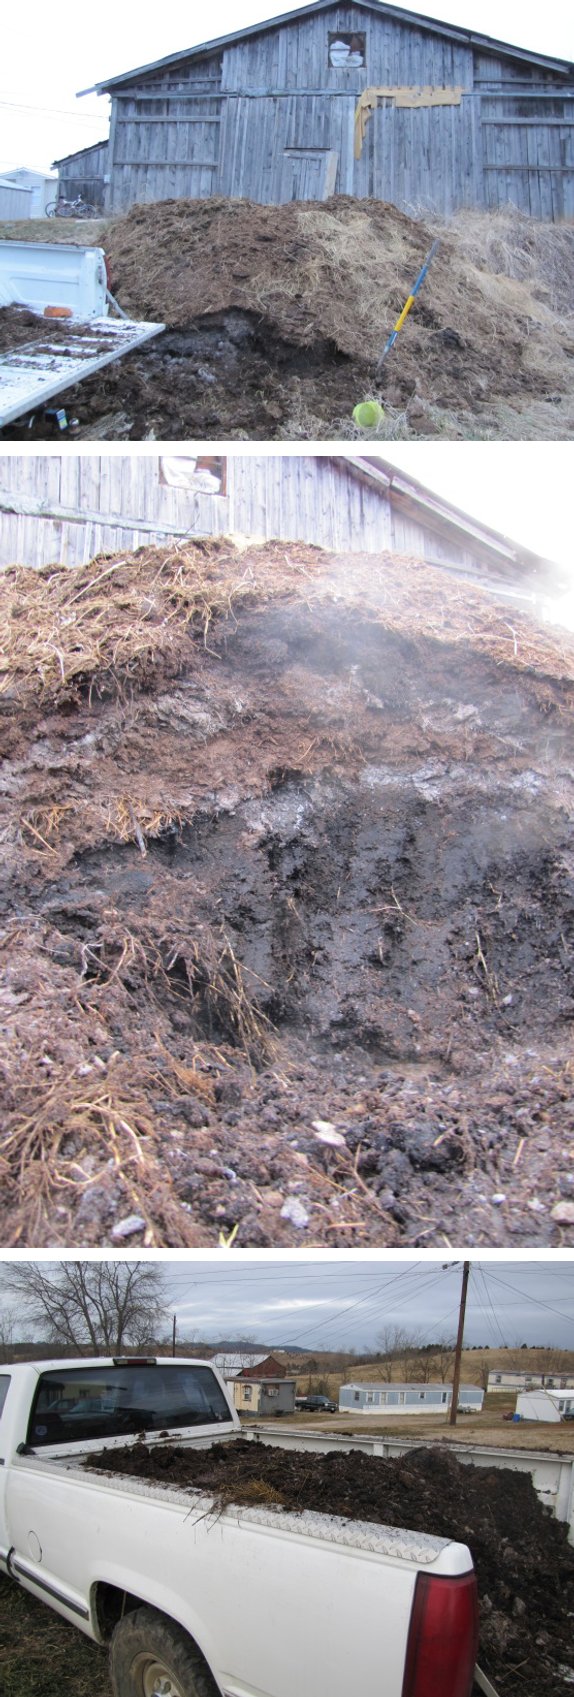
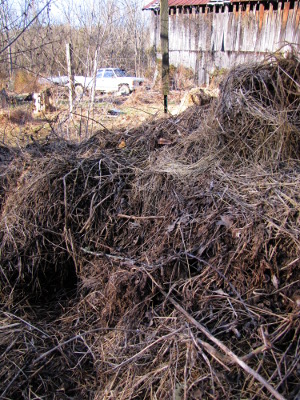
Recently I got introduced to
a friend of a friend who has a friend with a very large pile of horse
manure that was looking for a home.
He said we could have it
all...and we're inclined to take him up on the offer while the getting
is so darn good.
 I have a confession to
make. When it was 55 degrees on Tuesday and Mark had gone to town
to do our weekly chicken waterer mailing, I snuck out and
weeded a row of berries. It wasn't on the list --- I was supposed
to be pruning --- but the ground had
thawed, and three years of organic mulches had turned the soil into
black, moist humus. The weeds almost seemed to jump out of the
ground into my hands, and my fingers ended up just as black as the soil.
I have a confession to
make. When it was 55 degrees on Tuesday and Mark had gone to town
to do our weekly chicken waterer mailing, I snuck out and
weeded a row of berries. It wasn't on the list --- I was supposed
to be pruning --- but the ground had
thawed, and three years of organic mulches had turned the soil into
black, moist humus. The weeds almost seemed to jump out of the
ground into my hands, and my fingers ended up just as black as the soil.
The chickens were
overjoyed, and so was I. Only later, did I find out that my bout
of winter weeding was akin to self-medication. A few years ago,
scientists discovered that a bacterium in the soil --- Mycobacterium
vaccae --- works
like an antidepressant by tricking our brains into making more
serotonin. Maybe this would explain why the garden-obsessed among
us go a little crazy at this time of year.
Feeling blue? Go
play in the dirt!
 Now
that you've slogged through two days of bee doom and gloom, it's time
for a new hope --- splitting your hive in two! I've been daunted
by the notion of hive splitting in the past, since the techniques for
optimal efficiency are
complicated and often require special equipment. But there are
also quick and dirty techniques that work quite well using standard
hive boxes if you only want to create one new hive from each of your
hives rather than turning one hive into as many colonies as possible.
Now
that you've slogged through two days of bee doom and gloom, it's time
for a new hope --- splitting your hive in two! I've been daunted
by the notion of hive splitting in the past, since the techniques for
optimal efficiency are
complicated and often require special equipment. But there are
also quick and dirty techniques that work quite well using standard
hive boxes if you only want to create one new hive from each of your
hives rather than turning one hive into as many colonies as possible.
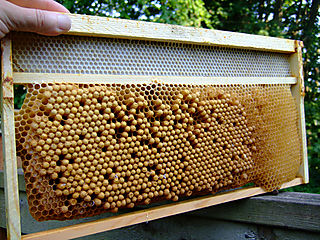
The simplest way to
split a hive is to begin with double deeps and wait
until both deep boxes are full of brood, honey, and pollen. You
should have a mixture of fresh eggs, uncapped brood, and capped brood
in each box --- if not, swap some around so the two boxes are evenly
filled with brood. Then set up a bottom board in a new
location and carry one of the deep brood boxes over to place on
it. Shake some extra nurse bees into the box, put on the inner
and outer cover, add an entrance reducer, and you're done.
 One of the split hives will
have the queen in it --- this is the mother
colony --- while the other will realize they are queenless and will
quickly turn one of the eggs into a queen. Within a few days, you
should be able to tell the difference in the hives. Treat the
mother
colony the way you would any other hive, but leave the nucleus (aka
"nuc" --- the hive with no queen) alone for 30 days to let them raise a
queen and give her time to start laying.
One of the split hives will
have the queen in it --- this is the mother
colony --- while the other will realize they are queenless and will
quickly turn one of the eggs into a queen. Within a few days, you
should be able to tell the difference in the hives. Treat the
mother
colony the way you would any other hive, but leave the nucleus (aka
"nuc" --- the hive with no queen) alone for 30 days to let them raise a
queen and give her time to start laying.
Inevitably, most of the
foraging bees will drift back to the hive in
the old location, which is why you put some extra bees in the hive you
carted to a new spot. This is also why you want to make sure both
hives have at least a few frames of pollen and honey to get them
started while they regroup and get back on track.
As long as you carry out
your split early in the year --- I figure April or May in our area ---
you shouldn't have to give either hive supplemental feed. You
won't get as much honey that year as you would have without performing
the split, but you will probably be able to harvest at least a bit of
honey from the mother hive (and maybe from the nuc as well.) I've
decided to try this out with both of our hives, if they seem strong
enough, and hope that we'll end 2011 with four hives instead of two.
| This post is part of our Natural Beekeeping lunchtime series.
Read all of the entries: |
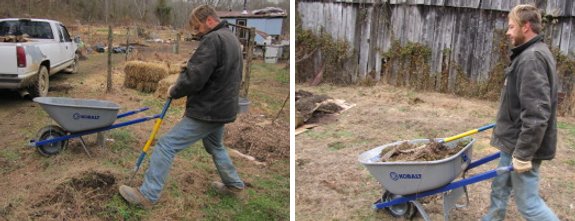
The new Kobalt
never-flat wheelbarrow
can handle what seems like twice the volume as our old ramshackled
pneumatic version, which
had a habit of wobbling back and forth when she had a large load.
Now that I've had a chance to
use it with multiple loads I think I could guess that the new
never-flat technology increases rolling
resistance around 10 percent compared to an air filled tire.
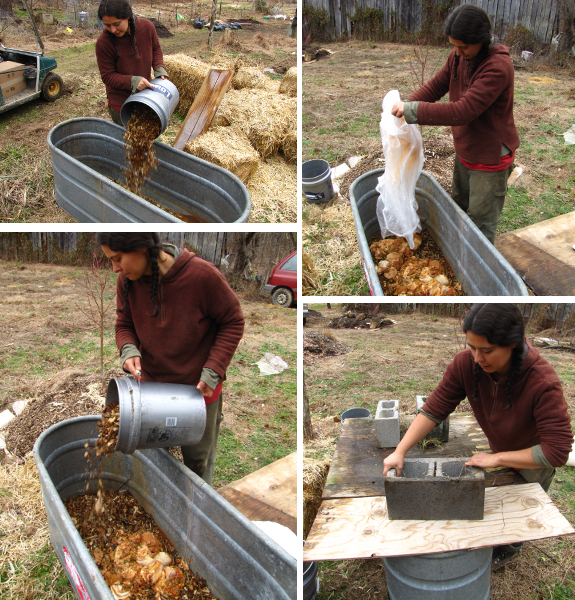
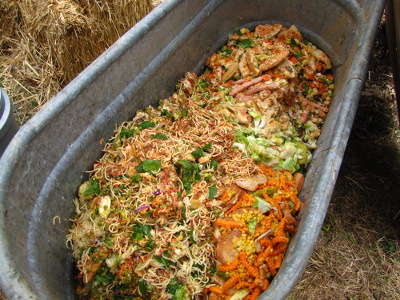
We got our first
delivery of food
scraps from the local school! As Mark suspected,
once the bulky milk cartons were separated out, the scraps were much
smaller than anticipated. Since we're working the kinks out of
our system, small is good...for now.
 Although
we're excited to get started, we have to get an idea of how much food
we'll get each week before we build the worm bin. We had
originally planned to give the initial round of food scraps to the
chickens after weighing them, but learned just in time that health
department policy says no food scraps from public facilities can be
given to livestock.
Although
we're excited to get started, we have to get an idea of how much food
we'll get each week before we build the worm bin. We had
originally planned to give the initial round of food scraps to the
chickens after weighing them, but learned just in time that health
department policy says no food scraps from public facilities can be
given to livestock.
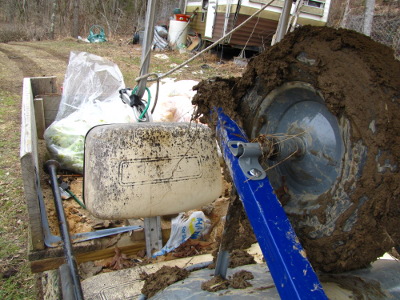
That put us in a bit of
a bind, since the only outside area that Lucy knows is off-limits is
the chicken pasture (which is where we usually build our compost
piles.) Luckily, Mark's friend had found a stock tank with a hole
in it at the dump a few months ago and my mom had given us a few pieces
of scrap plywood. Add on some cinderblocks and we had a dog-proof
container with a handy drainage hole at the bottom.
We laid down a layer of
wood chips, dumped the food scraps on top, and topped them off with
another layer of wood chips. So far, we don't have enough data to
make a real estimate, but if we continue to get the same amount of
food, we'll only need a small worm bin --- roughly three feet by four
feet by one foot. I wonder if this will be big enough to get all
of the benefits
of mid-scale worm bins?
Would we be better off building a slightly larger bin? Plenty to
ponder before we make decisions.
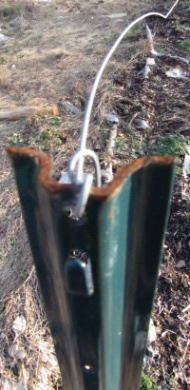
 It
occurred to me while pulling this fence post up that there should be
some sort of device you could hook up to the bottom and pump with your
foot which would utilize some jacking leverage to power it out.
It
occurred to me while pulling this fence post up that there should be
some sort of device you could hook up to the bottom and pump with your
foot which would utilize some jacking leverage to power it out.
The name Post-Up comes to mind...but the
more I thought about it the more I started thinking that it's most
likely easier to just wiggle it back and forth and pull, pull, and pull
till it's free.
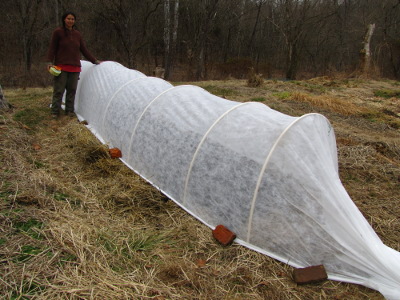 Mark
and I put together a quick
hoop on Monday
and I was about to tell you about it...when it blew away. So
we adapted the design to give the structure a lower profile, which
incidentally resulted in some extra fabric on the edges to roll around
lengths of rebar. The rebar is just flexible enough to follow the
contour of the soil when weighted down with bricks, but is still
straight enough to keep the edge of the row cover from blowing up and
letting the wind rip under the quick hoop.
Mark
and I put together a quick
hoop on Monday
and I was about to tell you about it...when it blew away. So
we adapted the design to give the structure a lower profile, which
incidentally resulted in some extra fabric on the edges to roll around
lengths of rebar. The rebar is just flexible enough to follow the
contour of the soil when weighted down with bricks, but is still
straight enough to keep the edge of the row cover from blowing up and
letting the wind rip under the quick hoop.
Our farm is tucked down
into a hollow between two hills, so a gentle
breeze is usually something to be remarked upon, but this week has been
full of roaring winds. I figure that's a good thing --- most of
you probably have much more wind than we do, and it would be a shame to
tell you how to build a structure that would promptly blow apart in
your garden. Which is all a long way of saying --- I promise you
more information on quick hoop construction once we're sure the
structure will stand the test of time.

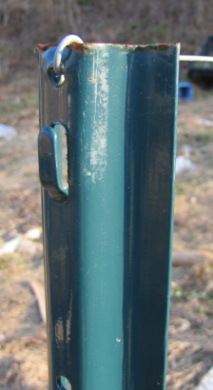
Thanks Shannon for
pointing out the above T-post puller which can be found for a bit
under a hundred dollars.
The design is clever, but I
don't think it would work with our lower grade fence posts.
These lighter posts are more
like a U shape. They fit in well with our applications at less than
half the price of the sturdier T-post.
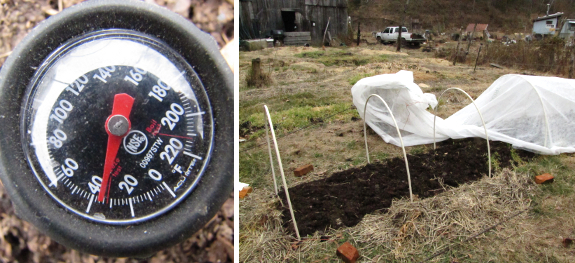
Two days after reinstalling
our quick hoop, the
soil temperature underneath the protective fabric was already four
degrees warmer than soil temperature on a neighboring bed!
Granted, I had raked back the mulch on the neighboring bed just like I
did on my quick hoop bed, but hadn't applied juicy, warm manure, so
it's possible the manure application is part of the reason for my fast
soil heating.
Truthfully, though, I
don't care if it's the quick hoop or the manure that kicked my soil
temperature up to 36. I'm just thrilled that it's finally warm
enough to plant my first lettuce bed. Fresh lettuce in four
weeks if all goes well!
 I
know that it hasn't been that long since you choked your way through a
lunchtime series on urine, but Liquid Gold got me so fired up that I
started a slew of experiments. I apologize in advance to those of
you with weak stomachs, but I'm going to subject you to another week of
urine ramblings.
I
know that it hasn't been that long since you choked your way through a
lunchtime series on urine, but Liquid Gold got me so fired up that I
started a slew of experiments. I apologize in advance to those of
you with weak stomachs, but I'm going to subject you to another week of
urine ramblings.
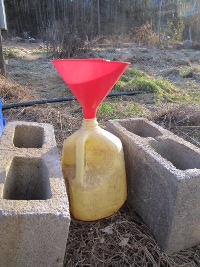
First up --- how to
collect that pee. Since we don't have an indoor bathroom, Mark
had been peeing into a milk jug for months before I got obsessed with
using urine as fertilizer --- it was just simpler (and warmer) than
going outside. So I didn't have a hard time talking him into
giving up his liquid gold for my experiments, though I did ask if he
might like a fancy,
homemade urinal.
Mark rolled his eyes and told me the gallon jug worked just
fine.
Mark did make one slight
modification to his milk jug --- he printed "DO NOT DRINK!" in large
letters around the rim of the container. During cold spells, we
often imbibe water out of cleaned out milk jugs (filled during warm
spells), so the warning label is a good precaution. In households
with more regular running water, you wouldn't even need that.
| This post is part of our Urine in the Garden lunchtime series.
Read all of the entries: |
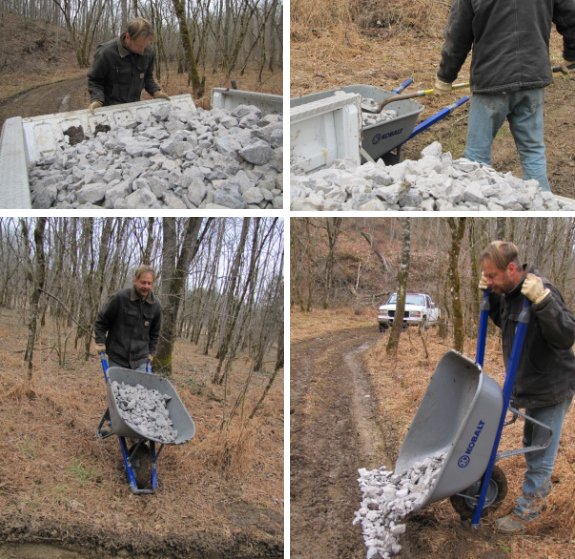
The new Kobalt wheelbarrow has enough
volume to handle 6 cubic feet, but when it comes to heavy gravel on
muddy terrain my new limit is somewhere between 4 and 5 depending on
how much elbow grease I can muster.
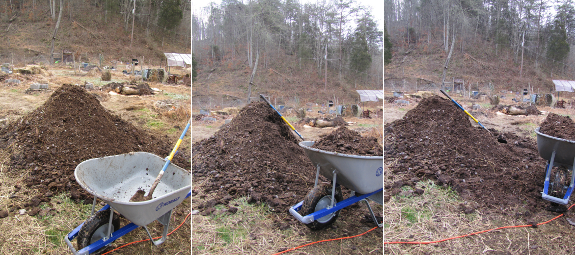
 The truck, wheelbarrow, and
shovel got a real workout yesterday, with me and Mark using them in
shifts. First, I unloaded the rest of the manure on top of half a truckload
of imperfect
chicken compost so
that Mark could drive out to get gravel while the ground was still
frozen. All morning, I spread manure in the mule garden,
focussing on the beds that we'll be planting in February and
March. Mark got home just as I was finishing up and took the
wheelbarrow out to work
on the driveway.
I estimate we each moved about the same volume of material, which means
he probably worked about three times as hard as I did.
The truck, wheelbarrow, and
shovel got a real workout yesterday, with me and Mark using them in
shifts. First, I unloaded the rest of the manure on top of half a truckload
of imperfect
chicken compost so
that Mark could drive out to get gravel while the ground was still
frozen. All morning, I spread manure in the mule garden,
focussing on the beds that we'll be planting in February and
March. Mark got home just as I was finishing up and took the
wheelbarrow out to work
on the driveway.
I estimate we each moved about the same volume of material, which means
he probably worked about three times as hard as I did.
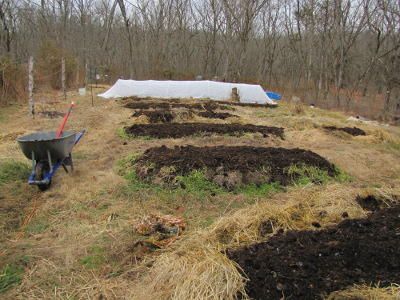
In the past, I've been
extremely frugal with compost and manure, but now that we have a
better supply (and a truck to haul it with), I'm adding a solid inch to
each garden bed, the amount recommended by soil builders. Being
so profligate with manure, though, means that even Mark's huge compost
pile may not be enough. I figure I need about six more truckloads
(14.4 cubic yards) to treat the whole garden, orchard, and berry patch
right. It feels like a very ambitious plan, but I suspect that
after a year or two of heavy manuring, we'll be able to keep fewer beds
in production and cycle some through low-work cover crops. My new
goal --- the same amount of high quality food with less work.
 The
first place I wanted to use urine was to fertilize my nitrogen-hungry
dwarf potted citrus trees. Our movie star neighbor has the
most
amazing dwarf Meyer lemon tree anyone has ever seen, and he attributes
part of his success to regular doses of miracle grow. I'm leery
of chemical fertilizers and wondered if urine would work as well.
The
first place I wanted to use urine was to fertilize my nitrogen-hungry
dwarf potted citrus trees. Our movie star neighbor has the
most
amazing dwarf Meyer lemon tree anyone has ever seen, and he attributes
part of his success to regular doses of miracle grow. I'm leery
of chemical fertilizers and wondered if urine would work as well.
For my first attempt, I
ignored
instructions and poured straight urine
around the roots of my citrus trees, washing the pee in
with plenty of water. I thought the mix-in-the-pot technique
should work, but the plants complained, so my next trial consisted of
mixing urine and water in a bucket at a proportion of roughly one part
urine for six parts water, then using that mixture on the plants.
This time, the plants were pleased.
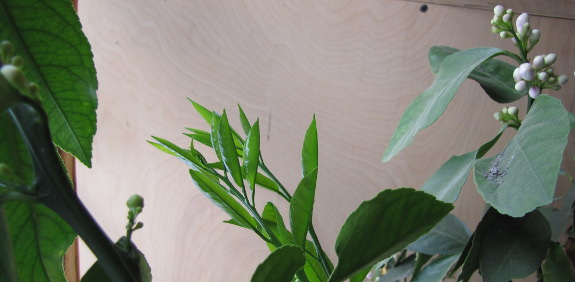
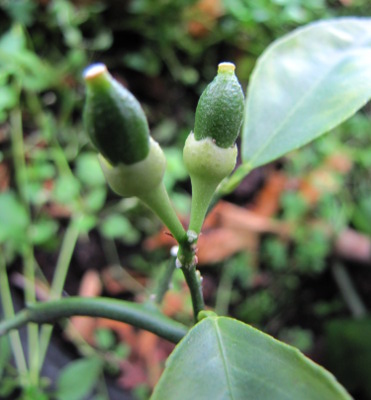
In fact, our dwarf Meyer
lemon was so pleased it popped out in
literally hundreds of blooms! Now, from my vague understanding of
the bloom-decision-process in fruit trees, I think the number of
 flowers must have been decided before I started pouring urine around
her roots (although I'm not positive about that.) The real test
will be how many of those flowers she sets into fruit since my
experience has been that our Meyer lemon drops a large percentage of
the young fruits soon after blooming. I have high hopes that
giving her plenty of nitrogen during that critical fruit-setting period
might help us keep a higher percentage of fruits this year and get a
bumper crop of lemons next winter. As the old saying goes, "If
you've got urine, make lemonaide."
flowers must have been decided before I started pouring urine around
her roots (although I'm not positive about that.) The real test
will be how many of those flowers she sets into fruit since my
experience has been that our Meyer lemon drops a large percentage of
the young fruits soon after blooming. I have high hopes that
giving her plenty of nitrogen during that critical fruit-setting period
might help us keep a higher percentage of fruits this year and get a
bumper crop of lemons next winter. As the old saying goes, "If
you've got urine, make lemonaide."
| This post is part of our Urine in the Garden lunchtime series.
Read all of the entries: |

I've found that using a
dedicated pair of gloves for sticky
roofing chores makes the
clean up process quick and easy.
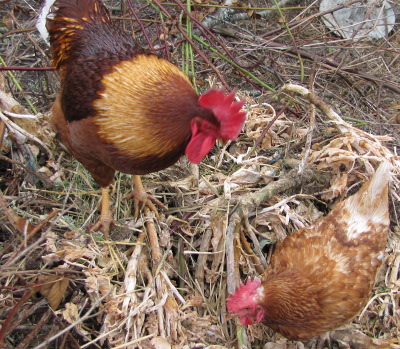 We
kept our homegrown
rooster because I want to try to raise our own chicks this year,
but I have to admit that until recently I still muttered "freeloader"
under my breath whenever I saw him. He started to prove his worth
when we integrated three flocks --- the rooster's
mitigating instinct means that even the lowest chicken on the totem
pole gets to eat at the table and doesn't get picked on too much. But while shoveling
manure, I discovered that the rooster was even more useful than I
thought.
We
kept our homegrown
rooster because I want to try to raise our own chicks this year,
but I have to admit that until recently I still muttered "freeloader"
under my breath whenever I saw him. He started to prove his worth
when we integrated three flocks --- the rooster's
mitigating instinct means that even the lowest chicken on the totem
pole gets to eat at the table and doesn't get picked on too much. But while shoveling
manure, I discovered that the rooster was even more useful than I
thought.
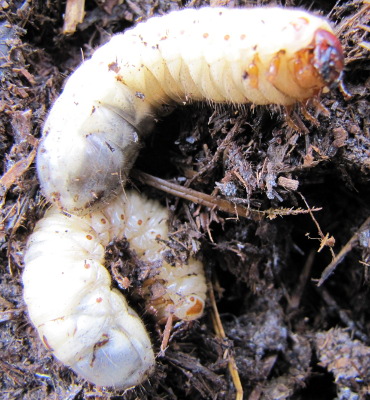 I soon turned up a big fat
grub and headed over to the chicken pasture to give the girls a
treat. The only chicken outside, though, was the rooster, so I
decided it was time for a real test. When I bring out the scraps
in the morning, the rooster is quite a gentleman, picking out the best
pieces and clucking over them until one of his harem takes the treat,
but I figured he'd just eat up the grub when left to his own
devices. I lobbed the beetle larva under his nose, and the
rooster immediately started clucking like crazy. He picked up
that grub, dropped it back down to the ground, and clucked some
more. Within seconds, a hen came to see what the fuss was about,
and the grub went down her gullet faster than I could pull out the
camera.
I soon turned up a big fat
grub and headed over to the chicken pasture to give the girls a
treat. The only chicken outside, though, was the rooster, so I
decided it was time for a real test. When I bring out the scraps
in the morning, the rooster is quite a gentleman, picking out the best
pieces and clucking over them until one of his harem takes the treat,
but I figured he'd just eat up the grub when left to his own
devices. I lobbed the beetle larva under his nose, and the
rooster immediately started clucking like crazy. He picked up
that grub, dropped it back down to the ground, and clucked some
more. Within seconds, a hen came to see what the fuss was about,
and the grub went down her gullet faster than I could pull out the
camera.
As much as I hate to say
I was wrong, I have to admit that our rooster is far from a
freeloader. He's definitely going to remain an integral part of
the flock.
 Fertilizing
our house plants with urine seems to be working great, but once
Mark
started bottling his pee, I realized that we had too much of a good
thing. What to do with the extra?
Fertilizing
our house plants with urine seems to be working great, but once
Mark
started bottling his pee, I realized that we had too much of a good
thing. What to do with the extra?
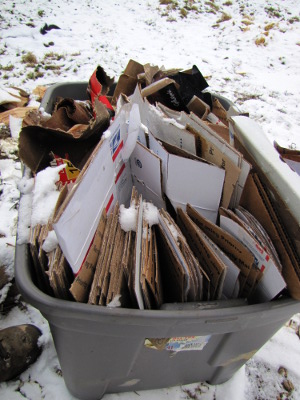
Urine is so high in
nitrogen that one of its best uses is mixing
with high carbon compounds to create a C:N ratio more suited to
decomposition. Although I use large
cardboard boxes for kill
mulches as soon as we get them (sometimes emptying out components
early
to get to those important boxes), small cardboard boxes tend to pile
up, waiting for a use. Time to see if we can compost them with
pee!
Following the lead of
someone mentioned in Liquid Gold,
I filled a plastic bin with cardboard, making sure that the cut ends
all faced up. By laying the cardboard vertically in the box
rather than horizontally, I made it much more likely that urine will
soak down into each layer and get to work rather than puddling in the
top few layers. I didn't want the cardboard to get waterlogged,
so I figured I could either put holes in the bottom of the bin and put
it outside, or leave the bin intact and move it out of the weather, and
I chose the latter. The final step was to pour a gallon of urine
over the cardboard. I'll try to remember to check on the bin at
intervals and pour on more pee if the cardboard seems dry, but
otherwise I'll just leave the decomposition chamber to do its thing and
report on the experiment in six months to a year.
| This post is part of our Urine in the Garden lunchtime series.
Read all of the entries: |
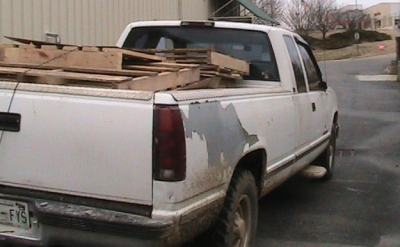 The first
chicken pasture coop
worked out fine during the summer months, but our hillside blocks all
the winter sun and makes the chickens a bit grumpier than they should
be.
The first
chicken pasture coop
worked out fine during the summer months, but our hillside blocks all
the winter sun and makes the chickens a bit grumpier than they should
be.
A second coop with more
pasture is now planned for a more sunny location.
I'm pretty sure I can use the
above load of pallets for most of the building materials, just not sure
exactly which way it will all go together yet.
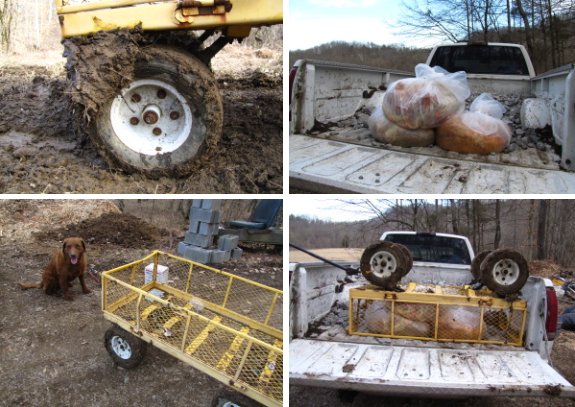
 When
Mark's not home, I often do stupid things. The trouble is that
I'm not very patient and I don't like to admit that anything's beyond
my abilities --- in other words, waiting for Mark to get home and help
me with a task is often too tough. That's how I ended up with
bags of food scraps floating down the creek and me jumping into the
freezing water after them.
When
Mark's not home, I often do stupid things. The trouble is that
I'm not very patient and I don't like to admit that anything's beyond
my abilities --- in other words, waiting for Mark to get home and help
me with a task is often too tough. That's how I ended up with
bags of food scraps floating down the creek and me jumping into the
freezing water after them.
It all started when the
ground froze good and solid and Mark headed to the big city to pick up
a truckload of pallets. I'd been aching for a day like this to
 haul in the rest of our firewood since the woodshed was nearly empty
and we had a full cord sitting out at the parking area, so I jumped in
the golf cart and started hauling. On the third trip, though,
something was clearly wrong --- an area around the back wheels started
squealing like crazy and the cart began to lose power at
intervals. Yikes! I stabled our intrepid golf cart and
moved onto the next thing on my agenda --- heading into town to mail chicken waterers and pick up the week's food
scraps. Based on the
small amount of scraps we'd gotten last week, I figured I could easily
wheel the scraps home with our fancy
new wheelbarrow.
haul in the rest of our firewood since the woodshed was nearly empty
and we had a full cord sitting out at the parking area, so I jumped in
the golf cart and started hauling. On the third trip, though,
something was clearly wrong --- an area around the back wheels started
squealing like crazy and the cart began to lose power at
intervals. Yikes! I stabled our intrepid golf cart and
moved onto the next thing on my agenda --- heading into town to mail chicken waterers and pick up the week's food
scraps. Based on the
small amount of scraps we'd gotten last week, I figured I could easily
wheel the scraps home with our fancy
new wheelbarrow.
 At
the school, I discovered that the kids have started learning the system
better, which means that food scraps end up in our bin instead of in
the trash. As a result, we got nearly twice as much food scrap
volume as last time --- exciting! At this point, if I was smart,
I would have noticed that the driveway was starting to thaw out and
would have chosen to split the scraps into two loads, or might have
vetoed the wheelbarrow expedition entirely and waited until Mark came
back and the driveway froze again to drive the compostables home.
But, being who I am, I instead loaded the wheelbarrow to the brim and
went merrily on my way.
At
the school, I discovered that the kids have started learning the system
better, which means that food scraps end up in our bin instead of in
the trash. As a result, we got nearly twice as much food scrap
volume as last time --- exciting! At this point, if I was smart,
I would have noticed that the driveway was starting to thaw out and
would have chosen to split the scraps into two loads, or might have
vetoed the wheelbarrow expedition entirely and waited until Mark came
back and the driveway froze again to drive the compostables home.
But, being who I am, I instead loaded the wheelbarrow to the brim and
went merrily on my way.
 It's downhill for the first
quarter of the journey, and that was easy, but then I came to the
ford. I hadn't thought this expedition through, so I was just
wearing my work boots, which means I had to hop on blocks on the side
of the ford to get across the creek. Did you know that
wheelbarrows don't hop on blocks? The overloaded wheelbarrow and
I did some weird contortions, trying to get across the creek together
without my feet getting wet, and then she tiiiiiiiiipppppped.....
It's downhill for the first
quarter of the journey, and that was easy, but then I came to the
ford. I hadn't thought this expedition through, so I was just
wearing my work boots, which means I had to hop on blocks on the side
of the ford to get across the creek. Did you know that
wheelbarrows don't hop on blocks? The overloaded wheelbarrow and
I did some weird contortions, trying to get across the creek together
without my feet getting wet, and then she tiiiiiiiiipppppped.....
I didn't fall in the
creek --- that's about the only thing I did right. I just let the
wheelbarrow tip over and snagged the one bag still within reach,
wheeling the empty wheelbarrow to the top of the ford. But I had
to get even wetter to capture the other bags as they floated merrily
away down the creek (not polluting the water, luckily --- they were
sealed.) A few minutes later, I had a very cold, wet foot, but
the food scraps were rescued and back in the wheelbarrow.
 I
thought I was home free, but the top inch of driveway had turned into
mud that coated the overloaded wheelbarrow's wheel and made it nearly
impossible to push. Just as I gave up, Lucy got engrossed in
digging a rodent out of the woods, which is good since I otherwise
couldn't have left the food scraps unattended around her. I
hurried home, begged the golf cart to give me one more trip, and drove
down to rescue my wheelbarrow and food scraps. We made it home at
last and I weighed and covered up the food scraps in their temporary
compost bin before heading inside to dry my shoe. I know I'll
regret this episode later when the boot is still damp inside, but
for now, I'm just happy that I got the job done, even if I put in five
times as much energy as I needed to.
I
thought I was home free, but the top inch of driveway had turned into
mud that coated the overloaded wheelbarrow's wheel and made it nearly
impossible to push. Just as I gave up, Lucy got engrossed in
digging a rodent out of the woods, which is good since I otherwise
couldn't have left the food scraps unattended around her. I
hurried home, begged the golf cart to give me one more trip, and drove
down to rescue my wheelbarrow and food scraps. We made it home at
last and I weighed and covered up the food scraps in their temporary
compost bin before heading inside to dry my shoe. I know I'll
regret this episode later when the boot is still damp inside, but
for now, I'm just happy that I got the job done, even if I put in five
times as much energy as I needed to.
Mark's motto is "Work
smart, not hard." My motto, apparently, is "Jump in the creek
when it's below freezing outside! It's fun!"
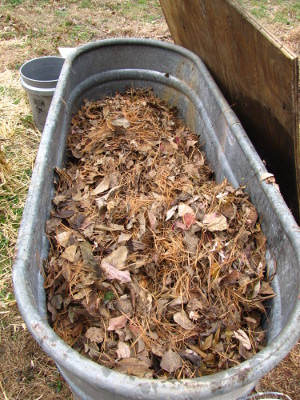
 I've
discussed the benefits of
biochar before, but as I did more research, I realized that
gardening with biochar isn't as simple as taking charcoal and throwing
it in your soil. Instead, you need to prepare the charcoal a bit
to get best results. The first step in preparation is soaking the
charcoal --- charcoal is naturally hydrophobic, so you have to overcome
that barrier to water. The second step is to add some kind of
high nitrogen input to the charcoal to give the first microorganisms
something to eat. You can do both preparation steps at once using
urine.
I've
discussed the benefits of
biochar before, but as I did more research, I realized that
gardening with biochar isn't as simple as taking charcoal and throwing
it in your soil. Instead, you need to prepare the charcoal a bit
to get best results. The first step in preparation is soaking the
charcoal --- charcoal is naturally hydrophobic, so you have to overcome
that barrier to water. The second step is to add some kind of
high nitrogen input to the charcoal to give the first microorganisms
something to eat. You can do both preparation steps at once using
urine.
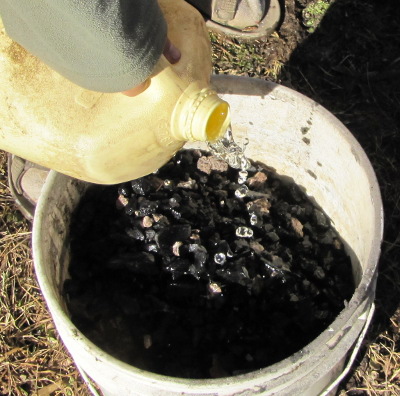
I
filled a four gallon bucket with biochar and poured a gallon
of urine over top. The charcoal chunks snapped, crackled, and
popped just like rice cereal as they soaked up the liquid, and only a
scant half cup was left in the bottom of the bucket a few hours
later. I'll apply the mixture to the garden soon and hope that
microorganisms get to work on the fertilized biochar in time to see
results in this year's garden. (Much more on biochar to come in
next week's lunchtime series.)
| This post is part of our Urine in the Garden lunchtime series.
Read all of the entries: |
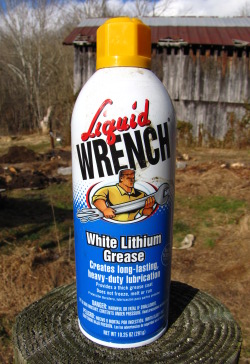
I recently discovered that white lithium grease is a much more
appropriate lubricant to use than WD-40 when it comes to items that are
open to the elements.
It provides a thick coat that stays in place and won't freeze.
The technical name for it is Cerflon, which uses a carbon-flourine
bond to form a ceramic reinforced fluoropolymer.
 In
the past, I've direct-seeded onions at the beginning of March.
The first year, we had a
great harvest.
The second year, I put
the onions in the worst part of the garden and the clayey, waterlogged
soil resulted in puny onions. And last year was even worse --- I
didn't even get any of the onion seeds to sprout! Clearly, I need
to do something different this year.
In
the past, I've direct-seeded onions at the beginning of March.
The first year, we had a
great harvest.
The second year, I put
the onions in the worst part of the garden and the clayey, waterlogged
soil resulted in puny onions. And last year was even worse --- I
didn't even get any of the onion seeds to sprout! Clearly, I need
to do something different this year.
Year two's mistake is
easy to remedy --- I'll be planting my onions in
the deeper soil of the mule garden from now on. And I suspect
that part of my problem last year was shoddy seeds, so we've changed
our loyalties to a seed company with a better reputation
(Johnny's). Still, I want to try giving our precious Alliums a bit of extra protection in
the 2011 garden.
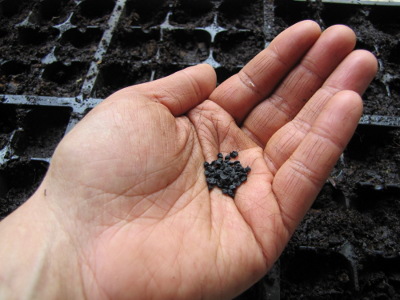
 The
first method I'm using is more work (from me) and more energy (from
the electric grid), but I want to hedge my bets and make sure I get at
least some onions this year. So I've started a flat of onions
inside and might start one or two more. The problem with starting
seeds indoors is that I'm committing to running grow lights for a
couple of months, and I also have to give the seedlings extra TLC at
the transplanting stage, but it does make me happy to play in the soil
in early February.
The
first method I'm using is more work (from me) and more energy (from
the electric grid), but I want to hedge my bets and make sure I get at
least some onions this year. So I've started a flat of onions
inside and might start one or two more. The problem with starting
seeds indoors is that I'm committing to running grow lights for a
couple of months, and I also have to give the seedlings extra TLC at
the transplanting stage, but it does make me happy to play in the soil
in early February.
Meanwhile, I'll be
starting some onion seeds directly in the ground
under quick hoops
within the next few weeks. Onion seeds are
supposed to need the same soil temperature for germination as lettuce,
so I could probably plant them under quick hoops right now,
but I want to tweak our design a bit before I build another quick hoop
structure.
 Of
course, we're growing several beds of potato
onions too, but I'm
still not sold on the idea that these perennial onions will make big
bulbs. We'll just have to wait and see which method gives us the
best onions in 2011.
Of
course, we're growing several beds of potato
onions too, but I'm
still not sold on the idea that these perennial onions will make big
bulbs. We'll just have to wait and see which method gives us the
best onions in 2011.
 Once
I started collecting my own urine (with the quick and dirty contraption
shown here), I suddenly had a lot more to play with. In fact, I
ran out of projects dying for an immediate dose of nitrogen and ended
up wandering around the garden with a jug of liquid gold in my hand.
Once
I started collecting my own urine (with the quick and dirty contraption
shown here), I suddenly had a lot more to play with. In fact, I
ran out of projects dying for an immediate dose of nitrogen and ended
up wandering around the garden with a jug of liquid gold in my hand.
Aha! The fall
compost pile was sitting there doing nothing, mostly because I'd made
it completely out of late summer weeds, which have a higher C:N ratio
than spring weeds and decompose very slowly on their own. Time to
see if a regular dose of urine will speed up the composting process.
That's all of our urine
experiments for now, but I'm sure I'll come up with more as the pee
starts piling up again. Have you gotten inspired and started to
use your urine in your garden? What's your favorite method?
| This post is part of our Urine in the Garden lunchtime series.
Read all of the entries: |
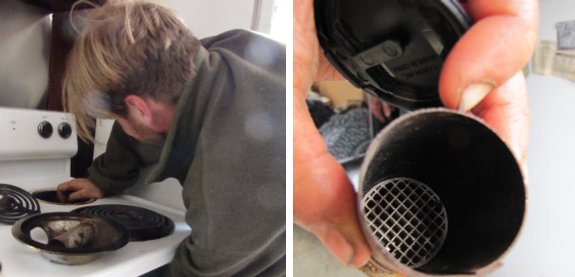
Our new stove seemed to have
a problem with leaking smoke and heat out of the top right burner in
the back. After a few minutes of research we found out this is normal
and all stoves have this vent hole to prevent explosions, but our old
one never seemed to leak any smoke.
It only took about 10 minutes
to take the old grid thing out and make room for it in the new vent
hole, which seems to have stopped the leaking smoke problem.
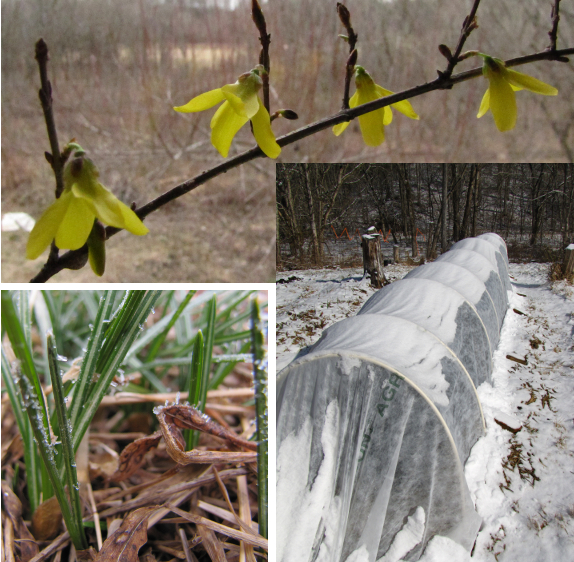
When small talk runs
toward the weather, just about everyone tells me that they're heartily
sick of winter. The truth is that it's been an abnormally cold
and snowy winter for our region, but I can't get behind that
sentiment. Yes, my green thumb is aching for spring, but at the
same time, there is so much joy to be found in a snow-covered quick hoop in February, in crocus
leaves sticking up through the frozen soil, and in forsythia forced to
bloom early on a windowsill. (Thanks for the cutting, Mom!)
There's the sheer
rapture of baking my chilly toes in front of a wood stove on a frigid
day. The way my long johns hug me after I dash out of my cold
bedroom to find them. And the way the late sunrise gives me
permission to sleep in.
Although we don't talk
about it much here, Mark's patented system of positive thought is 25%
of the Walden Effect. So cheer yourself up and find the sunny
side of February. What's your favorite part of this last full
month of winter?
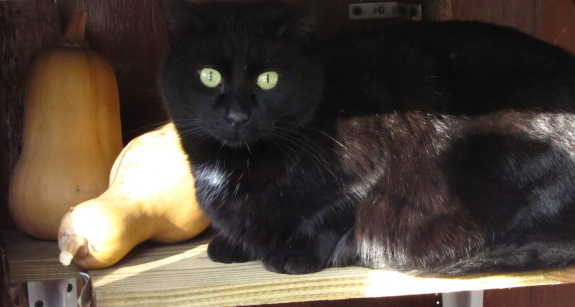
We've lost about a dozen butternut
squashes this year due to
freezing.
The problem was a decision on
how high to set the space heater when we went on vacation.
I remember Anna saying
"Should we put it on level 2?"....."Nahhhh...level 1 should be fine",
was my reply.
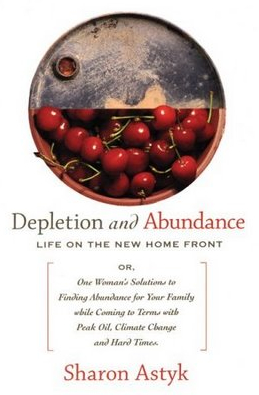 I read a lot of blogs, but only a handful
captivate me enough that I talk about them with Mark around the dinner
table. Sharon Astyk's blog is so thought-provoking that we
discuss "blogger Sharon" at least once a week. Since Sharon is
also an author, it seemed like a no-brainer to check one of her books
out of the library.
I read a lot of blogs, but only a handful
captivate me enough that I talk about them with Mark around the dinner
table. Sharon Astyk's blog is so thought-provoking that we
discuss "blogger Sharon" at least once a week. Since Sharon is
also an author, it seemed like a no-brainer to check one of her books
out of the library.
Depletion
and Abundance
fleshed out the thesis I've been picking up in bits and pieces on
Sharon's blog --- peak oil and climate change are going to change the
face of our world, and we need to be prepared for a lower energy future
full of good food and friends (and hard work.) Then there's the
Anyway clause --- even if you don't believe in peak oil and climate
change, the actions you would take to prepare for those eventualities
are just the right thing to do anyway.
Unfortunately, since I'd
been reading her blog for months, I was a bit disappointed to be
getting the same information again in book form. I kept hoping
we'd make our way out of the big picture and that Sharon would write
more about the minutae --- for example, I was aching to hear about how
her family cut their energy usage to 10% of the national average over
the course of a year. (Perhaps that tale is in one of her
other books?)
People who enjoy
philosophizing will probably take to Depletion
and Abundance
better than I did. I tend to look for solid answers when I read a
book (or at least for a record of what worked and didn't work in the
author's own experience.) Instead, Sharon's book is full of
thought-provoking questions about home and community, but not enough
hard data to really suck me in. Still, I'd recommend that you
pick up Sharon Astyk's book, or at least add her blogs to your reading
list for exactly the minutae I missed in her book --- milk goats,
homeschooling, canning, and much more. Sharon writes one blog
about "food, farm, and family" and another on Science Blogs
about the more technical side of peak oil and climate change.
When we first started the hoop
house project there was an experiment to use pieces of hose
material cut lengthwise to secure the Agribon fabric to the PVC frame.
It didn't work.
The hose pieces fit nicely
around the PVC pipe, but the pressure was just too much for it to keep
the fabric attached. We ended up making the hoop shorter so that
we could have some extra fabric on the bottom to roll up and weigh down
with 10 foot long sections of rebar and bricks.
 What
do you do for food on the road? We used to pack sandwiches a lot,
but have been reducing our grain intake drastically lately, which
leaves me in a bit of a bind. Instead, we've ended up visiting
restaurants with lots of vegetables on the menu, but we've become such
snobs that anyone's vegetables except our own leave us feeling a bit
empty (and I hate to pay for restaurant food very often.)
What
do you do for food on the road? We used to pack sandwiches a lot,
but have been reducing our grain intake drastically lately, which
leaves me in a bit of a bind. Instead, we've ended up visiting
restaurants with lots of vegetables on the menu, but we've become such
snobs that anyone's vegetables except our own leave us feeling a bit
empty (and I hate to pay for restaurant food very often.)
On the way back from
visiting Mark's folks in Ohio this past weekend, Mark's step-mom hooked
us up with this fancy container that makes picnicking with real food
much easier. You fill the container up with hot water and let the
warmth soak in for a few minutes, then dry the container out and put in
your hot food. Three hours later when we finished exploring an
Indian mound, the vittles were still toasty and ready for our picnic.
What are your favorite
traveling recipes and methods?
 I've been intrigued by terra
preta
ever since I first heard about it, and am equally intrigued by its
modern grandchild, biochar. Last year, Mark and I attended a
workshop on biochar and came away with a lot of information about how biochar is
used in large scale agriculture.
I resolved to put biochar to use in our 2011 garden, then got bogged
down in the details of how to tweak the technology to fit the backyard
scale. Did I need to build a special piece of equipment to make
the biochar? Did I need to grind the biochar? To charge or
activate it? Is biochar compatible with no-till or does it have
to be worked into the soil? And what exactly happens when you put
biochar in the soil?
I've been intrigued by terra
preta
ever since I first heard about it, and am equally intrigued by its
modern grandchild, biochar. Last year, Mark and I attended a
workshop on biochar and came away with a lot of information about how biochar is
used in large scale agriculture.
I resolved to put biochar to use in our 2011 garden, then got bogged
down in the details of how to tweak the technology to fit the backyard
scale. Did I need to build a special piece of equipment to make
the biochar? Did I need to grind the biochar? To charge or
activate it? Is biochar compatible with no-till or does it have
to be worked into the soil? And what exactly happens when you put
biochar in the soil?
In this week's lunchtime
series, I do my best to answer those questions. I delved into
several books and websites in the research process, but the ones I
think you'd enjoy the most are:
 Lehmann, Johannes, and Stephen
Joseph. 2009. Biochar
for Environmental Management. Earthscan Publications,
Ltd., London.
Lehmann, Johannes, and Stephen
Joseph. 2009. Biochar
for Environmental Management. Earthscan Publications,
Ltd., London.
| This post is part of our Biochar in the Backyard lunchtime series.
Read all of the entries: |
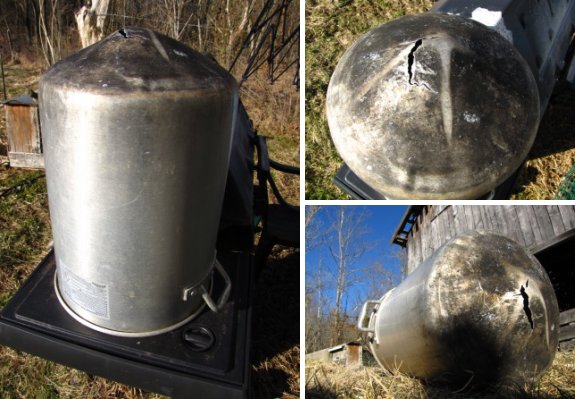
I left this large pot out all
winter and somehow the lid blew off and filled up with water.
Big mistake!
I'm not sure why I didn't put
it away in the barn back in the fall...it was fine like that the last 3
winters, but I guess these cold spells of 2011 were just too much for
its made in China construciton.
I'll do a bit of research
before we find a replacement. The size was perfect for dunking chickens
in on processing day, but maybe aluminum wasn't the best metal for this
application.
 I've
always been confused by frost
free dates,
especially after asking two local extension agents for information and
getting two very different answers. So I was thrilled to stumble
upon a tool that gives me actual data
from local weather stations while also clearing up the mystery.
I've
always been confused by frost
free dates,
especially after asking two local extension agents for information and
getting two very different answers. So I was thrilled to stumble
upon a tool that gives me actual data
from local weather stations while also clearing up the mystery.
Frost free dates are
like flood zones. If you live in a wet region like ours, you'll
want to head to the local authorities to find a map showing 10 year and
100 year flood zones. The idea is that, on average, waters will
reach the 10 year flood line once every decade and the 100 year flood
line once per century. Of course, this is a statistical tool, not
a forecast, so you might get a 100 year flood three years running, or
might not get one for 300 years. But either way, you won't want
to build your house in the 10 year flood zone, and probably shouldn't
put it in the 100 year flood zone either.
 Similarly, frost free dates
are reported based on the percentage likelihood of seeing frost on a
certain day in the spring. Using data from our closest weather
station, we have a 10% chance of seeing frost as late as May 16,
compared to a 90% chance of seeing frost on April 12. On average,
our last frost falls on April 29. So, in a way, those extension
agents were both right. One was being careful and giving me the
date after which frost will nearly never occur while the other was more
of a gambler and figured we could plant on the average last frost date.
Similarly, frost free dates
are reported based on the percentage likelihood of seeing frost on a
certain day in the spring. Using data from our closest weather
station, we have a 10% chance of seeing frost as late as May 16,
compared to a 90% chance of seeing frost on April 12. On average,
our last frost falls on April 29. So, in a way, those extension
agents were both right. One was being careful and giving me the
date after which frost will nearly never occur while the other was more
of a gambler and figured we could plant on the average last frost date.
 The Dave's Garden tool also
tells me the chances of seeing 28
degree frosts (which will nip our peach blossoms) and 24 degree
frosts (which will kill unprotected broccoli.) If I hadn't decided
to change over to using
soil temperature as my method of choosing planting dates, I can tell this tool would
be worth its weight in gold.
The Dave's Garden tool also
tells me the chances of seeing 28
degree frosts (which will nip our peach blossoms) and 24 degree
frosts (which will kill unprotected broccoli.) If I hadn't decided
to change over to using
soil temperature as my method of choosing planting dates, I can tell this tool would
be worth its weight in gold.
(In case you're curious,
the photos in this post are from our trip to Ohio, where there's still
lots of snow on the ground. You can see my review
of Mound City over
on our travel blog.)
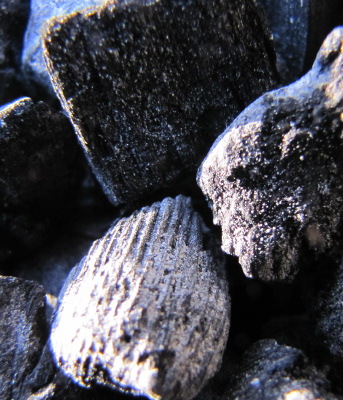 I've posted previously about
the benefits
of biochar, but how
does biochar actually cause those increases in crop yield? It's
probably easiest for the average gardener to understand that the
increase in pH is caused by the ash that inevitably comes along for the
ride --- using wood
ashes to increase the alkalinity of (or "sweeten") soil is common
wisdom among farmers. And we can visualize the water retention
properties too since a closeup look at biochar makes it look like a
tiny sponge.
I've posted previously about
the benefits
of biochar, but how
does biochar actually cause those increases in crop yield? It's
probably easiest for the average gardener to understand that the
increase in pH is caused by the ash that inevitably comes along for the
ride --- using wood
ashes to increase the alkalinity of (or "sweeten") soil is common
wisdom among farmers. And we can visualize the water retention
properties too since a closeup look at biochar makes it look like a
tiny sponge.
The complexities come in
when you start thinking of the chemistry involved. Since biochar
is negatively charged, it naturally attracts anything positively
charged in the soil, and that includes important plant nutrients like
calcium, nitrates, phosphorus, and silicates. This chemical
attraction is why biochar in your soil prevents nutrient leaching --- the minerals are kept in
the root zone rather than washing into the subsoil during heavy rains.
All of these factors
help your plants grow, but probably the greatest benefit of biochar is
its ability to increase the populations of beneficial microorganisms in
the soil. In fact, one study of Amazonian Dark Earth (aka terra
preta) compared to nearby, natural soil showed that the Dark Earth
contained a completely different set of microorganisms than the natural
soil.
 Biochar helps many bacteria
and fungi grow because it provides tiny nooks and crannies just big
enough for these microorganisms but not large enough for predator
microorganisms. In their protected dens, the bacteria and fungi
grow like crazy, especially if you make your biochar at a relatively
low temperature so that the insides are coated with energy-rich tars
for them to eat. Scientists have found that arbuscular
mycorrhizae (the fungi that attach to your plants' roots and help them
get hard-to-find nutrients) are especially aided by biochar in the soil.
Biochar helps many bacteria
and fungi grow because it provides tiny nooks and crannies just big
enough for these microorganisms but not large enough for predator
microorganisms. In their protected dens, the bacteria and fungi
grow like crazy, especially if you make your biochar at a relatively
low temperature so that the insides are coated with energy-rich tars
for them to eat. Scientists have found that arbuscular
mycorrhizae (the fungi that attach to your plants' roots and help them
get hard-to-find nutrients) are especially aided by biochar in the soil.
Nitrogen-fixing
bacteria also love
biochar, but for a different reason. The biochar pores tend to
create low oxygen conditions where these anaerobic bacteria
thrive. As a result, legumes create more nitrogen-fixing nodules
when biochar is in the soil and free-living nitrogen-fixing bacteria
also multiply. That means more nitrogen for your plants without
any work on your part.
| This post is part of our Biochar in the Backyard lunchtime series.
Read all of the entries: |
With the golf cart down and
the driveway too muddy for the truck I resorted to the old trusty garden
wagon to haul in the latest round of food
scraps/worm food.
I didn't make it that far
before I realized mud was packing in the wheel well area causing an
increase in the rolling resistance to the point of being dragged parts
of the way.
My solution for now is to use
the wagon as a cage and figure something out tomorrow. Maybe we should
build the new worm bin by the parking area to simplify the operation?
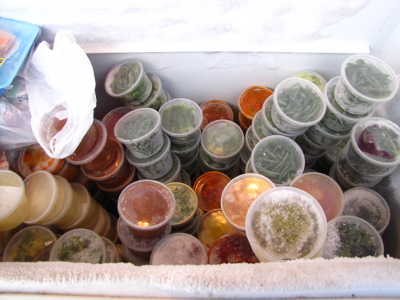 This
is a perfect time of year to assess the state of your freezer (or
pantry) and change your hoarding goals for next year. Every year,
I try to guess how much of each type of produce we should save for the
winter, and every year it seems like our tastes change and I wish I'd
had more of some things and less of others. This winter, our joy
has been harvest
catch-all soup ---
when I'm feeling under the weather or am just in need of a quick meal,
I thaw out two pint-sized servings, add a fried egg or bit of cheese
for extra protein, and the meal is done. Even though I froze
seven gallons of the soup, we could have used more.
This
is a perfect time of year to assess the state of your freezer (or
pantry) and change your hoarding goals for next year. Every year,
I try to guess how much of each type of produce we should save for the
winter, and every year it seems like our tastes change and I wish I'd
had more of some things and less of others. This winter, our joy
has been harvest
catch-all soup ---
when I'm feeling under the weather or am just in need of a quick meal,
I thaw out two pint-sized servings, add a fried egg or bit of cheese
for extra protein, and the meal is done. Even though I froze
seven gallons of the soup, we could have used more.
 On the other hand, our pesto
column is nearly untouched. Since we're now exercising a lot more
moderation with pasta, I tend to make lasagna instead of pesto pasta or
spaghetti with tomato sauce. I can use up three quarts of
vegetables in a single pan of lasagna, mix in two cups of flour (turned
into noodles, of course), add a pound of meat and some cheese, and have
a well-rounded, one dish dinner.
On the other hand, our pesto
column is nearly untouched. Since we're now exercising a lot more
moderation with pasta, I tend to make lasagna instead of pesto pasta or
spaghetti with tomato sauce. I can use up three quarts of
vegetables in a single pan of lasagna, mix in two cups of flour (turned
into noodles, of course), add a pound of meat and some cheese, and have
a well-rounded, one dish dinner.
Greens are also going
begging. We love our greens year-round, but since we were eating
them fresh out of the garden well into December, we just didn't put as
much dent into the frozen winter supply.
I like to take stock now
rather than later because I always make sure all of the food gets eaten
before next year's produce piles into the freezer. By April, I
may have forgotten wishing for more soup in February and would just
look at my freezer chart and assume that since we ate
or gave away everything, the proportions were just about right.
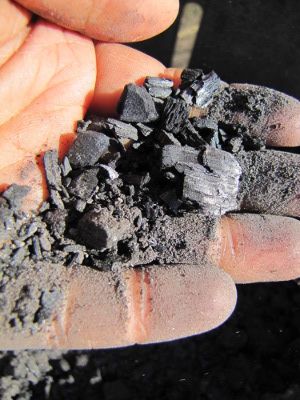 We've
been collecting
charcoal all winter by screening it out of the ashes in the bottom of
the wood stove,
waiting until I figured out how to crush it before putting the biochar
to use. Large-scale farmers powder their
biochar
so that it's easy to apply with their machinery, but on the small
scale, crushing biochar is a pain.
In fact, from the multitude of questions about how to crush biochar on
forums (and from my own experience), I suspect that the crushing step
is holding a lot of gardeners back using biochar in the garden.
Is it really necessary to grind biochar?
We've
been collecting
charcoal all winter by screening it out of the ashes in the bottom of
the wood stove,
waiting until I figured out how to crush it before putting the biochar
to use. Large-scale farmers powder their
biochar
so that it's easy to apply with their machinery, but on the small
scale, crushing biochar is a pain.
In fact, from the multitude of questions about how to crush biochar on
forums (and from my own experience), I suspect that the crushing step
is holding a lot of gardeners back using biochar in the garden.
Is it really necessary to grind biochar?
The answer is "probably not." Scientists found that biochar
particle sizes ranging from a twelfth of an inch to three quarters of
an inch showed the same effects on crops. In fact, natural
processes in the soil probably break those large particles down into
small particles quite quickly due to freeze/thaw cycles and to plant
roots and fungal hyphae penetrating
the charcoal. Unless you're an industrial-scale farmer who needs
powdered biochar so that it can be applied with your existing
machinery, grinding charcoal probably only speeds up the process by a
couple of months to a year.
I even stumbled across a statement on
a biochar forum that
made
me think we'd be better off using chunky biochar in our soil:
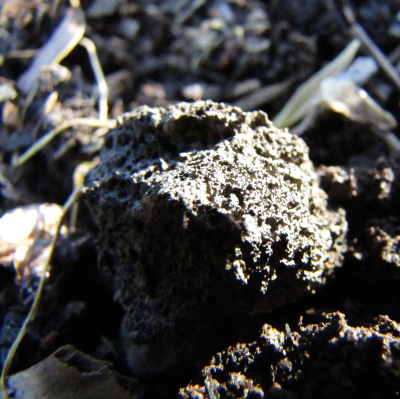 Since our soil is
already high in clay and needs all the airflow it can
get, it sounds like we should
apply our
biochar in chunk
form. Come to think of it, the healthiest part of our current
garden is the area where the previous residents tossed their stove
ashes, and the chunks of charcoal in the soil there don't seem to be
causing any problems. A few big lumps like this remain after
fifty years, but most of the charcoal has broken down to soil-sized
particles.
Since our soil is
already high in clay and needs all the airflow it can
get, it sounds like we should
apply our
biochar in chunk
form. Come to think of it, the healthiest part of our current
garden is the area where the previous residents tossed their stove
ashes, and the chunks of charcoal in the soil there don't seem to be
causing any problems. A few big lumps like this remain after
fifty years, but most of the charcoal has broken down to soil-sized
particles.
| This post is part of our Biochar in the Backyard lunchtime series.
Read all of the entries: |
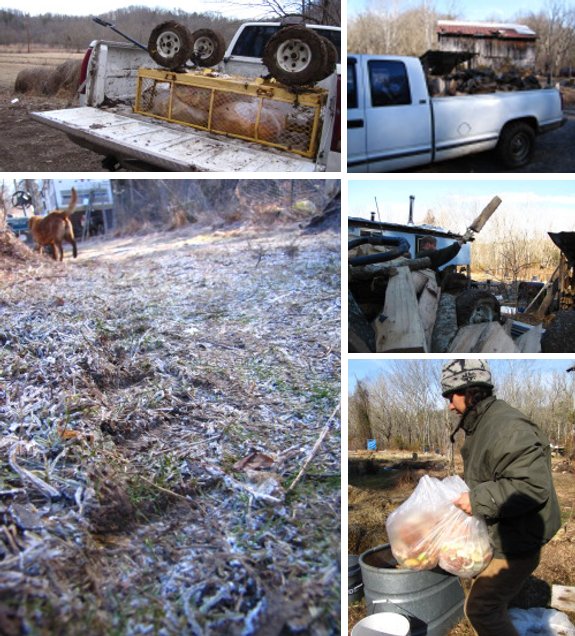
I wasn't expecting the ground
to freeze overnight...but the power of ice
really came through in providing a small window of opportunity to drive
in the food
scraps and most of the remaining firewood.
Our hillside that blocks the
morning winter sun has some advantages after all.
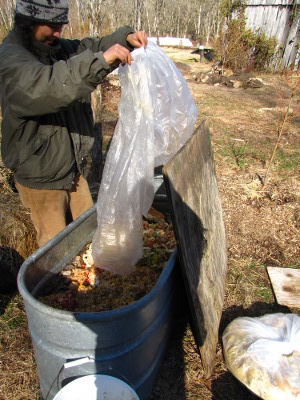 Even
though I'd like a bit more data before building our worm bin, it's
clearly time to move on to the next step --- our compost
holding bin is
already almost full! We've decided to make a simple
bin like Binet Payne's,
but with a false bottom to catch the compost tea. What we haven't
decided yet is how many worms to buy.
Even
though I'd like a bit more data before building our worm bin, it's
clearly time to move on to the next step --- our compost
holding bin is
already almost full! We've decided to make a simple
bin like Binet Payne's,
but with a false bottom to catch the compost tea. What we haven't
decided yet is how many worms to buy.
You
need two pounds of worms per pound of daily food scraps,
and if you factor in the no-food weekends, we're currently clocking in
around 17 pounds of scraps per day. But 34 pounds of worms would
cost around $850, unless we can find a source of worms in bulk.
Of course, worms will
reproduce, and under good conditions Binet Payne
estimates that one of her bins stocked with 8 pounds of worms will come
up to full production (64 pounds of worms) in 3 months.
Currently, I'm budgeting $100 for worms, figuring we'll have to build
some additional compost holding bins to use the extra food scraps for
the first few months. If you know of any bulk sources of compost
worms to make my worm dollars go further, I'd appreciate your advice!
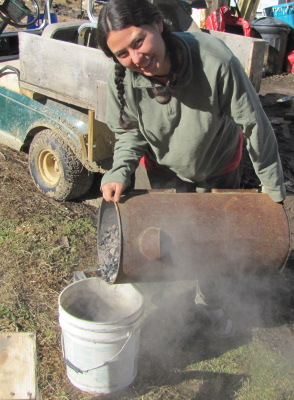 Traditional terra
preta,
on which current biochar research is based, was made by mixing
charcoal, bones, pottery shards, human waste, and other trash together
in a pit, and recent studies have shown that it's best to mimic this by
adding some sort of high nitrogen fertilizer to your charcoal before
applying it to the garden. Applying biochar to the soil without
adding nitrogen to it first can sometimes stunt your plants for a short
time, a bit like mixing fresh wood chips into the soil, since
microorganisms have to use up nitrogen to break down the carbon.
Adding manure, compost, or urine
to the biochar counteracts that initial
decline in plant growth and may also tempt microorganisms to move into
their biochar condos faster.
Traditional terra
preta,
on which current biochar research is based, was made by mixing
charcoal, bones, pottery shards, human waste, and other trash together
in a pit, and recent studies have shown that it's best to mimic this by
adding some sort of high nitrogen fertilizer to your charcoal before
applying it to the garden. Applying biochar to the soil without
adding nitrogen to it first can sometimes stunt your plants for a short
time, a bit like mixing fresh wood chips into the soil, since
microorganisms have to use up nitrogen to break down the carbon.
Adding manure, compost, or urine
to the biochar counteracts that initial
decline in plant growth and may also tempt microorganisms to move into
their biochar condos faster.
If you're in a hurry for great soil, an alternative method of
activating the biochar is working it into your compost pile. A
few studies have suggested that biochar helps speed up the composting
process (probably by increasing microorganism populations), and when
you put the biochar-compost on your garden, the biochar will already be
full of hard-working microbes.
Finally, don't forget to soak your biochar before application.
This isn't technically part of the activation process, but everything
will go more smoothly if you fill those pores with water. And if
you do decide to grind
your charcoal, pre-soaking it is supposed to make biochar easier to
work with both during the grinding and application process.
| This post is part of our Biochar in the Backyard lunchtime series.
Read all of the entries: |
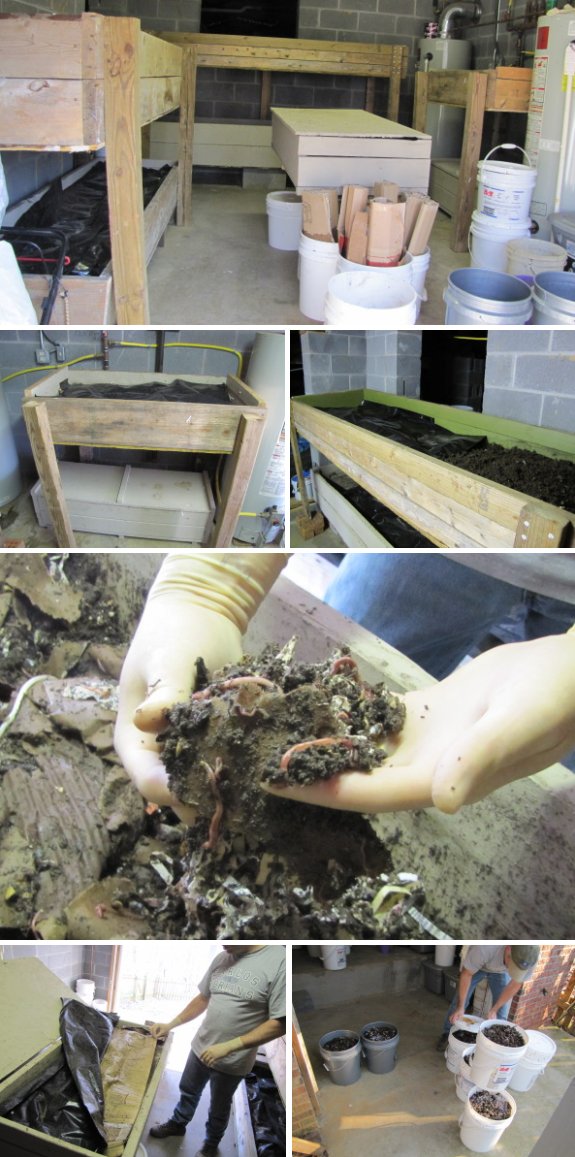
Anna said we need
worms.....lots of worms.
I said "It sure would be nice
to find someone local we could buy from instead of ordering them on the
internet". Sure enough someone near Johnson City was selling worms and
worm castings on Craigs list. We're not sure how many pounds of worms
each bucket holds due to the bedding material included, but I felt like
20 dollars per 5 gallon bucket was a fair price, and I got the added
bonus of checking out someone's operation who is years ahead of
ours. His name was Warren, and he told me one of his motivations
behind being a worm guy was to get his sons involved in something that
included learning how to work and being away from the computer. I had to laugh when
he told me his wife recently asked him to stop talking about worms so
much to their friends, so now he refers to them as his livestock.
Craigs list
continues to be a valuable tool for the urban and rural homesteaders who are looking to save money and
network with other folks in the community.
 Maybe you've heard the buzz
by now --- the Dervaes family (authors of urbanhomestead.org) have
trademarked the following terms:
Maybe you've heard the buzz
by now --- the Dervaes family (authors of urbanhomestead.org) have
trademarked the following terms:
- URBAN HOMESTEAD®
- URBAN HOMESTEADING®
- PATH TO FREEDOM®
- GROW THE FUTURE®
- HOMEGROWN REVOLUTION®
- FREEDOM GARDENS®
- LITTLE HOMESTEAD IN THE CITY®
I can understand the
urge to protect their intellectual property (even though I feel like,
in today's digital age, that kind of "mine!" mentality is a bit
misguided.) Just the other day, I noticed another book with
"urban homesteading" in the title, and I understand that publishers are
getting ready to churn out yet more books on the topic.
On the other hand, the
Dervaes family doesn't seem to be going after the big dogs.
Instead, they've sent cease and desist letters to the Santa Monica
Public Library for hosting a free event on urban homesteading and have
forced Facebook to shut down several groups with "urban homesteading"
in the title. They are, apparently, sending out letters to little
guys, too, with the following wording:
"When using a phrase listed above to refer to the work of the Dervaes Institute, proper trademark usage should include the proper trademark notice [®], use the protected phrase in all capital letters, and note in close proximity that the term is a protected trademark of Dervaes Institute."
The Dervaes family say
on their blog that we shouldn't be pissed off about this because all
kinds of other terms (like biodynamic and simple living) are
trademarked, adding that we should be glad they trademarked the term
rather than leaving it to be trademarked by an evil corporation.
However, my gut feeling is that those of us who make our livings from
the homesteading movement have a moral obligation to help that movement
rather than hindering it. The Dervaes' actions feel a bit like it
might feel if Barbara Kingsolver tried to make people stop using the
term "local food".
I'd be curious to hear
your take on the matter. Meanwhile, if you've linked to any of
their sites in the past (urbanhomestead.org, dervaesgardens.com,
peddlerswagon.com, freedomgardens.org, barnyardsandbackyards.org, and
homegrownrevolutionfilm.com), I recommend you take down the links to
help the Dervaes family understand that giving a little bit to the
little guys impacts their bottom line.
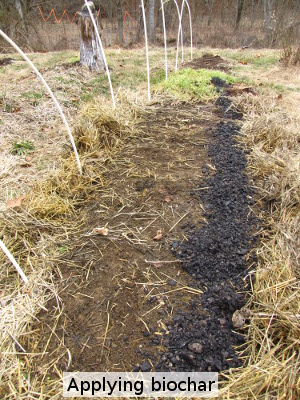 We started our first biochar
experiment at the beginning of February. After soaking
a bucket of biochar in urine, I applied it in a thin
coating across half of one of our garden beds. (The other half of
the bed was left alone as a control.) Then I added an inch of
well-composted horse manure on top of both halves. I'll be
planting lettuce there this spring, and I hope to be able to see a
difference between the biochar and control portions of the bed.
We started our first biochar
experiment at the beginning of February. After soaking
a bucket of biochar in urine, I applied it in a thin
coating across half of one of our garden beds. (The other half of
the bed was left alone as a control.) Then I added an inch of
well-composted horse manure on top of both halves. I'll be
planting lettuce there this spring, and I hope to be able to see a
difference between the biochar and control portions of the bed.
When applying biochar,
there seems to be only one rule --- make sure the charcoal gets covered
up so it doesn't erode or blow away. Traditional farmers plow
biochar into their soil while no-till farmers have been known to powder
the charcoal and apply it mixed with liquid manures. Although
biochar seems to give the most benefits at or just below the primary
root zone, earthworms and other soil critters have been shown to mix
the biochar into the soil pretty quickly, so you don't need to work too
hard at incorporation.
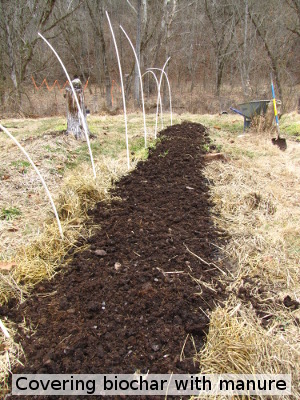 Farmers have even applied
biochar to existing perennials (like trees.) One method is to dig
several holes within the tree's root zone, add biochar, then put the
native soil back in. A less intrusive method involves scattering
the biochar on the soil surface in the autumn when the charcoal will
soon be covered up by falling leaves. This last method is
particularly useful in riparian buffers where you need to catch
nutrients leaching away from your field or pasture to prevent pollution
of a stream.
Farmers have even applied
biochar to existing perennials (like trees.) One method is to dig
several holes within the tree's root zone, add biochar, then put the
native soil back in. A less intrusive method involves scattering
the biochar on the soil surface in the autumn when the charcoal will
soon be covered up by falling leaves. This last method is
particularly useful in riparian buffers where you need to catch
nutrients leaching away from your field or pasture to prevent pollution
of a stream.
I have one more bucket
of biochar being activated as I type and suspect I might come up with a
third and final bucket before the heating season is over. I
haven't quite decided what to do with my limited bounty, but am already
thinking of ways to get more biochar. I had originally assumed
that we would make a biochar-producing stove if our garden experiments
look promising, but Mark suggested, instead, hooking up with other wood
burners in our area who are unlikely to use their charcoal.
Turning the region's trash into fertility for our garden seems to be
the theme of 2011!
| This post is part of our Biochar in the Backyard lunchtime series.
Read all of the entries: |
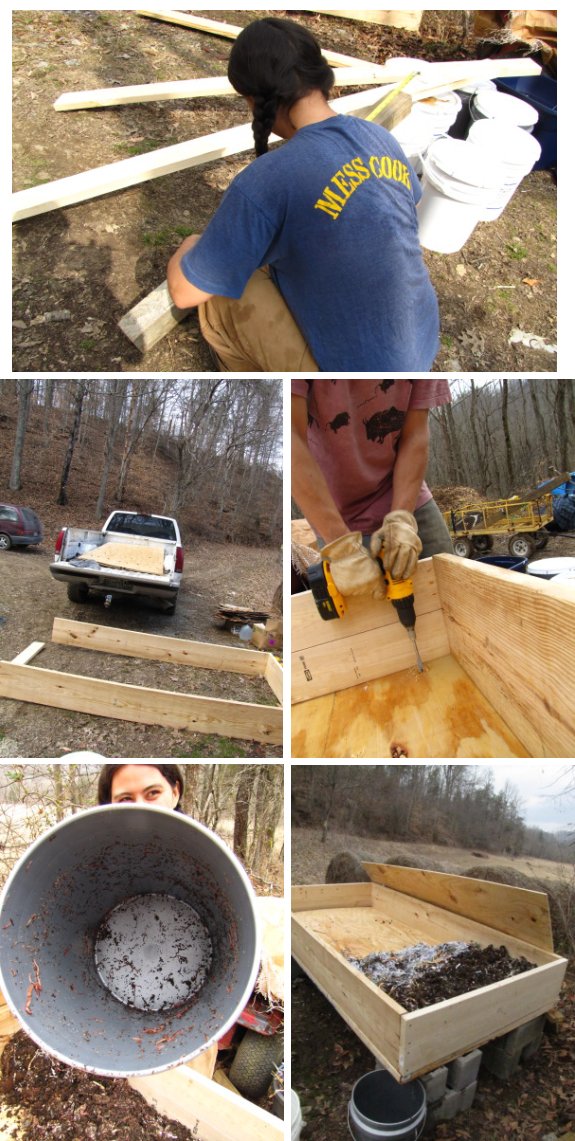
The
worms are tucked in and starting to make themselves at home in our
new 4x8 do it yourself worm bin.
It's got a slight downward
slope so that all the liquids drain towards the corner where the bucket
is.
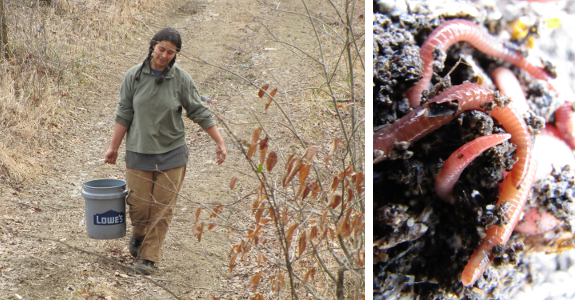
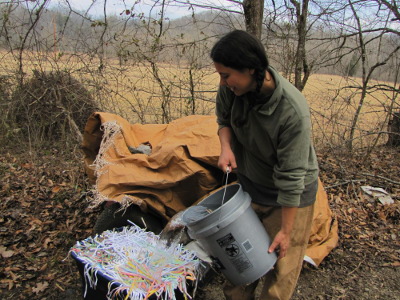 Mark
had a stroke of genius when he thought of buying
local worms from craigslist. Not only did we get
more worms for our money (I estimate we came away with about nine
pounds of worms for $140), but they also probably got stressed very
little during their ride down the interstate. Sealed up tight in
their five gallon buckets, the worms stayed damp and dark, and I
suspect we won't see the lag time you often have to wait through before
mail order worms get to work.
Mark
had a stroke of genius when he thought of buying
local worms from craigslist. Not only did we get
more worms for our money (I estimate we came away with about nine
pounds of worms for $140), but they also probably got stressed very
little during their ride down the interstate. Sealed up tight in
their five gallon buckets, the worms stayed damp and dark, and I
suspect we won't see the lag time you often have to wait through before
mail order worms get to work.
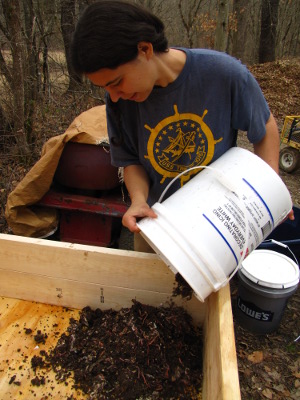 I've been shredding
all of our non-glossy paper (and non-corrugated
cardboard) waste for about a month now, so the first step was to soak
the new bedding. We decided to put this worm bin out where we
park our cars so that we wouldn't have to haul the scraps half a mile
down our swampy driveway in wet weather. We'll still have to haul
out the paper and haul in the worm castings, but those bits of organic
matter are less perishable, so we can bide our time and wait on the
weather. Unfortunately, we don't have running water out at the
parking area, so I carried a bucket up from the creek, already
envisioning ways to capture rainwater out there to make this stage in
the process easier.
I've been shredding
all of our non-glossy paper (and non-corrugated
cardboard) waste for about a month now, so the first step was to soak
the new bedding. We decided to put this worm bin out where we
park our cars so that we wouldn't have to haul the scraps half a mile
down our swampy driveway in wet weather. We'll still have to haul
out the paper and haul in the worm castings, but those bits of organic
matter are less perishable, so we can bide our time and wait on the
weather. Unfortunately, we don't have running water out at the
parking area, so I carried a bucket up from the creek, already
envisioning ways to capture rainwater out there to make this stage in
the process easier.
Since our worms came in
nearly-finished worm castings, we just dumped the mixture into one end
of the worm bin rather than mixing our livestock into fresh
bedding. The worms will have no problem migrating to the new
bedding once we 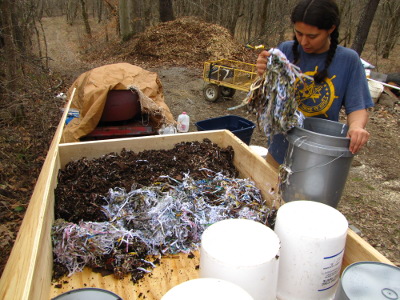 add
food waste, and I suspect that leaving them in their native bedding
will speed up the acclimation process even more.
add
food waste, and I suspect that leaving them in their native bedding
will speed up the acclimation process even more.
With nine pounds of
worms already prepared to work, I plan to start out by adding 30 to 60
pounds of food scraps to the bin each week, adding more food waste over
time as the populations grow. The only flaw in the plan is that
my sodden paper shrank down to a much smaller volume than I anticipated
--- I figure there's only enough there now to cover up perhaps ten
pounds of food waste. We're going to have to hurry up and find
another source of waste paper!
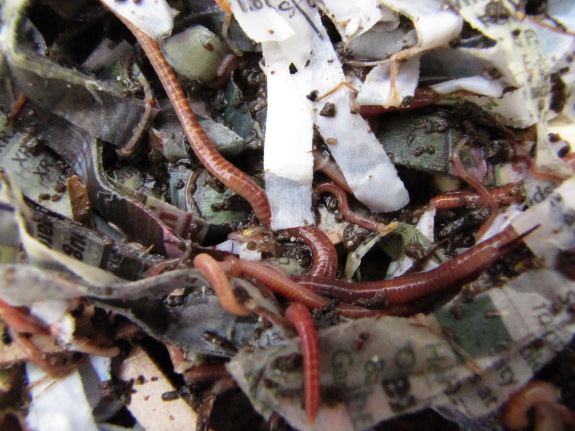
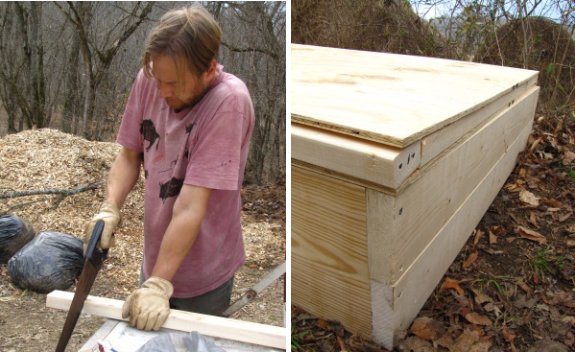

One modification we made to
our worm
bin was a false bottom.
The first layer of plywood
has several holes drilled in it. The next layer has a 2 inch gap and a
slope to guide the worm tea toward the collection bucket.
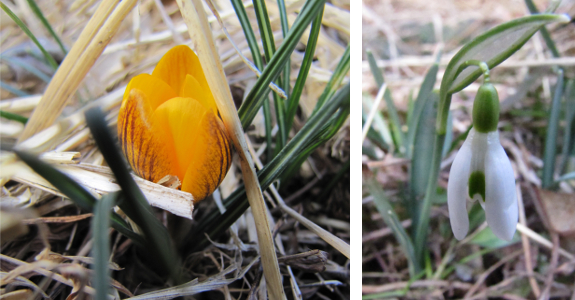
I spent most of last
week lying on the couch, nursing a cold. While I was otherwise
occupied, spring came. Crocuses! Snowdrops!
I thought it was an
abnormally cold winter this year, but the truth is that the
snowdrop popped up right around the same time it did two years ago and the
crocus is three weeks ahead of last year. Maybe all that snow
actually kept the earth warmer than usual? I think I can get away
with planting a bed of early peas!
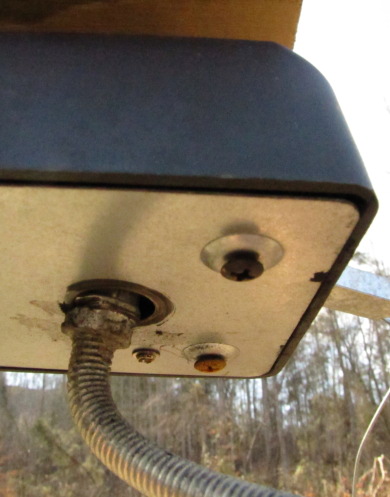
It turns out that the new
rotisserie motor deer deterrent isn't as hearty as I originally
thought.
I think it may have been too
much pressure on the motor shaft because the metal that started out
lightly rubbing on each other ended up wearing down till the movement
was hindered.
The motor is still working,
it just wobbles to the point of being non functional. I still like this configuration better than the previous
incarnation, and with a
bit of tinkering I think I should be able to figure out some way to
reduce the friction and prevent any future grinding of metal parts.
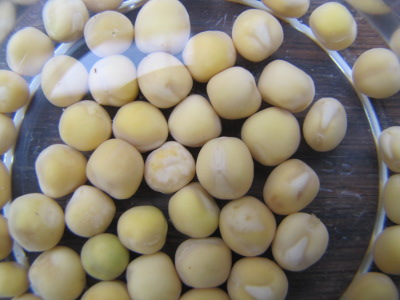 Saturday, I checked the soil
temperature in the mule garden and got a reading of 40 degrees
Fahrenheit, so I soaked a handful of snow peas to prepare for Sunday
planting. But when I headed out with peas and thermometer the
next day, the soil temperature had dropped to 33. Oops. I
suspect my Saturday measurement was taken too late in the day to get an
idea of the current soil baseline temperature, which is almost
certainly still too cold for
Saturday, I checked the soil
temperature in the mule garden and got a reading of 40 degrees
Fahrenheit, so I soaked a handful of snow peas to prepare for Sunday
planting. But when I headed out with peas and thermometer the
next day, the soil temperature had dropped to 33. Oops. I
suspect my Saturday measurement was taken too late in the day to get an
idea of the current soil baseline temperature, which is almost
certainly still too cold for  peas. Since the peas
were soaked, I went ahead and put them in the ground, but I'm not
holding my breath about getting a crop from this early planting.
peas. Since the peas
were soaked, I went ahead and put them in the ground, but I'm not
holding my breath about getting a crop from this early planting.
Meanwhile, I had some
leftover hydrated peas. Most years, I
give these peas to the chickens as a treat, but this year I decided to
drop the seeds into a pot to sprout in a warm spot inside for pea
tendrils.
Maybe a dose of pea vines will fill that winter craving I'm beginning
to develop for fresh vegetables?
 There's so much I want to
tell
you about our new worm project that I decided it needed to be a
lunchtime series. I'll start out with the design of our large-scale
worm bin.
There's so much I want to
tell
you about our new worm project that I decided it needed to be a
lunchtime series. I'll start out with the design of our large-scale
worm bin.
As you can see from this
first photo (upside down during construction),
the bin is pretty simple. Our supply list included:
- 3 @ 4'X8' sheets of plywood (for lid and two bottoms)
- 3 @ 2"X3"X8' (for spacer between bottoms)
- 3 @ 2"X12"X8' (for walls)
- 3 hinges for the lid
- 2 clasps to hold the lid shut
- screws
- 16 cinderblocks (or some treated 4"X4"s) for legs
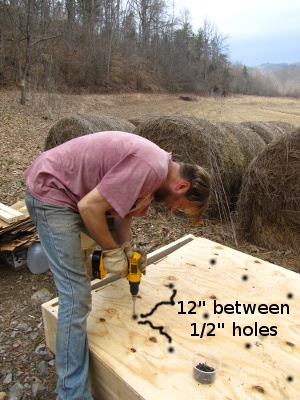 We cut one of the 2X12s and
one
of the 2X3s in half (and if we'd been thinking straight, would have cut
three inches off the ends of the other pieces of lumber so that we
wouldn't have to fill in the gaps where the bin is a little bigger than
the plywood.) Then we screwed the 2X12s together into an eight
foot by four foot box and topped it off with a sheet of plywood.
We cut one of the 2X12s and
one
of the 2X3s in half (and if we'd been thinking straight, would have cut
three inches off the ends of the other pieces of lumber so that we
wouldn't have to fill in the gaps where the bin is a little bigger than
the plywood.) Then we screwed the 2X12s together into an eight
foot by four foot box and topped it off with a sheet of plywood.
This sheet of plywood
will be the bottom of the worm chamber, so we
drilled half inch holes every foot along the length and width for
drainage and to give the worms a bit of bottom aeration. Mark
also drilled a slightly larger hole in the corner which would become
the downhill end when the bin is turned over so that water wouldn't
pool there.
Next, we made another
box out of the 2X3s and set it on top of the
plywood, then added a second sheet of plywood on top of this box.
The result is a tray under the bin to collect
the compost tea.
A hole in the downhill corner allows compost
tea to drip into a bucket.
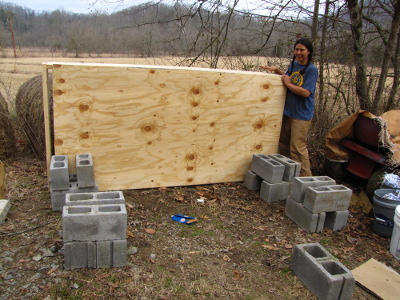 After
flipping the bin over, we set it up on
cinderblocks. 4X4 legs would have been cheaper if we were buying
them new, but we always have a lot of seconds cinderblocks lying
around, so it was easy to stack four blocks on each corner. We
were working on a bit of a hill, so we didn't have to add any extra
blocks to make one end of the bin higher than the other. The
purpose of raising the bin off the ground is twofold --- to allow us to
catch the compost tea and to allow for aeration under the bin to keep
the bin aerobic. The downside is that we can't use the earth's
temperature to mitigate summer's heat and winter's cold, but with a
large bin, worms should be able to keep working all year round anyway.
After
flipping the bin over, we set it up on
cinderblocks. 4X4 legs would have been cheaper if we were buying
them new, but we always have a lot of seconds cinderblocks lying
around, so it was easy to stack four blocks on each corner. We
were working on a bit of a hill, so we didn't have to add any extra
blocks to make one end of the bin higher than the other. The
purpose of raising the bin off the ground is twofold --- to allow us to
catch the compost tea and to allow for aeration under the bin to keep
the bin aerobic. The downside is that we can't use the earth's
temperature to mitigate summer's heat and winter's cold, but with a
large bin, worms should be able to keep working all year round anyway.
The last step is to add
a lid on top. A piece of plywood should
be enough to keep animals and rain out while keeping the bin moist and
dark. No pictures of this step yet since we ran out of time on
Friday and didn't install the hinges yet.
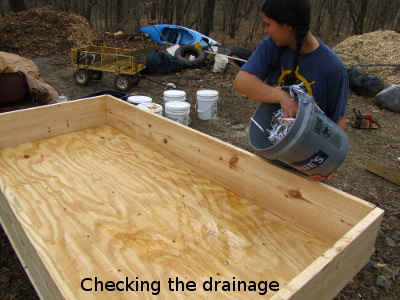 Total cost for the worm bin,
using nearly completely new materials, is just under $100. We
figure we'll probably expand into a second bin this summer, and are
already thinking of ways to make the second bin better. Would a
bead of liquid nails along the edges of the bottom keep moisture from
settling into the joints and rotting out the wood as fast? (We
can't use treated wood since treated wood is reputed to kill
worms.) Could we make a cheaper bin by using multiple 2X6s or
2X4s for the walls, or maybe even plywood? I'm sure that worm bin
2.0 will be even better, but this one was easy to make and should work
fine for now.
Total cost for the worm bin,
using nearly completely new materials, is just under $100. We
figure we'll probably expand into a second bin this summer, and are
already thinking of ways to make the second bin better. Would a
bead of liquid nails along the edges of the bottom keep moisture from
settling into the joints and rotting out the wood as fast? (We
can't use treated wood since treated wood is reputed to kill
worms.) Could we make a cheaper bin by using multiple 2X6s or
2X4s for the walls, or maybe even plywood? I'm sure that worm bin
2.0 will be even better, but this one was easy to make and should work
fine for now.
| This post is part of our Hands-on Wormkeeping lunchtime series.
Read all of the entries: |
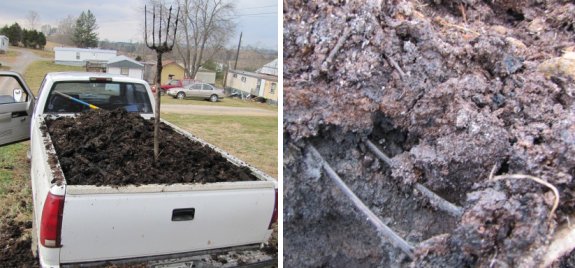
Our latest load of horse
manure went a bit smoother once I wised up to the advantages of a
pitch fork.
You can lift bigger
chunks compared to a shovel and it only took a slight tap against the truck bed to dump any manure trying to make it back to the
pile.
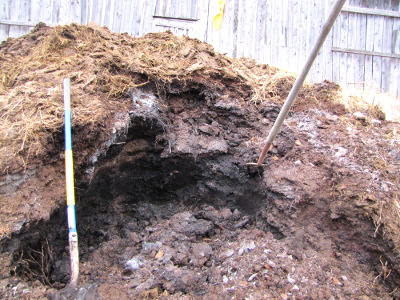 Mark
dug deep into the motherlode
of horse manure for
our most recent two loads. When I opened the tailgate of the
truck, I was awestruck --- I'd never seen such amazing compost.
Most of it was pure black and able to hold so much water that a
shovelful was as much as I could handle. (No pitchforks
full of manure for me!)
Mark
dug deep into the motherlode
of horse manure for
our most recent two loads. When I opened the tailgate of the
truck, I was awestruck --- I'd never seen such amazing compost.
Most of it was pure black and able to hold so much water that a
shovelful was as much as I could handle. (No pitchforks
full of manure for me!)
Mark reported seeing one
writhing clump of worms while loading up the truck, but I mostly 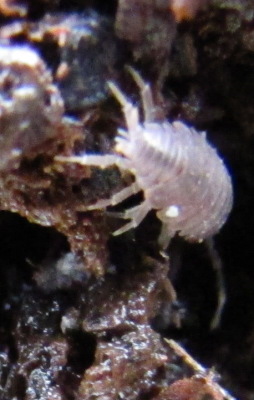 saw
masses of sowbugs (aka roly polies) and a few big red centipedes.
We're both convinced that a high percentage of this amazing compost is
probably worm castings, but the layer that Mark dug Monday had finished
decomposing to the point that the worms moved out and the sowbugs moved
in. Sowbugs and centipedes in your compost are a sign that
compost is cooled down and done, ready to go on the garden. My
mouth waters just looking at it!
saw
masses of sowbugs (aka roly polies) and a few big red centipedes.
We're both convinced that a high percentage of this amazing compost is
probably worm castings, but the layer that Mark dug Monday had finished
decomposing to the point that the worms moved out and the sowbugs moved
in. Sowbugs and centipedes in your compost are a sign that
compost is cooled down and done, ready to go on the garden. My
mouth waters just looking at it!
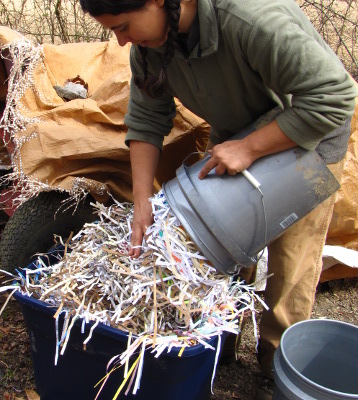 Worm composting is a lot like
ordinary composting in that it's important to mix together the right
ratio of browns (high carbon materials) and greens (high nitrogen
materials) for efficient composting without a bad smell. In the
past, greens have been in short supply on our farm, but now that we're
getting food scraps from a local school, we're suddenly short of
browns. The browns make up the bedding in the worm bin, covering
up the food scraps so that they don't smell and keeping the bin damp
and aerated, so we really can't skimp there. Time to do a bit of
research and figure out which waste materials can be used as bedding in
a worm
bin:
Worm composting is a lot like
ordinary composting in that it's important to mix together the right
ratio of browns (high carbon materials) and greens (high nitrogen
materials) for efficient composting without a bad smell. In the
past, greens have been in short supply on our farm, but now that we're
getting food scraps from a local school, we're suddenly short of
browns. The browns make up the bedding in the worm bin, covering
up the food scraps so that they don't smell and keeping the bin damp
and aerated, so we really can't skimp there. Time to do a bit of
research and figure out which waste materials can be used as bedding in
a worm
bin:
- Shredded paper seems to
be one of the best options, as long as you steer clear of glossy
magazines and seed catalogs. Once separated into small strips in
a shredder,
paper soaks up water well, and the spaghetti-like strands tend to stay
fluffy, allowing lots of air to get to the worms. We had planned
to focus on shredded paper for our worms' browns, but quickly ran
through our junk mail and needed much more!
- Cardboard is another good option, although you have to tear corrugated cardboard by hand. (The thin cardboard that many foods come in goes through our shredder.) Several people have reported good luck using cardboard in their worm bins, but it's essential to keep an eye on it and make sure the cardboard doesn't mat down and make the bin anaerobic.
- Autumn leaves don't require any work to prepare them for use in the bin, but can tend to mat down. Also, they don't absorb as much water as other bedding materials, so you risk having your worm bin dry out. It sounds like leaves make a good bedding when mixed with other high carbon materials, but probably aren't the best idea by themselves.
- Cardboard egg cartons were suggested to me by J and I think they have a lot of potential. They're easy to rip apart, and I suspect that the complicated shape will make them much less likely to mat down than traditional cardboard.
- I've read about people using other materials for worm bedding
like straw, coconut coir, and peat moss, but those would all have to
come from the store for me, so they fail the "waste materials" test.
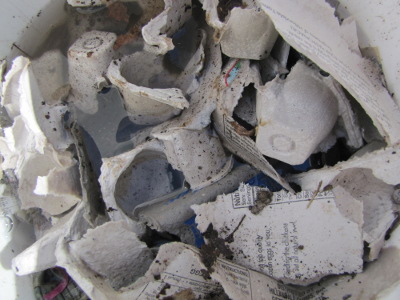 Since I was itching to put
the first round of food scraps in our bin, I went ahead and gave all of
the free options above a try. I (mostly) segregated the bedding
into zones within the bin, so I should be able to tell which ones work
best for us when I come back through in a few weeks to check on the
state of decomposition.
Since I was itching to put
the first round of food scraps in our bin, I went ahead and gave all of
the free options above a try. I (mostly) segregated the bedding
into zones within the bin, so I should be able to tell which ones work
best for us when I come back through in a few weeks to check on the
state of decomposition.
| This post is part of our Hands-on Wormkeeping lunchtime series.
Read all of the entries: |
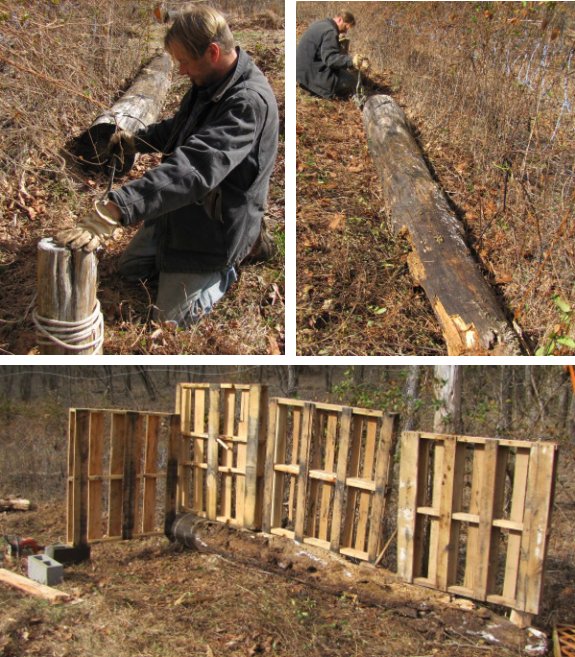
This long log is one of the
first trees we cut down when we were making room for the mule garden.
Winching it over a few feet
made it possible to use it as part of the base for the used pallet
chicken coop.
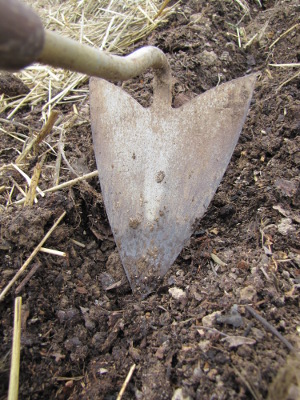 I'm
still making basic beginner mistakes as I figure out the best ways to
work with a no-till system. Since I
don't want to disturb the soil, I've been tossing my soil
amendments on top of the ground and counting on rain and worms to bring
the nutrients down into the root zone. But my first lettuce bed
proved that this method isn't going to work during a droughty
February. Every few days, I'd peek under my quick
hoop and look for
sprouts, and nothing ever seemed to happen. Finally, I realized
that the composted manure had dried out on top, so the tiny lettuce
seeds I'd sprinkled on the surface weren't going to sprout. After
two bouts of heavy hand-watering, lettuce roots finally appeared.
I'm
still making basic beginner mistakes as I figure out the best ways to
work with a no-till system. Since I
don't want to disturb the soil, I've been tossing my soil
amendments on top of the ground and counting on rain and worms to bring
the nutrients down into the root zone. But my first lettuce bed
proved that this method isn't going to work during a droughty
February. Every few days, I'd peek under my quick
hoop and look for
sprouts, and nothing ever seemed to happen. Finally, I realized
that the composted manure had dried out on top, so the tiny lettuce
seeds I'd sprinkled on the surface weren't going to sprout. After
two bouts of heavy hand-watering, lettuce roots finally appeared.
To prevent this problem
in other beds I plan to direct-seed this spring, I'm gently working the
manure into the top inch of the soil. This triangular hoe that
Mark's mom gave us over the summer turns out to be perfect for surface
incorporation without disturbing the lower soil profiles.
Most of the garden,
though, can simply be topdressed, mulched, and then ignored until it's
time to plant. Transplanted broccoli seedlings and potato tubers
won't have any trouble growing in a layer of manure over soil, and I
suspect our healthy earthworm population will work the manure into the
soil before it's time to plant summer crops.
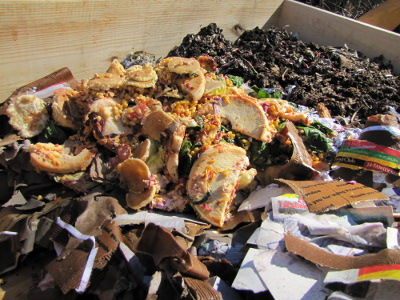 Even though the worm bin
needs a bit more work before it's completely critter-proof, I couldn't
resist putting in the first round of food scraps Saturday.
Partly, the impetus was impatience on my part, but I was also thinking
about worm biology. Although we think that worms eat our garbage
(and there is, in fact, a book with that name), worms really eat the
microorganisms that eat our garbage. Our worms can't do much with
food scraps until the waste material has been composting for about a
week, so I figured I'd better get that process started.
Even though the worm bin
needs a bit more work before it's completely critter-proof, I couldn't
resist putting in the first round of food scraps Saturday.
Partly, the impetus was impatience on my part, but I was also thinking
about worm biology. Although we think that worms eat our garbage
(and there is, in fact, a book with that name), worms really eat the
microorganisms that eat our garbage. Our worms can't do much with
food scraps until the waste material has been composting for about a
week, so I figured I'd better get that process started.
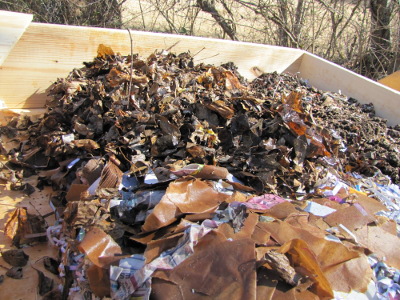 We
pick up food scraps twice a week, but right now I'm keeping the worms
on a once a week feeding schedule. For our estimated 9 pounds of
worms, I figure they can handle 30 to 60 pounds of food scraps per week
(plus however much bedding I mix in to keep the bin in
good shape.) Since the weather is still on the cool side and the
worms are just getting used to their new home, I added 37 pounds for
their first week's diet. In a couple of weeks, I should be able
to poke through this week's compost zone and see whether the worms have
done their job, which will give me an idea about whether I should slow
down or speed up
We
pick up food scraps twice a week, but right now I'm keeping the worms
on a once a week feeding schedule. For our estimated 9 pounds of
worms, I figure they can handle 30 to 60 pounds of food scraps per week
(plus however much bedding I mix in to keep the bin in
good shape.) Since the weather is still on the cool side and the
worms are just getting used to their new home, I added 37 pounds for
their first week's diet. In a couple of weeks, I should be able
to poke through this week's compost zone and see whether the worms have
done their job, which will give me an idea about whether I should slow
down or speed up 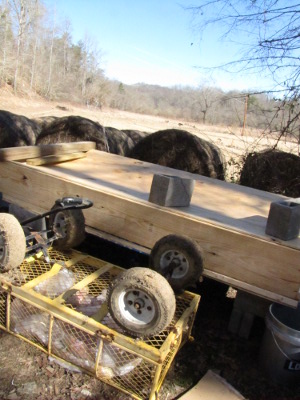 their food intake. I
have high hopes that within a couple of months, the worm population
will have expanded far enough that we can put all of the school's food
scraps in without worrying about overloading the bin.
their food intake. I
have high hopes that within a couple of months, the worm population
will have expanded far enough that we can put all of the school's food
scraps in without worrying about overloading the bin.
As a side note, you
might notice the hamburgers poking out of the top of the mass of food
scraps in the first photo. Most websites will tell you to steer
clear of breads, meats, and oils in your worm bin, mostly because they
attract scavenging animals and can smell. However, I suspect that
the large
size of our worm bin
(and its distance from habitation) will mitigate these issues and allow
us to mix in all types of waste. I'll let you know if we have any
problems.
| This post is part of our Hands-on Wormkeeping lunchtime series.
Read all of the entries: |
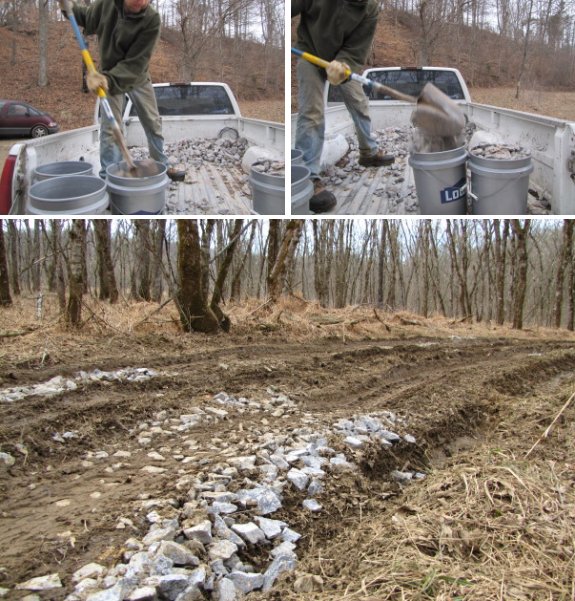
The groove in the mud on the
far right here is what I call the "Rut of Despair". It was carved out
by a large bull dozer pulling our trailer and if the truck goes down it
stuckness will happen.
Our latest strategy of
blocking the entrance with huge chunks of gravel is working for now.
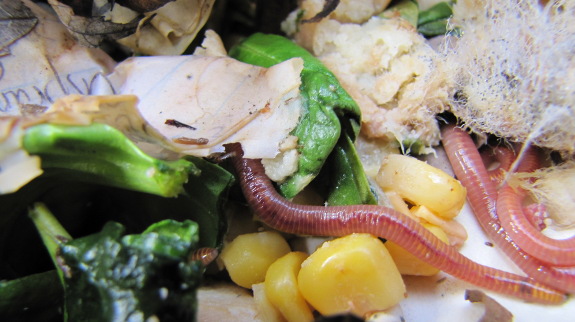
The worms have found the food
scraps! I know
that worms work a lot harder when they're not constantly being poked
and prodded, but I couldn't resist lifting up a few leaves and peeking
into the bin Wednesday to see what was going on. I don't know how
the worms found the food so fast, but they were already wending their
way through some hamburger buns and vegetable scraps --- success!
 If
you look closely at the second photo, you can see mold growing on the
hamburger bun. Although mold on your food is usually a bad sign,
in the worm bin it means that enough microorganisms have colonized the
scraps so that your worms can feast. I wonder how long it will
take for the worms to break these scraps down into castings?
If
you look closely at the second photo, you can see mold growing on the
hamburger bun. Although mold on your food is usually a bad sign,
in the worm bin it means that enough microorganisms have colonized the
scraps so that your worms can feast. I wonder how long it will
take for the worms to break these scraps down into castings?
Our parking area, a
third of a mile from the trailer, used to just be a spot I passed
through. Lately, though, it has turned into one of my favorite
places to pause and commune with the worms. With big piles of
wood chips, a compost bin (more on that in a later post), and the worm
bin, I might have to
rename the spot Biomass Central!
 A
few months ago, one of our readers asked why
you would compost with
worms instead of just making a traditional compost pile, and I answered
"Um, well, errr, they're cute?" (Well, actually, I
made something up.)
Since then, I've been delving
into the literature to see whether vermicompost (aka worm castings) is
the same as traditional compost, and have discovered that there's
actually a big difference.
A
few months ago, one of our readers asked why
you would compost with
worms instead of just making a traditional compost pile, and I answered
"Um, well, errr, they're cute?" (Well, actually, I
made something up.)
Since then, I've been delving
into the literature to see whether vermicompost (aka worm castings) is
the same as traditional compost, and have discovered that there's
actually a big difference.
When you look at the
basic macronutrient levels found in compost and
worm castings, it actually looks like compost is the winner. NPK
values of compost will vary considerably depending on the raw materials
you use, but each macronutrient will range from 0.5 to 4% of the
compost's weight. On the other hand, NPK values of worm castings
can be as low as 0.1 or as high as 2, again depending on what you feed
the worms.
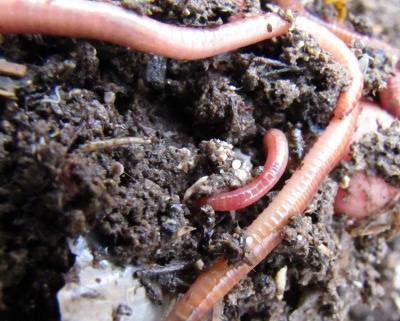 Despite
the higher NPK values of compost, though, worm castings have a huge
positive effect on plant growth. When up to 20% of the soil
consists of worm castings, plants germinate better, grow faster, and
produce higher yields. Why?
Despite
the higher NPK values of compost, though, worm castings have a huge
positive effect on plant growth. When up to 20% of the soil
consists of worm castings, plants germinate better, grow faster, and
produce higher yields. Why?
The answer is that worm
castings are biologically and chemically
different from compost or soil. Worm castings have much
higher percentages of humus than either soil or compost, which helps
the castings hold more water and stay aerated, while also providing
binding sites for micronutrients
that would otherwise wash out of soil during heavy rains. The
castings are also chock full of plant growth promoters like cytokinins
and auxins, along with increased levels of micronutrients like calcium,
magnesium, and sulfur. Worm castings also host ten to twenty
times as much microorganism activity as plain soil. No wonder a
study showed that worm castings produced bigger blueberry plants and
higher fruit yields compared to blueberries treated with either cow
manure or chemical fertilizers.
| This post is part of our Hands-on Wormkeeping lunchtime series.
Read all of the entries: |
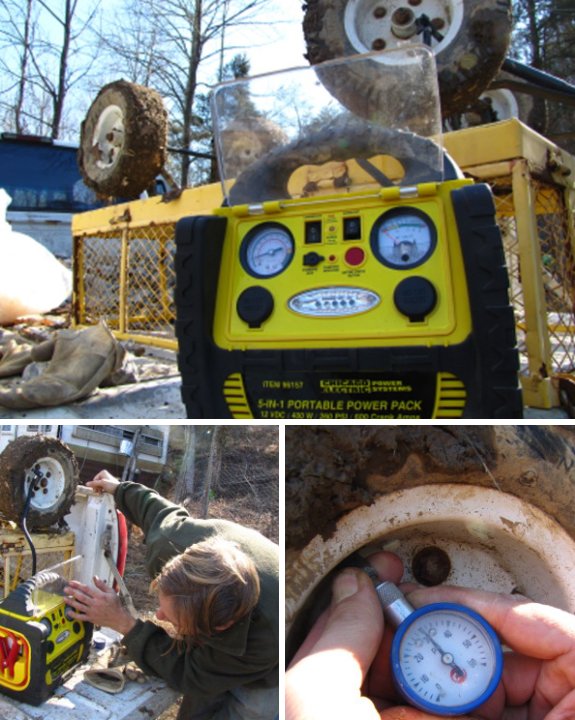
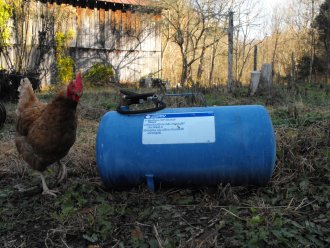
The
5 in 1 portable power pack has quietly replaced our blue air tank
when it comes to inflating small tires.
It took considerable effort
to lug that tank to a gas station and it would only hold a full charge
for a month or two.
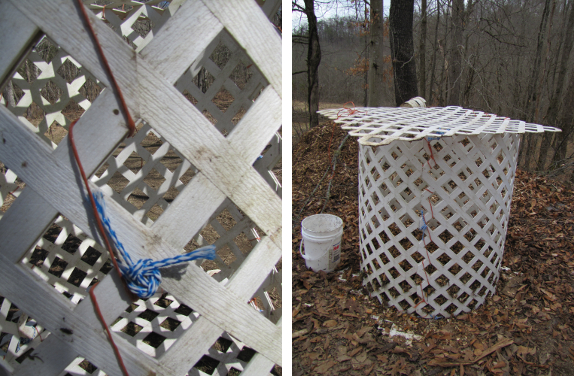
Although I would love to
be giving
every bit of the local school's food waste to the worms, I don't want to overload
the bin, so I needed to come up with some kind of critter-proof compost
bin to take care of the excess. I settled on a simple (and free)
design using vinyl lattice trellis panels Mark's mom found for us on
the side of the road (thanks, Rose Nell!) tied together with the
plastic baling twine they now use to bind up strawbales. I also
used a few pieces of rope that Rose Nell got us for free when a rope
factory went out of business.
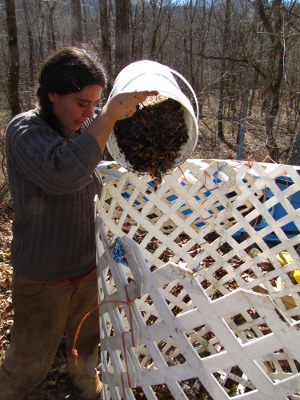 While
my bin wouldn't stand up to steady
gnawing from Lucy,
once I laid down a thick layer of wood chips inside, tossed in the
excess scraps, and topped it all off with another layer of wood chips,
the bin became so unappealing that our dog didn't even give it a second
glance. Hopefully wild animals will be similarly uninterested.
While
my bin wouldn't stand up to steady
gnawing from Lucy,
once I laid down a thick layer of wood chips inside, tossed in the
excess scraps, and topped it all off with another layer of wood chips,
the bin became so unappealing that our dog didn't even give it a second
glance. Hopefully wild animals will be similarly uninterested.
I suspect the bin will
reach capacity about the same time the worms come up to full
production. At that point, I might decide to pass the partly
decomposed compost through the worm bin to turn it into value-added
worm castings, or I might just let the compost keep decomposing by
itself. Either way, I'm looking forward to our first big mass of
homegrown compost being ready to go on the fall garden.
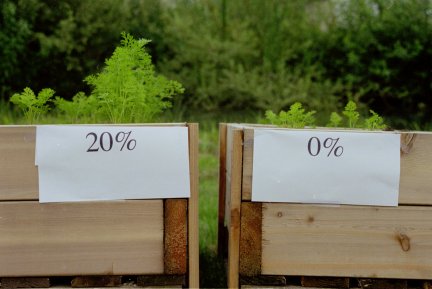 With
all of the benefits
of worm castings in
mind, you might be tempted to grow your plants in worm
castings alone (if you could somehow come up with that many
castings.) However, some studies suggest that castings may lower
germination rates if they make up more than about a fifth of your
garden soil (perhaps because of a buildup of salts.) In addition,
be aware that the heightened levels of microorganisms in castings
consist nearly entirely of bacteria, so keep the castings in the
vegetable garden rather than feeding them to your fruit trees (who
enjoy a higher fungal to
bacterial ratio in
their soil.)
With
all of the benefits
of worm castings in
mind, you might be tempted to grow your plants in worm
castings alone (if you could somehow come up with that many
castings.) However, some studies suggest that castings may lower
germination rates if they make up more than about a fifth of your
garden soil (perhaps because of a buildup of salts.) In addition,
be aware that the heightened levels of microorganisms in castings
consist nearly entirely of bacteria, so keep the castings in the
vegetable garden rather than feeding them to your fruit trees (who
enjoy a higher fungal to
bacterial ratio in
their soil.)
What about the more
realistic problem of not having enough worm castings to go
around? In that case, it sounds like your best bet is to put just
a bit of worm
castings in each of your garden beds rather than dosing any one bed
heavily. Since even low levels of worm castings can jumpstart
your soil
food web, I wonder if the best use of this limited
resource might not be to activate
biochar?
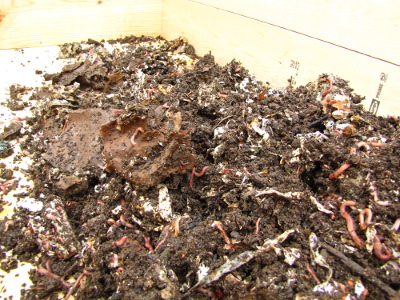 However you decide to use
your precious castings, be sure to put them
in the ground when they're fresh. If you allow your castings to
dry
out, to be exposed to sunlight, or just to wait around a few months
before applying them to your garden, many of the positive benefits of
worm castings disappear. Yet another reason to make your own
rather
than trusting a big box store to provide castings for your garden!
However you decide to use
your precious castings, be sure to put them
in the ground when they're fresh. If you allow your castings to
dry
out, to be exposed to sunlight, or just to wait around a few months
before applying them to your garden, many of the positive benefits of
worm castings disappear. Yet another reason to make your own
rather
than trusting a big box store to provide castings for your garden!
| This post is part of our Hands-on Wormkeeping lunchtime series.
Read all of the entries: |
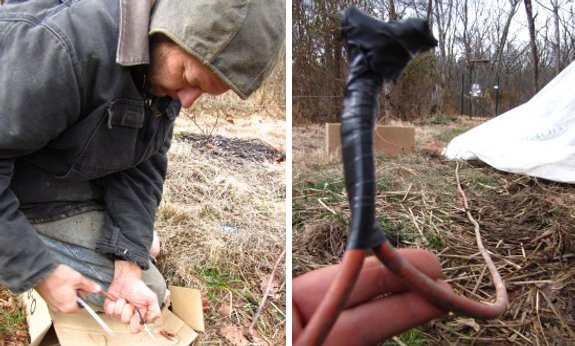
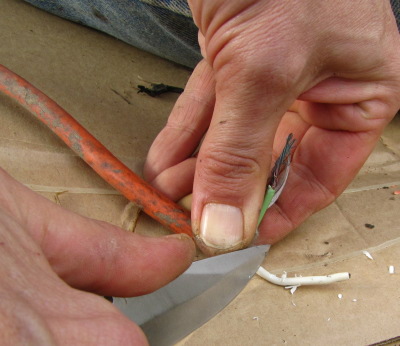 We've
had good luck just leaving these low grade extension cords out year
round...that is until this year when one
of the deer deterrents kept
tripping a breaker when it rained.
We've
had good luck just leaving these low grade extension cords out year
round...that is until this year when one
of the deer deterrents kept
tripping a breaker when it rained.
A visual inspection will
usually show you where the damaged spot is. I think this one may have
been at the wrong end of a shovel or fence post.

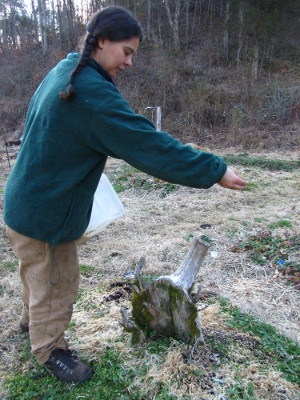 March is
usually the begining of our big planting push,
with 31 beds slated to be seeded along with some perennials in the
forest garden and chicken fodder crops in the chicken pasture.
However, the addition of spring cover
crops
to our rotation led to an even earlier planting heyday this year.
Wednesday, I got out my soil thermometer and decided the ground was
warm enough to put in 20 beds of oats, two of which were interplanted
with field peas.
March is
usually the begining of our big planting push,
with 31 beds slated to be seeded along with some perennials in the
forest garden and chicken fodder crops in the chicken pasture.
However, the addition of spring cover
crops
to our rotation led to an even earlier planting heyday this year.
Wednesday, I got out my soil thermometer and decided the ground was
warm enough to put in 20 beds of oats, two of which were interplanted
with field peas.
These oats will become
mulch for summer corn, beans, and squash, and I
debated whether to manure the beds now or wait until May when the
vegetable seeds go into the ground. I eventually decided to
topdress our inch of composted manure over the oat seeds since compost
is a time-release fertilizer and I suspect there will be plenty of
nutrition left to feed the summer crops when the time comes.
Rotting oat leaves and roots should put the nutrients sucked up by the
cover crop back into 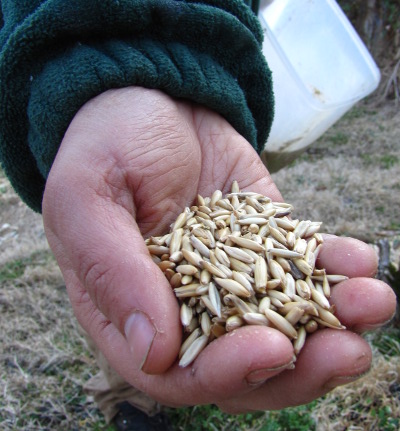 the
soil throughout the summer, too, so nothing will be lost. I even
added a thin layer of straw on top of the newly planted beds to
keep the manure from drying out.
the
soil throughout the summer, too, so nothing will be lost. I even
added a thin layer of straw on top of the newly planted beds to
keep the manure from drying out.
It may seem like a lot
of work to grow mulch, but I was extremely happy with my fall
cover crop trials
and suspect that my spring planting will repay me as well. And
then there's the other incentive of planting cover crops --- working my
way through that 50 pound bag of oat seeds I bought in the fall....
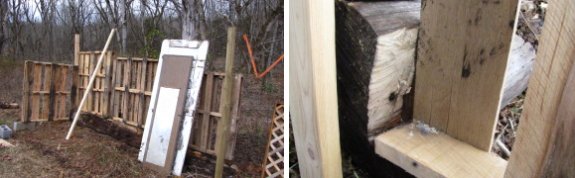
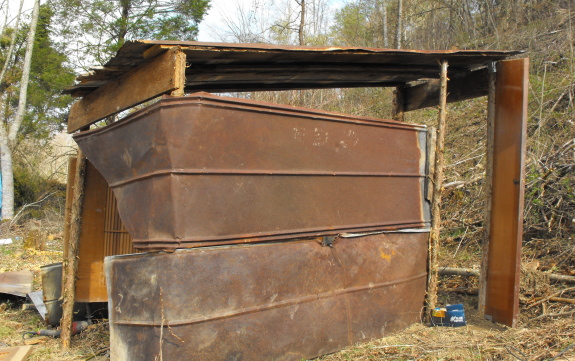 This
part of the chicken coop building process involves looking in the barn
at what salvaged materials are available.
This
part of the chicken coop building process involves looking in the barn
at what salvaged materials are available.
One of the things I would
change about the first
chicken pasture coop was
the height clearance. The way I configured the roof had me ducking
towards the roosting end.
I figure making this one tall
enough for me to walk through will provide even more opportunities to
install primary and secondary perching areas in an attempt to reach
maximum coop comfort.
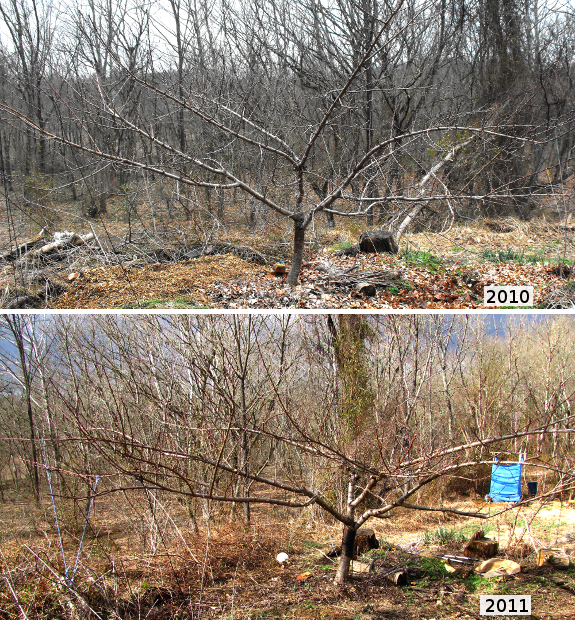
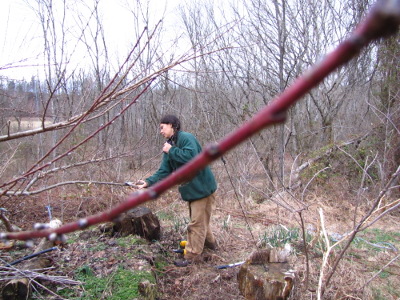 I
can understand why many dabblers in orcharding don't prune their tree
fruits, or prune them very lightly. Even though I'm starting to
build up my confidence after several years of pruning, I'm still a bit
daunted when the time comes to take a wheelbarrow load of branches off
our biggest peach tree. She just looks so naked with the
watersprouts, crossing branches, and shaded branches removed, like she
couldn't possibly put out a bushel of peaches this summer. And
yet, my photographic record from last year shows that she looked just
as shorn after being pruned then, and our
peach harvest last summer was phenomenal.
I
can understand why many dabblers in orcharding don't prune their tree
fruits, or prune them very lightly. Even though I'm starting to
build up my confidence after several years of pruning, I'm still a bit
daunted when the time comes to take a wheelbarrow load of branches off
our biggest peach tree. She just looks so naked with the
watersprouts, crossing branches, and shaded branches removed, like she
couldn't possibly put out a bushel of peaches this summer. And
yet, my photographic record from last year shows that she looked just
as shorn after being pruned then, and our
peach harvest last summer was phenomenal.
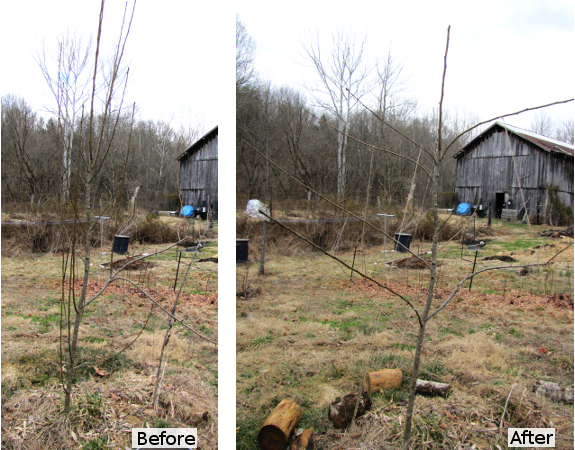
I'm almost confident
enough about my skills to write a lunchtime series about pruning, but
not quite. Maybe next year. Especially if I can talk my
pear limbs into toeing the line and 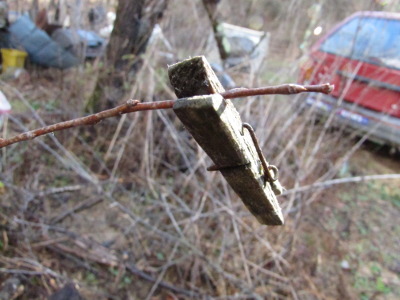 succumbing to my training job
this year rather than making 90 degree turns and growing straight up.
succumbing to my training job
this year rather than making 90 degree turns and growing straight up.
You can read my pruning and
training philosophy here. The only real
addition that I made this year was to weigh down the tips of small
twigs with clothespins --- this is a quick and easy method of training
the tenderest branchlets. Remember --- the more you can get your
trees to do what you want by training instead of pruning, the more
energy the tree will have to put into growth and fruit.
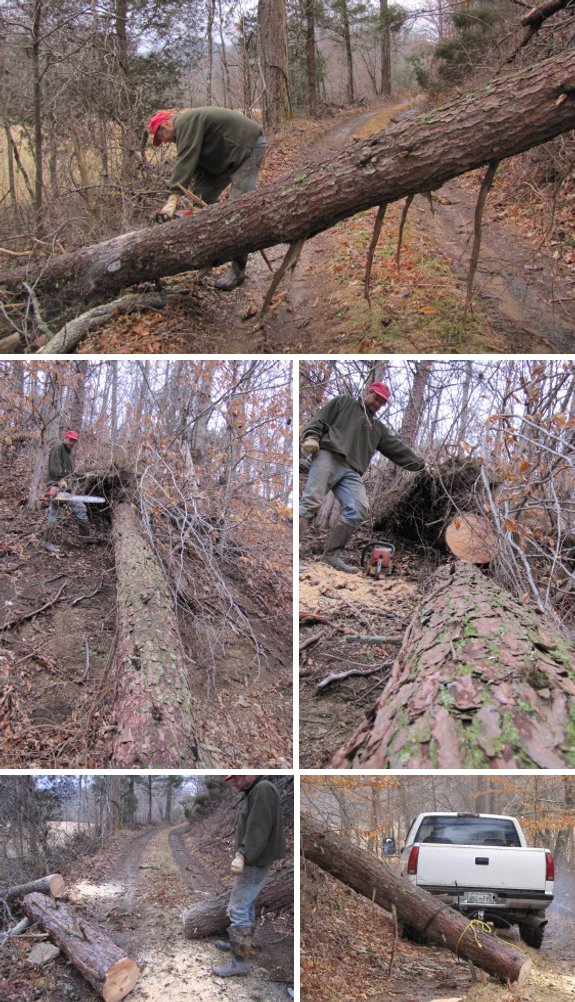
This big old pine tree
prevented me from going into town Friday afternoon.
We normally like to take the
weekend off, but an early morning appointment on Monday required the
driveway to be unblocked today because you never can tell how long this
kind of thing takes.
It's the third time we've
been blocked from leaving since we've been here, which doesn't feel too
bad.
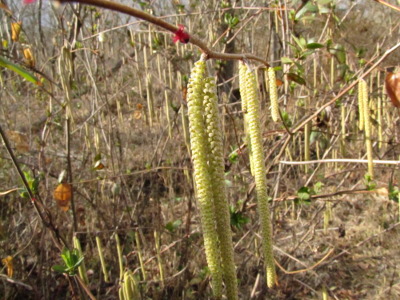 Even
though I planted hybrid
hazelnuts a couple
of years ago, I don't expect to see much from them for a few
years. But we do have hazels --- native
American hazels that grow up in shrubby areas and never do much because
they become entangled in Japanese Honeysuckle. I like them anyway
since these shrubs usually showcase the first native flowers of the
year --- I was stunned to see blooms on the hazel bushes last week,
nearly a month
Even
though I planted hybrid
hazelnuts a couple
of years ago, I don't expect to see much from them for a few
years. But we do have hazels --- native
American hazels that grow up in shrubby areas and never do much because
they become entangled in Japanese Honeysuckle. I like them anyway
since these shrubs usually showcase the first native flowers of the
year --- I was stunned to see blooms on the hazel bushes last week,
nearly a month 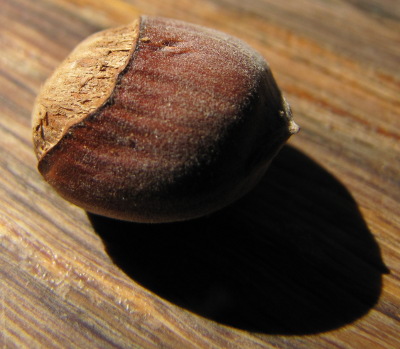 ahead of last
year's schedule.
ahead of last
year's schedule.
While I was poking
around, looking for the first spring flowers, I saw a leafy mass
hanging on one of the bushes. Was that an actual fruit?! I
pushed my way through the briars and vines and returned with our first
homegrown hazel nut.
The shell was tough, explaining the reason we
opted to grow the softer-shelled hybrids rather than propagating our
native species. After a few pounds with the hammer, I was able 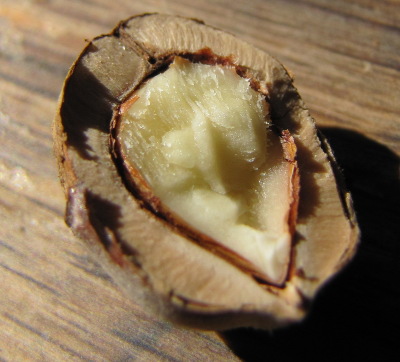 to
excavate a small nutmeat that wouldn't win any taste tests (but what
would after sitting outside all winter?) Here's hoping that the
one hybrid hazel that didn't get dug up during Lucy's rodent-hunting
campaign will be as vigorous as our native species, but twice as tasty.
to
excavate a small nutmeat that wouldn't win any taste tests (but what
would after sitting outside all winter?) Here's hoping that the
one hybrid hazel that didn't get dug up during Lucy's rodent-hunting
campaign will be as vigorous as our native species, but twice as tasty.
 I became intrigued by black
soldier flies a year ago, but quickly
realized that we didn't have enough food scraps to grow these hungry
larvae. Now that we've tapped
into the community's waste, it's time to
revisit black soldier flies. In the rest of this lunchtime
series,
I'll explain why we think black soldier flies are worth adding to our
farm and how we plan to go about it, so today I just want to talk a bit
about the flies themselves.
I became intrigued by black
soldier flies a year ago, but quickly
realized that we didn't have enough food scraps to grow these hungry
larvae. Now that we've tapped
into the community's waste, it's time to
revisit black soldier flies. In the rest of this lunchtime
series,
I'll explain why we think black soldier flies are worth adding to our
farm and how we plan to go about it, so today I just want to talk a bit
about the flies themselves.
What
are black soldier flies?
Hermetia ilucens
is a small, black fly that spends most of its life in the larval
stage. Black soldier fly larvae eat any kind of decaying organic
matter, including food scraps, human and livestock waste, and more.
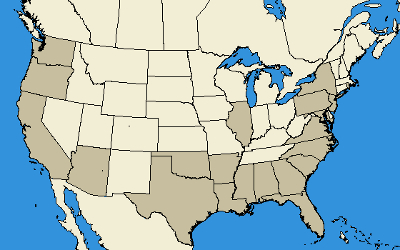 Where do
they live?
Where do
they live?
Black soldier flies (Hermetia illucens) are tiny and they don't
bother anyone, so until people started harnessing them as composters,
we didn't pay much attention to them. This map, from Bugguide.net,
is "based on images submitted and identified by contributors. Range and
date information may be incomplete, overinclusive, or just plain
wrong." Experts on the internet report that black soldier flies
live in zone 7 and warmer, but we have them here in zone 6 and the map
suggests they might even dip into zone 5. You can see adults from
April to December in the Deep South, and from about June to September
further north.
Why
do we care about black soldier flies?
Black soldier flies have
the potential to quickly compost all kinds of organic waste, from swine
excrement in huge factory farms to food scraps from apartment-dwellers
with no room for a compost pile. As you'll see tomorrow, the
larvae are high quality livestock feed.
| This post is part of our Black Soldier Fly lunchtime series.
Read all of the entries: |
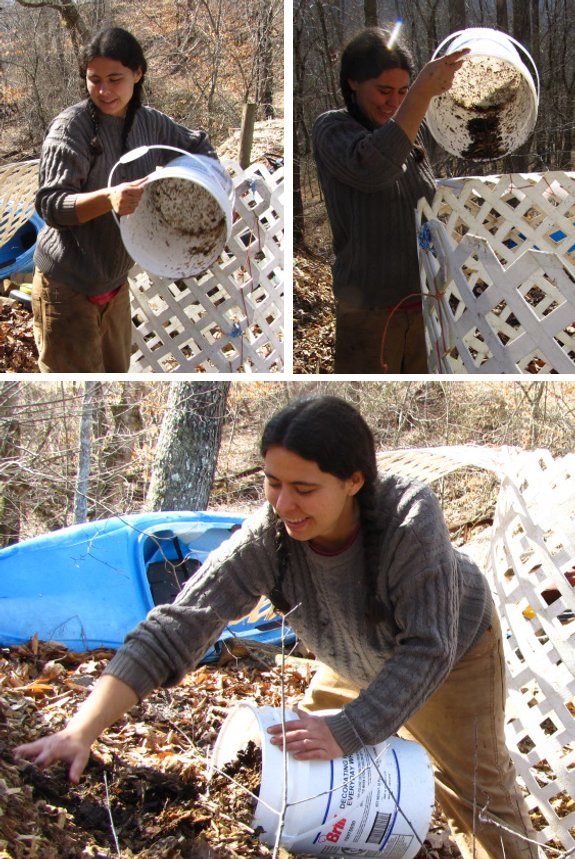
We've been adding new 5
gallon buckets to our
infrastructure for the past year and it still seems like we need a few
more.
The guy
we bought our worms from
had an impressive inventory of used buckets. He gets them from a bakery
for free and just has to rinse out the icing. I suspect the plastic
handle might give out sooner than our store bought buckets, but does
longevity matter as much when the replacement cost is zero?
I think I'll give this a try
with the bakery inside our grocery store the next time I go shopping.

Or explore more posts by date or by subject.
About us: Anna Hess and Mark Hamilton spent over a decade living self-sufficiently in the mountains of Virginia before moving north to start over from scratch in the foothills of Ohio. They've experimented with permaculture, no-till gardening, trailersteading, home-based microbusinesses and much more, writing about their adventures in both blogs and books.