
archives for 01/2011

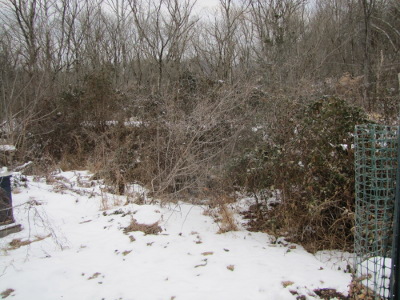
The woodpile melted
enough that I could stack logs in the shed....
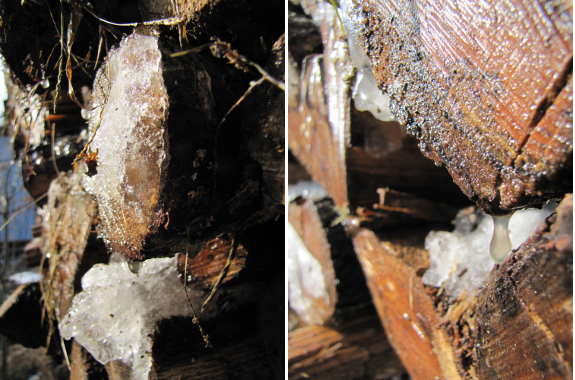
...and the firewood is
already dripping dry.
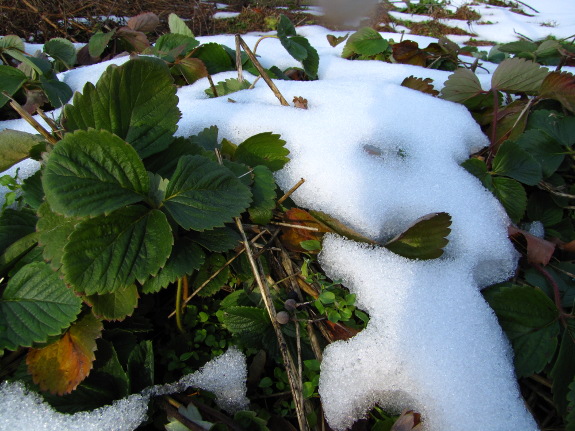
The snow is melting off
the garden.
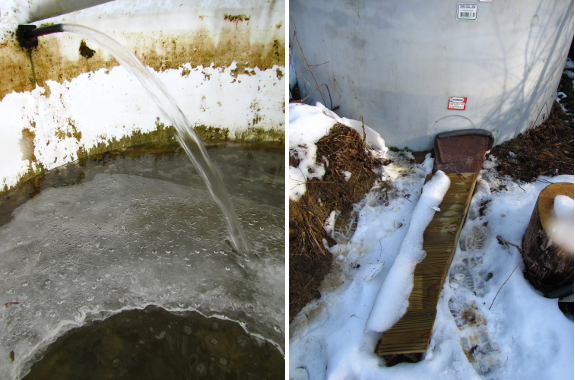
The wash water tank is
full again, and Mark's
insulated exit point
clearly works.
Best of all, for the
first time in months, the birds are singing! Happy New Year!
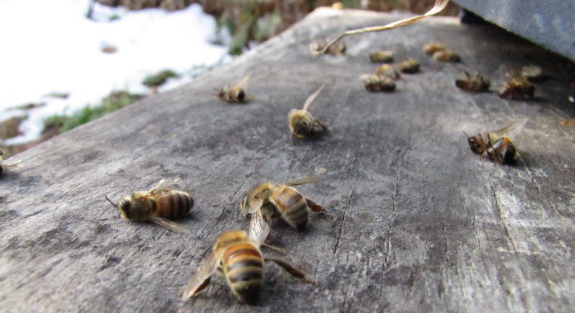
 Our
bees took advantage of the recent warm snap to do some house cleaning by
bringing out the dead bees that expired recently.
Our
bees took advantage of the recent warm snap to do some house cleaning by
bringing out the dead bees that expired recently.
Bee keeping sure is easy when
all you have to do is take a few pictures of your wife doing the actual
work and then let the bees do the rest.
Of course I help when it
comes to eating the honey, which makes it a sweet spectator chore that
I recommend to all homesteading husbands out there.
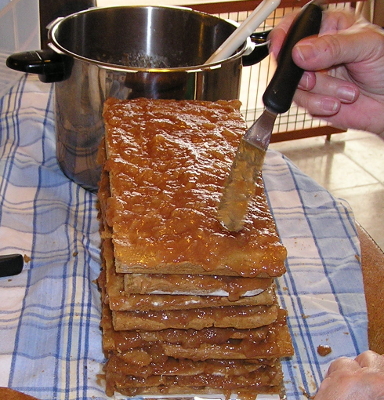 When
Mark
and I got married,
Mark's family kept saying that they wanted to bring a stack cake to our
wedding. We both looked at them in confusion since neither of us
like apple butter, and we instead ended up with the most delicious and
beautiful cake known to man (thanks, Sheila!)
When
Mark
and I got married,
Mark's family kept saying that they wanted to bring a stack cake to our
wedding. We both looked at them in confusion since neither of us
like apple butter, and we instead ended up with the most delicious and
beautiful cake known to man (thanks, Sheila!)
Years later, Mark's mom
sent me the following email, and suddenly the obsession with stack
cakes made sense:
This is the
old apple stack cake, also known as the Appalachian wedding cake.
Years ago, people would come to a wedding and it was a tradition, the
guest would bring one layer of the cake, baked very thin, like with
molasses, ginger, etc. It would 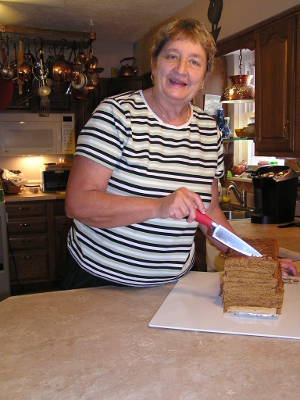 be real dry, could travel without ruin.
Then the hostess would put them all together with apple butter, between
each layer, so the more layers meant that the bride & groom were
that well known.
be real dry, could travel without ruin.
Then the hostess would put them all together with apple butter, between
each layer, so the more layers meant that the bride & groom were
that well known.
This is Mom's favorite cake. I
was able to bake one this year, wanted to share with you how pretty it
came out. I am freezing part of it, so you and Mark can taste
it. Yum yum. This one is 12 layers.
Now that the tradition
has been explained to me, I almost wish we'd gone old-fashioned and had
each of our guests bring a layer to our wedding. Doesn't a stack
cake sound like a fun center-piece for a potluck, but perhaps with
chocolate cakes instead of apple? Or maybe with any cake that
goes well with chocolate frosting?
Thanks for the beautiful
photos and for not minding our cluelessness, Rose Nell! We're
looking forward to tasting such a traditional cake.
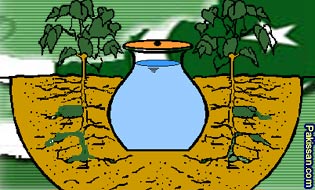 A couple of inches of rain
and a lot of melting snow mean that our garden is about as wet as it
gets right now. Still, I was intrigued when I read about pitcher
irrigation. This traditional technique is a bit like drip
irrigation for dummies --- you bury an unglazed ceramic pot in the
soil, fill it with water, and the liquid seeps out into a three to six
foot diameter area, keeping the soil at a constant 80% of
saturation. If the soil gets too wet, water will actually seep
back into the pot, so there's no need to worry about overwatering, and
there is clearly no runoff.
A couple of inches of rain
and a lot of melting snow mean that our garden is about as wet as it
gets right now. Still, I was intrigued when I read about pitcher
irrigation. This traditional technique is a bit like drip
irrigation for dummies --- you bury an unglazed ceramic pot in the
soil, fill it with water, and the liquid seeps out into a three to six
foot diameter area, keeping the soil at a constant 80% of
saturation. If the soil gets too wet, water will actually seep
back into the pot, so there's no need to worry about overwatering, and
there is clearly no runoff.
I've read that 1.5 to
2.5 gallon ceramic pots are ideal, but infonet-biovision suggests using a dried sweet
monkey orange fruit (whatever that is.) Makes me wonder if a
dried gourd would work? I'm very content with our
irrigation method
for the main part of the garden, but would like to have something more
low-tech in my arsenal, especially for watering trees and other
perennials that are spread out across the yard. I can even see
pitcher irrigation being a fun way to keep those potted plants wet
during a dry summer on a hot patio. Has anybody tried it?
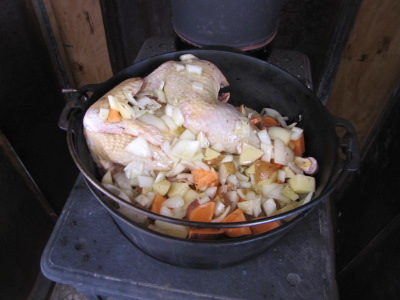 After
trying out the kindergarten level of cooking
on the wood stove, I
decided to move on to first grade. Joey gave us this beautiful
Dutch oven after our power outage last year, and it seemed to be the
obvious choice for expanding our culinary arts to roasting a
chicken. I prepared the veggies and chicken as I usually do when roasting in the
electric oven,
settled the fire on a medium-low setting, and then put on the lid of
the Dutch oven.
After
trying out the kindergarten level of cooking
on the wood stove, I
decided to move on to first grade. Joey gave us this beautiful
Dutch oven after our power outage last year, and it seemed to be the
obvious choice for expanding our culinary arts to roasting a
chicken. I prepared the veggies and chicken as I usually do when roasting in the
electric oven,
settled the fire on a medium-low setting, and then put on the lid of
the Dutch oven.
I stirred the vegetables
a few times so that they wouldn't stick to the bottom --- which I
assume is more of a problem in a Dutch oven since the heat comes up
from the bottom --- but I didn't have to baste the chicken at
all. That made this roast chicken a bit lower work than my
oven-roasted chicken, where I try to remember to baste every ten
minutes or so. 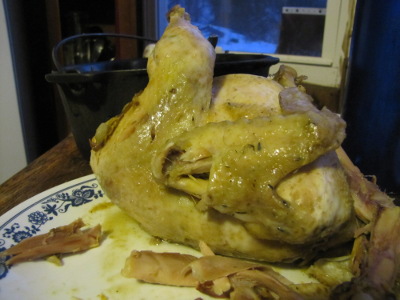 On
the other hand, the chicken took about half an hour longer than usual
to cook, and I was glad I had a meat thermometer so that I'd know when
the meat was safely done.
On
the other hand, the chicken took about half an hour longer than usual
to cook, and I was glad I had a meat thermometer so that I'd know when
the meat was safely done.
Our taste test declared
the Dutch oven roasted chicken and vegetables just as good as the
oven-roasted version, but the aesthetics weren't quite as good. I
didn't get the crispy skin I usually end up with and the vegetables
turned into a mush, making me think that I probably should have cooked
the chicken alone for about an hour before adding the root and onion
mixture.
In fact, the Dutch oven
roasted chicken reminded me of the results I've seen from folks who
roast their chicken in a crock pot. That makes me think that
crock pot recipes would be a good place to start when looking for meals
I can cook in the Dutch oven on top of the wood stove.
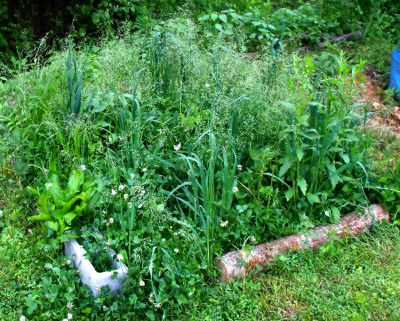 In
the garden, one of our biggest experiments in 2010 was embarking on the
first stage of experimentation with grain. We tried a do-nothing
oats bed, grew amaranth and quinoa in the vegetable garden, and tried
out buckwheat and oats in the chicken pasture. We learned a lot,
but we still have a long way to go before we achieve grain independence.
In
the garden, one of our biggest experiments in 2010 was embarking on the
first stage of experimentation with grain. We tried a do-nothing
oats bed, grew amaranth and quinoa in the vegetable garden, and tried
out buckwheat and oats in the chicken pasture. We learned a lot,
but we still have a long way to go before we achieve grain independence.
First, I have to admit
that our eating habits changed dramatically in the middle of our grain
experiment, which veered my priorities away from grain. After
extensive research, I decided that we needed to increase the percentage
of protein in our diets. Since I wasn't going to cut back on
fruits and vegetables, that meant reducing our carbohydrates to leave
more room on our plates for beans and meat. Growing oats suddenly
seemed much less important once I stopped eating them for breakfast,
and other grains were similarly sidetracked to the chicken feed
category. But we both felt that the change was a plus since we
started feeling perkier, our brains flowed faster, and we even lost
some weight.
 That said, we learned a lot
about growing grains anyway. Our do-nothing
patch (first photo)
wasn't very successful --- leaving the chicken tractor on a patch of
ground for a week in the winter is not enough to kill off the weeds,
and the oats had a lot of competition and ended up patchy and
scrawny. A more effective do-nothing method turned out to be planting
grains in a paddock of the chicken pasture that was scratched bare over
the early summer and then had the last few hardy weeds hoed out
by hand. Of course, growing grains in the vegetable garden
was easy, but seemed like a waste of space since the plants were hardy
enough to put up with the minimal work chicken pasture situation.
That said, we learned a lot
about growing grains anyway. Our do-nothing
patch (first photo)
wasn't very successful --- leaving the chicken tractor on a patch of
ground for a week in the winter is not enough to kill off the weeds,
and the oats had a lot of competition and ended up patchy and
scrawny. A more effective do-nothing method turned out to be planting
grains in a paddock of the chicken pasture that was scratched bare over
the early summer and then had the last few hardy weeds hoed out
by hand. Of course, growing grains in the vegetable garden
was easy, but seemed like a waste of space since the plants were hardy
enough to put up with the minimal work chicken pasture situation.
In terms of variety
selection, the results were once again a mixed bag. I was
intrigued by hullless oats, but in practice found that they were much
more finicky than traditional oats. I can't draw many conclusions
from the failure of hullless oats in the do-nothing patch, but I did
grow side by side hullless and traditional oats as cover crops starting
in August and the former achieved a height of perhaps a third the size
of the latter. I suspect that it's better to just grow
traditional oats and find a way to hull them if you want to eat them
yourselves.
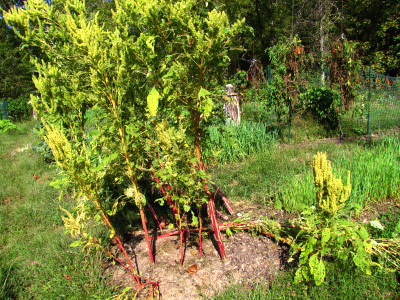 In
the unusual grain category, quinoa
was a flop ---
perhaps I need to try another variety? On the other hand, Manna
de Montana Amaranth was extremely productive, and grew so tall that I
suspect I could grow it in the chicken pasture and let the flock graze
between the plants without worrying about them reaching the
seeds. Amaranth was also very easy to thresh and winnow, although I'm still learning
how to cook it.
In
the unusual grain category, quinoa
was a flop ---
perhaps I need to try another variety? On the other hand, Manna
de Montana Amaranth was extremely productive, and grew so tall that I
suspect I could grow it in the chicken pasture and let the flock graze
between the plants without worrying about them reaching the
seeds. Amaranth was also very easy to thresh and winnow, although I'm still learning
how to cook it.
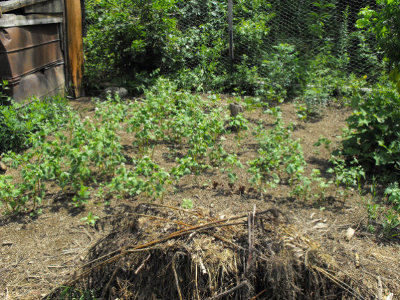
Back among traditional
grains, we're experimenting with growing
wheat this winter,
but the jury is still out. I have enough data about buckwheat, though, to say that it's a
so-so grain that I probably won't repeat (except as a cover
crop.) Buckwheat did relatively well in the chicken pasture, but
complained about drought --- I think that for maximum yields, I 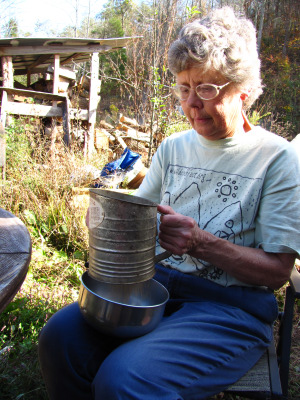 should
plant it in a part of the garden that gets irrigated. On
the other hand, buckwheat wasn't a fan of the waterlogged soil where I
grew it as a cover crop. The plants also didn't seem to produce
all that much grain, and it would have been tough to pick the
individual seeds if I hadn't just turned the chickens in to eat it
up.
should
plant it in a part of the garden that gets irrigated. On
the other hand, buckwheat wasn't a fan of the waterlogged soil where I
grew it as a cover crop. The plants also didn't seem to produce
all that much grain, and it would have been tough to pick the
individual seeds if I hadn't just turned the chickens in to eat it
up.
Looking toward the
future, our grain patches next year will look very different. The
only grains we eat much of nowadays are a bit of rice and wheat, but
since I can't grow the former I'll be planting wheat and amaranth for
our table. For the chickens, I want to try out millet and field
corn, but will focus more on the high protein sunflower seeds and
perhaps some sort of legume. My hope is that I can continue to
grow our grains in the two chicken pasture paddocks which are on flat
ground, utilizing the chickens to prepare the soil for me and to delete
most weeds.
This post is part of our 2010 experiments lunchtime series.
Read all of the entries:
|
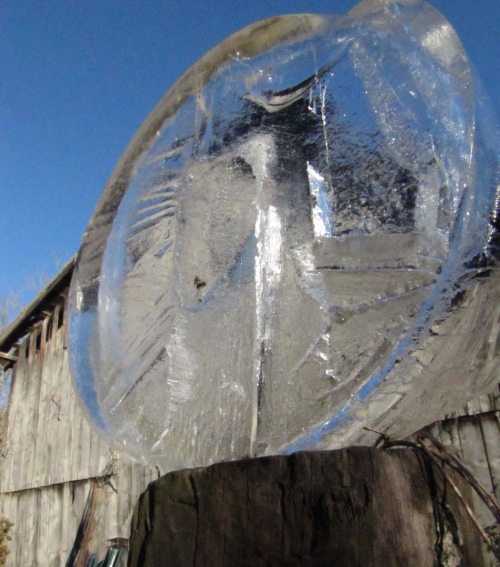
1. Leave a 5 gallon
bucket out in the yard to collect rain.
2. Wait for water to freeze.
3. Remove top layer of ice
and position on an old fence post.
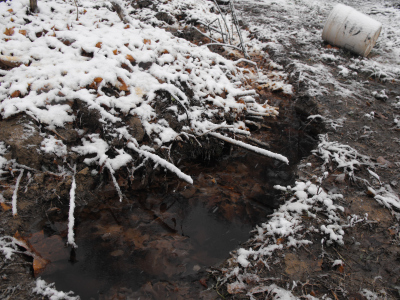
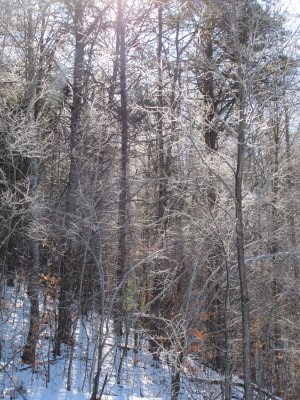 After
over four years gardening on the same two acres of vegetables, orchard,
and chicken pasture, I'm constantly surprised at how little I know
about the yard's microclimates. As Eliza pointed out on her blog,
snow-melt
is a perfect time to get those microclimates pertaining to sun figured
out --- sunny spots
will be the first to melt while shady spots will keep their snow for
hours or days longer. Our accumulated December snow took days to
melt (tiny bits of it are still out there), so I had a perfect
opportunity to scope out sunny spots day by day.
After
over four years gardening on the same two acres of vegetables, orchard,
and chicken pasture, I'm constantly surprised at how little I know
about the yard's microclimates. As Eliza pointed out on her blog,
snow-melt
is a perfect time to get those microclimates pertaining to sun figured
out --- sunny spots
will be the first to melt while shady spots will keep their snow for
hours or days longer. Our accumulated December snow took days to
melt (tiny bits of it are still out there), so I had a perfect
opportunity to scope out sunny spots day by day.
We live in pretty much
the worst place for gardening in the winter --- on a north-facing slope
on the north side of a hill. As the sun sinks lower into the sky
during the colder months, more and more of the area up against the hill
remains in shadow, and I look with longing at our neighbor's hay field,
across the creek and far enough from the hill that frost on the field 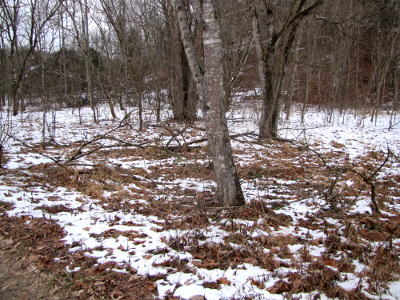 melts
hours before it does in our garden. So I was a bit surprised to
realize that a gap in the hills made an area just beyond the mule
garden melt off even before my neighbor's field did. Doesn't this
look like the absolutely perfect spot for a winter forest pasture? Can't you just
imagine how happy our flock would be, scratching through these leaves,
when their current pasture is still socked in under three inches of
snow and ice?
melts
hours before it does in our garden. So I was a bit surprised to
realize that a gap in the hills made an area just beyond the mule
garden melt off even before my neighbor's field did. Doesn't this
look like the absolutely perfect spot for a winter forest pasture? Can't you just
imagine how happy our flock would be, scratching through these leaves,
when their current pasture is still socked in under three inches of
snow and ice?
 Moving
back toward our main yard, I realized that we had another abnormally
sunny spot --- the south-facing side of the gully that divides our mule
garden from our back garden. Seeing the bare soil on this sheer
south face while everything around it was covered with snow made me
realize that I'm leaving a lot of sun on the table by letting this spot
grow up in weeds. Maybe we should put Mark's hobbit cave here
(assuming we could deal with drainage since the bottom of the gully
stays good and damp.) Or perhaps this would be a good spot to
terrace and plant sun-loving something-or-other halfway up the south
face? If we went to all of the work of building a stone wall
behind the terrace, I'll bet we could gain as much as two climate zones
and plant just about anything we want there.
Moving
back toward our main yard, I realized that we had another abnormally
sunny spot --- the south-facing side of the gully that divides our mule
garden from our back garden. Seeing the bare soil on this sheer
south face while everything around it was covered with snow made me
realize that I'm leaving a lot of sun on the table by letting this spot
grow up in weeds. Maybe we should put Mark's hobbit cave here
(assuming we could deal with drainage since the bottom of the gully
stays good and damp.) Or perhaps this would be a good spot to
terrace and plant sun-loving something-or-other halfway up the south
face? If we went to all of the work of building a stone wall
behind the terrace, I'll bet we could gain as much as two climate zones
and plant just about anything we want there.
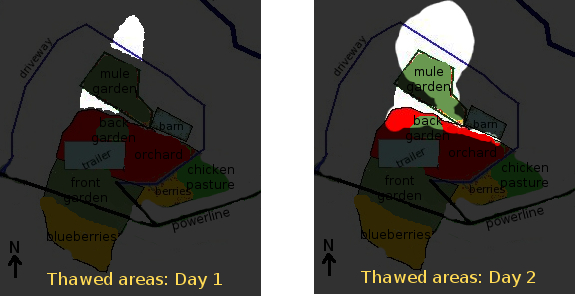
 And
now for the bad news. Since the gully has never been reclaimed
(aka mowed), young trees, briars, and Japanese honeysuckle create a
wall along the south side of the mule garden. Here, in our
sunniest piece of flat ground, I'm wasting an eight foot strip of
growing area along the southern edge due to deep shade from my briar
bushes. We clearly need to find a way to get that gully under
control so that the mule garden will work even better as our sunny
winter garden spot.
And
now for the bad news. Since the gully has never been reclaimed
(aka mowed), young trees, briars, and Japanese honeysuckle create a
wall along the south side of the mule garden. Here, in our
sunniest piece of flat ground, I'm wasting an eight foot strip of
growing area along the southern edge due to deep shade from my briar
bushes. We clearly need to find a way to get that gully under
control so that the mule garden will work even better as our sunny
winter garden spot.
 One
of our goals for 2010 was constant mulch cover in the vegetable
garden. We didn't get there, mostly because I got so caught up in
weeding in the middle of the summer that I forgot I could have been
spending half that time mulching and getting the same results.
But we did try out a lot of different mulching materials, discovering
in the process which ones work well for our garden.
One
of our goals for 2010 was constant mulch cover in the vegetable
garden. We didn't get there, mostly because I got so caught up in
weeding in the middle of the summer that I forgot I could have been
spending half that time mulching and getting the same results.
But we did try out a lot of different mulching materials, discovering
in the process which ones work well for our garden.
The easiest and best-suited
mulch (in terms of
C:N ratio and water infiltration) for the vegetable garden is straw, but straw costs an arm and
a leg in our non-grain-growing region. I have high hopes that we
will eventually be growing our own straw as part of our grain
experiments, but in the meantime, I wanted to see which free mulches
would work in its place.
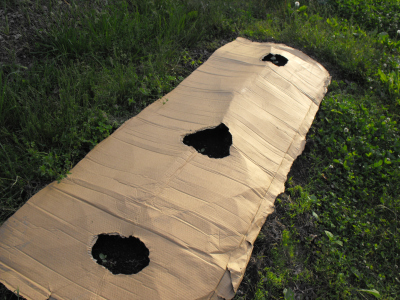 Cardboard showed a lot of promise
early in the season, but ended up keeping the soil too dry. In
the early summer, soil was wetter under the cardboard mulch than in
unmulched areas, but I suspect that was due to the cardboard preventing
evaporation of water that was already in the soil. Even though I
punched holes in the cardboard to promote infiltration of rainwater,
the cardboard-mulched beds started drying out by mid-summer. In
the fall, it was clear that the cardboard-mulched beds were bone dry,
and even our dry-soil-loving peppers started to wilt near the end of
the year. Cardboard seems to be more useful as part of sheet
mulches to delete weeds from new garden areas or from around woody
perennials, and I don't think I'll be using it in the vegetable garden
again.
Cardboard showed a lot of promise
early in the season, but ended up keeping the soil too dry. In
the early summer, soil was wetter under the cardboard mulch than in
unmulched areas, but I suspect that was due to the cardboard preventing
evaporation of water that was already in the soil. Even though I
punched holes in the cardboard to promote infiltration of rainwater,
the cardboard-mulched beds started drying out by mid-summer. In
the fall, it was clear that the cardboard-mulched beds were bone dry,
and even our dry-soil-loving peppers started to wilt near the end of
the year. Cardboard seems to be more useful as part of sheet
mulches to delete weeds from new garden areas or from around woody
perennials, and I don't think I'll be using it in the vegetable garden
again.
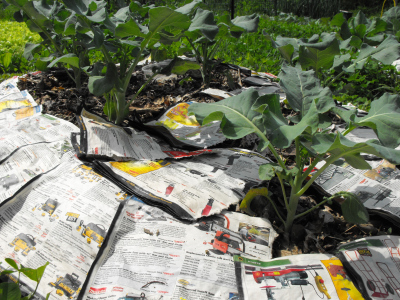 Paper was even less
promising. If we subscribed to the newspaper, we probably would
have had better luck, but the junk mail I mulched with had too high of
a percentage of colored dyes and glossiness, and the plants around the
paper mulch mostly died. I'd be curious to see if running the
paper through a shredder first would make it a slightly better mulch by
adding fluffiness and air pockets, but we'll probably use up our junk
mail in the worm bin and perhaps with mushrooms in the future.
Paper was even less
promising. If we subscribed to the newspaper, we probably would
have had better luck, but the junk mail I mulched with had too high of
a percentage of colored dyes and glossiness, and the plants around the
paper mulch mostly died. I'd be curious to see if running the
paper through a shredder first would make it a slightly better mulch by
adding fluffiness and air pockets, but we'll probably use up our junk
mail in the worm bin and perhaps with mushrooms in the future.
We used tree
leaves as a winter mulch on most of the garden last
year, but they were a bit too high in carbon to be optimal for the
vegetable garden. This winter, we're using tree 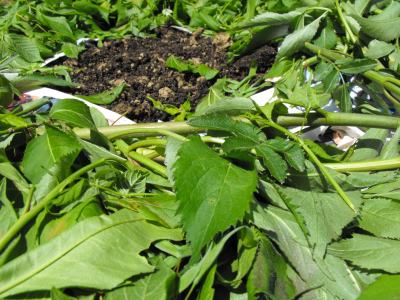 leaves
as bedding in the chicken coop, where they mix with manure and (I hope)
will turn into a perfect mulch by spring.
leaves
as bedding in the chicken coop, where they mix with manure and (I hope)
will turn into a perfect mulch by spring.
Green leaves --- like grass
clippings, elderberry
leaves, and comfrey
leaves --- are well suited to being used directly on the vegetable
garden as mulch, but each has flaws as well. Elderberry and
comfrey leaves work great, but it feels like the juice isn't worth the
squeeze unless I can find a quicker way of harvesting them, and grass
clippings are really only suitable in the spring before the plants
start to go to seed. I think that this year, I'm only going to
have Mark bag grass clippings for the first month or two, then let the
grass grow up in out of the way parts of the yard in late summer to use
as hay for the chickens.
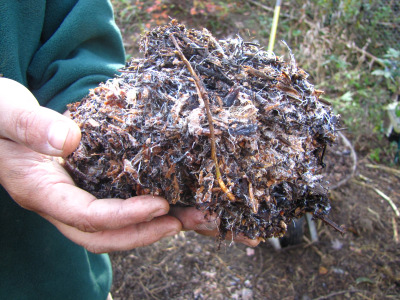 The
final mulch possibility is wood chips. Well aged wood
chips make the best
mulch for our woody plants, full of beneficial fungi and other soil
microorganisms. I suspect that wood chip mulch that has been well
worked over by the chickens and looks like it's halfway on its path to
becoming stump dirt would also make a perfect mulch for the vegetable
garden since chicken manure would keep this mulch from locking up
nitrogen in the soil. Unfortunately, I rarely have enough really
good (aka homemade) wood chip mulch for the trees and berries, let
alone for the vegetable garden.
The
final mulch possibility is wood chips. Well aged wood
chips make the best
mulch for our woody plants, full of beneficial fungi and other soil
microorganisms. I suspect that wood chip mulch that has been well
worked over by the chickens and looks like it's halfway on its path to
becoming stump dirt would also make a perfect mulch for the vegetable
garden since chicken manure would keep this mulch from locking up
nitrogen in the soil. Unfortunately, I rarely have enough really
good (aka homemade) wood chip mulch for the trees and berries, let
alone for the vegetable garden.
In 2011, we'll probably
continue to buy quite a bit of straw for the garden, but we'll
supplement it in the spring with grass clippings and with the deep
bedding from the chicken coop. In the long run, someday I'd like
to be making enough compost (from cafeteria food scraps?) and wood chip
mulch to keep the garden happy with entirely homemade mulches.
This post is part of our 2010 experiments lunchtime series.
Read all of the entries:
|
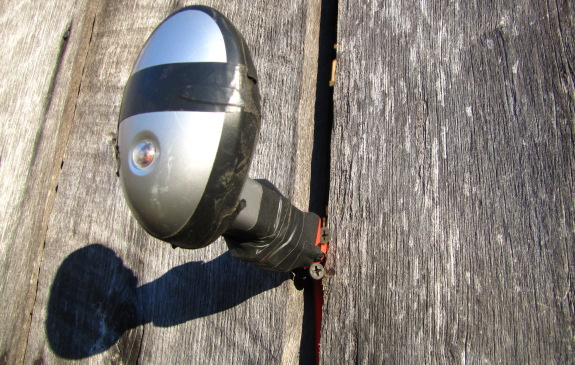
I've been experimenting
with one of these L.E.D. night lights to see if it can function as a
low budget deer deterrent that shows motion during vulnerable night
hours.
It only took a few minutes to
wrap electrical tape around the cracks to make it water proof and
mounting was even easier as shown in the image above.
A little sensor knows when
the sun goes down and begins projecting different colored light
patterns on the side of the barn, which will hopefully appear as
human/hunter movement to any potential night nibblers.
 Worm bin
experiment 2011 is
gearing up. Our new shredder came in the mail yesterday --- the
Fellows PS-60. As usual, I over-researched the decision, but was
glad I did. Most of the shredders on the market today are
cross-cut or confetti shredders, made to turn your paper into pieces
too small for your nosy neighbors to read. However, the whole
point of a shredder for me is to get long strips that won't mat down
quickly in the worm bin, so I kept hunting until I found what's called
a "strip-cut" model. Mark talked me into choosing a shredder in
the $100 price range since he figures the ones half that price will
break down much faster.
Worm bin
experiment 2011 is
gearing up. Our new shredder came in the mail yesterday --- the
Fellows PS-60. As usual, I over-researched the decision, but was
glad I did. Most of the shredders on the market today are
cross-cut or confetti shredders, made to turn your paper into pieces
too small for your nosy neighbors to read. However, the whole
point of a shredder for me is to get long strips that won't mat down
quickly in the worm bin, so I kept hunting until I found what's called
a "strip-cut" model. Mark talked me into choosing a shredder in
the $100 price range since he figures the ones half that price will
break down much faster.
I pulled her out of the
box, sorted my paper into glossy and unglossy, and let her rip.
Junk mail is suddenly a joy! The Fellows shredder will take
twelve sheets of normal paper at a time, which means I could feed
unopened envelopes, big hanks of catalogs, and even the thin cardboard
that tea bags come in through with no trouble. Flattened toilet
paper center rolls were too much for her, but you can just turn the
switch to reverse if you overdo it and your paper will come right back
out.
Meanwhile, I've talked
it over with my non-profit, and they're on board for
being the public face of asking the local school for their food
scraps. I hope that with a non-profit behind me, I won't look
quite so much like a kook. My letter to the principal is going in
the mail this week. Wish me luck!
 Cover
crops were another innovation in 2010, doing double-duty as weed
suppressors and compost creators. My first goal was to find
varieties that like our clay soil and work well with no-till conditions
in zone 6 (i.e. they die over the winter or are easy to kill
by mowing), while
also building up as much organic matter in the soil as possible.
Meanwhile, I wanted to learn the best planting dates in order to grow
vegetables for as much of the year as possible and still find time to
slide in a cover crop planting.
Cover
crops were another innovation in 2010, doing double-duty as weed
suppressors and compost creators. My first goal was to find
varieties that like our clay soil and work well with no-till conditions
in zone 6 (i.e. they die over the winter or are easy to kill
by mowing), while
also building up as much organic matter in the soil as possible.
Meanwhile, I wanted to learn the best planting dates in order to grow
vegetables for as much of the year as possible and still find time to
slide in a cover crop planting.
 Here's a rundown on each
species I tried, with the caveat that the December snow coat prevented
a winter kill in several species that I suspect will still die out
before spring planting time. I also can't tell how much organic
matter has been added to the soil yet --- I'll try to remember to post
again when I delve into the dirt in each bed and notice the differences
between crops, but for now I'm just making guesses based on how much
vegetation is on the surface.
Here's a rundown on each
species I tried, with the caveat that the December snow coat prevented
a winter kill in several species that I suspect will still die out
before spring planting time. I also can't tell how much organic
matter has been added to the soil yet --- I'll try to remember to post
again when I delve into the dirt in each bed and notice the differences
between crops, but for now I'm just making guesses based on how much
vegetation is on the surface.
- Oats are currently my very favorite cover crop. They had no problem with our heavy clay soil and thrived even in the most water-logged beds, creating more top growth than any other cover crop we tried. Forage oats that I bought in a 50 pound bag at the feed store grew much better than hull-less oats, and the oats also seemed to need a top-dressing of compost to achieve maximum growth (which is worth it to me, although some people might wonder about using compost to grow compost.) The best planting period for oats in our garden seems to extend from the beginning of August (or possibly earlier?) through mid September --- the earliest ones bloomed two months later and had to be cut down, which is a bit of extra work but not a significant deterrent, while the late September and October planted oats just didn't get big enough to make it worth our while. The jury is still out on whether oats will winter kill, but mowing them is easy and weakens the plants enough that they die in even a moderate cold snap.
 Oilseed radishes
are currently my second favorite cover crop, perhaps to be promoted to
favorite once I dig into the dirt --- they produce most of their
biomass below ground, so I can only guess at how their organic matter
production will stack up compared to oats. The only downside of
oilseed radishes is seed cost --- you can't buy the seeds at the feed
store, so you're stuck paying shipping and a higher price through
online suppliers (and they're new and trendy, so they cost a
lot.) Otherwise, though, the radishes do just as well as oats at
growing fast, putting up with clay soil and waterlogged conditions, and
outcompeting weeds. They are currently about two-thirds
winter-killed too, so I'm pretty sure I won't need to do any mowing to
wipe the radish cover crop out in the spring. As for planting
date, I planted radishes each week in September, and the earliest ones
definitely did better than the later ones, so I suspect their optimal
planting date is around the same as for oats, perhaps leaning a hair
toward earlier planting.
Oilseed radishes
are currently my second favorite cover crop, perhaps to be promoted to
favorite once I dig into the dirt --- they produce most of their
biomass below ground, so I can only guess at how their organic matter
production will stack up compared to oats. The only downside of
oilseed radishes is seed cost --- you can't buy the seeds at the feed
store, so you're stuck paying shipping and a higher price through
online suppliers (and they're new and trendy, so they cost a
lot.) Otherwise, though, the radishes do just as well as oats at
growing fast, putting up with clay soil and waterlogged conditions, and
outcompeting weeds. They are currently about two-thirds
winter-killed too, so I'm pretty sure I won't need to do any mowing to
wipe the radish cover crop out in the spring. As for planting
date, I planted radishes each week in September, and the earliest ones
definitely did better than the later ones, so I suspect their optimal
planting date is around the same as for oats, perhaps leaning a hair
toward earlier planting.
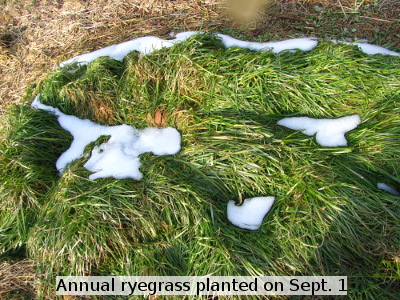 Annual ryegrass got off to a much
slower start than oats and oilseed radishes, but it seems to have kept
growing later in the year as well. When I went out to check on it
after the snow melted, I was surprised to find such a dense growth on
the ryegrass beds, and it's possible ryegrass might do as well as my
oats, especially when a bed opens up for cover crops later in the
year. Beds planted on September 1 did the best, but those planted
at the end of September did better than oats planted on neighboring
beds on the same day. The real question will be whether annual
ryegrass will winter kill since we're on the edge of its hardiness zone
and the beds are still bright green. If so, I'd plant annual
ryegrass on any bed that opens up between mid September and early
October.
Annual ryegrass got off to a much
slower start than oats and oilseed radishes, but it seems to have kept
growing later in the year as well. When I went out to check on it
after the snow melted, I was surprised to find such a dense growth on
the ryegrass beds, and it's possible ryegrass might do as well as my
oats, especially when a bed opens up for cover crops later in the
year. Beds planted on September 1 did the best, but those planted
at the end of September did better than oats planted on neighboring
beds on the same day. The real question will be whether annual
ryegrass will winter kill since we're on the edge of its hardiness zone
and the beds are still bright green. If so, I'd plant annual
ryegrass on any bed that opens up between mid September and early
October.
- Buckwheat was a
disappointment. The plants hated waterlogged clay soil, and even
where buckwheat seemed to grow well, very little biomass was left
behind. Buckwheat's main advantages are that it will grow fast,
reaching maturity in just a bit over a month, and that the crop is very
easy to mow-kill. I could envision planting buckwheat in a bed
that was being reserved for a late spring planting, but I don't think
it's worth using up prime fall beds with buckwheat.
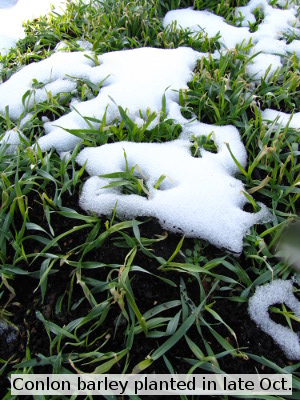 Barley
is still a big question mark. I planted it on a whim in late
October, and the plants didn't do much. Clearly, I'll have to try
again at a more realistic planting date.
Barley
is still a big question mark. I planted it on a whim in late
October, and the plants didn't do much. Clearly, I'll have to try
again at a more realistic planting date.
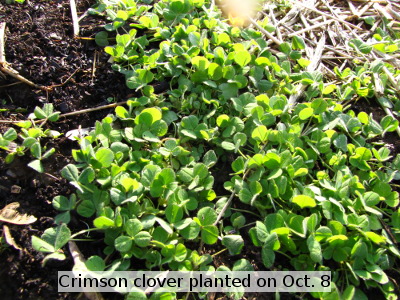
- Crimson Clover is also a
"who knows." I seeded clover in early October, and it came up and
produced its first set of true leaves before the cold weather hit, but
it's hard to tell anything else.
Looking beyond the
minutae, cover crops are a great addition to the garden, and I can't
imagine why it took me so long to come on board. (Well, I know
why --- I thought they were incompatible with no-till.) Cover
crops keep the soil from eroding and the food web alive in the fall
after the main garden is done, and it really
perks me up to look out at a sea of colors in November rather than at a
lot of dead stalks.
If I had to make only one recommendation to gardeners based on my 2010
vegetable garden experiments, it would be "Plant cover crops!"
This post is part of our 2010 experiments lunchtime series.
Read all of the entries:
|

2010 was the year we figured out the power of having a large truck to
haul big loads and just how much of a time saver it can be.
Joey
was kind enough to make us an offer to transfer ownership and we were
happy to accept. Of course he retains shared custody for times when he
needs to move something large.
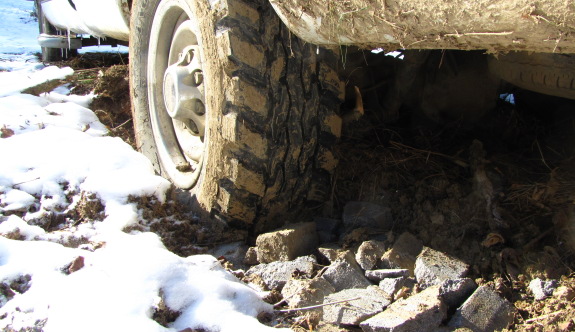
It's that time of year when
the ground temperature determines if the truck can move or just spin in
the mud. So far when it gets stuck the course of action is to wait till
it freezes, which is a lot easier than using a hand winch like we did
in the good old days with the Isuzu baby truck.
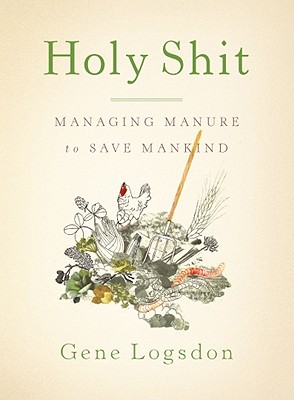 I
saved up a few special books as treats to take along on our recent
cruise, one of which was Holy
Shit: Managing Manure to Save Mankind by Gene Logsdon. I
have to admit that I was partly saving the book because it made me
laugh to envision reading a book called Holy Shit on a cruise, but I was
also really looking forward to learning more about one of my favorite
forms of biomass. I've thoroughly enjoyed several of Gene
Logsdon's other books, like Small-Scale
Grain Raising,
so I figured I was in for a treat.
I
saved up a few special books as treats to take along on our recent
cruise, one of which was Holy
Shit: Managing Manure to Save Mankind by Gene Logsdon. I
have to admit that I was partly saving the book because it made me
laugh to envision reading a book called Holy Shit on a cruise, but I was
also really looking forward to learning more about one of my favorite
forms of biomass. I've thoroughly enjoyed several of Gene
Logsdon's other books, like Small-Scale
Grain Raising,
so I figured I was in for a treat.
Unfortunately, Holy Shit let me down. I was
hoping for some data and hands-on information that would help me use
manure more effectively on our homestead, but the book was instead an
extended rant on how our society is broken because we throw away our
manure. I kept my pen poised on my notebook for hours, and
couldn't come up with a single tip to write down and pass on to you
folks. If you're interested in reading Gene Logsdon's latest
book, I recommend you check it out of your local library as light
reading rather than seeking any answers in its pages.
 After
four years of hard-core gardening, the vegetable garden doesn't require
much experimentation any more. I've mostly figured out when to
plant our crops, which varieties grow well in our soil, and how to
fight the worst diseases and pests. I do keep trying out new
experimental varieties, but I've discussed this year's successes and
failures previously (for example: amaranth, urd beans, other
experimental beans,
and quinoa,
sesame, and poppies.)
In this post, I just want to sum up our dealings with some of the
thornier issues --- how to
keep tomatoes from getting blight, how to keep cucurbits from dying of
anything and everything, and some work with woody plants.
After
four years of hard-core gardening, the vegetable garden doesn't require
much experimentation any more. I've mostly figured out when to
plant our crops, which varieties grow well in our soil, and how to
fight the worst diseases and pests. I do keep trying out new
experimental varieties, but I've discussed this year's successes and
failures previously (for example: amaranth, urd beans, other
experimental beans,
and quinoa,
sesame, and poppies.)
In this post, I just want to sum up our dealings with some of the
thornier issues --- how to
keep tomatoes from getting blight, how to keep cucurbits from dying of
anything and everything, and some work with woody plants.
 2009
was the year without a tomato,
when every tomato in the eastern U.S. seems to have been impacted by
blight. We adore tomatoes, so we tried a lot of techniques to
keep our plants blight-free in 2010, including pruning
tomatoes to keep their leaves away from the damp soil, ripping
out any plants that contract the fungus, planting
blight-resistant tomato varieties, scattering
tomatoes throughout the garden and planting some later in the year, and weeding out
volunteer potatoes and weedy nightshades that can harbor the blight.
The combination of factors all added up to a good tomato year, despite
blight spores wafting through the air, although I don't think that the
tomato islands and succession planting did much good. We put away
enough tomatoes for pizza and spaghetti sauce, soups, and general
cooking to last us through the winter, and the only thing I would have
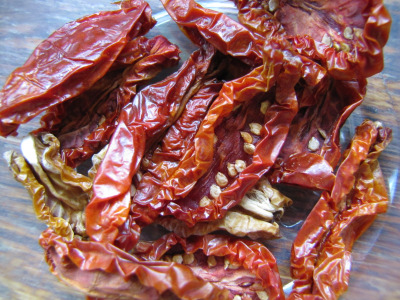
done differently would be to start drying
tomatoes earlier in
the year so we could have more of those delicious treats!
2009
was the year without a tomato,
when every tomato in the eastern U.S. seems to have been impacted by
blight. We adore tomatoes, so we tried a lot of techniques to
keep our plants blight-free in 2010, including pruning
tomatoes to keep their leaves away from the damp soil, ripping
out any plants that contract the fungus, planting
blight-resistant tomato varieties, scattering
tomatoes throughout the garden and planting some later in the year, and weeding out
volunteer potatoes and weedy nightshades that can harbor the blight.
The combination of factors all added up to a good tomato year, despite
blight spores wafting through the air, although I don't think that the
tomato islands and succession planting did much good. We put away
enough tomatoes for pizza and spaghetti sauce, soups, and general
cooking to last us through the winter, and the only thing I would have
done differently would be to start drying
tomatoes earlier in
the year so we could have more of those delicious treats!
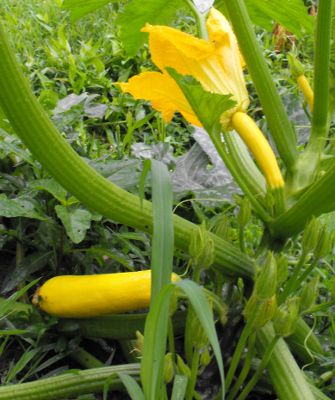 We
also mostly licked our cucurbit problems. In the past, we've lost
many of our squashes to vine borers and our cucumbers and melons to
wilts and blights, and we've tried lots of complicated methods to solve
these problems. In the end, it seems like the lowest tech answers
are the best when it comes to cucurbits. Among winter squashes,
we simply converted
over to an all-butternut garden, which deleted all of the
issues and also fed us the tastiest of the winter squashes. For
summer squashes, we settled on succession
planting, seeding a
new bed May 1, May 15, June 1, June 15, July 15, and July 30. As
soon as the earlier bed succumbed to vine borers, the next bed was
producing, and our freezer is chock full of squash slices. We
used nearly the same succession planting technique with cucumbers, with
the addition that we chose a more mildew-resistant variety (Diamont
Hybrid), and for the first time we were overrun with cucumbers for most
of the summer. We had a so-so watermelon year, but the problem
there was mislabelled seeds. In the end, the only cucurbit that
still eludes me is canteloupes --- since these plants need a long
growing season like winter squash, I can't just succession plant to
beat the blight. Maybe some research will turn up a more
resistant variety, or perhaps I'll follow my movie star neighbor's lead
and plant canteloupes atop black plastic for faster drying.
We
also mostly licked our cucurbit problems. In the past, we've lost
many of our squashes to vine borers and our cucumbers and melons to
wilts and blights, and we've tried lots of complicated methods to solve
these problems. In the end, it seems like the lowest tech answers
are the best when it comes to cucurbits. Among winter squashes,
we simply converted
over to an all-butternut garden, which deleted all of the
issues and also fed us the tastiest of the winter squashes. For
summer squashes, we settled on succession
planting, seeding a
new bed May 1, May 15, June 1, June 15, July 15, and July 30. As
soon as the earlier bed succumbed to vine borers, the next bed was
producing, and our freezer is chock full of squash slices. We
used nearly the same succession planting technique with cucumbers, with
the addition that we chose a more mildew-resistant variety (Diamont
Hybrid), and for the first time we were overrun with cucumbers for most
of the summer. We had a so-so watermelon year, but the problem
there was mislabelled seeds. In the end, the only cucurbit that
still eludes me is canteloupes --- since these plants need a long
growing season like winter squash, I can't just succession plant to
beat the blight. Maybe some research will turn up a more
resistant variety, or perhaps I'll follow my movie star neighbor's lead
and plant canteloupes atop black plastic for faster drying.
 I've learned a lot about
propagating perennials this year, too, but was much less successful
with my first attempts. I easily got
hardy kiwis to root from softwood cuttings, but then transplanted them
straight into the unirrigated part of the garden when their roots were
too small, and the plants promptly kicked the bucket. Since the
original kiwi vines seem to have really taken off this year (their
second full summer in the ground), I figure I'll have a lot more
material to root next year and can try again. I also completely
failed at starting
various trees from seed since I didn't count on
their slow germination and lost track of exactly where I'd planted
them. This year, I'm starting
seeds that need stratification in pots, and also plan to put down a
kill mulch and start a little nursery area up by the water tank.
I've learned a lot about
propagating perennials this year, too, but was much less successful
with my first attempts. I easily got
hardy kiwis to root from softwood cuttings, but then transplanted them
straight into the unirrigated part of the garden when their roots were
too small, and the plants promptly kicked the bucket. Since the
original kiwi vines seem to have really taken off this year (their
second full summer in the ground), I figure I'll have a lot more
material to root next year and can try again. I also completely
failed at starting
various trees from seed since I didn't count on
their slow germination and lost track of exactly where I'd planted
them. This year, I'm starting
seeds that need stratification in pots, and also plan to put down a
kill mulch and start a little nursery area up by the water tank.
This post is part of our 2010 experiments lunchtime series.
Read all of the entries:
|
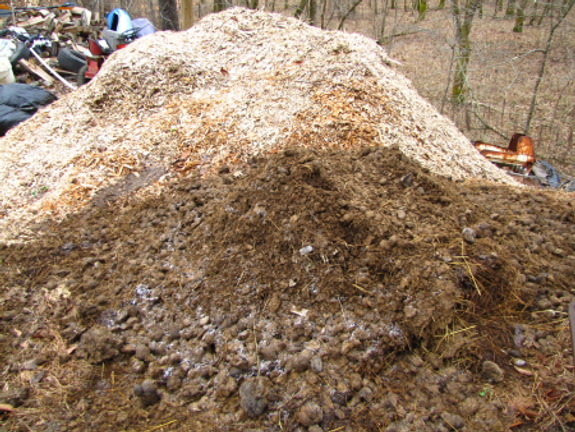
This picture shows a medium
size pile of horse manure in front of the large mass of wood chips near
our parking area.
That load of horse dung
represents years of back and forth with the guy who scoops it out of
the neighbors barn. My timing was just right last week on New Years Eve
when I was driving home from the store with some beer and happened to
notice the guy pull in to the driveway of the barn full of organic gold
as Anna sometimes calls it.
I stopped....shared a couple
beers....casually mentioned how easy it might be for him to dump the
latest horse manure next to our wood chips instead of the previous
place. Talked about
chicken waterers and sweet potatos and headed on home.
In my opinion the moral of
this story is to never under estimate the motivation that a cold beer
can inspire.
 Doesn't
that look like a useful pile of biomass?
Doesn't
that look like a useful pile of biomass?
Mark pointed out to me
last week that our miter saw channels the sawdust
(mostly) through a little tube in the back of the saw.
Presumably, the purpose is to enable you to hook the saw up to a bag or
vaccuum system to keep your house from turning into a mess when using
the miter saw indoors, but Mark has a plan to add a hose to the opening
and channel that sawdust into a five gallon bucket. Meanwhile,
I've just been scooping it up and adding it to various mulch piles.
Mark dreams of providing
so much biomass that I get sick and tired of it, a bit like parents who
make their kids smoke a whole pack of cigarettes if they catch them
easing into the bad habit at a young age. I'm afraid I'm already
too addicted, though, for his strategy to work.
 I'll
end my run-down on 2010 experiments with the ones nearest and dearest
to my heart --- the forest garden. My forest garden trials are by
far the most experimental, so it's no surprise that most of them didn't
do all that well. You should also keep in mind that I planted my
primary forest garden in the worst part of the yard, where the topsoil
eroded away under the care of previous owners leaving behind solid clay
with an abnormally high groundwater. Quite possibly, these
techniques would have worked in more prime garden soil.
I'll
end my run-down on 2010 experiments with the ones nearest and dearest
to my heart --- the forest garden. My forest garden trials are by
far the most experimental, so it's no surprise that most of them didn't
do all that well. You should also keep in mind that I planted my
primary forest garden in the worst part of the yard, where the topsoil
eroded away under the care of previous owners leaving behind solid clay
with an abnormally high groundwater. Quite possibly, these
techniques would have worked in more prime garden soil.
 I've
read in several books that comfrey makes a great living mulch beneath
fruit trees, sucking up nutrients from deep in the subsoil with its
taproots and then depositing the hard-to-find minerals right by the
tree roots. Unfortunately, my
experience with comfrey around fruit trees is entirely negative ---
the tree with comfrey around its base seems to be growing slower and
its summer leaves were yellowish, suggesting that the comfrey is
fighting the tree for nitrogen. While this experiment has no
control (I put the comfrey around my only nectarine and can only
compare it to the closely related peaches planted in another part of
the yard), I'd be leery of planting comfrey around any other fruit
trees, and am planning on putting down a kill mulch to try to eradicate
the comfrey from around my nectarine. It's possible that comfrey
makes a good living mulch around the drip-line of more established
fruit trees, but for now I'm sticking to planting my comfrey where it
won't fight with anyone, then cutting the leaves for mulch.
I've
read in several books that comfrey makes a great living mulch beneath
fruit trees, sucking up nutrients from deep in the subsoil with its
taproots and then depositing the hard-to-find minerals right by the
tree roots. Unfortunately, my
experience with comfrey around fruit trees is entirely negative ---
the tree with comfrey around its base seems to be growing slower and
its summer leaves were yellowish, suggesting that the comfrey is
fighting the tree for nitrogen. While this experiment has no
control (I put the comfrey around my only nectarine and can only
compare it to the closely related peaches planted in another part of
the yard), I'd be leery of planting comfrey around any other fruit
trees, and am planning on putting down a kill mulch to try to eradicate
the comfrey from around my nectarine. It's possible that comfrey
makes a good living mulch around the drip-line of more established
fruit trees, but for now I'm sticking to planting my comfrey where it
won't fight with anyone, then cutting the leaves for mulch.
 Meanwhile,
I installed swales around several fruit trees
in an attempt to drain a bit of water away from their roots and keep
the forest garden from turning into a morass of mud in the
winter. In areas where the groundwater is extremely high, the
swales just made the muddy area larger --- ditches would have been a
better choice. On the other hand, in moderately problematic area,
the swales nearly did the job, just leaking a bit of water to the
downhill side. When I find enough organic matter, I plan to fill
the good swales up with mulch and also to add an extensive kill mulch
around each fruit tree in this trouble area so that the tree roots can
benefit from the concentrated water in the dry period of summer.
Meanwhile,
I installed swales around several fruit trees
in an attempt to drain a bit of water away from their roots and keep
the forest garden from turning into a morass of mud in the
winter. In areas where the groundwater is extremely high, the
swales just made the muddy area larger --- ditches would have been a
better choice. On the other hand, in moderately problematic area,
the swales nearly did the job, just leaking a bit of water to the
downhill side. When I find enough organic matter, I plan to fill
the good swales up with mulch and also to add an extensive kill mulch
around each fruit tree in this trouble area so that the tree roots can
benefit from the concentrated water in the dry period of summer.
 My hugelkultur mounds
--- rotting wood topped with soil --- did what I wanted only too
well. I hoped they would keep plants out of the groundwater in
the trouble spots, but the small amount of soil and large amount of
not-yet-rotted wood in the mounds meant that during year one, they were
too dry for anything except rosemary. Also, Lucy loved
digging my mounds up in search of small mammals. On the other hand, I
think that hugelkultur has a lot of potential for my forest garden if I
can put them in spots where nothing needs to grow for a year or two
until the wood really breaks down. This year, I'm creating
hugelkultur extensions to each tree mound to give my fruit trees more
dry ground to spread out, and this time I'm putting a layer of
cardboard below each mound so tenacious weeds won't grow up through.
My hugelkultur mounds
--- rotting wood topped with soil --- did what I wanted only too
well. I hoped they would keep plants out of the groundwater in
the trouble spots, but the small amount of soil and large amount of
not-yet-rotted wood in the mounds meant that during year one, they were
too dry for anything except rosemary. Also, Lucy loved
digging my mounds up in search of small mammals. On the other hand, I
think that hugelkultur has a lot of potential for my forest garden if I
can put them in spots where nothing needs to grow for a year or two
until the wood really breaks down. This year, I'm creating
hugelkultur extensions to each tree mound to give my fruit trees more
dry ground to spread out, and this time I'm putting a layer of
cardboard below each mound so tenacious weeds won't grow up through.
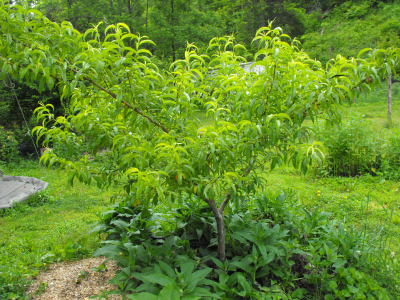
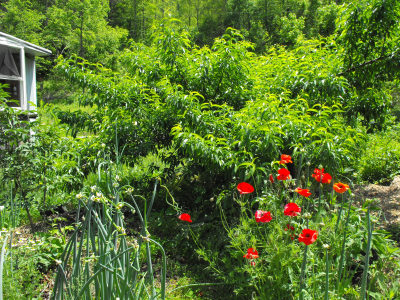 As
you can tell from the photos, my favorite part of the forest garden is
that I get to play with it in the winter when a dormant vegetable
garden combined with the garden itch would otherwise itch drive me
nutty. The forest garden pretty much takes care of itself for the
rest of the year, so it's hard to complain about some growing
pains. And, lest you still become disheartened from this dismal
list of problems, I should also tell you that my forest
garden island (in
the portion of the garden with good soil) is huge and provided masses
of fruits for us --- clearly, permaculture concepts have a lot of merit
even if they have to be tweaked a bit to work in the most problematic
parts of the yard.
As
you can tell from the photos, my favorite part of the forest garden is
that I get to play with it in the winter when a dormant vegetable
garden combined with the garden itch would otherwise itch drive me
nutty. The forest garden pretty much takes care of itself for the
rest of the year, so it's hard to complain about some growing
pains. And, lest you still become disheartened from this dismal
list of problems, I should also tell you that my forest
garden island (in
the portion of the garden with good soil) is huge and provided masses
of fruits for us --- clearly, permaculture concepts have a lot of merit
even if they have to be tweaked a bit to work in the most problematic
parts of the yard.
This post is part of our 2010 experiments lunchtime series.
Read all of the entries:
|
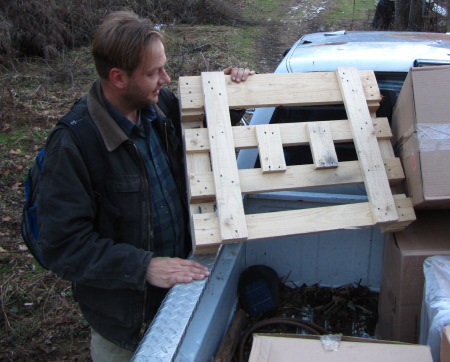 The
guy at the wood stove store mentioned how they have a problem with
these high quality pallets stacking up behind their store.
The
guy at the wood stove store mentioned how they have a problem with
these high quality pallets stacking up behind their store.
I'm thinking of planning the
next big city trip with a visit to this alley. He just wants to get rid
of them and says the local pallet guys aren't interested because of the
irregular shapes. They seem to be of a higher grade than normal pallets
which should make good firewood if no other uses come to mind.
 I've been itching for a soil
thermometer, but haven't wanted to pay for shipping and couldn't find
one locally. When we were in Wal-Mart the other day, I stumbled
across a meat thermometer in the cooking section that I suspected would
do the job. As far as I can tell, the only difference between a
typical meat thermometer and a soil thermometer is that the latter
tends to measure lower temperatures, and the Mainstays Quick-Response
Thermometer goes all the way down to 0 degrees Fahrenheit so that you
can test meat temperatures in the freezer as well as on the grill ---
perfect!
I've been itching for a soil
thermometer, but haven't wanted to pay for shipping and couldn't find
one locally. When we were in Wal-Mart the other day, I stumbled
across a meat thermometer in the cooking section that I suspected would
do the job. As far as I can tell, the only difference between a
typical meat thermometer and a soil thermometer is that the latter
tends to measure lower temperatures, and the Mainstays Quick-Response
Thermometer goes all the way down to 0 degrees Fahrenheit so that you
can test meat temperatures in the freezer as well as on the grill ---
perfect!
 I gave my new soil
thermometer a test run in the chicken coop's deep bedding yesterday and was highly
impressed to see that composting action raises the temperature from the
exterior soil temperature (27 degrees Fahrenheit) to a toasty 58
degrees! Just think how useful this thermometer will be to help
me figure out when the soil is warm enough to plant peas (35 to 40
degrees.) Usually, I just put the seeds in the ground two or
three times throughout the late winter in hopes that I'll hit on the
right soil temperature by chance, and I suspect adding a little science
to the mix will save me the $7.97 cost of the thermometer in lowered
seed costs during the first year.
I gave my new soil
thermometer a test run in the chicken coop's deep bedding yesterday and was highly
impressed to see that composting action raises the temperature from the
exterior soil temperature (27 degrees Fahrenheit) to a toasty 58
degrees! Just think how useful this thermometer will be to help
me figure out when the soil is warm enough to plant peas (35 to 40
degrees.) Usually, I just put the seeds in the ground two or
three times throughout the late winter in hopes that I'll hit on the
right soil temperature by chance, and I suspect adding a little science
to the mix will save me the $7.97 cost of the thermometer in lowered
seed costs during the first year.
Now, if I can just
remember not to stick my chicken-poop-covered thermometer into a juicy
steak....
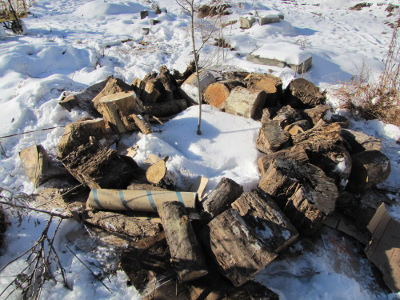
 Days
when the snow fills the air are perfect for planning next summer's
garden and ordering seeds. The first step is to go through all of
my old seeds to see which ones will last another year and which ones
need to be replaced. I've posted previously about how long
seeds last,
but you have to take that chart with a grain of salt --- we live in a
very humid climate and I haven't gotten around to making a good seed
storage box, so some of our seeds have less longevity than they
should. For example, some turnip seeds that I thought had a year
or two left in them completely failed to germinate in 2010, so those
bit the dust and will be replaced.
Days
when the snow fills the air are perfect for planning next summer's
garden and ordering seeds. The first step is to go through all of
my old seeds to see which ones will last another year and which ones
need to be replaced. I've posted previously about how long
seeds last,
but you have to take that chart with a grain of salt --- we live in a
very humid climate and I haven't gotten around to making a good seed
storage box, so some of our seeds have less longevity than they
should. For example, some turnip seeds that I thought had a year
or two left in them completely failed to germinate in 2010, so those
bit the dust and will be replaced.
Meanwhile, I had five
species that I just wasn't sure of. One was
parsley that I harvested this year in the garden, but am not sure I
matured well enough on the plant. Another is bean seeds saved
from 2009 (or was it 2008?). Last year's corn and peanut
seeds should still be good, but both can have low germination rates
after the first year, so I wanted to try them out. Finally, I
have extra onion seeds from last year, but they didn't germinate well
in the spring garden --- did I just plant them when the soil was too
cold, or were the seeds a dud to begin with?
 I
placed five seeds of each questionable variety between two moistened
cloth
napkins in a plastic container for a germination test. Those of
you with conventional kitchens may choose to use paper towels, but
disposables are verboten in our household. Since all of these
seeds
prefer relatively warm temperatures for germination, I've situated the
container on the back of the electric stove where heat from the wood
stove keeps temperatures around 70 degrees during the day. Night
temperatures will fall much lower, but I'll just add a few days onto my
germination test to take that into consideration. In conventional
kitchens, finding a warm spot is often easier --- just put your
germination chamber on top of the fridge or hot water tank.
I
placed five seeds of each questionable variety between two moistened
cloth
napkins in a plastic container for a germination test. Those of
you with conventional kitchens may choose to use paper towels, but
disposables are verboten in our household. Since all of these
seeds
prefer relatively warm temperatures for germination, I've situated the
container on the back of the electric stove where heat from the wood
stove keeps temperatures around 70 degrees during the day. Night
temperatures will fall much lower, but I'll just add a few days onto my
germination test to take that into consideration. In conventional
kitchens, finding a warm spot is often easier --- just put your
germination chamber on top of the fridge or hot water tank.
Now I just need to wait
and see what happens. See
this site for optimal germination temperature and time to germination
for many common vegetables. After two and a half
weeks have passed, I'll conclude the experiment and order any of the
seeds that didn't germinate well, or choose to just double or triple my
seeding rate for the spring.
This is the 2nd time I've
managed to get the truck stuck in the mud this winter season.
Each time has been an
opportunity to help gauge the limitations of its traction.
I think getting stuck pushes
my "loss of power" buttons in the same way not knowing where
I'm at does.
The lesson I've been trying
to learn lately is to not get so bent out of shape when these dips in
power happen. My first instinct is to react in a way that solves the
problem in the easiest and quickest way possible, but my latest
findings seem to indicate that there is often an advantage to stepping
back and looking at a problem from a few different perspectives.
The week before Mark's
birthday, I try to take a bit of time every day to appreciate the
specialness of my sweet husband. I don't buy him flowers or
candy, but I do try to cook his favorite foods (especially things like
hamburgers with white buns that don't make the diet-police cut during
the rest of the year, or more time-consuming treats like potstickers
that don't spring to mind when I'm pulling together a quick
supper.) This year I took over the dishes for the week --- I
suspect Mark would rather have those couple of extra hours of freedom
rather than a toy I picked up on a whim at the store. It's not
much, but I hope he feels appreciated. Happy birthday, honey!
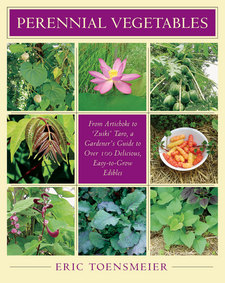 Permaculture books trip over
themselves to toss out the names of intriguing perennial vegetables,
but the books are short on specifics of where and how these vegetables
can be grown. When I heard that Eric Toensmeier (co-author of Edible Forest Gardens) had written a book called Perennial
Vegetables, I
knew I'd fond the holy grail, but I put off reading Toensmeier's book
for one simple reason --- I knew that I'd want to buy every vegetable
listed. So, be forewarned --- don't pick up this book unless
you've got $100 or more burning a hole in your pocket.
Permaculture books trip over
themselves to toss out the names of intriguing perennial vegetables,
but the books are short on specifics of where and how these vegetables
can be grown. When I heard that Eric Toensmeier (co-author of Edible Forest Gardens) had written a book called Perennial
Vegetables, I
knew I'd fond the holy grail, but I put off reading Toensmeier's book
for one simple reason --- I knew that I'd want to buy every vegetable
listed. So, be forewarned --- don't pick up this book unless
you've got $100 or more burning a hole in your pocket.
Perennial
Vegetable
provides cultivation information for over 100 plants that are grown for
edible leaves, shoots, tubers, and more. In this lunchtime series, I've picked out the crops that I find the most
intriguing, but I highly recommend that you read the book yourself,
especially if you live further south than zone 6 --- over half of the
species like warmer temperatures, so I skipped over them. My list
is also low on tubers because we don't eat that may of them and I'm
very happy with our potatoes and sweet potatoes. Tuber-lovers
should look up Perennial
Vegetables to
read about additional crops like lotuses, skirret, Jerusalem artichokes, and Chinese yams.
Finally, if you want to
get a head-start on checking out which plants might suit your climate,
you can go directly to Eric Toensmeier's website and find plant lists for
various parts of the U.S., a list of other books to read, and sources
for perennial vegetable seeds and starts. Or drop a comment here
to let me know which perennial vegetables you've tried in your own
garden.
| This post is part of our Perennial Vegetables lunchtime series.
Read all of the entries: |
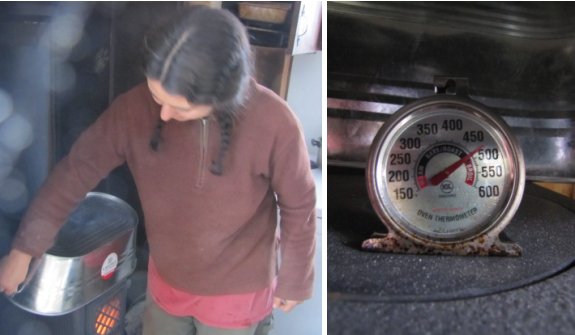
This experiment is still in
the planning stages...but one of these small metal tubs placed on
top of the Jotul
F 602 wood stove does a good job at reaching temperatures suitable
for baking.
The goal is to see if it's
possible or practical to bake muffins.
Of course the temperature
will depend on the size of the fire, but this first test proves that
reaching the main baking temperature of 350 degrees is indeed workable.
The idea is to use a couple of fire bricks to support the muffin pan
which might be enough to prevent the pan from getting too hot and
burning the product.
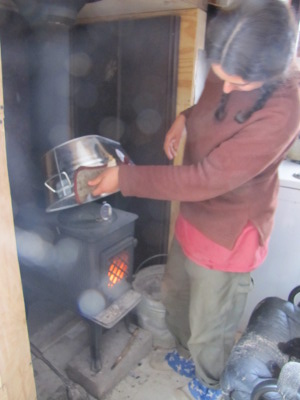 When I mentioned our goal
of making a small oven on top of the wood stove,
Roland pointed out that it's essential to do some basic tests first and
make sure the stove top temperature is within baking range.
Purchasing an oven thermometer in order to make those tests was the
real reason we
were in the kitchen section of Wal-mart to pick up my meat
thermometer turned soil thermometer.
When I mentioned our goal
of making a small oven on top of the wood stove,
Roland pointed out that it's essential to do some basic tests first and
make sure the stove top temperature is within baking range.
Purchasing an oven thermometer in order to make those tests was the
real reason we
were in the kitchen section of Wal-mart to pick up my meat
thermometer turned soil thermometer.
I compared three
different permutations to get an idea of stove top
temperatures while the wood stove was running at medium to high
heat. First, I just put the oven thermometer on a fire brick on
the hot-plate section of the wood stove top and got a reading of 210
degrees Fahrenheit --- not that hot. But when I upending the
galvanized
basin Mark had
bought for the purpose over top of the whole wood stove, the addition
raised the
internal temperature to 525 degrees. (You don't see the fire
brick in the photo because I actually did a test without it the
first time around, but figured the off-the-chart reading just couldn't
be
right.)
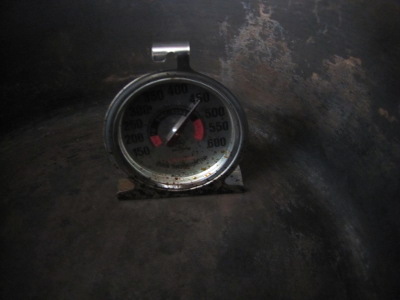 The fire brick didn't quite
fit into the Dutch oven, so I first tested with the thermometer set on
the bottom of the cast iron pot and got a reading of 475 degrees.
Figuring a lot of heat was getting conducted from the metal of the pan
to the metal of the thermometer, but unable to add in a fire brick
because it was too large, I set a pot holder on the bottom of the oven
with the thermometer on top. Ten minutes later, a foul stench
filled the trailer --- the pot holder had spontaneously
combusted. So, unfortunately, I can't tell you whether Mark's
idea of cutting down the sides of a 6-pack muffin tin so that it sits
on a fire brick inside the Dutch oven will give me temperatures
sufficient to bake his favorite sweet treat. Clearly, more
experiments are required.
The fire brick didn't quite
fit into the Dutch oven, so I first tested with the thermometer set on
the bottom of the cast iron pot and got a reading of 475 degrees.
Figuring a lot of heat was getting conducted from the metal of the pan
to the metal of the thermometer, but unable to add in a fire brick
because it was too large, I set a pot holder on the bottom of the oven
with the thermometer on top. Ten minutes later, a foul stench
filled the trailer --- the pot holder had spontaneously
combusted. So, unfortunately, I can't tell you whether Mark's
idea of cutting down the sides of a 6-pack muffin tin so that it sits
on a fire brick inside the Dutch oven will give me temperatures
sufficient to bake his favorite sweet treat. Clearly, more
experiments are required.
 Before
I delve right into the most intriguing
plants from Eric Toensmeier's Perennial Vegetables, it's
worth taking a minute to see if perennial vegetables are right for
you. The advantages are intriguing. Since you don't have to
plant them every year, perennial vegetables are low maintenance and
work very well with no-till systems, building soil quality with their
decaying leaves. Some are shade tolerant, which is seldom true
with annual vegetables, so you can slide these perennials into out of
the way spots in your garden. Even more intriguing, perennial
vegetables
extend the harvest season, often providing food when your annual
vegetable garden is at its worst. I was won over this March when
I wandered out into the yard and picked
some mulch-blanched dandelion greens long before any of our
annual
greens were ready to eat --- who wouldn't want delicious food that they
hadn't worked for when no other fresh food is available?
Before
I delve right into the most intriguing
plants from Eric Toensmeier's Perennial Vegetables, it's
worth taking a minute to see if perennial vegetables are right for
you. The advantages are intriguing. Since you don't have to
plant them every year, perennial vegetables are low maintenance and
work very well with no-till systems, building soil quality with their
decaying leaves. Some are shade tolerant, which is seldom true
with annual vegetables, so you can slide these perennials into out of
the way spots in your garden. Even more intriguing, perennial
vegetables
extend the harvest season, often providing food when your annual
vegetable garden is at its worst. I was won over this March when
I wandered out into the yard and picked
some mulch-blanched dandelion greens long before any of our
annual
greens were ready to eat --- who wouldn't want delicious food that they
hadn't worked for when no other fresh food is available?
 As a certified picky eater,
the answer could
be "me." Toensmeier is very realistic about the potential of
perennial vegetables, and goes so far as to explain that many perennial
vegetables are too strong-flavored to be a mainstay of the diet.
Perennial greens are usually at their best just when I picked my March
dandelions (which were scrumptious, by the way), but later in the year
after the perennials bloom, you'd be much better off eating swiss chard
out of your annual garden. Another disadvantage is that many
perennial vegetables take years to establish, just like asparagus or
fruit trees, and since you can't rotate perennials through your garden,
viral diseases can build up and wipe out your crop. Other
perennials are altogether too tenacious, turning into weeds in your
garden, and non-vegetable weeds can be yet another problem among your
perennials if you're not adept at creating weed-free no-till beds.
As a certified picky eater,
the answer could
be "me." Toensmeier is very realistic about the potential of
perennial vegetables, and goes so far as to explain that many perennial
vegetables are too strong-flavored to be a mainstay of the diet.
Perennial greens are usually at their best just when I picked my March
dandelions (which were scrumptious, by the way), but later in the year
after the perennials bloom, you'd be much better off eating swiss chard
out of your annual garden. Another disadvantage is that many
perennial vegetables take years to establish, just like asparagus or
fruit trees, and since you can't rotate perennials through your garden,
viral diseases can build up and wipe out your crop. Other
perennials are altogether too tenacious, turning into weeds in your
garden, and non-vegetable weeds can be yet another problem among your
perennials if you're not adept at creating weed-free no-till beds.
The conclusion that I
came to is that perennial vegetables are really a
complement to your annual vegetable garden, not a replacement. If
you're happy with the amount of work you're putting in and with the
year-round output of your vegetable garden in a certain area (like
tubers for us), you might decide to forego perennial vegetables
in that category. But if you've had problems with making your
annual crops produce in a certain category (like storage onions) or
provide fresh food all year (like greens), there's almost certainly a
perennial vegetable that can be slid in to fill that niche.
| This post is part of our Perennial Vegetables lunchtime series.
Read all of the entries: |
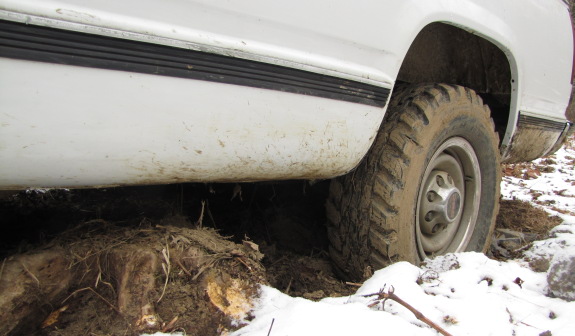
It sure was easy to back up
over this stump, but now it's causing some problems when we try to get
back over it.
We thought waiting for
the ground to freeze
might make things solid enough for an escape, but it still just spins
in place.
The next attempt will involve
trying to use a hand winch to get over the hump, which sounds
like a good title for a country
western song if I could just think of something catchy that rhymed
with winch.
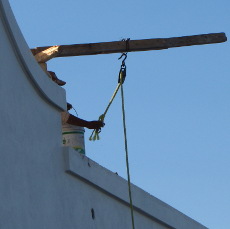 I
promised you all pictures of thatched roofs...and then promptly
forgot about it. When I remembered and took the time to go
through my Mexican photos looking
for thatching, I realized that I had far too many shots to fit in one
post,
so I instead posted a series about Mexican architecture over on our travel blog. Head over there to
see Mexican
thatched roofs, a
picturesque Mexican barn, the ubiquity of
Mexican hand tools,
and a Mexican
gravity water system.
The posts were almost homesteading-related enough to share over here,
but I didn't want to annoy anybody with what (in an earlier era) would
have been an endless slideshow of travel pictures.
I
promised you all pictures of thatched roofs...and then promptly
forgot about it. When I remembered and took the time to go
through my Mexican photos looking
for thatching, I realized that I had far too many shots to fit in one
post,
so I instead posted a series about Mexican architecture over on our travel blog. Head over there to
see Mexican
thatched roofs, a
picturesque Mexican barn, the ubiquity of
Mexican hand tools,
and a Mexican
gravity water system.
The posts were almost homesteading-related enough to share over here,
but I didn't want to annoy anybody with what (in an earlier era) would
have been an endless slideshow of travel pictures.
 Finally, in case you haven't already, you can now read about our entire
adventure over there as well. Highlights included an amazing
journey by
train to get to the
pier, a
restful cruise (complete with security guards knocking on our door),
seeing a
trail of army ants and their associated wildlife at the Mayan
ruins of Coba, and a
fascinating glimpse into Mayan culture at a steam
lodge on Cozumel.
I hope you'll especially pass around the link to the last adventure
since the steam lodge is run by a very like-minded soul who could use
some better exposure. Tell all your friends!
Finally, in case you haven't already, you can now read about our entire
adventure over there as well. Highlights included an amazing
journey by
train to get to the
pier, a
restful cruise (complete with security guards knocking on our door),
seeing a
trail of army ants and their associated wildlife at the Mayan
ruins of Coba, and a
fascinating glimpse into Mayan culture at a steam
lodge on Cozumel.
I hope you'll especially pass around the link to the last adventure
since the steam lodge is run by a very like-minded soul who could use
some better exposure. Tell all your friends!
 Since
the plow wasn't introduced to North America until after European
settlement and since perennial vegetables are much easier to manage
with hand tools than annuals are, several of the vegetables profile in
Eric Toensmeier's book were important in the Native American
diet. In some cases, the Native Americans just hunted down the
plants whenever they wanted a meal, but in other cases they would
transplant these perennials into the woods around their settlements for
easier harvest. I sometimes wonder whether the high percentage of
"wild" edibles on our farm is the result of just such an ancient forest
garden.
Since
the plow wasn't introduced to North America until after European
settlement and since perennial vegetables are much easier to manage
with hand tools than annuals are, several of the vegetables profile in
Eric Toensmeier's book were important in the Native American
diet. In some cases, the Native Americans just hunted down the
plants whenever they wanted a meal, but in other cases they would
transplant these perennials into the woods around their settlements for
easier harvest. I sometimes wonder whether the high percentage of
"wild" edibles on our farm is the result of just such an ancient forest
garden.
Our farm is naturally
home to four major perennial vegetables --- arrowheads, poke,
groundnuts, and nettles --- and a fifth (ramps) grow in nearby
woodlands. All five of these natives are good candidates for
simply harvesting sustainably out of the wild, or for introducing to
wild habitats where they might have once grown. I hope to hunt
each one down this year and give them a taste test to determine whether
they're worth cultivating in our forest garden or encouraging in our
wild areas. For those of you unfamiliar with the quintet of wild
edibles, here's a run-down on their uses and cultivation.
Our native arrowheads (Sagittaria
latifolia) were
once important in the diet of Native Americans, while the related
Chinese arrowheads (S.
graminea) are
still planted in rice-paddy-like farms in Asia. In both species,
you eat the small tubers which can be located quite a distance from the
parent plant along its roots, cooking them like potatoes.
Toensmeier recommends planting arrowheads four to five feet apart in
sunny ponds, or in pots in water gardens for easier harvest. The
native species is more cold hardy, but you might get away with growing
the Chinese species if you can keep the roots from freezing (and,
presumably, the Chinese species has been bred to have a better taste.)
 Poke (Phytolacca
americana) is a
common weed in our area, and most old-timers can tell you exactly when
and how to eat it. Although poke has clear potential as an early
spring green, I was always turned off by the careful preparation
required to delete the poisons --- you have to harvest shoots before
they are eight inches tall, carefully cut off any portion that is pink,
then put the edible parts in a pot of water and bring it to a
boil. After the water boils, pour it off and refill the pot with
another round of boiling water, simmering for about five minutes this
time. I can't seem to wrap my head around the idea that there
would be any nutrients and flavor left in the poke after this double
boil, but Toensmeier wrote "I was shocked to discover that the hearty,
rich flavor left me wanting more!", so maybe poke is worth a try after
all.
Poke (Phytolacca
americana) is a
common weed in our area, and most old-timers can tell you exactly when
and how to eat it. Although poke has clear potential as an early
spring green, I was always turned off by the careful preparation
required to delete the poisons --- you have to harvest shoots before
they are eight inches tall, carefully cut off any portion that is pink,
then put the edible parts in a pot of water and bring it to a
boil. After the water boils, pour it off and refill the pot with
another round of boiling water, simmering for about five minutes this
time. I can't seem to wrap my head around the idea that there
would be any nutrients and flavor left in the poke after this double
boil, but Toensmeier wrote "I was shocked to discover that the hearty,
rich flavor left me wanting more!", so maybe poke is worth a try after
all.
Groundnuts (Apios
americana) are
another edible that our farm grows in spades, but which I've refrained
from eating for fear of poisons. I'd read previously that a few
people are allergic to groundnuts and have severe adverse reactions,
but Toensmeier points out that's also true of peanuts and other common
staples. He recommends trying every new perennial vegetable in
small amounts for the first two times before eating your fill
thereafter. Groundnut is an annual vine that naturally grows up
through shrubs and other understory plants in open, damp forests.
You harvest the small, round tubers year-round and cook them like high
protein (16%) potatoes. If we try them out and like the taste, it
would be worth buying one of the varieties that Louisiana State
University has been breeding since those tubers can be up to 5 inches
in diameter rather than the usual one inch. When cultivating
groundnuts rather than just digging them in the wild, plant tubers one
foot apart in the fall and provide a trellis for the vines to twine
around. Groundnuts prefer full sun to partial shade and like
moist soil. After a couple of establishment years, the groundnuts
should be harvested heavily since they tend to take over the garden
otherwise.
Both Stinging Nettles (Urtica
dioica) from
Europe and Wood Nettles (Laportea
canadensis) from
the U.S. are well-spoken of as early spring greens. Once again,
I've known about the benefits of nettles for a long time, but have
steered clear, this time because of the painful stinging hairs.
This spring, I'm going to try to remember to hunt down these early,
nutritious greens, harvest them with gloves, and then boil for two
minutes to deactivate the sting. I don't have any plans to add
them to my garden, though, because Wood Nettles grow quite profusely
right up the hill.
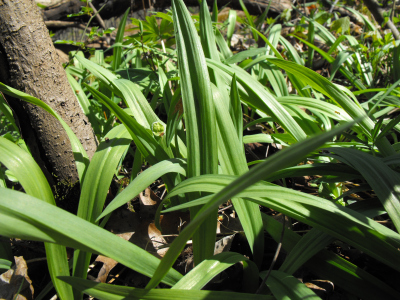
Ramps (Allium
tricoccum and Allium
burdickii) are
the final wild edible that made the cut to be included in Toensmeier's
book. Ramps are so well loved in our area that they are
threatened in the wild from overharvesting, so I've never tasted them,
but I've read that both the bulbs and leaves are edible, with the
former tasting like garlic and the latter like leeks or
scallions. Last year, I transplanted a few ramps into my forest
garden a bit willy-nilly, and this spring I hope to plan ahead a bit
better and get a start that's more likely to take hold.
Toensmeier suggests that ramps can probably be transplanted into many
moist, deciduous forests in the eastern United States and that their
current relative scarcity is due to ant-dispersed seeds which make
ramps slow to recolonize an area after it has been opened up by logging
or agriculture. Ramps are easiest to propagate by dividing
clumps, preferably when they're dormant, but the plants can also be
divided when in leaf if you work with care. You can grow ramps
from seed, too, but it may take two years for the seedlings to
come up from under their preferred thin mulch of leaves. In
either case, space plants 12 to 18 inches apart and harvest lightly
until they are established.
I dug a small batch of
groundnuts up while writing this post, but the other four wild edibles
are going to have to wait until spring for the taste test. My
memory is notoriously faulty, so I hope all of our readers can help
remind me --- if you see that it's ramp, nettle, arrowhead, or poke
season, drop me a comment and send me out in the woods to harvest our
dinner!
| This post is part of our Perennial Vegetables lunchtime series.
Read all of the entries: |
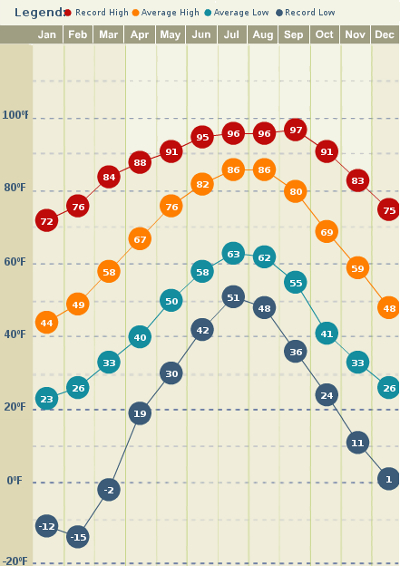 Long-term
readers have probably noticed that I'm a big fan of numbers and graphs,
so you won't be surprised to hear that I peruse local climate data with
a fine-tooth comb. Back in my
wandering years, my
favorite way of getting to know a new area was making a graph of the
monthly average highs and lows and the inches of precipitation. I
generally had to dig pretty deep to find that information, then graph
it myself, so I was thrilled to find Weather.com's
average climate feature.
Long-term
readers have probably noticed that I'm a big fan of numbers and graphs,
so you won't be surprised to hear that I peruse local climate data with
a fine-tooth comb. Back in my
wandering years, my
favorite way of getting to know a new area was making a graph of the
monthly average highs and lows and the inches of precipitation. I
generally had to dig pretty deep to find that information, then graph
it myself, so I was thrilled to find Weather.com's
average climate feature.
The link above takes you
to information for the town where I spent a lot of my childhood which
is only about 50 miles away from where I now live. The geekiest
among you may enjoy comparing data from my hometown to data from my
current town --- if Weather.com can be trusted, my current location is
8.5 inches wetter than my hometown! Although the data says that
we're only two tenths of a degree colder here on average, I suspect
that information is less relevant to our homestead --- without any
pavement nearby, our farm's temperatures are regularly as much as five
degrees colder than the website reports for our nearest town.
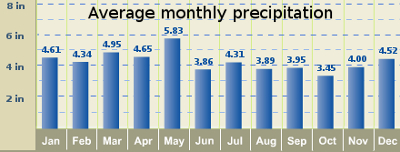 The real reason I looked up
this data, though, was to remind myself that we're on the upswing of
the year. Although just the word "February" is enough to make me
shiver, the cold hard facts say that February isn't all that cold or
hard. In fact, January is our coldest month --- maybe my boots
won't be freezing to the floor any more in a few weeks.
The real reason I looked up
this data, though, was to remind myself that we're on the upswing of
the year. Although just the word "February" is enough to make me
shiver, the cold hard facts say that February isn't all that cold or
hard. In fact, January is our coldest month --- maybe my boots
won't be freezing to the floor any more in a few weeks.
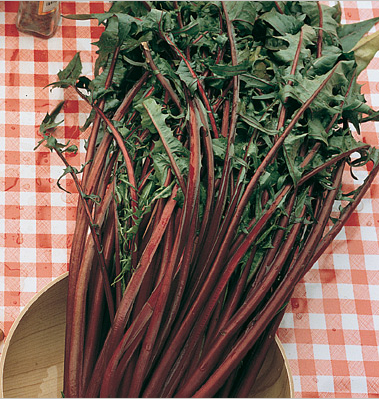 The main niche that I would
like perennial vegetables to fill in our diet is extending the fresh
greens season to the early spring. While I read Eric Toensmeier's
Perennial Vegetables, I kept jotting down notes
on species that might fill that niche, and here are the top contenders.
The main niche that I would
like perennial vegetables to fill in our diet is extending the fresh
greens season to the early spring. While I read Eric Toensmeier's
Perennial Vegetables, I kept jotting down notes
on species that might fill that niche, and here are the top contenders.
Chicory (aka Italian Dandelion, Cicorium
intybus) and Dandelion
(aka French Dandelion Taraxacum
officinale) are
currently at the top of my list for perennial spring greens. Both
are popular in Europe as salad or cooked greens, and after my
experience last spring with dandelions, I can see why. Like other
perennial greens, the leaves are ready much earlier in the year than
any annuals you can grow, although you will probably give up on eating
chicory and dandelion for the season once they bloom and the leaves
turn bitter. (Pick off flowers and blanch the leaves by piling
mulch on them for a longer harvest season.) You can easily find
dandelions and chicory in the wild, but I suspect that the cultivated
versions are even tastier, so I plan to buy some seeds and give them a
shot this year. Both species are easy to grow from seed, and
should be planted a foot apart in full sun or light shade. The
most difficult part seems to be wading through seed catalogs in search
of varieties that are perennial, since annual and biennial versions of
chicory exist (although all French Dandelions are perennials.)
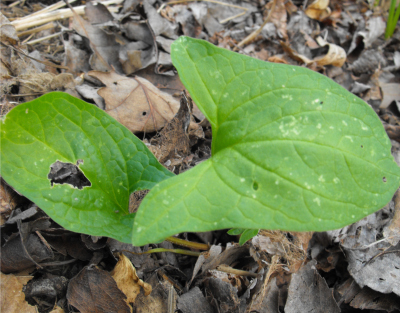 Good King Henry (Chenopodium
bonus-henricus)
is probably mentioned more than any other perennial vegetable in
permaculture texts. (Well, except for rhubarb and asparagus,
which are both so common I'm not talking about them in this lunchtime
series.) Good King Henry is primarily grown for its edible shoots
(think asparagus), which poke out of the ground three weeks before
asparagus is visible and extend for a three month season. If this
glut is not enough, leaves, young flower clusters, and seeds are also
edible, although it sounds like the last need to be soaked overnight
and none of the three are taste-test winners. Seeds or root
divisions are planted 18 to 24 inches apart, and the shoots are
harvested beginning in the second year. A friend gave me a start
of Good King Henry last spring, which I
planted in the forest garden island and promptly forgot about in
the bustle of the annual vegetable garden. If it survived the
neglect, we might be able to taste a few leaves this spring.
Good King Henry (Chenopodium
bonus-henricus)
is probably mentioned more than any other perennial vegetable in
permaculture texts. (Well, except for rhubarb and asparagus,
which are both so common I'm not talking about them in this lunchtime
series.) Good King Henry is primarily grown for its edible shoots
(think asparagus), which poke out of the ground three weeks before
asparagus is visible and extend for a three month season. If this
glut is not enough, leaves, young flower clusters, and seeds are also
edible, although it sounds like the last need to be soaked overnight
and none of the three are taste-test winners. Seeds or root
divisions are planted 18 to 24 inches apart, and the shoots are
harvested beginning in the second year. A friend gave me a start
of Good King Henry last spring, which I
planted in the forest garden island and promptly forgot about in
the bustle of the annual vegetable garden. If it survived the
neglect, we might be able to taste a few leaves this spring.
 Bamboo shoots are more of a texture
addition to meals than a nutrient powerhouse, but since the plants are
useful for so many other things, I decided to plant a species that
provides shoots as well. If you want to cultivate edible bamboo,
your first choice is between clumping bamboos, which have more and
bigger shoots and won't take over your garden, but which also need
warmer temperatures, or running bamboos, which will definitely take
over your garden, are sometimes hardy as low as -10 degrees Fahrenheit,
and make smaller shoots that are considered by some to be
tastier. The chart to the right lists the size, hardiness, and
edibility of the top bamboo species --- Toensmeier profiles several
more in his book, but I've excerpted the bamboos that make the largest
stalks (aka "timber bamboos"), will survive in our climate, and are
listed in his book as having excellent flavor. In terms of
hardiness, zone 6 can get as low as -10 degrees Fahrenheit, but I
suspect that most or all of these bamboo species will grow here since
the temperatures listed are simply those at which the leaves die.
With a good mulch cover, your bamboo will come back from the roots even
if the entire cane freezes during a cold winter. To harvest and
eat bamboo shoots, pick them when they are just barely poking through
the soil, remove the leafy sheath, boil, and then use the pre-cooked
shoots in stir-fries.
Bamboo shoots are more of a texture
addition to meals than a nutrient powerhouse, but since the plants are
useful for so many other things, I decided to plant a species that
provides shoots as well. If you want to cultivate edible bamboo,
your first choice is between clumping bamboos, which have more and
bigger shoots and won't take over your garden, but which also need
warmer temperatures, or running bamboos, which will definitely take
over your garden, are sometimes hardy as low as -10 degrees Fahrenheit,
and make smaller shoots that are considered by some to be
tastier. The chart to the right lists the size, hardiness, and
edibility of the top bamboo species --- Toensmeier profiles several
more in his book, but I've excerpted the bamboos that make the largest
stalks (aka "timber bamboos"), will survive in our climate, and are
listed in his book as having excellent flavor. In terms of
hardiness, zone 6 can get as low as -10 degrees Fahrenheit, but I
suspect that most or all of these bamboo species will grow here since
the temperatures listed are simply those at which the leaves die.
With a good mulch cover, your bamboo will come back from the roots even
if the entire cane freezes during a cold winter. To harvest and
eat bamboo shoots, pick them when they are just barely poking through
the soil, remove the leafy sheath, boil, and then use the pre-cooked
shoots in stir-fries.
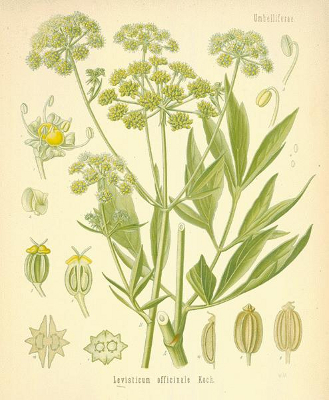 Finally, Lovage (Levisticum
officinale) looks
like it might be a good addition to our anti-celery garden. I
really enjoy adding celery to soups and salads, but find that the
vegetable is very difficult to grow in our garden. Instead, I
plant lots of parsley, which has a similar taste and grows much better
for me. Lovage seems to fit into the same celery-alternative
category, especially in the spring before the plant becomes too
strongly flavored for normal consumption. To grow lovage, start
the plants from seed or by divisions of fully dormant plants and set
them out where the six foot flower stalks won't cause problems.
Enjoy the greens very early in the spring, blanching them with mulch
for a milder flavor.
Finally, Lovage (Levisticum
officinale) looks
like it might be a good addition to our anti-celery garden. I
really enjoy adding celery to soups and salads, but find that the
vegetable is very difficult to grow in our garden. Instead, I
plant lots of parsley, which has a similar taste and grows much better
for me. Lovage seems to fit into the same celery-alternative
category, especially in the spring before the plant becomes too
strongly flavored for normal consumption. To grow lovage, start
the plants from seed or by divisions of fully dormant plants and set
them out where the six foot flower stalks won't cause problems.
Enjoy the greens very early in the spring, blanching them with mulch
for a milder flavor.
| This post is part of our Perennial Vegetables lunchtime series.
Read all of the entries: |
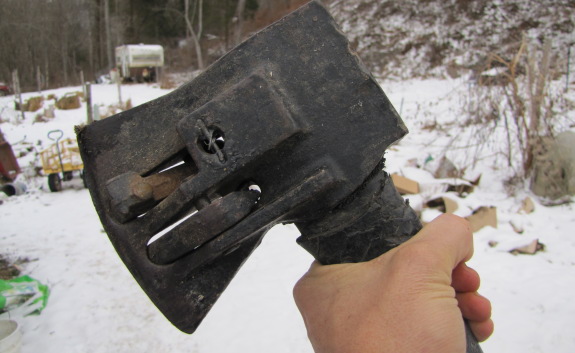
The improvised
spring repair on the chopper 1 has been holding up very well
these past 2 weeks.
Before that I was using it
with only one spring working and I can't really tell a big difference
since I got them both going.
I think in most cases gravity
helps the fingers return to home position when the axe is being pulled
back for a swing and I suspect the springs help to prevent a strike
while the finger is fully extended.
 School's back in session, and
I've started the ball rolling on our worm bin project. I sent a
letter to the principal of our closest school and then gave her a
followup phone call yesterday. She seems cautiously optimistic,
and we've got a plan to meet with her and the cafeteria workers on
Monday to work the kinks out of the plan. I'm over the moon ---
I've been aching to find a source of food scraps for years!
School's back in session, and
I've started the ball rolling on our worm bin project. I sent a
letter to the principal of our closest school and then gave her a
followup phone call yesterday. She seems cautiously optimistic,
and we've got a plan to meet with her and the cafeteria workers on
Monday to work the kinks out of the plan. I'm over the moon ---
I've been aching to find a source of food scraps for years!
In case any of you would
like to follow suit in your own neck of the woods, here's the meat of
the letter I sent to the principal (with various identifying features
removed.) Feel free to edit it and use it with your own local
school.
Although Binet Payne documented every step of her adventure in Worm Cafe, over a decade later most cafeteria food waste still ends up in the landfill. Why hasn't her system spread across the nation? Payne's program relies on at least one passionate teacher to lead the way in turning garbage into black gold, a tough call when most teachers are already up to their eyeballs in other projects.
Clinch River Educational Center would like to use ***** School as a pilot project as we work the kinks out of a community worm bin program. Our plan is to team schools up with passionate gardeners in their community who are willing to take over the day to day chores of a worm bin in exchange for the high quality compost that will be produced. We would like to start out by simply putting food waste containers in your school's cafeteria, providing one container for each day so that they can be sealed after lunch and placed in an out of the way location for pickup on Fridays. We would provide the containers, signs, and the person to pick up the scraps. Your teachers would just need to spend a couple of minutes explaining the project to their students, then your cafeteria workers would need to be aware of the system so that they could point kids in the right direction.
I will give you a phone call next week to discuss the project with you, but feel free to contact me before then if you want to get the ball rolling sooner. If you have any questions, my personal contact information is ***** and *****. You can read more about the Clinch River Educational Center on our website at http://www.crec76.org.
Thank you for your time considering this project.
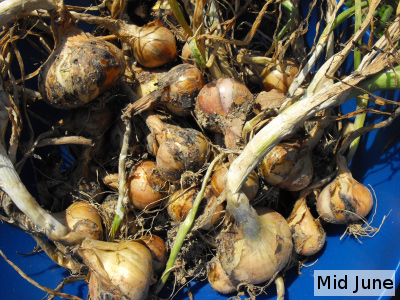 I was thrilled to learn about
multiplier
onions a year ago, a category that includes both shallots and potato onions.
The latter is potentially a replacement for the pesky storage onion, a
crop that most small gardeners grow from expensive sets that produce
bulbs with a short storage life, or from seeds that are often difficult
to germinate and are picky about soil. Potato onions promise to
replace both of those problematic storage onions with a type that is as
simple to grow as garlic --- just save some bulbs every year to toss
back in the soil and seed next year's crop.
I was thrilled to learn about
multiplier
onions a year ago, a category that includes both shallots and potato onions.
The latter is potentially a replacement for the pesky storage onion, a
crop that most small gardeners grow from expensive sets that produce
bulbs with a short storage life, or from seeds that are often difficult
to germinate and are picky about soil. Potato onions promise to
replace both of those problematic storage onions with a type that is as
simple to grow as garlic --- just save some bulbs every year to toss
back in the soil and seed next year's crop.
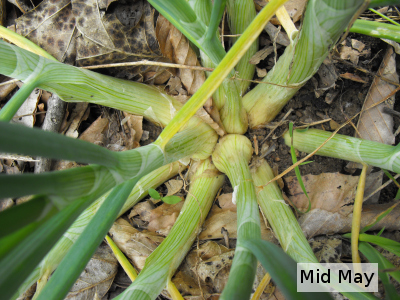 Unfortunately,
the results of my
first year of experimentation were not that great. I ended
up with a lot of little potato onions that were too small to consider
eating, and just a few big onions. Figuring that I might
have
planted them too late in the fall for optimal results, I turned around
and put
every single bulb back in the ground this September, but I
wasn't all that confident that I'd get onions that were worth my
while.
Unfortunately,
the results of my
first year of experimentation were not that great. I ended
up with a lot of little potato onions that were too small to consider
eating, and just a few big onions. Figuring that I might
have
planted them too late in the fall for optimal results, I turned around
and put
every single bulb back in the ground this September, but I
wasn't all that confident that I'd get onions that were worth my
while.
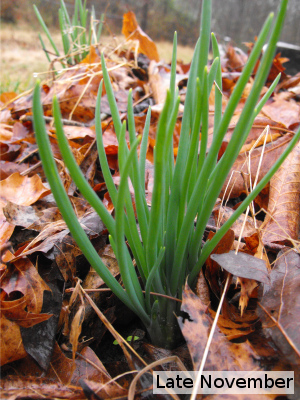
Eric Toensmeier clued me
in to some information about
potato onions that makes me much more confident of my results. He
wrote that if you plant small bulbs, they turn into one to two large
bulbs by the next year, while if you plant big bulbs, each one instead
turns into up to a dozen small bulbs. The trick is to always
plant a mixture of both large and small bulbs in your garden --- the
former will produce seed bulbs for replanting while the latter will
produce your eating onions for that year. If he's right, we
should have lots of big bulbs come spring and just a few small bulbs
for replanting. Assuming that Toensmeier knows what he's writing
about, potato onions may be the salvation of our garden after all.
| This post is part of our Perennial Vegetables lunchtime series.
Read all of the entries: |
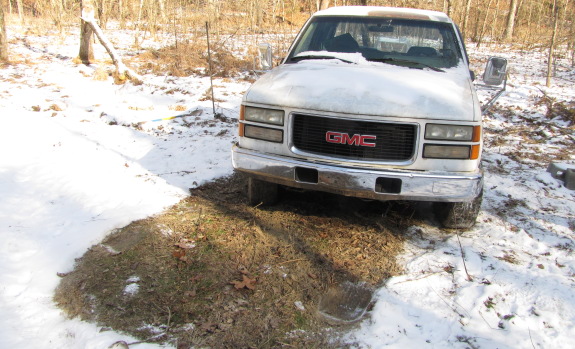
Sometimes you have go back a
step in order to get 2 steps ahead, or at least that's what I've been
telling myself this week.
We managed to back up a few
feet which got us out of the frozen holes the spinning tires have been
digging, but a medium sized tree is blocking any further passage.
The next step will be to get
some fuel for the chain saw, take out that tree and see if we can drive
out past the problem stump.
 One of the most common things we hear from
Walden Effect readers is some form of "We'd love to be full time
homesteaders. But how do you find the time while working a
job?" Our answer is --- why work a job?
One of the most common things we hear from
Walden Effect readers is some form of "We'd love to be full time
homesteaders. But how do you find the time while working a
job?" Our answer is --- why work a job?
Over the last two years,
we've made a living by selling our automatic chicken waterer, a simple product that Mark
dreamed up and that we build and mail off to customers in about 13
hours a week. (That's 6.5 hours apiece, in case you're
wondering.) We don't charge an arm and a leg for our waterers and
we don't exploit child laborers in China, but we're still able to make
a very good living in what amounts to less than two work days per week.
 We summed up a series of simple
steps that we think anyone can follow to achieve this financial
self-sufficiency and published it in the form of an ebook a bit over a
year ago. At that time, we had just barely poked our heads above
the poverty line, which I thought was just fine --- it really is quite
possible for a couple to live simply on $14,000 and not feel pinched at
all. Unfortunately, I could tell that our ebook readers weren't
excited enough by that low income existence to quit their jobs.
So when we streamlined the process and tripled our income while putting
in no extra work hours in 2010, I figured I should revamp the ebook and
perhaps tempt a few hardy souls to escape the rat race.
We summed up a series of simple
steps that we think anyone can follow to achieve this financial
self-sufficiency and published it in the form of an ebook a bit over a
year ago. At that time, we had just barely poked our heads above
the poverty line, which I thought was just fine --- it really is quite
possible for a couple to live simply on $14,000 and not feel pinched at
all. Unfortunately, I could tell that our ebook readers weren't
excited enough by that low income existence to quit their jobs.
So when we streamlined the process and tripled our income while putting
in no extra work hours in 2010, I figured I should revamp the ebook and
perhaps tempt a few hardy souls to escape the rat race.
Which is all a long way
of saying --- the second edition of Microbusiness Independence is now
available for immediate download for $2. You can just click on
this Buy Now buttton, or visit our Wetknee Books page to download the first three
chapters for free and read more about the ebook.
Please be aware that our
ebook is not a get rich quick book. Instead, it gives you tried
and true, up to
date information on how to make a comfortable living in just a few
hours per week by marketing your invention. (Don't worry, we'll
help you figure out what your invention is too.) We start with
basics and
walk you through developing your product,
selling it to the world, and living the dream with a modern
perspective. If you're aching to leave your job and are ready to
tighten your belt for a few months and pinch pennies while building
your own empire, Microbusiness Independence is for you. I hope
you'll download a copy and give it a try.
It's been over 2 years since my
first review of the TC1840H steel yard cart and it's still holding
up to some heavy work outs.
I've noticed the price has
gone up about 10 percent since we got ours 4 years ago.
If the factory asked
me for some input on the next generation I would request wheels that
were more heavy duty like what most wheel barrows have and maybe some
slightly taller sides to increase the capacity.
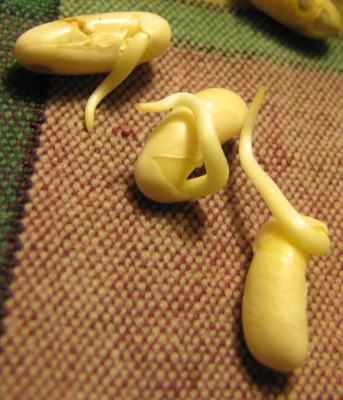 In our seed
germination test,
100% of our corn seeds and 60% of our bean seeds germinated in 2
days. The other two bean seeds promptly got moldy, suggesting to
me that they probably weren't viable. The beans are seeds that I
grew myself, and I didn't go through and pull out obviously damaged
seeds (something I often do while planting), so I suspect the
germination rate of the ones I hand select for planting is more like
80%. I concluded that the corn is a definite keeper, and I'll
just plant the beans a bit more thickly than I normally would due to
their age.
In our seed
germination test,
100% of our corn seeds and 60% of our bean seeds germinated in 2
days. The other two bean seeds promptly got moldy, suggesting to
me that they probably weren't viable. The beans are seeds that I
grew myself, and I didn't go through and pull out obviously damaged
seeds (something I often do while planting), so I suspect the
germination rate of the ones I hand select for planting is more like
80%. I concluded that the corn is a definite keeper, and I'll
just plant the beans a bit more thickly than I normally would due to
their age.
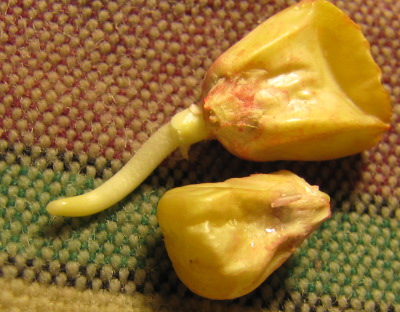 Nothing much seemed to happen
for the rest of the week, except for a peanut and some parsley
succumbing to mold. The same temperature and humidity that
promote seed germination are perfect for mold growth, but I figure that
a viable seed should be able to survive mold and sprout. Finally,
seven days after starting the experiment, one peanut sprouted and an
onion seed showed a tinge of white that might be an incipient root
pushing through the seed coat. I'll give the seeds one more week,
then put in my seed order.
Nothing much seemed to happen
for the rest of the week, except for a peanut and some parsley
succumbing to mold. The same temperature and humidity that
promote seed germination are perfect for mold growth, but I figure that
a viable seed should be able to survive mold and sprout. Finally,
seven days after starting the experiment, one peanut sprouted and an
onion seed showed a tinge of white that might be an incipient root
pushing through the seed coat. I'll give the seeds one more week,
then put in my seed order.
By the way, I realized
that the days to germination chart I linked to last time is really days
to emergence from the soil. That's a very different length of
time since seeds first send down their roots and get established before
sending up their cotyledons to poke out of the soil. As my
experience suggests, you should see sprouts of at least beans and corn
in a couple of days if conditions are optimal for your germination test.
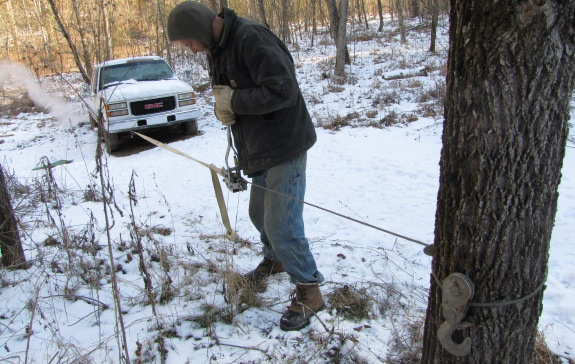
We tried hand winching the
truck out of trouble last week but just couldn't get it to budge more
than a few inchs.
The
winch is rated at 8000
pounds, which may have been enough if gravity wasn't working against us
with the incline. Usually we manage to creep forward with a combination
of me cranking on the winch and Anna easing forward, but that was with
a truck about half the size of this one.
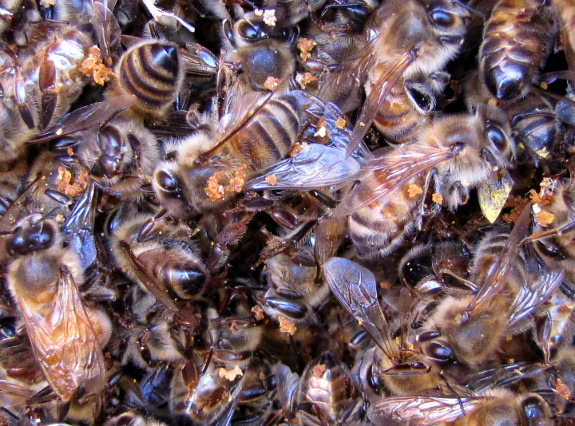
We had our first ever
bee hive casualty this month...and it's all my fault. I would
love to follow the lead of modern beekeepers and blame the death of
hundreds of bees on colony collapse disorder, but I'm pretty sure the
problem was mismanagement.
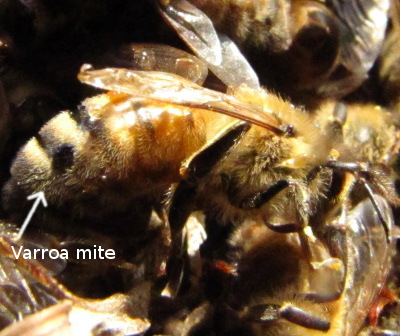 This
was my prize hive that began 2010 with double deeps, bulked up its colony in
record time, and socked away nearly our entire year's harvest of
honey. When I checked them at the beginning of November, they had
about 84 pounds of honey --- more than any other hive --- but I was a
bit concerned because the
hive's varroa mite numbers were also high (180 mites per day in
September, declining to 74 mites per day in November.) I
considered either using an organic or chemical varroa mite treatment,
but in the face of insufficient data on how many mites is too many, I
instead decided to test my boundaries and see how the bees survived the
winter.
This
was my prize hive that began 2010 with double deeps, bulked up its colony in
record time, and socked away nearly our entire year's harvest of
honey. When I checked them at the beginning of November, they had
about 84 pounds of honey --- more than any other hive --- but I was a
bit concerned because the
hive's varroa mite numbers were also high (180 mites per day in
September, declining to 74 mites per day in November.) I
considered either using an organic or chemical varroa mite treatment,
but in the face of insufficient data on how many mites is too many, I
instead decided to test my boundaries and see how the bees survived the
winter.
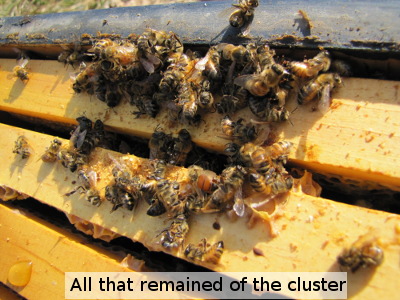 Maybe
they had too many mites, but I don't think that's what killed
them. I was so confident in our hives' honey stores in early
November that I skipped a month and didn't check on them until December
30. At that time, the writing was already on the wall --- the
bottom of the hive was littered with a thick carpet of dead bees and
the cluster looked too small to cope with this winter's abnormally cold
temperatures. Sure enough, when sun returned on January 16 and
bees came flying out of the other two hives, my prize hive was
silent. I pried the lid off and found a hive full of dead bees.
Maybe
they had too many mites, but I don't think that's what killed
them. I was so confident in our hives' honey stores in early
November that I skipped a month and didn't check on them until December
30. At that time, the writing was already on the wall --- the
bottom of the hive was littered with a thick carpet of dead bees and
the cluster looked too small to cope with this winter's abnormally cold
temperatures. Sure enough, when sun returned on January 16 and
bees came flying out of the other two hives, my prize hive was
silent. I pried the lid off and found a hive full of dead bees.
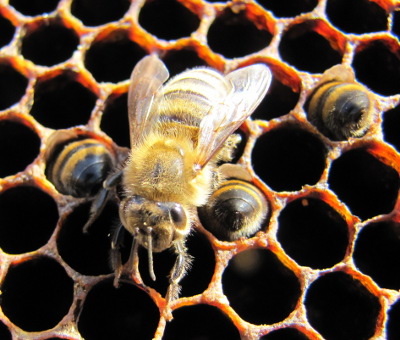 My autopsy turned up only a
couple of varroa mites clinging to dead bees, but lots of bees with
their heads poking into empty honey comb, desparate for
dinner. There was plenty of honey left, but the problem is that
it was too far from their cluster for the bees to eat during December
and January's long spells of sub-freezing weather. When I checked
on the hive two weeks ago, I noticed that the bottom brood box (where
the bees were) was nearly out of honey, so I moved a bunch of full
frames down from above. Too late. None of the fresh honey
was touched, and I suspect the colony died soon after I checked on them
in December.
My autopsy turned up only a
couple of varroa mites clinging to dead bees, but lots of bees with
their heads poking into empty honey comb, desparate for
dinner. There was plenty of honey left, but the problem is that
it was too far from their cluster for the bees to eat during December
and January's long spells of sub-freezing weather. When I checked
on the hive two weeks ago, I noticed that the bottom brood box (where
the bees were) was nearly out of honey, so I moved a bunch of full
frames down from above. Too late. None of the fresh honey
was touched, and I suspect the colony died soon after I checked on them
in December.
Shun the fault I fell
in! Don't be lulled into a false sense of security by a fall
check with copious honey. Especially if you have a hive with a
very large bee population, check in at least once a month (or more
often!) and move honey around as needed to make sure the bees have
plenty of food right in their living rooms.
I'm trying not to be too
heartbroken by the loss, and to instead consider it a learning
opportunity. After all, this makes up my mind --- I'm definitely
going to have to learn to propagate hives this year.
 To
round out my cruise reading, I hunted down Liquid
Gold: The Lore and Logic of Using Urine to Grow Plants
by Carol Steinfeld. I've been wanting to integrate urine into our
homestead fertility plan more rigorously, but got stuck on not knowing
if the salts would build up in the soil. I'm disappointed to say
that Liquid
Gold didn't
precisely answer that question, but it is a great jumping off point for
our own experiments.
To
round out my cruise reading, I hunted down Liquid
Gold: The Lore and Logic of Using Urine to Grow Plants
by Carol Steinfeld. I've been wanting to integrate urine into our
homestead fertility plan more rigorously, but got stuck on not knowing
if the salts would build up in the soil. I'm disappointed to say
that Liquid
Gold didn't
precisely answer that question, but it is a great jumping off point for
our own experiments.
The book is very slim,
but the price is low --- $10 plus $2 shipping on the Liquid Gold website --- so I
wasn't too disappointed that I could sum up the garden-related
information in just a few short pages. And I was certainly amused
and intrigued by the cute pictures and fun factoids. For example,
did you know that in nineteenth century London, people sold their urine
for a penny per bucket for fixing dye? And that numerous cultures
have drunk human urine for ceremonial or health purposes?
Clearly, there's a lot to learn about plain old pee.
| This post is part of our Urine Fertilizer lunchtime series.
Read all of the entries: |

We finally got around to
upgrading the ramshackled
wheel barrow with this
state of the art Kobalt, six cubic foot beauty.
The handles are steel and the
tire is a new type of technolgy made from some sort of solid material
that never goes flat yet feels just as easy to push as our old air
filled version. These two features boosted the price by 20 dollars,
which I figure will be worth it in time saved from future flats.
Operation
food scraps is
underway...and we need your help! Before I
tell you all of the exciting details of our visit to the principal's
office, I hope you'll each put on your thinking caps and help me come
up with a name for this project. If all goes well this semester,
we've already got a couple of folks who'd like to expand the project to
collect food scraps from schools in nearby counties, and we desperately
need a catchy project title. Please comment with your
ideas!
Anyway, to get back to
the exciting part.... We had an
appointment with the principal of our nearest school Monday to talk the
project over, and we were trying hard not to get our hopes up although
she
had sounded guardedly enthusiastic on the phone. Even if the
principal gave our project the go-ahead, we didn't know what kind of
volume of
food waste to expect, so we figured we'd wait until after the meeting
to buy the food scrap bins. This was to be a reconnaissance
mission --- get approval and figure out exactly what kind of bins to
buy.
It turns out that our
local school is one of the tiniest
schools you're likely to come across, with only 80 students, along with
20 headstart students.
This may sound bad from the point of view of food scrap volume, but the
small size of the school is actually a boon --- the principal is able
to try out projects like ours without too much paperwork or
hassle. Mark and I sat down with the principal,
lunchroom lady, and janitor, who together take care
of the entire lunch operation. I'd been a bit afraid that the
lunchroom staff
would roll their eyes and turn up their noses at our idea even if the
principal was in favor, but I was pleasantly surprised --- all three of
the staff turned out to be enthusiastic, down-to-earth, and just plain
good folks who I'm pleased to have had the opportunity of meeting.
After explaining that we
wanted the food and napkins, but not the milk
cartons or straws, I asked "How much food waste do you think you
produce per day?" Unlike bigger schools, the lunchroom lady cooks
all of the
food for the students herself, and she clearly kept a close eye
on the waste stream. "On pizza day, we hardly have any waste,"
she said
with a smile, "but today we served chicken noodle soup with carrots and
crackers on the side, and kids just don't like carrots...." The
janitor jumped in with his estimate that the school puts out one to two
large trash cans of food waste every day.
The sheer volume of
waste produced by such a tiny school blew me
away. Granted, the school serves breakfast as well as lunch, so
that's only about a third of a gallon of food waste per kid per
meal. Okay, that still sounds huge. Clearly this project
was bigger than I'd thought, and it's a very good thing we started with
a very small school.
With the volume
information in hand and the support of all three
cafeteria personnel, we've now decided to buy a rolling trash can for
each day of the week. The principal and janitor decided that it
would
be no problem to store a sealed trashcan of food waste in the Dungeon
for a few days until we can pick it up. Yup, I did say "Dungeon"
--- maybe I wouldn't have wanted to go to that school after all?
 While
most homesteaders know all about the potential of humanure, I've
seldom heard talk of using urine. After reading Liquid Gold,
I was much more surprised by that oversight since urine has a far lower
potential for creating
health problems and contains a higher percentage of plant
nutrients than the solid portions of humanure.
While
most homesteaders know all about the potential of humanure, I've
seldom heard talk of using urine. After reading Liquid Gold,
I was much more surprised by that oversight since urine has a far lower
potential for creating
health problems and contains a higher percentage of plant
nutrients than the solid portions of humanure.
I'll write in more depth
about the safety issue in later posts,
but it's worth running through a quick overview right off the
bat. Unless you have a urinary tract
or kidney infection (or live in a tropical climate), urine is nearly
always sterile. That means you can use fresh urine around food plants
with very few concerns about food-borne illnesses. Contrast that
with composted
fecal matter, which most humanure advocates recommend using only around
the base of fruit trees or ornamental plants. Why not start your
humanure journey by
just using urine and delete the worry?
Unfortunately, in
traditional western culture, urine is channeled into
the waste stream along with solid human wastes. The additional
volume of waste means that we spend more money and resources treating
our wastewater...and that treatment does nearly no good to the
urine. After treatment, we release the whole shebang into natural
rivers and streams, where the high nitrogen from the urine (not
removed by our conventional treatment processes) causes excessive plant
growth, which leads to drastic drops in dissolved oxygen levels and the
resultant death of aquatic animals.
 Swedish
scientists thinks they've found a better way. Separating toilets
(like the one pictured at the top of the page) are becoming common in
Sweden, where a funnel in the front of the toilet diverts the urine
into a separate waste stream for eventual application to fertilize
fields. Studies suggest that one person's pee provides all the
nitrogen needed to grow half or more of that person's food, and we can
ship urine for more than 100 miles to apply it to agricultural fields
before the energy usage matches that used to "treat" urine in a
wastewater treatment plant.
Swedish
scientists thinks they've found a better way. Separating toilets
(like the one pictured at the top of the page) are becoming common in
Sweden, where a funnel in the front of the toilet diverts the urine
into a separate waste stream for eventual application to fertilize
fields. Studies suggest that one person's pee provides all the
nitrogen needed to grow half or more of that person's food, and we can
ship urine for more than 100 miles to apply it to agricultural fields
before the energy usage matches that used to "treat" urine in a
wastewater treatment plant.
Although it would be
great if our municipal wastewater systems followed
Sweden's example, I'm aways more interested in what each of us can
individually do in our own lives. Stay tuned for more home-scale
applications of urine.
| This post is part of our Urine Fertilizer lunchtime series.
Read all of the entries: |
 What's the easiest way to
dig an outhouse hole?
What's the easiest way to
dig an outhouse hole?
Carlos
Mullins, West Texas.
Thanks for the question
Carlos.
I use a combination of post
hole diggers and a spud
bar, but once you get past a few feet the going gets tough due to
the distance you need to bring the dirt up and out of the hole.
One possible easy solution
would be to hire someone with a tractor that has one of those power
augers on the back. You would still need to get the dirt out of the
hole, but it would be considerably more easier with it all broken
up. I would say by the time you went to all the trouble of
tracking someone like that down you could have dug two or three holes
and saved around 50 bucks.
 Indian
Givers by
Jack Weatherford is a
thought-provoking look at ways contact with Native Americans changed
the face of the rest of the world. For example, Weatherford
suggested that the new crops of potatoes and cotton from the Americas
were the driving force behind Industrialization. The addition of
potatoes to the European diet reduced the amount of grain grown, which
in turn left many mills idle. At the same time, cotton replaced
wool as the fiber of choice for making clothes. Farmers were able
to produce a lot more cotton than wool since sheep require considerable
acreage to graze on, so the bottleneck in the clothing production
process shifted from land to manpower. Wait, didn't we have a
bunch of idle mills lying around just waiting to power a clothing
factory? From the union of potatoes and cotton, Industrialization
was born.
Indian
Givers by
Jack Weatherford is a
thought-provoking look at ways contact with Native Americans changed
the face of the rest of the world. For example, Weatherford
suggested that the new crops of potatoes and cotton from the Americas
were the driving force behind Industrialization. The addition of
potatoes to the European diet reduced the amount of grain grown, which
in turn left many mills idle. At the same time, cotton replaced
wool as the fiber of choice for making clothes. Farmers were able
to produce a lot more cotton than wool since sheep require considerable
acreage to graze on, so the bottleneck in the clothing production
process shifted from land to manpower. Wait, didn't we have a
bunch of idle mills lying around just waiting to power a clothing
factory? From the union of potatoes and cotton, Industrialization
was born.
The book is full of
other agricultural (and non-agricultural) tidbits like the war that
almost broke out between Peru and the young U.S.A over access to guano
for fertilizer, or the tale of how feeding corn to livestock increased
Europeans' dietary intake of animal products and caused a population
boom. On the other hand, many of the author's arguments felt a
bit over-simplified
and biased toward giving complete credit to the Native Americans, and
after I found a few botanical flaws in the book I started to wonder how
carefully the author had done his research. So don't take
anything in this book as gospel, but do read it as a good way to open
your eyes to parts of world history you might have missed learning
about in school.
 Since
we're considering using urine as a fertilizer, it makes sense to figure
out what's in that yellow liquid. The actual percentages of each
component can vary depending on what you eat, but pee from an average
Westerner has an NPK of 11-1-2.5. For those of you not familiar
with NPK, that's a fertilizer that's very high in nitrogen, low in
phosphorus, and moderate in potassium.
Since
we're considering using urine as a fertilizer, it makes sense to figure
out what's in that yellow liquid. The actual percentages of each
component can vary depending on what you eat, but pee from an average
Westerner has an NPK of 11-1-2.5. For those of you not familiar
with NPK, that's a fertilizer that's very high in nitrogen, low in
phosphorus, and moderate in potassium.
After water, the major
components in urine are high nitrogen chemicals
including urea, creatine, ammonia, and uric acid. Pee also
contains a significant amount of salt (sodium chloride), and a bit of
calcium, magnesium, and sulfur. Rarely will urine contain a few
disease-causing organisms --- primarily leptospirosis and schistosoma
in the tropics, and salmonella (which dies quickly in soil.)
Beyond the unbalanced
NPK (which can be fixed by mixing the urine with other
nutrient sources, like chicken manure to increase the phosphorus and
wood ashes to increase the potassium), the primary problem with using
urine as fertilizer
is salt. If you fertilize solely with urine, your soil may build
up salts to a level which harm the plants growing there, so Carol
Steinfeld recommends using urine as fertilizer only in regions with
regular rainfall to wash salt away. A high tech option consists
of buying a Total Dissolved Solids (TDS) meter from a hydroponics store
to monitor salt content of your urine, then diluting the urine down 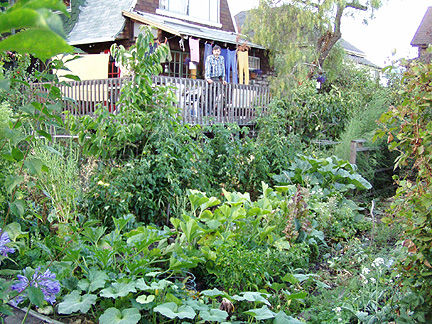 to
1,700 ppm salt before using it as fertilizer. Alternatively, just
spread urine around a lot, never focusing on one part of the garden,
and salt buildup will probably be minimal. Finally, a
doctor-gardener profiled in Liquid
Gold
(and pictured here) took a more proactive approach --- he put himself
on a low-salt diet so
that his plants wouldn't be hindered by the salty urine.
to
1,700 ppm salt before using it as fertilizer. Alternatively, just
spread urine around a lot, never focusing on one part of the garden,
and salt buildup will probably be minimal. Finally, a
doctor-gardener profiled in Liquid
Gold
(and pictured here) took a more proactive approach --- he put himself
on a low-salt diet so
that his plants wouldn't be hindered by the salty urine.
I wasn't entirely
content with Carol Steinfeld's answers about salty
soil, so I did a little research of my own. Although extension
service and USDA websites don't talk about applying urine to your
plants, they do have answers for salt buildups from other
sources. Reading between the lines, I would suggest applying your
urine to salt-tolerant
crops
such as asparagus and zucchini, while steering clear of salt-haters
like beans, carrots, okra, onions, parsnips, peas, and
strawberries. Don't apply urine to waterlogged or high clay soil
since these soils will hold onto the salt no matter what you do ---
sounds like we should keep our urine out of the badly-drained back
garden. If you're concerned that 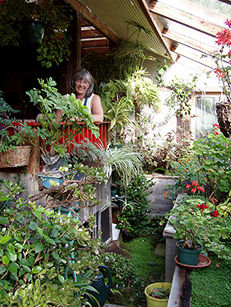 you've overdone it, you could
send your soil in to be tested by the experts, or you can follow the Colorado
State University Extension's
lead and use bean plants as biological indicators: "Bean plants are
rather salt sensitive and can be used to help assess
salt problems. In a garden, if beans are doing well, soluble
salts are
not a problem." The cure for salty soil is adding lots of water
(6 to 24 inches in a slow, continuous stream) to leach the salts out.
you've overdone it, you could
send your soil in to be tested by the experts, or you can follow the Colorado
State University Extension's
lead and use bean plants as biological indicators: "Bean plants are
rather salt sensitive and can be used to help assess
salt problems. In a garden, if beans are doing well, soluble
salts are
not a problem." The cure for salty soil is adding lots of water
(6 to 24 inches in a slow, continuous stream) to leach the salts out.
As long as you
understand how to prevent salt buildup in the soil, it sounds like
urine is a great fertilizer. Liquid Gold's website
includes some beautiful pictures from gardeners who fertilize with
urine, and we're keen to work the kinks out of applying urine to our
own farm. Stay tuned for tomorrow's post about the nitty-gritty
of
urine fertilizing.
| This post is part of our Urine Fertilizer lunchtime series.
Read all of the entries: |
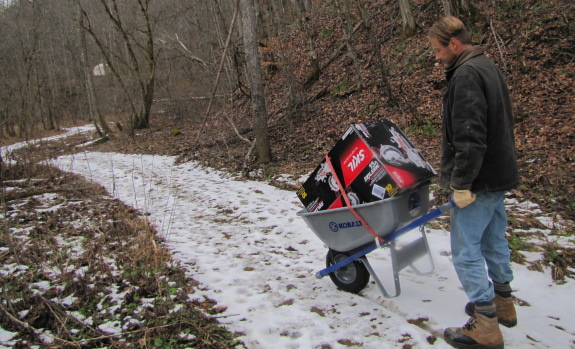
I figured the best way to
test out the Kobalt never flat wheel barrow tire was to load it down and push
it about a quarter mile over uneven ground, across the creek and up
our little hill that proved to be
too much for the truck.
I'm not sure how to test the
rolling resistance, but it feels comparable to the old air filled one
with the added security of knowing the tire pressure is always going to
be right where it needs to be.
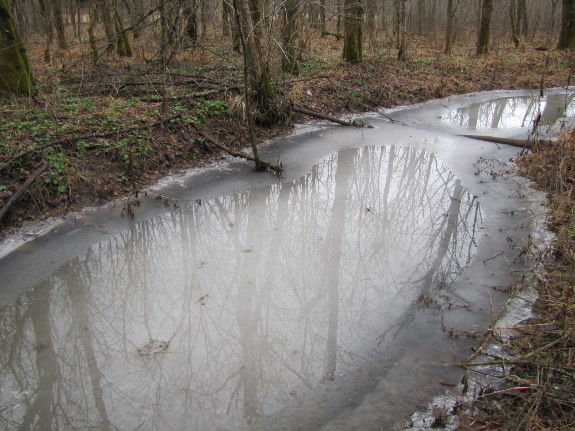
By my calculations,
yesterday was the last Persephone
Day here in
southwest Virginia! That means that right around today, plants
will really start growing again, and I'll be putting 2011's first crop
(lettuce) in the ground in just two weeks. Time to hurry up and
make my seed order!
If you live further
south, your Persephone Days are already gone and you should probably be
thinking about planting. My condolences to those further north
--- you get a few more days or weeks of winter.
 Carol Steinfeld's Liquid Gold
presents a wide array of methods to use urine in your garden.
Since urine has a C:N ratio of 0.8:1, it is far too high
in nitrogen to
be used as a straight fertilizer in most instances or you'll burn your
plants. Instead, dilute one part urine in three to ten parts
water, at which concentration urine can be used like a chemical
fertilizer. However, keep in mind that diluted urine has all of
the same pitfalls for disrupting soil microorganisms as other chemical
fertilizers do, and use it with care. The only place that I would
feel comfortable applying diluted urine directly to our plants is our
potted citrus since they crave nitrogen and are too isolated from the
soil to get their full nutritional requirements from compost.
Carol Steinfeld's Liquid Gold
presents a wide array of methods to use urine in your garden.
Since urine has a C:N ratio of 0.8:1, it is far too high
in nitrogen to
be used as a straight fertilizer in most instances or you'll burn your
plants. Instead, dilute one part urine in three to ten parts
water, at which concentration urine can be used like a chemical
fertilizer. However, keep in mind that diluted urine has all of
the same pitfalls for disrupting soil microorganisms as other chemical
fertilizers do, and use it with care. The only place that I would
feel comfortable applying diluted urine directly to our plants is our
potted citrus since they crave nitrogen and are too isolated from the
soil to get their full nutritional requirements from compost.
 In
my opinion, a better use of urine is as a high nitrogen
source to round out your compost pile. You can simply pee onto a
big pile of wood chips, leaves, sawdust, or a bale of straw turned so
that the cut ends go up, and you'll have a smaller but richer pile of
compost in six months to a year. One experimenter put a lot of
cardboard vertically in a plastic container and filled the
container with urine, ending up with rich compost in a year. For
a lower work option, Carol Steinfeld recommends peeing directly onto
woody mulches (three or more inches deep) around your trees and shrubs
--- the high carbon mulch will mitigate the high nitrogen urine and
your woody plants will get a slower meal.
In
my opinion, a better use of urine is as a high nitrogen
source to round out your compost pile. You can simply pee onto a
big pile of wood chips, leaves, sawdust, or a bale of straw turned so
that the cut ends go up, and you'll have a smaller but richer pile of
compost in six months to a year. One experimenter put a lot of
cardboard vertically in a plastic container and filled the
container with urine, ending up with rich compost in a year. For
a lower work option, Carol Steinfeld recommends peeing directly onto
woody mulches (three or more inches deep) around your trees and shrubs
--- the high carbon mulch will mitigate the high nitrogen urine and
your woody plants will get a slower meal.
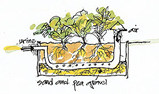 For
those of you with small city gardens (or who want to pee in the
bathroom and forget it), you might consider building a graywater
bed. Channel the urine from a urine-diverting toilet in your
bathroom to a garden bed with a layer of sand and pea gravel on the
bottom topped by good garden soil and plants. The urine filters
out through holes in the bottom of the pipe while air comes in from
the other end of the pipe to keep aerobic bacteria happy.
Replacing the sand and pea gravel with bales of straw captures any
urine leaching away and provides high quality compost, but you have to
turn and rebuild this type of bed once a year to add in new straw bales
and take out the excess compost. For best results, consider
diverting laundry water or other graywater into the bed to dilute the
urine.
For
those of you with small city gardens (or who want to pee in the
bathroom and forget it), you might consider building a graywater
bed. Channel the urine from a urine-diverting toilet in your
bathroom to a garden bed with a layer of sand and pea gravel on the
bottom topped by good garden soil and plants. The urine filters
out through holes in the bottom of the pipe while air comes in from
the other end of the pipe to keep aerobic bacteria happy.
Replacing the sand and pea gravel with bales of straw captures any
urine leaching away and provides high quality compost, but you have to
turn and rebuild this type of bed once a year to add in new straw bales
and take out the excess compost. For best results, consider
diverting laundry water or other graywater into the bed to dilute the
urine.
 Be
aware that using fresh urine to grow your own food is pretty safe since
you can't give yourself a disease you don't already have, but if you
find a way to collect a whole community's urine and apply it to your
farm, you'll probably want to sterilize it first. The simplest
way to sterilize urine is to store it in a sealed container for six
months. (Don't let air come in contact with the urine or a lot of
the nitrogen will turn into ammonia and escape, which smells bad and
also lowers the nutritional quality of your pee.) For added
safety, apply urine to crops where edible parts don't touch the ground
or wait one month after applying urine before harvesting the
crops. The absolute safest way to apply urine is below the soil
surface (such as in the graywater beds in the last paragraph or by drip
irrigation) since a
healthy soil food web will make short work of any pathogens that might
happen to be present in your pee.
Be
aware that using fresh urine to grow your own food is pretty safe since
you can't give yourself a disease you don't already have, but if you
find a way to collect a whole community's urine and apply it to your
farm, you'll probably want to sterilize it first. The simplest
way to sterilize urine is to store it in a sealed container for six
months. (Don't let air come in contact with the urine or a lot of
the nitrogen will turn into ammonia and escape, which smells bad and
also lowers the nutritional quality of your pee.) For added
safety, apply urine to crops where edible parts don't touch the ground
or wait one month after applying urine before harvesting the
crops. The absolute safest way to apply urine is below the soil
surface (such as in the graywater beds in the last paragraph or by drip
irrigation) since a
healthy soil food web will make short work of any pathogens that might
happen to be present in your pee.
| This post is part of our Urine Fertilizer lunchtime series.
Read all of the entries: |
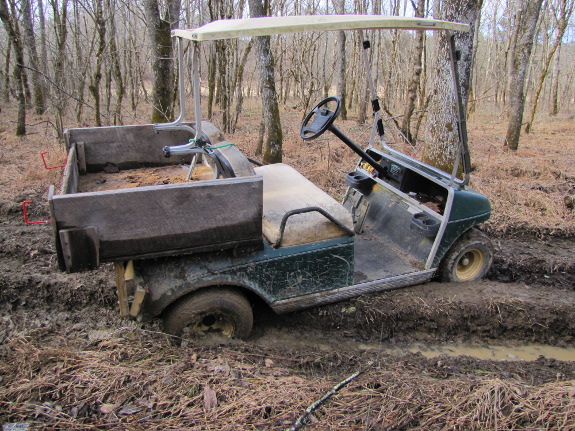
It thawed enough today to
convince the golf cart into bringing in some supplies and Anna's mom for a visit. Too bad it wasn't in
the mood for the return trip.
Now I can see how the truck
has been increasing the rut depth to a point where the golf cart
bottoms out in certain areas of what we loosely call our driveway.
I think a short term fix
would be to dig out the middle high ground between the problem
ruts...but not today.
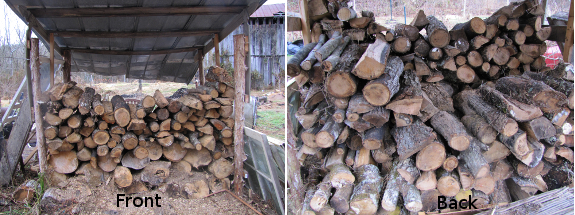
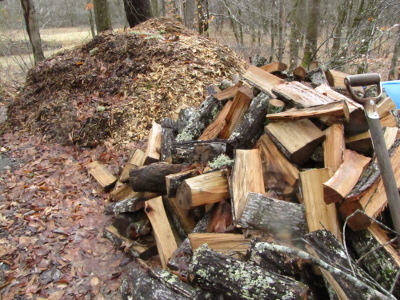 Last
year at this time, we'd run out of wood. I was too ashamed to
admit to the blogosphere that we'd gone back to electric heat in
January (albeit setting the thermostat around 50), which is too bad
because that means I don't know exactly when we ran out of wood in 2010
or even whether we bought one truckload of wood or two. So I
thought I'd post a state of the woodshed report so that we'll be able
to compare next year --- hopefully we'll have tightened our house up
more and maybe have used even less wood!
Last
year at this time, we'd run out of wood. I was too ashamed to
admit to the blogosphere that we'd gone back to electric heat in
January (albeit setting the thermostat around 50), which is too bad
because that means I don't know exactly when we ran out of wood in 2010
or even whether we bought one truckload of wood or two. So I
thought I'd post a state of the woodshed report so that we'll be able
to compare next year --- hopefully we'll have tightened our house up
more and maybe have used even less wood!
 The
photos at the top of the page show how much wood we've got left in the
shed --- I figure it's perhaps a quarter to a third of the first
truckload. The princess has clearly served us well,
cutting back our wood use considerably despite much colder than average
conditions through most of December and January. Meanwhile, our
second truckload is still waiting at the parking area to be ferried in
now that this iceberg has mostly thawed out of the driveway, making it
passable by golf
cart again. (Well, mostly passable --- I managed to get her stuck
twice yesterday, but Mark popped her free.) It's a good feeling
to know that even if February is
a doozy, we'll be warm.
The
photos at the top of the page show how much wood we've got left in the
shed --- I figure it's perhaps a quarter to a third of the first
truckload. The princess has clearly served us well,
cutting back our wood use considerably despite much colder than average
conditions through most of December and January. Meanwhile, our
second truckload is still waiting at the parking area to be ferried in
now that this iceberg has mostly thawed out of the driveway, making it
passable by golf
cart again. (Well, mostly passable --- I managed to get her stuck
twice yesterday, but Mark popped her free.) It's a good feeling
to know that even if February is
a doozy, we'll be warm.
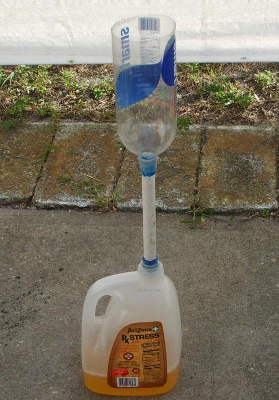 "I'm
sold on the idea of using urine in my garden," you may be saying.
"But how do I collect it?" Urine collection for men can be as
simple or complex as you want. In addition to just peeing outside
or straight into a milk jug, you can make a simple urinal with a bleach
bottle, a milk jug, a length of hose, and a ping pong ball. Cut
the bleach bottle into a funnel shape and connect it to milk jug with
the hose, then drop the ping pong ball into the funnel as a
stopper. When you pee in the funnel, the ping pong ball floats
and rises out of the way, allowing your urine to flow into the milk jug
reservoir. When the pee's all gone, the ping pong ball falls back
into place to make the whole setup relatively air tight and cut down on
smells. Liquid Gold has
a great diagram of this simple urinal, but I can't find one on the
internet, although you can read a longer description by its creator, Chris
Melo. I've
included a related homemade urinal picture instead, but this one looks
like you'd need a bit better aim.
"I'm
sold on the idea of using urine in my garden," you may be saying.
"But how do I collect it?" Urine collection for men can be as
simple or complex as you want. In addition to just peeing outside
or straight into a milk jug, you can make a simple urinal with a bleach
bottle, a milk jug, a length of hose, and a ping pong ball. Cut
the bleach bottle into a funnel shape and connect it to milk jug with
the hose, then drop the ping pong ball into the funnel as a
stopper. When you pee in the funnel, the ping pong ball floats
and rises out of the way, allowing your urine to flow into the milk jug
reservoir. When the pee's all gone, the ping pong ball falls back
into place to make the whole setup relatively air tight and cut down on
smells. Liquid Gold has
a great diagram of this simple urinal, but I can't find one on the
internet, although you can read a longer description by its creator, Chris
Melo. I've
included a related homemade urinal picture instead, but this one looks
like you'd need a bit better aim.
Another DIY option that
is more suited to women consists of a five
gallon bucket full of sawdust underneath a potty chair. The
sawdust soaks up the urine, and the combination is 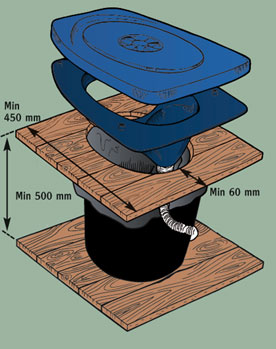 emptied onto the compost pile
when you start to smell an odor. Alternatively, women can get a pStyle
and pee straight onto the compost pile along with men (although I have
to admit that I got sick of my pStlye after a while --- too much work.)
emptied onto the compost pile
when you start to smell an odor. Alternatively, women can get a pStyle
and pee straight onto the compost pile along with men (although I have
to admit that I got sick of my pStlye after a while --- too much work.)
If you want to get
fancy, you can always buy a urine-diverting toilet,
although a quick search of the internet suggests that they start at
around $600. A more interesting storebought option is the Ecovita Privy Kit
for $112 (plus $15 shipping), which fits onto your outhouse seat and
diverts the urine away from the solid wastes. After looking at
the Privy Kit diagram, it seems like we should be able to retrofit our biochar
composting toilet
into a urine-diverting biochar composting toilet with a funnel and
length of hose. We may have to start our experiments there!
| This post is part of our Urine Fertilizer lunchtime series.
Read all of the entries: |
 After
plugging away in the office a few hours a week for the last two months,
I've finally cleared out enough mouse nests, deleted enough junk, and
organized enough tools that I figured I deserved a treat --- putting
the oil
expeller to
work! I had a few jars of dried sunflower
seeds (still in
their hulls) leftover from the 2010 garden, so I decided they would be
my first experiment.
After
plugging away in the office a few hours a week for the last two months,
I've finally cleared out enough mouse nests, deleted enough junk, and
organized enough tools that I figured I deserved a treat --- putting
the oil
expeller to
work! I had a few jars of dried sunflower
seeds (still in
their hulls) leftover from the 2010 garden, so I decided they would be
my first experiment.
Taking Daddy's advice, I
used some kerosene we had in the barn instead of the lamp oil
recommended by the manufacturers. Big mistake! The impure
kerosene blackened the surface of the expeller so much that the dark
color made its way into the oil. Meanwhile, foul-smelling smoke
filled the air, and I had to open all of the windows to make expelling
possible.
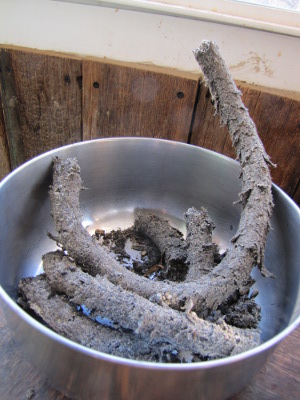 Most
people would have stopped there and tried again once they bought lamp
oil, but I really wanted to see if the expeller worked, figuring I
could always mix the blackened oil back into the seed cake and feed it
all to the chickens. On my first try, the wick was too high,
causing a large flame that overheated the expeller tube and made oil
come out the seed cake end rather than out of the slit partway down the
expeller tube. After trimming the wick much lower, though, I was
able to get a seed cake to form in the end of the expeller and soon had
(black) oil dribbling out into my jar. All told, I spent maybe
half an hour expelling 5.5 cups of sunflower seeds and ended up with
around a quarter of a cup of oil.
Most
people would have stopped there and tried again once they bought lamp
oil, but I really wanted to see if the expeller worked, figuring I
could always mix the blackened oil back into the seed cake and feed it
all to the chickens. On my first try, the wick was too high,
causing a large flame that overheated the expeller tube and made oil
come out the seed cake end rather than out of the slit partway down the
expeller tube. After trimming the wick much lower, though, I was
able to get a seed cake to form in the end of the expeller and soon had
(black) oil dribbling out into my jar. All told, I spent maybe
half an hour expelling 5.5 cups of sunflower seeds and ended up with
around a quarter of a cup of oil.
The conclusion?
The Rajkumar oil expeller works as advertised. It's not terribly
fast, but I figure we could probably crank out a week's worth of oil
pretty easily in an hour or less, producing nutritious seed cake in the
process to feed to the chickens. Next experiment will involve
using actual lamp oil (and storebought sunflower seeds since I've run
out of the homegrown ones) to produce homemade oil good enough for a
taste test. Stay tuned!

I found a new take on the power
antenna automatic chicken coop door opener/closer that includes
over 30 images that take you step by step from ordering your parts to
wiring up the timer and power supply.
What I like best about this
approach is the detailed photos. I doubt if you even need to undertand
the English language to comprehend the few steps needed to put this
project together.
Image credit goes to an
anonymous backyardchicken forum member.

Edited to add:
After years of research, Mark eventually settled on this automatic chicken door.
You can see
a summary of the best
chicken door alternatives and why he chose this version here.
If you're planning on
automating your coop, don't forget to pick up one of our chicken waterers. They never spill or
fill with poop, and if done right, can only need filling every few days
or weeks!
One of the best things
about the golf cart is that I can drive it with
impunity. I'm not the world's best driver in the slippery, rutted
driveway, and I have a tendency to try to push the envelope, driving
the golf cart in conditions when it would be better to leave it at
home. Often when I just get a bit stuck, I can disembark and push
the cart free by leaving one foot on the gas pedal. But when the
two wheels on the right side of the golf cart are in different ruts, I
have to call Mark for a bit of extra muscle.
You would think we'd
have to slave over the above situation for hours, but Mark just lifted
up the back of the cart using the spud bar while I pushed the back
wheel up onto the center island. Then I got in, Mark lifted the
back of the cart again to keep it from bottoming out, and I gunned her
out of there. Elapsed time: 3 minutes. Motherly impression:
"Awesome!"
This low budget solar water
heater could be made for free if you're good at scrounging material and
taking advantage of scrap pieces.
I've been thinking of making
a modified version of the one above that would link two or maybe three
refrigerator coil grids together with a small pump.
Image credit belongs to the
online community of Sietch.org.
 My
darling little blue Festiva, the first and only car I've ever owned,
kicked the bucket. (Her sister is pictured here.) Our very
competent and cheap mechanic explained that when the timing belt broke,
it knocked a bunch of things apart in there, and that it would cost
$500 to fix it. My gut reaction was, "I don't care! Fix
her!" But after crunching the numbers, I'm afraid we're going to
let her go.
My
darling little blue Festiva, the first and only car I've ever owned,
kicked the bucket. (Her sister is pictured here.) Our very
competent and cheap mechanic explained that when the timing belt broke,
it knocked a bunch of things apart in there, and that it would cost
$500 to fix it. My gut reaction was, "I don't care! Fix
her!" But after crunching the numbers, I'm afraid we're going to
let her go.
I estimate that we drive
around $10,000 miles per year, and when I started crunching the
numbers, I realized that 75% of that time, we're hauling supplies and
have to use the truck or the
van. Another 20% of the time, Mark's driving on long trips and
doesn't feel like cramming his tall frame into a clown car, so it's
only the 5% of the time I drive by myself that we were using the
Festiva. Her selling point is her great gas mileage (over 40
miles to the gallon), but at current gas prices and driving methods, it
would take 50 more years driving her to make it worthwhile to fix the
Festiva.
 So I went on to consider a
couple of other options. The truck and the van fit a similar
niche since we've taken the back seats out of the van and use that area
for hauling supplies. If we sold the van (estimated value $500)
and bought a good gas mileage car to replace the Festiva, making sure
we choose one that's big enough to fit Mark's long legs (estimated cost
$2,000), then we could probably use the lower mileage vehicle 25% of
the time. At current gas prices, that would save us around $400
per year, which means the switch would be worthwhile in around 4
years. On the other hand, you have to factor in a major hassle
value for selling the van and buying a used car, and the possibility
that we'd get a lemon.
So I went on to consider a
couple of other options. The truck and the van fit a similar
niche since we've taken the back seats out of the van and use that area
for hauling supplies. If we sold the van (estimated value $500)
and bought a good gas mileage car to replace the Festiva, making sure
we choose one that's big enough to fit Mark's long legs (estimated cost
$2,000), then we could probably use the lower mileage vehicle 25% of
the time. At current gas prices, that would save us around $400
per year, which means the switch would be worthwhile in around 4
years. On the other hand, you have to factor in a major hassle
value for selling the van and buying a used car, and the possibility
that we'd get a lemon.
The final option would
be to stick with the van and truck and just admit that we're not the
kind of family where it makes sense to have a gas efficient
vehicle. We don't commute, we don't drive separately (because I
hate to drive), and we're often hauling big masses of compost or mulch
or chicken waterer supplies that won't fit in a passenger car. In
that case the question remains --- what do we do with the
Festiva? Mark rolled his eyes when I suggested hauling her home
to use as parts for the parts Festiva (and as a solar
dryer.)
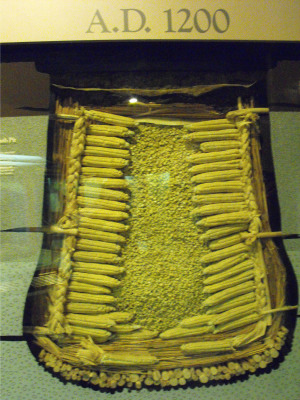 It's
amazing how finding the right words expedites research. Ever
since I learned that modern
forest gardening is based on traditional
farming practices in the tropics, I've wondered "What do
Native
Americans from my own neck of the woods have to teach us?"
Delving into North American native agriculture, I quickly learned that
corn dominated the area's fields and diet in a near monoculture for the
last thousand years, causing health problems I don't want to
repeat. But
corn had only travelled north from Mexico in the last couple of
millenia --- what did
people around here eat before that?
It's
amazing how finding the right words expedites research. Ever
since I learned that modern
forest gardening is based on traditional
farming practices in the tropics, I've wondered "What do
Native
Americans from my own neck of the woods have to teach us?"
Delving into North American native agriculture, I quickly learned that
corn dominated the area's fields and diet in a near monoculture for the
last thousand years, causing health problems I don't want to
repeat. But
corn had only travelled north from Mexico in the last couple of
millenia --- what did
people around here eat before that?
During our visit to Sunwatch, I splurged on a couple of
books, one of
which was a type-written and home-bound writeup of the archaeological
history of the site, not so succinctly titled A
History of 17 Years of Excavation and Reconstruction --- A Chronicle of
12th Century Human Values and the Built Environment: Volume 1. Can you blame me that I put
this tome on a back shelf for a cold winter day?
 If
I'd opened this remarkably easy to read volume back in the summer,
though, I would have shortened my research journey considerably.
The text
provides an overview of not only the diets of the Sunwatch inhabitants
(living in
the era of corn), but a comparison with the diets of people who lived
in the same area before corn became king. Best yet, one chapter
is entitled "Paleoethnobotanical Research at the Incinerator
Site." Eureka! Using my newfound understanding of the eras
of prehistory in the eastern U.S. and the name of the field, I quickly
found several (also easy to read) scientific and layman's texts about
the paleoethnobotany of Archaic and Woodland Native Americans. If
only I'd known that's what I was looking for eighteen months ago!
If
I'd opened this remarkably easy to read volume back in the summer,
though, I would have shortened my research journey considerably.
The text
provides an overview of not only the diets of the Sunwatch inhabitants
(living in
the era of corn), but a comparison with the diets of people who lived
in the same area before corn became king. Best yet, one chapter
is entitled "Paleoethnobotanical Research at the Incinerator
Site." Eureka! Using my newfound understanding of the eras
of prehistory in the eastern U.S. and the name of the field, I quickly
found several (also easy to read) scientific and layman's texts about
the paleoethnobotany of Archaic and Woodland Native Americans. If
only I'd known that's what I was looking for eighteen months ago!
| This post is part of our Native American Paleoethnobotany lunchtime
series.
Read all of the entries: |
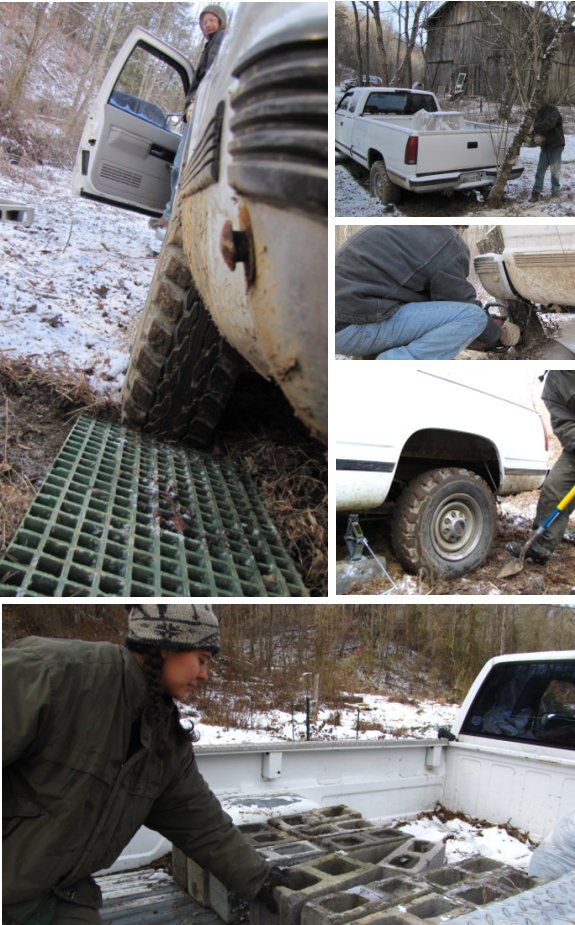
It only took cutting down a
tree, jacking up the rear wheel, scooting a grid thingamajig under the
tire, and adding some weight to finally get the truck free.
The green grid thing got left
behind by the crew who leveled out our trailer. They got their truck
stuck in the mud and used a few of them to get out and I guess didn't
want to get muddy by retrieving them.
I think we'll keep the cinder
blocks in place to increase our traction.
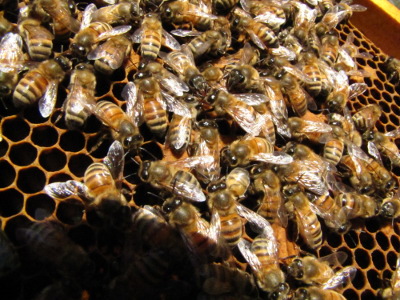 A
beautiful sunny afternoon on Monday gave me
a chance to dip into our two remaining hives. I knew they were
both alive because I've taken to holding my ear up against the lower
brood box now and then to listen for a happy hum, but I didn't want to
risk another hive dying of
starvation.
Just like at this time last year, both hives seem to have
barely eaten anything since I checked on them near the end of December,
probably because they're down to such a small cluster, so starvation is
no longer an issue.
A
beautiful sunny afternoon on Monday gave me
a chance to dip into our two remaining hives. I knew they were
both alive because I've taken to holding my ear up against the lower
brood box now and then to listen for a happy hum, but I didn't want to
risk another hive dying of
starvation.
Just like at this time last year, both hives seem to have
barely eaten anything since I checked on them near the end of December,
probably because they're down to such a small cluster, so starvation is
no longer an issue.
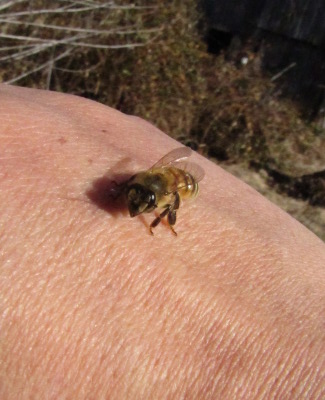 The
east hive surprised me by having a small nursery already in
action! A few capped worker cells and more uncapped larvae and
eggs
suggest the hive is already bulking up for spring. I'm thrilled
that
they're building their numbers, although a few dead larvae on
the floor of the other hive's brood box suggests cold weather put a
damper on the other colony's early brooding efforts.
The
east hive surprised me by having a small nursery already in
action! A few capped worker cells and more uncapped larvae and
eggs
suggest the hive is already bulking up for spring. I'm thrilled
that
they're building their numbers, although a few dead larvae on
the floor of the other hive's brood box suggests cold weather put a
damper on the other colony's early brooding efforts.
Meanwhile, I've decided
to take advantage of winter's minimal bee colonies
to learn to work the hives with no gloves. I hate to squash bees,
especially when their numbers are so low, but clumsy gloves make bee
kills inevitable. (It's also a lot easier to take pictures
without gloves on.) During my first attempt, I got stung once on
my thumb, but I was
surprised to realize that my tough fingers barely register any pain
from a bee sting. And most of the bees who landed on my hand just
chatted for a while, then flew on, so I guess I'm on the right track.
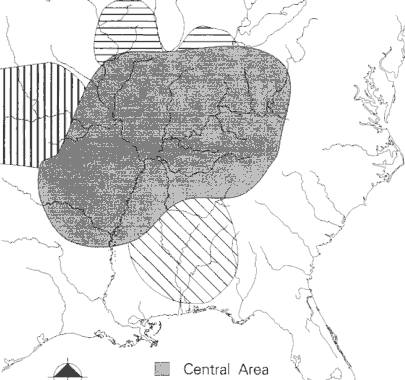 Most
laypeople believe that eastern native Americans didn't start farming
until corn, beans, and squash made their way north from Mexico,
becoming common crops around 1000 AD. But well before then,
Native Americans in the area shaded on this map had domesticated a
whole suite of other crops. These plants, known as the Eastern
Agricultural Complex, may have made up as much as 67% of the diet of
the Native Americans 2500 years ago, with the history of the plants'
cultivation extending perhaps as far back as 2050 BC.
Most
laypeople believe that eastern native Americans didn't start farming
until corn, beans, and squash made their way north from Mexico,
becoming common crops around 1000 AD. But well before then,
Native Americans in the area shaded on this map had domesticated a
whole suite of other crops. These plants, known as the Eastern
Agricultural Complex, may have made up as much as 67% of the diet of
the Native Americans 2500 years ago, with the history of the plants'
cultivation extending perhaps as far back as 2050 BC.
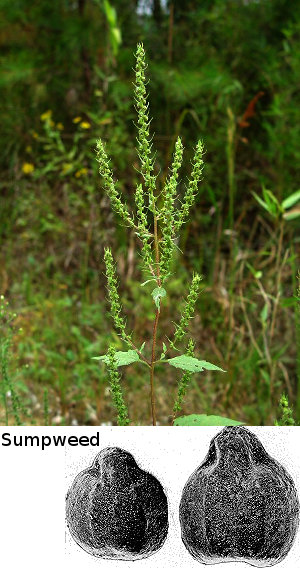 Oily
seeds were an important part of the Eastern Agricultural
Complex. We're still familiar with one of these eastern North
American natives --- sunflowers. Another oil-seed crop is
familiar for a different reason --- the original squashes cultivated
in eastern North America had an inedible flesh and were instead grown
for their tasty seeds. Finally, sumpweed (also known as
marsh-elder) was an important crop which produced nutritional seeds
made up of 32% protein and 45% oil, but which has largely disappeared
from our knowledge-base. Gayle
Fritz's Laboratory Guide to
Archaeological Plant Remains from Eastern North America notes that "Harvesting
experiments using wild stands show that sumpweed holds considerable
economic potential."
Oily
seeds were an important part of the Eastern Agricultural
Complex. We're still familiar with one of these eastern North
American natives --- sunflowers. Another oil-seed crop is
familiar for a different reason --- the original squashes cultivated
in eastern North America had an inedible flesh and were instead grown
for their tasty seeds. Finally, sumpweed (also known as
marsh-elder) was an important crop which produced nutritional seeds
made up of 32% protein and 45% oil, but which has largely disappeared
from our knowledge-base. Gayle
Fritz's Laboratory Guide to
Archaeological Plant Remains from Eastern North America notes that "Harvesting
experiments using wild stands show that sumpweed holds considerable
economic potential."
Small "grains" (meaning
plants with starchy seeds in this context) were
also important, and are mostly familiar to us now as garden
weeds. Look for lamb's quarter, maygrass, erect knotweed, and
little barley in your garden and think of their long history.
In the case of most of
the species in the Eastern Agricultural Complex,
Native Americans selected for plants that were easier to harvest or
better to eat, so we can distinguish the wild ancestors from the
domesticated versions in the archaeological 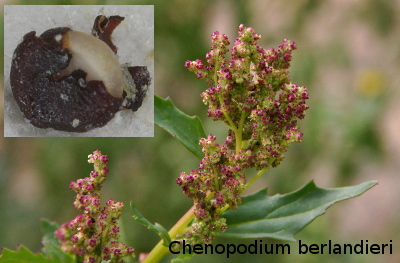 record.
As a result,
you shouldn't assume that the lamb's quarter you pull out of your
garden every year is the same as the one the Native Americans
grew. First of all, the most common lamb's quarter weed is in a
different species (Chenopodium
album instead of
Chenopodium
berlandieri).
Even if you tracked down a wild Chenopodium
berlandieri,
it probably wouldn't look much like the domesticated version since the
Native Americans bred their lamb's quarter to produce all of its
flowers at the same time and to concentrate the enlarged seeds in the
top inflorescence for easy harvest. In fact, like most of our
current garden vegetables, the varieties in the Eastern Agricultural
Complex had changed so much from the wild type that they depended on
humans to propagate
them and many couldn't reproduce or compete naturally in the wild.
record.
As a result,
you shouldn't assume that the lamb's quarter you pull out of your
garden every year is the same as the one the Native Americans
grew. First of all, the most common lamb's quarter weed is in a
different species (Chenopodium
album instead of
Chenopodium
berlandieri).
Even if you tracked down a wild Chenopodium
berlandieri,
it probably wouldn't look much like the domesticated version since the
Native Americans bred their lamb's quarter to produce all of its
flowers at the same time and to concentrate the enlarged seeds in the
top inflorescence for easy harvest. In fact, like most of our
current garden vegetables, the varieties in the Eastern Agricultural
Complex had changed so much from the wild type that they depended on
humans to propagate
them and many couldn't reproduce or compete naturally in the wild.
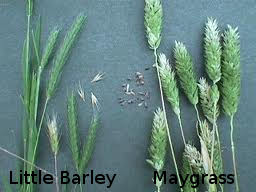 Are you interested in trying
to grow some of North America's most ancient
crops in your own garden. Too bad! Just as modern farmers
are ignoring the hundreds of varieties of heirloom vegetables
well-suited to their climate in favor of a few industrial varieties,
Native American farmers quickly ditched most components of the Eastern
Agricultural Complex when corn came on the scene. By the time of
European contact, all domesticated varieties except sunflowers and
squash were extinct.
Are you interested in trying
to grow some of North America's most ancient
crops in your own garden. Too bad! Just as modern farmers
are ignoring the hundreds of varieties of heirloom vegetables
well-suited to their climate in favor of a few industrial varieties,
Native American farmers quickly ditched most components of the Eastern
Agricultural Complex when corn came on the scene. By the time of
European contact, all domesticated varieties except sunflowers and
squash were extinct.
| This post is part of our Native American Paleoethnobotany lunchtime
series.
Read all of the entries: |
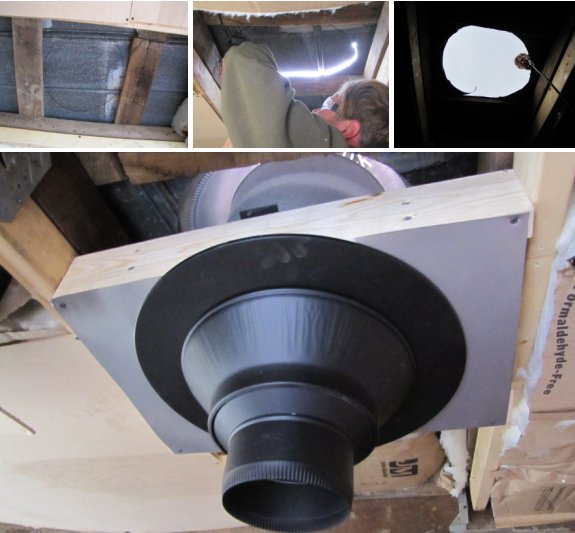
We started the east wing
wood stove project today.
It feels smoother this time
compared to the first
chimney we built last year.
I attribute that to Anna's advanced skills in calculating dimensions
and translating them into measurements that work.
 I can just see Everett
pulling out his notebook and thinking, "Drat! There's a step I
forgot about even before I start guessing at how to prune my apple
trees?!" Don't worry --- prepruning is an obsessive-gardener
extra step that consists of peering out the window at our peach tree
and dropping by to visit with the other fruit trees all winter before
pulling out my pruning shears. As the old adage goes "Measure
twice and cut once," so I guess prepruning is just my first measuring
step.
I can just see Everett
pulling out his notebook and thinking, "Drat! There's a step I
forgot about even before I start guessing at how to prune my apple
trees?!" Don't worry --- prepruning is an obsessive-gardener
extra step that consists of peering out the window at our peach tree
and dropping by to visit with the other fruit trees all winter before
pulling out my pruning shears. As the old adage goes "Measure
twice and cut once," so I guess prepruning is just my first measuring
step.
 I fell down on the job this
summer and neglected to summer prune, so part of my winter
prepruning is figuring out how to make up for that mistake. The
thicket of watersprouts on my favorite peach tree should have been
clipped back in June so that the tree would direct its energy into
flower buds, and even though I missed that boat, I'll still need to
shorten the watersprouts so that they won't shade my crop this
summer. Meanwhile, I remember what
I fell down on the job this
summer and neglected to summer prune, so part of my winter
prepruning is figuring out how to make up for that mistake. The
thicket of watersprouts on my favorite peach tree should have been
clipped back in June so that the tree would direct its energy into
flower buds, and even though I missed that boat, I'll still need to
shorten the watersprouts so that they won't shade my crop this
summer. Meanwhile, I remember what  a big difference in size,
flavor, and beauty existed between the sun-kissed peaches and the few
that sprung up on twigs hidden in the underside of the tree, so I'll
just cut all of those soon-to-be-shaded twigs off so that my tree can
pump her sugars into prime peaches this year.
a big difference in size,
flavor, and beauty existed between the sun-kissed peaches and the few
that sprung up on twigs hidden in the underside of the tree, so I'll
just cut all of those soon-to-be-shaded twigs off so that my tree can
pump her sugars into prime peaches this year.
I'm also keeping an eye
on the trees for signs of other problems, like the encrustation above
which houses tent
caterpillar eggs and
should be removed. The larger, spongy egg case, though, is the
overwintering home of baby praying mantises, so I want to make sure
that my pruning doesn't impact these good garden predators.
Finally, I'm guessing
that these slightly swollen and blackened twig tips are the spot where
our Oriental
fruit moths went
through their spring larval stage before burrowing into my
peaches. While the pests are probably overwintering under loose
bark and in my mulch, I'll probably snip these problematic areas off
and burn them just in case. (Now's  also the time for me to
decide if it's worth it to try to build a short-term chicken paddock
around the peach to let the chickens delete this year's pests before
they invade my fruit.)
also the time for me to
decide if it's worth it to try to build a short-term chicken paddock
around the peach to let the chickens delete this year's pests before
they invade my fruit.)
It's amazing how
productive I can feel while peering out into the rain....
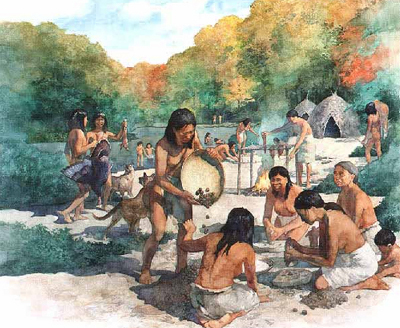 Before
eastern Native Americans domesticated the crops in the Eastern
Agricultural Complex,
they still relied heavily on plants for their
nutrition. Between 8000 BC and 2000 BC (the so-called Archaic
period), Native Americans in our area ate a variety of un-domesticated
native
plants, including the fruits of sumac, blackberry, grape,
hackberry, hawthorn, plum, pawpaw, cherry, mulberry, and persimmon; the
nuts of hickory, oak, hazel,
walnut, chestnut, beech, and pecan; and the sweet insides of honey
locust pods. They also ate the fruits, leaves, or tubers of
Jerusalem artichoke,
two wild beans, groundnut, maypop, black nightshade, amaranth,
pokeweed, carpetweed,
dock, chickweed, ground cherry, purslane, carpetweed, panicgrass, hog
peanut, and a
spurge. Most of these plants continued to be important in the
Native American diet for thousands of years thereafter.
Before
eastern Native Americans domesticated the crops in the Eastern
Agricultural Complex,
they still relied heavily on plants for their
nutrition. Between 8000 BC and 2000 BC (the so-called Archaic
period), Native Americans in our area ate a variety of un-domesticated
native
plants, including the fruits of sumac, blackberry, grape,
hackberry, hawthorn, plum, pawpaw, cherry, mulberry, and persimmon; the
nuts of hickory, oak, hazel,
walnut, chestnut, beech, and pecan; and the sweet insides of honey
locust pods. They also ate the fruits, leaves, or tubers of
Jerusalem artichoke,
two wild beans, groundnut, maypop, black nightshade, amaranth,
pokeweed, carpetweed,
dock, chickweed, ground cherry, purslane, carpetweed, panicgrass, hog
peanut, and a
spurge. Most of these plants continued to be important in the
Native American diet for thousands of years thereafter.
 If you've ever picked up a
book on eastern
North American edible
plants, you'll have
noticed that most of the top edibles are listed above.
So the Native Americans just figured out what was edible and they
wandered around all day looking for them, right? In Cultivated
Landscapes of Native North America,
William E. Doolittle makes a strong case for the hypothesis that most
or all of these "wild"
plants were cultivated to some extent, even though they weren't
domesticated. You'll notice that nearly all of the woody plants
listed aren't old growth species and instead require some space and
extra sunlight to produce plenty of fruits. Native Americans cut
the competition away from favored plants, burned out the undergrowth,
pruned trees and vines to make fruits larger and easier to harvest, and
transplanted edible-fruited trees to the edges of their fields after
they began growing domesticated crops. A great deal of evidence
exists to suggest that grapes were propagated by cuttings and planted
in vineyards, mulberry trees were planted near homes, and chickasaw
plums and pecans were carried east from their natural range to plant
throughout the South.
If you've ever picked up a
book on eastern
North American edible
plants, you'll have
noticed that most of the top edibles are listed above.
So the Native Americans just figured out what was edible and they
wandered around all day looking for them, right? In Cultivated
Landscapes of Native North America,
William E. Doolittle makes a strong case for the hypothesis that most
or all of these "wild"
plants were cultivated to some extent, even though they weren't
domesticated. You'll notice that nearly all of the woody plants
listed aren't old growth species and instead require some space and
extra sunlight to produce plenty of fruits. Native Americans cut
the competition away from favored plants, burned out the undergrowth,
pruned trees and vines to make fruits larger and easier to harvest, and
transplanted edible-fruited trees to the edges of their fields after
they began growing domesticated crops. A great deal of evidence
exists to suggest that grapes were propagated by cuttings and planted
in vineyards, mulberry trees were planted near homes, and chickasaw
plums and pecans were carried east from their natural range to plant
throughout the South.
 Smaller edibles were also encouraged in much
the same way that a modern
gardener might let a volunteer vegetable alone once he recognizes its
worth. A wide range of small plants weren't completely dependent
on the Native Americans for their care (like the Eastern Agricultural
Complex was) but still benefited from a bit of encouragement and were
then eaten. Many of the plants listed in the last sentence of the
first paragraph are
weedy species that require some disturbance in order to grow, so they
sprang up in the Native American's cultivated fields. At the time
of European contact, it was common to see maypops, Jerusalem
artichokes, and other "weeds" allowed to grow in the corn fields, to be
harvested for food.
Smaller edibles were also encouraged in much
the same way that a modern
gardener might let a volunteer vegetable alone once he recognizes its
worth. A wide range of small plants weren't completely dependent
on the Native Americans for their care (like the Eastern Agricultural
Complex was) but still benefited from a bit of encouragement and were
then eaten. Many of the plants listed in the last sentence of the
first paragraph are
weedy species that require some disturbance in order to grow, so they
sprang up in the Native American's cultivated fields. At the time
of European contact, it was common to see maypops, Jerusalem
artichokes, and other "weeds" allowed to grow in the corn fields, to be
harvested for food.
Although the native
North American systems of encouraging wild plants
weren't as intricate as the forest gardens you see in the tropics, the
widespread range and abundance of many of the species mentioned in this
post can probably be
linked back to the continent's earliest human inhabitants. It
begs the question --- are you really wildcrafting when you harvest the
ubiquitous pokeweed growing behind your house, or are you just eating
the remains of a Native American garden?
| This post is part of our Native American Paleoethnobotany lunchtime
series.
Read all of the entries: |
Today we learned how a pair
of safety glasses can make stuffing insulation above your head a lot
less painful.
We also managed to get the
concrete pad secured down with all 12 tiles glued in place.
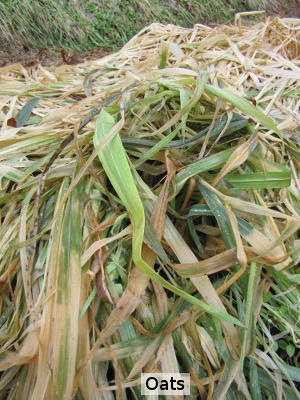 When
I summed up 2010's no-till
cover crop experiments,
the only question left was how various crops would winterkill here in
southwest Virginia. Now that the traditional coldest month of the
year is just about over (and the garden is finally free of a coat of
snow), I went out to check on the state of the cover crops. For
those of you who haven't been following along, I was looking for the
opposite of what gardeners usually aim for --- dead plants so that I won't have
to till them in. Here's what I saw:
When
I summed up 2010's no-till
cover crop experiments,
the only question left was how various crops would winterkill here in
southwest Virginia. Now that the traditional coldest month of the
year is just about over (and the garden is finally free of a coat of
snow), I went out to check on the state of the cover crops. For
those of you who haven't been following along, I was looking for the
opposite of what gardeners usually aim for --- dead plants so that I won't have
to till them in. Here's what I saw:
- Oats have a green leaf
here and there, but look pretty much dead. If any of the plants
sprout back up when warm weather comes, it won't be hard to mow them
down, but I suspect I won't have to do that. It looks like the
remains of the oats will make a good mulch for the coming growing
season.
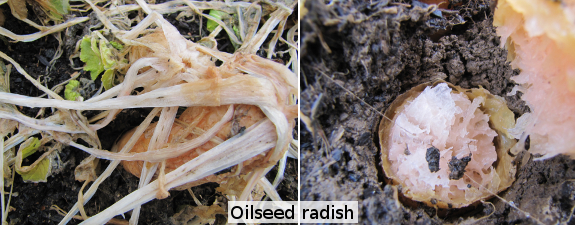
- Oilseed radishes have a
wisp of green here and there, but the plants are clearly dead --- I can
easily tear the huge taproots apart with gentle pressure. Inside,
the roots are soft, spongy, and mostly decomposed already. The
plus side is that the biomass will probably have melted into the soil
enough that crops I plant in old oilseed radish beds can use the
nutrition this coming year. The flip side of the coin is that I'm
going to need to mulch the oilseed radish beds soon because bare ground
will quickly grow full of weeds now that the snow is gone. As a
final note, I feel that I should mention that the stench most websites
report from their decomposing oilseed radishes didn't
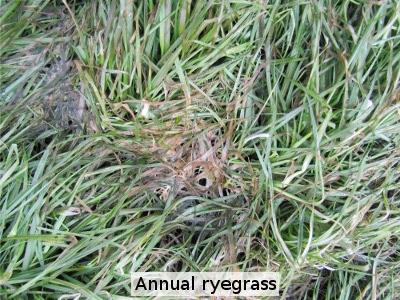 materialize in my garden, perhaps because the
radishes spent so long under a coat of snow.
materialize in my garden, perhaps because the
radishes spent so long under a coat of snow.
- Annual ryegrass is still
mostly green, so it looks like I'm going to need to find a way to
kill it. I've read that ryegrass is easy to mow-kill, so
that will be my first option.
- Buckwheat is frost tender
and is long gone.
 Barley
is still green, despite the fact that I planted it in late October and
the plants only got a couple of inches tall before growth ceased for
the winter. I'd be tempted to leave it alone and see what it does
this spring, but the barley is located in beds that are slated to go
back into early spring vegetable production. So I'll probably
just weed or smother the baby barley out.
Barley
is still green, despite the fact that I planted it in late October and
the plants only got a couple of inches tall before growth ceased for
the winter. I'd be tempted to leave it alone and see what it does
this spring, but the barley is located in beds that are slated to go
back into early spring vegetable production. So I'll probably
just weed or smother the baby barley out.
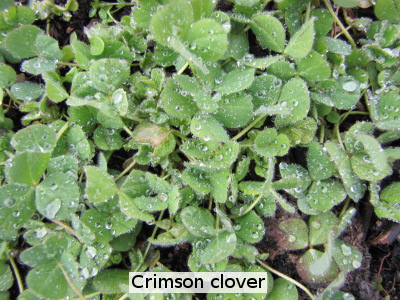 Crimson
Clover is still bright green and small. Unlike the other
cover crops I'm trialing, the clover is a legume, which means its
benefit isn't so much adding biomass to the soil as adding
nitrogen. Some people have good luck leaving crimson clover as an
intercrop among large vegetables, so I'm going to see if the clover can
share beds with broccoli and other large crops this spring.
Crimson
Clover is still bright green and small. Unlike the other
cover crops I'm trialing, the clover is a legume, which means its
benefit isn't so much adding biomass to the soil as adding
nitrogen. Some people have good luck leaving crimson clover as an
intercrop among large vegetables, so I'm going to see if the clover can
share beds with broccoli and other large crops this spring.
Based on this winterkill
data, I've got some changes to make for next year. I think I'm
going to delete ryegrass from my winter cover crop rotation, plant
barley and crimson clover in the shady part of the garden where I don't
start vegetables until May and could allow the cover crops to mature in
the spring, plant oats where I want a mulch the next summer, and plant
oilseed radishes where I want to direct-seed early spring crops.
It's great to finally be wrapping my head around the niche of each
cover crop.
All 5 cans fit nicely along
the wall of the hallway that leads to the coal furnace (also known as
the dungeon).
We'll know more about how
much volume to expect in a few weeks.
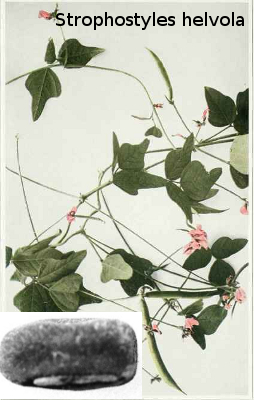 Now
that I've finally answered my question about what eastern Native
American food looked like before corn dominated their fields, I can
start to tease permaculture implications out of the information.
First of all, the intricate layering
(trees planted above vines above
shrubs above groundcovers) often focused on by forest gardening
fans
seems to be more of a tropical and semi-tropical concept, and I suspect
we just don't have enough sunlight in our temperate climate to make
layering work well. I
don't think it's just coincidence that the Native Americans from our
area used techniques that basically turned their wild food tree systems
into
orchards by burning and clearing out the undergrowth.
Instead, it sounds like the admonition in Edible
Forest Gardens
to give your trees lots of space and diversify horizontally (a grape
vine just beyond the canopy of your apple tree, for example) rather
than vertically
is more appropriate for our climate. Those of you who live in
zone 8 or warmer are more likely to be successful with the vertical
layering advocated in earlier forest gardening books.
Now
that I've finally answered my question about what eastern Native
American food looked like before corn dominated their fields, I can
start to tease permaculture implications out of the information.
First of all, the intricate layering
(trees planted above vines above
shrubs above groundcovers) often focused on by forest gardening
fans
seems to be more of a tropical and semi-tropical concept, and I suspect
we just don't have enough sunlight in our temperate climate to make
layering work well. I
don't think it's just coincidence that the Native Americans from our
area used techniques that basically turned their wild food tree systems
into
orchards by burning and clearing out the undergrowth.
Instead, it sounds like the admonition in Edible
Forest Gardens
to give your trees lots of space and diversify horizontally (a grape
vine just beyond the canopy of your apple tree, for example) rather
than vertically
is more appropriate for our climate. Those of you who live in
zone 8 or warmer are more likely to be successful with the vertical
layering advocated in earlier forest gardening books.
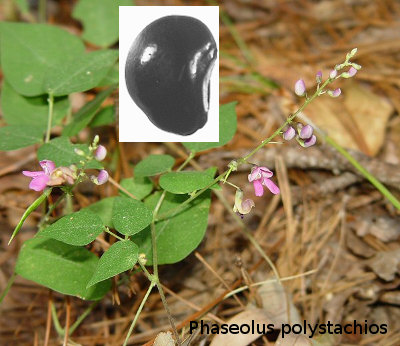 I also see implications for
the chicken pasture in the ten thousand
years of research carried out by the Native Americans. Perhaps
the food plants that were simply encouraged by the Native Americans
rather
than domesticated and planted can fit into our chicken pasture
scheme? I'm especially interested in the small, weedy species
that like disturbance and are also edible, like the wild beans, maypop,
black nightshade, amaranth,
pokeweed, carpetweed,
dock, chickweed, ground cherry, purslane, carpetweed, panicgrass, and
spurge. Black
nightshade and chickweed sprang up naturally in our chicken pasture
last year and were two of the chickens' favorite natural foods, so
the idea probably has some merit. It sounds like I've got my work
cut out for me in 2011, gathering weeds to test them on the chickens.
I also see implications for
the chicken pasture in the ten thousand
years of research carried out by the Native Americans. Perhaps
the food plants that were simply encouraged by the Native Americans
rather
than domesticated and planted can fit into our chicken pasture
scheme? I'm especially interested in the small, weedy species
that like disturbance and are also edible, like the wild beans, maypop,
black nightshade, amaranth,
pokeweed, carpetweed,
dock, chickweed, ground cherry, purslane, carpetweed, panicgrass, and
spurge. Black
nightshade and chickweed sprang up naturally in our chicken pasture
last year and were two of the chickens' favorite natural foods, so
the idea probably has some merit. It sounds like I've got my work
cut out for me in 2011, gathering weeds to test them on the chickens.
| This post is part of our Native American Paleoethnobotany lunchtime
series.
Read all of the entries: |
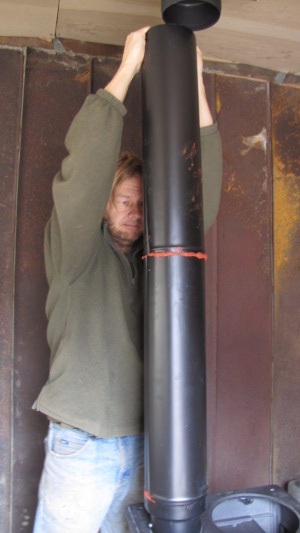
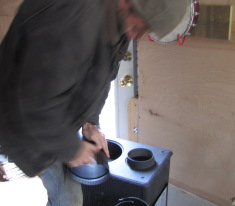
We got the new Jotul
woodstove installed onto the hearth today.
The first fire will need to
wait till we finish sealing up the chimney which is contingent on nice
weather for the cement to cure right.
One of these days I'll figure
out the secret to connecting a piece of stove pipe to itself. I'm not
sure if it's my technique or a weak design, but something tells me
there's a trick to snapping them together that must be easier than the
round about way I've been doing it.
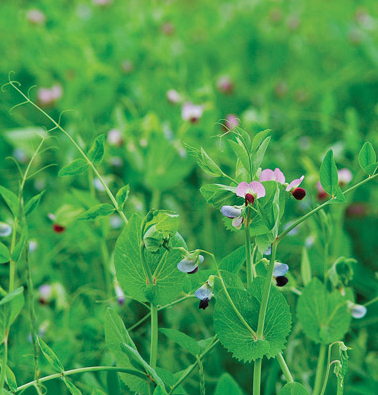 Last year, I remember
thinking that it was wasteful to have half of the garden fallow until
May, with some beds being held open all the way until June.
Sounds like a spot for spring cover crops!
Last year, I remember
thinking that it was wasteful to have half of the garden fallow until
May, with some beds being held open all the way until June.
Sounds like a spot for spring cover crops!
The goal for fall
cover crops is usually weed suppression and soil building, but
spring cover crops are often used to boost soil nitrogen so you don't
need to add so much compost to the soil. I've narrowed down our
spring cover crop choices to one familiar candidate and one newbie:
- Oats don't add nitrogen to the soil, but they can be planted much earlier than other spring cover crops. Although soil temperature is variable from year to year, I suspect we'll achieve their recommended planting temperature of 38 degrees Fahrenheit in February or early March. That will give the oats their full six to ten week growing season before I mow them down in mid to late April, and the leaves can decompose a bit and then provide mulch through the summer.
- Field peas are a good source of nitrogen and their flowers are an early source of nectar for honeybees too. Field pea residue breaks down quickly in the soil, so it's best to plant the legumes where I'm going to be direct-seeding summer crops and need bare soil. I suspect we can plant field peas in early March (minimum soil temperature 41 degrees Fahrenheit) and give them a couple of months to grow before mowing them down in time to plant our summer crops.
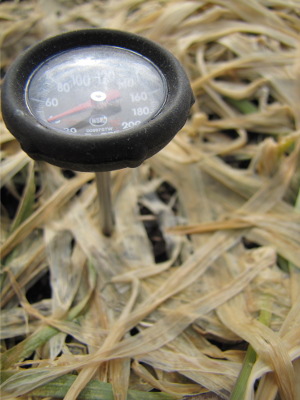 Since I have about 35 pounds
of oat seed leftover from the fall and only an expensive 1 pound of
field pea seeds on their way from Johnny's Select Seeds, I suspect I'll
plant mostly oats for my spring cover crop. I do want to try at
least one bed of oats and field peas together, though, since the two
make a good duo --- the oats give the peas something to grow up, and
when the cover crops are mowed down the high nitrogen peas give the
mixture a C:N ratio that promotes more rapid decomposition.
Since I have about 35 pounds
of oat seed leftover from the fall and only an expensive 1 pound of
field pea seeds on their way from Johnny's Select Seeds, I suspect I'll
plant mostly oats for my spring cover crop. I do want to try at
least one bed of oats and field peas together, though, since the two
make a good duo --- the oats give the peas something to grow up, and
when the cover crops are mowed down the high nitrogen peas give the
mixture a C:N ratio that promotes more rapid decomposition.
At the moment, though,
our soil temperature is hovering right around freezing (a little warmer
in the sunny mule garden and a little colder in the shadiest end of the
front garden), so I've got to wait a while before planting.
 I've
focused on the southeast and midwest in this lunchtime series because
I'm interested in what's going on in my own neck of the woods. If
you want to learn more about your part of the country, you might like
to check out some of the texts I used in my research. Here's
an annotated bibliography to get you started.
I've
focused on the southeast and midwest in this lunchtime series because
I'm interested in what's going on in my own neck of the woods. If
you want to learn more about your part of the country, you might like
to check out some of the texts I used in my research. Here's
an annotated bibliography to get you started.
Doolittle, W.E.
2002. Cultivated
Landscapes of Native North America. Oxford University Press.
Heilman, J.M., M.C.
Lileas, and C.A. Turnbow. 1988. A History
of 17 Years of Excavation and Reconstruction --- A Chronicle of 12th
Century Human Values and the Built Environment. Volume 1. The
Dayton Museum of Natural History, Dayton, OH.
 Lentz, D.L. 2000.
Imperfect
Balance: Landscape Transformations in the Precolumbian Americas. Columbia University
Press.
Lentz, D.L. 2000.
Imperfect
Balance: Landscape Transformations in the Precolumbian Americas. Columbia University
Press.
Scarry, C.M.
1993. Foraging
and Farming in the Eastern Woodlands. University Press of Florida.
And, of course, if
you're completely new to the topic and want to learn
a bit more about what North and South America looked like before
European contact, I highly recommend the mainstream books 1491, Indian Givers, and Guns,
Germs, and Steel.
What books do you think should go on the reading list of those
interested in Native American agriculture?
| This post is part of our Native American Paleoethnobotany lunchtime
series.
Read all of the entries: |
I've been paying attention to
the caulk section of building supply stores since this project began
and have observed only two choices when it comes to fire barrier caulk.
We used DAP
on the first stove. It
got the job done but was very stiff to work with. A salesman at the
store who helped us that day advised a liberal coat of water to loosen
it up so you could shape it into the areas you need. The color is black.
The second stove involved a
3M product that was much easier to work with but had a red tint to it,
which is no problem for me but might be an issue for someone concerned
with a color scheme.
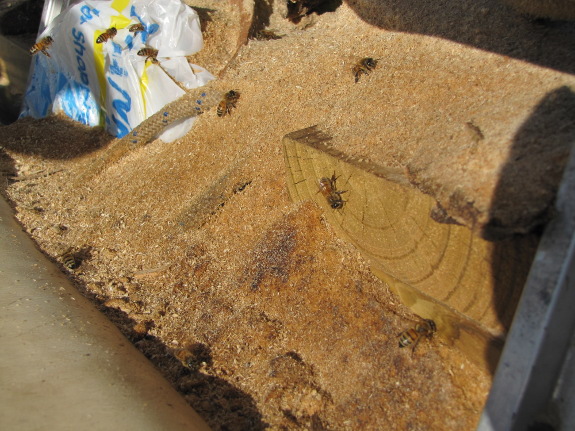
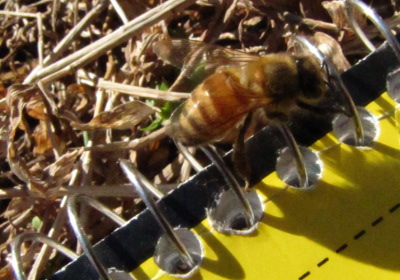 The bees and I agree --- when
it's fifty degrees in January, you have to be outside.
The bees and I agree --- when
it's fifty degrees in January, you have to be outside.
We also seem to share an
obsession with sawdust piles. With the whole world
soggy, I can't imagine our fuzzy friends flew all the way around the
trailer just to suck water out of some sawdust, so I assume they're
getting something more interesting. Minerals? Fungi? Any ideas?
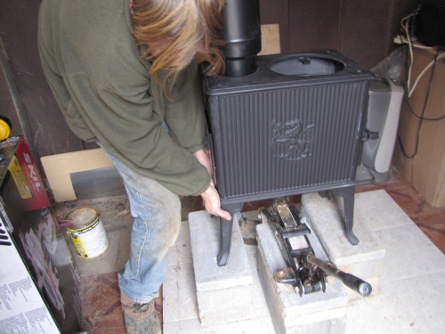 A
friend of mine asked me nicely while actually scratching his head why I
decided to install the Jotul woodstove "backwards".
A
friend of mine asked me nicely while actually scratching his head why I
decided to install the Jotul woodstove "backwards".
"Most folks start with the
stove and then install the pipe on top of each other".
That does make a lot of
sense, but jacking
the stove into the pipe
lets you slowly connect the pieces together, which require a bit of
adjusting to get fully seated, and taking this process a centimeter at
a time really decreases the grunt factor.
 Our
honeybees
were visiting my sawdust pile by the dozen yesterday, so I
decided to see if I could track down what they were up to. The
internet was not very helpful --- several people reported seeing
honeybees
visit sawdust in the early spring when there's nothing else around to
eat and they suggested that honeybees were collecting sawdust in lieu
of pollen. The sole piece of data backing up this assertion,
though, seemed to be the coincidence that pollen is absent in the wild
at this time of year and that this is the only season when people have
noticed honeybees collecting sawdust. While it's possible that
honeybees could be tricked into thinking that sawdust is pollen
(although at the bee scale, the two substances are orders of magnitude
different in size, shape and texture), I suspect that bees who expend
their precious winter energy on such a frivolous pursuit would die out
in the wild. Surely there's a better explanation.
Our
honeybees
were visiting my sawdust pile by the dozen yesterday, so I
decided to see if I could track down what they were up to. The
internet was not very helpful --- several people reported seeing
honeybees
visit sawdust in the early spring when there's nothing else around to
eat and they suggested that honeybees were collecting sawdust in lieu
of pollen. The sole piece of data backing up this assertion,
though, seemed to be the coincidence that pollen is absent in the wild
at this time of year and that this is the only season when people have
noticed honeybees collecting sawdust. While it's possible that
honeybees could be tricked into thinking that sawdust is pollen
(although at the bee scale, the two substances are orders of magnitude
different in size, shape and texture), I suspect that bees who expend
their precious winter energy on such a frivolous pursuit would die out
in the wild. Surely there's a better explanation.
Joey was visiting, and
he suggested that the bees might be extracting
some residual sap out of the sawdust. We reached down amid our
buzzing workers and snagged a pinch of sawdust apiece, then savored the
dust. At first, I couldn't taste anything at all, but after
Joey's more discerning palate caught a hint of nutmeg, I thought that I
might taste something too. No proof there, but it made for an
interesting photo.
As we continued to watch
the honeybees, I became relatively
convinced that they were putting something in their pollen baskets
rather than sucking the liquid out of the sawdust. I could see
the insects using their legs to push at their pollen baskets, and none
of the bees seemed to be sticking out their probosci. The
honeybees also seemed to be expending a lot of effort to kick through
the pollen in search of their desired object --- by midafternoon, the
pile of sawdust had turned from a volcano into a wide, squat
hill. Despite all this work, when I watched the bees returning to
the hive, I couldn't see any sawdust in the pollen baskets, suggesting
that the insects were collecting a much smaller substance than sawdust.
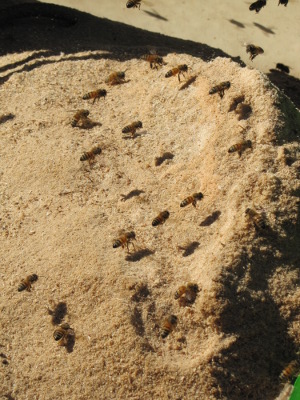 Back
to the internet I went, this time delving into the scientific
literature. Several scientists repeated the pollen dearth
maladaption hypothesis, but none cited any sources. Instead, I
was drawn to a series of articles by Dorothy Shaw, who reviewed over
100 years worth of reports on bees collecting fungal spores all over
the world. Most of the bees gathered spores from rusts or Neurospora, both of which have a
protein content comparable to high quality pollen (around 25%).
Although in some cases bees seem to collect fungal spores when other
foods are absent, other bees fly right past good pollen and nectar
sources to gather fungal spores, returning to the hive with 100% spores
in their pollen baskets. Shaw suggests that the high protein
content of the spores makes them a nutrition source comparable to
pollen and that collecting spores can sometimes be a better use of a
bee's time than gathering pollen since large masses of fungi allow the
bees to fill their pollen baskets quite quickly.
Back
to the internet I went, this time delving into the scientific
literature. Several scientists repeated the pollen dearth
maladaption hypothesis, but none cited any sources. Instead, I
was drawn to a series of articles by Dorothy Shaw, who reviewed over
100 years worth of reports on bees collecting fungal spores all over
the world. Most of the bees gathered spores from rusts or Neurospora, both of which have a
protein content comparable to high quality pollen (around 25%).
Although in some cases bees seem to collect fungal spores when other
foods are absent, other bees fly right past good pollen and nectar
sources to gather fungal spores, returning to the hive with 100% spores
in their pollen baskets. Shaw suggests that the high protein
content of the spores makes them a nutrition source comparable to
pollen and that collecting spores can sometimes be a better use of a
bee's time than gathering pollen since large masses of fungi allow the
bees to fill their pollen baskets quite quickly.
I can't prove that our
bees are picking through the sawdust in search of fungal spores, but
I'm guessing that's the case. If they're gathering rust spores, I
might be able to test my hypothesis next time I look in the hive since
scientists have been able to pick out rust spores stored in the brood
chamber of honeybee hives by looking for their bright orange
color. I remember seeing bright orange "pollen" in our hives
before, and now I wonder if I was actually seeing spores?
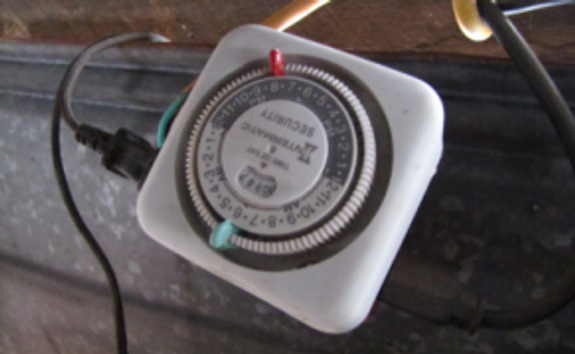
 The new
chicken water heater is
working well since we installed it.
The new
chicken water heater is
working well since we installed it.
I think the light may be
helping to stimulate an increase in egg laying during what is usually a
slow producing time of the year.
Do chickens sleep better with
the light off at night? I'm not sure, but to be on the safe side I
added a timer that shuts off a bit before my bedtime and comes back on
an hour before the crack of dawn.
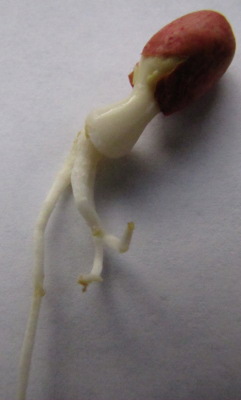 In
the past, I've planted
crops a certain number of days before or after our traditional
frost-free date.
But the more I think about it, the more the date-based approach feels
like eating your meals at set times with no wiggle room if you've been
chopping wood and are starving early or have been loafing around all
day and aren't really hungry at all. By planting seeds on set
dates, I'm trying to estimate times at which the soil temperature is
warm enough to let the seeds germinate and the air temperature is in
the right range to let the seeds grow well. So why not measure
soil temperature and plant seeds when I know it's warm enough?
In
the past, I've planted
crops a certain number of days before or after our traditional
frost-free date.
But the more I think about it, the more the date-based approach feels
like eating your meals at set times with no wiggle room if you've been
chopping wood and are starving early or have been loafing around all
day and aren't really hungry at all. By planting seeds on set
dates, I'm trying to estimate times at which the soil temperature is
warm enough to let the seeds germinate and the air temperature is in
the right range to let the seeds grow well. So why not measure
soil temperature and plant seeds when I know it's warm enough?
The table below tells
the minimum and optimum soil temperatures for germination of most
common vegetable seeds. For spring planting, you can probably get
away with planting at the minimum temperature (especially if you soak
the seeds to get them off to a quick start), but for many of the summer
vegetables it's often best to wait until you reach the optimum
temperature range.
| Vegetable |
Minimum
temp. (degrees F) |
Optimum
temp. (degrees F) |
| Beans |
60 |
60-85 |
| Cabbage |
40 |
45-95 |
| Carrots |
40 |
45-85 |
| Corn |
50 |
60-95 |
| Cucumbers |
60 |
60-95 |
| Lettuce |
35 |
40-80 |
| Muskmelons |
60 |
75-95 |
| Okra |
60 |
70-95 |
| Onions |
35 |
50-95 |
| Parsley |
40 |
50-85 |
| Peas |
40 |
40-75 |
| Peppers |
60 |
65-95 |
| Pumpkins |
60 |
70-90 |
| Spinach |
35 |
45-75 |
| Squash |
60 |
70-95 |
| Swiss chard |
40 |
50-85 |
| Tomatoes |
50 |
70-95 |
| Turnips |
40 |
60-105 |
| Watermelons |
60 |
70-95 |
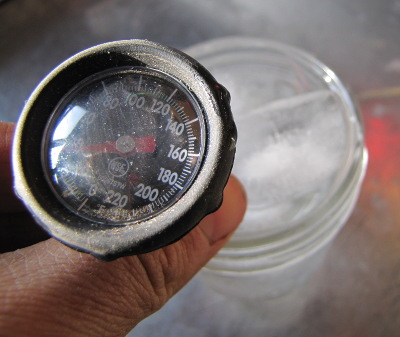 To test your soil
temperature, first calibrate your soil
thermometer in a jar
of ice water to check its accuracy. (The thermometer should read
32 degrees Fahrenheit.) Then stick the thermometer three to four
inches into the soil first thing in the morning and read the
temperature. If you don't have a soil thermometer, you can get a
rough estimate of your soil temperature by looking at this soil
temperature map.
To test your soil
temperature, first calibrate your soil
thermometer in a jar
of ice water to check its accuracy. (The thermometer should read
32 degrees Fahrenheit.) Then stick the thermometer three to four
inches into the soil first thing in the morning and read the
temperature. If you don't have a soil thermometer, you can get a
rough estimate of your soil temperature by looking at this soil
temperature map.If you're like me and are dying to put spring seeds in the ground as soon as possible, you can make the soil warm up more quickly by raking back your mulch, adding a thin layer of dark compost to the surface of the soil, laying down a sheet of black or clear plastic (although I don't like blocking off air to soil microorganisms), or building a cold frame or quick hoop. You should also be aware that the temperature of the upper layer of soil in your garden can change quite quickly --- a couple of degrees per day --- if a cold snap or warm spell hits your area, so even if the soil has reached 35, don't plant lettuce if an arctic blast is forecast for tomorrow.
 Natural Beekeeping: Organic
Approaches to Modern Apiculture by Ross Conrad is the
beekeeping equivalent of Weedless
Gardening or Gardening
When it Counts
--- an intermediate text for those of us who want to reach beyond the
mainstream, chemical techniques. I love these intermediate books
because they tend to turn me onto topics to experiment with on our own
homestead, but you have to take the whole category with a grain of
salt.
Natural Beekeeping: Organic
Approaches to Modern Apiculture by Ross Conrad is the
beekeeping equivalent of Weedless
Gardening or Gardening
When it Counts
--- an intermediate text for those of us who want to reach beyond the
mainstream, chemical techniques. I love these intermediate books
because they tend to turn me onto topics to experiment with on our own
homestead, but you have to take the whole category with a grain of
salt.
For example,
intermediate texts tend to fill up space with beginner's information
that their intermediate readers don't need while not providing enough
of
that basic info to take the place of a book like The Backyard
Beekeeper.
Especially in the case of this book, intermediate texts often lack
essential organization and are prone to extended bouts of
philosphizing. And although the author makes a concerted effort
to pull together
related information from the literature and from other beekeepers, Natural
Beekeeping is
essentially the summation of one man's experiences trying to raise
healthy hives without chemicals in Vermont. (Hmm, those flaws
sound a lot like the flaws of our blog....)
I guess what I'm trying
to say is, don't take any book like this as the
gospel, but do mine out as much data as possible. Which is
exactly what I've done for this week's lunchtime series. If
you've never petted a bee, the information I present might be too
confusing, but I hope established beekeepers will enjoy seeing a
different perspective on bee care.
| This post is part of our Natural Beekeeping lunchtime series.
Read all of the entries: |
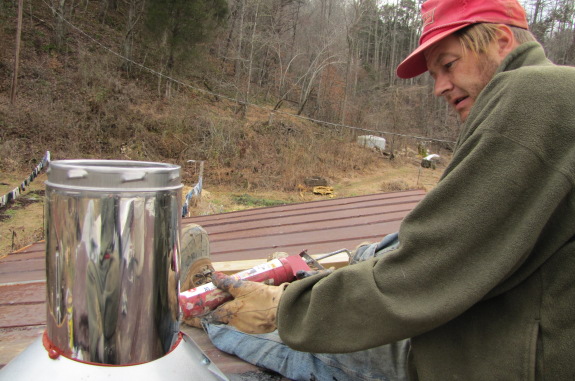
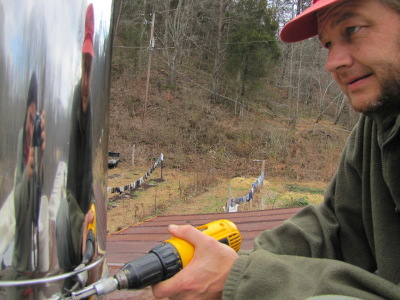
The new Jotul chimney is all sealed up and connected thanks to some
spring like weather today.
I'm guessing this part of the
process took about half as much time due to the difference
in the fire barrier caulking material.

Or explore more posts by date or by subject.
About us: Anna Hess and Mark Hamilton spent over a decade living self-sufficiently in the mountains of Virginia before moving north to start over from scratch in the foothills of Ohio. They've experimented with permaculture, no-till gardening, trailersteading, home-based microbusinesses and much more, writing about their adventures in both blogs and books.