
archives for 03/2010
 I
amused myself Sunday morning with a sudoku
puzzle --- figuring out which beds each crop will grow in this
year. The process is actually quite fun, with three axes to
consider --- soil depth, amount of sun, and plant family over the last
three years. As an example, I wanted carrots to grow in an area
with deep soil, where carrots and parsley hadn't grown lately, with any
kind of sun exposure. In contrast, my peas don't mind thinner
soil, but I want them in one of the sunniest spots since I
plant them so early, and of course the bed can't have hosted peas,
beans, or peanuts lately.
I
amused myself Sunday morning with a sudoku
puzzle --- figuring out which beds each crop will grow in this
year. The process is actually quite fun, with three axes to
consider --- soil depth, amount of sun, and plant family over the last
three years. As an example, I wanted carrots to grow in an area
with deep soil, where carrots and parsley hadn't grown lately, with any
kind of sun exposure. In contrast, my peas don't mind thinner
soil, but I want them in one of the sunniest spots since I
plant them so early, and of course the bed can't have hosted peas,
beans, or peanuts lately.
The puzzle was engrossing and fun, but I quickly realized that we don't
have enough beds in rotation to plant all of the veggies I hope to grow
this year. Two years ago, I was
working for a non-profit, trying to keep the garden
going between
writing grants and attending meetings. I was so stressed out,
that when I planned last year's garden, I cut out nearly a quarter of
the growing area. In farmer speak, I let those areas go fallow;
in Anna speak, the weeds grew up.
The downside of last
year's smaller garden is that we didn't
grow quite enough vegetables to make it through this winter.
We'll probably have to buy some veggies in March and April, which is an
unpleasant surprise since we we haven't bought vegetables (beyond
onions and potatoes) in years.
On the upside, I managed to keep the beds that were in rotation last
year well weeded and mulched and started to cut down on the awful weed
population that grew up during my stressed out, non-profit year.
Overall, a year of gardening smaller made sense and was an asset to the
farm (and my sanity.)
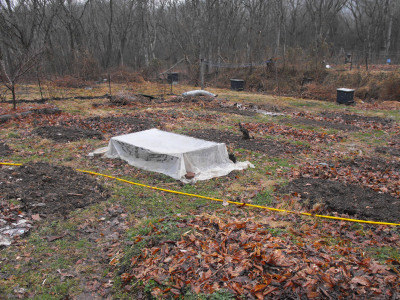
 Even though I advocate no-till
farming, I never
manage to put down a sheet mulch a
year in advance to start new beds (or re-start fallow
ones.) So, I'm
back to a bit of digging to delete the weeds from last year's fallow
beds. I like to plant potatoes in these
spots, since the tubers necessitate a second round of digging in the
fall, ensuring that few deep-rooted weeds survive the renovation
year.
Even though I advocate no-till
farming, I never
manage to put down a sheet mulch a
year in advance to start new beds (or re-start fallow
ones.) So, I'm
back to a bit of digging to delete the weeds from last year's fallow
beds. I like to plant potatoes in these
spots, since the tubers necessitate a second round of digging in the
fall, ensuring that few deep-rooted weeds survive the renovation
year.
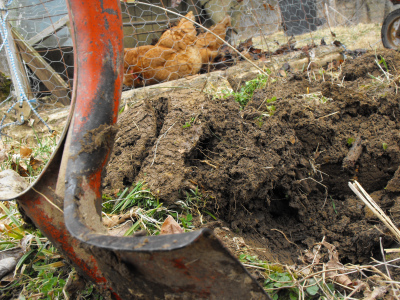
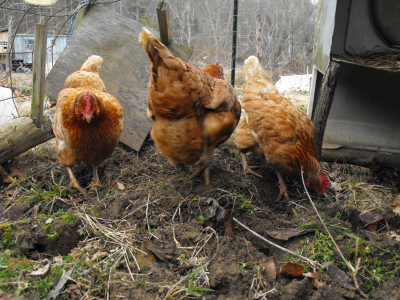
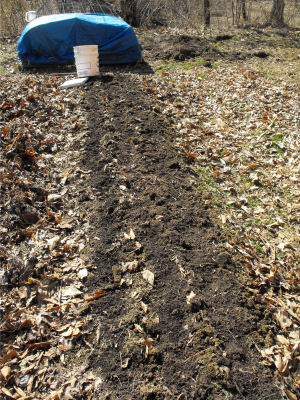
On Sunday, I dug up a
few of the beds, just spading the
soil enough that the chickens could get a foothold, then watched as our
feathered friends went to town scratching up the soil. After a
few days of chicken scratching (and fertilizing), I'll rake the beds to
pull out any big root masses, mound the soil back up, and cover the
renovated beds with a heavy leaf
mulch. This
method has worked very well in the past, as long
as I plant the potatoes on raised mounds --- last year I flubbed by
putting the seed potatoes below the original ground level and watched
them rot in our wet soil. Hopefully this fall, I'll have
delicious potatoes and some newly weed-free beds.
 Microhydro:
Clean Power From Water
by Scott Davis is written at a sixth grade reading level...and that's a
good thing. I'm far from ready for an installation guide;
instead, I just wanted to know if microhydro is feasible on our farm.
Microhydro:
Clean Power From Water
by Scott Davis is written at a sixth grade reading level...and that's a
good thing. I'm far from ready for an installation guide;
instead, I just wanted to know if microhydro is feasible on our farm.
Although most people
with an interest in alternative energy go straight to solar cells,
microhydro
can be a much more economical option if your terrain is right.
I've read estimates suggesting that consumer-level microhydro systems
are between 5 and 40 times as cost effective as photovoltaic systems,
in large part because water is much less intermittent than the sun so
you don't need as many batteries.
Scott Davis divides
microhydro systems into five levels, only two of which are of interest
to me. The bare essentials level will run lights and small
appliances (like a microwave, radio, telephone, blender, stereo, and
laptop) while the modern conveniences level adds in efficient
refrigerators, freezers, and well pumps. A microhydro system
running the bare essentials can be put together for as low as $2,000
(or possibly even less if you scrounge some parts) while the modern
conveniences level can cost two to three times that much.
Finally, an alternative energy source that wouldn't put us into debt!
| This post is part of our Microhydro lunchtime series.
Read all of the entries: |

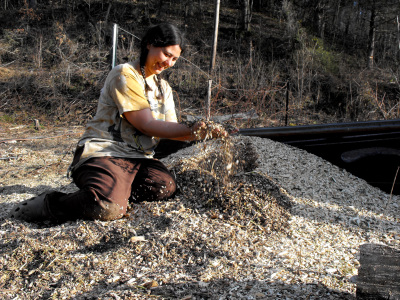
Each round
of gravel shoveling yields a few improvements on our technique.
 Painters
make conscious choices about their pictures' edges because the edges
play a large role in the painting's impact. Ecologists know that
edges promote a diversity of species, more than can be found in either
habitat which the edge joins.
Painters
make conscious choices about their pictures' edges because the edges
play a large role in the painting's impact. Ecologists know that
edges promote a diversity of species, more than can be found in either
habitat which the edge joins.
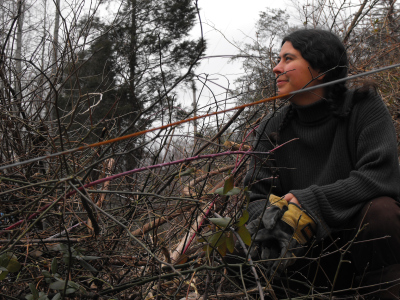
I've been pondering
edges as I whack back encroaching Japanese honeysuckle, sassafras saplings, and
brambles along the boundary of our garden. I've noticed that my
vegetables are sensitive to even the slightest bit of shade, and that
the boundary beds closest to the thicket produce about half as many
vegetables as do plants in more interior beds. These brushy edges
also delight the deer, who feel safer encroaching
if they can retreat back out of sight in just a few bounds.
Over the last few years,
we've been beating back the edges, first clipping the woody plants,
then running the chicken
tractors across
them, and finally beginning to mow them into a semblance of a
lawn. I don't believe in lawns for prettiness sake, but I do find
them very useful as a way to keep the forest edges from encroaching on
our garden, and the mixed herb pasture keeps our chickens happy.
 Power usage numbers were the first part of Microhydro that caught my
attention. Scott Davis considers a
system rated at 50 to 100 continuous watts to be the bare essentials
level (running lights and small appliances). This equates to only
35 to 70 kilowatt-hours per month! The
amount of juice put out by even the so-called modern conveniences level
seems
inconceivably low at 75 to 125 kwh/month.
Power usage numbers were the first part of Microhydro that caught my
attention. Scott Davis considers a
system rated at 50 to 100 continuous watts to be the bare essentials
level (running lights and small appliances). This equates to only
35 to 70 kilowatt-hours per month! The
amount of juice put out by even the so-called modern conveniences level
seems
inconceivably low at 75 to 125 kwh/month.For comparison's sake, the average American household uses 936 kwh/month. During our lowest energy month ever (this past June), we came in at 270 kwh. Running a household on 75 kwh/month seems almost inconceivable to me.
But Scott Davis makes the excellent point that artificially low electricity prices in North America have led to extremely wasteful behavior. Specifically, he notes that electricity should never be used for making heat --- since you lose a lot of power every time you convert energy from one form to another, burning coal to make electricity to make heat is a bad idea.
His example household that runs all of the modern conveniences on microhydro deletes any heating appliances from the mix. Clothes driers, of course, are replaced by the good old solar clothesline. Rooms are heated with wood or passive solar while water is heated with solar hot water heaters in the summer and coils around the wood stove in the winter. Finally, cooking is done on propane (or, I would add, on a rocket stove.)
As always, the best and cheapest way to save energy is to become more efficient, so I think we'll do some basic efficiency tricks before saving up for an alternative energy system. Our biggest energy hogs are clearly our electric stove (which heats our water as well as cooks our dinners) and our back-up space heaters, so these seem like a good place to start.
| This post is part of our Microhydro lunchtime series.
Read all of the entries: |
Video credit goes to Anna for capturing this 38 second driveway moment.
 Next
week, the cuteness quotient of the Walden
Effect will be rising considerably. We ordered 16 chicks as the
first step in solving our chicken
reproduction problem.
The goal is to start a self-sustaining
flock in a forest pasture --- which I'll be explaining in much greater
depth next week on our chicken
blog.
Next
week, the cuteness quotient of the Walden
Effect will be rising considerably. We ordered 16 chicks as the
first step in solving our chicken
reproduction problem.
The goal is to start a self-sustaining
flock in a forest pasture --- which I'll be explaining in much greater
depth next week on our chicken
blog.
After a great deal of research, we settled on the Dark Cornish as this
year's experimental chicken breed. Unlike the white, waddly
Cornish Cross chickens that share their name (and a bit of their
genetics), Dark Cornish chickens are wiley and nearly feral in their
ability to sustain themselves on pasture. They are also very good
at avoiding predators, and one blog even suggested that Dark Cornishes
can kill a marauding fox!
The only disadvantage of the Dark Cornish is that the chickens take
about twenty
weeks to reach cooking size, far longer than most other broilers.
But I've read that their flavor more than makes up for the wait.
If our forest pasture experiment works out, feed costs won't be an
issue, so we're excited to give the new system a shot.
Despite
wanting to consider energy efficiency first, I was still curious
whether the copious water on our farm would be a good fit for
microhydro power. The first step in assessing a site for
microhydro is to measure stream flow. Scott Davis suggests two
easy methods.
The
weir method
is used in
large streams or rivers. The water flows through a notched weir
that forms a waterfall. You can use various tables or formulas to
determine the flow rate of your creek based on the width and depth of
the water in the weir's notch. I didn't feel like constructing a
weir, so I moved on to option 2.
The
container method
consists of finding a spot where all of the creek's water runs through
a culvert or pipe, then sticking a five gallon bucket underneath.
Time how long it takes for your bucket to fill up, then use the
following formula to determine your stream's flow:
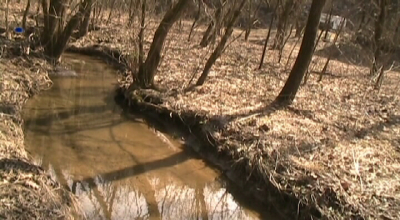
As you can see in the
embedded video, I found a spot where a
huge root mass had channeled all of our smaller creek's water into a
waterfall, so decided to try out the container method of estimating
stream flow. I couldn't fit a five gallon bucket under the
waterfall, but a one gallon cook pot slipped right in between the roots
and filled up in 3 seconds. Our flow in that creek is
approximately:
Our
smallest creek's flow is pretty low, but is definitely within the realm
of microhydro power. In fact, Scott Davis notes that you can get
power from streams running as slowly as 2 gpm (gallons per minute.)
| This post is part of our Microhydro lunchtime series.
Read all of the entries: |
There's a really good
wiki-how that sums up what you need to know about sharpening your
chainsaw with a hand file.
It seems the experts suggest
a machine grinding at a shop after every 5 hand sharpening episodes.
You can buy small attachments
for a Dremel to make the job easier, but these little hand files are a
lot cheaper.
 Last
year, a couple of friends teamed up and bought us a dozen beautiful blueberry
plants in honor of
our wedding. We were sorely unprepared, so we only managed to
whack down box-elders and open up the canopy, then roll the logs out of
the way and plant the bushes in new ground. This oversight caused
a lot of problems since I couldn't really get the lawnmower around the
logs, and by the middle of the summer, our blueberry patch had turned
into a weed patch. Luckily, the blueberries survived the neglect,
and I promised them a more weeded existence this year.
Last
year, a couple of friends teamed up and bought us a dozen beautiful blueberry
plants in honor of
our wedding. We were sorely unprepared, so we only managed to
whack down box-elders and open up the canopy, then roll the logs out of
the way and plant the bushes in new ground. This oversight caused
a lot of problems since I couldn't really get the lawnmower around the
logs, and by the middle of the summer, our blueberry patch had turned
into a weed patch. Luckily, the blueberries survived the neglect,
and I promised them a more weeded existence this year.
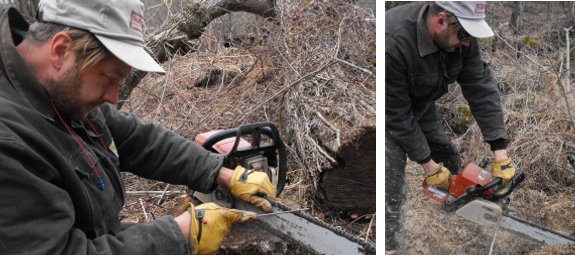
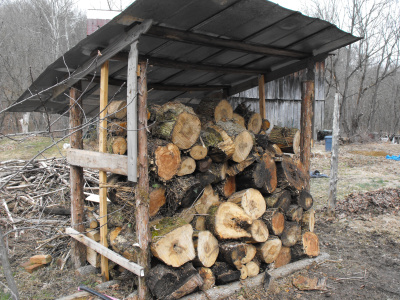
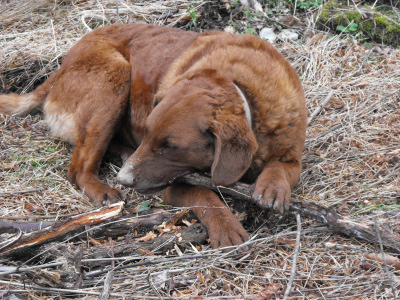 We
spent the morning Wednesday clearing up the tree carcasses in the
blueberry patch to make this year's mowing much easier. Mark's
hard work with the chainsaw netted us half a cord of
firewood, now drying in the woodshed, and my branch piles are growing
too. Our chipper rental date is tentatively set for
this weekend, but Lucy didn't want to wait --- she did her part to
increase the farm's wood chip supply while we cleared the brush.
We
spent the morning Wednesday clearing up the tree carcasses in the
blueberry patch to make this year's mowing much easier. Mark's
hard work with the chainsaw netted us half a cord of
firewood, now drying in the woodshed, and my branch piles are growing
too. Our chipper rental date is tentatively set for
this weekend, but Lucy didn't want to wait --- she did her part to
increase the farm's wood chip supply while we cleared the brush.
The
other important measurement to take when assessing your creek for
microhydro is pressure or head. The two terms are different
measurements of the same thing --- potential energy just waiting to
turn your turbine and make some power.
Many homesteaders pipe
water from a spring down to their house, and the energy in the water
line can be tapped for microhydro power. To measure pressure
directly in such a situation, install a gressure gauge in the line and
read the dial.
If you don't already
have a water line in place, you're better off calculating a stream's
head
rather than measuring pressure directly. Head is simply the
change in elevation between the highest and lowest points of a stream,
and it can be measured in several different ways. If you have a
gps or watch with an altimeter, this can give a rough measurement of
the respective elevations, but I found the water level method (outlined
in the embedded video) to be the
simplest.
To measure head using
the water level method, find an inflexible length of pipe and start at
the stream's highest point. Completely submerge the pipe, then
slowly lift the downhill end out of the water. Creek water will
flow out of the pipe's downhill end until it is raised level with the
uphill end, at which point water will stop flowing. Measure the
vertical distance between the downhill end of the pipe and the ground
and you have the change in elevation between the two points. Now
scoot the pipe downstream until the uphill end rests where the
downhill end used to be, and repeat your measurement. Lather,
rinse, and repeat until you run out of shampoo...er, reach the end of
the stream. The head is the sum of all of the elevations measured
along the creek's length.
The downfall of our
property's creeks is their valley-bottom flatness. Our small
creek has the largest head, and even there the total change in
elevation is
barely over three feet. Granted, microhydro applications can work
with as little as 2 feet of head, but the setup becomes much pricier if
your head is less than 50 feet.
| This post is part of our Microhydro lunchtime series.
Read all of the entries: |
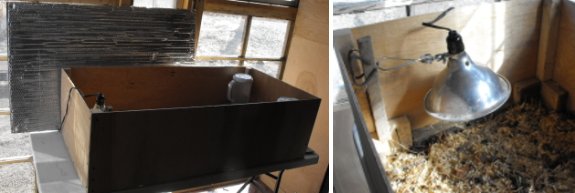
We decided to make the new home
made brood coop big enough to handle the little styrofoam incubator
for future chick operations.
The trick will be to monitor the temperature over the weekend to see if
any adjustments need to be made.
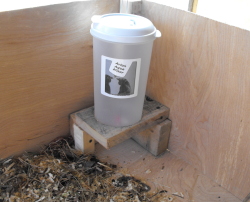
I used a few scrap pieces of
2x4 to secure up each corner, which worked nicely as a support for both
Avian Aqua Misers.
 Every
morning this week, I've woken up to a light coating of snow on the
ground. The snow cover gently melts off by lunchtime, meaning
that the soil in the floodplain has been too wet to drive on since
Tuesday. As a result, we couldn't haul in loads of manure
from our neighbor to
fertilize the onion beds I need to plant this
week. What could I do?
Every
morning this week, I've woken up to a light coating of snow on the
ground. The snow cover gently melts off by lunchtime, meaning
that the soil in the floodplain has been too wet to drive on since
Tuesday. As a result, we couldn't haul in loads of manure
from our neighbor to
fertilize the onion beds I need to plant this
week. What could I do?
The obvious solution is
chicken manure, but onions like soil high in organic matter and chicken
manure melts into the ground almost like chemical fertilizers.
Clearly, I needed humus. But I wasn't keen on the idea of
carrying heavy five gallon buckets a third of a mile from the parking
area to the garden.
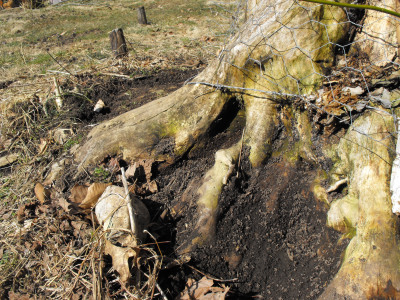
 As
I stood peering around me with furrowed brow, I noticed Lucy digging
frantically around a tree stump. Four years ago, we cut down
young forest in the mule garden, but we left the stumps in place since
I refused to let Mark buy dynamite and blow them out. We've been
mowing and working around them ever since.
As
I stood peering around me with furrowed brow, I noticed Lucy digging
frantically around a tree stump. Four years ago, we cut down
young forest in the mule garden, but we left the stumps in place since
I refused to let Mark buy dynamite and blow them out. We've been
mowing and working around them ever since.
I'd forgotten about the
stumps, but Lucy hadn't. She was hard at work rooting out a shrew
at one stump's base. If I'd been in a comic strip, a light would
have gone off above my head at that moment. "Lucy digs for
shrews, shrews love earthworms, earthworms love compost, and I want
compost..."
I pushed Lucy aside, and
ran my fingers through the rich stump
dirt that had been
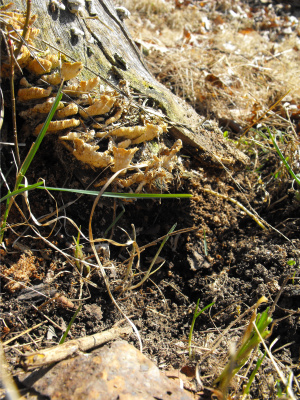
sitting right in front of my face. Over the last four years, turkey tail fungi
had colonized the stumps and broken the cellulose down into
compost. By digging around at the soil line, I quickly came up
with four beautiful bucket-loads of the soft, fluffy compost.
Thanks, Lucy!
 The
final step of assessing your stream for microhydro is doing a bit of
math to determine the creek's power. I'm simplifying a bit here
because you will lose some power due to friction as the water rubs up
against the inside of your pipe, but this formula is good enough for
estimating whether your creek is worth looking into further.
The
final step of assessing your stream for microhydro is doing a bit of
math to determine the creek's power. I'm simplifying a bit here
because you will lose some power due to friction as the water rubs up
against the inside of your pipe, but this formula is good enough for
estimating whether your creek is worth looking into further.
If you'd rather have
your estimated energy output in kwh/month so that you can compare it to
your electric bill, continue on to this formula:
So, it's finally time to
see if our little creek passes the test. She puts out 20 gpm of
water and has a head of about 3 feet. So:
Power output = 20 gpm X 3 ft ÷ 10 = 6 continous watts
Kwh/month = 6 continuous watts X 0.72 = 4.3 kwh/month
Sadly, our little creek
failed miserably --- that would be enough to keep the lights on in our
house, but nothing more. As a rule of thumb, you need either a
large head or a large flow to make microhydro appealing, and our little
creek had neither.
On the other hand, we
have several other possibilities on our property that look more
appealing. If we were willing to pay a lot for a run of the river
system, or to build a big dam, our primary creek would definitely
provide all of our power. On the cheaper side, it's possible that
it would be worth our while to tap energy from the spring that comes
out way up on the hill, although it does stop flowing during dry
weather.
Finally, I'm curious
whether there would be a way to make electricity from the water running
off the barn roof if we installed gutters. I envision using tanks
as a storage system and just letting the water leak out slowly, rather
than buying expensive (and environmentally unfriendly batteries.)
I estimate that nearly 4,000 gallons of water flow off the roof each
month, but I guess that's only 0.09 gpm. Back to the drawing
board....
| This post is part of our Microhydro lunchtime series.
Read all of the entries: |
The occasional water line
damage is to be expected when your wife is just starting to learn the
finer points of 40
caliber marksmanship.
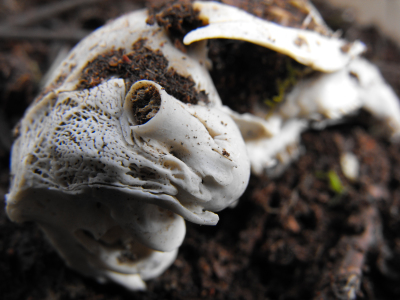 While
digging around in the stump
dirt Thursday, I
uncovered some found art. Lucy must have buried a carcass in the
base of the stump because my scrabbling fingers turned up tufts of fur
and leg bones...and then this perfect skull.
While
digging around in the stump
dirt Thursday, I
uncovered some found art. Lucy must have buried a carcass in the
base of the stump because my scrabbling fingers turned up tufts of fur
and leg bones...and then this perfect skull.
I found a very useful key for
identifying mammal skulls and soon discovered the
skull's owner. The answer is after the second picture for those
who want to guess.

The first distinguishing
feature is the large gap between the majority of the teeth and the
incisors, which determines that the animal was either a rodent or a
rabbit. If you look closely below the big incisors at the front
of the jaw, you'll notice two smaller teeth tucked back into the
skull. These peg teeth are used for grabbing or cutting food and
identify my skull as a rabbit.
I find skulls endlessly
fascinating and once had a collection, but eventually learned that
collections bog me down. So I gave this rabbit to our winesap
apple tree as a source of
calcium.
Last week's Arctic
homesteading documentary
really managed to stay with me and inspired a medium sized search for
another similar type story.
That seems like all there is
of the free stuff, but the Homestead National Monument
of America just updated
the movie that plays in their Museum. It's not online yet, but if
you're in or near the Beatrice Nebraska zipcode you might want to plan a visit.
160 acres of land free for
the taking sounds like a good deal, but I'm not sure if I would have
gone for such a dream if I were alive back then. I guess it would
depend on if there were any other options at the time.
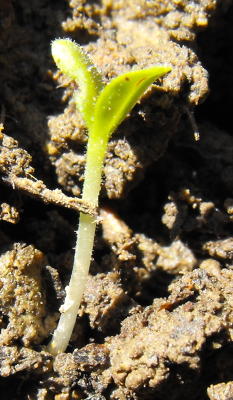 The
lettuce I planted a solid month ago in a cold frame is up at long
last. Usually, we would
have been eating the February lettuce by now and would have planted
a bed of March lettuce to eat next month. But this abnormally
cold winter has resulted in abnormally cold soil which sets our seeds
back.
The
lettuce I planted a solid month ago in a cold frame is up at long
last. Usually, we would
have been eating the February lettuce by now and would have planted
a bed of March lettuce to eat next month. But this abnormally
cold winter has resulted in abnormally cold soil which sets our seeds
back.
Luckily, I can tell that
the ground temperatures are finally rising. Not only is the
lettuce up, but our water line has started thawing during the days ---
more signs of spring!
On the bad news side,
I've been overdoing it and my carpal tunnel is flaring up. That
means I don't sleep well, which means I'm grumpy and my head goes wonky
during the day. I apologize if nothing I write makes sense. 
This short video provides an
accurate yet boring picture of how the
rental chipper cuts a rug.
Our share ended up being 1/3
of the weekend time which worked out to be
65 dollars.
It was a great opportunity
that would not have been possible without
our neighbors' suggestion of sharing the time and the aid of their
tractor to pull the thing all the way back here. Well worth waking up
early tomorrow morning to drive it back to it's home in the big city.
I imagine this might be the
closest thing we have to participating in
an old fashioned barn raising which is too bad because this neighborly
cooperation thing is a pretty darn good feeling at the end of the day.
 Wood
chips make me chipper. What can I
say --- some women like roses, but I like mulch, even if it won't be
properly aged until several months from now.
Wood
chips make me chipper. What can I
say --- some women like roses, but I like mulch, even if it won't be
properly aged until several months from now.
We spent most of the day Saturday over at our neighbors' helping them
chip the biggest pile of saplings I've ever seen. Sunday
afternoon it was our turn. One neighbor drove the chipper over to
our place with his amazingly huge tractor, and then we chipped up a
storm for about four hours before giving in to exhaustion.
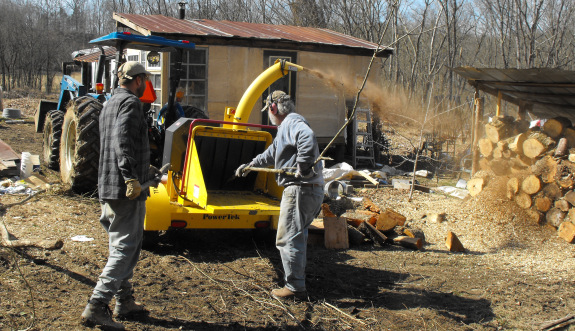
 Despite
being pleased as punch about our wood chips, I have to admit
that I think the chipper rental won't be an experiment we'll be
repeating. Once I put on my wrist braces, my carpal tunnel
simmered down, but it was still an awfully wearing weekend for about as
many chips as we could get for free if we
hunt down the utility line
guys. Add in a few hours drive to pick up and drop off the
chipper, and we might have been just as well off to buy mulch.
Despite
being pleased as punch about our wood chips, I have to admit
that I think the chipper rental won't be an experiment we'll be
repeating. Once I put on my wrist braces, my carpal tunnel
simmered down, but it was still an awfully wearing weekend for about as
many chips as we could get for free if we
hunt down the utility line
guys. Add in a few hours drive to pick up and drop off the
chipper, and we might have been just as well off to buy mulch.
On the other hand, we did clear up some brushy edges that needed work,
and I have my wood chip piles segregated into partially decomposed (for
mulching with this year), fresh pine (for mulching the blueberries next
year),
and fresh box-elder (for planting mushrooms in.) The control
freak
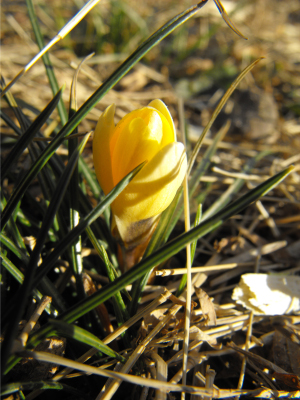
in me is well pleased. And, look, the year's first crocus!!
 As you've probably surmised,
I'm intrigued by traditional methods of gardening and farming. In
previous lunchtime series, I've explored Central
American farming, Chinese
farming, and tropical
forest gardens from around the world. This week I want to
look at a gardening technique that is much less exotic --- British
cottage gardening.
As you've probably surmised,
I'm intrigued by traditional methods of gardening and farming. In
previous lunchtime series, I've explored Central
American farming, Chinese
farming, and tropical
forest gardens from around the world. This week I want to
look at a gardening technique that is much less exotic --- British
cottage gardening.
The
Cottage Garden by
Christopher Lloyd is a pretty and chatty book, perfect for flipping
through when you're yearning for spring. It's nearly a picture
book, and doesn't have any in depth information, but the book is a
helpful look at the tradition that helped give rise to Robert
Hart's forest gardening. Cottage gardening
also has something to teach anyone who strives to be self-sufficient.
| This post is part of our Cottage Garden lunchtime series.
Read all of the entries: |
Dropped off the rental
chipper bright and early today in Kingsport which happens to be
down the road from the Mulch store.
We bought 2 cubic yards of
double ground, slightly aged mulch for 48 bucks.
Anna got a bit weak in the knees from her first handful and sniff not
unlike the reaction you see when a wine expert gets his or her hands on
a glass of 1943 Chateau Picard.
 When
it snowed the first four days of March, I started feeling like maybe we
weren't getting spring this year. But then came four days of
brilliant sun, and our farm now looks completely different.
When
it snowed the first four days of March, I started feeling like maybe we
weren't getting spring this year. But then came four days of
brilliant sun, and our farm now looks completely different.
As I worked more buckets
of stump
dirt into the garden and planted greens, I felt like I was living
in the climax of How the
Grinch Stole Christmas:
It came without droughts!
It came without lettuce,
spring peepers, or sprouts!
And what happened then...?
Well...on our farm they say,
That my tiny winter heart
grew three sizes that day!
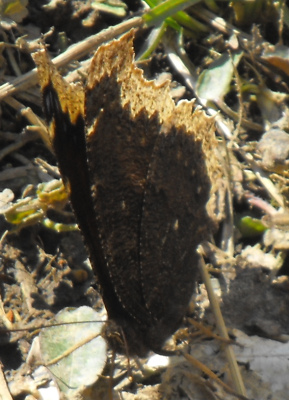
Not only did my heart
grow three sizes, I saw two species of butterflies out flitting about
--- the Mourning Cloak I captured in pixels and either a Comma or
Question Mark. The bees were foraging in earnest, though I didn't
take the time to hunt down their quarry. Best yet, Mark got the golf
cart all the way out to the parking area with just a bit of
encouragement. We're back in business!
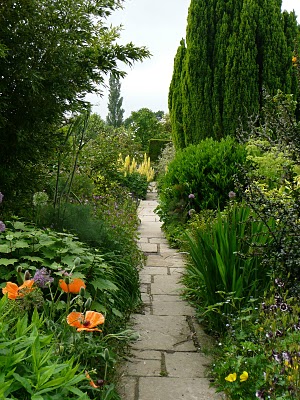
 The
cottage garden arose naturally over the last half millenium as British
peasants planted gardens around their small houses. These were
hard-working laborers who didn't have the time or energy to spare for
mere prettiness, so they planted large vegetable, herb, and fruit
gardens, interspersed with a few flowers. The cottage garden
traditionally held a pig sty, a chicken coop, and bee hives as well to
round out the cottager's fare.
The
cottage garden arose naturally over the last half millenium as British
peasants planted gardens around their small houses. These were
hard-working laborers who didn't have the time or energy to spare for
mere prettiness, so they planted large vegetable, herb, and fruit
gardens, interspersed with a few flowers. The cottage garden
traditionally held a pig sty, a chicken coop, and bee hives as well to
round out the cottager's fare.
Around the end of the
eighteenth centuries, these poor peasants were
joined by the first wave of back-to-the-landers. Members of the
gentry began to idealize the cottage life and to create their own
cottage gardens. This is when the cottage garden began to veer
toward prettiness for its own sake, with scads of flowers often
replacing the original mixture of edible plants and animals.
In either case, though,
cottage gardens were beautiful. While the
vegetable patch was usually planted in bare, straight rows, the rest of
the garden consisted of plants pushed together until no soil could be
seen between the leaves. This informal clumping is the signature
feature of the cottage garden and can also be seen in the hodge-podge
of closely packed plants in Robert
Hart's forest garden.
| This post is part of our Cottage Garden lunchtime series.
Read all of the entries: |
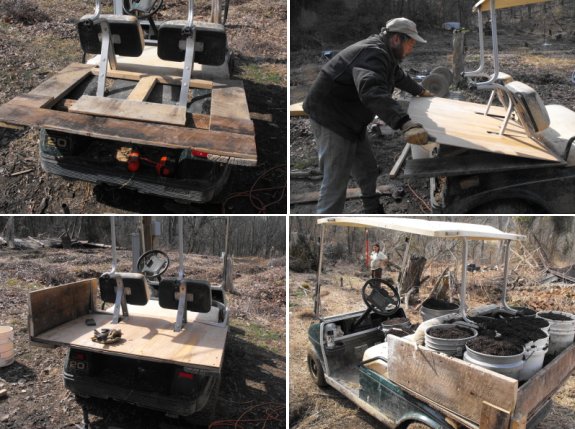
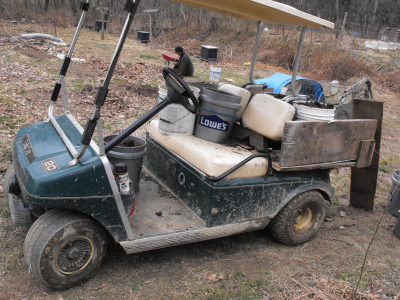
Total cost on this home made
golf cart dump box was just over 5 bucks thanks to using scrap
wood from the old house.
It expands the back hauling
capacity of the golf cart from 2 buckets to 7, with about 3 buckets
worth in between the cracks.
Next up is a wooden rack to
take advantage of some space up front.
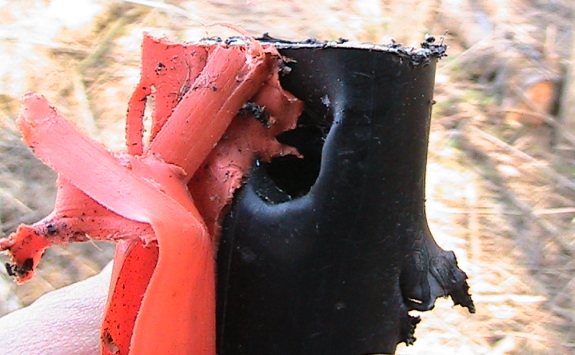
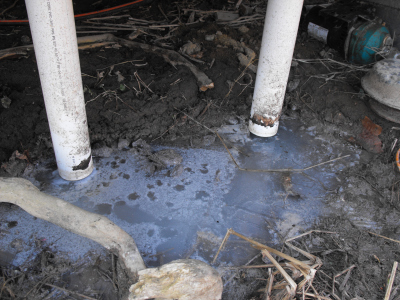 These
are our straight pipes. The operation isn't as environmentally
unfriendly as it sounds since the water only flows from our kitchen
sink, the worst pollutants are a bit of dish soap and toothpaste, and
there's no way any of it can run into the creek. Still, the
cesspool is unsightly, and Lucy likes to drink out of it, which we
highly disapprove of. Time for some mycoremediation!
These
are our straight pipes. The operation isn't as environmentally
unfriendly as it sounds since the water only flows from our kitchen
sink, the worst pollutants are a bit of dish soap and toothpaste, and
there's no way any of it can run into the creek. Still, the
cesspool is unsightly, and Lucy likes to drink out of it, which we
highly disapprove of. Time for some mycoremediation!
This is a hunk of King
Stropharia (aka Winecap) sawdust spawn. When we put in our
mushroom order this winter, I asked Mark if we could experiment with a
five pound bag of this new species. I told him how King
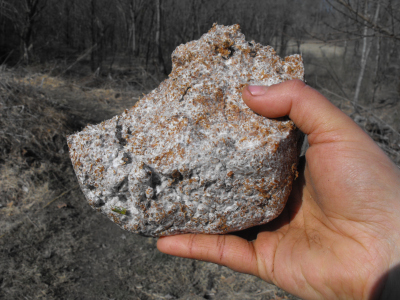 Stropharia is great at filtering graywater and is also a food source
for honeybees.
But Mark still seemed displeased by my order. "Should I back off
to two pounds?"I asked. "Nope," Mark countered. "Double
it! Double it!"
Stropharia is great at filtering graywater and is also a food source
for honeybees.
But Mark still seemed displeased by my order. "Should I back off
to two pounds?"I asked. "Nope," Mark countered. "Double
it! Double it!"
Just
in case you're curious, ten pounds of King Stropharia sawdust spawn is
enough to innoculate just over a cubic yard of wood chips. I
broke the spawn down into two pound sections so that I could innoculate
several smaller beds. First, I mounded up our fresh wood
chips to a depth of
about six inches, then I crumbled up the appropriate amount of sawdust
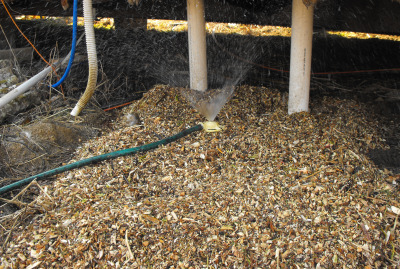 spawn to put on top. I covered the spawn with about an inch of
additional woodchips to protect it from drying out, then set up the
sprinkler and soaked the whole operation for a while. I'll need
to check every day for the next few weeks to make sure the mushroom
beds stay damp, watering them as necessary. Then there's no work
involved until the mushrooms appear this summer.
spawn to put on top. I covered the spawn with about an inch of
additional woodchips to protect it from drying out, then set up the
sprinkler and soaked the whole operation for a while. I'll need
to check every day for the next few weeks to make sure the mushroom
beds stay damp, watering them as necessary. Then there's no work
involved until the mushrooms appear this summer.
In addition to our
graywater filtration bed, I'm experimenting with four other
locations. Three are under the canopy of our young peach and
nectarine trees, and the fourth is out in the open but in a very damp
spot. Hopefully the spawn will take hold in at least one bed so
that next year we'll know what optimal King Stropharia habitat looks
like.
 The
traditional cottage garden had to be enclosed by a fence, hedge, or
wall to prevent wandering sheep from eating up the plants. Of
these three options, a hedge
was the most traditional enclosure since it was cheap and relatively
easy to create. A well developed hedge kept livestock and wind
out of the garden with ease.
The
traditional cottage garden had to be enclosed by a fence, hedge, or
wall to prevent wandering sheep from eating up the plants. Of
these three options, a hedge
was the most traditional enclosure since it was cheap and relatively
easy to create. A well developed hedge kept livestock and wind
out of the garden with ease.
Traditional British
hedges often contained a mixture of native trees,
roses, hazelnuts, blackberries, forsythia, quince, damsons, and
hawthorns. Christopher Lloyd noted that hedges did double-duty,
both keeping out unwanted livestock and providing edible plants without
taking up valuable garden space. The hedges did require trimming
once or twice a year, but that was a small price to pay for free and
tasty fencing.
| This post is part of our Cottage Garden lunchtime series.
Read all of the entries: |
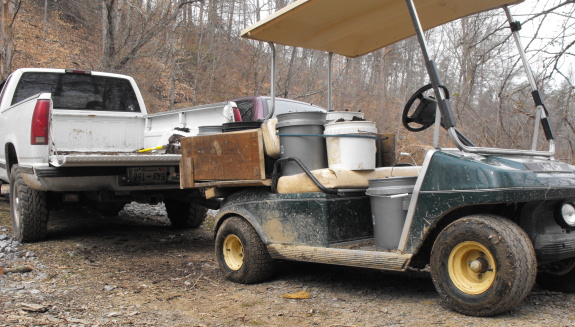
Today I discovered that 7
buckets of manure in the back with 3 buckets riding shotgun and 2
buckets of gravel on the floor board is about the load limit for the
new home
made golf cart dump box.
I can't believe it took us
this long to make such an obvious improvement in carrying capacity.
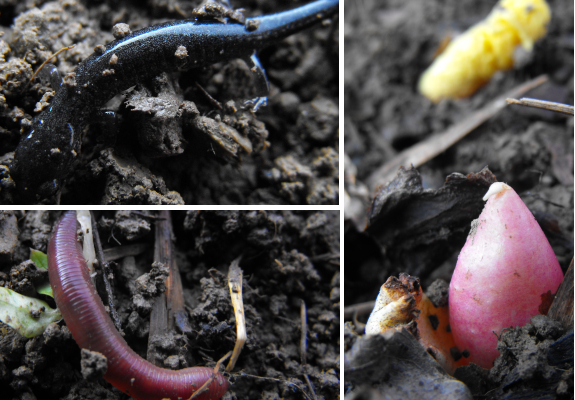
Huge pink buds under the
leaf
mulch give way to
pale yellow leaves --- the rhubarb is ready to grow. I rake
autumn leaves off the rhubarbs, strawberries, and asparagus to give my
early risers an opportunity to bask in the early spring sun.
Within minutes, I count two salamanders, half a dozen spiders, and
innumerable worms. It may just be my imagination, but the soil
seems more alive than in mulchless Marches. Once my plants spread
out a bit, I'll push the dead leaves back underneath as mulch, but for
now I don't want my perennials to fade away from lack of sunlight.
Meanwhile, with our
freezer nearly empty, I'm eying those rhubarb buds with
uncharacteristic glee. I'm ashamed to say that even though I've
had a very healthy patch for years, I don't think I've eaten a
stalk. What's your favorite rhubarb recipe? (Not
strawberry-rhubarb pie --- I consider any cooked form of strawberries a
waste of their vibrant goodness.)
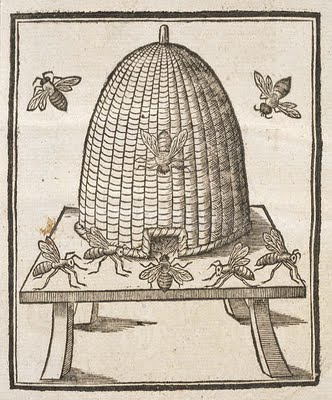 I
can easily imagine how a beehive would be an essential part of a
cottager's garden since they probably had no other source of
concentrated sugar. Due to the ubiquity of bees in the cottage
garden, Christopher Lloyd's The
Cottage Garden contains a whole section on bee-attracting plants.
I
can easily imagine how a beehive would be an essential part of a
cottager's garden since they probably had no other source of
concentrated sugar. Due to the ubiquity of bees in the cottage
garden, Christopher Lloyd's The
Cottage Garden contains a whole section on bee-attracting plants.
Christopher Lloyd
recites the common wisdom that the mint and aster
families are bee favorites, but goes on to add several other species
that are a must for bee habitat. Crocuses and willows are on his
list as good sources of early spring pollen, allowing the hive to
quickly build up their numbers so that they'll be ready for the
summer rush. Speaking of the summer rush, Hydrangea
villosa,
basswood, borage, fennel, thyme, sage, clematis, and white
clover are
all given pride of place as bee-friendly summer flowers. Finally,
Christopher Lloyd notes that fall-blooming Sedums are important
nectar-providers.
I tend to overlook
flowers in the garden, but will have to consider
adding some of these top bee plants to nooks and crannies over the next
few years.
| This post is part of our Cottage Garden lunchtime series.
Read all of the entries: |
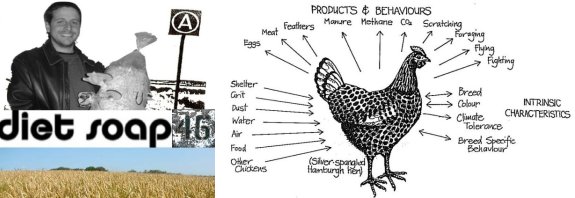
I really enjoyed the recent
interview with Frank
Aragona on the Diet
Soap podcast.
Frank goes into some detail
about a new project he's working on with a group in New Mexico that
wants to expand a program that teaches gardening skills to school
children.
It's a concept that is long
overdue and I can't help but to feel like a couple of hours working in
the dirt might actually help to calm down some of the more energetic
students that can never seem to stay in their seats.
I would take it a step
further and teach the kids some basic janitorial skills and put them to
work cleaning the school like students do in Japan.
 One
of the most common questions I hear from new gardeners is, "When should
I plant my first spring vegetables?" I'm not surprised that folks
are confused since there seem to be several schools of thoughts on the
matter.
One
of the most common questions I hear from new gardeners is, "When should
I plant my first spring vegetables?" I'm not surprised that folks
are confused since there seem to be several schools of thoughts on the
matter.
Around here, many people
plant by the signs. You pick up a calendar at the local hardware
store with phases of the moon and planting dates on it, then put your
seeds in the ground when the moon dictates. People who plant by
the signs also tend to believe that you need to put in your fence posts
at a certain phase of the moon, but I've yet to meet anyone who set up
a controlled experiment to test the effects of the moon's phase on
their garden. I dismiss planting by the signs as voodoo, although
I would like to see some scientific data one way or the other.
The next faction is the
scientific set, of which I'm partially a member. They figure out
their local frost free date (May 15 here in the mountains of southwest
Virginia) then download a spring planting chart and use some simple
math to figure out their planting dates. The chart below comes
from the Virginia Cooperative Extension, and I've posted an
explanation of how to use it here. Note that the example
assumes a frost free date of April 15.

I used a chart like this
to make a spreadsheet with optimal planting dates on it, but I don't
mark the exact dates on my calendar. Our seasons can be so
variable that I suspect the best way to figure out optimal planting
dates is to pay attention to natural signs, like when the first chorus
frogs begin to call or when certain flowers bloom. These plants
and animals are more alert to the intricacies of soil and air
temperature than we are, and chances are they know best.
 Unfortunately,
I haven't got this method really figured out yet, beyond the old saying
that you'd best plant your corn when the oak leaves are as big as a
squirrel's ear. So, for now, I just add in a one week window on
either side of the "optimal planting dates" to allow for rain, drought,
strange freezes, or warm spells. For example, although I'm slated
to plant our main crop of peas next week, we rushed and put them in the
ground on Thursday morning before the rain came. The ground is
warm enough that my hands don't freeze as I pull weeds, and the less
clayey areas are actually drying up on top (though some of the clayey
beds would have liked a few more days to evaporate winter's
moisture.) I figured I'd be better off putting my peas in the
ground now than waiting until the ground is dry again, which may not
happen for over a week.
Unfortunately,
I haven't got this method really figured out yet, beyond the old saying
that you'd best plant your corn when the oak leaves are as big as a
squirrel's ear. So, for now, I just add in a one week window on
either side of the "optimal planting dates" to allow for rain, drought,
strange freezes, or warm spells. For example, although I'm slated
to plant our main crop of peas next week, we rushed and put them in the
ground on Thursday morning before the rain came. The ground is
warm enough that my hands don't freeze as I pull weeds, and the less
clayey areas are actually drying up on top (though some of the clayey
beds would have liked a few more days to evaporate winter's
moisture.) I figured I'd be better off putting my peas in the
ground now than waiting until the ground is dry again, which may not
happen for over a week.
Of course, the real
reason I planted our main crop of peas early is because I talked to my
garden guru on Monday and she'd just planted peas in her own
garden. Gotta keep up with the Joneses!
 I
wrote earlier that traditional
cottage garden plants were primarily
edibles or medicinals,
but some flowers were included just for
prettiness. Cottagers couldn't afford to buy flowers, but they
often dug up pretty wildflowers to transplant into their garden, or
traded plants with their neighbors. The flowers in a traditional
cottage garden sound exactly like the flowers I allow in my garden ---
they were easy to propagate and often self-sowed, needing little care.
I
wrote earlier that traditional
cottage garden plants were primarily
edibles or medicinals,
but some flowers were included just for
prettiness. Cottagers couldn't afford to buy flowers, but they
often dug up pretty wildflowers to transplant into their garden, or
traded plants with their neighbors. The flowers in a traditional
cottage garden sound exactly like the flowers I allow in my garden ---
they were easy to propagate and often self-sowed, needing little care.
The close spacing of
flowers in the cottage garden helped minimize the
amount of time the cottager spent weeding since the flowers choked out
any weeds. Forest gardeners use this same technique, talking
about filling all unoccupied niches so that unwanted plants don't have
any space to gain a foothold.
I'm unlikely to focus on
flowers anytime soon, but I have started setting aside patches for
self-seeding annuals like cosmos and fennel and have some spring bulbs
that require very little care. I like to think that my garden is
more closely akin to the traditional cottage garden than modern
"cottage gardens" are, complete with fruit trees, herbs, lots of
vegetables, bees, and chickens. All I need is a pig.
| This post is part of our Cottage Garden lunchtime series.
Read all of the entries: |
 Before
picking up our latest load of
mulch I lined up all the
5 gallon buckets we had in the center of the bed.
Before
picking up our latest load of
mulch I lined up all the
5 gallon buckets we had in the center of the bed.
I was a bit curious to know
if they would stay in place or get knocked over by the force of the
load.
Now that I know it works we
plan to add another 10 buckets before the next load.
 With the driveway finally dry enough to drive
over, Mark spent most of his time this week hauling
in load after load of soil amendments. In the process, I've
been learning to visualize a much larger unit of measurement than I'm
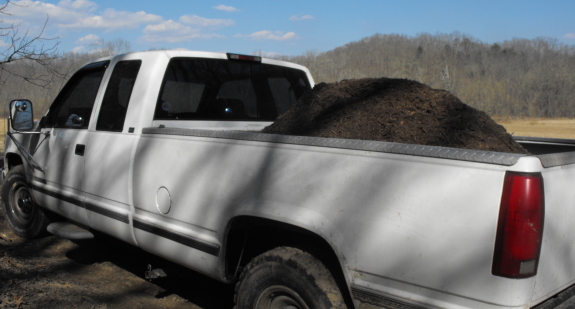
used to --- a cubic yard. Obviously, a cubic yard is a volume
that's three feet on each side, equal to 27 cubic feet. That's
equivalent to about 40 five gallon buckets, or half of Joey's pickup
truck bed.
With the driveway finally dry enough to drive
over, Mark spent most of his time this week hauling
in load after load of soil amendments. In the process, I've
been learning to visualize a much larger unit of measurement than I'm
used to --- a cubic yard. Obviously, a cubic yard is a volume
that's three feet on each side, equal to 27 cubic feet. That's
equivalent to about 40 five gallon buckets, or half of Joey's pickup
truck bed.
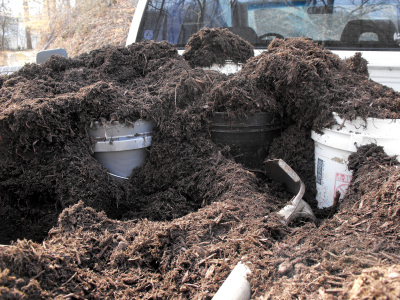
By my estimate, we
netted two cubic yards of wood chips during our chipper
rental weekend, for a cost of about $33 per cubic yard (not
counting our time and gas.) Ten pounds of King
Stropharia spawn used up a full cubic yard of those fresh chips,
with the other cubic yard set aside for later.
On his way home, Mark bought two
cubic yards of well composted wood mulch, for a cost of $24 per
cubic yard. The mulch covered the ground around a dozen
blueberries, eight grapes, and about seventy linear feet of
blackberries and raspberries. The seemingly huge amount of mulch
was perhaps a third of what I use on my woody perennials each year (and
maybe a tenth of what I could easily put to use if I had an unlimited
supply.)
 When I sent Mark over to the neighbors' to shovel up some
of their horse manure, I decided to translate the five gallon
buckets into cubic yards for comparison. He filled up the truck
with twenty buckets of well composted manure, which is about half a
cubic yard. That scantily covered twenty garden beds.
In fact, I put the manure into the garden nearly as fast as Mark could haul it
in to me, and figure I will need at least 5 cubic yards of
compost/manure to feed the vegetable garden this year (and could use
twice that much or more without overfertilizing.)
When I sent Mark over to the neighbors' to shovel up some
of their horse manure, I decided to translate the five gallon
buckets into cubic yards for comparison. He filled up the truck
with twenty buckets of well composted manure, which is about half a
cubic yard. That scantily covered twenty garden beds.
In fact, I put the manure into the garden nearly as fast as Mark could haul it
in to me, and figure I will need at least 5 cubic yards of
compost/manure to feed the vegetable garden this year (and could use
twice that much or more without overfertilizing.)
I'm not quite sure where
I'm going with this thought, except to say that I really like soil
amendments, and I could use many, many cubic yards of them. I
guess I just like to keep track so that we can work up to providing all
of the mulch and compost our farm needs.
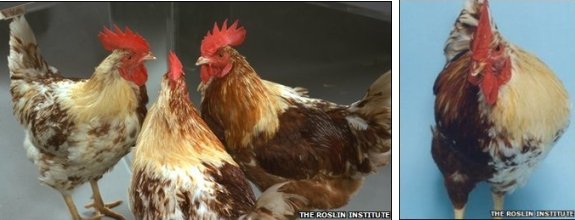
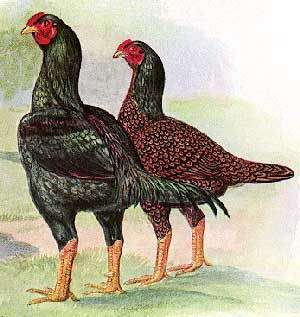
I recently discovered that 1
in every 10,000 chickens turns out to be gynandromorphous, half hen,
half rooster, thanks to a recent
BBC article.
Dr Michael Clinton of the
Roslin Institute has just published some of the latest research on the
subject in the scientific journal Nature.
They came up with a
surprising conclusion. The system is different from mammals in that
there is no mutation and the birds are full male on one side and full
female on the other.
Of course the hope is to find
a way to increase production in the poultry business by making female
birds with the same growth characteristics as the male to "increase
productivity and food security".
I don't think I've ever been
happier to see rain in March than I was
this weekend. After our cold, wet winter, a week of sunny days in
the fifties and sixties was irresistable and it took the rain to remind
me that working from dawn until dark every day requires intermittent
days of rest.
The frogs were happy to
see wet weather reappear as well. Spring Peepers and
Chorus Frogs were joined by dozens of Wood Frogs (captured in the
embedded video) by Friday night. Ever since the first spring when
I hunted them
down by flashlight, I've had a very soft spot in my heart for Wood
Frogs --- hopefully you'll see the appeal too.
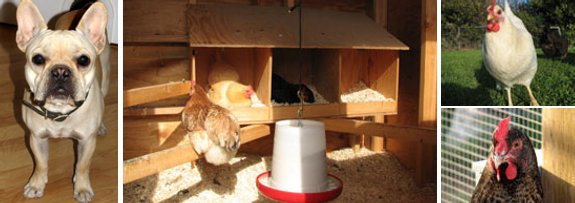
In researching designs for
our future chicken pasture coop I came across a great collection of
photos detailing the construction of what might be the sturdiest
chicken coop ever built.
I really like it when a
project can be broken down into a series of pictures, and Suburban
Chicken.org did a great job documenting their new chicken palace.
They use that same level of
detail to describe their varied flock of beautiful hens of which I seem
to be partial to Mabel...the one in the bottom right hand corner. It's
a good collection of data on various breeds, but I wonder how brutal
the pecking order is in such a diverse crowd? The more experience I get
with chickens the more I'm inclined to believe the old cliche "birds of
a feather flock together" which is why we've decided to go with just
one breed for the pasture experiment.
Is it cruel to segregate
chickens is such a way? I guess I don't know the answer to that
question, but when I see one chicken being a bully to another it tells
me that the stress level is going up for that one bird which means its
health and egg production might decline in direct relation.

The runner-up question,
after "When
should I plant my first spring vegetables?"
is always "What is my frost free date?" I have to admit that
frost free dates are unimaginably vague, and if you ask three different
people, you'll probably get three different answers. For goodness
sake, I asked two different extension agents (supposedly your best bet
for local information) and got two different answers.
Officially, you can use
the frost-free map reproduced above (which seems to think we're frost
free somewhere between April 1 and April 30) or city
tables like this one
(if you happen to have a city in your vicinity, which we don't.)
No matter where you find your local frost-free date,
you should be aware that microclimate effects mean everything in the
changeable spring. If you live on a north-facing slope, you may
really be one zone colder than if you lived on the south-facing slope
across the valley. If you live near a large body of water or in
an asphalt-laden city, you
may be one zone warmer than if you lived just a few miles away.
Higher elevations, of course, will also be colder than lower elevations
(although many mountains have frost lines with apple orchards safely
protected at the higher elevations from late spring frosts.)
The best way to know
your frost-free date for sure, of course, is to start keeping a weather
journal. Last year, we had a frost
on May 18, so I'm
sticking with my May 15 prediction and ignoring folks who think we're
frost free any earlier.
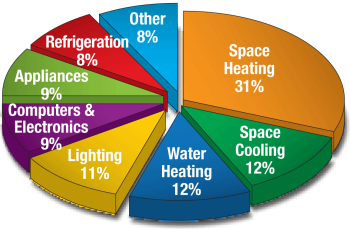
 One
of the most popular topics among homesteaders is alternative
energy. We've done some thinking in that direction ourselves (and
recently posted a series on assessing your
site for microhydro.)
Unlike gardening, though, which is largely intuitive, really
understanding alternative energy requires some grounding in
physics. My high school physics is unbelievably rusty, and I
suspect many of our readers may be equally out of practice, so I
thought it would be a good idea to bring us back up to date in a
lunchtime series.
One
of the most popular topics among homesteaders is alternative
energy. We've done some thinking in that direction ourselves (and
recently posted a series on assessing your
site for microhydro.)
Unlike gardening, though, which is largely intuitive, really
understanding alternative energy requires some grounding in
physics. My high school physics is unbelievably rusty, and I
suspect many of our readers may be equally out of practice, so I
thought it would be a good idea to bring us back up to date in a
lunchtime series.
This is where Roland
came to the rescue. Regular commenters have
probably noticed lengthy, well-thought out comments by Roland in the
past, often correcting our engineering mistakes. (Oops.)
Roland is a design and manufacturing engineer in the Netherlands, and
when I asked him if he might be interested in writing a lunchtime
series about energy, he quickly whipped off a primer on the physics of
energy sources. I have to admit that I'm beyond impressed at his
writing skills since English is not his first language --- I barely
cleaned up what he wrote at all. If you're similarly enthused,
maybe we can tempt him to write another series for us in the near
future.
| This post is part of our Energy Primer lunchtime series.
Read all of the entries: |
Starting up the deer deterrents is our newest
spring time tradition.
I've learned the hard
way that if our woody perennials aren't taken care of before spring
gets underway, they are quickly pushed to the end of the list and lost
in the shuffle. Last year, a third of our raspberries never got
pruned, fertilized, or mulched, and as a result their fruits were half
the size of the more tended patch. So, this week we're going to
focus on perennials and get them all sorted out and ready to taken on
2010.
I started on Monday by
pruning the fruit trees. In past years, I've spent hours out
there, looking back and forth between my trees and the pruning section
of my master gardener handbook. But this year --- my fourth year
of pruning --- I suddenly felt empowered and able to make short work of
the tree pruning. It helped that last year's summer
pruning and training
had left the trees in really good shape, so my "pruning" mostly
consisted of retying my training strings a little further out on the
branches, with a snip here and there to take out dead wood,
watersprouts, or crossing shoots.
I'm also starting to get
the hang of the two systems I'm using. I'm training our peaches
and nectarine to the open center system and our plum, cherry
(pictured at the top of the page), apples, and pears to the central
leader system. I still don't know if my pruning method is right, but at least it's starting
to become consistent from year to year.
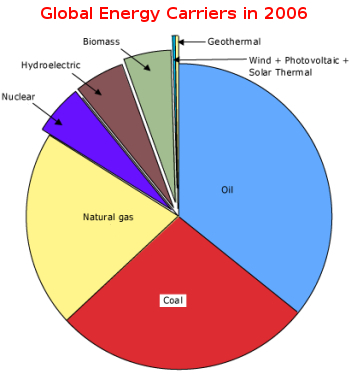 Before we speak about energy, it is useful to lay some groundwork to
understand it better. Most people, when talking about energy sources, are
really talking about energy carriers. Think about gasoline, coal, ethanol,
water, wind. Where does their energy actually come from?
Before we speak about energy, it is useful to lay some groundwork to
understand it better. Most people, when talking about energy sources, are
really talking about energy carriers. Think about gasoline, coal, ethanol,
water, wind. Where does their energy actually come from?
The conservation of energy law and the first law of thermodynamics state that energy cannot be created or destroyed. It can only change form. Einstein showed that mass and energy are equivalent, leading to the famous equation E=mc².
So physically, there are no "sources" of energy, because it doesn't just come into existence. It just looked that way to us before we understood what energy is. What we see as an energy source is just energy being taken from a carrier and transformed from one sort into another. But since the use of the word "source" is so ingrained, I'll not confuse you be being a stickler for accuracy.
 While it is possible for most kinds of energy to be transformed into other
kinds without loss (e.g. dropping something converts potential energy into
kinetic energy perfectly), it is impossible to convert thermal energy into
other forms with 100% efficiency. This is usually called the
second law of thermodynamics; systems tend to evolve towards larger
entropy.
While it is possible for most kinds of energy to be transformed into other
kinds without loss (e.g. dropping something converts potential energy into
kinetic energy perfectly), it is impossible to convert thermal energy into
other forms with 100% efficiency. This is usually called the
second law of thermodynamics; systems tend to evolve towards larger
entropy.
In mechanical systems, friction usually consumes a part of the energy put into the system, and dissipates it as heat. That is why machines are not 100% efficient. The ubiquitous ball bearing uses rolling resistance to reduce friction. But by using fluid bearings it is possible to reduce friction considerably more. Small machines are usually less efficient than big ones.

This work
is licensed under a Creative Commons
Attribution 3.0 Unported License.
| This post is part of our Energy Primer lunchtime series.
Read all of the entries: |
Where do you get a belt for a
wringer washer
that went out of production during the Nixon administration?
The local auto parts store of
course. Just take in the old belt and ask the nice person behind the
counter if they can patiently size it up with the masses of belts they
stock or tell them you want a Dayco GPL Premium V-belt model number
L432 which is what I ended up with.
 Trick
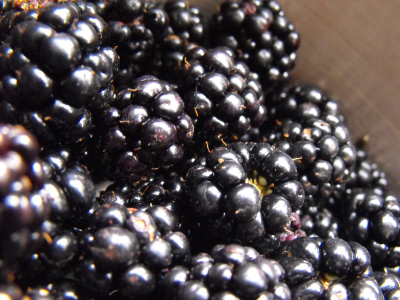
number one for growing great blackberries is choosing the right variety
for your climate. Daddy gave me some starts of his Navaho and
Arapaho berries that grew like gangbusters in his South Carolina
garden, but they were a bust here.
Trick
number one for growing great blackberries is choosing the right variety
for your climate. Daddy gave me some starts of his Navaho and
Arapaho berries that grew like gangbusters in his South Carolina
garden, but they were a bust here.
After three years with
no fruits, I ripped Daddy's berries out and replaced them with
some unnamed blackberries from the midwife who delivered my
sister. My new blackberries produced huge, beautiful
berries...and also extended their primocanes for twenty feet along the
trellis in each direction. Now that's a blackberry that likes our
climate!
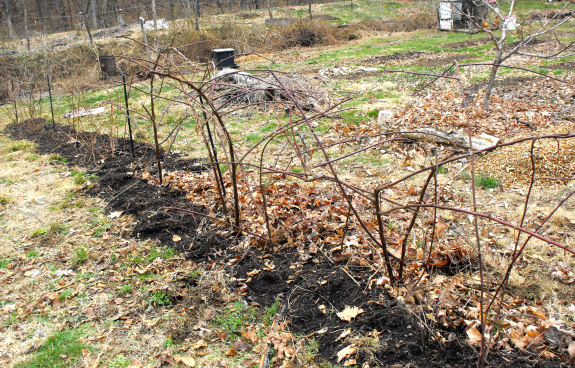
 Since
I neglected to summer tip the blackberries at three feet tall to
promote branching, my winter pruning involved cutting out last year's
dead canes and then whacking off about 75% of the living canes. I
didn't have the heart to prune them quite as hard as I probably should
have --- the photo above is the after
pruning shot.
Since
I neglected to summer tip the blackberries at three feet tall to
promote branching, my winter pruning involved cutting out last year's
dead canes and then whacking off about 75% of the living canes. I
didn't have the heart to prune them quite as hard as I probably should
have --- the photo above is the after
pruning shot.
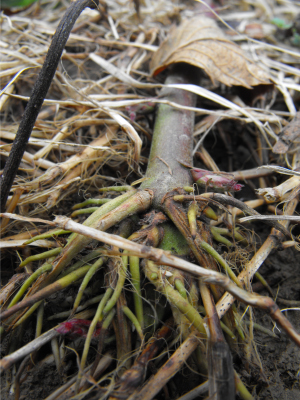
Several of the
canes had touched the ground and produced massive root structures, and
I dug up about a dozen of the best ones to expand my blackberry
patch. I also cut the tops off the everbearing raspberries,
pruned out the old floricanes on the other raspberries, trained the
grapes onto their trellises, and cut out the dead bits on the
blueberries. Our woody perennials are now all pruned --- a good
thing too since the blueberries are already thinking of leafing out.
 So where does the energy we use actually come from?
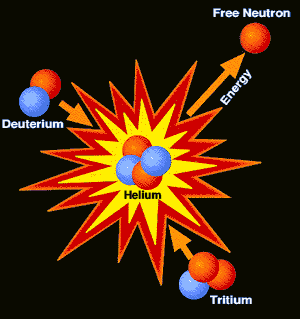
Radiation
In stars, hydrogen atoms undergo fusion producing helium. A very small part of the mass of these atoms is converted into energy which emanates from the sun as radiation. This is one of the two basic energy sources.
Fissionable elements
The other primary energy source is also formed in stars, but in a different way. When a star
substantially bigger than our sun runs out of fuel, its core collapses and the
star explodes in a process called a supernova. During this process, very
heavy elements can be formed that release energy when they are split. These
are called fissionables, and they are the second primary energy source.
 One should realize that nuclear fission happens naturally in every fissile
material. This is known as nuclear decay. Without this process we could
not exist, since it is this process that is largely responsible for the fact
that the earth's core is still liquid, which helps to keep us warm and
generates a magnetic field that protects us from cosmic radiation. The heat
flow from nuclear decay inside the earth is around 30 [tera][]watt. (30 000
000 000 000 Watt!)
One should realize that nuclear fission happens naturally in every fissile
material. This is known as nuclear decay. Without this process we could
not exist, since it is this process that is largely responsible for the fact
that the earth's core is still liquid, which helps to keep us warm and
generates a magnetic field that protects us from cosmic radiation. The heat
flow from nuclear decay inside the earth is around 30 [tera][]watt. (30 000
000 000 000 Watt!)
At least one instance has been found where a natural nuclear fission reactor has existed and run for a few hundred thousand years.
This work
is licensed under a Creative Commons
Attribution 3.0 Unported License.
| This post is part of our Energy Primer lunchtime series.
Read all of the entries: |

Bio char toilet composter is
just a fancy name for a portable out house structure in a strategic
location near a fruit tree.
The bio char element comes
into play by having a bucket of charcoal and leaf matter on hand to be
mixed in the composting section for maximum fertility.
Stay tuned for a more
detailed break down and the final construction pictures.
 Biochar
(aka terra
preta)
is the new darling of organic gardeners.
Everyone's talking about it, and no wonder since terra preta in the
Amazon has turned poor ground into high fertility soil that seems to
last hundreds of years without any additional input of fertilizer.
Biochar
(aka terra
preta)
is the new darling of organic gardeners.
Everyone's talking about it, and no wonder since terra preta in the
Amazon has turned poor ground into high fertility soil that seems to
last hundreds of years without any additional input of fertilizer.
What most people don't
realize, though, is that biochar is
more than just charcoal buried in the ground. Amazonians probably
stumbled upon the mixture accidentally when they combined human waste,
crop residue, charcoal from their cooking fires, animal bones, and
plain old trash in their midden heaps. Scientists aren't quite
sure why the resulting mixture is so good for plant growth, but until a
biochemist tells me otherwise, I'm going to assume that all of the
traditional elements are necessary to create true biochar.
Mark and I have decided to
experiment with our own biochar
composting toilet as
a method of adding fertility to our young forest
garden.
Our first incarnation is simply a four foot pit dug in the
ground. We'll poop in the hole and intersperse our humanure with
leaves, charcoal and ashes from the woodstove, and the poultry bones we
need to hide from Lucy. Presumably, the nearby fruit trees will
begin to send their roots into the terra preta as it ages and will get
a good meal. Meanwhile, our system won't require us to handle the
humanure at all, unlike most composting toilet systems, so there's
absolutely no risk of contamination. Maybe the biochar composting
toilet will replace composting toilets in the near future.
Remember how energy can neither be created nor destroyed, only transformed from one type to another? The primary sources of energy in the stars are transformed on earth into the various energy carriers you are probably more familiar with.
Fossil fuels
These are (hydro)carbons (i.e. chemicals mostly built up out of hydrogen and carbon) formed by anaerobic decomposition of buried dead organisms, over geological timescales. Organisms can be plants, or creatures that feed on plants, or creatures that feed on other creatures. If you follow the chain back, you'll come to plants collecting solar energy and using it (via a process known as photosynthesis) to convert carbon dioxide into organic compounds, mainly sugars.
So essentially, fossil fuels are chemically stored solar energy! The problem with fossil fuels is that we're currently using them at a much faster rate than they are formed. Meanwhile, the carbon dioxide released by burning them influences the climate.
Wood and other plant matter
Since these were the basis for fossil fuels, they hardly need explaining. If they aren't dried before burning, a substantial part of their energy will be consumed by evaporating the water in them. The energy in this water vapor is usually not captured and is lost.
Ethanol
Ethanol can be made via fermentation or as a petrochemical via the hydration of ethylene. Of course, only ethanol produced by fermentation can be considered carbon-neutral.
Fermentation is the process where sugars from plants are converted into ethanol by yeasts. The sugars in the plants, again, are formed by photosynthesis.
The problem with this process is that it results in a lot of biomatter that is of no use to the fermentation process. For example only the grain seeds can be used for ethanol production. Most of the plant is useless in this way. Producing cellulosic ethanol would make this process much more sufficient. Another worry is that growing plants to produce ethanol might hurt food production.
But again, the root source of the energy embodied in ethanol is the sun.
Biodiesel / vegetable oil
 These are lumped together because biodiesel is usually made from vegetable
oils or used cooking oil, via a process called transesterification. These
oils are pressed from seeds or fruits or beans of plants. The main reason to
make biodiesel is that diesel engines usually require modifications to run on
straight vegetable oils, while biodiesel requires little to no modification of
a diesel engine.
These are lumped together because biodiesel is usually made from vegetable
oils or used cooking oil, via a process called transesterification. These
oils are pressed from seeds or fruits or beans of plants. The main reason to
make biodiesel is that diesel engines usually require modifications to run on
straight vegetable oils, while biodiesel requires little to no modification of
a diesel engine.
As with ethanol, only a small part of any plant can produce oil. And the same oils that can be used for biodiesel are also used as food. The process uses a strong base like NaOH or KOH as a catalyst, and produces glycerin as a by-product.
Since it is made from plants, the real energy source is again the sun.
This work
is licensed under a Creative Commons
Attribution 3.0 Unported License.
| This post is part of our Energy Primer lunchtime series.
Read all of the entries: |
I thought it was finally time
to give some photographic credit to the two horses that provide most of
the organic material for our garden.
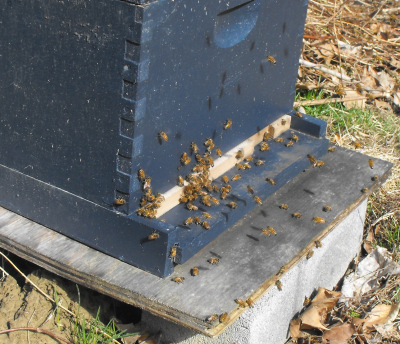 When
the sun came out Thursday morning, so did
the honeybees. For the first time this year, they seemed to be
deep into a pollen
or nectar flow of
some sort --- there were aerial
traffic jams as the bees piled up, trying to make it through the little
hole in the entrance
reducer.
Honestly, I'm not sure what their
primary food is right now, since I've seen them on the crocuses (more
in the embedded video) and on the tiny speedwell, dead nettle, and
chickweed flowers in the yard. I suspect there may be something
much larger blooming out in the woods to account for this much traffic
--- maybe those swollen elm or hazel buds have burst open?
When
the sun came out Thursday morning, so did
the honeybees. For the first time this year, they seemed to be
deep into a pollen
or nectar flow of
some sort --- there were aerial
traffic jams as the bees piled up, trying to make it through the little
hole in the entrance
reducer.
Honestly, I'm not sure what their
primary food is right now, since I've seen them on the crocuses (more
in the embedded video) and on the tiny speedwell, dead nettle, and
chickweed flowers in the yard. I suspect there may be something
much larger blooming out in the woods to account for this much traffic
--- maybe those swollen elm or hazel buds have burst open?
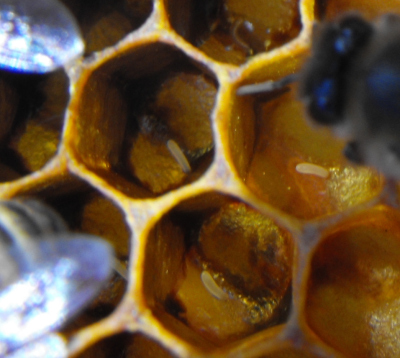 So much for the outside of
the hive --- what's
going on inside? Once the day was thoroughly warm, I went ahead
and opened up the hives to see how the end of winter was treating the
colonies. I found tiny white eggs, grub-liked larvae, and capped
cells of pupae in two of the hives, along with scads of leftover
honey. I took out the entrance reducers and popped a new super on
each hive just in case the bees get really industrious before I check
back.
So much for the outside of
the hive --- what's
going on inside? Once the day was thoroughly warm, I went ahead
and opened up the hives to see how the end of winter was treating the
colonies. I found tiny white eggs, grub-liked larvae, and capped
cells of pupae in two of the hives, along with scads of leftover
honey. I took out the entrance reducers and popped a new super on
each hive just in case the bees get really industrious before I check
back.
The queens are clearly
just starting to lay their eggs, but I saw a
troublesome sign in one hive. The bees had extended three of the
larvae's cells out beyond the comb's normal face --- it looks to my
untrained eye like they're thinking of building queen cells. That
would mean that I let the hive get too congested with honey and the
bees are thinking of swarming. I'll check on them again next week
and, if necessary, split the hive in two to keep all of the bees under
domestication.
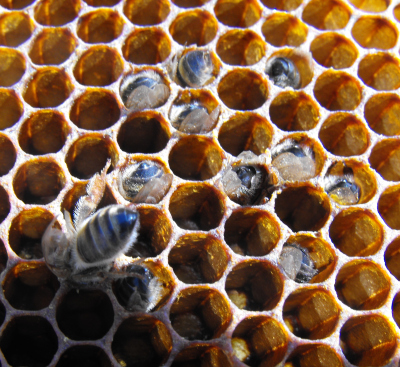 I
also found a tiny cluster of eleven starved
bees. The poor things were face down in adjacent cells, searching
for honey. I've read that little
starvation clusters like this happen when a sudden cold snap strands
some of the bees outside the main cluster. They can't find the
frames of honey, even though food can be quite nearby. Still, a
death toll of less than a dozen bees is not bad since most beekeepers
lose a
third of their hives over the winter. Our chemical-free hives are
still happy and healthy.
I
also found a tiny cluster of eleven starved
bees. The poor things were face down in adjacent cells, searching
for honey. I've read that little
starvation clusters like this happen when a sudden cold snap strands
some of the bees outside the main cluster. They can't find the
frames of honey, even though food can be quite nearby. Still, a
death toll of less than a dozen bees is not bad since most beekeepers
lose a
third of their hives over the winter. Our chemical-free hives are
still happy and healthy.
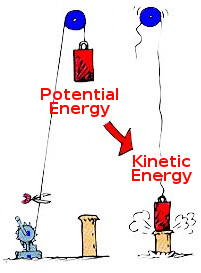
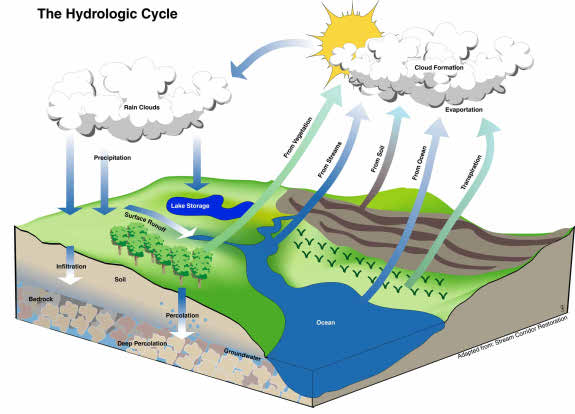
Water
Very simply put, everything that sits at a higher altitude in a gravitational field has potential energy. The trick is to convert that potential energy into something we can use, like e.g. kinetic energy that we can use or convert into electrical energy. Kinetic energy is the energy embodied into something that is moving.
Water is a prime candidate for tapping potential and kinetic energy, because of its abundance and the fact that it is usually a liquid under normal conditions. Either we use the flow of water directly (e.g. low head hydro, or wave power), or we use the height of a body of water (the "head") to create a high-velocity stream of water.
The crux of the matter is how do you get a flow of water or a large body of water, since water doesn't flow uphill? This is what is called the water cycle, or hydrologic cycle. Our friend the sun (again) heats water and vaporizes it. The water condenses at cooler (higher) places and runs downhill. So hydropower is indirectly solar power as well. The water (sitting higher-up in the gravity field) is just a storage medium and carrier for the energy.
Wind
Again it is ultimately the sun that drives the wind. Very simply put, sunlight heats earth and water, which heats the air. Hot air rises, causing a flow of air from colder parts. Of course there are lots of other phenomena at play; the aforementioned hydrologic cycle has a large part in it as well.
Geothermal energy
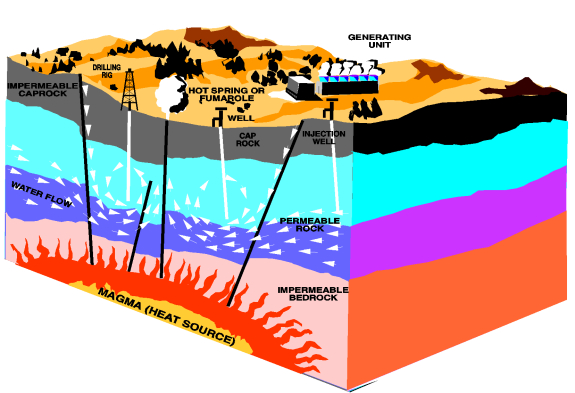
The temperature of the earth increases with depth. This is known as the geothermal gradient. It is mostly caused by the aforementioned nuclear decay happening inside the earth. So ultimately this is also solar energy.
Now a peculiar property of heat is that the higher the temperature, the more efficiently you can convert heat into mechanical energy, which is the most used form to provide transportation and is the most-used precursor to electric energy. In most places the gradient is between 25 to 30 degrees Kelvin (or Celcius) per kilometer depth, which means you've got to drill a pretty deep hole to get at the really hot stuff, unless you're near a geologically active area. Of course you don't need a very high temperature for heating your house. If you've got enough water of say 27 degrees Celcius (80 F) you could very well heat your house with it. Of course, drilling a hole over a kilometer deep is quite expensive.
This work
is licensed under a Creative Commons
Attribution 3.0 Unported License.
| This post is part of our Energy Primer lunchtime series.
Read all of the entries: |
This view of our neighbor's
gate prompted me to start a series of pictures dedicated to Appalachian
fences and the gates that connect them.
 We
took our
movie star neighbor's advice, and hit a nursery in search
of a bigger pot for our dwarf Meyer lemon. The ten gallon pot we
came home with has twice the capacity of our old pot, and also has
better drainage since the holes are on the sides rather than the
bottom. This kind of pot can be quite pricy new, but you can
often find them pretty cheap at nurseries where trees have died or been
transplanted, leaving slightly used pots behind. Ours was $8.
We
took our
movie star neighbor's advice, and hit a nursery in search
of a bigger pot for our dwarf Meyer lemon. The ten gallon pot we
came home with has twice the capacity of our old pot, and also has
better drainage since the holes are on the sides rather than the
bottom. This kind of pot can be quite pricy new, but you can
often find them pretty cheap at nurseries where trees have died or been
transplanted, leaving slightly used pots behind. Ours was $8.
I hadn't taken our lemon
tree out of her pot in years, just added stump
dirt, manure, and
worm juice on top. So it was a bit of a surprise to discover that
her roots only extended two thirds of the way down into the soil.
I'm not sure if the small root mass is a result of the soil in the
lower half of the pot being too wet (though it was far from sodden), or
whether Meyer lemons are just really dependent on the
soil flora that tends to live in the top few inches of soil. Either way, the next
time we repot her we'll try to find an even wider but shallower pot.
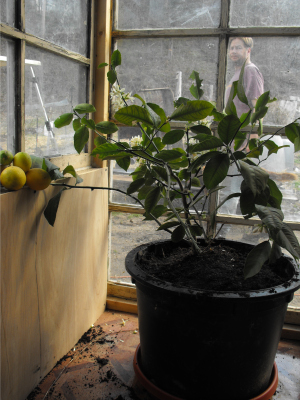
Since I figured I'd be
unable to lift ten gallons of dirt and fruiting citrus tree, we went
ahead and repotted her straight in the not-quite-finished storage
building. One
of our primary purposes for the building was to give our citrus room to
grow in front of a floor-to-ceiling, south-facing window. We put
our tangerine (not a star yet since she's yet to bloom) in the other
corner, and the place suddenly looked lived in.
If any of you are
interested in starting your own dwarf citrus collection, I highly
recommend hurrying over to Spring Hill Nursery. Currently, they have
an offer for $20 of free plants where all you pay is shipping.
For $7.95 (shipping), you can get three dwarf naval oranges or three
dwarf key limes (or one dwarf Meyer lemon.) I can't vouch for the
nursery since our plants haven't arrived yet, and I don't get any
affiliate cash for sending you to them (drat!), but we decided to jump
on the deal and will soon be trying out several new dwarf tropical
fruits.

I know
why the caged gate swings, oh me,
When its
frame is warped and its hinges sore,
When it
scrapes its bottom and almost swings free;
It is not
a carol of joy or glee,
But a
squeal that it sends from its deep rooted core,
But a
plea, that someday again it will swing-
I know
why the caged gate swings.
There's a lot of places on
the web that claim to be an authority on making your own gate, but Jeff
Greef's wood working site delivers detailed pictures backed up with
a real world explanation of each step.
If you've never built a gate
before, or remember how the last gate you built sagged and rubbed on
the ground then save yourself some grief and skim over these three
pages before you draw up your plans.
 Even
though the grass in the aisles is starting to green up, the garden
looks pretty bare and brown. But if you peer closely enough,
you'll see signs of life.
Even
though the grass in the aisles is starting to green up, the garden
looks pretty bare and brown. But if you peer closely enough,
you'll see signs of life.
Despite an unusually
cold winter, our Valentine's Day peas
popped up a few days ago with an excellent germination
percentage. In a nearby cold frame, cabbage and broccoli seeds
bathed in the absurdly high temperatures required for germination (60
to 70 degrees Fahrenheit) and have already opened up their
cotyledons. We even have true leaves beginning on the lettuce in
the other cold frame.
Meanwhile, the garlic
and Egyptian onions are putting on their spring growth spurt.
Even if I didn't like garlic, I think I would plant them for their
beauty in the spring, so firm and tall against the brown leaf mulch.
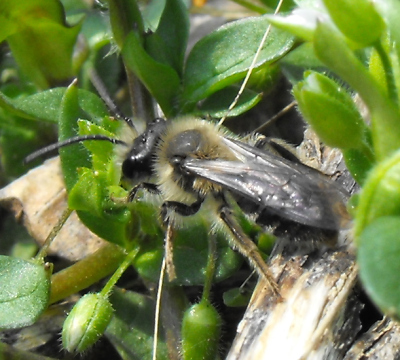 On the wild side, I've been
keeping an eye on pollinators (other than our honeybees, of
course.) The unintentional bed of chickweed outside our kitchen
window has been buzzing with these small native bees --- does anyone
know what they are? Don't forget to leave some weedy patches in
your own garden to give these guys a home!
On the wild side, I've been
keeping an eye on pollinators (other than our honeybees, of
course.) The unintentional bed of chickweed outside our kitchen
window has been buzzing with these small native bees --- does anyone
know what they are? Don't forget to leave some weedy patches in
your own garden to give these guys a home!
The last gate in my series is
the only one we can see from our property besides the low
budget garden gate which is only for foot traffic.
This is a classic example of
a store bought metal version. A good choice compared to a home
made wooden gate when
weight is a factor.
 During
the winter of 2008 to 2009, I quit my job and finally had time to work
on a book about central Appalachian ecology. I started studying
the topic as a hobby in high school, majored in biology in college to
round out my expertise, then worked for a half dozen years leading
hikes and conducting ecological inventories. When an acquaintance
broached the idea of publishing a trail guide about a local park, I
jumped at the chance to get those ecological stories down on paper.
During
the winter of 2008 to 2009, I quit my job and finally had time to work
on a book about central Appalachian ecology. I started studying
the topic as a hobby in high school, majored in biology in college to
round out my expertise, then worked for a half dozen years leading
hikes and conducting ecological inventories. When an acquaintance
broached the idea of publishing a trail guide about a local park, I
jumped at the chance to get those ecological stories down on paper.
 All winter, I wrote and polished, but once we
got to the final publishing stage, the deal fell through.
Basically, the aquaintance and I had been operating under two different
assumptions about how our collaboration was going to work, and neither
of us was willing to bend to meet the other's reality. (Note to
self --- ignore Appalachian conventions and get agreements down on
paper on later deals.) For me, it came down to not wanting to
have to be the one marketing the book --- how would I have time to
obsess over my garden and keep you all informed about the most boring
aspects of my daily life?
All winter, I wrote and polished, but once we
got to the final publishing stage, the deal fell through.
Basically, the aquaintance and I had been operating under two different
assumptions about how our collaboration was going to work, and neither
of us was willing to bend to meet the other's reality. (Note to
self --- ignore Appalachian conventions and get agreements down on
paper on later deals.) For me, it came down to not wanting to
have to be the one marketing the book --- how would I have time to
obsess over my garden and keep you all informed about the most boring
aspects of my daily life?
Meanwhile, I'd
discovered that publishing ebooks just makes a lot more sense than
publishing paper books for niche subjects. With the success of Microbusiness Independence under my belt, I decided to
publish my Appalachian ecology book in the same format. As an
experiment, I'm also making the entire book available for free on the Clinch Trails website.
Sugar Hill: A Microcosm of Central Appalachian Ecology spans 300
million years, with tales of chemical warfare, sex changes, and murder. The book
is one part trail guide and two parts stories about our local ecology,
flora, and fauna. Even if you never plan to visit southwest
Virginia, I
suspect the book will explain at least one mystery relevant to your own
ecosystem.
I hope you'll check it out and let me know what you think!
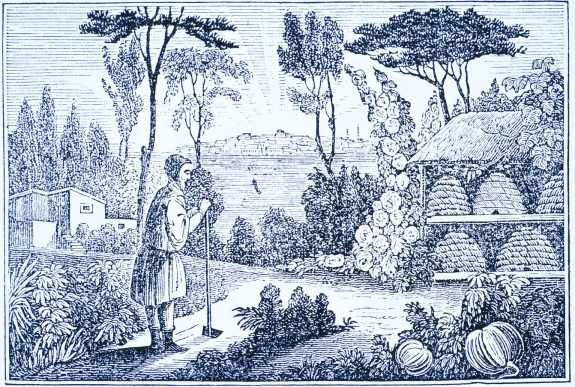
A few months ago, we
checked out PBS's Colonial
House on
Netflix. The reality TV show plunks a few families down in New
England where they replicate what life was like in Plymouth Colony in
1628. Although the series was interesting, I was sorely
disappointed by the lack of time spent focusing on the gardens ---
that's the whole point of a reality TV show about the past,
right? Early
New
England Gardens: 1620 - 1840, a little booklet put out by
Old Sturbridge Village, filled in the
gaps.
The early American
colonist generally had two separate gardens.
First, a house plot (also known as a merestead) was equivalent to our
kitchen garden. It was placed right by the house and was full of
vegetables, herbs, and flowers used every day. Further off, the
settlement fields were planted with large-scale crops --- the staples
backyard gardeners don't often grow much of anymore, like field corn,
parsnips, turnips, beans (for drying), pumpkins, and cabbage.
Personally, I've found that putting a garden any further than two steps
out the front door means that it gets neglected (and eaten by deer),
but I guess these colonists felt the need to concentrate their houses
close together for mutual protection.
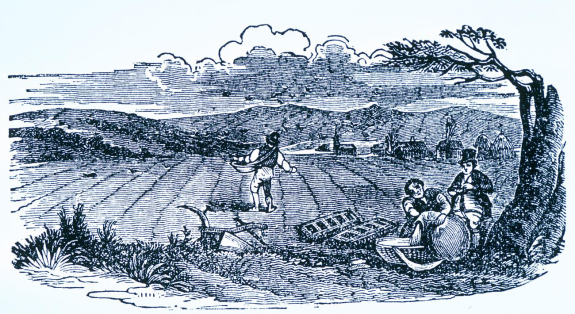
There were two general
patterns evident in meresteads in early New
England --- the cottage garden style and the formal garden style.
The former predominated in the Plymouth colony and among the poorer
colonists while the latter was more common in Massachusetts Bay colony
and among richer folks.
I've described cottage
gardens in a
previous lunchtime series --- you may remember that
cottage gardens are a very informal hodgepodge of plants and animals,
with herbs, flowers, vegetables, fruits, and even pigs and bees mashed
together in a small space. The people who settled in Plymouth
Colony believed that gardens should be austere and utilitarian, and
that flowers with no use were frivolous and extravagant. The
booklet notes, "There was actually an early Connecticut statute
declaring it unlawful to walk in the garden on the Sabbath."
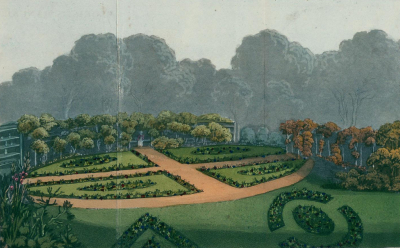 In contrast, the more
prosperous Massachusetts Bay colonists based
their gardens on the English manor garden. There was usually a
long central path, ending at an arbor, summer house, or dovecote.
Beds along the side were usually linear (though still informally
planted with mixtures of plants).
In contrast, the more
prosperous Massachusetts Bay colonists based
their gardens on the English manor garden. There was usually a
long central path, ending at an arbor, summer house, or dovecote.
Beds along the side were usually linear (though still informally
planted with mixtures of plants).
As New England colonies
became more prosperous in the eighteenth century, the more formal type
of
garden became widespread. Soon, flowers were separated out
of the vegetable gardens and the layout began to resemble the American
landscape seen today. Most houses had a large front garden
composed purely of flowers and/or lawn running down a path to their
front
gate, with the vegetables tucked away out of sight.
As a final note, all of
the photos in this week's lunchtime series
come from Old Sturbridge Village's website. I got a bit lost
browsing their images and comparing colonial life
to my life. If you're bored, you might wander over and look for a
while too.
| This post is part of our Early New England Gardens lunchtime series.
Read all of the entries: |
It seemed to take these new
chicks about an hour to warm up and settle down from their long
journey. Tapping on the Avian
Aqua Miser nipple with a finger for a couple of minutes was all it
took to train the first chick to drink, and they all caught on like a
chain reaction after that.
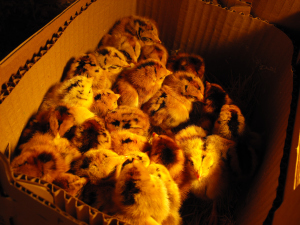
What's it like to order
25 chicks from a hatchery? Well, first you wait, and wait, and
wait for the day when the postmistress finally calls you up and
announces that your flock has arrived. Then your honey carries
the cheeping box 'o chicks home, and you dump them into their brood box.
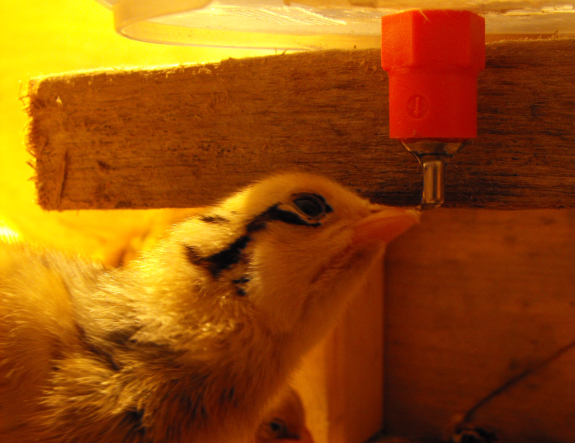
If your experience is
like ours, they will be a bit chilled, but spunky, ready to crowd under
the heat lamp, pushing against their neighbors to be the first to warm
up. Our box came with a "bonus" chick which was half the size and
had a tenth the vigor of his boxmates, and he kicked the bucket in the
first five minutes. On the other hand, the rest of the chicks
soon forgot their traumatic journey and settled in to do what chicks do
best --- eat, drink, poop, and be merry.
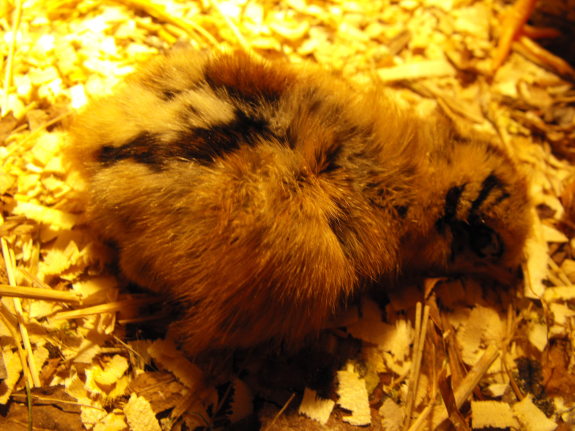
Then, in the midst of
his play, a chick's head will suddenly nod, and before you know it he's
lying prostrate on the ground. His siblings will jump on his
noggin, but he's so sound asleep that he doesn't even stir. If
you're a worrywart like me, you'll be terrified the chick has joined
his puny boxmate in the happy hunting grounds, but when you poke him,
he'll hop up and go back to the daily grind of pecking, peeping, and
scampering.
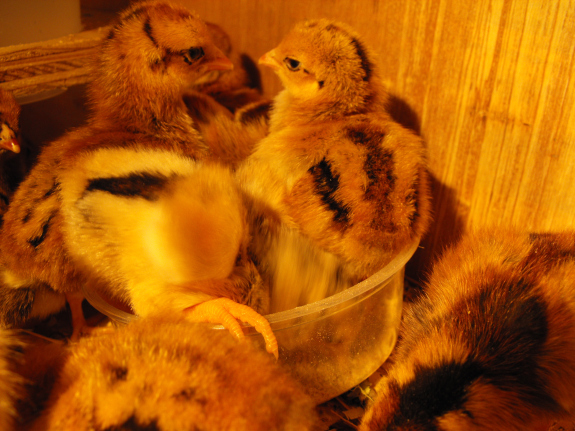
I have nothing to
compare these chicks to, so I don't know if all varieties are as quick
to peck and poke and search for food as our Dark
Cornishes. I
tossed in three worms to give them a taste of the wild side, and the
wrigglers quickly disappeared down chick gullets. I hope that's a
sign of good foraging habits to come.
 The
earliest American gardens were much less diverse than vegetable gardens
today. Seed companies didn't come into existance in the United
States until after the Revolutionary War, so people saved their own
seeds and tended to grow the same varieties year after year.
Gardeners would trade seeds with their neighbors, but since there was
very little seed traffic between the United States and Europe at the
time, neighbors weren't likely to have anything extremely different or
innovative.
The
earliest American gardens were much less diverse than vegetable gardens
today. Seed companies didn't come into existance in the United
States until after the Revolutionary War, so people saved their own
seeds and tended to grow the same varieties year after year.
Gardeners would trade seeds with their neighbors, but since there was
very little seed traffic between the United States and Europe at the
time, neighbors weren't likely to have anything extremely different or
innovative.
So what did early
American colonists grow? Early New England Gardens
lists asparagus, beans, beets, cabbage, carrots, cucumbers, kale,
lettuce, corn, melons, onions, parsnips, peas, peppers, potatoes,
pumpkins, radishes, rutabaga, squashes, turnips.
Many of the vegetables
that we now consider common were missing at the
time, but not because they were unknown in Europe. Instead,
vegetables like tomatoes, broccoli, and garlic were eaten only by the
very poor or by certain ethnic groups, entering mainstream American
culinary tradition in the early nineteenth century (tomatoes) and the
early twentieth century (broccoli and garlic.) I can't imagine
life without tomatoes and garlic!
| This post is part of our Early New England Gardens lunchtime series.
Read all of the entries: |
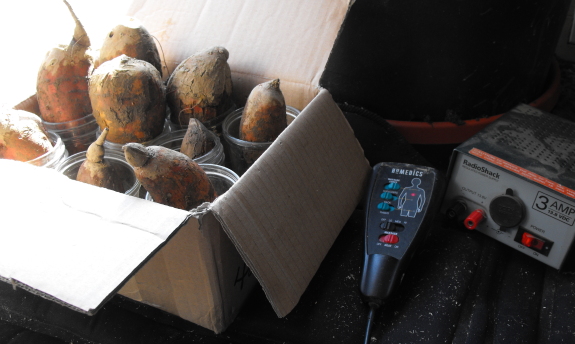
I found this car seat heating
pad at a thrift store a couple years back thinking it might come in
handy for something farm-related in the future.
There's an interlock switch
that tells the heater if anyone is sitting on it or not which needs to
be bypassed for this application. Hook up a 12 volt DC power supply and
you've got yourself a homemade do it yourself heating pad for
sprouting sweet potatoes and anything else that needs to be kept warm
during these cold spring nights.
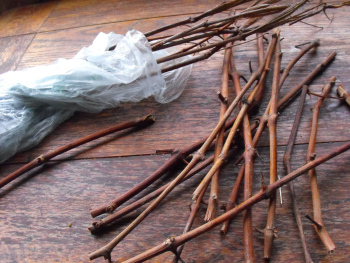 The
last week in March is cloning week around here. First, I pulled
the grape cuttings out of the crisper drawer, where they'd been sitting
on top of a dwindling pile of last fall's carrots since December when I
pruned Mark's mom's vines. Scionwood is supposed to keep for
months in root cellar conditions, which I simulated by draping a damp
dish towel over the top of the drawer's contents, rewetting weekly to
keep the carrots and cuttings moist. I really didn't think the
grapes were still alive after three months off the vine, but when I
snipped off one end to test them, the cambium was fresh and green just
under the bark. Storage success!
The
last week in March is cloning week around here. First, I pulled
the grape cuttings out of the crisper drawer, where they'd been sitting
on top of a dwindling pile of last fall's carrots since December when I
pruned Mark's mom's vines. Scionwood is supposed to keep for
months in root cellar conditions, which I simulated by draping a damp
dish towel over the top of the drawer's contents, rewetting weekly to
keep the carrots and cuttings moist. I really didn't think the
grapes were still alive after three months off the vine, but when I
snipped off one end to test them, the cambium was fresh and green just
under the bark. Storage success!
 I tossed all of the cuttings
into the kiddie pool where we're experimenting with duckweed
for the chickens.
The grapes will take a few weeks to grow roots once I stick them in the
ground, so it's essential that the cuttings hydrate now in
preparation. After three days of soaking, I'll push them most of
the way into the ground in a well-drained and semi-shady spot, mulch
them well, and ignore them until the fall. I consider grapes to
be one of the easiest perennials to propagate --- read last year's
tutorial about starting
grapes from hardwood cuttings and give it a shot!
I tossed all of the cuttings
into the kiddie pool where we're experimenting with duckweed
for the chickens.
The grapes will take a few weeks to grow roots once I stick them in the
ground, so it's essential that the cuttings hydrate now in
preparation. After three days of soaking, I'll push them most of
the way into the ground in a well-drained and semi-shady spot, mulch
them well, and ignore them until the fall. I consider grapes to
be one of the easiest perennials to propagate --- read last year's
tutorial about starting
grapes from hardwood cuttings and give it a shot!
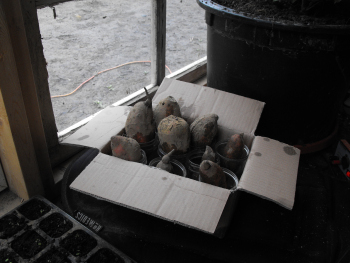 Next, I pulled nine firm
tubers out of the cupboard to begin sweet
potato slip production.
I submerged the bottom third of the sweet potatoes in warm water and
placed them on a heating
pad (only necessary because our house is kept
cold.) In a couple of weeks, the bottoms of the tubers will grow
roots and the tops will sprout shoots. I'll clip the shoots and
place them in another cup of water, then set out dozens of free slips
in May. Sweet potato slips are extremely expensive at the feed
store, so it's thoroughly worth setting aside a bit of space in a sunny
window to start them yourself.
Next, I pulled nine firm
tubers out of the cupboard to begin sweet
potato slip production.
I submerged the bottom third of the sweet potatoes in warm water and
placed them on a heating
pad (only necessary because our house is kept
cold.) In a couple of weeks, the bottoms of the tubers will grow
roots and the tops will sprout shoots. I'll clip the shoots and
place them in another cup of water, then set out dozens of free slips
in May. Sweet potato slips are extremely expensive at the feed
store, so it's thoroughly worth setting aside a bit of space in a sunny
window to start them yourself.
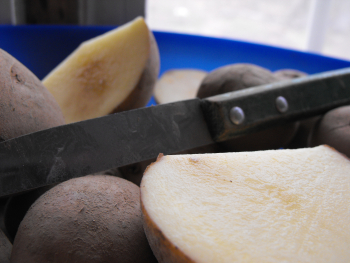 Finally,
Mark cut fifteen pounds of seed potatoes into sections, retaining two
or three eyes on each one. Last year, my potatoes were an abject
failure, mostly because I planted them in heavy clay, it rained all
summer, and a blight swept through the east coast. I want to
take a bit of extra care this year, letting the cut portions of the
seed potatoes callous over before they go into the ground by leaving
them exposed to air for a day or two after cutting. I also plan
to
give them well-drained raised beds in hope that our potatoes will do
better this year, regardless of the weather.
Finally,
Mark cut fifteen pounds of seed potatoes into sections, retaining two
or three eyes on each one. Last year, my potatoes were an abject
failure, mostly because I planted them in heavy clay, it rained all
summer, and a blight swept through the east coast. I want to
take a bit of extra care this year, letting the cut portions of the
seed potatoes callous over before they go into the ground by leaving
them exposed to air for a day or two after cutting. I also plan
to
give them well-drained raised beds in hope that our potatoes will do
better this year, regardless of the weather.
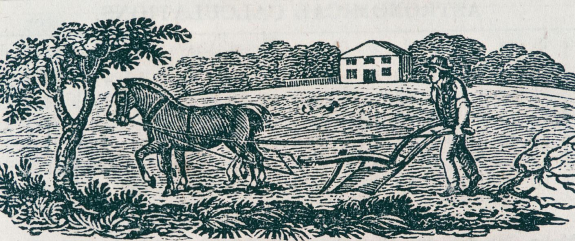
If
you're growing all of your own food, early spring is the hungry time,
when your stores are running low and you're craving fresh
vegetables. Over the three and a half years that we've been
farming our land, we've slowly learned that sun exposure is the most
important factor in early spring gardens, and early American colonists
came to the same conclusion. Whenever possible, they planted
their gardens on south-facing slopes to jumpstart the gardening season,
and hilled up soil on the north sides of rows to trap even more heat
and block the wind.
Modern organic growers
put down black plastic around their strawberries
to heat the ground and promote earlier crops. Once again, the
early colonists were way ahead of us. They saved charcoal dust
from their fires and spread it on the soil around early crops to absorb
the sun's heat.
New England's growing
season is short, so it was especially important
to start some seedlings inside. Instead of the modern plastic
growing trays, colonists dug sod in the fall, stored the clods of earth
and grass in their cellars over the winter, then planted their
seedlings in the inverted sod clumps the next spring. This worked
especially well for crops that didn't like to be transplanted --- the
colonists could simply bury the entire hunk of sod into the garden
where it merged with the soil and protected the seedling's roots.
Pest control was pretty
minimal at the time. One technique I'd
like to try is placing fresh onion skins on cucumber hills to control
squash bugs. Another of the settlers' methods --- scattering
ashes on plants to control flea beetles and other insects --- is
still
common today. If you're having a problem with slugs or snails,
why not do as the Plymouth colonists did and scatter cabbage leaves
between your plants, then collect the sluggy leaves in the early
morning and burn them?
| This post is part of our Early New England Gardens lunchtime series.
Read all of the entries: |
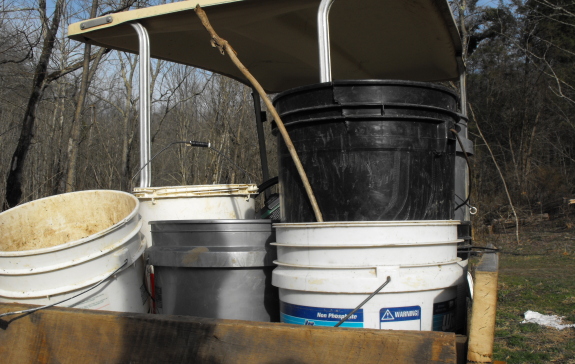
The bigest downside to using 5
gallon buckets for
hauling mulch is when two buckets get stuck together.
One easy way to avoid this is
to carry a bundle of twigs to use as spacers.
I can remember being on a
construction job site and needing to separate two buckets that were
hopelessly married to each other. A co-worker held one end while I
pulled on the other. After about 5 minutes of struggle we decided to
stop trying to recreate a scene from the 3 stooges and threw the
buckets in a dumpster.
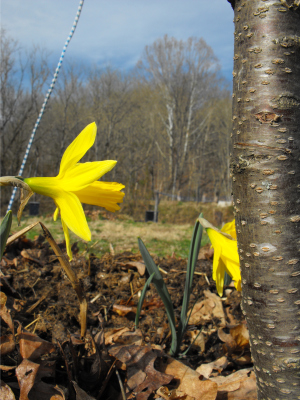 I've
been struggling with daffodils in the garden for years. You see,
they come up as weeds in my raised beds and cover ground I want to
farm. For years, I've been giving bulbs away by the hundred, but
we still have scores of them blooming beside the old house, as well as
two thousand in straight rows by the driveway where I transplanted them
out of the way our first spring. I can't bear to just weed them
out and be done with it --- the blooms are just so pretty.
I've
been struggling with daffodils in the garden for years. You see,
they come up as weeds in my raised beds and cover ground I want to
farm. For years, I've been giving bulbs away by the hundred, but
we still have scores of them blooming beside the old house, as well as
two thousand in straight rows by the driveway where I transplanted them
out of the way our first spring. I can't bear to just weed them
out and be done with it --- the blooms are just so pretty.
This past winter, I read
that early
spring ephemerals are useful in the forest garden since they suck up
water-soluble nutrients when nothing else is active. When their
leaves die back in the summer, the plant matter rots down and releases
those nutrients which might have otherwise washed away. In
essence, the ephemerals have acted as a nutrient bank, holding onto
nitrogen until the trees are actively growing again.
Given that bit of
information, our daffodils finally found a purpose on the farm and I
transplanted about a hundred of them into the soil around our fruit
trees. I know you're not supposed to transplant daffodils in the
spring, but I've honestly had a hard time killing them and I like to
move the bulbs when I know I'm getting ones big enough to bloom
immediately. And bloom they did --- the yellow flowers have been
unfurling all week, brightening my day every time I look in their
direction.
 In
1648, the governor of Massachusetts traded 500 apple trees for
250 acres of land. I figure that means the trees were worth at
least $500 apiece in today's dollars. Can you imagine how scarce
and important fruit trees must have been in early New England to
command that kind of price?
In
1648, the governor of Massachusetts traded 500 apple trees for
250 acres of land. I figure that means the trees were worth at
least $500 apiece in today's dollars. Can you imagine how scarce
and important fruit trees must have been in early New England to
command that kind of price?
As nurseries began to
open up, fruit trees became a common component of
the New England garden. The most common were apples, pears,
peaches, and cherries, but all of the following woody fruits were
recorded in New England gardens before 1840: cornelian cherry, white
and black mulberries,
currants, highbush cranberry, fox and muscadine grapes, apricots,
barberries, gooseberries, nectarines, plums, quinces, walnuts,
chestnuts, and raspberries.
Entire orchards were
planted, but fruit trees were also tucked into
gardens wherever they might fit. Perhaps the colonists have
something to teach us about forest
gardening too?
| This post is part of our Early New England Gardens lunchtime series.
Read all of the entries: |
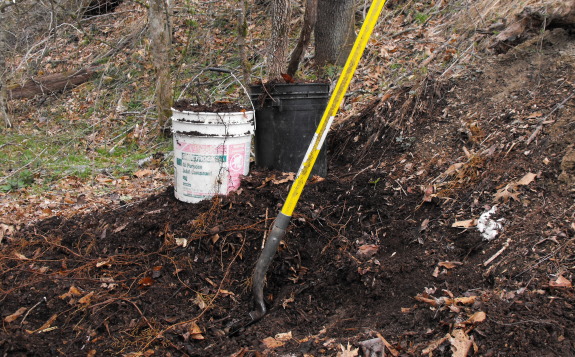
We got a few piles of wood
chips from the local cutting crew almost 4 years ago.
I'd say it was well worth the
wait for such fine looking mulch.
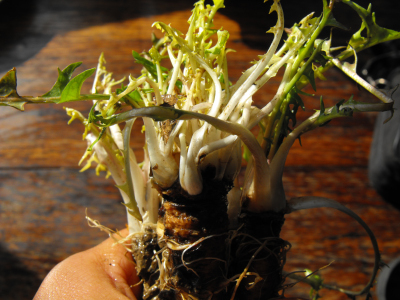 Last
winter, my forest gardening map put dandelions amid the
other dynamic
accumulators around
the bases of my fruit trees. But I just couldn't make myself put
the dandelions in the ground. Here I was hacking at the long
taproots in my vegetable garden beds, and I wanted to plant some dandelions elsewhere in
the garden? Was I nuts?
Last
winter, my forest gardening map put dandelions amid the
other dynamic
accumulators around
the bases of my fruit trees. But I just couldn't make myself put
the dandelions in the ground. Here I was hacking at the long
taproots in my vegetable garden beds, and I wanted to plant some dandelions elsewhere in
the garden? Was I nuts?
But a bit of research
suggests that dandelions have a lot going for them. They are
dynamic accumulators of sodium, silica, magnesium, calcium, potassium,
phosphorus, iron, and copper, which means they could bring trace
minerals to the surface where the tree roots can access them.
Dandelions are also an early, prolific bloomer that feeds honeybees
both pollen and nectar in the spring before many other flowers are
out. Plus, dandelions are perennials that self sow readily, so
they can fill gaps in the forest garden that might otherwise come up in
less helpful weeds.
I didn't get pushed over
the edge, though, until our larder started getting pretty bare and I
decided to find some spring greens to saute for lunch. I'd been
eying the dandelion greens since early March, remembering that they
were an edible but suspecting that they were also quite bitter.
When a walk around the yard turned up only a handful of creasies and
Egyptian onion tops, I decided to round out my pot with young dandelion
leaves, and the result was scrumptious! Perennial greens that are
ready to eat in early March with no care on my part? I think
dandelions have finally won a place in the forest garden. Now I
just have to decide if I'm going for the wild version or am actually
going to pay money for cultivated dandelion seeds.
 I
was amused to see that most of the flowers in my garden were already
being planted in New
England gardens
before 1700. These included
sunflowers, columbine, crocuses, bee balm, grape
hyacinth, evening primrose, star-of-bethlehem, and tulips. I
didn't set out to plant old-fashioned flowers, but I think that the
early colonists, cottage
gardeners, and I all
share similar notions
about flowers --- there's little time in our lives to tend to them, so
the blooms had better take care of themselves and also have a use.
I
was amused to see that most of the flowers in my garden were already
being planted in New
England gardens
before 1700. These included
sunflowers, columbine, crocuses, bee balm, grape
hyacinth, evening primrose, star-of-bethlehem, and tulips. I
didn't set out to plant old-fashioned flowers, but I think that the
early colonists, cottage
gardeners, and I all
share similar notions
about flowers --- there's little time in our lives to tend to them, so
the blooms had better take care of themselves and also have a use.
Like cottage gardeners
in England, American colonists transplanted easy
to care for wildflowers into their meresteads. Of course, these
were different wildflowers than the colonists had at home, but they're
probably familiar to you --- milkweed, butterflyweed, celandine poppy,
larkspur, wood lily, cardinal flower, musk mallow, forget-me-not, and
black-eyed susan are some examples. When I was in high school, I
was also prone to transplant wildflowers into my garden and I gave over
half of these flowers a shot. It sounds like I should probably
consider the other flowers used by the early colonists since the plants
are likely to be right up my alley.
| This post is part of our Early New England Gardens lunchtime series.
Read all of the entries: |
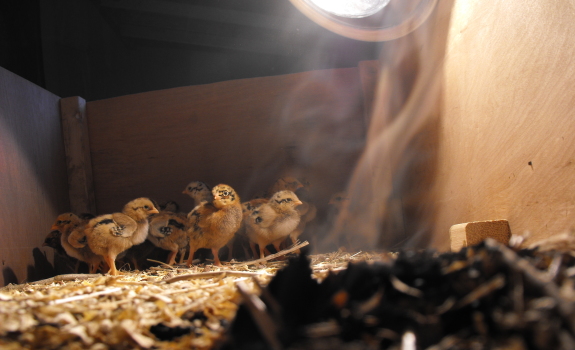
We had a close call today.
The electricity went off, which prompted Anna to make some adjustments to the do
it yourself table top brood box to keep the heat in. Once the juice
came back on I went out to set the light back up, not knowing the new
upgraded light can not be closer than 18 inches from anything
flammable.
Fast forward about 20 minutes
and I'm smelling smoke. Luckily I got there in time to remove the
smoldering wood chips and adjust the lamp accordingly.
The chicks are fine, and I
learned a valuable lesson about heat lamp safety.
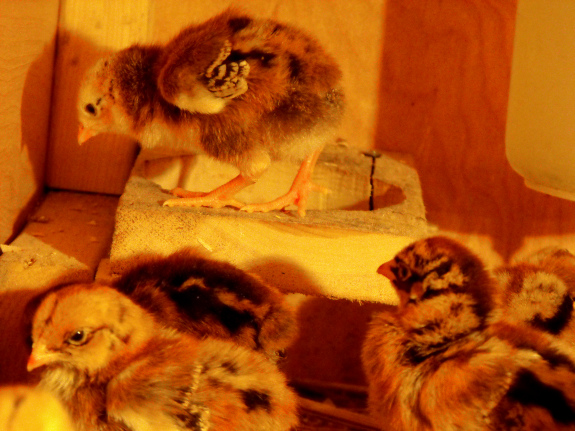
I'm astonished by the
changes I see in our chicks after a mere five days. When they
arrived a few of them had their first wing feathers poking through,
but most were pure fuzz balls. Now they all have wing feathers,
and are even starting to realize that they are birds. Mark moved
our homemade chicken
waterer to hang on
the wall so that he could raise it up a bit, and our chicks decided the
empty mounting ledges are perfect for practicing vertical hops.
As a short person, I can understand the urge to be taller than everyone
else.
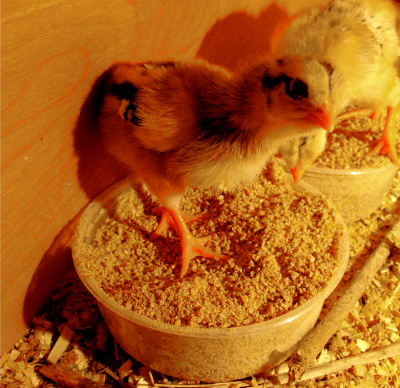 Meanwhile,
their food consumption has been doubling every day. I realized
near the end of day two that the chicks weren't actually eating all of
that food. The palest chick has learned to scratch --- he'll hop
up into the food dish as soon as I fill it and send chick feed hurtling
throughout the brood box. Kind bird that he is, he taught his
friends how too. Although I'm thrilled that our little foragers
are scratching already, the time has come to develop a better feeding
system.
Meanwhile,
their food consumption has been doubling every day. I realized
near the end of day two that the chicks weren't actually eating all of
that food. The palest chick has learned to scratch --- he'll hop
up into the food dish as soon as I fill it and send chick feed hurtling
throughout the brood box. Kind bird that he is, he taught his
friends how too. Although I'm thrilled that our little foragers
are scratching already, the time has come to develop a better feeding
system.
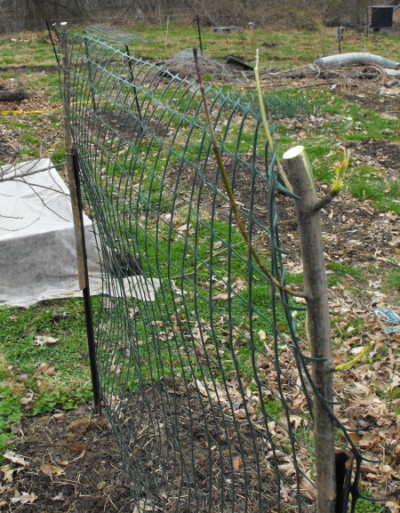
These small metal fence posts come about 10 inches shy of reaching the
top of the new pea
trellis.
It only takes 2 small sheet
rock screws to attach each extension to the inside groove of its
respective post.
I'd be surprised if there's
an easier way to make a temporary trellis and still have it easy to
take down and put up.
 You keep talking about
permaculture, and it does sound cool. But it's so
complicated! What are a few simple permaculture steps I can take
around my own home or farm?
You keep talking about
permaculture, and it does sound cool. But it's so
complicated! What are a few simple permaculture steps I can take
around my own home or farm?
Introducing permaculture into your life starts with
changing the way you think rather than with changing a specific
action. Like the natural ecosystems that permaculture is based
on, our man-made environments are so variable that no single answer
works for everyone. Instead, we need to take the central
permaculture principles and apply them to our own mini-ecosystems on
our farms or in our yards. Here are my top three favorite
permaculture concepts:
There's
no such thing as waste. Despite the 14 billion
tons of used materials that Americans deposit in landfills every year,
waste is more of a state of mind than a reality. Most of you
probably have a worm bin and/or compost pile to turn your food "waste"
into productive soil. Hopefully, you've also done away with paper
towels, swiffers, and anything else that is billed as a disposable. Permaculture
admonishes us to think beyond these basic steps and eliminate all types
of waste from our lives. Mark and I have a long way to go, but
we've started buying some of our
staples in bulk,
seriously cutting down on packaging. We're experimenting with growing
mushrooms on our junk mail and cardboard, and are also using these
"wastes" as decomposable weed barriers under mulch in the garden.
Our most recent step is harnessing
graywater from the kitchen sink to grow King Stropharia mushrooms. I'd love to hear what
your waste-free household looks like.
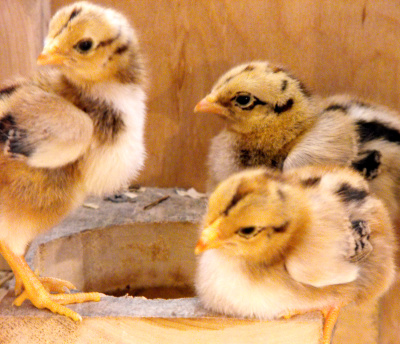 Every aspect of your permaculture system
should have multiple functions. The earth is full of
non-human life, so we are ethically bound to make our homesteads
compact, leaving as much natural space as possible to house salamanders
and wildflowers. The trick to keeping your homestead small is
requiring each facet to serve multiple functions. For example, chicken
tractors allow you
to raise a useful food in the aisles of your garden or even in your
city lawn, while at the same time keeping your poultry healthier than
they would be in a coop situation and providing fertilizer for the
garden. Even if your neighborhood association restricts you to
only growing ornamentals in your front yard, why not intersperse
edibles (colored swiss chards and cabbages make elegant show-plants)
and focus on nectary
species to increase
the local population of beneficial insects? If you've got a
multiple acre farm, how about turning a few acres of woodland into a
multi-purpose forest
garden which will
provide your firewood, some fruits and nuts, and wildlife habitat all
at once?
Every aspect of your permaculture system
should have multiple functions. The earth is full of
non-human life, so we are ethically bound to make our homesteads
compact, leaving as much natural space as possible to house salamanders
and wildflowers. The trick to keeping your homestead small is
requiring each facet to serve multiple functions. For example, chicken
tractors allow you
to raise a useful food in the aisles of your garden or even in your
city lawn, while at the same time keeping your poultry healthier than
they would be in a coop situation and providing fertilizer for the
garden. Even if your neighborhood association restricts you to
only growing ornamentals in your front yard, why not intersperse
edibles (colored swiss chards and cabbages make elegant show-plants)
and focus on nectary
species to increase
the local population of beneficial insects? If you've got a
multiple acre farm, how about turning a few acres of woodland into a
multi-purpose forest
garden which will
provide your firewood, some fruits and nuts, and wildlife habitat all
at once?
Focus
on perennials.
While I don't see any permaculturalists getting rid of their cucumber
and tomato plants, they do advocate using perennials instead of annuals
wherever possible. Perennial edibles generally require much less
input of organic matter, don't tempt you to till up the soil, and need
less maintenance. Perennials also tend to encourage wildlife and
discourage soil erosion, another example of multiple uses in a single
system.
I could go on and on for
hours, but I'd rather hear about your own experiences. Which
permaculture concepts have you applied to your life?
If you've been thinking about
gettng started with permaculture why not try a simple aquaponics
set up?
You take advantage of the
fish waste by having the water pumped up to a reservoir holding the
plants in place with some sort of medium like sand or gravel that
easily drains.
Photo credit goes to the CompostGuy.com who has a great section on his
experiences with do it yourself aquaponics. If that floats your boat
you might want to check out this short
video from permaculture expert Sepp Holzer and his impressive pond set up in
Austria.
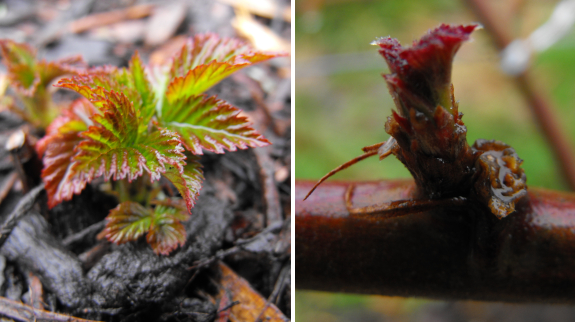
Last year my
three exclamation point spring post came on March 26 --- the plant world had
awakened, with peaches and dandelions in bloom and blackberry and pear
leaves unfurling. This year, we're at least a week behind...which
is a good thing.
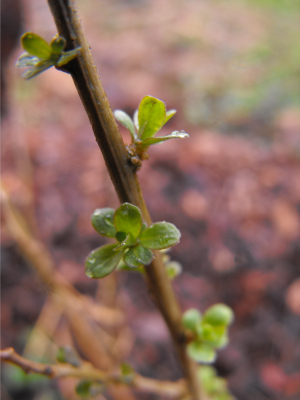
A few of our fruit trees
--- the oldest peach, for sure, but also maybe the younger peach,
nectarine, and cherry --- are old enough to set fruit, but only if a
hard spring freeze doesn't nip their flowers. Each stage in the
bud-opening process has its critical temperature, below which the bud
will be too damaged to set fruit. For peaches, these temperatures
are (for 10% and 90% kill, respectively):
- Swollen bud stage - 18 F; 1 F
- Bud shows green (like in the photo below on the right) - 21 F; 5 F
- First pink on bud - 25 F; 15 F
- First bloom - 26 F; 21 F
- Full bloom - 27 F; 24 F
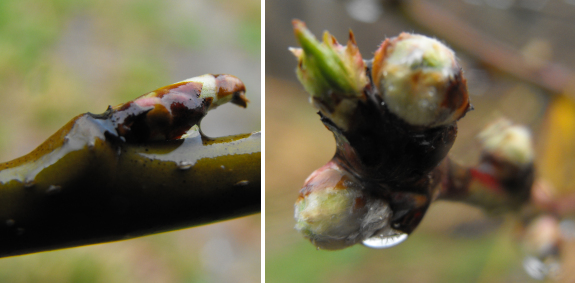
In the spring, we
gardeners tend to get antsy and want everything to happen now, but a chilly winter slows
things down and may mean more food in the long run. Here's a table of critical
temperatures for most of the common fruits. Don't forget to keep
your eye on the weather forecast once your fruit trees begin to bloom!
 One
of my goals for this growing season is to experiment with grains.
As I mentioned in my series on small-scale
grain-growing, I'd
eventually like to be growing most or all of the grains that we humans
and our chickens eat. But my goal for the first year is far less
ambitious --- I just want to experiment with a half dozen types of
grain to find out which ones like our climate and fit our lifestyle.
One
of my goals for this growing season is to experiment with grains.
As I mentioned in my series on small-scale
grain-growing, I'd
eventually like to be growing most or all of the grains that we humans
and our chickens eat. But my goal for the first year is far less
ambitious --- I just want to experiment with a half dozen types of
grain to find out which ones like our climate and fit our lifestyle.
I got Sara Pitzer's Homegrown
Whole Grains on
interlibrary loan to round out the information I've been
compiling. The book is very handy because it provides a lot of
specifics I've been unable to find elsewhere about planting dates and
growing zones. That said, quite a bit of the information in this
week's lunchtime series has come from previous books and websites I've
read on the topic, so don't expect to pick up Homegrown
Whole Grains and
find it all. Still, the book has lots of pretty illustrations and
is a quick read, so I recommend it.
| This post is part of our Homegrown Whole Grains lunchtime series.
Read all of the entries: |
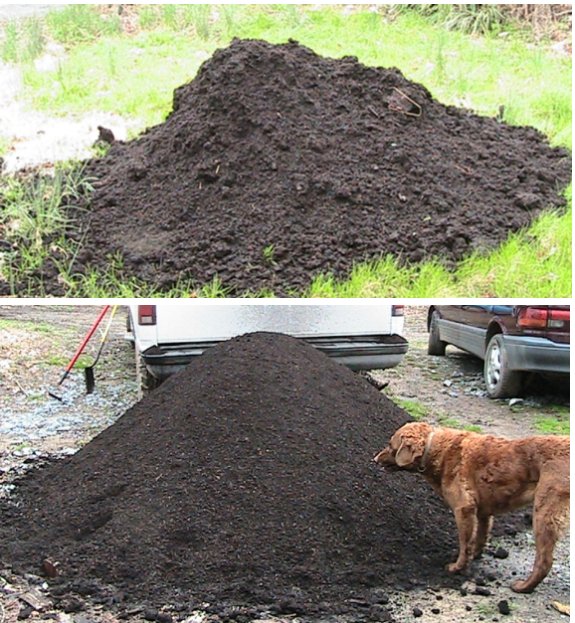
Each of these piles represents
a truckload of compost from different sources.
The one on the bottom comes
from a warehouse where they keep it out of the rain as opposed to the
top one which was heavy with moisture.
Even though Lucy's pile cost
just over twice as much as the other I think it's going to be our
preferred location for tomorrow's load.
 Every
month, I make a list of the farm projects that really must get done
that month. And at the end of the month, I shake my head in
digust and move half a dozen tasks onto next month's list.
Every
month, I make a list of the farm projects that really must get done
that month. And at the end of the month, I shake my head in
digust and move half a dozen tasks onto next month's list.But not this March! For the first time ever in our three and a half years on the farm, we actually finished everything on the month's list...with two days to spare! In large part, I suspect this unexpected success came about because Mark insisted on buying a truckload of mulch, saving me days worth of work raking leaves out of the woods. But I like to imagine that we're actually starting to get the farm under control and broken down into bite-size segments.
Of course, weeding didn't even make it onto the March list. Guess what I'll be doing all of April? I got a head start on Monday, with sodden soil making it easy to rip out chickweed, deadnettles, bittercress, and dandelions that had sprung up in gaps in the strawberry beds' mulch. Three wheelbarrow loads of succulent greenery plopped into our four year old Golden Comets' tractor, their prize for laying one egg per bird per day for the last few days despite their age.
My long-term goal is to
grow most of the grains Mark and I eat using Fukuoka's do-nothing
farming
--- utilizing heavy straw mulches from previous crops and a groundcover
of clover to fertilize the soil and prevent weeds from growing in the
field. Unfortunately, I can't seem to find any definitive
information from people who have translated this Japanese method to the
United States, so I'm prepared for the first few years to be dismal
failures. Here's a rundown on the current incarnation of this
experiment.
Wheat
is our winter grain
 The first step in a do-nothing rotation is
finding a winter
grain. From everything I've read, if you live in a climate colder
than zone 7, your choices are slim --- wheat or rye. (Barley is
another option if you live further south.) I'm not a fan or rye,
so wheat will be our winter grain.
The first step in a do-nothing rotation is
finding a winter
grain. From everything I've read, if you live in a climate colder
than zone 7, your choices are slim --- wheat or rye. (Barley is
another option if you live further south.) I'm not a fan or rye,
so wheat will be our winter grain.
Winter wheat should be
planted early enough in the fall that the plants
grow 5 to 6 inches before going dormant (which equates to 8 to 12 weeks
of growth), but late enough that the Hessian fly has died back for the
year. From browsing extension service sites, it sounds like we
should plant our wheat in early to mid October, after the first freeze.
There are half a dozen
different types of wheat, so I expect I'll be
talking about seed choice in more depth in a later post. Here are
the main decisions you have to make when choosing a type of wheat for
your garden:
- Soft wheat, hard wheat, or durum wheat. Soft wheat has less gluten and protein, and is great for baking biscuits and cakes. Hard wheat is high in protein and gluten, so it makes great bread flour or all-purpose flour. Durum wheat is also high in protein, but is low in gluten, so it is primarily used to make pasta.
- Winter wheat or summer wheat.
This is pretty self
explanatory --- one grows in the winter and one in the summer.
This distinction does not necessarily relate to the other distinctions
--- winter wheat, for example, can be soft or hard and red or
white. Clearly, we'll be choosing a winter variety.
- Red
or white wheat.
Among the hard winter wheats, you
can choose between the widespread red wheat or the newly trendy white
wheat. I'm actually intrigued by the latter since it has just as
much nutritional value as red wheat, but results in bread that is
paler, less bitter, and softer --- sounds like just the way to complete
Mark's conversion to whole grains.
Buckwheat
is our summer grain
 The summer grain in a do-nothing rotation
should be of a different
genus than the winter grain so that diseases and pests from the winter
crop won't ruin the summer crop. In addition, the summer grain
needs to mature relatively quickly since the winter grain usually eats
up over half of the year.
The summer grain in a do-nothing rotation
should be of a different
genus than the winter grain so that diseases and pests from the winter
crop won't ruin the summer crop. In addition, the summer grain
needs to mature relatively quickly since the winter grain usually eats
up over half of the year.
My top choice for a
summer grain is buckwheat. This "grain" is
not even in the grass family, so it shares no diseases with wheat, and
it can be planted as late as mid June and still produce a good
crop. I have to admit that I've never actually eaten buckwheat,
but the grain is supposed to have a complete set of amino acids (unlike
other grains, but like meats) and blooms for at least a month, making
it a great nectary for honeybees. Buckwheat flour is often used
in pancakes, but the seeds can also be sprouted or cooked whole (or fed
to the chickens if we hate it.)
On the negative side, buckwheat is not a good choice for bread and the
hulls must be removed before cooking.
Buckwheat likes warm
soil for growing, but cool nights during bloom and
seed set, so it is best planted two to three months before the average
fall frost free date --- July or August here in southwest
Virginia. Unlike many of the true grains which can be left in the
field to dry, buckwheat needs to be harvested before the frost so that
the seeds don't fall to the ground.
| This post is part of our Homegrown Whole Grains lunchtime series.
Read all of the entries: |
These new goat gloves claim
to be 67 percent better than cow leather, which will be worth the
additional 50 percent to the price if they actually last that much
longer.
The design and construction
indicate an improvement, but time will tell if a goat really is
tougher than a cow.
 The
permaculture way is to mix your own compost out of homegrown goodies
and waste products from nearby, but our garden has grown faster than
our capacity to come up with free compostables. Last year, I
top-dressed each of our vegetable garden beds with about 2.5 gallons of
composted
horse manure (equivalent to about 0.2 inches of compost, for a
total of about 3 cubic yards), and I felt like the garden
didn't grow as much as in previous years despite additional
mulch. Feeding the soil is a necessity, so we've broken down and
bought storebought compost to allow us to double the application rate
for this year.
The
permaculture way is to mix your own compost out of homegrown goodies
and waste products from nearby, but our garden has grown faster than
our capacity to come up with free compostables. Last year, I
top-dressed each of our vegetable garden beds with about 2.5 gallons of
composted
horse manure (equivalent to about 0.2 inches of compost, for a
total of about 3 cubic yards), and I felt like the garden
didn't grow as much as in previous years despite additional
mulch. Feeding the soil is a necessity, so we've broken down and
bought storebought compost to allow us to double the application rate
for this year.
As always, I have lots
of crazy plans for creating as much compost as we need within the next
year or two. Here's a rundown of the top contenders:
- Horse manure. We've got a steady annual supply of around two to three cubic yards of horse manure from the neighbors. In the past, we've been guilty of applying some manure which was only semi-composted because we needed more organic matter immediately. This year, I'm hoping the storebought compost will tide us over so that we can run fresh manure through a worm bin for use next year.
- Black soldier flies are on the horizon for this year, primarily because we want the free, high protein food to supplement the bugs our chickens will peck up naturally in the soon-to-be-built forest pasture. If we find a source of free food scraps (difficult since we live so far from town and only make the trip once a week, on average), we could potentially create quite a lot of compost in the black soldier fly bins.
- Compost tea from the worm bin and the black soldier fly bins. In the past, our summer worm bin has been on the ground, which means all of the high quality tea leaches out into the surrounding soil. Mark's going to build new bins for this summer that collect the tea --- now I'll have enough to use on plants other than the potted citrus!
- Compost piles. In the past, I've never had a compost pile, because I just threw the weeds and food scraps to the chickens or used them to build new raised beds. This year, I hope to build some compost piles in the forest pasture to serve double duty as an insect reservoir for the chickens and a way to supplement my other sources of compost. Potential components in these piles include leaves raked out of the woods, weeds pulled from the garden, wood chips and/or sawdust if we can find a free source, urine, manure from the chickens (naturally added as they scratch), duckweed, and comfrey leaves from my expanded patch.
I've got a whole 'nother
set of goals for the mulch that goes on top of the compost, but this
post is already too long! By the way, the careful reader will
have noticed that I included a photo of the year's first dandelion ---
I guess this spring isn't a
solid week behind last year's spring, at least according to the
dandelions.
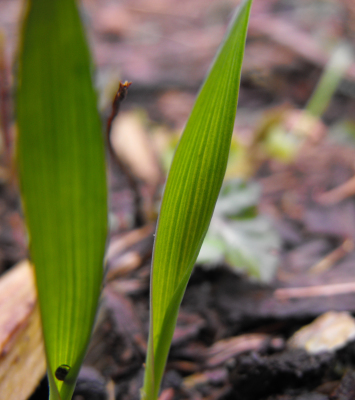 Although
I can't make them fit into my do-nothing
grain experiment, I
want to try three other grains for human consumption this year: oats,
quinoa, and
amaranth.
Although
I can't make them fit into my do-nothing
grain experiment, I
want to try three other grains for human consumption this year: oats,
quinoa, and
amaranth.
Oats are a cool season crop, but
are unlikely to overwinter
successfully here in zone 6. They require 90 to 120 days to
mature, and should be planted "as early as the ground can be worked in
the spring." I really detest this designation, since some
winters our ground can be worked every month of the year, while other
winters the ground can't be worked until March....
I planted a test
plot of hull-less oats combined with red clover on March 8 in an area
where the chicken tractors had sat for a month, killing most of the
perennial weeds. I suspect I should have given the grain its own
garden bed instead, but I wanted to try the easiest method possible
first (and was afraid of planting a perennial like clover in my
vegetable garden.) So far, a few of the oat seeds have sprouted,
but so have
some of the perennial weeds that the chickens didn't managed to scratch
all the way up. On the off chance this experiment actually works,
I'll let you know, but chances are I'll have to try again in a less
weedy spot next year.
Amaranth is an easy grain that I
posted about previously.
I bought some Manna de Montana Amaranth from Seeds of Change since
pale-seeded varieties like this one are
supposed to have better flavor than the black-seeded types. I
plan to put our amaranth seeds in the ground on June 1 when the soil is
thoroughly
warmed up, and I may try it in  my
do-nothing plots in place of buckwheat next year since amaranth matures
in a similarly short three months. Like
buckwheat, you can't leave amaranth heads on the plant too long or the
seeds
will fall to the ground, so harvest when two thirds of the seedhead is
mature. Be sure to cook before eating since the raw grain blocks
absorption of nutrients. Amaranth can be eatend whole, flaked,
ground, or popped, and the young leaves can be eaten like spinach.
my
do-nothing plots in place of buckwheat next year since amaranth matures
in a similarly short three months. Like
buckwheat, you can't leave amaranth heads on the plant too long or the
seeds
will fall to the ground, so harvest when two thirds of the seedhead is
mature. Be sure to cook before eating since the raw grain blocks
absorption of nutrients. Amaranth can be eatend whole, flaked,
ground, or popped, and the young leaves can be eaten like spinach.
Quinoa is a cool season crop that
is not winter hardy, much like oats. But you plant quinoa later,
in mid April to mid May, and refrain from watering after germination
since the plants are adapted to drought conditions. Harvest in 90
to 120 days, then wash the
seeds to remove saponin and grind them into
flour. Or use the seeds as a rice
substitute, toasting first to enhance the flavor. Just like
amaranth, quinoa leaves can be eaten like spinach. If quinoa
finds a permanent place in our garden, it will have to be in separate
garden beds like oats.
| This post is part of our Homegrown Whole Grains lunchtime series.
Read all of the entries: |

Step 1: Cut up downed
Magnolia tree for frame work of the new chicken pasture coop building.

Or explore more posts by date or by subject.
About us: Anna Hess and Mark Hamilton spent over a decade living self-sufficiently in the mountains of Virginia before moving north to start over from scratch in the foothills of Ohio. They've experimented with permaculture, no-till gardening, trailersteading, home-based microbusinesses and much more, writing about their adventures in both blogs and books.